Buell Fever Part 4: I’ve Struck Oil!

By Joe Gresh

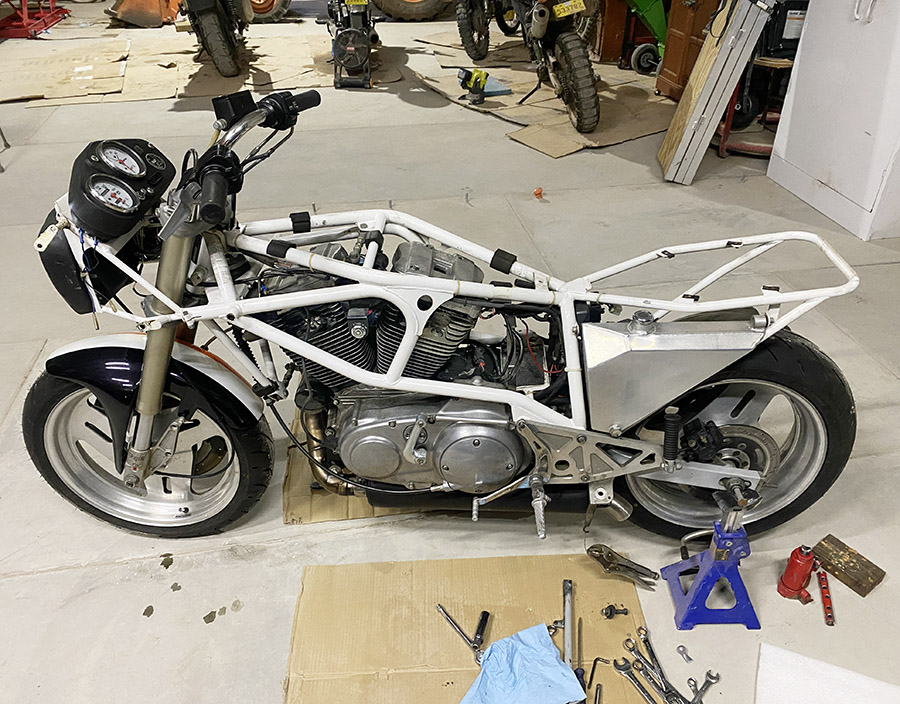
Part of the reason I bought a Buell was because my life has become too predictable. Except for the Husqvarna, you stand a good chance of getting where you’re going on my old bikes. And the Buell is not disappointing. Lots of fun stuff is happening as I work on getting the bike back on the road.

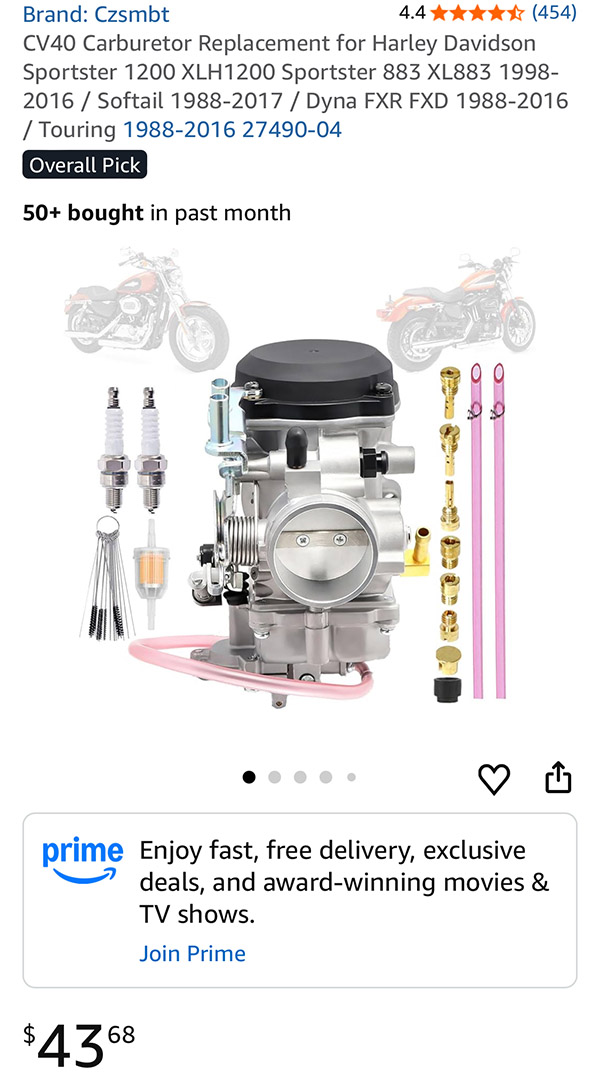
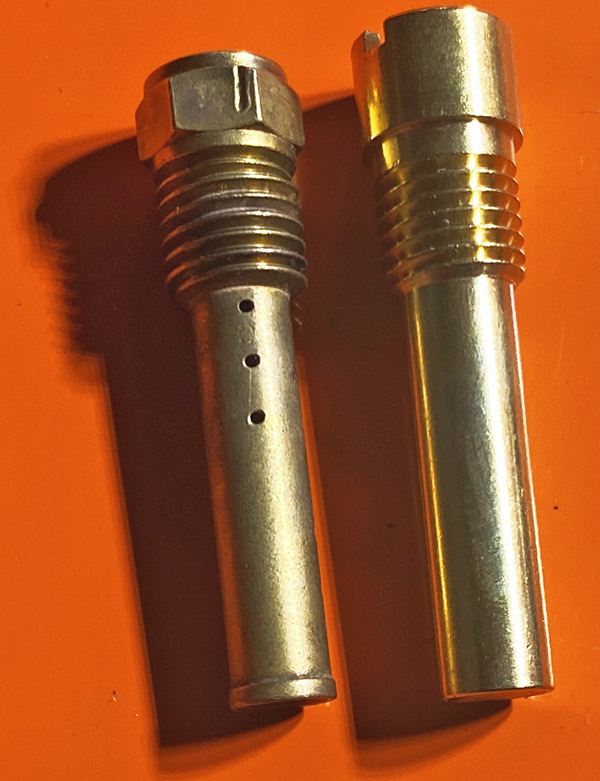
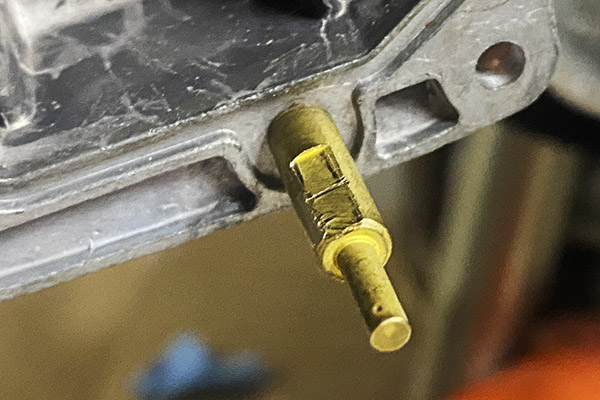
It’s such a joy to tinker on a single-carb motorcycle. There are no racks and synchronizing to deal with, you only have to do a thing once instead of four times, but watch out for those aftermarket parts. The kit I bought was okay, but the emulsion tube was not drilled properly. And then I managed to pinch the bowl o-ring.  It was cheaper to buy another kit than a single bowl gasket, so I did that. Unfortunately, that kit’s bowl o-ring was too small. No matter how I stretched it, it kept popping out of the bowl groove. I ended up reinstalling the pinched o-ring. It was a futile effort to keep my mechanical standards up.

It wouldn’t be a Harley without baling wire. The choke tube is plastic and was fragile after all these years. The choke knob was falling out of its slot. I broke the tube finger tightening the thing. Wire to the rescue!
The accelerator pump plumbing was clogged. I fished a small bit of wire through the passage to clear it.
The carb kit emulsion tube (right side) was not drilled correctly. I try to use all the old stuff if possible. So this was no great loss.
This brass nozzle sprays fuel from the accelerator pump. Supposedly the tube is removable for cleaning but it seems well stuck and I started to chew it up a bit so I stopped.

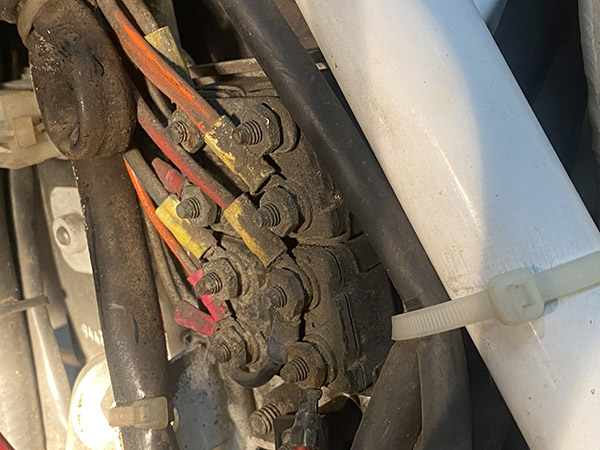
I’m a big fan of lithium batteries, so I bought a Vevor brand close in size to the original lead-acid battery. The Vevor was a bit small and the factory battery location is not far from the rear cylinder exhaust header. To help with the heat I wrapped the sides and front with foam, then wrapped gorilla tape around the mess to hold the foam insulation.

It looks a little rough but an insulated battery is a happy battery.

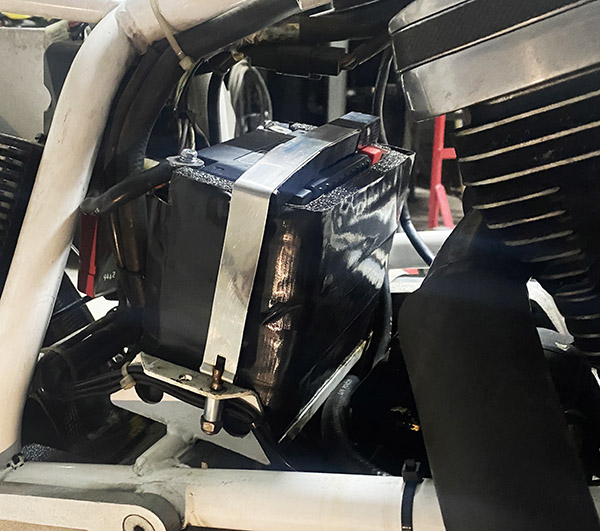
A neat feature on the Vevor is the dual posts (four total). There are positive and negative posts on both sides of the battery; if your cables are in the wrong place, just flip the battery around. I added a spacer on the hook side of the battery strap to keep it tight and a small tube spacer in the bolt side (less threading to do on the hold down bolt), which makes installation 12 seconds faster. When you ride a Buell every second counts. The battery seems secure; hopefully, it will stay put.  With the Vevor battery (supposedly 400 cranking amps) in place and the carb back on, I needed to hear the Buell run. The oil tank level was between the high and low marks. The oil looked clean, like it had just been changed.

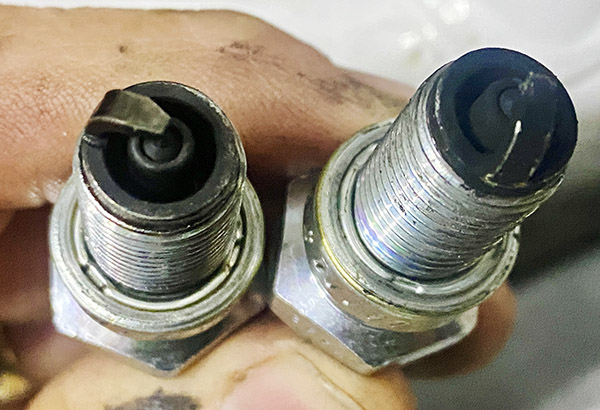
I removed the spark plugs, put the coke machine key in the ignition, and spun the engine over to clear any excess oil from my previous cylinder lubing. With the sparkplugs back in the cylinder heads I pulled the choke, hit the right turn indicator button, and nothing happened.

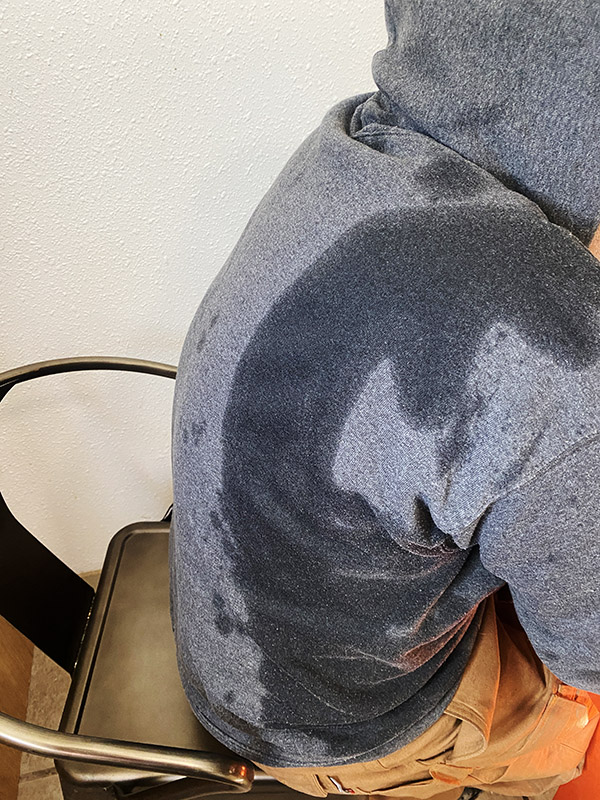
Harley handlebar switches are so weird. Pushing the starter button on the inside of the blinker switch worked better, and the Buell fired up in a couple revolutions. The engine popped and farted a few times. Lots of smoke came out the tail pipe but all things considered, it was running good.  Then came a loud pop followed by a geyser of oil spewing from the oil tank. The oil broadcast in a 15-foot fan covering the general area with great dollops of thick oil. The spots were viscous, so they stood proud of my clean concrete floor. Except for the spot I was standing. I received a blast of spraying oil that covered my sweater and left a clean, Joe-shaped silhouette on the concrete floor.

My nice, clean floor got its first baptism-by-Harley.
My sweater took the brunt of the oil explosion.

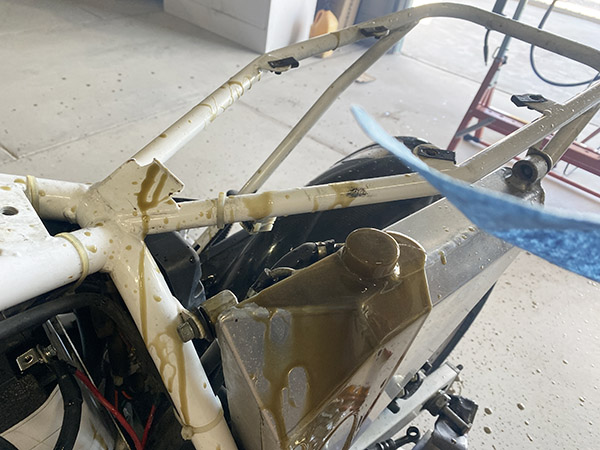
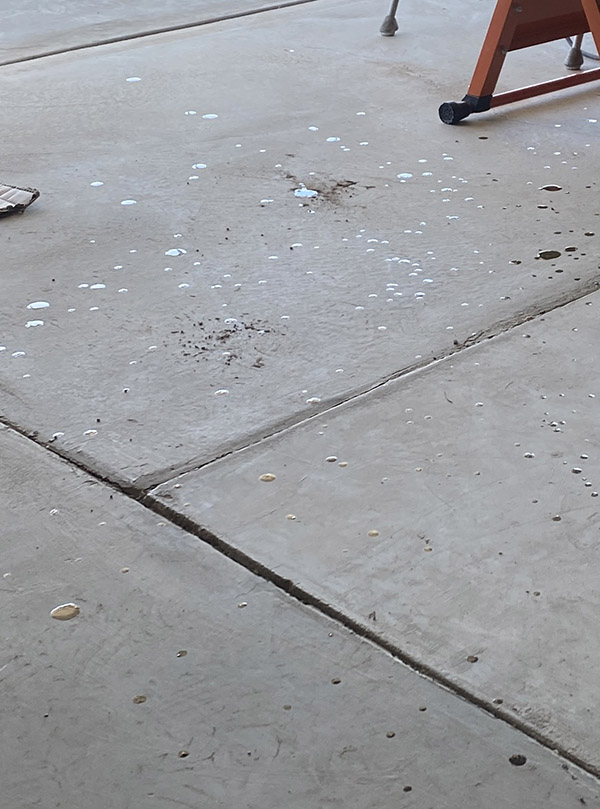
What a mess. How long the Buell had been sitting was unknown, but the oil tank must have slowly drained into the crankcase.  Some helpful person topped off the tank with fresh oil and I squirted the stuff all over the place. I drained the tank.  There must have been a gallon in there if you include the oil on the ground.  Once the oil level was correct, I fired the Buell and it settled down to the hit and miss syncopation Harley likes to call idle.

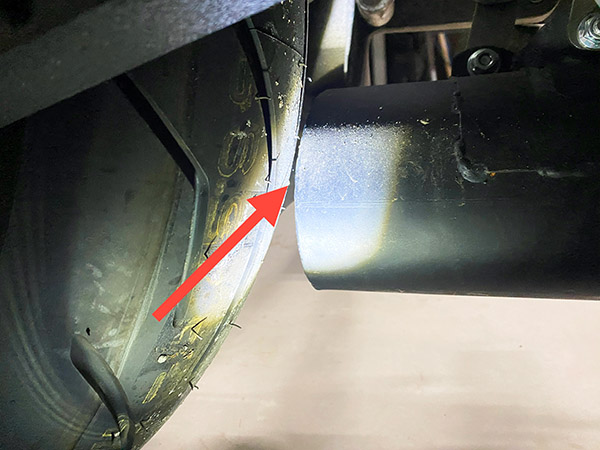
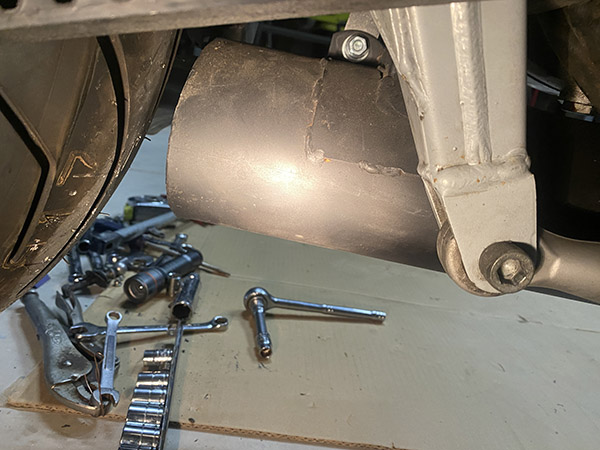
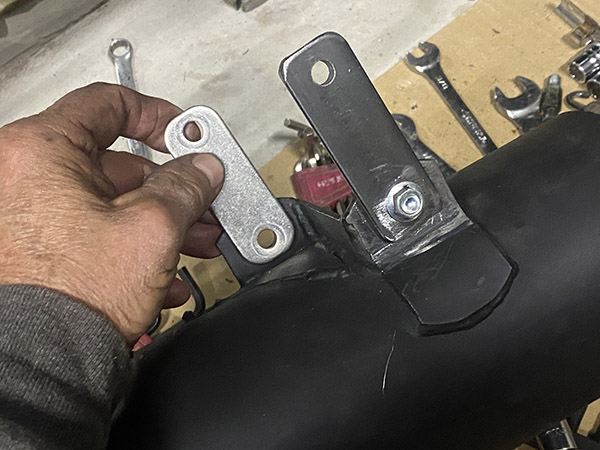
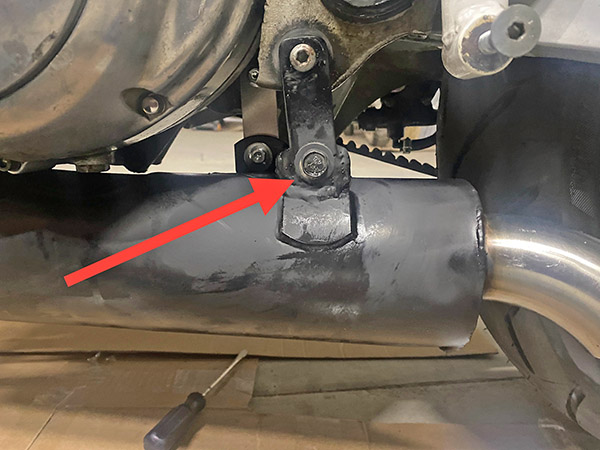
Back to other issues. I didn’t like the way the muffler was held into the bike. The setup relied on the front clamp combined with two rear brackets that bolted up in a parallelogram-like deal. The only thing that held the muffler in place was fastener tension.  To achieve a more secure mounting I made a thicker bracket out of mild steel and welded it to the Muffler. Now in order for the muffler to slide back my crappy weld would have to break. Which it just might.

Since I don’t have the equipment to weld stainless steel I made a mild steel bracket for the muffler.
The bracket welded to the muffler. Now the muffler can’t work loose and rub the tire.

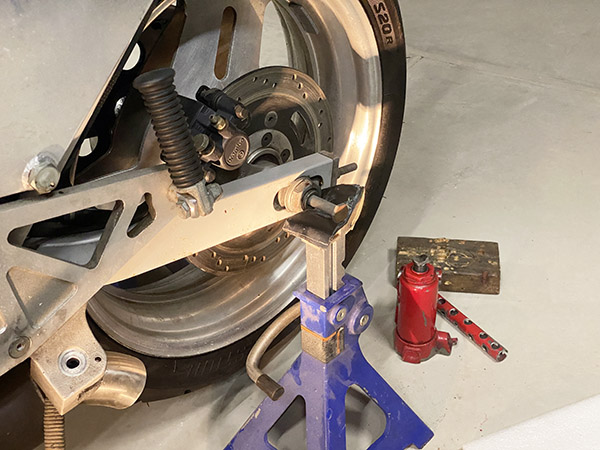
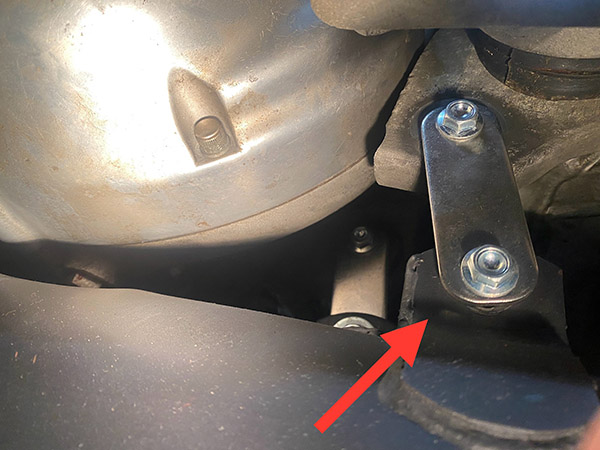
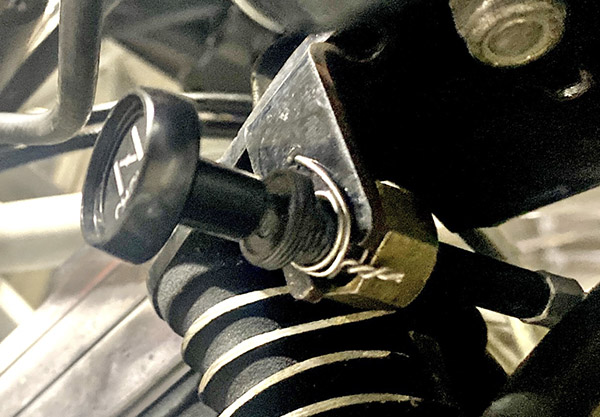
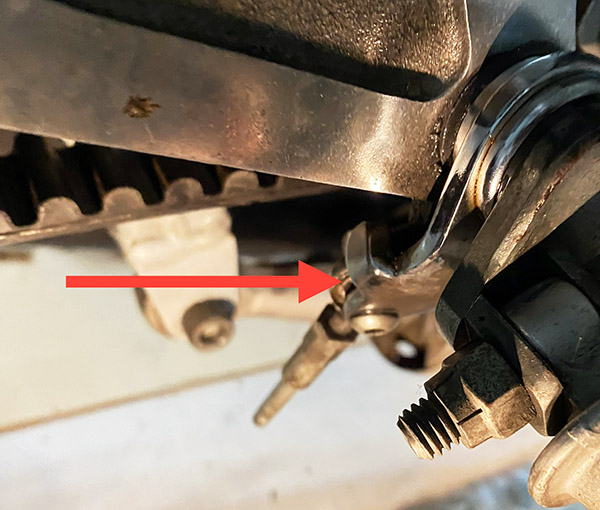
The rear brake on the Buell was stuck. There were several issues contributing to this problem. The first was the brake pedal. It was bent where the master cylinder pushrod attached in a way that made the rod move dramatically sideways when the brake was applied. I used Harley tool 0-U812 (a big crescent wrench) to adjust the brake pedal. Now the push rod moved in a straight line concentric with the master cylinder.

This replacement rear brake assembly was close but off in meaningful ways. The seller refunded my money and didn’t want me to ship it back.
This part of the brake left was bent causing the master cylinder pushrod to go off course.
It’s still a little bent but the pushrod articulates correctly now.

The clone master/slave kit I bought on Amazon that was supposed to fit was just off enough to be completely useless, so I decided to rebuild the original stuff.

All the original brake parts cleaned up well. So far no leaks.

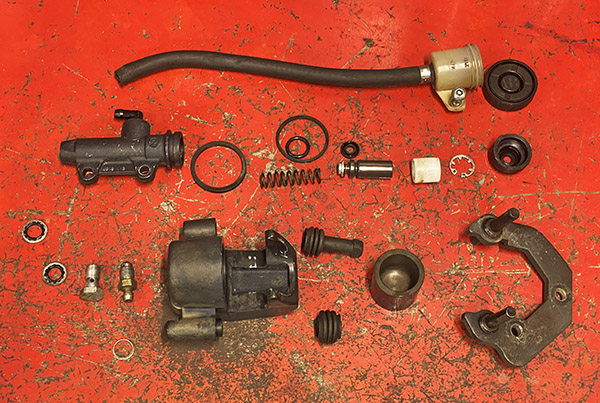
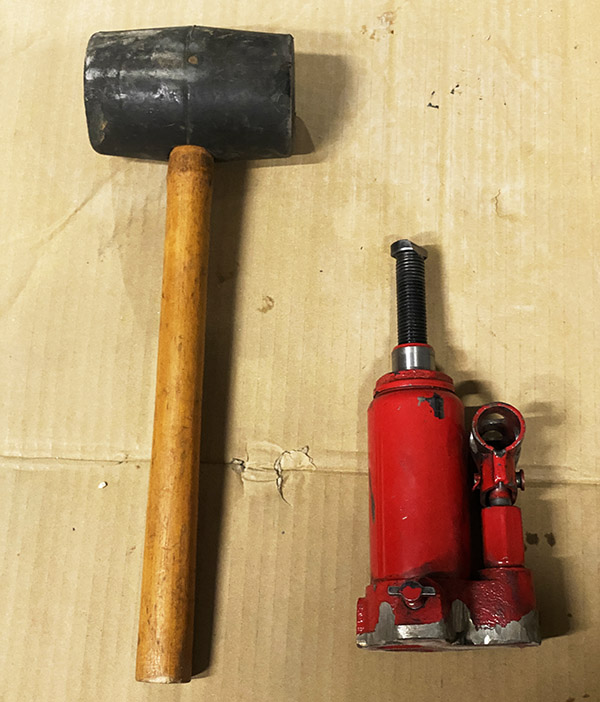
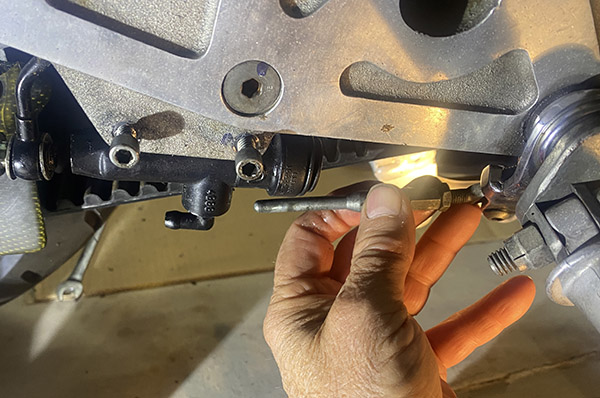
The piston inside the master cylinder was stuck but a few raps with a hammer had the piston moving and I dismantled the master/slave. I was having trouble finding seals for the Brembo components, so I cleaned everything and reassembled the brakes.

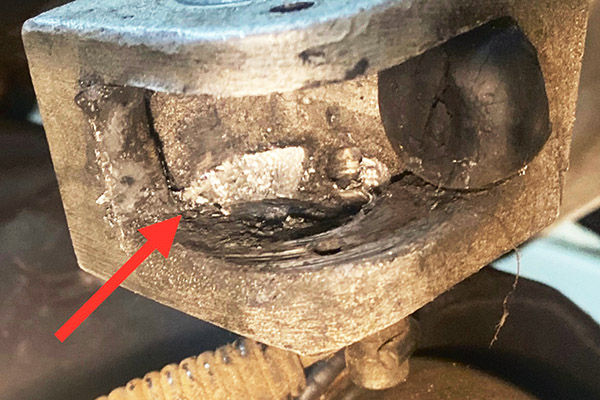
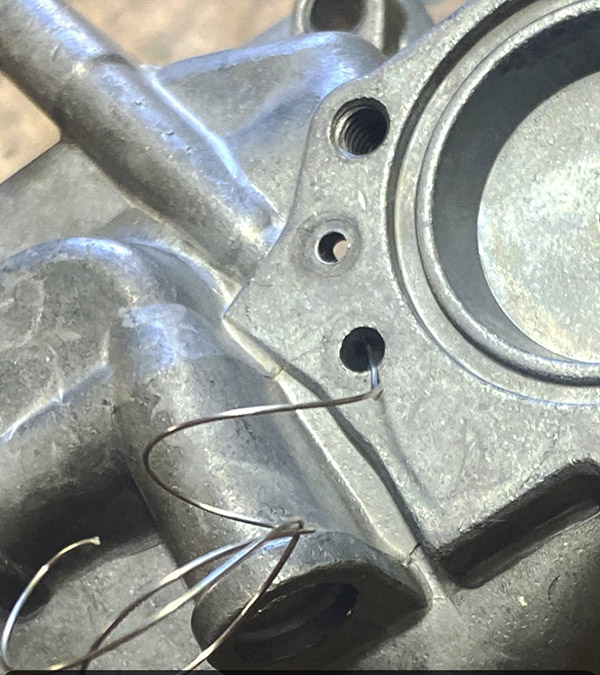
Bleeding the brakes wasn’t going well. I could get pressure at the banjo bolt on the master cylinder but nothing at the slave. Shooting brake cleaner into the brake line did nothing. The hose was clogged.  Out came the battery to access a hose clamp bolt, and I removed the brake line. Removing the brake light switch gave me a mid-point spot to shoot cleaner. The metal brake line was clear, the clog was in the rubber line.  I soaked the line in an ultrasonic parts cleaner then worked a 0.30 flux core welding wire through the rubber line. It took a bit of finagling but the wire made it through. Then it was just a matter of soaking with brake cleaner and shuttling the 0.30 wire back and forth until the line was clear. Blowing the lines with compressed air got rid of any stragglers inside the hose.  A quick reassembly and I had pressure to the slave. Bleeding the system was a straightforward proposition. The rear brake works.

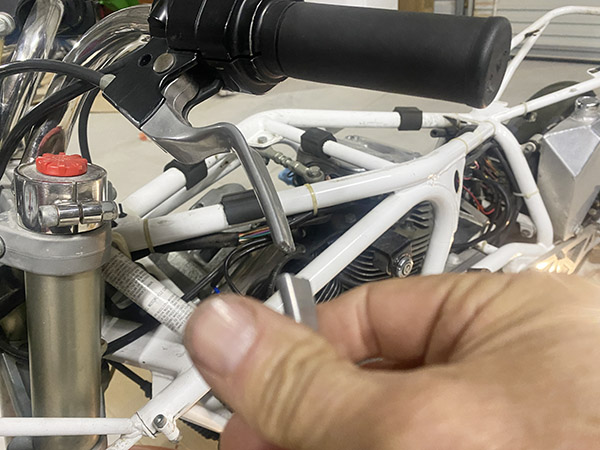
Next on the list is fixing the kickstand and broken clutch lever.


Join our Facebook ExNotes page!


More Joe Gresh?   It’s right here:


Help us keep the lights on:

Buell Fever Part 3: An Own Goal

By Joe Gresh

I’ve been ordering parts for the Buell as I dismantle the beast for service. I really like the way Erik Buell wrapped his tube frame around the 1200cc V-twin Harley lump. The bike is all engine and actually looks even better with the bodywork removed.

A new carb for $44! Tariffs? Never heard of her.

I’ve got the carb off and apart.  It looks pretty clean inside, and the bike probably would have run fine, except for the rubber tip on the float needle. It has a pronounced ridge that may or may not have caused a flooding issue.

The kickstand culprit. This worn area was the locking boss. It’s wiped out so no locking. I may weld it up and relocate the pivot to allow for over-centering (eliminating the lock system).

The Buell has a strange kickstand (another bike with a goofy kick stand; see the Husqvarna kickstand story here on ExhaustNotes). The stand has an elongated mounting hole that allows the stand arm to pivot up and down in addition to the normal fore-aft motion.  This extra motion was designed to allow the square pivot end of the stand to drop into a notch cast in the frame mounted, aluminum foot peg/kickstand boss. That’s a mouthful but when you see it it’s easy to grasp the concept. When new this setup made for a locking stand when deployed with the bike’s weight bearing on the stand.

The operative words here are “when new.” On my Buell the notch area inside the kickstand boss is worn out and the stand no longer locks. As built the stand doesn’t over-center and naturally stay in place like normal kickstands. You know where this is going. Fixing the kickstand was on my Buell to-do list. I should have made it job one.

Kickstands break levers. Ask me how I know.

As I was removing the carb (standing on the right side of the bike) the Buell started rolling forward. As it fell left I held onto the frame as best I could but the bike hit the ground hard breaking the clutch lever. The right mirror, which is also a faring mount, took a hard hit and things look a bit off from the cockpit. I have the bike on jackstands now and it’s stabilized.

Jack stands after the horse has left the barn. At least I stopped dropping the bike.

Luckily, I had most of the bodywork removed and the only bits left, the front fender and fairing, are unscathed. $20 will get me two new levers (Harley parts are cheap!) but I think I’ll just weld the broken tip back on. You know, to keep it original.

Back to the carb. The Buell motor is a stock 1995 Sportster mill and there is a huge parts aftermarket serving the Sportster. The carb kit was $13! I can get a complete, clone carburetor with new spark plugs, fuel filter and jet cleaning tool for $44! I know, I know, it’s Chinese but who’s to say the original isn’t Chinese? The Amazon clone carb reviews are positive: just bolt it up and the bike runs great. I bought the kit but that new carb was tempting.

This 1995 Sportster is quite a bit different than my old 1968 Sportster. The bottom end looks similar but everything else is different. What I thought was a pressure feed for oiling the top end seems to be a vent as the hose ends under the battery with the hose end left open to the breeze.

There’s also a rubber grommet with an open hole in the filtered side of the air cleaner. I suspect a crankcase vent hose went there but I’m not sure. As is, the hole allows unfiltered air into the carburetor so that’s not good. I’ll plug the hole or figure out what goes in it.

Plugs look a little sooty. I’ll clean them up and flog the bike to blow out the soot.

I don’t know how long the Buell sat so I pulled the iridium spark plugs (sooty) and squirted some motor oil in the cylinders so the rings don’t have to scrape on dry bores. When I get a battery, I’ll give the motor a spin with the plugs removed to blow out any excess lube.

Apparently, the White Power front forks on the 1995 S2 are different from the following years. I’m having trouble finding fork seals and have emailed White Power directly. No response yet. If I had a 1996 S3 fork seals are everywhere for the damn things.

For me, the rear tire was a little too close to the Buell’s underslung muffler. Like a 1/8″ gap. It looks like the muffler slid back a bit from the header pipe. I loosened the pipe clamp and mounting bolts then beat the muffler forward with a rubber mallet.

Does this tire gap make me look crashed? Not much clearance, Clarence.
Hammers and jacks gained quite a bit of clearance. I have no faith in this fix.
Buell tools. Anvil and forge not shown.
I think the permanent fix is to make these brackets a bit longer so the muffler fits the header better. Then weld the brackets on the muffler side to prevent the parallelogram effect when the bolt clamping inevitably loosens.

A jack under the header pipes pushed the header into a more agreeable position and I tightened the bolts. This beating gained about 3/4″ but I’m sure it won’t hold. The muffler looks like a new one or freshly painted. The angle of the header pipe isn’t quite right.  The tail of the muffler needs to drop about 1/4″ which means slightly longer muffler brackets. Once the bike is operational, I may do some exhaust re-engineering.

$30 seems cheap but then I’m approaching the end so I’m risking less.

The rear brake Brembo master cylinder is stuck and will need to come apart along with the rear caliper. Seals for the rear brake components are another hard to find item. I did find a Brembo clone master cylinder/caliper/brake line set up that may fit for $30 so I bought that. Watch for the ExNotes Brembo-clone brake system review.

Wiring straight out of 1960. I love it.

Except for the damage I’m causing by dropping the Buell, it looks to be in good shape. I probably could have poured gas in the thing, popped a battery in and gone for a ride. Who needs a rear brake anyway? I’ll be dismantling the front end soon to measure the fork seals and to give the steering head bearings a shot of grease.

That 6-mile Cyclone (the one I didn’t win) is looking more and more like a steal!


Buell Part 2:  The Reckoning
Buell Part 1:  More Cowbell


Join our Facebook ExNotes page!


More Joe Gresh?   It’s right here:


Help us keep the lights on: