Riding Tools

Our good buddy Mike Huber, who literally lives his life from a motorcycle, has shared several great stories with us in the past.  This one came in yesterday, it’s one of his best.   It’s about the websites and services that support you when in the field, and it’s a great read and a great resource. We’re happy to share it with our ExNotes readers.

Mike, thanks again!


Many people think motorcyclists just wake up, ride in whatever direction we want, have no plans, and live without a care in the world. This stereotype often is true, but for veteran riders who have battled weather, crashes, and other unforeseeable incidents we know that being prepared with the proper tools and having our awareness honed can not only save our lives, but will allow for a more enjoyable ride when we do encounter these obstacles.

There have been a lot of trial and error moments over the years living as a fulltime motorcyclist; some of these errors in hindsight could have been easily avoided with little planning and the use of a few tools. I want to share a few links and tips with you to improve your safety and riding experience while avoiding the headaches I have had to conquer in the past.

Camping

For me, dispersed camping is the only way to go. When beginning motorcycle camping KOAs and local state parks are great for training wheels to learn and overcome mistakes or equipment you forgot or need to purchase, but can be rather loud and unfulfilling as a camping getaway. After a few incidents with generators running at all hours, kids screaming, and dogs barking I realized this wasn’t communing with nature at all.  It was, however, testing my patience and destroying my Zen. From that moment on dispersed camping on a motorcycle is all I do (with the exception of some National Parks). Dispersed camping allows you to be alone deep in nature with a crackling fire reflecting off the steel of your motorcycle while embracing the silence. This is an experience not to be missed as a motorcyclist and these two links below have greatly helped in guiding me to some beautiful and unforgettable campsites that otherwise would never have been located.

freecampsites.NET
ioverlander.com

Riding Offroad

Everyone has different ability levels on their own style of motorcycle when it comes to off-roading. The links below provide information on the terrain you will likely encounter and difficulty levels which can keep you from getting in over your head while riding these beautiful roads. Along with these links, speaking to locals in coffee shops and bars can be an invaluable resource since many of them will be up to speed with the current conditions and be able to provide you with tips and suggestions that websites just can’t compete with.

alltrails.com
trailsoffroad.com

Weather/Area Warnings

The apps below are another must have for any serious rider. Storms in the mountains can appear very ferociously and with little warning at times. Staying current on weather and fire conditions will minimize your risk of being caught in a dangerous situation. These tools when used can enable you to avoid and even learn to wait out, outrun, or detour around many storms. An added suggestion would be to scout out the weather and fire conditions in the area you plan to camp. Dispersed camping often will leave you with no cell phone signal or other warning capabilities. Researching these conditions ahead of time will not only ensure you are comfortable from a weather standpoint, but can also save your life if there are adverse conditions or wild fires you aren’t prepared for.

myradar.com
windy.com
https://www.fireweatheravalanche.org/fire/

Emergency Support

When I began my journey I spoke with several riders (especially those doing the BDRs (Backcountry Discovery Routes) who swore on using a GPS or satellite communication device for emergencies. I thought at the time this was overkill even for my deep level of preparedness. Well it just took one solid fall while off-roading to convince me otherwise. I now keep this device in my riding jacket at all times (not on the bike, as in a crash you and the bike tend to part ways) in the event I do require help and am alone without cell phone coverage. The SPOTGen3 also has an “All OK” signal I use each evening when camping so my Mom knows I am safe and not in any danger.

https://international.findmespot.com/#/

These are the websites and apps I have learned to use and appreciate while riding and camping off my motorcycle. I am always interested in learning what other tools people are using on their motorcycle trips in order to continue and pass on ideas to others in our tightly knit motorcycle community.


Mike, that’s awesome.   Thanks so much for sharing this with us and our readers.  All the way, Amigo!

A Santa Cruz Mountains Loop

I had a great ride this week…a loop through the Santa Cruz Mountains down to the Pacific coast and back.  Think giant redwoods, beautiful scenes, great roads, and a rich history.

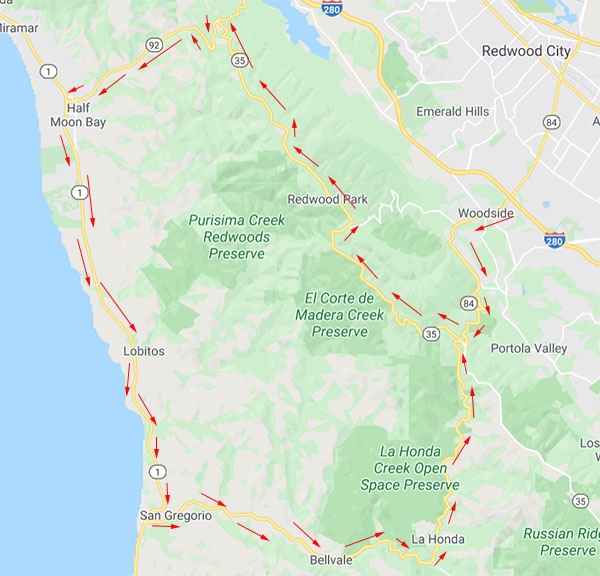
First, the route:  It’s a quick hop down the 280 to the Woodside exit (that’s Highway 84), and then a twisty ride west on the 84 to Highway 35.  Highway 35 is called Skyline Boulevard, which runs north to Highway 92, and 92 drops down to Half Moon Bay.  Then it was another left onto the world-famous Pacific Coast Highway.  I had an interesting stop at a very old cemetery just off the PCH, and after that I continued south to San Gregorio State Beach.  Another left put me back on 84 and on into La Honda.  From there, the 84 completed the loop.  Here’s what it looks like:

The area to the west of 280 is surprisingly rural for a location so close to San Francisco (about 30 miles to the north) and Silicon Valley (which sort of starts just on the other side of 280).   Highway 84 is a quick ride to the first town on this loop, and that’s Woodside.

Woodside is one of the wealthiest towns in America.  A partial list of the big names who live or have lived in Woodside include Charles Schwab (yes, that Charles Schwab), Steve Jobs, Michelle Pfeiffer (the classiest actress ever), Joan Baez, Nolan Bushnell (the founder of Atari and the Chuck E. Cheese restaurant chain), Scott Cook (the founder of Intuit), Carl Djerassi (a novelist and the guy who developed the birth control pill), Larry Ellison (the CEO of Oracle Corporation), James Folger (as in need a cup of coffee?), Kazuo Hirai (the CEO of Sony), Mike Markkula (the second Apple CEO), Gordon E. Moore (Intel’s co-founder and originator of Moore’s Law), Prince Vasili Alexandrovich (the nephew of Tsar Nicholas II of Russia), Shirley Temple, John Thompson (Symantec’s CEO), and Nick Woodman (founder and CEO of GoPro).  Woodside is within commuting distance of Silicon Valley, so it’s understandable, I guess, why so many high-rolling Silicon Valley types call it home.  Needless to say, I didn’t bump into any of these folks on my ride (if I had, you’d see photos here).  Given the choice, I’d like to meet Michelle Pfeiffer, but it just wasn’t in the cards that day.  Charles Schwab would be cool, too, as Charles Schwab & Company have done well for me.  Maybe next time.

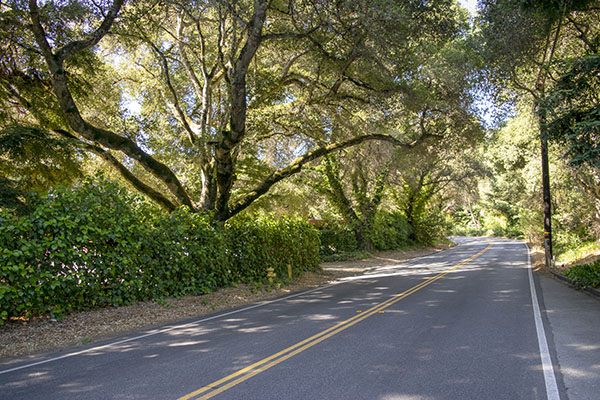
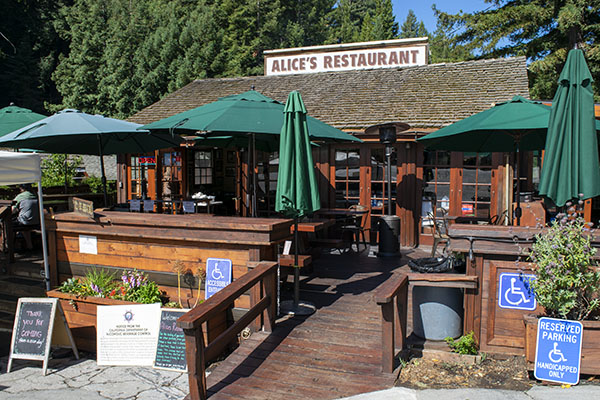
After passing through Woodside and climbing into the Santa Cruz Mountains, it’s on to the intersection of Highways 84 and 35. Alice’s Restaurant is right at that intersection.   Getting there was fun.  The road has 15-mph hairpins and there are redwoods, eucalyptus, and other tall trees on either side.  In many cases they form a green leafy tunnel over the road. I would have liked to grab a photo or two, but there was literally no place to stop and truth be told, I had my hands full.

It’s only about 3 1/2 miles from the 280 to Alice’s on Highway 84.  Before you get too excited, it’s not that Alice’s Restaurant (you know, the one in the Arlo Guthrie song).  But the woman who started this restaurant is named Alice, and hey, why not ride that coattail?  I was there during the week and I was able to get a photo of the place.  When I went by on an earlier weekend, Alice’s was jammed with people, motorcycles, and Ferraris.

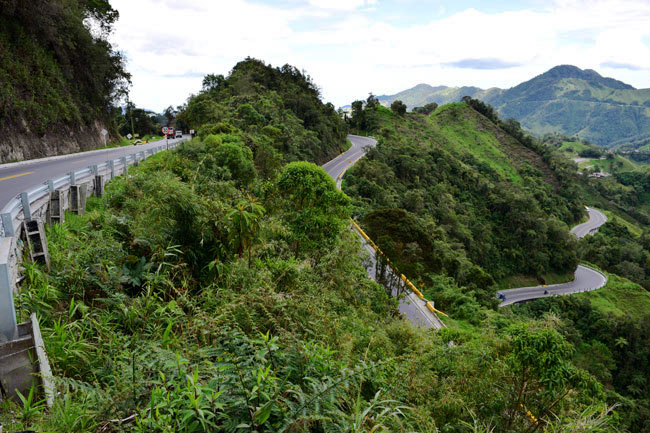
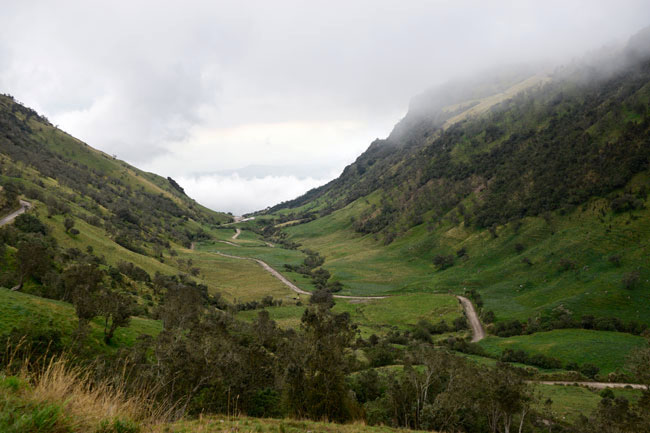
Highway 35 is called Skyline Boulevard.  I think of a boulevard as a city street, but this was nothing like that.   It was another twisting mountain road and the views were stunning.

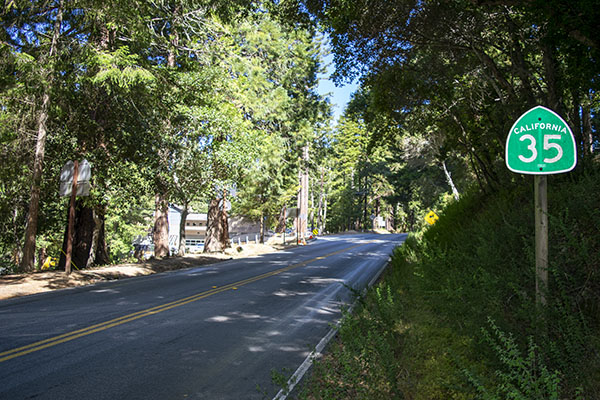
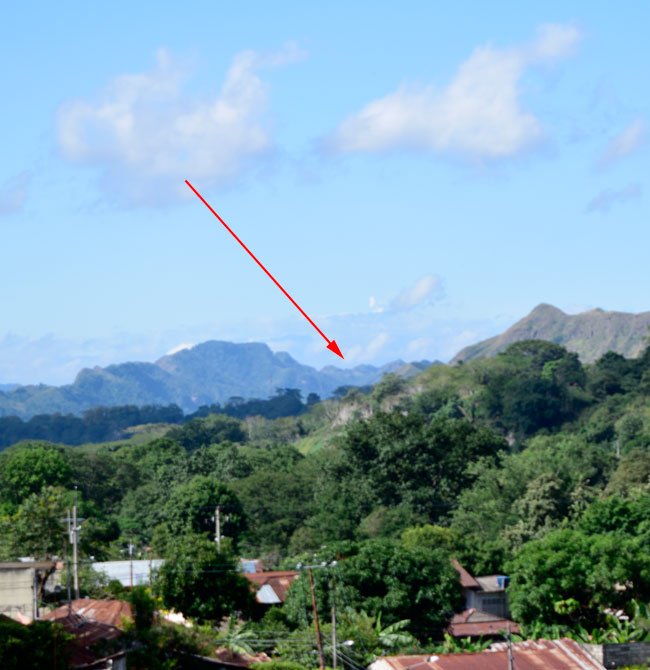
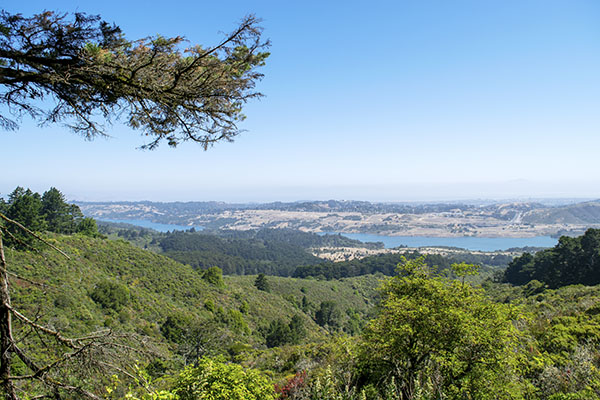
Skyline Boulevard tees into Highway 92 at its northern end and my ride along it was only 13 miles, but 13 miles can take a while on mountain roads.  Part of it is the twisting nature of the roads and part of it is the scenery.  I had the road to myself and it was awesome.  Skyline Boulevard follows the ridge of the Santa Cruz Mountains.  There are places where you can see San Francisco Bay looking to the right, and the Pacific on the left.  The photo below shows the Crystal Springs Reservoir to the east, and if you look real hard, you can almost see San Francisco Bay beyond it.

When I reached Highway 92, another quick 5.4 miles brought me to Half Moon Bay.

Highway 92 has twists and turns, but it’s a busy road and Half Moon Bay is a tourist place.  Not needing any refrigerator magnets and having been there many times before, I didn’t stop in Half Moon Bay on this ride.  But it’s a cool place and based on my earlier visits, it’s impossible to find a bad restaurant (my favorite is the Greek Taverna on the left side of 92 as it nears the PCH; it’s a great walkup place for fresh seafood).  Bring money; things are not cheap in Half Moon Bay.  The major employer is the Ritz Carlton Hotel (it’s that kind of place).

Another interesting tidbit about Half Moon Bay: They used to host big wave surfing competition here.  They get 50 to 60 foot waves when conditions are right and the area attracts the best surfers in the world.  The organizers moved the competition someplace else about three years ago.  Me?  I’ll stick to something safer, like riding motorcycles.

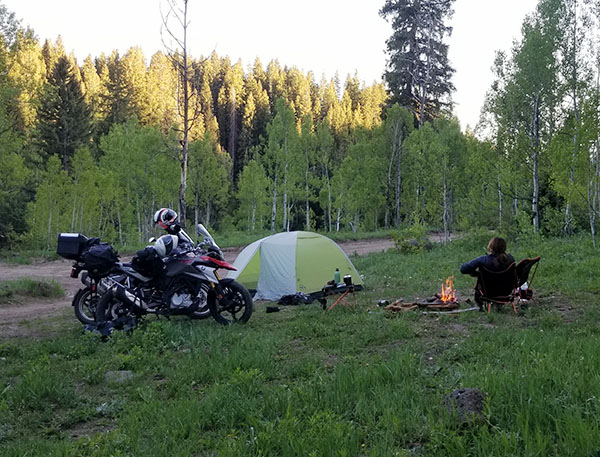
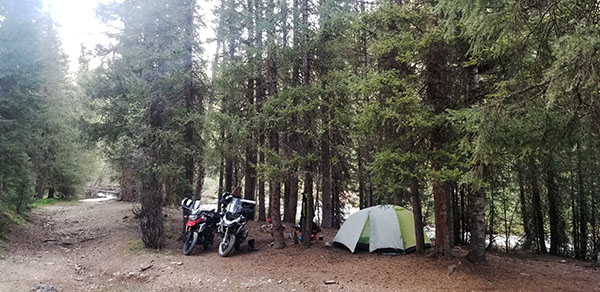
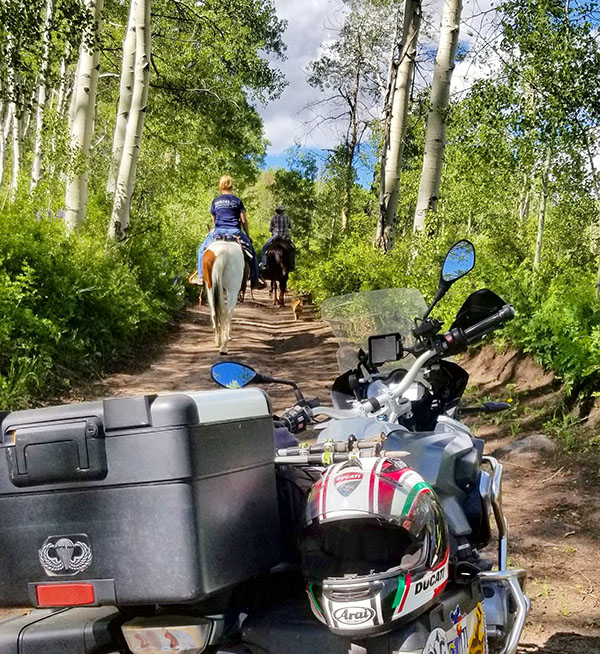
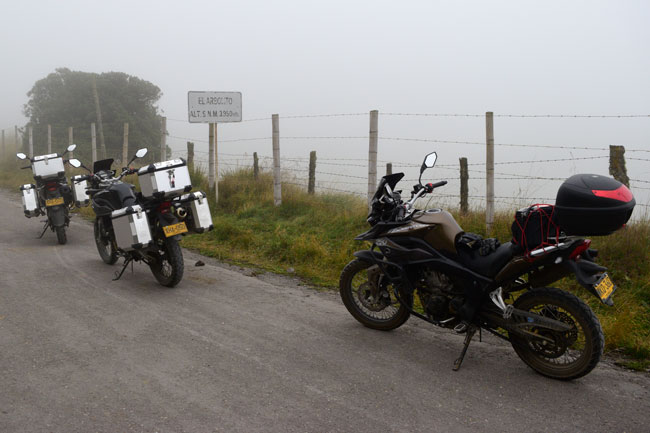
Highway 92 ends at the Pacific Coast Highway (also called the Juan Cabrillo Highway) and it runs long the Pacific for about a dozen miles before our next turn comes up (and that’s Highway 84 again, to complete our loop).  Even though the road is the Pacific Coast Highway, it’s a fair way off to the Pacific and for most of that distance I couldn’t get a photo with the road and the ocean in the same frame, but hey, it’s the PCH, man.  It doesn’t get much better than that, as these two Triumph-riders near San Gregorio State Beach already knew (where I finally did get the photo I wanted).

Before I reached San Gregorio State Beach, though, I had a stop I wanted to make.  In researching this area before the ride, I discovered that there’s a ghost town and an old cemetery about four miles south of Half Moon Bay.  It’s Purissima (with two “s”s), not to be confused with the La Purisima Mission, the subject of a recent ExNotes blog.  The town of Purissima is long gone, but the cemetery is still there, and I stopped for a few photos.  It’s a left on Verde Road, and the cemetery is about a half mile up the road.

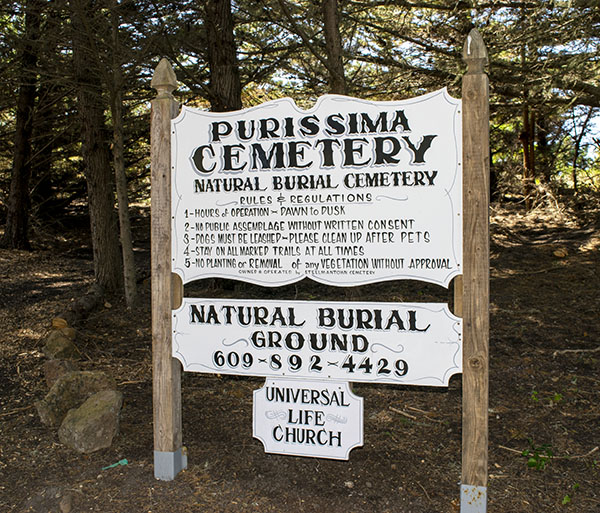
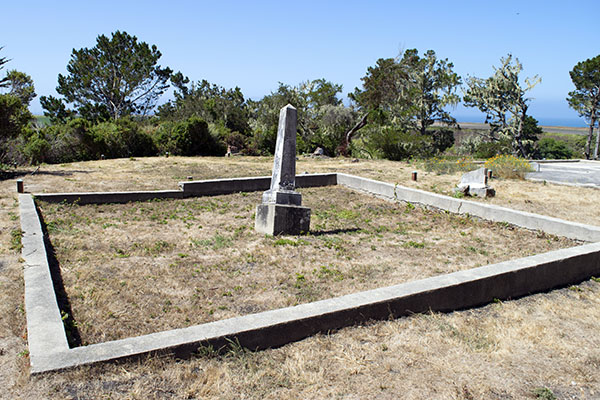
I like old cemeteries.   After snapping a few photos, I was back on the PCH pointed south.

Eight miles down the road at San Gregorio State Beach I made a left on Highway 84.  The town of San Gregorio is just up the road.  There’s not much there, but the people are friendly.  When I stopped for a shot of their general store there was a guy with a white beard taking in the day.  When he saw me taking pictures, he asked if I wanted him to move.  “No way,” I said. “Stay right there. You add character to the place.”

The Spaniards were the first Europeans to pass through this area in 1769 when they were expanding the Alta California mission chain.   They stayed for a bit and named the area San Gregorio after Pope Gregory I.  San Gregorio became a favored 1850s destination when San Franciscans visited the area for swimming, fishing, and hunting.  Grizzly bears used to live in these hills, you know. And mountain lion.  And deer (the ones the mountain lions didn’t get).  I’ll bet the hunting was good.  I’ve hunted California’s coastal mountains a hundred miles or so further south (we were chasing wild boar, but all I ever got was poison oak).  The thought of going after a grizzly bear with a single-shot muzzleloader 170 years ago crossed my mind more than a few times as I rode through this area.

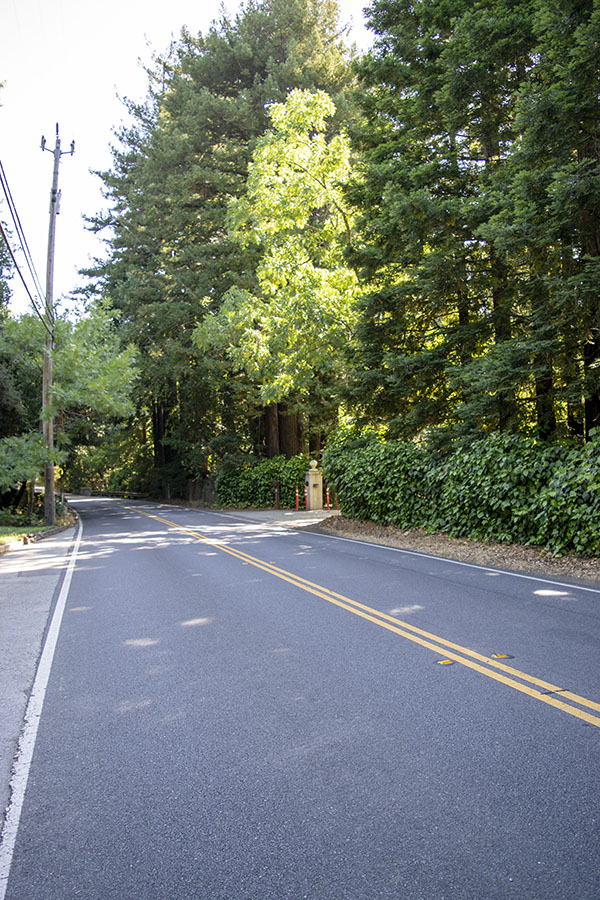
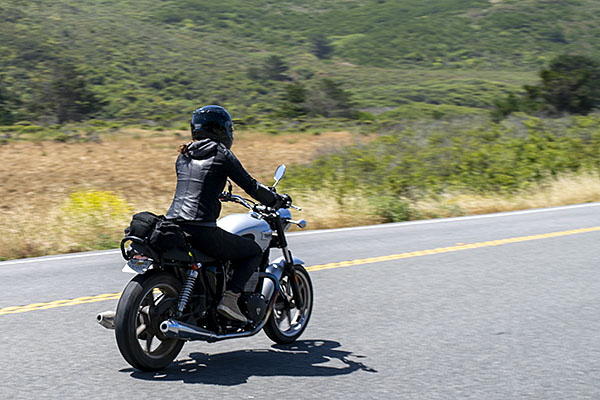
Further up the 84 (heading east) I entered the tiny town of La Honda (the name means “the sling” in Spanish).  Impressive redwood trees made me stop for a photo, but before I could get to the trees this motorcycle whizzed by:

La Honda is a nice little place.  I chatted with an old guy who had an English bulldog.  I say old, but he was probably about the same age as me.  “I did that once,” he said. “Stopped because my car was making a noise and decided this is where I was going to retire.”  We had a nice conversation.  He’s a former aerospace guy like me, and we talked shop for a bit about the good old days.  You know, when the cold war was still in a full tilt boogie and the aerospace industry was the closest you could get to Heaven without a one-way ticket.

La Honda is a wide spot in the road that isn’t very wide at all, but it sure has a colorful background.  The outlaw Cole Younger and his brothers used to live here.  That’s the Younger brothers who ran with Jesse James (the real one, not the reality TV dude).  The Younger brothers hid out in La Honda because it was cool and it was remote.  Ken Kesey lived here (he wrote One Flew Over The Cuckoo’s Nest), and his drug-fueled La Honda exploits with Hunter S. Thompson and Tom Wolfe are documented in Wolfe’s The Electric Kool-Aid Acid Test.  And like I mentioned above, grizzly bears used to live in these mountains.  There are stories about a guy who survived a grizzly attack by killing the bear with his knife (not Davy Crockett, but the two would have probably got along).  Fewer than a thousand people live in La Honda (at least as recorded by the last census).  It’s a cool place made even cooler (literally and figuratively) by the giant redwood trees in the area.

So, about those redwoods:

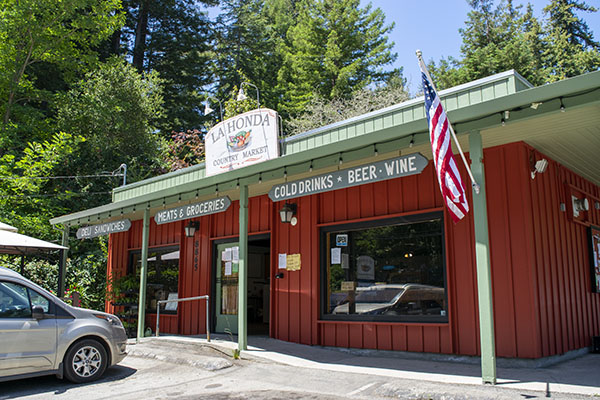
I was hungry when I reached La Honda.  I  usually select a place to eat based on how many vehicles are parked in front (who needs Yelp?) and by that measure, the La Honda Country Market looked mighty inviting (I had to wait for other folks to leave to get the unobstructed photo you see below).  The Country Market has a killer deli bar.  I had a pastrami sandwich on toasted marbled rye and it was maybe the best pastrami sandwich I ever had.  Give it a shot. You can thank me later.

I’m up in this area fairly regularly, but this is the first time I’ve done the loop described here.  It’s a great ride best done during the week.  Because it is such a great ride (and because it’s close to both Silicon Valley and San Francisco), these roads are jammed on the weekends (motorcycles, Ferraris, Lamborghinis, Cobras, McClarens, and other motoexotica).  When I did the ride on Tuesday, the roads were delightfully open.

I’d advise avoiding speeding (especially on the weekends, as the roads had a significant CHP presence) and I’d also say don’t wear a tinted visor.  The giant redwoods and eucalyptus trees bathe the roads in alternating patches of bright sunlight and deep shade (the riding equivalent of chiaroscuro), and in the shade it’s tough to see through a dark visor.

The ride I described above is about 60 miles from the point you exit the 280 until you get back on it, as shown in the map at the top of this blog.  I’d allow about two hours for a relaxed ride during the week, and maybe throw in another hour or two if you want to stop for breakfast or lunch.


Want to see our other rides on one of the greatest roads in the world?   That would be California’s Pacific Coast Highway, and you can see it here.

Day 7: Volcan Nevado del Ruiz

On my 8th day in Colombia and 7th day on the road, we left the town of Honda and rode to the top of Volcan Nevado del Ruiz, which took us up to about 14,000 feet.   It was the highest I’d ever ridden and I was surprised at how well the RS3 (the carbureted version of the RX3) was doing.  But I’m getting ahead of myself…let’s get into the blog I wrote for CSC Motorcycles at the end of that fine day.


Posted on December 21, 2015

A delightful hotel, sweltering heat, more mountain twisties, freezing cold, fog that cut visibility down to 30 feet, dirt roads, riding at 13,576 feet, hot sulfur baths, and a burbling volcano that killed 23,000 people in 1985…all in a day’s ride for us.

The hotel first…it was the Epoque, a great little boutique hotel in Honda that was one of the coolest places (in one of the hottest cities) I’ve ever parked a motorcycle. It was arranged in a square around a small pool (which we enjoyed immensely the previous night). Here are a few shots of the courtyard, Juan and Carlos having breakfast, and an antique record player in the dining room…

From there, it was another trials ride following the boys from Medellin as we twisted, turned, climbed, and descended cobbleboulder streets in Honda. Juan took us to the first bridge to ever span the Magdalena River, where I grabbed this shot of a Colombian woman taking in the humid morning air of Honda…

Here’s the bridge. It has planks across the bottom as the road surface. It’s real Indiana Jones stuff….

We saw the Magdalena River museum, and stopped in to check it out. Folks, it was hot. I was soaking wet by now, drenched in sweat.

The museum was interesting and it had some bizarre art. This guy reminds me of a boss I had a couple of decades ago…

The Colombians used steamships on the Magdalena, just like we did on the Mississippi River.

We left Honda and started to climb. The temperatures dropped mercifully. We stopped in Fresno. Yep, Colombia has a Fresno, too.

That’s me in the town square. I’m the guy on the right.

Two young ladies in a small store in Fresno.

As we were sipping energy drinks, Juan pointed out our destination for that evening, the Volcan Nevado del Ruiz. It was showing a little steam, and I stuck an arrow in this picture so you could see it.

We continued our climb. The roads were magnificent.

The photo below shows my front tire, with chicken strips that are about as small as I’ve ever been able to make them. I was getting better at keeping up with the Colombian motorcycle community.

Our riding positions are Juan, me, and Carlos. Juan is amazing. I’m struggling to keep up in the twisties, and I know he’s dialed it back for me. He’ll ride through the corners (and the roads are all corners, folks) standing on the pegs. At one point, we were taking a set of curves at speeds way above those at which I would normally ride, with the bikes leaned over at an unimaginable angle, when I looked ahead and saw Juan. He was standing on the pegs, similarly leaned over, and while all this was going on, he was reaching back to check the latch on one of his saddlebags as if it was the most normal thing in the world to do. The guy is an incredible rider.

As we continued to climb, we entered the clouds. Literally. We left the pavement and got on a dirt road headed up to the volcano.

4,138 meters! That’s 13,576 feet, and it’s as high as you can go on a motorcycle anywhere in Colombia. Juan told me he once did this ride on a Yamaha DT100, carrying a passenger on the back!

That’s not dirt on my RX3, folks. It’s volcanic ash. This was not your typical motorcycle ride.

Yours truly, posing with Carlos, on the top of the world, on top of a volcano with indigestion. Wow. This volcano is the very same one that blew in 1985 and wiped out an entire community. It was like Pompeii, as the guys explained it to me. 23,000 people lost their lives in that event. And here we were, riding in conditions where I could barely see Juan’s tail light in front of me, on dirt roads, in bitter cold. Wow.

Here are a couple of shots showing my helmet and my jacket, dusted with Volcan Nevado del Ruiz ash.

We left the volcano, rode another 20 kilometers on this dirt road, and found our hotel in the middle of nowhere.

The hotel had hot springs, and they were awesome. I had a good soak, we had dinner, and that was the end of Day 7 on this epic journey.

Today is our last day. We’re finishing our great circumnavigation and headed back to Medellin. Much of our ride today will be on dirt. I’ll take a few shots and post about it tomorrow.

Later, my friends.


You can read the earlier blogs from this great trip, and a few other moto adventures, here on our Epic Rides page!


Please click on the popup ads!


Never miss an ExNotes blog:

The Nevada Northern: It’s Worth a Trip To Ely

I last time I was in Ely, Nevada I was riding motorcycles with my Dad. I had a Honda XL600 and he was on a Suzuki 450 twin street bike. This must have been in the mid-1980’s because my XL600 was a 1983 model and the bike wasn’t that old at the time. We were traveling east on The Loneliest Highway, Nevada’s Route 50, and made a turn south onto, if not The Loneliest, a damn lonely Highway 93. In doing this we skirted Ely having never seen the main part of town or even realized it existed. The impression that there was nothing at Ely except a gas station and a sandblasted alien curio shop stuck with me for the next 35 years. Until I recently turned east off of Highway 50 onto 93 heading north: There was a whole town with streets and a downtown area! So not nothing after all.

Ely, Nevada has a cool, working train museum just a few blocks off the highway. Look, I love trains. I like riding on them. I like sitting nearby when they rip down the tracks at speed. I like waiting at crossing guards, how the train takes precedence. I like how engineers will still blow the whistle when you ride alongside on your motorcycle making that whistle-blowing arm motion. I like the wheels of the train flattening the pennies I put on the tracks. (If they don’t shake off.) I like riding motorcycles on old railroad right-of-ways and rotting black ties full of termites. I mean, my bathroom towel holders are bent railroad spikes, man. The older the train the better; steam trains are at the top of the list. You get dirty just looking at a steam engine. I like a train that sets fire to the countryside and consumes coal and water like a Saturn Five consumes rocket fuel. I guess I just like a train, you know?

Inside the Nevada Northern Railway yard you can wander through the old workshops where huge machinery worn smooth by decades of human interaction await the call. And the stuff still works! Lifetimes have been spent spinning these wheels. The day I visited the action was kind of slow, even the shop cat was nowhere to be found but I did see new bronze axle bearings waiting to be finished.

The star of any train museum is the Steam Engine. For all the reasons mentioned above. Imagine cross-country travel cut from 3 months to 3 days. Telegraph lines ran alongside railroad tracks sending messages thousands of miles at the speed of light. (minus a few relay stations) For their time and impact on society, these smoking water-spewing monsters make the Internet’s capabilities look like two rusty baked bean cans and a length of string.

Things used to be a lot snowier in the west, miles-long snow sheds were built in the Rockies and where the sheds petered out giant snow blowers cleared the tracks. This one looks to be in pretty good condition. I can spend hours poking around this place daydreaming about being alive in that era. Maybe I could have been the one spinning those wheels or repairing leaking heat exchangers.

Check in with the Nevada Northern (https://www.nnry.com) and be sure to get a ride on the old trains. They still operate on a schedule, just not when I was there. There’s a gift shop full of cool train-a-phernalia and cold drinks. I walked for hours but I’ll be going back to Ely again. I want to ride!


Want more railroad stuff?  Hey, here’s a great railroad story about Old No. 463.  How about the Chattanooga Choo Choo? And another one about Golden Spike National Historic Site.  We’ve got two more train stories coming up real soon about the railroad museum in Sacramento and Big Boy (Ol’ No. 4014), too, so stay tuned!

Repairing Blinkers: KLR250 Refresh, Reflash and Rehash Part 2

Blinkers on a dirt bike are kind of silly but lately I’ve been running The Widowmaker, my 2005 KLR 250, on the street more than is right or just. The KLR250 spends most of its time in Florida and the automobile drivers in that state are legendarily bad. With Nearly-Deads behind the wheel and blind rage as their co-pilot any blinking light that may draw attention is a good thing.

The Widowmaker’s blinkers have had a rough go of it. They worked fine when I bought the bike but several thousand miles of the Trans America Trail managed to put a pronounced sag in the rubber stalks holding the lamp fixtures. The rubber soon cracked and the blinkers hung down swinging on their electrical wires.

At first I managed to keep the original stalks in the game using the KLR rider’s best friend, duct tape. Soon the tape was not enough and I progressed to beer can wraps, bailing wire and spit. The rubber stalks crystallized and began to crumble into small, hard black cubes. It was a metamorphosis: soft, pliable rubber became fragile like chalk. The lamps, now free from their moorings swung in a crazy amber half circle pointing towards the ground. As they filled up with water the light fixtures quit blinking and they became memories of directional indicators slapping the side of the motorcycle.

I couldn’t find replacement stalks online. The complete blinker is sold as a unit and when your motorcycle needs as much attention as mine you can’t blow a bunch of money on parts that will break off soon anyway. I dismantled the old blinkers and decided to try to fix them for two reasons: Because I’m cheap like that and KLR riders will always take the hardest path.

Two of the direction lamps weren’t rusty and came apart fairly easy. The rusty ones were more of a challenge. I had to soak them in penetrating oil and break the glass bulbs in order to remove the bulb base from the socket using pliers. After getting them apart I soaked the rusty bits in Evaporust for a few days and then painted the reflector and socket a fetching metallic silver.

Making new stalks was a conundrum: I needed something stiff enough to hold the lamp in position but flexible enough to bend during a crash, preventing destruction of the blinker lens and housing. I toyed with the idea of two thin strips of sheet metal to provide a malleable stem that could be bent back into position. I debated welding a thin tube between the threaded ends but didn’t have any tubing that would serve the purpose.

I settled on ½” Pex plastic plumbing tubing mainly because it comes in a red color than neatly matches The Widowmaker’s faded bodywork. The Pex copper crimp rings would make for a neat finished end to the Frankenstalks. The only problem was the threaded ends salvaged from the old rubber parts were a little too big for the Pex pipe.

I really could have used the South Bend lathe to turn down the ends but that project is not completed yet so I had to chuck the parts into a hand drill and grind them to size. Even cut down they were still too large for the Pex but I didn’t want to grind any more and lose the knurling. It’s amazing how a new tool opens up avenues of creativity. It frees your mind, man. My new tubing expander (bought for an air conditioning job) made short work of the Pex inside diameter and the threaded inserts fit perfectly.

Next I used the tubing expander to resize the copper Pex crimp rings to fit the expanded pipe. Things were going well. After crimping the copper rings with a hydraulic cable crimper the stalks looked like 100 bucks.

The grinding process put a divot in the threaded end so I had to run a 10mm die over the things to straighten out the divots. With 4 new blinker stalks it was only a matter of time before everything was reassembled and back on the motorcycle. I’ll need to put a battery in to see if the blinkers actually work (I’m using the same battery in the Z1, the Husky, and the KLR) but I remain confident they will work at least as good as they used to. Which is not at all.

A few questions remain. Will the crimped ends stay put on a rough trail? I assume they will rip out during a crash and that’s good. My new stalks cost about 67 cents apiece so I can replace them as often as I like. Will the plastic tube droop leaving me with a sad-eyed KLR250? Will the bike require a plumbing inspection now? I don’t know the answers but I’ll report back if these Frankenstalks actually work.


More “Bring ‘Em Back Alive” Gresh Resurrection stories are here!

A .22 250 Ruger M77

Custom-crafted .22 250 ammo.  With the right loads, 4000 feet per second and sub-half-inch groups can be had from this cartridge.

One of the hottest .22 centerfires ever conceived, the .22 250’s wildcat ancestry goes all the way back to 1937, and to this day it is still one of the world’s hottest .22 centerfire cartridges.  The concept was simple enough:  Take the .250 Savage, neck it down to .224 caliber, stuff it full of the right powder, and oila, you get a .22 250.  Capable of exceeding 4,000 feet per second with lighter bullets, it’s a cartridge so fast that if you pick the wrong bullets, they’ll disintegrate in flight due to aerodynamic heating and spin-induced centrifugal forces.  That’s fast, folks.

Until 1963, if you wanted a .22 250 you had to build your own rifle.  Browning offered a production rifle chambered for the .22 250 that year, but even then you couldn’t just walk into a store and buy ammo.  No, the .22 250 was still a wildcat.  You had to make your ammo:  Form the brass from another cartridge case, and roll your own.  Then in 1965 in a nod to the .22 250’s appeal, Remington changed all that.  They offered a .22 250 rifle and the factory ammo to go with it, and it was an instant success.

My Dad was a member of an east coast woodchuck hunter/killer pack back in the 1960s and he regarded the .22 250 as the Holy Grail.  Dad used a .243 Winchester Model 70 (another hotrod in its day), but he spoke of the .22 250 in hushed and reverential terms.  Dad never owned a .22 250 and that might have been his only character flaw, a family deficiency I’ve been making up for ever since.  I remember visiting Effinger’s with Dad before I shipped out to Korea (Effinger’s was an outstanding gunshop in central New Jersey that only recently closed their doors).  They had a Ruger No. 1 .22 250 in stock and Dad came close to buying it.  But he didn’t.  He let it get away and he lamented that loss for years.

Life went on, I spent a year in Korea compliments of Uncle Sam, and then I came back to Fort Bliss, Texas.  One night I was in a K-Mart in El Paso (when K-Mart sold guns), they had a bolt action Ruger Model 77 in .22 250, and you can guess the rest.   I think I paid $169 (the list price on a Ruger Model 77 was $215 back then).   It’s a beautiful rifle with classic American bolt action styling.   The bluing is deeper than deep (infinitely richer than what you see on new rifles today),  the hand-cut checkering is perfect (today’s rifles have mostly laser cut checkering that’s fuzzy as an old peach), and the profile is just right (thank you, Len and Bill).  The walnut is a joy to behold even though it’s straight-grained and doesn’t have much figure, and that red recoil pad is classy.  This rifle is nearly five decades old, but it still looks new.

My Ruger Model 77 in .22 250. It’s equipped with a Redfield 4×12 scope.
Classy, huh?  Based on my rifle’s serial number and info on the Ruger website, my rifle was manufactured 45 years ago.
The period-correct 4×12 Redfield. The optics on current-production scopes and the ability to dial out parallax make today’s telescopic sights much better, but this one was what was in vogue in the mid-70s and I like the look.
That’s not rust you see on the countersunk muzzle; it’s just muzzle-blast staining.

I tested the Ruger with Nosler 60-grain Varminter bullets at different H380 powder levels. H380 is the “go to” powder in .22 250, and I wanted to see what it would do with the Nosler bullets.

My .22 250 loads with 60-grain Nosler bullets and H380 powder.  Win some, lose some.

My buddy Greg recently acquired a .22 250, and that got me interested in shooting mine again.  I dug it out of the safe, loaded some ammo, and settled on on the 100-yard line.  I tried four different loads for a ladder test using H380 propellant and Nosler’s 60-grain ballistic tip bullet (the rounds you see in the photo above).

I’d like to brag about great groups with the above loads, but the results were disappointing.  Sometimes that happens.  You have to kiss a few frogs in the reloading game to find a prince (sometimes you have to kiss a lot of frogs), and let me tell you, every one of my loads during that range session was amphibious.  But that’s okay.   When you develop a load for a rifle, you find out what works and what doesn’t.  My Ruger .22 250 doesn’t like Nosler 60-grainers and H380.  Now I know.

I knew the rifle had potential, though.  Here’s earlier data with lighter bullets:

That one load at the bottom of the table showed real promise, so I loaded a few more with the same 52-grain Hornady bullets and tested them a few days later.  Here’s what I found:

The above results were promising, but there were inconsistencies in how the lighter bullets grouped.  What was driving that?  Was it me being a Shakey Jake, or was it something else?  I took a hard look at the bullets, and to my surprise, more than half of them had deformed tips.

Deformed tips on the 52-grain Hornady jacketed hollow point bullets.  There are a few other things detrimental to good accuracy revealed in this photo, like the faint circumferential witness mark left by the bullet seater, and the shaved copper at the case mouth.

I called Hornady to ask about the deformed tips, and their guy explained to me that what I was seeing was indeed a bullet defect.  He asked me for the lot number on the bullet box, and it turned out these bullets were manufactured in 2013 (which is weird, because I had only purchased them a year or two ago).  You’ll remember that 2013 was in the Obama era when component shortages were common and the factories were struggling to keep up with demand.  These bullets should have never left the factory, and the Hornady rep put a box of replacement bullets in the mail for me that same day.   Hornady is a good company that stands behind their products.

Not content to wait for the new bullets, I screened the ones I had and selected bullets with no visible tip deformation for the next reloading lot.   I also tried neck-sizing rather than full length resizing.  The theory on this is that the cartridge case is fire-formed to the exact chamber dimensions of the rifle, and it should more precisely locate the bullet in the chamber (when you neck size only, you only resize the case where it grabs the bullet).  With visually-screened bullets and neck-sized cases, the M77 returned about the same accuracy.   But I was seeing more groups below an inch, and I even had one below a half inch:

There’s still variability and that’s probably due to me.  There may still be issues I couldn’t see to screen in the bullets, but I think things are moving in the right direction.  So what’s next?  Varget is another powder reported to do well in the .22 250 (there’s a can of it on my bench), and the new box of Hornady bullets arrived last week.   And I’ve got a few more accuracy tricks I want to try.  We’ll see what happens.


More gun stuff is right here!