
The last time I had the Compact 1911 on the range, I shot worse than usual. At 25 yards (with me resting my arms on the bench), I can typically keep my shots in the black with the Rock Compact. This is how I shot last week:
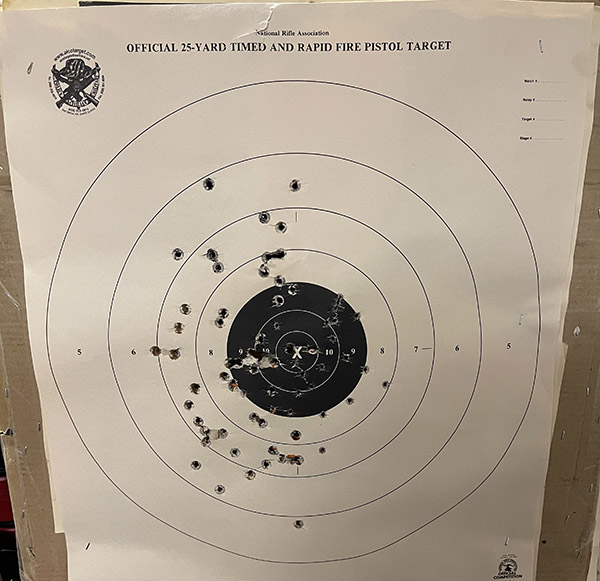
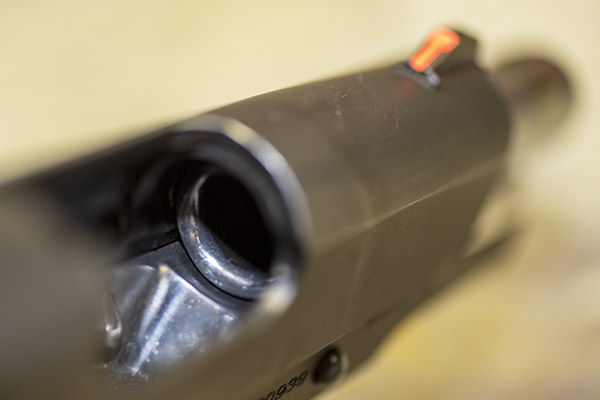
That’s pitiful (there’s a few 9mm holes on that target above; ignore those). Then I noticed the slide was not going fully back into battery, which was something new to me. It wasn’t jammed, it just needed a slight nudge to finish the trip home.
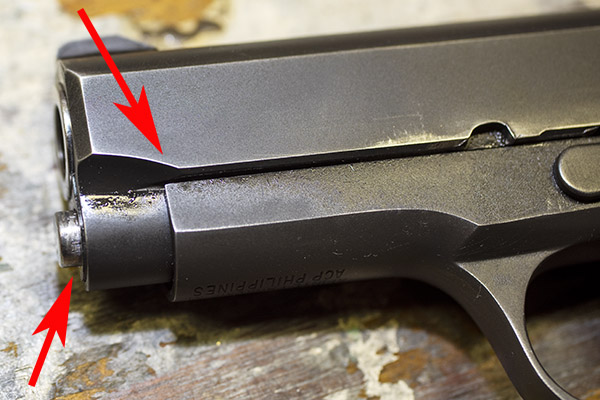
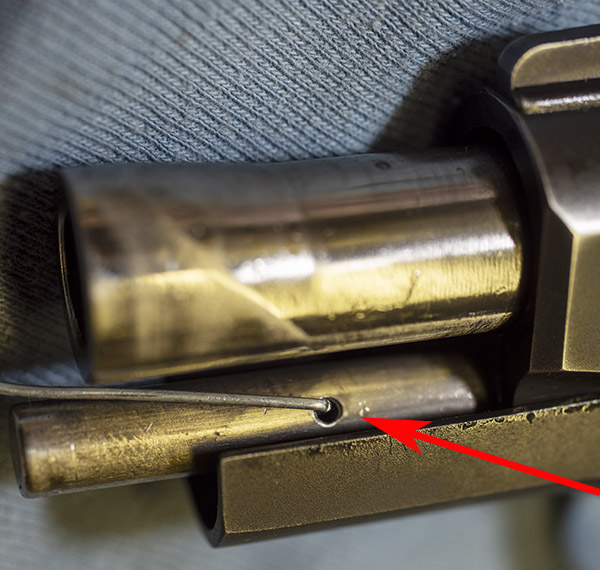
Another view of the slide not returning to battery. “Battery” means fully forward, ready to fire the next round.I knew that Compact 1911 recoil springs fatigue earlier than the springs in full-sized 1911s, but this one snuck up on me. Armscor (the Rock Island Armory folks who manufactured my Compact 1911) were out of stock, so I ordered a new spring from Wilson Combat. Wilson Combat is a recognized “go to” shop in the 1911 world. I received my new recoil spring a few days later.
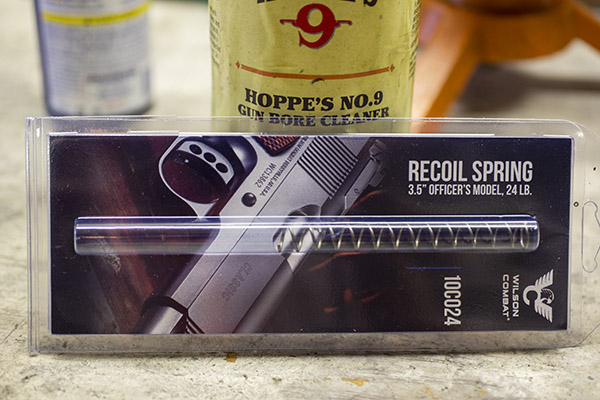
Online research said the life of these springs in a Compact 1911 is only about 2000 rounds, tops. That surprised me. The literature from Wilson surprised me even more:
1000 rounds. That’s 10 boxes of ammo. Wow. I probably had several times that many rounds through my Rock. Small wonder the slide wasn’t returning to battery.
When the spring arrived, I was eager to put it in my 1911. I dropped the magazine and cleared the weapon:
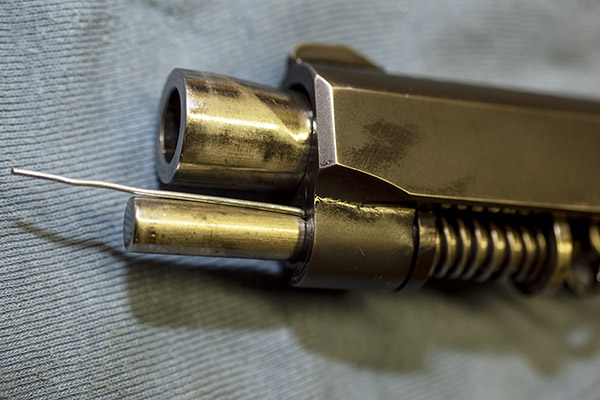
Then it was time to turn to my custom, German tool steel, carefully configured to exacting tolerances, Rock Island Armory Compact 1911 disassembly tool. It’s a bent paper clip:
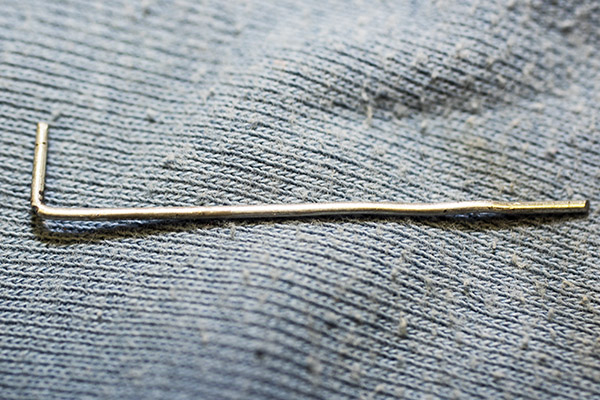
The drill is to lock the slide back, put the paper clip in the guide rod hole, and ease the slide gently forward to engage the paper clip.
Once I had the slide forward, with the paper clip disassembly aid in place like you see above, I withdrew the slide release from the left side of the pistol. At that point, the entire slide assembly can slide forward off the receiver.
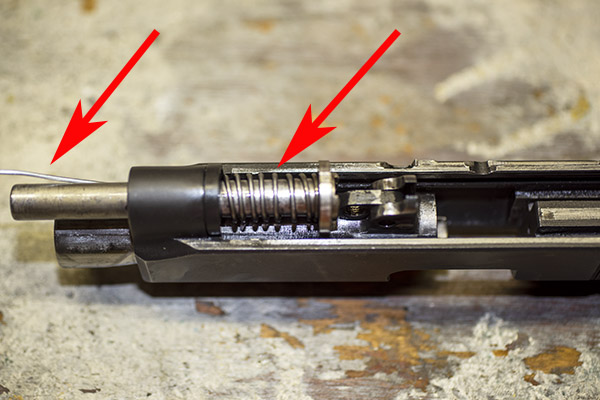
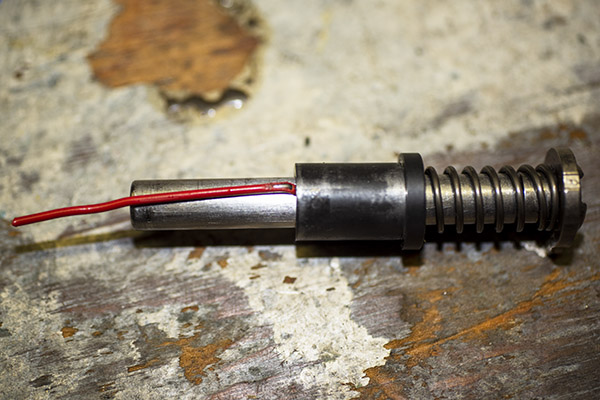
The next step was to extract the recoil spring, the guide rod, and the recoil plug out of the slide. It’s best to leave the paper clip in the guide rod (i.e., with the recoil spring still compressed), and then slide the entire recoil plug/recoil spring/guide rod rearward as a unit out of the slide. After that, I pushed down on the recoil plug, withdrew the paper clip from the guide rod, and released the compression on the spring. I was careful when I did this; parts could go flying if I just let them go. Don’t ask me how I know this.
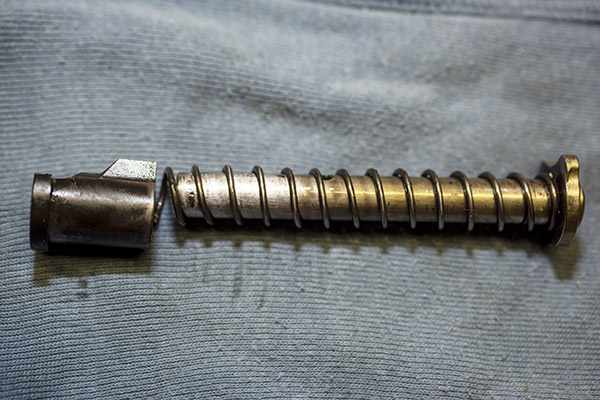
Here’s what the guide rod, the original recoil spring, and the new Wilson Combat recoil spring look like. The new spring is on the bottom:
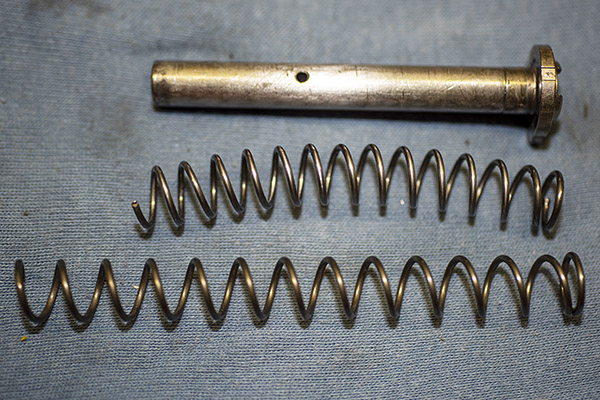
I think the new spring wire diameter is larger than the original spring wire diameter. I didn’t think to measure it before I installed it; I will do so the next time I have the gun apart. And there’s a huge difference in free length, as you can see in the above photo.
Installing the new spring on the guide rod with its recoil plug was a challenge. I had make to a tool to compress the spring and the recoil plug enough to get a paper clip on the guide rod to hold everything together so I could install it in the slide. Again, I was super careful. I didn’t want to release these parts, and I always wear eye protection when I do this sort of thing. A lot of people get hurt by being careless with springs.
At this point, I reinstalled the subassembly in the slide, I slid the slide onto the receiver, and then I reinstalled the slide stop.
Once the gun was back together, the first time I tried to rack the slide I was shocked. I couldn’t pull the slide all the way back. I muscled it and then did so several times, and it seems to be okay now, but wow, it is stiff. The 24-pound recoil spring is way stronger than what the Compact 1911 had in it. That’s the bad news. The good news is that the problem with the slide not returning to battery is gone.
You know, I was playing around with the Compact 45 when I was cleaning it before the above spring replacement and I noticed that because the slide only went limply into battery there was a lot more play between the receiver and the slide. I thought maybe it was me, but I noticed the accuracy was really falling off the last couple of times I shot it. I’ll bet when the recoil spring holds the slide firmly in battery keeps the slide in the same spot each time. With a weak spring, it stands to reason that the slide would swim around a bit more and accuracy would suffer. I shook the gun in my hand with the old spring in it, and it rattled just like the 1911s I carried in the Army. I’ll bet they all had worn recoil springs, too.
When testing a recoil spring to see if it’s the right one, the drill is to load one round in the magazine, fire it, and if the slide locks back after that round (as it is supposed to do), the spring is good. I tried that with seven rounds of factory hardball and the new Wilson Combat 24-pound recoil spring, and it worked each time. Then I tried my 230-grain cast hardball load with 5.6 grains of Unique (my reloads are less potent but way more accurate than factory ammo), and it worked great. Then I tried my 185-grain cast semi-wadcutter load (with 5.0 grains of Bullseye; my Compact 1911 accuracy load), and it worked great. It’s a little easier to rack the slide now, but it’s still way stiffer than it was before.
Like 1911 stories? Or maybe other handgun stories? Or good reloading info? Hey, it’s all available on Tales of the Gun!
Help us keep the content coming: Please click on the popup ads!
More stories on the Rock Island Armory Compact? Yes, indeed!
The 1911
A Tale of Two 45s
An Accurate Compact 1911 Load
A Gripping 1911 Story
A Tale of Two More 45s
RIA Compact: Load versus Point of Impact
TJ’s Custom Gunworks
RIA Compact Update
Never miss an ExNotes blog:
We love it when you click on those pop up ads! It’s what keeps the lights on!
Thanks for the chuckle. When I purchased my Kimber 1911 lo these many years ago (my first 1911) the shop owner gave me the same serious, straight faced spiel about not losing the expensive and difficult to source Kimber special take-down tool that came with the pistol, then quipped at the end, “otherwise known as a bent paper clip”
Yeah, it’s pretty funny. Bent paper clips come in handy for assessing excessive case thinning in rifle cartridges, too.
That note from Wilson was for some stouter ammo,+P?
Thanks for some clues and hope you follow up in the blog.
That’s a good question. I’ll try to reach them tomorrow and ask the question. Thanks for commenting.
I’ve been using the slide to disassemble the spring/rod assembly on my 10mm 1911. I started using this method after seeing sootch00 using it in his Ruger 10mm 1911 video.
https://www.youtube.com/watch?v=5xvHBAb4C7o
Awesome and an interesting approach. Thanks for posting.