The Sportster of Seville

By Joe Berk

When I was a kid, I used to watch a weekly television comedy show called The Little Rascals.   In one of the episodes, one of the rascals named Alfalfa sang a song from Gioachino Rossini’s opera, The Barber of Seville.  Until very recently, Alfalfa’s rendition and a Cadillac made in the 1970s (the Seville) were all I knew of Seville.  That changed with our recent trip to Spain.

I found it: The Barber of Seville!

Cards on the table:  I didn’t know anything about Gioachino Rossini’s opera until I Googled the Little Rascals and the Barber of Seville.   In so doing, I found out that Warner Brothers also had a Bugs Bunny cartoon with the same song.  I know…I digress.  Indulge me for 56 seconds more. Here’s Alfalfa belting it out.  Told ya…

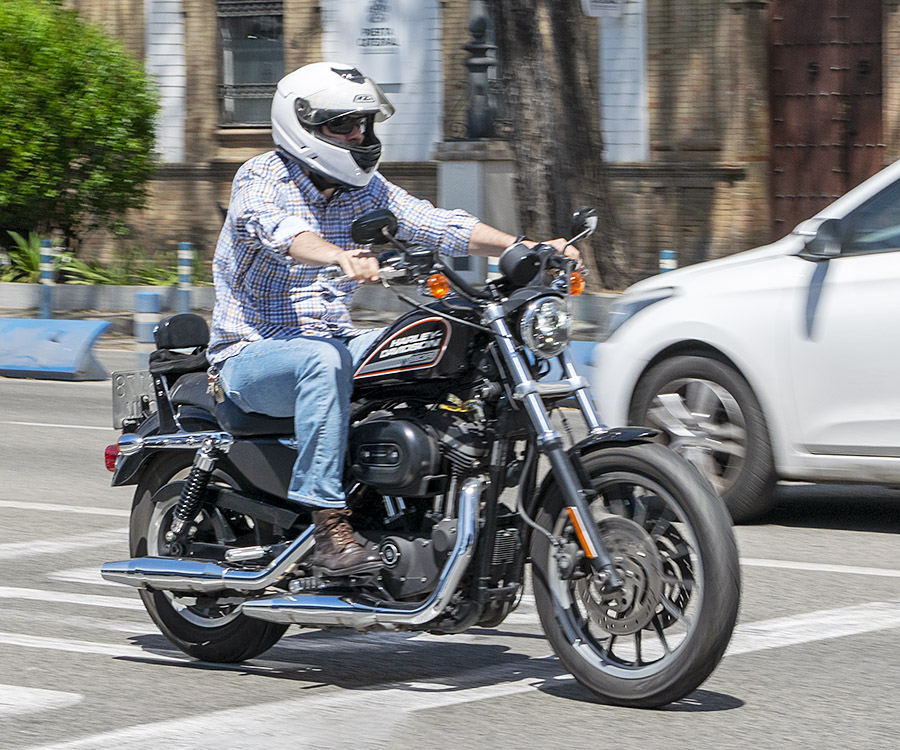
You might be wondering:  What’s with the Sportster in the cover photo up top?   I saw it my first afternoon in Seville.   Believe it or not, in Spain, the land that brought us Bultaco (the motorcycle, not the Mexican bullfight snack bar delicacy), Ossa, and Montesa (or, as some might say, Montessa), the ultimate motorcycle status symbol is a used Sportster.  Hence the title of this blog:  The Sportster of Seville.  We’ve had a lot of fun with Sportster blogs here on ExNotes, but let’s get to the main topic of this discussion:  Seville.

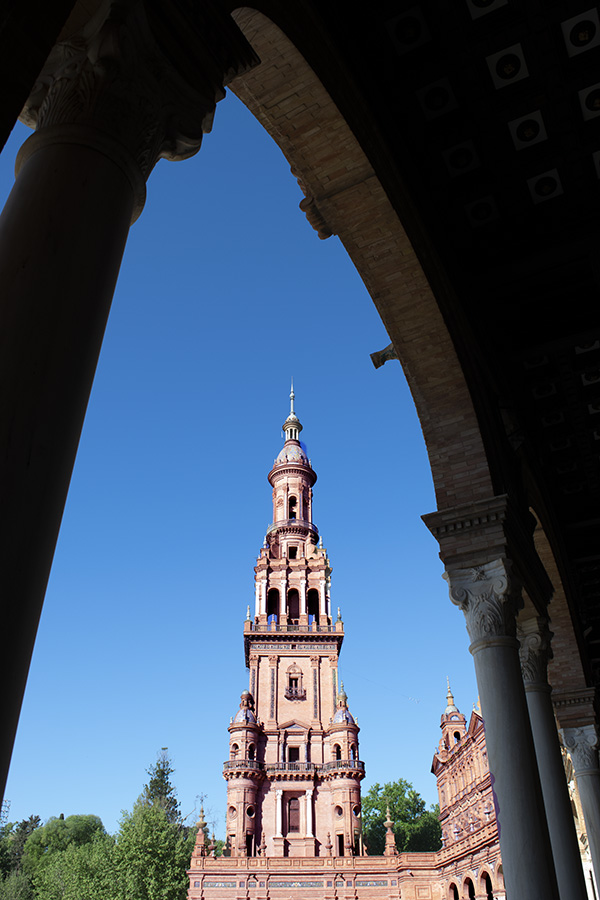
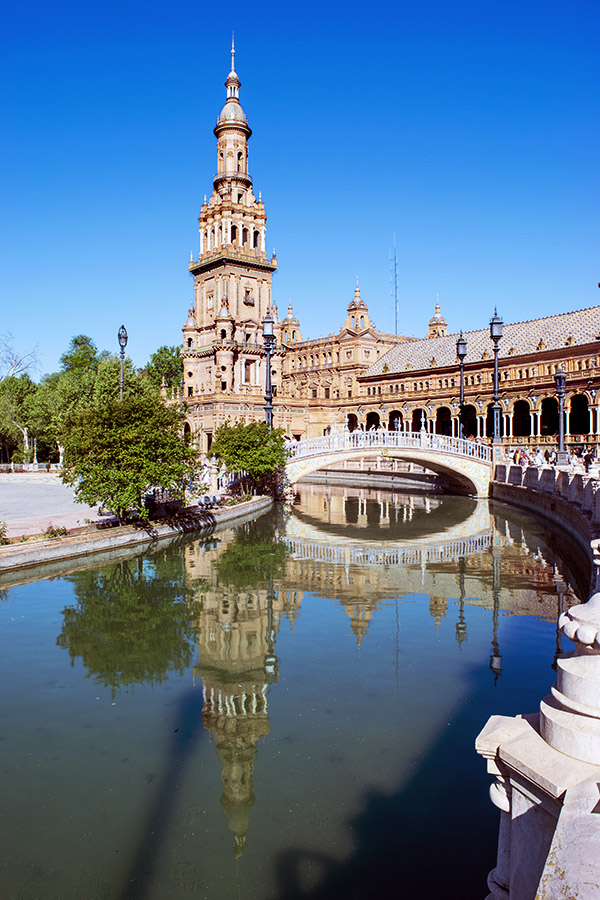
One of our first stops in Seville was the Plaza de España, which is a magnificent building and park area built in 1929 when Seville hosted the Ibero-American Exposition World’s Fair.  The Plaza de España is impressive.  Today, the building has been renovated and it is used for Spanish government agencies.  It’s beautiful.

Photo opportunities abound. This shot of the tower through one of the many arches almost took itself.
Any time there’s water or a mirror, I’m there. You can do a lot with reflections when you shoot a photo.

We saw a bunch of touristy chotchkas in the Plaza de España courtyard that made for good photos (I would never buy this sort of stuff…if I need to generate a breeze, I’ll hop on my motorcycle…you know, to get my knees in the breeze).  But it was fun to photograph.

Fans for sale in the Plaza de España courtyard.

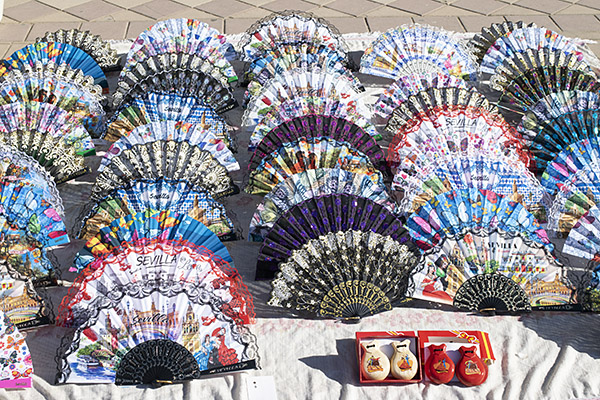
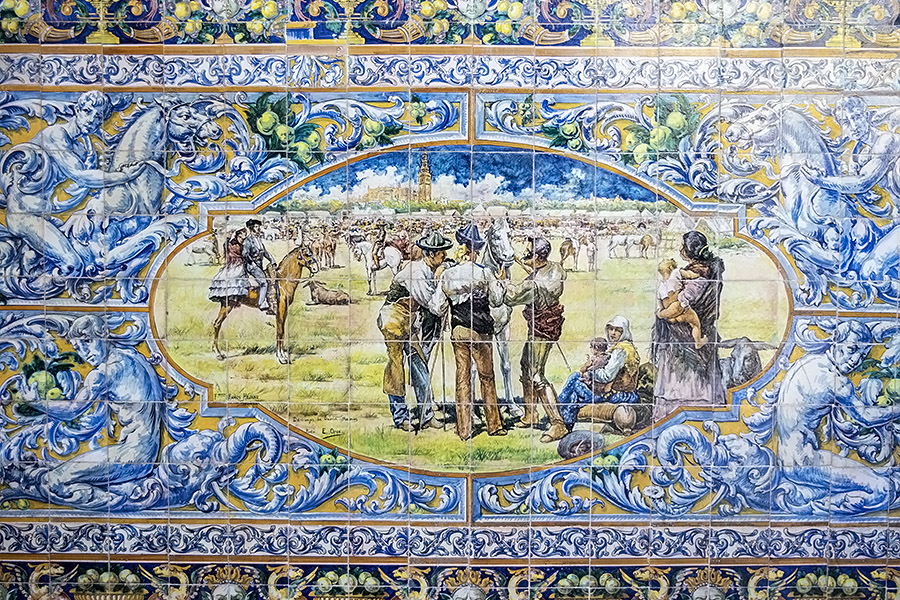
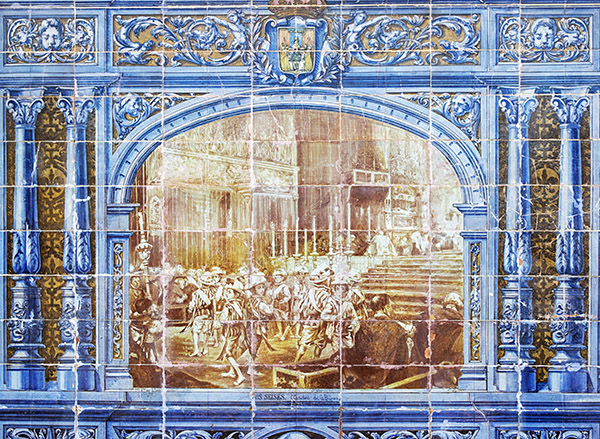
My attention then turned to the tilework along the Plaza de España courtyard wall that stretched for half a mile.  Each tile-based mural depicts a Spanish province.  The work was impressive, but what was even more impressive was what happened next.

One of many tile murals in the Plaza de España courtyard.
Another Plaza de España courtyard tile mural.

Two Spanish motor officers rolled into the Plaza de España courtyard on (get this) police motor scooters.  I always thought small motorcycles and motor scooters made a lot of sense in urban areas (I’ll say more on that in a second).   I asked the motor officer in the photo below if I could grab a picture and he was cool with it.

A Seville motor officer. If I was 50 years younger and spoke Spanish, I might try out for a job like this. It looked like a great gig, and I like the colors.

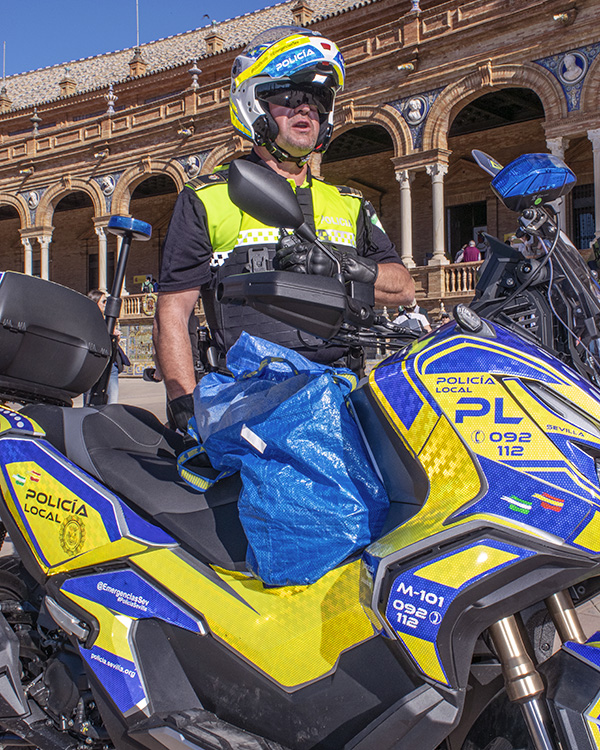
I didn’t realize why the motor officers had appeared out of nowhere.  All those tourist chotchkas like the fans you see in the photo above?  The folks  selling their wares there (I’m told they were Gypsies, if you can even say that anymore) weren’t supposed to be there.  When I looked up after grabbing the photo above, all the chotchkas (and the chotchka merchants) were gone.  They just went poof and vanished. Wiped clean from the face of the Earth (as they said in that Indiana Jones movie).  I guess you don’t want to mess with a Spanish motor officer.

On the motor scooter/small motorcycle thing for police motorcycles:  When Gresh and I were at the Zongshen factory in Chongqing, one of the many very cool things we saw there were RX3 police motorcycles.  Imagine that:  A 250cc police motorcycle.  I talked Zongshen into giving us (“us” being CSC Motorcycles) three or four of the things so we could market them to police departments in America.   Imagine that, too…one short email and poof: Three free motorcycles.

The CSC RX3 250cc police motorcycle. I had a lot of fun on these.
The obligatory blog commercial: The Complete Book of Police and Military Motorcycles. Did I mention these make great gifts?

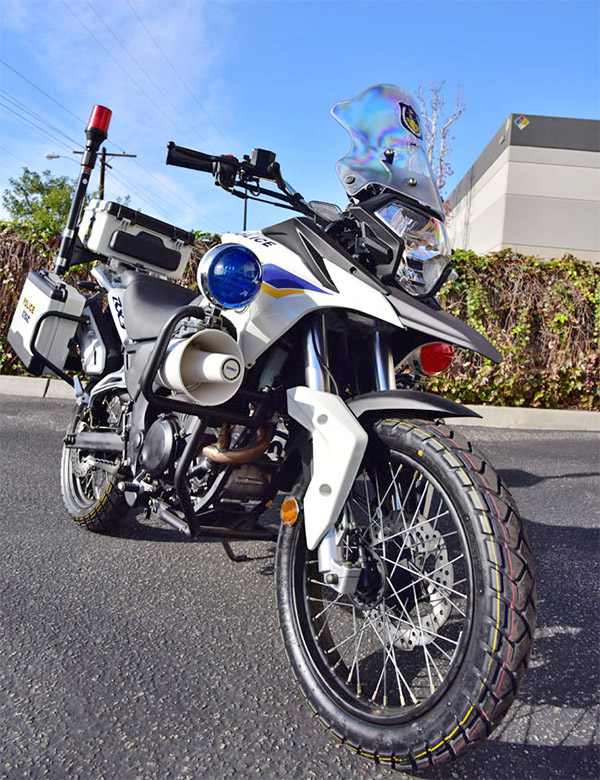
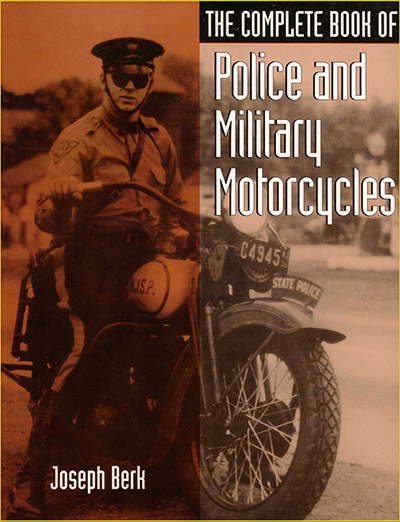
I thought I knew the police motorcycle market a little bit because I had written a book about police motors.  Man, I tried, but it was a bust.  The Sacramento Fairgrounds Police were interested, but I couldn’t close the deal.  We shipped one to the New York City Police Department (I knew they used Vespas for police work), Andy Sipowicz and crew kept the bike for about two months without ever taking it out of the crate, and then they shipped it back.  I took one to a couple of local police departments, but the only thing to come of that was one of the cops told me I wasn’t allowed to ride it around with the red and blue lights and the siren still attached.  I told him not to worry; I only used that stuff if people wouldn’t get out of my way.  Zongshen, on the other hand, has done fabulously well with their police bikes.  They are selling RX1s, RX3s, RX4s, and other bikes as police motors literally all over the world. Just not in America.  I’ll do a blog about Zongshen police bikes someday.

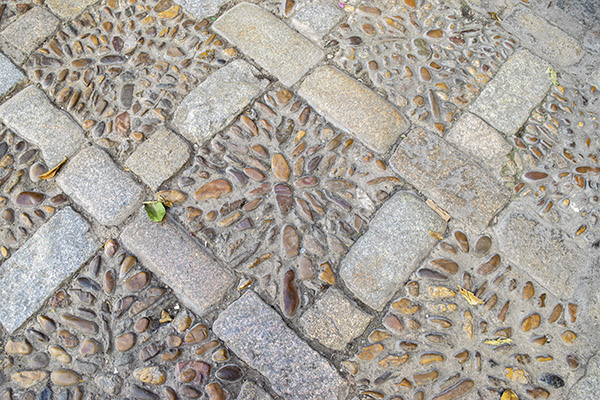
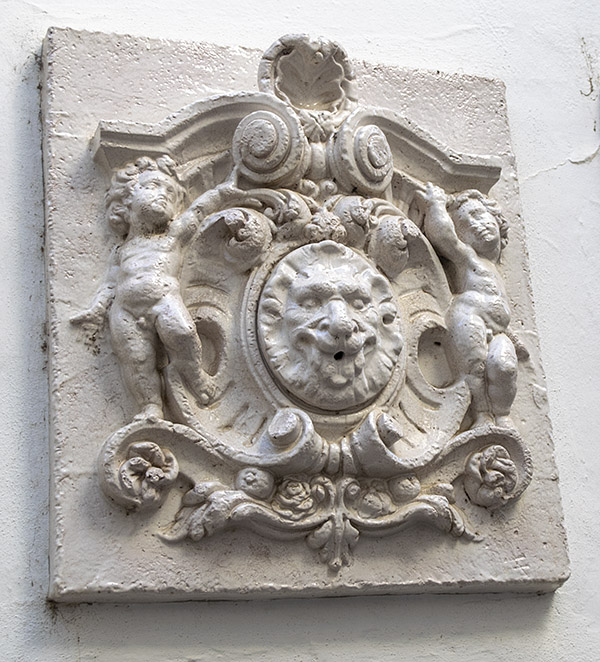
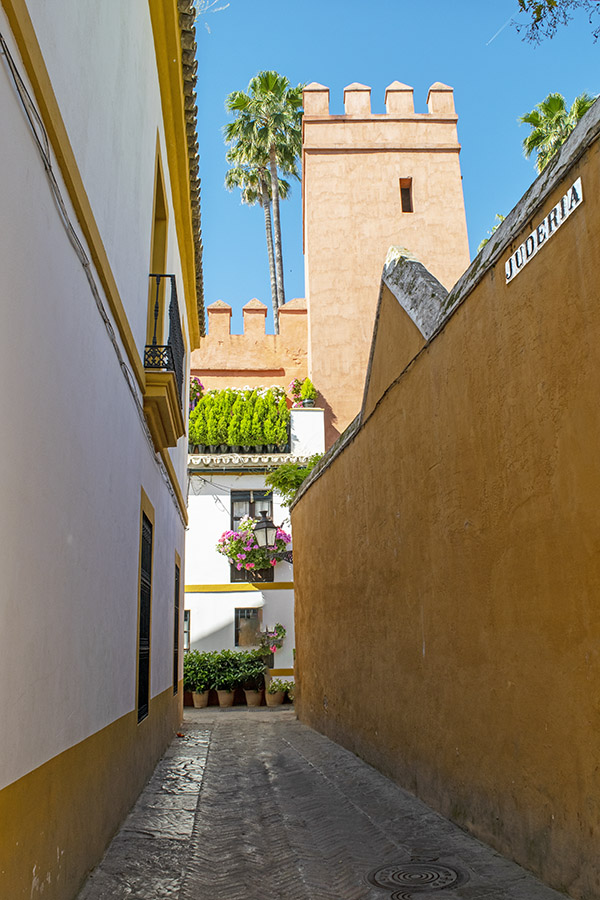
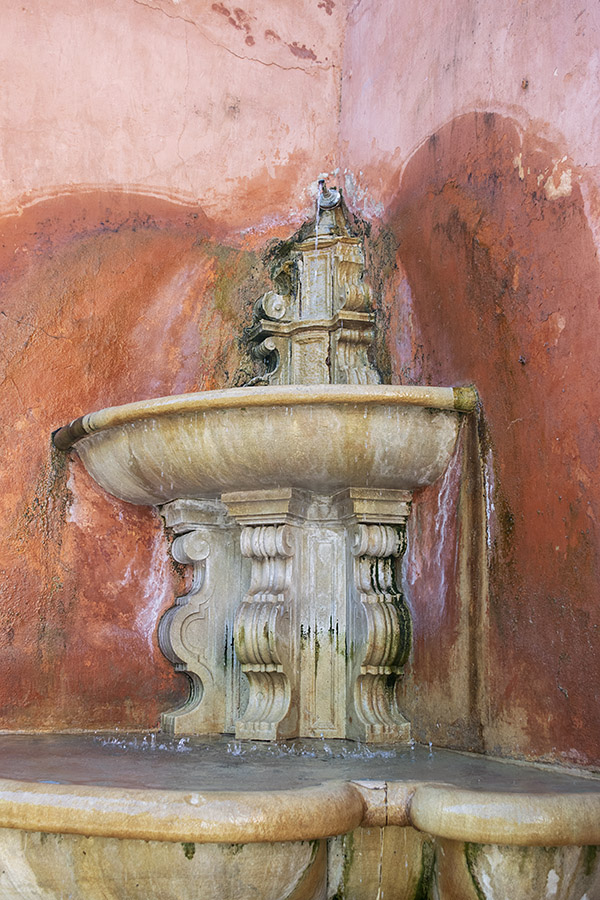
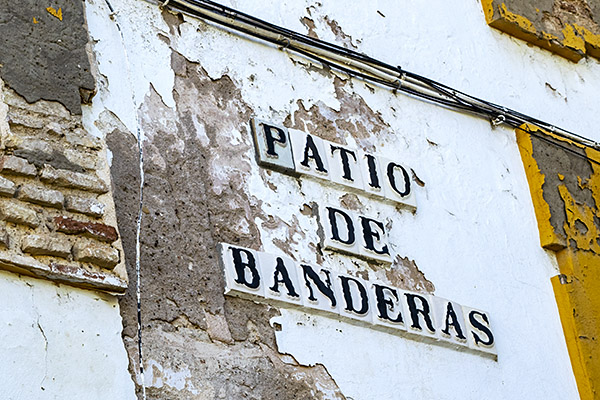
I know, I’m digressing again.  Back to the main attraction:  Seville.  We walked around quite a bit (I did 17,000 steps one day) and there were tons of photo ops.  Doors, tiles, alleys, and more.

A door in Seville. Spain and Portugal are an artist’s palette. Both were awesome.
A Seville sidewalk. The sidewalks were awesome everywhere we went. Think of the labor that went into this. Joe Gresh, this is your new concrete standard. I’ll take a photo when you finish and put it on the blog.
Decor on a home in Seville.

As we walked around Seville and took in the sights, Jose (our awesome guide) told us we were in the Jewish quarter.  I asked if Jewish people still lived there.  Very few, he said.  You know:  The Spanish Inquisition.  Oh, yeah.  I remember reading about that in James Michener’s The Source (a great story and a great read).

In Seville’s Jewish Quarter. Note the sign on the wall on the right.

Our walk through Seville presented one photo op after another.  I had my old Nikon D3300 (the current version is the Nikon D3500), an entry-level consumer grade digital SLR, and the relatively inexpensive (but vibration-reduction-equipped) 18-55mm zoom lens.  It was great.   The D3300 is a light camera. My other Nikon (the D810) has more capability, but it is much heavier.  For this kind of tourism, the D3300 (or the current D3500) is a better deal.

A fountain in the exterior corner of a Seville structure.
I saw this and had to ask: Is Antonio here? Which one, they answered…we have lots of Antonios. Sometimes, my humor is an acquired taste.

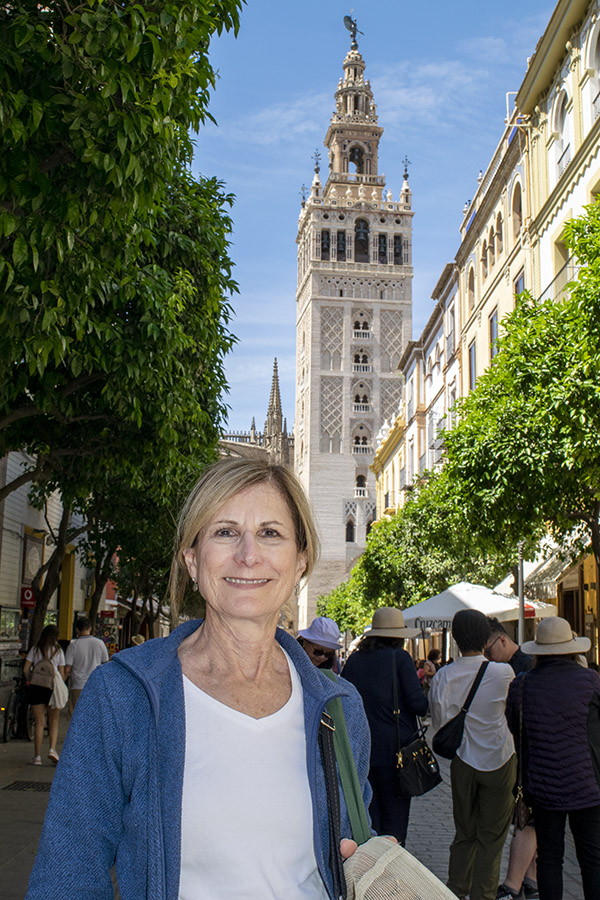
We continued our walking tour, and it was on to the Catedral de Sevilla, a massive cathedral built between 1434 and 1517 over what used to be the city’s main mosque (when the Moors occupied the Iberian peninsula).  It rivals the Vatican’s Saint Peter’s cathedral (it’s that big).

The 18-55mm lens wasn’t wide enough to take in the entire Catedral de Sevilla. It is a massive church, the largest in Spain.
Susie, my traveling buddy for 40 years, with the Catedral de Sevilla in the background.

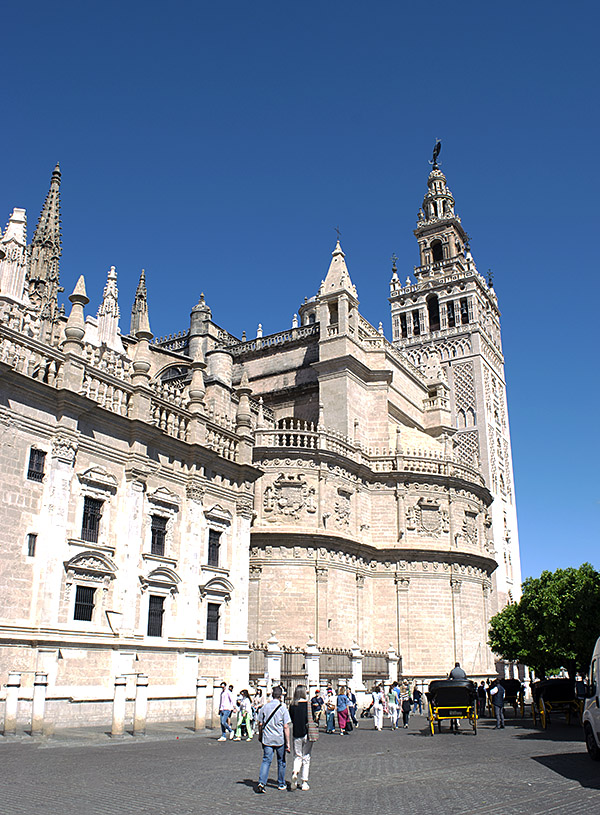
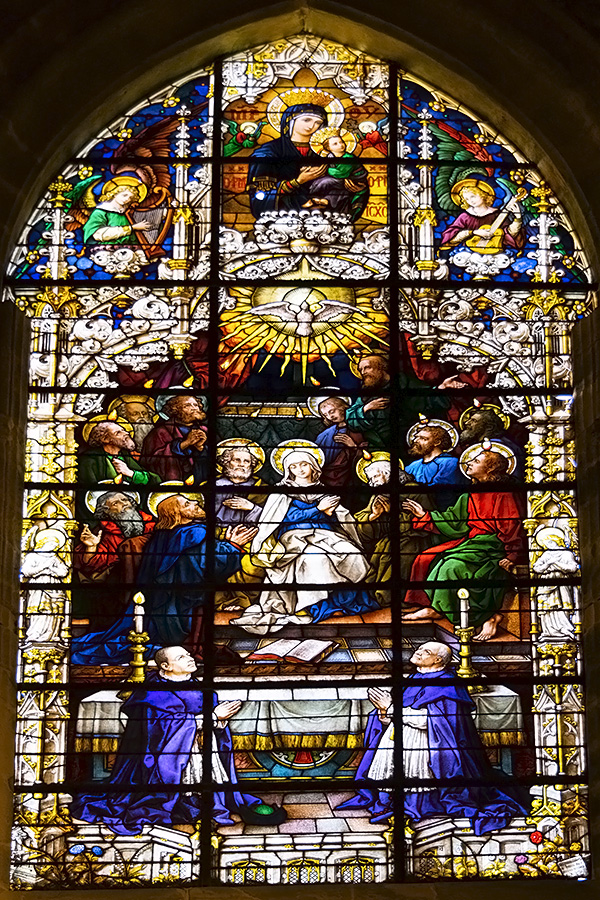
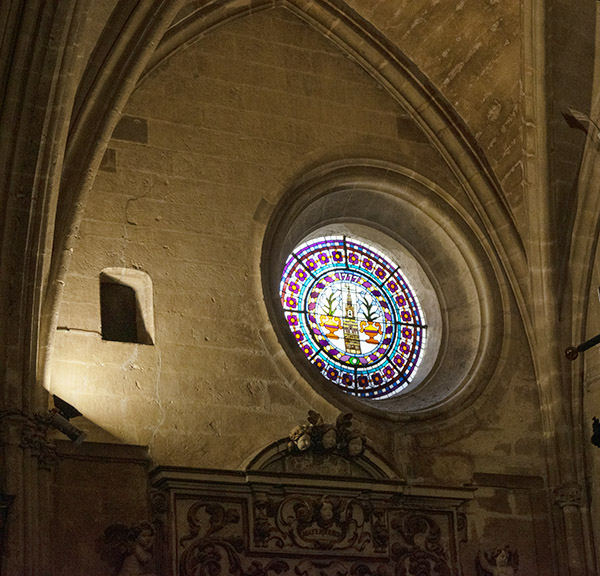
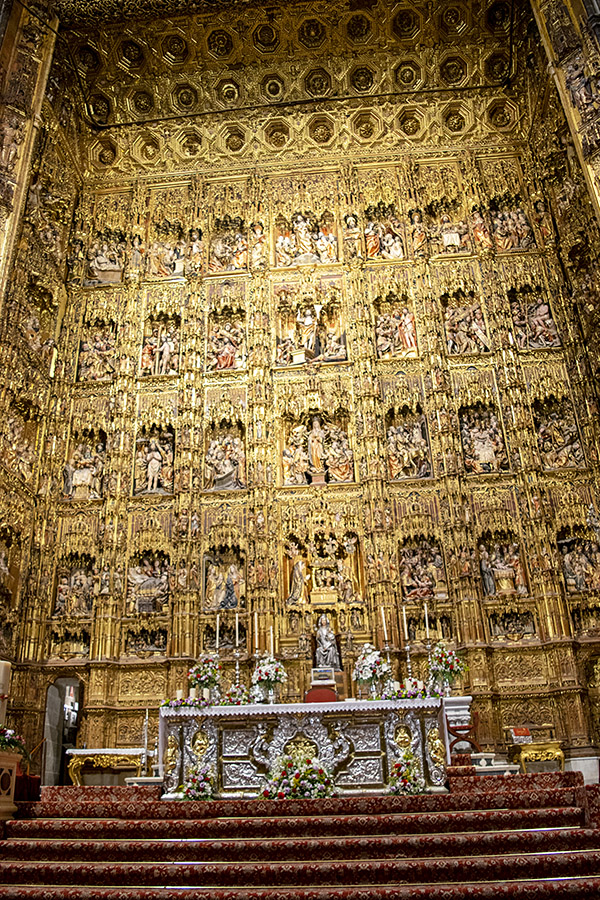
The Catedral de Sevilla interior is impressive, but it is dimly lit and flash photography is strictly verboten (I wouldn’t have used flash, anyway), so I relied on finding something to brace my camera against and the lens’ vibration reduction technology (which did a great job).  I could do a photobook with just interior shots, including the Catedral de Sevilla’s beyond impressive stained glass windows.

This was but one of many stained glass windows in the Catedral de Sevilla.
Shooting in the camera’s RAW mode and allowing PhotoShop’s Auto adjustment to work its magic brings up features that can’t be captured with jpeg alone.
Incredible sights, incredible detail, and lots of photography fun.

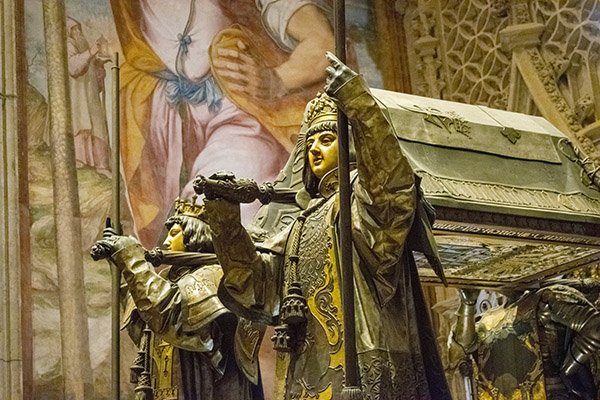
You may not know this (I certainly didn’t) but one of Christopher Columbus’s crypts is in the Catedral de Sevilla (folks apparently spread his remains around a bit).   The photo below shows one of his crypts in the Catedral de Sevilla.   Columbus was an Italian from Genoa, but his expeditions were funded by Spain’s Queen Isabella.

Columbus lies within. Impressive.

So there you have it:  Seville.  There’s more to come from our Spanish adventure, so sign up for your free subscription (don’t forget to tell your email program we’re not spam) or check back often.  Or maybe do both.  And if you have comments, we’d love to hear them.


Help us bring more content to you:  Please click on the popup ads!


Never miss an ExNotes blog:

The 9mm 1911 Resurrection

By Joe Berk

As mentioned in recent blogs on my 9mm Springfield Armory 1911, I took the gun to TJ’s Custom Gunworks to have it repaired and customized.  I have the gun back now and I am very satisfied with the work.

When I took the 1911 to TJ, I asked him to repair the damage I did to my 1911 and to add several custom touches.  That’s what he did, and I’ll describe them below.   Most of the photos in this blog are from TJ.   I took a few, too.

Fortunately, the 1911’s barrel was not damaged (the cartridge blew apart; the barrel and chamber survived).  TJ polished the barrel, the chamber, and the ramp.  The reinvigorated barrel looks great and it adds to the 1911’s appearance.

The polished 1911 barrel.
It looks great, doesn’t it?

TJ polished the 1911’s ramp and chamber.  This helps to prevent feed failures and assists in extraction.  The polished ramp also helps to prevent bullet pushback into the case as the ramp is pushed from the magazine into the chamber.

The feed ramp before polishing.
The feed ramp after polishing.

The trigger was in bad shape after the 9mm cartridge went into its sudden unintended disassembly mode.  TJ cleaned it up, but I’m going to have him fit a new target trigger at some point in the future.

The rigger before TJ cleaned and finished it.
The trigger and its bracket after brushing and polishing.

While TJ was in the gun, he removed and replaced the Springfield Armory firing pin and firing pin spring (which he does on all the Springfield Armory 1911s that come into his shop).   Springfield uses a titanium firing pin and a heavier firing pin spring, which is a bad combination.  I’ve had occasional misfires with my Springfield, and the primers have previously always shown light firing pin strikes.  With the new Wilson firing pin and firing pin spring TJ installed, that problem is in the rear-view mirror (where it belongs).

TJ found that the extractor on my Springfield Armory 1911 was terrible.  I thought that might be due the base of the cartridge bursting, but it was not.  It was just a factory goof up. The photo TJ included shows the extractor about as I remembered it before the event that set all this in motion.  The extractor had been extremely difficult to remove from the slide when I disassembled it for cleaning, but I never thought to check if it was engaging the cartridge (the gun had been ejecting).  You would think an outfit like Springfield would know what they are doing in this area, but apparently they did not.  TJ fit a new extractor to fix that problem.

This photo shows the original extractor not touching the cartridge case at all. It appears that the claw is just too short.
The new extractor TJ installed; note that it now has a firm grip on the case rim.
Another shot of the extractor on the case rim. It’s amazing the cartridges were extracting and ejecting before this fix.  They were flying everywhere.
The old extractor is on top; the new one is on the bottom. Note that the old extractor was not reaching in to engage the case.

Ejection is way better now.  The gun drops all the cases in the same spot just to my right (they don’t go flying all over creation like they used to).  It makes scooping up my brass a lot easier.

Reinstalling the slide release on my Springfield was difficult.  The slide release plunger was too long and the camming surfaces on the underside of the slide release were not cut at the correct angles.  TJ reconfigured both.  The slide release snaps into place in a very slick manner now.  There’s no more worry about scratching the receiver (the so-called idiot scratch) when the gun is reassembled.

The slide release plunger, as delivered by Springfield Armory, was originally too long. It made installing the slide release problematic. TJ shortened and recontoured it.
The slide release has a contoured bevel to push the slide release plunger in when the slide release is installed. As delivered by Springfield Armory, the angles were incorrect. TJ recontoured this area to make installing the slide release much easier.

TJ polished and fit a new hammer, which looks better than the original.  He also lightened the trigger pull.  The new trigger is light and I like it.

A polished hammer and sear.
The new hammer. It looks good.

The Springfield Armory 9mm 1911 came from the factory with a two-piece guide rod, which I hated.  It would constantly unscrew, even after applying blue Loctite after each cleaning.  The stock Springfield guide rod needed an Allen wrench to unscrew and remove it (Springfield provided one with the gun).  The gun required doing this to be able to rotate the barrel bushing after depressing the guide rod plug.  In my opinion, two-piece guide rods are a solution to a problem that doesn’t exist.  I don’t know why manufacturers fit them to new guns and I don’t why anybody would want one. I asked TJ to fit a polished one-piece guide rod to my 1911, and to make it short enough so that I could rotate the barrel bushing for disassembly without having to unscrew the guide rod.  I like the new set up a lot better.

TJ installed a one-piece guide rod. I like it. The original two-piece guide rod was always unscrewing.
The new guide rod in its bushing. TJ modified it so I could disassemble the 1911 without having to unscrew the guide rod. Not the polished end of the new guide rod, and the polished barrel end.

Finally, TJ polished the slide-to-receiver interface points.  You can see this work in the photos below.

The 1911 slide underside.
The 9mm 1911 receiver.

While TJ had the gun, I ordered new grips and a replacement magazine from the Springfield Armory website.  The original crossed-cannon cocobolo Springfield grips were damaged when the cartridge burst, so I bought another set (they were reasonably priced at $32.95).  The Springfield site also advertised a set of double-diamond checkered cocobolo grips (without the Springfield logo) for $15, so I checked that box, too (I like having an extra set of 1911 grips on hand).  The grips and the new magazine arrived a few days after I ordered them.

I picked up the repaired and reinvigorated 1911 from TJ this week. I’ve already been to the range with it and it works well.  Watch the blog; I’ll post a range report in the near term.  I’ve also had a few more thoughts on what might have caused the burst round that started this adventure, and we’ll have another blog on that as well.  Here are links to our prior blogs on this topic:

KABOOM!

Thoughts on the 9mm Double Charge


Help us bring more content to you…please click on the popup ads!


Seeing double? Nope. I liked my 9mm 1911 so much that when I saw the same gun in .45 ACP, I bought it, too. Watch for a report on it in an upcoming ExNotes blog.

Never miss an ExNotes blog: