Painless, Paintless Dent Repair

By Joe Gresh

I’ve ridden my Yamaha RT1B 360 Enduro for thousands and thousands of miles. The old two-stroke has been across country more than once and I rode it on the Trans America Trail east to west from Kitty Hawk, North Carolina to Port Orford, Oregon. In all that time I never put a dent in the beast known as Godzilla.

It is a fairly easy job to load the light-ish Yamaha into a pickup truck…normally. This time was different. I lost my balance mid-ramp and the Yamaha started to topple over onto me. I was out of position to save the bike, my legs were getting tangled and in that split second I envisioned a broken arm or crushed ribcage. I let the bike go and jumped down to safety. The bike fell to the left; the gas tank smashed into the side of the truck bed and my somewhat pristine Godzilla had a huge dent.

You and I have both heard about the paintless dent repair kits.  Amazon had this one for pretty cheap and I thought I’d give it a try.

The kit comes with everything you need, except alcohol (to clean the tank, not drink). After the tank got a good scrubbing with the hooch, I used the included hot glue gun to attach the little puller tabs in places I thought needed to be pulled. The dent was pretty deep and had a crease running diagonally across the tank. I didn’t hold out much hope.

The flimsy plastic puller seemed like it would break at any moment but the thing held up. It was strong enough to yank the pull-tabs.

The kit came with a slide hammer but that tool broke the tabs. I believe the shock load was more than the plastic could handle. You’ll need weld on tabs to use the slide hammer.

Usually the tab would pull off the tank and since the paint on Godzilla is 53 years old the glue removed a bit of paint each time. The kit came with a little spray bottle that you fill with alcohol; the alcohol loosens up the hot glue to allow reuse of the tabs. It took several re-positionings but I managed to get the majority of the dent pulled out.

The creases in the tank are still visible and the tank is far from straight but it’s at least 80% better than it was. From 10 feet away you may not notice the thing is dented. I worked on another egg-shaped dent on the top of the tank that was there when I bought the bike. The paint in this spot was in bad shape so it was hard to get anything to stick.

I ended up sanding the egg-dent to get something firm to attach the pull tab and gave the spot a light dusting of gloss black spray paint. After the paint dried I feathered it in with 600-grit. Again, I got the dent about 80% removed.

I think for minor dents without sharp creases and with fairly new paint stuck firmly to the metal the kit would actually work pretty well. The Z1 has a ding that’s a prime candidate for the dent puller except the dent is right over a stripe decal. I’m sure the tab will lift the decal.

I call the paintless dent removal process a good one. The kit I bought was bottom of the barrel cheap so possibly a better kit would produce better results. I’m happy enough with Godzilla’s tank. After all, it’s a dirt bike and will probably take a few more hits before I shuffle off.


Never miss an ExNotes blog:


Don’t forget: Visit our advertisers!


The Idaho State Capitol

By Joe Berk

A few years ago we visited California’s Capitol and it was fun.  Getting into it, though, was like getting into an airport.  We had to go through a metal detector, there was a list of prohibited items, and there were police officers scattered throughout the building.  The security precautions were mildly annoying (just like they are at an airport).  That’s why I was surprised when we visited the Idaho Capitol.  We weren’t sure which door to use, so we just walked into the first one we saw, and just like that, we were in.  No metal detectors.  No armed guards.  Just a kicked back, we’re cool kind of atmosphere.  The way it ought to be.

We saw a sign for a movie with a short film about the Capitol (the theatre was next to the gift shop).  When we found it, there was a small group already seated and a nice lady named Bridgette was getting ready to lead them on a guided tour.  Bridgette invited us to join the group, and we did.

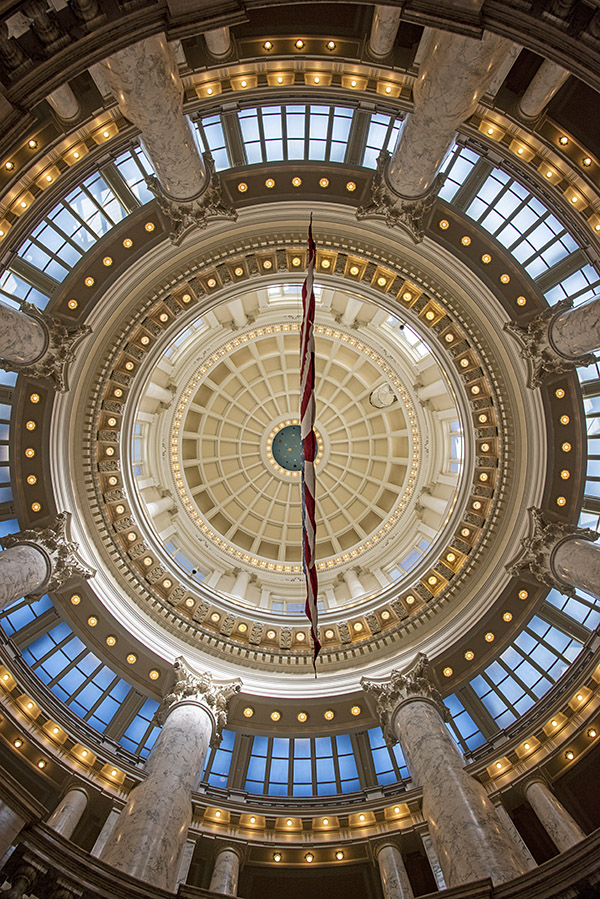
We walked down the hall and found ourselves beneath the Capitol dome.  That’s an American flag hanging from it.   The mosaic you see in the lead photo for this blog is directly beneath the Capitol dome.  It’s comprised of approximately 10,000 pieces.

Our first stop was the financial management room.  Bridgette explained it’s where different elements of the Idaho state government made their case for annual funding to a group of four state officials.

Here’s another photo of the Capitol dome taken at a different angle to show more of the US flag.

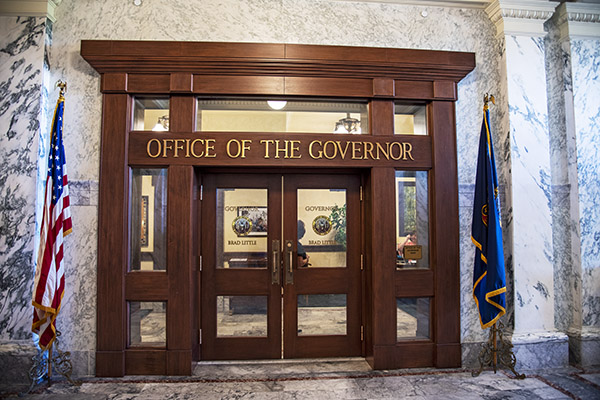
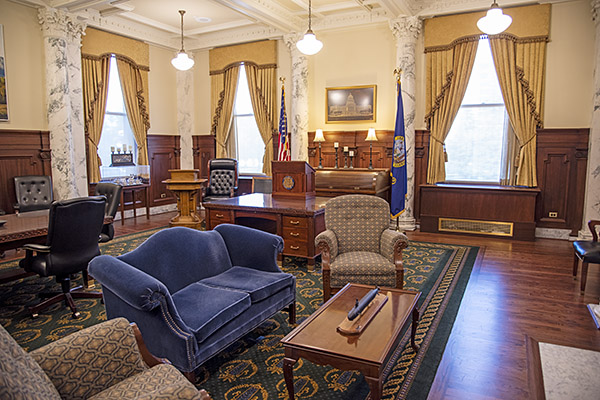
Bridgette led us to the Governor’s office.  She had to enter the staff’s administration area for permission to bring our group in.  It was an interesting place to see.   Bridgette explained that this was the Governor’s ceremonial office.  The Governor uses it for receiving dignitaries and holding press conferences.  She told us the Governor’s working office is much smaller.

Idaho’s legislature has a House and a Senate, much like the U.S. government.  Unlike the U.S. government, the Idaho Representatives and Senators serve in a part time capacity, and the state Legislature only operates for three months each year.  In Idaho, the state legislators are people with real jobs (farmers, ranchers, folks who operate businesses, teachers, etc.).  They are not career politicians.   I like that.  In fact, there’s a lot I like about Idaho.  Their government is working.  Idaho was clean and friendly everywhere we went.  We were there for a week and we didn’t see a single homeless person, or people begging, or graffiti, or any of the other urban decay prevalent in most California cities.  We could take a lesson or two from Idaho.

Bridgette next took us into the Idaho House chamber.

There are three domes above the Capitol:  The large one easily visible from outside the building (the one seen from inside in the photos above), and two smaller domes.  One of the two smaller domes is above the House, and the other is above the Senate.

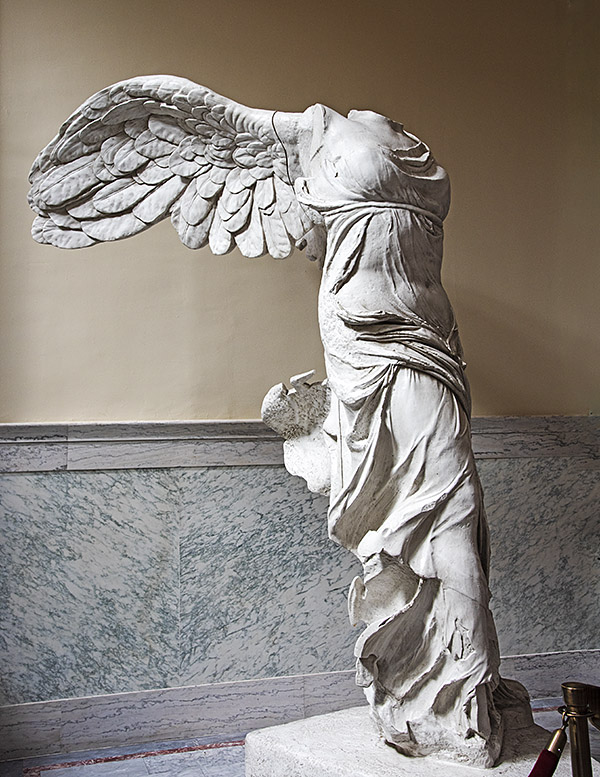
We saw interesting statues in the Capitol.  The first is a replica of a statue originally created on the island of Samothrace about 2400 years ago.  France sent the replica to Idaho in 1949 as part of their program to provide a statue to each U.S. state in gratitude for our help liberating Europe in World War II.

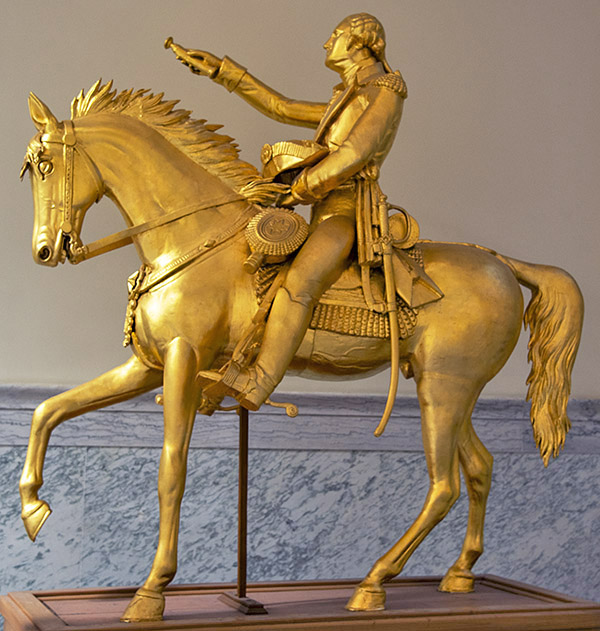
Another statue depicted George Washington on a horse.  It was hand carved out of pine in 1869 by Charles Ostner.   The statue was restored and gilded in real gold in 1966.

We enjoyed our visit to the Idaho State Capitol.  There’s no admission fee, it’s welcoming, and we had a good time.  If you’re planning a visit, you might want to allow a couple of hours to see the Capitol.  If you get on one of the guided tours (as we did), you’ll enjoy it even more.


Never miss an ExNotes blog:


Don’t forget: Visit our advertisers!


Texas Rangers Smith and Wessons

By Joe Berk

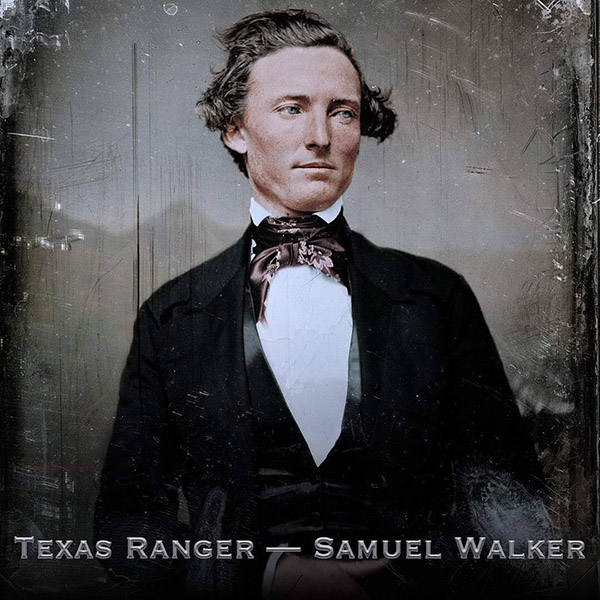
I think it would be difficult to be a firearms enthusiast and not be a student of history.  Firearms are history.  And some of that history revolves around the Texas Rangers, the oldest and perhaps most legendary law enforcement group in US history. I’ve always been fascinated with the Texas Rangers, starting with their use of the very first Colt Paterson revolvers in combat, the early Captain Samuel Walker days, and the emergence of the Colt Walker black powder revolver.

Texan Ranger Captain Samuel Walker.

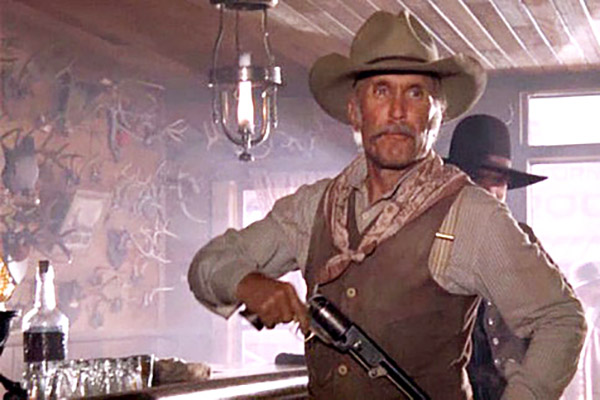
When I was a kid, we had a steady diet of Westerns on TV and in the movies, and the Texas Rangers figured prominently in many of those shows.  I’m a Lonesome Dove fan, having read Larry McMurtry’s novels and watched the television series numerous times.  Go Gus and Woodrow (but especially Gus; he carried a Colt Walker).

Robert Duvall as Gus MacCrae in Lonesome Dove, and his Colt Walker.

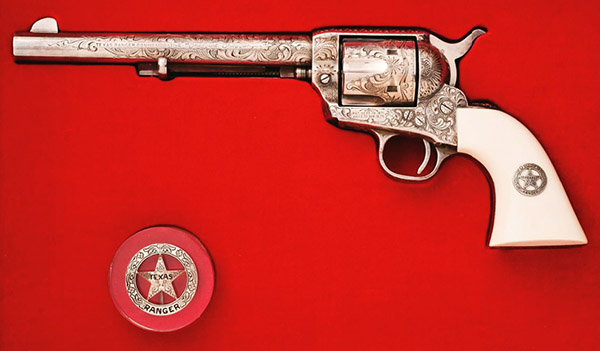
You would think with the Texas Rangers’ historical and often romanticized use of Colt revolvers, Colt would be all over the Texas Ranger commemorative gun business.   They did so in the early 1970s with a very limited run of Single Action Army revolvers, but that was the only time.

Colt’s Texas Rangers 150th Anniversary Commemorative. These guns don’t come up for sale often, and when they do, the price is stratospheric.  It’s the only Texas Rangers Commemorative Colt has ever done.

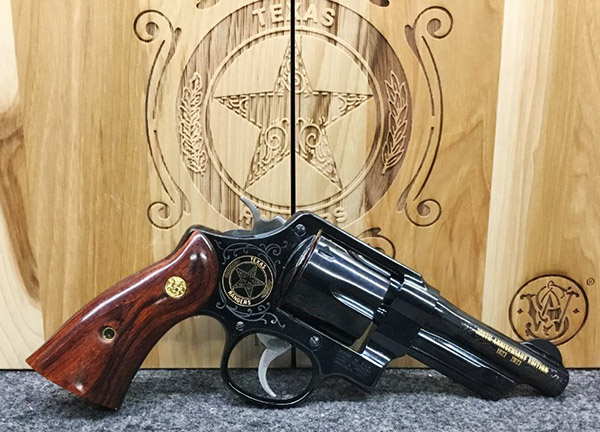
The Texas Rangers commemorative mantle has been picked up by Smith and Wesson, first in 1973 for the Texas Rangers’ 150th anniversary, and again in 2023 for the 200th anniversary.  These are beautiful firearms (they are art, in my opinion).

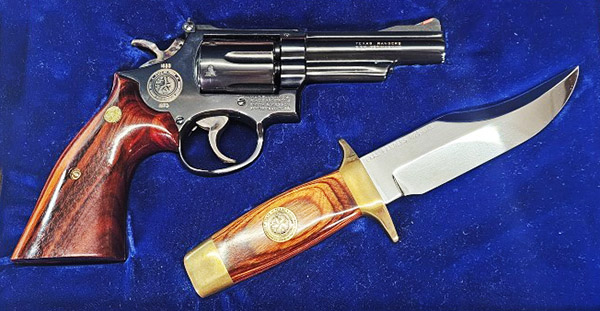
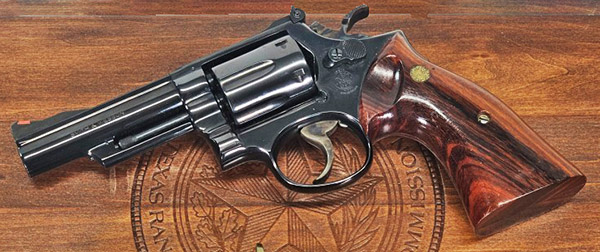
A Texas Rangers 150th Anniversary Smith and Wesson Model 19.
Another view of the Texas Rangers 150th Anniversary Smith and Wesson Model 19.

Jumping back to 1973, Smith and Wesson offered a cased commemorative Model 19 Smith and Wesson along with a Bowie knife.  A standard Model 19 cost about $150 back then (I had one); the Texas Rangers Model 19 with display case and matching Bowie knife was a whopping $250.  It seems an almost trivial amount today.  A standard Model 19 costs around a thousand bucks today, and the Model 19 of today is not the same gun it was in the 1970s.   The older ones, as is true with many things in life, are better.

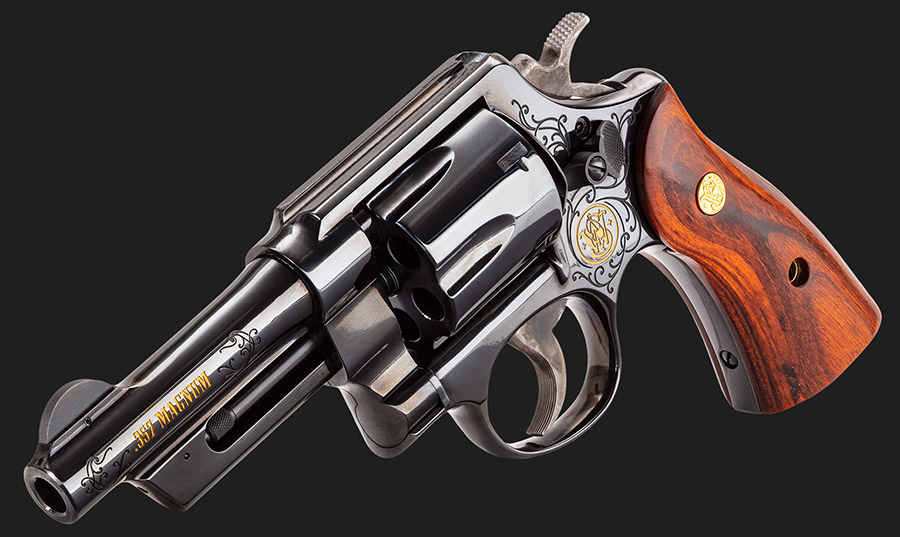
The 200th Anniversary Texas Rangers Smith and Wesson .357 Magnum revolver.

Fast forward to 2023, and Smith and Wesson did it again, with a Texas Rangers 200th anniversary revolver.   This time it’s a highly polished N-frame, fixed sight version.  The N-frame is Smith’s big gun frame used on their original .357 Magnum, the Model 27, the .45 ACP revolvers, and the .44 Magnum revolvers.  You know, the Big Boy guns for us full-figured shooters.

A real beauty, these 200th Anniversary Texas Rangers Smith and Wessons are.

I’ve been perusing both of these Texas Ranger guns on the gun auction sites.  I can get the 1973 version (which was based on the Model 19) for about $1500, which isn’t a bad deal considering you get a more collectible gun, the knife, and the case for not too much more than what a new Model 19 cost today.  I’d shoot it, too, if I bought one.  And then there’s the current Texas Rangers 200th Anniversary revolver, built on the N-frame   Those are going for around $2500 or more.  That a bit pricey, but maybe in 50 years $2500 will be a trivial amount.  I’m a firm believer that you can’t pay too much for a gun; you just maybe bought it too early.

A lot of things are different today, and the price for either of the Smith and Wesson Texas Ranger commemoratives is just a starting point here in California.  Compounding the felony on both guns is our outrageous California 11% excise tax on firearms and ammo (that little bit of silliness and government overreach went into effect this month), which gets added onto:

      • Our outrageous California state sales tax
      • The federal government’s $40 background check and ATF Form 4473 (the one that Hunter Biden was convicted of falsifying when his sweetheart deal fell apart)
      • The FFL dealer’s $40 transfer fee
      • A $75 shipping fee to get the gun to me here in left wing Utopia (i.e., the Peoples Republik of Kalifornia)

It all adds up to roughly another $700.  And all that’s aggravated by the likelihood I couldn’t even get the 200th Anniversary Texas Rangers commemorative because our California Attorney General hasn’t seen fit to add it to our roster of approved handguns.  Even Gomer Pyle wouldn’t know how to react to all these added government fees, but I’m guessing his reaction would be a heartfelt Gosh, or a Golly, or maybe even a Shazam!  It’s almost as if California doesn’t agree with the Second Amendment to the United States Constitution.

But that earlier Texas Rangers Smith and Wesson…the Model 19 150th Anniversary gun.  It’s now over 50 years old, and that makes it an antique in California’s all-seeing and all-knowing firearms book of state regs , and antiques are exempt from the Roster of Approved Handguns limitations.  I’d still have to pay all the fees described above.  But it’s doable, and I’m thinking about it.


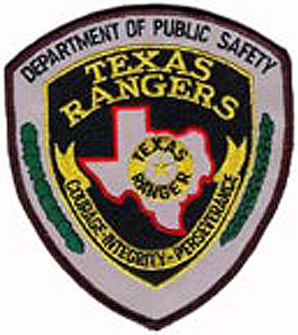
You might wonder:  Are the Texas Rangers still around, and what sidearm do they carry?   The answer is yes; the Texas Rangers are part of the Texas Department of Public Safety.  Texas Rangers are issued a SIG 320 (a 9mm semi-auto), but they are allowed to carry their personal sidearms.  Many choose to carry the 1911.


Never miss an ExNotes blog:


Don’t forget: Visit our advertisers!


Boise’s Birds of Prey

By Joe Berk

When Sue and I moved into our home some 40+ years ago, I was setting up my office when I heard a thump.  It sounded like a bird flew into the window, so I looked out and sure enough, there was a rather large red-tailed hawk on my front yard with its wings spread out.  The thing was huge, and I knew that if it had flown into the window, it would have broken glass, but the window was intact.  I’d never seen a red-tailed hawk close up (the thing was only about 10 feet away).  The way its wings were spread out led me to believe it had maybe hit the roof and was now lying there, wounded, in front of me.

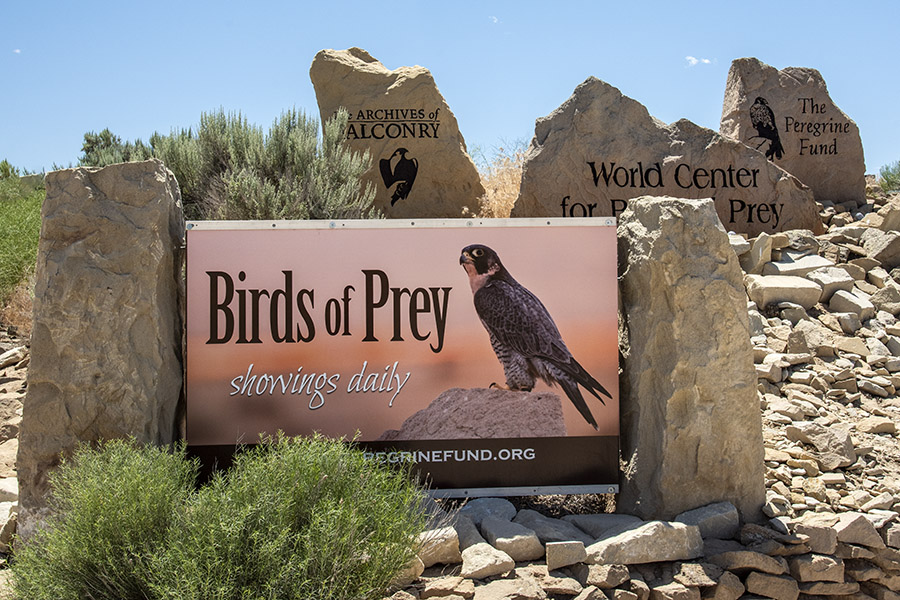
I was pondering my next step when the hawk lifted one wing and peered down.  It wasn’t wounded at all.  It held another bird in its talons, which were tightly clenched around its neck.  The hawk shook the other bird and it twitched a bit, so it put its wing down again and waited (as did I).  After maybe another minute, the hawk did an instant replay, except this time the bird in its claws was motionless.  The hawk released it and then, with its beak, proceeded to tear into the smaller bird’s body, taking its time and eating the internal organs.  When it finished, it flew off, leaving the dead bird and a scattering of its feathers.   I’ve been fascinated by birds of prey ever since, and I live in a good spot for one so afflicted.  We have a family of red-tailed hawks and another family of great horned owls that nest nearby.  When I ride into Baja, we get great photos of osprey eating sushi in the protected areas near Guerrero Negro.  These birds are amazing, so when I was in Boise and I saw they the World Center for Birds of Prey, I was in.   It’s only $10 for a senior citizen ticket.  I would have paid more.  The photo ops were…well, read on.  You’ll see.

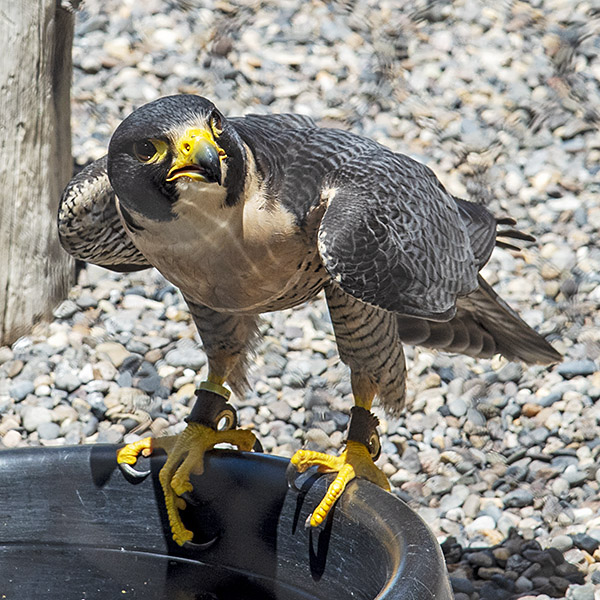
A Peregrine Falcon taking a sip of water.
Not bad for shooting through chicken coop wiring.

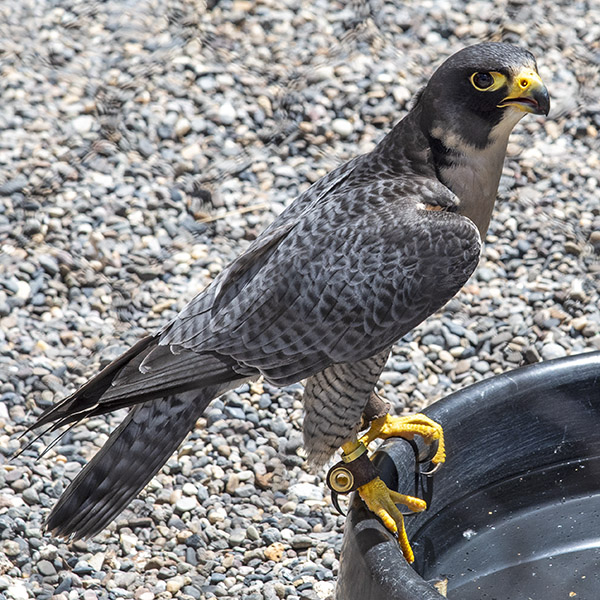
The first raptor we saw was a peregrine falcon.  It was the first one I’d ever seen, although I’d heard about them being in our area when I was growing up in New Jersey.  They live in many regions, but I’d never encountered one before.   I’m pleased with the photo; I photographed the bird through its wire cage and the wires blurred and disappeared in the image.

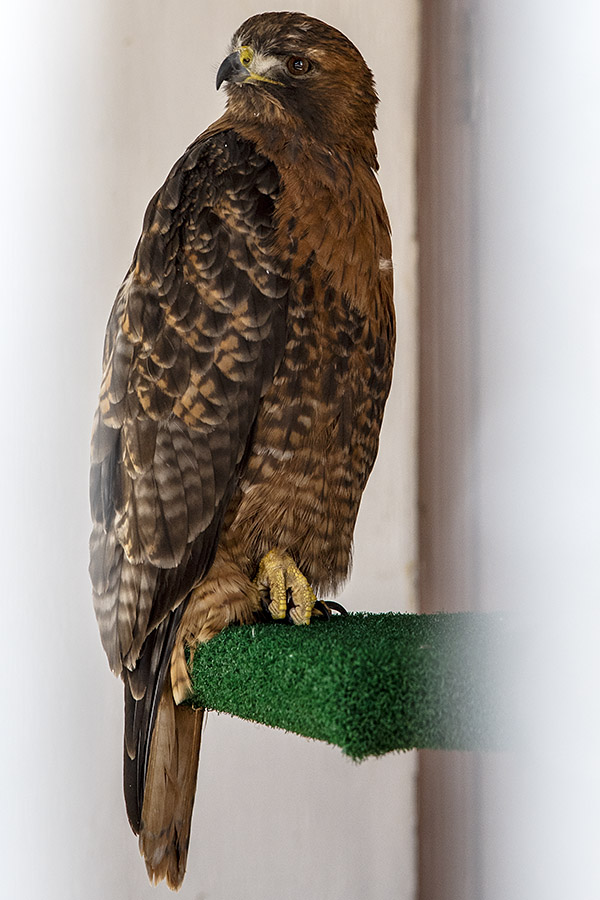
Next up was my old buddy, the red-tailed hawk.  The lighting was much more of a challenge here, as this one was in an indoor cage with bars instead of woven wire.  I had to angle myself to get the camera lens pointed between the bars.

A Red-Tailed Hawk.

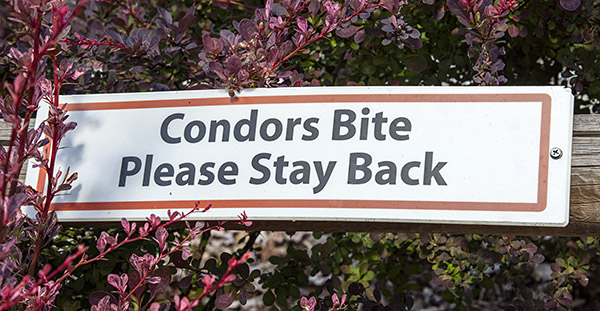
We walked a little further and saw a sign for the California condor exhibit.

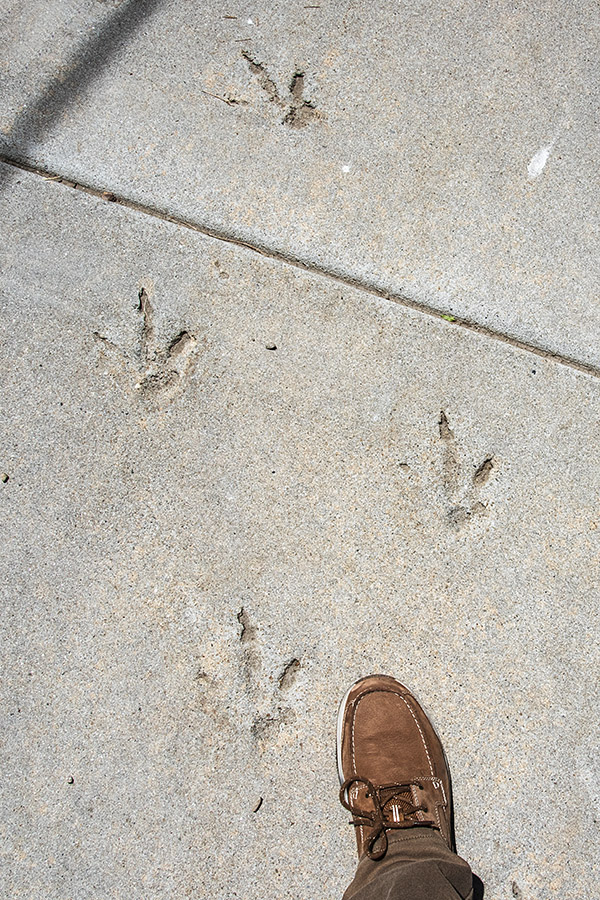
California Condors are huge birds, as these tracks in the sidewalk indicate. That’s my Buster Brown in the photo for a size comparison.

I had never seen one of these, other than the super cool video Mike Huber posted in one of his blogs.  Mike had a surreal experience.  Boise’s Birds of Prey Center breeds the California condor; they are then released in California’s Pinnacles National Park.  Coming back from near extinction, they now range all over the American Southwest and down into Baja.  When Mike hiked into Pinnacles National park and stopped to eat his lunch, a California condor landed just a few feet away.  Lucky guy, Mike is.

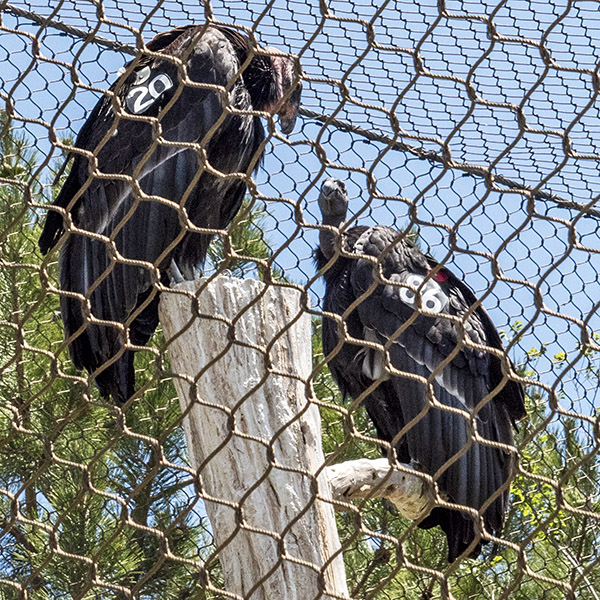
Two California Condors hanging out in Boise, Idaho.
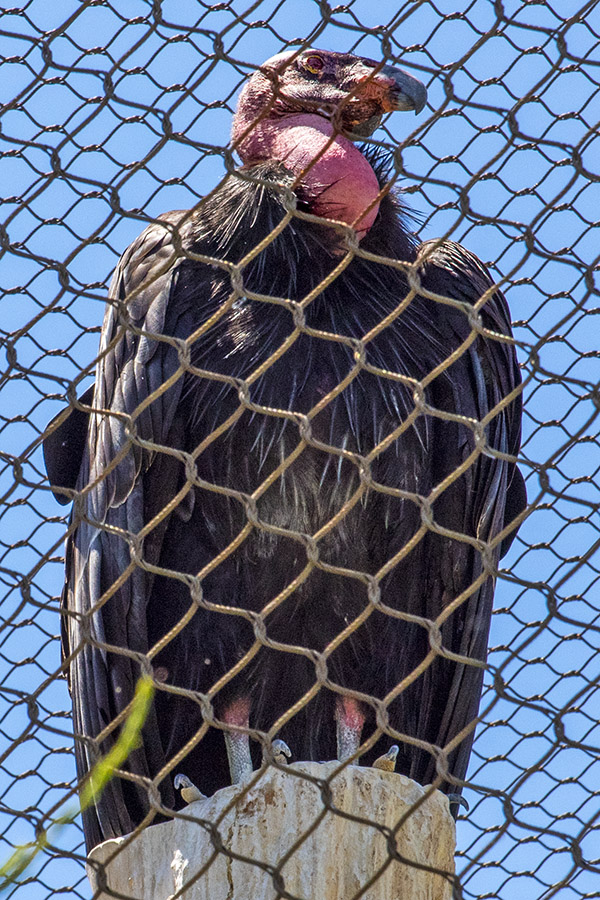
Wow. These birds have a 9 1/2-foot wingspan.
Believe it.  I stayed back.

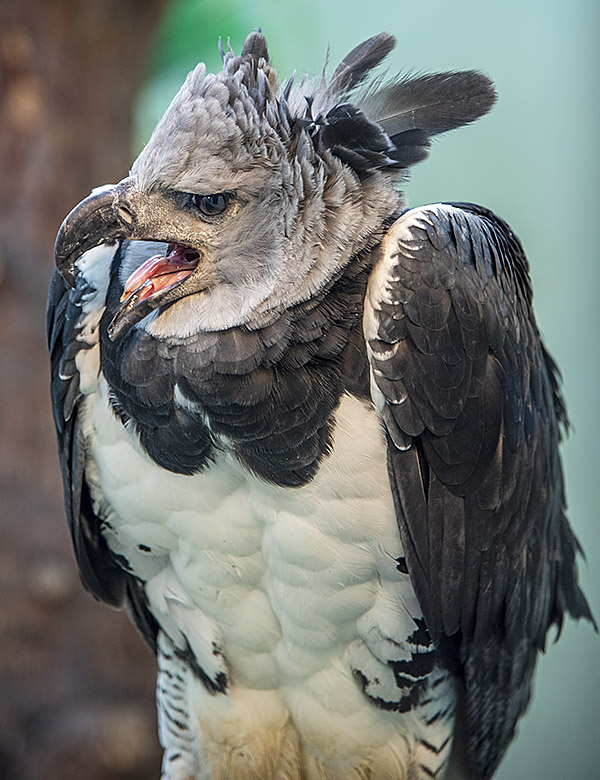
The Harpy eagle is an unusually photogenic raptor.   They range from southern Mexico to northern Argentina.  Like some of our ExNotes commenters, it started squawking up a storm when I mentioned I watch Fox News.

Who the hell is Sean Hannity?

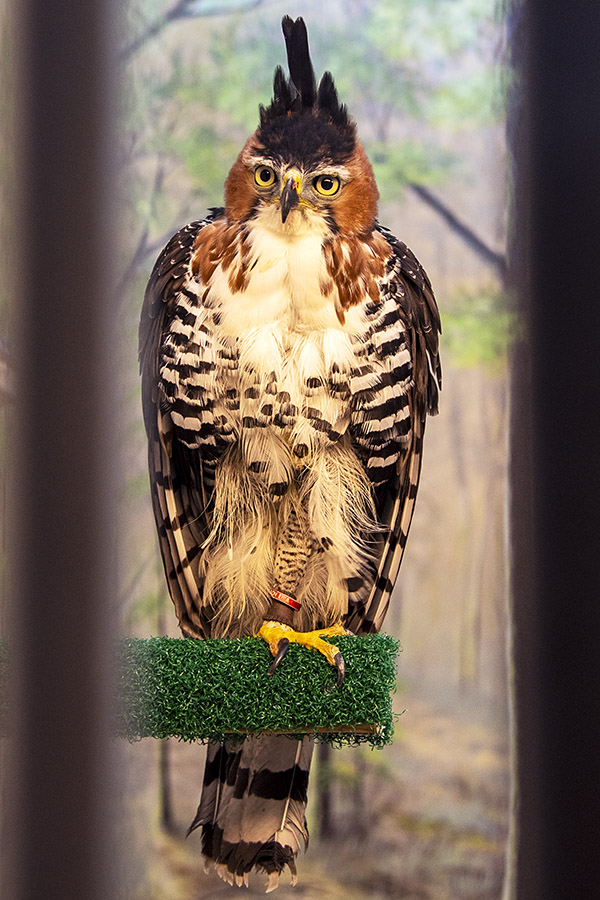
The Ornate hawk-eagle is another large raptor.   It’s from the tropical regions of Central and South America.  I had never heard of this bird, nor had I ever seen one.  It is beautiful.   It’s another one I photographed through the bars of its cage.

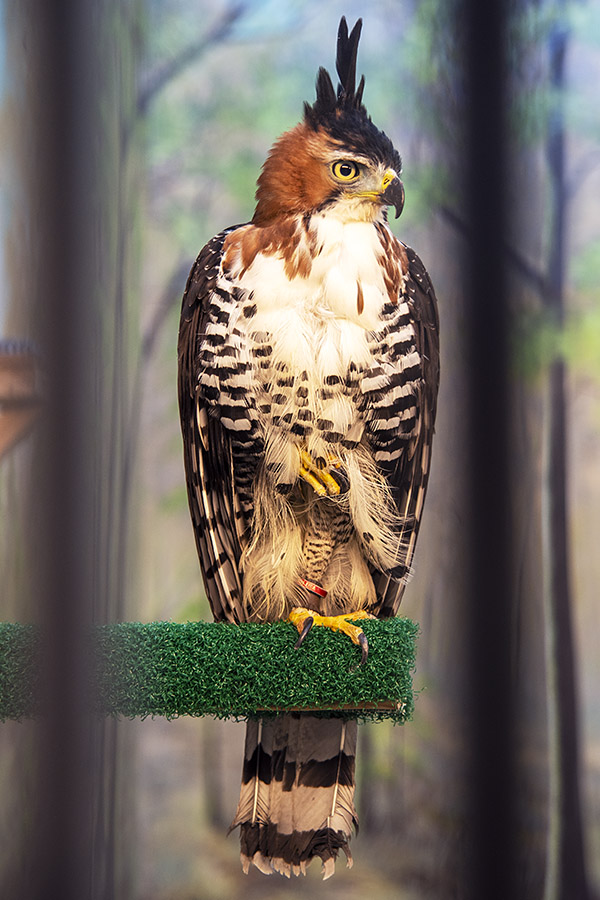
An Ornate Hawk-Eagle, an appropriately named bird if ever there was one.   Because the Birds of Prey Center also takes in injured birds, I thought this one was missing a leg until I processed the photo below.
A great profile photo.

The Birds of Prey Center had a gyrfalcon (also known as the Arctic Falcon) that I think was the most interesting bird there.   While I was photographing it, I tilted my head, and the falcon tilted his head.  I then tilted my head the other way, and the falcon mimicked that, too.  I started doing so repeatedly, and so did the bird.  The only thing missing was the music.  It was really cool.

You looking at me?
I enjoyed interacting with this falcon.

The gyrfalcon lives in the Arctic.  It’s the largest falcon in the world, and it’s perfectly okay living in temperatures that dip below -40 degrees.

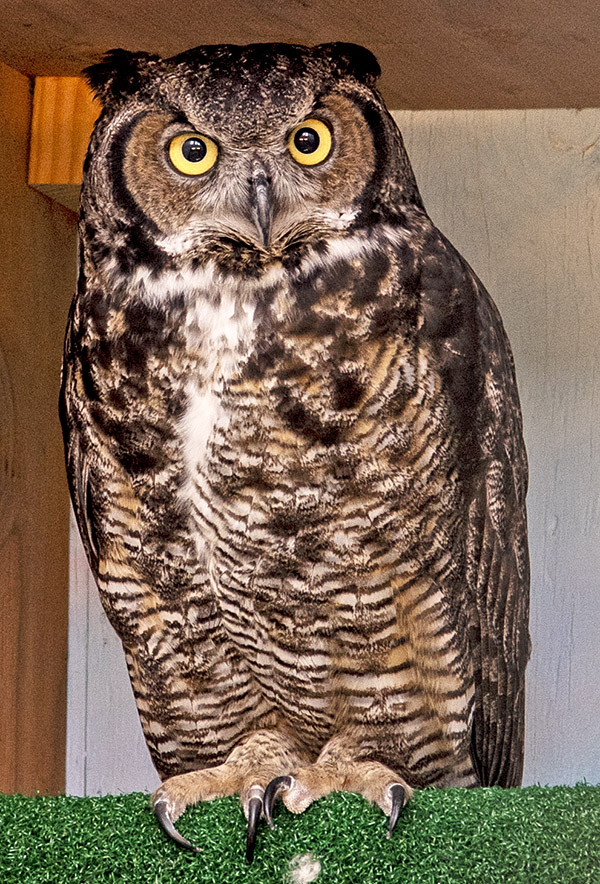
Here’s a photo I particularly like.  It’s a great horned owl.  We’ve had a family of these owls nest behind our house in the past, and it was great seeing the baby owl chicks emerge from the nest for a few weeks and then finally fly away.  They are large birds.  One still comes around on patrol, looking for mice and other tasty treats.  It wakes us up sometimes hooting away in the dark. I’ve seen these fly by and they are impressive.  Their flight is absolutely silent.

These birds are amazing. They always make me hungry for potato chips.

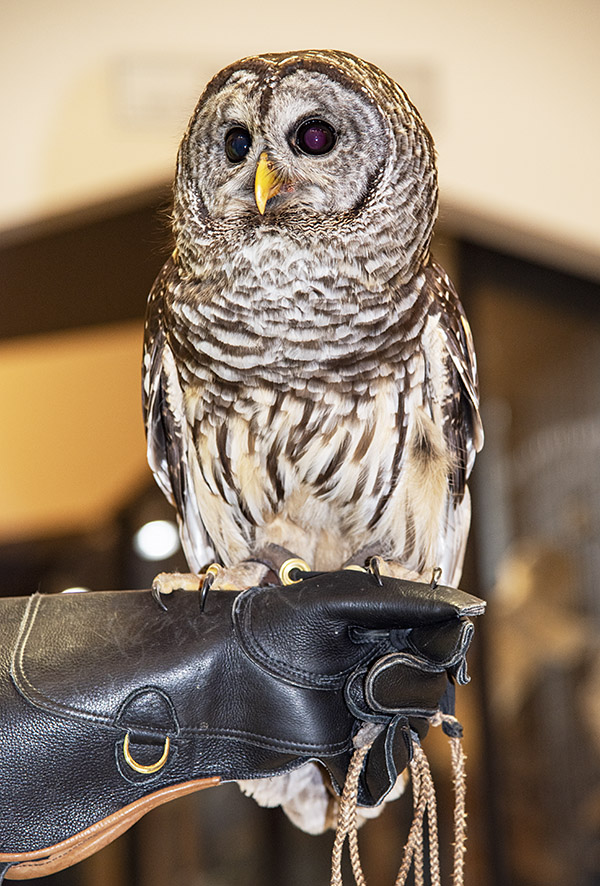
While we were in the Birds of Prey center, a handler was there with a barred owl.  It was most impressive.  I asked if I could use my flash and she said the owl wouldn’t mind.

A very cooperative and photogenic Barred Owl.

So there you have it.  If you ever find yourself in Boise, the World Center for Birds of Prey needs to be on your list of places to visit.


A bit more on Boise…if you are spending some time there, I’ve got a good restaurant recommendation.  We were chatting up a couple of young ladies near the Lucky Peak State Park and I asked them:  What’s the best Italian restaurant in Boise?  Their answer was instantaneous:  Luciano’s.  You know what?  They were right.


Never miss an ExNotes blog:


Don’t forget: Visit our advertisers!


The Flying Z

By Joe Berk

Janus Motorcycles issued this press release recently.  “The Flying Z” is a good-looking motorcycle with an interesting story.

FOR IMMEDIATE RELEASE:
###############################
July 6th, 2024
Goshen, Indiana

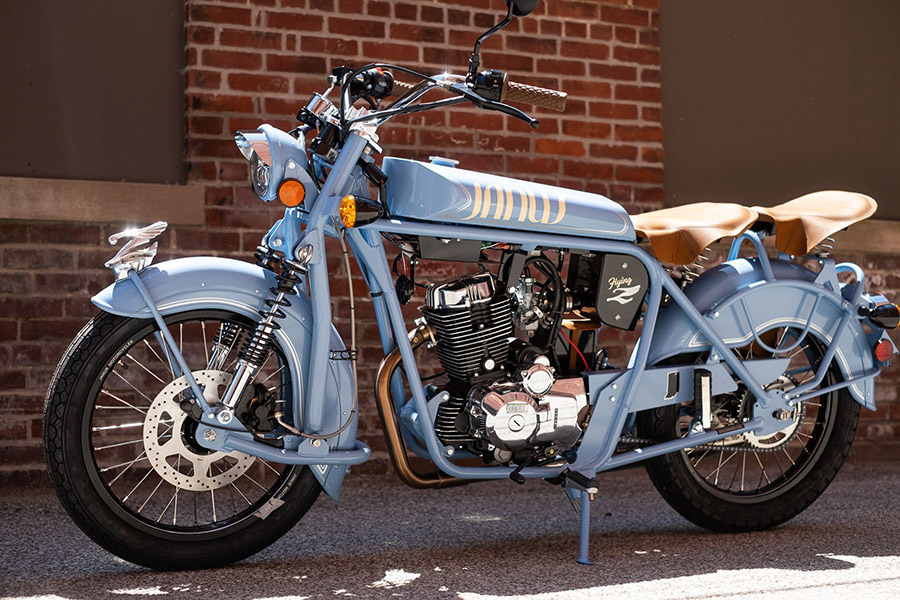
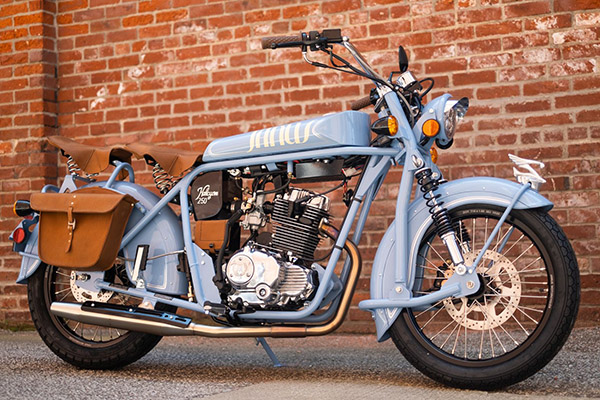
This spring, 66 year-old Mark Zweig—a lifelong motorcyclist, Janus Motorcycles partner, and part-time CFO for the firm, commissioned a new one-off bike for himself—a custom-built Janus Halcyon 250 dubbed “The Flying Z.”

Zweig has been a restorer, customizer, and collector of a wide range of motorcycles from the 60s and 70s for many of his years, sometimes having as many as twenty bikes at a time. And while he has always had a soft spot for smaller, lighter weight bikes, an accident in 2016 where he totalled his brand new Triumph Thruxton 1200, combined with a divorce and resulting downsizing, got him to eventually sell all of his larger bikes and narrow down his rides to a small group of small-displacement bikes including a new Janus Halcyon 250 in the year 2000.

“I just don’t ride as much as I used to, and certainly don’t need to go that far or that fast. Our founder, Richard Worsham, has dubbed that kind of riding as ‘rambling.’ Most of my riding is to and from campus (Zweig is the ‘Entrepreneur in-Residence’ at The Sam M Walton College of Business at The University of Arkansas), or on short trips in and around town. The Janus to me represents everything I want in a motorcycle. It’s incredibly beautiful, simple, reliable, ultra lightweight, and fun to ride. That’s why when I decided to have a new bike built for myself—where we could test out some new design ideas—I opted for another Halcyon 250 instead of one of our larger displacement bikes. It’s such a wonderful basic design.”

In fact, this bike is the second of Zweig’s “Flying Z’s.” The first Flying Z was a custom car—a boattailed speedster he built together with his friend and master fabricator, Mike McPherson—featuring a unique handbuilt chassis, hand-formed steel body, rumble seat, sand cast 18” wheels with knockoffs, and a straight-8 Buick engine with triple carbs. “That thing looked like it came from the same era as our Halcyon,” Zweig said.

Janus Motorcycles has made its marque and established a cult like following in the motorcycle world by building unique bikes to customer order, one at a time. Their bikes come in a huge range of colors and styles, with all kinds of options for hand pinstriping, leather seats and bags, and much, much more. But Zweig’s Halcyon Flying Z takes things a step farther and has some unique features not found on any other factory-direct Halcyon 250s.

“Our basic Halcyon 250 looks like a bike that could have come out of the 1920s,” Zweig said. “So I wanted to see what we could do by creating a bike that looked like the natural evolution of that one and that would have been built in the 1930s or 40s,” he added.

“One of the coolest aspects of The Flying Z is its set of uniquely flared and deeply skirted fenders making it more aerodynamic. I have been wanting to see what one of our bikes would look like with some fenders like these for the last couple years, and our master fender builder Brent Lehman, along with the design guidance from our founder and design lead, Richard Worsham, made it happen.”

The bike also has a one-off color scheme, with the frame and most other parts color-matched to the RAL 5024 powder-coated “Cavalry Blue” body work. The large “Janus” script on the tank sides was laid out by the design team and painted by lead pinstriper, Kelly Borden, as well as the cream-colored “Flying Z” script and logo on the bike’s black airbox. It has hand-painted dual silver pinstripes on the tank and fenders, along with silver pinstriped black wheel rims.

The bike also features a sandcast Flying Z fender ornament, based on the original Flying Z hood ornament, created by Zweig’s friend—famed Arkansas sculptor, Eugene Sargent. “Sargent made the fender ornament so it bridges the front fender brace and didn’t require any special mounting hardware,” Zweig said. The bike also features other bespoke polished components.

Topping off the build is a custom engraved fuel cap for its hand formed aluminum tank, replete with a “Flying Z” logo.

“I cannot wait to see the public reaction to the new Janus Flying Z,” Zweig said. “My old Janus draws a crowd every time I park it, and I expect this one will be even more attention-grabbing,” he added with a smile.

For more info, contact Grant Longenbaugh – grant@janusmotorcycles.com


Never miss an ExNotes blog:


Don’t forget: Visit our advertisers!


Idaho’s Lucky Peak State Park

By Joe Berk

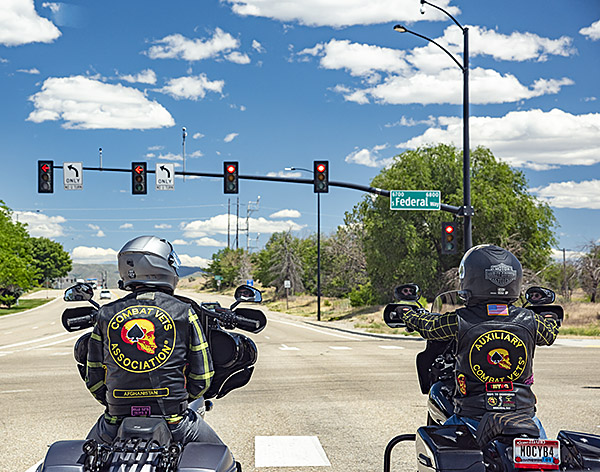
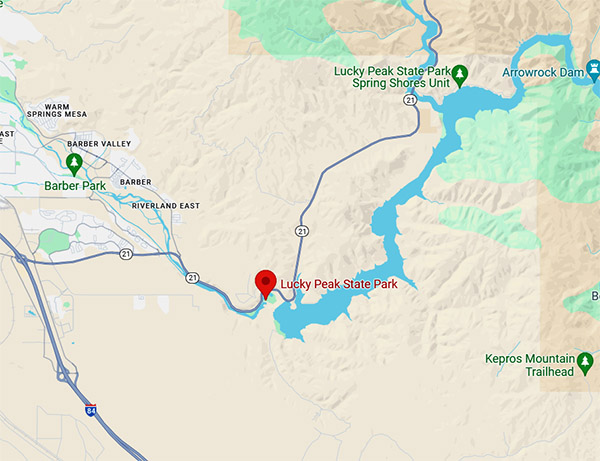
I love Idaho and the Boise area, and no story about this part of the country would be complete without mentioning at least one of the motorcycle rides out of town.  A short and easy one is the run along Idaho Highway 21 to Lucky Peak State Park.

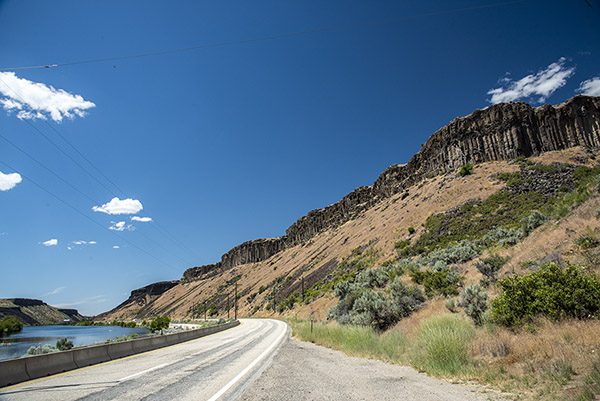
It’s easy:  Just grab Interstate 84 east out of Boise and then Highway 21 north.  You’ll be running alongside the Boise River up to Lucky Peak.  It only takes about 10 minutes to get up to Luck Peak State Park if you are in a car or on a motorcycle.  If you’re into bicycling (I am), it’s about a 30-minute ride on the Boise River Greenbelt, a dedicated bike lane that parallels Highway 21 along the river.  The bike lane is protected from traffic by a concrete barrier.  I didn’t have a bicycle on this Boise trip, but I found myself wishing I did.  It looked like a great bicycle ride.

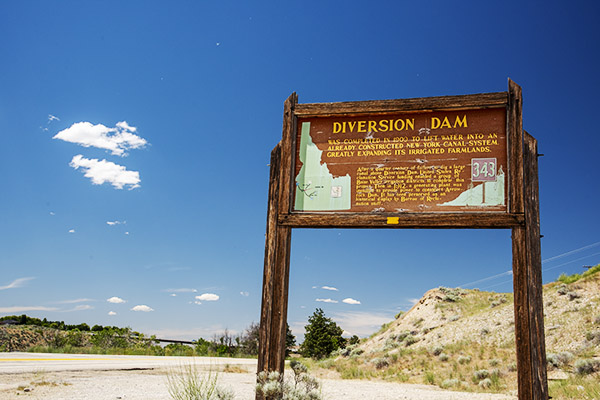
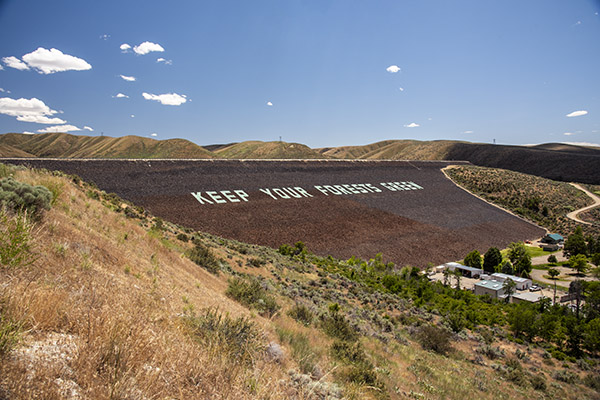
Highway 21’s north and south lanes are separated, and the northbound lanes up to Lucky Peak State Park don’t have good places to pull off and grab photos.  For that reason, most of my on=the-road pictures were taken on our ride back to Boise, including this one of a sign for the Diversion Dam.

You get a great look at the Boise River’s Diversion Dam heading to Lucky Peak, but like I said above, there’s no place to pull off for a photo.  On the way back, you see the sign in the above photo, but you can’t see the Dam from there.   It provides water for Idaho’s agricultural canal system and it also generates electricity.  The company that built it in 1909 took a financial bath on the project, but the dam didn’t give a damn.  It’s well over a hundred years old and it’s been doing its job well the entire time.

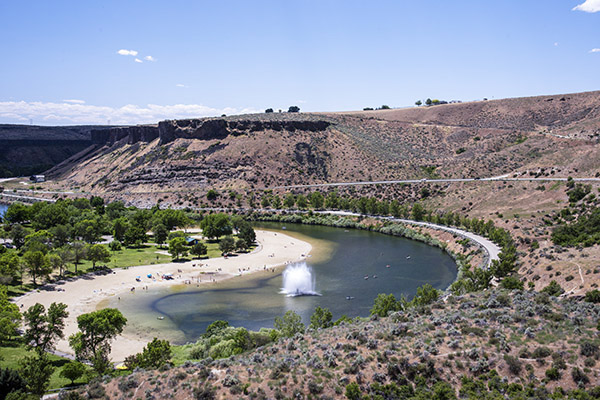
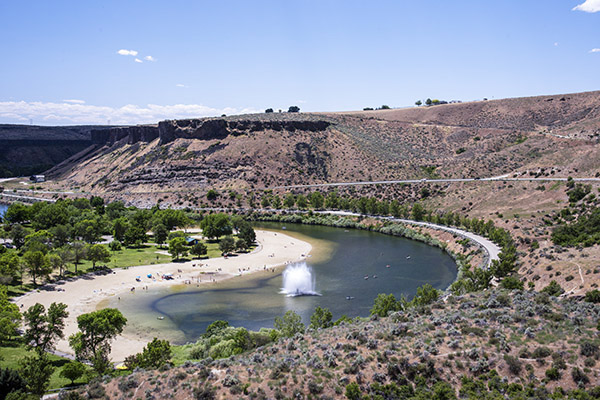
The Lucky Peak State Park is a multi-use park.  You can swim in its freshwater beach, there are a couple of boat launch ramps, we met people there for kayaking, you can rent watercraft, you can fish, or you can just hang out and take pictures (which is what we did).

There are two dams in this area.  The first is the Diversion Dam mentioned above; the second is a much larger Army Corps of Engineers Dam that forms Lucky Peak Lake.

The ride back had places along Highway 21 to pull over and grab a photo or two, which is what we did. There’s a lot to see and do in the Boise area and in Idaho, and there’s more coming up here on ExNotes about that.  Stay tuned, my friends.


Never miss an ExNotes blog:


Don’t forget: Visit our advertisers!


Product Review: Tipton Universal Bore Guide Kit

By Joe Berk

No matter how much I scrub a bore with patches and solvent, I can’t get all the copper fouling out.  For that, I need to turn to a bore brush, and the general rule of thumb seems to be one complete back and forth stroke for each round fired.  50 rounds fired (which I sometimes will do), and it’s 50 back and forth strokes with a bore brush.  The copper literally has to be scraped out of the barrel.

The problem with this, of course, is that a new bore brush takes a lot of force to drive through the bore, and in doing so, the cleaning rod I’m pushing it with flexes if it is not supported while the bore brush is in the bore.  That can cause the rod to bear on the chamber entrance or the leade in the chamber, and that can damage the chamber.

The Tipton Universal Bore Guide Kit is a contraption that allows you to protect a bolt action rifle’s chamber from the cleaning rod.  An added benefit is that it prevents solvent or oil from dripping into the action.  The concept is good; the execution is slightly flawed for some firearms in my opinion.  That said, I’ll continue to use it on my bolt action rifles.

Here’s how the Tipton Universal Bore Guide Kit comes to you:

The packaged Tipton Universal Bore Guide Kit as delivered from Amazon.

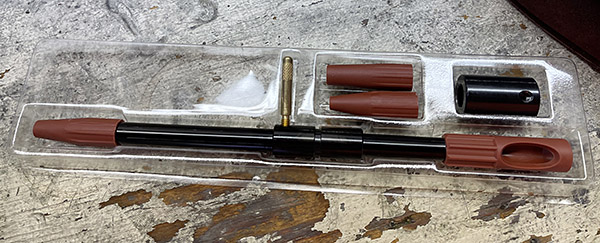
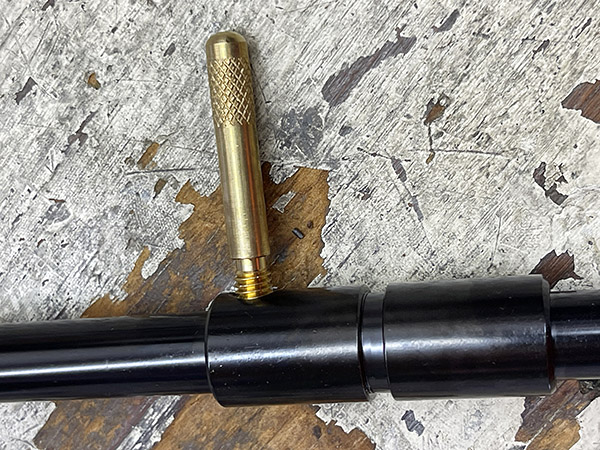
The pieces include a tube, an end piece with a slot for adding solvent, a sleeve that includes a combination bolt/set screw, an optional bore guide for an AR-15, and three different rubber funnels (for lack of a better word) based on the caliber.

The Tipton Universal Bore Guide Kit components.

In the photo above, the bore funnel is the red rubber piece on the left end of tube.  Its purpose is to align the tube to the barrel.   The two red rubber pieces above the tube in the photo above are for different size bores.  The brass piece above the tube is the combination set screw/bolt (its use will become clear in another photo below).  The stubby black at the top right of the photo above is the AR-15 chamber adaptor.  The red rubber piece on the right in the photo above is guide that guides the cleaning rod into the tube.  You’ll notice an elliptical cutout in it.  The elliptical cutout’s purpose is to allow you to add solvent or oil to the cleaning patch at that point.  The idea is to not insert a cleaning rod into the rifle with a solvent or oil soaked patch.  This is to prevent the solvent or oil from dripping into the action as the cleaning rod and patch are inserted into the gun.

The Tipton Universal Bore Guide Kit rubber tip that inserts into the chamber mouth.
The Tipton Universal Bore Guide Kit sleeve and “bolt” that also functions as a set screw.
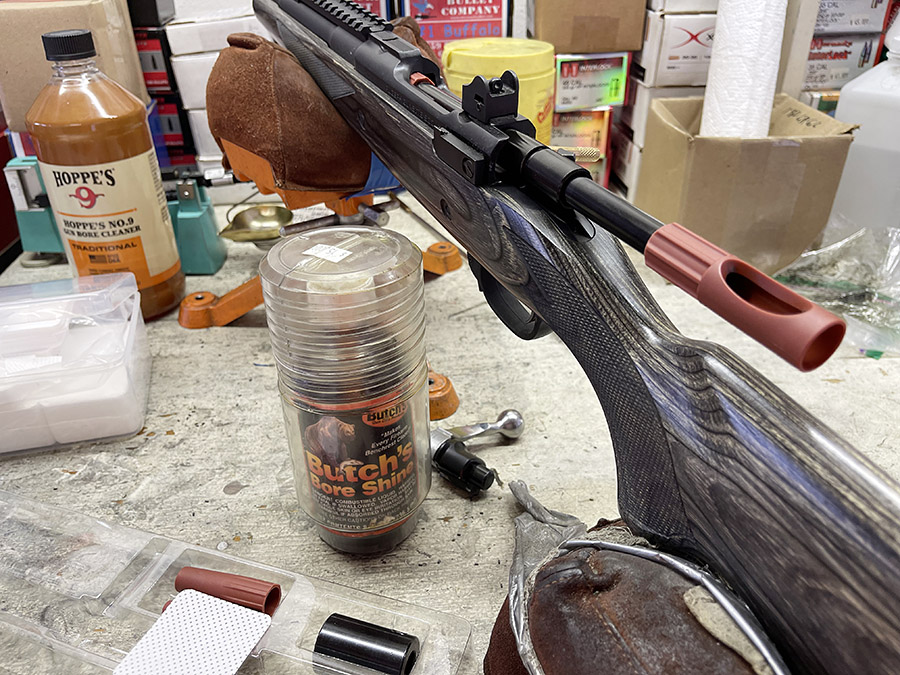
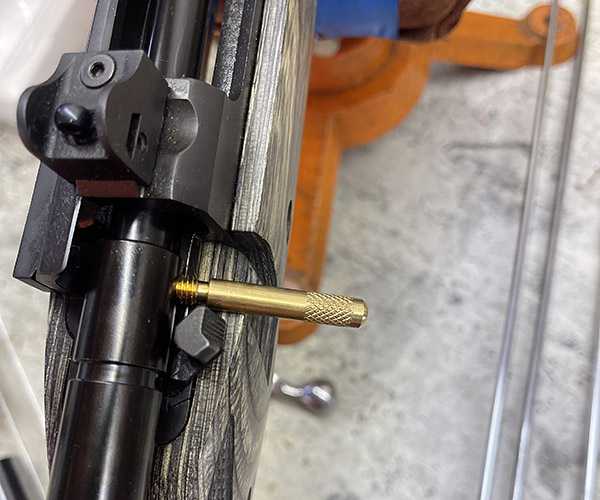
The Tipton Universal Bore Guide Kit inserted into my Ruger GSR.
The Tipton Universal Bore Guide Kit, with the “bolt” down in the GSR.
Inserting a cleaning rod and bore brush into the Tipton Universal Bore Guide Kit.

There are some things I did not like about the Tipton Universal Bore Guide Kit.

    • The first is that the red rubber guide fits into the chamber will not withdraw from the action when the Tipton Universal Bore Guide Kit is pulled out.  The rubber chamber guide hangs up on the rear of the action.  It’s not a big deal.  I just pulled on the tube, the guide falls off, and I reinstalled it.  I only needed to do this when I was finished using the Tipton Universal Bore Guide Kit and I wanted to remove the thing.
    • The feature that allows you to add solvent through a port in the rear red rubber guide is something I didn’t need for applying the solvent.  I just dipped the cleaning rod tip (with patch) into the solvent bottle and ran it through the bore.  The same is true with the oiled patch after I’m done cleaning.  That extra port solves a solvent or oil application problem that doesn’t exist.  But it sure came in handy when I encountered the next problem.
    • The Tipton Universal Bore Guide Kit doesn’t work with a long action and a 26-inch barrel as the kit is configured.  I tried working a new bore brush through my .30 06 Mark V Weatherby, and the cleaning rod handle butted up against the rubber guide at the Tipton bore guide’s rear end with the tip of the bore brush just showing at the end of the muzzle.  That was a real “uh oh” moment.  There’s no way to back the bore brush out (especially when the brush is new).  The bore brush, the bore brush rod, and the Tipton were locked in place.  That’s when the opening in the rear guide came in handy.  I was able to grasp the cleaning rod with a pair of needlenosed pliers and turn it about an eighth of a turn at a time (my cleaning rod handle allows the rod to rotate, a feature intended to prevent the cleaning rod from unscrewing).  Then I’d release the pliers’ grip, move it around the section of cleaning rod visible through the red rubber rear guide, and turn the rod another eighth of a turn.  I did this for several minutes until I could get the rod unscrewed from the bore brush, and after that, I put an extension on the rod.  It was a real pan in the ass.  I’ll cut the length of the Tipton bore guide down to prevent this from occurring again.  I feel the Tipton’s bore guide instructions should have a warning about this.

The above notwithstanding, I think the Tipton Universal Bore Guide Kit is still a good purchase.  It seems to work well, and it prevents cleaning rod flex when running a tight-fitting bore brush through a rifle barrel, so it does what I want it to do.  I paid $13.01 for mine when I bought it on Amazon.  For $13, it’s a decent deal.


The Ruger .308 GSR story is here!

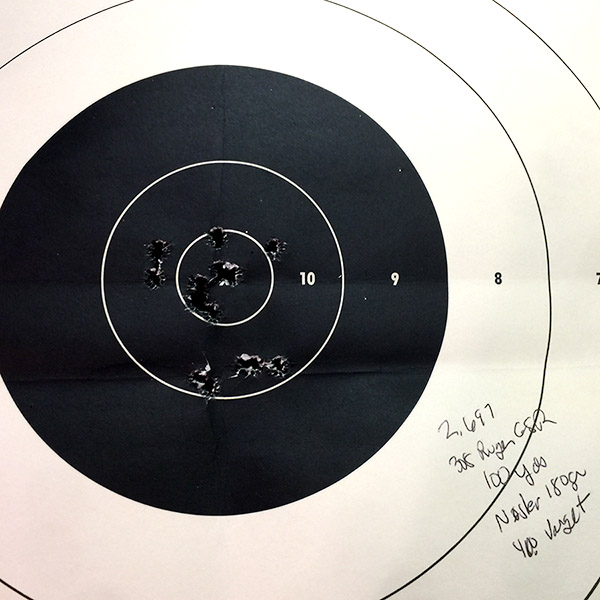
Open sights at 100 yards!

More product reviews are here.


More gun stories are here.


Never miss an ExNotes blog:


Don’t forget: Visit our advertisers!


Adventure Towards Ayers Rock

By Mike Huber

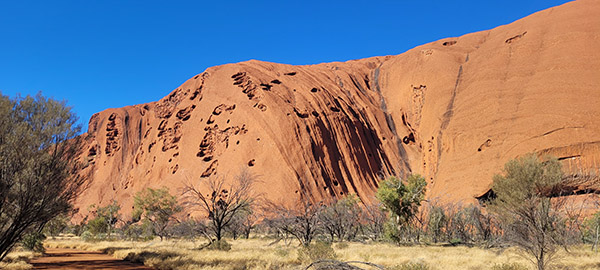
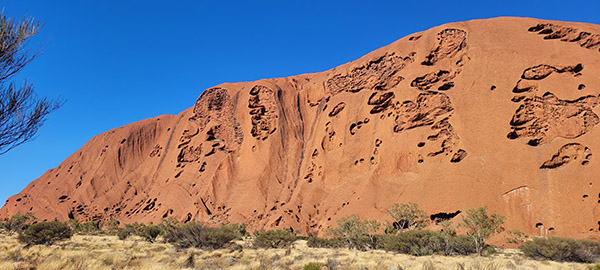
Ayers Rock was my destination.  This is not an easy destination to reach, especially by car.  It takes dedication, time, and patience. Many people fly to this location and use tourist busses to get around in the park, snap a few photos, and leave.  Not me.  It is cliché, but I feel the journey is more important than the destination.  What you see, hear, and feel along the way allows you to appreciate the destination when you do finally reach it.  This two-week drive to Ayers Rock was one that elevates that cliché phrase to a level I never thought possible.

My original plan was to circle the entire continent of Australia in a month. That was NOT happening so Ayers Rock (Uluru) was a solid turnaround point.  Mind you to even complete this took me one month. The isolation was beyond what I had expected.  I knew going into this that isolation would be the greatest challenge, but what I didn’t grasp was how far I would be pushed mentally during this journey.

To add to the trip, one of my best friends and a fellow paratrooper had been diagnosed with cancer a few years back and I knew his time was coming.  Our texts and calls were becoming more and more infrequent. Fortunately, I am very close with one of his sisters.  When I don’t hear from him within a week I reach out to her to obtain a status.  During one of the most desolate spots on earth I received a text from her to inform me of his passing.

You don’t understand isolation until you receive a text like that in spotty cell phone coverage.  There was no way of replying or reaching out to console and provide support to his loved ones.  This left a more than significant gap in my mind with no way of processing it since I was in the middle of the Outback.  There is no one to rely on for comfort or a crutch to get you by.  There is nothing.  Just nothing. The only consolation I found was hours of alone time to think and process it while focusing on how fortunate I was to have such a close friend, all the while driving for hundreds of miles with, again…nothing.  A few dead kangaroos on the side of the highway with an occasional eagle or dingo chomping on them was the only life I saw through this portion of the drive.

Upon arriving at Uluru I set up camp, which only entailed pulling into a parking spot as I was car camping.  This has been a solid pro to car camping, just minimal to no preparation setting up or pulling down camp. After cooking a quick meal in my “campsite” I thought I had enough in me to drive around Ayers Rock for sunset.

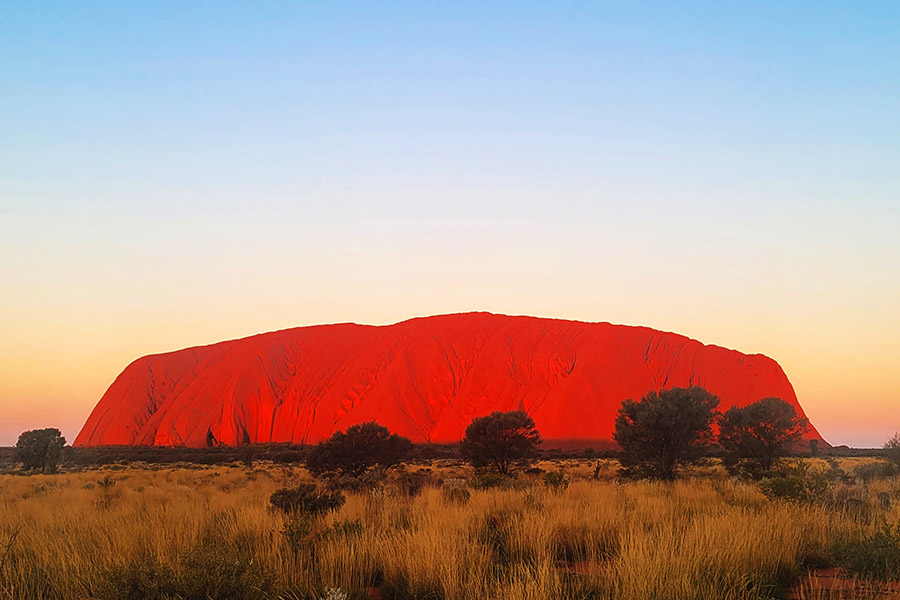
Upon entering the park and seeing Ayers for the first time my eyes welled up.  I am not sure if it was due to this area being such a spiritual place for the Aboriginals or that the drive to reach it was so emotional.  It really doesn’t matter.  To finally lay eyes on this magnificent rock glowing in the golden hour of sunset was a moment that will resonate with me forever.  I was fully present in the moment and felt a sense of calmness.

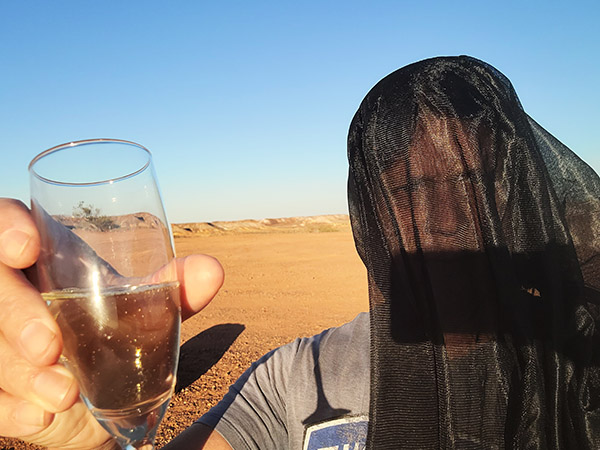
After a semi-solid night’s sleep in the car, it was time to do a 3-hour hike around the rock and really get to experience this monument of the ancients up close and personal.  Since I had been car camping in some warm climates I purchased some mesh window covers to allow the windows to remain down in the evening without having any bugs, flies, snakes, kangaroos, or dingos enter the vehicle while I was sleeping.  This purchase turned out to be one of my better decisions along this drive.  Uluru is plagued with flies. An unimaginable amount of them.  Starting the hike early in the morning was key to avoid them and as the sun rose over this great rock having the car mesh as a makeshift fly screen for myself on the hike was a lifesaver.

Traveling alone through Australia is an experience that forced me to look at life from a unique perspective that many will never understand or even imagine existed. The month was filled daily with two constants: Change, and being challenged to adapt to the environments. By environments I mean both from the outside world and from the world within me.  Both were deeply felt throughout my long journey to Ayers Rock.


Never miss an ExNotes blog:


Don’t forget: Please click on the popup ads and visit our advertisers!


Zongshen Acquires Loncin

By Joe Berk

Two of the largest motorcycle companies in China are Zongshen and Loncin.  I recently learned that Zongshen became the major shareholder of Loncin, turning Zongshen into the largest of the motorcycle companies in China.  I asked my contact at Zongshen if he could tell me more about this, and he did.


Hi Joe:

On July 3rd, Zonsen Power, a listed company under Zongshen Group, announced official news.  Here are the details:

Zonsen Power announced that its associate company intends to invest 3.35 billion yuan (CNY) to acquire a 24.55% stake in Loncin. Upon the completion of the transaction, Zonsen will become the largest shareholder and the actual controller of Loncin.

In fact, before this acquisition, Loncin Group had been trapped deeply a debt crisis due to heavy losses in its real estate business, leading to significant debts in 13 of its subsidiaries.

In previous years, Loncin had been trying hardly to resolve this issue, and some companies proposed acquiring shares in Loncin, but ultimately, none succeeded.

The Chongqing court ruled that Loncin Group must resolve this debt issue before August 2024, or the company will be auctioned. This acquisition of Loncin by Zonsen is likely the result of coordination by the Chongqing government.

As the previous acquisition of Lifan by Geely Automobile was not successful. Geely, a powerful automotive enterprise in China that is the largest shareholder of Daimler and once acquired 100% shares of Volvo, but had no intention of developing the motorcycle industry by acquiring Lifan. Instead, it aimed to obtain Lifan’s electric vehicle production license.  However, after the acquisition, Geely did not invest much in the motorcycle sector, causing Lifan to decline significantly, which greatly displeased the local government.

Although Loncin’s real estate business has suffered heavy losses, its motorcycle business is still operating well. Therefore, the local government is unwilling to let Loncin suffer the same fate as Lifan, so it coordinated with Zonsen to acquire a majority stake in Loncin, and state-owned assets also invested in Loncin.

Whether Zongshen and Loncin’s businesses will be merged is yet to be announced officially, but most people believe that Loncin will maintain its current structure and business, and there will still be competition between the two companies in the same industry.

Thanks!


These are interesting developments.   In case you were wondering, Zonsen is the name by which what we knew as Zongshen now wishes to be called.  Another bit of information:  3.35 billion Chinese Yuan is the equivalent of approximately 461 million US dollars.  I first visited Zongshen more than a decade ago, and the company impressed me greatly.


Never miss an ExNotes blog:


Don’t forget: Visit our advertisers!


Idaho: Check!

By Joe Berk

Susie and I were talking a few days ago about the states we haven’t visited. I’ve hit all but North Dakota, partly due to a sense of wanderlust and partly due to the jobs I’ve had over the last 50 years.  Susie has about a dozen states on her “yet to see” list, and one was Idaho.   That became our latest destination, and boy oh boy, do I have tales to tell about the Gem State.  We flew into Boise with my trusty D810 Nikon and its 24-120 lens and rented a Jeep.  Talk about fun!  Here’s a brief look at upcoming posts.

Lucky Peak State Park

This was a great ride out of Boise: A super road and an awesome watersports destination.

World Center for Birds of Prey

Fun beyond description with an up close and personal look at raptors and scavengers.  This place is fantastic.  It was one of the best stops on our Idaho adventure.  But they all were great.   We had a blast.

Idaho State Capitol

Beautiful, laid back, and fun:  Idaho’s government has its head screwed on straight, and they do it all with a part-time legislature.

Idaho State Penitentiary

A fascinating old territorial prison with fantastic stories.  We loved this place.

Yanke Motor Museum

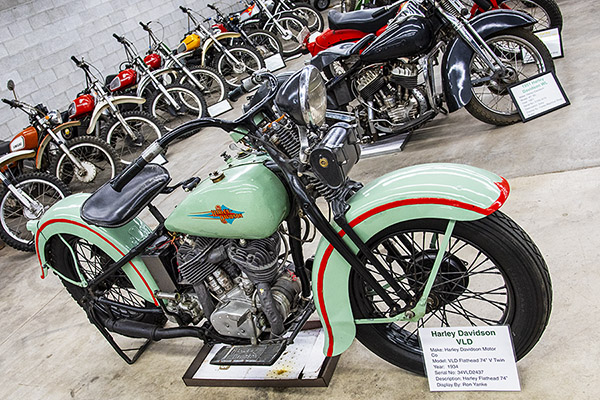
I’ve got to wait for permission from the Yanke family to share this story and all the photos with you.  It was a very impressive automobile, motorcycle, tractor, and musical instrument collection.

Idaho Military Museum

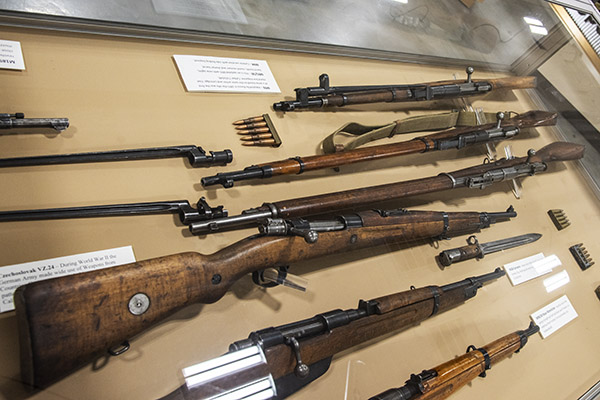
Small but cool, that’s how I’d describe the Idaho Military Museum.   Guns, armored vehicles, aircraft, and more.  You’ll enjoy this one.

Basque Museum

The Basque Museum is a small museum in downtown Boise.  It covers the history of the Basque people in Idaho as well as other parts of the United States.  There were a lot of interesting things to see there and we enjoyed the stop.

Warhawk Air Museum

This is an awesome place with great exhibits, exciting photo ops, and fun docents.  We chatted with a guy who moved to Idaho from Alaska, and he knew I guy I went to school with who moved to Alaska.  We live in a small world, my friends.

The Hemingway Idaho Connection

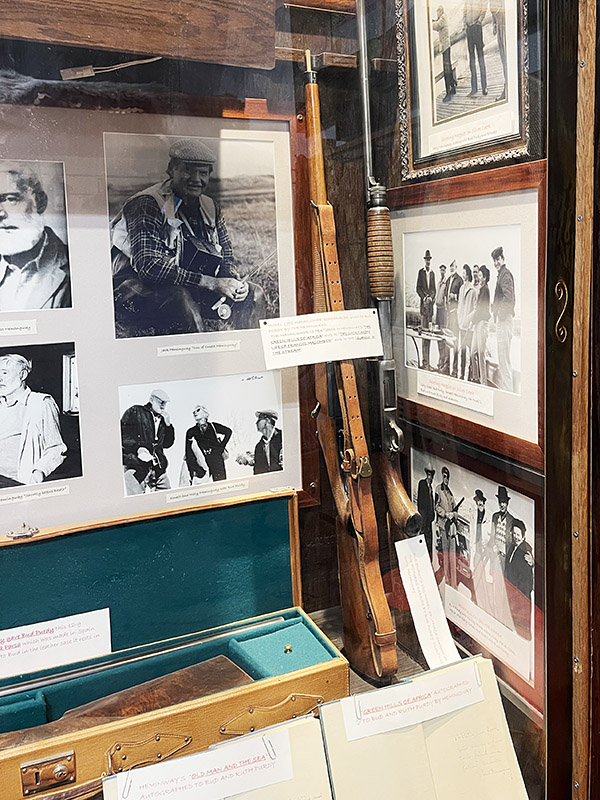
Ernest Hemingway had a strong connection to Idaho.  We stopped in a restaurant and general store in Picabo on our way to Craters of the Moon National Monument, and we saw three guns that Ernest Hemingway used when hunting in Idaho.  Hemingway gave them to a friend, and we got a few photos.

Craters of the Moon National Monument

I blew through this area 8 years ago leading a group of Chinese motorcyclists across the American West, and I didn’t really get to see Craters of the Moon National Monument on that trip.  That’s a character flaw I fixed this time around!

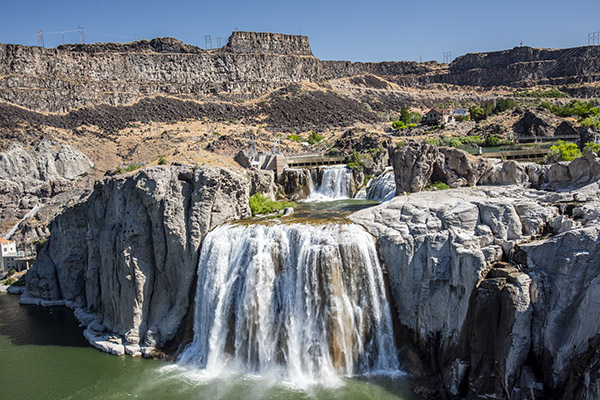
Shoshone Falls

Ever wonder how Twin Falls, Idaho, got its name?  Well, wonder no more.  We’ll tell you the story!

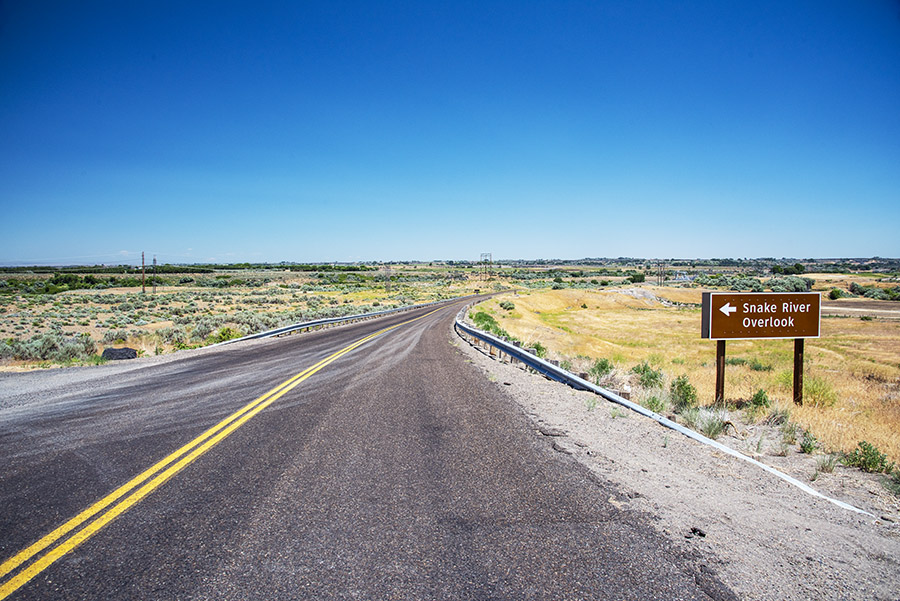
Evel Knievel’s Snake River Canyon Jump

Do you remember when Evel Knievel jumped the Snake River Canyon 50 years ago?  We found our way there on this trip, and we climbed the ramp that Evel used for his wild and crazy Snake River Canyon jump.  You’ll get the full story in a near term ExNotes blog!

Hagerman National Fish Hatchery

We tried, mostly because we’ve eaten a whole bunch of steelhead trout over the years.  Alas, the fish had all left town by the time we visited, but that’s okay.  There were plenty of other photo ops!

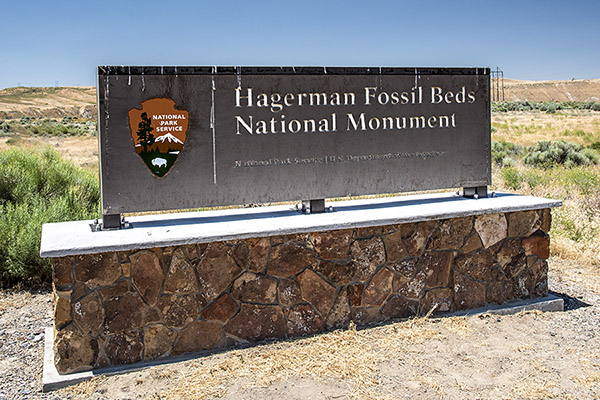
Hagerman Fossil Beds National Monument

Commanding views of Idaho’s Snake River, prehistoric fossils, the Oregon Trail, and more were all a part of our ride out to the Hagerman Fossil Beds National Monument.


We covered a lot of ground, we checked the box next to Idaho for Susie, and we did all the above in just 5 days.  I snapped something north of a thousand photos, and I selected the best ones to share with you here.  Stay tuned, buckle up, and get ready for Idaho!


Do you have a copy yet?


Never miss an ExNotes blog:


Don’t forget: Visit our advertisers!