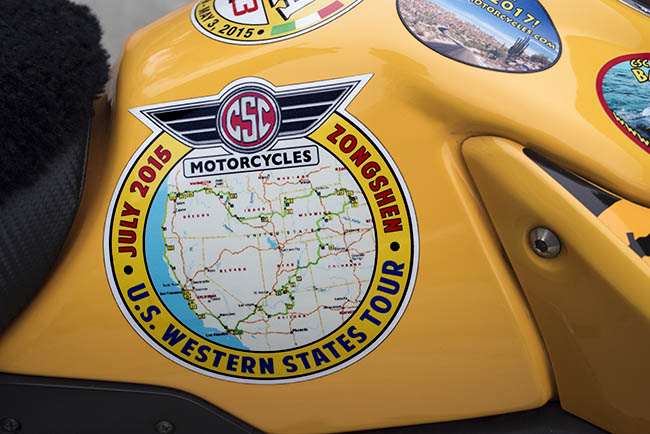
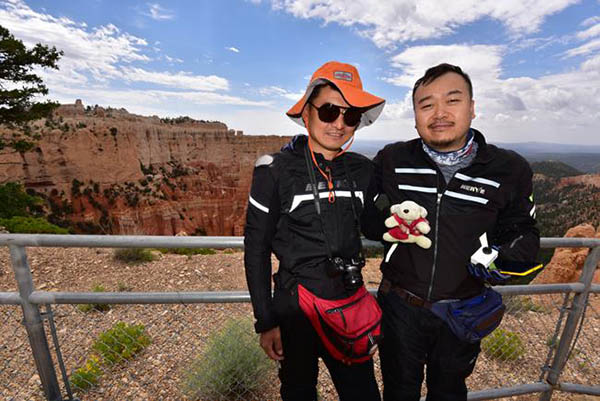
That was my reaction when the photos you see below popped up on my Facebook feed, telling me it had been four years since I posted them. Yep, it was in July of 2015 that yours truly, Joe Gresh, and riders from China and Colombia descended on CSC Motorcycles to christen the RX3 with a ride through the great American West. So Cal to Sturgis, due west to Washington and Oregon, and then a run down the coast home, hitting every National Park and site worth seeing along the way. It was an amazing adventure, and truth be told, I was shocked that it has been four years already. That meant it was about four years ago that CSC brought the RX3 to America, it was four years ago that I first met Joe Gresh in person (a living legend, in my mind), and it was four years ago that we took a ride that made the entire motorcycle world sit up and take notice. A dozen guys, a dozen 250cc motorcycles fresh off the boat from China, 5000 miles, and not a single breakdown. Tell me again about Chinese motorcycles are no good? Nah, don’t waste your breath. I know better.
It was a hell of a ride, and good buddy John Welker did a hell of a job as our very own Ferdinand Magellan, defining the route, making all of the hotel reservations, keeping us entertained with great stories, and more. These are the same photos (I took them all) that popped up on Facebook. They represent only a small portion of the ride, but they give you an idea of what it was like. It was grand.
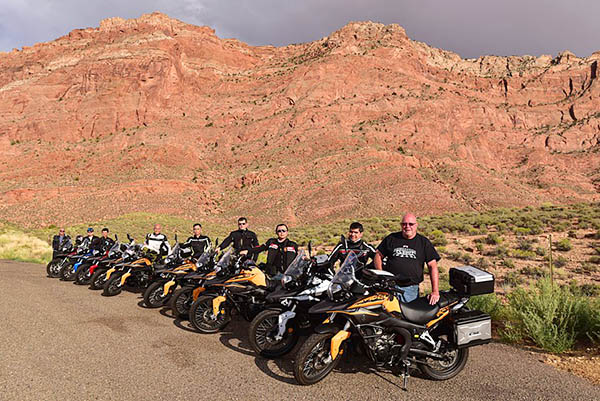
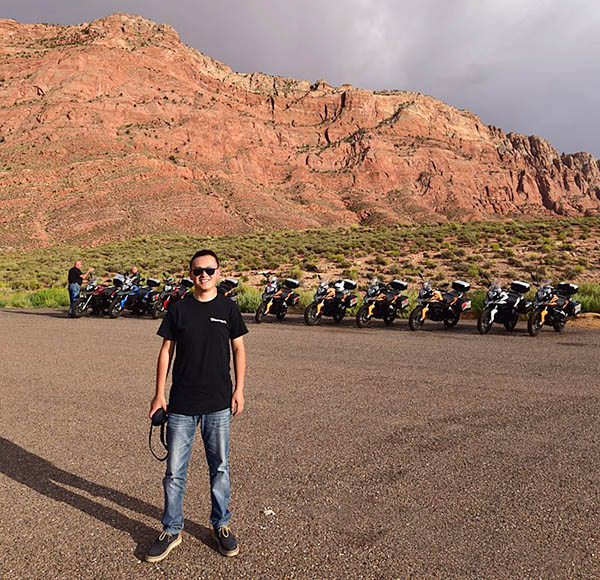
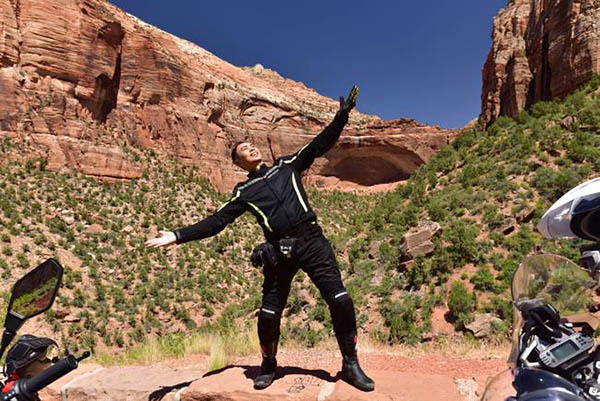
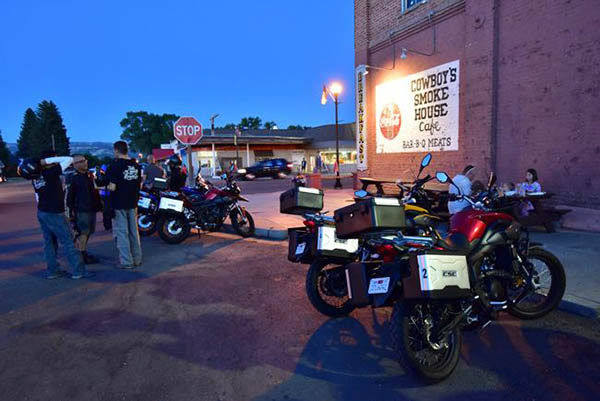
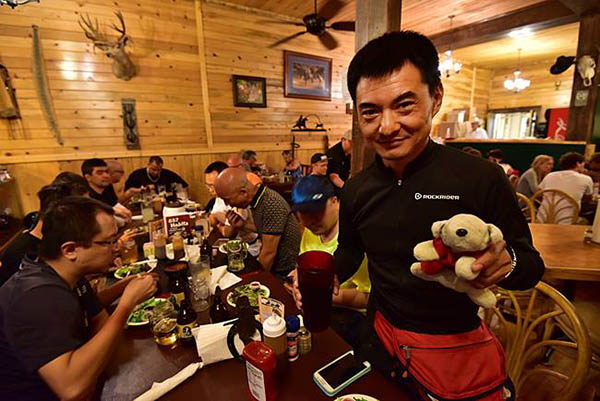
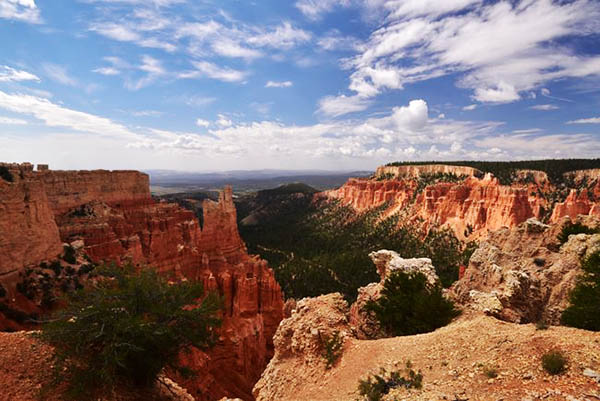
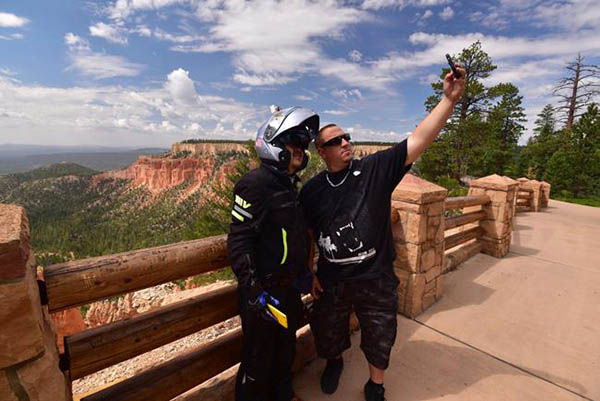
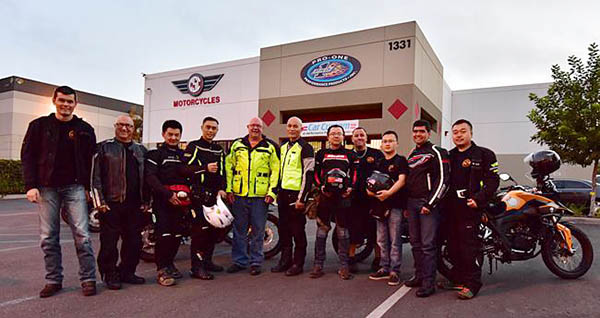
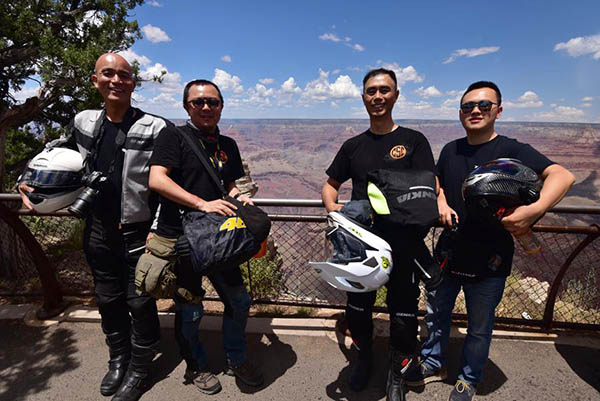
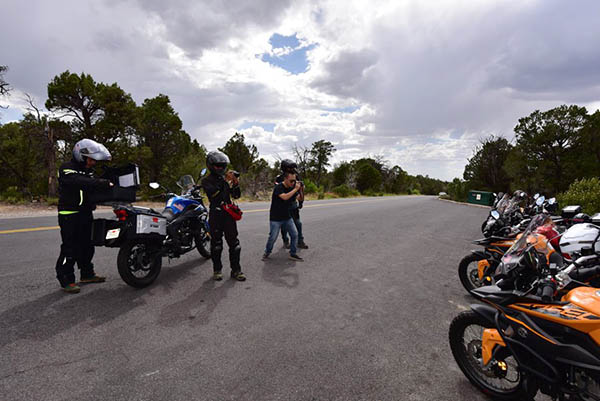
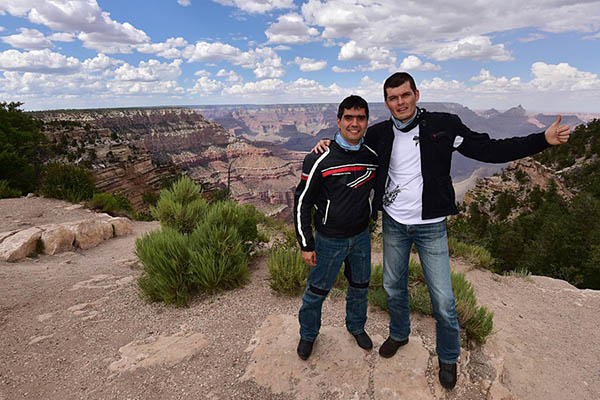
Somewhere along Highway 89 in Arizona. The guy in the foreground is our very own Baja John Welker. That’s Joe Gresh way at the other end of this row of motorcycles.Same location, with Hugo out front. Hugo is the Zongshen factory rep. He’s a great guy who kept us constantly entertained.Mr. Tso, posing for me in Zion National Park. This guy makes for a great photograph. He rode with us in China, too!We stayed in Panguitch, Utah, the night before we visited Bryce Canyon National Park. Dinner that evening was at the Cowboy’s Smoke House. I liked it so much I later returned with my wife just to have dinner there.Tony and his mascot inside Cowboy’s. Great times.Bryce Canyon National Park. Everyone was captivated by this place. It was awesome.Kyle, one of the Chinese riders, and Big John, our chase vehicle driver. Good guys both.Tony and Kyle, posing at Bryce.The crew when we returned to So Cal. From left to right, it’s Juan from Colombia, Joe Gresh, Tony from China, Mr. Tso from China, John Welker, Lester from China, Kong from China, Big John Gallardo, Hugo Liu, Gabriel from Colombia, and Kyle from China.The obligatory photo at Roy’s in Amboy, somewhere in the Mojave Desert. God Almighty it was hot that day.The guys at the Grand Canyon…Lester, Kong, Tso, and Hugo.In Capitol Reef National Park in Utah, at an impromptu photo stop.I grabbed this photo of Joe Gresh along the South Rim of the Grand Canyon. It looks like he’s Photoshopped into the picture, but he’s not.Same spot, different guys: Gabriel and Juan from Colombia. Juan later invited me to ride with him in Colombia, and I went. That, too, was an incredible ride.
So there you have it, or at least snippets of what was one of the greatest rides I’ve ever done. I’m hoping Facebook has more of these anniversary photos pop up for me, as the ride lasted 19 days and I know I posted more on that ride. Good times. Great riders. Superior camaraderie.
As always, there’s more good stuff coming your way. Stay tuned!
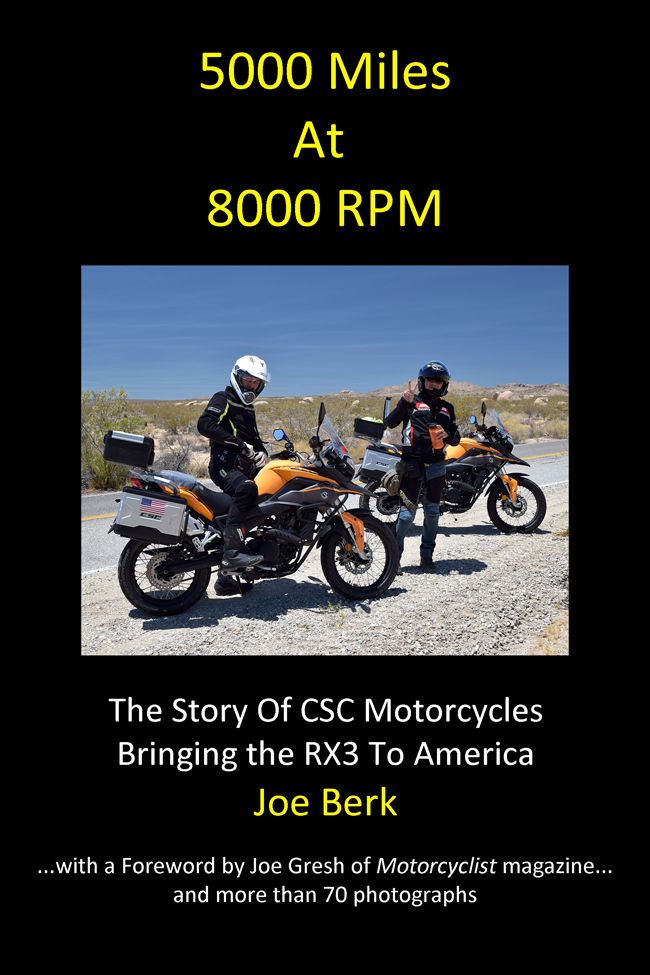
Hey, the whole story of that ride is here. You can get the whole nine yards by buying your own copy of 5000 Miles At 8000 RPM. There’s a lot more good information in there, too, like CSC’s no-dealer approach to market, how we dealt with the Internet trolls who tried to hurt the company, the first CSC Baja trip, the RX3’s strengths and weaknesses, and much, much more!
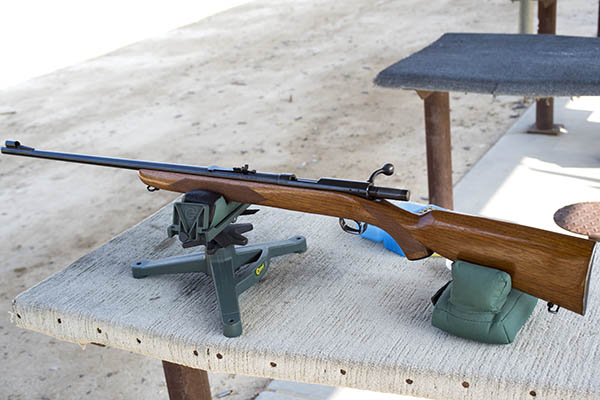
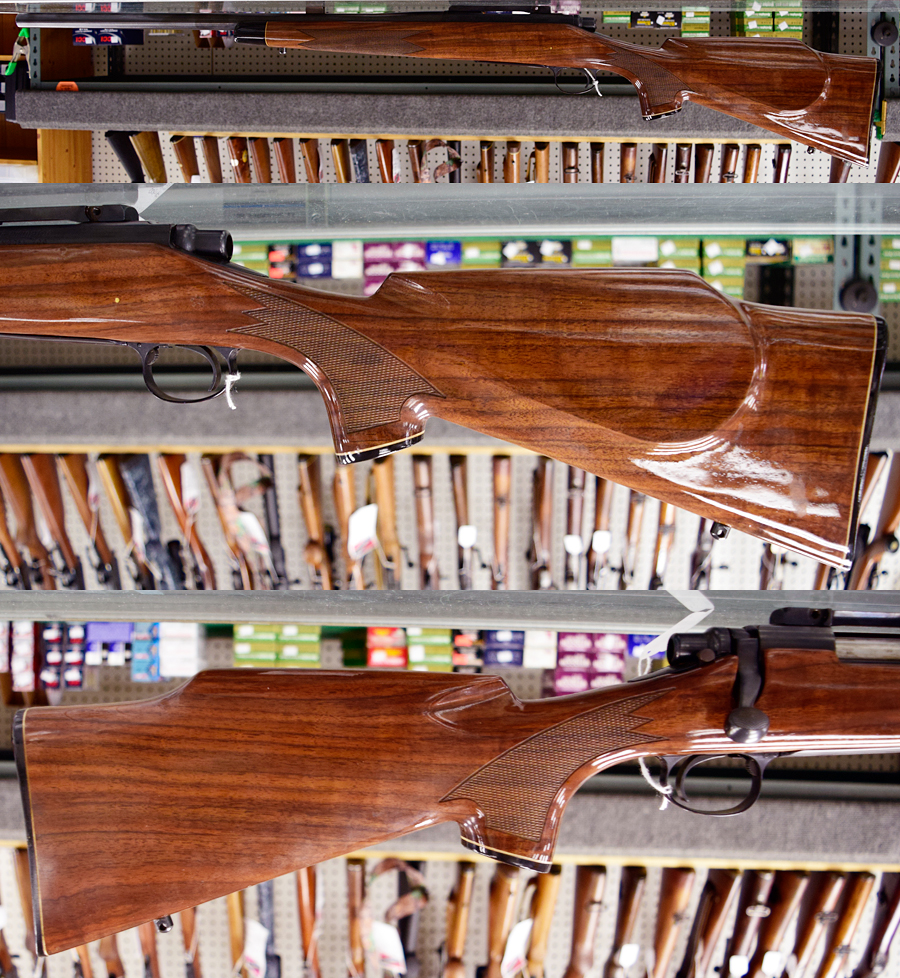
A Remington Model 700 BDL Varmint gun in .223. I spotted this at the Gunrunner in Duarte, and it followed me home.
There’s gun stores, and then there’s gun stores. I can’t pass a gun store without stopping in. The issue is that most gun shops today are soulless retail outlets with black plastic. Glocks, ARs, you get the idea. Guns with no soul and gun shop owners with even less. But there are exceptions. One that comes to mind is the Gunrunner in Duarte. It’s a favorite, partly because the team working there consists of older guys a lot like myself (crusty, maybe carrying a few pounds more than they should be, and a sense of humor). But it’s mostly because they get it. “It” being, of course, blue steel and walnut. And military surplus rifles. I can’t drive by Gunrunner’s without stopping in. You never know what they might have in stock, and even if I don’t buy anything, it’s always fun looking.
One day a few years ago on just such a stop, I noticed an older Remington Model 700. It was the varmint model and it had a price that was just too good to walk away from. And the photos don’t do it justice. It had a real contrasty bit of walnut with horizontal dark stripes that were unusually nice on a production gun. As the saying goes, I pulled the trigger. I bought the rifle for a scant $400, which I thought was a hell of a deal (I think new ones are about a thousand bucks now).
The Remington was pretty well gummed up with old oil (so much so the firing pin and trigger were stuck), and the standard M-700 BDL high gloss urethane finish was going south in a big way. I took the barreled action out of the stock and gave it a thorough cleaning. Then I spent hours on the stock with 0000 steel wool.
When I was finished, I was pleased with the results. The rifle looked way better than it did with the original high gloss finish (which never really appealed to me…it was too Hollywood for my tastes). The stock had a few nicks and scratches before; after the refinish, those completely disappeared. It became a thing of great beauty with a nice, subdued, European look. I grabbed a few shots, and then I played with them a bit in Photoshop to subdue the background and highlight the rifle. I like how the rifle and this photo in particular turned out…
The results of 0000 steel wool and a bit of work on my Model 700 Varmint rifle.
I mounted an inexpensive Tasco 6×24 scope on the Model 700. I wasn’t wild about the scope, as it didn’t seem to be able to focus the reticle and the target simultaneously (or maybe it was just my old eyes). A new Weaver or a Leupold might have been in order, but the results with this resurrected old warhorse were still outstanding. The rifle shot into an inch at 100 yards before I did any load development (which wasn’t too shabby) with what I regarded as junk .223 ammo.
More photos of the Model 700 after refinishing and with the new Tasco mounted.
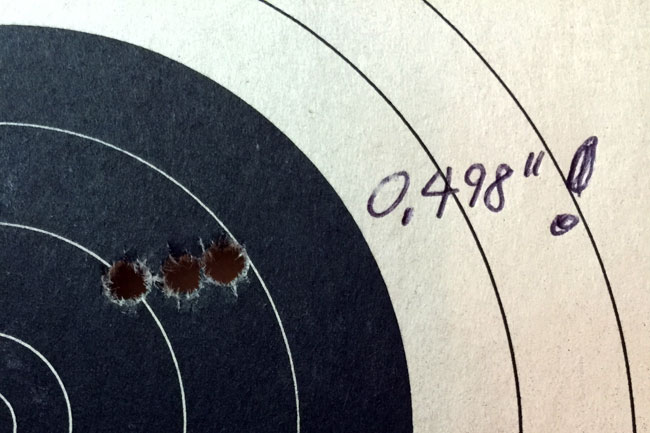
I went to work on developing a load to get the rifle to shoot into a half-inch, and I succeeded: I broke the half-minute-of-angle barrier with a 0.498-inch three-shot group almost immediately!
A half-minute of angle!
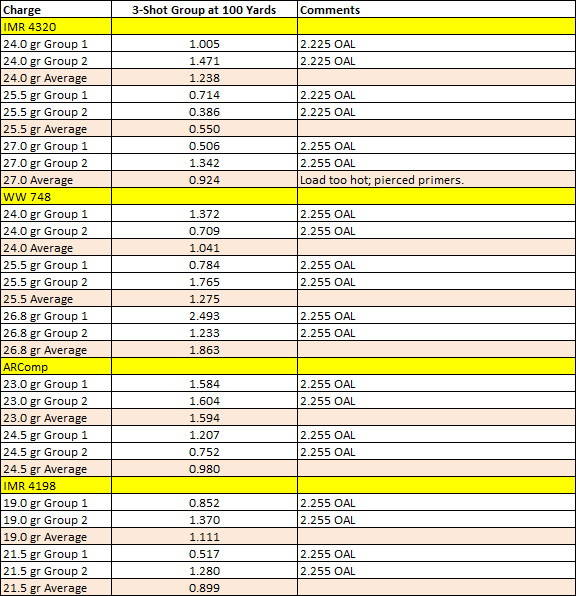
That was with IMR 4320 propellant, and it prompted me to try several different propellants and charge weights:
Load results for the Model 700 .223 Remington. All of the above loads used the Hornady VMax 55 grain bullet. You should always start at the low end of the charge range and work up; do not simply take my accuracy loads and try them in your rifle!
You might think that with the above results the rifle was a keeper. It was, but not for me. A couple of my shooting buddies wanted it, and I transferred it to a good friend for what I had into it.
I am getting thoroughly pumped up about riding the 2019 Three Flags Classic this year on the RX4. There’s just something about the Three Flags Classic that’s magic, and I haven’t been this excited about getting out on the road in quite a while. It’s going to be grand and it’s going to be a blast, and you’ll be able to follow my personal ride from Mexico through the western United States on up into Canada right here on the ExNotes blog. I’ll have tons of great photos and the writing will be as good as I can make it. You’ll be able to follow first hand my further impressions of the CSC RX4, too. This won’t be a silly superficial set of impressions like you’d read in a half-baked one-page magazine article, either. Nope, this will be thousands of miles of international riding across three countries on the newest motorcycle to hit these shores. I’m not worried. I’ve never been let down by a CSC motorcycle, and I feel comfortable that the RX4 is going to be another home run for CSC and Zongshen. Whatever happens, you’ll get the straight skinny right here on ExhaustNotes!
I think it’s going to be great. If you want to read more about the 2019 Three Flags Classic, take a look at the SCMA site here! If you’d like to read about our 2005 Three Flags Classic ride, you can do so here.
Make sure you never miss an ExNotes blog with fresh Gresh and yours truly, and get a free decal! Hey, sign up right here:
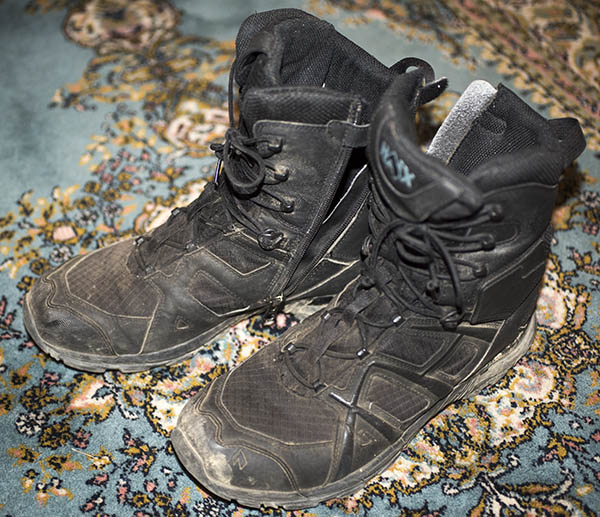
My second pair of Haix boots. They’re comfortable as slippers, they last forever, and they are perfect for adventure riding. These will last me until 2027, I think.
You read Joe Gresh’s Tested to Destruction piece on Rossi Boots. When I read it, I immediately thought of my Haix boots. My first pair lasted more than 10 years. After they finally wore out I tried a less expensive brand, but then I went back to Haix. I had worn the best; no substitute would ever be as good. Haix is pronounced “hikes” and they are, simply put, the best footwear I’ve ever owned.
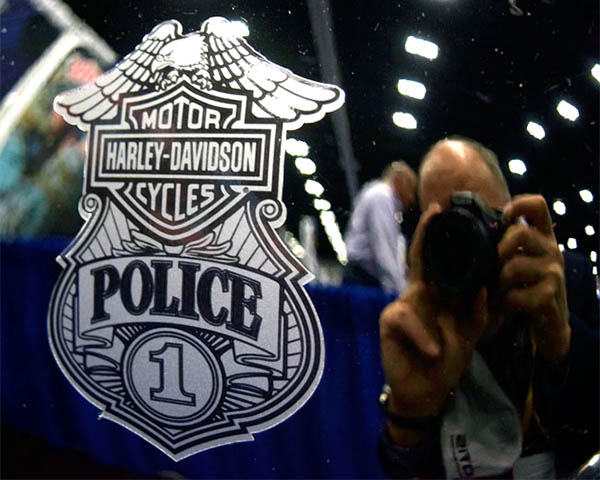
I happened upon my first pair of Haix almost accidentally. The story goes like this: My good buddy Mike, whom I’ve known since the 7th grade, is a retired police chief. He worked his way up through the ranks of a major metropolitan city on the east coast, became Director of that department (it’s the top spot), and retired. Mike goes to the International Association of Police Chiefs conventions every year, in 2004 that convention was here in Los Angeles, and Mike invited me to go with him. It was a cool experience and we had a blast.
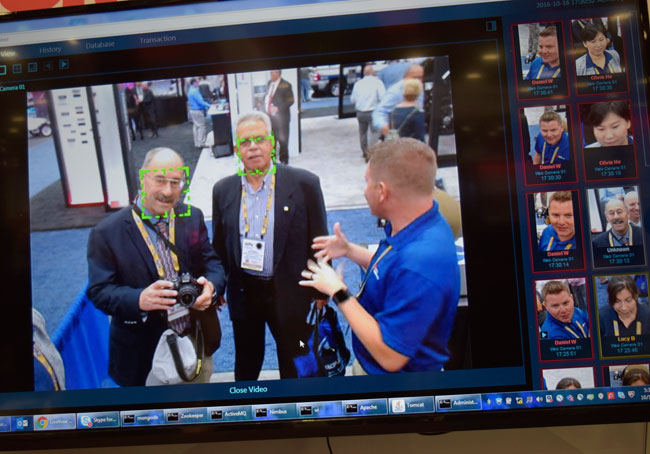
I had a to have a police connection to get in to the event, so Mike deputized me as the Administrative Assistant to the Chief of Police. My new position included a cool official-looking police ID card and I asked if I could get a gun out of the deal. Mike’s answer was a curt “No,” but hey, I tried. We had a hell of a time at that convention. There was all kinds of interesting gear on display. Guns. Helicopters. Police motorcycles. Patrol cars. Surveillance equipment. You get the idea. Oh, yeah. And boots. I’ll get to that in a second.
Facial recognition software. You know, Big Brother. That’s me and Mike being dropped into the data base.
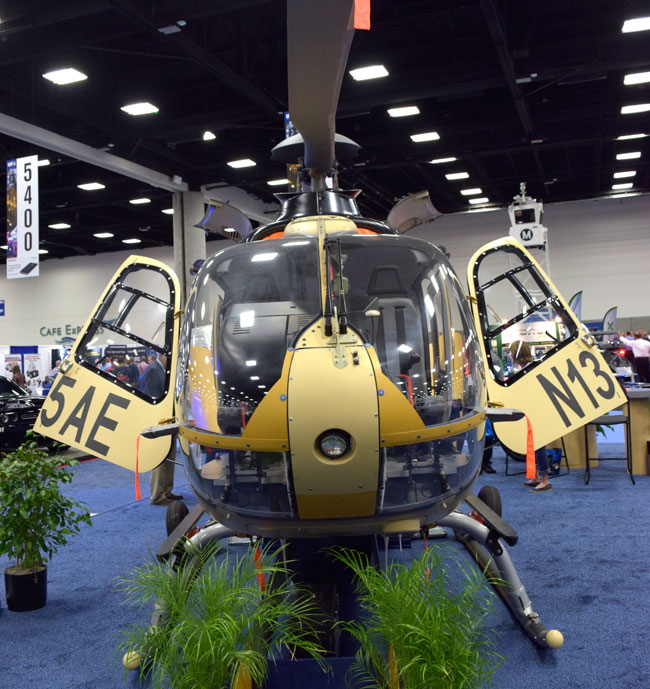
There were cool guys there, too. Mike introduced me to Willie Bratton, senior FBI executives, and the head of the CHP (I asked that guy if he could help me with a speeding ticket and no one laughed…I thought it was funny as hell). We saw all kinds of cool gear, including a police helicopter that you could climb into. I did that and immediately starting pushing buttons from the pilot’s seat. One sent power to the turbine starter, the turbine started to whir, and the blades actually started to move. Mind you, all of this was indoors at the Staples Convention Center. Wow, talk about people descending on us quickly! When we walked by that helicopter later, it was roped off. You couldn’t sit in it any more, thanks to me.
Oh, yeah. The starter worked. We’re still laughing about that one!
But I digress. The point of this story was that one of the vendors displaying their goods was the Haix boot company, whom I had never heard of before. The boots looked good, I tried a pair on, and they felt great. Think slippers for comfort level, great support, and a cool combat boot look. They were $200, but I was in. The guy told me to take the pair I had tried on, and they would invoice me later.
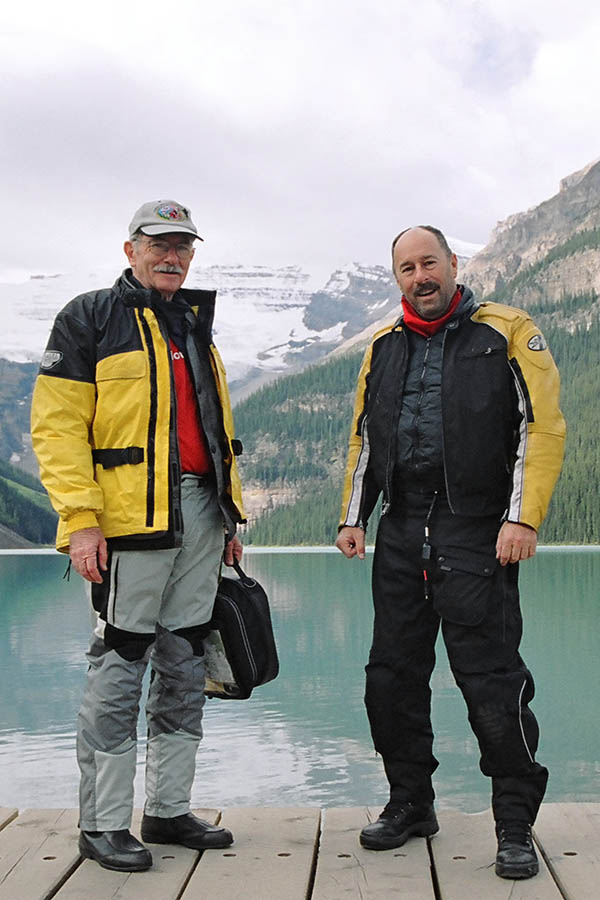
I wore those boots everywhere for the next 10 years, and I always wore them on my motorcycle rides. That included the 2005 Three Flags Rally, tons of weekend rides, tons of Baja rides, the Hells Loop Rally, and lots more. They were waterproof, unlike motorcycle-specific boots they were comfortable to walk around in, they were lightweight, and they just felt great. After more than 10 years of abuse, though, the soles started to separate during the Western America Adventure Ride in 2015. I remember Gresh picking up some Shoe Goo for me in Cheyenne, Wyoming, which got me another year of use. But finally, I had to give in. It was time for a new pair.
Yours truly on the right, wearing my first pair of Haix boots, in 2005. Marty and I were standing in front of Lake Louise in Canada. We rode in the 2005 Three Flags Classic Rally from Mexico to Canada.
I cheaped out and bought a pair of S.W.A.T.-brand boots on the Internet prior to leaving for the Colombia ride. They were stiff, they were uncomfortable, and after 5 days of riding through the Andes Mountains’ heat, humidity, and rain, they were toast. My take on it is that the S.W.A.T. brand is probably good for kicking butts and taking names, but they didn’t make it for me as a comfortable motorcycle boot. Nope, I needed me another pair of Haix.
Then good buddy Mike came to the rescue. There was another IACP convention (in San Diego, this time), I was Deputy Dawg again, and I shelled out $200 for my second pair of Haix. Which I’m wearing now, knowing they’re worth every penny of that $200. In 2027, I’ll be due for my third pair, and you can bet I’ll be going for HAIX again. I’m just hoping that the 2027 IACP convention will be here in southern California.
First up today…our good buddy Gary’s Vintage Yamaha Enduro site. Gary alerted me to it a few days ago, I’ve enjoyed poking around on it, and you will, too.
This is a cool site about cool bikes. Spend some time here; you’ll be a better person for doing so!
I’ve always admired those vintage Yamaha enduros. Gresh has one and it’s one his favorite motorcycles. I remember the maroon 360 Yamaha offered back in the early 1970s (I was still in college then). I always wanted one, but it’s an itch I haven’t scratched yet. Maybe someday. I’m still young.
Good buddy Buffalo, a world-class artist who rode with us on one of the Baja rides, created a line art RX3 motorcycle and it’s available in several formats. Buffalo loves riding and he loves his RX3. Hey, what’s not to like?
This is muey cool, and it’s from a muey cool dude.
Buffalo is a very cool guy who’s done some very cool things. We’ve written about Buffalo before here on the ExNotes blog. Buffalo also has a very cool blog (MotoFritz.com), and it’s another I recommend you visit. Buffalo (along with his cousin and niece) recently toured Vietnam on motorcycles, and there are cool videos on the MotoFritz blog from that trip.
I’m going hunting. Deer this time, in Idaho. Good buddy J invited me to head up north with him later this year to chase Bambi, and I’ll be posting about that here on the ExNotes blog.
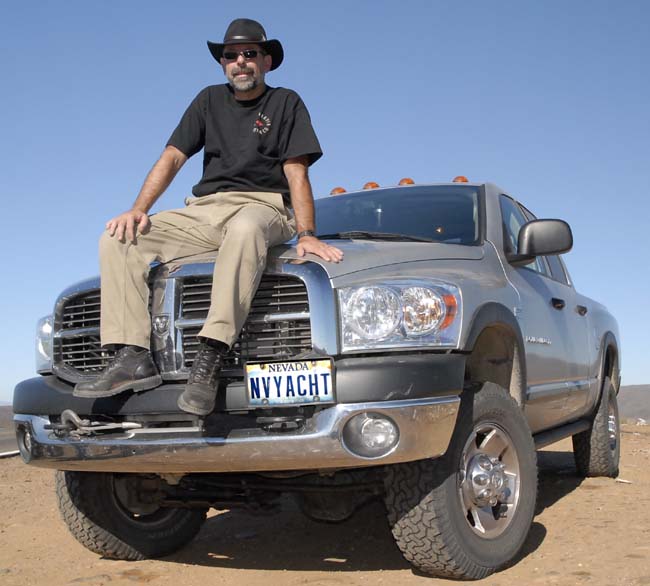
Good buddy J and the Power Wagon on an earlier Baja expedition.
I mentioned J recently when I described his new website (Sierra Mountain Passes), but J and I go back a few years. We first met when we were involved in manufacturing high performance sails for ocean racing yachts. Think a million bucks for a set of sails for one boat (and the sails are only good for one season). Good times, those were.
Whoa! Talk about adventure!
But back on the deer quest…I’m starting to research venison recipes (yeah, I know, it’s a little early for that and I am counting my chickens before the eggs have hatched). I’m really looking forward to this adventure. We may get a deer, or we may get skunked. Either way, it’s going to be fun. I’m thinking I’ll take my .300 Weatherby Vanguard. It’s way more power than I’ll need, but we’ll be in some rugged country, the Vanguard is my only composite-stocked rifle, and the thing is a tack driver.
The Weatherby Vanguard in 300 Weatherby Magnum.
More cool stuff…you’ve seen the series we did on the 2005 Three Flags Classic Rally from Mexico to Canada. I rode with good buddy Marty, and it was a hell of an adventure.
Good buddy Marty on the left and yours truly at Lake Louise in Canada during 3FC05. There were signs warning us of grizzlies in the area!
The 3FC is one of the world’s premier motorcycle events, and it’s sponsored by one of the world’s premier motorcycle clubs: The Southern California Motorcycle Association. As it turns out, the SCMA is one of our biggest ExNotes fans. They’ve run our ExNotes stories in the SCMA newsletter and they follow our zany ramblings daily. Good buddy Gonzo, their president, suggested that I join the festivities again this year for the 3FC19 rally, and you know what? I’m going. I’ll be on a new CSC RX4 (one from the very first shipment), and I’ll be blogging the hell out of the ride the entire way from Mexico through the United States and on up into Canada. And then I’ll do the same thing on the way home, for which I’ll take a different (to be determined) route.
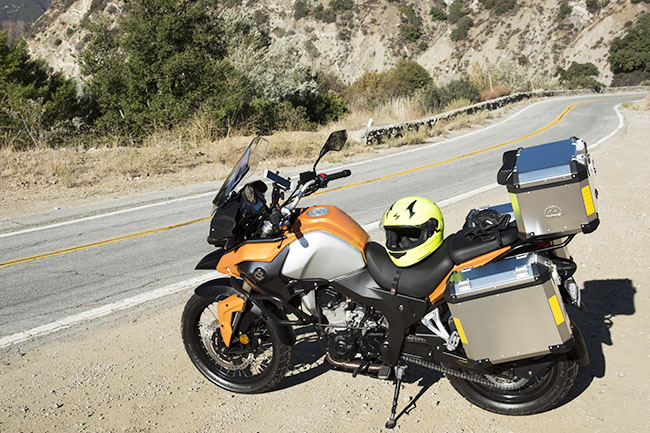
The CSC RX4 up in the San Gabriel Mountains.
The CSC RX4 is an exciting motorcycle. There was a recent article on this bike in Adventure Motorcycle magazine, but I thought that review was a bit on the short side. (How about that? A review of a review!) You can read a lot more about the RX4 right here on ExNotes, and you’ll see a whole lot more when I do the 3FC19 on one of the new CSC 450cc RX4 adventure bikes.
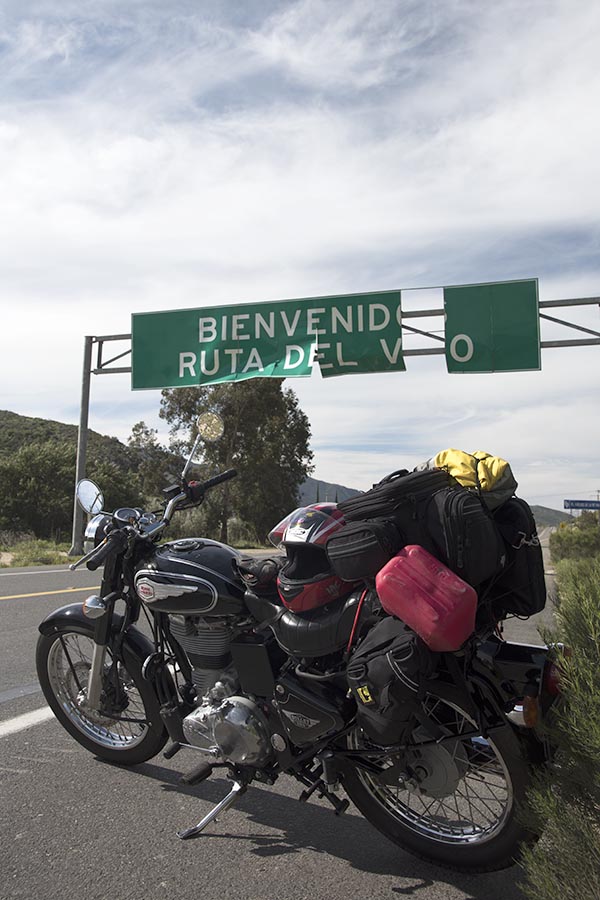
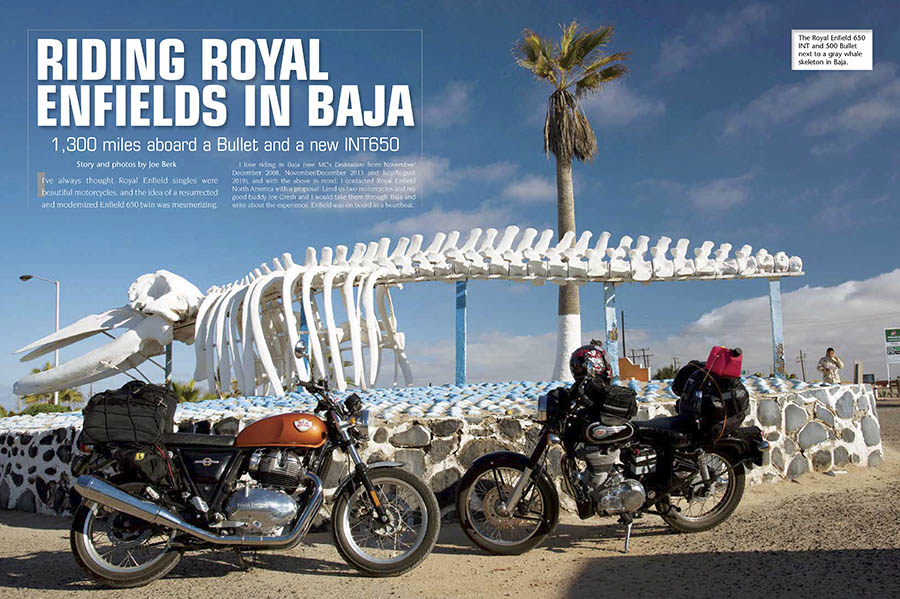
The Bullet in Baja. The new 650 Interceptor was a strong and reliable motorcycle. The Bullet, not so much, but it wasn’t the bike’s fault. Read the article, and learn more…
Some say the adventure doesn’t start until something goes wrong; by that measure, the Bullet was every inch an adventure bike…
Ah, quoted again. That’s my line, and you can read it online in the latest issue of Motorcycle Classics magazine.
Good times and great bikes in Baja, and the story is in the current issue of Motorcycle Classics magazine.
Our story of the Baja Enfield adventure is now available online, and you can read it here. Joe Gresh and I rode the new 650 Interceptor and an older Bullet, and we had a blast. Great food, great riding, beautiful people, and we said hi to the whales. It was awesome!
Yes, it really was like that. Somewhere along the Silk Road (the actual Silk Road) in China. I parked my RX3 when I saw the double rainbow, thinking someday I might use the shot in a blog about this adventure.
Almost 40 years ago, I saw my first Indiana Jones movie and it affected me profoundly. I started traveling the world stumbling upon lost empires. Things that have been swallowed by time, as they say. My motorcycle ride through Colombia had some of that. The Baja adventures have a bit of it, too. But none of the rides had more of an Indiana Jones flavor than did the ride across China. That ride was three years ago this month, and I still think about it every day. There were several things we saw in China that would have been right at home in an Indiana Jones movie. One was Liqian. I can best tell you about it with an excerpt from Riding China, the story of the ride with Joe Gresh across the Ancient Kingdom.
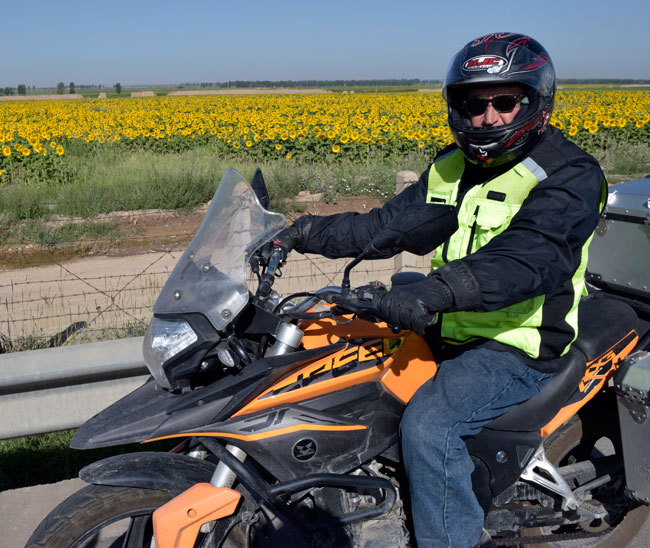
Gobi Gresh, aka Arjiu, stopping to smell the sunflowers in China.
The ride in the morning was just like yesterday. We rode the Silk Road at high speed, making great time in magnificent weather. I knew we were going to Wuwei (you could have a lot of fun with that name; it’s pronounced “woo wee”), but that was really all I knew about that day as we started out that morning. Boy, would this day ever be an interesting one!
It was to be a very full day, and Wuwei would be another one of those cities of several million people that seem to pop up in China every 50 to 100 miles. It was a huge city I had never heard of. China is an amazing place, and I was going to learn today it is more amazing than I could have imagined, and for a reason I would have never guessed. I’ve mentioned Indiana Jones movies a lot in this book. Today, we came upon something that could easily be…well, read on. This is going to be good.
After riding for a couple of hours, we left the freeway and entered a city called Yongchang. It seemed to be pretty much a regular Chinese city until we stopped. I needed to find a bathroom and Wong helped me. Wong is a big, imposing guy. He’s a corrections officer supervisor in Xi’an. He has a friendly look, but he can turn that off in a New York minute and become an extremely imposing figure. I saw him do that once on this trip, and I’ll tell you about that episode when we get to it.
Corrections Officer Supervisor Wong. He looks like a mischievous guy. This guy’s command presence was amazing. I saw him stop a car just by looking at it. Here, he’s enjoying the attention in Yongchang.
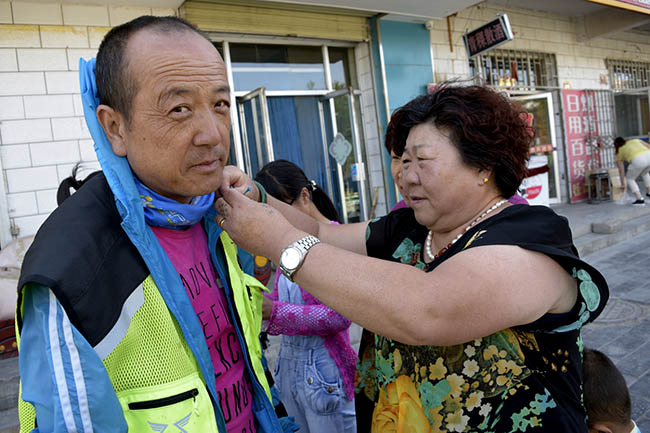
Anyway, I followed Wong through a couple of alleys and businesses until we came to an empty restaurant (it was mid-morning, and it had no customers). Wong spoke to the lady there, she nodded her head and smiled at me, and pointed to the bathroom. When I rejoined the guys back on the street, several women at a tailor shop (we had coincidentally stopped in front of a tailor shop) were fussing over Wong. He needed a button sewn on his jacket and it was obvious they were flirting with him. Wong seemed to be enjoying it. Like I said, Wong is a big guy, and I guess you could say he’s good looking. I think the women who were sewing his button on were thinking the same thing.
Beautiful young Chinese ladies. Mostly Chinese, anyway. The one on the left is entering my phone number in her contacts list.
Three teenage girls approached us and wanted to know about our bikes. Like many young Chinese, they spoke English (in China, you learn English as a second language in grade school; it is a strong advantage in Chinese society if you can speak English well). They wanted to practice with us. It was the routine stuff (“how are you?” “hello,” and things like that) until one of the teenaged girls looked directly at me and asked, “Can I have your phone number?” Gresh and I both had a good laugh over that. I actually gave her my phone number and she carefully entered it into her phone (and no, she hasn’t called me yet).
I was enjoying all of this immensely, taking photos of the girls, the seamstresses flirting with Wong, and the rest of China all around me. There was something different about one of those teenage girls. I couldn’t quite recognize what it was, but to me she definitely looked, well, different.
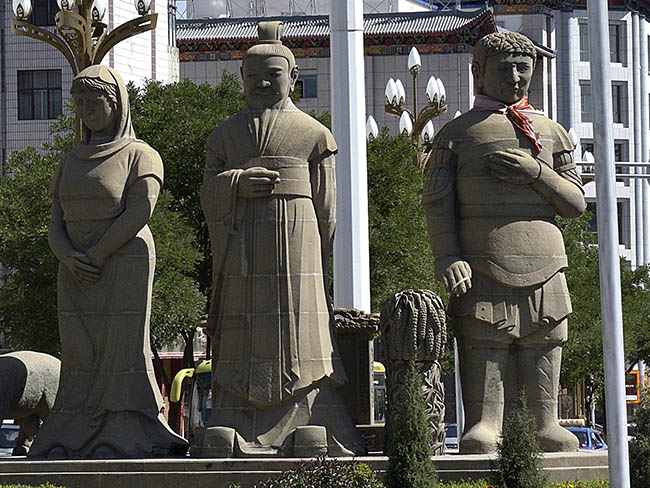
Yongchang statues. They don’t look as Chinese as you might think they should. There’s a reason for that.
It was at about that time that Sean approached me and said, “Dajiu, do you see those three statues over there?” He pointed to three tall statues that faced us, perhaps 300 yards away. I nodded yes. “If you look at their faces, you will see that they have Roman features.” Truth be told, I couldn’t really see it in the statues because they were too far away, but I grabbed a photo and later, on my computer, I could see something different. But before I looked at the photo, it all clicked for me. That’s what had my attention with that girl. We were literally in the middle of China and she didn’t look as Chinese as her two friends. She looked different.
All right, my friends, I need to go tangential here for a minute or two and share this story with you. Hang on, because this is real Indiana Jones stuff. No, scratch that. I’ve never seen an Indiana Jones movie with a story line this good (and I’ve seen all of them).
More than 2,000 years ago, before the birth of Christ, the two most powerful empires on the planet were the Roman Empire and the Han Dynasty. These two superpowers of their time enjoyed a brisk trade relationship along the Silk Road. Yep, the very same trail we had been riding for the last few days. Between them (in what became Iran and its surrounding regions) lay a smaller empire called Parthia. For reasons only the Romans understood, Rome thought it would be a good idea to attack Parthia. They sent several Roman Legions to war (and to put this in perspective, a Roman Legion consisted of about 5,000 men). To everyone’s surprise (including, I would imagine, the Romans), the Parthians kicked Rome’s butt.
Wow, imagine that. Rome, defeated on the field of battle by the much smaller Parthian Empire. To put it mildly, things did not quite go the way the Romans thought they would.
Help us bring more content to you: Please click on the popup ads!
All of this severely disrupted trade between the Han Dynasty and the Romans, and nobody liked that. “Why the hell did you do that?” the Han Dynasty asked Rome. “We had a good thing going and you screwed it up.” At least that’s what I’m guessing the conversation went like. You get the idea.
Cooler minds prevailed and the Romans realized, yeah, that was a dumb move. The Romans told the Parthians, hey, it’s over, let’s be friends again. The war ended, the Chinese were happy, the Romans were happy, the Parthians were happy, and trade resumed. All’s well that ends well.
Well, sort of. There was still that matter of those pesky Roman legions that had invaded Parthia. They didn’t come back from that war, and for two thousand years, no one knew what happened to them. The Romans probably assumed their Legionnaires had all been slaughtered. No one knew until an Australian dude and a Chinese guy, both University archeologist types (starting to sound a little like Indiana Jones yet?) put a theory together in 1957. Hmmm, maybe those Romans had not been killed after all.
The Parthians, being bright enough to defeat the Romans, were not about to let the Legionnaires go home and perhaps attack them again in some future war. They didn’t want to kill the Romans, either. I guess they were kinder, gentler Parthians. Here’s where those two Aussie and Chinese archeologists enter the picture. They hypothesized that the Parthians told the errant Legionnaires, “Look, we don’t want to kill all you guys, but there’s no way we’re going to let you go back to Rome. And there’s no room for you here, either. Your only option is to keep heading east. Go to China. Maybe you crazy warmongering Italians will find nice Chinese girls and settle down.” With that, and as one might imagine, a hearty arrivederci, the Romans continued their eastward march straight into the middle of China.
And folks, the prevailing wisdom today is that is exactly what happened (although the prevailing wisdom evidently hasn’t prevailed very far, as I had never heard the story until that morning in Yongchang). In fact, prior to this theory surfacing, folks wondered why the Chinese referred to the area around Yongchang as Liqian. That’s not a Chinese word, and it’s unlike the name of any other Chinese town. The folks who know about these things tell me it is an unusual word in the Chinese language.
Liqian is pronounced “Lee Chee On.”
Get it yet?
Lee Chee On? Liqian?
Doesn’t it sound like “legion?” As in Roman legion?
A Chinese man in Liqian. This guy could be the Marlboro Man for a Chinese cigarette company!
I found all of this fascinating. I saw more than a few people around the Liqian area that had a distinct western appearance, and they all consented to my taking their photos when I asked. They recognize just how special their story is. The Chinese government is taking note of this area, too. They are developing a large theme park just outside of Yongchang with a Roman motif. We visited that theme park, and while we were there, Sergeant Zuo gave a book to me (printed in both English and Chinese) about the place. It is one of the two books I brought back from China, and that book is now one of my most prized possessions.
Imagine that: Roman legions, resettled in the middle of China, in a town called Liqian. And I rode there. On an RX3.
Watch for our next Indiana Jones episode in China. It’s about the lost Buddhist grottos at Mo Gao in the Gobi Desert. There’s more good stuff coming your way. Stay tuned!
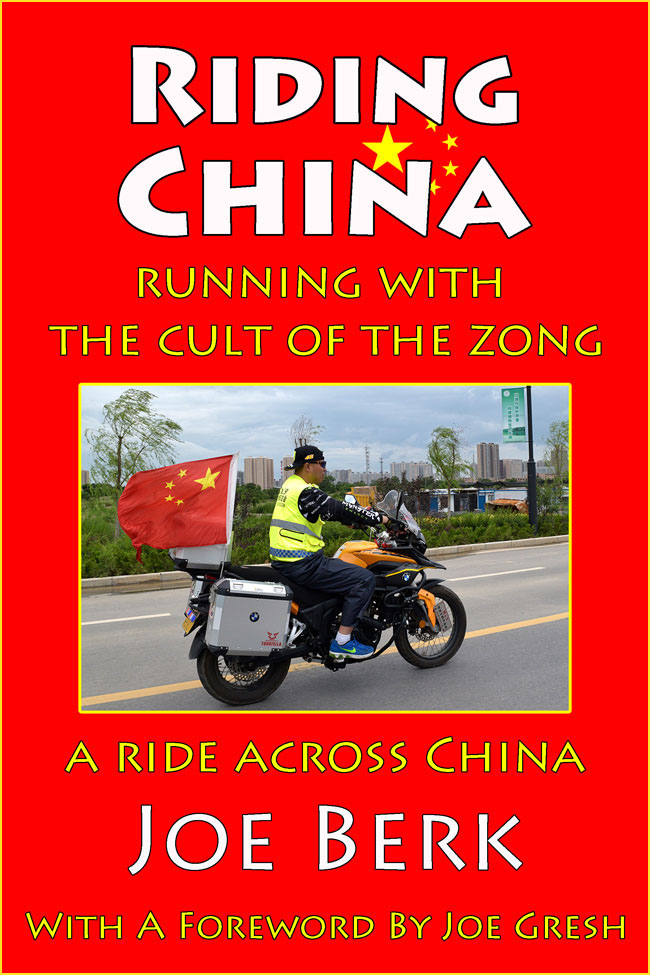
Want to read more about the ride across China? Pick up a copy of Riding China!
A few weeks ago, blogmeister Joe Gresh vented on Bonnier and Motorcyclist magazine. It was a great piece of writing (not a surprise, seeing as it was coming from Gresh) and it garnered more than a few comments.
I thought that Motorcyclist had already gone belly up. I used to subscribe, and I thought my subscription had already ended, so I was more than a little surprised when I received the final issue in the mail last week. We checked our records and whaddaya know, we had renewed for a year, so now I’m annoyed that I’m apparently going to get stiffed for the last two issues (Motorcyclist didn’t say anything about reimbursing folks like me who are owed another issue or two). I guess the reason I was surprised was that with Motorcyclist’s recently-adopted quarterly print schedule, it had been so long since I received the last issue I assumed the subscription had already expired. Truth be told, the last few issues of Motorcyclist were terrible, I hadn’t read most of their articles after glancing at them initially, and I’m not missing Motorcyclist at all. It had become a collection of snowflake fluff.
Anyway, I looked through the last issue (the one I received last week) to see if they were making this a special issue (you know, because it was the last). Nope, not really. There was a brief article (less than a page) near the beginning that explained this was the last issue and it stated what I believe to be not more than a couple of half-assed excuses: The motorcycle industry has been in a permanent funk since the recession and nobody with any brains advertises in print media. It’s a digital world, Motorcyclist said, and motorcycling (as an interest, an endeavor, and an industry) is on life support (my words, but that’s essentially the Motorcyclist message). My take? These guys are good at making excuses. They’re right up there with that world-class, place-the-blame-anywhere-but-on-me hack who wrote What Happened. Blame it on the Russians, I guess.
The rest of the articles in the final Motorcyclist made no mention that this was the last issue, so my take on the whole affair is that it was a decision made suddenly. It’s a pity, as Motorcyclist used to be good. Really good. They had superb writing (including a regular column by a guy named Joe Gresh). But they failed to adapt. The market was changing and the coffee-table format and fluffy content Motorcyclist switched to a few years ago missed the mark by a mile. To their credit, they realized they had a problem, but their diagnosis and prescribed course of treatment was wrong. It’s that old joke: What do you call the student who graduates at the bottom of their medical school class? The answer, of course, is Doctor. Just having the title, though, doesn’t mean you know the right answers.
In the final analysis, I don’t buy what Motorcyclist said for the most obvious of reasons: There are good motorcycle magazines out there that are thriving. They’ve done a far better job of picking the right content, format, and market niche, and they are serving it well. One is Motorcycle Classics, with a focus on classic motorcycles. Another is RoadRUNNER, with a focus on touring. Rider may be in that category, too (I haven’t looked at them lately). And there’s Buzz Kanter’s American Iron magazine, with a focus on custom and vintage mostly-made-in-America motorcycles. I believe there are several things that inoculate these publications to the double whammies of a depressed motorcycle market and the brave new digital world. The first is that each is led by passionate riders. Think Landon Hall at Motorcycle Classics, the Neuhausers at RoadRUNNER, and Buzz Kanter at AIM. These are folks who ride, who tour, who love motorcycles, and who live in our world (and that comes across in their magazines). The second huge factor is that each of these magazines found a niche that doesn’t need to scoop the competition. If you’re in the printed magazine business and you need to be the first to publish breaking news, you’ll never beat the Internet. Nope, each of these magazines went a different route. Vintage bikes aren’t bold new graphics or the latest race results (let the Internet break that kind of baloney). Touring is not breaking news and that’s why RoadRUNNER does well. And custom, or vintage, Harleys and Indians…well, that’s the same deal: American Iron has what is essentially a timeless topic. And then there’s one last factor, I think, and it is that each of these magazines has superior editorial direction. The articles are profoundly interesting, well-written, error-free, and skillfully presented. Landon, Florian, and Steve are gifted editors who take their life’s work seriously, and if you didn’t know, they are the editors of Motorcycle Classics, RoadRUNNER, and American Iron.
Nope, the demise of Motorcyclist is unfortunate, but it’s of their own doing. Cream always rises to the top, flawed strategies ultimately fail, and the Russians had nothing to do with it.
I belong to a small circle of good buddies who, like me, are into shooting military surplus rifles and other cool old guns. We get together every two months or so for an informal match at the West End Gun Club. It’s a fun match, nothing terribly formal, and the winner has to buy lunch for everyone (and it’s usually me or Greg shelling out the cash for the fine Mexican lunches that follow our get-togethers). Those events are a lot of fun and you can read about them (and the milsurp rifles) on our ExhaustNotes Tales of the Gun page.
Lots of times, though, it’s just me and good buddy Greg out there on the rifle range, and this past Friday morning was one of those days. When that happens, we’ll usually send an email around to the other guys in our milsurp squad talking about what we shot, the loads we used, and how we did. We did that last week, and I thought I’d share the emails with you. First, my email to the boys…
Guys:
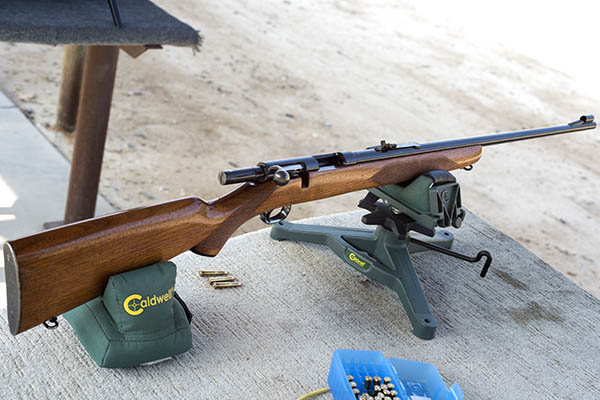
Every once in a while I get this feeling I need to sell a few guns, and that happened again earlier this week. I thought one of the ones I would sell was a pristine Model 43 Winchester Deluxe in .22 Hornet. This rifle is in as new condition with the original bluing. It was manufactured in 1949, 2 years before I was born. I took it out of the safe with the idea of taking a few photos for Gunbroker.com, and then I realized: What was I thinking? I don’t want to sell this rifle. Nope, a far better idea would be to load some .22 Hornet ammo and take it to the range.
The Model 43 Winchester, in .22 Hornet. This is the Deluxe version, with cut checkering and a deep blue finish. It’s hard to believe this rifle is 70 years old!An elegant rifle, to be sure.
I bought the Model 43 about 6 years ago and until this morning I had never fired it. It found it on the consignment rack at Turner’s in Covina. After seeing the rifle there, I stopped by every other week for a couple of months, and then on one visit I saw they had dropped the price. I thought it was fairly priced at the original number they had on the rifle, but I was initially hesitant. It’s a beautiful rifle, but it didn’t really fit in with the other stuff in my modest collection and I didn’t want to shell out big bucks for another toy that would just sit in the safe. When they dropped the price, though, I pounced. The gun department manager there was mildly annoyed because he wanted to buy it and it a weird sort of way that made me feel good. Hey, you snooze, you lose.
I knew I had waited too long to finally get around to shooting the old Winchester, but the Hornet’s day in the sun was today. The Model 43 and I found our way to the WEGC range this morning, and as you might imagine, it was a good day. Hell, any day on the rifle range is a good day.
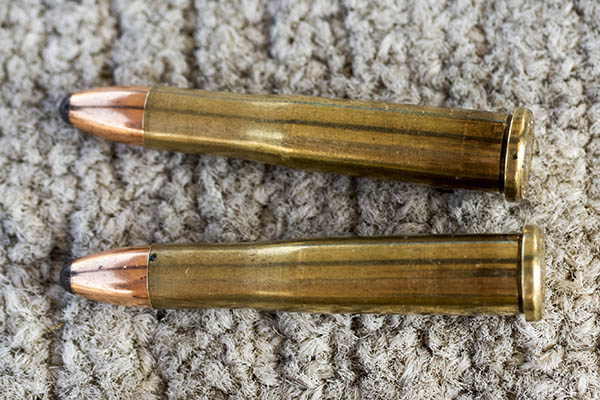
22 Hornet ammo. It’s the original 22 centerfire cartridge, and in its day, it was the ultimate varmint round. Plus, it’s just cool.
About that .22 Hornet ammo: Good buddy Michael B sent some Hornet brass to me a few months ago. I loaded the brass Michael sent to me yesterday with a mild 4227 load (the powder came from Paul) and a box of 45 grain Sierra bullets that have been on my reloading bench since God was a roadguard. (Thanks, Michael…I put your brass to good use!) Good buddy Greg was there with me. He can verify that everything you read here is true, unless he takes the 5th.
[Note for our blog readers…you’ve heard me talk about good buddy Paul, who was my next door neighbor when we were kids. So was Michael. He’s Paul’s little brother.]
Here are a few more shots of the Model 43…it is a beautiful little rifle. Clean, rare, collectible, and in fantastic condition. I mean, do any of you think you are going to look this good when you are 70 years old?
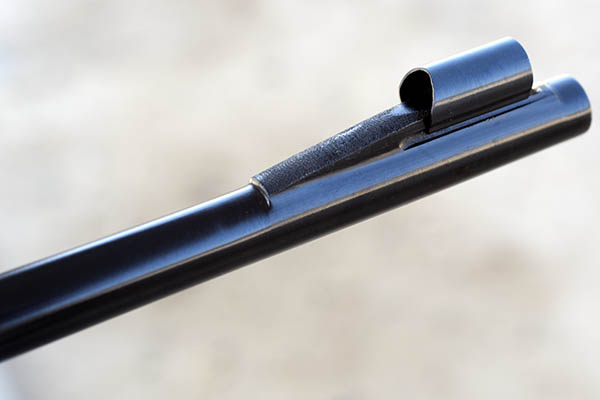
The Model 43’s front sight. It and the barrel are machined from one piece of steel.
In examining the front sight and its ramp, I was surprised to see that it was a not a separate piece attached to the barrel. Nope, these barrels started as a giant hunk of steel, and were hogged down to shape. The front sight ramp is an integral part of the barrel. That had to be expensive to manufacture. Note the stippling on the ramp. Things were different in 1949.
I’m pretty sure that the bluing is original…the lettering and roll marks are all very crisp.
Note the checkering, a feature of the Deluxe version of the Model 43.The rear sight and the fore end. This thing looks like could be brand new.
The stock may have been refinished, or at least had a coat or two or TruOil added to spruce it up somewhere along its life’s journey. The checkering is sharp, though. It might be the original stock finish. Overall, the rifle is in excellent condition.
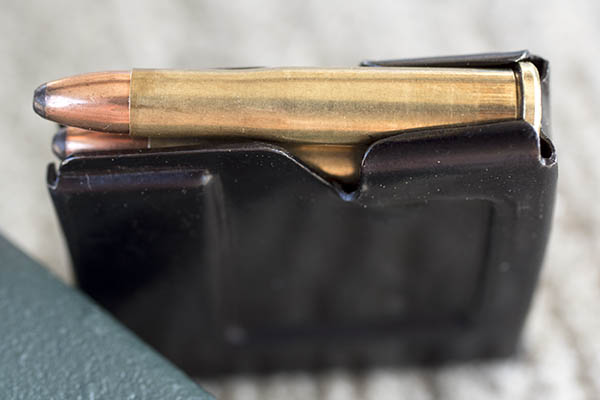
And finally, a photo of Michael’s brass reloaded by yours truly in the original Model 43 magazine…I can’t imagine what a replacement magazine (if you could even find one) would cost for this rifle…
Good-looking ammo in a good-looking (and original) magazine. It’s a magazine, not a clip.
The Model 43 shot well this morning. It had already been zeroed in by the previous owner and it shot roughly 1-inch above point of aim at 50 yards, which is about perfect for a rifle like this. Recoil was very moderate, as you might imagine with a 45-grain bullet at 2400 fps. The groups were about 1.5 to 2.0 inches, which is, as they say, close enough for government work. Not too shabby for a 70-year-old Winchester.
Joe
So that was my email, and it was quickly followed by a response from Greg. Here’s what old Greg had to say…
Every word Joe says is true, I swear. That gun looked like someone just took it out of the box. And that machined ramp at the front sight was very unexpected. Anyone familiar with manufacturing techniques will immediately recognize the difficulty of machining that final few inches of the barrel. Eh, times gone by. You won’t find that on any guns today I think.
Greg firing his 7mm Mag Ruger No. 1 on an earlier outing.
My story-of-the-day is the 7mm Remington Magnum Ruger No. 1 I took out. I had the normal power loads that did about as they usually do at 100 yards, roughly an inch and a half. But the surprise was a very low power load I jinned up with Trail boss. I had a 140 grain Sierra Game King sitting on top of 20 grains of Trail Boss (I know, it sounds weird). The Hodgdon site has a data sheet (attached) that has loads all the way up to a .416 Remington Magnum. But for the 140 grain bullet in a 7mm RemMag they list a load starting at 17.2 grains and going up to a max load of 24.5 grains, so my 20 grains was somewhere near the middle.
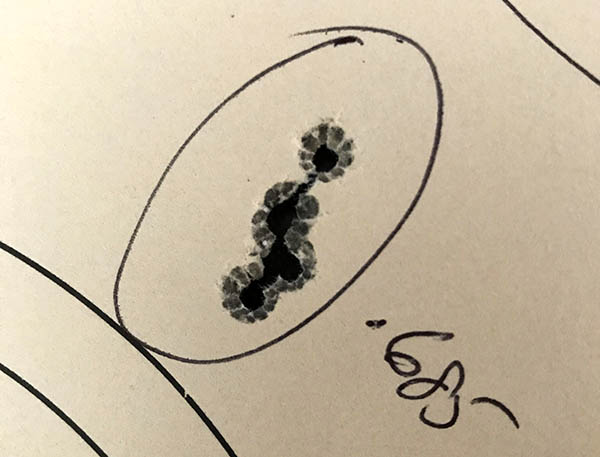
Anyway, I had just put away the Mini-14 and thought I’d start the Ruger No. 1 off with the low recoil Trail Boss loads. I was stunned to see the five shot group pictured below (at .685”). It was easily the best group of the day for the rifle, though it ended up on paper about 12” below, and 1” to the left, of the “normal” loads for that beast. Recoil was extremely mild as you would expect.
A reduced-velocity 7mm Mag load loaded with Trail Boss propellant. This is a 5-shot group at 100 yards. It’s a phenomenally accurate load in Greg’s Ruger No. 1.
My problem with this Trail Boss load is that the scope, as mounted, doesn’t have the adjustment range to accommodate the 12” drop at 100 yards, so I may end up shimming its mount to enable the use of Trail Boss. Time will tell…
Greg
And there you have it. More good times, good guns, good shooting, and good loads. Stay tuned…because we’ll keep the Tales of the Gun stories coming!
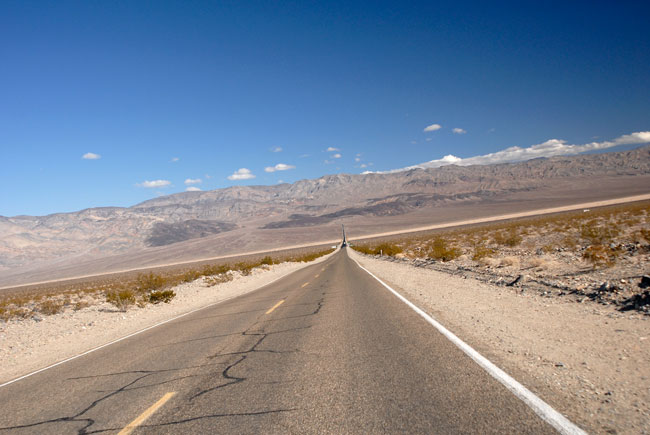
Back to back earthquakes in the last two days…that’s what’s been happening here in So Cal. A 6.4 and a 7.1, to be precise, and they occurred in an area I know will. Both were centered near Ridgecrest, which most folks have never heard of, but the adjoining Navy base is China Lake Naval Weapons Station, which most folks have heard of. And that area is near Death Valley, which every knows about. It’s about 150 miles from where we live.
On the road near Ridgecrest and Death Valley, California. There’s not too much out there.
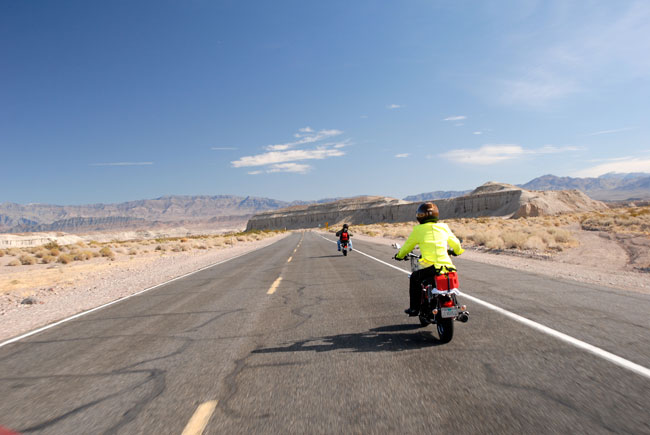
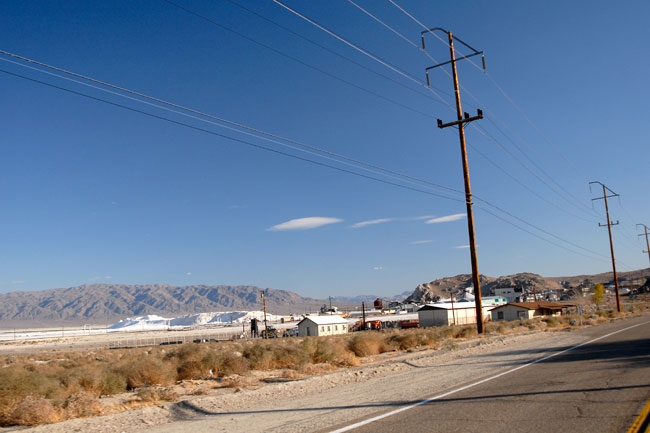
About 8 years ago good buddies TK and Arlene, and I, rode in a one day scooter endurance rally, in which we racked up 400 miles on the California Scooter CSC-150s. One of the towns we passed through was Trona, the epicenter of yesterday’s 7.1 quake.
TK and Arlene out in front on the CSC-150 Mustang replicas.My old Baja Blaster CSC-150. It was a good-looking little scoot. I rode it to Cabo and back.Trona, the epicenter of yesterday’s shaker. It’s a mining town…a small, desolate spot out in the Mojave Desert.
Trona is a town in the middle of a stark landscape just outside the western edge of Death Valley. It’s a place I’ve thought of visiting again just to grab a few photos. There’s not much out there, and the desolation and jagged edges would make for interesting pictures, I think. But this is not the time to go.
I was reloading .22 Hornet ammo for an upcoming blog on a cool and very vintage Winchester Model 43 when the first quake hit two days ago. I felt dizzy and nauseated for an instant, and than I realized the world really was swaying around me. That quake, the 6.1 centered near Ridgecrest, went on for perhaps 15 seconds. I could see things moving around and that’s a weird feeling. It’s like being out in the ocean on a small boat. Dry land is not supposed to behave like this. Usually earthquakes don’t last that long, and many times, our So Cal shakers are sharp cracks (almost like a detonation) that last for but an instant. But not these recent shakers. The second one hit yesterday evening while we were watching television, and it went on for even longer. It was 7.1, which is pretty significant in the earthquake business. Again, there was no sharp crack, and again, the rocking and rolling lasted for perhaps 20 seconds.
We came through both quakes just fine, so mark us safe here in So Cal.


 I am getting thoroughly pumped up about riding the 2019 Three Flags Classic this year on the RX4. There’s just something about the Three Flags Classic that’s magic, and I haven’t been this excited about getting out on the road in quite a while. It’s going to be grand and it’s going to be a blast, and you’ll be able to follow my personal ride from Mexico through the western United States on up into Canada right here on the ExNotes blog. I’ll have tons of great photos and the writing will be as good as I can make it. You’ll be able to follow first hand my further impressions of the
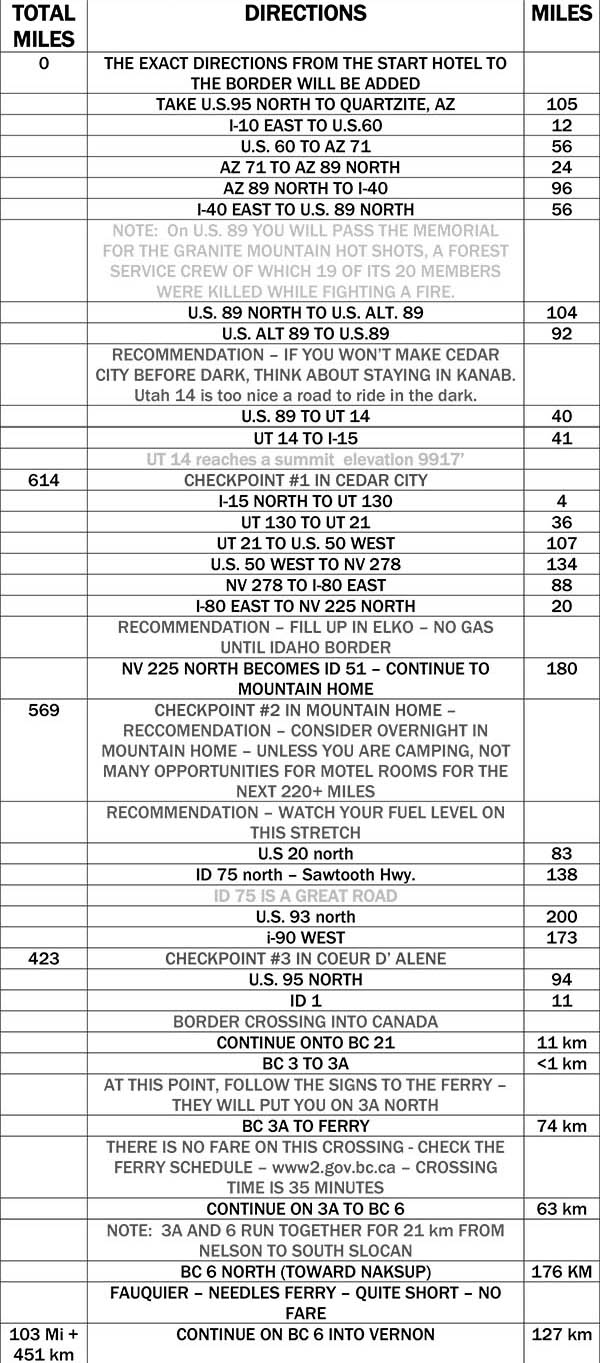

 I had a to have a police connection to get in to the event, so Mike deputized me as the Administrative Assistant to the Chief of Police. My new position included a cool official-looking police ID card and I asked if I could get a gun out of the deal. Mike’s answer was a curt “No,” but hey, I tried. We had a hell of a time at that convention. There was all kinds of interesting gear on display. Guns. Helicopters. Police motorcycles. Patrol cars. Surveillance equipment. You get the idea. Oh, yeah. And boots. I’ll get to that in a second.