Our good buddy Andrew Capone has taken the reins at long-established and legendary British Motorcycle Gear. Located in Sea Girt, New Jersey and shipping all over the world, BMG sells a variety of Belstaff, Barbour International, and other top quality moto clothing and accessories. You may recall Joe Gresh’s review of BMG’s outstanding Rapido gloves here on the ExNotes blog a few weeks ago.
While you’re on the BMG site, visit their BMG Moto Media page, too. With articles on T.E. Lawrence, the Isle of Man, and more, it’s muey cool. And on that Isle of Man TT topic, Andrew started going to that event several years ago and it has become an important part of his life. He’s an Isle of Man marshal, he has been Motorcycle.com’s correspondent on the event since 2008, and he goes every year.
British Motorcycle Gear is a family-operated business and the principals are motorcycle enthusiasts, so when you buy from these folks you’re not just pumping money into a faceless corporate Internet outlet with no appreciation for our world. Andrew owns 14 motorcycles, ranging from a 1961 Moto Morini 175 up to a Ducati Multistrada 1260S. There’s a 1968 Norton P11 Ranger and a Triumph Thruxton in that mix, too. He’s the real deal, folks.
And one more bit of good news…when you order from British Motorcycle Gear, use the ExNotes discount code BMGJOES and get 10% off any purchase. Run your order up to over $199 and you’ll get free shipping, too.
My ride through Colombia started on 13 December 2015 (it’s hard to believe it was more than 4 years ago; it feels like it was last year). What started this trip down memory lane for me was the Netflix TV series Narcos, and yeah, Susie and I binge-watched the first two seasons (which culminated in the Colombian forces taking down Pablo Escobar). It was an awesome series, filmed in Colombia, and the scenery took me back to that awesome adventure ride with my good buddies Juan and Carlos. Like I said in the last blog, I wanted to treat you to the blogs I wrote for CSC when I was on that trip, and this was the first one I did upon my arrival in Colombia.
There are no straight roads in Medellin, there are more motorcycles than cars, the weather is awesome, and the cuisine is incredible. If that doesn’t sound like heaven to you, well, you need to rethink your concept of fun. Colombia, folks! On an RX3! What an adventure!
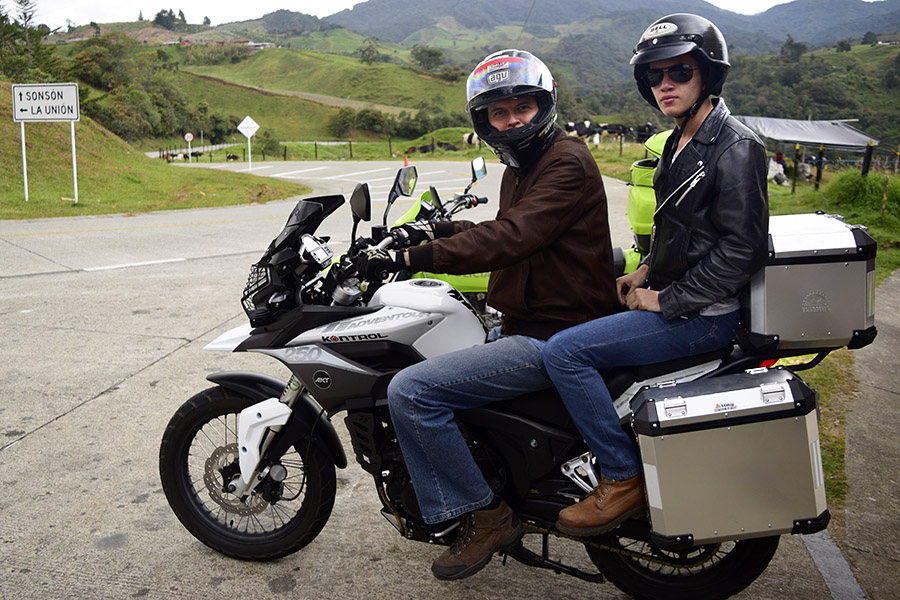
So today is Day 1, we put a couple of hundred miles on the AKT Moto RX3 motorcycles, and we haven’t even started our journey yet (it officially begins tomorrow). My good buddies Juan Carlos and Carlos (there are a lot of guys named Carlos over here) set today aside just to let me get used to riding in Colombia.
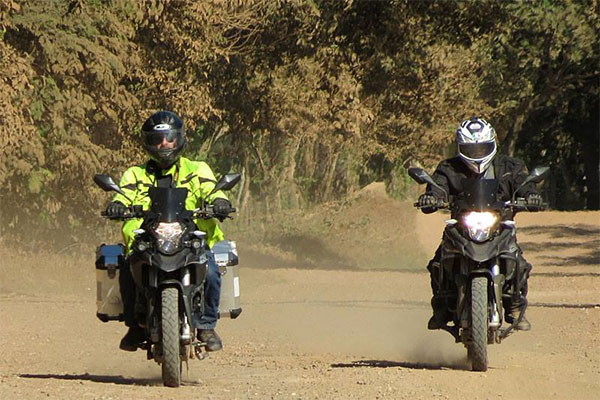
Here’s a shot of me with my two moto buddies in a village somewhere in the mountains surrounding Medellin.
Back to the RX3 designation…AKT Moto is one of Zongshen’s largest customers, and they sell a carbureted version of our favorite motorcycle called the RS3. It’s a cool bike. Here’s a shot of mine…it’s the one I’ll put 2500 miles on here in Colombia in the next week or so.
And that village? It’s actually called Mesopotamia. Folks, I can’t make up stuff this good!
Motorcycling in Colombia is substantially different than what we’re used to. For starters, there’s the prevalence of motorcycles. I’m not exaggerating. I saw far more motorcycles today than cars. It seems to be the national pastime. There were thousand (maybe tens of thousands) of riders in the hills this morning.
More interesting facts:
Motorcycling is predominantly a social activity here in Colombia. We must have stopped at 4 or 5 coffee houses and restaurants today. The pattern is you ride for 45 minutes or so, and then stop for coffee. Hey, is this what café racing is all about? Juan Carlos knows everybody at these coffee stops, and they all know him. Juan Carlos founded the only motorcycle magazine in Colombia (DeMotos), and he’s an icon over here. Any you know what? Some of these guys recognized me! Juan Carlos ran a feature story in his magazine on our Western America Adventure Ride, and these guys were all familiar with it.
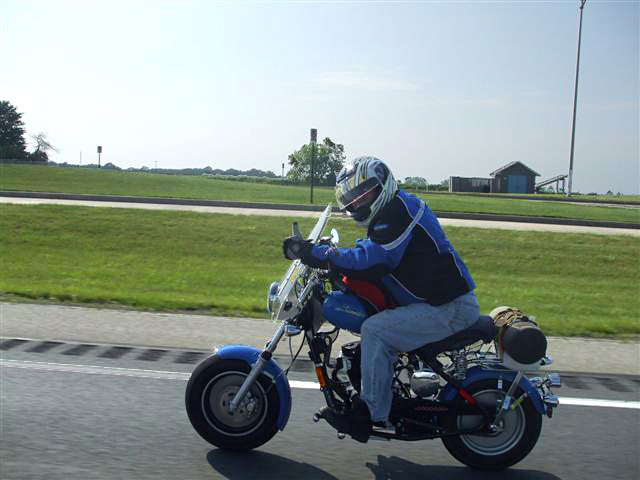
The bikes are predominantly in the 100cc to 150cc range, and these folks are all happy with that. Small bikes rule over here. We saw people dragging their pegs on these things having as much or more fun as we do on the big bikes in the US. Nah, scratch that…they were having more fun!
I asked about freeways and the guys laughed at me. They pointed to the winding set of twisties just outside the restaurant and told me, “that is our freeway.” These are my kind of people!
There are elite riders over here on Triumphs, Ducatis, BMWs, and MotoGuzzis. There are lots of large Yamahas over here, too (or, is they say in Colombia, Jamahas). They’re not arrogant. We had coffee with a bunch of them, and they were all great guys. The photo below is a typical roadside restaurant, and they all looked like this. What a place!
The food is awesome. Here’s a shot of my lunch at that restaurant above. The dish is called Capresse Buenaventura.
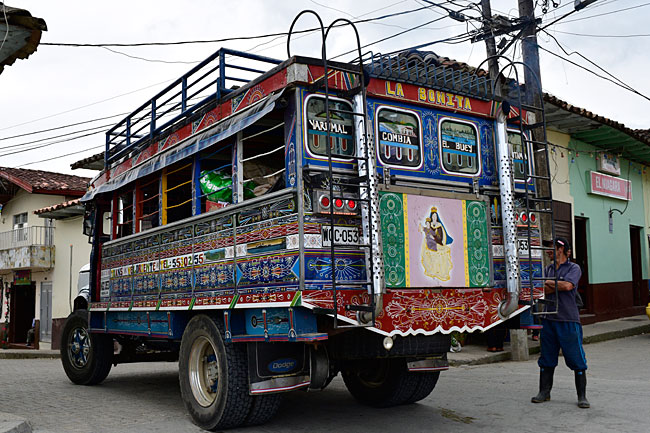
Ah, let’s see, a few more photos from some of the little villages we rode through today.
Juan Carlos picked up his cousin Heronimo (you gotta love their names!) and he rode with us in the afternoon.
After I took that shot above and Juan Carlos and Heronimo pulled out, I saw a cool police bike painted in fluorescent safety yellow (or is it a green?). I always wondered what a bike would like painted in that color.
Bikes are both sporting propositions and utilitarian vehicles down here. I saw bikes carrying all kinds of cargo (no photos, but I’ll get some of those later), and I saw a few bikes that had to be 20 or 30 years old and were still doing hard time.
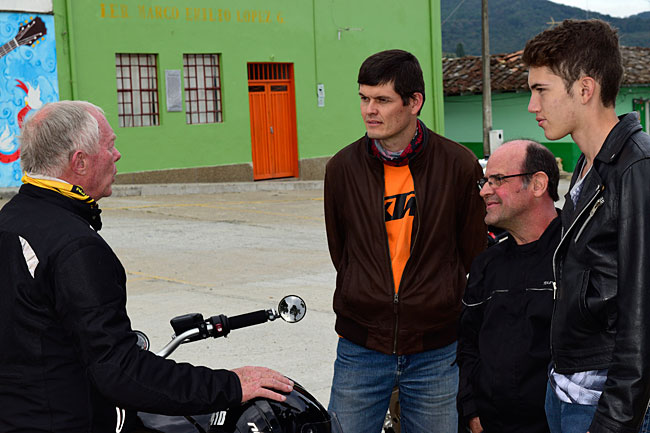
One of the guys I met at one of our coffee stops is a retired US Army Colonel named Miles. I liked the guy immediately…he’s a dead ringer for Lee Marvin and he even sounds a little like him. Talk about stories…this guy has been everywhere and when he retired, he decided to hang his hat in Colombia. Here are a couple of photos of my new buddy Miles…the first one with the guys listening to him in Mesopotamia, and a shot at yet another coffee stop. I sure drank a lot of coffee today!
Well, I think that’s enough blogging for Day 1. We’re rolling out at 4:30 tomorrow, and I want to get a good night’s sleep. The altitude bothered me a bit yesterday and I didn’t sleep too well, but I think I’m used to it now. The plan tomorrow is to put 300 miles on the bikes, and like I said, there are no straight roads in Colombia. We’re climbing up over another mountain range and headed for the coast. It’s going to be fun!
So there you have it. The above was my first day in Colombia, and it was sort of a “get acquainted” bit of tearing up the roads around Medellin. The real journey, our romp through the Andes Mountains, would start the next day. Stay tuned, folks. There’s a lot more to this story.
If you’d like to see the entire Colombia ride, just click here!
Susie and I are hanging out at home, getting out for our daily walk or two, and generally obeying our fearless, fiercely-partisan, and fear-mongering leaders as we wait for them to declare a CV19 victory. We’ve been watching a lot of TV while under house arrest, and it’s a big deal when we find a series we haven’t seen before. We had one such discovery last week with Narcos, a series on Netflix about the drug wars in Colombia.
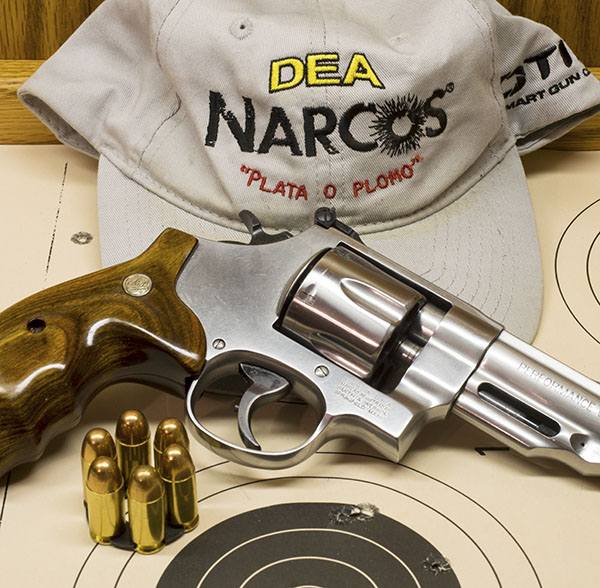
Silver or Lead, Amigos y Amigas. Or in this case, a Model 625’s stainless steel and six full metal jacket .45 ACP rounds. That hat is one of my favorites.
Somehow we missed Narcos the first time around, although I was vaguely aware of its existence from a hat I picked up at an International Association of Chiefs of Police convention in San Diego two or three years ago. Good buddy and retired police chief Mike was going to the IACP convention and he invited me along as his official “Assistant to the Director.” I was even issued an official laminated ID card, but Mike drew the line when I asked him if I would get a gun, too. His answer was immediate and clear: No. That’s okay, I already had a gun.
Mike and I had a good time at the IACP show and we came home with a lot of swag. One bit of that haul was a Narcos hat embroidered with the show’s tagline: Plata O Plomo. If your Spanish is a bit rusty, it means Silver or Lead, with the premise being (if you were a Colombian cop or politician) your choice was either a bribe or a bullet.
The Narcos Netflix series is the story of Pablo Escobar, the activities involved in taking him down, and the drug wars in Colombia. From the first episode, I thought the scenery was stunning. I mentioned to Sue that it looked exactly the way I remembered Colombia from my Andean adventure. We started in Medellin’s Antioquia neighborhood (which, by the way, was Pablo Escobar’s old stomping grounds). Sue checked it out on her cell phone and, sure enough, Narcos was indeed filmed in Colombia.
Riding with good buddy Carlos in Colombia. That’s me in the green jacket. Photo by good buddy Juan DeMotos.
We’ve been binge-watching Narcos and every scene brings back a memory for me. Colombia is a magnificent place, and I loved every minute of that adventure. I’m going to recreate that ride by posting some of the photos (the one above is but a sample) of one of the grandest adventures I’ve ever enjoyed. I’ll post a series of blogs from our Colombia trip over the next two weeks.
I stopped by CSC Motorcycles last week to visit with my friend Steve and see the new TT250, San Gabriel, and RX3 colors. I and my camera will try to do justice to the new CSC paint themes, and hey, while we here, we’ll share a few videos.
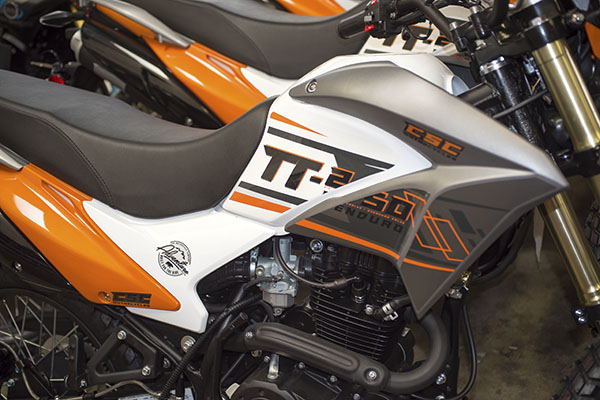
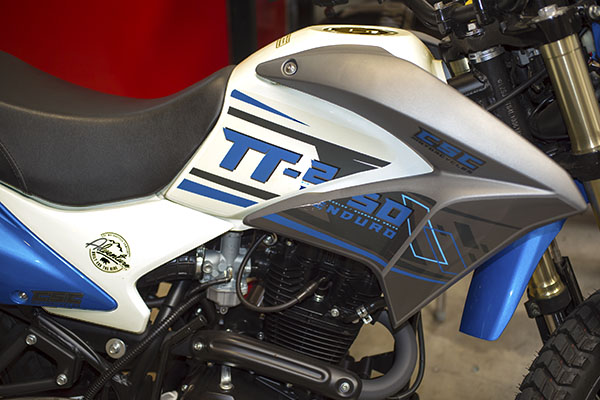
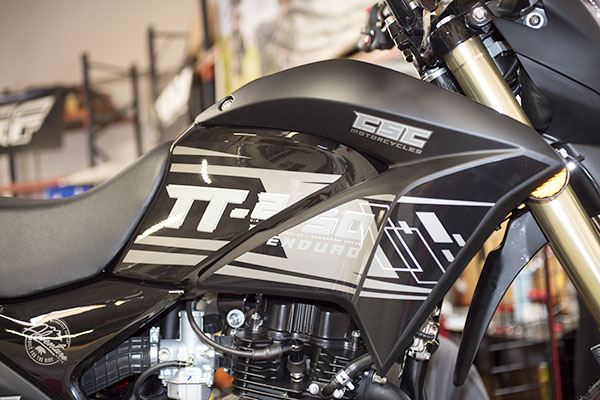
The TT250 line has an entirely new set of colors, and I like the new look.
There’s a cool decal on the TT250 side panel, too, which i like a lot. It reminds me a bit of what new Triumphs had in the 1960s, when every one of their bikes had a “world’s fastest motorcycle” decal on the tank.
As you know, I have a TT250, and mine is from the very first shipment that came into CSC a few years ago. Mine is black with bold TT lettering on the tank and side panels. I like that bike, I’ve ridden it in Baja (the video below is taking it through the Rumarosa Grade in northern Baja), and I’m going to fire it up and ride it around a bit today.
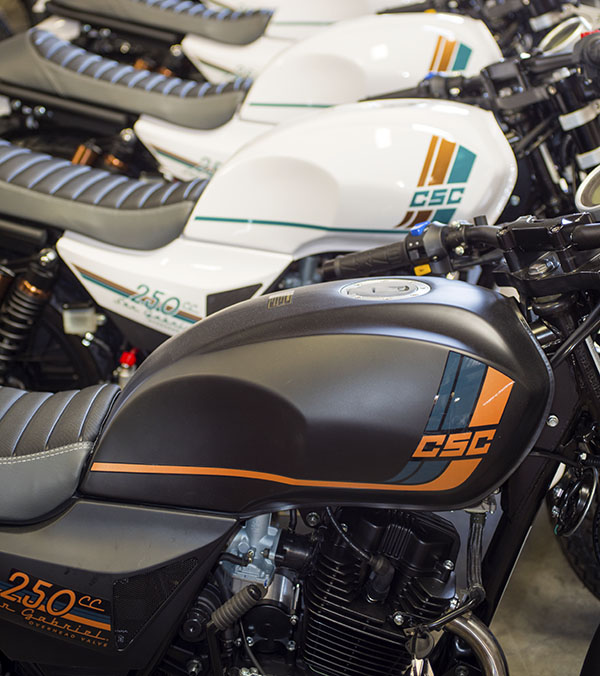
Next up is a photo of the San Gabriels. The new colors on the SG250 work well, too.
You know, I did one of the very first San Gabriel videos when those bikes first came to America. It, too, was a hoot.
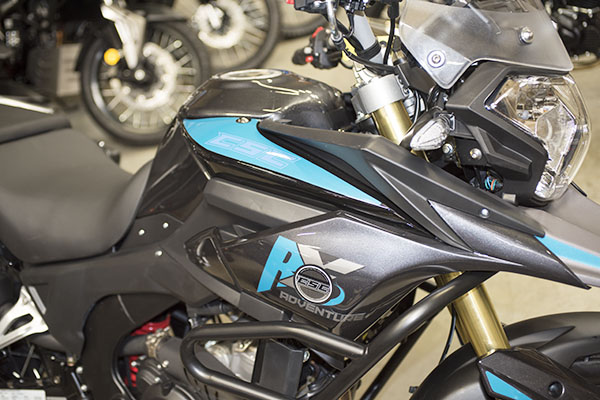
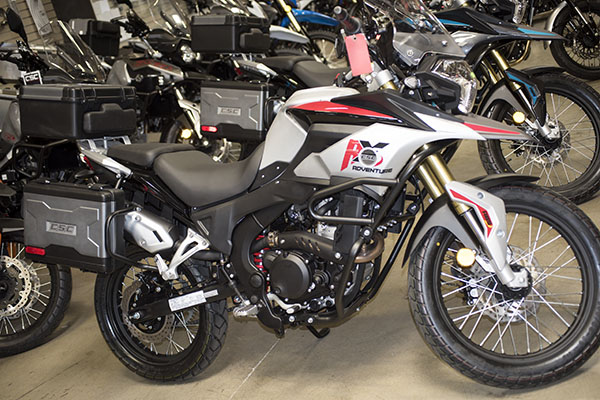
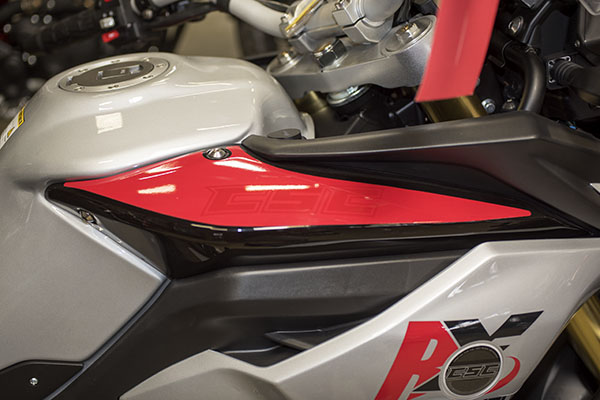
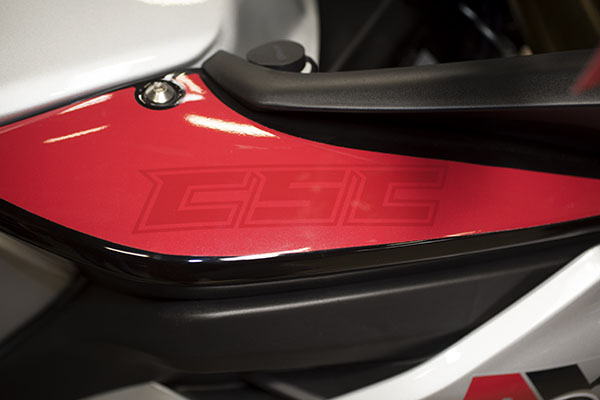
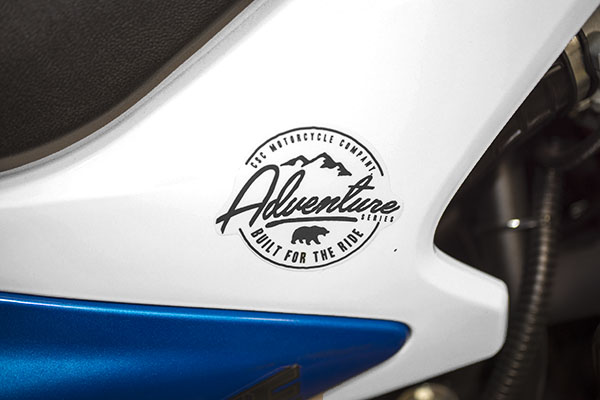
And here are a few photos of the CSC RX3, a bike that has generated lots of smiles and lots of miles since its introduction to the United States in 2015. The new colors are much more interesting and maybe a little more subtle than what we’ve seen on RX3 motorcycles in the past. There’s a gray and turquoise theme, and a silver and red alternative. They both look good.
I like the new RX3 paint themes, and I like the original ones, too. I ride an RX3. Mine’s a 2015 model and, like my TT250, it’s one from the very first shipment to the US. My RX3 is orange (the fastest color, as good buddy Orlando knows), and it’s one of the early ones that faded to a kind of subdued yellow (that’s before Zongshen started adding color stabilizers to the paint). I like that look and I’ve had a lot of great rides on RX3 motorcycles, starting with our initial CSC Baja run. That ride was a hoot and a half. Imagine that: A brand new shipment of RX3 motorcycles (the first in the US), and yours truly and 15 other intrepid CSC riders did 1700 miles in Baja on these bikes. Take a look:
Our next big RX3 ride was the Western America Adventure Ride…5000 miles across the Western US, from So Cal to Sturgis to Portland and then down the Pacific coast to home. I didn’t do a video on that ride, but good buddy Joe Gresh sure did!
We did several more CSC Baja rides, a bunch of rides in the US, and our absolutely amazing 6000-mile ride across the ancient kingdom on RX3 motorcycles:
Not enough? Hey, how about a ride through magical Colombia on RS3 motorcycles? The RS3 is the carbureted version of the RX3, and it, too, was an amazing adventure:
If you enjoy watching YouTube videos, we have quite a few more on our YouTubby page. Grab a cup of coffee, click on the YouTubby link, and have fun. I sure did.
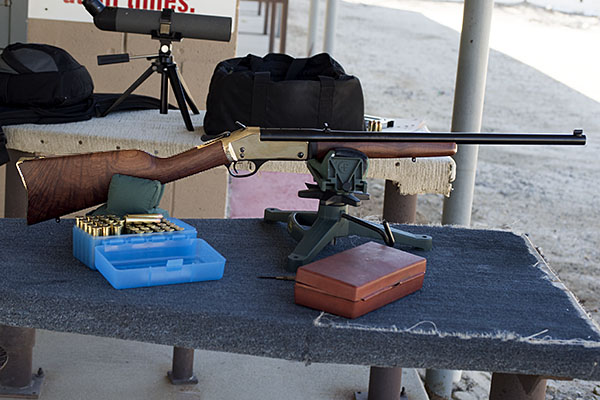
It’s time to get out and do stuff. Yeah, this CV19 thing is a disaster, but it looks like what the wizards recommended is starting to produce results, and that gave me an excuse to get to the range again. Not that anyone ever needed an excuse to get to the range, but I felt like it was time, and that beautiful Henry Single Shot I’ve been writing about (but had not yet fired) was calling my name.
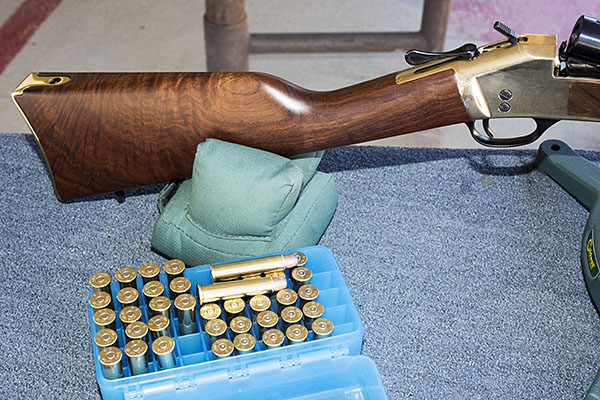
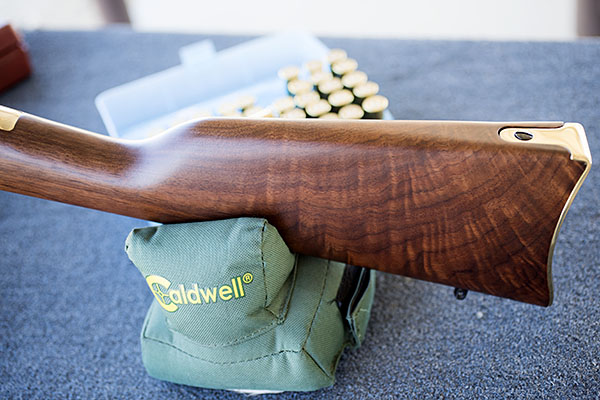
Exhibition-grade walnut, blue steel, polished brass, and a box of .45 70 ammo. Life is good!
I had my Nikon with me, too, so I was finally able to get some good D810 photos of this beauty from Henry’s Rice Lake, Wisconsin manufacturing operation.
A view from the right.And the view from the left.
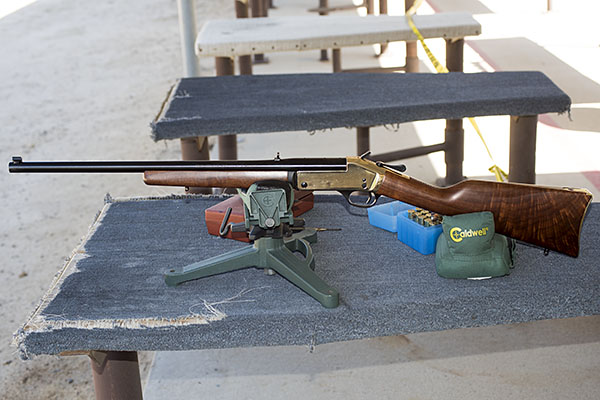
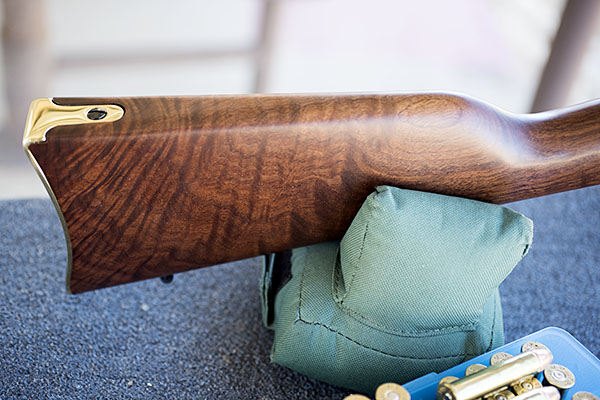
I wanted a couple of photos showing the entire rifle, and then I wanted to get a couple more showing the highly-figured walnut stock. The folks at Henry sure did a great job.
Sweet, huh? The polished brass buttplate works, too. This is a stunning bit of American firearm artistry. Like Mr. Imperato says, made in America, or not made at all.What’s nice is the stock is highly-figured on both sides. It’s hard to find wood like this on a production rifle these days. Always has been. I believe it’s getting tougher, too.
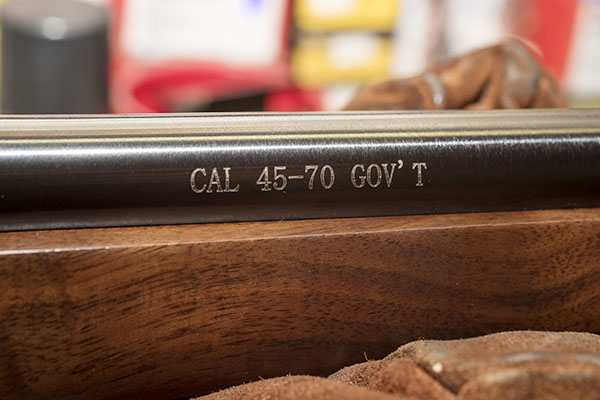
The .45 70 cartridge is a big one, and I’ve written about it in earlier blogs. There’s a list of links to our earlier blogs on the Henry single shot at the end of today’s post, along with a few other cool links. Take a stroll through them to get a feel for how I came to acquire this magnificent rifle (after you’re read this blog and shared it on all your social media platforms, of course).
If you have one of these and someone says “bring enough gun,” you’ll have all the bases covered with the Henry Single Shot.
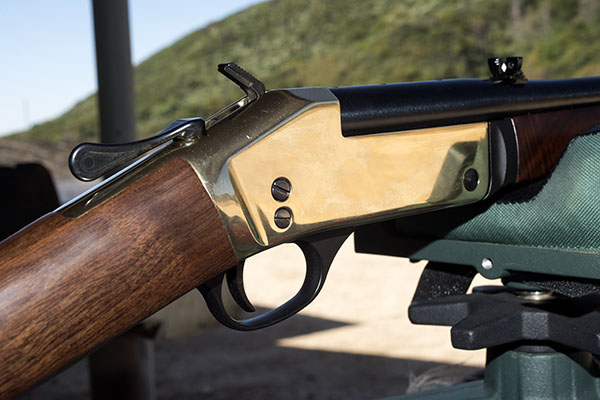
It was fun shooting the Henry, both literally (more on that in a second), and figuratively (with the Nikon). The brass receiver on these guns photographs well, I think.
The rear sight is a standard folding leaf. You can flip it to the other side so that you don’t have the white diamond, and you can invert it to get a square notch instead of the U-notch. I’ve left mine as it was delivered from the factory.
On to the good stuff, and that’s an answer to the most basic question for any firearm: How does it shoot? In a word or two, superbly well. I had a big plan to test all kinds of different loads, but I don’t want to bore you with the details of what didn’t work well and get right to what did.
First, a word on my marksmanship. It had been about 9 weeks since I’d been to the range, and the ability required to shoot a rifle well is not something you just pull out of drawer and pick up where you left off. Nope, rifle marksmanship is an art, and I needed to put a few rounds downrange before the Henry started performing. Well, actually, that’s not quite accurate: I had to send a few rounds downrange before I started performing. There’s a skill set involved in shooting a rifle well. You can read our treatise on rifle marksmanship later (I’ll include a link for that at the end of this article, too).
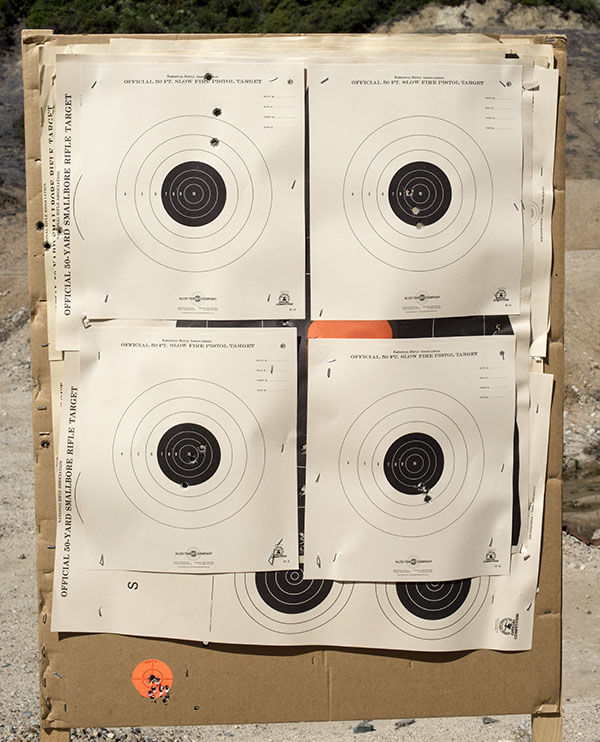
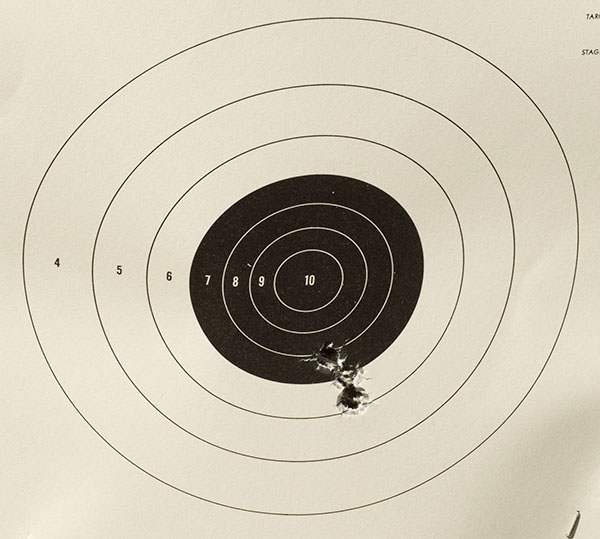
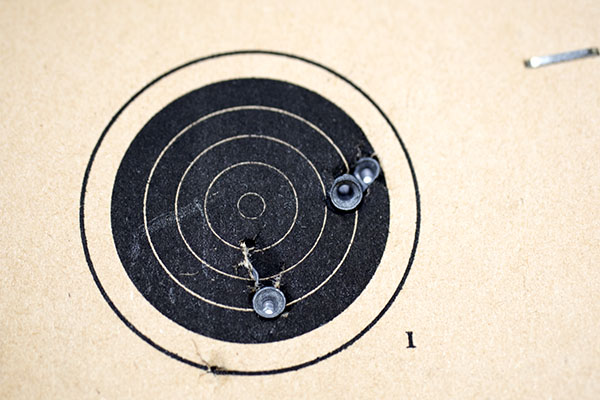
I started with four targets this morning at 50 yards and the results were not what I wanted, but I knew it was me and not the rifle. So I put another four targets out, and I started to settle down. It was a beautiful morning out at the West End Gun Club. Bright skies, mild temperatures, no wind, and I had the range to myself. It wasn’t too long before I was in the groove. The first target (the top left) was a bit shaky (good enough for deer or hog, and especially good enough for buffalo), but not what I knew I should be able to do with this rifle. The second target (top right) was a lot better, as I was kind of figuring out how to get the right sight picture. Shooting with iron sights is much more challenging than simply laying a scope’s crosshairs on the bullseye. Iron sights demand skill and practice. With 9 weeks away from the firing line, I was coming up short on both, but I was getting my groove back. I could feel it. The third target (bottom left) was another good deal, and then the fourth target sealed the deal. That one was a 0.740-inch group, with all the holes touching. With open sights on a lightweight .45 70 at 50 yards, I’ll take three-quarter-inch groups all day long.
50 yards, with a 6:00 hold on each target. Top left, top right, bottom left, and bottom right. Not bad, if I do say so myself.
Here’s another photo of my last target of the day, showing that beautiful 0.740-inch group. Bring on the buffalo. I’m ready. So is my Henry.
I think I’ll leave the Henry’s adjustable rear sight right where it is.
The secret sauce? It goes like this: A 300-grain Hornady jacketed hollow point bullet crimped in the cannelure, 16.2 grains of Trail Boss powder, a CCI 200 primer, and Federal brass. I don’t think the brass makes much of a difference when shooting .45 70, as long as the brass is trimmed to a uniform length. I used Federal brass because it’s what I had, and I’ve had it a long time. My .45 70 brass is over 40 years old. It’s been loaded a lot of times, but when you load at Springfield levels, brass lasts a long time.
So what’s it like to shoot the Henry .45 70 Single Shot? It’s fun. The Henry is more of carbine than a full-sized rifle, although the length of pull is the same as my other rifles and the barrel is a full 22 inches. It’s that single shot design that allows the overall package to be shorter. It’s a compact, hard-hitting package with recoil that is one thin red hair on the good side of tolerable. The rifle’s brass buttplate adds substantially to the rifle’s overall rich appearance, but let me tell you, you feel it when the hammer drops. I was glad the 300-grain bullets worked well; the 405-grain loads I had were just a hair over a tolerable recoil level for me. My shooting was all in shirt sleeves shooting off the bench, though. With a winter jacket or on a hunt, making friends with 405-grain bullets would be a lot easier.
It’s stunning just how elegant the Henry .45 70 Single Shot is, and what’s equally stunning is the amount of “cool” you get for the price. The MSRP on this rifle is $628, and Henry tells you on their website that you should expect a discount from that price. To me, the benchmark single shot rifle is Ruger’s No. 1, and that rifle is something like $1500 these days. I believe the Henry’s fit and finish are actually superior to what you get on a Ruger No. 1. The walnut on my Henry is exceptional. I think Henry is undercharging for these rifles. They’re that good.
So where am I on all of this? The Henry likes 300-grain bullets better than the heavier 405-grain stuff, and that’s where I’ll focus future load development. Several suppliers offer 300-grain .458 bullets, and there are other powders to try. One more thing I want to make sure you know: I love this rifle. Life is good. I’m having a lot of fun with my Henry.
Check out our earlier Henry Single Shot stories here:
Bill Murar, at speed, on a CSC 150 somewhere near Lake Erie.
That’s good buddy Bill Murar in the photo above, riding a CSC 150 Mustang replica a few years ago in the Lake Erie Loop (a one-day, 600-mile endurance event around the periphery of Lake Erie). That’s impressive…600 miles in a single day on a 150cc motorcycle! Bill and I have stayed in touch ever since, and a couple of weeks ago I received this note from him:
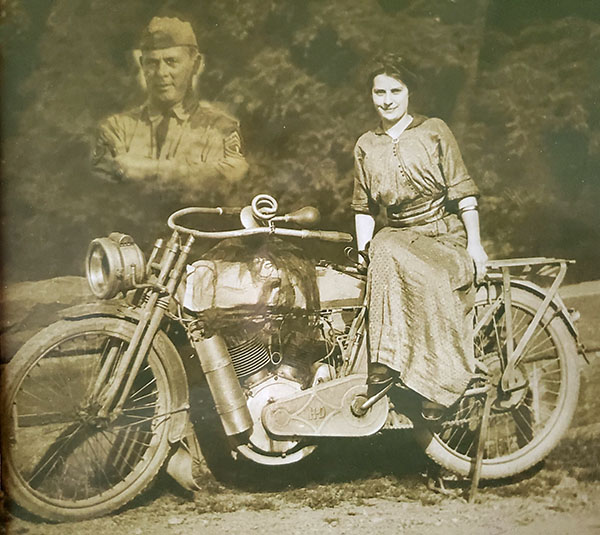
Joe, thought you might enjoy this photo of my grandmother (Estelle Dadney) standing next to my grandfather’s (William Dabney’s) early H-D motorcycle. I had his photo superimposed above the bike. He was a pilot in WWI and WWII. Somewhere, there is another photo with (I believe) the same motorcycle with a sidecar with both of them.
Enjoy!
Bill
That’s a great photo, Bill. Thanks for sharing it with us. Ride safe and stay in touch.
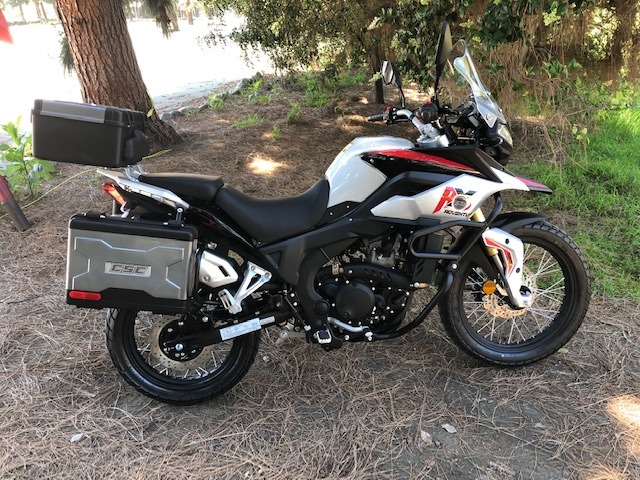
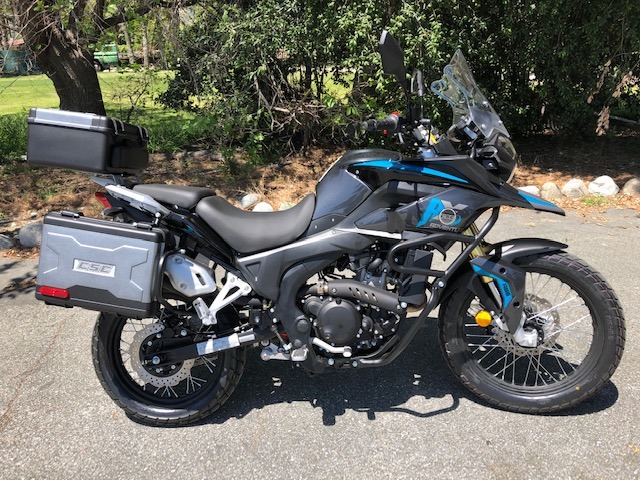
I recently heard from good buddy Steve Seidner over at alma mater CSC Motorcycles that the new 2020 RX3 colors have arrived, and the colors are sharp! Take a look:
Steve told me that the new 2020 RX3 includes substantial refinements and that the bike has steadily improved since its 2015 introduction. I thought the 2015 version (the one I ride) was impressive; to hear that it has improved makes the RX3 even more desirable. The 2020 RX3 motorcycles are in stock now, and the price has dropped to $3995. That’s a hell of a deal.
The RX3 story makes for an interesting read and if you’d like to know more about these motorcycles, pick up a copy of 5000 Miles At 8000 RPM.
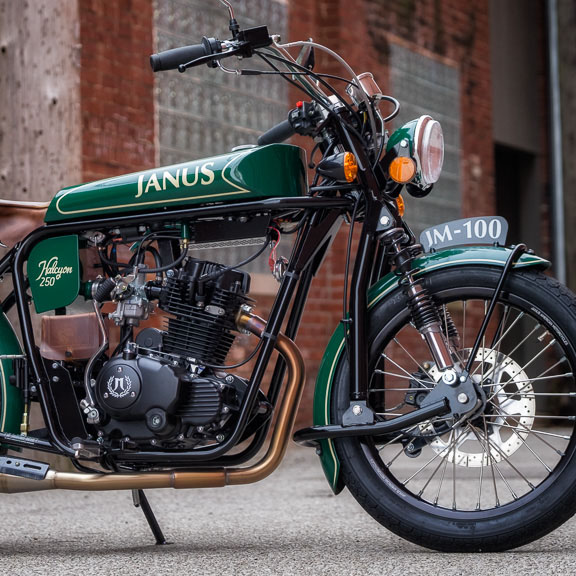
This Saturday at 10:00 a.m. EDT Janus Motorcycles is hosting a Virtual Discovery Day that you can sign up for here. Hey, if you’re under house arrest (as most of us are these days) this is a much better alternative than watching Netflix or TV reruns. The Janus bikes are beyond cool, and in the Virtual Discovery Day you’ll get to meet Devin Biek and Richard Worsham, the two guys who founded Janus. I rode with Devin and Jordan (another key Janus guy) in Baja (you can read about that ride here) and it was a hoot.
So it’s this Saturday at 10 Eastern. I’ll be there, and I hope to see you there, too!
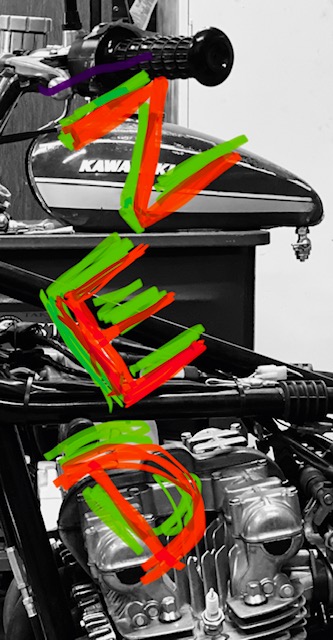
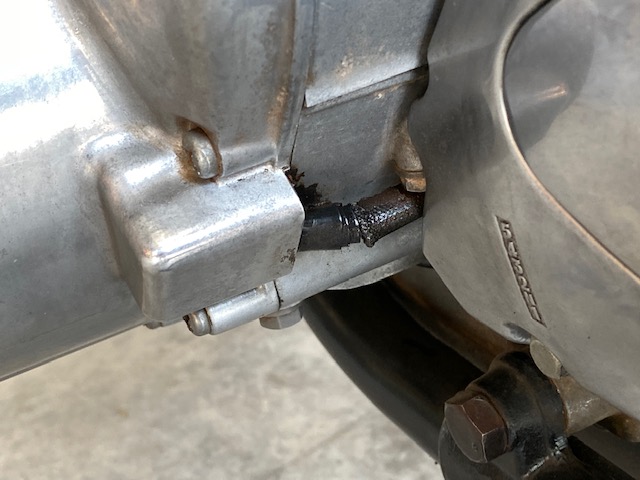
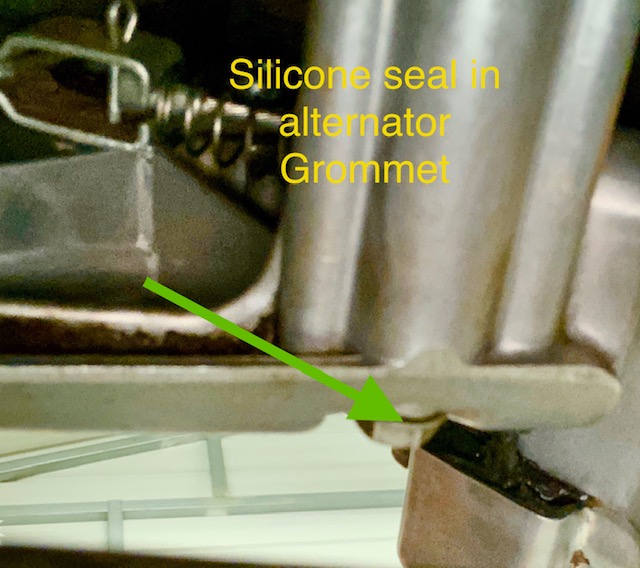
Every time I tinker with Zed it leaks a little less. This session I tackled the alternator wire oil leak. Zed’s alternator runs wet, a popular thing to do way back when motorcycles were made of steel and riders were flesh and blood. Where the wire harness exits the stator housing a rubber grommet is supposed to keep oil from seeping out. Someone had stuffed electrical tape down in there and Zed’s grommet wasn’t doing its job because the harness dripped oil.
The problem with replacing the grommet is that the stator harness plug needs to be dismantled to get the wire ends through the grommet. Dismantling the 45 year old stator plug is an iffy proposition. You’ll break the brittle plastic for sure. I guess you could eliminate the plug, cut the wire ends off and butt splice the mess back together. It would probably be better from an electrical standpoint.
The job also requires removing the stator housing to gain access to the grommet. That means a new cover gasket and more work. Instead, I took ExhaustNotes.us reader, Honda 919’s advice: After removing the tape and gunk in the grommet area I flushed the void with carb cleaner and mopped it out with a rag. Once I got the void nice and clean I packed in black, RTV silicone until it was flush with the stator housing. Then I let it dry over night. No more stator leak…at least for now.
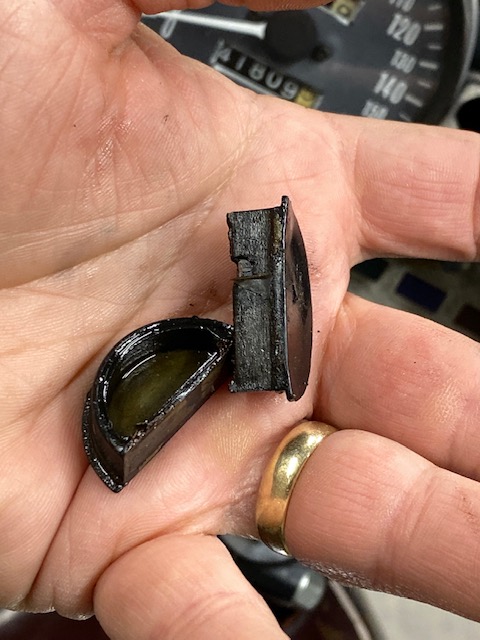
The black rubber, half-circle cam end plugs were the next problem. Oil seeped out of these with the engine running and at high speeds the oil would blow back onto the plug wire and whatever pants you happened to be wearing that day. The plugs are more than just rubber though, they have an aluminum core to help hold their shape. Zed’s were dry and hard from years of service so I bought new ones.
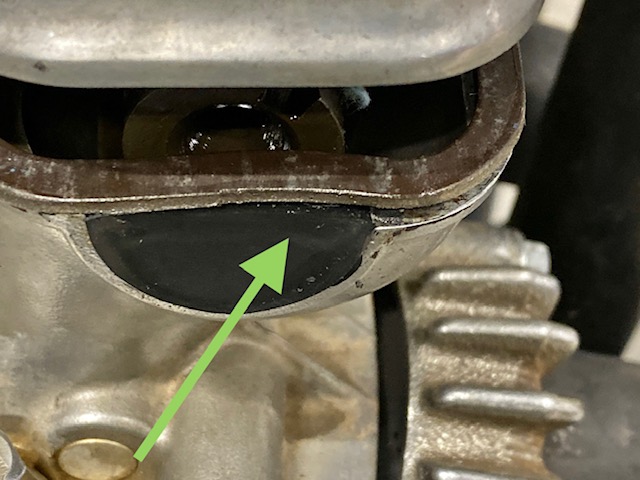
The old cam plugs were glued in with silicone. I’m not sure it’s a factory process but I used a tiny bit of RTV black on the head semi-circle to help seal the plugs. All went well until I started tightening the valve cover and the rubber plugs started to squirt out the side of the head. Maybe the silicone was making the plugs slippery. I used a rubber mallet to tap the rubber plugs back into the head but when I did that the valve cover gasket pulled in towards the head.
I decided to let the silicone set up and walked away. The next day I loosened the valve cover, set the valve cover gasket back into position and buttoned the thing up. Hopefully for good.
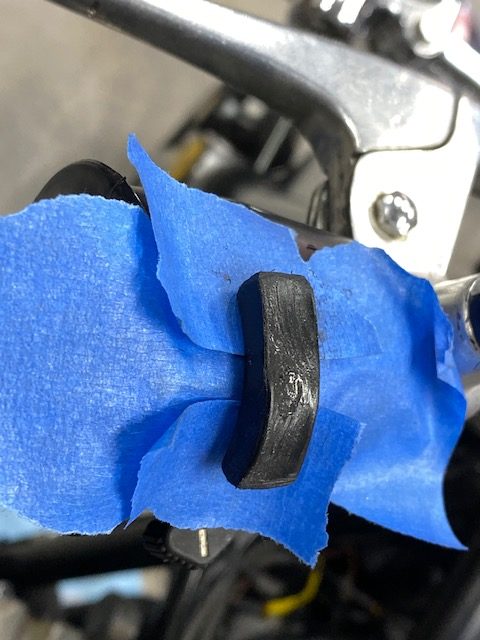
Somewhere in all these road tests the high/low beam knob fell off leaving a broken bit of plastic stalk to control the lights. The parts to fix the high/low switch cost nearly as much as an entire new switch cluster! Having had about enough parts ordering I heated and curved a bit of black plastic, drilled a hole in the thing and RTV silicone glued it onto the protruding bit of the switch stalk. It looks horrible but at least it’s ugly.
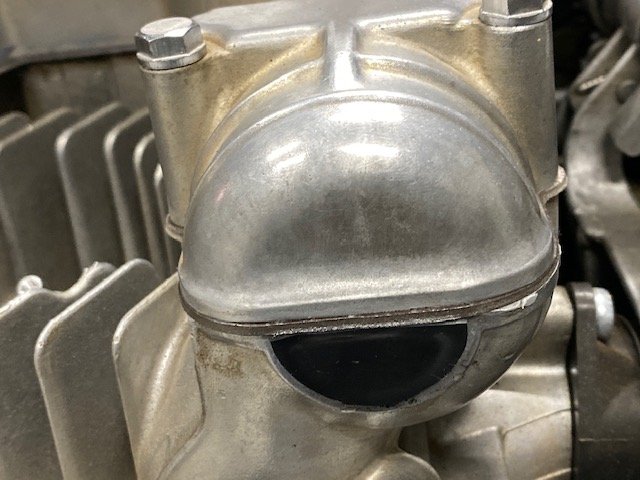
I set an ambitious goal for Zed’s 4th test run: 200 miles across the Sacramento Mountains to eastern New Mexico and back. I was only 15 miles into the test run when I smelled oil. The damn valve cover was leaking. Still! The two forward cam ends had a light sheen of oil so I aborted the big ride and took a shorter route. After 36 miles of riding the oil leak seemed to be gone. After 60 miles of riding the cams were nice and dry and there was no oil smell. After 90 miles of riding, not a drop of oil anywhere: the engine was dry. Maybe the earlier oil leak was pre-existing oil blowing around the front of the engine? Back home I checked Zed and could not find any leaks.
I believe the test runs are over for Zed. It runs great and it doesn’t leak. There will be more repairs in Zed’s future but I feel pretty confident in the old motorcycle getting me where I need to go. That is, if the gas tank doesn’t leak.
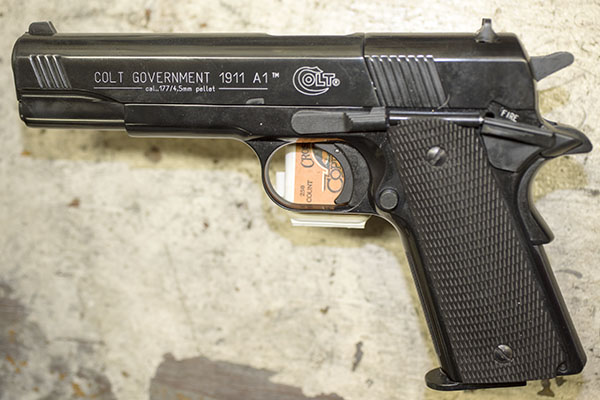
Same dimensions, same heft, and it says Colt on the slide. How cool is that?
The Colt .177 1911 Pellet Pistol
That 1911 you see above is the same size and the same weight as a real deal .45 ACP 1911, but this one is a CO2 pistol that fires .177-caliber pellets. I saw it in a Big 5 sporting goods store a good 20 years ago, and for reasons I can’t easily explain, I bought it. It was an impulse buy. I thought it was a cool idea and I figured if I was ever stuck in the house and couldn’t go out, I could entertain myself by shooting my pellet pistol. Little did I know the CV19 debacle would turn that eventuality into reality (I mean, I’ve been under house arrest for over a month…I have everything but the ankle monitor). I paid $150 for my .177 1911, I put it on the shelf, and I forgot about it for the next two decades.
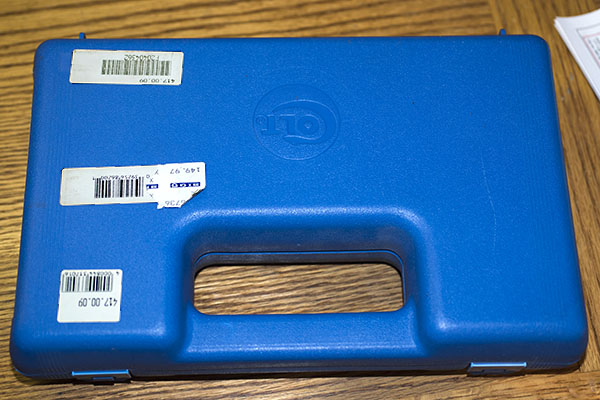
A cool case, too, and it also sports the Colt logo. How could I go wrong?
As you know from following our earlier pellet pistol blogs, I recently set up an indoor pellet pistol range in my garage in an effort to keep myself entertained (I don’t live on a big ranch in New Mexico and I don’t do concrete). I previously wrote about two Crosman pellet pistols that wouldn’t hold pressure and my old Daisy 717 pellet pistol that worked like a champ. A the end of the most-recent Daisy blog I mentioned that I had the 1911 pellet gun and I said I would break it out if I could find it.
Pellet Pistol Packaging Problems
Well, that’s what I did. I found the gun pretty easily…it was in the bright blue case you see above. But when I opened the case, things did not look good.
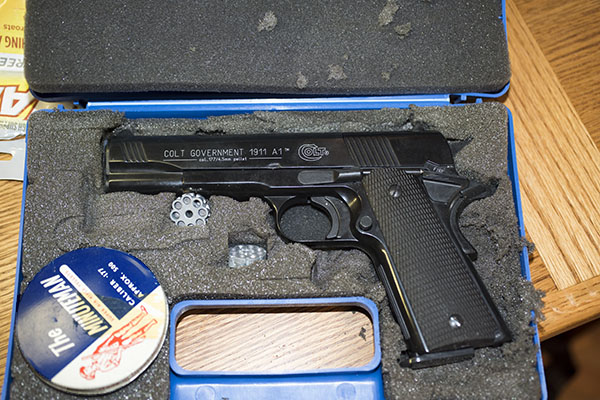
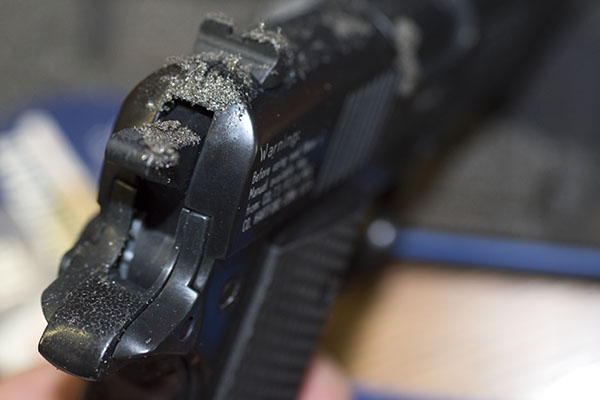
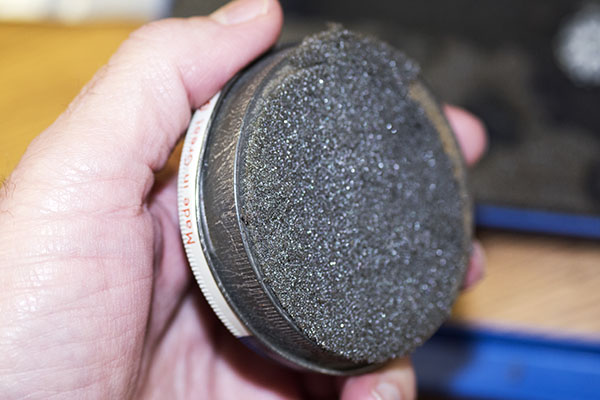
The road to Hell is paved with good intentions. In this case, those good intentions were a foam bed that attacked the gun chemically as the foam decomposed.
Hmmm, the foam padding inside the case that was supposed to protect the gun was doing just the opposite. Instead of protecting the gun, the foam was decomposing and appeared that it might be damaging the 1911. Ah, maybe not, I thought. Given a spritz of that powerful spray that cures all evil (that would be WD 40, not YooHoo, Fred), the foam that was sticking to the 1911 would probably fall right off. Or so I hoped. Before you feel compelled to weigh in on this, let me say at this point I realize this is all my fault. I was remiss in letting the gun sit in that case for 20 years without ever pulling it out, checking it, and keeping it wiped down. Maybe. It could be that if I wiped it down the oil I used would have accelerated the foam’s decomposition. Who knows?
Messy. Whoever specified this foam did a lousy job. It was rotting away and sticking to the gun.The appropriate engineering response to this condition is: Yeccchh!The boys at Colt were thoughtful enough to include a tin of pellets. The foam had cruddily bonded to it, too.
Finish Degradation
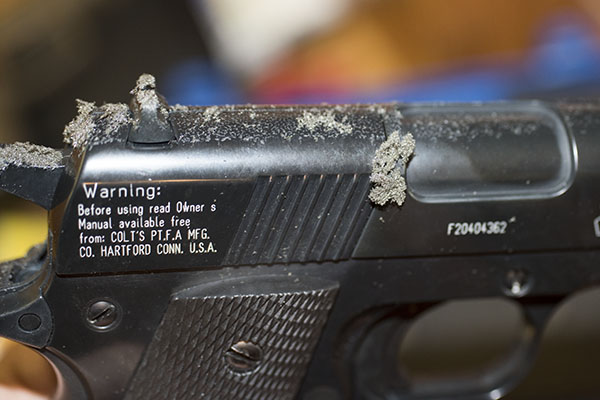
So I was hoping all this rotting, rotten foam would wipe right off and the gun underneath would be fine. Well, like the old saying goes, you can hope in one hand and poop in the other. You know which one is going to fill up first. A few shots of WD 40, a good scrub with an oily rag, and the verdict was in: Things were not looking good.
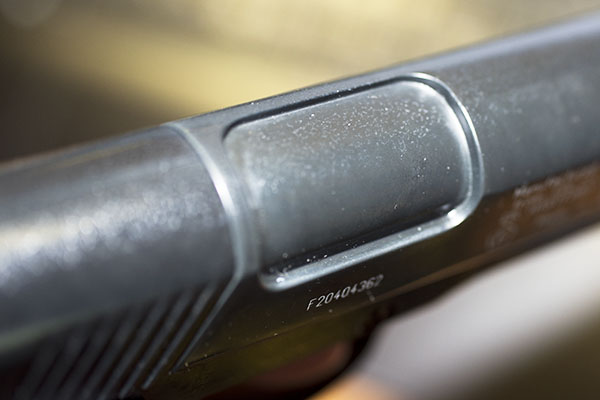
That’s not dust. It’s pitting in the finish where the foam had attacked it.
I even tried lightly scuffing the gun with steel wool (that works on light rust on blued steel), but nothing helped. The 1911 has what I’m guessing is a powder-coated finish, and that damned decomposing foam actually was eating into the finish. It was like rust, but it was a different chemical reaction. It actually etched its way into the powder coating.
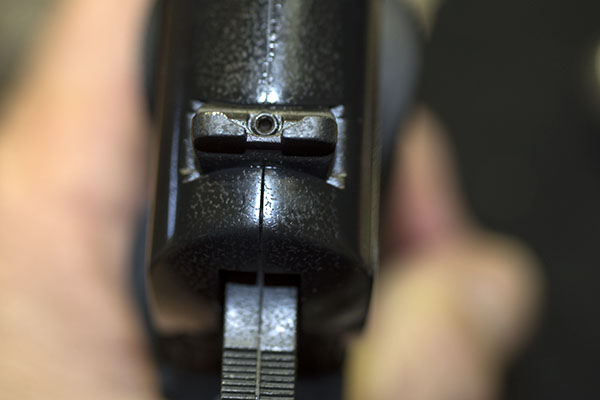
Another shot of the surface finish damage. You live and you learn. Sometimes, anyway. Interestingly, the Colt pellet 1911 rear sight has an Allen screw that can be loosened to slide the sight left or right to adjust zero.
So I learned a lesson again I learned a long time ago: You can’t just put something away in a box and forget about it. I should have taken that gun out of its case every year and wiped it down. Eh, we live and we learn.
.177 1911 Operation
I cleaned up the 1911’s exterior as best I could, and then I had to figure out how to operate it. I had the owner’s manual, but what would be the fun of simply reading it? Nope, I had to play with my fuzzy friend and figure it out for myself. The 1911 had two little cylinders for holding the pellets and the owner’s manual (what little I read) said it could be fired either single or double action. Hmmm, that’s cool, I thought.
I looked at the gun and it had a lot of the same features as a regular 1911 (i.e., a .45 ACP 1911). You know, the grip safety, the mag release, and the slide release. I tried the grip safety (unlike the rest of this 1911, it’s plastic). It was hinged at the top just like a real 1911. Cool, I gotta check this out, I thought, so I pulled the hammer back, pointed the gun in a safe direction without depressing the grip safety, and pulled the trigger. The hammer fell anyway. Okay, so the grip safety is purely cosmetic. The 1911 also has a thumb-actuated safety, but unlike the grip safety, it actually works (it prevented the hammer from falling when I pulled the trigger). The pellet 1911 has a mag release just like a real .45 auto, and what that does is press against the right grip to flex it away from the frame. That allows you to get a fingernail under the grip, and you can pop it off (more on that in a second). And finally, there’s a slide release just like a real 1911. I pressed it down and what do you know, the slide slid! Forward, that is…about three quarters of an inch (more on that in a moment, too).
The thumb safety really works, just like it would on a real 1911. The plastic grip safety is hinged like it would be on a real 1911, but it is cosmetic only.
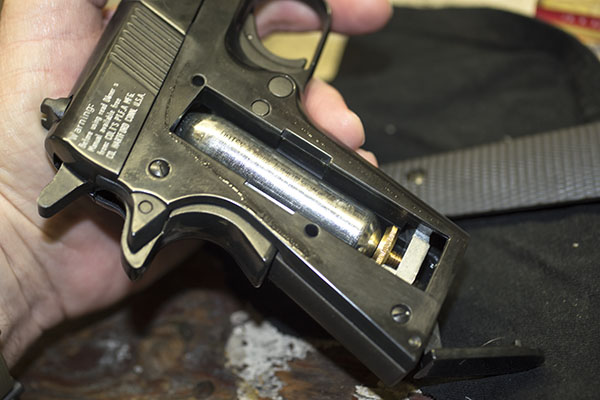
Like I said, when you press the mag release, it pushes the right grip away from the gun’s frame. You can then pull it off and that exposes where the CO2 cylinder sits. There’s a lever under the grip. You can rotate that down and it releases upward pressure under the CO2 cylinder. Then you rotate a knurled brass wheel to lower it and a brass cup underneath the cylinder, and then the spent cylinder can be removed. To install a new cylinder (which you need to do a lot, as I’ll explain shortly), you just insert the new cylinder, rotate the brass wheel to take out all the clearance between it and the cylinder, and then rotate the 1911’s grip lever (underneath the grip) upward. That pushes the CO2 into the probe that penetrates the cylinder cap and seals the cap against the probe. It’s all very clever.
A CO2 cartridge in the 1911’s grip cavity. That little brass wheel beneath it snugs up against the bottom of the CO2 cartridge.Snap the right grip back on the gun, rotate the lever beneath the grip (shown here in the lowered position), and the gun is charged.
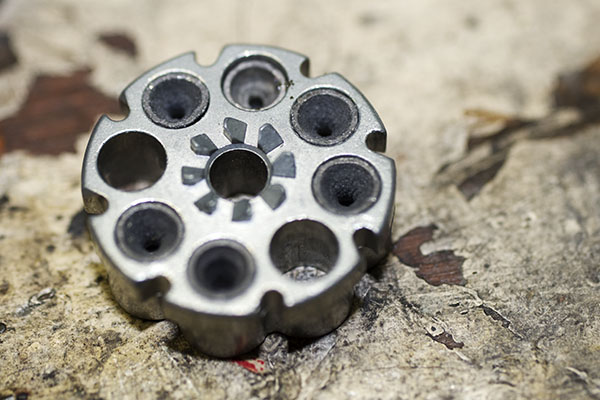
I did all the above, locked a new CO2 cartridge in place, and the gun was charged. And unlike the two Crosman handguns I tried a couple of weeks ago, it held pressure. Next up was loading one of the little revolving cylinders with .177 pellets.
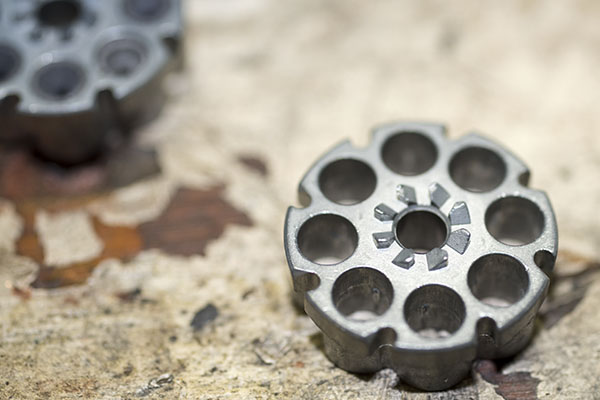
Colt provided two pellet cylinders with the .177 1911. They are like the cylinders in a revolver. Those little protuberances on the face of the cylinder are supposed be engaged by a push from the gun’s internals to rotate the cylinder when it is fired double action or when the hammer is cocked.Here’s another shot of the pellet cylinder with a few pellets inserted. It holds eight pellets, matching the magazine capacity of a real 1911.
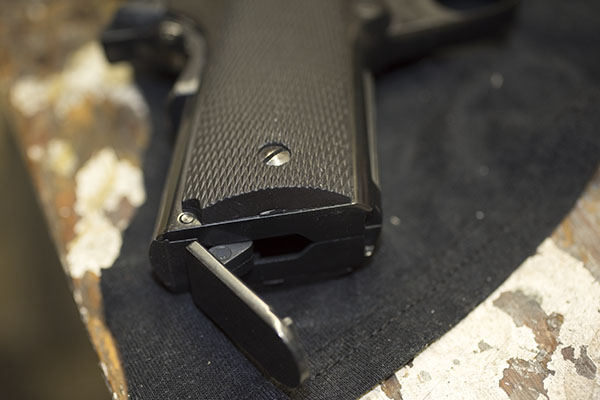
After you’ve loaded the cylinder with pellets, the idea is that you drop it into the 1911 between the rear of the slide and the frame, and then pull the slide to the rear to close it. I did all that, and at that point, I was ready to start sending lead downrange.
A loaded cylinder, in place. Rack the slide rearward, and it should be ready to go.
Double Action It Ain’t
Downrange, in this case, was 20 feet away into my house-arrest, Rube Goldberg, cardboard-box-contrived bullet trap. Like my pistol, I was pumped because it felt good to have a hefty 1911 in my hand again. This 1911 pellet gun feels like a real one. It weighs exactly the same, it’s got relatively decent sights, and lining it up on the target felt like the real deal. Alvin York, step aside, ’cause this 1911 has the added advantage of double action.
Or so I thought. With the safety off and the gun pointed at the target, I tried firing double action. I felt the take up on the trigger and I felt it come all the way to the rear, but nothing happened. I tried again, looking at the hammer, but the hammer just sat there. Hmmm. Well, so much for double action.
I manually cocked the hammer, lined up the sights, held my breath, focused on the front sight, and then I heard a satisfying PFFFT! That delightful report was followed a nano-second later by the mighty .177 lead hourglass sharply smacking into my target. I could see the hole it made, and it was in the black! Yeah, baby!
Cool, I thought. Okay, double action was a bust, but that’s no big deal…I’ll just cock the hammer for each shot. So I pulled the hammer back, repeated the steps above, and it was PFFFT again, but this time without the thwack of the pellet hitting the target. I looked downrange and that prior hole on the target was looking mighty lonely. Hmmm again. Shooting blanks with a pellet gun. Whoever heard of such a thing?
I pressed the slide release, the slide slid forward, and I peeked in. The cylinder holding the pellets had not advanced. It was still sitting on the empty chamber I had fired previously. I pulled the hammer back to see if the hand that is supposed to advance the cylinder was moving up to do so, but it wasn’t. Rats. It looks to me like the parts that form the mechanism to rotate the cylinder are plastic. They may be broken, or age-degraded, or maybe stuck in place by agglomerated lube. Who knows? I need to take the thing apart to do a proper proctological exam, but that’s a project for another time. A quick Google search showed that others complained of similar problems with these guns, and one of the comments noted that there are YouTube videos showing how to work on the thing. Hey, Gresh has his Z1 and concrete, and I have my broken-down pellet guns! Life is good.
Sending Lead Downrange
For right now, I have a single shot 1911 pellet gun. I just have to open the breech, take the cylinder out, load a pellet, put the cylinder back in, close the slide, cock the hammer, and take a shot. Which I did several times, and here are the results.
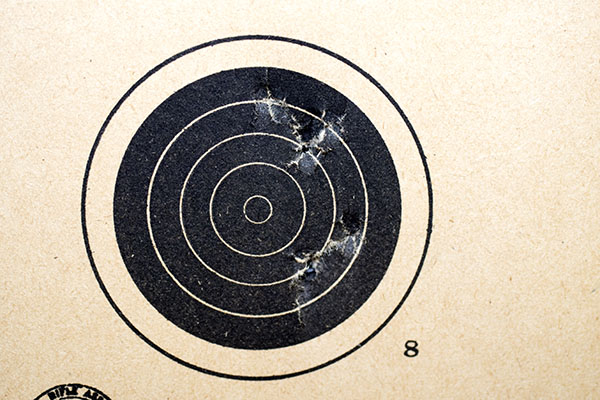
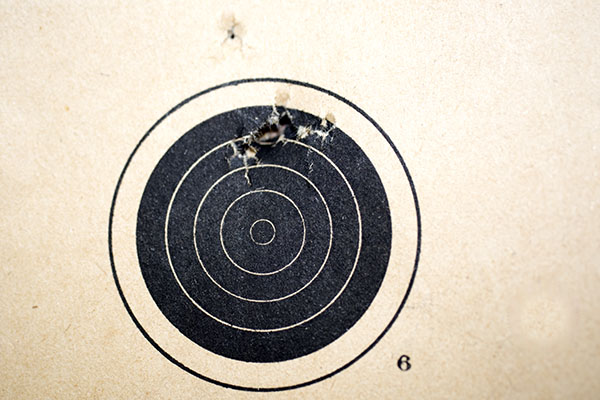
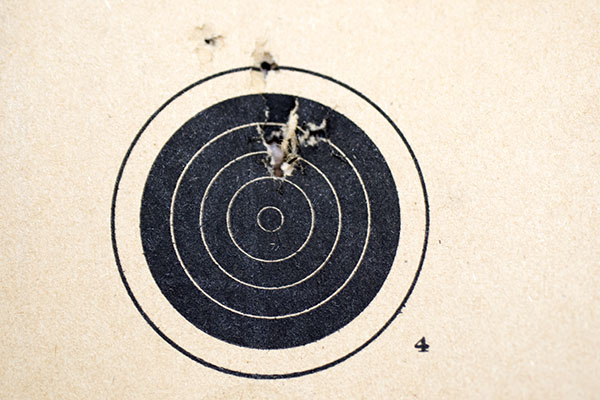
Eh, not bad. Not as good as the Daisy 717, but not bad, either.Another five rounds. One went high.I had a good group going, but this time two went high.Running out of steam. After 25 or 30 shots, the CO2 cartridge was circling the drain. The pellets didn’t have enough poop to pop through the paper.
Cost per Shot (Pellets vs .45 ACP Ammo)
This is a good news/bad news story. You’ve already read the bad news. A little bit more bad news: I only get about 30 shots (maybe less) out of a single C02 cartridge. That surprised me. So much so, that I looked it up on Google, and it seems like 30 shots is about what any CO2 pellet pistol gets. I think I’ll probably get comments from our readers on that and I’m looking forward to reading your inputs. Hey, if your mileage varies, leave a comment and tell me about it.
Just for giggles, and because I have the time while we’re all under house arrest, I thought it would be fun to compare the cost of shooting the pellet 1911 to the real thing.
I checked online (because it’s been a long time since I’ve bought C02 cartridges), and they seem to be going for around $8 for a box of 5. That works out to $1.60 per cartridge, and at 30 shots per cartridge, that’s a little more than 5 cents per shot for the CO2. The pellets seem to run around $7 for a tin of 150, and that’s a little less than 5 cents per pellet. So, every time I pull the trigger on my 1911 pellet gun, I’m sending a dime downrange.
For my .45 ACP reloads, there are costs in the bullets, the powder, and the primer. I don’t count the .45 brass, because I get mine for free and it seems to last forever. My favorite Missouri 230-grain cast roundnose bullets are $50 for a box of 500, so that’s a dime per shot in lead. Unique powder is about $30 a pound, there are 7,000 grains in pound, each cartridge takes 5.6 grains of Unique, and if you do the math, that works out to $0.024 per cartridge for propellant. CCI 300 large pistol primers are $30 per thousand, s0 that’s $0.03 per round for primers. The bottom line here is each time I pull the trigger on a real 1911, it costs me 15 cents.
What the above means is that I’m saving about a nickle per shot with the 1911 pellet gun. I guess need to shoot a whole bunch more…you know, so I can make up for the hit my 401K is taking as a result of the corona virus.
Wrapping It Up
So where am I on all this? The good news is I like my 1911 pellet gun. It’s impressive how much it feels like a real 1911 (without the sound and fury of a real 1911’s bark, of course). The pellet gun 1911’s accuracy isn’t stellar, but it isn’t terrible, either. It doesn’t index when I cock the thing and it doesn’t work double action, but that’s almost an advantage given our current house arrest situation (fixing those problems is just another project to put in the hopper). The bottom line? I like my .177 Colt pellet gun and it’s one I’ll be using more.


 You know, I did one of the very first San Gabriel videos when those bikes first came to America. It, too, was a hoot.