Another Day, Another Leak

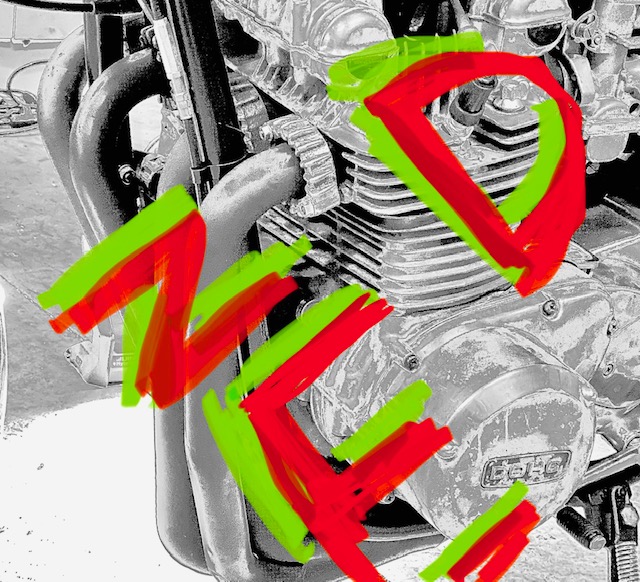
I don’t want to give you the wrong impression. It sounds like I’m having lots of trouble getting Zed back on the road but it’s really more a function of my resurrection approach. I tried to spend the minimum amount required to get the 1975 Kawasaki Z1 operational because I didn’t know if the engine was shot or if the transmission slipped out of gear under load. Having done that, and proven to myself that this 900cc mill is a sweet one I can invest more money into some age-related issues.

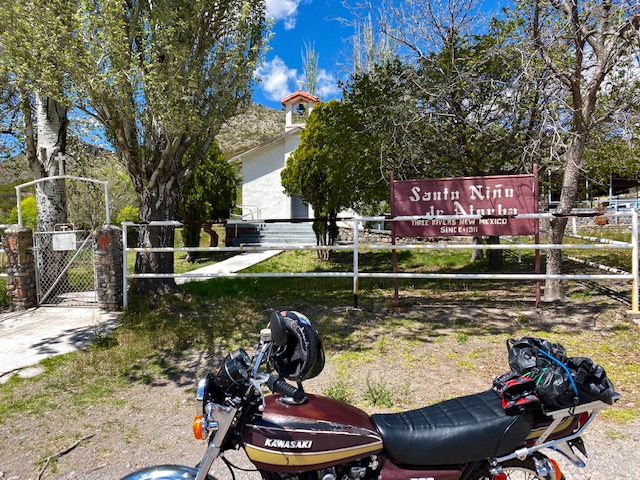
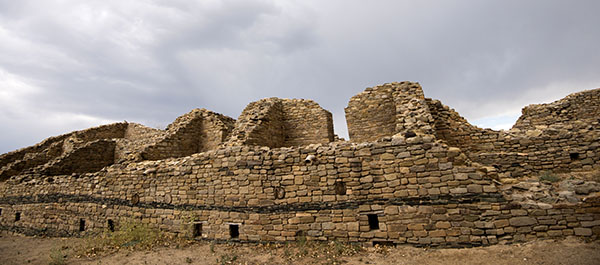
On my first 30-mile road test I had a two copious oil leaks and I resolved those in a previous story. Zed was ready for a more ambitious undertaking. I laid out an 80-mile round trip to the Three Rivers, Santa Nino De Atocha church. The Santa Nino is off the beaten path but is still in use. Next door to the church is an interesting graveyard that I planned to commune with the spirits in while I sipped my thermos of Batdorf & Bronson® coffee. Hanging out with dead people is a great way to avoid catching the corona virus.

Zed ran strong and we made it out to church in fine tune. I parked the bike, pulled out my thermos and prepared for the séance. Then I noticed the gas leak. A panic set in: how long has it been leaking? Will I have enough fuel to get home? Won’t I look pretty stupid after hating on tank sealer for so long?

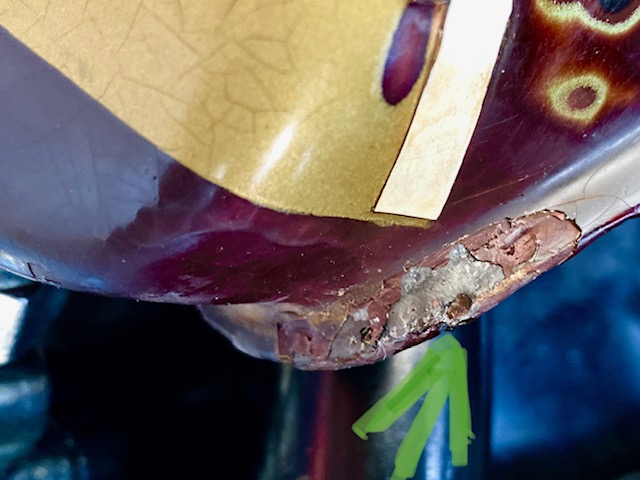
I took a big slug of coffee in case the situation spun out of control and I had no time later. Popping the seat I could see a thin stream of fuel shooting from the left rear seam directly into the air box inlet screen. It was strong, pretty thin and 3-inches long…Ahem…

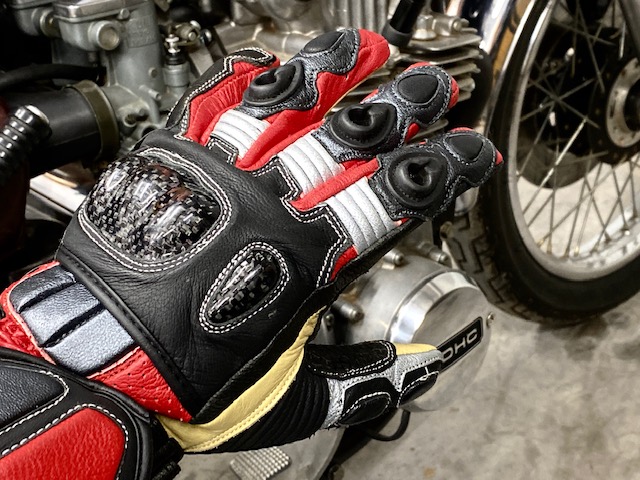
I never go anywhere on a motorcycle without tools so I had vise grips in my bag (that was strapped to the much-hated luggage rack) and managed to crimp the seam slowing the pinhole leak. Fuel was still seeping but at least it wasn’t spraying out. I took one more slug of coffee for the road and reloaded the bike. Since the leak was using fuel faster than I was burning it I cruised back at a brisk 80 miles per hour. I had less than a gallon left when I got home, a 20-mpg average.

This next part will require so many disclaimers that the blog would crash under the weight of them. Listen, if you don’t know how or are even slightly worried about welding a fuel tank then don’t do it. If you choose to weld on a fuel tank don’t come crying to me pointing at bits of sheet metal stuck in your eye.

After draining the tank I blew it out with a grass blower to dry out any residue. Next I shot a heat gun into the filler neck to warm up the tank, hoping to evaporate any remaining fuel. Then I blew it out again and gave it the heat gun treatment again. This all took about ½ hour.

My finely calibrated nose told me that the fuel/air ratio inside the tank had dropped to safe levels. You can’t teach this skill; it’s like wine tasting. You have to blow up a few gas tanks to get the knack. I took the tank outside where there was plenty of room to explode and stuck a lighted propane torch nozzle inside the tank. The tank did not kill me. I was ready to weld.

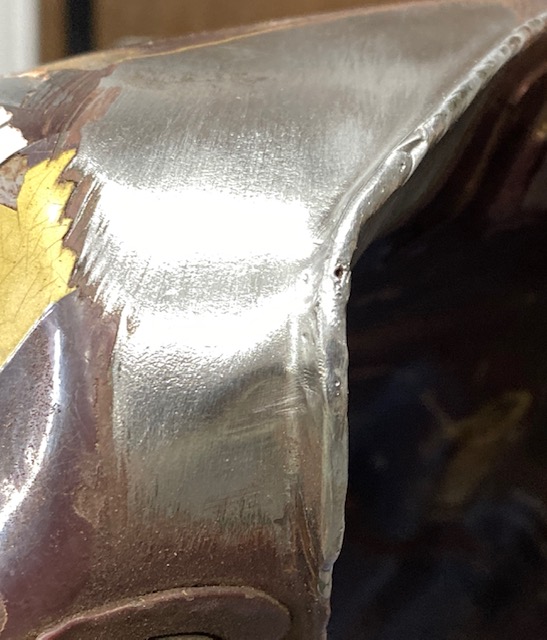
I knew where the pinhole leak was but I brazed a wide area on either side in case other leaks were concealed by the main leak. I use brazing rod instead of welding the tank because the metal was so thin I would burn through trying to cover the amount of tank I wanted to cover. Once I thought that I had piled on enough material I reinstalled the fuel tap, filled the tank and waited to see if it would leak.

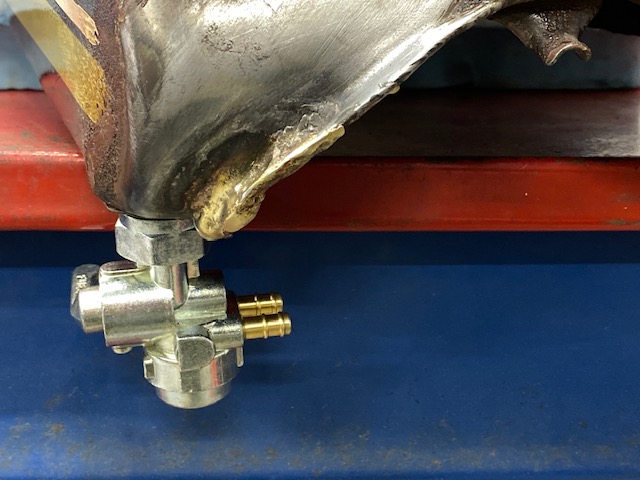
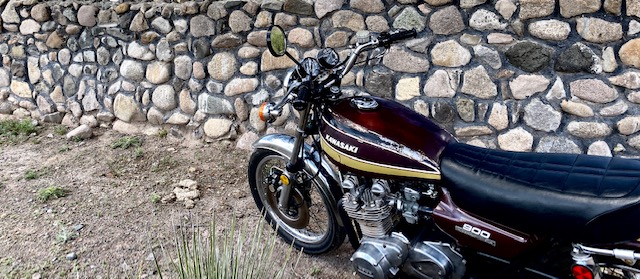
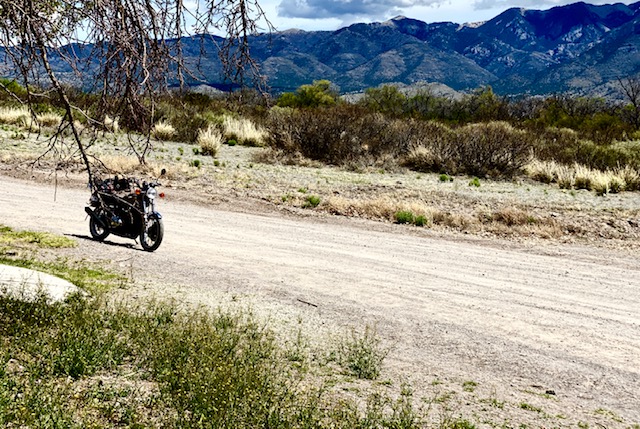
The tank stayed nice and dry. It was time for another test run, this one 140 miles in duration. Zed passed with flying colors. This bike runs smooth at 4800 RPM and 70-ish miles per hour. Hills and headwinds don’t bother the thing and I had plenty of both on the third test run. I averaged 40 miles per gallon running 70 most of the trip.

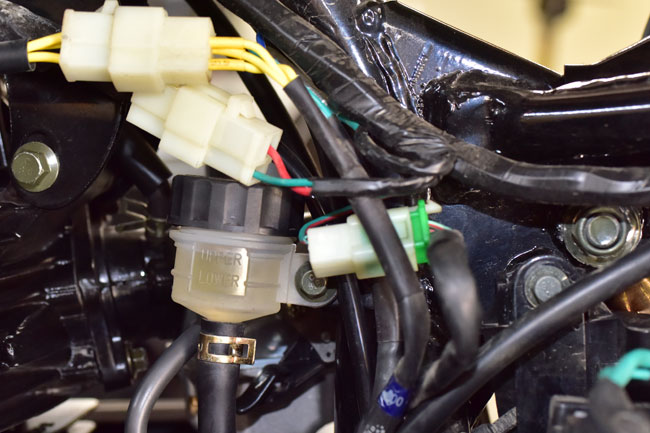
The half-circle cam-end rubbers leaked oil but I knew they were leaking and I have new ones on order. The alternator wire harness leaks a few drops where it exits the stator housing. That will require a new grommet. The speedometer is jumpy above 60 miles per hour. I’ll try a new cable but I suspect the grease has dried out inside the gauge. Low beam blew out in the headlight. That may be due to the 14.8-volt charge rate or the old bulb that came in the headlight was ready to go. I’ll install another bulb and if it blows I’ll knock down the voltage to the headlight. Otherwise nothing really bad happened.

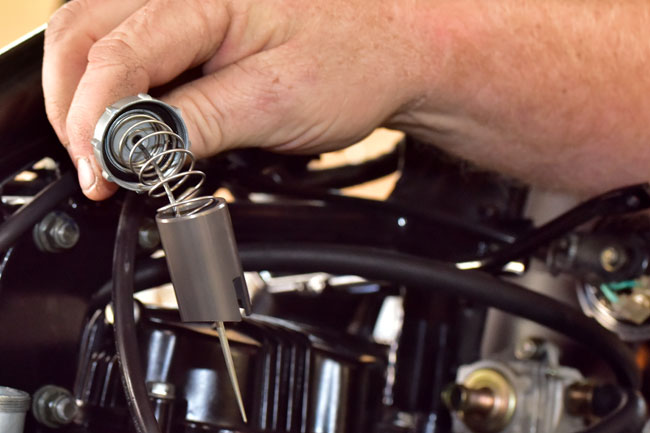
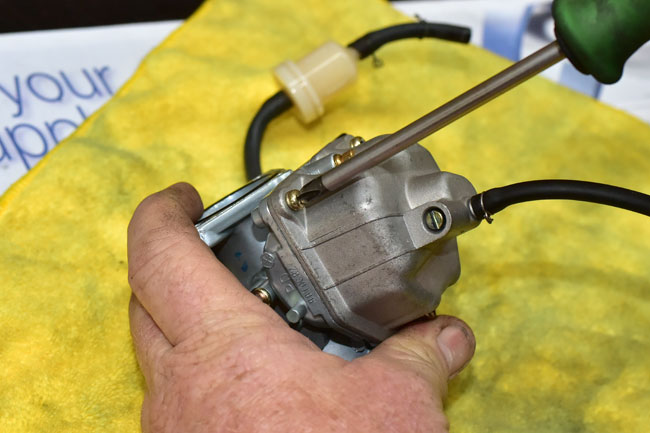
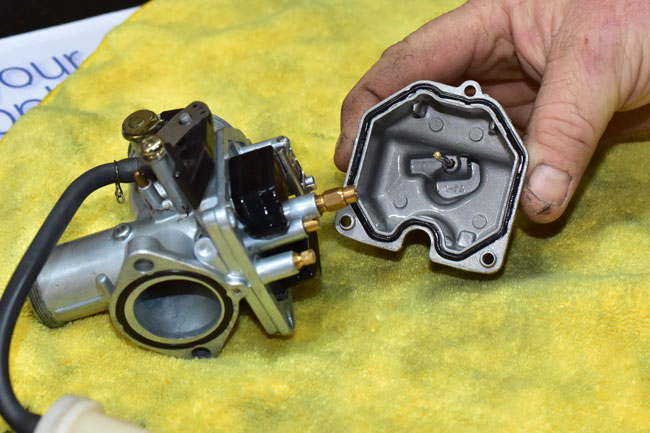
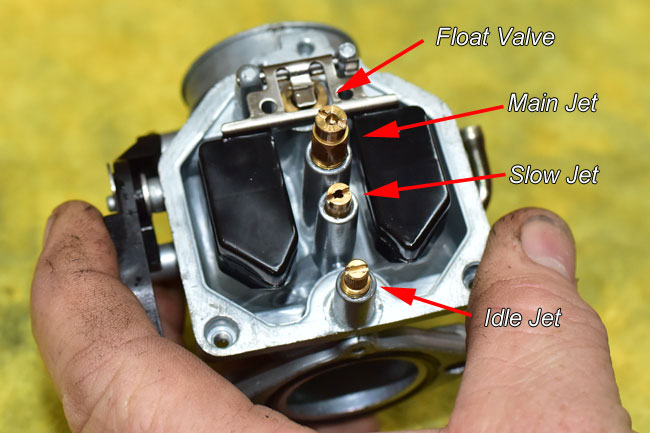
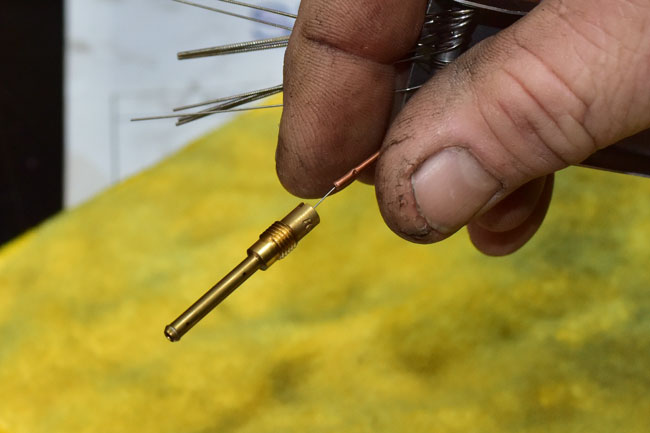
Zed has proven to be an excellent runner so there are a few more things I want to do to the carburetors. New needles and seats, enrichener plunger seals, bowl gaskets and free up the stuck bowl drain screws. Kind of tighten up the carbs as it were.

Now we come to the elephant in the room: the fuel tank. Zed’s tank was very rusty before I cleaned it out. That rust has eaten deep into the seams of the gas tank. I don’t believe my patch job is a permanent fix. Maybe not today, maybe not tomorrow, but someday another thin spot on the seam will give way and start spewing gasoline. Zed’s patina is cool and all but I plan on taking some long, lonely motorcycle rides and that gas tank worries me. I know I could pour that devil’s brew tank liner crap inside and buy a few years of service. A new Z1 aftermarket tank in grey primer is $300. Or I could use Trump’s stimulus check on a whole new set of Z1 Enterprise’s red bodywork (tank, fender, side covers) beautifully painted in the original Kawasaki style for $1300.

I’m cheap but that Z1E bodywork would make old Zed look like a new motorcycle. I have no bias against a nice looking motorcycle. I don’t need to ride a ratty bike, you know? Any suggestions?


Check out the compleat Z1 resurrection here!

It’s a Daisy!

A pellet gun that shoots as well today as it did nearly 40 years ago…the Daisy 717!

The pellet pistol you see in the above photo is a Daisy 717, one I’ve owned for nearly 40 years.  After learning that my Crosman C02 pellet pistols wouldn’t hold pressure a few days ago, I thought I’d try the Daisy, and whaddaya know, it worked like a champ (just like it did when I bought in the early 1980s).   The Daisy is a single-stroke pneumatic air pistol.  You pump it once with this long lever that swings out to the left, open the bolt (just like on a bolt-action rifle), put a single pellet in it, close the bolt, and then shoot.  No CO2 cartridges required.

Daisy first introduced these guns in 1981, and at the time, they sold for something well below $60.  I want to say I paid around $40 for mine at a department store called Gemco.  In those halcyon days, I thought I’d give competitive air pistol shooting a shake and I didn’t want to spend a thousand bucks or so on a serious handgun.  The range was short (I  think it was 10 meters, or 33 feet), and wow, were those targets ever tiny.  I only tried that game once…the club where the matches were held was a long drive for me, the competitors had uber-expensive guns, and I just wasn’t that into it.  But I didn’t embarrass myself, and I did better than some of the folks out there with their big bucks pellet pistols.   Then I put the Daisy away and more or less forgot about it for the last 40 years.

Well, sort of.   A friend in the bomb factory (where I was working at the time) told me about another use for air guns, and on occasion, I would put the Daisy to work when the need arose.   That story goes like this:  No matter how militant a feminist your better half might be, when there’s a spider on the ceiling or in the bathtub she’s going to get all sguiggly and require manly intervention.  That’s where yours truly and the mighty Daisy answer the call to arms.

Truth be told, there’s no way I went to get up close and personal with a big old hairy, funky spider.  I was always just as scared as Sue was, but I couldn’t let her see that.  I know, I used to be an Army officer, I’ve jumped out of airplanes, I’m pretty good with a 1911, and I rode a motorcycle across China.  But I’ll admit it, and only to you:  Spiders scare the hell out of me.  But we’re men, you see.  Real men.  And when it’s time to step up, that’s what we gotta do.

This guy might be a little much for the Daisy. I photographed him on Glendora Ridge Road in 2003. Maybe a .458 Win Mag would be more appropriate.

The good news?  The Daisy 717 makes it easy.   All you need to do when you hear that dreaded directive (There’s a spider in the bathroom…get it!) is dig out the Daisy.   Cock it without putting a pellet in the gun (that part is real important…make sure you don’t put a pellet in).  Stalk your prey carefully and slowly approach the offending arachnid.  Place the muzzle (the end the pellet comes out of) approximately two inches from the spider, taking care not to alarm it.  Take a deep breath, let it halfway out, and then slowly squeeze the trigger (without jerking it) while maintaining proper sight alignment.  When the pistol discharges, a high speed jet of compressed air will strike the spider, breaking it up into its major body parts, legs, and assorted arachnid appendages, which will then fall gently and harmlessly to the floor.  It’s likely said appendages will continue to twitch for several minutes after your demonstration of manly marksmanship.   More good news:  At this point, your job is done (you’ve done what your significant other requested).  You were asked to “get it” and you did.  If you are of a mind to, you can tell her to clean it up, but I wouldn’t advise doing so (don’t ask how I know this).

All that aside, after nearly four decades of faithful spider stalking and, most recently, trying to amuse myself during our self-imposed shelter-in-place house arrest, I thought I would try my Daisy in my cobbled-up indoor, garage-based pistol range.  I made a target stand out of a cardboard box and a phone book, and hey, the Daisy and I can still drive tacks!

Five shots at 20 feet with the Daisy. The 717 does nice work.

Product Test: British Motorcycle Gear Rapido Gloves

I have managed to use British Motorcycle Gear’s Rapido gloves in temperatures ranging from the low 40s to the mid-90s and they have worked well across that range. All in, I’ve done about 600 miles wearing these gloves. Despite the wide temperature variations the gloves were never uncomfortably hot on my rides around muggy, warm Daytona last month.

The Rapidos are fairly stiff when you first put them on. Normally stiff is an attribute men aspire to but getting the Rapidos on and off was a bit of a struggle the first day. By day 4 the gloves had loosened up quite a bit and I no longer thought about the process.

Another reason I had trouble getting in the Rapidos was because they come with triple hook and loop straps, two on the gauntlet and one on the wrist. I didn’t realize the wrist strap adjusted and so was forcing them on willy-nilly. Loosening all the straps made it easier.

One benefit to all those straps is security: once tightened down this glove is not going to fly off in a crash unless your hand is still inside it. More security is provided by the thick rubber finger guards on the leading edge of the glove. If you’ve done much off-roading with faster buddies you know how painful a rock tossed into your hand can be. I wish I had these on a few months ago when Mike kicked up a boulder into my finger. It felt like the thing was broken. Three of the finger guards have little vents built into them, kind of like little hood scoops. The vents don’t pass much air but if you hold your hand out fingers forward you can feel the air coming in.

Yet more security comes in the form of a carbon fiber looking knuckle plate attached to the glove. BMG calls it Carbon Leather, I think. I haven’t managed to test this bit because I don’t want to hurt myself but if your hand became pinned beneath the bike and the pavement (never let go of the bike!) I imagine it would buy a few hundred feet of abrasion before you started to lose any knuckle. Amazingly, all that armor does not restrict hand movement much and once the gloves are broken in you can make a fist easily.

The Rapidos have a fairly long gauntlet and with the straps disconnected the mouth opens wide to fit big jacket sleeves. There’s a decent range of adjustment on the gauntlet. I was able to snug them down while riding in just a T-shirt and a G-string. The Rapido’s palm area has a lot of activity going on what with extra pads and stitches but none of it seemed to cause blisters. The Rapidos are heavier duty gloves than I’m used to wearing. They feel like they might actually protect your hands in a wipeout. I usually wear long white opera gloves or Harbor freight Nitrile gloves when riding motorcycles.

My red Rapido glove’s appearance is not exactly conservative; in fact they’re downright flashy. When I put them on I get a strange urge to crash The Avengers from the Marvel movie series. If you’re an under-the-radar guy get the black Rapidos. At $79 list price the Rapidos are not cheap but my regular work gloves run 10 or 12 bucks a pair and they don’t have near as many nifty features as the Rapidos.

I’m going to use the Rapidos for the next few years and I’ll be sure to write an Exhaustnotes long term review if the world doesn’t end before the gloves do. Maybe we’ll get lucky and I’ll get to crash test the Rapidos.

The Leaky Wheel Gets The Seal

I’ve been watching Berk’s incredible ExhaustNotes content tsunami from afar. The man is amazing, filing stories at a pace that would take 10 or more standard journalists to match. I, on the other hand, have been sleeping until noon and never change out of my pajamas. I managed to avoid getting Covid-19 so far and for a lot of Americans that would be considered success. I’m not most Americans. I want it all so I tore into Zed hoping to stop a few nagging oil leaks that are messing up my nice new concrete floor.

The biggest leak on Zed was the tach drive. And on that part the hardened, dry O-ring was the major source of oil. I dismantled the thing anyway and replaced the shaft seal with a new one from an EBay seal kit. I went EBay for the seals even though my favorite store Z1 Enterprises was cheaper. It was the shipping. The EBay kit was only a $1 more but included free shipping, which made the seal, kit $10 less. Yes, I’m that cheap.

The O-ring had to be gently cut off and it broke into two pieces as the razor knife dug in. For the internal seal I inserted a small screwdriver at an angle and using a small pin punch, tapped the screwdriver until the seal popped out. It wasn’t that tight. Reassembly was a breeze.

While the leak from the tach drive was dependent on the engine running, a constant drip from the very bottom of the engine was not. It leaked all the time. I traced that leak to the shifter shaft seal. This seal is submerged in oil, hence the steady if unspectacular leak. This leak wasn’t the end of the world as a week’s worth added up to a dime-sized puddle. I figured I had the seal so why not change it?

To do the shifter seal right you really need to remove the countershaft sprocket and the shift ratchet housing. I’m way too lazy to mess with all that, Besides, I didn’t have a gasket for the shifter casting and I didn’t want to create more work. Instead, I used two thin strips of metal and bent short hooks on the ends. The hooks were small enough to fit between the shifter shaft and the outer metal ring of the seal. After jiggling them into place I clamped the ends together with vise grips and used a long paddle bit to lever the seal out of its housing.

It worked so well it caught me off guard. Oil poured out of the shift seal housing onto my nice, new concrete. I rushed around looking for something to catch the mess. Nothing was low enough to fit under Zed’s 4-into-1 headers. Ultimately I cut down an empty kitty litter jug and shoved the plastic tray under Zed. What a mess.

Oil was still dribbling out when I managed to get the seal somewhat started using a short piece of ½” CPVC pipe as a driver. The CPVC pipe wasn’t quite thick enough to make a good, flat push so I drilled a ½” galvanized nut to slip over the shifter shaft and then pounded the nut with the CPVC. That combination made a satisfying thunk when the seal quit moving and the new seal looks seated about the same as the old seal depth wise.

I lost a quart of oil in the shifter shaft mess so I topped up the Kawasaki and after cleaning the floor, ran the bike 5 minutes with out seeing any major leaks. This is good news. The seal changing kit has been taped together and labeled so that when I die anyone going through my tools will know what it’s for.

Time to take Zed out on a run to see what else leaks. I still don’t have a tag because the tag places are closed here in New Mexico. I should have insurance soon. I’m going to bring along the title in my name, proof of insurance and a line of BS for when I get stopped due to my tag being expired 17 years.

There are a few other seals that I’m going to change because they are old. They’re not leaking yet but I plan on taking Zed on some long rides. I figure 45 years is long enough for a seal to last.

Pfffftttt!

Hmmmm….an indoor range with pellet guns during the shelter-in-place. What say you?

Sitting in my home office surfing the net, I’m sheltered in place which basically means staying home.  It’s like detention in high school, or maybe house arrest, except if you sneak out you could die.  I don’t know what it’s been now.  Two weeks?  Maybe more?  Anyway, I was thinking about how much I missed getting to the range.  I’m dry firing my SIG Scorpion a lot and assessing my performance by how stable the sight alignment is when the hammer drops, but it’s not the same thing as seeing the results on target.  Then I saw two handguns I hadn’t fired in maybe 30 years.  They’re the two you see above…Crosman CO2-powered replicas of a Smith and Wesson Combat Magnum (the Model 19) and the Colt Python.   Hmmmm.

So I grabbed the Python and headed out to the garage.   You load a CO2 cartridge in these things by popping the left handgrip off, inserting a fresh CO2 cartridge, and then tightening the screw at the bottom of the grip to tap the keg and form a seal.  Except it didn’t.  Form a seal, that is.  Pfffttttt!  That’s the sound of a CO2 cartridge emptying.  That sound, and a bit of frost on the backstrap due to the rapidly expanding CO2 escaping around what used to be an effective seal.

No problem, I’ll just try the Combat Magnum.  It’s good to have spares, you know?  Except the results were the same.   Pfffffttttt again!

Eternally optimistic, I went back to the Python and took it apart.  Cheaply made guts, to be sure, but to my great surprise the internals are more complex than a real Python.  Hmmmm.  Man, there are a lot of seals inside that thing!   I took it all apart and sprayed the hell out of everything with WD40, thinking the seals would be refreshed and, you know, seal.  It took a lot longer putting it back together, and then it was another CO2 cartridge.    And another frosty Pfffffttttt!  Times that by two, and you’ll have a good idea of how I spent Saturday afternoon.  Except after the last attempt, I guess I forgot how it all went together again and I reverted to a YouTube video on this specific subject.   You can find everything on YouTube.  God forbid I ever have a brain tumor, but if I did, I’m pretty sure somebody’s done a YouTube on how to surgically extract it yourself at home using readily-available kitchen utensils.

Sunday morning started with me watching the video again.  With the help of a good Mariachi sound track (watch the video) and an artfully-edited YouTube video, I finally got the Crosman back together with no parts left over.

My Crosman .357 had two problems.  The first was its Pfffftttt! problem; the other was the “elastomeric spring” that holds the barrel latch up.  That part was sort of a rubber chingadera that had degraded and hardened.  The spring aspect of its existence didn’t really work because the part no longer had any spring to it.  Holding and examining it in my fingers, it fell apart like a cheap politician’s promise (sorry for the redundancy).  I thought maybe I could order a new elastomeric spring (which really is an exotic term for a little piece of rubber), but when I went online I saw right away I would have problem.    I found parts lists for my pellet pistol, but most of the parts were out of stock, and the few parts that were still in stock were way expensive.   I only paid something like $37 when I bought the pellet gun maybe 35 years ago.   There’s no way I’m going to pay half that for a little piece of rubber.

Like most exploded drawings, though, it was visually arresting.  I was already in mental handcuffs studying it when I noticed the elastomeric spring circled in red.  Whoever loaded that drawing evidently needed the same part.

The way the Crosman 357 loads is you depress a button in the top of the frame and it acts against the elastomeric spring you see in the drawing above.  That lowers a lever to unlock a tab (the lever is the part immediately above the elastomeric spring in the drawing).  That allows you to unlock and rotate the barrel down and the gun opens like an old British Webley. Then you can remove the cylinder and put the pellets in it.

I couldn’t fix the seal problem, but I felt like I wanted to fix something.  So I cut up a wide rubber band, superglued the pieces together, and made my own elastomeric spring.  It works well.  But that’s not the main problem.  That honor goes to the seals being (pardon the pun) shot.  They are suffering (like me) from age-induced degradation.  To make a long story longer, I went through six CO2 cartridges trying to find a fix.  You can buy new seals, but they cost nearly as much as what I paid for the whole gun originally.  And that’s before you put the larcenous shipping and handling charges on top of it all.  Truth be told, I just don’t want to mess with the Crosman anymore.  Even if I got those new seals, there’s no guarantee the thing is going to work.

The good news?  I know a hell of a lot more about how a Crosman pellet revolver is supposed to work.  More good news?  The story I’m telling here was an interesting way to spend eight hours of my shelter in place time.  The bad news?   My two Crosman pellet guns are now nothing more than display pieces.  I could probably find a way to make new seals, but I’m just not that committed to it.

I’ve got another CO2 pellet gun (a 1911) laying around somewhere that I’ve had about 10 years and never fired. I might dig it out later and screw around with it. I’ve also got an old Daisy pneumatic pellet pistol, and I think I’ll try to find it to see if it still works.  As always, stay tuned.

If your TT250 won’t idle…

When you don’t run a carbureted bike for a while and it runs rough or won’t idle, it’s probably because the slow jet is clogged.  It’s not from dirt or contaminants getting into the fuel; it’s from the fuel itself.   The fuel congeals when the bike sits for an extended period (we’re talking months here), the jet clogs, and your bike just won’t idle or run well at small throttle openings.  That often occurs if you let your bike sit over the winter.  One way to potentially avoid this is to close the petcock and run the bike out of fuel when you’re done riding.   I don’t do that, though, mostly because I don’t want to let the bike idle for an extended period and, truth be told, I’m lazy.

I wrote the CSC maintenance tutorials for the TT250, so I had a bit of a leg up doing this myself on my TT250 when I had the problem recently.  I hadn’t ridden my TT250 in a few months, it was hard starting and I couldn’t get it to idle when I finally did get it to start.  I knew what was going on immediately:  It was the slow jet clogging.   All carbed bikes will do this (it’s not a problem unique to the TT250).

Everything I’m showing you here is right out of the CSC TT250 carb maintenance tutorial.  That tutorial covers everything about the carb. This blog is specifically focused on cleaning the slow speed jet to address the idling and slow speed roughness issue.

I find the best way to do this is to pull the carb off the engine.  To do that, you’ll need to remove the bike’s side panels.  Close the fuel petcock and remove the fuel line from it to the carb (you’ll spill a little gas, so don’t do this around open flame or heat).  Like a lot of maintenance actions on modern motorcycles, half the job is just removing stuff that’s in the way first.

Disconnect the duct that goes to the airbox and pull it off the carb.
You don’t have to disconnect the duct at the airbox end; just take off the end that attaches the carb.
Unscrew the top of the carb.
Remove the slide from the carb.
Working from the left side of the bike (opposite the carb) remove the bolt securing the rear brake fluid reservoir and let it hang free. You need to do this to get to the carb mounting bolt on the left side.
Unbolt the carb from the cylinder head. The nut on the right is easy to get to; the nut on the left side of the carb is a bitch to get to, which is why we moved the brake fluid reservoir out of the way.

At this point, you can remove the carb from the bike, and then the float bowl from the carburetor.  This will provide access to the jets.  Some folks might think that you can remove the float bowl with the carb still on the bike, but I’ve not found a way to do that.  It’s best to do it the way I describe here.

Undo the three screws securing the float bowl to the carb.
Remove the float bowl. You’ll spill a little gas here, so be careful.

After have removed the float bowl, you’ll be able to see the jets.  The one we’re interested in here is the slow jet.   Remove it with a flat-bladed screwdriver.

The slow speed jet is the main character in this “won’t idle worth a damn” story.

After removing the slow jet, clean it thoroughly.  This involves cleaning all the orifice holes on the sides of the jet, and the main hole through the inside diameter of the jet.   You need to use a thin wire to do this.  Just blowing it out with carb cleaner or WD 40 won’t dislodge the tiny bits of congealed fuel.  There are tools to do this (CSC Motorcycles sells them).  I used a small diameter brass wire and it got the job done.

Use a wire to clean the slow jet and then blow it out with carb cleaner or WD40.
Looking down the bore of the slow jet.
Make sure you use the wire to get everything out of all the holes.

Once the slow jet is clean, reinstall the jet in the carb.   There’s no adjustment here; just screw it in taking care not to overtighten it.

After you’ve done the above, assembly is the reverse of disassembly.  Your bike should start easily, idle, and run well at small throttle openings.

Golden Spike National Historic Park

To continue our Utah exploration, this blog is on the Golden Spike National Historic Park in Promontory, Utah.   This is where the Transcontinental Railroad came together, with the Union Pacific building from the east, and the Central Pacific building from the west.   The Transcontinental Rail Road was completed on 10 May 1869.  It’s quite a story, and Golden Spike National Historic Park does a grand job in telling it.

Heading into Gold Spike National Historic Park.
The National Park Service advises not listening to your GPS, but to instead watch for the signs.
Jupiter and No. 119. Both locomotives were built in the eastern, industrialized US.
Keep going in one direction, and these tracks would lead to Council Bluffs, Iowa. Head in the opposite direction and you’ll arrive in Sacramento.
Jupiter and its coal tender. Both this locomotive and No. 119 (see below) are not the originals. They were reverse engineered from photographs and completed in 1979.
No. 119. Neither Jupiter nor No. 119 were supposed to be the locomotives that met at this site. Antelope was replaced by Jupiter when it hit a fallen tree trunk along the way to Promontory. No. 119 replaced another locomotive when the first one was chained to the rails in Piedmont, WY, by workers who had not been paid.
A reenactment of a famous cowcatcher kiss.
Another view of Jupiter.
And another. If you are a photography enthusiast, Utah is a target-rich environment.
No. 119 basking in the Utah sunshine.
I had a new wide-angle lens when I shot these photos.
Colorful Jupiter. Both originals, Jupiter and No. 119, died a death that didn’t quite fit their historical significance: They were both sold for scrap (at less than $1000 each) in the early 1900s.
And finally, headed back to Ogden, Utah, on State Route 183.

Susie and I arrived late in the afternoon at Golden Spike National Historic Park to catch their last presentation of the day.  We hung around for a bit taking a few more photos and were about to leave when one of the docents suggested we stay a little longer.  They were about to move the locomotives back to their garage, or barn, or whatever you call the structure where you park a locomotive.   We were glad we did, and I grabbed this video.

Italian meat sauce and lasagne…

I’m sheltered in place, I’ve got enough ammunition reloaded to arm an infantry platoon, I’ve been reading a lot, and I’ve been sending and receiving lots of email.  Some of that email has been from good buddy Sergeant Zuo over in Lanzhou, and one of the things Zuo mentioned he’s been doing is developing his culinary skills.  I’ve been doing the same, and I thought I might share one of my favorite recipes with you.

Whoa, you might say…all this manly man stuff about motorcycles, international travel, guns, reloading, and…well, you know.  Cooking?

You bet.  For me, it started back in the ’70s, when I was an engineer at General Dynamics in Texas on the F-16.  I couldn’t get a date to save my life, I was single, and I was lonely.  And there were all those beautiful young Texas ladies.

One of my good friends was constantly dating a variety of beautiful women.  So one day I asked him:  What’s the secret?

Good buddy John was only too happy to put me on the right path.  “Don’t ask them out for dinner,” he said.  “Invite them over to your place for dinner, and you cook a meal.  No one can resist that…”

Hmmm….

Well, it worked.  Every time.   And today I’m married, two kids, two grandkids with a third on the way, and yep, I love to cook.

So here’s one of my favorite recipes:  Italian meat sauce and lasagna.   It’s not the original dinner good buddy John cued me to (that was bacon-wrapped filet mignon, and that’s a story for another time).  But this one is even better, I think.  You can use the meat sauce with anything Italian (ravioli, spaghetti, stuffed shells, and more).  Today’s focus is on lasagne and it works well.

Italian Meat Sauce Ingredients

What you’ll need is:

1 16-once can of diced tomatoes (my preference is Contadina, but these days, I’ll take whatever is on the shelves)
1 8-0unce can of tomato paste
2 stalks of celery (sliced)
1/2 onion (chopped)
3 cloves garlic (crushed)
1 lb ground beef (browned and chopped)
1 Italian sausage
1 teaspoon Italian seasoning
1 teaspoon oregano
2 bay leaves
1/4 to 1/2 teaspoon red chili pepper flakes (depending on how much zing you want in your sauce)

Getting started. I don’t usually eat the sausage, but having it in the crockpot adds tremendous flavor to the sauce.
You can leave this out if you don’t want a tiny kick to the sauce, but I think it adds something to the mix. I generally use a little more than a quarter of teaspoon.
We usually get the leanest ground beef we can find.
Brown the meat in a frying pan.  As the ground beef simmers, I’ll chop it up with a plastic spatula.  PRO TIP:  I think the sauce is better if you chop the meat into the tiniest pieces you can get while it is browning.
I chop the onion into pieces like you see here.
Sliced celery in Italian meat sauce?   Yep. Try it.

So when everything is prepped, add it all to the crockpot, stir it a bit, and then start the crockpot. I start my Italian meat sauce in the morning and I’ll let it cook for about 5 hours on the crockpot’s high setting.

After everything is in the crockpot, stir it before turning the crockpot on.

While it’s cooking, the house will fill with this delicious Italian meat sauce aroma.  That’s part of the fun.  When the sauce is ready, it’s delicious.

The finished Italian meat sauce. It’s exquisite.  It’s far better than anything that comes out of a can or a bottle.

PRO TIP:  Slice up a half a green pepper, and add it to the crockpot before you start cooking.   It adds another flavor dimension.

Lasagne

Like I said above, you can use the Italian meat sauce with any recipe calling for it.  One of my favorites is lasagna.  All you’ll need in addition to the ingredients listed above is a box of lasagna noodles.

Lasagne Ingredients

1 box lasagna pasta
16 ounce container of ricotta cheese
Shredded parmesan cheese
1 container of sliced mozzarella cheese
Italian meat sauce (as prepared above; you’ll need the entire pot)

Follow the directions on the pasta box and boil the noodles.  I usually drop a little bit of olive oil in the boiling water to keep the noodles from sticking to each other.  The box will probably tell you to boil the noodles for 8 minutes.  Don’t go over that or the noodles will get too soft.

After the noodles boil, drain in a colander and we’re ready to start.
Place one layer of noodles in a baking pan.
Place a layer of meat sauce on top of the noodles; then, put ricotta cheese on top of the meat sauce.
Place slices of mozzarella cheese on top of the ricotta cheese as shown here.  Add another layer of noodles and repeat the layering with meat sauce, ricotta cheese, and mozzarella cheese.  Repeat this layering until the bowl is nearly full.  Sprinkle a little bit of Parmesan cheese on top.
Cover the pan with aluminum foil and preheat oven to 375 degrees.
Bake at 375 degrees, covered, for 40 minutes. I like to remove the aluminum foil and put the oven on broil for a couple of minutes to brown the cheese on top just a bit.

And there you have it.  It’s good, it’s easy, and you’ll have plenty of leftovers.

Aztec Ruins, New Mexico and Motorcycle Classics magazine

This was exciting…Susie and I were tooling through New Mexico on  our way to Mesa Verde in Colorado when we spotted a sign for Aztec Ruins National Monument.   We’d never been there.  In fact, we had never even heard of the place.  But it’s there, it’s real, and it’s a grand destination.  The result?   Well, hey, check this out!

The Browning Firearms Museum

Ogden’s Finest. It was a good morning to be a Harley, I think. A little wet, maybe, but still a good day to be out and about.

You know, you could do a pretty cool adventure ride lasting a couple of weeks without ever leaving Utah.  I know we’re stuck at home, self-isolating and all that, so it’s a good time to share past adventures and photos of great trips.  I’ve traveled a lot, and I think Utah is one of the best destinations on the planet.  It is probably the most scenic and interesting state in the country.

About that photo you see above…Susie and I rolled into Odgen one day back in 2015 to visit their museums, and these Ogden motor officers were parked out front. It was a great photo op, so I asked, they said okay, and the photo you see above is the result.  It was raining that morning, but that never stopped me from riding and it didn’t stop these motor officers, either!

Ogden has four museums and an art gallery in their old railroad station, and it’s one heck of a deal. For a very minimal entrance fee, you get to see the Browning antique car collection, the Browning firearms museum, the railroad museum, the cowboy museum, and an art gallery.  If you don’t have Ogden on your destinations list, maybe you need a new list!

Entering the Browning Firearms Museum. This museum alone makes Ogden a must-see destination.

Our focus in this blog is the Browning firearms museum.  John Moses Browning, who did much of his work in Ogden, was perhaps the world’s most prolific arms inventor.  This museum highlights his creations as well as many other interesting guns. I was in my element here!

Handguns, rifles, machine guns…Browning’s creations cover it all.
An 1886 Winchester. That buttplate is punishing with the 1886’s .45 70 cartridge.
The 1911 .45 ACP semi-auto handgun, one of Browning’s best-known inventions.
A few of Browning’s single-shot rifles.
More cool Browning single-shot rifles. The second one from the top is a Browning B78. I have one of those rifles.
A close up of the Browning 1878 stock.
A display of Winchester rifles.
An ornately-engraved Browning 9mm Hi-Power handgun. It was a later design than the 1911.

The lighting in the Browning museum was dim, and that’s why the photos you see in this blog are perhaps a bit below what I try to present on the blog. I was shooting at a very high ISO without flash, as most of the displays were behind glass.  The photos are not great, but they are pretty good considering the lighting.

There were a lot of interesting firearms on display, and then we migrated over to the car collection and the railroad museum. Those will be the subjects of subsequent blogs. Trust me on this…if you’re ever in Ogden, you don’t want to miss this place.

After a great lunch in downtown Ogden, we talked about where we’d go next, and Susie suggested Promontory Summit. We had learned a bit about it in the railroad museum, and we were only about 45 miles away. It’s where the railroad construction crews completed the railroad that reached across the United States. That’s coming up, so stay tuned!