
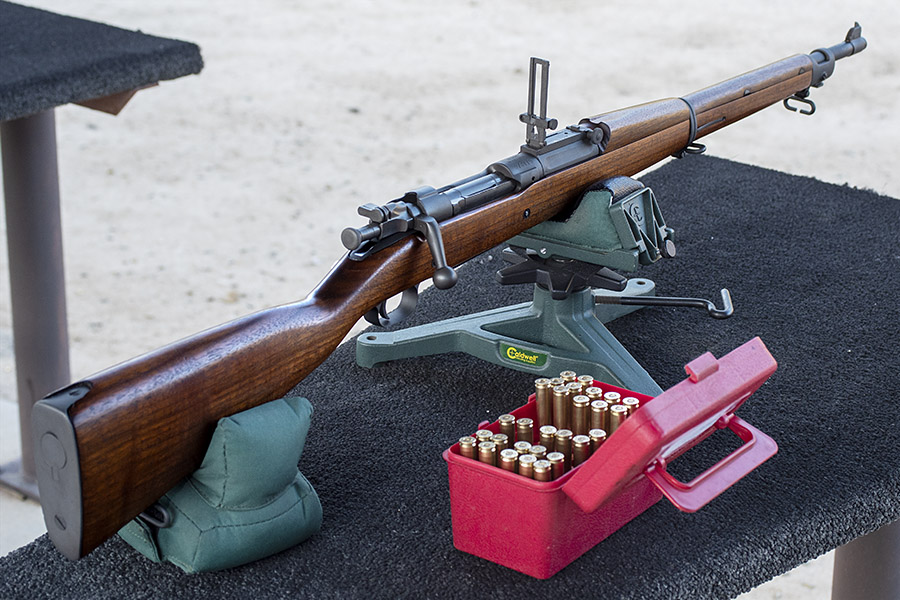
This is an update on my latest 1903 Springfield load development work.
I purchased this rifle about three years ago assuming the headspace was correct, but it wasn’t. That’s a risk associated with old military rifles. Rifle parts are often mixed through the years, and when doing so with the bolt and the barreled action, it’s easy to induce an excess headspace condition. That’s what I encountered on my rifle, so I had the Civilian Marksmanship Program (CMP) in Anniston, Alabama install a new 1903 barrel and rechamber the rifle. Live and learn, I guess. Always check the headspace when purchasing a milsurp rifle.
As it was returned to me from the CMP the rifle shot to the right and jacketed bullets shot way too high (at least I thought it shot way too high, but I was wrong…more on that in a bit). I noticed that the front sight was biased to the left (which made the rifle shoot to the right). I drifted the front sight in its base (it’s a dovetail fitting). The front sight takes a retaining screw that secures it to the barrel mount, and on my rifle that screw was missing. It might have shipped that way from the CMP or it might have fallen out.
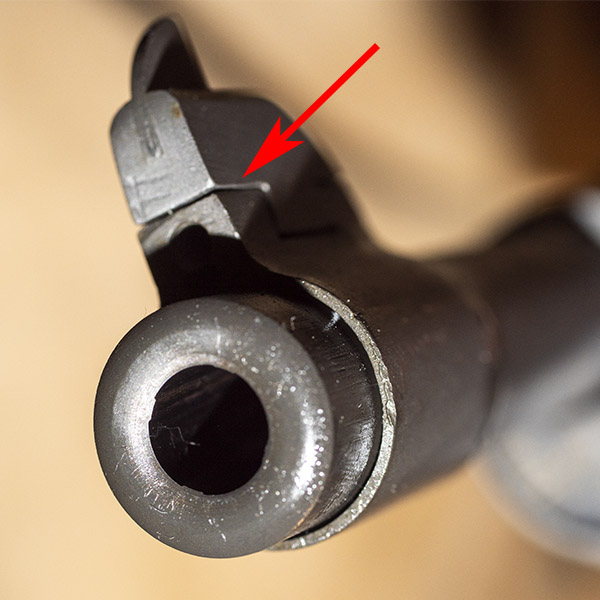
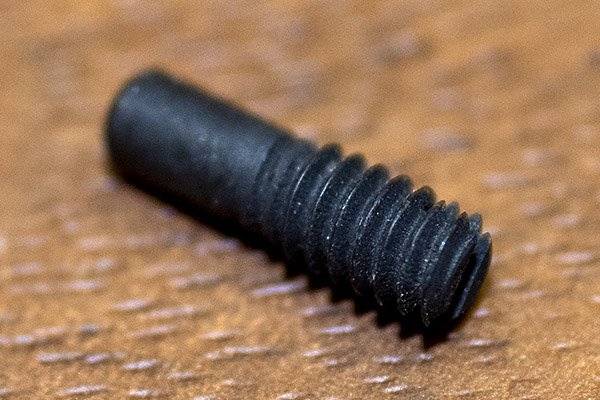
I wrote to the CMP regarding the missing front sight screw, but I haven’t heard from them and I found a replacement front sight screw on the Sarco website. I haven’t installed it yet (that will come later). I drifted the front sight in its dovetail to the right, and that brought the point of impact closer to the point of aim.
Before I get into the reloading specifics, I should explain a bit about the rear sight. The rear sight on the 1903 Springfield rifle is a complicated device. It’s called the M1905 rear sight, and it is designed and calibrated for standard military ball ammo (back in the day when the Army used .30 06 ball ammo). The sight is a ladder type rear sight and it has four aiming methods. One is the battlesight zero (it’s with the ladder down); the other three are with the ladder up which allows adjusting for various distances. In the big photo at the top of this blog, you see the rear sight with the ladder up. In the photo below, you see the rear sight with the ladder down.
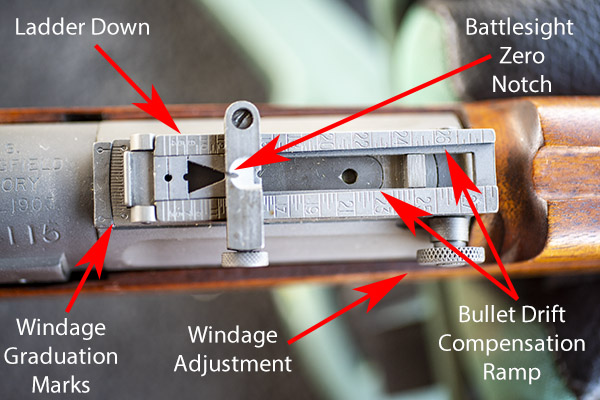
This first aiming method is through the battlesight zero notch with the ladder down. Battlesight zero means the bullet will coincide with the point of aim at 547 yards. The thought is that if you hold center of mass on a man-sized target at any distance up to 547 yards, you’ll hit the target. At 100 yards the rifle will shoot way high with the ladder down using the battlesight zero, which is what I experienced. I did not understand this was a normal occurrence when using the battlesight zero rear sight notch.
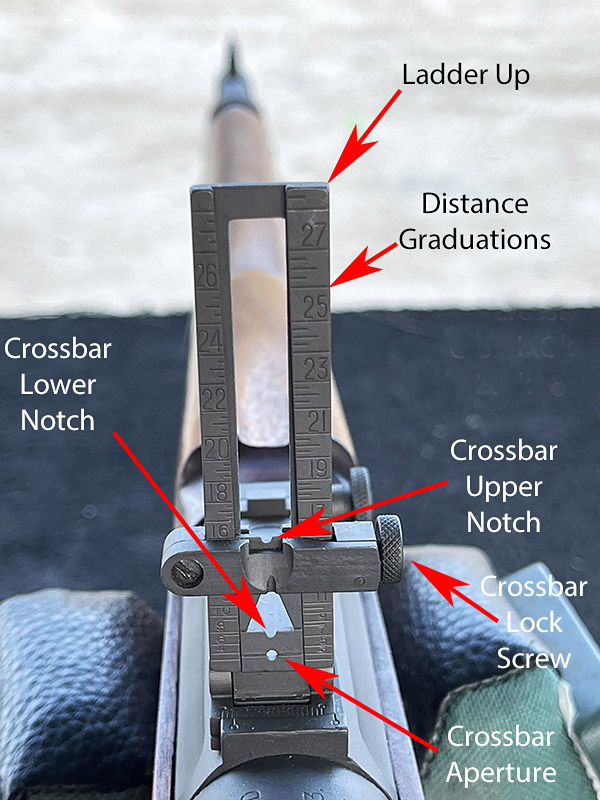
The other three aiming methods all involve shooting with the ladder up (as you see in the above photo). You can adjust for various ranges from 100 yards out to 2800 yards (which is roughly a mile and a half) by loosening the crossbar lock screw and sliding the crossbar up or down to various indicated ranges on the ladder. One sighing method uses the crossbar upper notch. You simply slide the crossbar up or down so that the top of the notch aligns with the estimated distance to the target (in yards) on the ladder’s distance graduations. Another sighting method uses the crossbar lower notch. In this case, you slide the crossbar up or down so that the top of this lower notch aligns with the estimated distance to the target. The last sighting method involves using the crossbar aperture. There’s a horizonal scribe line across the plate containing this aperture, and when using the aperture, you align that scribe line with the estimated distance to the target. The aperture allows zeroing the rifle for ranges as close at 100 yards, which is where I do most of my shooting.
All the above is calibrated for standard military .30 06 ball ammo. If you’re shooting cast bullet ammo, or jacketed ammo with bullet weights or velocities other than standard ball ammo, you have to zero your rifle for your specific load.
There’s one other bit of coolness incorporated into the design of this rear sight. The sight ladder is designed so that as you raise the crossbar, the sighting notches and aperture move to the left. That’s to compensate for the bullet’s natural drift to the right as distances increase.
It’s all very clever, but in my opinion the Army made it too complicated. The rear sight was probably designed by an engineer who never had to carry or use a rifle in the field or train recruits to do so. I think most of the guys I served with in the Army would have a hard time remembering all this (I’m an engineer and I struggled to understand it). Apparently the Army agreed: They simplified the rear sight on the later 1903A3 rifle. The 1903A3 rear sight is much better for an infantry rifle.
That’s enough background on the 1903 Springfield sights. Let’s get to the reloading variables and which loads the Springfield likes. I prepped several, and I also grabbed some of the ammo I had previously loaded for the M1 Garand.
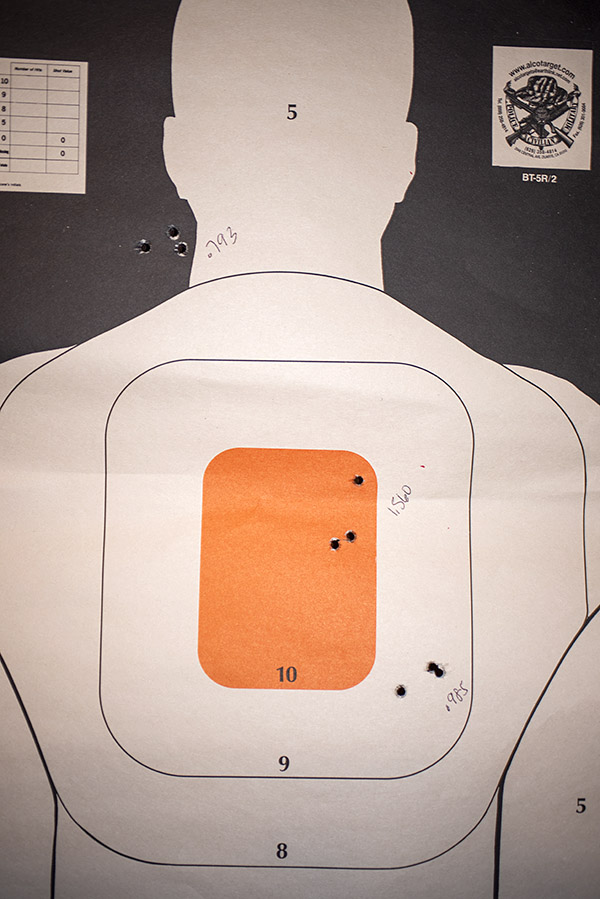
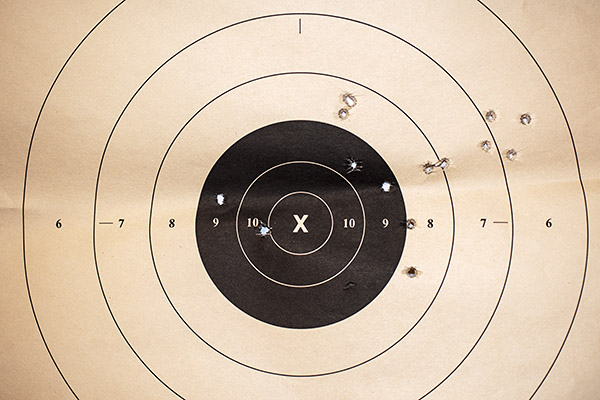
I first fired at a 5o-yard silhouette target to see where the bullets were hitting (there’s lots of real estate on that target). With the ladder down, the point of impact was to the right and low using the 17.0-grain Trail Boss and 173-grain Hursman bullet load. With the ladder up, it moved left a little and printed higher using the higher rear sight notch. For that 0.793 group up top, I used the bottom edge of the upper left box as the aimpoint. For the other two groups, it was the bottom of the orange bullseye.
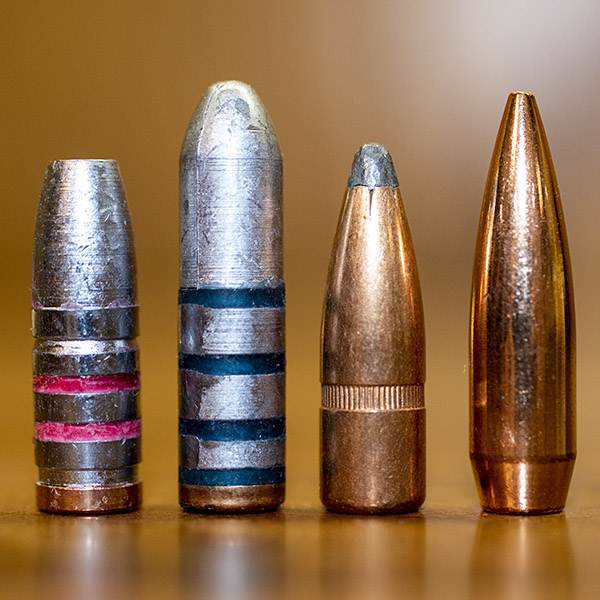
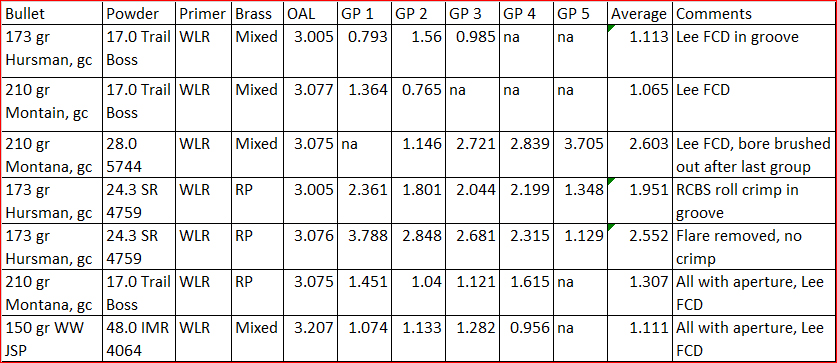
I shot groups at 50 yards with several different loads using combinations of the bullets shown above and SR 4759, Trail Boss, 5744, and IMR 4064 propellants, all at 50 yards, and all with neck-sized-only .30 06 brass. Then I returned a week later and fired groups with the 150-grain jacketed Winchester bullets (again at 50 yards).
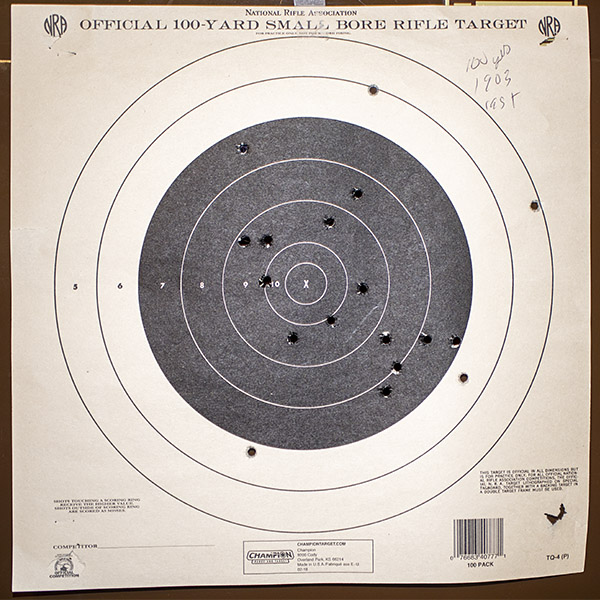
After shooting the above groups, I had 20 rounds left with the Trail Boss, Hursman bullet, and SR 4759 load. I shot two of them at a clump of dirt at about 80 yards and hit it (I think) both times. Then I put a 100-yard small bore rifle target up at 100 yards and shot at it with the 173-grain cast bullet SR 4759 load (8 rounds were crimped, and 10 rounds were not). To my surprise, all 18 rounds were on the paper and 14 of the 18 were in the black. It’s not that great a 100-yard group, but it shows potential. All this was with the ladder down using the battlesight zero sighting approach, so with cast bullets this rifle (at least with the SR 4759 load) is pretty much in the ballpark.
For the jacketed loads, I used the 150-grain Winchester jacketed soft point bullet (I bought a bunch of these a few years ago when somebody had them on sale) and 48.0 grains of IMR 4064. This is the accuracy load in the Lyman reloading manual with a 150-grain jacketed bullet, and I know from prior development work it is superbly accurate in my Model 70. It is also a minimum load, which is nice given the 1903’s steel buttplate. The 1903 did well at 50 yards with the Winchester bullets, so I posted another silhouette target at 100 yards. I fired three rounds and it was rough shooting at that target. Using the aperture, I literally could not see the orange bullseye at 100 yards when I focused on the front sight. The orange bullseye disappeared until I shifted my focus to the target. I’d acquire the bullseye, then rapidly shift my focus to the front sight and squeeze the trigger. I did that three times, literally firing blind, and managed to get a 3.050-inch 3-shot group.
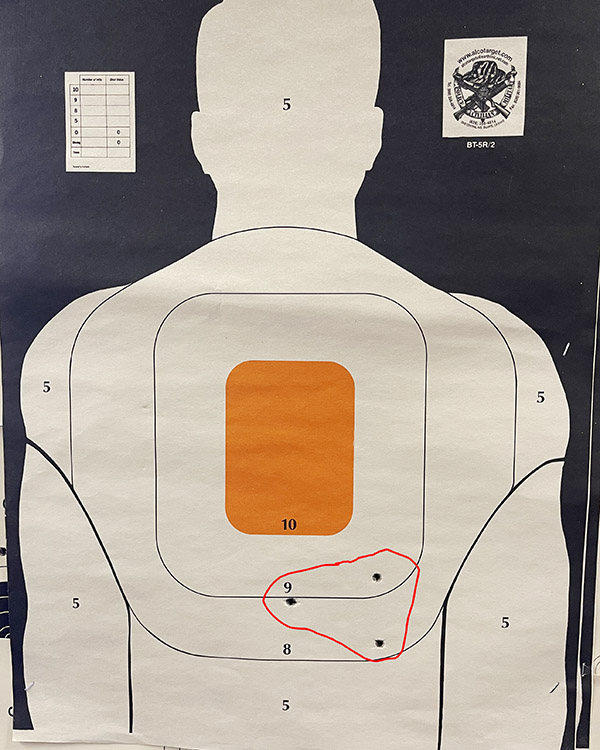
I figured it was time to quit while I was ahead. I didn’t have any more black bullseye targets with me. I knew I would be able to see those focusing on the 1903’s front post while sighting with the aperture. But with the orange bullseyes (like you see in the target above), I might as well have been shooting at night. I returned to the range a few days later and shot at 100 yards with the jacketed 150-grain Winchester bullets (with the 48.0-grain IMR 4064 load), the 210-grain cast Montana bullets (with the 17.0-grain Trail Boss load), and the 168-grain Speer match bullets (with a 48.0 grain IMR 4064 load).
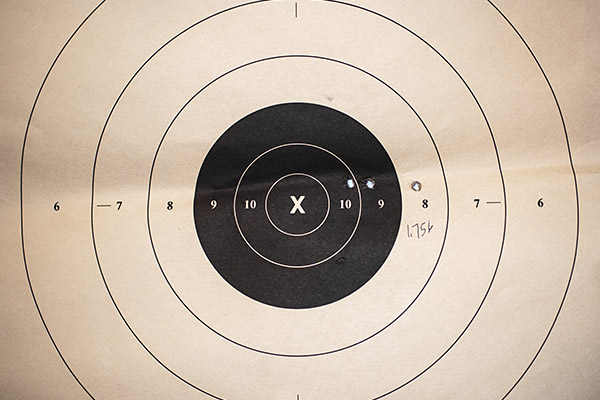
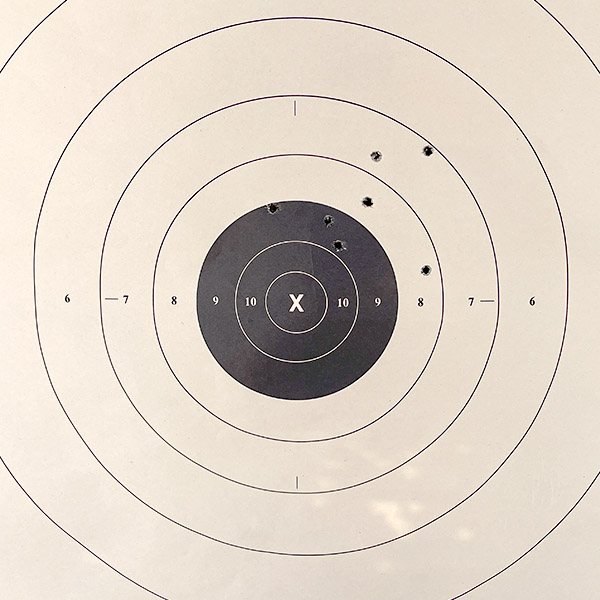
Using the rear sight aperture, I shot the target below at 100 yards with the 150-grain Winchester jacketed bullet and 48.0 grains of IMR 4064. I was pleased with the results and I quit after 3 shots (I didn’t want to screw up the group).
I then shot at another 100-yard target with the 210-grain Montana cast bullet (these were loaded with 17.0 grains of Trail Boss). I used the rear sight’s lower notch for this target. Hmm, what do you know…the elevation was about perfect without moving anything on the rear sight.
Finally, I fired eight rounds originally loaded for the Garand (I reload for the Garand in multiples of eight, as that’s what a clip holds), returning again to the rear sight aperture. This load used the 168-grain Speer jacketed boattail hollowpoint bullet and 48.0 grains of IMR 4064 propellant. The Speer bullets are almost identical to the Sierra match bullet, but the Speer’s ogive is slighly different and it has less bearing area in the barrel. I called the wizards at Speer about that and they recommended going to a heavier charge than would be used with the comparable Sierra bullet (they specifically recommended 48.0 grains of IMR 4064 for the Garand). That load was a little warm in the 1903 (the recoil was significantly more than the 150-grain Winchester bullet and the primers had slight flattening). But it was reasonably accurate.
My observations and conclusions from the above are:
-
- The 1903 Springfield rear sight is needlessly complex for an infantry rifle. You may feel differently. Hey, go start your own blog.
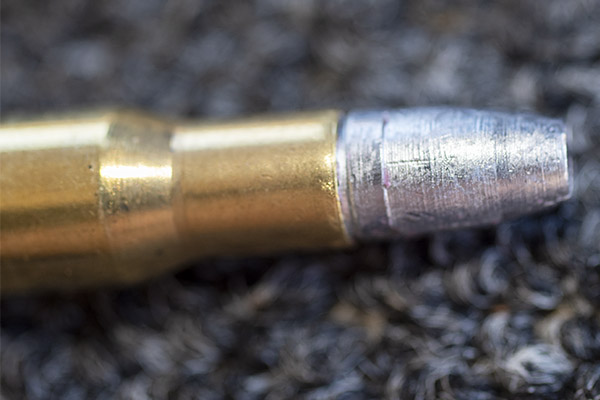
- With my cast bullet loads, there was no leading. My cast bullets had gas checks (the little copper cup on the bullet base), which helps to prevent leading.
- The Lyman cast bullet book showed a minimal 5744 load to be the accuracy load for the 210-grain Montana cast bullet. I did not find that to be the case.
- Both the Hursman 173-grain and the Montana 210-grain cast bullets were extremely accurate with 17.0 grains of Trail Boss, at least at 50 yards.
- The Winchester 150-grain jacketed bullet accuracy load, per the Lyman manual, was with 48.0 grains of IMR 4064. I found this to be a very accurate load. I didn’t do a lot of work developing a jacketed bullet load. I’m going to stick with this one for this rifle.
- Orange bullseyes and aperture rear sights don’t work with my old eyes at 100 yards. They are okay at 50 yards, but not 100 yards.
- Both of the jacketed bullet loads I tried (the Speer Garand load and the Lyman 150-grain accuracy load) are accurate. Without adjusting the rear sight from the 150-grain jacketed bullet setting, the Garand load shoots a little high and to the right, but the group size would fit into the bullseye if the sights were adjusted.
- The cast bullets are not as accurate as the jacketed bullets at 100 yards. The cast bullets are comparabily accurate to jacketed bullets at 50 yards, but not at 100.
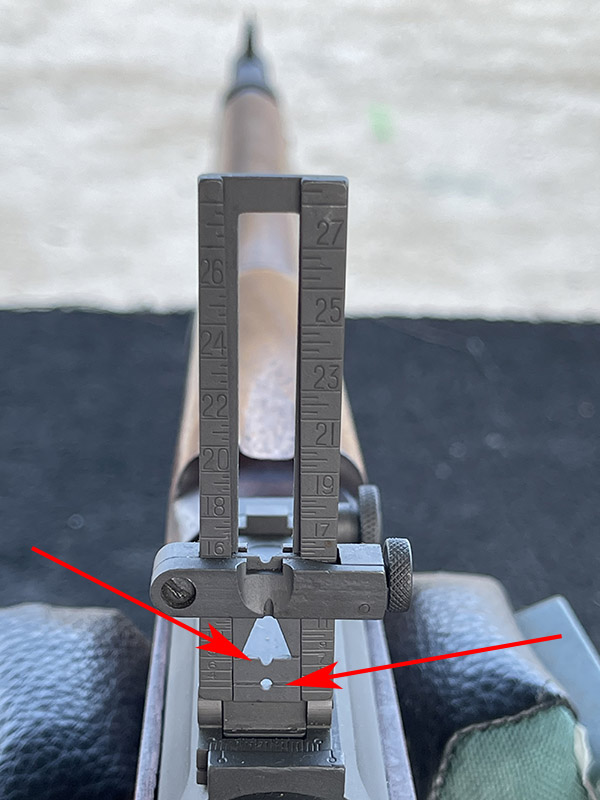
With regard to shooting both cast and jacketed bullets in the same rifle, I got lucky: As complicated as that 1903 Springfield rear sight is, I found that one rear sight position shoots to the same point of impact at 100 yards for both my cast bullet accuracy load and my jacketed bullet accuracy load. Yep, you read that right. With the rear sight crossbar secured as you see in the photo below, I can use the aperture (denoted by the right arrow) with the 150-grain jacketed bullet load. Or, I can use the lower crossbar notch (denoted by the left arrow) with the 210-grain cast bullet, 17.0 grains of Trail Boss load. Both will shoot to the same point of impact at 100 yards. A friend asked if I tuned the loads to do this. I wish I could say I had that kind of load development expertise. Nope, I just got lucky.
One final note that’s sure to set the Internet on fire: I know this is heresy. As much as I like my 1903, I think the 91/30 Mosin Nagant is a better rifle. My Mosin groups better at 1oo yards. But that’s a story for another blog.
Never miss an ExNotes blog:
Tales of the Gun: 1911s, revolvers, 9mm semi-autos, bolt action sporters, milsurps, reloading, big bore rifles, and more. It’s all right here!
Click on those popups, folks! It’s what pays the rent!
Good story but I never use the sights. I’m rarely at a gun club but my brother is a member and takes me as his guest. I like to use his semi-auto .22 target pistol because it holds a lot of rounds and being heavy, it doesn’t upset the arthritis in the base of my thumbs (a gift from forty years of twisting wire nuts). What I do is watch where the first bullet or two lands then blast away. The rest are right on target. I’m actually not a bad shot, I just don’t have the patience to line up sights. Jerry Miculek I am not.
Scoped or open sights are both challenging. Especially when you get older.
Bingo!