ADV Cannonball Press Release

By Joe Berk

This press release came in the mail a few days ago and I thought I would share it here.


ADV Cannonball Rally

A mix of curated motorcycle roads and a checkpoint rally for the ultimate cannonball rally, ADV moto style.

Port Angeles, WA — A new kind of annual adventure motorcycle event is in the works. It will take riders across the United States on amazing roads hand-selected specifically for riders. But this isn’t a tour – it’s a competitive GPS-based rally. Go for glory. Go for adventure.

The 2025 ADV Cannonball Rally will take place October 6-14, 2025. This year it will start in historic Kittyhawk, North Carolina on the Outer Banks and ends in Redondo Beach, California at the famous Portofino Hotel & Marina – a staple finish line for many cannonball rallies throughout history. This unique 3,550-mile experience is open to motorcycles of all types, will include nine days of riding, and has GPS-based checkpoint competitions located at epic places.

This coast-to-coast rally will have an emphasis on overland GPS navigation, endurance, preparedness, self-reliance, and rider skill. Aaron Pufal, the event’s organizer, says, “Each day, participants will leave the official hotel at specific times. Navigating by provided GPX tracks, competitors will ride on paved and optional unpaved roads to checkpoints, electronically earning points while experiencing a highly curated and painstakingly vetted motorcycle route.”

Pufal, an experienced rally planner and ADV moto enthusiast believes there’s a secret sauce to a good motorcycle road, and this route is carefully crafted by motorcycle enthusiasts for enthusiasts. The event will take riders through iconic, amazing locations—all with remarkable riding roads as the backbone. “This route isn’t for the faint of heart,” Pufal states, “but riders will appreciate the hundreds of hours of planning and prerunning.”

This isn’t a race; It’s a rally; and it’s self-supported. No team chase vehicles. No support crews. No whining. Riders must rely on themselves or any public resources available to any competitor to stay the course on the road to victory.

The ADV Cannonball Rally is a friendly competition. Here, riders are scored on their ability to reach specific checkpoints. Bonus points are awarded for the first rider to arrive at the next official hotel each day of the rally. Special achievements and separate extreme checkpoints revealed throughout the event will allow the chance to get a leg up on the competition with some extra points. The event is scored via a GPS app. The rider with the most points at the end is the winner.

Trophies will be awarded at the rally’s banquet for various achievements. The overall winner will have their name embossed on the ADV Cannonball perpetual trophy in perpetuity.

Entrants can be as competitive as they’d like—go for glory, adventure, or a bit of both. No rally experience? There will be opportunities for learning and guidance before the starting gun is fired, ensuring entrants understand how the competition aspect works.

Entries Are Limited: This event is open to the public. Anyone is welcome on any motorcycle. Current entries are exactly what you’d expect, big ADV bikes, but, we’d surely welcome the wacky, brave, or oddball entry!

Currently, we have enough paid signups to proceed with the event but we are limiting the entries to 30 hotel rooms for the 2025 rally.

Learn More: Complete info is available at the rally website, ADVCannonball.com. There, visitors will find the rules and regulations, interactive route map, FAQs, ADV Cannonball Podcast Links, and the official entry form. The ADV Cannonball Motorcycle Rally is sure to be an amazing journey. “Come have a good time,” says Pufal. “This is going to be for like-minded riders who are sick of sitting behind the computer and ordering accessories for their bikes—and definitely not for ADV Weenies.”

We’re seeking: Press interactions, sponsors, and partnerships in the ADV-Biz and motorcycle social media. We feel the inaugural running of the ADV Cannonball is a great story that deserves to be told.


It looks exciting.  It’s worth considering.  I checked out the website and it’s interesting reading.

Happy New Year, folks.  I’m looking forward to a great 2025.  We’ll keep the stories and the photos coming.  You keep clicking on those popup ads and  please consider making a donation via the Donate buttons below!


Join our Facebook ExNotes page!


Never miss an ExNotes blog:


Help us keep the lights on:


Don’t forget: Visit our advertisers!


ExNotes Product Review: Yonligonju Compression Tester

By Joe Gresh

If you’ve been keeping up with us here at ExhaustNotes you’ll know I had a lot of trouble getting Zed, my 1975 Kawasaki Z1 900, running correctly.

In between rebuilding the carbs and tinkering with most everything I could think of it dawned on me that maybe the engine was just tired. After all, it wouldn’t be unusual for a 50-year-old, air-cooled engine to wear out after 46,000 miles.

I used to have a nice compression tester that was at least 40 years old. In the big move west I can’t seem to find it. Maybe it got tossed after one of the many floods that inundated our house in the Florida Keys. I forget the brand but it had a flex hose and several adaptors for different size spark plugs.

I don’t need a pro-level compression tester as I’m not in the mechanical business anymore. This cheap, cheerful Yonligonju (say it three times fast!) Chinese kit on Amazon looked like the goods for less than 20 dollars.

The Yonligonju comes with a nice, blow molded plastic case that keeps all the little bits in order.

It amazes me how China can build such a nice kit for so little money. Including the quick release flex hose, this kit comes with adaptors to fit 5 different spark plug sizes.

In addition, the set came with two of the rubber bung type connectors. To use these, you just hold the compression tester tightly in the spark plug hole. It speeds things up on a multi cylinder engine. This works well enough if you’ve got enough hands for the job.

My Yonligonju worked well, showing 80-ish psi on all four Kawasaki cylinders. This isn’t great compression but the cylinder pressures were nearly even and Zed might have done better if the engine wasn’t cold. My Kawasaki manual claims 85 psi as the lower limit and Zed may get there warm. What do you want after 46,000 miles?

Besides compression, what you’re looking for with a compression tester is one cylinder being much lower than the others. This indicates a problem in the cylinder. The actual psi number is less important. Unless they are all really low…

Anyway, the Yonligonju gauge proved compression wasn’t the reason my Kawasaki was fouling plugs. See the latest Zed update for the full story.

The compression gauge held the reading without bleeding off for the few minutes it took me to look at it. There’s a pressure release valve on the side of the gauge that also worked as it should.

This isn’t a kit that will see a lot of usage.  If you’re like me, a home-shop tinkerer, the thing will do the job for not much money. Hell, just taking your bike to a motorcycle shop once to test the compression would cost five times what the tool cost.

I think people rebuild old motorcycle engines more than is needed. Two-strokes especially get the piston, ring and bore because it’s so easy to do. Most likely the bike would have run fine the way it was.

For classic bikes that don’t see everyday use it’s enough that the engine runs well. There’s no need for a ton of compression with today’s crappy fuel anyway. I’m guessing the Yonligonju will last a while sitting in my toolbox waiting for another engine to test.


Join our Facebook ExNotes page!


Never miss an ExNotes blog:

Help us keep the lights on:


Don’t forget: Visit our advertisers!


One Up, Three Down

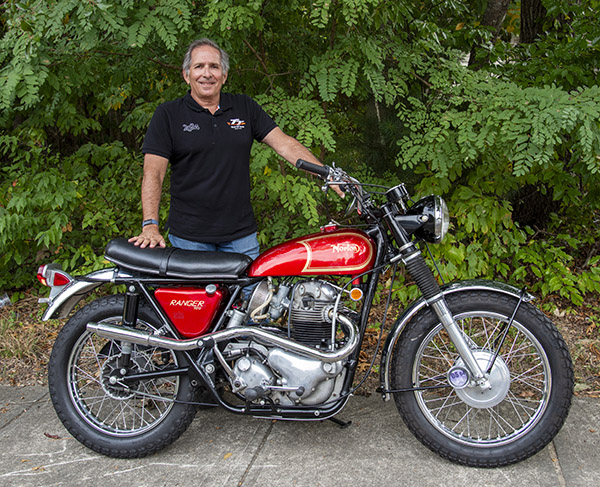
Those of you who subscribe to Motorcycle Classics magazine may have seen my article on good buddy Andrew’s Norton P11.  I was very proud of that piece and its photos, until I found out that I got a few things wrong.  The most significant faux pas was my description of the shift pattern, which I mistakenly assumed was the same as a Triumph’s.  All my ‘60s and ‘70s Triumphs were one down, a half click up for neutral, and all the rest up (just like on most of today’s motorcycles).  BSA was the same way.  When I rode good buddy Steve’s Norton Commando of the same era it was one down and three up.  That’s the natural order of things, right?

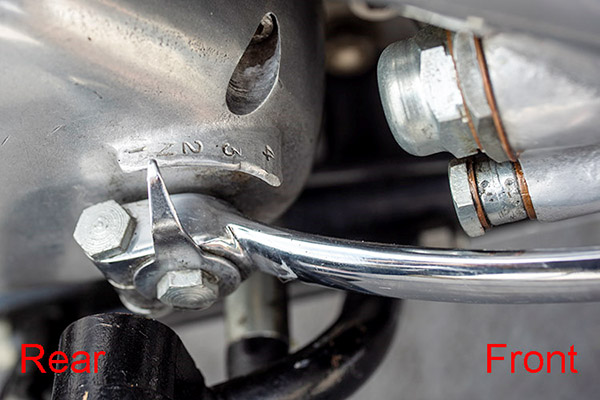
The shift lever on the right side of Andrew’s P11A. It’s one up and three down. They even stamped it for me at the factory, and I still got it wrong. Andrew owns British Motorcycle Gear.

Ah, not so fast.  Norton did it differently.  On a Norton, it’s one up and three down.  Just like it’s marked on the transmission.  Just like my photo above shows.

So why did I get it wrong in the MC article?  Chalk it up to old age and carelessness, I guess.  I sure am embarrassed about it.  I should stick to things that are harder to get wrong (maybe I should be a presidential election pollster for the New York Times).

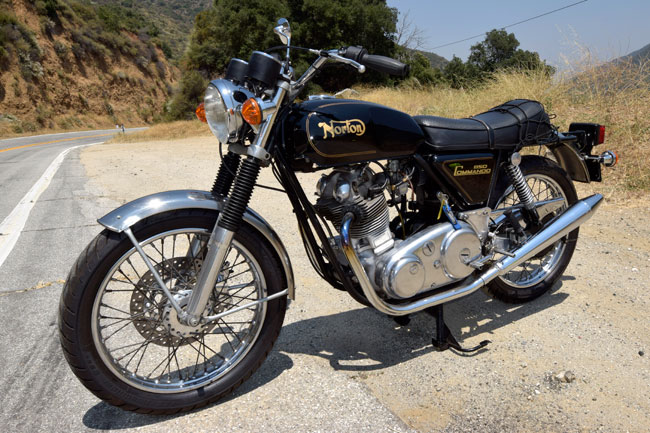
Steve’s Norton Commando in the San Gabriel Mountains. It’s one down and three up, as God intended.

You might be wondering:  What about Steve’s Norton Commando, which had the conventional one down and three up shift pattern?  As it turns out, more than a few Norton owners reversed the shift pattern on their bikes to make them like the rest of the world, which can be accomplished by installing a mirror image cam plate in the Norton’s AMC gearbox.   That’s evidently what happened to Steve’s bike way before he owned it, and way before I rode it.

Guys who have the original Norton gearbox pattern write that it’s the more natural of the two shift patterns.   When you want to go faster, you push down on the shift lever.   It’s kind of like stepping on the gas, I guess.  Foot down, go faster.   Thinking about it, it makes sense.

You know, I didn’t think too much about the Norton’s controls layout when I wrote the P11 article (and obviously, what little thinking I did was not enough).  I wrote another MC story about a 1913 Thor several issues back, and if I would have made a mistake, I would have thought it would be in that article.  On that one, I had to study my photographs and think about what each lever, pedal, valve, and twist grip did (and there were a lot of each); there was no one to explain it all.  After I had done that, I actually found a guy who owned a 1914 Thor (how many of them can there be?) and he told me I had it right.  But on that Norton…I’ve ridden a Norton, I’ve owned a bunch of Triumphs and one BSA, and I just never thought I’d get it wrong. But I did.  Mea culpa.

Oh, two more things:

      1. Merry Christmas and Happy Hannukah.  They’re both on the same day this year, which is very unusual.
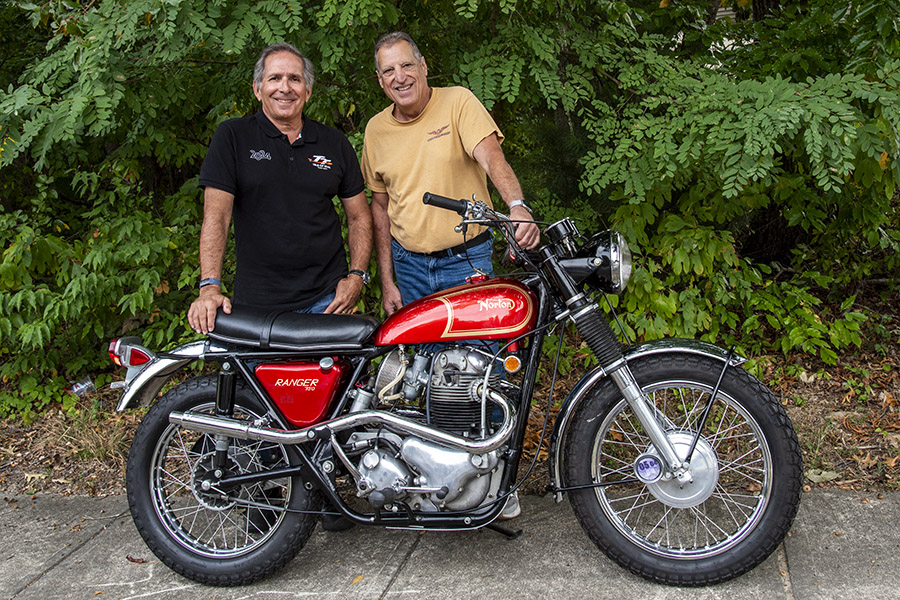
      2. That photo at the top of this blog?  That’s the P11A, Andrew (on the left), and good buddy Harry (aka the Norton Whisperer).

Join our Facebook ExNotes page!


Never miss an ExNotes blog:


Help us keep the lights on:


Don’t forget: Visit our advertisers!


Colombia’s Mighty Magdalena

By Joe Berk

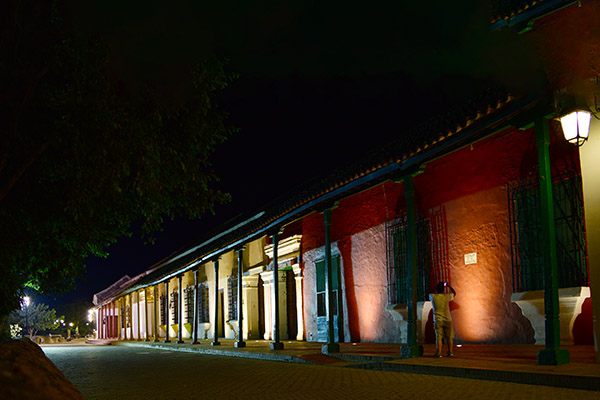
I felt a mix comforting mix of “been there, done that” and smugness when I read the Wall Street Journal yesterday.  The lead photo in the paper’s “Off Duty” section was strangely familiar, and as the coffee kicked in I realized it was because I’d been there:  Colombia’s Magdalena River.  My Magdelena photo (one of many) is the photo you see above.

The Wall Street Journal article featured places not part of the borscht belt (i.e., typical tourist destinations), and the stops it recommended along a Magdalena River cruise were locales I’d been to: Barranquilla, Cartagena, Mompox, Magangué, and others.  I’ve been luckier than most because I’ve had incredible motorcycle adventures:  China, Mexico, the Three Flags Classic, Baja, the Western America Adventure Ride, and more.  The ride through Colombia and along the Magdalena River, though, was in many ways greater than the other motorcycle adventures.   The Journal’s story had me thinking about Colombia again, and I thought I would share a few photos of the places it mentioned with you.

Mompox

Ah, Mompox.  It’s pronounced and sometimes spelled Mompos…an amazing city, unlike any I had ever visited.  The night we were there I wanted to stay in the hotel and post a blog for my CSC readers, but good buddy and ride leader Juan told me:  Joe, your readers will wait.  You need to see Mompox.  He was right.

A street along the riverfront in Mompox. People actually live here. Wow.
One of several churches in Mompox.
Carlos, me, and Juan having dinner in an Italian restaurant run by a German in Colombia.

Magangué

We began our ferry ride to Mompox from Magangué (pronounced ma gong gay). It was brutally hot and humid and we had to wait a couple of hours for the ferry to arrive, but that ride down the Magdelana was worth the wait.  Dreamlike, it was a scene from a 1930s adventure movie.  Peaceful.  Indiana Jones.  That ferry ride had it all.  There are more adjectives I could use, but you get the idea.

The ferry at Magangué.
Headed downstream and facing north on the Magdalena River.

Barranquilla

I first saw Barranquilla (pronounced bar en key ah) on an earlier business trip to Colombia.   I’d just purchased a new Nikon D200 (the cat’s meow back then), and it had a backfocus issue I later had corrected (you can’t see it in these photos, though).   I felt like Indiana Jones at a beauty pageant.  If there are unattractive women in Colombia, I couldn’t find them.

Business beckoned in Barranquilla…good buddy Paul Smarr and yours truly examining manganese dioxide.

Cartagena

Yep, that Cartegena, the same one as is R0mancing the Stone (although that movie was actually shot in Mexico).  On that same business trip, we took an afternoon to visit Cartegana, about an hour and a half down the coast from Barranquilla.

Two Colombian highway patrol officers on the road to Cartegena. My friends thought I was nuts when I jumped out to grab this photo. The Colombian police officers probably thought so, too.
A shopkeeper in Cartagena who agreed to let me take her picture.
Cartagena is a very photogenic city.

There were many things in Colombia well beyond what the WSJ article covered:  Honda (the town, not the motorcycle), Covenas, Volcan Los Nevados, La Playa de Belem, Barichara, Villa de Leyva, and more.   I saw them from my RS3 motorcycle (the carbureted version of the RX3) and you can, too, if you don’t mind living vicariously through my lens and keyboard:


Join our Facebook ExNotes page!


Never miss an ExNotes blog:


Help us keep the lights on:


Don’t forget: Visit our advertisers!


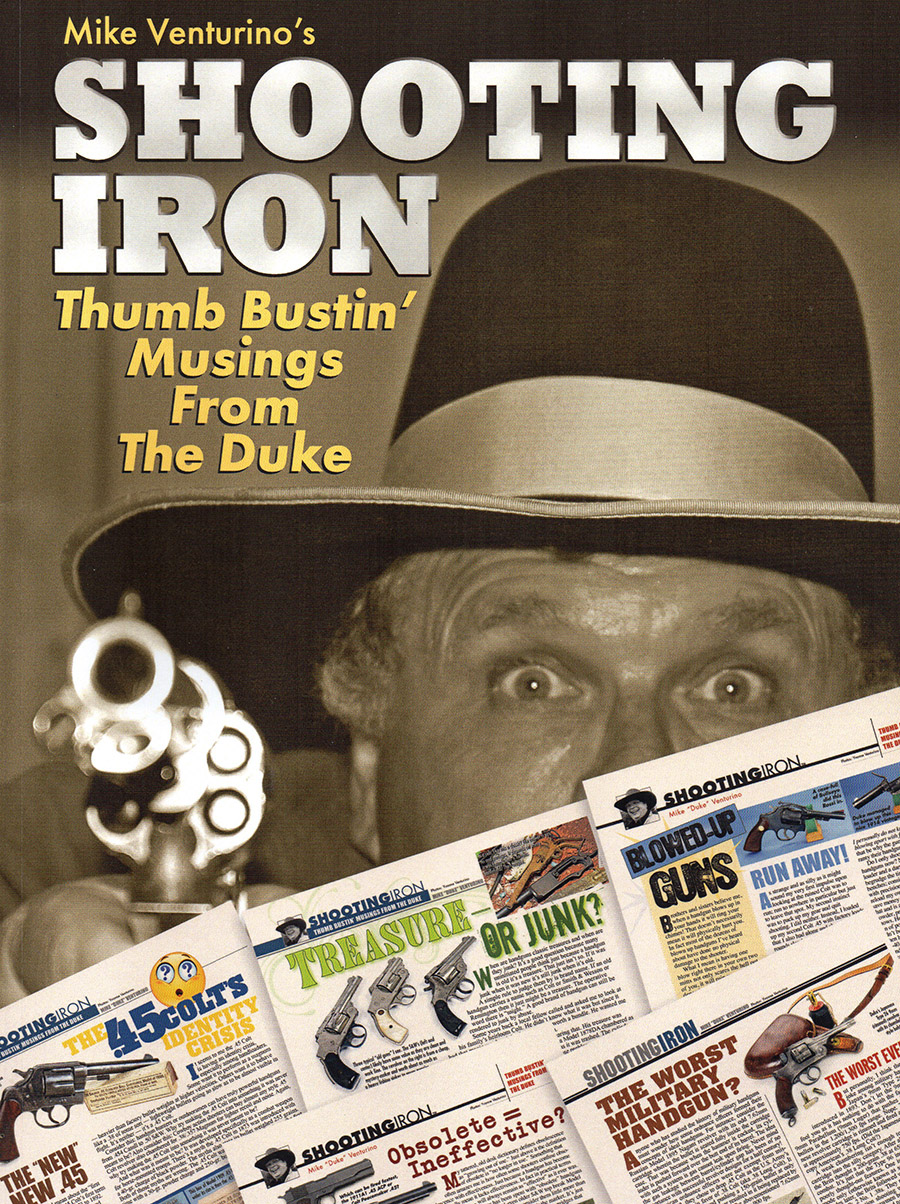
ExNotes Review: Shooting Iron

By Joe Berk

Mike Venturino was one of the greatest gun writers who ever lived.  Whenever I’d see his byline in a gun magazine, I would carefully read every word in the accompanying article.  He was a guy who wrote about things that exactly matched my interests:  Handguns, rifles, military surplus weaponry, reloading, reloading for accuracy, and more.  His style was relaxed and friendly, and his writing was easy to follow and understand.  I felt like I knew the guy, even though we had never met.  His writing style, I’m sure, influenced mine.

Mike Venturino passed away recently, and FMG Publications assembled a collection of his articles originally published in American Handgunner magazine.  As soon as I heard about Shooting Iron, I ordered a couple of copies on Amazon (one for me, and one for a good friend).  If you like good writing, good storytelling, and all things firearms related, I think you should pick up a copy, too.  You can order Shooting Iron here.

As I read through Shooting Iron, I came across two descriptions in which Venturino described blowing up a 9mm handgun.  You may recall that I did the same, and I shared that experience with you here and here.  Based on what Venturino wrote and what I experienced, I am rethinking my 9mm 1911 Springfield blow up.  I previously concluded that I must have had a double charge in one of the cartridges (particularly because I was using a new turret press).  Now I am thinking that wasn’t it at all, but it was instead the bullet being pushed back into the case.  This is based on the following:

    • I was using powder coated Gardner bullets, which are very slippery.  It’s would have been easy to push one of them back into the case if the crimp was not strong.  I don’t know if I had a really tight crimp when I loaded the round that burst.  I use a very strong crimp now.  Back then, I don’t know if I did.
    • I checked about 1500 cartridges after that event (ones I had previously loaded but not fired) by pulling them apart and examining the charge.  None were double charged.  That doesn’t prove I didn’t double charge one, but it suggests it was unlikely.
    • In reading the articles in Shooting Iron, I found where Venturino describes the 9mm bullet pushback phenomenon in two places (when you buy your copy, take a look at Pages 32 and 63).  On Page 32, he describes this having occurred with a 9mm round, and he shows a burst case that looks just like mine.  He further describes this episode with “…the escaping gas spitting (he probably meant splitting) the two grip panels and stinging my hand.” That’s precisely what I experienced.  On Page 63, Venturino shows a burst case that looks like my case.  I don’t know if the two instances described in the book are the same event.  They both sound like what I experienced.

The bottom line is I don’t know exactly what happened when I blew up my 9mm 1911 and I never will.  But after reading Mike Venturino’s  Shooting Iron experiences, I am more convinced it was a bullet being pushed back into the case.  In either event (bullet pushback or a double charge), I’m guilty of careless reloading, but somehow messing up on the crimp makes me feel less dumb than double charging a case.  And I especially feel less dumb knowing that one of my literary heroes (Mike Venturino) did the same thing.


Never miss an ExNotes blog:


Don’t forget: Visit our advertisers!


Too Pretty To Fight?

By Joe Berk

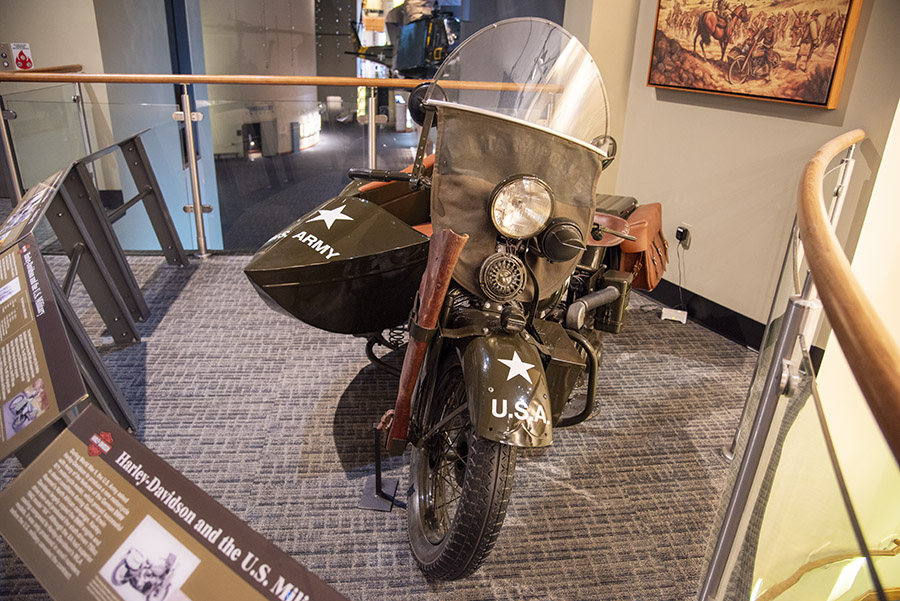
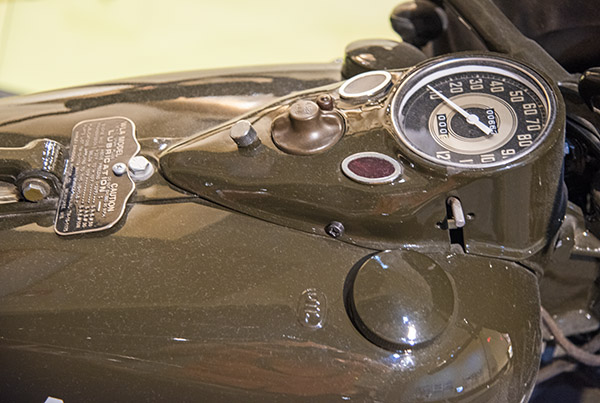
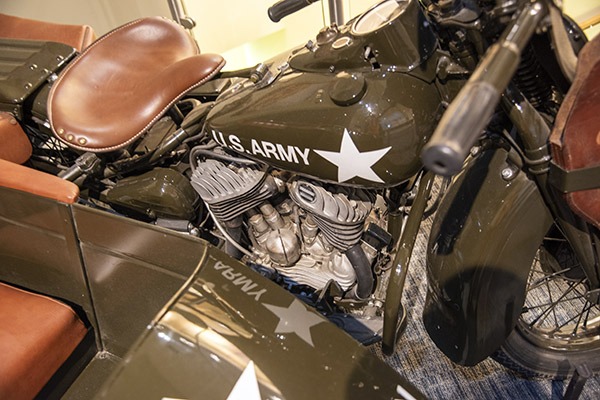
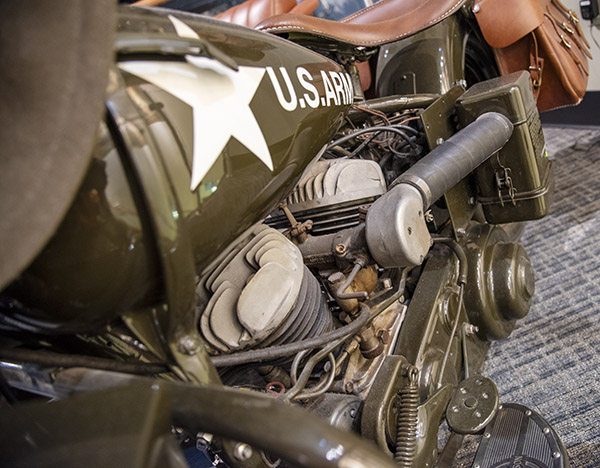
The Harley WLA at the National Infantry Museum was a lot prettier than any other WLA I had ever seen, but  I wasn’t impressed.  It was way over-restored, finished in gloss OD green (something I had never seen on a WLA before).  I couldn’t find anything in my research to show that any World War II Harleys might have had such a paint treatment.  I found a reference that indicated Army administrative vehicles were sometimes painted gloss OD, but nothing about motorcycles.

Can you say over-restored?
Fancy leather. I doubt anyone ever sat in this saddle.
The port side of the Harley 45.

I once saw General William Westmoreland’s Cadillac Sedan de Ville in Washington, DC, and it was gloss OD.  But WLAs had been out of service long before that, and in any event, when I spoke with General Westmoreland he didn’t mention anything about riding motorcycles.  If anyone out there knows anything about WLAs with glossy paint, please leave a comment.


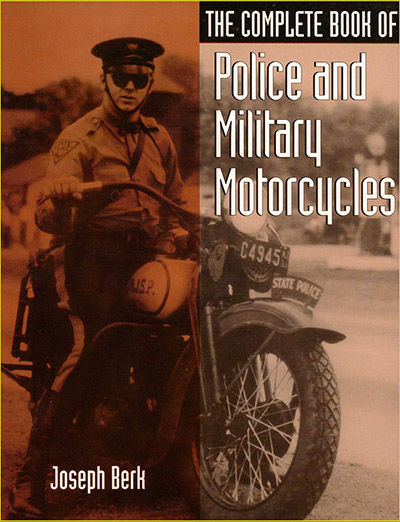
Want to know more about Police and Military Motorcycles?


Join our Facebook ExNotes page!


Never miss an ExNotes blog:


Help us keep the lights on:


Don’t forget: Visit our advertisers!


Three Mosin-Nagant Loads

By Joe Berk

Here’s a quick look at what I’ve found to be three Mosin-Nagant accuracy loads shot off the bench at 100 yards using the rifles’ standard open sights.  I didn’t try to get too sophisticated for this quick comparison; I simply shot a 10-shot group with each load.  All were at 100 yards.  I used the NRA 25-yard handgun target because it’s what I had on hand (the bullseye on that target is slightly smaller than the 100-yard NRA rifle bullseye target, and it gave a decent aiming point).  You’ll see the targets below.

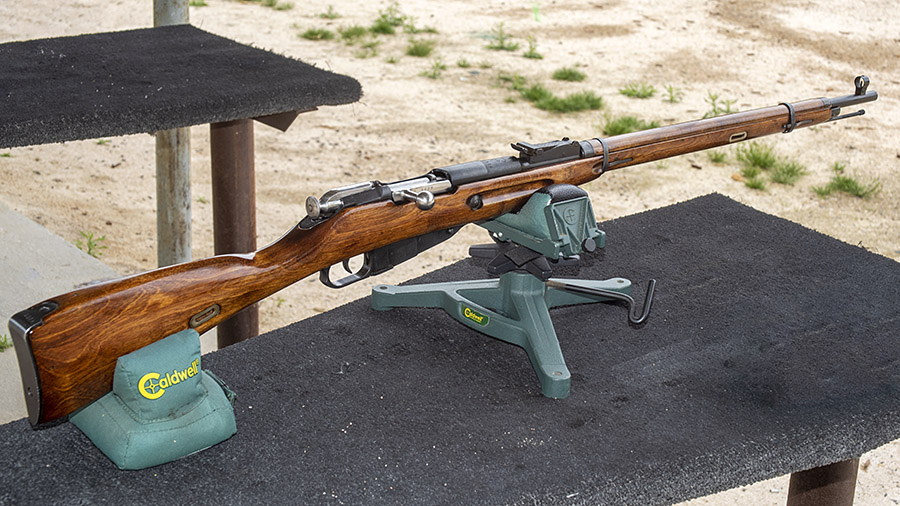
My jacketed bullet Mosin. It’s one of my favorite rifles.

My first two loads were with a rifle I use strictly for jacketed bullets.  It’s my Tula 1940 round-top receiver.  All you purists and keyboard commandos look away; this rifle is not for you.  I refinished the stock with TruOil, I glass-bedded the action, and I reworked the trigger.  As I’ve explained in earlier blogs, this rifle has a very rough bore, but the rifle remains blissfully ignorant of that fact and it shoots well.

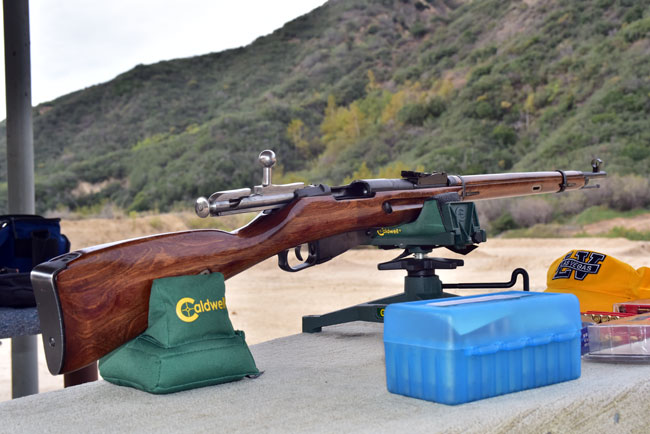
My Mosin reserved exclusively for cast bullets. It’s another favorite.

I shot the cast bullet load in a Mosin-Nagant rifle I use for cast bullets.  It’s a 1928 Ivshevsk hex receiver with a relatively clean (i.e., unpitted) bore.  When I first shot this rifle with jacketed bullets, I found that it shot a foot or more above the point of aim at 100 yards with the rear sight in its lowest setting.  I could have compensated for that by finding a taller front sight, but I decided instead to use the rifle with cast bullets.  It shoots cast bullets within the rear sight’s adjustment range.

The Ammo

I shot 7.62x54R Russian reloaded ammo for this article.   Two of the loads used jacketed bullets; the third used cast bullets.

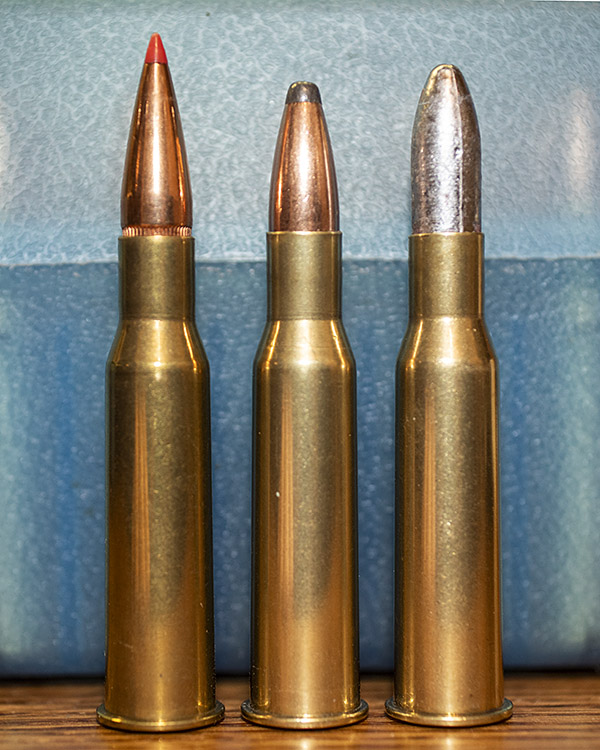
Three Mosin loads. From left to right, it’s the Hornady 150-grain polymer tipped bullet, the PPU 150-grain jacketed softpoint boat tail bullet, and the 200-grain cast bullet. The cast bullet is Lyman’s 314299 bullet sized to .313.

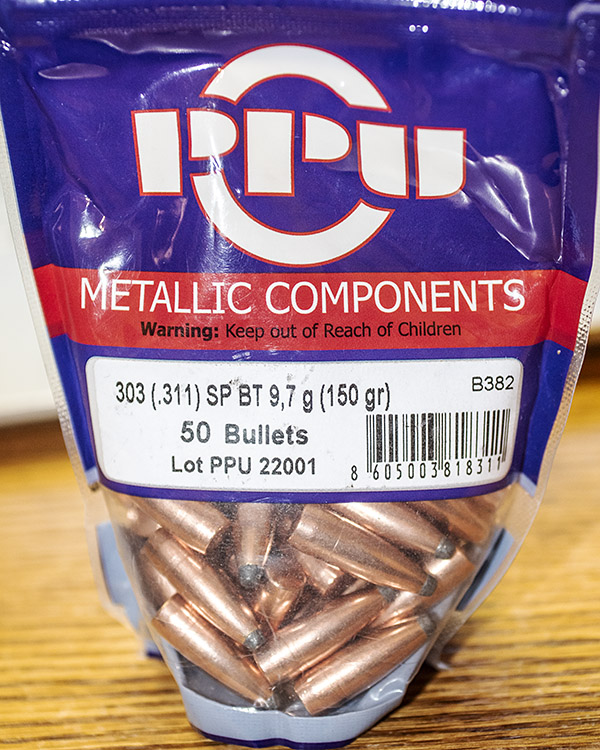
The jacketed loads were identical other than the bullet and cartridge length:  For one load, I used Hornady’s 150-grain polymer-tipped jacketed bullet; in the other, I used Privi Partizan’s 150-grain jacketed softpoint boattail bullet.  I didn’t crimp either load, and I didn’t attempt to find the best seating depth.   The seating depths I used, though, worked well.  Both loads used a charge of 43.7 grains of IMR 4320 propellant.

A bag of PPU 150-grain bullets. When these go on sale, I tend to stock up.

The cast load used a 200-grain cast lead bullet with a gas check.  I didn’t crimp the cast bullets, either, although I did use the Lee factory crimp die to remove the case mouth flare that prevented bullet shaving when the bullet was seated.  This load used 18.0 grains of SR 4759 propellant.

The astute reader and reloader will notice that several of the components I used for these loads are no longer available.  The Hornady polymer-tipped 150-grain .312 bullets went out of production some time ago, as did the IMR 4320 and SR 4859 powders.  It’s annoying, because when I get a load that works, I’d like to be able to load it again.  I’ve got a good stash of IMR 4320 and that will probably last me the rest of my life (it’s a powder that works well for .30 06 and several other cartridges).  I’ve also got a good stash of SR 4759.  That’s been a favored “go to” powder for cast bullet loads and reduced .458 Win Mag loads, and I’m working through it at a pretty good clip.  Trail Boss and 5744 are two powders frequently mentioned as also being good for reduced loads and cast bullets, so at some point I’ll have to start developing loads with those powders. I’m probably good for the next two or three years with my SR 4759 stash.

The Results

To cut to the chase, here are the loads and the results:

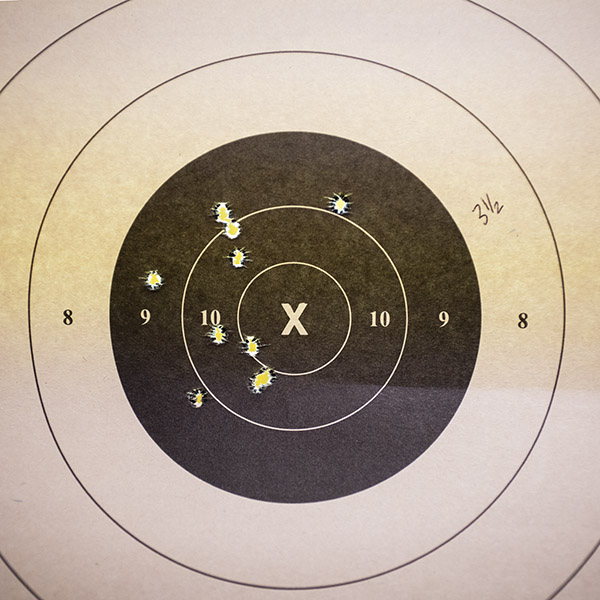
The Hornady polymer-tipped bullet was the clear winner:

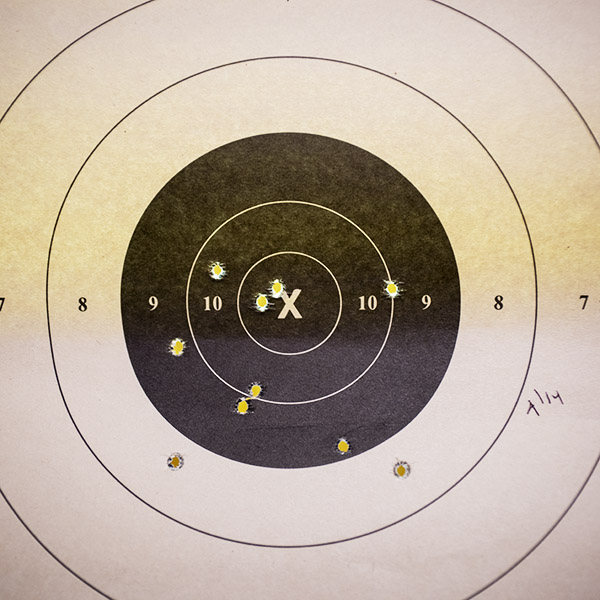
Not too bad, I think. 10 shots with the Hornady bullets at 100 yards. I’ve shot tighter groups. I’ve shot worse groups, too.

The Hornady polymer-tipped bullet put all 10 shots into a 3 1/2-inch group at 100 yards, which is not too bad with iron sights and geezer eyes.  That’s almost a 10-ring-sized group (the 10 ring on these targets is 3 1/4 inches in diameter).  I’ll call it close enough for government work.

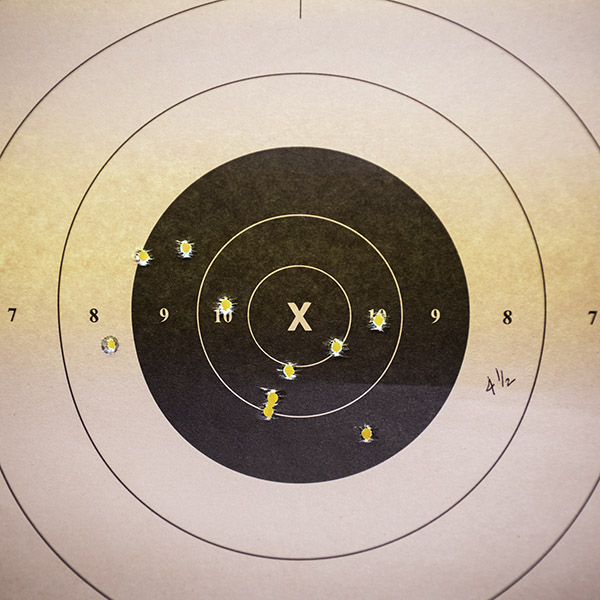
The PPU bullets are still available, although you don’t come across them very often.  Sometimes the big online reloading shops (MidwayUSA,  Midsouth, Natchez Shooting Supply, Powder Valley, etc.) have them on sale, and when that happens, I’ll stock up.  Here are two PPU-bullet, 10-shot, 100-yard targets:

A 10-shot, 100-yard group with the PPU bullets.
I shot another 10-shot group with the PPU bullets because I forgot to chronograph the first 10 shots. Nobody’s perfect.

Interestingly, the velocities of the two jacketed bullets (Hornady and PPU) were about the same.  The Hornady bullet had a much larger velocity spread, but it turned in the tighter group.

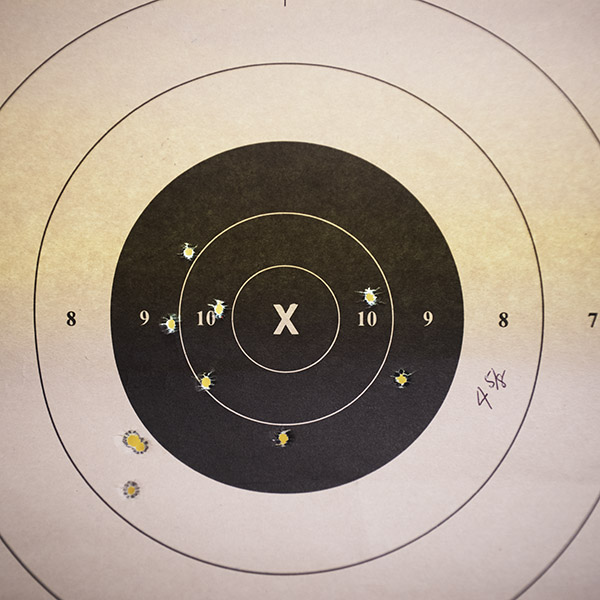
And finally, here’s the 10-shot, 100-yard target I shot with cast bullets:

A 10-shot, 100-yard group with cast bullets. These are much easier to shoot. Less noise, less recoil, and lots of fun.

I was pleased with the cast bullet target, too.  I wouldn’t ordinarily expect a cast bullet to group as well as a jacketed bullet, but these hung right in there.

So there you have it:  Three loads that return acceptable accuracy in a Mosin-Nagant.


We have several articles on Mosin-Nagant rifles and on different loads for these rifles:

Mosins, Sewer Pipes, and Lunar Landscapes
A Tale of Two Mosins
More Mosin Loads
Mosin Cast Bullet Loading and Shooting
Enemy at the Gates
Chonographing Mosin Loads
A Tale of Two Old Warhorses
Home on the Range
Stupid Hot 7.62x54R Ammo
Lee Ermey’s Guns
Revisiting World War II
Sniper!
Motorcycles and Milsurps

We also have a bunch of articles on other guns (and my preferred loads) on our Tales of the Gun page.


Join our Facebook ExNotes page!


Never miss an ExNotes blog:


Help us keep the lights on:


Don’t forget: Visit our advertisers!


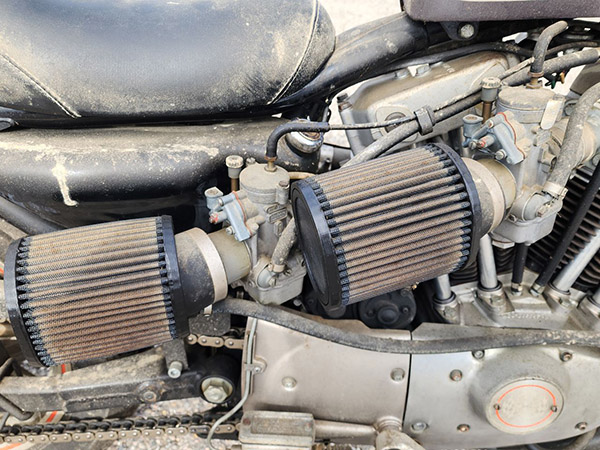
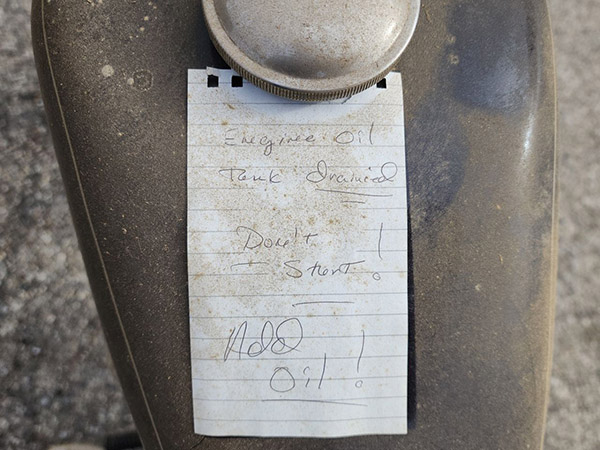
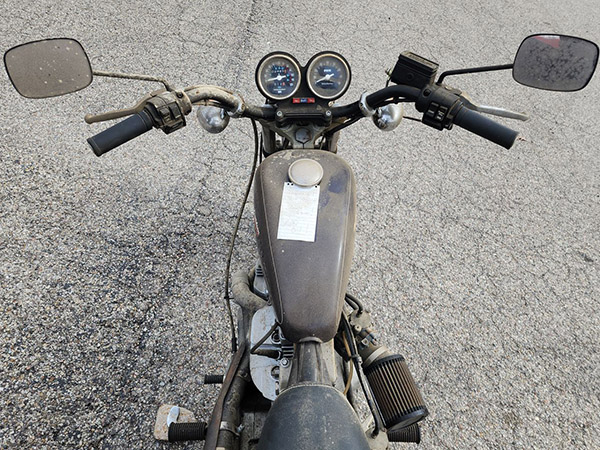
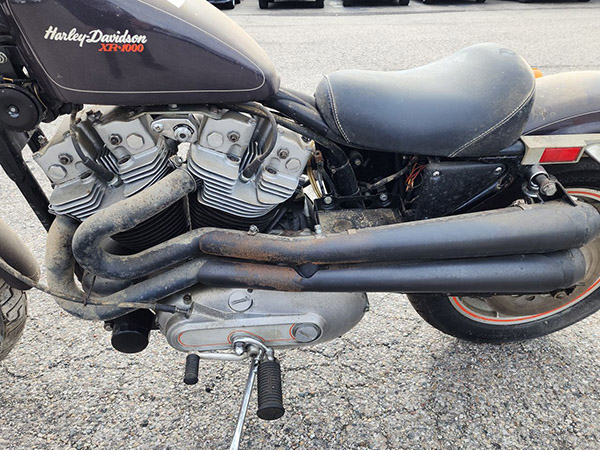
An XR1000 Barn Find!

By Joe Berk

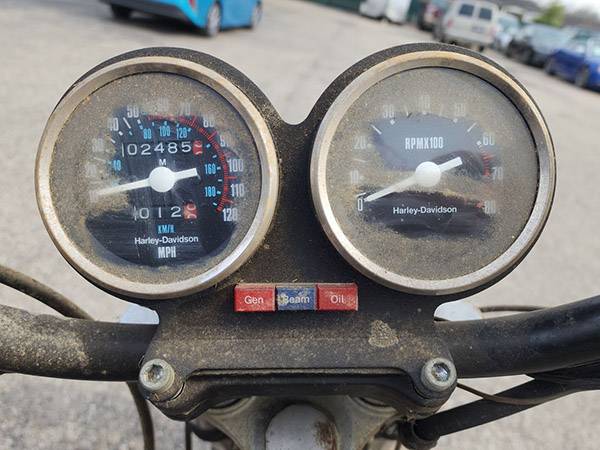
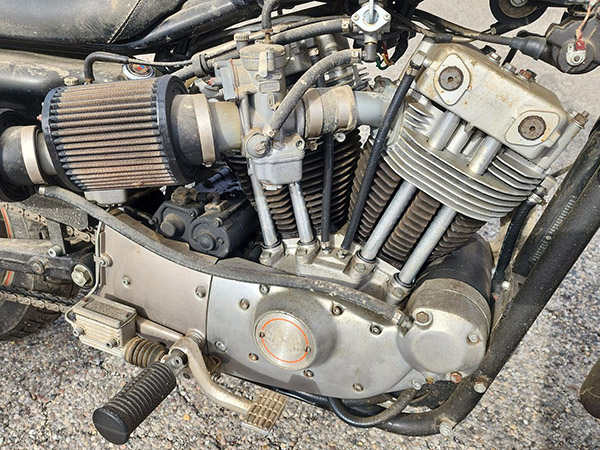
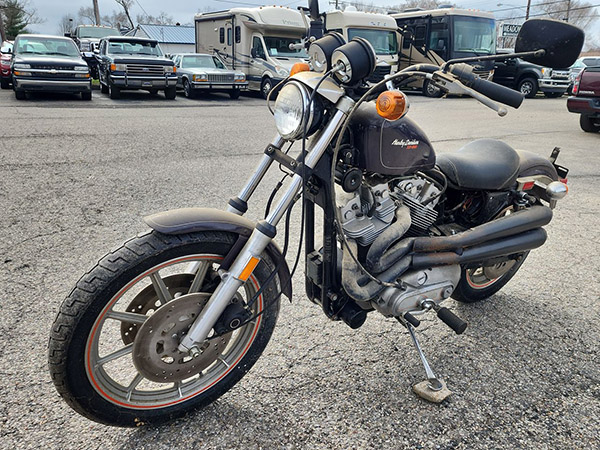
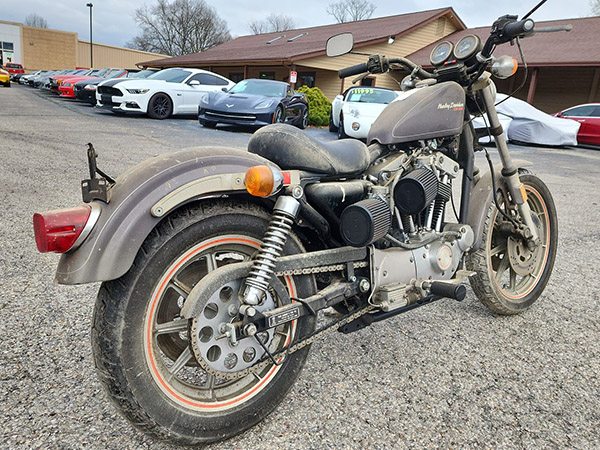
Boy oh boy oh boy!  Talk about an interesting barn find!  We all have regrets filed under “I shoulda bought that when I had the chance,” and in my case, one of those items is the Harley XR1000.  I did a Dream Bikes feature on it a ways back, and as soon as I did, Joe Gresh let me know that he had been planning to do the same (I beat him to it).

I always thought the Sportsters had a cool look, and to me, the XR1000 was cool raised to an exponent.  It did what it was supposed to in my mind:  It evoked images of Bart Markel drifting around a half mile dirt track (which I actually saw many times at East Windsor Speedway when I was a teenager), and it made me want to be that guy.

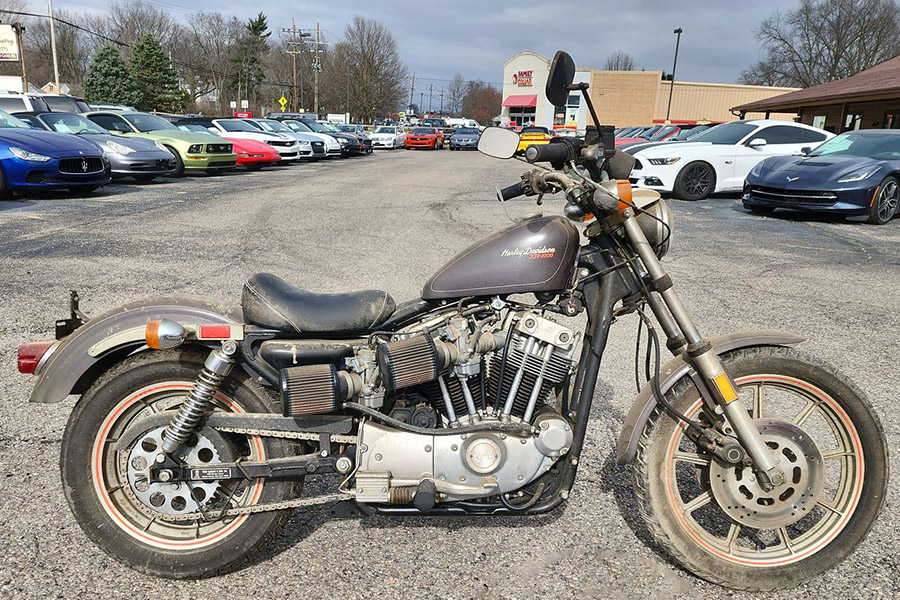
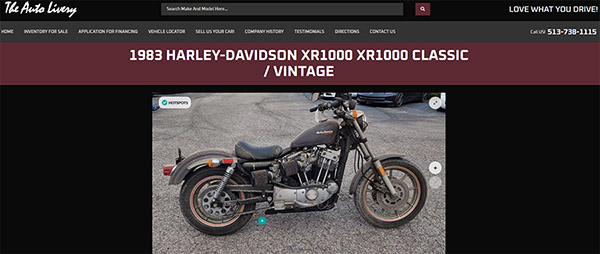
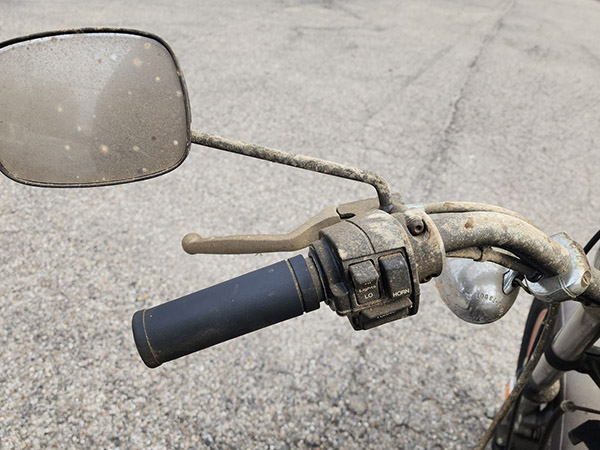
On a whim, I typed “XR1000 for sale” on Google, and this popped up.   Wow, talk about a barn find!

The ad text says it all:

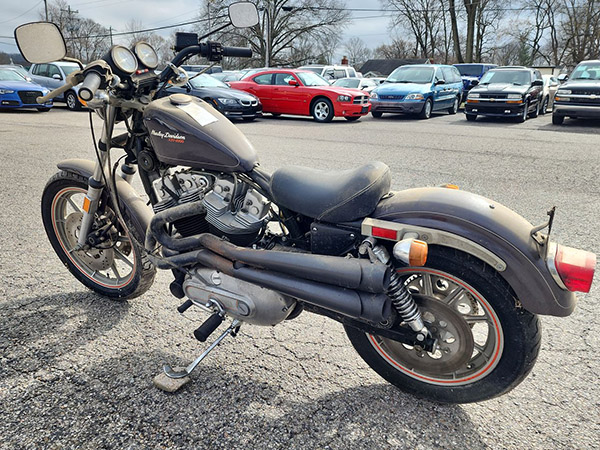
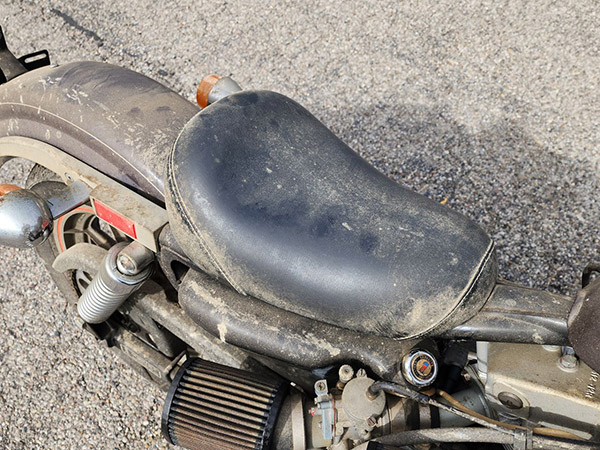
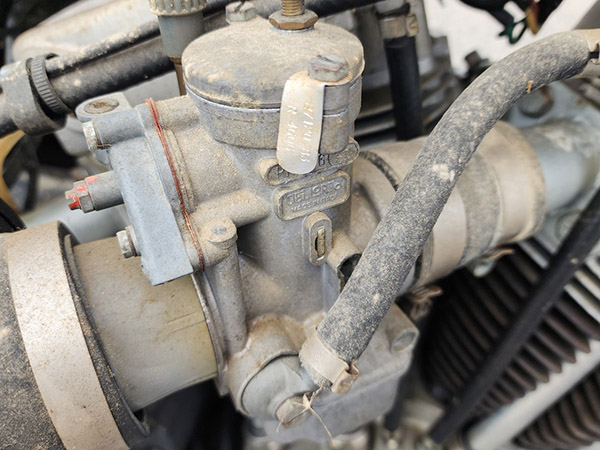
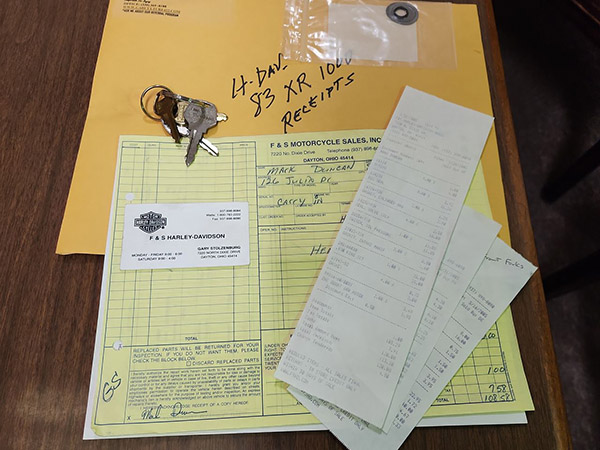
2,486 ORIGINAL MILE INCREDIBLY ORIGINAL BARN FIND!!! Untouched “barn find” condition very original XR1000 in absolutely amazing condition! Although I am using the term “barn find,” this bike was properly stored in an attached climate controlled garage after being completely serviced and prepared for long term storage, including cylinder fogging, fuel draining, oil change, battery removal, and a full check over and service including: head and valve spring check by the Harley-Davidson dealer race program lead technician (back in the day), fork seals, brake fluid, chain lube, etc. We have tested all non-running systems including front and rear brakes, turned over the engine, lights, starter operation, horn, tires holding air, suspension compliance, etc. and confirmed all to be in proper working order. If the new owner would like us to fill the fuel tank and get the bike running, we would be happy to do that as well, or we will leave it as it is in “barn find” condition. It is up to the buyer’s preference. The condition of all the paint, chrome, and metal is excellent with only dirt and dust covering, no corrosion. The only slight surface corrosion I see is limited to the exhaust heat shields only and could easily be remedied. The rest of any “rust colored” things you may see is simply dirt that I have confirmed in a couple small spots will clean off. Of course, I can’t say the bike will look like brand new with a simple wash after sitting for 20 years, but I am saying the chrome and trim IS NOT corroded. The bike does come complete with 2 keys (one ORIGINAL Harley key), books and manuals, and some records from the Harley Dealership when it was gone through and fully serviced and readied for storage in 2005. The bike also comes with the original longer black mufflers, while the optional accessory shorter less baffled mufflers are currently installed on the bike. We purchased the bike directly from the previous older collector owner as part of a seven Harley-Davidson collection and rolled it out of his garage into our enclosed trailer and brought it here for inspection. I have described everything to the best of my ability and provided lots of detailed photos and information for your consideration. Please feel free to contact Jason for any intelligent unanswered questions if you are interested in purchasing the bike. Without a doubt an incredibly rare opportunity to own a piece of Harley-Davidson history, and the only one like it for sale nationwide.

Wow!  Somebody buy this before my “Want” overcomes my “Need.”  Will it get away?  Man, $27K sure is a lot of money.  But how much is $27K these days of $4/gallon gasoline and runaway inflation, anyway?

Like I said: Wow!  Will there ever be another opportunity like this?

Check out these photos of this incredible find:

A special thanks to Jason for allowing us to use these photos and the description above.  You can reach Jason at The Auto Livery (telephone 513-738-1115).


Join our Facebook ExNotes page!


Never miss an ExNotes blog:


Help us keep the lights on:


Don’t forget: Visit our advertisers!


British Motorcycle Gear Exclusive Offers!

By Joe Berk

Good news!  Good buddy Andrew Capone, Isle Of Man empresario and British Motorcycle Gear baron is having an exclusive sale for ExNotes readers.  It’s a whopping 21% off any BMG brand jacket. When you enter your order on the British Motorcycle Gear site, just add the code BMGJOES21 at checkout.  British Motorcycle Gear also has great deals on Belstaff closeouts (as well as nice gifts in the $100 range) for under your Christmas tree.  Andrew tells us that the 21% BMG jacket discount is 1% more off the sale he’s currently running, and that’s because we ExNoters are his kind of 1%-ers.

You read about Andrew here on ExNotes before.  He’s the real deal and he’s a real rider.  The latest issue of Motorcycle Classics magazine (Jan-Feb 25) is about to hit the newsstands, and Andrew’s magnificent Norton P11 is featured in it.  It’s a great read about a great bike (I know because I wrote it).  Pick up a copy when you get a chance.  Or, if you have a subscription, you can read it online.

You’ve also read about BMG gear here on ExNotes.  Joe Gresh tested several of their items, he’s a crusty old fart, and he gave all the British Motorcycle Gear high marks.  You can read Gresh’s BMG reviews here.


Join our Facebook ExNotes page!


Never miss an ExNotes blog:


Help us keep the lights on:


Don’t forget: Visit our advertisers!


Zed’s Not Dead: We Get It Right The Tenth Time

By Joe Gresh

I like to think of myself as handy with a wrench. I try to fix most things even if I have no clue and oftentimes succeed. This Kawasaki 900 though, this Zed has been giving me fits. It almost makes me question my do-it-yourself mantra. Almost…

After initially getting Zed running a few years ago I enjoyed 4000 relatively trouble-ree miles. Zed had a slight hitch in its giddy-up right off idle but otherwise it ran fine.  Then the bike started fouling spark plugs and missing. Occasionally gasoline would pour out the carb overflow tubes and a sharp rap with a screwdriver handle was needed to stop the flow.

So my first line of attack was the float needles because they were original and came out of corroded carbs. I went online and bought some cheap carb kits that included needles and seats.

Setting float height on carbs using plastic hose screwed into float bowl drain.

On a 1975 Z1 Kawasaki the carbs sit up high off the engine block so you can do a lot of tinkering without removing the carb bank. I changed all the needles and set the float height using the clear tube tool that screws into the carb bowl drain.

New fuel tees @ $26 each!

This didn’t really cure anything.  Plugs were still fouling. I started to suspect an ignition problem. After messing with the points and several test runs I was getting nowhere so I purchased a new, aftermarket ignition system. They’re cheap, like $90 or so.

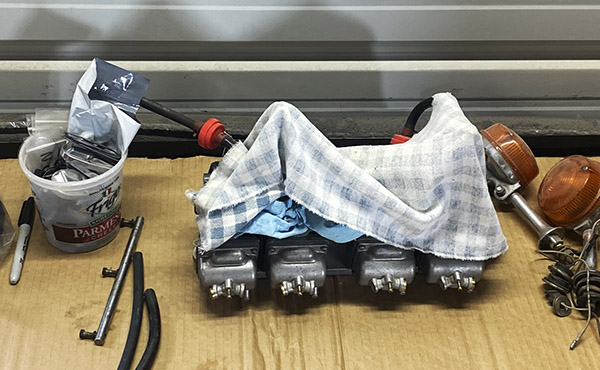
Carbs removed from Zed. A scene I got accustomed to. After the 4th round trip I decided to look elsewhere.

The new system came complete with new coils and wires. This was nice as the old coils were butchered by the previous owner. I installed the new ignition system and the bike still ran terrible and fouled plugs.

I rechecked the aftermarket floats and upon examination I found the needle seats miss-punched with what looked like lettering for the needle size. This caused a wrinkle in the exact spot the needle needed to seat.

.030 tool for setting baseline carb slide height.

Next, I bought new Mikuni needles and seats. I put the Mikuni stuff in and re-set the float levels. The bike ran like crap and foiled the plugs. At least I knew the ignition system was ok.

I was at my limit of understanding, my attention went back to the carburetors. I pulled the carbs, dismantled them and cleaned everything.

Zeds carbs sat like this for 2 years. I was befuddled, vexed, stressed right the “F” out.

I bought another, more expensive carb kit and new Mikuni enrichener plungers. The carbs were in a million pieces on my bench and I lost interest. Other things were happening, concrete need pouring and the carbs gathered dust for two years.

A few months ago I decided to get Zed running for the Motorado vintage motorcycle show up in Santa Fe, New Mexico. Buckling down, I reassembled the carbs and using new rubber manifolds (the others had dry rotted in only a few years!) I slid the carbs back into Zed and the bike ran like crap, still fouling plugs.

I couldn’t get the bike running well enough to sync the carbs. A bad condenser was messing up two cylinders.

I took the carbs off the bike and went through them again making sure everything was spotless. And the bike ran like crap. Again, I took the carbs apart racking my brain over the flooding issue. And the bike ran like crap. I changed jets, I changed float heights, I swapped pilot air jets, I swapped emulsion tubes. The third time I took the carbs apart and triple checked everything the bike still ran terrible.

I was in the weeds bad-like and decided to think hard on the situation. I told myself that carbs aren’t all that complicated and that even if I didn’t get them perfect it should still run. And that the bike ran fine for 4000 miles with those carbs. That was when I decided to go back to the new ignition system.

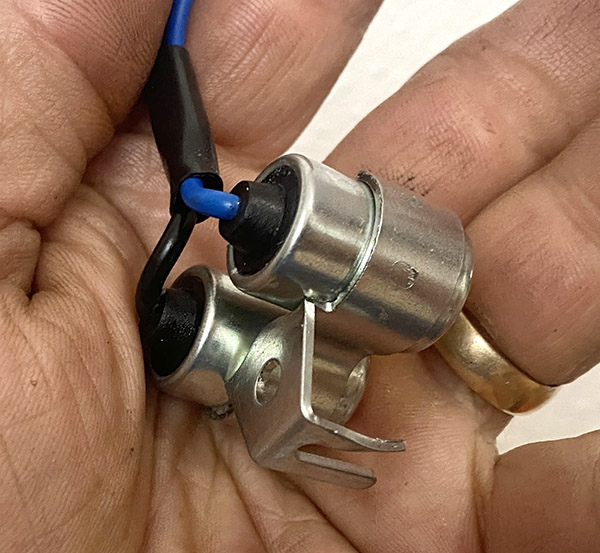
One of the new points had a whitish coating. I thought maybe the bike sat so long the points corroded. Then inspiration hit me: the condensers! I checked the condensers with an ohm meter and found one of the two condensers bad.

Bad condenser from new kit.

I had started with one problem: fouling plugs and by using aftermarket needles I installed a worse set of needles. By removing the original ignition system I installed an entirely new problem with the bad condenser.

These two errors were compounded by my inability to believe that the new parts were bad out of the box so I kept rebuilding the carbs over and over.

The condensers on the old ignition system tested ok and I swapped them into the new plate. And the bike ran. Not perfectly because I had all the jets wrong in my attempts to make the bike run.

I walked the carbs back to their original settings. First the old slide needles and emulsion tubes went back in. Then the main jets, then the pilot jets until finally everything was back to where I started from two years ago.

Zed was running pretty good so I took a little 300 mile test loop. No fouled plugs. Stupid hurts and I was so damn stupid chasing gremlins that I was creating even as I was installing new gremlins.

Home built replica of the official Kawasaki carb sync tool.
The business end of the carb sync tool.

Next up is a good carb sync and since parts are so crappy now I will try an electronic ignition system just for fun because I haven’t screwed things up enough yet. Stay tuned.

New electronic ignition. Only $68 on Amazon. Cheaper than points! What could go wrong?

Want to follow the initial resurrection of Zed? It’s right here!


Join our Facebook ExNotes page!


Never miss an ExNotes blog:


Help us keep the lights on:

Don’t forget: Visit our advertisers!