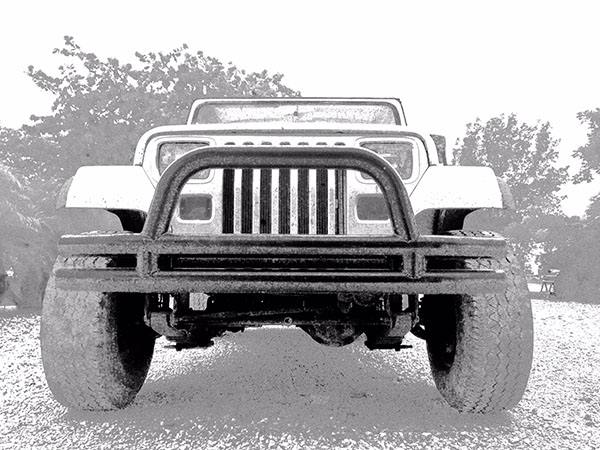
Reason 1: Leaf Springs
The YJ, built from 1987 until a somewhat vague date in either 1994 or 1995, came with leaf springs. Next to no suspension at all, leaf springs are the simplest way to attach four wheels to a frame. The addition of a hydraulically dampened shock absorber is the only thing separating the Jeep YJ from a Conestoga wagon.
In 1987 Tort Lawyers at American Motors Corporation wrested control of Jeep’s design offices from the guys that actually knew what they were doing. In an attempt to cut back the number of Jeeps rolling over on America’s roadways, the Sons, Sons and Sons-a-Bitches law firm decided that restricting the Jeep’s already stiff wheel travel to no travel was the answer.
AMC-Law’s track bars and sway bars were configured in such a way that the various components were in constant mechanical opposition to each other, eliminating wheel movement. Naturally this bind produced extreme loads on the hot attachment points causing the rod and linkage connections built into the Jeep YJ’s frame to self-destruct. Oddly, the more things broke on the frame, the better the YJ rode. How many cars can you say improve dramatically by removing 50% of the suspension parts?
Reason 2: Square Headlights
If ever a vehicle cries out for square headlights it’s the Jeep. The whole car is a box with a slightly smaller box set on top of the first box. With square fenders, square gauges and square tail lights it’s only fitting that square owners dig the headlights. Less hard-core Jeepers (anyone who dislikes square headlights, really) complain about the YJ’s face but never bother to spend the extra effort on their own face. A little concealer, maybe a dash of rouge and a finely cut-in set of lips would go a long way towards making themselves more presentable down at the Mall. And they’re always at the Mall.
Reason 3: We Still Wave
Jeep YJ owners are the last generation of Jeep drivers to wave at each other. There has been a long-standing tradition of Jeep people waving which indicates to other Jeeps passing in the opposite direction that they have bits of their bodywork falling off. Or that the Jeep is on fire. Newer Jeep owners, coddled in their climate-controlled interiors and bedazzled by multi-color dashboard displays going haywire have lost the ability to see other Jeeps. With automatic transmissions and soft, coil-sprung axles their bodies and especially their arms have atrophied from disuse. And the newer the model, the worse the prognosis: buyers of Jeep’s latest model, the JL, are kept alive in a nutrient-rich petri dish until a help-mate smears their gelatinous bodies onto the JL’s driver seat. They aren’t even sentient; how could they wave?
Reason 4: The 2.5-Liter 4-Cylinder
Many YJ’s came with a 6-cylinder engine and that’s fine if you like that sort of stuff. YJ connoisseurs know that the 2.5-liter, 4-cylinder is AMC’s gift to off-roading. Weighing 100 pounds less than the 6 it produces 25% of the power while consuming the same amount of fuel. The extra power of the 6 is futile because with its boxy shape top speed on a Jeep is limited by wind resistance. Under ideal conditions, dropping a YJ out of a cargo plane will see the thing reach 80 miles per hour as long as it doesn’t start to flutter or break up.
Reason 5: The AX5 Transmission
This transmission gets a bad rap from Jeep haters because it disintegrates from time to time. What they are too dense to grasp is that Jeep engineers planned the AX5 to act as a fuse between the 35-horse 2.5 engine and the Dana 35 rear axle. The combination of a weak engine, weak transmission and a weak rear axle, like the trinity, is an economical mixture that transcends the sum of the components. The Internet is full of stories about YJ’s that have gone off-road and survived. I’ve only broken my transmission once and the rear axle once. It’s that good.
The Jeep YJ is the last of the real Jeeps, the hard-core Jeeps that keep you awake at night wondering what that sound was. YJ’s can draw a direct line to Jeep’s military past and have a sort of Stolen Valor way of conking out when least expected. That’s all part of the fun. Sure, modern jeeps may be smoother off road but if smoothness is what you are looking for, stay on the pavement. And get some exercise because you really should start waving.


 While I’m busting a new tire onto Zed I figured I might as well replace the rear wheel bearings. I could have cleaned them and re-greased them and if I was broke I would have.
  Kawasaki made a nice motorcycle when they built the Z1. Stuff like a brake shoe wear indicator was rare back in the 1970’s. Mama K even went to the trouble of recessing the brake shaft opening to fit a felt dust seal. That’s class, man. I’m not sure it does any good because the brake shoes generate more dust than you’d get kicked up from the street. Maybe it helps the shaft grease stay clean.
 Kawasaki threw everything at the Z1. The sprocket carrier has its own bearing so that gives a total of three rear wheel bearings. Pretty sweet; I wish my Yamaha 360 had a better sprocket carrier design. The hub wears out and I have to feed spring-steel from a ¾-inch tape measure to take up the slack.
 Part of the fun of working on motorcycles is setting up the exploded parts shot. I like to get all the parts clean before reassembly because they will never be cleaned again. Rear discs are mostly standard now but a husky rear drum like this will stop a bike just fine.
 Changing tires is a lot of stress for me. If you don’t plan to use the tube or tire you can cut the work involved in half by cutting the old tire off. Use a razor, utility knife and lube the blade with a little oil. Then plunge in and pull the knife. Don’t saw at it. As you cut move around a little and you will find the thinnest part of the tire. Once you’re there, ride that sucker all the way around. After you do both sides the tread falls away leaving two beads. They pop off easy with no tire to create resistance and you can peel the remains off the rims without a tire iron.
 I removed the swingarm to check the bushings and lube the mess. Zed’s battery box is pretty rusty so I removed it to clean and paint the thing. I looked at the rear of the bike and decided there wasn’t much more to take everything off and give the rusty frame tubes a lick of paint. So I did.
 Reassembling the rear of the bike is going well and the
 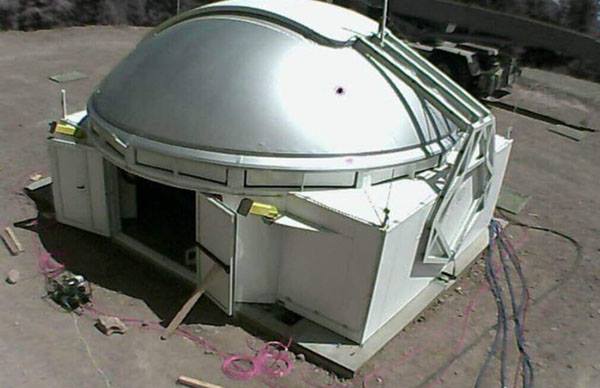 Water Canyon Road, west of Socorro, New Mexico is paved all the way to the Water Canyon Campground. The Campground is beautiful, wooded and self-serve: You put your fees into a pipe and pitch your tent. There are clean pit toilets and yodeling coyotes along with bear-proof trash cans. I’d like to hang out here but we are heading to The Magdalena Ridge Observatory.
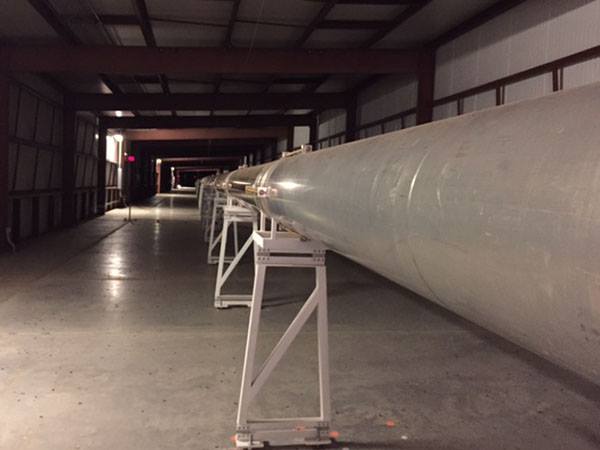
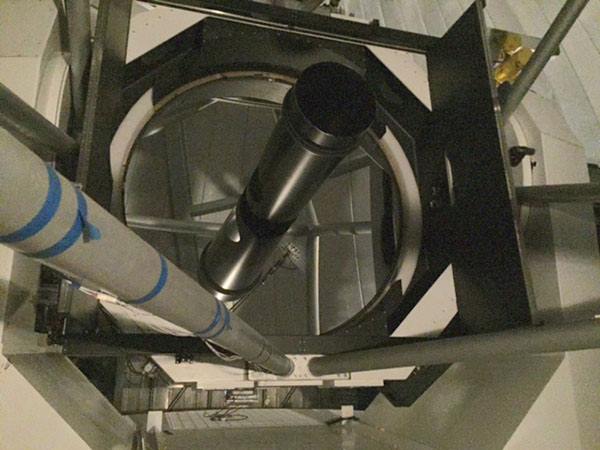
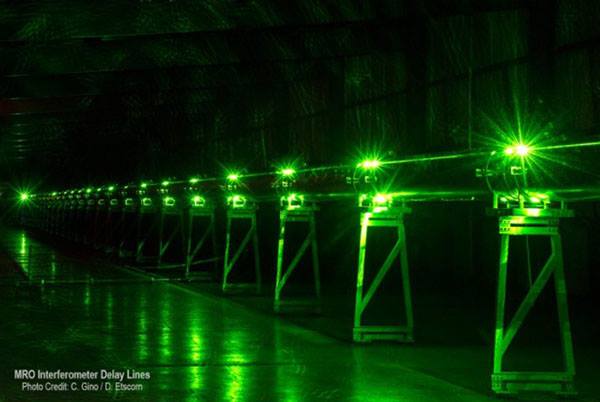 The mirror at the MRO is an ex-Hubble part of which there were three built; one is inside Hubble floating around space, the other is at The National Air and Space Museum in Washington, DC.
 Zed is missing its chrome seat bar and rather than finding a stock replacement I grabbed this $50, period-correct luggage rack from eBay. All my motorcycles have rear racks. I need a place to strap stuff because I get around, you know? I dig the square tubing and the big-hair, 1980’s plastic plugs filling the open ends.
 Zed’s 41,000 mile, front wheel bearings are probably stock and I could’ve cleaned them up and re-greased them but a new set is not that expensive so I popped the old ones out and fitted new bearings.
 I had an old-ish Dunlop tire in stock. I bought it new to put on Godzilla for a run from Hunter’s place in Oklahoma to Florida and that’s all the miles it has done. I guess I should worry about the rubber aging. In my defense, it’s been stored in a dark trailer and the Fingernail-Probe test reveals a fresh feel to the rubber. Anyway, the Dunlop is about 20 years newer than the tire that came on Zed so I call it a win. No one will believe this but I did install a new tube in the front and managed to get the tire onto the rim without pinching the tube.
 The grease inside the speedometer drive was hardened so I cleared out the muck and squished new grease into the worm drive parts. I also had to swap the disc to the opposite side of the wheel as Zed came with the caliper mounted backwards. They tell me this mod improved handling but I’ll not ride around listening to Z1 experts constantly telling me my brakes are backwards.
 My latest order from
  The most expensive part of the order was the ignition advancer @ $159. My buddy Skip sent me a couple advancers in the hope one would fit but as luck would have it there must be 537 different advancers for the Z1. The left advancer fits the crankshaft bolt (loosely) and looks close from this side but the advancer has timing marks only for cylinders 1 and 4. Also note how close the “T” (top center) and the “F” (ignition fire) marks are. The center advancer unit has all the correct cylinder markings but the bolt hole is too small for the crank bolt. This unit also has “F” and “T” close together.
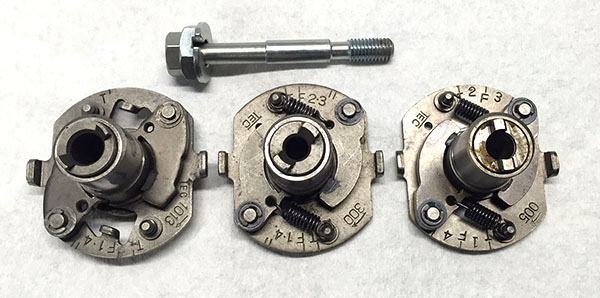 Moving to the backside of the three advancers we see that the left unit has a cup that prevents the advancer from sitting flush onto Zed’s crankshaft end. The middle unit will marry to the crank ok but note the slight degree angle difference on the locator-pin hole. Finally the new unit, like the bear’s soup, is just right.
 To attach the points plate I had to shorten 3 screws. The best way I’ve found to do this is to run a nut onto the screw, cut the screw, grind the screw making the grinding wheel cut towards the center of the screw (or dragging the metal away from the threads). Removing the nut will clean any swarf left in the threads. The nut should start back on the screw without problems, if not, I’ll clean the screw up some more with the grinder.
 Zed’s exhaust system hangs low and as such has hit the ground frequently enough to create pinholes. When pipe gets this thin I prefer to braze the holes closed. The brazing rod requires less heat and leaves a nice, thick pad to give a dirt rider something to beat on.
 Finally, when I fit the exhaust headers I tape around the frame tubes to help prevent scratches. I also tape the headers to keep the exhaust collars from falling down the pipe scarring up the new paintwork.

 Back when we were running Briggs and Stratton mini-bikes a few kids had Yamaha Mini Enduro 60cc or Honda Mini Trail 50cc bikes. Both of these bikes were stone reliable and a real leap forward from the hard-tail, flathead, one-speed stationary motored mini-bikes. I had a blue Mini Trail Honda that was indestructible. Riding the Everglades of South Florida the cooling fins would cake with mud and the engine would overheat until it would stop running. Just stop.
 Into these tiny times strode a colossus: The Steen Alsport 100. What a machine! The Steen was equipped with a 100cc Hodaka engine, and the front forks were Earles type utilizing a swingarm and held up by two oil-damped shocks. The gas tank was fiberglass and beautifully shaped. White was the only color I saw but there were other colors. Steens were rare around the neighborhood.
 Dealerships more so than motorcycle quality determined motorcycle popularity at the start of the 1970’s. There were no Hodakas to be found. Very few Kawasakis or Suzukis populated our riding areas. Oddly enough a Montesa or Bultaco might ride by. These were huge motorcycles. The Steen didn’t have much of a dealer network In Miami so there was only the one kid who had a Steen in our group. I should remember his name but it has slipped away to that place all memories eventually slip.
 This is not a restoration. This is a resurrection. I plan to ride Zed, not store it away like a stolen Rembrandt. The front down tubes were pretty chipped and scratched with lots of bare metal so I had to fog a little black paint onto them to slow down the rust. I know all things rust. As soon as ore is melted into steel it begins the long path back to earth. We live in a temporary world; as soon as we stop our struggles and ambitions the things we care about turn into dust. So I painted the Kawasaki’s down tubes.
 Next on my list were new steering head bearings. I have a Proto puller set that cost around $150 in 1970 and it mostly is still intact. From that kit I used the bearing separator to get behind the lower stem bearing. I clamped the stem in the vise and a few sharp raps later the bearing was off.
 Removing the races pressed into the fork stem is a little harder. There isn’t a whole lot of meat exposed to get a purchase. Some people weld a bead on the race then use that to punch the race out. I’m sure there’s a correct way but I don’t know it so I use two puller claws and force them against each other to wedge the puller tips behind the race. Since you have to hold the claws together with one hand you’ll need a length of old bronze boat shaft to pound on the claws. Most Old Boat Shaft stores carry lengths of bronze shaft. It’s finding the store that’s the hard part.
 The new races pop in without trouble. I get them started with a dead blow hammer then finish seating them with a punch worked slowly around the circumference of the race. You can hear the hammer-tone change pitch when the race seats against the frame tube.
 The triple clamps were a mess so I wire brushed them and shot some black paint on the things. I’m always aware that any paint work or cleaning I do destroys the originality of the bike so I try to keep it to a minimum. While the headlight ears were soaking in a vat of Evapo-rust I started assembling the forks.
 A new throttle/switch assembly from
  I’m close to $1000 in parts now. I’m replacing some wear items so I don’t think those should count against Zed.

 Kawasaki’s bold new W800 Café looks a lot like a restyled W800 standard but we here at Wild Conjecture have no way of confirming this statement. You see, Wild Conjecture by its very name is nothing but guesses bulked up with opinion into a plausible hunch.
 Kawasaki claims the styling is inspired by Kawasaki’s W1 650, which taken to its logical conclusion would mean the Café was inspired by an ancient 1950’s BSA A7 (later becoming the A10) twin. And that’s not a bad thing. For years the W1 650 held the title of the largest displacement motorcycle built in Japan until the CB750 Honda came sauntering into the room.
 For me, the Café looks good overall but misses the mark in a few key areas. The colors shown on Kawasaki’s web site are dreadful. The faring and side covers are a mismatch for the fenders and gas tank. I know this is done on purpose but a bike like this should have an all alloy tank with chrome fenders. Kudos to Kawasaki for trying something different. Better luck next time.
 The forks, side covers, rear fender and exhaust all look great to me. I like the shaft-driven camshaft and the air-cooling system. Hopefully you’ll be able to buy the thing without anti-lock brakes but I suspect the days of ABS delete are nearly over.
 Progress has slowed on Zed. I really wanted to start the beast up. The problem is I haven’t figured out the ignition advancer issue yet. My E-buddy Skip sent me two of the things but neither one will work on the 1975 Z1 crankshaft end. I feel bad that Skip is trying to do me a favor and that the poor guy has to keep digging around in his parts stash. It goes to show you: no good deed goes unpunished. I am going to suck it up and buy a new, $159 advancer from
 Meanwhile, I’m not ignoring the rest of the bike. Let’s face it, even if the engine is shot I have to get this bike running. The front forks were leaking and contained about 3 ounces of oil between both fork legs. This is down a bit from the 5.7 ounces per leg suggested in my shop manual. I know I said this was not going to be a show bike restoration but I couldn’t bear a future staring at this gouged fork cap bolt so I sanded the thing smooth and gave it a lick of polish. Of course this means that I have to do the other side also.
 The internals of the forks were covered in sticky black goo, which required a ton of solvent and liberal doses of carb cleaner to cut loose. Then came rags stuffed down the tubes and pushed back and forth using a drill bit extension. The sliders came polished from the factory and since they were preserved under a coat of oil it took no time at all to spiff them up without crossing over to the dreaded Show Bike threshold.
 All the fork parts look usable if not perfect. The upper section of the fork tubes that were covered by the headlight brackets is pretty rusty. I’ve polished it off a bit and will lube the rusty areas to prevent further rust. None of the rust will show on the assembled forks but I’ll have to deduct points when the bike is in the Pebble Beach show.
 The fork sliders are held to the damping rod via this Allen-head bolt. There was a fiber washer to seal in the fork oil but I don’t have any fiber washers. I ended up grinding a copper washer to fit and I only have one of those. Looks like a trip to Harbor Freight is in order to buy their 5090 Copper Washer Warehouse kit.
 The clutch actuator was in good shape but dirty and dry. Most of the ones I bought for my old Yamaha had the helix cracked. I suffered along with the cracked helix until Hunter found a new, re-pop part and sent it to me, asking if he could have some of the ones I’d stolen from him in exchange. I have no idea what the old man is on about. This Kawasaki part is much sturdier than the Yamaha part and crack free so that’s one point to Kawasaki in the red-hot clutch actuator wars.
 I’m placing another big order with