Playing Well With Others: 18 Group Riding Tips

Riding in a group is a lot like sex:  Most of us think we’re better at it than we really are.

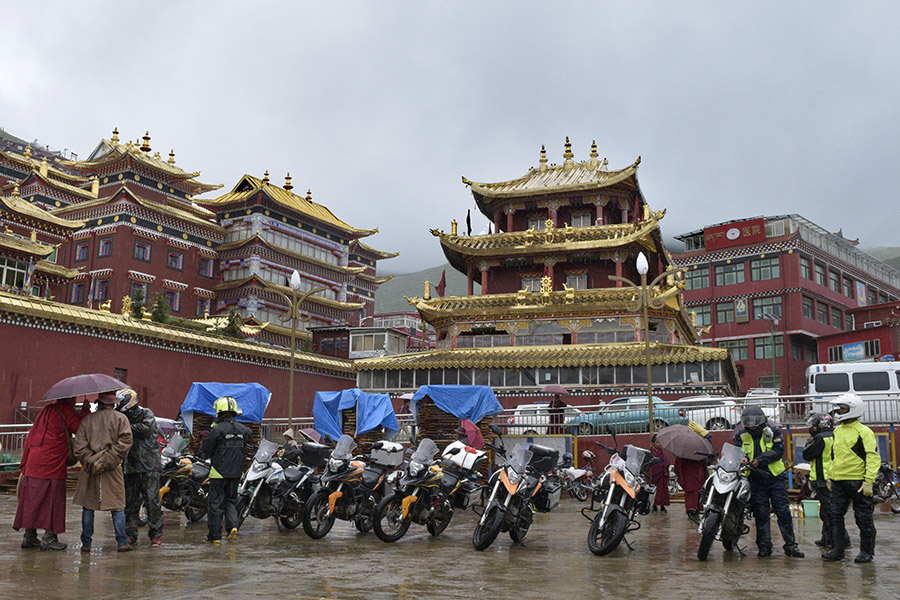
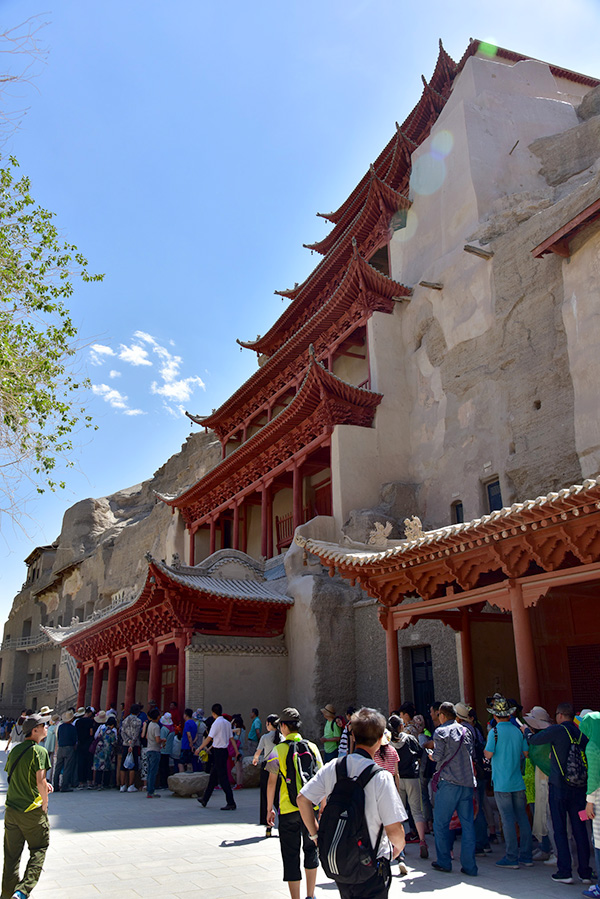
This blog focuses on how to play well with others on a group ride.  It’s told from the perspective of a guy who has organized and led group rides (that would be me) and who has been a participant on group rides (that would also be me).  You can have a lot of fun on a group ride and go places you might not otherwise go, like Seda in the photo above.  Seda is a town that will take your breath away…it’s the largest Tibetan Buddhist school in the world, it took days to reach, and I would have never visited it had I not done so on a group ride. You can read all about that in Riding China.
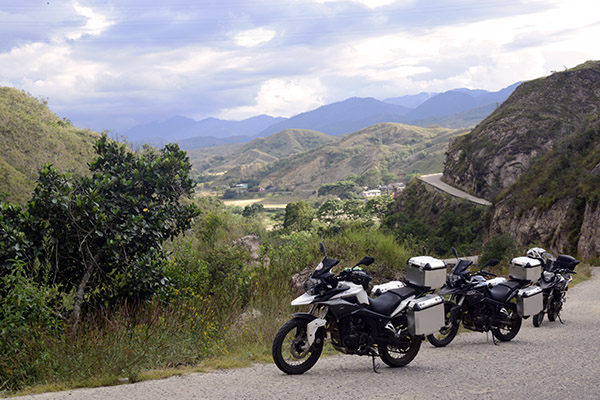
Riding AKT Motos RS3 motorcycles in the Andes Mountains. This was a fabulous group ride organized by AKT Motos and my good buddies Juan and Carlos.  The RS3 is a carbureted RX3. You can read that story in Moto Colombia.

I make a distinction between organized group rides and simply taking a ride with a buddy or two. This article is not about rides in that second category.  In this blog, I’m describing organized rides with several riders, rides that are usually put together by a club, a dealership, and on occasion, by a manufacturer (like the ride I did with AKT Motos through the Andes Mountains in Colombia).

Tip 1:  Don’t Be A “Maybe” Rider

If you’re not sure, don’t commit to the ride.  Don’t be a guy who says he might go if he can get off work, or if his girlfriend says he can go, or if he feels like going that day, or any of the myriad of brainless “ifs” folks put on their potential participation.  You know the drill…you start out with a whole platoon of guys who say they’re going, a week before the ride it’s down to five people, and the morning of the ride it’s you and one other guy.  If you can go, put on your big girl panties and go.  If you’re not sure, don’t say anything.

Tip 2: Don’t Invite Others Without Checking First

I’ve had this happen to me a few times when I’ve planned rides: Folks I invited invite others.  Consider it from this perspective: I invited you because I think you’d add something to the ride and I think I know how you ride.  I don’t know other folks you might want to invite, I don’t know how they would fit in the group, and I don’t know how they ride.  My suggestion is this: Ask the ride organizer if you want to invite someone else.  Don’t just invite others along.

If it’s a marque-specific ride, don’t invite others along who ride other motorcycles.  The ride organizer is promoting a manufacturer’s motorcycle.  It’s weird; folks would badmouth Chinese motorcycles but then get their shorts in a knot because we wouldn’t allow other brands on the CSC Baja rides (you can read about those in 5000 Miles at 8000 RPM and Moto Baja).  Call Brand X and complain to them if they don’t have a ride for you; don’t bitch at me because I don’t want your bike sneaking into my marketing photos.

Tip 3:  Don’t Ask To Join The Ride Along The Way

This seems to be a recurring request, and the only thing I can attribute it to is laziness and that all-too-common sense of “You don’t understand…I’m special.”  It doesn’t seem to matter if we’re organizing a 300-mile ride or a 5000-mile ride.  There’s always that guy who doesn’t want to ride an extra 15 miles to join the group at the starting point.  He wants the group to pull off the highway to meet him somewhere along the way.

Don’t do this, folks.  Either make it to the start of the ride or stay home.  The ride organizer has enough going on without adding additional stops to save you 15 miles (and we don’t want to inconvenience everyone else who made it to the  start point).  Find those big girl panties.  Pull ’em on.

Tip 4:  Attend the Pre-Ride Briefing

If there’s a pre-ride briefing, go to it.  Ride organizers do this to provide critical information and to emphasize safety.  Don’t ask if you can skip the pre-ride briefing.
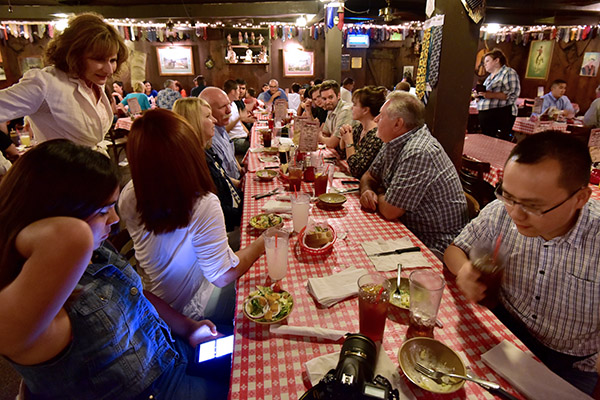
A combined dinner and pre-ride briefing before our Western America Adventure ride. It was an awesome ride: 15 guys, 5000 miles, and no mishaps.

Tip 5:  Don’t Push Alternative Routes

Trust me on this:  The ride organizer has put a lot of thought into the route.  I know when I plan a ride I have a lot of things in mind (start times, how long the ride will take, getting in before dark, the group’s safety, things to see along the way, the route, fuel stops, etc.).  If you have a better idea, do your own ride.

If the group isn’t going somewhere you want to go, you might ask the ride organizer privately if it would be okay to split off, see what you want to see, and then meet up with the group later that night (or just finish the ride on your own).  I’ve had guys do this and I’m fine with it.  What ride organizers don’t want is a debate during the pre-ride briefing.

Tip 6:  Arrive Early

This is so obvious it almost seems silly to mention it.  When I plan a ride and specify a departure time, that’s when we’re leaving.  If you’re not ready to go at that time, we’re leaving anyway.  I won’t delay the group because you can’t get there on time.
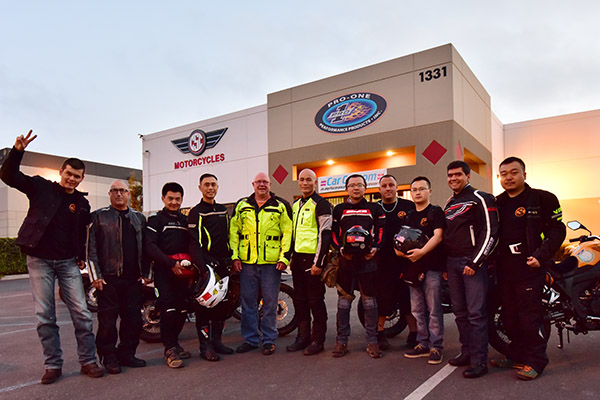
It was the morning we departed California for a 5000-mile ride through the western United States. Everyone was there on time except the chase truck driver. Always show up early for any group ride.

Tip 7:  Arrive Fully Fueled

Stop for fuel someplace close to the departure point and fill up, and do so such that you can arrive for the start on time.  There are few things more frustrating than a rider who announces he has to stop for fuel when the group is ready to leave.

This applies to breakfast, too:  Eat your breakfast early, unless the group plans to stop for breakfast.  I’ve had guys announce when the group was ready to leave that they needed to eat first. Seriously?

Tip 8:  Make Sure You and Your Bike Are Ready

If you need to adjust your chain, check your oil, charge your cell phone, clean your faceshield, tweet, post on Instagram, adjust your jockstrap, or any of the other things I’ve seen guys do at the start of a group ride, do all that before you arrive.  I used to ride with a guy named Dick who did that sort of thing constantly, and he always did it just as we were ready to leave.  “Wait a second,” Dick would say, “I think my chain is loose.”
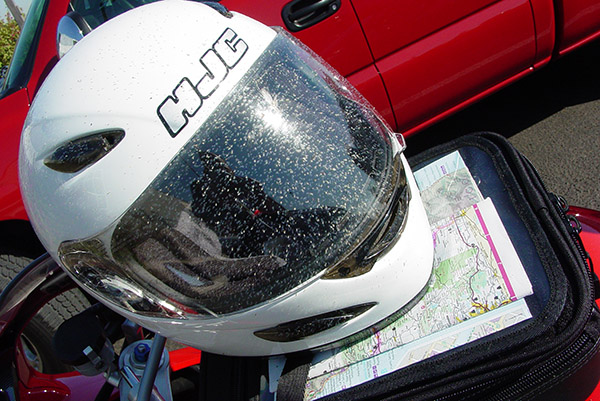
Yep, I needed to clean my faceshield. But I didn’t make anyone wait while I did so.

The advice here is simple: Don’t be a Dick.  Do whatever you need to do so that you’re ready to roll at the designated departure time.

Tip 9:   Keys, Gear, and Mount Up (in that order)

Put your key in the ignition before you suit up, suit up, and then get on your bike.  Don’t get on your bike before you put on your gear, and don’t pull your gloves on when your key is still in your pocket.  I know, this all sounds obvious.  But people do these things. I’ve seen guys drop their bikes because they suddenly realize they need to put on their helmet, jacket, and gloves as the group is leaving.  They’ll jump on their bike, try to balance an 800-pound motorcycle while pulling on their gear, realize the key is still in their pocket so they have to remove their gloves…and in the middle of it all:  Bam, down goes the bike.  Dick used to do that all the time.

Put the key in the ignition, suit up, and then get on your bike.  And do it so when the group is ready to leave, you are, too.
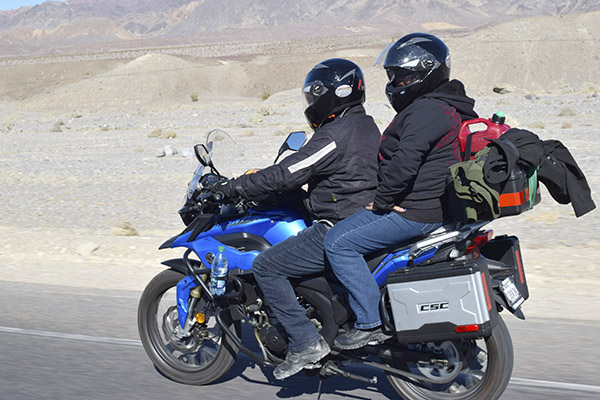
Velma and Orlando at speed in Death Valley. She was wonderful…always on time and always reminding Orlando that orange is the fastest color.

One more point on this:  If you want to bring your significant other along and he or she is one of those people who takes a long time getting ready, explain that motorcycle rides are different.  They just are.  If your significant other can’t adapt, maybe you need another significant other.

Tip 10: Refuel When Everyone Else Does

Your ride organizer will have considered the bikes and their fuel ranges and selected stops accordingly.  Don’t assume you can make it to the next fuel stop when everyone else is refueling.  I’ve had guys do this and then run out of gas at inconvenient times and in inconvenient places.  One guy did so coming home from a Baja ride.  We spent the night in Tecate and fueled the bikes there, but for whatever reason, he decided he had enough gasolina and he didn’t top off.  He ran out of gas on I-5 somewhere north of San Diego.  For all I know, he’s still sitting by the side of the road.

Tip 11:  Keep Your Helmet On At Gas Stops

A fuel stop can be 10 minutes if everyone pulls up to a pump, keeps their helmet on, and is efficient.  Or it can be 45 minutes or more if folks take their helmets off, start kibitzing and posting on social media…you know.  Listen to what the ride organizer says about this during the pre-ride briefing.  I like to keep my helmet on and keep things moving.
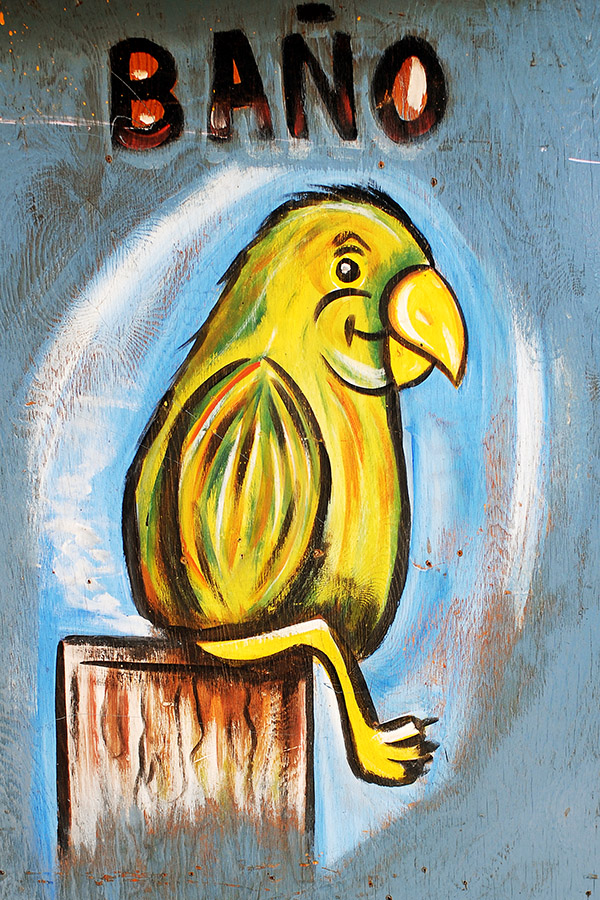
Drink enough to stay hydrated. Use the restroom every chance you get, even if you don’t have to (so you won’t have to while underway).

Fuel stops are a good place to use the rest room, too, but be quick about it.  Most ride organizers will make a pit stop every hour or so (hey, we’re mostly a bunch of full-figured mature prostate patients), so take advantage of every stop and hit the head.

Tip 12:  Eat With The Group, and Be Nice

Don’t decide you don’t like the restaurant the ride leader selects for lunch and wander off looking for your idea of the perfect place, and don’t suggest different places to eat when the group stops at a restaurant.   Give the ride leader credit for having thought about things like how long it takes to get served at a restaurant, cost, etc.  On the wandering off thing, I’ve had guys do this and I left without them when we were finished eating.  Sometimes they got back in time and sometimes they didn’t, but I wasn’t going to inconvenience everyone else waiting for my vagabundos to rejoin the group.

If you’ve ever worked in a restaurant, you know large groups are tough.  The wait staff may be leery of your group for a couple of reasons…you’re a bunch of people dressed like Power Rangers (so you may be a little intimidating), and most groups tend to leave scanty tips (or no tip at all).  Be nice and leave a good tip.  The ride organizer probably has a relationship with the restaurant from prior visits, and he ‘ll probably want to bring other groups on subsequent rides.  Don’t poison the well.
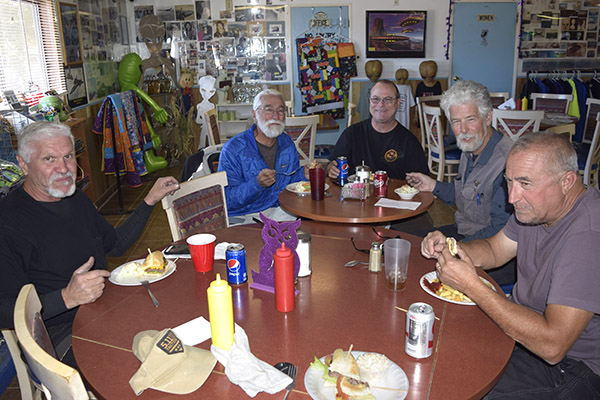
That ketchup bottle belongs where you see it. Gresh knows this now.  We are not alone.

Don’t take up other tables by stacking your helmets, your jackets, and other stuff on them.  Leave other tables free for the restaurant’s other customers.

Some folks take forever choosing from the menu, or they have special requests (you know, put this on the side, add this but subtract that, can I get goat cheese instead of American cheese, etc.).   That makes things difficult for the restaurant and the other riders.  Choose from the menu, be quick about it, and don’t delay the group.

Here’s another thing I want to mention:  I’ve ridden with guys my age or older who mostly look like me, yet they somehow feel compelled to hit on the wait staff.  For the record, I’m overweight, I’m bald, and I’m not tall, dark, or handsome.  Read that sentence again, because whether you realize it or not, I may have just described you.  Do you really think a young woman working in a restaurant is going to be impressed by a short, fat, and not-so-handsome guy three times her age hitting on her?  Give it a break, guys.

Tip 13:  Ride Safely

Safety trumps everything else on a group ride.  Go to the safety briefing, ride in a staggered formation, don’t crowd the rider in front of you, and don’t try to carry on a conversation by riding alongside another rider.
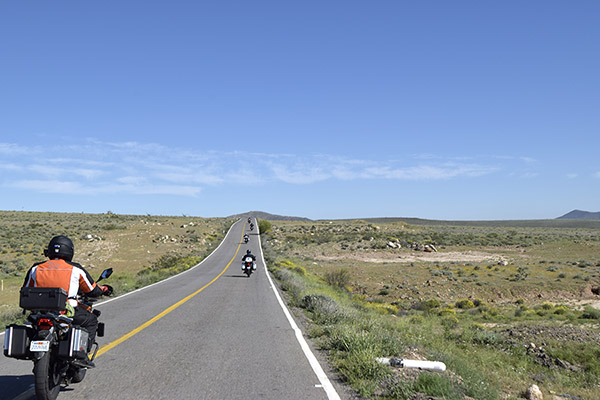
Good spacing and a staggered formation make for a safe ride.  If you’re wondering, I shot this photo in Baja.

Riding in a group also means keeping up…you don’t want to tailgate the rider in front of you, but you don’t want to ride so slowly that it opens up huge gaps in the group.

If a traffic light changes to red, don’t blow through it just to keep up with the group.  The ride leader will most likely stop to wait for you.  You should know the route so that if you do get separated, you can join the group down the road.  And if a car needs to change lanes to exit in front of you, allow it to enter and cross your lane.

Finally, know your capabilities and consider the group.  If you’re a loud-pipes-saves-lives kind of rider and the group is a bunch of loud-clutches-saves-lives canyon carvers, you may be praying at the wrong church.  If the group is riding at a pace beyond your capabilities, drop out and ride your own ride.   Don’t get in over your head, and don’t assume because the guy in front of you made it through that corner at 80 mph you will, too.

Tip 14:  Avoid Alcohol During the Ride

I’ll only ride with folks who won’t drink at all on a ride.  Once the bikes are parked for the evening, that’s another story, but during the day, it’s no booze.  Period.  I’ve played the game with guys who think they can have a beer during the day.  Then it becomes two.  Then three.  Nope.  Not gonna happen.  Not with me.
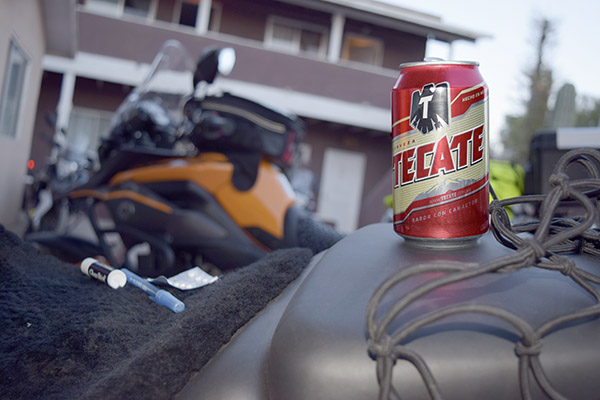
Nothing is better than a Tecate with lime and rock salt around the rim once the bikes are put away for the evening.

There are liability issues here, and it’s likely that folks sponsoring a ride simply won’t risk the extra exposure that goes with allowing alcohol consumption on a ride.

Tip 15:  Be An Extremely Careful Photog

You can have a great motorcycle ride or you can make a great video, but you can’t do both at the same time.

If you want to do a video on the road, get a mount (Ram makes good gear) to mount your Go Pro or cell phone to the bike so you don’t have to screw around holding it or looking through a viewfinder while you ride.  If you’re using a wide angle lens, don’t try to make up for it by crowding the rider in front of you to get a better view of his bike.  Safety first all the time is the rule here.

If you’re using a digital camera for still shots, never try to use the viewfinder or look at the LCD screen to compose the shot while you’re riding.  Digital film is cheap: Take a bunch of photos without looking through or at the camera. One or more of your photos will be good.  You can’t control your motorcycle trying to compose a photo, and you put yourself and the riders around you at risk if you attempt to do so.
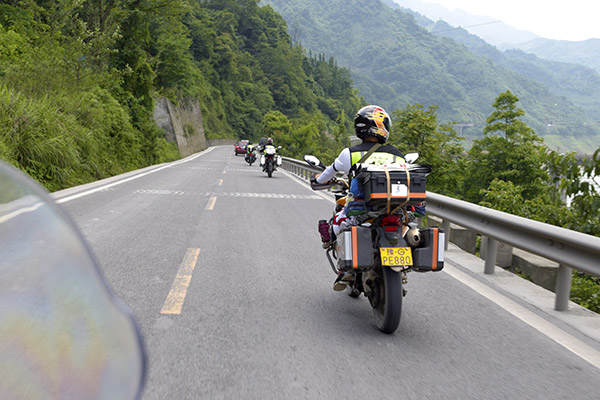
Riding China. Buy the book (don’t wait for the movie).  It was a glorious 6,000-mile group ride without a single incident.

Last point on this topic:  Don’t delay the ride so you can get the perfect photo or an artistic video.  There’s a lot more at stake here than the number of likes you’ll get on Facebook.

Tip 16: Pay Attention To Your Turn Signals

Keep an eye on your turn signals.  Dick used to put his turn signal on, he’d make the turn, and then he’d ride the next 72 miles with his turn signal flashing.  Again: Don’t be a Dick.

Tip 17:  Pack Your Bike Safely

One time I rode with bunch of guys from the place I was working at the time, and the plan was for a 3-day trip to San Felipe.  I had my KLR, there was another guy on an FJR, and there was another guy on a full dress Harley.  We met up at a Denny’s and I was shocked, although I guess I shouldn’t have been.  The Harley guy’s bike had saddlebags and a tailpack, and he still had a bunch of stuff strapped down on his rear seat and the top of the tailpack.  “I brought everything I needed for the three days,” Mr. Harley announced (his name wasn’t Dick, but it could have been).

I had everything I needed, too, and it was all in the tankbag on my KLR (including a camera).  I pointed that out to my portly V-twin buddy.  Learning how to pack (and what to pack) comes with experience, I guess.  New riders tend to overpack.  I used to do that.  I travel light now.
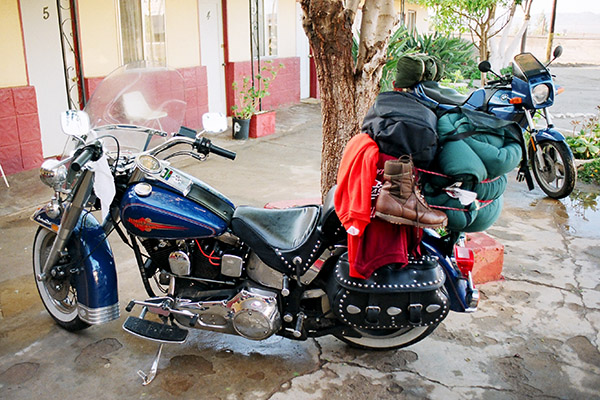
My Harley on one of my first Baja rides. Cue in the music from the Beverly Hillbillies.

The drill on a ride for me is this:  If I can’t get it into the panniers and the tailpack, I don’t need it.  And that includes tools, a laptop, my camera, and a couple of lenses.   I mentioned this on one of the week-long CSC Baja rides, and one of my friends said, “I don’t know how you do it. I have the same bike with the same bags, and I still need to strap a bag down on the rear seat to hold everything.  And I only brought enough underwear to change every other day.”

My response?  “You brought underwear?”

Tip 18: Let Others Know If You Bail

If you’re going to leave the ride, let others know.  It’s okay to do that; it’s not okay to do it without letting anybody know and just disappearing.  That happened to me once in Baja and it scared the hell out of us.  You don’t want to make people nervous (and maybe become the object of a search party, like we had to do in Baja) by simply changing your mind about the ride or the route.  Be a nice guy and let someone know if you’re going to bail.


So there you have it.   If I’ve offended anyone with the above list, my guess is you’re young and you’ll probably get over it.  If not, mea culpa.  And if you have more suggestions on how to ride well in a group, we sure would like to hear them.  Please leave your comments here on the ExNotes blog (don’t post your comments on Facebook; be one of the cool kids and post them here).

Ride safe, folks.  And ride extra safe if you ride with a group.


Help keep us going:  Please click on the popup ads!


Never miss an ExNotes blog!  Sign up for free here!

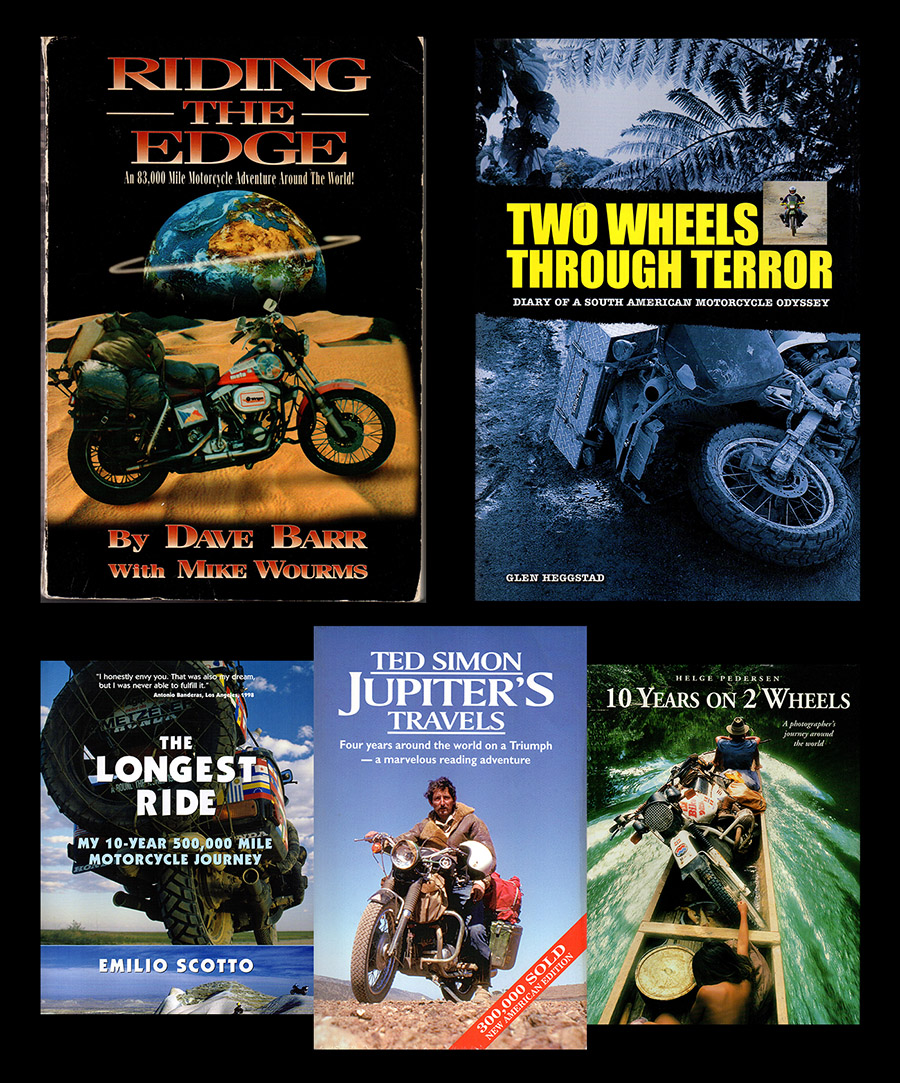
Five Best Motorcycle Books Ever

Listicles, Gresh calls them…articles based around the (fill in the number) best things to do, worst things to do, motorcycles, movies, and more.  One of Gresh’s friends told him that lists get more hits than any other kind of Internet article.  I was a bit skeptical when I first heard that, but Google Analytics doesn’t lie:  When we do a listicle, our hits go up big time.  And comments, too.  We like comments.  And a lot of this blogging game is about the hits and comments.  Gresh’s The 5 Stupidest Ideas in Motorcycling, my recent The Big Ride: 5 Factors Affecting Daily Mileage, and other ExNote listicles…they’ve all done extremely well.

This listicle thing has me thinking in terms of the five best whatever when I’m spitballing new blog ideas, and the list du jour is on motorcycle books.  It’s a topic near and dear to my heart and one we’ve touched on lightly before, although the emphasis in the past has usually been on a single book.  I think I’ve read just about every motorcycle book ever published, and I particularly like the travel stories.  That said,  I think this introduction is long enough.  Let’s get to it.

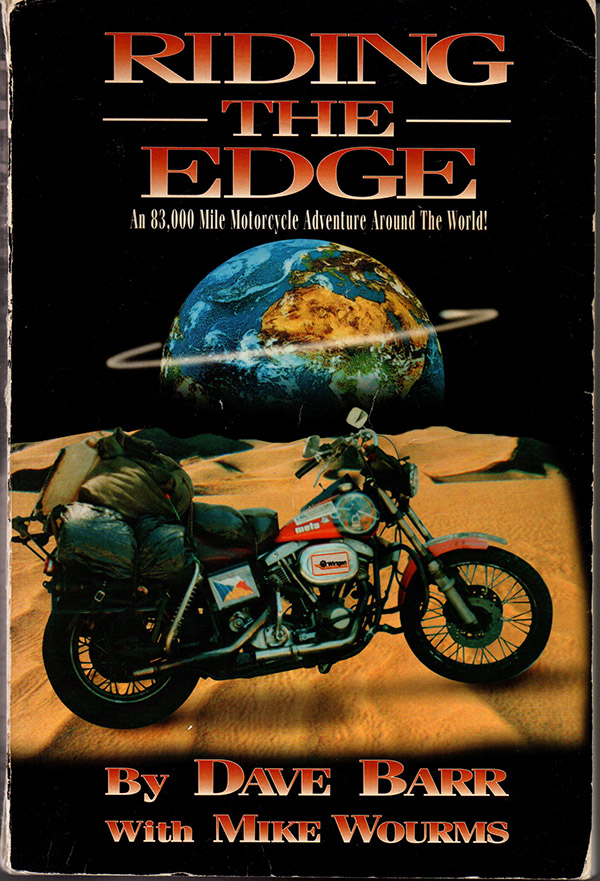
Riding the Edge

Riding the Edge, in my opinion, is the greatest motorcycle adventure story ever told, made all the more significant by two facts.   The first is that Dave Barr, the author, did the ride after losing both legs to a land mine in Africa; the second is that Dave did the ride on a beat up old ’72 Harley Super Glide that had 100,000 miles on the odometer before he started.

I know Dave Barr and I’ve ridden with him.  I can tell you that he is one hell of a man, and Riding the Edge is one hell of a story.  The ride took four years, mostly because Dave pretty much financed the trip himself.  He’d ride a country or two, run out of money, get a job and save for a bit, and then continue.  I read Riding the Edge nearly two decades ago, and it’s the book that lit my fire for international motorcycle riding.  None of the rides I’ve done (even though I’ve ridden through a few of the countries Barr did) begins to approach Dave Barr’s accomplishments.  The guy is my hero.

Riding the Edge is written in an easy, conversational style.  I’ve probably read my copy a half-dozen times.  In fact, as I type this, I’m thinking I need to put it on my nightstand and read some of my favorite parts again.  If you go for any of the books on this list, Riding the Edge is the one you have to read.

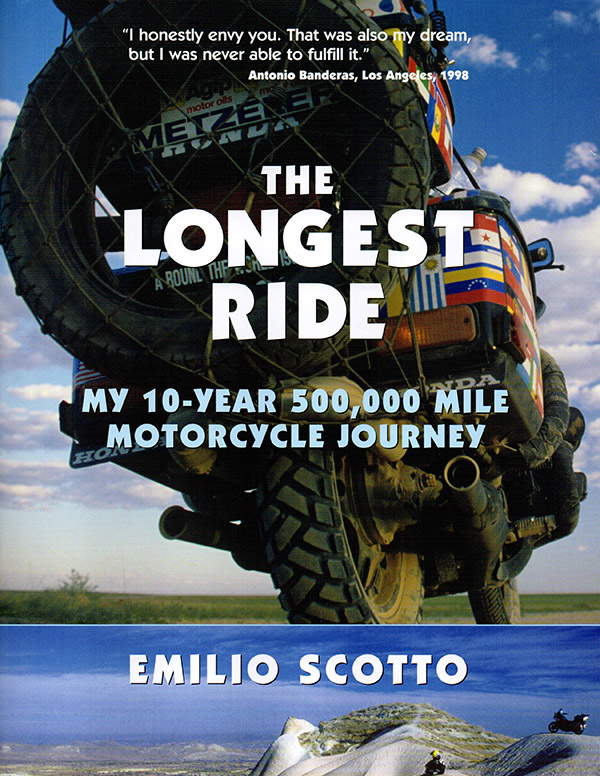
The Longest Ride

Emilio Scotto.   Remember that name, and remember The Longest Ride.  This is a guy who had never left his native Argentina, thought it might be cool to see the world on a motorcycle, bought a Gold Wing (which he named the Black Princess), and then…well, you can guess the rest.  He rode around the world on a motorcycle.

Emilio took 10 years for his trip around the world, and he covered 500,000 miles in the process.  He’s another guy who is good with a camera.  I thoroughly enjoyed The Longest Ride.  I think you will, too.

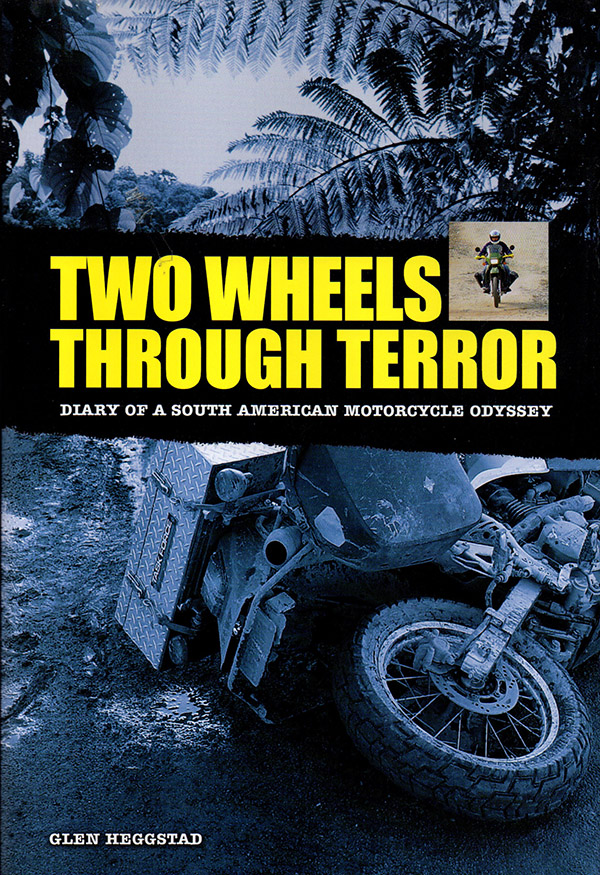
Two Wheels Through Terror

Glen Heggstad…that’s another name you want to remember.  Mix one martial arts expert, a Kawasaki KLR 650, a kidnaping (his own), a trip through South America, and a natural propensity for writing well and you’ll have Two Wheels Through Terror.  I love the book for several reasons, including the fact that Mr. Heggstad used a KLR 650 (one of the world’s great adventure touring motorcycles), the way he tells the story of his kidnaping in Colombia (a country I rode in), and his wonderful writing.

I’ve met Glen a couple of times.  The first time was at a local BMW dealership when he spoke of his travels; the second time was at his booth at the Long Beach International Motorcycle Show.  Glen is a hell of a man, a hell of a writer, and a hell of a fighter (all of which emerge in Two Wheels Through Terror).  He is a guy who just won’t quit when the going gets tough.  I admire the man greatly.

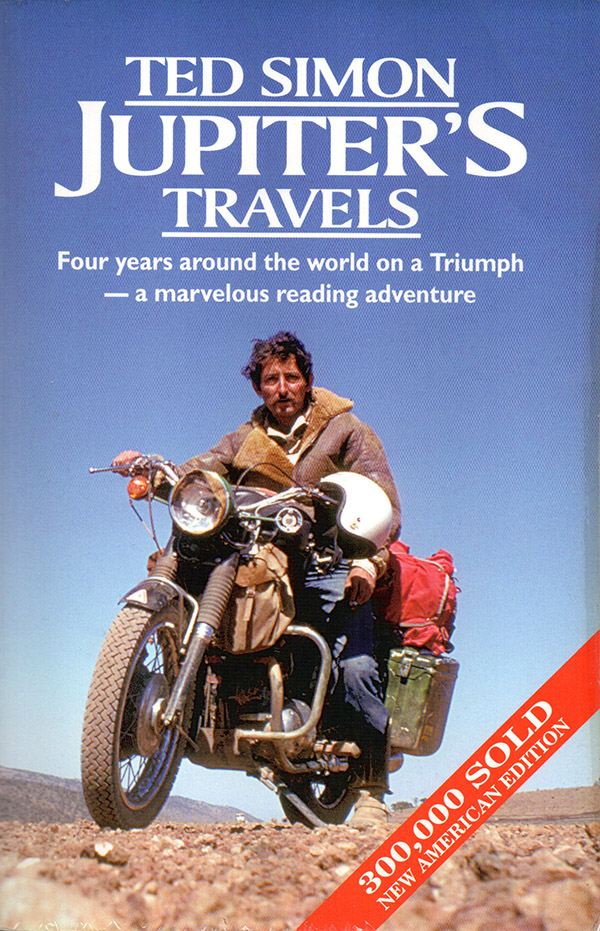
Jupiter’s Travels

Ah, Ted Simon, one of the granddaddies of adventure motorcycle riding.  I’d heard about his book, Jupiter’s Travels, for years before I finally bought a copy and read it, and then I felt like a fool for not having read it sooner.

Jupiter’s Travels was one of the first books about riding a motorcycle around the world, and what made it all the more interesting for me was that Simon didn’t do it as a publicity stunt.  No big sponsors, no support vehicles, no nothing, a lot like the other great journeys on this list.  It was what the guy wanted to do, so he quit his job and did it.  Simon’s bike was a 500cc air-cooled Triumph, and I liked that, too.  I’m a big fan of the old British vertical twins (the Triumph was a state-of-the-motorcycle-art when Ted Simon did his ride).  Trust me on this, folks:  Jupiter’s Travels is a motoliterature classic, and it’s one you need to read.

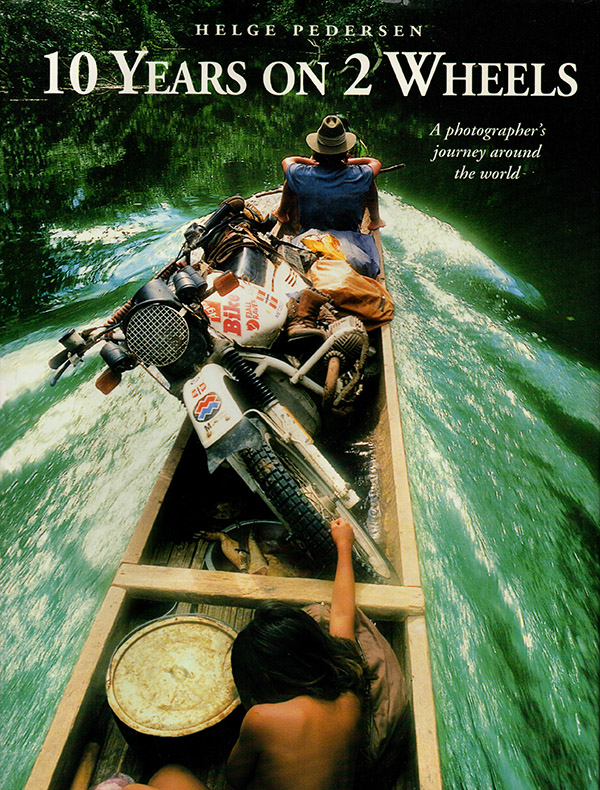
10 Years on 2 Wheels

Helge Pedersen is another name you want to know.  He is a phenomenal world traveler, writer, and photographer, and 10 Years on 2 Wheels is a phenomenal read.

What sets 10 Years on 2 Wheels apart is the photography, and you get a sense of that just by seeing the cover (this is one of those rare books that you can, indeed, judge by its cover).  10 Years on 2 Wheels is what inspired me to get serious about capturing great photographs during my travels, and Helge’s photos are fabulous (they’re art, actually).  This is a physically large book, and that makes the images even more of a treat.
Next Up:  The Five Worst Motorcycle Books

Look for a blog in the near future on the five worst motorcycle books I’ve ever read.  That one will be tough, because I pretty much like any book about motorcycles, but I’m guessing it will elicit a lot of comments.

So that’s it: Our list of the five best motorcycle books.  What do you think?  Leave your comments and suggestions here.   We want to hear them!


More book reviews?   You can find them here!

Never miss an ExNotes blog!  Sign up here:

The Star Primer Feed Mechanism

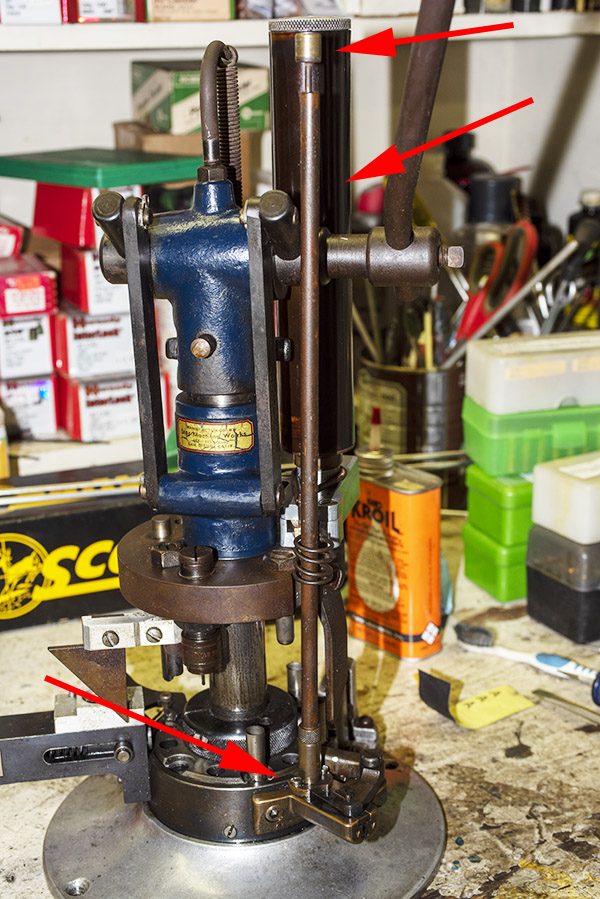
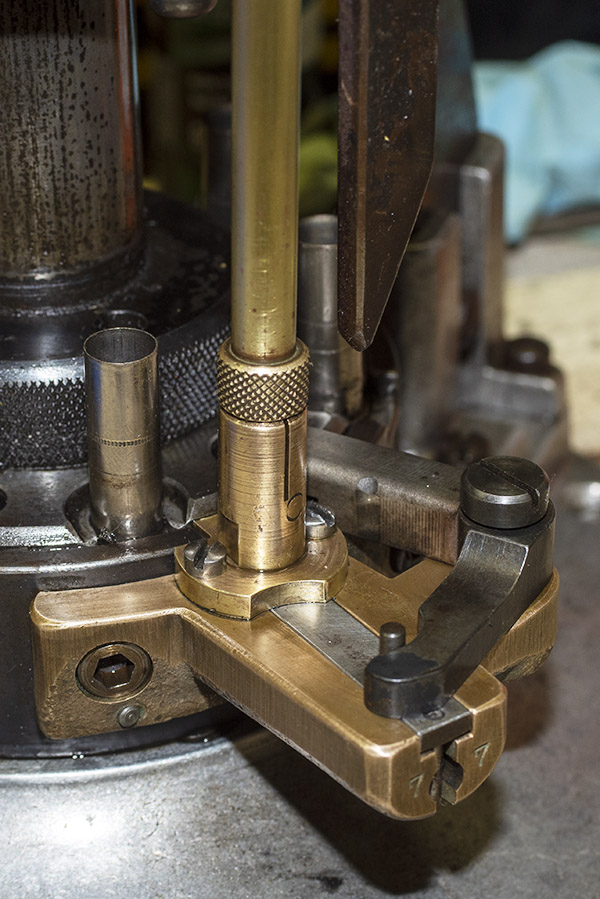
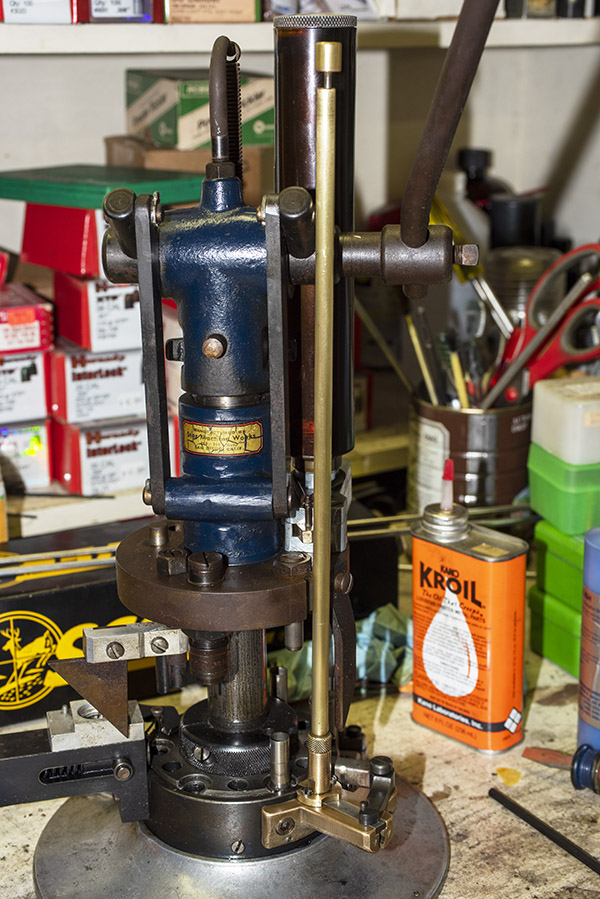
The next steps in bringing the Star progressive reloader back to life focused on the primer feed mechanism.  That subsystem consists of the primer follower rod (the upper red arrow in the photo below), the primer magazine (the middle arrow in the photo below), the primer pickup and feed mechanism (the lower red arrow in the photo below), and the primer seating device (which is under the base of the reloader, as you’ll see further along in this blog).

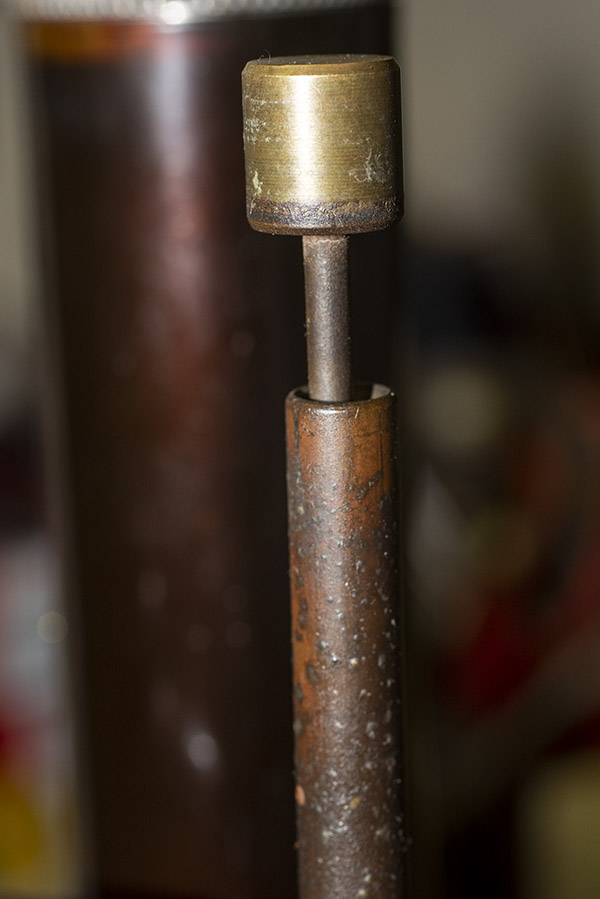
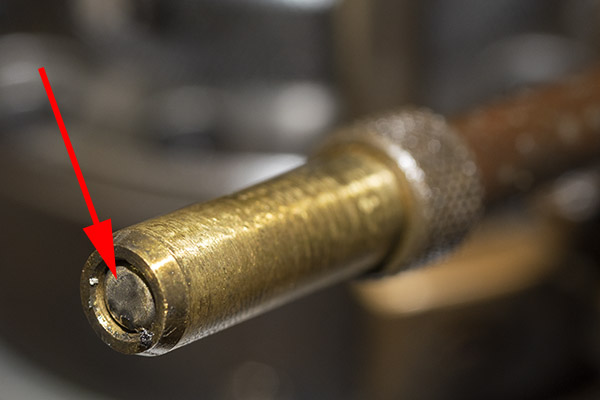
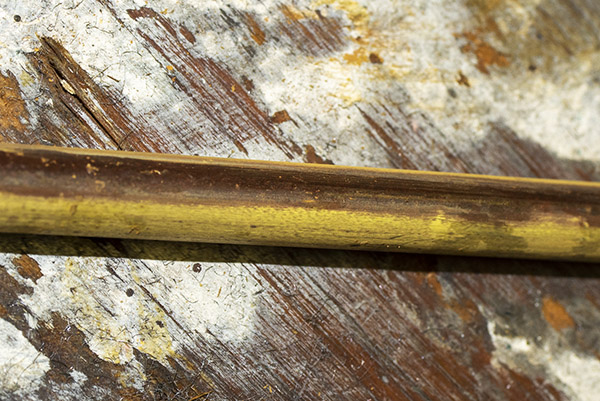
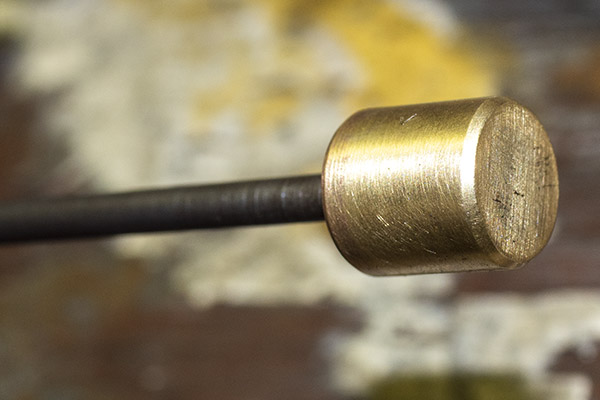
In looking at the primer feed mechanism, the primer magazine , and the primer follower rod, I could see they were mighty funky and thoroughly oxidized.  I wondered if they were all made of brass.  The tip of the primer follower rod obviously was (see the photo below), and probably the feed mechanism base was, but the magazine tube and other parts were so corroded I couldn’t tell.

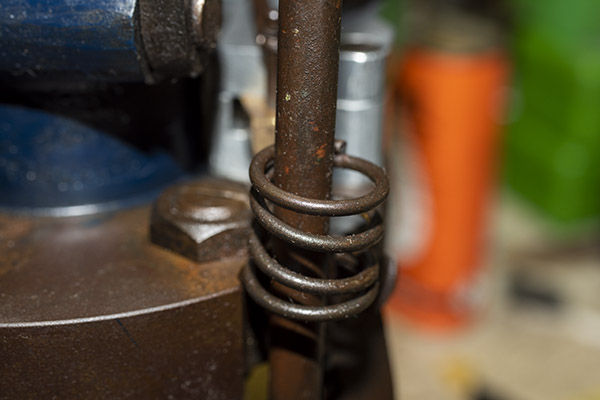
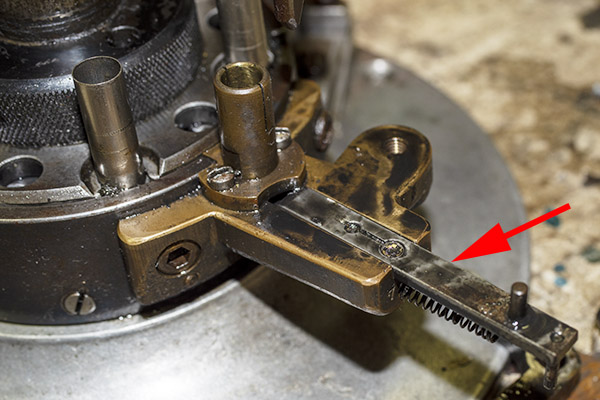
Then I realized I had another question.  See the spring in the photo below?  That one through me for a loop.  I couldn’t see that it served any function, and all the online references I found for Star reloaders did not show it.   So I sent an email to my good buddy Bruce over at Star Machine Works (the outfit that restores and sells parts for Star equipment).

Bruce responded quickly.  Here’s what he told me:

Hi Joe,

The spring is a hitch hiker on your machine. Nothing to do with a Star.

Bruce

A hitch hiker.  That got a laugh.

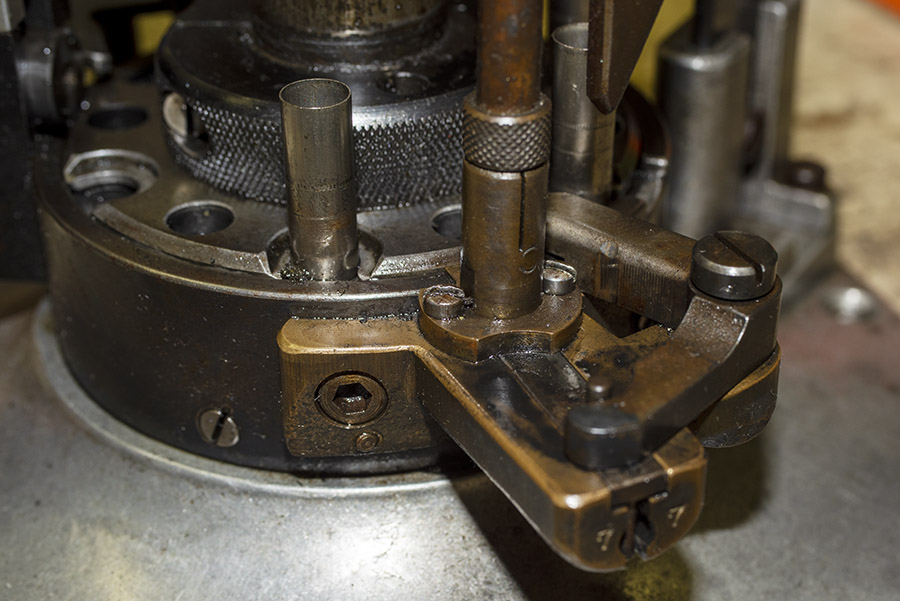
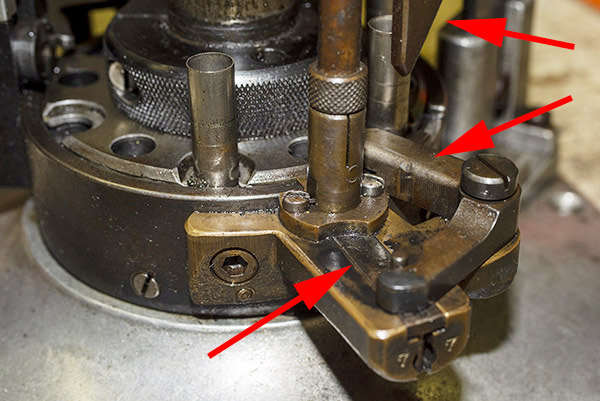
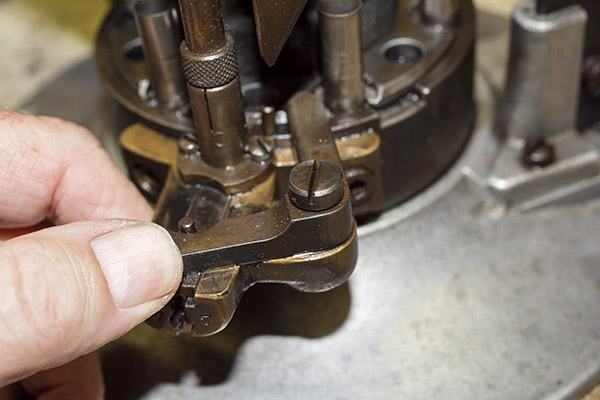
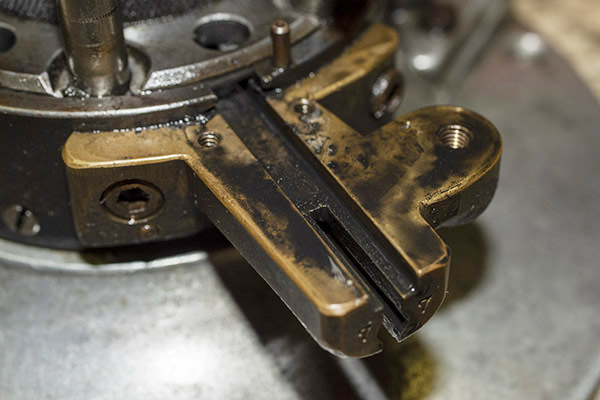
The primer pickup and feed mechanism (shown below) is what takes primers from the primer magazine and pushes them below the empty case.  That L-shaped lever on the right?  It’s the primer slide angle lever (shown by the lower arrow).  It’s actuated when the primer feed cam (shown by the middle arrow) descends as the tool head is lowered on each stroke.  The lever in turn actuates the primer slide in the feed mechanism (shown by the lower arrow), and that’s what picks up a primer from the magazine and positions it underneath the empty case.

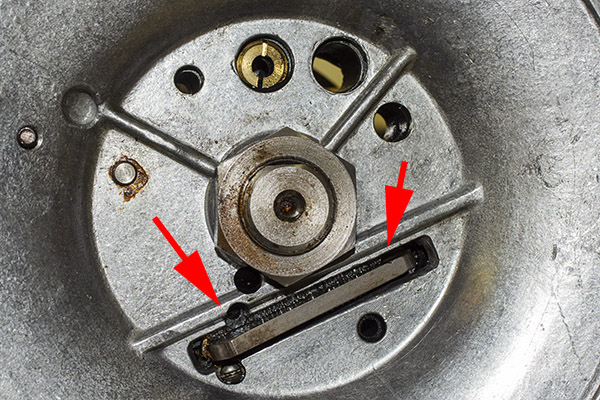
With the primer now in position beneath a .38 Special case, it needs a way to be inserted into the case.  The Star has a clever way of doing this that takes advantage of the fact that there’s a shaft in the tool head that descends with the tool head when the main lever is pulled.  When the main lever is actuated and the tool head descends, the shaft fits through a hole in the shell plate and extends into the base of the reloader.  The tip of the shaft pushes one end of a pivoted lever down, and that then pushes the other end of the lever up.  That end actuates a plunger that seats the primer into the empty case.  Here’s what the lever looks like underneath the reloader.

Like I said, it’s all quite clever.  The guy that designed the Star was a mechanical genius.

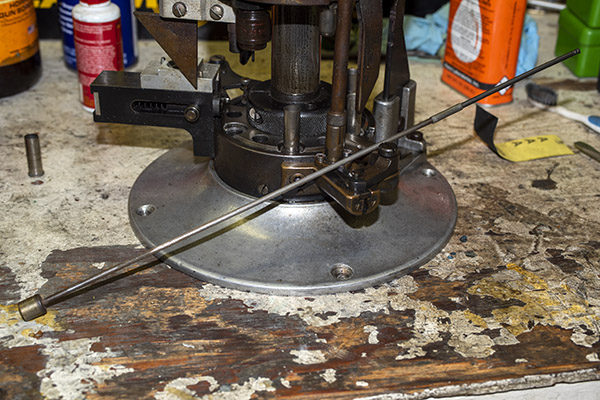
Here’s a photo of the primer follower rod.  It sits on top of a stack of primers in the primer magazine.  Its weight pushes the primers down each time one is transferred from the primer magazine by the primer slide.

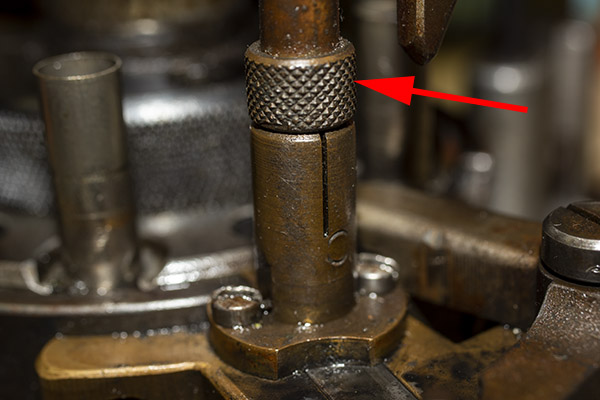
The knurled knob below allows you to grasp the primer magazine to remove the tube from the primer feed mechanism.  It doesn’t unscrew; it’s just a tight slip fit into the feed mechanism.

When I removed the primer magazine, I could see that the tube was made of brass.  There were still a couple of primers in it.  I doubt they would fire; they were probably soaked in oil.

When I removed the primer slide angle lever screw, the primer slide was pushed out by its spring.  As I was disassembling the primer feed mechanism, I found that the primer slide still held a primer.  These parts were pretty funky.  In a working reloader, you don’t want any oil in this area.  It will contaminate the primers and make them inert (we only want “ert” primers when reloading ammo).

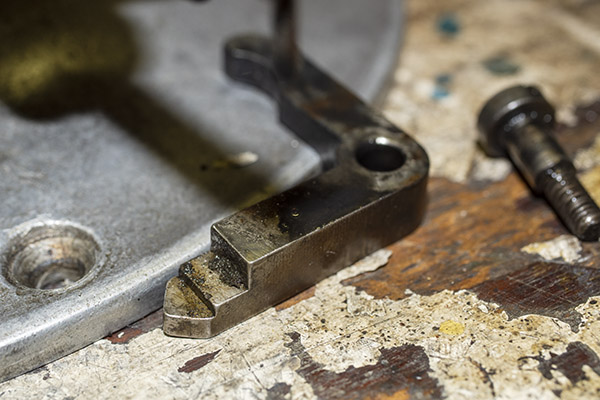
Check out the funk on the primer slide angle lever.  This machine had been rode hard and put away wet, I think.  My spraying it down with WD 40 to clean didn’t help in that regard.  But it sure helped to clean up the Star.

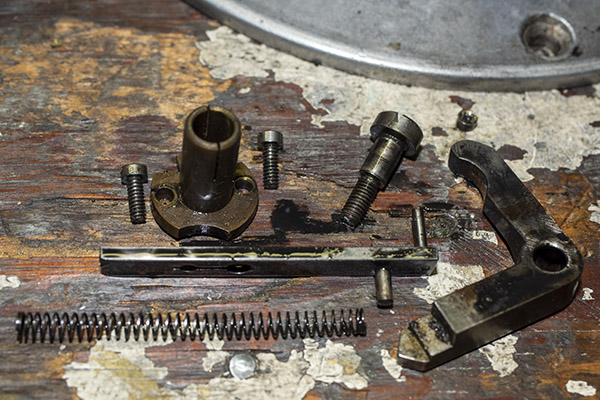
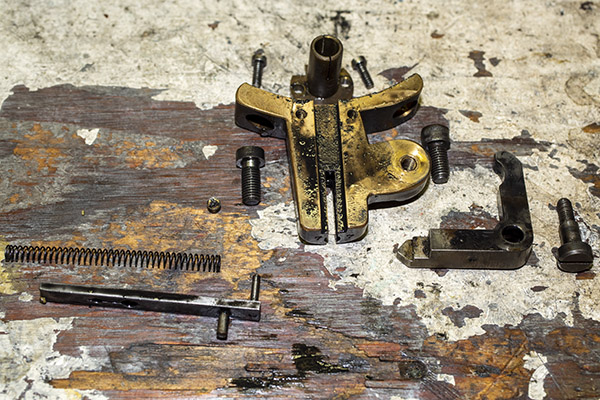
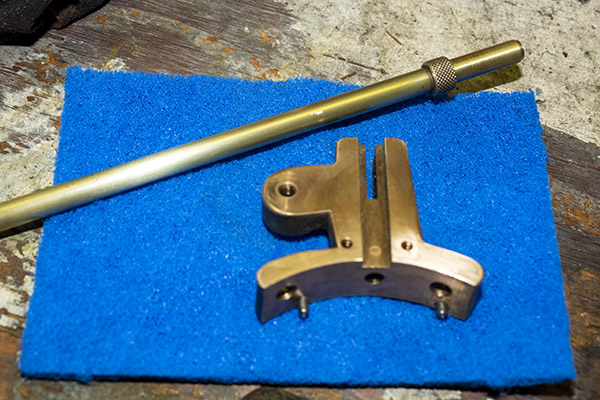
I then unscrewed the two screws holding the primer magazine socket to the primer feed mechanism housing.  Here are the parts in all their glorious funkiness.

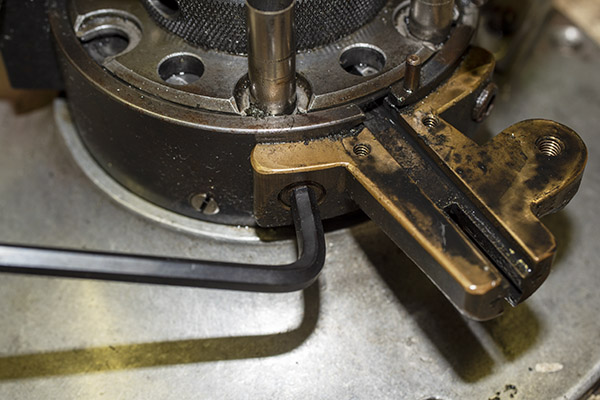
The primer feed mechanism base is attached to the steel floor base with two large Allen bolts.

I removed the Allen bolts and then took the primer feed mechanism base off the machine.  It had two pins to locate it on the Star reloader’s base.

Here’s another exploded view photo of the primer feed mechanism and its components.

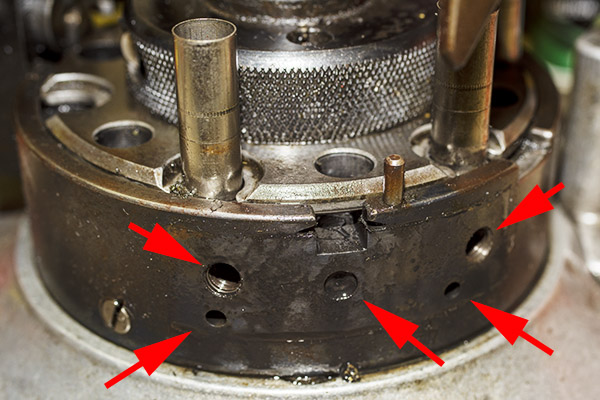
The photo below shows the reloader’s steel base and where the primer feed mechanism attaches.  The upper two arrows point to the Allen bolt attach points.  The lower two arrows point to the locating holes (this is where the two pins mentioned above fit).  The arrow in the middle points to the hole for the primer slide spring.  The rectangular slot is where the primer slide enters the reloader base to position a new primer beneath a .38 Special case.

The steel base is a blued steel part.  It’s just like the bluing on a gun.  This is a pretty cool feature.  There’s a fair amount of corrosion and discoloration on my Star, but it’s part of the machine’s charm.  I hit it with some OOOO steel wool and Kroil, but I’m not going to reblue it.  I like its patina.

I next turned my attention to the primer magazine (the long tube I pointed out earlier).  When I withdrew the primer magazine from its slot, I could see the lower end of the tube was brass, but I still wasn’t sure about the entire tube.  I went to work on the tube with Scotchbrite and that did the trick. Hello, Beautiful!

I worked on all of the primer feed mechanism’s brass pieces with Scotchbrite.   The brass finish came up nicely.  This project is coming together fabulously well.

After cleaning and polishing everything, I reassembled it all.  I could have polished everything to a mirror finish, but you know the drill:  This is a resurrection, not a restoration.  Like I said above, I like the patina look.  This machine might be older than me, and I sure don’t look like new.  We match, the Star and I do.  Old.  Funky.  The ultimate in personalized patina.  That’s us.

In the photo below, you can see the primer cam to the right of the brass magazine tube.  It’s the part that actuates the primer angle lever.   You’ll get to see it all in a short video in just a minute.  People like videos, Gresh tells me.  We aim to please.

It’s beautiful, isn’t it?

So how does it all work?  Gloriously well, thank you.  Take a look:

Next up?  It’s going to be the case feed mechanism, and that will be the topic for our next Star blog.

I’ll share with you that the blogging part of this Star resurrection business is lagging behind the actual resurrection.  Yep, I actually have the Star running already, and it’s running well.   You’ll see how I got there in future blogs, and those blogs will be right here in the not too distant future.  But I don’t mind jumping ahead a tiny bit to tell you that I picked up my Model 60 Smith and Wesson yesterday morning and I fired the first few rounds I made on the Star through it.  They worked just like they were supposed to, as did the Model 60.  That’s a story for a future blog.

Stay tuned, my friends!


Hey, here are the Star resurrection blogs so far, along with our other Resurrection projects!

Hasty Conclusions: 2020 Go-Bowen Fit Right DB003 40cc Mini Bike

I keep hearing a complaints about Globalism. People are talking. Some folks don’t like the idea of making the world’s population one homogenous group of consumer/aphids to be milked by evil corporations. I get that and it bothers me that a mini bike that cost $250 dollars in 1970 now costs only $44 adjusted for dollar devaluation. That’s right, this Fit Right Chinese-built mini bike costs less in real dollars than a really long, long-distance telephone call did in 1970.

In some ways that old 1970 mini bike was better. It had a couple more horses than the DB003’s 1 horsepower. It was made in the USA, which helped support local businesses. I think the fit and finish on the Fit Right DB003 is at least as good or better than an average vintage mini, maybe not as good as a Rupp but then nothing was as good as a Rupp. As far as reliability goes, those flathead, loop framed, scrub-braked minis were not a vehicle you could ever assume you’d get back home on. Time will tell if the Fit Right holds up.

I’m in the middle of a back porch remodel so I only have time to do a short review on what I’ve found unboxing the Fit Right. A more thorough road test and video will be forthcoming.

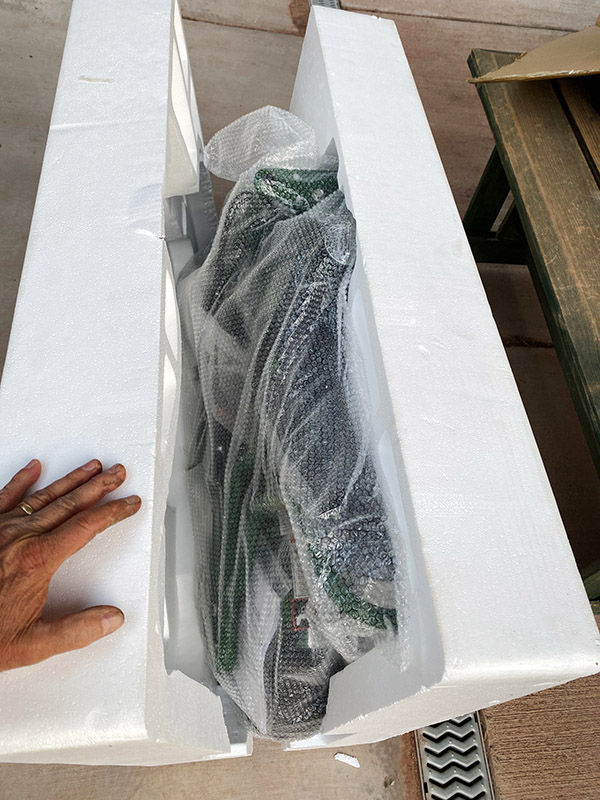
The Fit Right DB003 comes fairly well packed in bubble wrap and then molded Styrofoam all stuffed inside a heavy cardboard box. The cardboard is thick and strong, it’s too good to throw away. I’ll be using it for a working pad to cover the dirt and ants while tinkering under the MBG-GT. Even though the mini was packaged well a ragged hole was punched into the side and parts were rattling around.

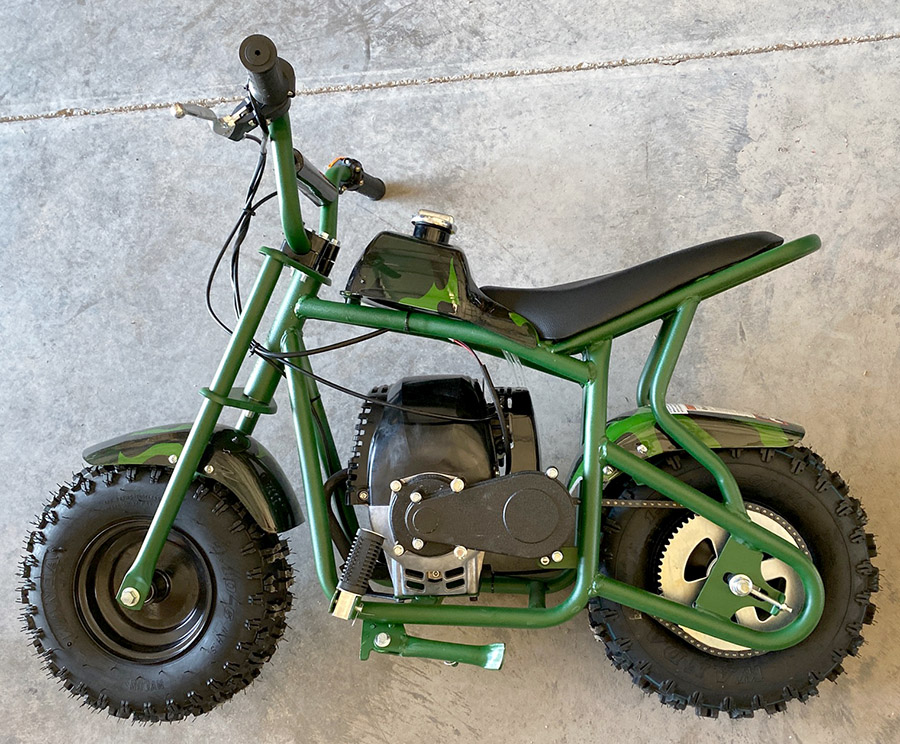
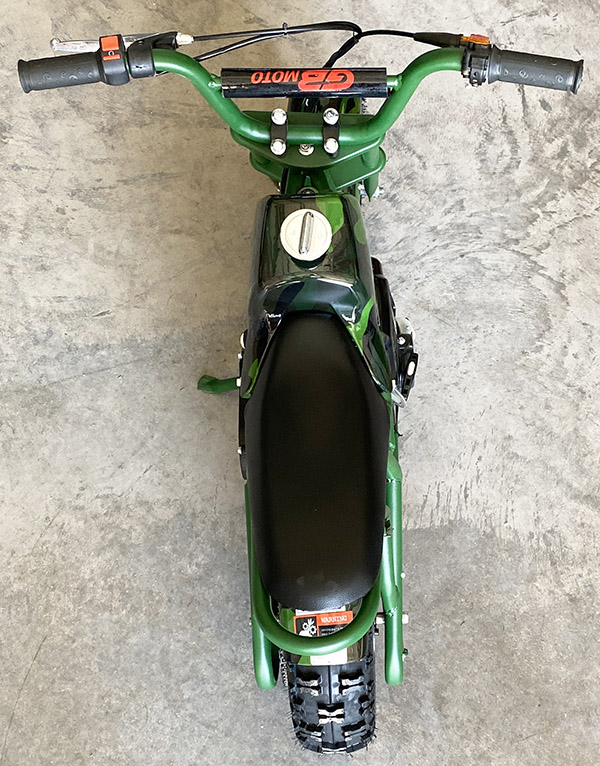
Once out of the packaging the Fit Right mini comes fully assembled except for the handlebars. It only took a few minutes to install the bars after a few hours searching for a 10mm socket. The bars are held on by four bolts/nuts and one of the nuts had gone missing. It probably fell out of the hole. Luckily I had a spare 8mm locknut left over from a roof rack installation.

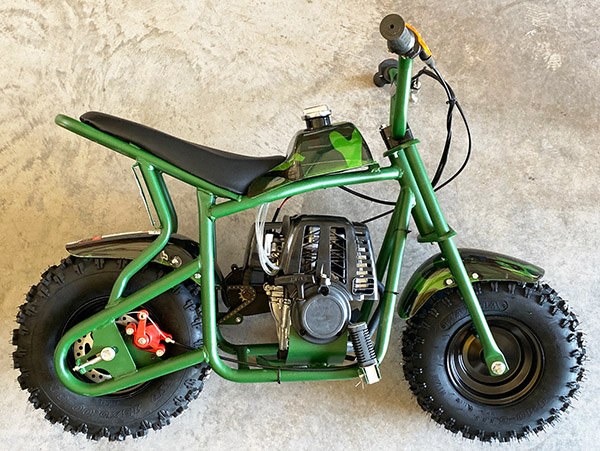
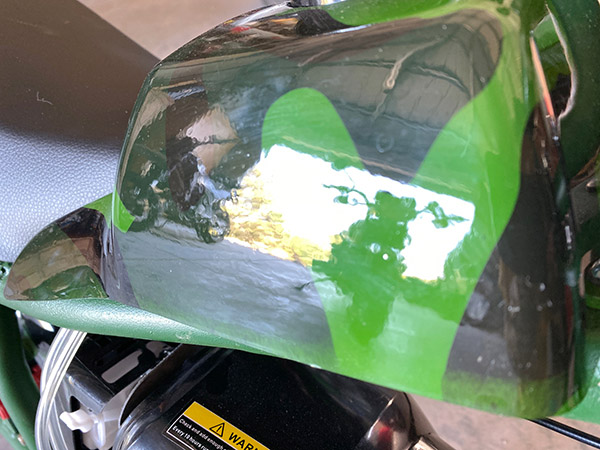
The fit and finish on this $299 (shipping included!) Fit Right mini bike are pretty good. The graphics on the plastic gas tank cover are molded in so you won’t have any cheap, stick-on labels peeling off. The real gas tank under the plastic is made of steel. One odd thing is that there are no steering stops: the forks bang into the gas tank at full lock. This mini bike is smaller than usual; I’ll need to rig some bar-risers to clear my knees.

The Fit Right Model 139F, 40cc, overhead valve engine is jewel-like. Its castings look smooth and there is no rough mold flashing at the edges. The frame is fairly complex design with a lot of tubes and angles that don’t seem to make any sense. I suspect the stylists threw a couple extra pipes in the mix to make the mini look cool. Welds are pretty good, much better than I can do. The Fit Right even has folding foot pegs, a rare feature on the old mini bikes.

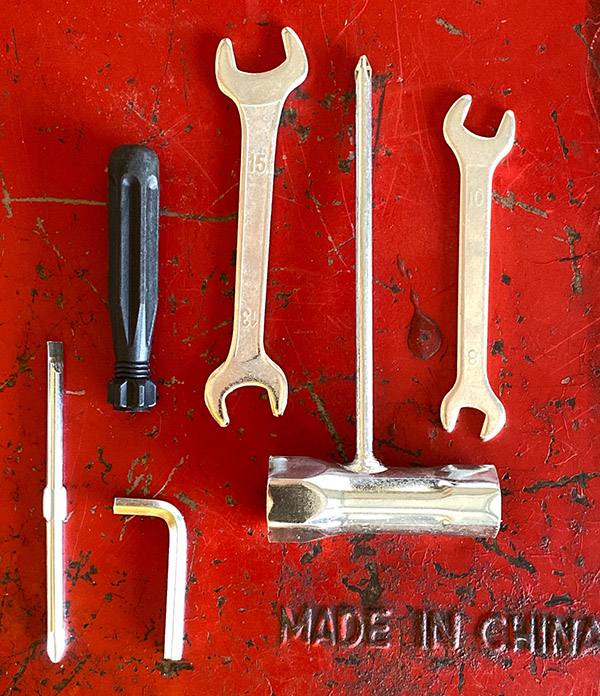
Unusual for such an economy mini motorcycle the Fit Right came with a flimsy but usable tool kit, something lacking on a $40,000 Harley-Davidson. For $299 you can’t expect Japanese-level quality, however I’m satisfied with the DB003’s presentation and the easy assumption of owner-provided care.

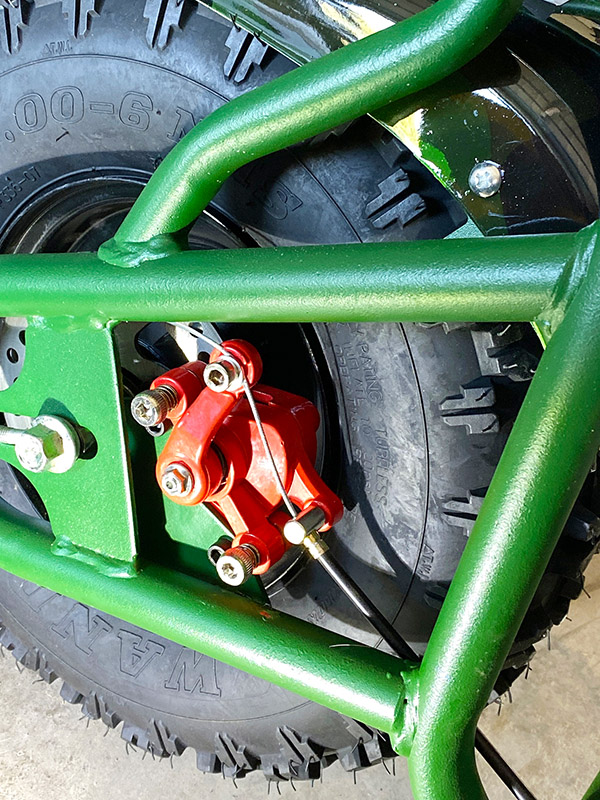
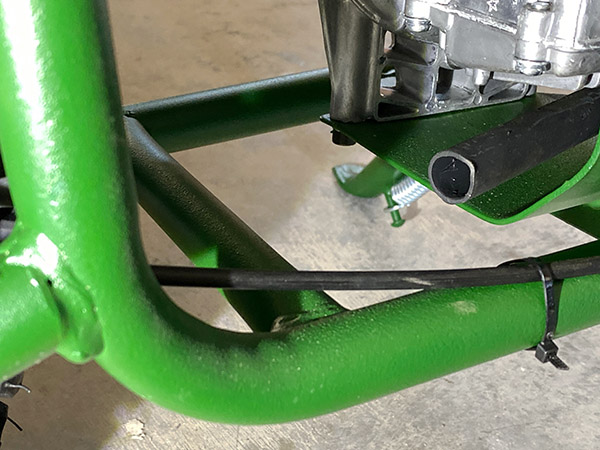
There are some interesting things on this bike that I need to look into later. For instance the fuel tank has a return line and a feed line but no fuel shut off. The engine has a fuel pump because in stationary-engine uses the fuel tank mounts below the carburetor. The carb itself is odd looking. It may be a diaphragm type carb like on a chain saw. The drive train is double reduction and I’ve just got to know what is under the nifty cast aluminum primary cover. The rear brake is a mechanical disc, which is a huge improvement over the old-fashioned scrub brake that simply rubbed on the tire. I don’t like that the hot exhaust exits directly onto the brake cable. I need to turn the exhaust tip more downwards.

The Fit Right DB003 is quite a bit more sophisticated than your traditional double-loop mini of days gone by. Whether this added sophistication equates to better performance remains to be seen. As soon as I get time I’ll get the mini running and ExhaustNotes.us will have performance numbers and a riding impression.


See our other Product Reviews!  Subscribe for free here:

Day 1: Adventure Riding the Andes!

Our Colombia adventure continues…a circumnavigation of the Colombian Andes on a 250cc motorcycle.  For those of you just joining in, I’m reposting a series of blogs I did for CSC Motorcycles describing my ride through the Andes Mountains in December 2015.  After spending the previous day tearing around Medellin and its surroundings, I had become acclimatized to the mile-high altitudes.  As the adventure continued, we would head even higher, all the way up to 14,000 feet, but that’s all coming later.   On this, my second day in Colombia, we headed into the Andes and then down to the Caribbean.  Our real journey had started, and here is that story.


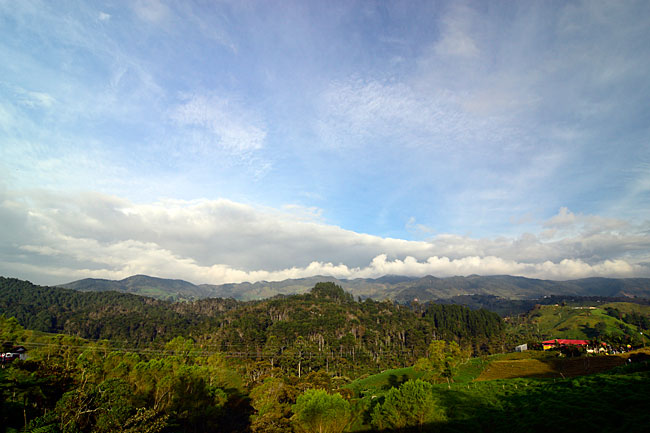
Wow! I never thought I’d been typing this, but here I am. I just rode across the northernmost range of the Andes Mountains.  On an RX3.  Here they are: The Andes!

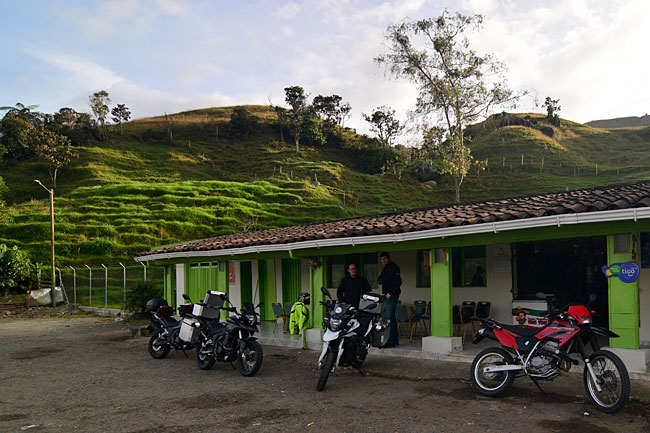
I took that shot from a cool little spot where we stopped for a typical Colombian breakfast…hot chocolate, scrambled eggs, and arrepa. More on that later…here’s a shot of the bikes at what has to be one of the coolest biker restaurants I’ve ever enjoyed.

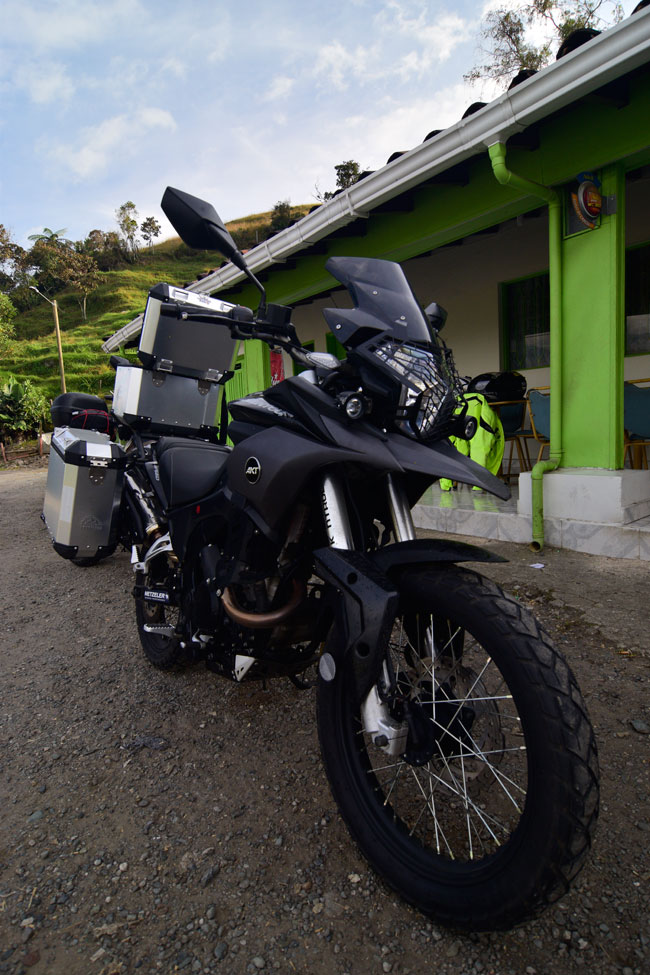
And here’s another shot of my AKT Motos RS3 (the RS3 is the carbureted version of the RX3).

I liked that restaurant a lot. They painted it to match my jacket.
We rode about 370 miles yesterday, and about half of it was in the Andes. 370 miles may not seem like a lot, but picture riding Glendora Ridge for 6 or 8 hours. The Andes are a motorcycling paradise. The Andes Mountains.

Wow!

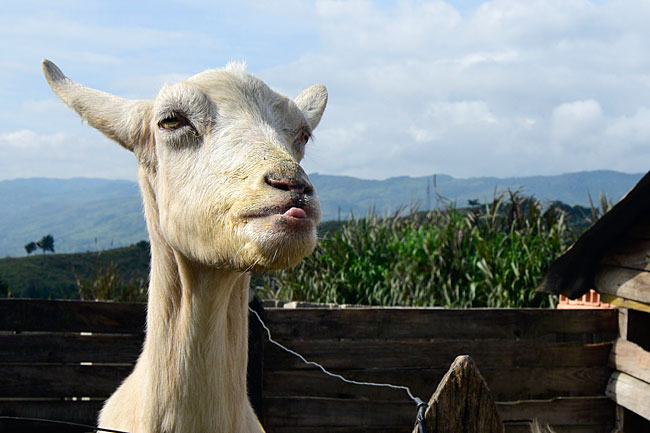
I guess you never know what you’re going to see in the Andes. This old goat was kind of cool…and I had to grab a shot.

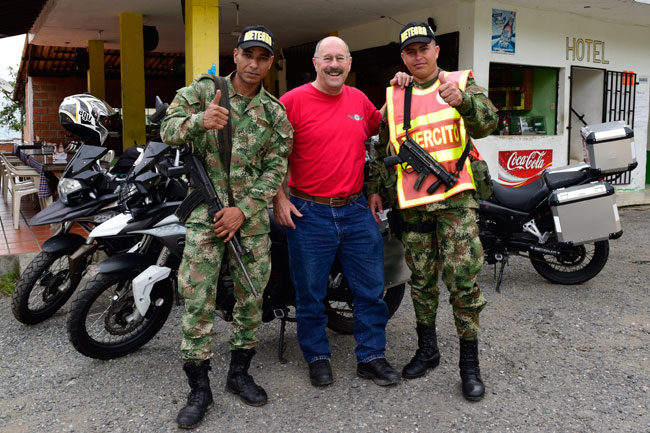
We stopped to take a break and some of the local paramilitary/police guys came over to check out the bikes. The RX3 is a prestige motorcycle in Colombia (just like it is in the USA) and these boys wanted a closer look. They gladly consented to a photo. They are most definitely well armed. You see police and military units everywhere.

These next photos are from the saddle after we descended from the Andes. Good times, my friends.

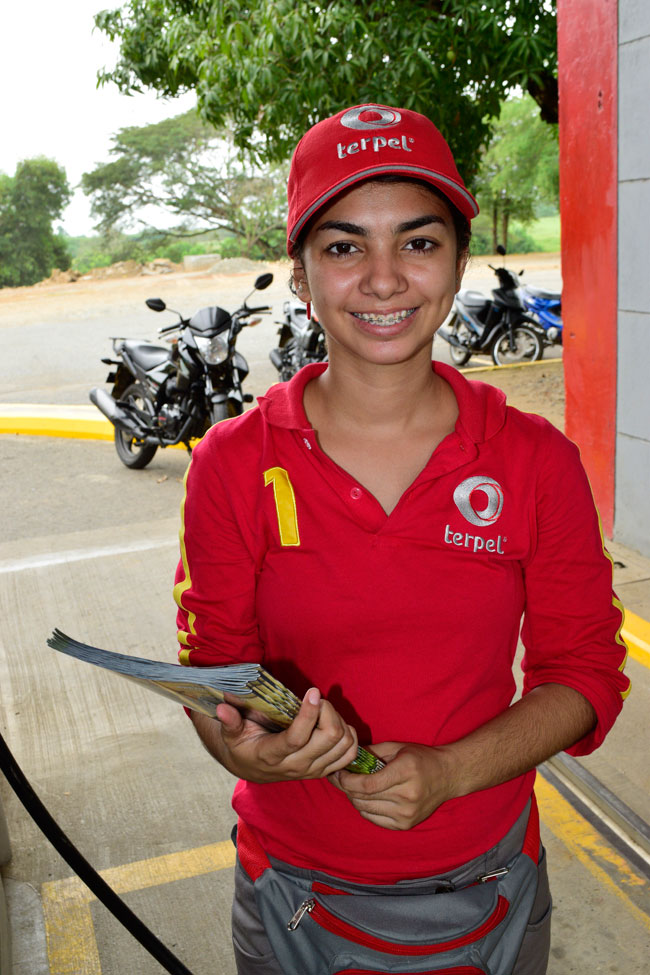
These next photos are of young ladies who are gas station attendants. When they saw our 250cc RX3 motos, they wanted to know what it was like riding such huge motorcycles. That’s a bit different from what you might hear in the USA, I suppose.

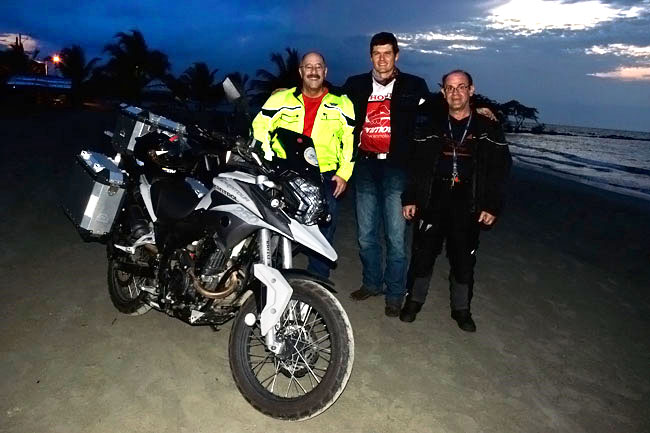
It was a long day, and it ended in a town called Covenas, right on the Caribbean. We stopped for a few shots with the sea in the background.

Keep an eye on the blog, folks. I won’t be able to post every day, but I’ll do my best.


And that wrapped up the second day of my time in Colombia, and the first day of our ride through the Andes.  We’re going to make it a little easier to track this adventure for our blog readers.  You can get all of the good stuff from our Colombian ride here.  I’ll post the next blog from our Colombia adventure in a few days, so stay tuned!

Movie Review: The 24 Hour War

Gresh’s review of Ford versus Ferrari had my attention, and SWMBO wanted to see the movie, so off to the theatre we went.  My take on it was pretty much identical to Joe’s:  Grand entertainment, lots of grimaces and Hollywood liberties with the facts, but overall, an entertaining if not entirely accurate flick.

Later that evening, we were channel surfing and we flopped over to Netflix, and what do you know, a documentary titled The 24 Hour War popped up.  I know Amazon, Facebook, and others use all kinds of spyware to figure out what to pitch to us next, but wow, this was amazing.  That very day, and a pop up for another movie about the great Ford versus Ferrari war and Le Mans.  Hey, in for a penny, in for a pound, so we watched The 24 Hour War.

Unlike Ford v. Ferrari, The 24 Hour War took no liberties with the truth, the facts, the timelines, or the vehicles themselves.  It was a damn fine bit of actual, factual reporting, and I enjoyed it more than the movie we had seen earlier that day.  If you get Netflix, it’s free, and if you own a microwave and a refrigerator, you won’t have to pay $15 for popcorn and a couple of Cokes (like Gresh did).

A few more good things about The 24 Hour War:  It went into much more detail about Henry Ford and Enzo Ferrari (I found that interesting), and portions of the show were narrated by A.J. Baime.  Mr. Baime does a series on interesting cars people still drive in The Wall Street Journal and I love his writing.   I’m just finishing up a book by Baime about our industrial mobilization prior to and during World War II, and it, too, focuses heavily on the Ford family.   The guy is a great writer, and I’ll have a review here on Baime’s book, The Arsenal of Democracy, in the near future.

One more thing regarding the cars themselves:  To me, it’s not really a contest and I don’t much care who won Le Mans.   Given the choice between owning a Ford GT or a Ferrari, to me the answer is obvious:   It’s Ferrari all day long.

But I digress.  Back to the review.  The bottom line?  Ford versus Ferrari was an entertaining movie, but the The 24 Hour War is an absolutely outstanding documentary.  I think you’ll enjoy it.

The Perfect Bike?

This was a blog I wrote for CSC about 6 years ago, and it’s still relevant.  Earlier this year I posted a photo showing my Harley in Baja and Gresh made a good comment:  Any motorcycle you take a trip on is an adventure motorcycle.  I agree with that.  The earlier blogs on my Harley Softail had me thinking about this question again:  What is the perfect motorcycle?


Cruisers. Standards. Sports bikes. Dirt bikes. Dual sports. Big bikes. Small bikes. Whoa, I’m getting dizzy just listing these.

The Good Old Days

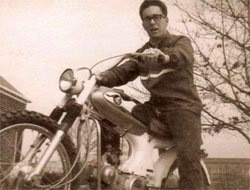
In the old days, it was simple. There were motorcycles. Just plain motorcycles. You wanted to ride, you bought a motorcycle. And they were small, mostly. I started on a 90cc Honda (that’s me in that photo to the right). We’d call it a standard today, if such a thing still existed.

Then it got confusing. Bikes got bigger. Stupidly so, in my opinion. In my youth, a 650 was a huge motorcycle, and the streets were ruled by bikes like the Triumph Bonneville and the BSA Lightning. Today, a 650 would be considered small. The biggest Triumph today has a 2300cc engine. I don’t follow the Harley thing anymore, but I think their engines are nearly that big, too. The bikes weigh close to half a ton. Half a ton!
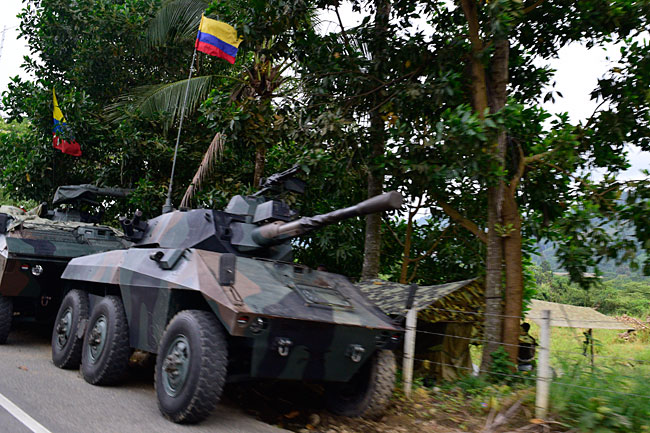
I’ve gone through an evolution of sorts on this topic. Started on standards, migrated into cruisers after a long lapse, went to the rice rockets, then morphed into dual sports.
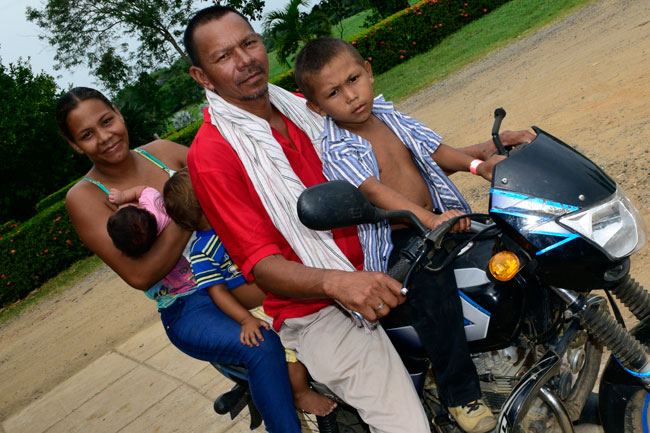
Cruisers and Adventure Bikes

The ADV bug hit me hard about 15 years ago. I’d been riding in Baja a lot and my forays occasionally took me off road. Like many folks who drifted back into motorcycles in the early 1990s, the uptick in Harley quality bit me. As many of us did, I bought my obligatory yuppie bike (the Heritage Softail) and the accompanying zillion t-shirts (one from every Harley dealer along the path of every trip I ever took). I had everything that went along with this kind of riding except the tattoo (my wife and a modicum of clear thinking on my part drew the line there). Leather fringe, the beanie helmet, complimentary HOG membership, and the pot belly. I was fully engaged.

Unlike a lot of yuppie riders of that era, though, I wasn’t content to squander my bucks on chrome, leather fringe, and the “ride to live, live to ride” schlock. I wanted to ride, and ride I did. All over the southwestern US and deep into Mexico. Those rides were what convinced me that maybe an 800+ lb cruiser was not the best bike in the world for serious riding…

The Harley had a low center of gravity, and I liked that. It was low to the ground, and I didn’t like that. And it was heavy. When that puppy started to drift in the sand, I just hung on and hoped for the best. Someone was looking out for me, because in all of that offroading down there in Baja, I never once dropped it. As I sit here typing this, enjoying a nice hot cup of coffee that Susie just made for me, I realize that’s kind of amazing.
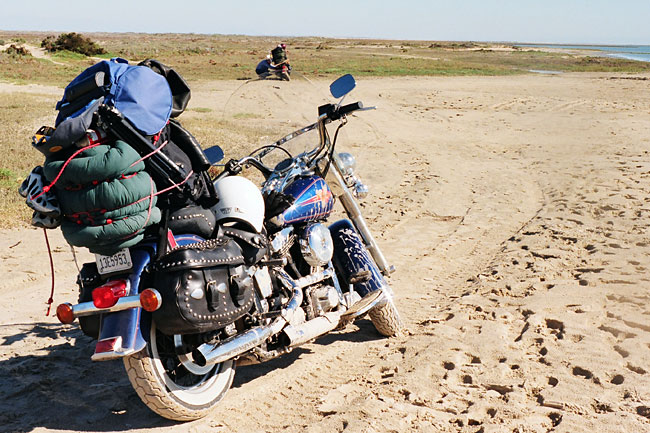
The other thing I didn’t like about the Harley was that I couldn’t carry too much stuff on it without converting that bike into a sort of rolling bungee cord advertisement. The bike’s leather bags didn’t hold very much, the Harley’s vibration required that I constantly watch and tighten their mounting hardware, and the whole arrangement really wasn’t a good setup for what I was doing. The leather bags looked cool, but that was it. It was bungee cords and spare bags to the rescue on those trips…

Sports Bikes

The next phase for me involved sports bikes. They were all the rage in the early 90s and beyond, but to me they basically represent the triumph of marketing hoopla over common sense. I bought a Suzuki TL1000S (fastest bike I ever owned), and I toured Baja with it. It would be hard to find a worse bike for that kind of riding. The whole sports bike thing, in my opinion, was and is stupid. You sit in this ridiculous crouched over, head down position, and if you do any kind of riding at all, by the end of the day your wrists, shoulders, and neck are on fire. My luggage carrying capacity was restricted to a small tankbag and a ridiculous-looking tailbag.

I was pretty hooked on the look, though, and I went through a succession of sports bikes, including the TL1000S, a really racy Triumph Daytona 1200 (rode that one from Mexico to Canada), and a Triumph Speed Triple. Fast, but really dumb as touring solutions, and even dumber for any kind of off road excursion.
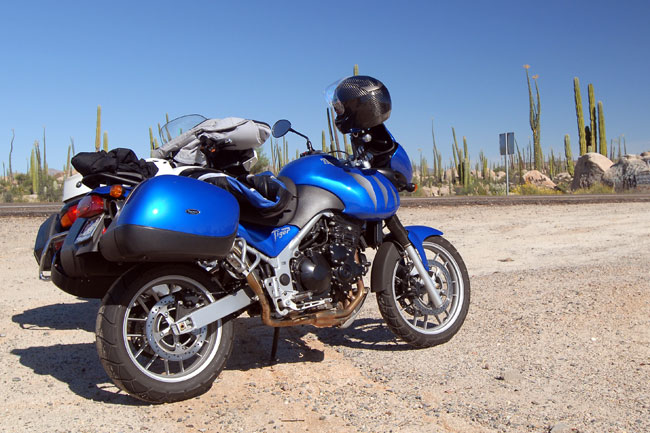
Phase III for me, after going through the Harley “ride to live” hoopla and the Ricky Racer phases, was ADV riding and dual sport bikes. The idea here is that the bike is equally at home on the street or in the dirt. Dual purpose…dual sport. I liked the idea, and I thought it would be a winner for my kind of riding.

A BMW GS versus Triumph’s Tiger

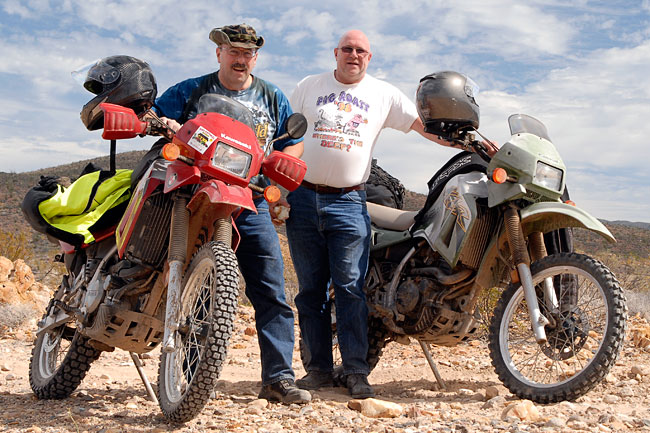
The flavor of the month back then was the BMW GS. I could never see myself on a Beemer, but I liked the concept. I was a Triumph man back in those days, and the Triumph Tiger really had my attention. A couple of my friends were riding the big BMW GS, but I knew I didn’t want a Beemer. In my opinion, those bikes are overpriced. The Beemers are heavy (over 600 lbs on the road), they have a terrible reputation for reliability, and I think they looked goofy. The Tiger seemed to be a better deal than the Beemer, and it sure had the right offroad look. Tall, an upright seating position (I had enough of that sports bike nonsense), and integrated luggage. So, I bit the bullet and shelled out something north of $10K back in ’06 for this beauty…

The Triumph had a few things going for it…I liked the detachable luggage, it was fast, it got good gas mileage (I could go 200+ miles between gas stations), and did I mention it was fast?
The Tiger’s Shortfalls

Looks can be deceiving, though, and that Tiger was anything but an off-road bike. It was still well over 600 lbs on the road with a full tank of gas, and in the soft stuff, it was terrifying. I never dropped the Triumph, but I sure came close one time. On a ride out to the Old Mill in Baja (a really cool old hotel right on the coast a couple hundred miles south of the border), the soft sand was bad. Really bad. Getting to the Old Mill involved riding through about 5 miles of soft sand, and it scared the stuffing out of me. I literally tossed and turned all night worrying about the ride out the next morning. It’s not supposed to be like that, folks.

And the Tiger was tall. Too tall, in my opinion. I think all of the current dual sport bikes are too tall. I guess the manufacturers do that because their marketing studies show a lot of basketball players buy dual sports. Me? I don’t play basketball and I never cared for a seat that high. Just getting on the Tiger was scary. After throwing my leg over the seat, I’d fight to lean the bike upright, and not being able to touch the ground on the right side until I had the thing upright was downright unnerving. I never got over that initial “getting on the bike” uneasiness. What were those engineers thinking?
The other thing that surprised me about the Tiger was that it was uncomfortable. The seat was hard (not comfortably hard, like a well designed seat should be, but more like sitting on small beer keg), and the foot pegs were way too high. I think they did that foot peg thing to make the bike lean over more, but all it did for me was make me feel like I was squatting all day. Not a good idea.

Kawasaki’s KLR 650

I rode the Tiger for a few years and then sold it. Even before I sold it, though, I had bought a new KLR 650 Kawasaki. It was a big step down in the power department (I think it has something like 34 or 38 horsepower), but I had been looking at the KLR for years. It seemed to be right…something that was smaller, had a comfortable riding position, and was reasonably priced (back then, anyway).

I had wanted a KLR for a long time, but nobody was willing to let me ride one. That’s a common problem with Japanese motorcycle dealers. And folks, this boy ain’t shelling out anything without a test ride first. I understand why they do it (they probably see 10,000 squids who want a test ride for every serious buyer who walks into a showroom), but I’m old fashioned and crotchety. I won’t buy anything without a test ride. This no-test-ride thing kept me from pulling the trigger on a KLR for years. When I finally found a dealer who was willing to let me ride one (thank you, Art Wood), I wrote the check and got on the road…and the off road…

My buddy John and I have covered a lot of miles on our KLRs through Baja and elsewhere. I still have my KLR, but truth be told, I only fire it up three or four times a year. It’s a big bike. Kawi says the KLR is under 400 lbs, but with a full tank of gas on a certified scale, that thing is actually north of 500 lbs. I was shocked when I saw that on the digital readout. And, like all of the dual sports, the KLR is tall. It still gives me the same tip-over anxiety as the Tiger did when I get on it. And I know if I ever dropped it, I’d need a crew to get it back on its feet.
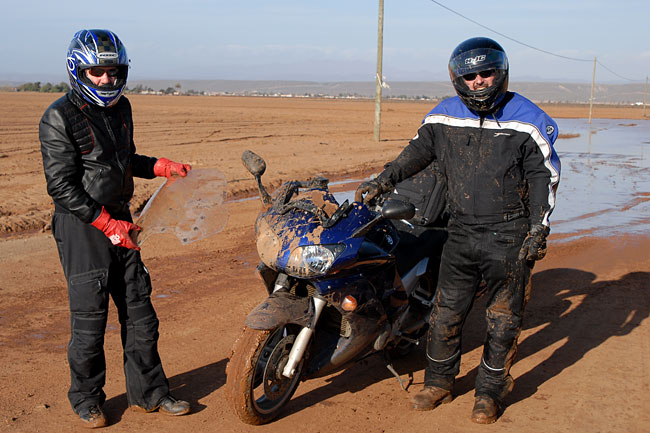
That thing about dropping a bike is a real consideration. I’ve been lucky and I haven’t dropped a bike very often. But it can happen, and when it does, it would be nice to just be able to pick the bike up.

Muddy Baja

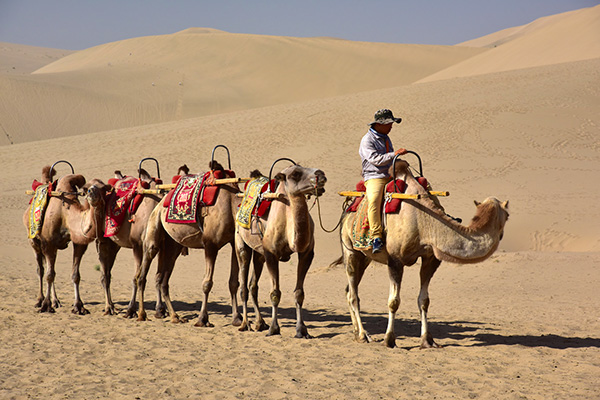
On one of our Baja trips, we had to ride through a puddle that looked more like a small version of Lake Michigan. I got through it, but it was luck, not talent. My buddy Dave was not so lucky…he dropped his pristine Yamaha mid-puddle…

The fall broke the windshield and was probably a bit humiliating for Dave, but the worst part was trying to lift the Yamaha after it went down. Slippery, muddy, wet…knee deep in a Mexican mudbath. Yecchh! It took three of us to get the thing upright and we fell down several times while doing so. Thinking back on it now, we probably looked pretty funny. If we had made a video of it, it probably would have gone viral.
The Perfect Bike:  A Specification

So, where is this going…and what would my definition of the perfect touring/dual sport/ADV bike be?

Here’s what I’d like to see:

Something with a 250cc to 500cc single-cylinder engine. My experience with small bikes as a teenager and my more recent experience has convinced me that this is probably the perfect engine size. Big engines mean big bikes, and that kind of gets away from what a motorcycle should be all about. Water cooled would be even better. The Kawi KLR is water cooled, and I like that.

A dual sport style, with a comfortable riding position. No more silly road racing stuff. I’m a grown man, and when I ride, I like to ride hundreds of miles a day. I want my bike to have a riding position that will let me do that.

A windshield. It doesn’t have to be big…just something that will flip the wind over my helmet. The Kawi and the Triumph got it right in that department.

Integrated luggage. The Triumph Tiger got that part right. The KLR, not so much.

Light weight. Folks, it’s a motorcycle…not half a car. Something under 400 lbs works for me. If it gets stuck, I want to be able to pull it out of a puddle. If it drops, I want to be able to pick it up without a hoist or a road crew. None of the current crop of big road bikes meets this requirement.

Something that looks right and is comfortable. I liked the Triumph’s looks. But I want it to be comfortable.

Something under $5K. Again, it’s a motorcycle, not a car. My days of dropping $10K or so on a motorcycle are over. I’ve got the money, but I’ve also got the life experiences that tell me I don’t need to spend stupidly to have fun.


It was maybe a year after that blog that the RX3 came on the scene, and it answered the mail nicely.  A year or two after the RX3 hit the scene, BMW, Kawasaki, and one or two others introduced smaller ADV motorcycles.  I commented that these guys were copying Zongshen.  One snotty newspaper writer told me I was delusional if I thought BMW, Kawi, and others copied Zongshen.   I think that’s exactly what happened, but I don’t think they did as good a job as Zongshen did.

If you’ve got an opinion, please leave a comment.  We’d love to hear from you!


Never miss an ExhaustNotes blog!  Sign up here…

Indiana Jones: Part II (The Mo Gao Grottos)

A few weeks ago, I wrote a blog about the Indiana Jones aspects of riding a motorcycle across China, and in that blog, I told you about the Roman Legions that had settled in Liqian two thousand years ago. I mentioned that there were other Indiana Jones experiences to be had in China and I said I would write about them.  It’s time to keep that promise. This blog is about the abandoned Mo Gao Buddhist grottos in the Gobi Desert. It’s an excerpt from Riding China, and if you want to get the whole story, well, hey, buy the book!


Dun Huang

The day was to be a short one for riding (only a hundred kilometers), but it would be rich with sightseeing in and around Dun Huang. It started with a short ride to Dun Huang’s vendor stalls with all kinds of brightly-colored trinkets, lots of Chinese tourists, and around it all, huge sand dunes. We had arrived at what might possibly be the least known and most inaccessible tourist attraction in the world: The Gobi Desert, up close and personal.

The Lake of the Crescent Moon in the Gobi Desert.

The signs pointed to the Lake of the Crescent Moon (and if that doesn’t sound like an Indiana Jones movie title, I don’t know what does). It was a small bright green crescent lake surrounded by the Gobi’s massive pale white dunes. The city planners in Dun Huang were making good use of it as a tourist attraction. It was amazing. The lake was a bright green arc of still water perhaps 300 meters long, forming a natural arc in the dunes, surrounded by bright green vegetation. I can only imagine how a camel caravan would have felt coming upon this place a thousand or more years ago, slowly drifting through the oven that is the Gobi, long before Dun Huang built its five-star tourist hotels. They must have viewed it as a miracle. A true oasis in the desert. It seemed to be a miracle to me and I had it easy; I had ridden here on my RX3.

Gobi Camel Riding

What really interested me were the camels. I was still feeling smug about seeing camels in the desert the day before, and I had wondered what it would be like to ride one. This was to be my day. There was a large camel riding operation set up specifically for tourists, and I realized I might never have an opportunity like this again. I needed to ride a camel. Yep, I became Joe Tourist, and I’m glad I did. It was fun. The camels took us to the top of one of the dunes, and I loved every minute of it. I’ve heard camels described as ships of the desert, and I realized as I rode along on mine that it was an appropriate description. A camel kind of rocks back and forth as it walks, the same way a ship does as it sails the ocean. The sand dunes, devoid of any vegetation, could be rolling waves. It’s all very calming. The camel behind mine came closer, and closer, and closer until its face was literally right alongside me. Its nose was just an inch from my arm. I could feel its warm dry breath on my arm and my face. It sounds a bit on the strange side, I know, but it was all somehow very soothing, riding along in the hot dry air, gently rocking left and right, with a camel breathing in my ear.

Camels in the Gobi.
Quite a sight. I enjoyed Dun Huang enormously. You may have seen this photo before. It’s the cover photo for the ExhaustNotes home page, and it as a two-page spread in RoadRUNNER magazine.
The view from the camel cockpit.

We spent the entire morning riding camels, taking photos, and being tourists. As much as I like riding my motorcycle, it was good to be off it for a day. We were all feeling great, even though it as incredibly hot. But it was dry, and that made it bearable.

A very attractive young woman who allowed a photo on our camel caravan. I told her I walked a mile for my camel. She smiled politely. I don’t think she spoke English.

The Mo Gao Grottos

That afternoon, we parked the bikes and rode in air-conditioned buses to the Mo Gao Buddhist grottos. This was more Indiana Jones stuff. It’s another incredible story, and it is one I had never heard until this trip. Listen to this: Ancient Buddhists created a massive temple complex in the grottos along a riverbed canyon wall in a location called Mo Gao. It’s in the desert outside of what is now Dun Huang. It was a thriving Buddhist center a thousand years ago, and then the people living there left. No one really knows why. Time and history forgot about the place. It was only recently rediscovered, and a few years after that, it opened to the public. The place was stunning. I can see it possibly being named the 9th Wonder of the Ancient World, just as Xi’an’s Terra Cotta soldiers (which I’ll describe in a later chapter) became the 8th Wonder of the Ancient World. It’s that wondrous.

The Mo Gao caves consisted of many smaller grottos that were apartments for ancient monks, and larger ones that held majestic statues and ornate decorations. I can only imagine what it must of have been like for the archeologists who uncovered these things. Today, it is all closely managed and Chinese police were there to enforce a photography prohibition.

A small portion of the Mo Gao Buddhist grotto.
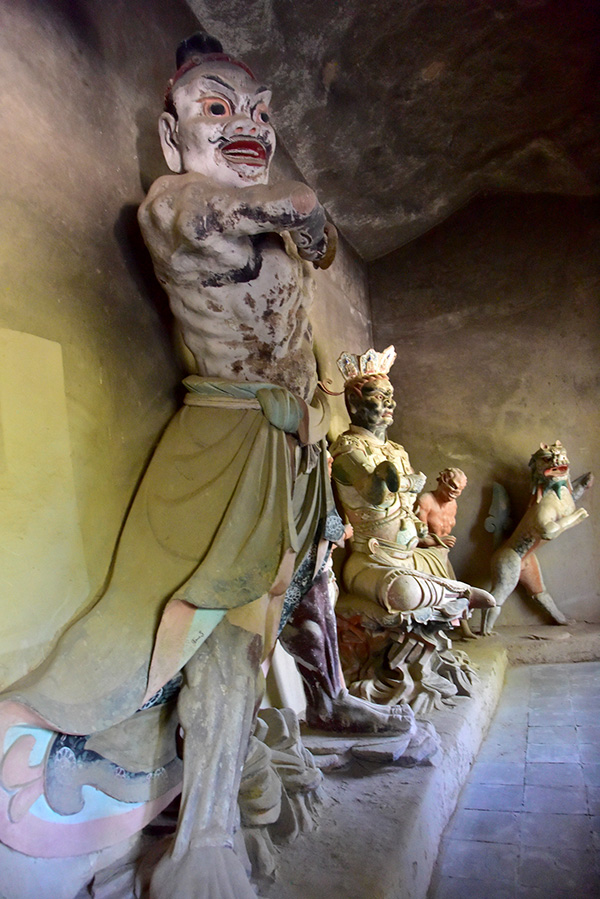
A forbidden photo inside one the Mo Gao grottos. Once again, the Nikon D810’s low light level capabilities came through for me!
The sights and photo ops at Mo Gao were well worth the trip. There were many, many more, but I called it quits after grabbing these photos.

There are two reasons for a photography prohibition in these kinds of places. The first is that flash photography could degrade the statues and artwork. A natural light photo (one shot without flash) would prevent that kind of degradation, but most people wouldn’t understand the distinction and a “natural light only” photo policy would be too hard to enforce. The other reason is that the owner of the place (I assume it would be the Chinese government) probably wants to sell its photos. Allowing people to grab their own pictures would interfere.

The bottom line to all of the above is that the no photography policy only slowed me a little. I waited until somebody else took a photo and the picture police started yelling at them, and then I would discreetly do my natural light thing. I got some good shots, too.

Let me go tangential here for a moment and tell you a quick story about Joe Gresh. He is a great guy to travel with and I’d go anywhere with him. We both have a twisted, extremely wry, and very corny sense of humor. He cringed every time I said something I thought was clever, and I did the same with him. I enjoyed being with him on this trip immensely. The guy just has a way with words, which is readily apparent in his columns for Motorcyclist magazine. Anyway, as we walked along one of the landscaped Mo Gao pathways, I noticed a ground-mounted speaker that was in a plastic case designed to look like one of the naturally-occurring rocks. It blended in well with other real rocks along the path. I pointed to it and said to Joe, “Look at that…even a thousand years ago, these Buddhist monks had electric speakers…”

Gresh, without missing a beat, responded with, “Yeah, they loved their grotto blasters…”

I slept well that night in our unusually upscale hotel. I probably had dreams along the lines of an Indiana Jones movie plot, but I didn’t remember any of them. I was tired when I called it a night and I felt refreshed the next morning. This was the trip of a lifetime, and I was enjoying the hell out of it.


So there you have it. The Mo Gao Grottos. Lost in time nearly a thousand years, only to be discovered again a few years ago. And we were there. Indiana Jones? You bet! And if you want to read the earlier Indy in China blog about the Romans, it’s right here!


Don’t miss anything! Sign up right here to see our blogs as they are published!

Loaded for bear…

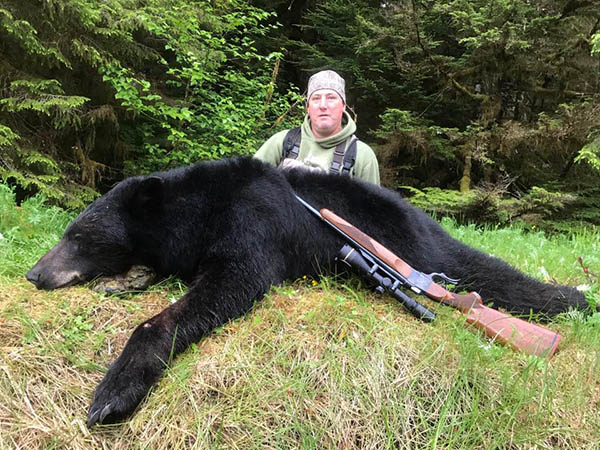
Good buddy Jason, a Ruger No. 1 in .338 Win Mag, and a 400-lb, 7-ft Alaskan black bear.

As the title of this blog implies and in this case, my good buddy Jason was literally loaded for bear. For several years I had owned a Ruger No. 1 single-shot rifle in .338 Win Mag.  That’s a monster of a magnum.  I had never fired the rifle and I sold it to Jason. He told me he was going on a bear hunt in Alaska (something I’ve always wanted to do), and I was happy to the see the rifle go to a good home. Most recently, Jason sent the photo you see above and a recap of his hunt to me to share here on the ExNotes blog. Here you go, folks!


It all started in 2016 when I purchased my first Ruger No. 1 in 338 Win Mag from Joe.  I’ve always wanted a Ruger No. 1, but I already had a Winchester Model 70 in 338 Win Mag. I planned to go on a bear hunt in 2018, so what I did was sell my Winchester Model 70 to my best friend, who went on the bear hunt, too. I would be using my Ruger No. 1. So this is a story about me and my new rifle and our quest for a big Southeast Alaskan black bear. It was a guided hunt through Alaskan Coastal Outfitters.

Our base camp was on a boat and in the evening we would take a skiff and cruise around all the little islands and bays looking for the right bear. We saw lots of bears (a lot of sows with cubs). We also saw a lot of boars. On Day 4 of our hunt we saw a really nice bear. We got as close as we could without spooking him. My guide told me to get out of the boat and he held the boat still for me. Then, as I was pulling my leg over the side of the boat I got hooked on to the edge of the boat and I fell face down in 8 inches of water.

The bear ran off and my beautiful Ruger No.1 was laying in 8 inches of salt water, so we raced back to the boat, took the rifle apart, and cleaned it up so it was like new.

The next day we went out again and this time I was extra cautious not to fall in when we came across the bear you see in the picture. He was about 300 yards from the skiff when we spotted him. We got as close as we could without spooking him, which was about 140 yards, and my guide kept on asking me if I could make the shot. I always answered “yes, no problem.” I lay down and rested my rifle on my pack. Wouldn’t you know it, I had to lay down in a little creek so I got wet again. We lay there for what seemed to be an eternity. My guide made sure it was a boar and not a sow. Finally, he gave me the OK.

Just then, the bear turned so he had his back to me (so I couldn’t shoot). It gave me an opportunity to situate my follow-up shot. I decided the quickest way to get a follow-up shot (if I needed one) was to shoot with the next round in my hand.

The bear finally turned broadside and I dropped the hammer. I hit him just behind the shoulder and he dropped. My guide backed me up with a 375 H&H rifle, but he didn’t need to fire it. The bear went down, and when we reached him, we saw he was the monster he appeared to be from a distance. The bear measured 7 feet and weighed about 400 lbs.


Jason, that’s an awesome story and a magnificent photograph.  I was sorry to see that rifle go, but it obviously went to a good home and you sure put it to good use.  You know, it takes a real sportsman to do what you did…going after bear with a single-shot rifle.   Congratulations on a successful hunt, and thanks much for sharing your adventure with us here on the ExhaustNotes blog!


Read our other Tales of the Gun stories!


Sign up for automatic blog updates here:


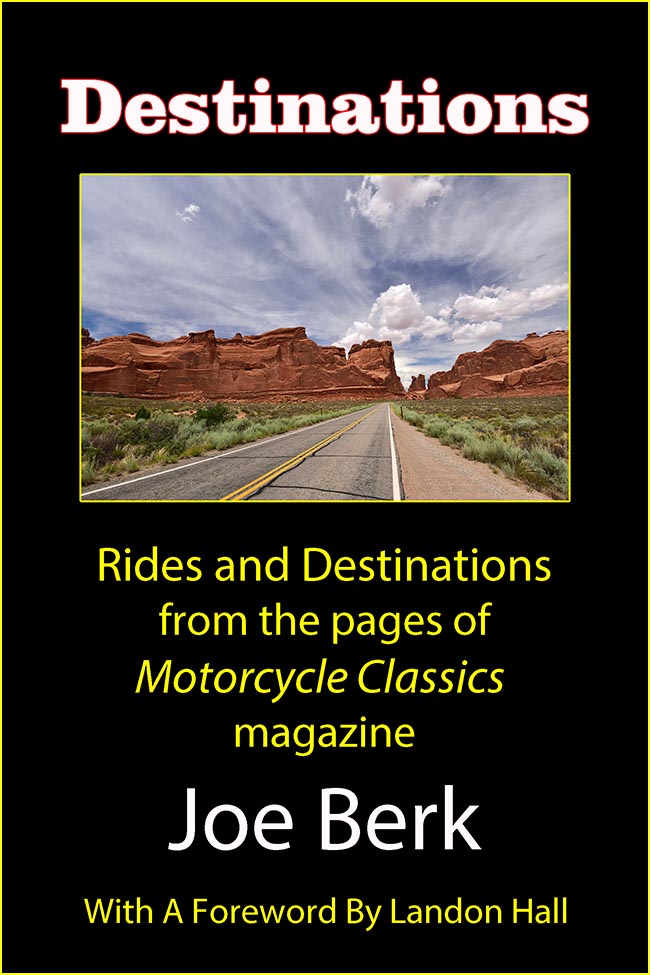
Would you like to write a guest blog for ExNotes?  It could be a gun story, a hunting story, a motorcycle story, or any other idea you think might work for our audience.  If you have an idea, please let us know at info@exhaustnotes.us.   If we publish your story, you’ll get a signed copy of Destinations with our compliments and gratitude!

The Browning B78

Sometime in the late 1970s, when I was an engineer on the F-16 program at General Dynamics in Fort Worth, Texas, I visited a company called National Water Lift somewhere in the Great Lakes area. What we bought from NWL had nothing to do with water (they made the F-16’s hydraulic accumulators). It’s a lead into this story, which is about my Browning B78 rifle. You see, every time I had to visit one of these distant places on my business travels, it was an opportunity to check out the gun shops in the area. Which I did, and the one that stuck in my mind had a Browning B78.

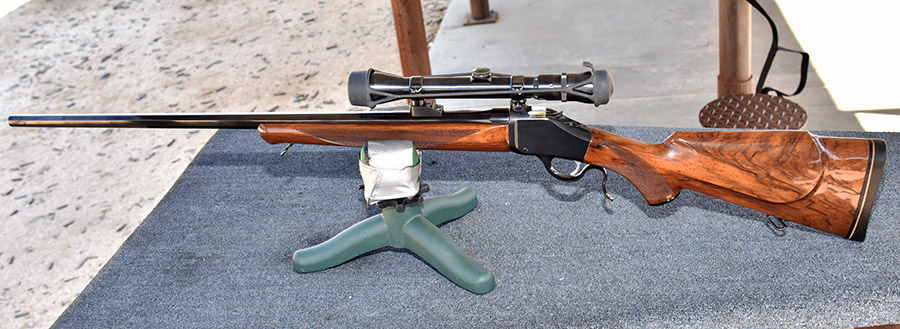
The Browning B78 Rifle

The B78 was a competitor to Ruger’s No. 1 single-shot rifle, and the design was basically a resurrection of the old Winchester High Wall. Ruger did surprisingly well with the No. 1 back in the 1970s (the idea of a single-shot rifle was intriguing to me and many others), and I guess Browning wanted in on the action (pardon the pun).


Help us bring fresh content to you:  Please click on the popup ads!

Rugers outsold Brownings probably 10 to 1 (or more) in those days because they were less expensive and Ruger’s marketing was better. But the Browning was (and still is) a very elegant rifle. I saw one at that store (I want to say it was in Kalamazoo, Michigan, but I can’t remember for sure), and it was nice. It was a 30 06 and it had an octagonal barrel, which was all very appealing. But the Browning was a good $100 more than the Ruger and in the 1970s, that kind of money was out of my reach.

Good Deals on Gunbroker

Fast forward 40 years, the Great Recession was upon us, and all kinds of exotic and collectible rifles were popping up on Gunbroker.com (a firearms auction site).  I saw what appeared to be a nice B78 on Gunbroker, with an octagonal barrel, in God’s caliber (that would be .30 06), and I pounced. I paid too much, but we never say it that way. I bought too soon. Yeah, that works. I just bought too soon.

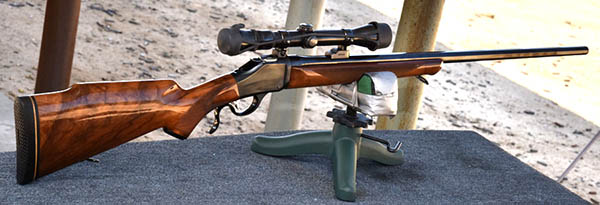
A earlier photo from one of my first range trips with the Browning B78. .30 06, one shot, great walnut, an octagonal barrel…this rifle is elegant.
The B78 is sharp from either side. That’s a Weaver 2×7 scope, and it gets the job done.

After I bought the B78, I wanted to put a period-correct scope on it (you know, from the 1970s) and I found a nice Weaver 2×7 on another auction site.   Weavers are good scopes and the ones from the 1970s were blued steel and made in America.   It was just what the doctor ordered, and it looks right at home on my B78.

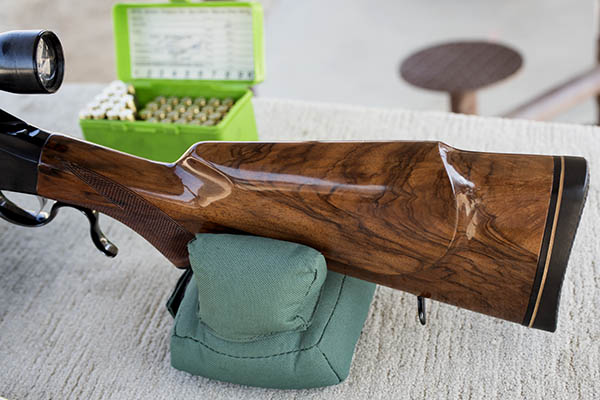
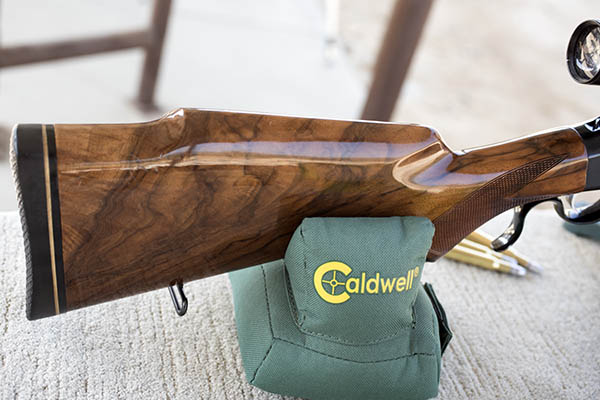
My B78 is used, and it’s got a few nicks and dings on it. But the metal work is perfect, and the walnut is (in my opinion) exhibition grade. Take a look, and you tell me.

Good wood. This is exhibition grade walnut…
…and it has fine figure on both sides.

Preferred B78 .30 06 Jacketed Loads

I’ve owned the B78 for about 10 years now, and it’s been a lot of fun. I’ve never seen another B78 on the rifle range, and I’ve certainly never seen one with an octagonal barrel. It’s just a cool firearm. But it is finicky. It likes heavier bullets and with the right load it’s accurate, but getting there took a lot of experimenting, a little bit of forearm re-bedding, and a lot of load development. I’ve got two loads that do very well in it…one is a heavy-duty jacketed load, and the other is a cast bullet light load. The heavy load is with a 180 grain Remington jacketed softpoint and a max load of 4064 (I’ve shot three-quarter-inch groups with this load at 100 yards). That load has big recoil, but it’s tolerable. I tried 180 grain Nosler bullets (that’s a premium bullet), but the rifle does way better with the less-expensive Remington bullets. That’s a good thing, because I found a good deal on 900 of those bullets and they have a home on my reloading bench now.

A Preferred B78 Cast Load

My cast bullet load is a short-range low power load, and it’s recoil is almost nonexistent compared to the jacketed load. It’s a 180 grain cast lead bullet (with a gas check) and 17.0 grains of Trail Boss power. After zeroing the Browning for the jacketed bullet load mentioned above at 100 yards, I had to crank the scope up a cool 85 clicks to bring the cast bullets back on paper at 50 yards (I was surprised there was that much adjustment in the scope). But wow, those cast bullets at 50 yards cloverleafed consistently. It was essentially putting them through the same ragged hole. At 100 yards, getting the cast bullet load back to point of aim involved another 25 clicks of elevation on the Weaver, and again, I was surprised there was that much in the scope. At 100 yards, the cast load groups opened up to about 2 ½ inches, and that’s still okay. What’s nice is I can shoot the cast bullet load all day long. The barrel doesn’t heat up and the recoil is trivial. As you might imagine with a load like this and the gas-checked bullets, there was virtually no leading.

When I go for deer later this year, it’s going to be with this rifle.  One shot.  I think that’s all I’ll need.   We’ll see.


Check out our other Tales of the Gun stories here!


Never miss an ExNotes blog…sign up here!


Targets delivered to your doorstep!


We load with Lee dies!