I’m in the money with the Mark V .300 Weatherby now, but it took some doing to get there and the journey isn’t over yet. My recent reloads with this rifle were all over the place at 100 yards. I suspected it was more me than the rifle (or the loads) and I was probably right about that. This rifle has serious recoil, way more than I am used to. I was developing a flinch in anticipation of getting whacked by the Mark V.
I have a friend who shoots the .300 Weatherby a lot, and he’s about the same size as me. I thought about him a bit, mentally picturing him on the range, and then I realized: He uses a shoulder pad. It was a click or two on Amazon until I found the Caldwell recoil shield.
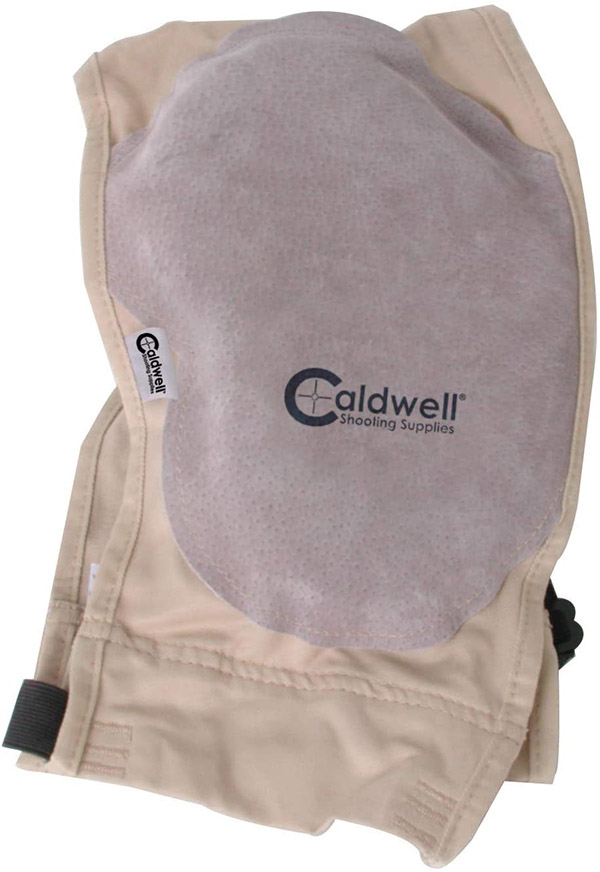
I had the Caldwell recoil shield the next day, and I had to play with it a bit to find how to wear the thing. I bought the thickest version, figuring that if some is good, more would be better.
I next researched the Internet to find ways to improve my bench rest technique and I immediately found two improvement opportunities: Parallax, and how I positioned the rear rest.
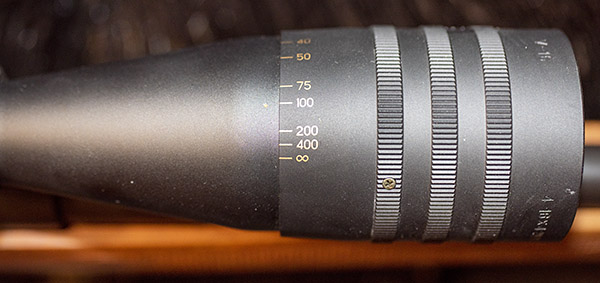
With regard to parallax, it’s a real thing and a real issue. Most scopes don’t have any adjustment for parallax, but the 4×16 scope I have on the Mark V does. To adjust for parallax, you set the rifle in the rest and put the cross hairs on the target. Then, without touching the rifle, you move your head around and see if the reticle moves around on the target. On a scope with parallax adjustment, what I read is that you ignore the markings on the parallax adjustment and move your head around, adjusting the parallax adjustor until the parallax is minimized. I couldn’t completely eliminate the parallax on my 100 yard target, but I was able to greatly reduce it. After making the adjustment I looked at the scope objective (the parallax adjustment feature), and what do you know, it was right on the 100-yard mark. I guess those Weaver boys knew what they were doing.
I had a rifle with me that has a non-parallax-adjustable scope and checked it for parallax at 100 yards, and wow, when I moved my head around the reticle was moving around a good 3 inches on the target (left to right, and up and down). To control parallax with a non-parallax-adustable scope, the trick is to get your eye in exactly the same spot every time. In fact, that’s good technique with any scope.
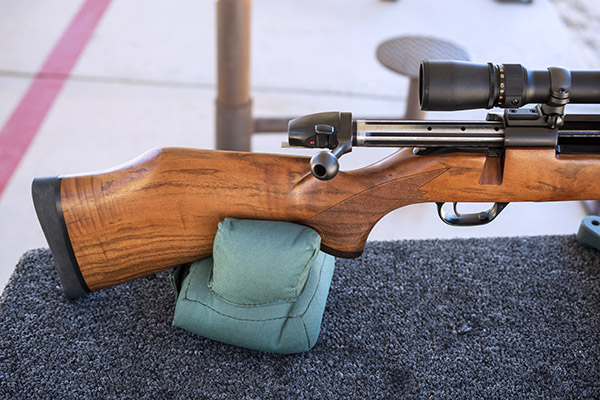
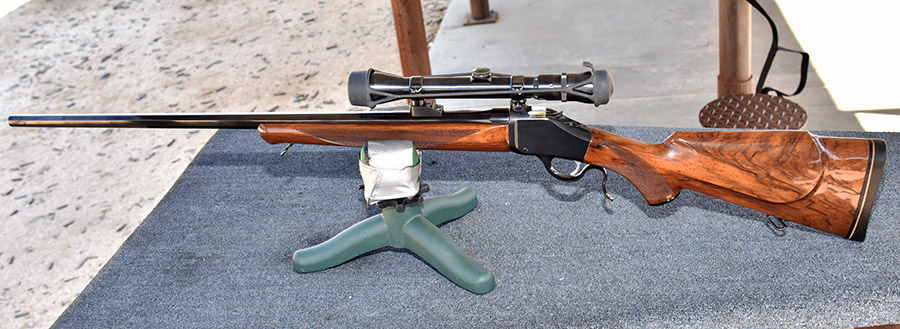
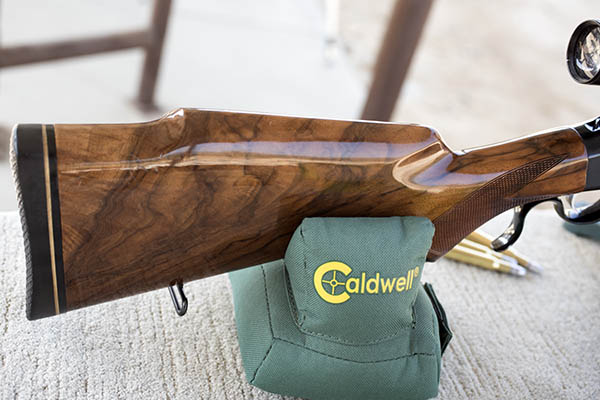
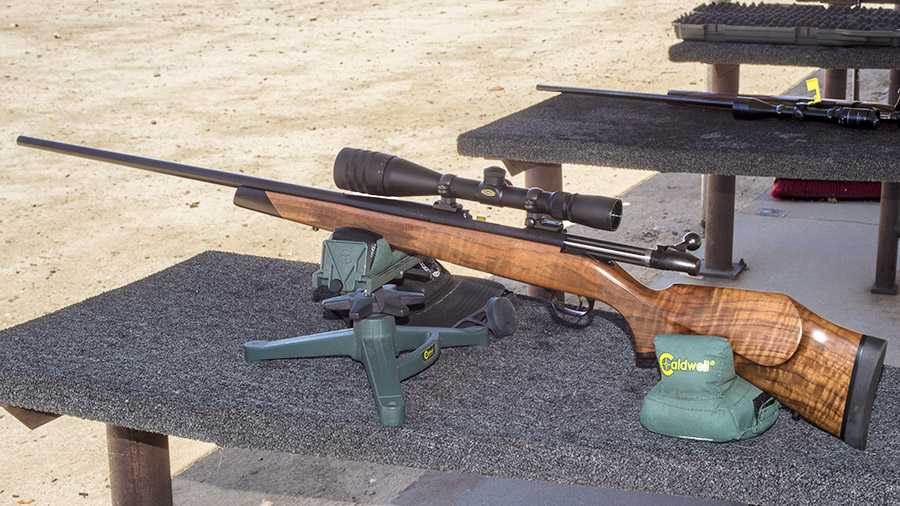
The next thing for me was to get the rear rifle rest directly under where my face rested on the stock. You can see the front and rear rest in the large photo at the top of this blog (I use Caldwell equipment). The idea behind getting the rear rest directly under where your cheek contacts the stock is that the downward force from your cheek is transmitted directly through the stock into the rear rest without flexing the stock. It may not seem possible (or even detectable), but if your face is ahead of the rear rest or behind it, you will impart a torque into the rifle and it can be enough to shift the point of impact at 100 yards.
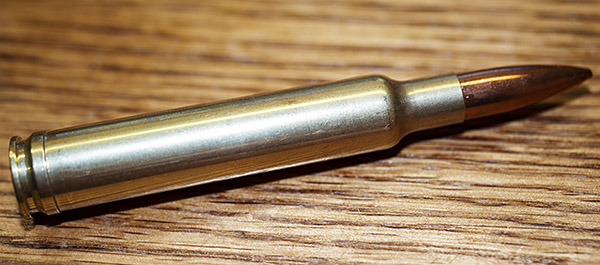
On to my loads: I reloaded the next set of .300 Weatherby cartridges, going with 73.0 grains of IMR 7828, the CCI 250 magnum primer, 200-grain Sierra MatchKing bullets, and every trick I knew of to improve accuracy. This is a relatively light load. I neck sized three different sets of brass (fireformed .300 Remington cases made from .300 H&H brass, Remington .300 Weatherby brass, and Weatherby brand .300 Weatherby brass). I have a Lee .300 Weatherby collet die that squeezes the neck down to size, and I used brass I had previously fired in the Mark V rifle. I also seated the bullets out much further (the reloading manuals all show the cartridge overall length to be 3.560 inches, but I seated the Sierras out for an overall length of 3.718 inches). The Weatherby Mark V rifles have a lot of freebore. The cartridges still fit in the magazine and the bullets did not contact the rifling, so I was good to go.
It was a quick trip to the West End Gun Club and I had the range to myself. I got everything set up, pulled on the Caldwell shoulder pad, and went to work. The Caldwell shoulder pad was awkward at first (as you might imagine), but it was wonderful. The .300 Weatherby Magnum is still a beast, but the Caldwell pad did its job. It greatly alleviated my fear of getting clobbered every time I squeezed the trigger and my groups tightened up immediately.
So my groups were way better, but I had a new problem. Many of the cases were sticking in the chamber after firing. The bolt would rotate freely, but the cases didn’t want to come out. When I pulled harder on the bolt, the extractor popped over the rim and the case stayed in the chamber. I had to tap the cases out with a cleaning rod. Other than the cases sticking, there were zero indications of excess pressure. No flattened primers or anything. The Remington cases were sticking almost 100% of the time (both the fireformed .300 H&H cases and the .300 Weatherby Remington cases). The Weatherby brass did not stick in the chamber, although a couple felt like they wanted to.
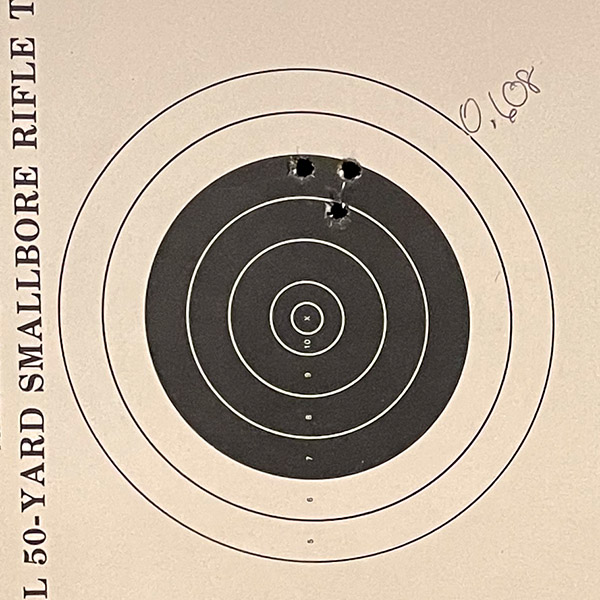
On to the good news: My best group was a .608-inch 3-shot group at 100 yards, which ain’t half bad on a fire-breathing monster like the .300 Weatherby. Before you trolls tell me I should shoot 5-shot groups, I will share with you that in my experience it’s pretty difficult to get animals to sit still for five shots. If your dead set on being critical, let’s get your butt out here. I want to watch you shoot 5-shot groups with your .300 Weatherby.
The next morning, after cleaning the rifle, I rechambered a couple of the fired Remington cases, and then when I withdrew the bolt the cases stuck in the chamber again. And again, I had to tap them out with a rod. The Weatherby brass did not, but it was tight. I measured each of the cases that stuck, and they all met the SAAMI .300 Weatherby specification. My conclusions are:
-
-
- I don’t have an excess pressure situation. I loaded at the bottom of the propellant range, the bolt rotated freely, there were no pressure signs on the case base, and the primers were not flattened.
- Neck sizing on my .300 Weatherby Mark V is not a good way to go (notice I said mine; your mileage may vary). I full length resized one of the cases that stuck (a Remington case) and it chambered and extracted easily. Weatherby brass is better (but it is hard to get).
- I need to full length resize when reloading for this rifle.
- The Weatherby Mk V extractor is weak. For a dangerous game rifle, that’s not a good thing. Maybe the extractor spring is weak.
-
I think the real issue was the neck sizing approach. I’m out of IMR 7828 propellant (powder goes fast with the 300 Weatherby) and no one seems to have any in stock, so I’ll try either H1000 or IMR 4831 next. Like we always say, stay tuned.
More Tales of the Gun and more Weatherby stories are here!
Never miss an ExNotes blog…sign up here for free!
I reload with Lee Precision equipment.