ExNotes Product Review: 4×12 Bushnell Banner Scope

By Joe Berk

Bushnell scopes have been around forever and they are kind of a generic scope…just as effective as the name brand medication but at a fraction of the cost.  I’ve had several that came with rifles I bought, but I never bought a new one until recently.  I’m glad I did.  I bought the Bushnell Banner 4×12 and it’s a great scope.

The 4×12 Bushnell Banner scope. It’s a surprisingly good scope for well under $100.

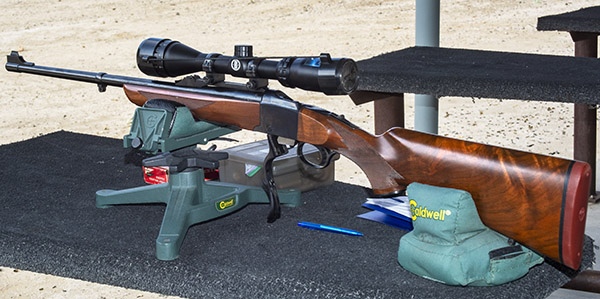
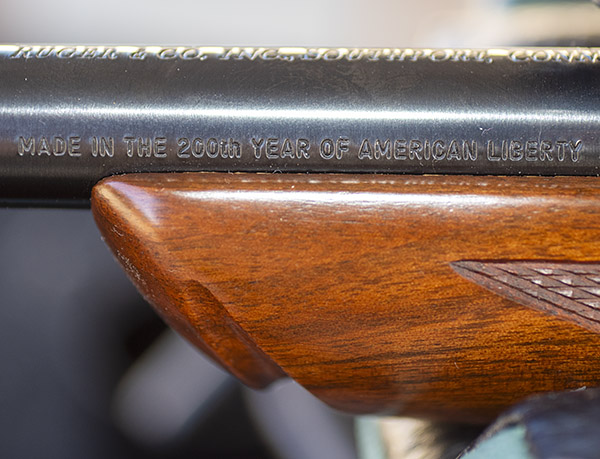
The story goes like this:  I won a Ruger No. 1 in 243 Winchester in an online auction about 15 years ago.  The rifle was a 200th year Liberty model, it looked good, and I stashed it in the safe.  I shot it for the first time a month ago, and that’s when I learned I had an accuracy issue.  The Ruger came with a period-correct 4×12 Weaver (long since discontinued), which provided plenty of magnification but my groups were embarrassing.

The .243 Ruger No. 1 on the range. The rifle is wearing the new Bushnell Banner 4×12 scope in this photo.

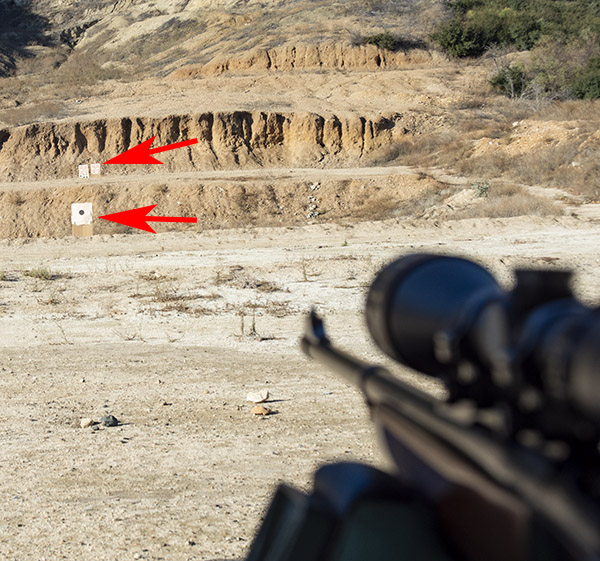
Let’s go tangential for a second or two:  The “4×12” I use above refers to the scope’s variable magnification, which ranges from 4 times actual size to 12 times actual size.  With a good scope (one offering optical clarity), you can see the bullet holes in the target at 100 yards when the scope is zoomed up to 12 times actual size.

The Ruger American Bicentennial inscription. It’s on all Rugers made in 1976.

For hunting, I always prefer a straight 4-power scope (i.e., a nonvariable) because of its wider field of view and the fact that I can still hold a pretty tight group with a 4-power scope.  Magnifying the target four times is good enough for hunting.  That’s especially true on a deer-sized target, but it’s good enough even on rabbits.  I’ve sent a lot of Texas jacks to the promised land with a simple 4-power Redfield on my .30 06 Ruger No. 1.

The scope companies pretty much all say that you should keep a variable scope at low magnification to acquire the target, and then zoom it up for a more precise aim.  But I’ll tell you that’s just marketing hype, it’s laughable, and it’s a lot of baloney.  When I’m hunting and I see a game animal, the adrenal glands go into overdrive.  It’s all I can do to remember to take the safety off, and I can remember a few times when I forgot to do that.  The thought of seeing a target, acquiring it in the scope at low magnification, taking the safety off, lowering the rifle, increasing the zoom, raising the rifle again, reacquiring the target, and then squeezing the trigger is ludicrous.  Nope, for hunting purposes, a straight 4-power scope is the way to go for me.  On the other hand, when I’m on the range, I just leave the variable scopes at their highest magnification.  In short, I don’t need a zoomable scope.  But the marketing guys know better, I guess, and that means they weather vane to variable scopes.  That’s pretty much all you see these days.

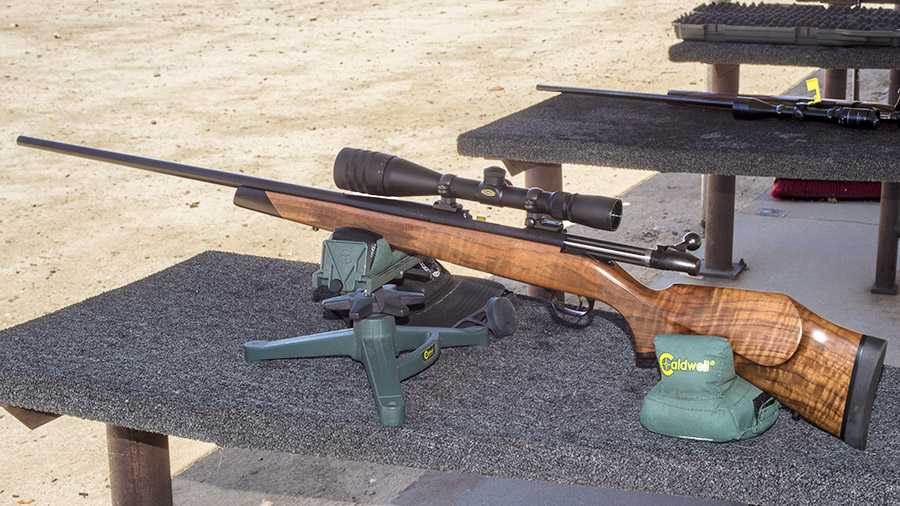
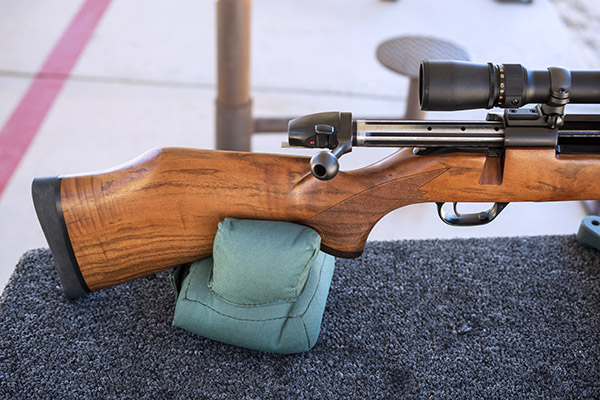
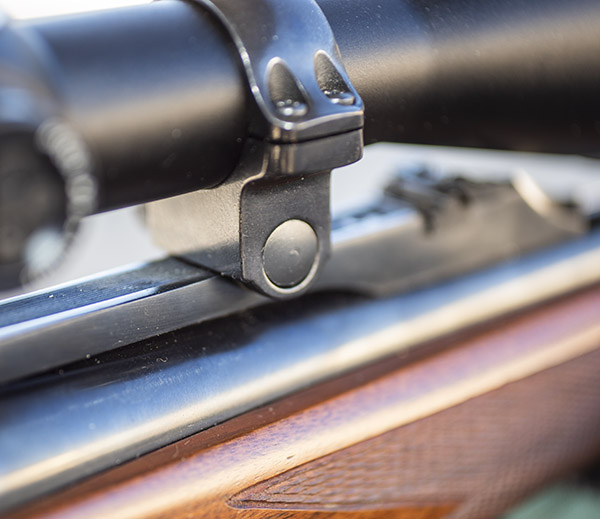
But I digress.  Let’s get back to the main attraction, and that’s the new Bushnell Banner 4×12 scope on my .243 No. 1 rifle.  This all started when I loaded some brass good buddy Johnnie G sent my way.  The rifle would not consistently hold a zero, and even when it did, it shot grapefruit-sized groups.  My thought was that the old 4×12 Weaver scope that came with the rifle had conked out, so I replaced it with another inexpensive scope I had laying around (an older Bushnell Banner 3×9 scope that is probably 50 years old).  While mounting the older 3×9 Bushnell, I checked both Ruger rings (front and rear) to make sure they were secure.  They seemed to be, but they were not (more on that below).  I took the No. 1 (now wearing the older model Bushnell Banner) to the range.  The accuracy situation did not improve.

The 4-12X Weaver scope that came with the 200th year .243 Ruger No. 1. That scope may still be good; I’ll have to mount it on another rifle to confirm that.

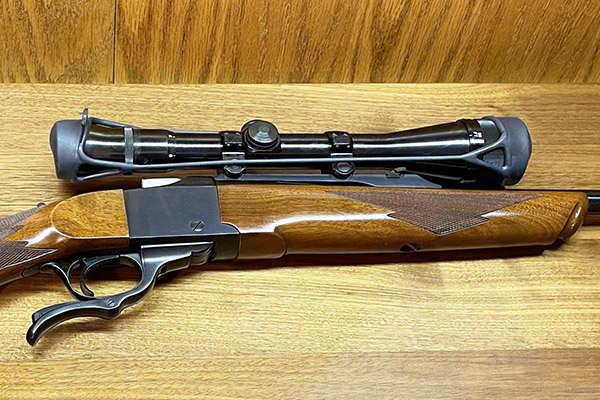
So I removed the older 3×9 Bushnell and the Ruger rings.  That’s when I discovered that the front ring was not secure.  It had felt like it was, but it fooled me (which is not too hard to do).  Ruger provides rings with their centerfire rifles and they are good, but the rings on this rifle were muey screwed up.  The clamp (the bolt with the angled head) on the front ring was mangled, and both the nut and the clamp were gunked up with some sort of adhesive (probably Loctite, but who knows).   I think what had happened was the clamp could be tightened on the mangled part of the clamp’s angled surface.  The buggered-up clamp was not properly positioned in the mounting surface and the caked-on adhesive compounded the felony.  Under recoil, the forward ring was moving around.

A Ruger scope ring. Ruger provides two of these with each of their centerfire rifles.
The Ruger scope ring clamp. It’s a bolt with an angled surface (denoted by the right arrow) that clamps onto a machined crescent on the rifle’s scope mounting surface. The threads on mine were caked with an adhesive.
The Ruger scope ring nut. It’s what threads on to the clamp shaft in the photo above.


The Ruger No. 1’s forward scope ring. This was not firmly mounted because the clamp had been damaged by Bubba gunsmithing.  God must love Bubbas; He sure made a lot of them.

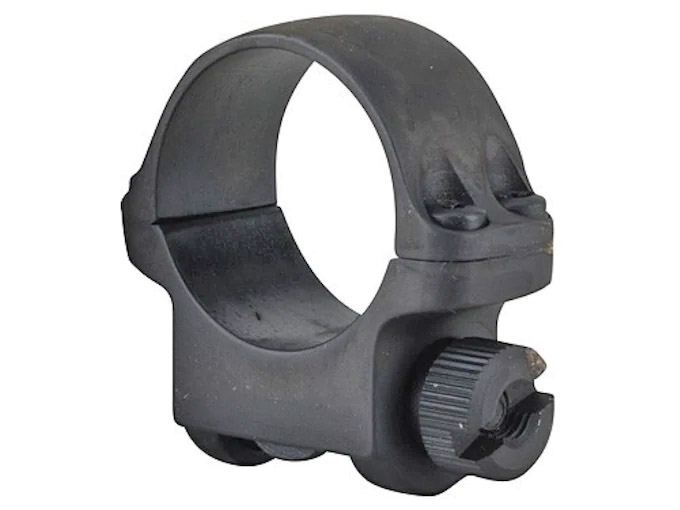
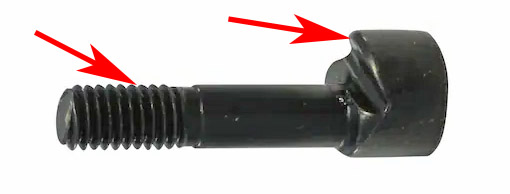
I recut the clamp ‘s angled surface with a file to eliminate the mangled portion and reblued the clamp using Birchwood Casey Cold Blue, and I wire-brushed as much of the adhesive as I could from the clamp’s threaded shaft with a bore brush.  I then worked the clamp into the nut until I cleaned out the remaining adhesive on the nut.  I reinstalled the ring and satisfied myself that this time it was secure.

The Bushnell Banner box. The scope was nicely packaged.
The Bushnell Banner’s parallax adjustment ring. These really work.
The Bushnell Banner’s quick adjust focusing rear ring. It’s a nice feature.
The Bushnell Banner’s adjustment knobs after their covers had been removed. These have a nice feel, with a distinct tactile click for each 1/4-inch adjustment. You don’t need any tools to make these adjustments. It’s first class.

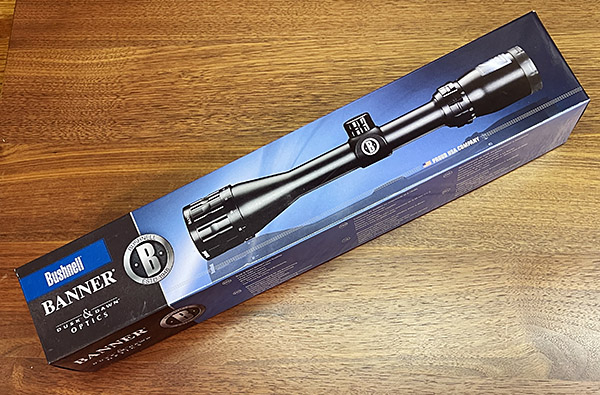
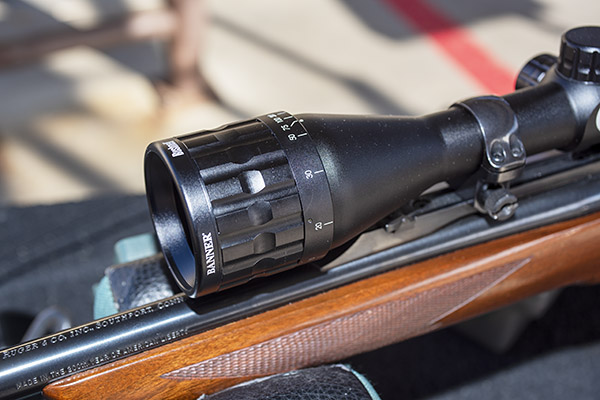
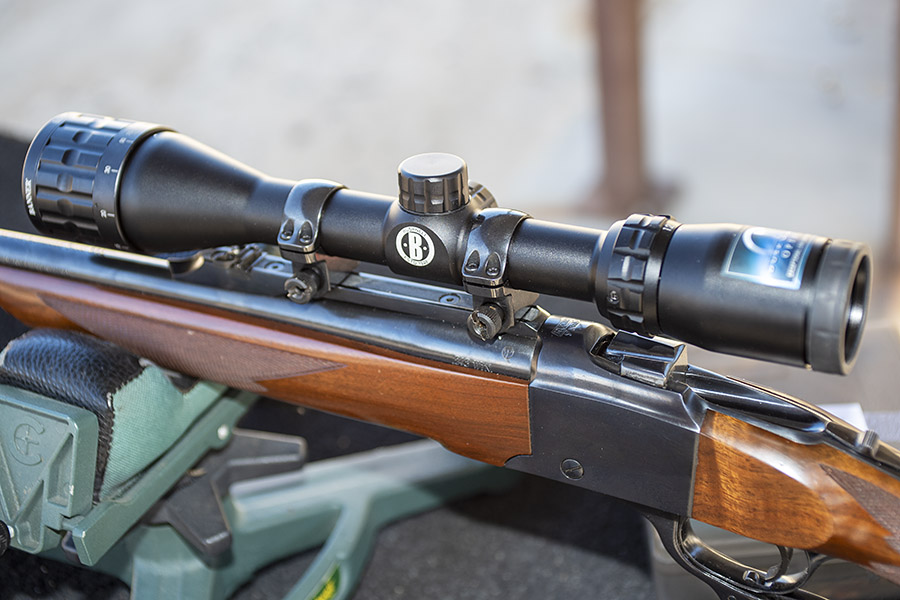
When my new 4×12 Bushnell Banner scope arrived a few days after I ordered it on Amazon, I was impressed with its appearance.  I even liked the box.  I looked through the scope and was impressed with its optical clarity.  These inexpensive Banner scopes have continued to improve over the years, and this one looks great.

The Bushnell Banner’s operator’s manual. It contains basic information about mounting and boresighting the scope.

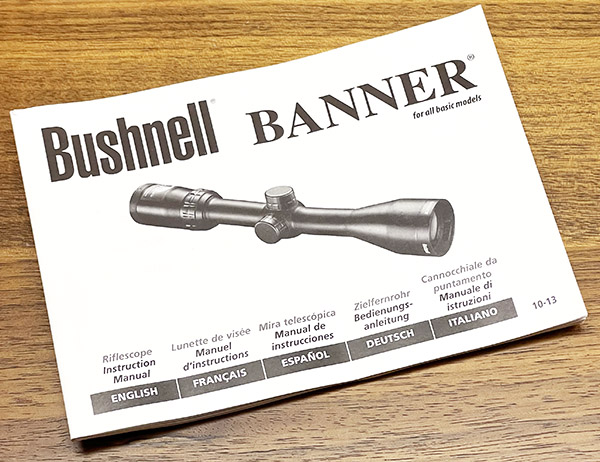
The Bushnell scope has a lifetime warranty and it came with what I thought was an impressively thick operating manual.  The manual is printed in five languages (English, French, German, Italian, and Spanish), so it was only one fifth as thick as it first appeared to be.  But it was still a good manual.  The scope also came with lens covers, which is a nice touch.

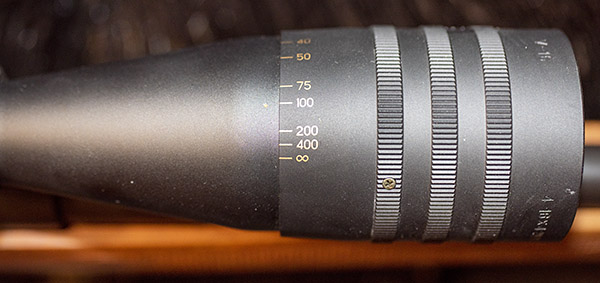
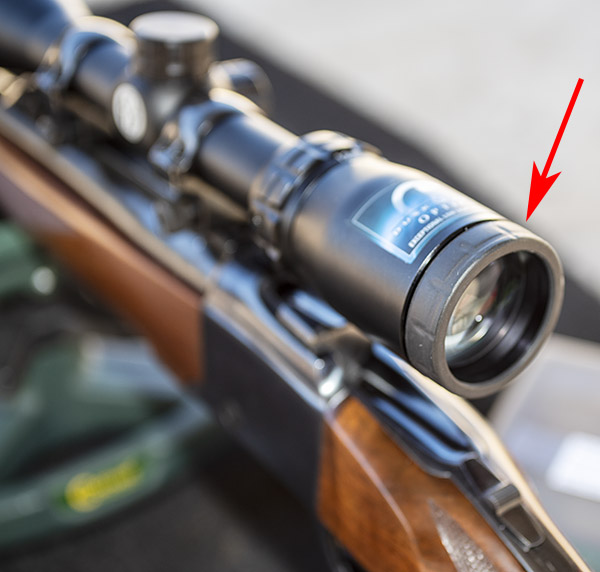
The Bushnell has other features that are important to me.  It has a quick focus ring at the rear to focus the reticle, and it has a parallax adjustment feature on the objective end (the front of the scope).   Parallax adjustment has become increasingly important to me; it minimizes the scope’s susceptibility to slightly different eye positions.   You adjust for parallax by moving your eye around and making sure the reticle stays centered on the target.

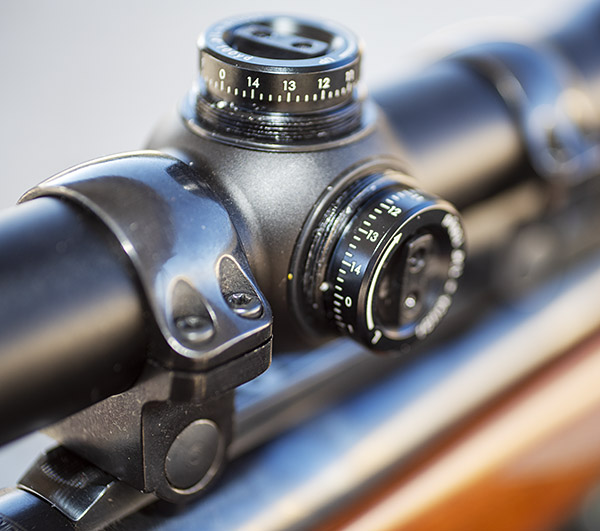
The Bushnell has removable windage and elevation adjustment dial covers, and windage and elevation adjustment can be made by hand (no special tools are required).  Each click represents 1/4-inch of movement on a 100-yard target, which is pretty much the standard on scopes.

The Bushnell has a 40mm objective lens, which I think is about right.  It looks right and still allows the scope to be mounted low on the rifle.  Some scopes go bigger with 50mm objectives, but I think they look silly.  These bugeye scopes have to sit higher on the rifle (which makes sighting through them difficult).   Nope, for me a 40mm objective is as big as I care or need to go.

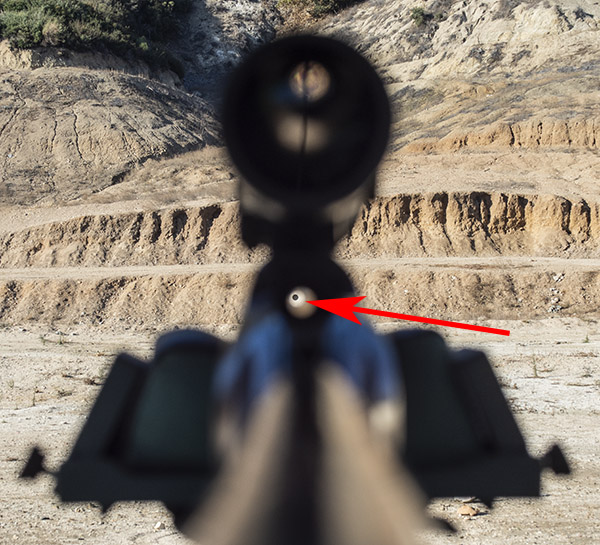
Although I own a boresigting device that mounts on the barrel, I prefer not to use it.  The thought of potentially damaging a rifle’s crown, which a boresighting device can do, is not something I want to entertain.  I boresight the old-fashioned way:  I’ll set the rifle up in a rest, look through the bore (from the breech end) and move the rifle around until a 50-yard target is centered in the bore.  Then, without moving the rifle, I’ll adjust the scope’s windage and elevation until the reticle is approximately centered on the target.  Once I’ve done that, I’ll fire one shot and see where it hits.  I’ve actually done this and had the impact be on the target with that first shot, but it took four shots this time.  After each shot, I adjusted the windage and elevation to get the next shot two inches below my point of aim at 50 yards, and then switch to a target at 100 yards to finalize the adjustment.

On the range at the West End Gun Club. The first target is at 50 yards; the second set of targets is at 100 yards. I used the first target for boresighting and initial scope adjustment.
To boresight the scope, you look for the target through the rifle’s bore. It appears to be a little offset in this photo because it was difficult to get the camera aligned with the bore, but you get the idea. You want the target centered when looking through the barrel.
I used PPU (PRVI Partizan) 100-grain jacketed soft point bullets for this round of load development. The Ruger has a 1 twist in 10 inches rate. A 100-grain bullet is right at the edge of stability with this twist rate; lighter bullets should be more accurate.
Another shot of the PPU 100-grain bullets.  There’s a long bearing area on that bullet.
I used two propellants for this test series: IMR 7828 and IMR 4166. The IMR 4166 performed better than the IMR 7828 load and it reduced the copper fouling in the bore.

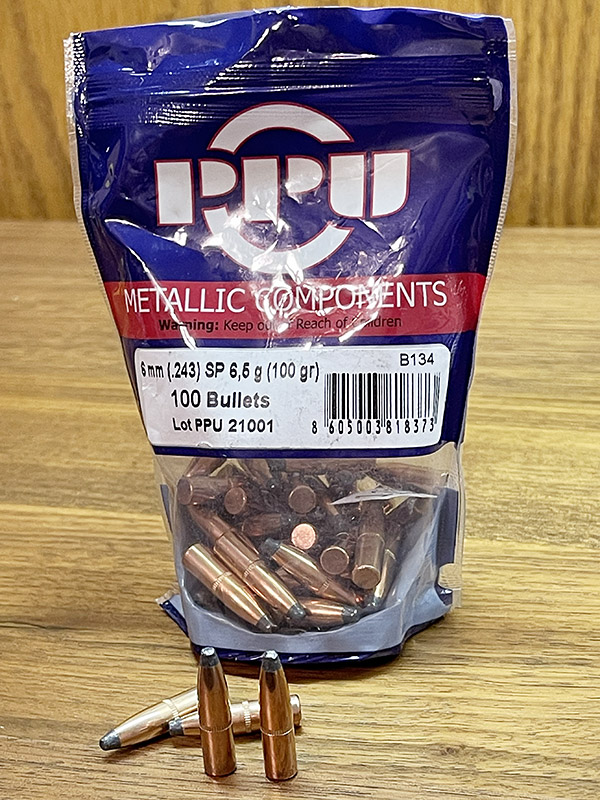
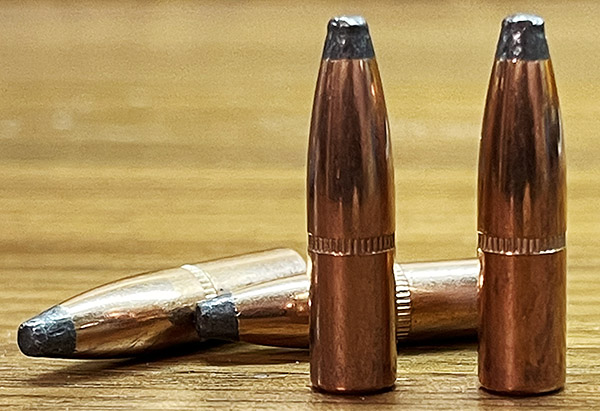
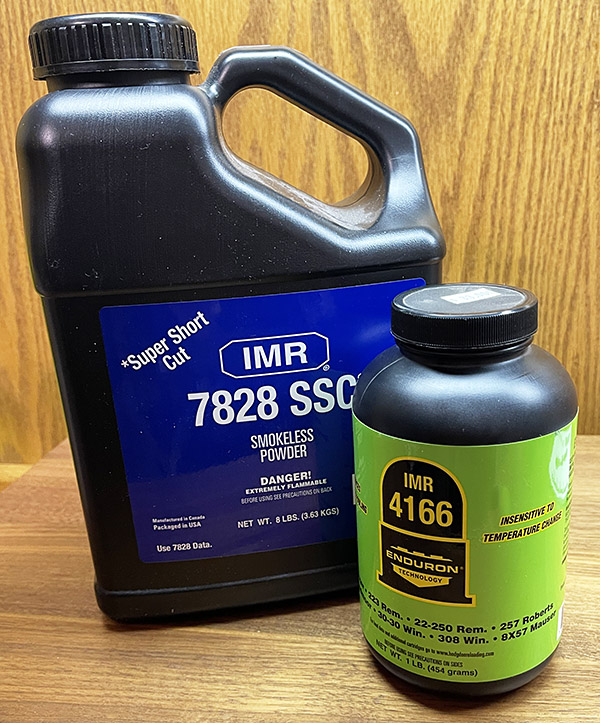
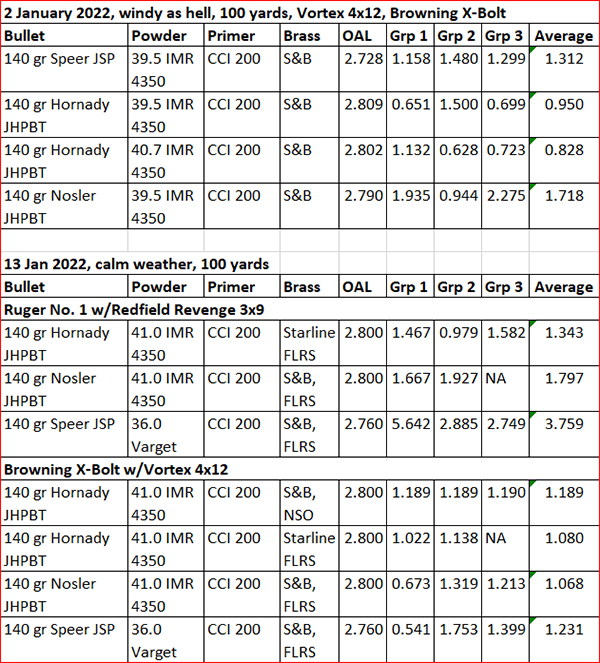
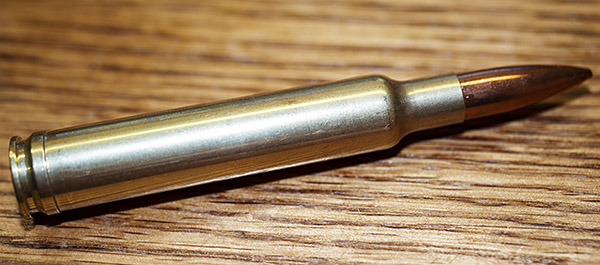
For this outing, I had loaded two groups of .243 ammo, both using PRVI Partizan 100-grain jacketed soft point bullets.  One load had 43.0 grains of IMR 7828 propellant; the other group had 34.5 grains of IMR 4166 propellant.  I used the IMR 4166 ammo last.  IMR 4166 was one of those new powders that is supposed to not leave copper deposited in the rifling (I’ll explain why I used the past tense in a second).  I wanted to use it to minimize the cleaning after shooting the rifle.

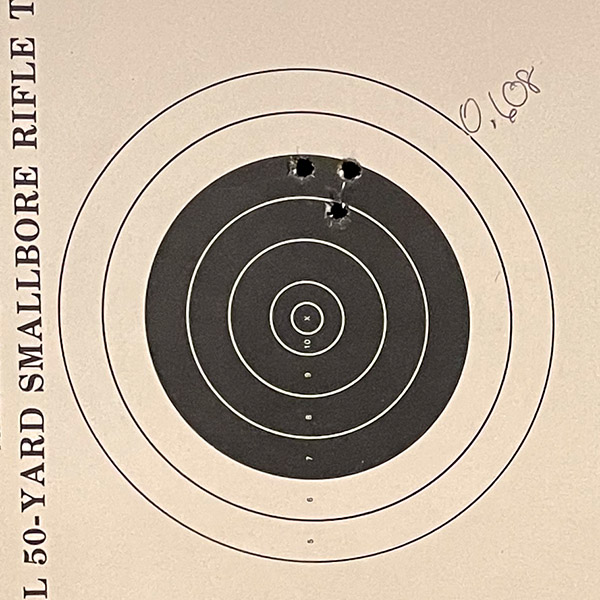
So how did it all work?  The IMR 7828 load didn’t perform well as the IMR 4166 load.  The IMR 7828 load was shooting 2 1/2 to 4-inch groups.  Part of that was due to the Ruger’s twist rate (1 in 10), which is marginal for a heavy (for the .243) 100-grain bullet.  But I was surprised with the last group of the day, which was with IMR 4166 powder.

The last shots of the day, and the last of the loads with IMR 4166 propellant.

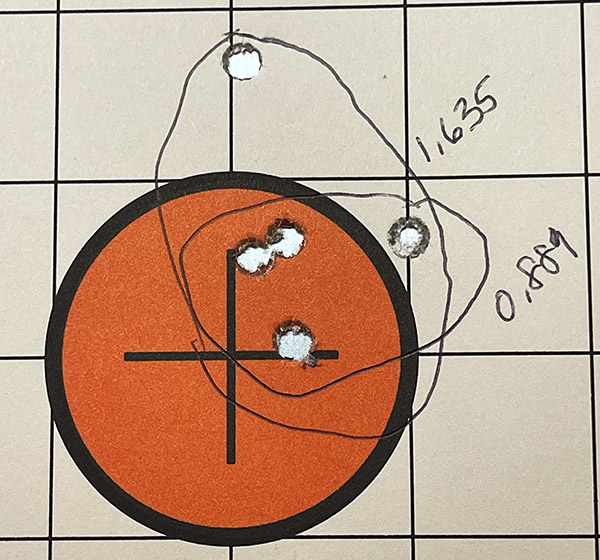
Four of the five shots went into 0.889 inch; the fifth shot opened the group up to 1.635 inches.  That fact that the IMR 4166 grouped much better might be due to the fact the propellant may have removed some of the copper fouling (it appeared to have a lot less copper fouling when I cleaned the rifle later), it might be due to the fact that IMR 4166 is a faster powder compared to IMR 7828, it might have been me, or it might be a statistical fluke.  You might think this would push me to develop a load with IMR 4166, but unfortunately the powder has been discontinued (I’m on my last bottle).  Future load development work for this rifle will be with lighter bullets and other powders with burn rates similar to IMR 4166.  Varget comes to mind. I’ll keep you posted.

I know, I’m digressing again.  I started out with the intent to do a product review on the Bushnell Banner 4×12 scope, which I think I did, but I morphed into a bit of load development work for the .243 Ruger No. 1.  On my intended topic:  The Bushnell Banner is a great scope, and it performs way beyond what it’s sub-$100 price would indicate (I paid $72 for mine on Amazon).  If you’re looking for a good low-priced scope, the Bushnell is hard to beat.  I like it so much I’m going to by another one for another Ruger, but that’s a story for another time.


Never miss an ExNotes blog:


Don’t forget:  Visit our advertisers!


A Tale of Two Creedmoors

The 6.5 Creedmoor cartridge draws a lot of flak on the Internet.  I suspect most of the folks who go negative do so with no real experience.  I have two 6.5 Creedmoor rifles, and both do very well for me.  Will they magically overcome a shooting skills deficit?  No.   Are there other cartridges out there that can do as well?  Sure.  But the 6.5 Creedmoor, in my opinion, does what it is supposed to, and that’s provide accuracy with modest recoil.  I’m a believer.

I had my two Creedmoors on the range a few days ago, a Browning X-Bolt and a Ruger No. 1 (you’ve seen them on these pages recently).  Both are elegant rifles and each has what I would call exhibition grade wood.  The Browning has a curly maple stock and the Ruger has fancy walnut.  Both are factory rifles, and other than mounting scopes on each, both are unmodified guns.

Which one is prettier?  It’s a tie in my opinion.  Good wood, to me, is one of the best parts of having a fine rifle, and both these 6.5 Creedmoors answer the mail in that regard.  The wood seems to be alive on each, changing  depending on the viewing angle and how the light hits it.  This sensitivity to light orientation is probably more pronounced with the maple-stocked Browning.  The curl runs from front to rear and top to bottom on both sides (this rifle has an unusually highly-figured stock).  When photographed from the front (as I did in the photo below), the figure on the Browning is more subdued.

When photographed from the rear, though (as you can see below), the Browning’s curl really pops.  The Ruger’s fancy walnut looks good from any angle.

The Browning is a bolt action rifle based on the Paul Mauser design (as are nearly all bolt action rifles) and it holds five rounds (four in the magazine and one in the chamber).  You can buy extra magazines and carry them with four more rounds ready to go in each (you know, in case your deer starts returning fire).  The Ruger is a falling block action and it is a single shot.  I prefer that and I admit it is a bit of snobbery on my part; I like to think I only need one shot.  On the rifle range, I only load one round at a time.  Come to think of it, on a hunt I also only load one round at a time.  California’s magazine restrictions are irrelevant to me; to my way of thinking if you need a 30-round magazine you aren’t much of a shot.

As much as I love Ruger No. 1 rifles, I prefer the scope location on a bolt action rifle better.  A telescopic sight on a bolt action is in a more natural position.  The Ruger No. 1 positions the scope further forward, and even when I mount the scope as far to the rear as it will go, it requires an unnatural amount of forward stretch to get the correct eye relief.  You can get Ruger scope rings with a rearward setback to overcome this problem, but they look goofy and they add more weight to the rifle.

The Ruger is a heavier rifle.  Part of that is the slender and shorter barrel on the Browning.   Walnut is lighter than maple, but the Ruger barreled action is heavier that the Browning X-Bolt barreled action.  Browning’s specs put the maple X-Bolt at 6 1/2 pounds; a Ruger No. 1B (this rifle’s configuration) is listed as 8 1/4 lbs.  On the rifle range the Ruger’s heft doesn’t bother me.  If I was carrying a rifle all day on pig hunt, I’d prefer the lighter Browning.  The Browning feels almost dainty compared to the No. 1.

I mounted inexpensive scopes on both rifles.  The Browning has a Vortex 4×12 scope and the Ruger has a 3×9 Redfield. The optics are equally bright on both.  The Vortex has indistinct indexing on its windage and elevation click adjustments; the Redfield turret is snappy and allows counting clicks by feel alone as you make them.  The Redfield Revenge is discontinued (the Redfield company is no more), but it is a good scope.  I prefer the Redfield to the Vortex.

Both rifles are accurate at right around minute of angle, and both will occasionally get down in the 0.6-inch group neighborhood.  The Ruger didn’t like the Speer 140 grain jacketed soft point bullet with 41.0 grains of IMR 4350, although I’ve used it before with a lighter charge of that same powder and achieved sub-minute-of-angle groups.   Rifles have their preferences.  With a load dialed for each rifle, the accuracy of both rifles is comparable.

I tried a few loads in both rifles recently with IMR 4350 and Varget powder, and I also tried neck-sized-only ammo in the Browning.  Here are the results:

If there’s an advantage to neck sizing fired cases in the Browning, it’s not obvious to me.  I’m going to full length resize the brass from this point forward, which will allow me to use my reloaded ammo in either rifle.

When I bumped the IMR 4350 charge up to 41.0 grains, accuracy deteriorated from previous sessions.  The Browning likes 40.7 grains (or maybe a little less); the Ruger did better with the Speer 140 grain jacketed softpoints at 39.5 grains of IMR 4350.

What’s next?  I found Berger Bullets load data for IMR 7828 SSC propellant.  That’s a slower burning propellant ordinarily used in magnum cartridges, but I like the fact that it fills the case (which should make for a more accurate load) and I thought I would give it a try.  I have 20 rounds loaded and I’ll test this combo later this week.   Stay tuned, and you’ll read about it here on the ExNotes blog.


More Tales of the Gun!


Our recent Browning 6.5 Creedmoor story!


Our recent Ruger No. 1 Creedmoor story!


Never miss an ExNotes blog!

Reloading and Shooting the .300 Weatherby

I’m in the money with the Mark V .300 Weatherby now, but it took some doing to get there and the journey isn’t over yet.   My recent reloads with this rifle were all over the place at 100 yards.  I suspected it was more me than the rifle (or the loads) and I was probably right about that.  This rifle has serious recoil, way more than I am used to.  I was developing a flinch in anticipation of getting whacked by the Mark V.

I have a friend who shoots the .300 Weatherby a lot, and he’s about the same size as me.  I thought about him a bit, mentally picturing him on the range, and then I realized:  He uses a shoulder pad.  It was a click or two on Amazon until I found the Caldwell recoil shield.

I had the Caldwell recoil shield the next day, and I had to play with it a bit to find how to wear the thing.  I bought the thickest version, figuring that if some is good, more would be better.

I next researched the Internet to find ways to improve my bench rest technique and I immediately found two improvement opportunities:  Parallax, and how I positioned the rear rest.

With regard to parallax, it’s a real thing and a real issue.  Most scopes don’t have any adjustment for parallax, but the 4×16 scope I have on the Mark V does.  To adjust for parallax, you set the rifle in the rest and put the cross hairs on the target. Then, without touching the rifle, you move your head around and see if the reticle moves around on the target.  On a scope with parallax adjustment, what I read is that you ignore the markings on the parallax adjustment and move your head around, adjusting the parallax adjustor until the parallax is minimized.  I couldn’t completely eliminate the parallax on my 100 yard target, but I was able to greatly reduce it.  After making the adjustment I looked at the scope objective (the parallax adjustment feature), and what do you know, it was right on the 100-yard mark. I guess those Weaver boys knew what they were doing.

I had a rifle with me that has a non-parallax-adjustable scope and checked it for parallax at 100 yards, and wow, when I moved my head around the reticle was moving around a good 3 inches on the target (left to right, and up and down).  To control parallax with a non-parallax-adustable scope, the trick is to get your eye in exactly the same spot every time.  In fact, that’s good technique with any scope.

The next thing for me was to get the rear rifle rest directly under where my face rested on the stock.  You can see the front and rear rest in the large photo at the top of this blog (I use Caldwell equipment).  The idea behind getting the rear rest directly under where your cheek contacts the stock is that the downward force from your cheek is transmitted directly through the stock into the rear rest without flexing the stock.  It may not seem possible (or even detectable), but if your face is ahead of the rear rest or behind it, you will impart a torque into the rifle and it can be enough to shift the point of impact at 100 yards.

On to  my loads:  I reloaded the next set of .300 Weatherby cartridges, going with 73.0 grains of IMR 7828, the CCI 250 magnum primer, 200-grain Sierra MatchKing bullets, and every trick I knew of to improve accuracy.  This is a relatively light load.  I neck sized three different sets of brass (fireformed .300 Remington cases made from .300 H&H brass, Remington .300 Weatherby brass, and Weatherby brand .300 Weatherby brass).  I have a Lee .300 Weatherby collet die that squeezes the neck down to size, and I used brass I had previously fired in the Mark V rifle.  I also seated the bullets out much further (the reloading manuals all show the cartridge overall length to be 3.560 inches, but I seated the Sierras out for an overall length of 3.718 inches).  The Weatherby Mark V rifles have a lot of freebore.  The cartridges still fit in the magazine and the bullets did not contact the rifling, so I was good to go.

It was a quick trip to the West End Gun Club and I had the range to myself.  I got everything set up, pulled on the Caldwell shoulder pad, and went to work.  The Caldwell shoulder pad was awkward at first (as you might imagine), but it was wonderful.  The .300 Weatherby Magnum is still a beast, but the Caldwell pad did its job.  It greatly alleviated my fear of getting clobbered every time I squeezed the trigger and my groups tightened up immediately.

So my groups were way better, but I had a new problem.   Many of the cases were sticking in the chamber after firing. The bolt would rotate freely, but the cases didn’t want to come out.   When I pulled harder on the bolt, the extractor popped over the rim and the case stayed in the chamber.  I had to tap the cases out with a cleaning rod.  Other than the cases sticking, there were zero indications of excess pressure. No flattened primers or anything. The Remington cases were sticking almost 100% of the time (both the fireformed .300 H&H cases and the .300 Weatherby Remington cases).  The Weatherby brass did not stick in the chamber, although a couple felt like they wanted to.

On to the good news:  My best group was a .608-inch 3-shot group at 100 yards, which ain’t half bad on a fire-breathing monster like the .300 Weatherby.  Before you trolls tell me I should shoot 5-shot groups, I will share with you that in my experience it’s pretty difficult to get animals to sit still for five shots.  If your dead set on being critical, let’s get your butt out here.  I want to watch you shoot 5-shot groups with your .300 Weatherby.

The next morning, after cleaning the rifle, I rechambered a couple of the fired Remington cases, and then when I withdrew the bolt the cases stuck in the chamber again.  And again, I had to tap them out with a rod.  The Weatherby brass did not, but it was tight.  I measured each of the cases that stuck, and they all met the SAAMI .300 Weatherby specification.  My conclusions are:

      • I don’t have an excess pressure situation.  I loaded at the bottom of the propellant range, the bolt rotated freely, there were no pressure signs on the case base, and the primers were not flattened.
      • Neck sizing on my .300 Weatherby Mark V is not a good way to go (notice I said mine; your mileage may vary).  I full length resized one of the cases that stuck (a Remington case) and it chambered and extracted easily.  Weatherby brass is better (but it is hard to get).
      • I need to full length resize when reloading for this rifle.
      • The Weatherby Mk V extractor is weak.  For a dangerous game rifle, that’s not a good thing. Maybe the extractor spring is weak.

I think the real issue was the neck sizing approach.  I’m out of IMR 7828 propellant (powder goes fast with the 300 Weatherby) and no one seems to have any in stock, so I’ll try either H1000 or IMR 4831 next.  Like we always say, stay tuned.


More Tales of the Gun and more Weatherby stories are here!


Never miss an ExNotes blog…sign up here for free!


I reload with Lee Precision equipment.