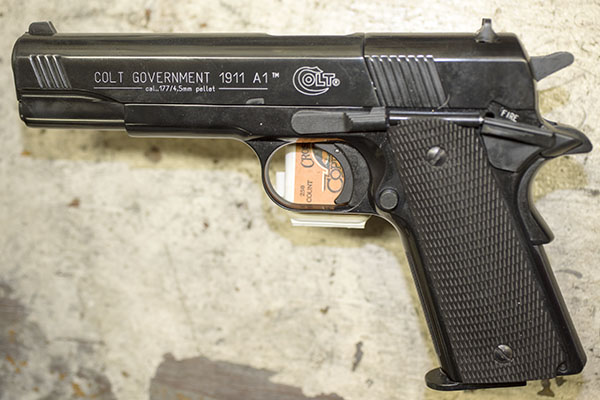
The Colt .177 1911 Pellet Pistol
That 1911 you see above is the same size and the same weight as a real deal .45 ACP 1911, but this one is a CO2 pistol that fires .177-caliber pellets. I saw it in a Big 5 sporting goods store a good 20 years ago, and for reasons I can’t easily explain, I bought it. It was an impulse buy. I thought it was a cool idea and I figured if I was ever stuck in the house and couldn’t go out, I could entertain myself by shooting my pellet pistol. Little did I know the CV19 debacle would turn that eventuality into reality (I mean, I’ve been under house arrest for over a month…I have everything but the ankle monitor). I paid $150 for my .177 1911, I put it on the shelf, and I forgot about it for the next two decades.
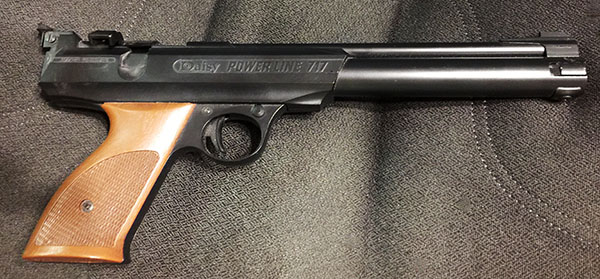
As you know from following our earlier pellet pistol blogs, I recently set up an indoor pellet pistol range in my garage in an effort to keep myself entertained (I don’t live on a big ranch in New Mexico and I don’t do concrete). I previously wrote about two Crosman pellet pistols that wouldn’t hold pressure and my old Daisy 717 pellet pistol that worked like a champ. A the end of the most-recent Daisy blog I mentioned that I had the 1911 pellet gun and I said I would break it out if I could find it.
Pellet Pistol Packaging Problems
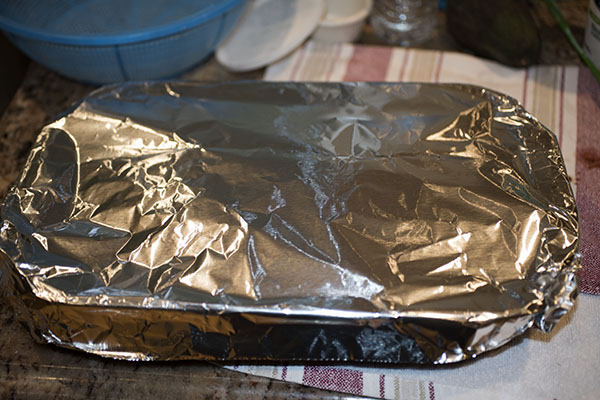
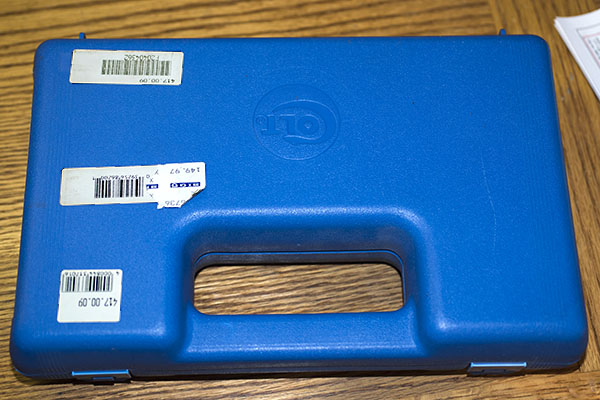
Well, that’s what I did. I found the gun pretty easily…it was in the bright blue case you see above. But when I opened the case, things did not look good.
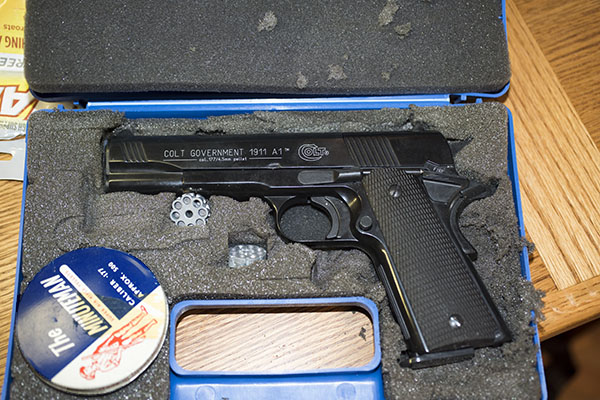
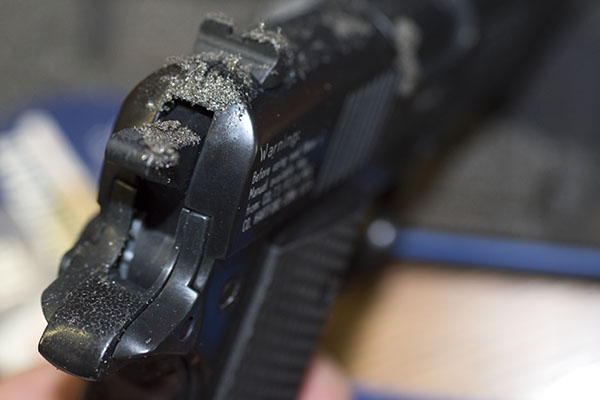
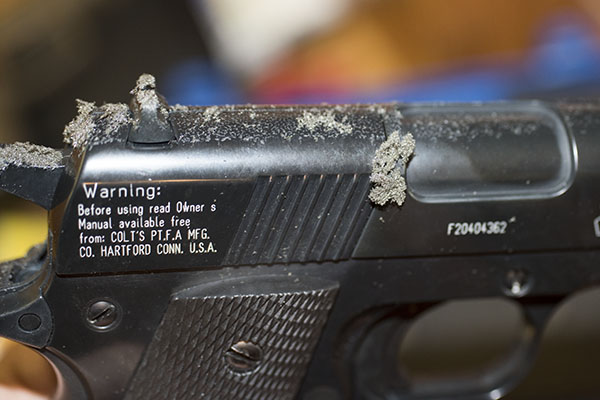
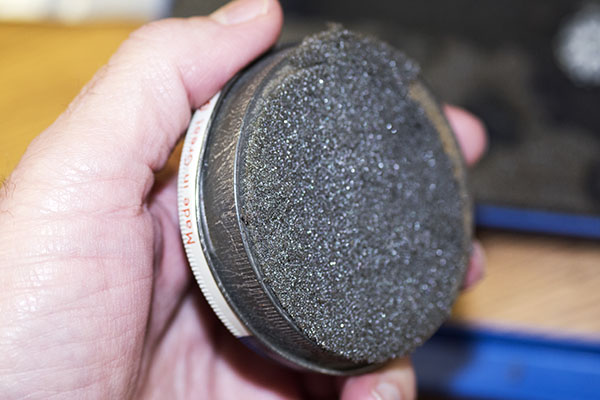
Hmmm, the foam padding inside the case that was supposed to protect the gun was doing just the opposite. Instead of protecting the gun, the foam was decomposing and appeared that it might be damaging the 1911. Ah, maybe not, I thought. Given a spritz of that powerful spray that cures all evil (that would be WD 40, not YooHoo, Fred), the foam that was sticking to the 1911 would probably fall right off. Or so I hoped. Before you feel compelled to weigh in on this, let me say at this point I realize this is all my fault. I was remiss in letting the gun sit in that case for 20 years without ever pulling it out, checking it, and keeping it wiped down. Maybe. It could be that if I wiped it down the oil I used would have accelerated the foam’s decomposition. Who knows?
Finish Degradation
So I was hoping all this rotting, rotten foam would wipe right off and the gun underneath would be fine. Well, like the old saying goes, you can hope in one hand and poop in the other. You know which one is going to fill up first. A few shots of WD 40, a good scrub with an oily rag, and the verdict was in: Things were not looking good.
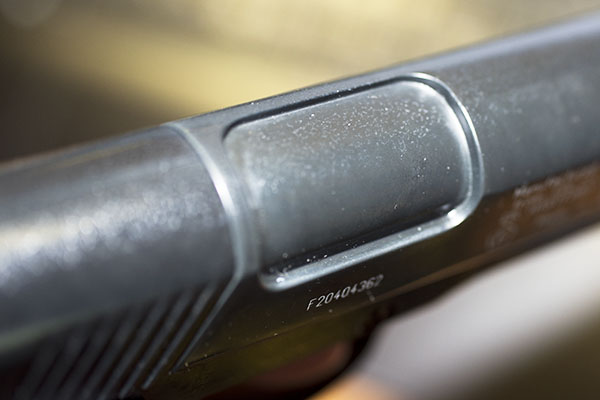
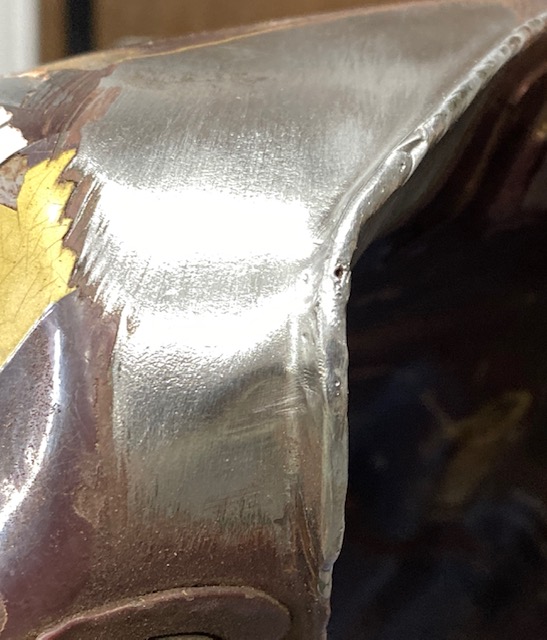
I even tried lightly scuffing the gun with steel wool (that works on light rust on blued steel), but nothing helped. The 1911 has what I’m guessing is a powder-coated finish, and that damned decomposing foam actually was eating into the finish. It was like rust, but it was a different chemical reaction. It actually etched its way into the powder coating.
So I learned a lesson again I learned a long time ago: You can’t just put something away in a box and forget about it. I should have taken that gun out of its case every year and wiped it down. Eh, we live and we learn.
.177 1911 Operation
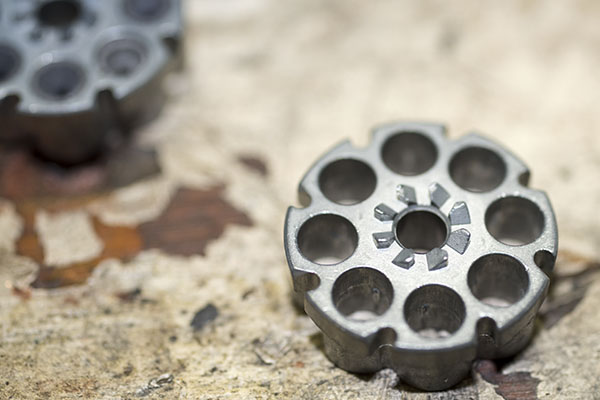
I cleaned up the 1911’s exterior as best I could, and then I had to figure out how to operate it. I had the owner’s manual, but what would be the fun of simply reading it? Nope, I had to play with my fuzzy friend and figure it out for myself. The 1911 had two little cylinders for holding the pellets and the owner’s manual (what little I read) said it could be fired either single or double action. Hmmm, that’s cool, I thought.
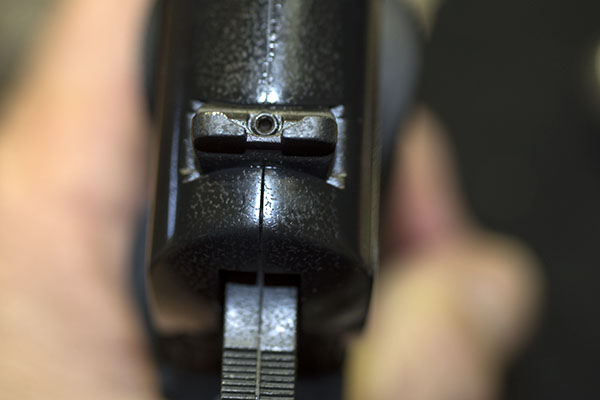
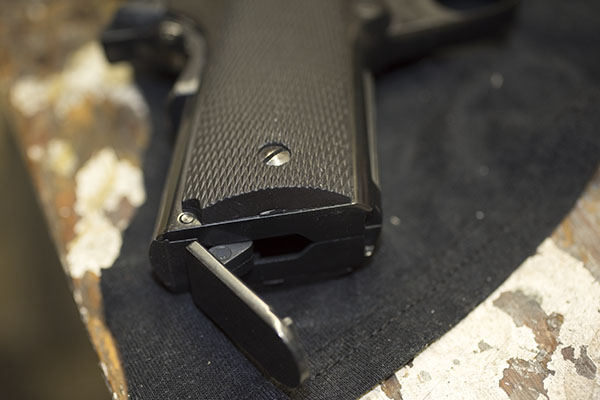
I looked at the gun and it had a lot of the same features as a regular 1911 (i.e., a .45 ACP 1911). You know, the grip safety, the mag release, and the slide release. I tried the grip safety (unlike the rest of this 1911, it’s plastic). It was hinged at the top just like a real 1911. Cool, I gotta check this out, I thought, so I pulled the hammer back, pointed the gun in a safe direction without depressing the grip safety, and pulled the trigger. The hammer fell anyway. Okay, so the grip safety is purely cosmetic. The 1911 also has a thumb-actuated safety, but unlike the grip safety, it actually works (it prevented the hammer from falling when I pulled the trigger). The pellet 1911 has a mag release just like a real .45 auto, and what that does is press against the right grip to flex it away from the frame. That allows you to get a fingernail under the grip, and you can pop it off (more on that in a second). And finally, there’s a slide release just like a real 1911. I pressed it down and what do you know, the slide slid! Forward, that is…about three quarters of an inch (more on that in a moment, too).

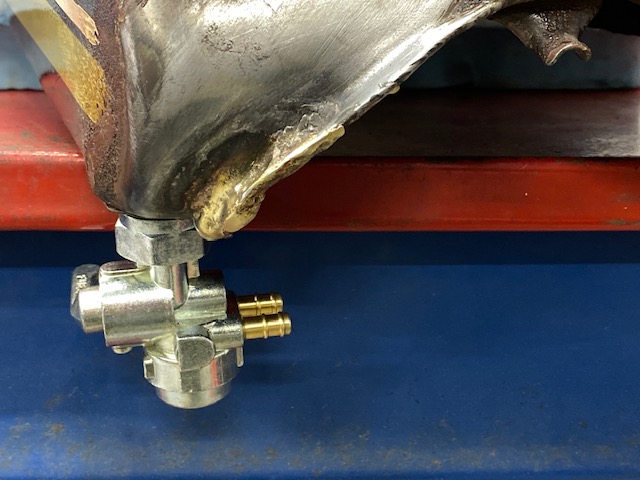
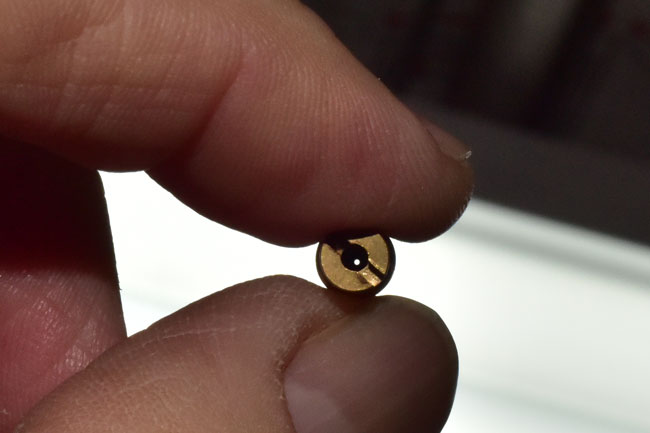
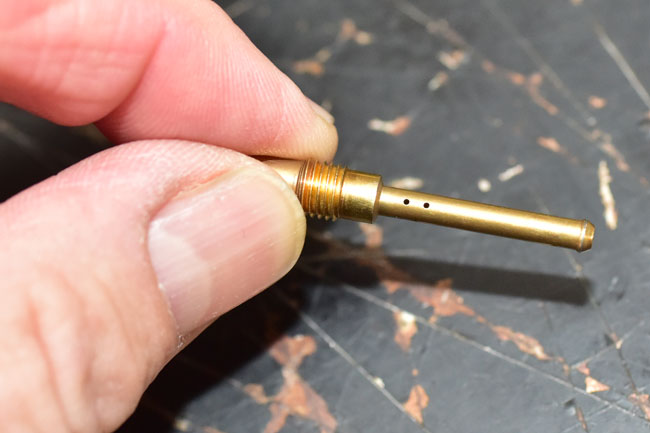
Like I said, when you press the mag release, it pushes the right grip away from the gun’s frame. You can then pull it off and that exposes where the CO2 cylinder sits. There’s a lever under the grip. You can rotate that down and it releases upward pressure under the CO2 cylinder. Then you rotate a knurled brass wheel to lower it and a brass cup underneath the cylinder, and then the spent cylinder can be removed. To install a new cylinder (which you need to do a lot, as I’ll explain shortly), you just insert the new cylinder, rotate the brass wheel to take out all the clearance between it and the cylinder, and then rotate the 1911’s grip lever (underneath the grip) upward. That pushes the CO2 into the probe that penetrates the cylinder cap and seals the cap against the probe. It’s all very clever.
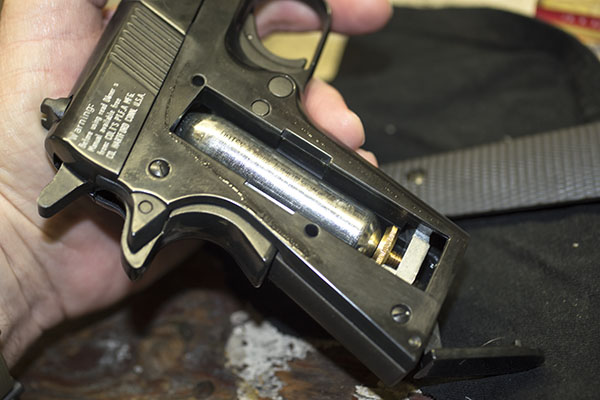
I did all the above, locked a new CO2 cartridge in place, and the gun was charged. And unlike the two Crosman handguns I tried a couple of weeks ago, it held pressure. Next up was loading one of the little revolving cylinders with .177 pellets.
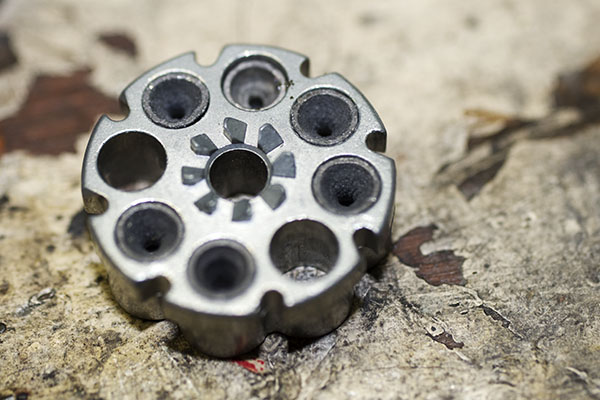
After you’ve loaded the cylinder with pellets, the idea is that you drop it into the 1911 between the rear of the slide and the frame, and then pull the slide to the rear to close it. I did all that, and at that point, I was ready to start sending lead downrange.

Double Action It Ain’t
Downrange, in this case, was 20 feet away into my house-arrest, Rube Goldberg, cardboard-box-contrived bullet trap. Like my pistol, I was pumped because it felt good to have a hefty 1911 in my hand again. This 1911 pellet gun feels like a real one. It weighs exactly the same, it’s got relatively decent sights, and lining it up on the target felt like the real deal. Alvin York, step aside, ’cause this 1911 has the added advantage of double action.
Or so I thought. With the safety off and the gun pointed at the target, I tried firing double action. I felt the take up on the trigger and I felt it come all the way to the rear, but nothing happened. I tried again, looking at the hammer, but the hammer just sat there. Hmmm. Well, so much for double action.
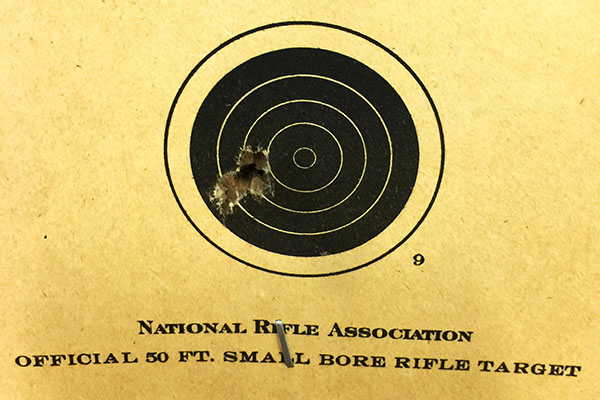
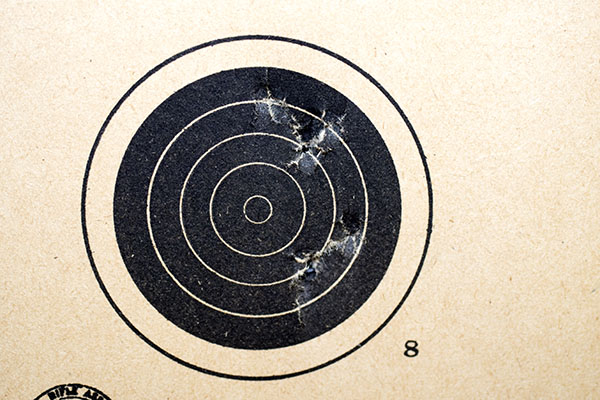
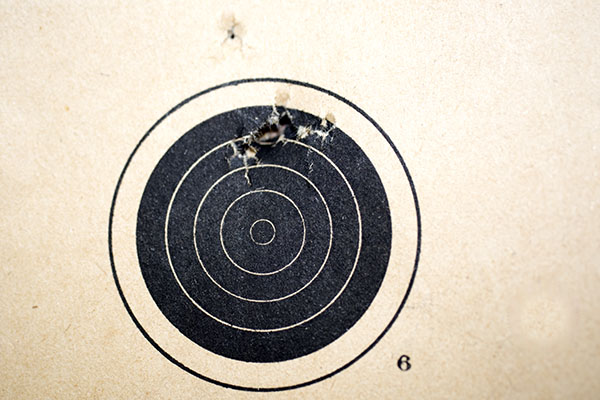
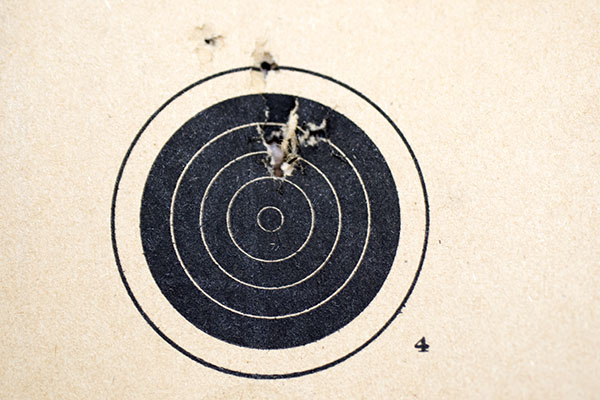
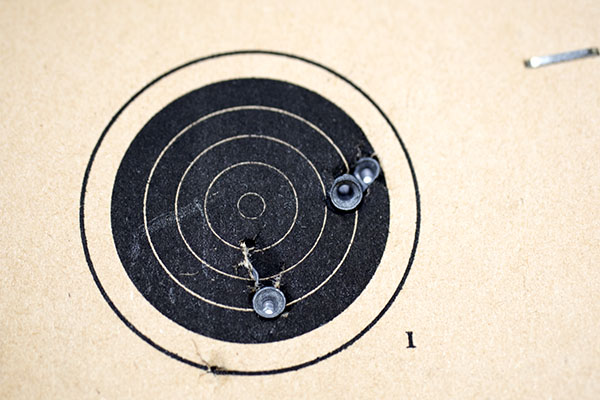
I manually cocked the hammer, lined up the sights, held my breath, focused on the front sight, and then I heard a satisfying PFFFT! That delightful report was followed a nano-second later by the mighty .177 lead hourglass sharply smacking into my target. I could see the hole it made, and it was in the black! Yeah, baby!
Cool, I thought. Okay, double action was a bust, but that’s no big deal…I’ll just cock the hammer for each shot. So I pulled the hammer back, repeated the steps above, and it was PFFFT again, but this time without the thwack of the pellet hitting the target. I looked downrange and that prior hole on the target was looking mighty lonely. Hmmm again. Shooting blanks with a pellet gun. Whoever heard of such a thing?
I pressed the slide release, the slide slid forward, and I peeked in. The cylinder holding the pellets had not advanced. It was still sitting on the empty chamber I had fired previously. I pulled the hammer back to see if the hand that is supposed to advance the cylinder was moving up to do so, but it wasn’t. Rats. It looks to me like the parts that form the mechanism to rotate the cylinder are plastic. They may be broken, or age-degraded, or maybe stuck in place by agglomerated lube. Who knows? I need to take the thing apart to do a proper proctological exam, but that’s a project for another time. A quick Google search showed that others complained of similar problems with these guns, and one of the comments noted that there are YouTube videos showing how to work on the thing. Hey, Gresh has his Z1 and concrete, and I have my broken-down pellet guns! Life is good.
Sending Lead Downrange
For right now, I have a single shot 1911 pellet gun. I just have to open the breech, take the cylinder out, load a pellet, put the cylinder back in, close the slide, cock the hammer, and take a shot. Which I did several times, and here are the results.
Cost per Shot (Pellets vs .45 ACP Ammo)
This is a good news/bad news story. You’ve already read the bad news. A little bit more bad news: I only get about 30 shots (maybe less) out of a single C02 cartridge. That surprised me. So much so, that I looked it up on Google, and it seems like 30 shots is about what any CO2 pellet pistol gets. I think I’ll probably get comments from our readers on that and I’m looking forward to reading your inputs. Hey, if your mileage varies, leave a comment and tell me about it.
Just for giggles, and because I have the time while we’re all under house arrest, I thought it would be fun to compare the cost of shooting the pellet 1911 to the real thing.
I checked online (because it’s been a long time since I’ve bought C02 cartridges), and they seem to be going for around $8 for a box of 5. That works out to $1.60 per cartridge, and at 30 shots per cartridge, that’s a little more than 5 cents per shot for the CO2. The pellets seem to run around $7 for a tin of 150, and that’s a little less than 5 cents per pellet. So, every time I pull the trigger on my 1911 pellet gun, I’m sending a dime downrange.
For my .45 ACP reloads, there are costs in the bullets, the powder, and the primer. I don’t count the .45 brass, because I get mine for free and it seems to last forever. My favorite Missouri 230-grain cast roundnose bullets are $50 for a box of 500, so that’s a dime per shot in lead. Unique powder is about $30 a pound, there are 7,000 grains in pound, each cartridge takes 5.6 grains of Unique, and if you do the math, that works out to $0.024 per cartridge for propellant. CCI 300 large pistol primers are $30 per thousand, s0 that’s $0.03 per round for primers. The bottom line here is each time I pull the trigger on a real 1911, it costs me 15 cents.
What the above means is that I’m saving about a nickle per shot with the 1911 pellet gun. I guess need to shoot a whole bunch more…you know, so I can make up for the hit my 401K is taking as a result of the corona virus.
Wrapping It Up
So where am I on all this? The good news is I like my 1911 pellet gun. It’s impressive how much it feels like a real 1911 (without the sound and fury of a real 1911’s bark, of course). The pellet gun 1911’s accuracy isn’t stellar, but it isn’t terrible, either. It doesn’t index when I cock the thing and it doesn’t work double action, but that’s almost an advantage given our current house arrest situation (fixing those problems is just another project to put in the hopper). The bottom line? I like my .177 Colt pellet gun and it’s one I’ll be using more.
See our other Tales of the Gun stories here!