
This will be the final installment of the RX3 and RX4 comparisons. We’ve got one more coming up after this, and that’s the RX4-to-KLR 650 comparis0n. And then, another cool and quick review…the BMW GS 310. Yep, I rode one of those yesterday to get a feel for how it compares to the RX3. That will be in another review. For now, on to the RX3 and RX4 final comparison in this series…
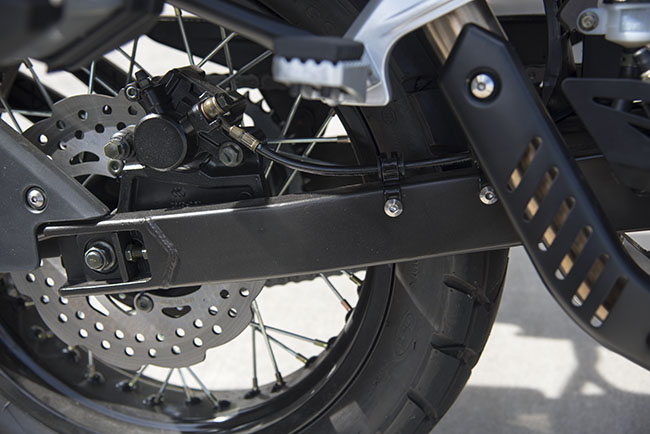
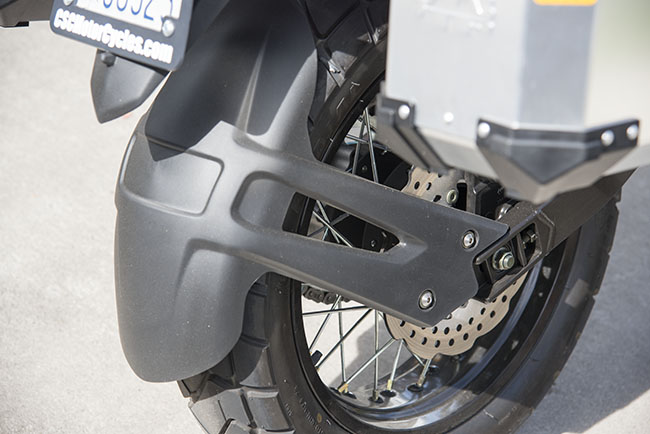
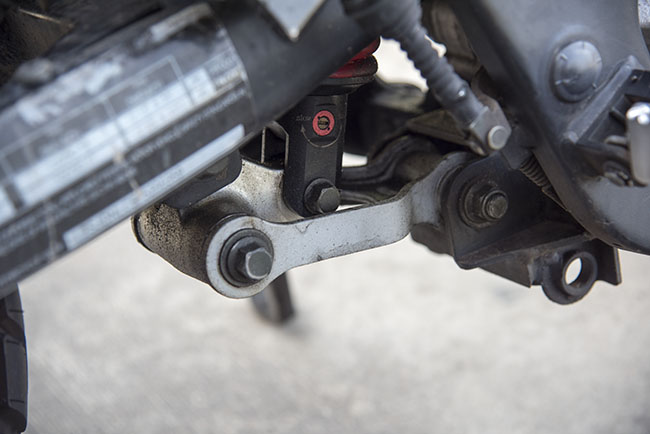
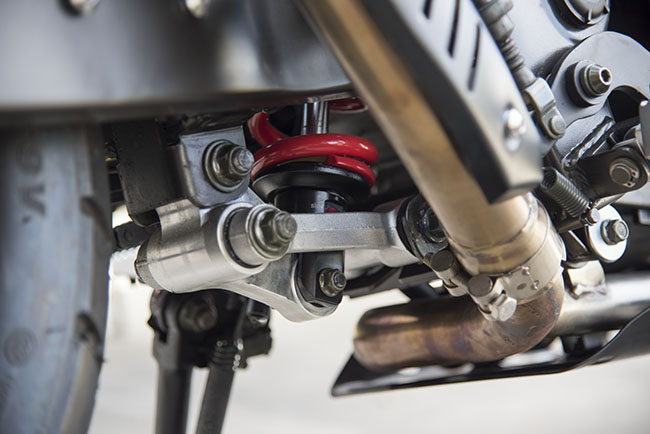
Take a look at the swingarms on the RX3 and the RX4. The RX4 has a much beefier unit, as you can see below.
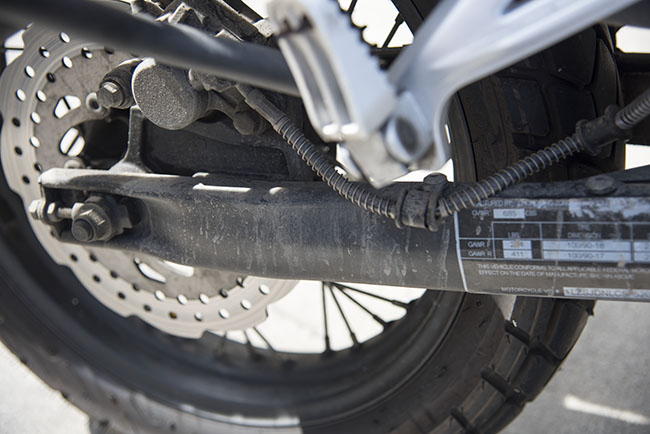

Overall, the RX4 swingarm appears to be much better design than that on the RX3. The only aspect of the RX3’s swingarm that I think I like better is the axle adjustment design. On the RX3, the threaded adjusters can be used to move the rear wheel forward or backward. On the RX4, it looks like Zongshen took a more conventional approach, where the adjusters can be used to move the wheel rearward, but you have to manually push the wheel forward.
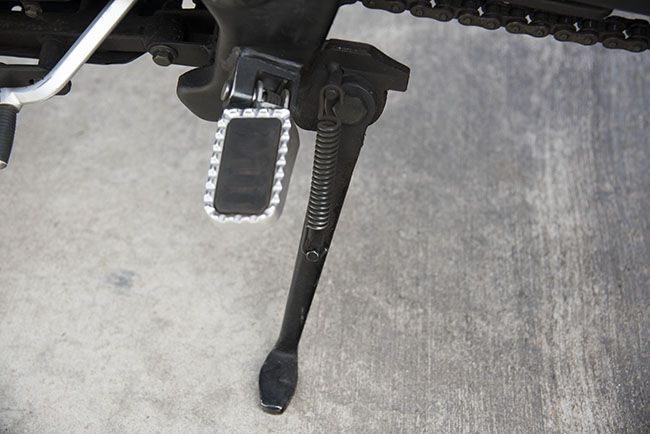
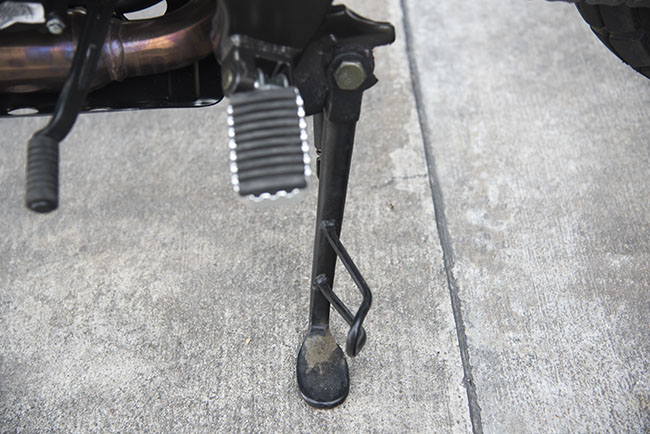
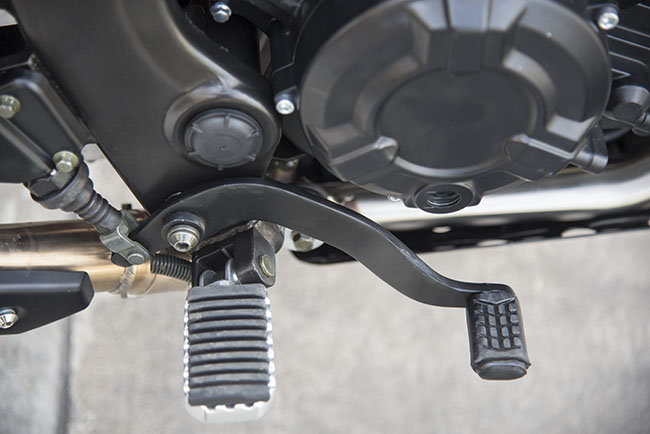
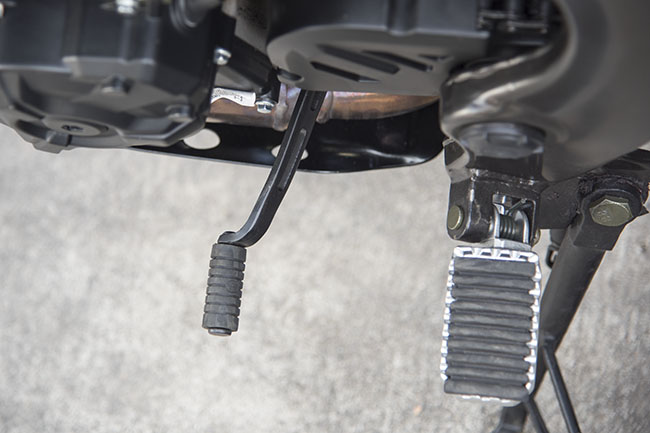
I may have already mentioned this next point in an earlier blog, but I’ll mention it again. On the RX4, the exhaust pipe sweeps down and under the engine, and then it sweeps up again to the muffler behind the engine. The RX3 has an upswept pipe.
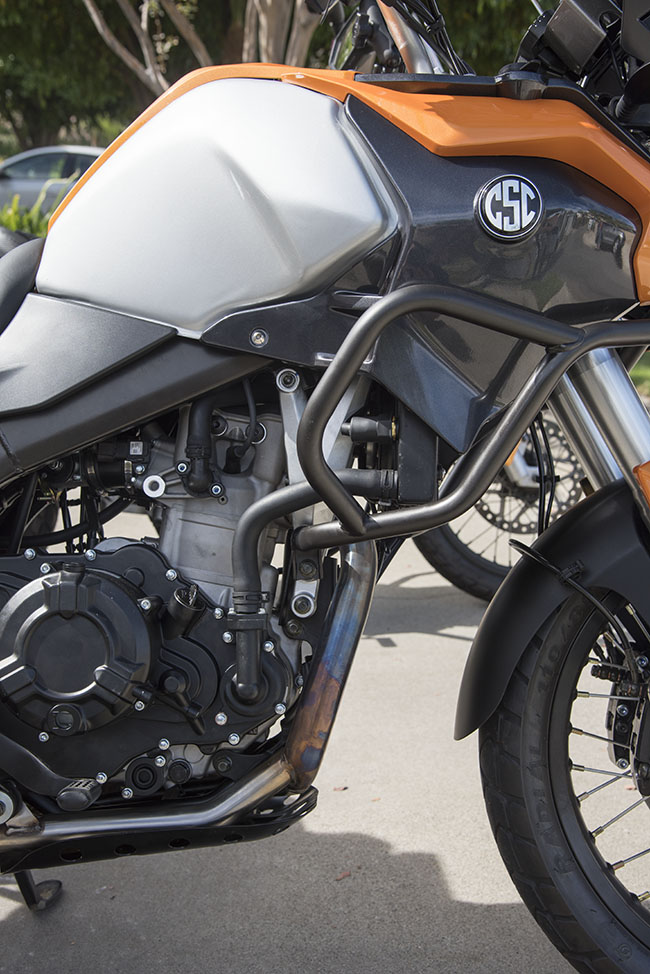

The purist will undoubtedly flood the forums with comments about the RX4’s downswept pipe. My reaction is: Meh. It’s the same approach as used on my Triumph Tiger. Upswept, downswept, six to one, half a dozen to the other. As the Germans say, machst nicht. That is, unless you’re changing the oil or adding oil. Then the RX4’s downswept pipe (and the improved access it offers to the oil fill ports) starts looking pretty good.
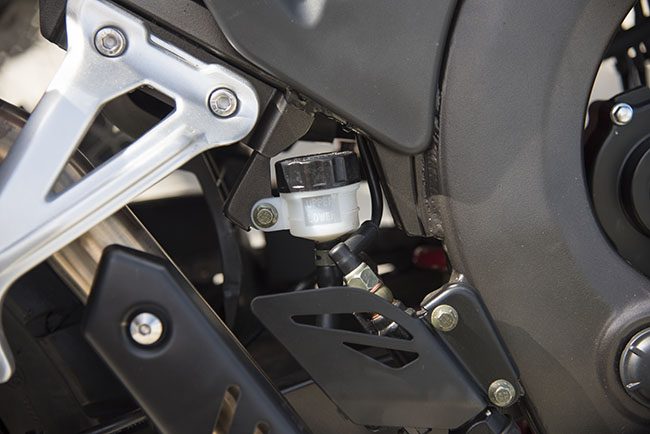
Here’s another significant difference: The radiator. The RX4 uses a single large radiator, compared to the RX3’s two smaller radiators.
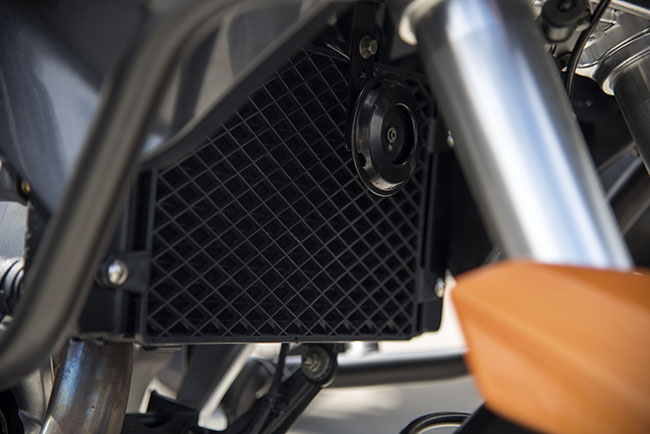
I like the RX4 radiator approach better. Simple is better in the engineering world, and a single radiator makes a lot more sense to me.
Moving on, we’ll next take a look at the grips and controls on the RX3 and the RX4. The RX3 photos you see here are my RX3, which is a 2015 model. In 2015, the RX3 did not have bar end balancers, but Zongshen added these in 2016 and beyond. Also, the 2015 RX3 had chromed bars, all subsequent years had subdued silver paint on the bars.
When Zongshen made the RX3 handlebar change, I wondered why they messed with something that worked so well. There was more to the story than I knew at the time. It basically went like this: The Chinese motorcycle industry took a major hit and underwent a significant shakeout in recent years. The US motorcycle market did, too. Here at home, the market dropped to 50% of its former levels with the Great Recession of 2008, and it has never moved much beyond that point since. We had a double whammy here: Banks and lending companies stopped giving 4th, 5th, and 6th mortgages to folks wanting to buy motorcycles (I’m exaggerating, but only slightly), and our demographics changed. Older guys aren’t buying bikes like they used to (they’re aging out), and Millenials are more interested in cell phones and self-driving cars than they are in motorcycles. And while all of this was going on, the industry here in the US continued (and continues) to offer outsized and overpriced choices. In China, there has similarly been a double whammy, but the two strikes are of a different nature. China is concentrating its population in the cities, and (incredibly) China is outlawing motorcycles in its cities. I know, it’s nuts, but it is what it is.
Anyway, all of this caught up with the Chinese motorcycle industry, and a lot of lower level motorcycle component suppliers in China finally called it a day in 2015-2016. That’s what resulted in the need for a new RX3 handlebar supplier going into the 2016 model year. With that change, Zongshen included bar end weights, which I think were unnecessary. Nah, change that: I know they were unnecessary, because I have a 2015 RX3 with no bar end weights and a zillion miles on the clock, and I’ve never had an issue with vibration.
All righty then…to dial this back to today, the bottom line is that both the RX3 and the RX4 have bar end weights. But not mine, because it’s a 2015 RX3. With that in mind, here we go…
So, about that sloppy bar-end fit on the left side of the RX4 preproduction prototype: While I was disappointed in this minor detail, I have to point out that it was the only area on the motorcycle that was poorly fit. Every other aspect of the RX4 (and I mean literally every other bit related to fit and finish) was absolutely world class. The bike just screams quality. The paint, the fit, the finish, everything. Except that sloppy left side bar-end weight.
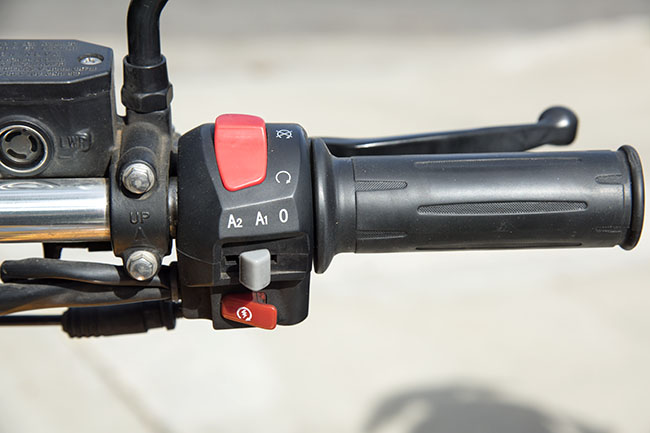
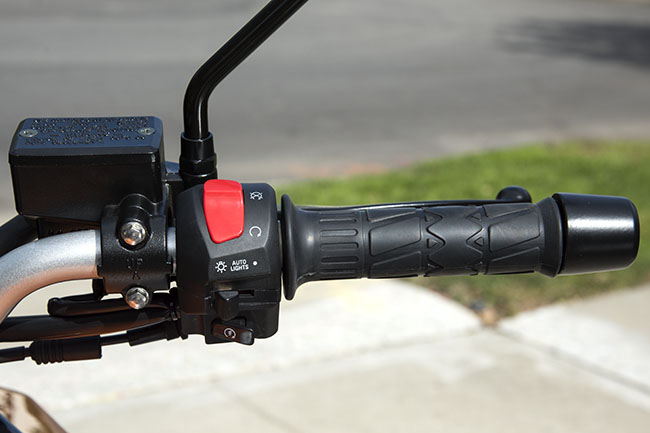
Moving on to the right side of the bike, here’s the right side grip and control area on my RX3. Note the A2, A1, and O switch; it controls the RX3’s underseat accessory plugs.
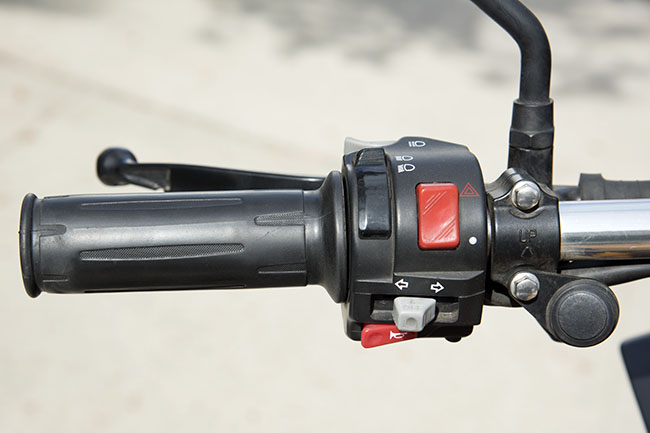
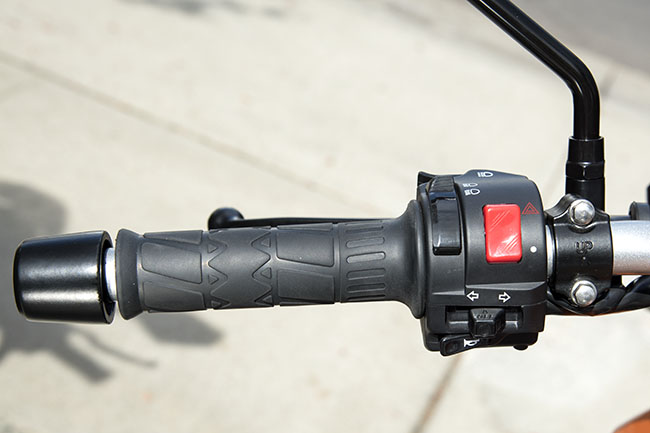
Here’s the same view of the RX4’s right side grip.
The photo above shows the RX4 preproduction bike, which has the headlight switch for on, auto, and off. I’m told the US configuration bikes will only have the on and auto positions. The on position turns on the headlight; the auto position leaves the LED headlight outline on all the time but only turns the headlight on when it senses it is dark. The A1 and A2 switch for the underseat accessory plugs will be controlled by an optional CSC-unique handlebar-mounted switch. At least that’s the plan as of this writing.
On this issue of bar-end weights: Like I said above, vibration is a non-issue on both bikes. If I concentrate on trying to feel it, I guess I would say the RX4 has a barely-detectable higher vibration level than the RX3, but you have to really focus on trying to tell the difference. I’d drop the bar-end weights on both bikes. But then, I don’t make a million motorcycles a year. Zongshen does.
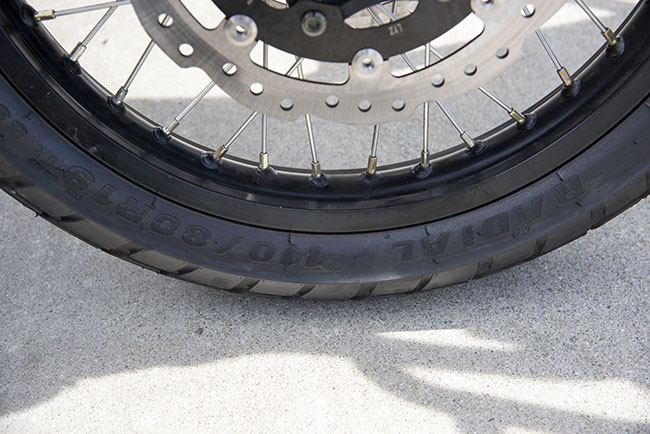
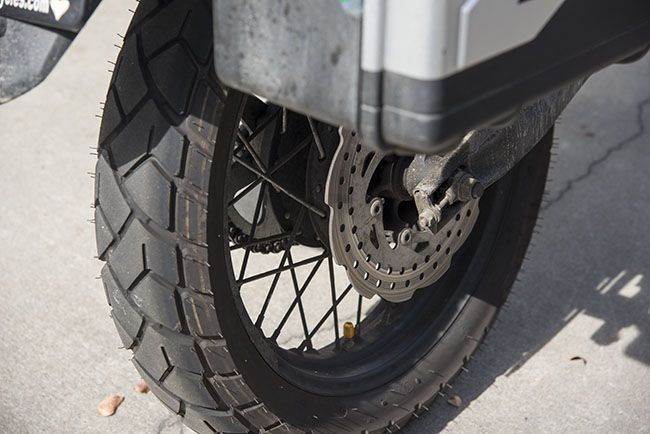
The big difference in the wheels between the RX4 and the RX3 is that the RX3 has spoked steel rims and cast wheels are not an option. On the RX4, the wheels are spoked aluminum rims, and cast aluminum wheels are an option.
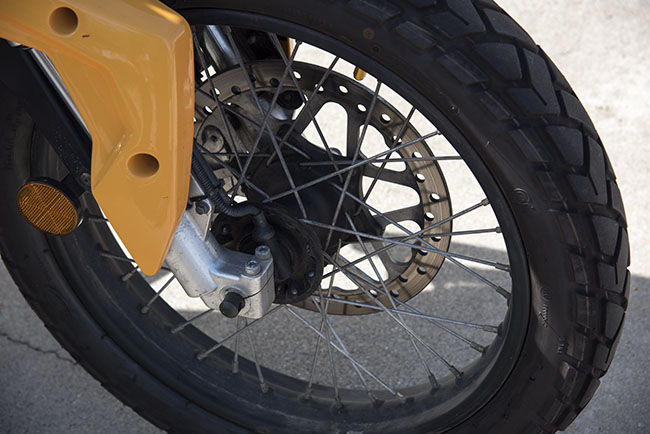
For comparison, here’s the wheel and tire on the front of my RX3.
The last area I’ll describe is the dash and instrumentation, and that part is easy: They are identical. Well, almost. The instrumentation is the same. The dash is a little different in that on the RX3, the USB and 12V chargers are optional accessories; on the RX4, they are standard equipment.
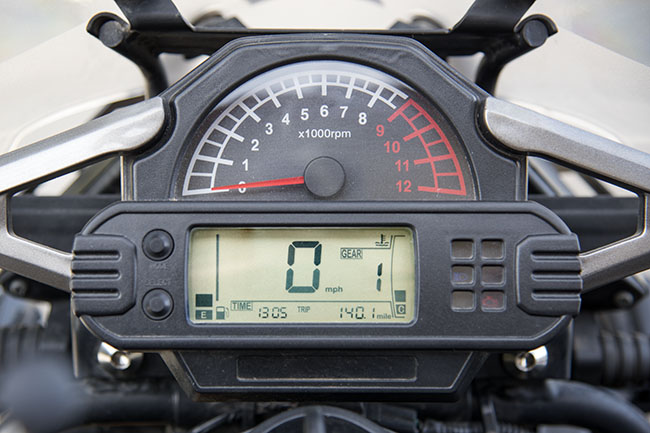
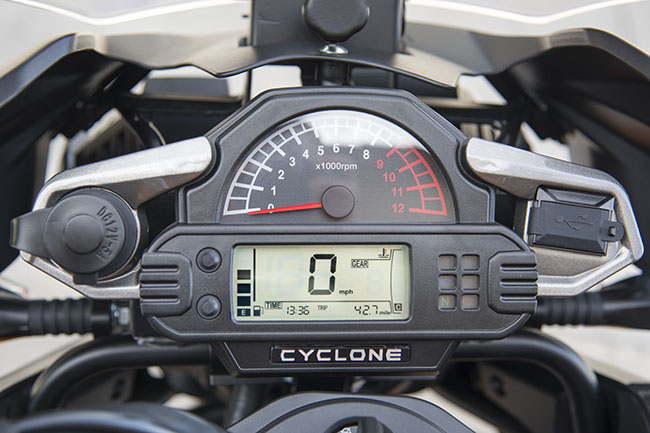
The RX4 instruments, which are identical to the RX3’s (including the 10-12% optimistic speedometers). Note the standard-equipment USB and 12V accessory outlets to the left and right of the speedometer. And folks, that wraps it up on the RX3-versus-RX4 comparisons. It was fun, and it was really fun to be the first to evaluate the RX4 and publish these findings on it here on the ExhaustNotes blog. My overall take is that the RX4 is a quality machine. It’s a little heavier than the RX3, but I suppose that’s to be expected on a motorcycle with nearly twice the displacement of the RX3. The handling and freeway performance is a substantial notch above the RX3. I don’t believe anyone is offering a comparable, fully-equipped adventure touring package at any price in the 450cc class, and that makes this motorcycle noteworthy (especially in view of the fact that this displacement is so obviously perfect for a serious roadburner). CSC asked me to mention that they are taking deposits now, and here’s the page where you can do that.
If you’d like to read all of the RX3-to-RX4 comparisons, here’s the page to do that. Stay tuned, because we have an RX4-to-KLR comparison coming up soon, and (as mentioned above), we’ll also be publishing a quick ride review of the BMW GS 310. BMW has a significantly different path to market than does CSC, and that difference (to me) is even more interesting than is a comparison between the two motorcycles. We’ll talk about that, too.
Don’t forget to consider signing up for our email updates list. You can do that by entering your email address on the widget at the top right of this page (if you’re on a desktop) or at the bottom of this blog (if you’re using your smartphone to read this blog). We’re having a contest to give a away a free copy of one of our motobooks in December if your name is on our email list. And we won’t share you email address with anyone else.
Yesterday was a fun day. I was at Brown BMW in the morning for my GS 310 ride, and I got to chat with Bob Brown a bit while I was there. Then it was over to CSC to visit with the guys there. I’m happy to report that both places were hopping. This morning, I’m off to the rifle range to evaluate a few new loads, and tomorrow, it’s the International Motorcycle Show in Long Beach (watch for the photos here on the ExhaustNotes blog). Good times, folks.
 Back when we were running Briggs and Stratton mini-bikes a few kids had Yamaha Mini Enduro 60cc or Honda Mini Trail 50cc bikes. Both of these bikes were stone reliable and a real leap forward from the hard-tail, flathead, one-speed stationary motored mini-bikes. I had a blue Mini Trail Honda that was indestructible. Riding the Everglades of South Florida the cooling fins would cake with mud and the engine would overheat until it would stop running. Just stop.
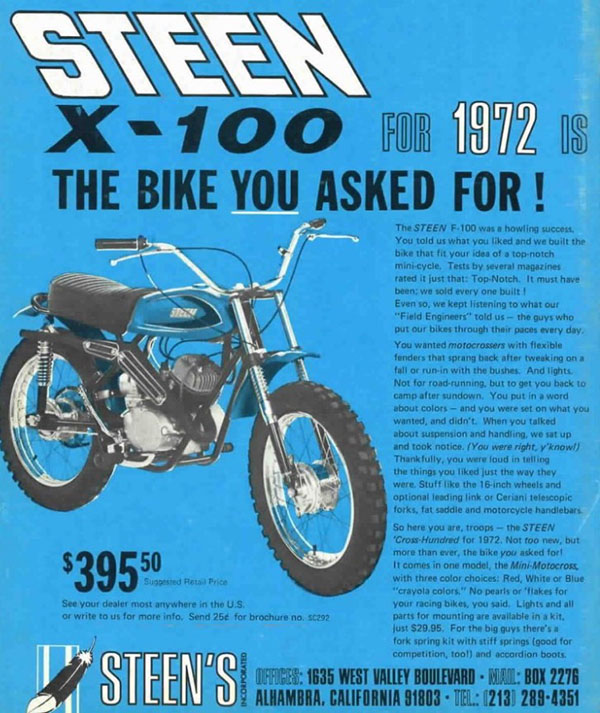
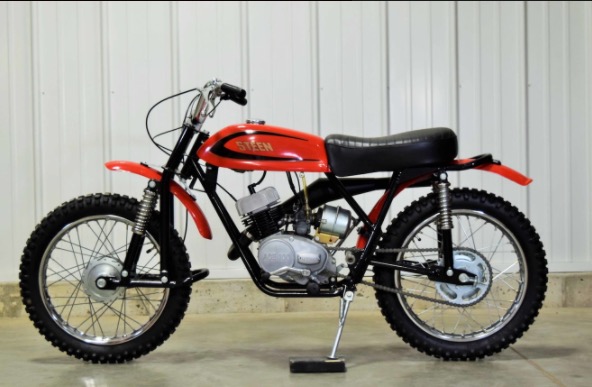 Into these tiny times strode a colossus: The Steen Alsport 100. What a machine! The Steen was equipped with a 100cc Hodaka engine, and the front forks were Earles type utilizing a swingarm and held up by two oil-damped shocks. The gas tank was fiberglass and beautifully shaped. White was the only color I saw but there were other colors. Steens were rare around the neighborhood.
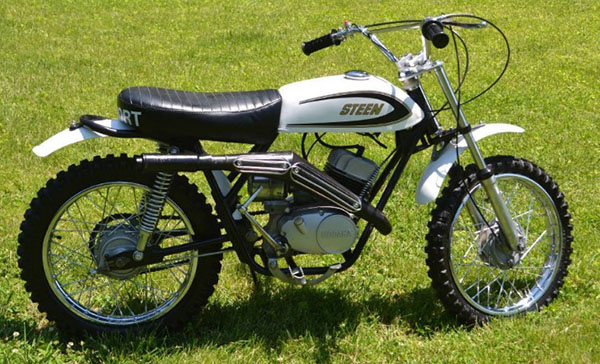 Dealerships more so than motorcycle quality determined motorcycle popularity at the start of the 1970’s. There were no Hodakas to be found. Very few Kawasakis or Suzukis populated our riding areas. Oddly enough a Montesa or Bultaco might ride by. These were huge motorcycles. The Steen didn’t have much of a dealer network In Miami so there was only the one kid who had a Steen in our group. I should remember his name but it has slipped away to that place all memories eventually slip.
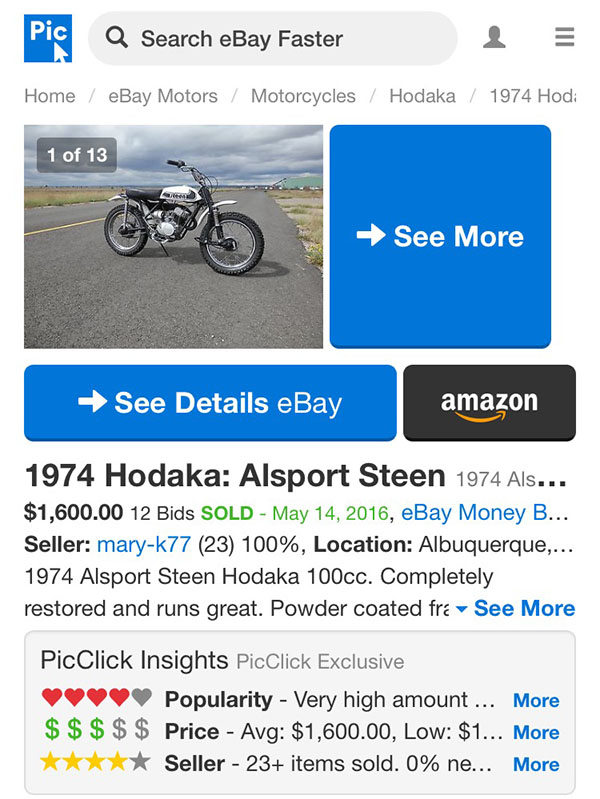

 This is not a restoration. This is a resurrection. I plan to ride Zed, not store it away like a stolen Rembrandt. The front down tubes were pretty chipped and scratched with lots of bare metal so I had to fog a little black paint onto them to slow down the rust. I know all things rust. As soon as ore is melted into steel it begins the long path back to earth. We live in a temporary world; as soon as we stop our struggles and ambitions the things we care about turn into dust. So I painted the Kawasaki’s down tubes.
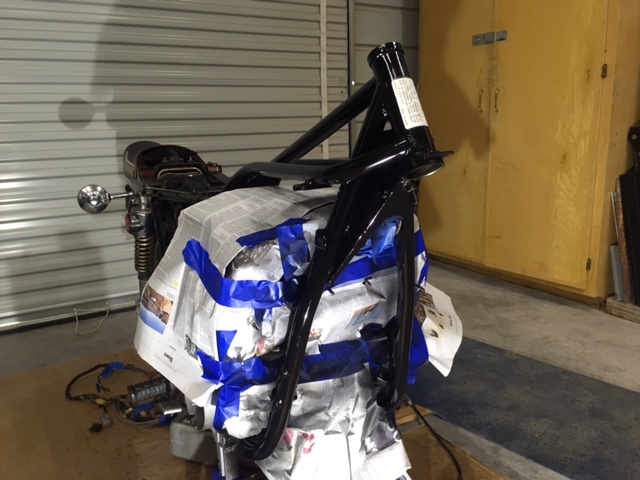 Next on my list were new steering head bearings. I have a Proto puller set that cost around $150 in 1970 and it mostly is still intact. From that kit I used the bearing separator to get behind the lower stem bearing. I clamped the stem in the vise and a few sharp raps later the bearing was off.
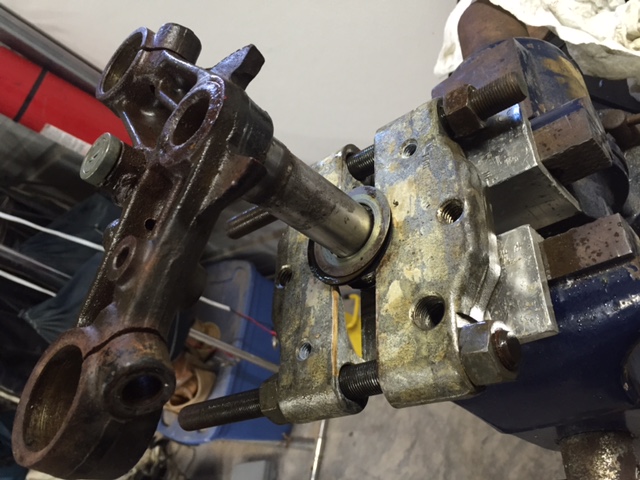
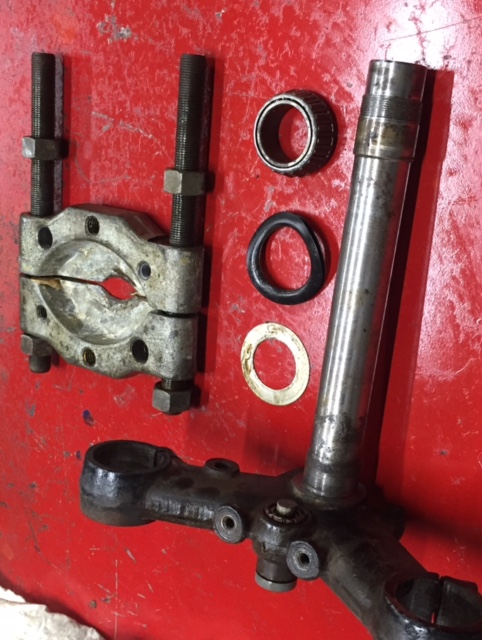 Removing the races pressed into the fork stem is a little harder. There isn’t a whole lot of meat exposed to get a purchase. Some people weld a bead on the race then use that to punch the race out. I’m sure there’s a correct way but I don’t know it so I use two puller claws and force them against each other to wedge the puller tips behind the race. Since you have to hold the claws together with one hand you’ll need a length of old bronze boat shaft to pound on the claws. Most Old Boat Shaft stores carry lengths of bronze shaft. It’s finding the store that’s the hard part.
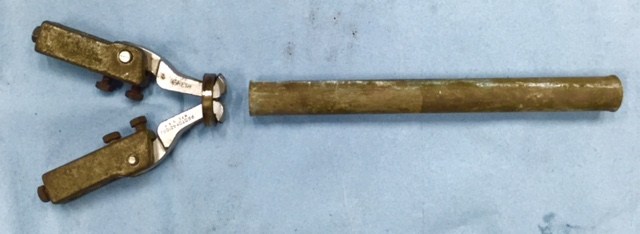 The new races pop in without trouble. I get them started with a dead blow hammer then finish seating them with a punch worked slowly around the circumference of the race. You can hear the hammer-tone change pitch when the race seats against the frame tube.
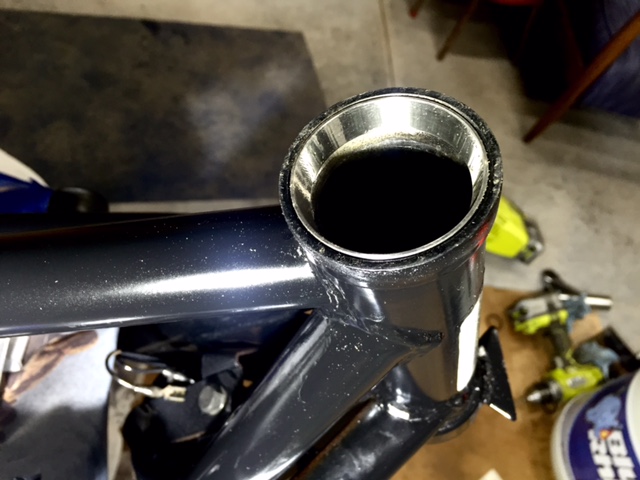 The triple clamps were a mess so I wire brushed them and shot some black paint on the things. I’m always aware that any paint work or cleaning I do destroys the originality of the bike so I try to keep it to a minimum. While the headlight ears were soaking in a vat of Evapo-rust I started assembling the forks.
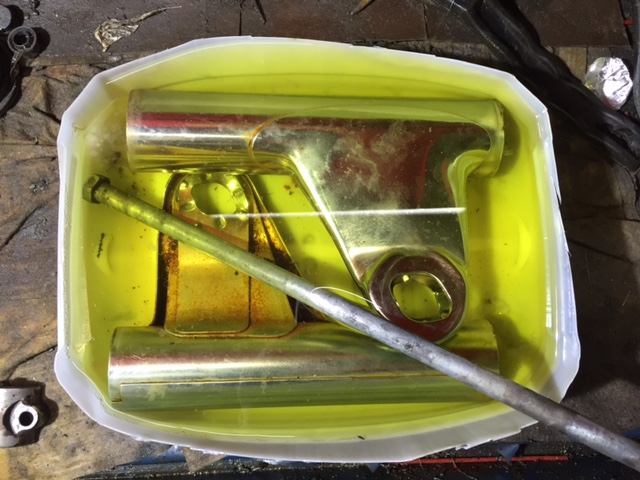 A new throttle/switch assembly from
 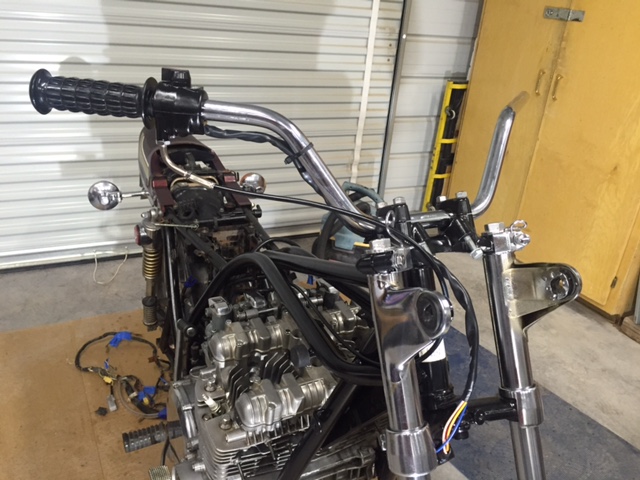 I’m close to $1000 in parts now. I’m replacing some wear items so I don’t think those should count against Zed.
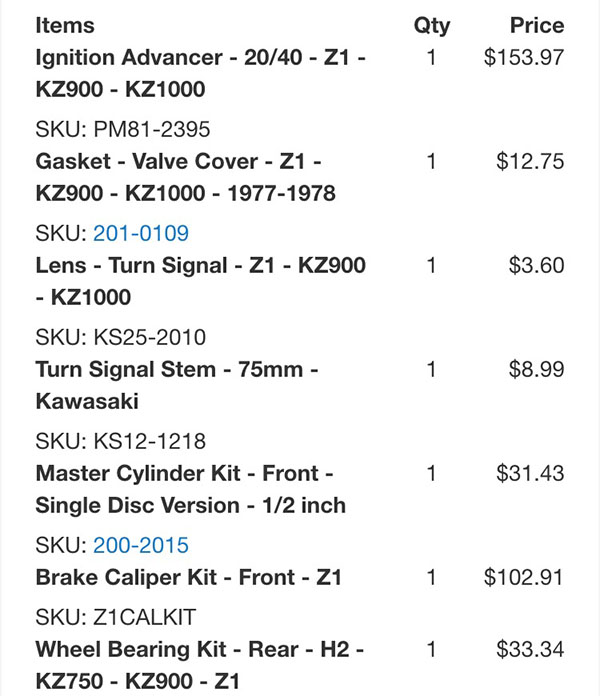


 Kawasaki’s bold new W800 Café looks a lot like a restyled W800 standard but we here at Wild Conjecture have no way of confirming this statement. You see, Wild Conjecture by its very name is nothing but guesses bulked up with opinion into a plausible hunch.
 Kawasaki claims the styling is inspired by Kawasaki’s W1 650, which taken to its logical conclusion would mean the Café was inspired by an ancient 1950’s BSA A7 (later becoming the A10) twin. And that’s not a bad thing. For years the W1 650 held the title of the largest displacement motorcycle built in Japan until the CB750 Honda came sauntering into the room.
 For me, the Café looks good overall but misses the mark in a few key areas. The colors shown on Kawasaki’s web site are dreadful. The faring and side covers are a mismatch for the fenders and gas tank. I know this is done on purpose but a bike like this should have an all alloy tank with chrome fenders. Kudos to Kawasaki for trying something different. Better luck next time.
 The forks, side covers, rear fender and exhaust all look great to me. I like the shaft-driven camshaft and the air-cooling system. Hopefully you’ll be able to buy the thing without anti-lock brakes but I suspect the days of ABS delete are nearly over.
 Progress has slowed on Zed. I really wanted to start the beast up. The problem is I haven’t figured out the ignition advancer issue yet. My E-buddy Skip sent me two of the things but neither one will work on the 1975 Z1 crankshaft end. I feel bad that Skip is trying to do me a favor and that the poor guy has to keep digging around in his parts stash. It goes to show you: no good deed goes unpunished. I am going to suck it up and buy a new, $159 advancer from
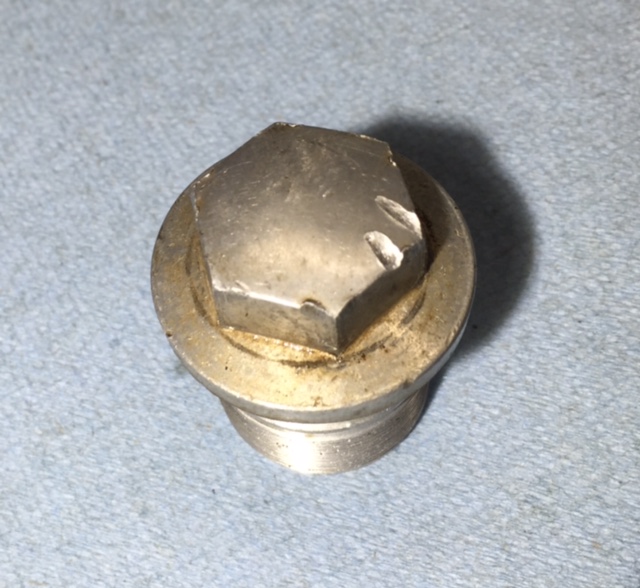
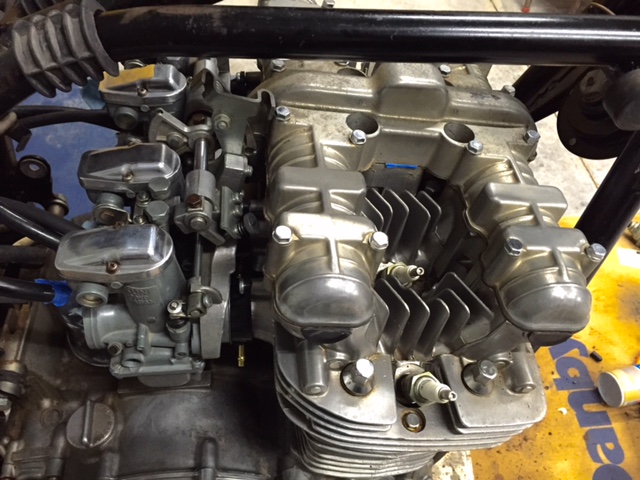
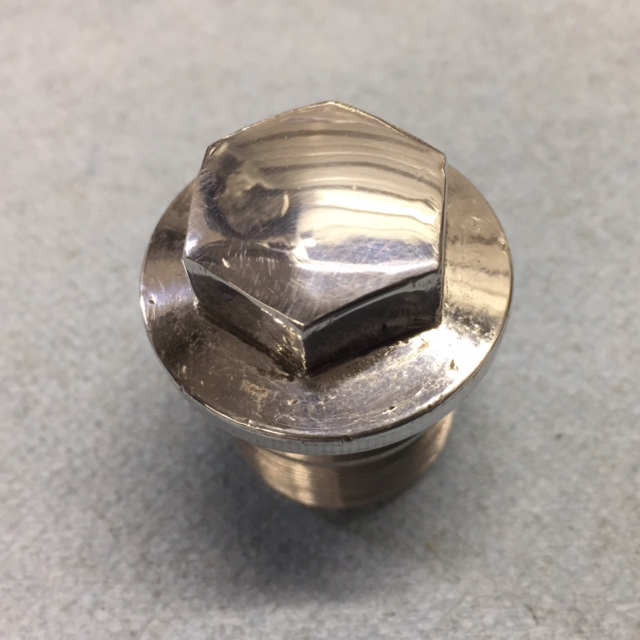 Meanwhile, I’m not ignoring the rest of the bike. Let’s face it, even if the engine is shot I have to get this bike running. The front forks were leaking and contained about 3 ounces of oil between both fork legs. This is down a bit from the 5.7 ounces per leg suggested in my shop manual. I know I said this was not going to be a show bike restoration but I couldn’t bear a future staring at this gouged fork cap bolt so I sanded the thing smooth and gave it a lick of polish. Of course this means that I have to do the other side also.
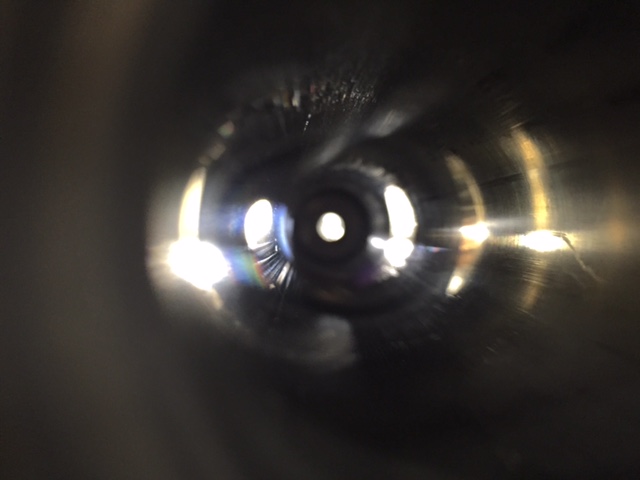 The internals of the forks were covered in sticky black goo, which required a ton of solvent and liberal doses of carb cleaner to cut loose. Then came rags stuffed down the tubes and pushed back and forth using a drill bit extension. The sliders came polished from the factory and since they were preserved under a coat of oil it took no time at all to spiff them up without crossing over to the dreaded Show Bike threshold.
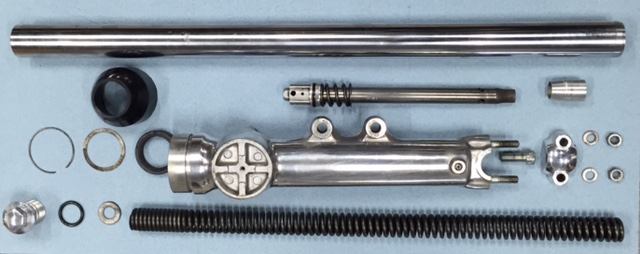 All the fork parts look usable if not perfect. The upper section of the fork tubes that were covered by the headlight brackets is pretty rusty. I’ve polished it off a bit and will lube the rusty areas to prevent further rust. None of the rust will show on the assembled forks but I’ll have to deduct points when the bike is in the Pebble Beach show.
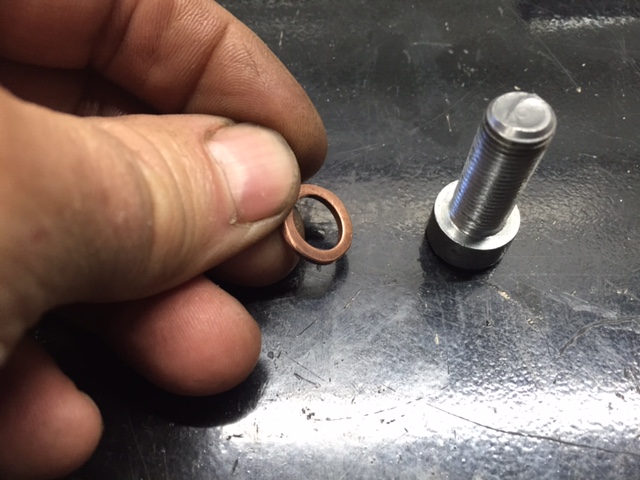 The fork sliders are held to the damping rod via this Allen-head bolt. There was a fiber washer to seal in the fork oil but I don’t have any fiber washers. I ended up grinding a copper washer to fit and I only have one of those. Looks like a trip to Harbor Freight is in order to buy their 5090 Copper Washer Warehouse kit.
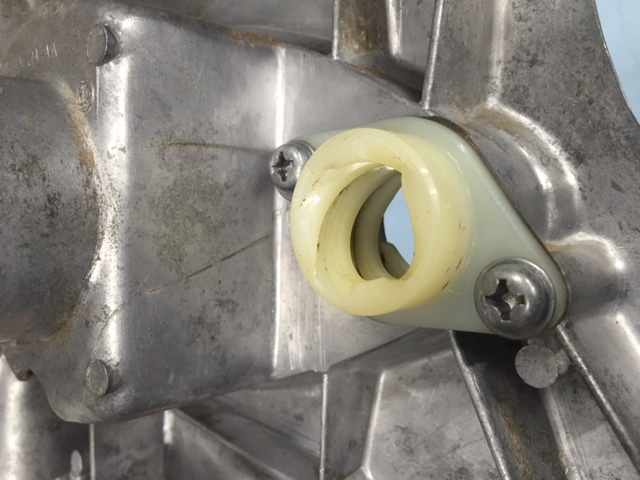 The clutch actuator was in good shape but dirty and dry. Most of the ones I bought for my old Yamaha had the helix cracked. I suffered along with the cracked helix until Hunter found a new, re-pop part and sent it to me, asking if he could have some of the ones I’d stolen from him in exchange. I have no idea what the old man is on about. This Kawasaki part is much sturdier than the Yamaha part and crack free so that’s one point to Kawasaki in the red-hot clutch actuator wars.
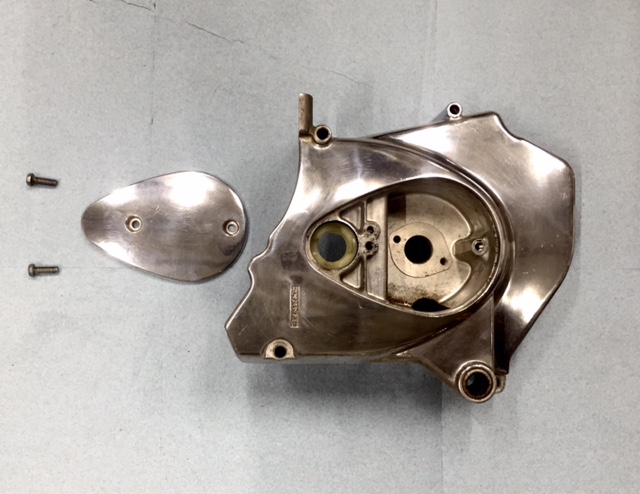 I’m placing another big order with