A .30-40 Krag Ruger No. 3

I am a fan of both the No. 1 and the No. 3 Ruger single shot rifles.  The No.  1 is the more elegant rifle with a fancier lever, a pistol grip stock, checkering, a rubber shoulder pad, a slick quarter rib, fancier walnut, and more.  The No.3 was the economy version without checkering, plain walnut, an aluminum (and later plastic) shoulder pad, and a no frills look.   When I started collecting these rifles in 1976, the No. 1 was chambered in contemporary cartridges and priced at $265.  The No. 3 came in classic chamberings; in 1976 that included .22 Hornet, .30-40 Krag, and .45-70.  Ruger listed the No. 3 at $165, and you could buy them all day long for $139.  Which I did.  In 1976, I bought No. 3 rifles in all three chamberings.  All had the “Made in the 200th Year of American Liberty” inscription.

Take a look at the finish on this Ruger No. 3. It’s better than how they came from the factory.

I was younger and dumber in those days, and I stupidly sold all three rifles within a year of purchasing them.  The Hornet went to Army buddy Jim, the .45-70 went to another Army buddy also named Jim, and the .30-40 was traded for something else I can’t remember.  If you’re reading this blog, you realize the phrase “stupidly sold” is redundant.  We have all sold guns we wish we kept.

Ruger has to have one of the best fonts ever for chambering designation.

I wanted to undo the wrong I did, and about 15 years ago I started a search to replace my No. 3 rifles.  The .45-70 was the easiest to find and the .22 Hornet followed shortly thereafter.   The prices had gone up (used, they were going for about $650-$700 back then).  The .30-40 Krag was tougher to find.  I’m assuming it was because Ruger made fewer of them.  Then I spotted something I had to have:  An unfired .30-40 No. 3 advertised on Gunbroker, and it had significantly nicer wood then No. 3 rifles typically have.  I had to own it and I paid top dollar.  When I called the shop, I used my American Express card instead of a certified check because I was eager to get it.  I had to pay a 4% premium, but that turned out to be a good thing (more on that in a second).

Unusually highly-figured walnut on a No. 3 Ruger.

The shop that sold it to me did something stupid.  They shipped the rifle in the original box with no additional padding and they didn’t insure it.  You could get away with shipping a No. 1 Ruger in the original box, as they were stout and contained big pieces of foam padding.  The No. 3 had a flimsy cardboard box in keeping with the No. 3’s lower price.  You can guess where this story is going.

A view of the No. 3’s port side at the West End Gun Club.

Yep, the rifle arrived with the stock broken at the wrist.  Wow.  The wood was as beautiful as it looked in the Gurnbroker.com ad, but it was busted.  I had a brand new, unfired 200th year No. 3 in .30-40 Krag with nice wood and its collector value was ruined.  Like the box, I was crushed.

I called the shop owner, who turned out to be a real prick.  “It’s your problem, and it’s between you and the US Post Office,” he told me.  “You didn’t tell me to insure it, so I didn’t.  Once it leaves here, it’s yours.”  I told him I was going to have the stock repaired and I offered to split the cost with him, but he kept repeating his mantra:  Once it leaves here, it’s yours.


Keep us publishing:  Please click on the popup ads!

I told this sad story the next day during our usual geezer gathering at Brown’s BMW in Pomona, and good buddy Dave asked if the gun shop had asked me about insurance.  “Nope, he never asked and I didn’t mention having it insured.  I guess I just assumed it would be.”  Dave explained that I was right to make that assumption, so I called the shop owner again, I explained to him I had learned about insurance responsibilities, and I again offered to split the repair cost.  He said no again.

Then I remembered I had used my credit card.  I called American Express, I explained the situation, and I told them it would cost about $275 to have the stock repaired and refinished.  Not a problem, the guy on the other end of the line said, and just like that, he took $275 off the charge and said that the shop owner had 30 days to appeal.  He didn’t, and that was that.

I sent the rifle off and when it came back I was both pleased and disappointed.  I had asked the place I use for such work to match the original Ruger finish, but they did not.  Instead, it was a much deeper and more glorious oil finish.  It was nicer than the original finish, but it wasn’t original.  That was good news and bad news.  I had planned to keep the gun in its unfired condition, but now that it was busted, repaired, and refinished, it would be a shooter (that was the good news).

You can just barely see where the crack was in the stock wrist, but that’s because I used flash for this photo. In normal light, you really can’t see it.

I didn’t shoot the No. 3 immediately.  This all happened 15 years ago before I retired and before COVID hit.   I recently decided I needed to shoot the .30-40, so I ordered unprimed brass and Lee’s Ultimate four die set.  Both were initially unavailable, but they came in and I was in business.  I already had large rifle primers, a stash of what has to be one of the best powders ever for cast bullets (SR 4759), and a bunch of 173-grain gas checked bullets.

.30-40 Krag ammo in new brass, loaded by yours truly.
Ready for the range.

I seated the cast bullets to the crimping groove and used the Lee factory crimp die, and the cartridges looked great.  I tried a number of different SR 4759 powder charge levels in the Lyman cast bullet manual.  When I fired on the 50-yard line at the West End Gun Club using the rifle’s open sights, I found that 20.0 grains of SR 4759 is my accuracy load.

I held at 6:00, and the rounds shot very close to point of aim at 50 yards. The target was mounted on its side, as you see it here.
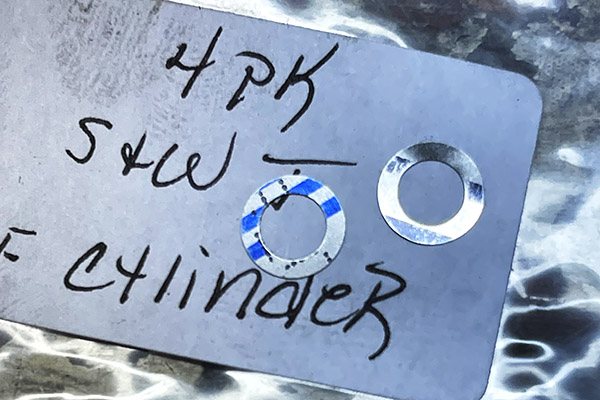
Very modest bore leading in the No. 3. That SR 4759 load with the 173-grain bullet is accurate even with the Ruger’s factory iron sights.

The .30-40 Krag is an interesting cartridge.  It was the US Army’s standard chambering after they phased out the .45-70 Springfield.  The new rifle was the 1892 Krag-Jorgensen rifle made at the Springfield Arsenal.  It was the first military cartridge designed for smokeless (as opposed to black) powder, and it originally fired a 230-grain jacketed bullet.  The .30-40 is a rimmed cartridge that looks a lot like the 7.62x54R Russian cartridge (which came out just one year earlier).  The ballistics of both are fairly close to the .308 Winchester (which is the 7.62 NATO round we currently use).

.45-70, .30-40  Krag, 7.62x54R Russian, .308 Winchester (7.62 NATO), .30 06, and .300 Weatherby cartridges.  The .300 Weatherby is the fiercest recoiling cartridge in the group when loaded with jacketed bullets at factory velocities (the cartridge shown here is loaded with a cast bullet).  With the exception of the .300 Weatherby, Gatling guns have been chambered in each of these cartridges.  Modern mini-guns are electrically-powered Gatlings chambered in 7.62 NATO (.308 Winchester).

After our experiences in the Spanish-American War, our government load plant created and issued a hotter version of the .30-40 Krag in an attempt to match the speed and ballistics of the Spanish 7mm Mauser round, but the Krag rifles started cracking bolts.  All the .30-40 Krag ammo was recalled and reconfigured with the original, lower pressure load.  The .30-40 Krag was also used in the Gatling gun.  You can read about that here:

The .30-40 Krag only lasted about a decade in US government service.  It was replaced with the .30-03 in 1903 (which was soon replaced with the .30-06, which became one of the most popular hunting cartridges ever).  The history of this fine old cartridge is interesting; shooting it with cast bullets in a sleek Ruger No. 3 is good old fun.  I might never have known that if the stock had not broken.


Never miss an ExNotes blog…sign up here for free!


More ExNotes gun stories are here!

The Enfield Baja Adventure

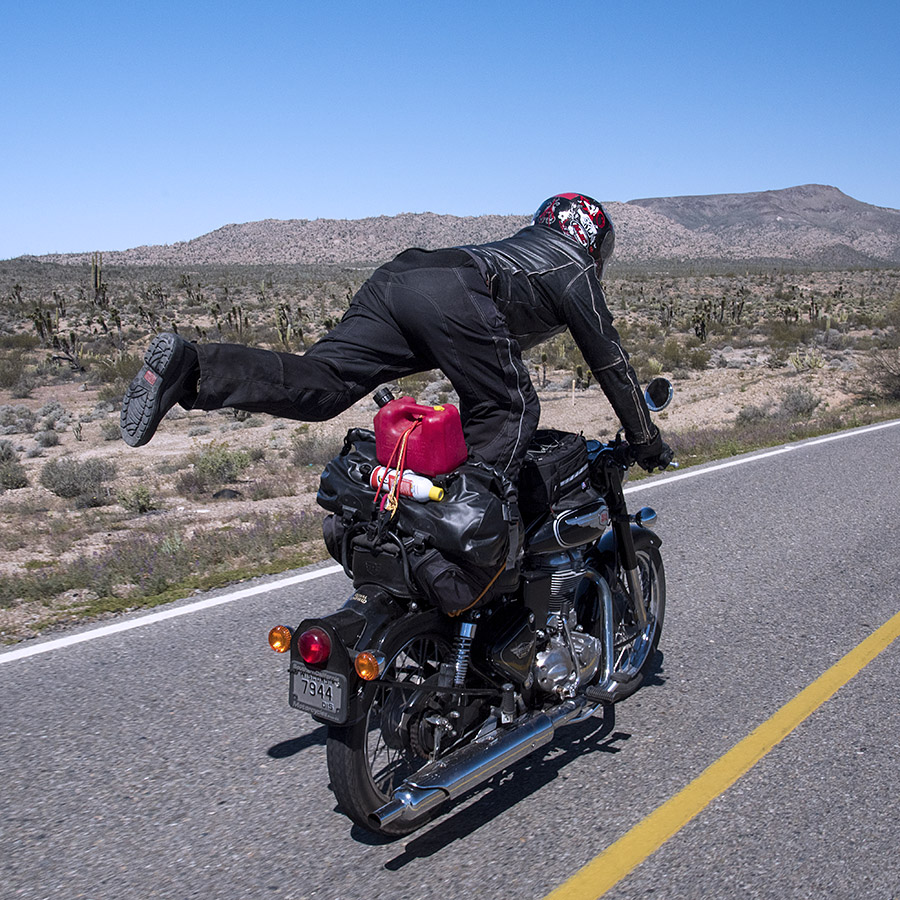
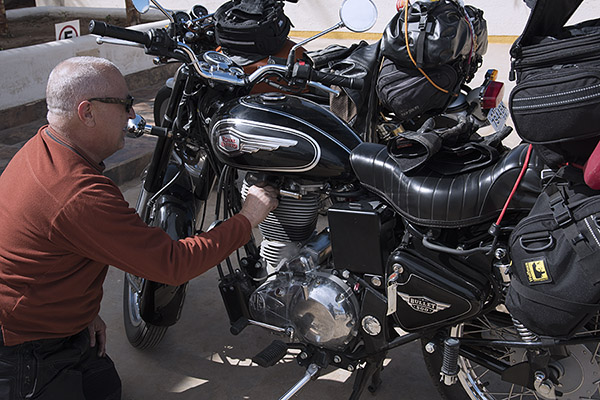
Shortly before the pandemic began, Uncle Joe and yours truly borrowed two Royal Enfields from Royal Enfield North America and toured Baja.  One was the new 650 Interceptor, and I liked it so much I bought one when I came home.  The other was a 500cc Bullet, and, well, you might want to read the blogs to understand how we felt about it.  Truth be told, the Bullet was probably better than we perceived it to be (that was because the dealer did a half-assed job prepping it for us).  Nah, that’s not fair (it implies the dealer did half of what he should have).  But there’s no expression for 10%-assed, and even that might be giving the dealer too much credit.  But I don’t want to spoil the story for you.  You can get to the Enfield adventures here.

Never miss an ExNotes blog…subscribe here for free!

The Corning Glass Museum

On my most recent content safari we visited New York, New Jersey, and Pennsylvania.  That’s why you’ve seen blogs for Niagara Falls and Steamtown National Historic Site.  We had a Chevy Blazer in fire engine red, and it was comfortable and fuel efficient.

We rolled into Corning, New York, a company town if ever there was one.  Corning’s population is a scant 10,696 people, and many of them work for the Corning company.  The roads in upstate, rural New York were beautiful, and we were there while the leaves were changing color.  Our destination was the Corning Museum of Glass.  Corning is home to the Corning corporation.  I knew it would have photo ops, especially after our visit to the Chihuly Garden and Glass exhibit in Seattle a couple of years ago.  Take a look:

I wanted Italian food for dinner that evening and in a quick online search we found what promised to be a good spot.  When we arrived the Italian place was closed.  So we went with a less high-tech, old-fashioned approach for selecting where to eat.  We walked around downtown Corning and looked for a place that was crowded.

Mooney’s answered the mail.  It’s a bar that also serves food.  The menu mentioned a Reuben (I love Reuben sandwiches), but the waiter explained that their Reuben was different.  Mooney’s specialty is macaroni and cheese, and they had a Reuben-based mac and cheese dish.  He suggested the appetizer portion, and that worked.

My dinner was huge, and even with help from my wife and sister, we only could take in about half of it.  It was a high end, gourmet mac and cheese (who knew such a thing even existed?) with bits of pastrami mixed in and toasted rye cubes on top.  Wow, it was delicious!

Never miss an ExNotes blog:  Sign up here for free!

Rifle Primers in Revolver Ammo

With reloading components still hard to find, the question emerges:  Can you use rifle primers in handgun cartridges?   If you’re flush with rifle primers but hurting for pistol primers (as I am), it’s a logical question.  To evaluate this, loaded a box of .357 Magnum ammo for my Colt Python.  I tried to different loads of Bullseye (not an ideal .357 Magnum propellant, but it’s what I had available) and Winchester small rifle primers.

I thought I would simultaneously test for accuracy and reliability on Alco 4-silhouette targets at 25 yards, firing single action at the top two targets and double action on the bottom two targets.  The first load was 3.2 grains of Bullseye, a 158 grain cast flatpoint bullet, and Winchester small rifle primers.

Accuracy was mediocre (if you’re ever assaulted by four little men with orange bullseyes painted on their chest, you’d be good enough for government work, but you won’t be taking home any accuracy trophies).  The upper two little orange guys were fired single action, and every round discharged.  The bottom two little orange guys were fired double action, and on those two targets, I had two misfires.   That’s two misfires in 10 rounds, and that’s not good.  When I fired the two misfired rounds a second time, they discharged normally.

The next target was a repeat of the first, except the ammo I shot at it had 4.0 grains of Bullseye.   Everything else was the same.  The top two targets were fired single action and the bottom two were fired double action.  All rounds fired normally.

You can ignore the shots below the bottom two targets.  I was just shooting up some ammo I had left loaded with different combos.  The lower left group on the zombie’s green hand were .38 Special 148 grain wadcutter loads (with 2.7 grains of Bullseye); the ones between the two targets were .38 Special loads with the 158 grain flat point bullets and 4.5 grains of Bullseye (a very hot .38 Special load).

The propellant’s name notwithstanding, none of the above were not particularly accurate loads.

As to the primary question:  Will rifle primers work in handgun cartridges, my take on this is yes, if fired single action.  In double action, ignition is unreliable.  On handguns with heavy hammers, you’re probably okay if firing single action.   That’s true on the Colt Python, and it’s definitely true on single action Ruger Blackhawks (I have a .30 Carbine Ruger Blackhawk and I always load .30 Carbine ammo with rifle primers).

I suppose it’s possible that the two rounds that misfired double action in the Python may have been suffering from primers that were not completely seated, but I don’t see a need to continue testing.  I learned enough from this quick look.


More Tales of the Gun!

Bangkok’s Soi Cowboy

I miss a lot of things about our pre-COVID days, and one is the foreign travel.  I love heading to exotic cities all over the world, and one at the top of my list is Bangkok.  I’ve been there a few times on assorted secret missions.  These photos are from a blog I wrote for CSC Motorcycles a few years ago, and I thought I would share them here.
Soi Cowboy (“soi” sort of means street) is a famous Bangkok road that played a role in the movie Hangover II and another movie named, well, Soi Cowboy (a movie I haven’t seen, although I’ll look for it).   It’s sort of an entertainment district with a lot of clubs.  There were a lot of photo ops centered on two of my interests – food and two-wheeled transportation.  With that as an intro, here we go.

These guys in orange vests are motorcycle taxi dudes. They carve paths through traffic as if it wasn’t there. It’s an amazing thing to see.
One of the many food carts and clubs on Soi Cowboy.
Another food cart. I had my Nikon D3300 (a relatively small but incredibly capable DSLR) on its “auto ISO” setting, which basically means it runs the ISO up as high as it thinks it needs to be to get a good shot. Some of these photos were at ISO 12,800.
Scooters and small-displacement motorcycles dominate Bangkok.  Here are a few scooters lined up on Soi Cowboy.
More Thai street food.
A look down Asoke (that’s the street name) from a pedestrian overpass.  Soi Cowboy is just off of Asoke.
The Bangkok grand prix.
Good buddy Kevin and friend. Rain? Not a problem!
A Thai SUV.
A Thai taxi scooter in action. Scenes like this are common throughout Bangkok.

One more thing, and that’s a video I shot just off Soi Cowboy showing the scooter action in vibrant downtown Bangkok.  It sure was fun.


Never miss an ExNotes blog…subscribe here for free!


More travel stories?  They’re right here!

Hasty Conclusions: First Look At The Harbor Freight Tire Changer

I usually change my own motorcycle tires. I’ve been doing it since I was a small child and the job has never been all that easy. In fact, I dread changing tires but there is no other way. The thought of taking a motorcycle in for new tires was as alien and hoity-toity to me as having a live-in maid. The Husqvarna changed all that. The Husky’s wide, 17-inch rims combined with even wider tires really stymied me. I would pinch the tube nearly every time I put a tire on that bike.

One time after pinching the tube four times trying to get the last bit of bead over the rim I stuck the only tube I had in the 150/60-17 back wheel: a 21-inch dirt bike tube. That tube lasted for the duration of the tread life and when it came time for a new tire I folded my cards. I took the rim to our local independent motorcycle shop, Holiday Cycles.

Holiday Cycles charged me $25 to install whichever tire I supplied. Size did not matter. I didn’t need to buy the tire from them, as they don’t stock sizes to fit the Husky. What a relief to drop the new tire and wheel off at Holiday and pick it up a few hours later shiny and new. And there were no holes: the tire held air. This was a wonderful relationship. Holiday gradually raised the price of a tire change to $40 but it was still worth it to me. Avoiding hours of struggle only to have the tire leak was not the sort of thing I wanted to go back to.

Unfortunately, Holiday Cycles closed up recently and I’ve been lucky not to need a new tire on the Husky. There is a Yamaha and a Kawasaki dealer in town that change tires. I’ve never used them; I kind of liked Holiday Cycles.

My buddy Mike from the Carrizozo Mud Chucker’s bought a Harbor Freight motorcycle tire changer and said it was okay. Better than a 5-gallon bucket, I think were his words. Naturally anything Mike gets I have to copy.

Harbor Freight spammed my Facebook page with the motorcycle tire adaptor part for $32. This seemed like a good deal. My first thought was to just get the adaptor and make my own base. When I got to Harbor Freight I saw the base was only $44 and it was made for changing car tires. I looked at the bright red, powder-coated base and thought, no way can I make a base this nice for only $44. I bought the car-tire changer base. I was all in for $76, a little less than two tire changes at the old bike shop. You get a lot of steel for your money with Harbor Freight and I loaded up the weighty boxes of metal and drove home.

Like most of Harbor Freight’s shop equipment, you have to modify the things to make them work a little better or at all. One of the first things I did was take the motorcycle adaptor to Roy’s Welding to weld the three legs of the adaptor to the adaptor hub. The factory setup is a couple bolts on each leg. This does not work well as the bolts are squeezing on square tubing. No matter how tight you torque the bolts, right down to crushing the square tubing, the arms won’t stay flat and move up and down easily.

The whole purpose of the motorcycle adaptor is to secure the rim so that you can work on the beads without the whole assembly skidding across the shed floor. You don’t want the three legs flopping around. Roy had a hard time welding the legs because the powder coating was very thick. “Man, they put a ton on there.” I thanked Roy, paid my $15 and the welded legs are very secure now.

The way the motorcycle adaptor works is two of the legs have adjustable, pinned rim-grabbers. You adjust those to suit your rim size. The third leg has a screw-driven rim-grabber that tightens onto the rim like a vise. Initially I thought the grabbers worked from the inside out. Turns out they grab the outside of the rim.

Since the grabbers are flat-faced when you tighten them onto the rim it doesn’t hold well: the tire slips upward and out of the adaptor. Mike simply heated the grabber tips and bent them inward so that the rim can’t slip out. My other brother, Deet, who also has a Harbor Freight tire machine, made some nice, plastic rim protectors to grip the rim. I copied Deet’s system. We will see if it works or just snaps off the first time I use the motorcycle adaptor.

I had an old bead breaker but the Harbor Freight tire machine comes with a pretty good bead breaker built right into the base. You use the (included) long tire iron as a lever. The base unit for car tires looks like it should work well. I might try changing a few MGB-GT tires on the thing. I think it needs a sturdier center cone to hold automobile rims but maybe not.

Bolting the base unit to the concrete floor was fairly easy. A hammer drill does the job faster than a plain old rotary drill. I used 5/8” expansion studs on three of the base legs and a 3/8” expansion stud on the bead-breaker leg to keep the bolt size down in that area. I also added a few angle pieces to join the three base feet together. Harbor Freight should have welded the foot pieces but that would make the package larger. Shipping stuff from China isn’t cheap.

Adding it up, I have about $100 in the Harbor Freight tire machine with the motorcycle adaptor, anchor bolts and plastic. I had to clean out a section of the shed to make room for it but it looks the business sitting there doing nothing. The long tire iron that came with the base is sort of fat for motorcycle tires so I may look around or make something different, maybe something with plastic tips to keep from scratching chrome wheels. I’ll do an update when I get around to using the thing. I figure with the money I’ll save using the Harbor Freight motorcycle tire changer I can start interviewing for that live-in maid.


Help us continue to bring new stories to you:  Please click on the popup ads!

Whoa!  A free subscription to ExhaustNotes!  You bet!


More Joe Gresh?  You bet!


More ExNotes product reviews?  Absolutely!

Bringing a 405 Ruger No. 1 Back To Life

Good buddy and fellow Inland Empire shooter Jose recently posted on Facebook about what has to be one of the best deals ever for a highly collectible Ruger No. 1 in .405 Winchester.  Ruger produced only a small number of these rifles (I’ve only seen one in person at a gun show a few years ago).  This one has exceptional walnut, which makes it even more desirable.

Here’s Jose’s story.  Enjoy, my friends.


I’ve never had any desire to hunt African game and I probably never will. But I’ve enjoyed reading about the African plains rifles since I was a kid in junior high school. Bringing a copy of Guns & Ammo magazine to school would probably get you a quick trip to the principal’s office these days…but I digress.

Exquisite walnut is often found on the older Ruger No. 1 rifles.

Quite a few years ago I saw an old Ruger No.1 Tropical in the consignment rack of a small gun shop that is now long gone. The owner said, “just pick it up and feel the heft.”  And of course, I did and the next thing you know we were talking price, knowing I would never pay $2,000 for a collectible Ruger No. 1.  Shaun confided in me that the rifle’s owner couldn’t find the obsolete 405 ammo for it anywhere and he wasn’t a handloader, so he wanted to sell the rifle. Another problem with the rifle was that a previous owner had cut down the front sight, probably because he had been shooting handloads with .41 caliber pistol bullets. So we settled on $500 and I became the owner of my first “unobtainable” Ruger No. 1!

In the gun shop years ago eyeing the Ruger No. 1. Salesman Shaun said, “hand me your phone and let me take a photo of you so you can see how good you look with that rifle!”  Shaun passed away a couple of years ago, but I know he smiled down from Heaven yesterday as I fired the Ruger No. 1H Tropical for the first time. And he was right, this gun was meant for me!

It took me a lot of searching over the past few years, but I finally located a set of 405 Win reloading dies, the shell holder, and all the components to bring this rifle back to life.

Hornady had made a run of new 405 Winchester brass and I was lucky enough to find a New Old Stock box of 50 shells. I also located some new Barnes .412, 300 grain TSX bullets.

The first step in restoring the old 1H Tropical was to contact Ruger and purchase a new gold bead front sight. That was a simple install as the blade is held in place by a small detent spring.

New Ruger NOS gold bead front sight blade installed.

Not wanting to use the expensive Barnes TSX bullets quite yet, lead bullets were cast from lead wheel weights with a bit of tin added using a Lyman 412263 plain base mold to cast 288 grain bullets. These were sized to 0.413 inch and lubed with Alox. Lyman has since discontinued this fine old bullet mold.

A Lyman 412263 bullet, lubed and sized.

Finally, yesterday morning I decided it was time to resurrect this old rifle! Besides, the project would give me the opportunity to test some old “salvage” Hodgdon 4198 powder I’ve had sitting on the shelf for nearly two decades. The powder is probably from the 1950s or early 1960s. I also had some ancient CCI 200 large rifle primers on hand.

Hodgdon “salvage” 4198 smokeless powder. The powder is probably WW II US Military surplus powder that Hogdon bought in bulk and repackaged in the late 1950s or early 1960s.
Vintage components for a vintage cartridge.

I loaded 20 rounds of 405 Winchester ammo using the cast lead bullets and a starting load of 38.5 grains of 4198 and headed down the hill with good friend Yvon to an informal shooting range on BLM land.

The obsolete 405 Winchester cartridge (left) and the popular 45-70 Government cartridge (right) used by 1880s plains buffalo hunters of the American west. I don’t shoot buffalo and never will. But I enjoy reviving and firing old guns!

Let me say that this Ruger No. 1H Tropical in 405 Winchester lives again. It shoots incredibly tight groups with the cast bullets and gold bead open sights.

My next project will be to develop a non-lead hunting load using the 300 grain Barnes TSX bullets.

Bringing life back into old obsolete rifles can be tons of fun.


That’s an awesome story, Jose, and thanks for allowing us to share it here on the ExNotes blog.  Your No. 1 has to be one of the best deals ever.   The dealer’s original asking price is probably what that rifle is worth if you could find one for sale.  Well done, my friend.


More Tales of the Gun!

Retail Therapy, Or How I Learned To Stop Worrying And Lower The Boom

Here at ExhaustNotes we like to support local businesses. Without local stores and a healthy business environment a town dries up and becomes a collection of houses. Interaction between the town populace slows to a crawl and sad as it is, the only action will be found at Walmart or the Chevron station out by the highway. That’s no way to live.

In the USA we operate on the capitalist economic system. This means I do your laundry and you do my laundry, we keep handing the same money back and forth. The cyclical movement, or pumping action, of these few, tattered dollars are where the magic happens. Capitalism relies on all of us constantly spending and gathering dollars: the trick is to keep that money supply moving. If no one buys anything no one earns anything and the whole system crashes.

When we buy stuff online that money goes out of our local economy to some far-fetched location. In other words, they do our laundry but take their laundry to another town or state. Maybe they don’t even get their laundry done. Maybe they invest in block-chain cyber securities and sit on it.

If the system is functioning correctly you will eventually do the laundry of someone who did the laundry for someone else three states over who did the laundry for someone else. Except when the system gets so large and ruthlessly efficient your town becomes unable to do laundry at the massive scale required to match the price of the other, Mega-Laundry-Towns.

The local pool of cash begins to flow in one direction: out of here. Your neighbors no longer want you to do their laundry. It’s easier and cheaper to send dirty clothes to an Internet laundry service. The people in your town become bitter, superstitious and convinced the system is rigged against them. Less money circulating means people have to shop for the cheapest place to get laundry done or forego clean clothes altogether, taking money out of circulation even faster.

Look around now: the people are wearing dirty clothes because no one can afford laundry service. There’s nothing to buy and no money to pay for it if you did find something to buy. Since there is no money circulating the pulse of your community grows weaker. Young people see a bleak future with no one to do laundry for and leave. They move elsewhere, anywhere clothing is being washed, leaving the halt and the lame behind.

Neighborhoods become run down due to deferred maintenance. Angry, desperate, hungry and poor, this is the point when you turn to a life of crime. You steal from other poor people, your neighbors, and get caught doing it. After the trial you are sent away to a privatized, for-profit prison because your local prison cannot compete with the private Mega-Prisons. There you are: locked up and forced to do laundry. For free.

So ExhaustNotes likes to shop local. Like the other day when my wife’s lock switch fell out of the driver’s door of her Jeep. It’s a Jeep thing. The plastic bezel that holds the switch has two little tabs that fit behind the door panel and the switch is held in by two metal flat springs. The whole magilla snaps into place and works fine unless the tabs break off. I spent 45 seconds on Amazon and found a replacement selling for $14 with free 2-day shipping. I was about to send the bezel to my cart when I thought about our local Jeep dealer and figured I’d practice what I preach. I like having a Jeep dealer in town and I want him to stay in business.

The Jeep dealer is about 23 miles away and I know I should have called first but I usually have a hard time describing what I want to the parts guy. I drove down the hill to the Jeep dealer and chatted up the parts guy. He found the driver’s side switch bezel on his computer after 15 minutes. “We don’t have it in stock, it’ll take a couple days.” I said, “go ahead and order it for me.” The price was $35. I asked the parts guy if he gave a local discount and he knocked $10 off. I was well-chuffed as they say in England.

A few days later the Jeep dealer called and said the part had arrived. I drove back down the hill and picked up the bezel. All was well with the world. Sure, I paid $10 more than Amazon but I had supported our local economy: I kept the money in town.

When I tried to install the bezel I noticed that it was the bezel for the passenger door. The little graphic of locked and un-locked would be upside down and the angle was wrong. Darn it. Ah well, mistakes happen. I rigged a few pieces of sheet metal to hold the switch in the door and drove back down to the Jeep dealer. I know I could have called but I figured I’d have a hard time explaining that they ordered the wrong part and it’s easier to deal in person. The parts guy looked the bezel over and apologized. He said he would order the driver’s side bezel for me.

A few days later the Jeep dealer called and said the part was in. I drove back down the hill and picked up the part. It was the correct one and fit perfectly. All in, I drove 184 miles to get a $25 switch bezel that cost $14 on Amazon. I used around 12 gallons of gas. Gas is right around $3 a gallon here so I spent $36 on gasoline. My time doesn’t really count because I enjoy riding around in old Brumby but if you’re counting I spent about 11 hours driving back and forth and talking with the parts guy.

I feel really good that I supported a local business. The money I spent was circulated to the gas stations, the Jeep place and a hamburger stand where I ate lunch on one of the four trips to the dealership. I really spread it around, man. I used my Social Security check to pay for the switch so that’s Uncle Sam’s money injected right into the veins of my town. Buying local is the best way we can work together to save capitalism… and have clean clothes to boot.


Never miss any of our missives…sign up here for free!

Yellowstone National Park

Man, it was cold.  It was the coldest we would be on our 18-day, 5000-mile ride around the western United States.  Yellowstone National Park was our destination and we wanted to arrive early.  Baja John was doing the navigating and the trip planning, and we were leaving early that morning out of Cody, Wyoming, at 5:00 a.m. to beat the tourist traffic in Yellowstone.  I had an electric vest; our Chinese and Colombian guests did not.  I knew they had to be hurting.  I had my vest dialed all the way up and I was.  Did I mention it was cold?

So, about that big photo above:  That’s Yellowstone Falls on the Yellowstone River.  There are something like 10 waterfalls in Yellowstone National Park.  I’ve only seen the one above.  That means I have at least nine reasons to return.

Back to the story.  I did mention it was cold riding into Yellowstone that morning, didn’t I?

Following Baja John into Yellowstone. That trip was 6 years ago, and I still get cold looking at this photo.
Another shot entering Yellowstone National Park from the east.  That’s Baja John in front of me…we were dressed for the cold, but I think our guests found it to be a little colder than the weather they are used to in southern China.

The trip was a wild one…18 days on the road with a dozen guys from China, two from Colombia, and all on free motorcycles provided by Zongshen via CSC Motorcycles.  CSC was the importer, I was the go-between spanning the CSC/Zongshen interface (and two continents), and while we were arranging the initial shipment Zongshen asked if I had any ideas to promote the bikes in the US.  Wow, did I ever!

In Zongshen’s main offices, with key Zongshen execs viewing photos from my rides in the US and Baja. Sue grabbed this photo and it’s one of my favorites. Without realizing it, I was selling those guys on giving us 15 motorcycles to ride around the US.  This looks like a staged photo.  It’s not.

That ride became the Western America Adventure Tour, and it was a hoot.   I mean, think about:  Every angry and ignorant asshole on the Internet was condemning Chinese bikes and here we were, with 15 of the things just arrived in America, setting off on a 5,000 mile ride from So Cal to Sturgis, west across the US to the Pacific Ocean, and then riding the Pacific coast back to So Cal.  On that epic ride we didn’t have a single breakdown and that was giving the Internet trolls meltdowns.  It was a grand adventure.

But I digress.  Back to Yellowstone.  On our ride, we hit every National Park along the way, and Yellowstone was one of the best.   Prior to that ride, I’d never been to Yellowstone and I had always wanted to see it.  And for good reason…it is (in my opinion) the quintessential National Park.  Yellowstone is surreal, with sulfur-laden steams and ponds spewing forth, majestic views, waterfalls, bison, bears, deer, elk, wolves, geysers, and more.   It was a first for me.  I was a Yellowstone green bean.

When we entered Yellowstone, we arrived so early the gates were unmanned and we entered for free.  But it had been a long, cold ride in from Cody and we were nearly out of gas.  My fuel light was blinking as we entered the park and I didn’t know for sure if there would be gas in Yellowstone.  John felt confident there would be, and he was right.   I saw the Sinclair sign up ahead, but before we got there, we had a close encounter of the bison kind.  We were cruising along at about 30 mph, and all of a sudden I noticed this locomotive next to me.  I was too slow to realize what it was until I was alongside, but our chase vehicle driver John (we had two Johns and one Juan on this ride) grabbed this photo…I had passed within 10 feet of this monster!

Just as I went past my big buff buddy above, he  exhaled.   In the frigid Yellowstone air, fog came out of his nostrils.   It was like riding alongside a steam locomotive.

Here’s another cool shot in Yellowstone:  The Continental Divide.  We had crossed it several times on the ride to Yellowstone already, but I think this is the first time I stopped for a photo.

Sometimes the photos almost take themselves.

One of the many attractions in Yellowstone is Old Faithful.   Here’s a shot of the geyser in its full glory.

It was one of those motorcycle rides that was so much fun it made me feel a little guilty.  (That’s a Jewish thing; maybe some of our Catholic readers will understand it, too.)  I felt bad because Sue wasn’t enjoying the trip with me.  So I fixed that.  A few years later Sue and I hopped in the Subie, pointed the car north, and a few days later I rolled into Yellowstone National Park again (this time with my wife).  Naturally, I grabbed a few more photos.

Peering into the valley carved by the Yellowstone River.
Ah, the bison. This was really cool stuff.
Click. Click. Click.
A photo of Sue in the Subie photographing a bison.
Wow.

I’m not a geologist, but geology seems to me to be a pretty interesting subject and there sure are a bunch of geological things in Yellowstone.  Like the bubbling and burbling pits and pools you most definitely do not want to fall into.

You get the idea.  In doing a bit of Internet research on Yellowstone, I came across this Yellowstone map.  It is a good way to get the lay of the land up there in Wyoming, but visiting Yellowstone National Park would be even better.

You can learn a little bit more about Yellowstone as a destination (and how to get there) by reading an article I wrote for Motorcycle Classics magazine.  It’s a cool place and I’ve never met anyone who felt like visiting Yellowstone was anything other than a marvelous experience.  Trust me on this:  Yellowstone National Park belongs on your bucket list.


Never miss an ExhaustNotes blog:


Would you like to read more Motorcycle Classics Destinations articles?  Hey, just click here or better yet, buy your own copy of Destinations.


One more thing…if you’d like to learn more about the RX3 motorcycle and our 5,000-mile Western America Adventure Ride, you should do two things:  Buy yourself a copy of 5000 Miles at 8000 RPM, and watch Joe Gresh’s video:

Baja’s Sierra de San Francisco Cave Paintings

Real Indiana Jones stuff, this is:  Baja’s prehistoric cave paintings, or as they are known in BCS, Pinturas Rupestres en Baja California Sur.  They are in the Sierra de San Francisco mountains in an area north of San Ignacio on the eastern side of the peninsula.

No one knows for certain how old these paintings are or who created them.  Conventional wisdom holds that the prehistoric Comondú people (ancestors of the Cochimí natives first encountered by Spanish explorers in the 1600s) created the paintings perhaps 7500 years ago, but like I said, no one knows for sure.   One of the very few relatively accessible sites is about 520 miles south of Tijuana, but don’t let the miles fool you.  You’ll need a very full day of hard traveling once you’ve crossed the border to reach Guerrero Negro, and it will be a full day from there to get to the cave paintings and return.

The red arrow on the left points to Guererro Negro; the red arrow on the right points to the cave paintings at Cueva del Raton.

There are well over a hundred known prehistoric Baja cave painting sites throughout the peninsula (there may be others yet to be discovered) and with very few exceptions, most involve traveling by mule for a day or two through difficult terrain.  One of those exceptions, though, is the Cueva del Raton site (the subject of this blog).  Getting there makes for a grand adventure, and you can do it in a day if you’re already in San Ignacio to the south or Guerrero Negro to the north.   Our advice is to visit Guerrero Negro and take in the whale watching, have a grand breakfast at Malarrimo’s the next morning, and then head southeast on Mexico Highway 1.  Guerrero Negro is where Mexico Highway 1 turns to cut across the peninsula to the Sea of Cortez.   You’ll head southeast for about an hour.  Keep your eyes open and watch for the Pinturas Rupestres sign pointing to the left.   Trust me on this:  The ride into the mountains is grand.  The road runs straight as an arrow for maybe 15 miles, with the at first distant and magnificent Sierra de San Francisco mountains straight ahead.

The path into the Sierra de Francisco Mountains. Mexico Highway 1 bends southeast to go across the peninsula at Guerrero Negro on Baja’s Pacific Coast. The big lagoon is Scammon’s Lagoon, one of two choice whale watching locations in Baja.

Then the road climbs through a series of desolate, precipitous, and tight switchbacks with stunning views in literally every direction.  I don’t use the word stunning lightly:  The ride into the Sierra de San Francisco Mountains is, all by itself, worth a Baja trip.   I’ve never seen other vehicles out there, unless they were fellow riders in the groups I’ve led to the cave paintings. I’ve seen goat herds tended by shepherds and sheep dogs (don’t tempt those dogs; sheep dogs in general are fiercely protective of their flock and the ones in this region seem particularly aggressive).  You may see other things out there as well.  On one trip, I had a close encounter with a very docile Mexican Red rattlesnake.

This guy (or gal; I wasn’t going to turn it over to check) was very polite. He (or she) was just outside my car door in the early morning hours. He (or she) didn’t rattle, although with those nine buttons I imagine its rattle would have been impressive.
They say few people (or even horses) survive a bite from one of these Mexican Red rattlers. This one’s previous meal might have been a rabbit; you can still see a hair on the right side of its mouth. I shot this photo with a 70×300 Nikkor lens (on a Nikon D810 camera) at 70mm. I was maybe 6 feet away in my Subaru with the window down, and the snake was just outside my door.

The road to the Cueva del Raton site (after you leave Mexico Highway 1) is paved for maybe 15 miles, and then the pavement ends for the next maybe 10 miles.  I would call it a fairly gnarly dirt road, but I’m an old guy and what’s gnarly to me may not be to you.  I wouldn’t attempt to ride it two up on a motorcycle.  I’ve done it in my Subaru with no problem and I’ve done it several times on my 250cc CSC RX3 motorcycle.   Depending on your skill level, you might be able to do it on a street bike.   Common sense is the order of the day:  If you’re on a Gold Wing or an FLH-anything, I would not think any less of you if you took a pass.  I think towing a trailer or driving a large recreational vehicle on this road would be a very bad move.

Twists and turns through the Sierra San Francisco Mountains.
When the pavement ends, this is what is ahead. It gets way rougher as you get into the mountains.
Traveling in style: My Subaru CrossTrek. It was a grand automobile for Baja exploration.
Don’t let this photo phool you. This was the only smooth stretch on the dirt road to the Cueva del Raton site.

You’ll see the sign for the Cueva Del Raton cave paintings on your right, but you can’t just go in.  There’s a locked gate and a set of stairs to get to the cave paintings, and to get in, you’ll need to buy a ticket.  There are two little villages in this area.  One is almost directly opposite the Cueva Del Raton site; the other is another two or three miles along the same dirt road (which dead ends in the little village of San Francisco de la Sierra).   At times I’ve tried to buy tickets in the little village directly across from the cave painting site and they sent me on to San Francisco de la Sierra, and at other times I’ve gone up to San Francisco de la Sierra and they’ve sent me back to the little village near the cave paintings.   The fees are modest and I always use larger Mexican bills and tell the people there to keep the change.  You’ll have to sign in when you purchase your ticket.  The cave paintings are a UNESCO World Heritage site.   Seeing them is a big deal.

If you ride to the end of the road to the little village of San Francisco de la Sierra, there’s a cool little church that is normally left unlocked. It’s a good spot for grabbing photos.

After you have purchased your tickets, one of the guides will meet you at the locked entrance to the Cueva del Raton site.  He will walk down from the village, so you may have to wait a couple of minutes.  Sometimes two guides come along.  They don’t speak English, so they don’t provide much explanation.   But you don’t really need much narration.  The paintings speak for themselves, which is no doubt what the artists who created them thousands of years ago intended.

The Cueva del Raton entrance. I led groups of CSC RX3 riders to this site several times. CSC offered no-charge Baja trips to its riders as part of its marketing approach and it worked. I don’t know why other motorcycle manufacturers don’t do the same.
Our local guides. These fellows didn’t speak English, but they didn’t need to.  The paintings spoke to me.

Once the guide unlocks the gate, it’s a modest climb up about three flights of steps, and there you’ll see the cave paintings (the cave is actually more of an overhang).  The paintings are protected from the rain and the region’s arid climate have protected them well.

Deer, a puma, and a human with a black face. In the more than one hundred known Baja cave painting sites, only four instances of humans with a black face have been found.
Another painting of a puma and a deer. In some cases, the paintings are done over other paintings. The black puma makes me wonder…was it really a cougar, or was it a jaguar? Jaguars have been found as far north as Arizona, even in modern times.
Goats? Or deer?
Another depiction of a person.
A better photo of the figures to the left of the humans.
And another. It was an eerie feeling, seeing these paintings and knowing they were done by a civilization that vanished thousands of years ago.

As I mentioned at the start of this blog, there are more than a hundred known cave painting sites throughout Baja and most are relatively inaccessible.  I’ve been a Baja traveler for more than 30 years, and many of my trips have been on Mexico Highway 1 down through the Cataviña boulder fields.   Several years ago I noticed a new sign for cave paintings just north of Cataviña on a trip with my daughter and three of her college friends.  We had to stop. These paintings were just off the main road and I’m pretty sure they were done by the famous Cochimí artist Sherwin Williams and his sidekick, Dutch Boy.  Don’t be taken in; you want the real deal and that’s the much further south Cueva del Raton.

A Spring Break trip through Baja with my daughter and three of her friends. All of these young ladies have gone on to very successful careers.

Our preference when traveling by car or motorcycle is BajaBound Insurance.  I’ve been using them for years and they are the best.


If you would like to learn more about Baja’s cave paintings, Harry Crosby’s The Cave Paintings of Baja California is a stellar reference with outstanding photos. It’s the best work of its kind on this fascinating topic.


Want more Baja moto adventure?  Check out our collection of stories on several trips in the full color Moto Baja book!


The six best bikes for Baja?  This one always gets the keyboard commandos wound up!


More on Baja, including favored restaurants, hotels, and destinations?  It’s all right here!