Let My Turtles Go

Hey, it’s a guest Baja blog from good buddy and fellow former US Army paratrooper Mike!  Check this out, folks.


As you travel through Baja Mexico and encounter so many beautiful and unique experiences that you just won’t find anywhere else in the world you really begin to appreciate all this area has to offer. This beauty arrives in the form of not only the people and their culture, but the form of raw nature that thrives on this magical peninsula. This rugged and hostile environment at first glance may not seem that inspiring but once you look closer and begin to absorb your surroundings you quickly realize how fragile, yet adaptable this ecosystem is.

This is true from plant life surviving in the driest of deserts to the sea life along the rugged Pacific Coast having to overcome predators and violent ocean conditions. It seems the challenges of nature never cease here. The encounter I am about to share with you highlights these conditions as well as the resiliency of nature in Baja.

Every day from around the 1st of December through the end of February there is a small, greenhouse-looking hut along the beach just north of Todo Santos, where the waves from the Pacific Ocean crash with such a concussion you almost feel nauseous from the vibration off this massive surf relentlessly slamming into the white sand beaches. This remote beach is where you can experience a magical wonder of life, baby sea turtles crawling into this violent ecosystem as their first test in their new world.

The turtles hatch in the early evening and four or five are placed into plastic buckets to await their release just after sunset. Timing is critical here as any earlier predatory birds are still out and will likely swoop in to gobble them up.

Once the sun begins to set it is time to set these little creatures free. We each take a bucket and walk about 20 feet away from where the surf is crashing and tip the bucket, thus releasing the sea turtles to crawl out onto the still sun-warmed sands.

Once these little guys exit the bucket it is difficult to imagine what they are thinking as they scurry towards the water with waves between 6-12 feet pummeling towards them. Some are fortunate and will hit the tide correctly and the water will suck them out to safety in the ocean, while others miss the tide, and it will toss them back violently 10-20 feet where they will start over. When this happens, you can hear a collective “Awwwww nooooo!!” from the group of us releasing them.

Ultimately (after three or four tries for some) all the baby sea turtles make it into the mighty Pacific Ocean just as the sun is fully dipping below the horizon. This is a beautiful piece of Baja life that should not be missed. We are very thankful to the Todos Tortugueos Volunteer organization for making this nightly event possible for the public.


Mike, that’s just awesome!  Thanks very much.  As always, we enjoy reading about your Baja adventures.  You wrote a fabulous story with amazing photos.  Ride safe, my friend.


Don’t ever miss an ExNotes blog!  Sign up for free notifications here:


If you’re headed into Baja, make sure you have your BajaBound motorcycle insurance!

img


Check out our choices:  The best budget bikes for Baja!

New Shoes for the Model 60

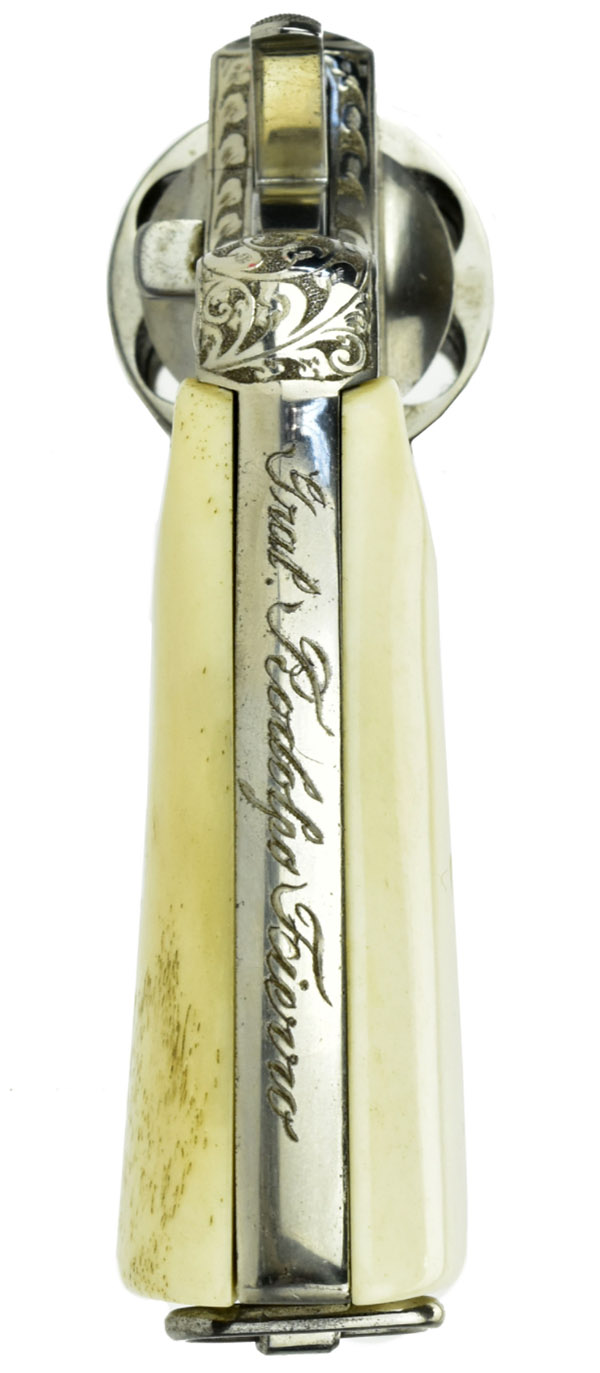
I visited with good buddy Paul up north last week, and while I was there he showed me a set of Altamont grips he had for his Smith and Wesson snubnose handgun.  When I saw the grips it was love at first sight, and I had to have them for my TJ-customized Model 60.  Paul was happy to oblige (thanks, Paul!), I came home with a new set of Altamont‘s finest, and they promptly went on the Model 60.  The Model 60 now looks like a scaled-down version of the big .45 ACP Smith & Wesson Performance Center Model 625, and I had to grab the shot you see above.   The 625 wears custom grips, too, but that’s a story for another blog.

There’s no question I’ve gone overboard in getting grips for the Model 60.  It came with the stock checkered walnut grips (the original equipment on this handgun), as well as a set of Pachmayr rubber grips.  The Pachmayrs would have been better for shooting, but I wanted a set of smooth rosewood grips and I found them on Ebay.  They looked great, but they were painful to shoot.

The Model 60’s OEM checkered walnut grips. Photo by TJ of TJ’s Custom Gunworks.
Smith and Wesson J-frame uncheckered rosewood grips. These are the same size as the walnut grips shown above.
The problem with both the OEM walnut grips and the replacement rosewood grips is that they are too small. My pinkie wraps around beneath the frame and takes a pounding with each shot.

The problem with the stock walnut grips and the Ebay rosewood grips is that my little finger gets under the grip.  The recoil from the little Model 60 is significant (as we engineers like to say, f = ma), and it would pound my pinkie every time I fired it.  Think about putting your pinkie sideways on a table and having someone whack it with a hammer, and you’ll have a pretty good idea what shooting this little snubbie was like.

All that’s changed with the Altamont grips Paul provided.  Take a look.  They’re beautiful.

Custom Altamont grips for the Model 60. Note the stippling (a crocodile pattern!) and the laser-engraved S&W logo.
The Altamont grips installed on the Model 60.

The new Altamont grips are extended just a bit below the frame and they have finger grooves.  It keeps my pinkie from getting underneath the frame, and with the new grips the Model 60 just feels right in my hand.

The Altamont grips provide a much better ergonomic hold. I like them a lot.

These new Altamont grips have a much better feel to them.  The wood-to-metal fit is way better than with the stock grips (the grips exactly contour to the Model 60’s frame, unlike the OEM grips).   The next obvious question, and the one that really matters is this:  How did the Model 60 shoot with the new grips?

In a word, it was amazing.  The new Altamont grips completely changed the character of the Model 60.  First, a couple of shots of the Model 60 on the range:

The Model 60 became an entirely different animal with the Altamont grips. It’s much easier to shoot now.
Good buddy TJ reworked my Model 60 extensively. It has an action job, selective polishing (ejector rod, cylinder, trigger, hammer, and cylinder release), and a red ramp front sight. TJ’s Custom Gunworks is the place to go if you want a bespoke handgun.

And here are two targets I shot at 15 yards (45 feet).  One has 10 shots on it; the other has 12 (each had two cylinders of 5 cartridges, and I had a couple left over to finish the box).

Two targets on the 15-yard line. That little Model 60 has near-target grade accuracy with the Altamont grips. If you have a snubbie, you need these grips!

Several things are amazing about the above targets.  The first is that it was windy as hell out on the range this morning, and even though I was shooting with both hands from a bench, I could see the sights swimming around as the wind gusted.  The second is that the groups are dramatically tighter than they had ever been before with this handgun.  And the third is that the revolver shot almost exactly to point of aim.  I was holding at 6:00 on the 50-foot slow-fire NRA targets you see above.  My load was the tried and true .38 Special target load:  2.7 grains of Bullseye propellant with the 148-grain Hornady hollow base wadcutter.  Before, with the OEM and rosewood grips shown above, this same load shot a good 12 inches to the right of the point of aim, and the groups were huge.  Evidently, as the revolver discharged, it was rotating to the right in my hands with those much smaller grips (and beating the hell out of me in the process).  The Altamont grips brought the point of impact essentially in line with the point of aim and just a bit high, which is what I want in a handgun.

You may recall from a recent blog that I have a load development test planned for the Model 60, and I’ll be firing the cartridges I loaded for it within the week.  I was up north on a secret mission last week and I didn’t get to shoot during that time.  I recently read that if you go 72 hours without firing a handgun your skills deteriorate.  I believe that, and I wanted to get in a little shooting before I shoot for group size.  Hopefully, the Santa Ana winds through the Cajon Pass will die down, conditions will be right, and I’ll get to do some real accuracy testing in the next few days.  You’ll get the full report right here.  Stay tuned, my friends.


More Tales of the Gun are right here!


Never miss an ExNotes blog:  Subscribe here for free:

Exhaustnotes Product Review: Gdrasuya 80-amp Battery Charger

You win some and you lose some on Amazon and with the Gdrasuya 80-amp battery charger I lost some. One of the few issues I have with my off-grid shed is snow. Here at normally sunny Tinfiny Ranch snow is infrequent which is not to say “never.” It does snow a few times each winter at 6000 feet and those times are when my solar panels get covered up and my batteries slowly lose power. Coincidently, when its cold and snowy I run pipe heaters to keep the shed’s PVC water pipes from freezing and splitting in the un-insulated space. It’s a double whammy: no power from the panels and a constant drain from the pipe heaters.

The system can go a few days like this but eventually the inverter shuts off and my pipes are left to live or die in New Mexico. To combat this I run a small 24-volt battery charger off my Harbor Freight Tailgator generator during the day to help resupply the batteries with precious electrons. I have an old Dayton 24-volt charger that puts out around 5 amps. With 12 batteries to charge it takes quite a while to bump them up.

Enter the Gdrasuya 80-amp charger. The Gdrasuya is 6v-12v-24v selectable and I assumed the 80-amp output was at 6 volts. That would mean the 12-volt setting would put out 40 amps and the 24-volt setting 20 amps. 20 amps charging is 4 times faster than the Dayton! I liked what I saw.

The charger arrived neatly packed and undamaged. The machine looked well made with beautiful glossy yellow paint and everything written in Chinese. No matter, battery chargers are easy to operate.

The first thing that gave me pause was the small diameter charge leads. The clamps looked pretty robust but no way was that small wire going to tote 80 amps without getting warm.

The small wires led me to investigate the inside of the charger to see how difficult it would be to install heavier wires. Once open I realized I didn’t need heavier wires because no way were these internals going to output 80 amps at any voltage.

The Gdrasuya uses a doughnut shaped transformer with various taps taken off the windings to select current to the battery. The wires are just a wee bit bigger than a human hair and the switching is very lightweight. Ok, I thought maybe they meant 8 amps instead of 80.

The main output breaker is rated 15 amps so no matter what you did to the thing 15 amps is all that’s passing through the breaker.

Worse than the misleading advertisement was the 120-volt AC input wiring. The green wire, or ground, from the plug was cut inside leaving the shiny yellow metal box in an ungrounded state. If the metal housing managed to short out to line voltage, a user touching the metal would receive a nasty shock.

Ok, the Gdrasuya 80-amp charger is dangerous and restricted on rated power by a 15- amp output breaker, but how does it work?

Turns out not too well. At 12-volt, max charging rate, the kilowatt showed the charger drawing 1 amp from the outlet, or 120 watts. On the DC charging side things looked bleaker. The Gdrasuya amp meter was reading 50 amps but my inline digital meter said 3.08 amps at a claimed 15 volts, a measly 46 watts. So not only was the Gdrasuya charger weak and dangerous, it was inefficient to boot.

In the description for the charger the 80-amp claim is made again along with a “power for 12V is 10A, for 24-v is 7A.” It does neither.

I haven’t tried it on 24-volts yet but you can figure maybe 2 amps tops or as we like to say in the electrical business, nothing. I was going to fix the ground issue but now that I’ve tested the charger it doesn’t seem like it’s worth the bother. That old Dayton putting out 5 amps looks like a champ in comparison.

It’s odd that someone would go through all this trouble to manufacture a charger that is pretty much useless. The thing consists of quite a few parts the sum of which is almost zero.

My recommendation is don’t buy the Gdrasuya. I’m not going to put an Amazon link in this story because I don’t want you to accidently buy one. I’ll put it back together and try to return the thing to Amazon. It serves no useful purpose in Tinfiny Ranch’s suite of electrical power products.


More ExNotes product reviews are here!


Subscribe to ExhaustNotes for free!

Favorite Baja Hotels: Tecate’s Hacienda

Tecate, not ordinarily a tourist destination, is more than just an entry point into Baja.  This little town has a lot to offer, and when I stay there, I usually opt for the Hotel Hacienda.  The Hacienda is easy to get to, it’s comfortable, it’s inexpensive, and it’s next door to one of the best restaurants in all of Tecate.

The Hotel Hacienda is at 861 Avenida Benito Juarez. Turn right after crossing the border and ride west about a mile. The Hacienda will be on your right.

As the map above indicates, the Hacienda is easy to get to.  You just go south into Mexico about two blocks after crossing the border, hang a right to head west on Avenida Benito Juarez, and ride about a mile.  The Hacienda will be on your right.

The Hacienda isn’t fancy, but it’s comfortable and clean, and the parking is secure (you park in a courtyard and you won’t have to worry about your motorcycle).  The last time I was there, a room was about $35, and they always have hot coffee available in the oficina.   What’s great about the Hacienda is that Malinalli’s is next door.  Malinalli’s is absolutely one of the best ever for breakfast, lunch, or dinner.  I’ll tell you more about Malinalli’s in a minute.

There’s just no telling what (or who) you might run into in the Hacienda’s courtyard parking lot.
A couple of Royal Enfields put away for the evening at the Hotel Hacienda.

Tecate is home to the beer company of the same name, and most folks think of Tecate as a gritty industrial town.   Trust me on this:  There’s a lot more to Tecate than just a beer company.

The Tecate brewery, located in the middle of town, is visible from just about anywhere in Tecate.

On the U.S. side, Tecate is not much more than the U.S. Customs and Immigration station; on the Mexican side, Tecate (population 102,000) is a much larger and far more intriguing place. Founded in 1892, Tecate’s history reaches back 12,000 years when the region was settled by the Kumeyaay Native Americans who still inhabit the area.

Getting to Tecate is a beautiful ride in itself. California SR 94 winds its way through the mountains just north of the border. Roughly 25 miles east of where 94 originates near San Diego, take a right on 2-mile-long SR 188 and you’re there. There’s a sign warning you not to bring guns into Mexico (duh), and suddenly, you’re crossing the border. There are no Mexican officials or inspections as you enter; you just ride right in. You can do that going south; don’t try it going north.

Crossing the border into Mexico at Tecate.
As soon as you cross the border, you’re in Tecate, Mexico. The road you see at the intersection ahead is Benito Juarez. Make a right, and the Hotel Hacienda is about a mile up the road.

Even if your plans are for a longer and deeper Baja visit, my advice is to spend at least one night in Tecate and enjoy the town’s best kept secret, which is the cuisine. Two restaurants that stand out are Amores for dinner and Malinalli Sabores Autóctonos for breakfast, lunch, or dinner.

Malinalli Sabores Autóctonos, right next to the Hotel Hacienda, has exquisite regional Mexican recipes, all prepared with fresh ingredients. Don’t think salsa and chips; this is the real deal and the cuisine is both exceptional and inexpensive.   When Gresh and I did the Enfield trip a couple of years ago, we parked our bikes directly in front of Malinalli’s (as you can see in the big photo at the top of this blog) and we ate there both on the way into Mexico and on the way.  Sue loves this place, too.

Just a few of the selections at Malinalli’s. Trust me on this: Malinalli’s is superb.
Blue corn tortillas and other Kamayeey cuisines make Malinalli’s stand out.

Amores, nestled between the central plaza and the Tecate brewery, features local foods and wines.  It’s a dinner spot, it’s what you might call haute cuisine, and it is absolutely outstanding.  It’s prices are higher than what you might ordinarily encounter in Tecate, but it’s still inexpensive by US standards.  They offer a choice of how many courses you might have for dinner, but the choices are what the staff feels like cooking that day. You won’t be disappointed; this is a memorable dining experience.

Two of several staff members at Amores. The dining was world class.
One of the five dinner courses we enjoyed…grilled octopus.

If your tastes run to simpler dining experiences, Tecate has you covered there, too.  There are numerous taco stands along Benito Juarez, and if there’s a bad one, I haven’t found it yet.  Watching the chefs prepare tacos is a treat unto itself, and they are absolutely delicious.

A taco chef at work in a Benito Juarez taco stand.
Taco taste tester extraordinaire Joe Gresh.

I usually try to work my Baja visits such that Tecate is my point of entry and my point of exit.  I like staying in the Hotel Hacienda and enjoying what Tecate has to offer, and bookending a Baja visit with a stay in this cool little town always works well for me.


Want to see more about our travels in Baja?  Check out our Baja and Epic Rides pages!


If you’re headed into Baja, make sure you insure with BajaBound Insurance.  It’s the best!

img


The best budget bikes for Baja?  You might be surprised!


Never miss an ExNotes blog!


Read about our other favorite hotels in Baja!

Santa Rosalia’s Frances Hotel
Mulege’s Historico Las Casitas
Bahia San Quintin’s Old Mill

The One: A Bianchi L’Una!

Maybe 15 years ago Sue and I were on vacation in Calistoga (where the bottled water comes from).  We had our bicycles with us and we were enjoying the Silverado Trail and other choice bicycling roads in Napa Valley.  I had an aluminum-framed Giant roadbike in those days with entry-level componentry (if I recall, they branded it the Tiagra line).  There was a bike shop in Calistoga, and like gun shops, I can’t pass a bicycle store without stopping to see what they have.

In the Calistoga shop, I saw something that stopped me in my tracks.  It was a Bianchi L’Una (“the One” in Italian), and it was the most visually-arresting bicycle I’d ever seen.

Riding an inexpensive aluminum bike, I lusted for a carbon fiber bike.  I managed a plant back then that manufactured carbon fiber aviation components, and a carbon fiber bike was something I knew I needed.

The Bianchi wasn’t just carbon fiber, though.  The bike had top-of-the-line Campagnolo components (Campy’s Record line, which is expensive stuff).  Bicycle guys are elitists (although I’ve found they are not nearly as obnoxious as Facebook and motorcycle forum experts; I swear, some of these guys could be featured on the cover of Modern Proctology).  But bicycle guys also have strong opinions, two of which are that carbon fiber and Campy Record componentry are as good as it gets.

Just about everything on the L’Una that could be carbon fiber was, and most of it was white carbon fiber (the frame, the stem, the seatpost, the forks, and the forks).  The levers were conventional carbon, as were selected bits and pieces on the front and rear derailleurs.  The brakes calipers and a few other machined bits and pieces were titanium.   That’s expensive stuff.  I knew from my aerospace job that the lead time on titanium in those days was a whopping 72 weeks. It was a stunning and stunningly-expensive bicycle.  Everything about the bike was exotic. I had never seen anything like it.

I had to ask, and the Calistoga bike shop guy told me the L’Una was $5700.  I’d never heard of a bicycle being that expensive, although today (15 years later), that would not be an unusually high price.  Back then, though, you could have knocked me over with a feather.  $5700.  For a bicycle.  Wow.

I continued to look at the L’Una for another half hour, but I told the sales dude not to get too excited.  I was a looky-lou, I explained.  There was no way I was going to spend that kind of money on a bicycle.  But the bike was mesmerizing.  It was the most beautiful thing I’d ever seen.  I asked if there was any room in the price, and the guy told me no.  “Bianchi is only bringing a few of these in from Italy,” he said, “and they are what they are.”

The L’Una continued to dance around in my mind for months after that encounter. It was a vision that wouldn’t go away.  I wanted it.

One day about a year later, I was poking around on E-Bay and I saw another L’Una for sale, brand new, at a bike store in Iowa somewhere.  It was posted at $3700.  That was still a pretty damn silly price for a bicycle, but it was $2,000 below what it I had seen in Calistoga.  I called the shop, introduced myself, and asked the owner what the deal was.

“The deal is there’s two feet of snow outside my front door, I have another 25 Orbeas (that’s another high-end bike) coming in, and I need to make room,” he told me.

“What’s the frame size?” I asked, knowing there was little chance it would be my size.  I’d have an easy out.

“It’s a 55,” he answered.

Hmmm.  55 centimeters is my frame size.

“Are there any marks or scratches on the bike?” I asked.  “From the E-Bay photos, it looks like it’s on display in your store.”   If it was scratched up or dinged, I’d have another out.

“Joe, I don’t know,” he answered.  “Let me check it out and I’ll call you right back.”

A half hour later the phone rang.  “I’ve gone over that bike with a magnifying glass,” came the report, “and it’s perfect.”

Hmmm.  I thought about the L’Una all night.  I talked to Sue and she said okay (and there went my last out).  So I called the Iowa bike shop guy the next morning and offered $3400.  “How’s that sound?” I asked.

“It sounds about $300 too light,” was his answer.

You can see from the photos here that I pulled the trigger, and even though I am one cheap SOB and I know spending $3700 on a bicycle is crazy, I’ve never regretted it.  The L’Una is the most exorbitant purchase I ever made, and I own (and have owned) some pretty cool toys.  But my L’Una is in a class all by itself.   I still look at it and just think, “wow.”  The bike fits me perfectly and it’s two miles per hour faster no matter what I’m doing (cruising, climbing, top end, whatever).  In the bicycle world, that’s a  lot.  The fit and feel of the thing is just incredible.

You know, most bicycles, including Bianchi bicycles, are made in China today.  And if you know anything about Gresh and me, and our travels here and overseas, you know that we think Chinese motorcycles are as good as any made anywhere in the world.  You may have a different opinion, but hey, it’s okay for you to be wrong.  But when it comes to my L’Una, it’s one of the original Italian Bianchi bicycles, and I like that.


You can read our blog about a steel-framed, Celeste green Bianchi bicycle here.


Read about Harrison Ford’s bike ride in Baja!


Hey, how about Gresh’s motorized bicycle!


Bicycles, motorcycles, guns, reloading, construction, living off the grid, and more!  Never miss an ExNotes blog:  Sign up here for free!

2022 KLR 650 Video

This flew into my mailbox last week from Kawasaki.  I’m still on their mailing list (I purchased a new KLR 650 in 2006).  I’ll let the video do the talking.

I had good times on my KLR. I don’t see another KLR in my future, but if the new model is as good as my 2006 KLR was, I think Kawasaki will do well with this motorcycle.   Both Gresh and I had thoughts about what the new model might feature; you can read those blogs here.

If I were going to buy a new KLR (I’m not, but if I were), I would probably wait until the 2023 models were out.  When Kawasaki introduced the Gen II KLR back in 2008, the 2008 bikes had oil consumption issues.  Kawasaki had a recall (if I recall correctly) and they fixed the problem in the 2009 model.  I think it’s best to let others work through the new model teething issues.

I’m guessing the full-freight new KLRs (luggage, ABS, etc.) will push $10K, which is roughly twice what a new CSC RX4 costs, and for me, selecting the RX4 over the Kawasaki would be a no-brainer.  For that kind of money, you could almost buy a new Sportster.


Never miss an ExNotes blog:  Subscribe here for free!
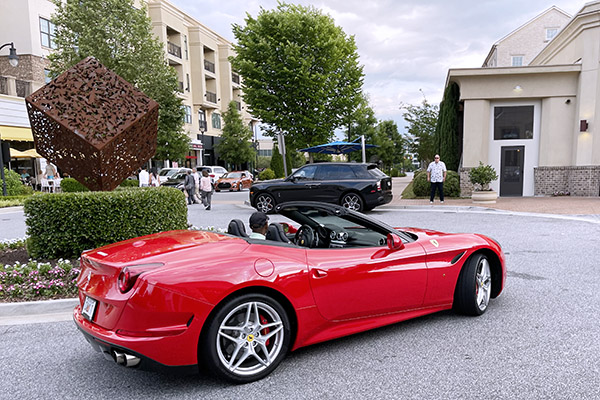

Want to see our predictions on what the new KLR would be?  Just click here.

A Model 60 Load Development Plan

This blog outlines the development plan I’m using for my new-to-me Model 60 Smith and Wesson revolver.  You might recall that I bought this revolver not too long ago and I had my good buddy and master pistolsmith TJ (of TJ’s Custom Gunworks) go through the gun, get everything perfect, do the trigger, and add a bit of tasteful polishing.

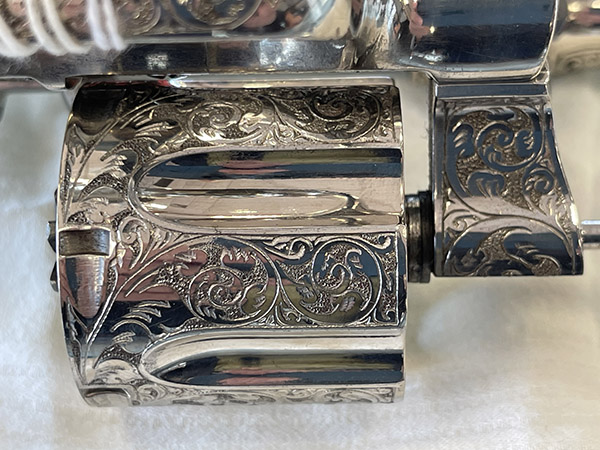
My custom Smith and Wesson Model 60. Note the polished ejector rod, cylinder, trigger, cylinder release, and hammer, and the smooth rosewood grips.

TJ did a hell of a job, I recently qualified with the Model 60 for my concealed carry permit, and now I want to find the most accurate load for this handgun.  To me this means two things:  The smallest group size and where the revolver hits with respect to the point of aim.  I’m not concerned with velocity.  All the velocity in the world doesn’t mean a thing if you can’t hit your target.

When I develop a load, I generally do a bit of research on the Internet to see what others have found to be an accurate load, I see what components I have on hand (bullets and powders), and I consult my reloading manuals.  I never take loads off Internet forums as gospel unless I confirm their safety in my load manuals or they come directly from the manufacturer’s websites (there is just so much inaccurate information on the Internet), and I never load at the manual’s max without working up to that level.  My approach is to load a few rounds at the minimum level and a few a bit below the max level with each bullet and powder combination to get a quick feel for further load development.  Or, I might find a combination in the initial tests that is so good I don’t need to do any further testing.

From left to right: 158-grain cast flatpoint, Hornady 158-grain jacketed hollow point, Hornady 110-grain jacketed hollow point, and Hornady 148-grain swaged wadcutter.

These days, I’m governed by what I have on hand, as the component suppliers are out of nearly everything.  For me and this test series, that means four bullets:

      • A 158-grain cast flatpoint bullet from a local caster
      • Hornady’s 158-grain jacketed hollowpoint
      • Hornady’s 110-grain jacketed hollowpoint
      • Hornady’s 148-grain swaged wadcutter

All are shown in the photo above.  My powders include Winchester 231, Unique, Bullseye, and Power Pistol (as seen in the featured photo at the top of this blog).

Here’s what the test plan looks like:

I’m going to test at 50 feet and fire two groups of three shots each for each combination.  That will keep the total number of rounds fired to a manageable 150 rounds.  It’s a quick look at what works and what doesn’t.

You might notice that I’m only going to test one load with the 148-grain wadcutter bullet.  That’s because it’s been the known accuracy load for years, and it’s also because it’s what I have my Star progressive reloading press set up to make. Stated differently, I’m not going to change this load because it’s my standard wadcutter load, and the Model 60 will either do okay with it or it won’t.  I already know this load shoots significantly to the right of my point of aim in the Model 60, but I’m including it here because I have the ammo and it’s easy to include in this test series.

That’s the plan.  I’m reloading the ammo as you read this, and I’ll have it tested most likely next week.  Watch the ExNotes blog for results in the near future.


More Tales of the Gun!


Never miss an ExNotes blog!  Sign up here:

Tough Rides: China

Here’s another Amazon Prime television show and video review.  This one (as the blog title suggests) is on a series titled Tough Rides China.  It’s about two Canadian brothers (Ryan and Colin Pyle) who circumnavigated China on BMW F800 motorcycles, and you can either watch it on Amazon Prime (if you have that streaming service) on your TV or on your computer.

The bottom line first:  I enjoyed this 6-part series.  A big part of that was because Joe Gresh and I rode around China with the cult of the Zong and we had a whale of a time, so it was easy to relate to what these two fellows did.

I didn’t think this series was as good as the one I reviewed recently about the two German dudes who rode from Germany to India (Himalaya Calling, which was a stellar production), but I still enjoyed it.

Surprisingly, the Pyle brothers’ BMWs broke down a couple of times during the trip, which suprised me.  They were concerned about how long it would take to get parts and the lack of a strong BMW presence in China (now there’s a switch).   For the record, our ten Zongshen RX1 and Rx3 motorcycles didn’t have a single breakdown during our ride.  The Pyle brothers had breakdowns that mandated trucking the bikes significant portions of the trip (does GS actually stand for Go Slow?).

The Pyles also put their bikes on trucks when they wanted to get on the freeways because motorcycles are not allowed on some Chinese freeways.  When Gresh and I were over there with the Zongers, we rode them anyway.  It made me nervous that we rode around the toll gate arms (without paying the toll) and I asked one of our Chinese brothers about it.  “We’re not allowed on the freeways, so if we tried to pay, they wouldn’t know what to do,” he told me.

Tough Rides China has a long introduction at the beginning of every episode, and it was the same in every episode.   That became a bit distracting, and I blitzed through the lengthy and redundant intro after watching the first two episodes.

Tough Rides China featured the giant sand dunes and camels in the Gobi Desert around Dun Huang.  Gresh and I were there.  It was an awesome place, as was all of China.  It really was the adventure of a lifetime.

Tough Rides China is part of a series.  The Pyle brothers have done similar series in Brazil and India, too.  I’ll have to look for those.  While I didn’t think this series was as good the Himalaya Calling adventure ride we recently reviewed, it was still good and I recommend seeing it.


Never miss an ExNotes blog.  Sign up here:


Would you like to read about the Zong trip when Gresh and I rode around China?  Hey, just click right here!

Halcyon 450 Riding Footage

You will recall our recent post on the new Janus 450.  Those Janus boys are not sitting still….here’s some exciting footage of the new Janus feeling its oats in the great American Southwest:

This is definitely cool. I can’t wait to ride one. 360 lbs. That’s amazing.

Check out our earlier Janus posts here and here!


Never miss an ExNotes blog…subscribe here for free!

Exhaustnotes Off-Grid: Part 2 What Battery Voltage Should I Use? Or, Going Native

Going off-grid requires many design decisions, none of them exceptionally hard or final. With off-grid you can always change your mind to suit your needs although you can save a bit of money if you have a plan and stick with it. Of course that’s not how I do things. I generally screw up and get it right the third time, you know what I mean?

The going native part in the title of this story pertains to base system voltage. In my mind a native setup uses roughly the same voltage for the panels, batteries and inverter as opposed to running high voltage panels and stepping them down to battery voltage.

Going native makes your system more resilient to failure. The two most complicated devices in an off grid system are the inverter and the solar panel voltage regulator (not counting strange new battery technologies). When either of those two fail you are pretty much done until you purchase parts. With a native system the regulator can be bypassed completely by connecting the solar array directly to the batteries. Depending on the size of the array you’ll have to keep an eye on your charging to not overcook the batteries but by simply shading or un-shading a few panels with cardboard you will be able to control the charge rate at a reasonable level.

When it comes to common battery voltages for your off grid system you have effectively 3 choices: 12-volt, 24-volt or 48-volt. Fast thinkers will realize that these voltages are all multiples of 12 and that’s because 12-volt batteries are the most popular. You can get batteries in other voltages; there’s no real reason the basic building block had to be 12-volt. You can buy 2-volt batteries all the way to 48-volt batteries.

One or more batteries connected together and powering your house are called a bank and like a bank you have to deposit energy into the batteries in order to draw energy out. For smaller off-grid systems 12-volt battery banks are popular. Inverters in the 2000-watt range powered by a 12-volt battery bank will work fine and are the simplest to connect if you’re electrically impaired. 12-volt banks become less desirable as power needs rise due to the large, expensive battery wires you’ll need to supply the amperage big 12-volt inverters need.

In favor of going native with 12-volt batteries, thanks to the RV industry there are a zillion products that operate at 12-volt. You can get 12-volt refrigerators, 12-volt coffee pots, 12-volt light fixtures, 12-volt pumps, 12-volt air conditioners, 12-volt televisions, 12-volt chargers for your phone and computer and you can even get 12-volt toilets. In fact, you could build yourself a pretty comfortable off-grid house using nothing but 12-volt appliances and skip having an inverter altogether. 12-volt is also fairly safe as your chances of being electrocuted increase along with voltage. Unless you’re really sweaty you can touch both poles of a 12-volt battery and not feel a thing.

The appliances that operate from native voltage will continue to operate with a dead inverter. In my shed that means lights and water pump still work with the inverter shut off. Going native allows you to slowly back out of the complex into the simple and simple things are understandable and reliable.

Going native at 24-volt limits the number of electrical devices you have to choose from. There are not nearly as many 24-volt things as there are 12-volt things. This is slowly changing and 24-volt stuff is becoming more popular. Most DC voltage LED lights are rated 10 to 30 volts. A lot of electronic devices and chargers are also rated 10 to 30 volts (read the fine print on that wall-pig that sucks up all the real estate on your outlets). Getting across 24-volts will give you a tingle and If you’re sweaty you’ll get a shock. Nothing that will kill you, we hope, but still it’s less safe than 12-volt for you electricityphobes out there.

In my off grid shed I’ve chosen 24 for my native voltage, kind of splitting the baby between 12 and 48. My solar panels are considered 24-volt (actually higher but close enough to connect directly). I only really need lights until I can rig up a small inverter to get critical things up and running. The water pump is 24-volt also. My 24-volt inverter is 6000 watts; if I went with a bigger inverter I’d probably go to 48-volt and lose some resiliency.

Going native at 48-volts is sort of useless because you can’t find very many things that operate off 48-volts except inverters. At this native voltage you should toss any hope of backing out of the system gracefully after a lightning strike and put your trust in the thousands of tiny electronic components inside those humming boxes. Go ahead and crank the solar panel voltage up and plan on being in the dark if the inverter fails. Safety wise, 48-volts will give you quite a shock and may even kill you if you are wet and have health issues.

There are devices that will allow you to run most any DC voltage from any other DC voltage. To me these are one more point to fail in the system and they aren’t cheap either. I have one to operate my 12-volt refrigerator from the 24-volt battery bank. It cost almost as much as the fridge!

If you’re planning an off grid system for a remote cabin consider going native. Give yourself the option to keep on keeping on when the buzzing widgets fail. And they will fail. Nothing lasts forever. By building resiliency into the system from the start you can use your head to make things work while others must scamper off to the Internet to order parts.


See Part I of our Off-Grid series!