Lee Safety Prime Installation

By Joe Berk

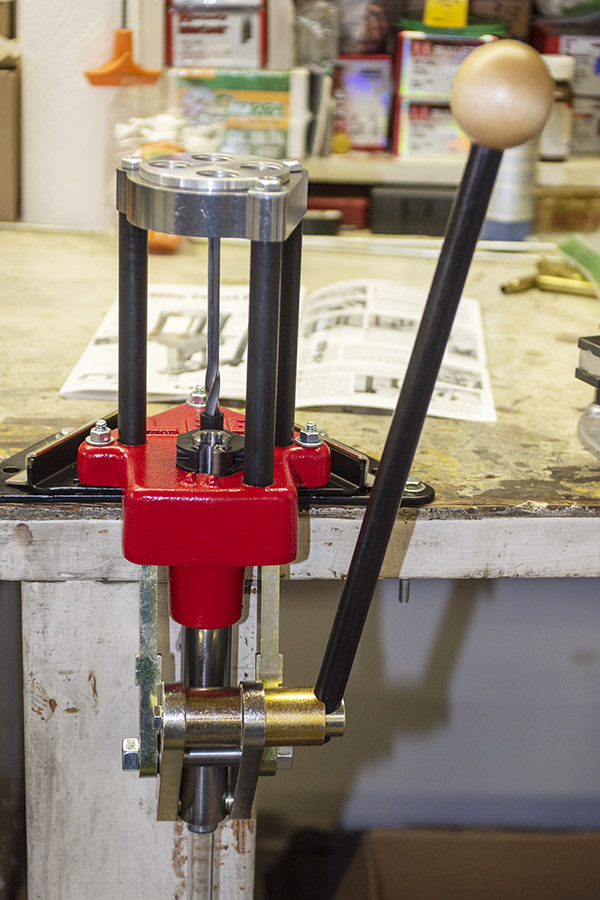
We’re just about there setting up and using the Lee Classic Turret Press Kit.  We explained in prior blogs how to set up everything except for the safety prime, and that’s what we’re going to focus on here.  The safety prime can be purchased separately; when you purchase the Classic Turret Press Kit it is in included.  You literally get everything you need to start reloading with the Classic Turret Press Kit except the dies and the brass, bullets, primers, and powder.  I chose a set of 9mm dies because it was my intent to load 9mm only on my classic turret press, but I like the press so much I’m going to buy additional turrets so facilitate changing from one cartridge to another.  I really like the Classic Turret Press Kit


Help us bring more stories to you:  Please click on the popup ads!


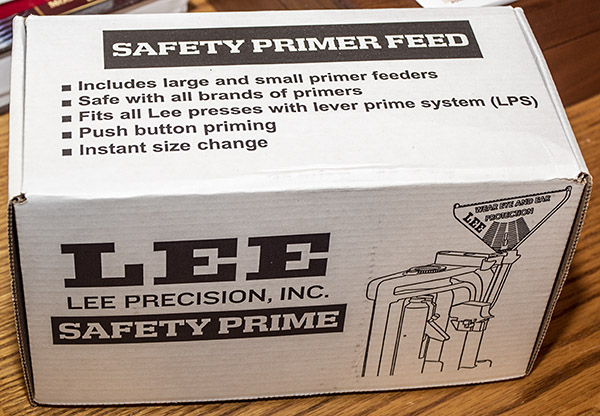
But I digress; back to today’s focus, and that’s on the Lee safety prime.  It arrives packaged nicely, as has been the case with everything from Lee.
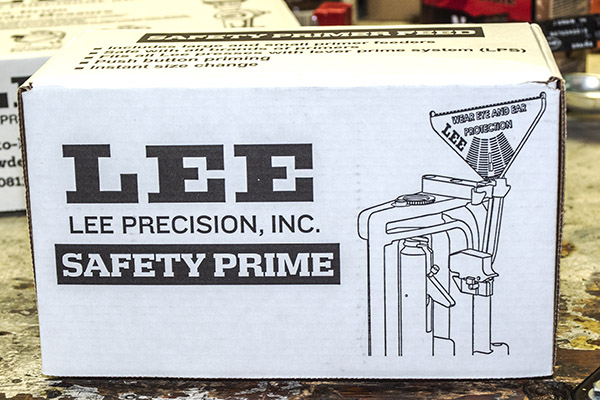
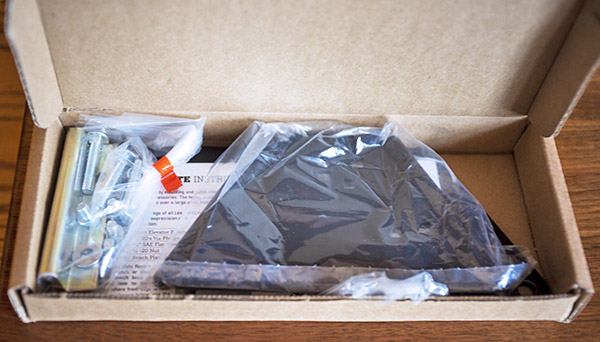
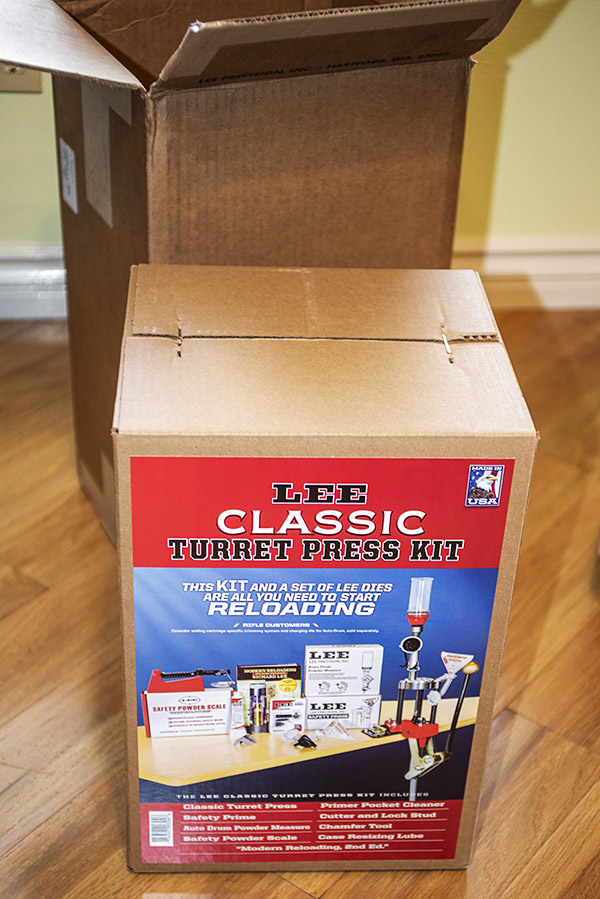
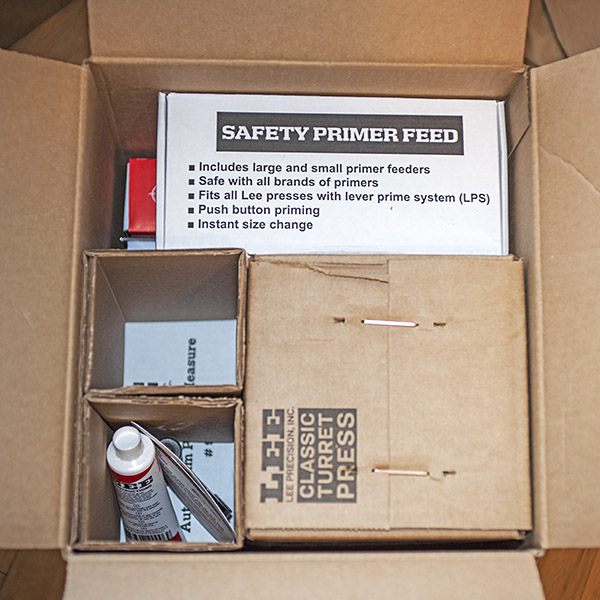
The Lee Safety Prime packaging. This carton arrives inside the Lee Classic Turret Press Kit box.
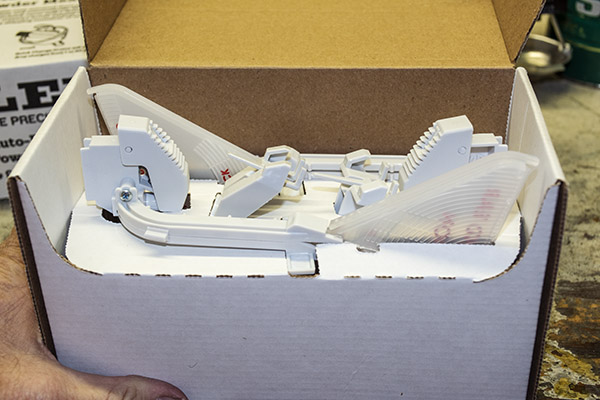
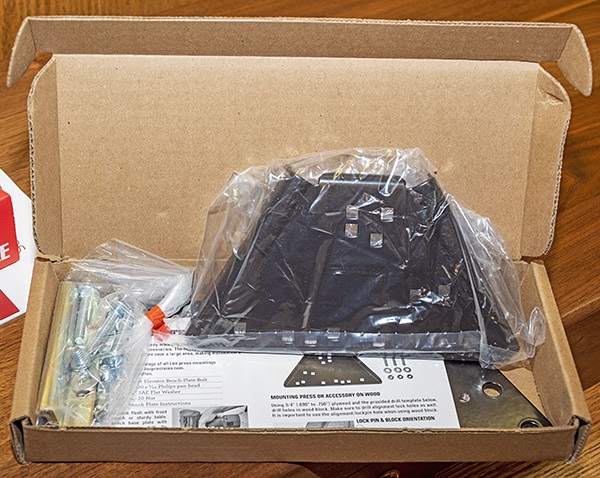
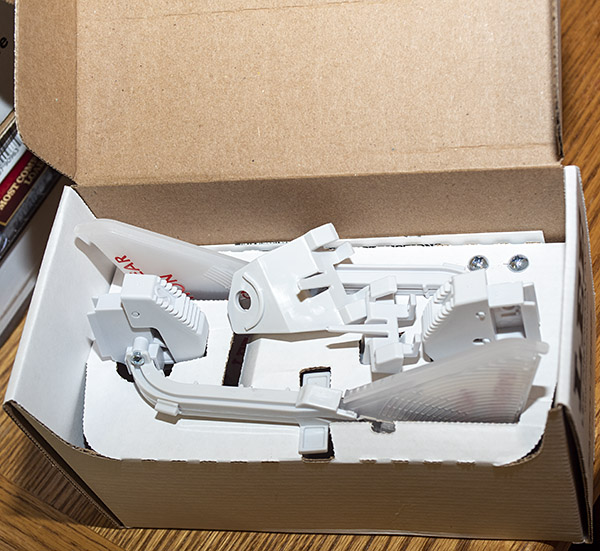
Inside the Lee Safety Prime box.

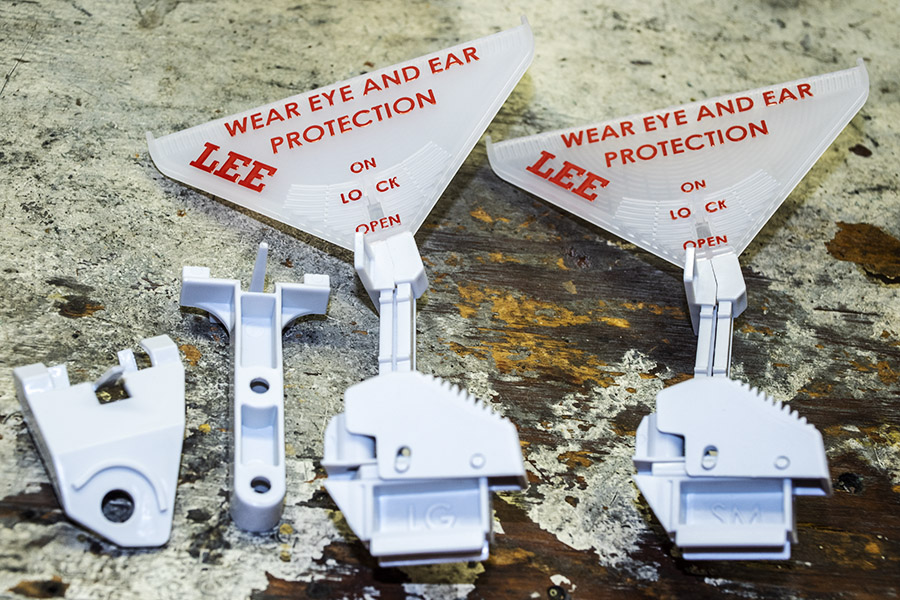
The Lee safety prime kit includes a primer two primer feed mounts, two primer trays, two primer feed chutes, and two primer triggers.  The primer tray, feed chute, and trigger are provided as assembled units.  One is for large primers, the other for small primers.  They are marked accordingly.  The two primer feed mounts you see in the photo below are included because the safety prime can be used on different types of presses.  We’re installing this on a classic turret press, so we will only need one of the two brackets (the one on the left side of the photo below).
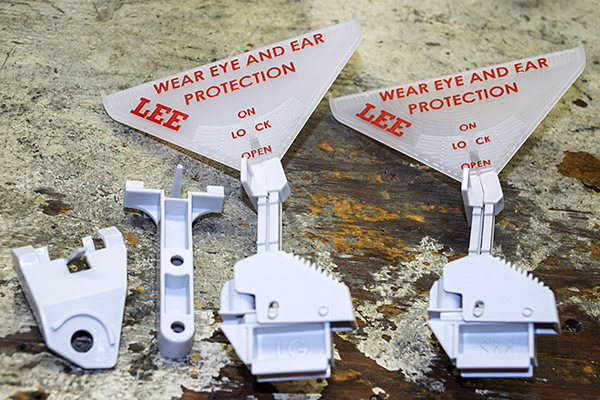
Mounts for the single stage Lee press and the turret press, and primer trays, feed chutes, and triggers for small and large primers.

When we prepared the blog on installing the classic turret press, I showed but did not explain the two primer arms that Lee provides with the turret press.  There’s one for large primers (either rifle or handgun) and one for small primers (either rifle or handgun.   These mount easily; you simply drop them into the slot on the ram, they fall into place, and they pivot on an axle in the ram.
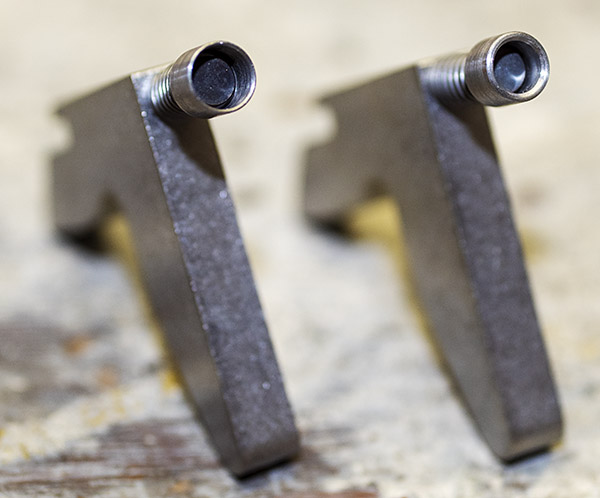
Primer arms for large and small primers. These are included in the turret press hardware.

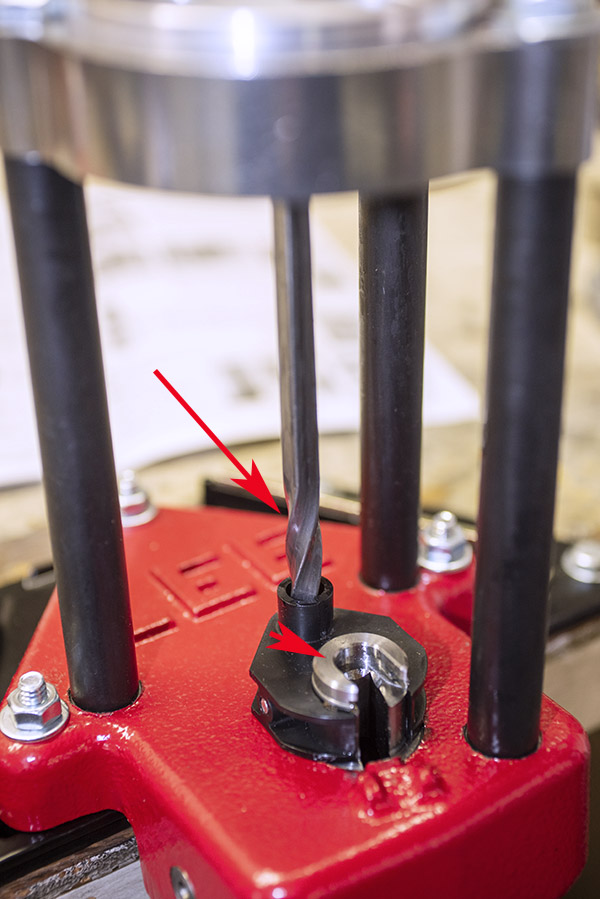
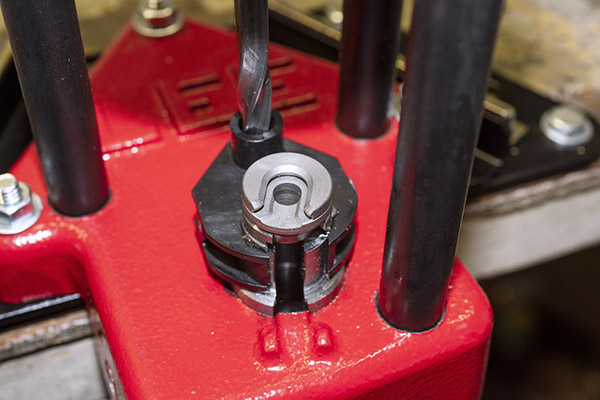
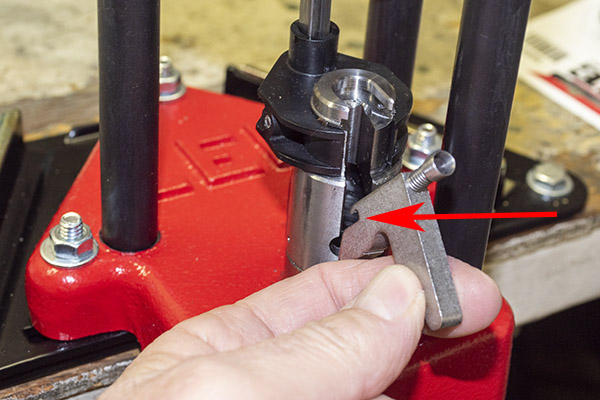
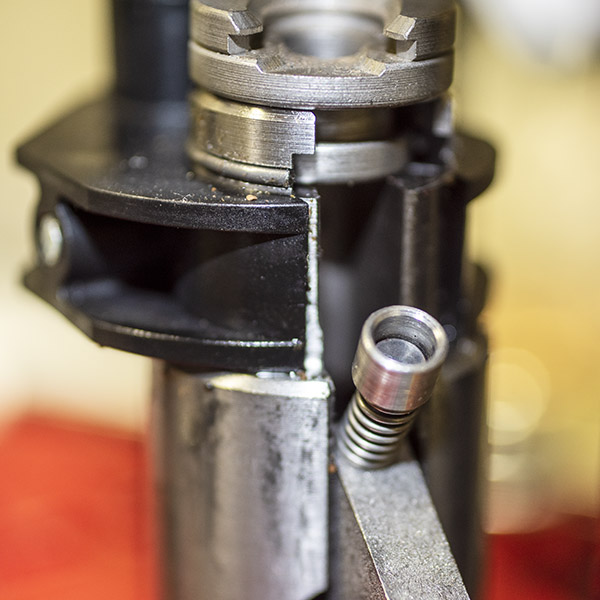
There’s an axle inside the press ram, as shown in the photo below.  It’s the attach point for the primer arm.   The primer arm drops into the ram when there’s no shellholder in the ram (if the shellholder is in place, you cannot insert the primer arm, so you need to remove the shellholder to install the primer arm).
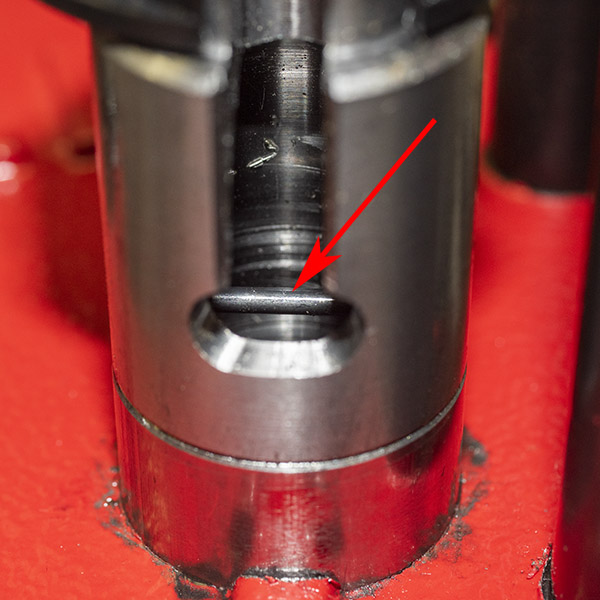
The axle for mounting the primer arm.
Inserting the primer arm into the ram. The slot shown by the red arrow mounts over the axle shown in the photo above.

Once the primer arm is installed, reinstall the shellholder.
The primer arm mounted on the ram.

As the ram is lowered, in the last inch or so of its travel the primer arm contacts the press base and the arm rotates to place the primer directly below the cartridge case.  When the press is lowered completely, the press arm seats the primer into the cartridge case in the shellholder.  We’ll show and discuss this further below.

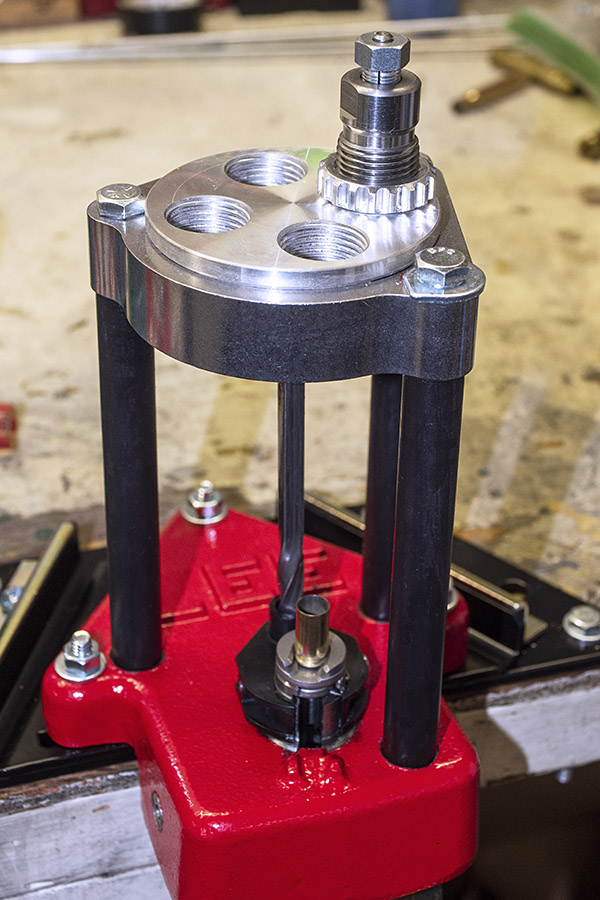
The next step is to mount the safety prime components on the classic turret press.   There’s a 1/2-inch bolt and washer securing the top of press; it needs to be removed to install the safety prime mounting bracket.
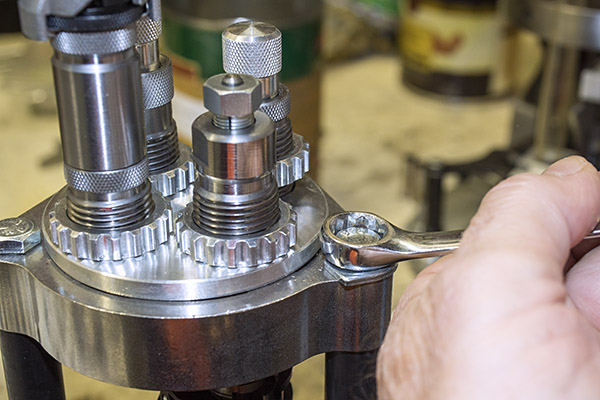
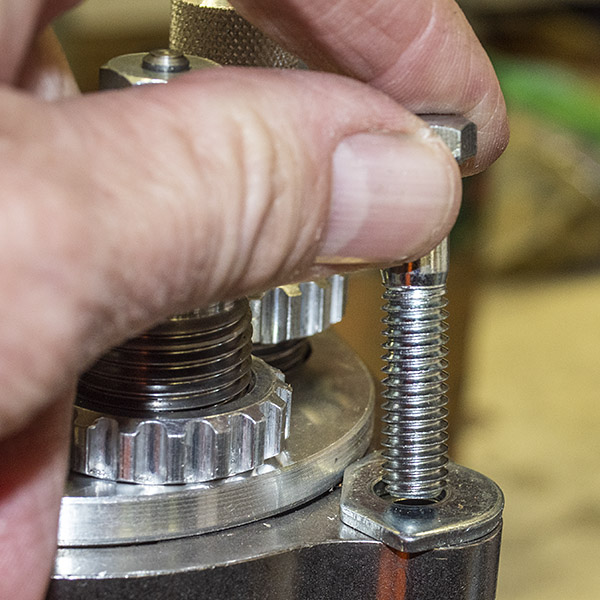
The 1/2-inch turret head mounting bolt has to removed to install the safety prime mount.
The turret head mounting bolt and its washer.

The 1/2-inch bolt and its washer are then installed in the safety prime mounting bracket, and the mounting bracket is installed on the press.
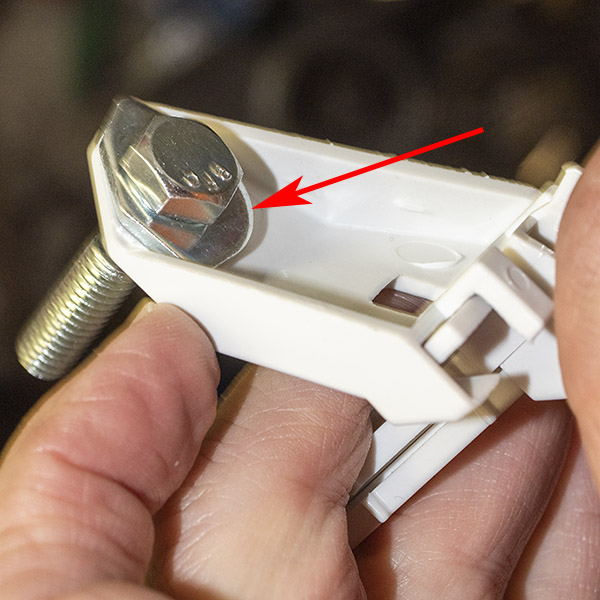
The bolt and washer on the safety prime mount.

Next, we’ll show the safety prime tray, feed chute, and trigger.  As mentioned above, as delivered from Lee the primer tray (the big triangular affair with the Lee name and appropriate warnings), the feed chute, and the trigger are already assembled.  The primer tray is a press fit into the feed chute; you can leave them assembled as shown below.  Note that the feed chute has slot near where it meets the primer tray; this area interfaces with the safety prime we mounted on the press.
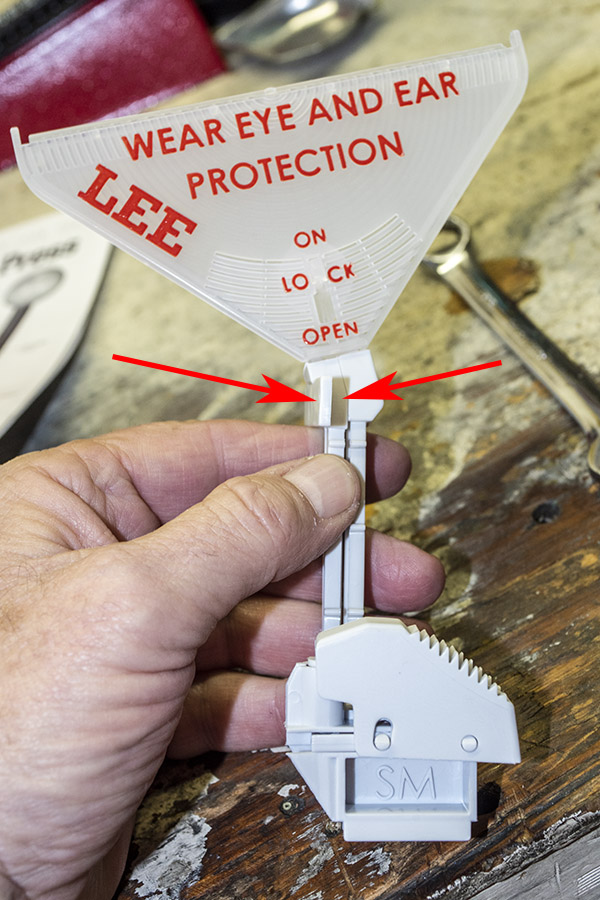
The small primer tray, feed chute, and trigger. The tab the arrows point to slips into the safety prime mount.

The feed chute fits into a loose joint on the safety prime mount.  There’s a lot of relative motion between these two items, and that’s okay.  Lee cleverly designed this loose joint so that it has six degrees of freedom.  This very clever design allows the safety prime trigger to move up, down, left, and right, and it can rotate.   We’ll see why that’s important in a bit.
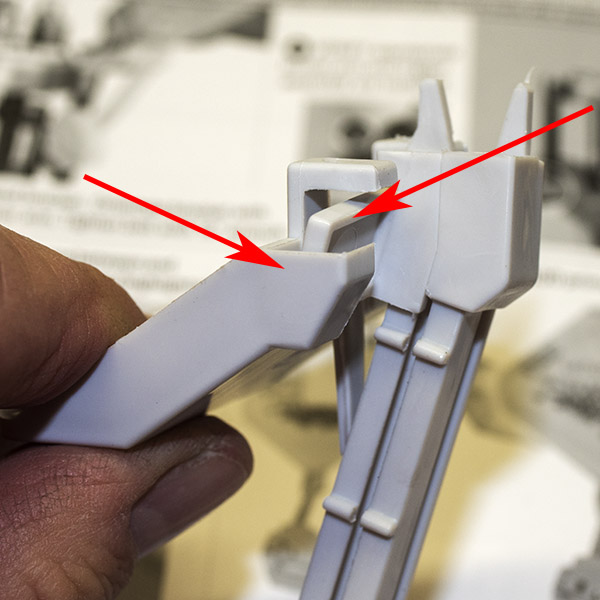
The feed chute coupled to the safety prime mount.

The Lee safety prime primer tray is a clamshell arrangement with a lock and an on-off switch.  In the open position, it allows the primer tray to open so you can load primers into the tray.  In the lock position, the tray is locked closed and it blocks primer entry into the tray.  In the on position, it allows primers to feed into the feed chute.
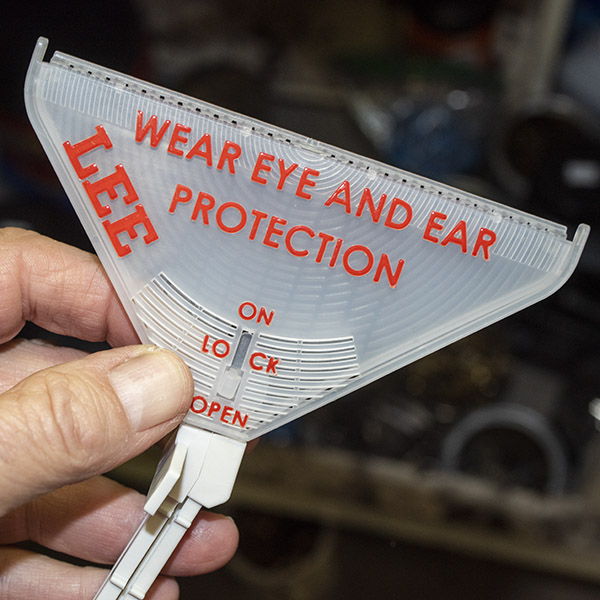
The primer tray has a switch that locks, opens, and allows the primers to flow from the tray to the feed chute.

When you want to load primers in the primer tray, you can do either remove the primer tray from the feed chute, or you can remove the entire primer tray, feed chute, and primer trigger from the press.  To open the primer tray, place the lock in the open position, and open the tray’s clamshell.
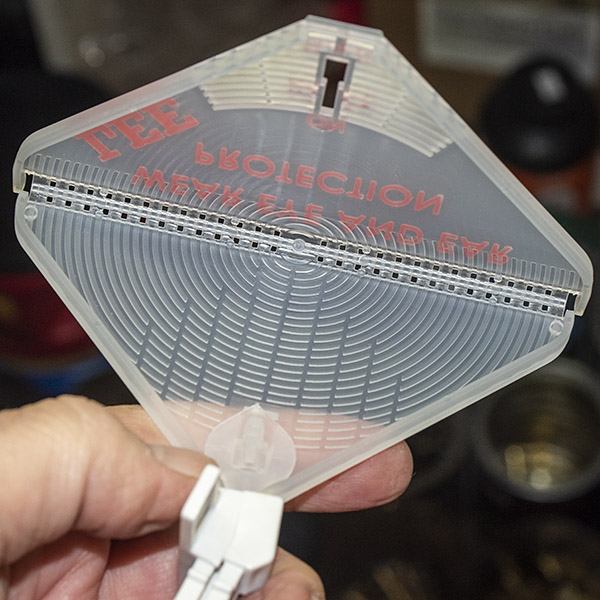
The safety prime primer tray in the open condition.

Put the primers into the tray.    You’ll notice that some face up, and some face down.
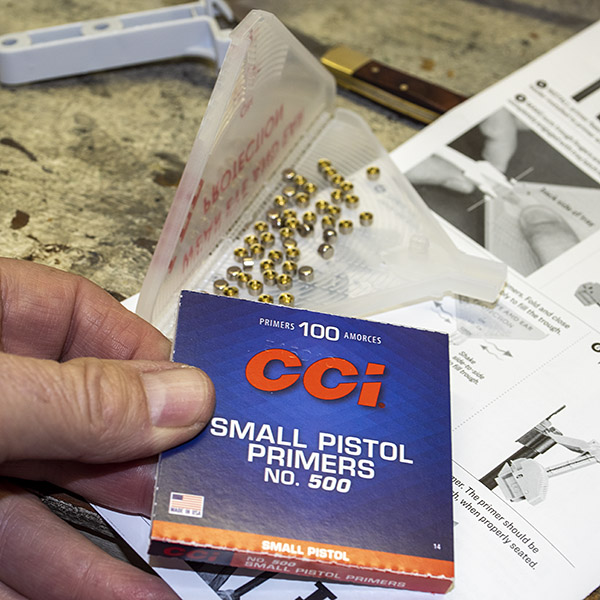
Primers loaded into the safety prime primer tray.

Once the primers are in the tray, and with the tray open, gently jiggle the primer tray back and forth.  Don’t get too aggressive here or you’ll jiggle primers out of the tray.  Just go easy, and after a few seconds, all the primers will face up.  The jiggling allows the ridges in the tray to turn all the primers face up.
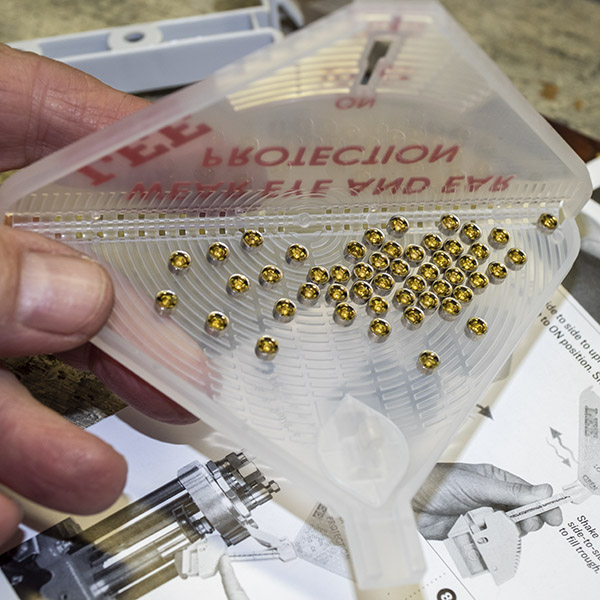
After gently jiggling the primer tray left to right the primers will all face up.

Once the primers are all face up, close the tray clamshell and put the lock in the lock position.  This will prevent primers from leaving the tray until you want them to.
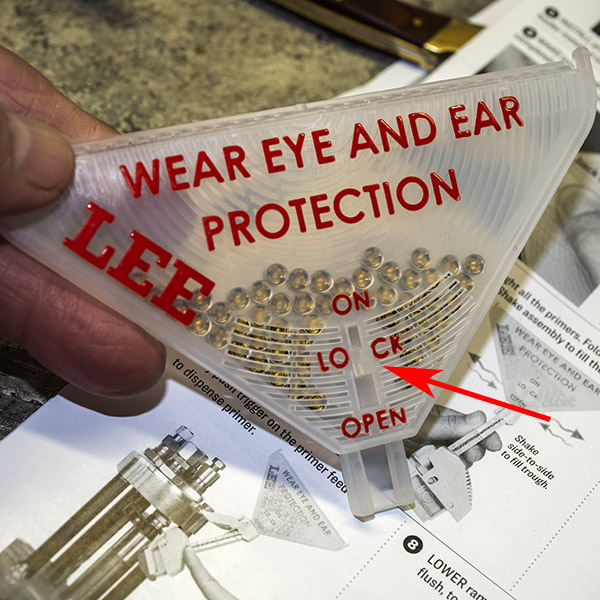
The safety prime primer tray closed and locked. The primer tray is shown removed from the feed chute, but it doesn’t need to be to load primers into the tray.

With the tray mounted on the feed chute, insert the primer tray, feed chute, and trigger assembly into the safety prime mount on the turret press.
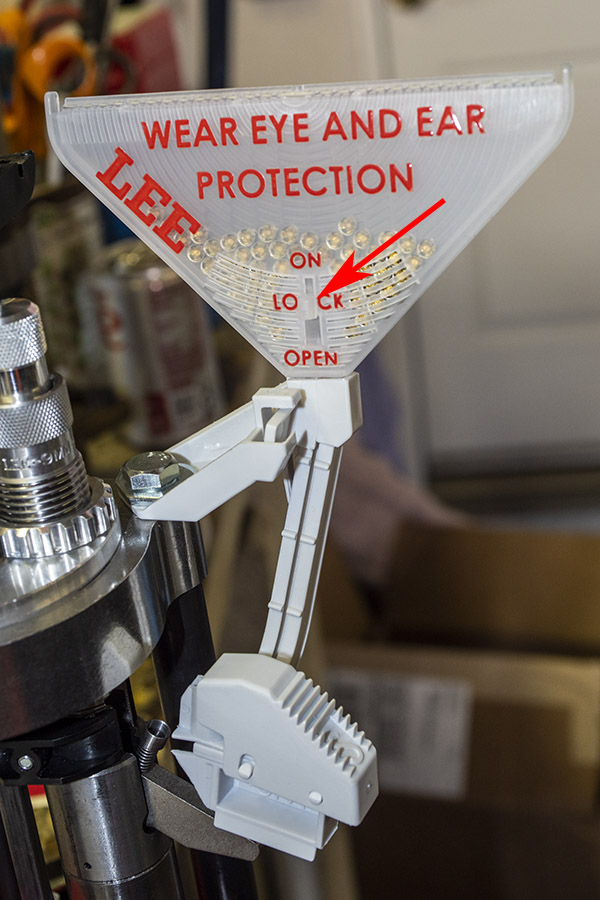
A loaded primer tray, feed chute, and trigger mounted on the safety prime mount.

At this point, move the primer tray lock to the open position, and the primers will fill the feed chute.  The entire affair can be moved around (within a limited range) to allow the safety prime trigger to find where it wants to be.
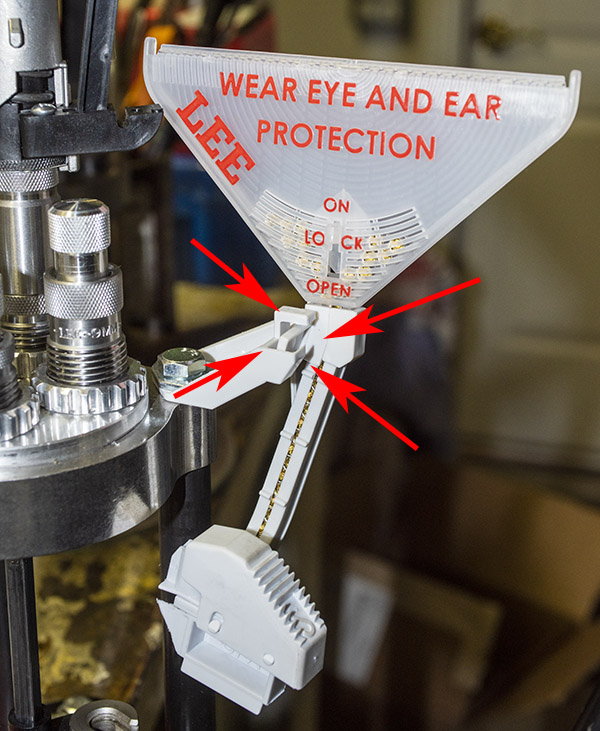
The interface between the safety prime mount and the primer tray, feed chute, and trigger allows for left to right, up and down, and rotational movement.

Here’s a macro shot of the forward end of the trigger.  It includes guides (one on each side) that allow moving the trigger to make contact with the primer arm and correctly position itself.
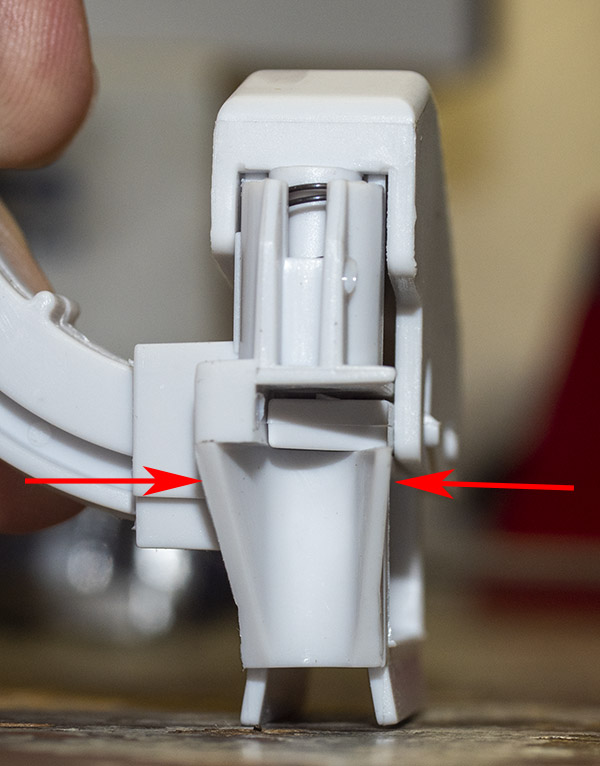
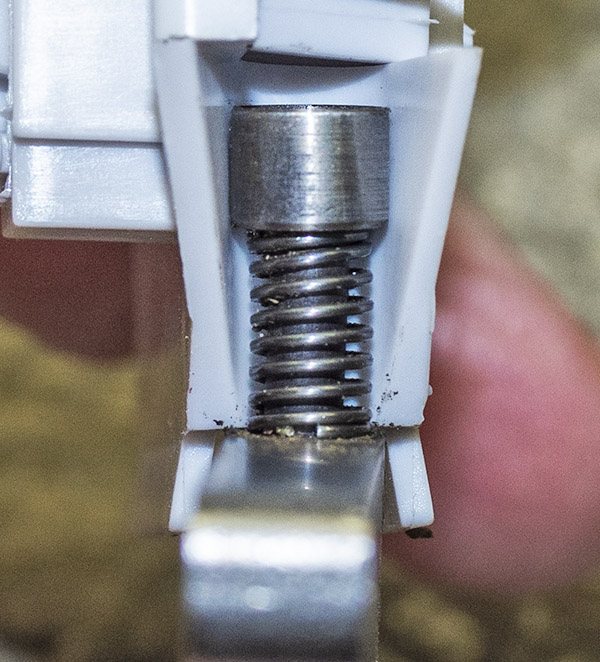
The trigger base includes two ramps that guide the trigger over the primer arm.
A macro shot of the trigger over the primer arm. The trigger’s ramps guide the primer arm into position.

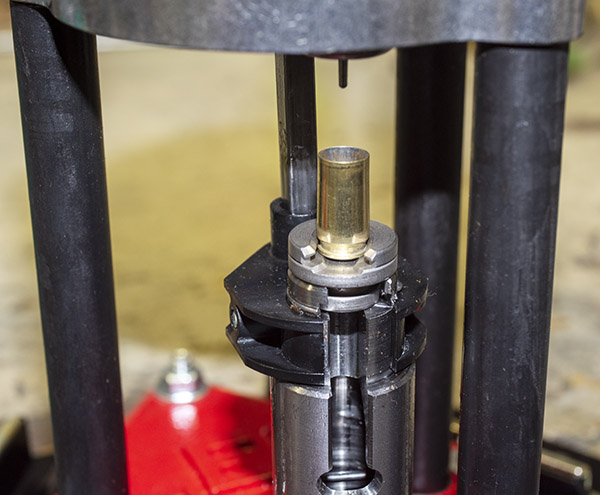
Here’s how this works.   I positioned the sizing die directly above the ram, with the ram in the lowered position.  I raised the ram a small amount and placed a 9mm cartridge case (one that I’ve already fired) in the shellholder.  I then fully raised the ram, driving the fired case into the sizing die and decapper.  I heard a satisfying “tink” as the primer fell into the primer catch tube.
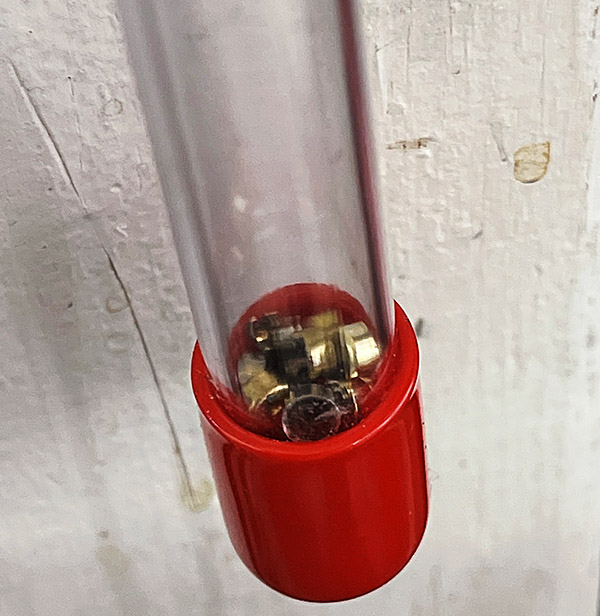
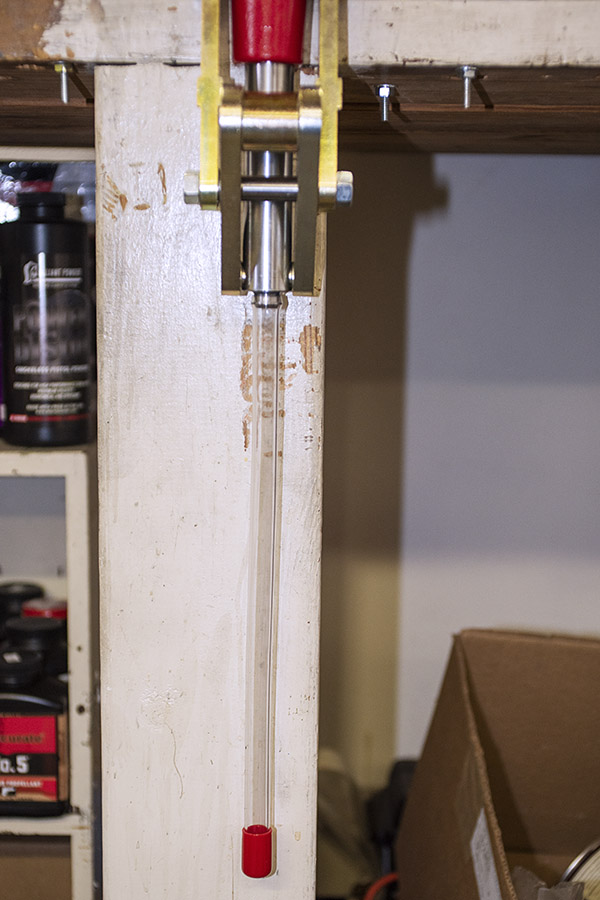
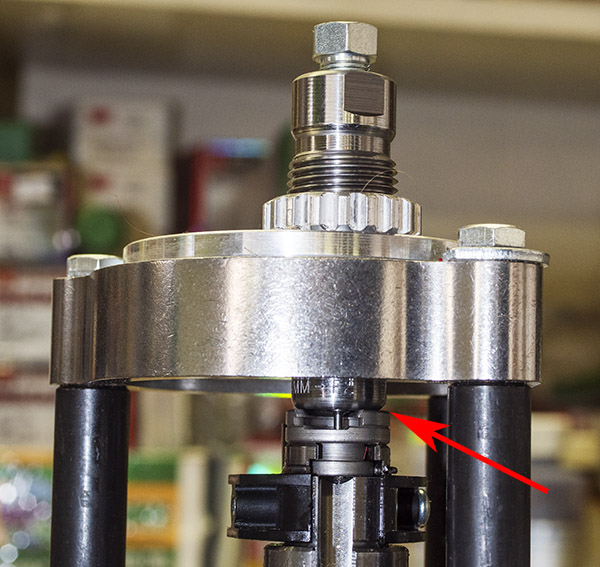
The spent primer tube hangs beneath the turret press ram. You can remove the red cap at the bottom to dump the spent primers. This is the cleanest spent primer collection approach I’ve ever used.

With the press in the fully-raised position, I pushed the primer trigger forward into the primer arm.  That allowed the trigger to align with the primer arm.  I then pushed down on the trigger.  That’s the required motion on the trigger:  Forward and then rotate downward, which places a fresh primer from the feed chute in the primer arm.  I then allowed the trigger to swing away from the primer arm.
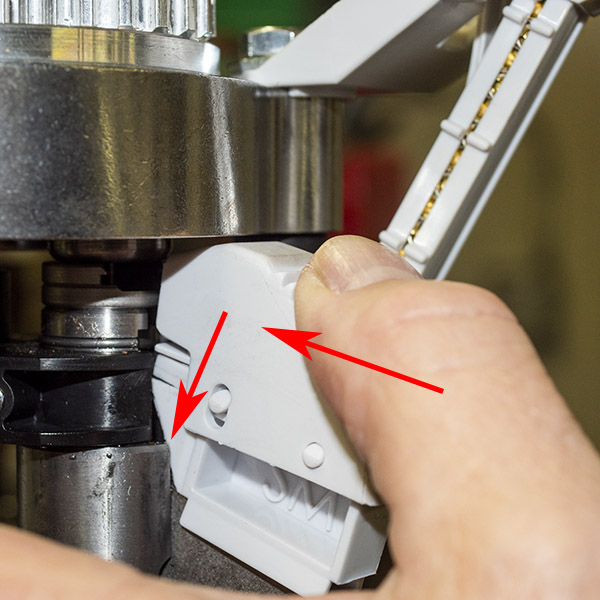
Pushing the trigger forward to mate with the primer arm and then down deposits a single primer into the primer arm. It’s a very clever approach.

Voila!  When the trigger was allowed to move away from the primer arm, there was a CCI 500 small pistol primer waiting to be seated.  The safety prime moving away from this primer is a very important safety feature.  If the primer in the primer arm fires when it is seated, the prior rotation of the safety prime trigger (and the rest of the safety prime assembly)  keeps the other primers away from the one being seated, and prevents the other primers from sypathetically igniting.
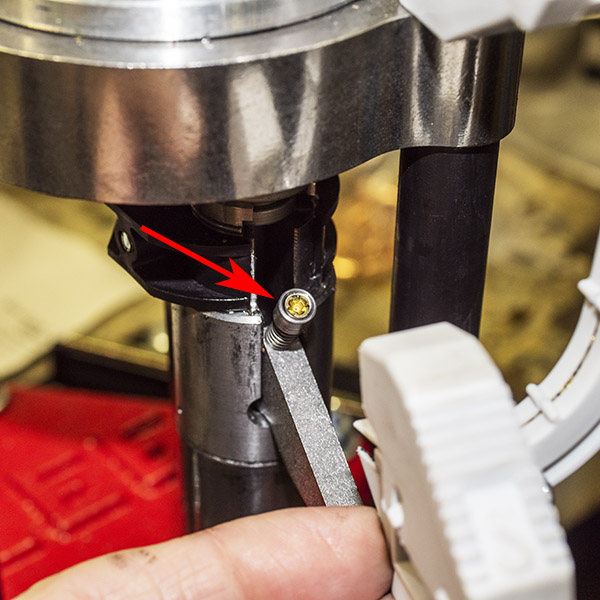
And there you go!

I then lowered the ram with a freshly sized case.  As the ram moved down, the primer arm contacted the press base and began to rotate into the ram.
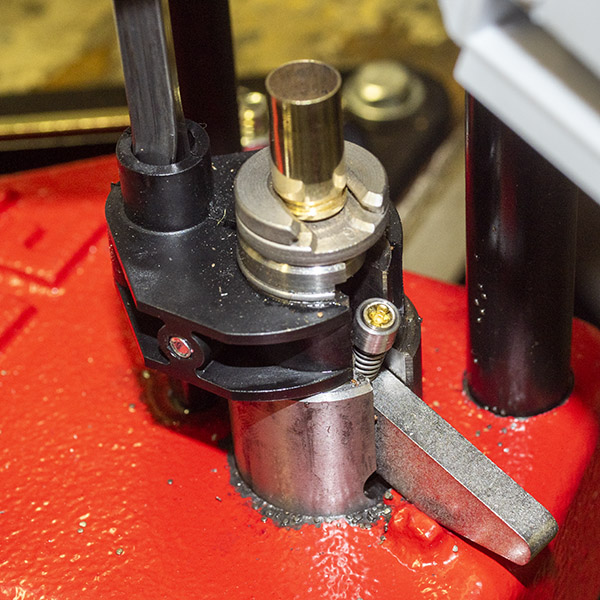
Lowering the ram rotates the primer arm into position.

When the ram approached the last part of its travel, the primer arm positioned the primer directly beneath the deprimed and resized case.  As I moved the lever up for to complete the stroke, I could feel the primer being seated.
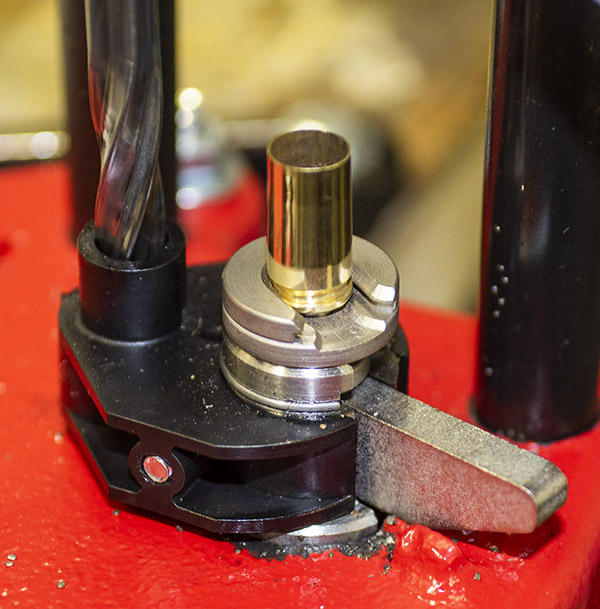
Fully lowering the ram seats the primer into the case that was deprimed on the upstroke.
A freshly primed case.

Wow, this was cool stuff.  I had already adjusted the Lee auto-drum powder measure to throw the correct charge of Accurate No. 5 powder (see our earlier blog).   Now all I needed to do was to adjust the bullet seating die and the factory crimp die.

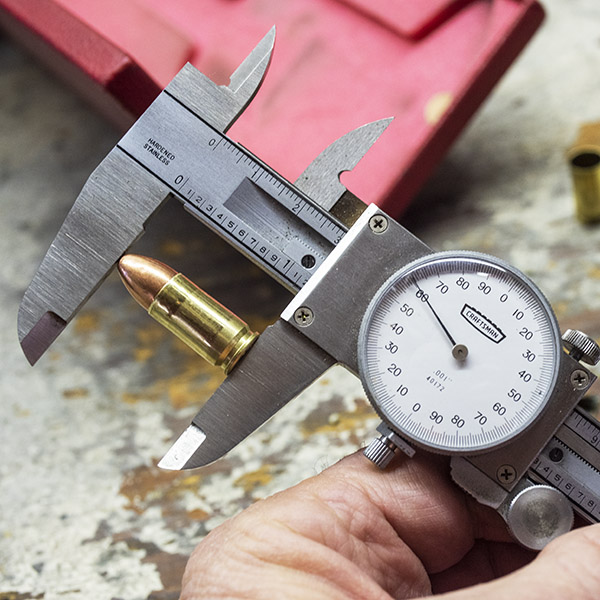
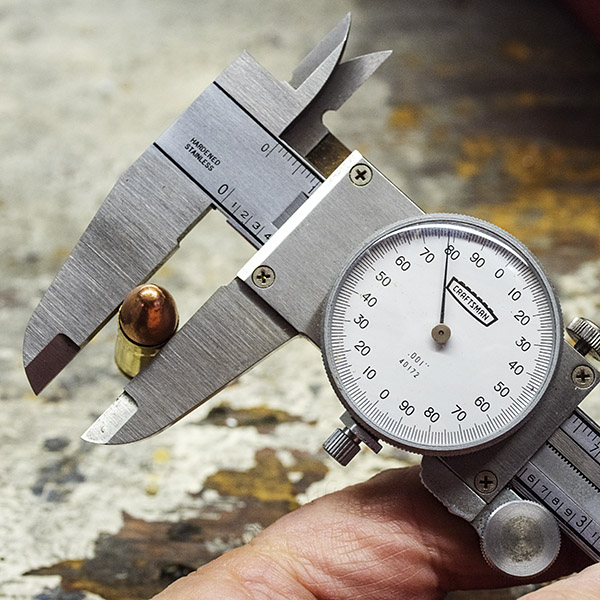
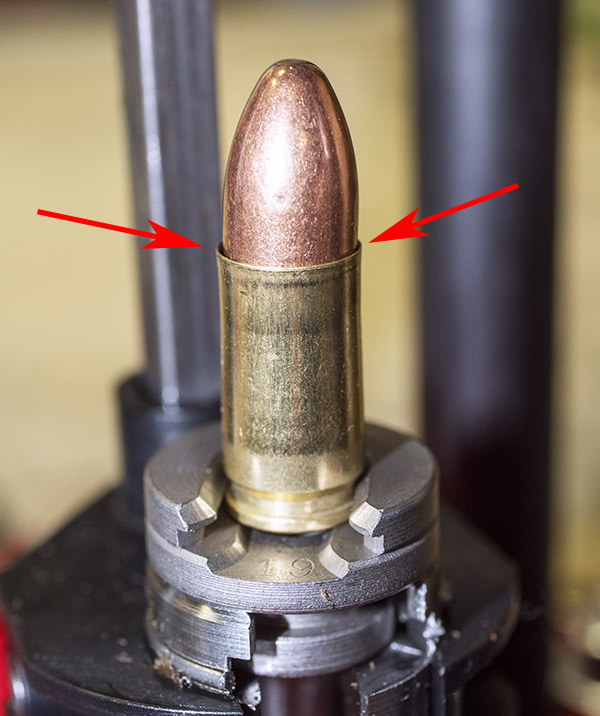
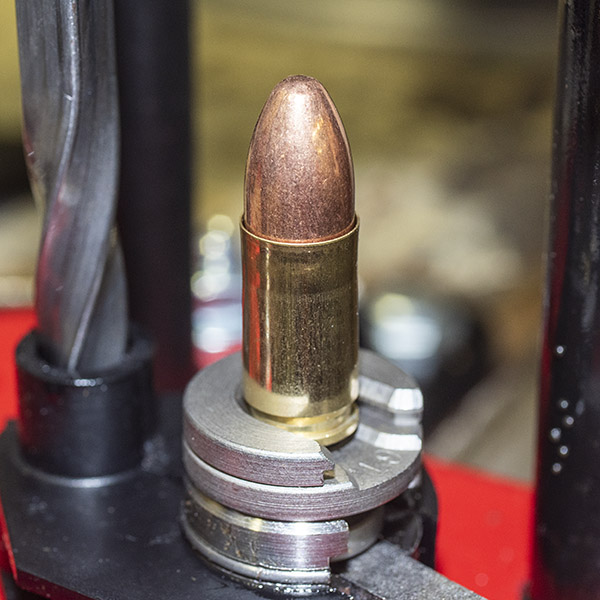
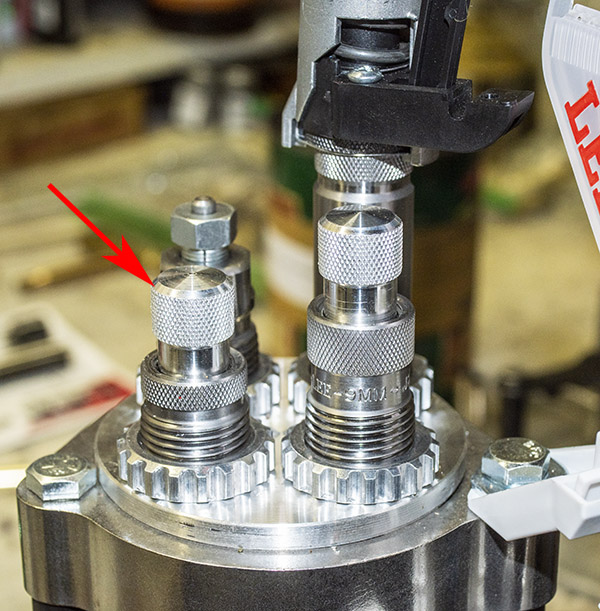
Adjusting the bullet seating die involved positioning the turret so the case was directly beneath the die.  I wanted to seat the bullet to the desired cartridge overall length, but I didn’t want to crimp the bullet with the bullet seating die.   That involved running the die all the way into the turret so that it contacted the shellholder, and then backing it out enough so the crimping feature in the die did not contact the cartridge case mouth.   Then, the next step was to adjust the bullet seater (the knob on top of the bullet seating die) so that it achieved the desired cartridge overall length (in this case, I was shooting for 1.160 inches).  The Lee Modern Reloading manual recommend 1.169 inches, but I didn’t want the cartridge to be that long.  I made the adjustment by putting a bullet in the case mouth and repeatingly running the ram up, screwing in the bullet seater a little bit at a time between each stroke until it seated the bullet to a cartridge overall length of 1.160 inches.   All this is explained in more detail in our earlier blog on using Lee’s Deluxe 4-die set.
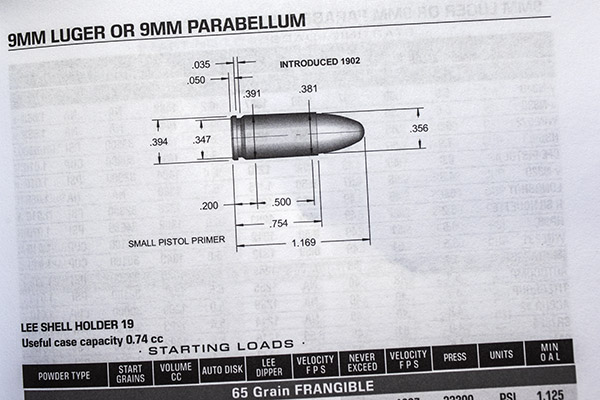
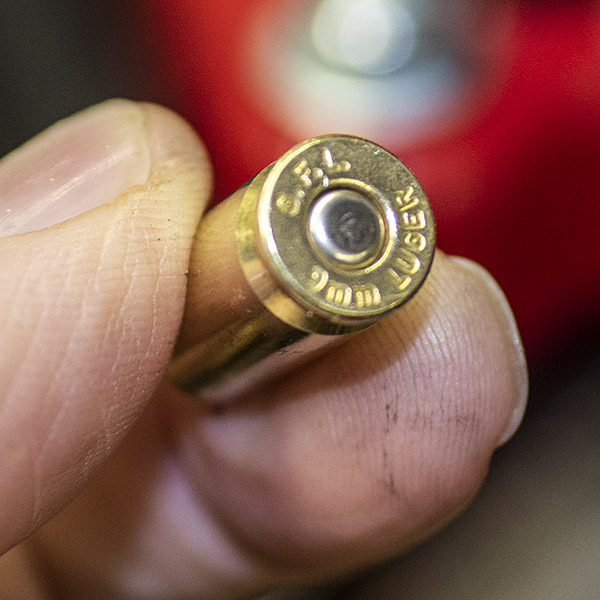
The 9mm Luger cartridge dimensions as shown in the Lee Modern Reloading manual.
A 124-grain plated roundnose bullet started in a 9mm case.
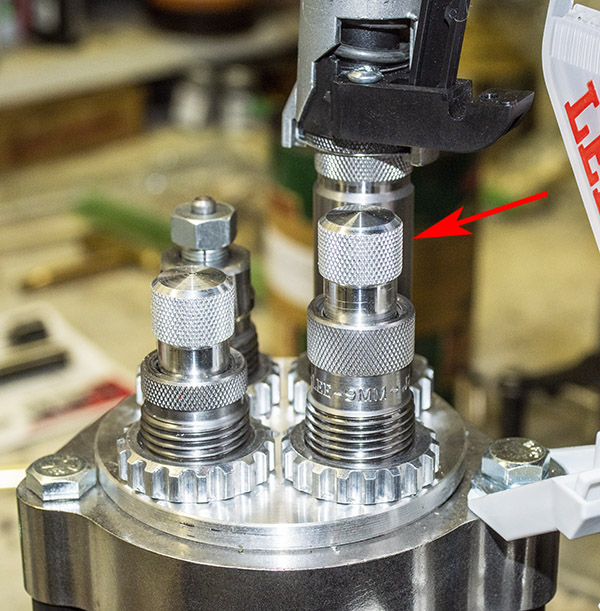
The bullet seating die. The red arrow points to the bullet seater. Screw it in to seat the bullet deeper, screw it out to not seat the bullet as deep.
Right on the money, at the desired cartridge overall length of 1.160 inches.

Now that I had the bullet seating die adjusted, the last step was to adjust the crimping die.  That’s also explained in detail in our earlier blog on using Lee’s Deluxe 4-die set.  What his entailed was raising the ram fully and then screwing the factory crimp die into the turret until it contacted the shell holder.  I then adjusted the crimp by screwing in the crimping feature in the crimping die.  Lee recommends a case mouth dimension of 0.381 inches; I wanted a case mouth outside diameter of 0.378 inches.   I wanted a stronger crimp.
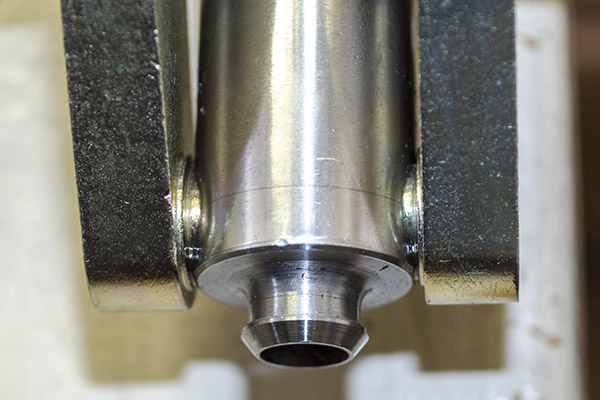
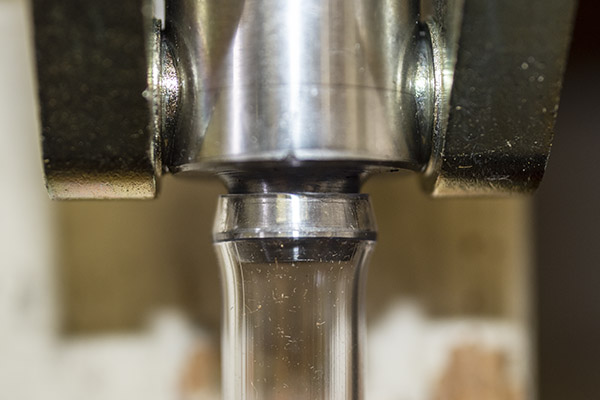
The Lee factory crimp die. The red arrow points to the crimp adjustment. Screw it in for a stronger crimp, screw it out for a less aggressive criimp.
A cartridge mouth outside diameter of 0.378 inches.

At this point, I was ready to start loading.  I found it easy to do with the Lee Classic Turret Press Kit.  After loading powder into the auto-drum powder measure and primers into the safety prime primer tray, and positioning the sizing die directly over the ram, I got into a rhythm.  The sequence goes like this:

      1. Place a fired 9mm cartridge case in the shellholder.
      2. Raise the ram to resize and decap the case.
      3. Push the safety prime trigger down and into the priming arm.
      4. Lower the ram (this advances the turret to place the expander die over the ram) and seat the primer.
      5. Raise the ram to charge and flare the case.
      6. Lower the ram (this advances the turret to place the seating die over the ram) and place a bullet in the case mouth.
      7. Raise the ram to seat the bullet.
      8. Lower the ram (this advances the turret to place the crimping die over the ram).
      9. Raise the ram to crimp the bullet.
      10. Lower the ram (this starts the sequence again by advancing the turret to place the sizing die over the ram).
      11. Remove the reloaded cartridge and place it in the ammo box.

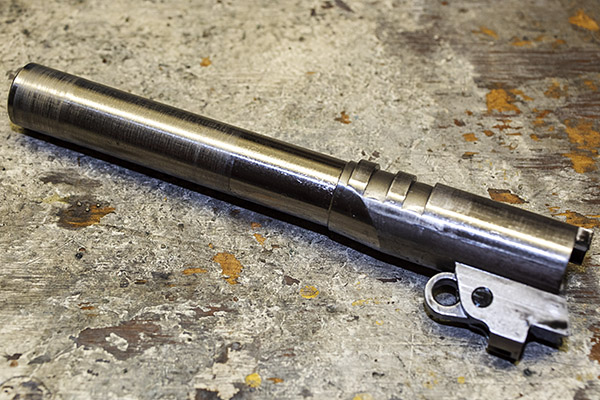
After the first few rounds, it was time for a fit check, also known as the plunk test.  I shoot a lot of 9mm; it is one of my favorite cartridges.  I have three 9mm handguns:  A SIG P226, a Springfield Armory 1911, and a Smith and Wesson M&P Shield.  Of these, the Springfield has the tightest chamber, so I use its barrel (after taking it out of the gun) for the the plunk test.  If my reloaded 9mm rounds pass the plunk test in my Springfield barrel, they will feed and chamber in anything.
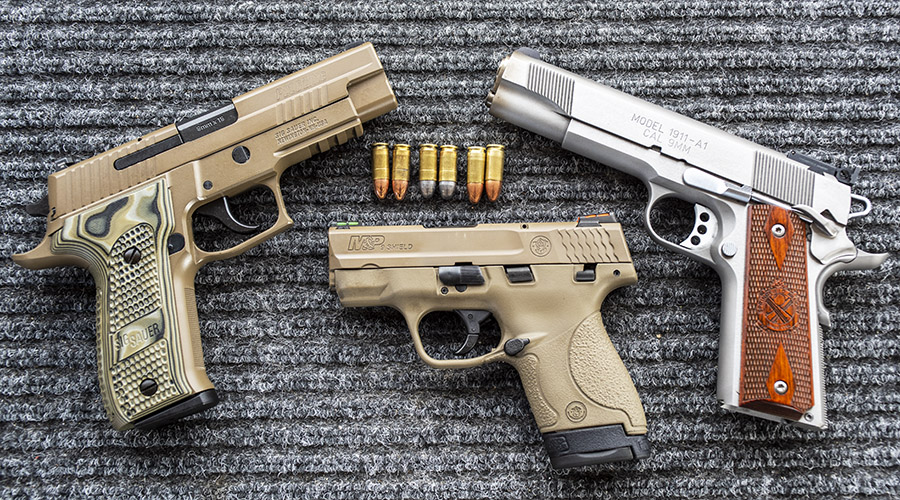
Three glorious 9mm pistols: A SIG P226, a Smith and Wesson Shield, and a Springfield Armory 1911.
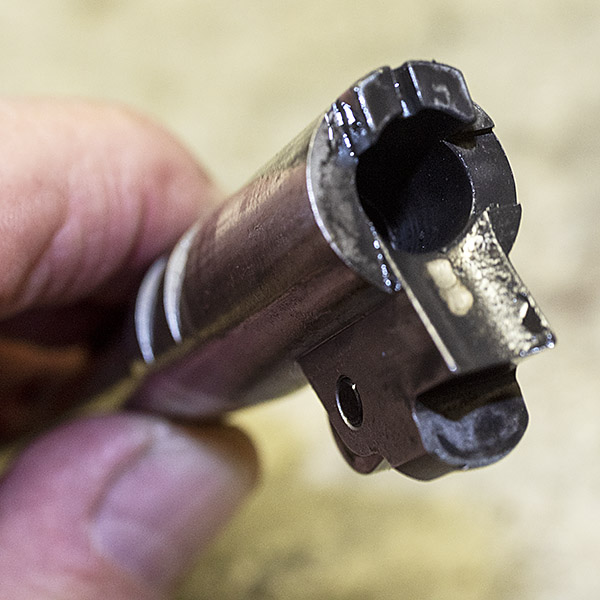
The Springfield Armory 1911 barrel.
I left the barrel dirty for a more stringent plunk test.

The plunk test is straightforward and highly technical.  I drop a 9mm round into the chamber, and if it drops in easily with a nice plunk, it passes the first part of the plunk test.
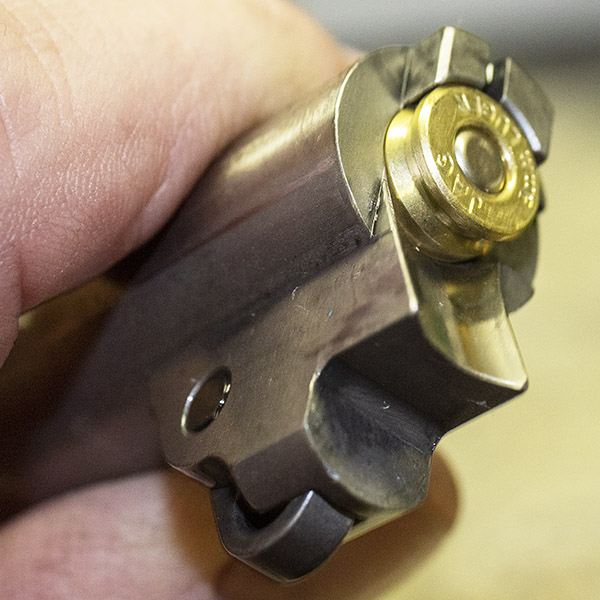
Plunk! Easy chambering in a dirty barrel with gravity feed. So far, so good.

The second part of the plunk test involves turning the barrel down, and if the round falls from the chamber with a nice plunk, it passes the second part of the test.
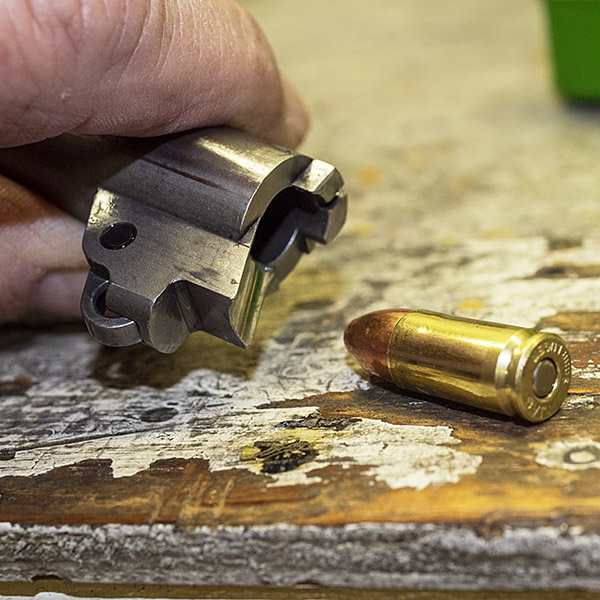
Plunk! Yep, a slight downward tilt and the reloaded 9mm round dropped right out. The Lee factory crimp die works wonderfully well.

If the first few rounds pass the plunk test, I’ll then proceed to reload the rest of the ammo.  That’s what I did here, and while I had the barrel out of the Springfield, I randomly selected a few more rounds and similarly plunk tested them.  They were good to go.

You know, I still do the plunk test on all of my 9mm ammo because old habits die hard.  Before I started using Lee’s Deluxe 4-Die set, I would occasionally experience plunk test failures, and what that meant is the rounds would most likely jam when I was on the range.  With Lee’s factory crimp die, that just doesn’t happen.   With Lee’s dies and this turret press, I suspect plunk test failures and jams will be a thing of the past.  You probably realize by now I really like my Lee dies.  And I absolutely love my Lee Classic Turret Press Kit.

After finishing the plunk test, we were off to the races.  I loaded one box of 9mm ammo, which took less than 20 minutes.   You can load high quality ammo quickly with the Lee Classic Turret Press Kit.
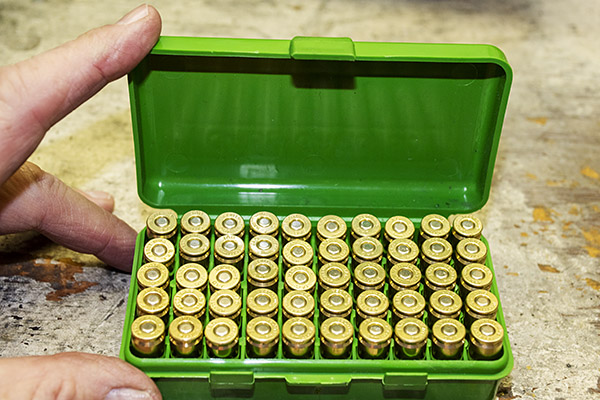
The first 50 rounds reloaded on my Lee Classic Turret Press. Life is good.

Next up…range firing the ammo you see above in a new S&W Shield, a SIG P226, and a Springfield Armory 1911.  That blog will post in a few more days.

Stay tuned!


One of the best places to buy Lee reloading gear is on Amazon.


Never miss an ExNotes blog:


Here are links to our earlier blogs on Lee reloading equipment:

Lee Auto-Drum Powder Measure
Lee Classic Turret Press Kit
Lee Bench Plate
Lee’s Modern Reloading Manual
Lee Safety Powder Scale
Lee Classic Turret Kit Unpacking
Lee .44 Magnum Dies 1
Lee .44 Magnum Dies 2
Lee .44 Magnum Dies 3
Lee .357 Magnum Dies

Setting Up Lee’s Classic Turret Press

By Joe Berk

This blog outlines the first steps in setting up the Lee Classic Turret Press Kit. Although it’s easy, there are a lot of steps and it’s more than you or I want to cover in a single blog.  I’ll present additional blogs covering this topic in the coming days.

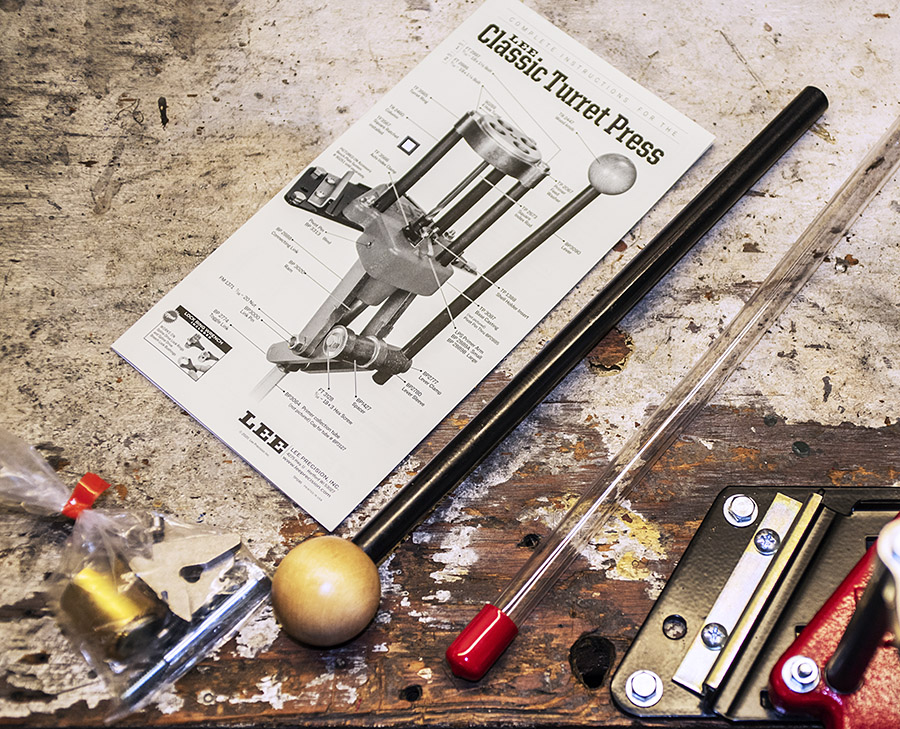
The Lee Classic Turret Press includes good instructions. The kit includes the turrent press, the handle, a spent primer catch tube, primer arms, and hardware.

After the turret press has been secured to your reloading bench (you can view the Lee bench plate installation blog here), attach the primer catch tube to the barb fitting beneath the ram.

This barbed fitting on the ram underside captures ejected primers.
The primer catch tube attaches to the barb.
The primer catch tube installed. It’s nice not having primers falling out. This is a well-thought-through design.

Lee provides a clear plastic bag containing the hardware items you see below.

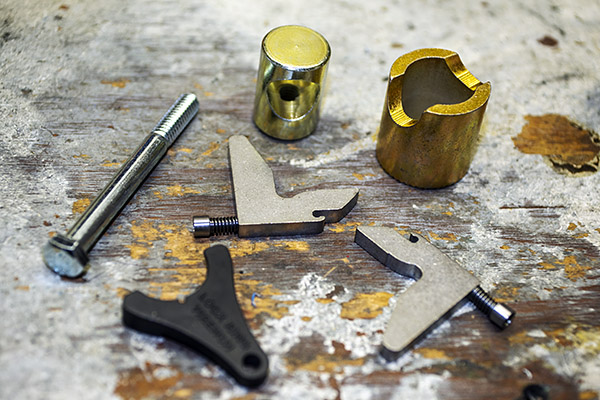
The handle bolt and fittings, the lock ring wrench, and two primer arms (one for small primers, the other for large primers).
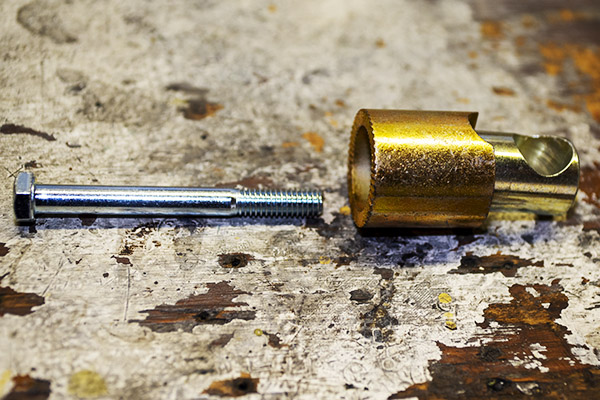
The handle attaching hardware.

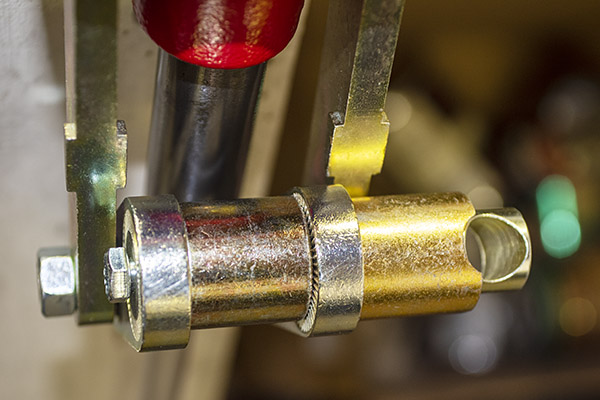
You can install the press handle to operate the press from either the left side or the right side.  I installed mine on the right side.  To do this, install the bolt from the left side and the two fittings (one goes inside the other) on the right side of the ram linkage.

Intallation of the handle’s half-inch bolt and the fittings in the ram attach point.

Insert the press handle on through the fitting, and then tighten the bolt.

The handle installed on the Lee turret press.

After installing the press handle, you can operate the press to cycle the ram. Each time you do so by raising and the lowering the ram, the turret head will advance a quarter turn (or 90 degrees) counterclockwise.  At this point, it’s a good idea to oil the ram, the ram linkage, and the turret.  I used gun oil on my press.  Lee states in their instructions that any gun oil will do.

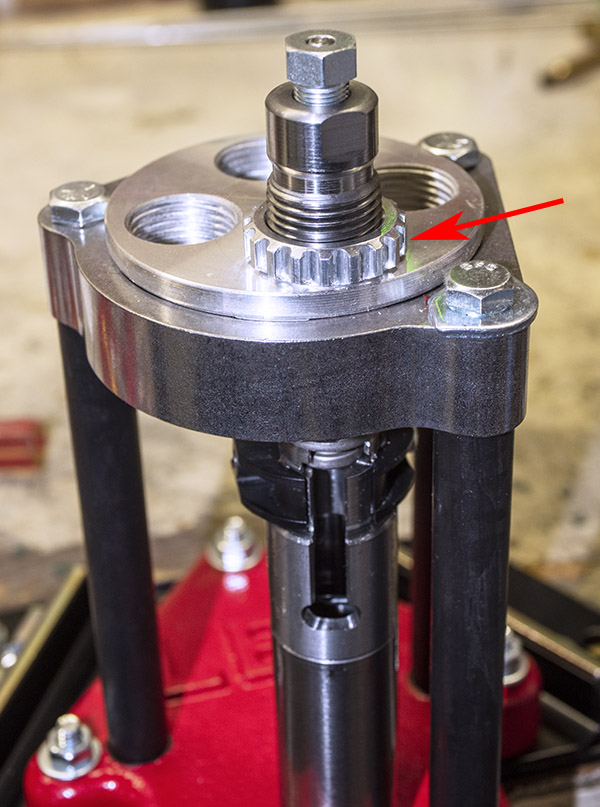
The lower arrow points to the ram. The upper arrow points to the twisted 1/4-inch-square bar that cams the turret 90 degrees counterclockwise with each ram cycle. It’s a very clever design.

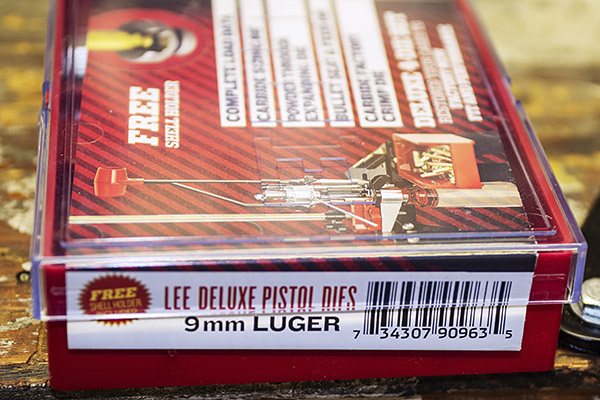
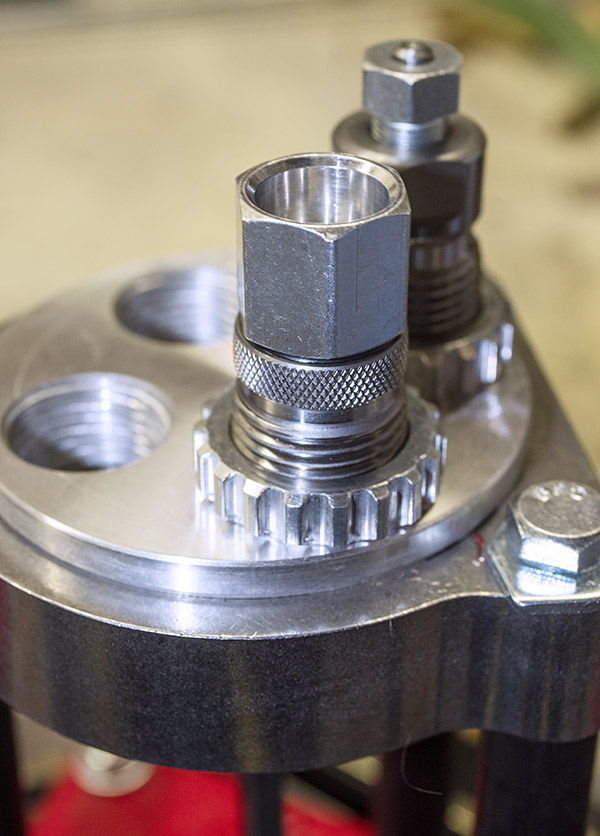
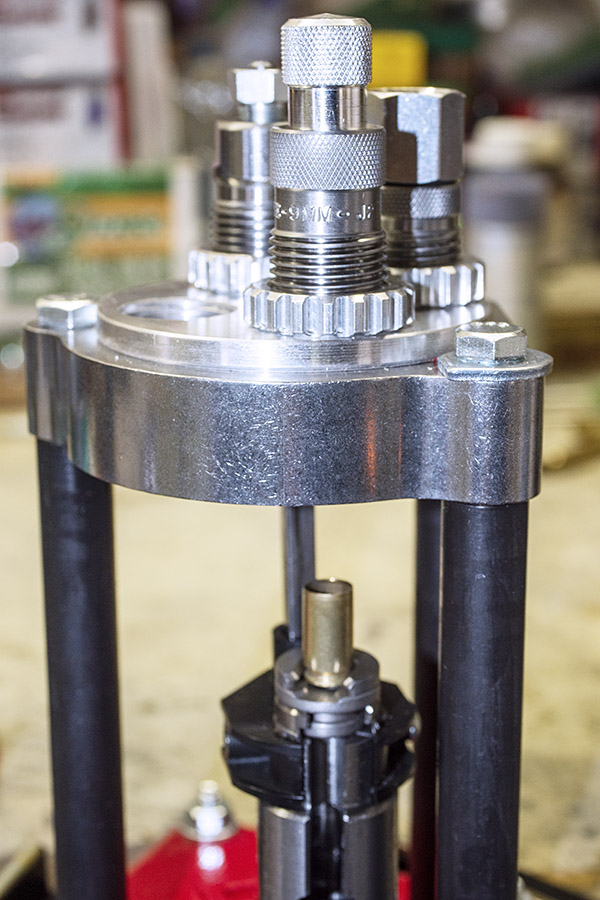
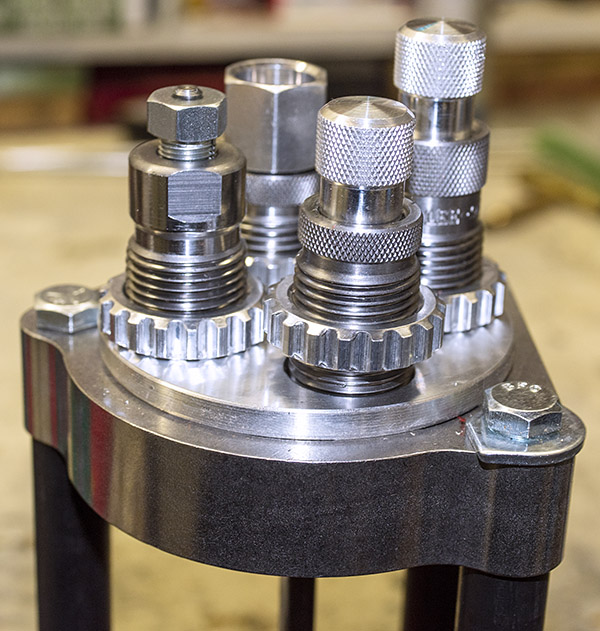
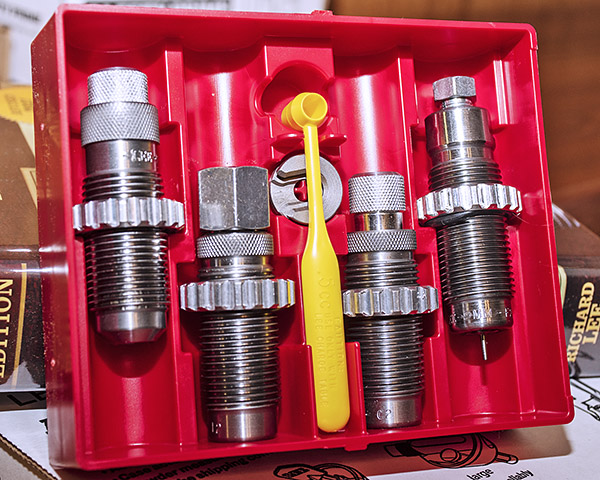
I’m going to initially reload 9mm ammo on my Lee turret press, so the next step involved installing the Lee Deluxe 4-die set in the turret.    We’ve previously written about Lee’s Deluxe 4-die sets for other cartridges here on the ExhaustNotes blog (we’ll include a set of links below).   In my opinion, they are the best dies available from any reloading equipment supplier.

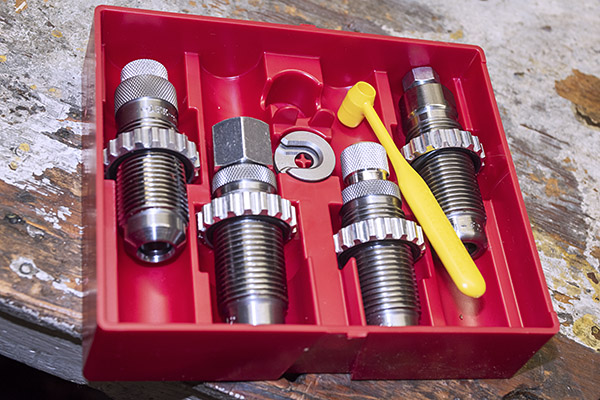
Lee’s Deluxe 4-Die Set in 9mm.
Lee’s Deluxe 4-Die Set includes a powder dipper, a shellholder, a resizing/decapping die, a powder through-hole expanding die, a bullet seating die, and the factory crimp die. Lee dies are the best dies I’ve ever used.  They are also the least expensive.

I started by installing the 9mm shell holder in the ram. After installing the shell holder in the ram, I raised the ram all the way up.

The 9mm shellholder in the turret press ram.

I next installed the the decapper and resizing die in the turret head.  With the ram fully raised, I screwed the sizing die into the ram until it contacted the shell holder, and then locked it in place with the locking ring.

The resizing die in the turret, locked in place by the locking ring.
I raised the ram fully, and screwed the sizing die all the way down so that the bottom of the die contacted the shellholder. Then I locked it in place with the locking ring.

After doing the above, I lowered the ram and inserted a 9mm case in the shell holder.   I then partially raised and lowered the ram halfway four times.  That rotated the turret to position the sizing die directly above the ram again.  You can also turn the ram manually.  With the sizing die directly over the ram, I raised the ram fully.   The sizing die resized the 9mm case, the old primer was pushed out of the case, and the primer was captured by the tube hanging beneath the ram.

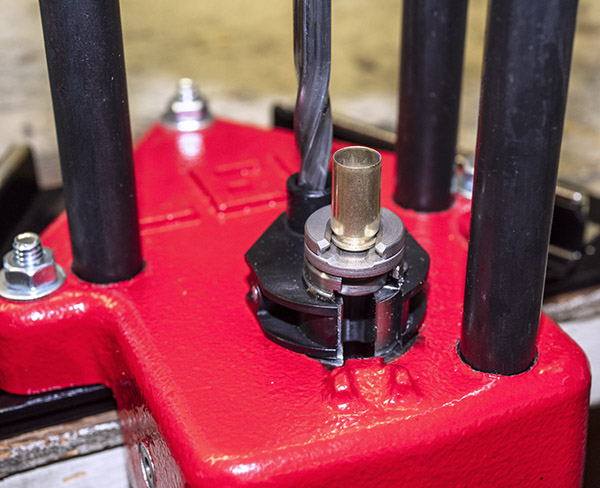
A 9mm case in the turret press.
Raising the ram to resize the case and push the spend primer out (the decapping operation).
When the ram is lowered, the turret is cammed a quarter turn counterclockwise.

The next die, installed one position to the left of the sizing die, was the expander die.   After raising the ram, I screwed it all the way into the turret such that it touched the shell holder, and I locked it in position with its locking ring.  I then repeated what I had done earlier.  I raised and lowered the ram halfway four times to bring the expander die back over the ram.  I put the 9mm case into the shellholder and ran the ram up fully.  It flared the case mouth perfectly, just enough to allow starting a 9mm bullet.

The expander die locked in place with its locking collar. This die is installed in the threaded turret hole one position to the left of the resizing die.
A 9mm, 124-grain plated copper bullet being fit checked in the flared case mouth. I’m not going to seat the bullet yet (we’ll discuss that in a subsequent blog); here, it’s only being fit checked after the case mouth flaring operation.

I then installed were the last two dies.  I installed the bullet seating die by partially screwing it into the turret’s third threaded hole, and then I installed the factory crimp die by partially installing it into the turret’s fourth threaded hole.  I didn’t attempt to adjust the bullet seating die or the factory crimp die yet; that will come later and we’ll discuss this in subsequent blogs.

The bullet seating die is the third die installed in the Lee turret.
The factory crimp die is the fourth die installed in the Lee turret.

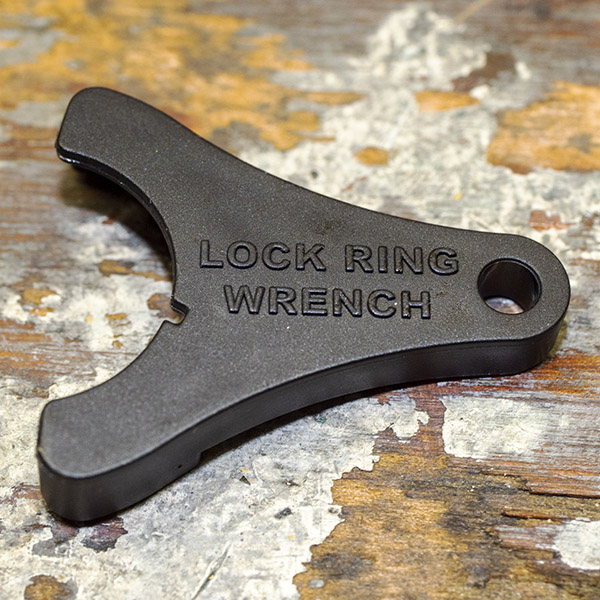
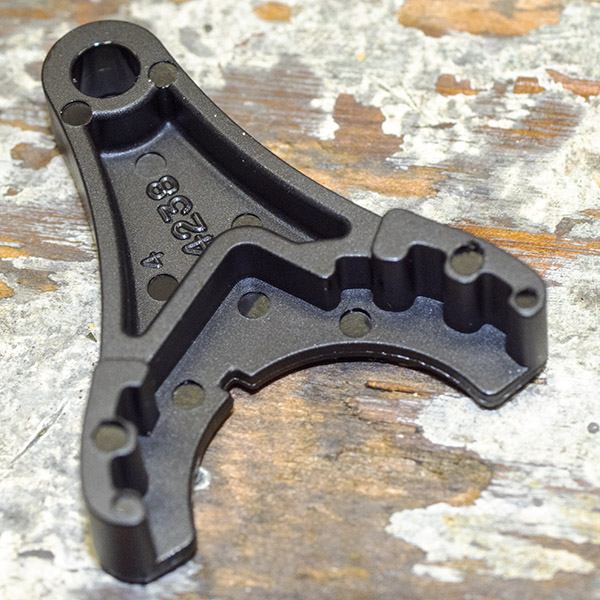
Lee includes two priming arms and a lock ring wrench in the clear plastic bag containing the turret press hardware.  You may have noticed that the four dies are right next to each in the turret.  The lock ring is a clever tool that makes it a bit easier to tighten the four dies’ lock rings.

The Lee lock ring wrench (top view).
The Lee lock ring wrench (bottom view).

Two days from now, I’ll cover installing and adjusting Lee’s auto-drum powder measure, and then after that I’ll have a blog on installing Lee’s safety primer feed.  Stay tuned, there’s more coming on this awesome reloader.


Never miss an ExNotes blog:


More reloading and more gun stories?  You bet!


Here are links to our earlier blogs on Lee reloading equipment:

Lee Bench Plate
Lee’s Modern Reloading Manual
Lee Safety Powder Scale
Lee Classic Turret Kit Unpacking
Lee .44 Magnum Dies 1
Lee .44 Magnum Dies 2
Lee .44 Magnum Dies 3
Lee .357 Magnum Dies
Lee’s Bench Plate

By Joe Berk

Our story on the Lee Classic Turret Press Kit continues.  There’s a lot in the kit, and we’re presenting articles on each item (links for our earlier Classic Turret Press Kit, its contents, and other Lee-related blogs are included at the end of this blog).   Today’s blog focuses on the Lee bench plate.  The bench plate allows quick installation and removal of any Lee press, and its price is $39.  The bench plate idea is a good one.  I own a couple of Lee progressive reloaders and I don’t have extensive real estate on my loading bench.  The Lee bench plate is the answer.

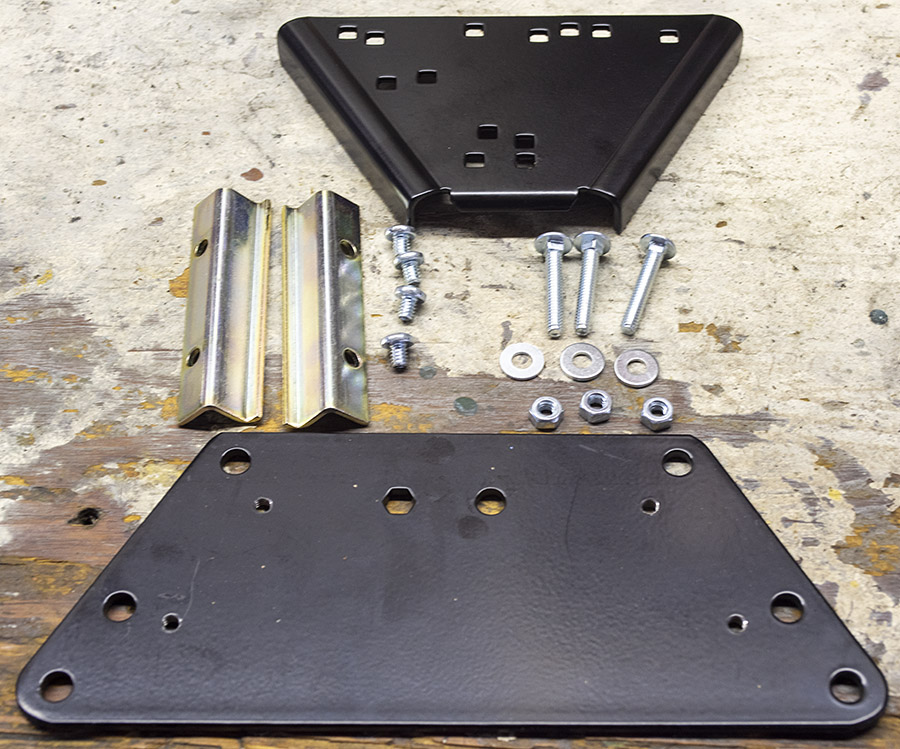
Here’s what you get in the Lee bench plate kit.

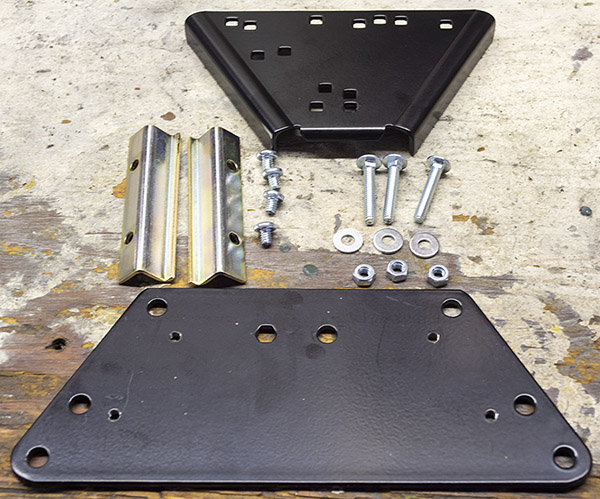
The Lee bench plate includes the lower plate, two Z-bars, four Phillips head screws, three panhead bolts with washers and nuts, and the upper plate.

The smaller upper plate bolts to the press base (the red casting that forms the base of any Lee reloading press).  The larger lower plate bolts to your reloading bench.  The two zinc plated pieces are Z-bars that screw into the lower plate and capture the upper plate bolted to the press.   The upper plate has several holes that allow it to be attched to any Lee press.  You can buy extra upper plates if you have other presses. It makes it easier to change presses on your bench.

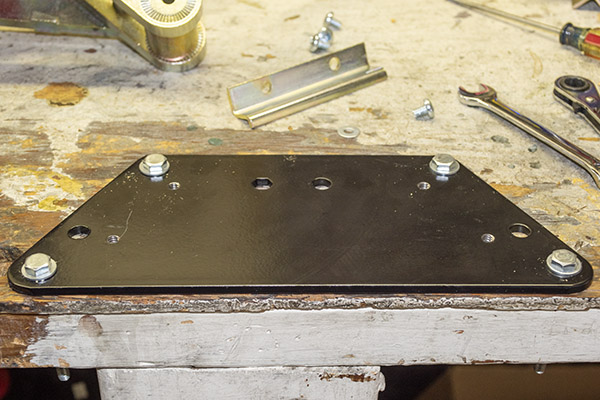
The Lee bench plate includes everything you’ll need except the bolts required to attach the lower plate to your reloading bench (that makes sense because Lee doesn’t know the thickness of your reloading bench).  You have to drill four holes through your bench to attach the lower plate.  Here’s what the lower plate looks like installed on my reloading bench.

The lower plate attached bo my reloading bench.

After attaching the lower plate to your reloading bench, the next step is to attach the upper plate to the reloading press.  I installed the upper plate on my Lee Classic Turret Press using the three panhead bolts, nuts, and washers Lee includes.  Note that the press is inverted in the photo immediately below.

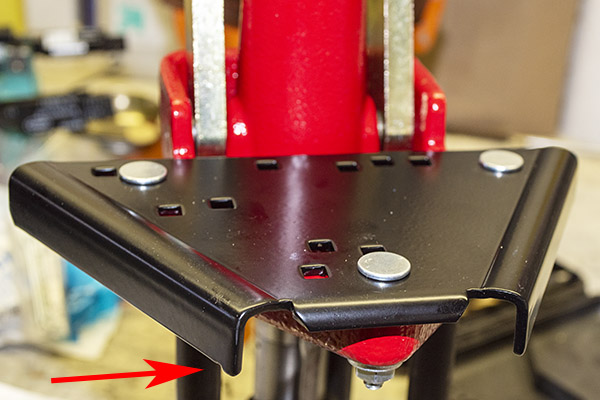
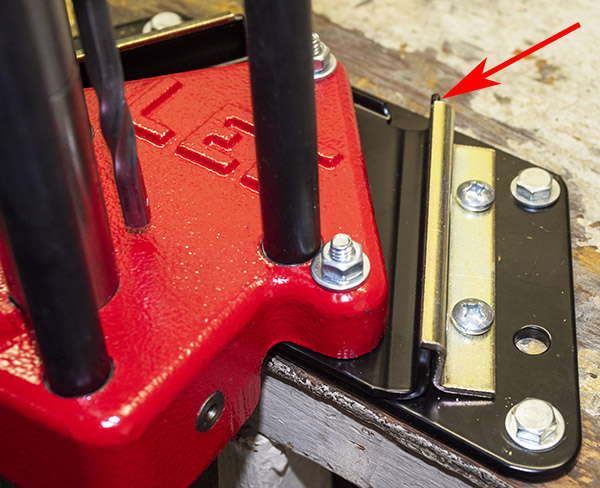
The upper plate attached to the press. The red arrow indicates the nub that prevents the press and upper plate from backing out. The press is upside down in this photo.

It’s not immediately apparent in the Lee instructions how to orient the upper plate (i.e., which side faces up).  It should be installed such that the flat base of the plate is at the bottom, and the two lips on either side extend up.  This will be more clear in the photos below.

Once the upper plate is attached to the press, the press and plate are set on the lower plate and the Z-bars can be secured to the lower plate with the four Phllips head screws Lee provides.  The Z-bars capture the upper plate, securing the press to the lower plate and the reloading bench.

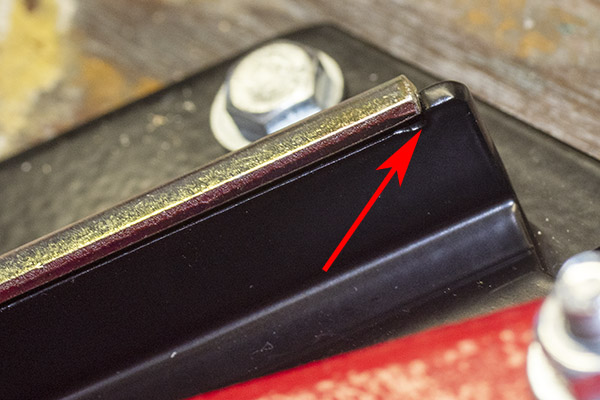
There are nubs at the end of the upper plate lips that catch the end of the Z-clamps (denoted by the red arrow), so then the Z-clamps are tightened, the little nub prevents the whole affair (upper plate and reloading press) from backing out.
A macro shot showing the upper plate nub captured by the Z-bar.

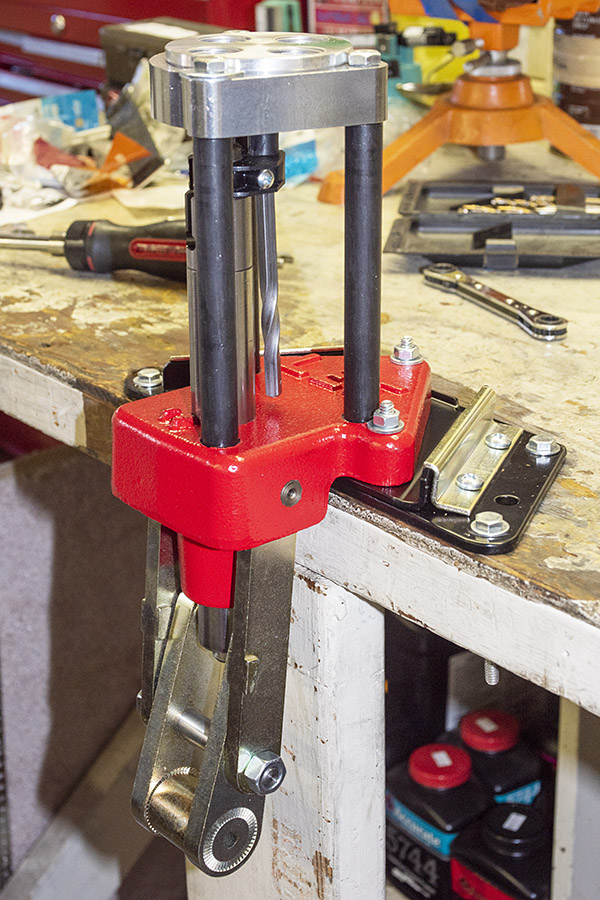
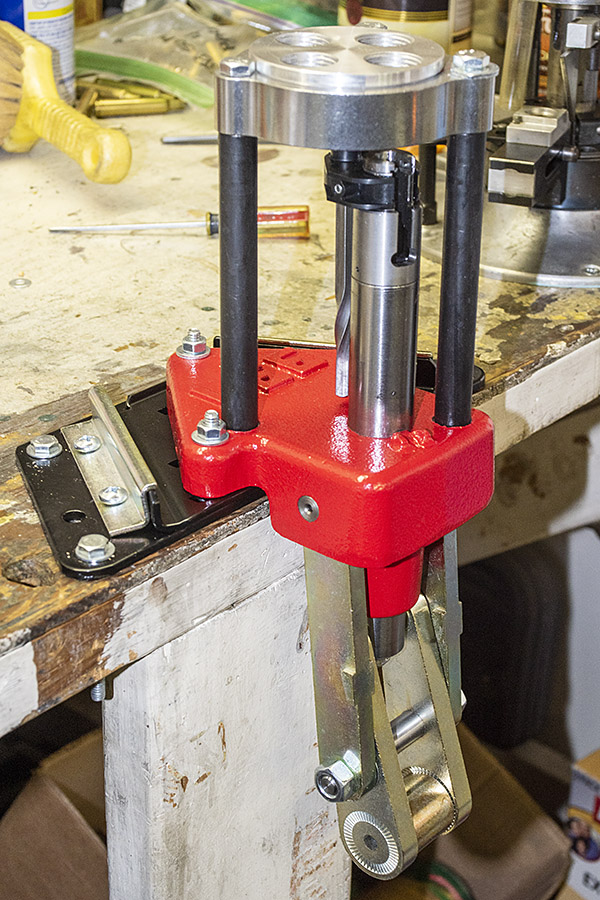
Here’s the press mounted on the bench with the Lee bench plate.  It’s a clever approach.

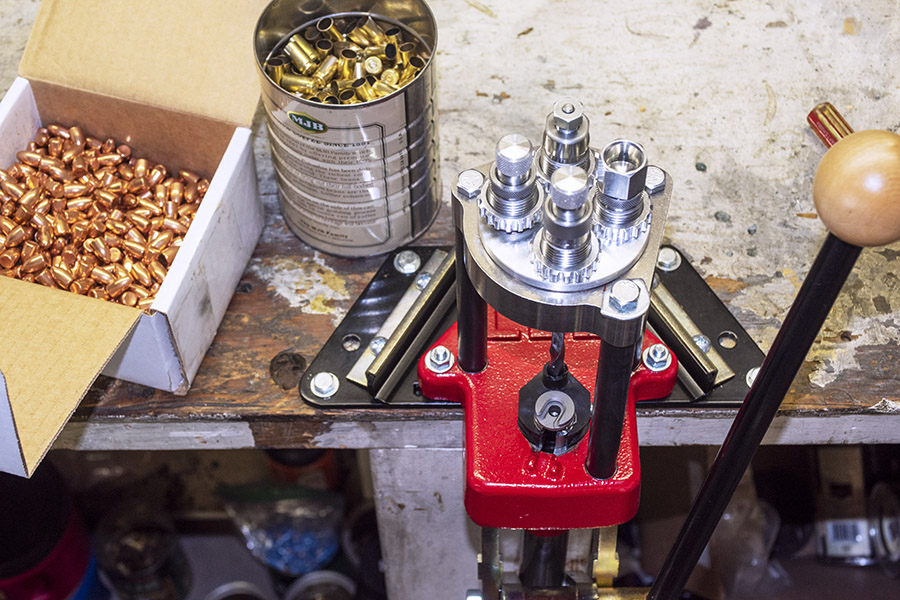
Lee turret press attached to the reloading bench with the Lee bench plate kit (right side).
Lee turret press attached to the reloading bench with the Lee bench plate kit (left side).

If you have other Lee presses or reloading gear, you can purchase additional upper plates (Lee calls this part the steel base block) directly from Lee.  Lee includes the mounting hardware (the panhead bolts, nuts, and washers) with each additional upper plate.  Lee lists the other equipment items compatible with the bench plate in their instructions:

    • Classic Turret Press
    • Load-Master
    • Breech Lock Reloader Press
    • Breech Lock Challenger
    • Classic Cast
    • Breech Lock Classic Cast
    • Pro 6000 Six Pack Progressive
    • Red Base Pro 1000
    • Red Base 4 Hole Value Turret Press
    • Year 2018+ Pro 1000 Press
    • Year 2018+ 4 Hole Value Turret Press
    • Auto Breech Lock Pro Press
    • Automatic Processing Press & Automatic Case Primer
    • Auto Bench Prime

If you don’t want to purchase additional upper plates, you can make your own upper plate from 3/4-inch plywood.   Lee includes a drawing in their instructions showing the dimensions of a plywood upper plate.  That’s a nice touch.  Lee also offers information on plywood bases for, as they describe it, “other color” presses.  That’s a nice touch, too.

The key question in all of this is:  Do you need the Lee bench plate?  If you use one press only, the answer may be no. You could just mount your press directly to the bench and not use the plate at all.  But if you own other Lee reloading gear (or another “other color” press), you might want to consider the Lee bench plate.  Or, if you want to get your press out of the way to use your bench for other purposes (such as cleaning a gun), it makes sense.  The bench plate greatly eases removing the Lee press for installing other equipment or to clear the bench.   It’s a good idea and good value for the money.  It makes sense for me.


Help us out, folks:  Hit those popup ads!


Never miss an ExNotes blog:


Check out our other Lee reloading equipment blog posts:

Lee Modern Reloading Manual
Lee Safety Powder Scale
Lee Classic Turret Kit Unpacking
Lee .44 Magnum Dies 1
Lee .44 Magnum Dies 2
Lee .44 Magnum Dies 3
Lee .357 Magnum Dies
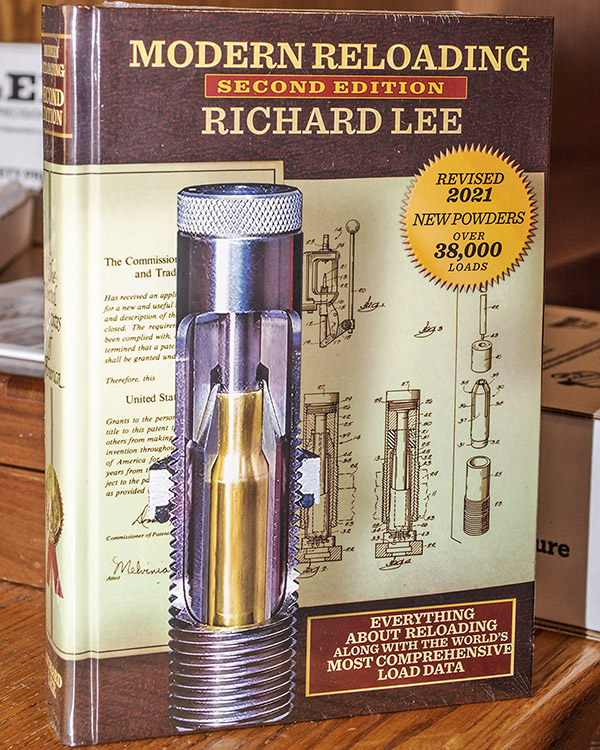
Lee’s Modern Reloading Manual

By Joe Berk

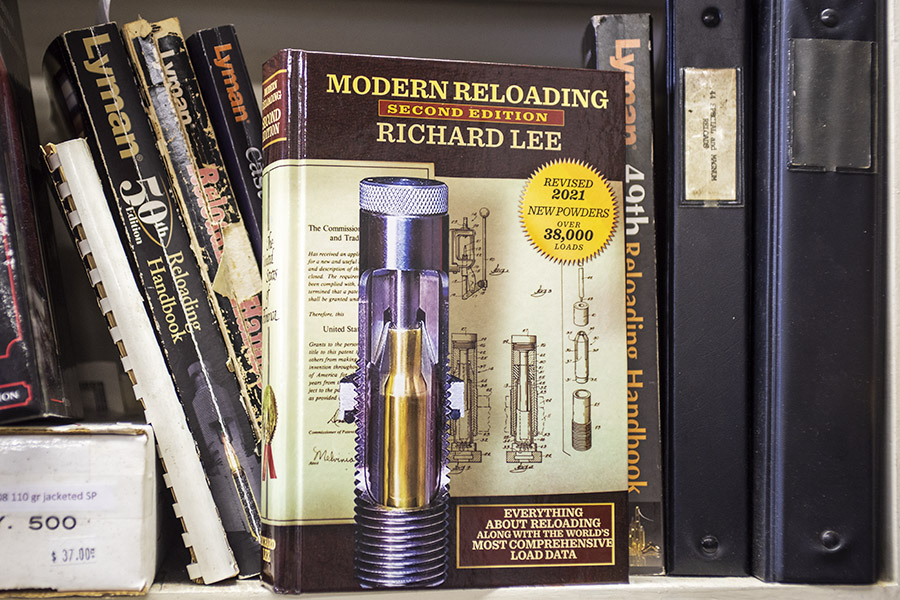
Lee’s Classic Turret Press Kit includes their Modern Reloading manual.   It’s written by the late Richard Lee (the founder of Lee Precision), it’s the second edition, and Lee’s retail price is $40.98.   By way of comparison, on Hornady’s site their reloading manual is $59.99, on Sierra’s site their reloading manual is $39.99, on the Lyman site their reloading manual is $34.98, and on the Speer site you get the load data for free (it’s published on their site).   You can also purchase the Lee manual on Amazon; oddly, the price on Amazon is higher than it is on the Lee website.

The Lee reloading manual is comparable in heft and contents to other big reloading manuals.  It’s a hardcover book with 692 pages and several chapters on various reloading topics, including basic instructions and more in-depth discussions of advanced reloading topics.  Richard Lee wrote the first parts covering various topics including the company’s history, Lee’s reloading equipment, primers and primer sensitivity (this was extremely interesting), how to reload, reloading for best accuracy, rifle reloading, handgun relaoding, measuring powder, powder safety, pressure issues, matching bullet metal to chamber pressure, hardness testing, bullet casting and sizing, shotgun reloading, and muzzle loading.  I thoroughly enjoyed reading Lee’s articles.  They are written in a folksy, technical, and easy to follow manner. It’s like having a conversation with one of my shooting buddies.  That, all by itself, is a good reason to buy the Lee reloading manual.

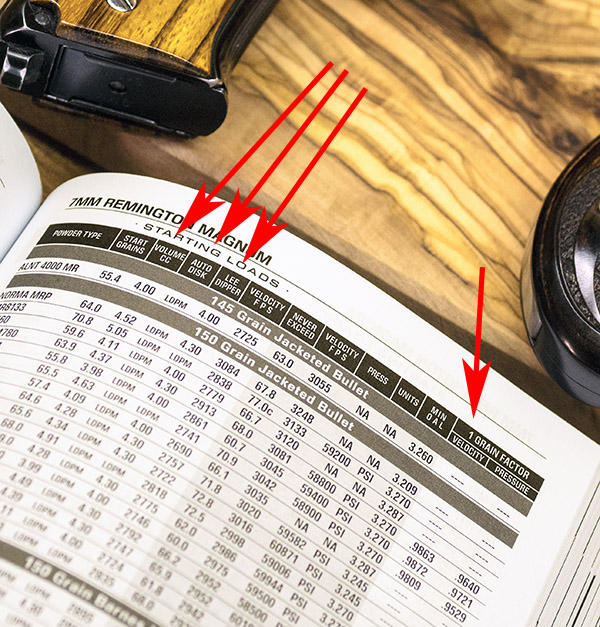
A load table inside the Lee reloading manual showing some of the date it contains that other reloading manuals do not. This includes the starting charge volume, the Lee dipper number, the Lee Auto-Disk number, and the 1 Grain Factors.

The load data tables start on Page 161 and continue to Page 686 (the load tables comprise most of the book).  These are interesting and they include several bits of data not found in other reloading manuals.  There’s the usual dimensioned cartridge drawings, starting load and max loads, the pressure, and the velocities, and then there’s more.  These additional pieces of information not usually found in other reloading manuals are:

    • Useful Case Capacity.  On each of the load table cartridge drawings, Lee includes the useful case volume in cubic centimeters.  Why this is useful will be apparent when you read the next bulleted statement.
    • Volume cc.  This table entry, immediately to the right of the starting load, shows the volume occupied by the starting charge.  You can compare this to the useful case capacity info (see above) included in the cartridge drawing to get an idea of how full the cartridge case will be at the starting charge.  Usually, a cartridge will perform better if the case is full or nearly full.  I’ve not seen this information in other reloading manuals.  I think it’s a good thing to know when selecting which powder to use.
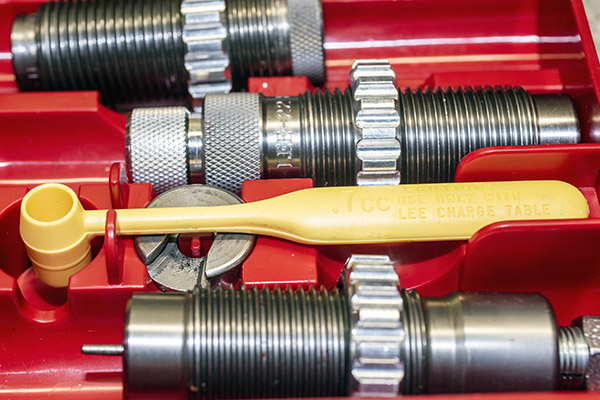
    • Lee Dipper.  Lee manufactures different size powder dippers.  The powder dipper is basically a yellow plastic spoon used to scoop a known volume of powder.  Some reloaders use this approach rather than using a powder dispenser or a scale, but others do.  Dippers are included with Lee dies, and you can also buy a set of different sized dippers separately. It’s not the powder measurement and dispensing approach I used, but I found the data interesting.  I’ve never seen this data in other load manuals.
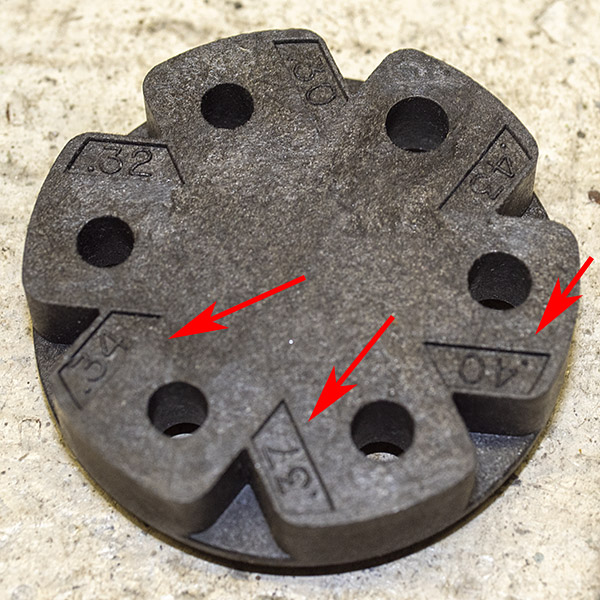
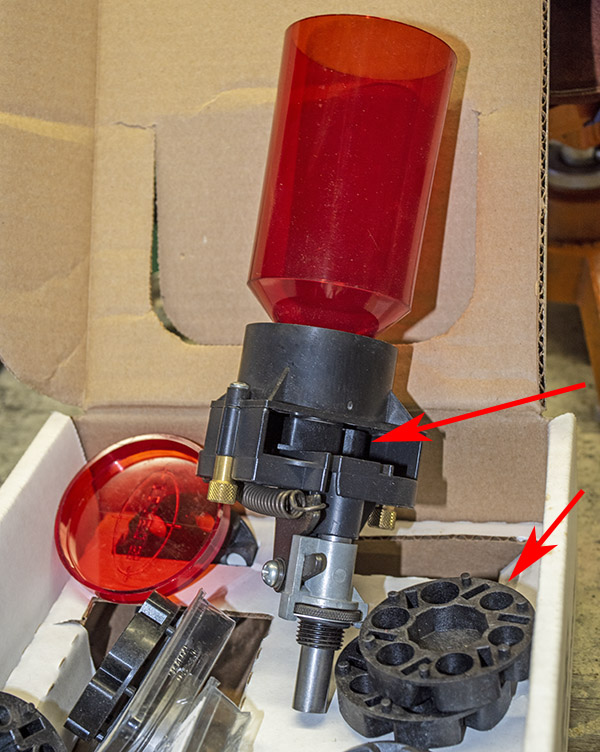
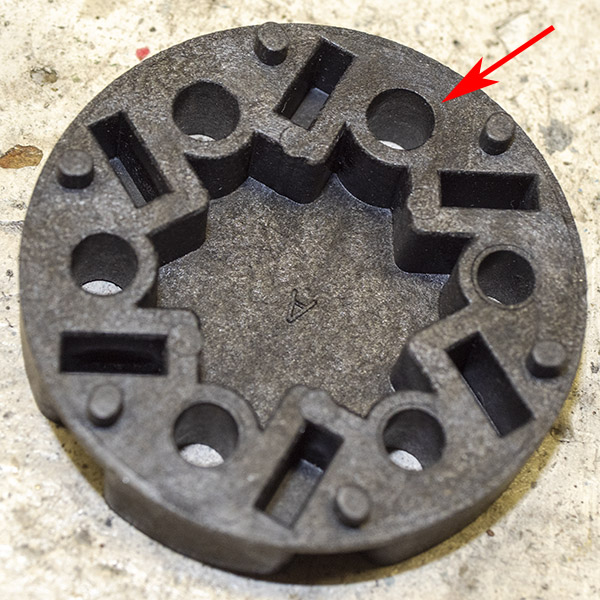
    • Auto-Disk.   Lee makes an Auto-Disk Powder Measure.  It’s a device that uses a sliding disk with different volume chambers (or cavities) in it to control the volume of powder dispensed by their Auto-Disk Powder Measure.  These cavities are denoted by decimal numbers.  The Lee reloading manual tables identify the appropriate Auto-Disk to use with charges included in the table.  I’ve never seen this data in other manuals.
    • 1 Grain Factor.  This is another bit of data not included in any other reloading manual I’ve ever seen.   The 1 Grain Factor can be used to show velocity reduction if the maximum powder charge is decreased by one grain.  You take the maximum velocity, multiply it by the 1 Grain Factor, and it will show the decrease in velocity that will be realized by reducing the powder charge 1 grain.  There’s a similar 1 Grain Factor included that can be used to calculate pressure reduction for a 1 grain powder reduction   The 1 Grain Factors are not included for every cartridge (they are included for the hotter magnum cartridges such as .44 Magnum and 7mm Remington Magnum).
A Lee dipper included with a set of Lee reloading dies. The dipper is a powder scoop. You can also buy the dippers separately.
An earlier Lee Auto-Disk Powder dispenser. This powder dispensing approach used disks (see lower arrow) installed in the dispenser (see upper arrow). The disks contained different cavities that dispensed different powder volumes.
A Lee Auto-Disk powder disk, as seen from below. The cylindrical openings collect different volumes of powder from the Auto-Disk hopper. Selecting different openings will dispense different charges.
Lee Auto-Disk powder disk as seen from above. The volume designator for each cavity is identified on the disk top. The Lee reloading manual shows which opening to use for a selected powder charge. No other reloading manual contains this information.

The Lee manual breaks with typical reloading manuals on the order in which loads are shown.  In other manuals, the cartridge sequence is organized by bullet diameter, and then within each bullet diameter category, by cartridge maximum velocity. There is a table of contents in the Lee manual (it’s on Pages 159-160) showing all the cartridges included in the Lee manual and where their load data appears.

If you are a reloader who enjoys getting into the more technical aspects of load development (and what reloader isn’t?) I believe you will thoroughly enjoy Lee’s Modern Reloading.  I think it’s a first-class work as good as or better than the manuals from Lyman, Sierra, Hornady, and other reloading manual publishers.  It’s money well spent, and when you purchase Lee’s Classic Turret Press Kit, you basically get it for free.


Keep us going…please click on the popup ads!

Never miss an ExNotes blog:


Read our blogs on other Lee reloading gear:

Lee Classic Turret Press Kit 1: Unpacking

By Joe Berk

We’re writing a series of blogs on the Lee Precision Classic Turret Press Kit, and this first one focuses on unpacking and taking an initial look at the kit. I think the YouTube kids call this a “reveal.”  I’ll just call it unboxing and seeing what’s in the box.  I thought I could do a single blog on the Classic Turret Press Kit, but there’s too much included in the kit and too much that’s new to me to handle in one blog.  We’re going to instead do a series of blogs:  One on each item that’s included with the kit, a blog on setting the press and dies up, a blog on reloading with the Lee equipment, and a blog on how the ammo reloaded with the Classic Turret Press Kit performs.   There’s a lot here.  You’ll get a feel for just how much in this initial blog on the Classic Turret Press Kit.

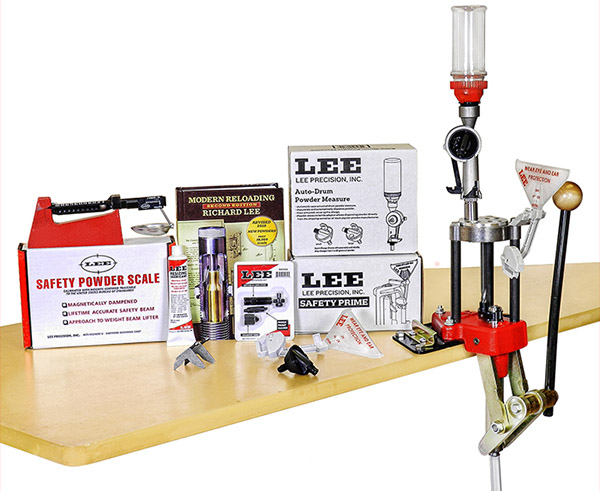
Here’s the picture on Lee’s website for the kit, which Lee advertises for $380.

The photo above shows everything set up, but the photo doesn’t do justice to the excitement associated with getting this kit, taking everything out of the box, and opening it.  Nor does it convey what I expect to be the satisfaction I’ll experience with using the Lee equipment.  That will be the subject of future blogs.  Think of this first blog as Christmas morning. That’s what opening and unpacking the Lee kit felt like to me.

ExNotes blog readers will recall that good buddy Jose left a comment on one of our Lee Deluxe 4-die set blogs.   Jose told us about his Lee turret press.  He wrote a guest blog or two for us here on ExNotes and he is a Ruger No. 1 aficionado, which means he stands tall with me.  After reading Jose’s comments, I had to check out the Lee Classic Turret Press Kit myself, and after poking around on Lee’s site a bit and seeing what the Lee kit included, I knew I wanted one.  I specifically wanted to set it up for 9mm using Lee’s Deluxe 4-die set.  I’ve been using older 9mm dies from various die makers, and my reloads would sometimes jam.  With my old dies, the crimps were inconsistent, and I knew from my experience with Lee’s .357 and .44 Magnum Deluxe dies I wouldn’t have that problem with Lee equipment.  I have the Lee Deluxe handgun die sets in 38 Special/357 Magnum, 44 Special/44 Magnum, .45 Colt, and .30 Carbine, and the ammo I reload with those dies is exceptional (better than anything I loaded with other manufacturers’ dies).  I use Lee dies for several rifle cartridges, and I have more than a few other bits of Lee equipment.  I’ve been pleased with all of it.

Lee advertises that their Classic Turret Press Kit includes everything needed to start making ammo, except for the dies and, of course, the components (brass, powder, primers, and bullets).   I have plenty of components, and the thought of wringing out the Lee gear, writing about it, and testing the ammo in a couple of my favorite 9mm handguns checked all the boxes for me.  This will be a fun project and I want to share the excitement with you.

I placed my order with Lee for the Classic Turret Press Kit, the Bench Plate Kit (something I saw on their website that appealed to me), and the 9mm dies.  It all arrived a few days later, well packed in a single box.  I was impressed with how fast it arrived (it shipped during the holiday season) and the packaging.  The Lee folks have done this before; it’s first class customer service.

This is the right time of year to open a box full of goodies and examine the contents.  I was a kid on Christmas morning.  This was fun!

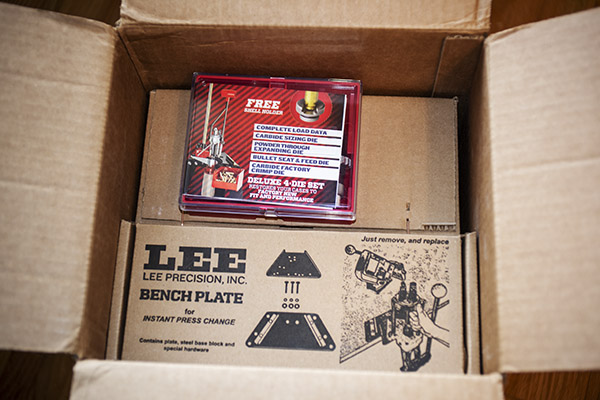
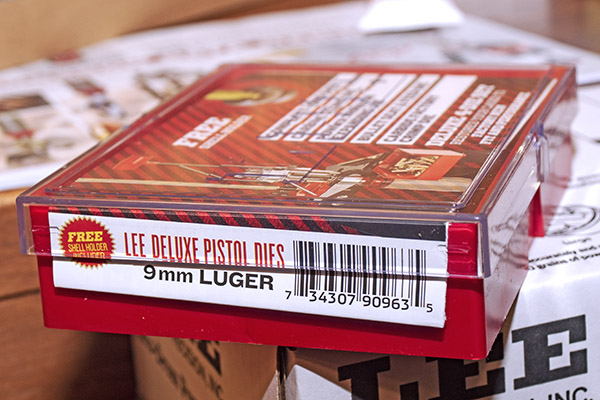
When I opened the outer container, I saw my 9mm Deluxe 4-die set and the Lee bench plate.

As I mentioned above, I’m a firm believer in Lee’s Deluxe dies.  I can’t wait to put these to work making 9mm ammunition for my SIG P226 Scorpion and Springfield Armory 1911.

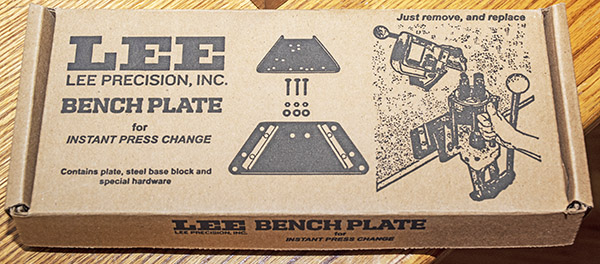
The idea behind the Lee Bench Plate is that it’s a quick detach/attach mount for a Lee press. It’s not included with the Classic Turret Press Kit (it’s priced at $39 on Lee’s website), but I like the idea of being able to quickly remove the press from my reloading bench.  You’ll get a complete report on setting up and using the Bench Plate in a future ExNotes blog.

After unpacking the 9mm dies and the bench plate, I pulled out the Lee Classic Turret Press Kit.  This was like one of those Russian dolls.  I was peeling the onion and enjoying it.

When I opened the Lee Classic Turret Press Kit, I found the Lee Safety Primer Feed, a tube of Lee Resizing Lube, and the Lee Case Conditioning Kit.

The Lee Safety Primer Feed (shown in the two photos below) is a device I have not used before.  I’ll explain how it works in a future blog.  I have three other Lee priming devices and I’ve been using them for decades with no problems.  The Lee Safety Primer Feed sells for $30.

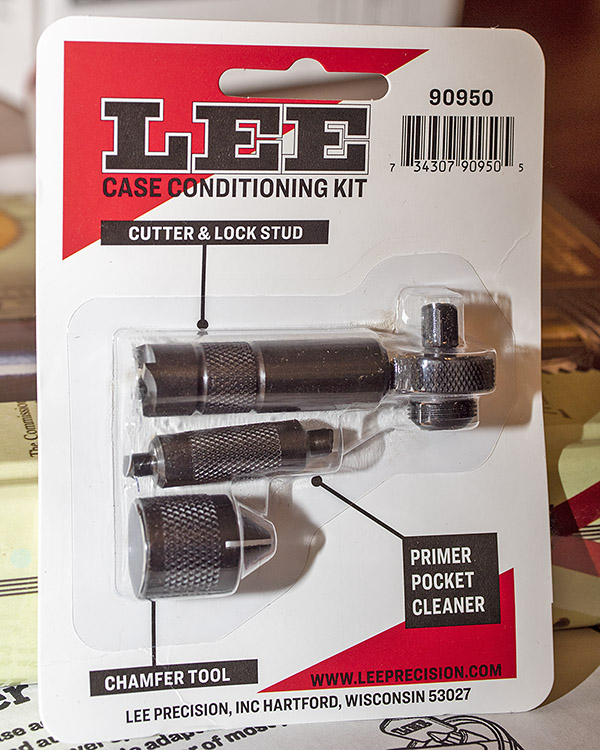
Lee includes their Case Conditioning Kit (see the photo below) with the Classic Turret Press Kit.  The Case Conditioning Kit consists of a primer pocket cleaner, a case cutter and locking stud, and a chamfer to bevel the case mouth after it has been trimmed.  I have not used these tools from Lee before; it will be interesting to see how they perform.  I have other equipment that performs these tasks, but I had to buy those items separately.  With the Lee Classic Turret Press Kit, it’s all included. The Case Conditioning Kit lists for $12.98 on the Lee site.

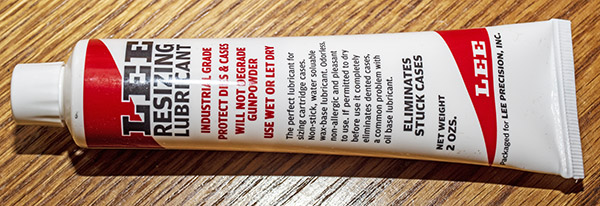
I won’t need the Lee Resizing Lube shown below because my new Lee 9mm dies include a carbide resizer (which negates the need for case lubrication).  Not having to lube the cases is a good thing.  On rifle cases, though, lube is necessary, so I’ll put the lube to good use on those.   The price for Lee’s Resizing Lube is $5.98.

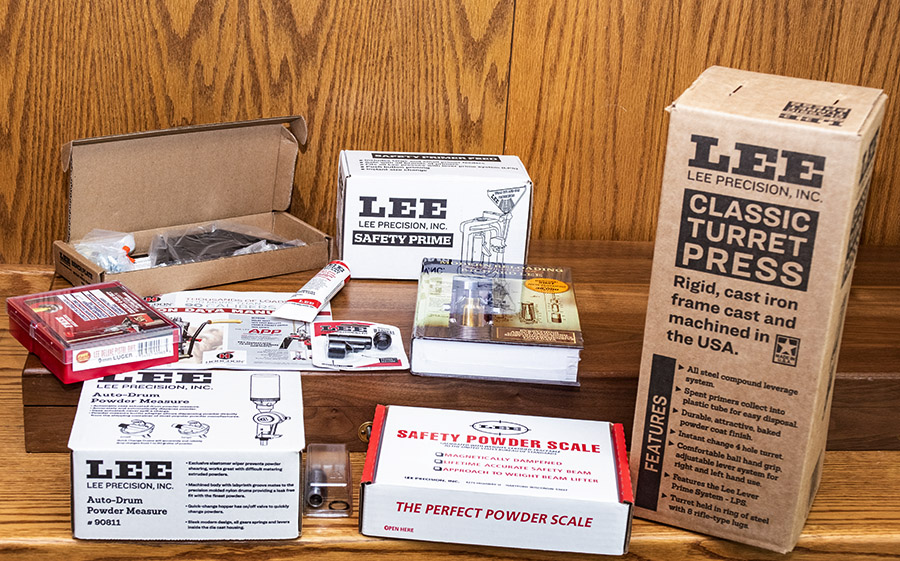
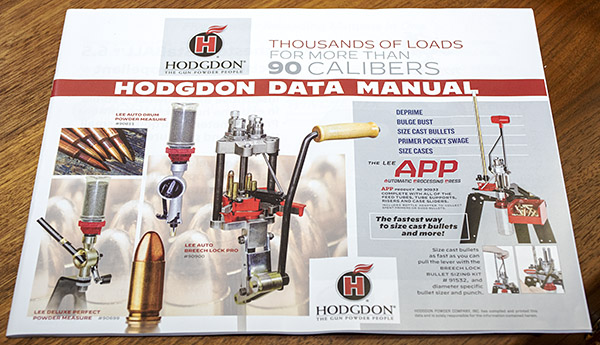
The Lee Classic Turret Press Kit includes Lee’s Modern Reloading manual (a sizeable book, comparable to the manuals from Hornady, Speer, Sierra, and other reloading component companies), and a Hodgdon reloading pamphlet.  I’m looking forward to reviewing the Lee manual.  I’ve been reloading a long time, but I still learn something new every time I pick up a reloading manual.  If you were to buy the Lee Modern Reloading manual separately, it sells for $40.98.  Lee also includes the Hodgdon Data Manual with the Classic Turret Press Kit.  I’ve seen the pamphlets from Hodgdon before; I’ll take a look at this one and share my impressions in a subsequent blog.

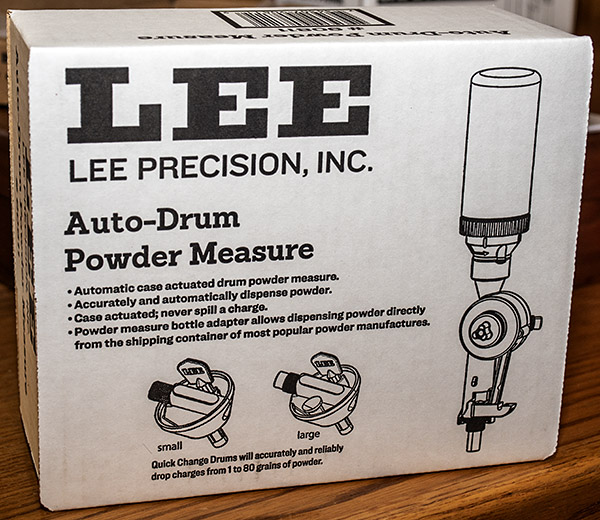
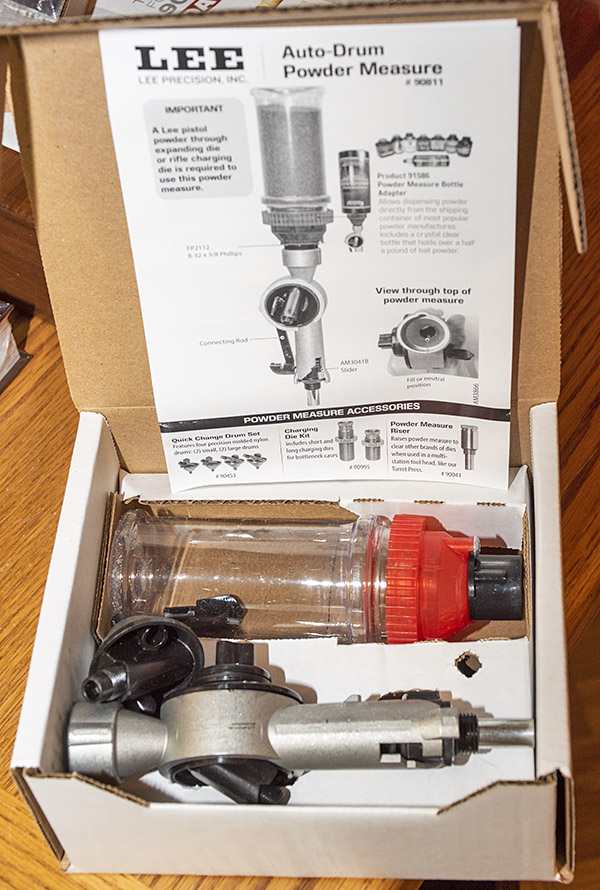
Next out of the box was Lee’s Auto-Drum Powder Measure.  I’ve used an older Lee version of this device.  I’m not familiar with how the new one works, but I’m looking forward to finding out.  The Auto-Drum Powder Measure is infinitely adjustable.  That’s a good thing.  The older version used a charging plate with discrete increments; infinite adjustment is a much better way to go.  The Auto-Drum Powder Measure automatically charges the case with with each stroke of the press.  If purchased separately, the Auto-Drum Powder Measure sells for $55.00.

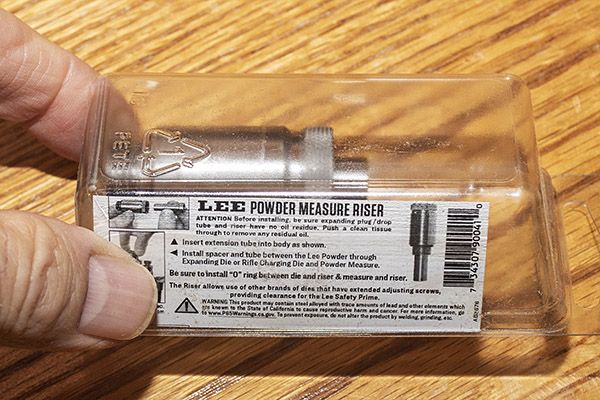
Lee includes a Powder Measure Riser in the Classic Turret Press Kit (see the photo below).  This is used with the Auto-Drum Powder Measure to position the powder dispenser above the priming mechanism (it allows adequate clearance).   The Powder Measure Riser sells for $9.98 on the Lee site.

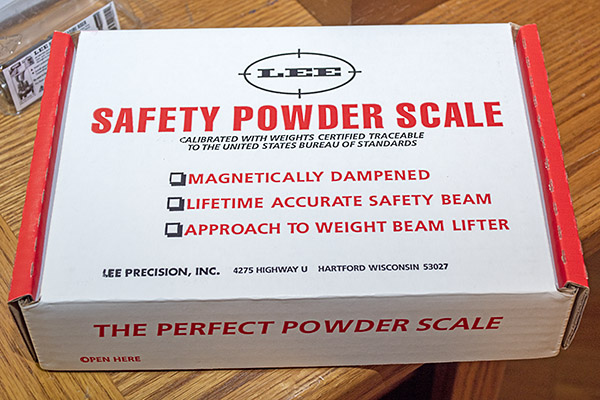
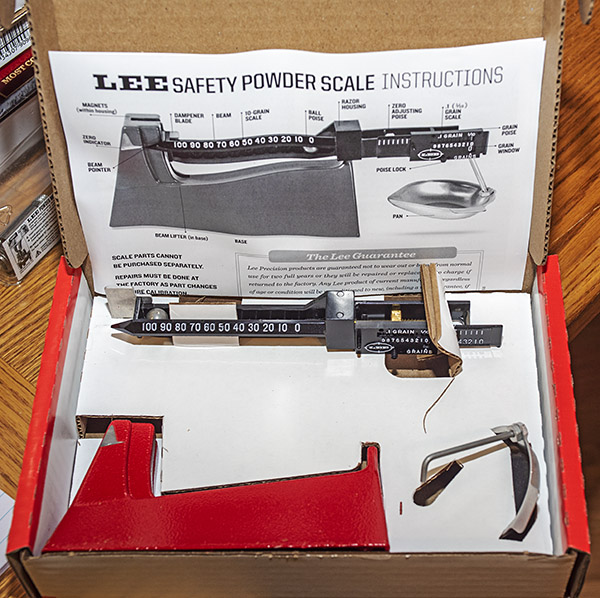
There’s a balance beam scale (the Lee Safety Powder Scale) in the Classic Turret Kit.   This is a standard reloading scale.  The Safety Powder Scale is $46.98 on the Lee site.  You might wonder:  Why use a simple mechanical scale when there are digital scales and digital powder dispensers?  The reasons are simplicity, reliability, and cost.  I have friends that use digital scales, and they report inaccuracies induced by nearby metal objects (have any of those on your reloading bench?), slow operation, and of course, much greater expense.  For me a simple balance beam scale works best; it’s what I’ve been using for 50 years.   The Lee Safety Powder Scale is new to me, and I’ll report how it works.

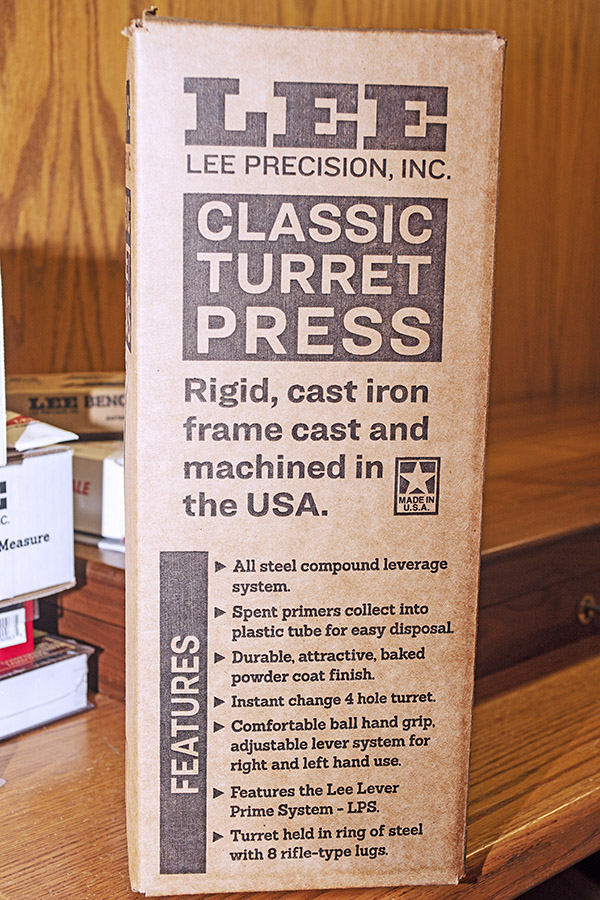
At this point, I had one more box to open, and it contained the Classic Turret Press.  Lee lists the Classic Turret Press at $220.  Like everything else in the Lee Classic Turret Press Kit, the Classic Turret Press was well packaged.

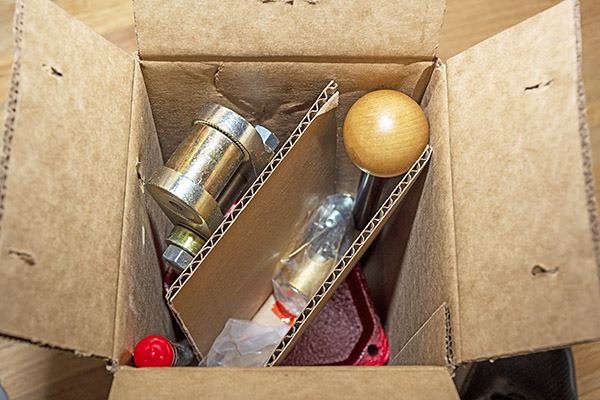
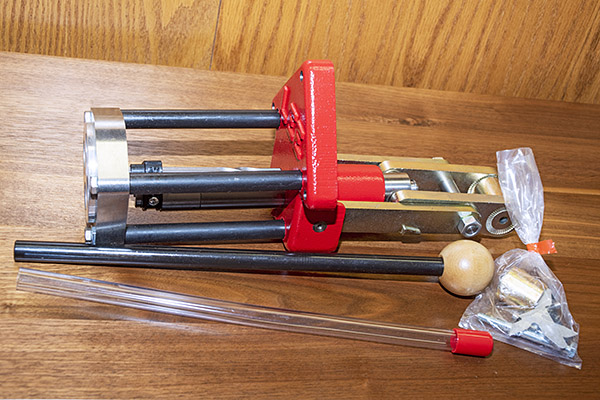
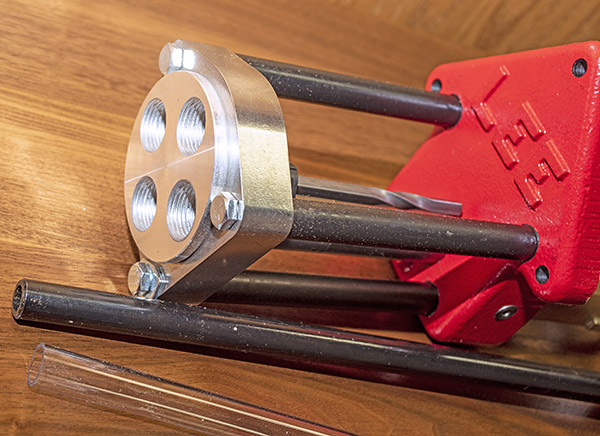
The Classic Turret Press is massive.   It’s beefy, it’s heavy, and it looks to be well built. What you see below is the press, along with the operating handle, a spent primer catch tube (a nice touch), the four position turret head, and the hardware required to assemble it.

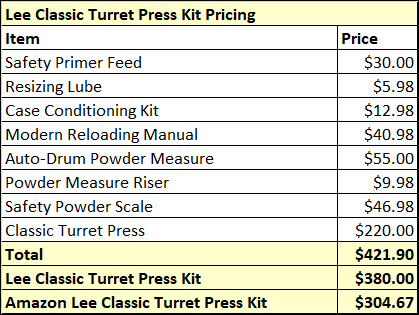
So there you have it:  The Lee Classic Turret Press Kit.  You might have noticed that I listed the cost for each item above separately, along with a link to the appropriate Lee page.  I thought it would be interesting to sum the prices and compare the total to Lee’s Classic Turret Press Kit price:

At Lee’s price of $380 for the Classic Turret Press Kit, it’s a good deal compared to buying the items separately.  But Lee goes a step further.  They recognize that retailers often sell the individual items and the Classic Turret Press Kit at lower prices, and Lee states on their site that you can find lower prices by visiting a Lee retailer.  One of the best places to find lower prices is Amazon.  I encourage you to explore Lee’s website, and to take a look at Lee gear on Amazon.

This project is going to be fun, folks.  Keep an eye on the ExhaustNotes blog as we put the Lee Classic Turret Press Kit through its paces.


Like what you see here? Don’t forget to help us by clicking on the popup ads!


There are many more shooting and reloading stories on Tales of the Gun.  Hope on over and take a look.


In the spirit of complete disclosure:  Lee liked our blogs on the .357 Magnum and .44 Magnum Deluxe 4-die sets and they asked us to similarly review the Classic Turret Press Kit.  Lee provided the kit to us at no charge.  But rest assured: That won’t color our judgment or what we report.  You will get the complete story, warts and all.