Man, I love my Colt Python. I thought I’d get that out of the way first in case anyone had any doubts. The Python is one of those things that just feels right. I’m glad I bought it and every time I take it to the range I feel good because I know I made a good decision.
I’ve been on a kick lately developing different loads for the Python with a focus on 158-grain and 180-grain jacketed bullets, and different propellants (including Winchester 296, Bullseye, IMR 4227, and Unique). Not to be combative and before you get your inner keyboard commando up, let me state at the outset that I can hear the comments already: What about 2400, or Power Pistol, or (fill in with your favorite powder). You go to war with the Army you have and I had to put a cap on the development work (and the above listed powders are what I had). If you want to see more development work with other powders, hit the donate button below and send me a note. Or start your own website.
158-grain DKC bullets, .357 Magnum reloads, and the Colt Python: A marriage made in Heaven.
I keep a stash of Hornady jacketed bullets as my preferred projectiles in the .357 Magnum, mostly because of their consistent quality and accuracy. Recently, I received an email from Raven Rocks for DKC 158-grain jacketed hollowpoint bullets, so I thought I’d try those. DKC is a Turkish bullet maker, and I know from prior defense industry experience that the Turks usually do a good job on armament components. You may recall that I recently tested some of DKC’s 147-grain 9mm bullets in three different handguns and I wasn’t too impressed with them (that blog is here). I wanted to see if the DKC .357 bullets were any better than the 9mm bullets (spoiler alert: they are).
For this testing, I fired all loads at 50 feet, I used my Garmin chronograph to measure the velocities, and I used my Lee classic four turret press and Lee’s .38/.357 four-die set for loading the ammo. I believe in Lee reloading gear, and when it comes to getting a good crimp on hot revolver cartridges, the Lee dies work best (you can read about that here). That’s especially critical on the Colt Python, which has a very short cylinder compared to some other sixguns). Making sure the other bullets in the cylinder don’t jump forward under recoil is critical with the Python (see our earlier testing).
So what’s the bottom line?
It’s 15.0 grains of IMR 4227, CCI 550 primers, and the DKC 158-grain jacketed hollowpoint bullet. Here’s how I got there:
I know the table’s font is too small to read as presented here. If you click on the table, a larger table will appear. You can thank me by clicking on the Donate button.
Oh yeah! A 50-foot target shot with the 15.0-grain IMR 4227 load. Point of aim was 6:00 on the orange bullseyes.
As stated above, I found that 15.0 grains of IMR 4227, a magnum primer (I used CCI 550 primers), and the DKC 158-grain bullet gave the smallest groups, but several of the other recipes were not too far behind. Just about any load combo worked well. But that 15.0-grain load…wow, it was a honey. The velocity (which averaged 1140 fps) was what I would consider moderate for a .357 Magnum. The recoil was correspondingly moderate.
Every gun is different, and it’s interesting to see what works best in different guns chambered for the same cartridge. The Unique load at the top of the table above was the accuracy load for my 6 1/2-inch blue steel Ruger Blackhawk. The 158-grain Hornady jacketed hollowpoint load with 16.7 grains of Winchester’s 296 worked best in my 6 1/2-inch Ruger stainless Blackhawk and it was stunningly accurate in my 8 3/8-inch Model 27 Smith and Wesson 40 years ago. But 16.7 grains of 296 makes for a religious experience type of load. Recoil is impressive and steady servings of those cartridges beat both the stainless Ruger Blackhawk and the Smith Model 27 to death. I only tried a few of those monster loads in the Python, and I’m glad they weren’t the accuracy winner.
I keep a stash of the .38 Special standard target load (2.7 grains of Bullseye with a 148-grain Hornady hollowbase wadcutter bullet) on hand. It is a one-hole load in my Model 52 Smith, and it’s been accurate in other .357 and .38 Special handguns. I wanted to use it in the Python as a standard of comparison, and it surprised me. It was the least accurate of any of the loads tested in my Python. Like I said above: Every gun is different.
After settling on the 15.0-grain IMR 4227 load, I wanted to see how it would do at 25 and 50 yards. I went to the West End Gun Club on a beautiful Sunday morning and set up targets at both distances.
I first shot at the 25-yard target and shot a great group, but it was high (it’s the group circled in red in the target below). The rear sight only had four more clicks left in the down direction, so I dialed those in and fired another five rounds. That produced the group circled in green in the target below. I used a 6:00 hold on the black bullseye for both groups.
A 25-yard target with my 15.0-grain IMR 4227 load. Two groups…one in red before lowering the rear sight, and one in green after lowering the green sight.
After firing the first 25-yard group, I shifted to the 50-yard target before adjusting the rear sight. That produced the group outlined in red in the target below. After lowering the rear sight, I shot the group outlined in green in the target below. It was a good group at 50 yards, but still too high (I was using the same 6:00 bullseye hold mentioned above). Because I was out of adjustment on the rear sight, I tried to hold about 4 inches below the bottom of the bullseye, and I shot the group outlined in yellow.
I couldn’t get the rear sight low enough at 50 yards, so I dialed in a little Kentucky droppage to get the group in yellow.
I’m pleased with these results. I might need to move the rear sight a scosh to the left, but I want to shoot a few more groups to confirm that. That will happen in the near term. I am also thinking about a taller front sight. The rear sight is already in its lowest position; a taller front sight would bring the point of impact in line with the point of aim. We’ll see.
What’s next? I’m thinking a trip to Arizona for some more pork. I’d like to see how this combo works on a pig, and I think there’s enough energy and accuracy to humanely take next year’s stash of bacon. Well, okay, you got me: I’m just kidding about the bacon part. There’s no belly fat on a wild pig. There’s plenty of other meat on one of those Arizona hogs, though, and I’m already thinking about a cookbook featuring recipes for the same.
Part 1 of this series took us through brass preparation, Part 2 took us through priming, and here we are at Part 3, which discusses powder charging, bullet seating, and case mouth flare removal.
Cast 200-grain bullets, lubed, sized, and gas checked. These are from the Lyman 314299 mold.
I had previously mentioned that I shoot cast bullets in my military surplus rifles, and in particular, I like a gas-checked 200-grain cast bullet. Good buddy Roy Hursman cast these for me. Roy retired and sold his bullet casting gear. I hope I’m able to find somebody that does as good a job as Roy.
This 8-lb bottle of IMR 4227 propellant is good for nearly 2,700 rounds of .303 British ammo.
I use different powders in my rifle cast bullet loads. A good one is IMR 4227, which is what I used for this .303 British load. The secret sauce recipe is 21.0 grains of IMR 4227 with no fillers. I’d like to tell you that I developed this load after extensive testing, but I can’t. It was next to what the Lyman cast bullet manual said was the accuracy load with this bullet and IMR 4227 was in my ammo components locker, so it got the nod, and it worked. I felt no need to experiment any further; the load worked well and was very accurate. This 21.0-grain IMR 4227 load is near the lower end of the loads listed in the Lyman manual. The bullets exited the muzzle at about 1600 feet per second (as tested with my Garmin chronograph), and that’s good enough for me.
I use an RCBS powder dispenser, and once I had it set up to throw 21.0 grains of IMR 4227 propellant, there was no need to weigh the charge for each cartridge because the powder meters so well. I loaded the 20 rounds like it was pistol ammo, placing each empty brass case beneath the dispenser, charging the case, and moving on. After I had charged all 20 cases, I threw another charge into my scale’s powder cup and weighed it again to make sure the dispenser was still on the money. It was (the powder dispenser released exactly 21.0 grains).
It was time to turn to the Lee Ultimate 4-Die set’s bulleting seating die. The first step was to install the bullet seating die in the press and screw it partially in.
The Lee .303 British bullet seating die. It includes a feature for a roll crimp if so desired. The knob on top adjusts the bullet seating depth.
I placed the first bullet over a charged .303 British case (charged with IMR 4227, that is) and raised the ram in the press. Observing where the bullet went (i.e., how deeply it seated in the case), I lowered the die in the press a bit more, repeating the process until I attained the desired bullet seating depth. I wanted the bullets to be seated such that the cartridge mouth was just behind the bullet’s first driving band.
A cast bullet about to be seated in the cartridge case.A seated bullet, positioned exactly where I wanted it.
After seating all 20 bullets in the 20 charged .303 British cases, it was now time to remove the case mouth flare we induced in Part 1 of this series. I probably could have skipped doing so, because I did as I advised in Part 1 (I flared the case mouth just enough to allow the bullet to enter). Even without removing the flare, the cartridges would chamber because the flare was so small. But I like to go for the extra step of removing it just to make sure.
The red arrows point to the remaining flare after seating the bullets. This will be removed with the Lee factory crimp die in the next step.
Lee’s factory crimp die (the fourth die provided in their Ultimate 4-Die set) is what I use for removing the flare. It can also be used (as the name implies) for crimping the case mouth on the bullet.
Lee’s factory crimp die. The arrow points to the cylinder that is pushed up into the die body by the shell holder when the press is fully raised. By adjusting how far the die body is screwed into the reloading press, you can adjust how much crimp is applied.The view from above the Lee factory crimp die. The cylinder shown in the photo above (see red arrow) cams into the four circumferential collets shown in this photo. These four collets apply force to the cartridge case. You can adjust the die to apply no force, just a small amount of force to remove case mouth flare (as I did to my .303 British cases), or to apply a crimp.
By adjusting how far the die is screwed into the press, you can control how much force is applied to the case mouth. You can screw it in just enough to remove the case mouth flare (as I did), or you can screw it further into the press to apply as firm a crimp as you want around the case mouth.
The Lee factory crimp die does not apply a roll crimp; it applies a concentric circular flat crimp around the case mouth periphery. Some folks think this makes the Lee factory crimp independent of case length. I don’t agree with that. On longer cases, the Lee factory crimp will press more case material radially inward than it would on a shorter case (theoretically, if the case were trimmed too short, the Lee factory crimp would apply no crimp). But it’s still more controllable than a roll crimp, and the amount of roll crimp applied is far more sensitive to case length than is the Lee factory crimp. And if you wish to apply a roll crimp instead of the Lee factory crimp, you can still do so with Lee bullet seating die. Just screw the die body in further (while backing off on the bullet seater on top of the die) until the reduced diameter step inside the die body contacts the case mouth enough to provide a roll crimp.
I ran all 20 cases through the Lee factory crimp die after adjusting the die. I adjusted the die to apply just enough radially-inward force to remove any remnants of flare from the case mouth.
After completing all 20 .303 British neck-sized cartridges, I put them in a box and applied a label, as I do with all my reloaded cartridges.
Reloaded, boxed, and labeled. “F2TNT” is my code for fired two times, not trimmed. “NSO” means neck sized only.
How did this ammo shoot? It did well, as the target below shows. I can’t show that my neck-sized-only reloads are dramatically better than full-length resized ammo, but I know I have the other advantages offered by neck sizing (not having to lube the cases, a quicker reloading process, and longer brass life). I am quite pleased with my Lee .303 British die set.
A perfectly centered, tight, 3-shot group at 50 yards, with light recoil and good accuracy. The Lee Ultimate 4-Die set does what it is supposed to.
More reloading, hunting, and shooting stories are here!
One of my favorite rifles is the Enfield No. 4 Mark 2, a bolt action rifle just dripping with history and charisma. The No. 4 Mark 2 was the last in the Enfield rifle series, with a run of 59,000 produced by Britain’s Fazakerly armory for Ireland in the 1950s. It was the last Enfield in a long line of continuously improved rifle designs, and it includes a much-improved trigger design. Most of these Irish rifles were never issued and many were sold in their unfired, cosmoline-laden condition. Mine comes from that group. It’s the one in which I tested the reloaded ammo featured in this blog series.
Once-fired .303 British cartridge cases. They almost look like scaled-down .375 H&H cases.A close-up view of the .303 British case after firing. These cartridge cases are ready for the reloading process.The headstamp. These are Winchester cases. Note the spent and indented primer, which will be removed in the case resizing process.
I have a stash of once-fired .303 British brass acquired from generous friends over the years. I will reload them with 200-grain cast bullets made by good buddy Roy Hursman, sized to 0.313 inches, which I also use in my Modelo 1909 Argentine Mauser and Mosin-Nagant rifle. I thought they might work well in the Enfield (and they did; I’ll tell you a bit about that here and provide much more detail in Part 3 of this series).
The cast lead bullets I load in my .303 British ammo. These weigh 200 grains. They have been lubed (the red grease in the lube grooves), gas checked (the copper cap on the base), and swaged down to 0.313 inches. They work great in the 7.65 Belgian Mauser, 7.62x54R Russian, and .303 British cartridges.
What I didn’t have in my shop was a set of dies in .303 British. I naturally turned to Lee Precision. I believe in Lee reloading equipment. I have their dies for the .22 Hornet, .22 250, .243 Winchester, 6.5 Creedmoor, .30 Carbine, .30 40 Krag, .300 H&H, .300 Weatherby, .38 Special/.357 Magnum, .44 Special/.44 Magnum, .45 ACP, .45 Colt, and probably a few others I can’t remember as I type this blog. I also use other Lee reloading equipment. I think their Classic Turret Press is the best reloading press of its type for loading handgun cartridges. The bottom line here is that I’ve never been disappointed with Lee products, and I say that as a guy who has been using Lee gear for 50 years.
I ordered Lee’s Ultimate 4-die set, and what I received surprised me. I received the four dies (which I expected) and a micrometer bullet seating attachment (which I did not). Each Lee die set also includes a little packet of case lube for the resizing operation (it’s not shown in the photos below). It’s a nice touch; Lee basically gives you everything but the reloading press and the components (bullets, brass, primers, and powder) to load a specific cartridge with each of their die sets.
The Lee ULee Ultimate 4-Die set includes four dies normally included in a single box. My set included a micrometer bullet seating attachment not evaluated in this blog series (although I will evaluate it in a future blog). The fourth die (the collet die) was provided in a separate container (see below). In the photo above, we have the full-length resizing die (top), the bullet seating die (bottom), the factory crimp die (right), the micrometer bullet seating feature, the shell holder, and a measuring cup (not used by me). Lee also provides a small pack of case lube (not shown here).The Lee collet neck sizing die, used in lieu of the full-length resizing die to neck size the brass case.
I won’t get into the micrometer bullet seater in this three-part .303 British Lee die set review (that review will occur down the road a bit).
The Lee Ultimate 4-die set includes two resizing dies (a full-length resizing die, and a collet die for neck sizing only), a bullet seating die (that also includes a roll crimping feature), and a separate crimping die for applying what Lee calls a factory crimp. The die set also includes a shell holder (a nice touch, as other manufacturer’s die sets do not) and a powder scoop. I’ve never used the powder scoop; I use a more precise powder dispenser.
The once-fired brass I had on had was good stuff. It was in the original factory boxes and it was in good shape. Because the rifles it had been fired in previously were not my Enfield, I knew I would have to full length resize the brass first to return each case to factory dimensions. To do that, I mounted the Lee shellholder in my press, ran the press all the way up, and then installed the full-length resizing die, screwing it down in the press until it contacted the shell holder. I then retracted the press ram, turned the die another 1/8 of a turn into the press, and locked the die in place with its locking ring.
The Lee .303 British shell holder installed in my reloading press. It snaps into place. Dies and shell holders are typically interchangeable between reloading press and die manufacturers. I use a single-stage RCBS Rockchucker reloading press; Lee dies and shell holders fit it perfectly.Lee’s full-length resizing die installed in the press. This die simultaneously resizes a fired case to factory specification and punches out the spent primer. Note the locking ring on the die body.The business end of the Lee full-length resizing die after resizing a bunch of cases. This photo shows the decapping pin, which removes the old primer.
I lubed each case with the lube Lee provided and ran it through the full-length resizing die, which simultaneously brought the cases back to factory dimensions and removed each case’s spent primer. The full-length resizing dies does both steps in one operation.
I intended using cast bullets in the .303 Enfield, so for me the reloading process included an additional step: Flaring the case mouth. Case mouth flaring allows cast bullets to enter the cartridge case without the case shaving any lead from the bullet. To flare the case mouths, I use a Lee universal flaring tool I purchased decades ago. It’s a clever die set that uses a cone to impart a slight bellmouth to the case.
Lee’s Universal Case Mouth Expander. I bought this in the 1970s and I’m still using it.The Lee Universal Case Mouth Expander disassembled. The amount the case mouth is flared is determined by how far the die body is screwed into the reloading press, and by how far the adjuster (top item in this photo) is screwed into the die body. The cone (shown in the middle of this photo) is what flares the case mouth. Lee provides two cones; one of small-to-medium calibers (shown here), and one for larger calibers (not shown here).When empty cartridge cases are run into the Lee Universal Case Mouth Expander) it imparts a slight flare to the case mouth. If you do it right, you can barely see the flare (as is the case for the case shown here) and the bullet enters the case with no lead shaving.
The approach to case mouth flaring is to install the Lee Universal Case Mouth Expander in the press and adjust it to impart just enough flare to allow the bullet’s base to enter the case. You don’t need much flare (less is more here; too much will work harden the brass unnecessarily). I’ll jump ahead a bit and mention here that if you can find that happy spot where you flare the case mouth just enough to allow the bullet to enter the case, you won’t have to crimp the case mouth later to eliminate the flare.
A perfectly-flared case mouth, with just enough flare to allow a bullet to start into the case without shaving any lead.
After completing the above full-length resizing and flaring, I reloaded 20 rounds (like you see in the photo at the top of this blog). Then I did what I always do: I labeled the box of reloaded ammo. After that, I fired the reloaded ammo in my Enfield.
I’m not going to cover the rest of the reloading process in Part 1 of this series, but I will in Parts 2 and 3. I’m jumping ahead here by mentioning firing the full-length resized ammo because I wanted brass that had been fired in my rifle. Ammo fired in my rifle would be perfectly formed to my rifle’s chamber, which is minutely different than other rifles’ chambers. That’s because of rifle chamber dimensioning tolerances. The once-fired brass I had was fired in other rifles, so I needed to shoot it in my rifle so the cases conformed to my chamber.
How did the full-length resized .303 ammo shoot? Very well, thank you. Take a look.
This was the first time I had fired this ammo in my rifle, so I needed to dial it in. The first three rounds went low at 50 yards (the nice tight group at about 5:30 on the outer edge of the 6-ring), so I ran the Enfield’s ladder aperture sight up. Oops, too much, which resulted in the group high in the 6-ring. I went down half the distance on the rear aperture, and the next three rounds were just above the bullseye. Down a click or two more, and the rifle was on the money. In case you were wondering, I used 21.0 grains of IMR 4227 and a Winchester large primer (but more on the load in Part 2 of this series).
Having fired my full-length resized ammo in my Enfield, the fired brass could now be neck sized instead of full-length resized. The idea behind neck sizing is that the clearance between the chamber and the brass case is greatly reduced by neck sizing (as opposed to full-length resizing), and theoretically, neck sizing should result in increased accuracy because the case won’t be rattling around in the chamber. There are a couple of another advantages to neck sizing, too. One is that it works the brass less, so it should last longer. A third advantage is that you don’t have to lube and then clean the cases. They can be neck sized without using lubricant. I’ll say more on that in a moment. Not having to lube (and then cleaning the lube from the cases) greatly speeds up the reloading process.
Now that I had brass cases that had been fired in my rifle, I installed and adjusted the Lee collet die in my press. The collet die performs two operations. It has a decapping pin that punches out the spent primer, and it has a set of four collets that compress the case neck around a spindle to bring it back to new brass factory dimensions (that’s the neck sizing operation). You can adjust the die’s depth in the press to adjust the final inside diameter of the case neck, which is a very useful feature to have. Ideally, the resized case neck inside diameter should only be 0.001 to 0.002 inch smaller than the bullet diameter. That amount of case neck inside diameter undersizing will allow the case the grip the bullet firmly so that it won’t push into or pull out of the case. You could make it tighter and still seat the bullet, but doing so would expand the case mouth more with the bullet’s insertion, and that is not desirable. It would distort the case and possibly introduce non-concentricity or angular misalignment between the bullet and the case, and that would hurt accuracy.
The Lee collet die installed in my RCBS Rockchucker press. This die will neck size the case instead of full-length resizing it.A .303 case entering the Lee Collet Die. By adjusting the depth to which the Collet Die is screwed into the press, you can control the neck-sized-only cases’ neck diameters. I adjusted the die to provide a 0.312 neck inside diameter, which gives 0.001-inch interference between the bullet and the case neck.
After completing the die seating depth adjustment, I had the case mouth diameter exactly where I wanted it: 0.312 inches. My cast bullets were at 0.313 inches, so I was good to go.
Not the world’s best photo (mea culpa). Parallax makes the inside diameter in this photo look like 0.313 inches; it was actually reading 0.312 inches. That’s what I wanted.
Next up will be our Part 2 of the Lee .303 British Ultimate 4-Die set review. Stay tuned.
So far, I am very impressed with this set of Lee dies. I’m not surprised, though. As I mentioned earlier, I’ve been using Lee equipment for decades, and it has always pegged the needle on my quality meter. These dies are good at any price. The fact that they cost less than any of the competitors’ products is a huge plus.
A quick preface before you read Joe Cota’s blog: Wow, we are up to three Joes on ExNotes…Joe Gresh, me, and now, Joe Cota. Joe Cota has contributed a few blogs to us previously (before we implemented our new writers program). When Joe most recently sent this in, I felt it was time to include him as one of our regulars, and with this blog, he is. Joe is one of the good guys. He is a professional geologist, an active off-road racer in Baja California, a handloader and bullet caster of 18 years, and an avid flintlock rifle and pistol shooter. Joe lives in the San Bernardino Mountains of Southern California. When not working or racing trucks and buggies in Mexico, Joe can be found fly fishing at his summer home on the Henry’s Fork River in eastern Idaho.
– Joe Berk
Written on Christmas Day, 2023
Merry Christmas to all 🎄❄️🎅!
A lot of you will be casting and handloading today, some with their new reloading equipment! Here’s something for your consideration that came up on another message board. Powder weight weenies will argue that all handloaders MUST unequivocally weigh each and every single powder charge to one tenth of a grain of powder or less. Some wildly claim that a half-grain (0.5-grain) of powder makes a 50 to 100 feet per second difference or more in rifle cartridge velocity while others often use this as flawed reasoning as back-up for claiming that volume-based powder dispensers, such as the Lee Auto Disc used on turret presses, are highly inaccurate and produce terrible and unacceptable ammunition. This could not be further from the truth! Let’s bust some reloading myths.
The variation that my ancient Lee Auto Disk throws is about 0.1 to 0.2 grain, depending on if I am using ball powders versus extruded powders. The photos below is what 0.5 grain of Hodgdon H4831 SC extruded rifle powder looks like. For reference, the variation in powder charges that my Lee Auto Disc throws is less than half of the 0.5 grain of H4831 shown in the photo.
So what does a half-grain of powder actually mean in terms of velocity in a typical big game hunting rifle? Let’s explore a real life example. I load .300 Weatherby Magnum ammunition with 168-grain bullets and H4831SC powder. Per the Hodgdon Reloading Data Center, the starting load is 74 grains (which provided 2,865 feet per second in their test rifle) and the maximum load is 81 grains (which provided 3107 feet per second in their rifle). That’s a 242 feet per second difference in velocity over a full 7-grain powder spread. Interpolating these results linearly (a 242 feet per second velocity difference over a 7-grain propellant spread) means that each additional grain of propellant over the minimum powder charger yields an additional 34 feet per second. Therefore, a half grain of powder would make only 17 feet per second difference in velocity! Everyone who uses a chronograph knows that 17 feet per second is typically only a fraction of the extreme velocity spread most rifles and rifle ammo produce.
What about pistol handloads? Take the .45 Colt, using a 255-grain cast lead bullet and Winchester W231 ball powder. The starting load is 5.1 grains (which provides 677 feet per second) and the maximum load is 6.9 grains (which provides 917 feet per second). Using the same methodology as the above rifle computations and comparisons, each 0.1 grain of W231 powder equates to only about 13 feet per second. Again, this is far less than the extreme spread one can expect in .45 Colt ammo.
Does case size matter? I believe it does, but not that much. Take the .223 Remington cartridge, for example, loading 55-grain Hornady bullets with Winchester 748 powder. Straight from the Hornady manual (the 7th Edition), 1 grain of powder between starting and max loads for this combination is 100 feet per second per grain of powder, or 10 feet per second for each 0.1 grain. And again, 10 feet per second is only a fraction of the extreme spread one could expect from perfectly identical powder charges.
So variations in powder volume does matter a little more in the smaller rifle cartridges, but not enough to make anyone steer clear of auto powder dispensers on turret presses versus individually weighing each charge. Richard Lee was right when he wrote in his Modern Reloading book that powder volume is more critical than weight and that one should periodically weigh a charge only as a double check for volume.
So there’s little justification for being a Tenth of a Grain Weight Weenie! Don’t be THAT guy who bashes turret press and powder dispenser users based on misconceptions posted by folks on the Internet.
Happy handloading and a prosperous new year to all!
This blog outlines the first steps in setting up the Lee Classic Turret Press Kit. Although it’s easy, there are a lot of steps and it’s more than you or I want to cover in a single blog. I’ll present additional blogs covering this topic in the coming days.
The Lee Classic Turret Press includes good instructions. The kit includes the turrent press, the handle, a spent primer catch tube, primer arms, and hardware.
After the turret press has been secured to your reloading bench (you can view the Lee bench plate installation blog here), attach the primer catch tube to the barb fitting beneath the ram.
This barbed fitting on the ram underside captures ejected primers.The primer catch tube attaches to the barb.The primer catch tube installed. It’s nice not having primers falling out. This is a well-thought-through design.
Lee provides a clear plastic bag containing the hardware items you see below.
The handle bolt and fittings, the lock ring wrench, and two primer arms (one for small primers, the other for large primers).The handle attaching hardware.
You can install the press handle to operate the press from either the left side or the right side. I installed mine on the right side. To do this, install the bolt from the left side and the two fittings (one goes inside the other) on the right side of the ram linkage.
Intallation of the handle’s half-inch bolt and the fittings in the ram attach point.
Insert the press handle on through the fitting, and then tighten the bolt.
The handle installed on the Lee turret press.
After installing the press handle, you can operate the press to cycle the ram. Each time you do so by raising and the lowering the ram, the turret head will advance a quarter turn (or 90 degrees) counterclockwise. At this point, it’s a good idea to oil the ram, the ram linkage, and the turret. I used gun oil on my press. Lee states in their instructions that any gun oil will do.
The lower arrow points to the ram. The upper arrow points to the twisted 1/4-inch-square bar that cams the turret 90 degrees counterclockwise with each ram cycle. It’s a very clever design.
I’m going to initially reload 9mm ammo on my Lee turret press, so the next step involved installing the Lee Deluxe 4-die set in the turret. We’ve previously written about Lee’s Deluxe 4-die sets for other cartridges here on the ExhaustNotes blog (we’ll include a set of links below). In my opinion, they are the best dies available from any reloading equipment supplier.
Lee’s Deluxe 4-Die Set in 9mm.Lee’s Deluxe 4-Die Set includes a powder dipper, a shellholder, a resizing/decapping die, a powder through-hole expanding die, a bullet seating die, and the factory crimp die. Lee dies are the best dies I’ve ever used. They are also the least expensive.
I started by installing the 9mm shell holder in the ram. After installing the shell holder in the ram, I raised the ram all the way up.
The 9mm shellholder in the turret press ram.
I next installed the the decapper and resizing die in the turret head. With the ram fully raised, I screwed the sizing die into the ram until it contacted the shell holder, and then locked it in place with the locking ring.
The resizing die in the turret, locked in place by the locking ring.I raised the ram fully, and screwed the sizing die all the way down so that the bottom of the die contacted the shellholder. Then I locked it in place with the locking ring.
After doing the above, I lowered the ram and inserted a 9mm case in the shell holder. I then partially raised and lowered the ram halfway four times. That rotated the turret to position the sizing die directly above the ram again. You can also turn the ram manually. With the sizing die directly over the ram, I raised the ram fully. The sizing die resized the 9mm case, the old primer was pushed out of the case, and the primer was captured by the tube hanging beneath the ram.
A 9mm case in the turret press.Raising the ram to resize the case and push the spend primer out (the decapping operation).When the ram is lowered, the turret is cammed a quarter turn counterclockwise.
The next die, installed one position to the left of the sizing die, was the expander die. After raising the ram, I screwed it all the way into the turret such that it touched the shell holder, and I locked it in position with its locking ring. I then repeated what I had done earlier. I raised and lowered the ram halfway four times to bring the expander die back over the ram. I put the 9mm case into the shellholder and ran the ram up fully. It flared the case mouth perfectly, just enough to allow starting a 9mm bullet.
The expander die locked in place with its locking collar. This die is installed in the threaded turret hole one position to the left of the resizing die.A 9mm, 124-grain plated copper bullet being fit checked in the flared case mouth. I’m not going to seat the bullet yet (we’ll discuss that in a subsequent blog); here, it’s only being fit checked after the case mouth flaring operation.
I then installed were the last two dies. I installed the bullet seating die by partially screwing it into the turret’s third threaded hole, and then I installed the factory crimp die by partially installing it into the turret’s fourth threaded hole. I didn’t attempt to adjust the bullet seating die or the factory crimp die yet; that will come later and we’ll discuss this in subsequent blogs.
The bullet seating die is the third die installed in the Lee turret.The factory crimp die is the fourth die installed in the Lee turret.
Lee includes two priming arms and a lock ring wrench in the clear plastic bag containing the turret press hardware. You may have noticed that the four dies are right next to each in the turret. The lock ring is a clever tool that makes it a bit easier to tighten the four dies’ lock rings.
The Lee lock ring wrench (top view).The Lee lock ring wrench (bottom view).
Two days from now, I’ll cover installing and adjusting Lee’s auto-drum powder measure, and then after that I’ll have a blog on installing Lee’s safety primer feed. Stay tuned, there’s more coming on this awesome reloader.
This is the next installment of our Lee Classic Turret Press Kit series, and this article focuses on Lee’s Safety Powder Scale. It’s the scale you see in the above photo and in the photos that follow. I haven’t assembled the turret press yet (that’s coming). Before I get to that, I’m doing this blog on the Lee scale, and then others on the Lee reloading manual and the Lee bench plate. These will be followed by blogs on the Lee turret press, the powder dispenser, the priming tool, and the 9mm dies I’ll use with this equipment.
My new Lee Safety Powder Scale. I used a .223 caliber 62-grain Hornady full metal jacket bullet to check my zero and the scale’s accuracy. Yep. It’s good.
Packaging
The box you see below was inside the Classic Turret Press Kit, and the Turret Press Kit’s box was inside a bigger box. It’s a box in a box (you know, Russian doll packaging, like I mentioned in the first blog on the Turret Press Kit). The Lee packaging is good. Everything arrived undamaged.
The Lee Safety Powder Scale box. It’s well packaged.What’s inside the Lee Safety Powder Scale box. You get the scale base, the balance beam, and the pan.
Lee Safety Scale Components
As mentioned in the photo above, there are three components in the Lee Safety Scale. These are the scale base (that’s the cast red frame in the photo below), the beam (I call it a balance beam; it’s the black subassembly in the photo below), and the pan (that’s where the material to be weighed is placed). The pan has an attached hook on it (it’s the bar extending up in the photo below) that hooks onto the right end of the beam.
The Lee base, balance beam, and pan.
The red base has a machined groove on the piece that extends up on the right side. The beam is placed over this, and it balances on a knife edge in this groove. There are magnets in the base to dampen the beam’s movement as it balances. The photo below shows the scale with everything in place.
The assembled Lee Safety Powder scale. The left arrow points to the index mark (the beam should point to it when weighing), the bottom arrow points to the 10-grain poise (more on it below), the center top arrow points to the 10-grain increments and markings on the balance beam, and the right arrow points to the 1-grain/.01-grain poise.
The magnetic beam dampers in the scale base work. When weighing powder charges with the Lee scale, the beam balanced in just a couple of oscillations.
The Lee balance beam is a molded phenolic subassembly with two poises. “Poise” an engineering term for the movable weights that balance the beam. It’s a term Lee uses in their documentation.
When I was Director of Engineering at Aerojet (we designed and manufactured munitions…big stuff, 2000-pound bombs, anti-armor munitions, and other things I can’t tell you about), we used plastic on as many parts as possible (rather than metal) because plastic was less expensive, it does not not corrode, it can be molded to exact dimensions, and moving parts are less likely to jam. Lee makes some of these same points in their literature. My point here is this: Don’t dismiss the Lee balance beam because it is a phenolic part. From an engineering perspective, it is the right choice. As Richard Lee (Lee Precision Products founder) stated in his excellent reloading manual, Modern Reloading:
Lee Safety Scale has a phenolic beam. Like a glass thermometer, if it is not broken it is still accurate.
Incidentally, the next blog in this series will be on Lee’s Modern Reloading book. I’m reading it now and it’s good.
The Lee pan is a one-piece subassembly that consists of an arm (the pan hangs from it on the right side of the beam) and the pan. The pan can be a bit difficult to get under a powder dispenser because the arm gets in the way. That’s not a big deal, and when I was weighing .357 Magnum charges with the Lee scale (so I could adjust my powder dispenser to drop the correct charge), it didn’t affect my ability to catch and weigh the powder.
The arm on the Lee pan interfered with getting the pan directly underneath the powder dispenser, but it was a minor inconvenience. That’s 8.0 grains of Unique you see above.
Measurement Range
The Lee scale can measure up to 110 grains. That’s good news and bad news. Most of us use powder scales for measuring powder, and if that’s your purpose, the Lee scale is the right tool. The 110-grain measurement range gives superior sensitivity for detecting slight weight differences. Other balance beam reloading scales can weigh up to 510 grains, but they do so with the same range of motion as the Lee scale, and that means they don’t provide the same sensitivity.
Sometimes we wish to weigh bullets (competitive bench rest shooters and cast bullet shooters might want to sort bullets by weight). On the Lee scale, you can only weigh bullets that are 110 grains or less. I’m what I would call a serious reloader, and in the last 50 years, I might have weighed bullets maybe a half dozen times. I’m happy to lose the ability to weigh bullets in exhange for the increased sensitivity I’ll get when weighing powder charges with the Lee scale. Your mileage may vary.
The bottom line is this: For weighing powder, the Lee scale does a superior job within its measurement range, and that range is adequate for any thing I shoot (that includes .22 Hornet, .416 Rigby, .458 Win Mag, and many handgun and rifle cartridges in between). For weighing bullets over 110 grains, you would be better served with scales offering a greater range than the Lee scale, but you give up accuracy with those scales. Do you really need the increased weight range? Most of us do not.
Zeroing the Scale
Like all scales, the Lee Safety Scale requires zeroing before use. Lee incorporates a threaded brass weight (in the form of a wheel) in the balance beam to move the beam up or down on its pivot in the base.
The Lee balance beam. The black arrow on the right is used for zeroing the scale, which is explained below. The red arrow points to the 10-grain poise.
The idea is you set the both poises to zero (see below). To set the 10-grain poise to zero, you roll it all the way to the right, and it comes to rest on the zero marker. The balance beam has ridges that will position the 10-grain poise ball bearing in 10-grain increments, starting at 0 and going up to 100 grains. To set the 1-grain poise to zero, you slide it all the way to the right, and lock the poise in the zero position with a little locking button on the bottom of the poise.
The 1-grain poise in the 0 position. The lower left red arrow points to the poise locking button (you push it in to lock the poise in place). The lower right arrow points to the 0 grains reading. The upper red arrow points to a protuberance that can be used as a little handle to move the poise. The “.1 grain” marking denotes the Vernier lines and windows used for reading tenths of a grain.
When the two poises are set to zero (as explained above), the brass wheel in the balance beam can be rotated to zero the scale. As the brass wheel is rotated, it moves to either the left or right along its threaded shaft depending on which way the wheel is turned. The idea is to turn the wheel until the balance beam is aligned with the index mark on the scale base as shown below.
The balance beam’s brass wheel. It’s used for zeroing the scale.The lower black arrow points to the 10-grain poise. It’s a captured ball bearing that can be moved in 10-grain increments. In this photo, it’s in the 0 grains position. The right arrow points to the 1-grain poise. The left black arrow points to the balance beam aligned with the base index mark.
Using the Lee Safety Scale
Using the scale after it has been zeroed when setting up a powder dispenser involves setting the desired powder charge with the 10-grain and 1-grain poises, and then adjusting the dispenser to provide an amount of powder that matches the scale adjustment. It’s fairly straightforward, although using the 1-grain poise with its Vernier tenth-grain readings may be new to some people.
Or, you may have an item you wish to weigh. Reading the scale is the same in either case. It involves setting the 10-grain poise in the appropriate notch, and then moving the 1-grain poise to the appropriate place.
After I had zeroed the scale, I wanted to check its accuracy. I weighed a .224-inch diameter, 62-grain Hornady jacketed boattail bullet to do this. I put the bullet in the pan, moved the 10-grain poise to the 60-grain position, and then moved the 1-grain poise laterally along the balance beam until the beam was aligned with the base index mark.
A 62-grain Hornady bullet in the Lee scale pan.The balance beam is balanced, with the pointed aligned to the base index marrk. The 10-grain poise is in the 60-grain notch.
Using the 1-grain poise is a bit tricky. In the photo below you can see that the poise shows 2 grains in the lower window. The Vernier windows on top of the 1-grain poise show that the 0 and .9 grain windows are aligned with visible lines, and a window is just a bit aligned with the .1 grain windows above and below the 0 and 9 windows. Like I said, interpreting the Vernier approach is a bit complicated, but the Lee instructions contain several photos explaining how to do it. What you see below for this measurement is interpreted to mean that the weight in tenths of a grain around the 2 grains in the lower window is somewhere between 1.9, 2.0, and 2.1 grains, and I interpolated that as 0.0 grains away from 2.0 grains. Stated differently, the measured bullet weight is 62.0 grains, which is exactly what it is supposed to be.
The Lee 1-grain poise. This sliding weight (or poise) is used for reading grains and tenths of a grain. Grains are read in the window denoted by the right arrow. Tenths of a grain are interpolated with a Vernier-based set of lines and windows denoted by the left arrow.
As a check, I also measured the bullet’s weight with the RCBS scale I’ve been using for the last 50 years, and it returned the same weight: 62.0 grains.
Cost
Lee did their usual outstanding job here: The Lee Safety Scale price is significantly lower than the competition. The Lee scale lists for $46.98 on the Lee website (interestingly, they also list factory second scales for $31.32). You can also purchase the Lee scale from Amazon and other retail outlets, and Lee tells you on their website that their retailers typically have lower prices than Lee advertises.
The nearest competitor to the Lee scale is the RCBS M500 mechanical scale, and that lists for $125.99 on the RCBS website. From a cost perspective, Lee is the clear winner here.
Documentation
The Lee scale includes a single-sheet, two-page instruction sheet. It’s good, and it provides all the information you need to set up and use the Lee scale. As mentioned above, the Lee instructions include information on using the Vernier feature on the 1-grain poise.
The Bottom Line
The Lee Safety Scale is accurate, inexpensive (less than half the cost of competitor products), and well built. Reading the Vernier scale to get tenths of a grain takes a little bit of study and practice, but once you get it, you’ll find it quick and easy to use. This is a good scale, it will serve any reloader well, and it should last a lifetime (and then some).
Help us out! Please click on the popup ads! And check out what else is available from Lee Precision.
Never miss an ExNotes blog:
Read our blogs on unveiling the Lee Classic Turret Kit and the Lee Deluxe 4-die sets:
We’re writing a series of blogs on the Lee Precision Classic Turret Press Kit, and this first one focuses on unpacking and taking an initial look at the kit. I think the YouTube kids call this a “reveal.” I’ll just call it unboxing and seeing what’s in the box. I thought I could do a single blog on the Classic Turret Press Kit, but there’s too much included in the kit and too much that’s new to me to handle in one blog. We’re going to instead do a series of blogs: One on each item that’s included with the kit, a blog on setting the press and dies up, a blog on reloading with the Lee equipment, and a blog on how the ammo reloaded with the Classic Turret Press Kit performs. There’s a lot here. You’ll get a feel for just how much in this initial blog on the Classic Turret Press Kit.
Here’s the picture on Lee’s website for the kit, which Lee advertises for $380.
The photo above shows everything set up, but the photo doesn’t do justice to the excitement associated with getting this kit, taking everything out of the box, and opening it. Nor does it convey what I expect to be the satisfaction I’ll experience with using the Lee equipment. That will be the subject of future blogs. Think of this first blog as Christmas morning. That’s what opening and unpacking the Lee kit felt like to me.
ExNotes blog readers will recall that good buddy Jose left a comment on one of our Lee Deluxe 4-die set blogs. Jose told us about his Lee turret press. He wrote a guest blog or two for us here on ExNotes and he is a Ruger No. 1 aficionado, which means he stands tall with me. After reading Jose’s comments, I had to check out the Lee Classic Turret Press Kit myself, and after poking around on Lee’s site a bit and seeing what the Lee kit included, I knew I wanted one. I specifically wanted to set it up for 9mm using Lee’s Deluxe 4-die set. I’ve been using older 9mm dies from various die makers, and my reloads would sometimes jam. With my old dies, the crimps were inconsistent, and I knew from my experience with Lee’s .357 and .44 Magnum Deluxe dies I wouldn’t have that problem with Lee equipment. I have the Lee Deluxe handgun die sets in 38 Special/357 Magnum, 44 Special/44 Magnum, .45 Colt, and .30 Carbine, and the ammo I reload with those dies is exceptional (better than anything I loaded with other manufacturers’ dies). I use Lee dies for several rifle cartridges, and I have more than a few other bits of Lee equipment. I’ve been pleased with all of it.
Lee advertises that their Classic Turret Press Kit includes everything needed to start making ammo, except for the dies and, of course, the components (brass, powder, primers, and bullets). I have plenty of components, and the thought of wringing out the Lee gear, writing about it, and testing the ammo in a couple of my favorite 9mm handguns checked all the boxes for me. This will be a fun project and I want to share the excitement with you.
I placed my order with Lee for the Classic Turret Press Kit, the Bench Plate Kit (something I saw on their website that appealed to me), and the 9mm dies. It all arrived a few days later, well packed in a single box. I was impressed with how fast it arrived (it shipped during the holiday season) and the packaging. The Lee folks have done this before; it’s first class customer service.
This is the right time of year to open a box full of goodies and examine the contents. I was a kid on Christmas morning. This was fun!
When I opened the outer container, I saw my 9mm Deluxe 4-die set and the Lee bench plate.
As I mentioned above, I’m a firm believer in Lee’s Deluxe dies. I can’t wait to put these to work making 9mm ammunition for my SIG P226 Scorpion and Springfield Armory 1911.
The idea behind the Lee Bench Plate is that it’s a quick detach/attach mount for a Lee press. It’s not included with the Classic Turret Press Kit (it’s priced at $39 on Lee’s website), but I like the idea of being able to quickly remove the press from my reloading bench. You’ll get a complete report on setting up and using the Bench Plate in a future ExNotes blog.
After unpacking the 9mm dies and the bench plate, I pulled out the Lee Classic Turret Press Kit. This was like one of those Russian dolls. I was peeling the onion and enjoying it.
The Lee Safety Primer Feed (shown in the two photos below) is a device I have not used before. I’ll explain how it works in a future blog. I have three other Lee priming devices and I’ve been using them for decades with no problems. The Lee Safety Primer Feed sells for $30.
Lee includes their Case Conditioning Kit (see the photo below) with the Classic Turret Press Kit. The Case Conditioning Kit consists of a primer pocket cleaner, a case cutter and locking stud, and a chamfer to bevel the case mouth after it has been trimmed. I have not used these tools from Lee before; it will be interesting to see how they perform. I have other equipment that performs these tasks, but I had to buy those items separately. With the Lee Classic Turret Press Kit, it’s all included. The Case Conditioning Kit lists for $12.98 on the Lee site.
I won’t need the Lee Resizing Lube shown below because my new Lee 9mm dies include a carbide resizer (which negates the need for case lubrication). Not having to lube the cases is a good thing. On rifle cases, though, lube is necessary, so I’ll put the lube to good use on those. The price for Lee’s Resizing Lube is $5.98.
The Lee Classic Turret Press Kit includes Lee’s Modern Reloading manual (a sizeable book, comparable to the manuals from Hornady, Speer, Sierra, and other reloading component companies), and a Hodgdon reloading pamphlet. I’m looking forward to reviewing the Lee manual. I’ve been reloading a long time, but I still learn something new every time I pick up a reloading manual. If you were to buy the Lee Modern Reloading manual separately, it sells for $40.98. Lee also includes the Hodgdon Data Manual with the Classic Turret Press Kit. I’ve seen the pamphlets from Hodgdon before; I’ll take a look at this one and share my impressions in a subsequent blog.
Next out of the box was Lee’s Auto-Drum Powder Measure. I’ve used an older Lee version of this device. I’m not familiar with how the new one works, but I’m looking forward to finding out. The Auto-Drum Powder Measure is infinitely adjustable. That’s a good thing. The older version used a charging plate with discrete increments; infinite adjustment is a much better way to go. The Auto-Drum Powder Measure automatically charges the case with with each stroke of the press. If purchased separately, the Auto-Drum Powder Measure sells for $55.00.
Lee includes a Powder Measure Riser in the Classic Turret Press Kit (see the photo below). This is used with the Auto-Drum Powder Measure to position the powder dispenser above the priming mechanism (it allows adequate clearance). The Powder Measure Riser sells for $9.98 on the Lee site.
There’s a balance beam scale (the Lee Safety Powder Scale) in the Classic Turret Kit. This is a standard reloading scale. The Safety Powder Scale is $46.98 on the Lee site. You might wonder: Why use a simple mechanical scale when there are digital scales and digital powder dispensers? The reasons are simplicity, reliability, and cost. I have friends that use digital scales, and they report inaccuracies induced by nearby metal objects (have any of those on your reloading bench?), slow operation, and of course, much greater expense. For me a simple balance beam scale works best; it’s what I’ve been using for 50 years. The Lee Safety Powder Scale is new to me, and I’ll report how it works.
The Classic Turret Press is massive. It’s beefy, it’s heavy, and it looks to be well built. What you see below is the press, along with the operating handle, a spent primer catch tube (a nice touch), the four position turret head, and the hardware required to assemble it.
So there you have it: The Lee Classic Turret Press Kit. You might have noticed that I listed the cost for each item above separately, along with a link to the appropriate Lee page. I thought it would be interesting to sum the prices and compare the total to Lee’s Classic Turret Press Kit price:
At Lee’s price of $380 for the Classic Turret Press Kit, it’s a good deal compared to buying the items separately. But Lee goes a step further. They recognize that retailers often sell the individual items and the Classic Turret Press Kit at lower prices, and Lee states on their site that you can find lower prices by visiting a Lee retailer. One of the best places to find lower prices is Amazon. I encourage you to explore Lee’s website, and to take a look at Lee gear on Amazon.
This project is going to be fun, folks. Keep an eye on the ExhaustNotes blog as we put the Lee Classic Turret Press Kit through its paces.
Like what you see here? Don’t forget to help us by clicking on the popup ads!
There are many more shooting and reloading stories on Tales of the Gun. Hope on over and take a look.
In the spirit of complete disclosure: Lee liked our blogs on the .357 Magnum and .44 Magnum Deluxe 4-die sets and they asked us to similarly review the Classic Turret Press Kit. Lee provided the kit to us at no charge. But rest assured: That won’t color our judgment or what we report. You will get the complete story, warts and all.
Most gift guides are hokey. Not this one. In keeping with our theme of shooting, motorcycles, and other interesting things, here are our recommended gifts and associated links. It’s good stuff. Purchase the things we recommend through the links we include here and you’ll ride faster, you’ll shoot straighter, you’ll weigh less, you’ll be better looking, and you’ll be one of the cool kids. (I took an advertising class and that’s the essence of what good advertising is supposed to do.) Without further ado (I have no idea what “ado” means, but if you say it during a wedding ceremony, you’re married), here you go.
Motorcycle Bungee Pack
Few things in our lives are as useful as a bungee cord, and it you want a nice gift for a motorcyclist, this Motorcycle Bungee Pack answers the mail. It includes an assortment of bungees and a cargo net, and it’s a sure thing whoever receives a gift like this will put it to good use.
A New BMW R 1250 GS
Well, sort of, although if any of our readers want to buy us a new BMW GS, that would be nice, too. Nope, what we’re referring to here are Maisto motorcycle models. They’re pretty cool, they’re high quality, and at approximately $20, they won’t break the bank. Maisto offers several other models, too, like the S1000RR you see at the top of this blog.
A Case of Mobil 1 Moto Oil
It doesn’t get any better than Mobil 1 4T synthetic oil for motorcycles. If you want to really impress someone, give them a case of Mobil 1 4T for their motorcycle. It’s only $79.00 and trust me on this, they will remember you every time they shift or blip the throttle.
Portable Jump Starter
We carried and used a portable jump starter on the Enfield Baja ride, and trust me, it was worth its weight in gold. There are several models available, and they start around $52. This Litake portable jump starter is small enough to carry on a motorcycle and it makes a great gift.
Lee Precision Reloading Gear
If you’re not reloading, your missing out on half the fun in the shooting sports. Making the decision to become a reloader can be a bit initimidating, but the major equipment manufacturers make it easy for anyone to start. If you want to start with a simple single-stage press, our advice is to go with Lee’s Challenger Kit for $229.
A single stage reloader is a good way to start, and the Lee Anniversary kit shown above is a good one. You can buy it directly from Lee or from Amazon.
If the person you are giving the reloading kit to (which can be you, by the way) wants to reload at higher rates, you might consider the Lee Classic Turret kit for $380:
With either kit, the person receiving the gift will need a set of dies specific to the cartridge to be reloaded. We think Lee Precision makes the the best dies at any price (these are $78.00).
You can buy the above dies directly from Lee, or you can purchase them from Amazon.
Cool Watches
There are three or four you might consider. We’ve recently written about Casio’s G-Shock GD400 series. These are reasonably priced, they are incredibly accurate, they offer a world-time quick change capability, and a bunch of other features (illuminated dial, stopwatch, countdown timer, and more). Casio offers these for both men (at $89.95) and women ($53.95). I wear a G-Shock and so does Susie.
If you want something more formal, our recommendation is to get an automatic watch. There’s something elegant about a selfwinding mechanical watch, and Orient is one of most exclusive brands out there at a very reasonable price. Two personal favorites are the Moonphase (from $274.95 to $374.95, depending on color) and the Mako dive watches (at $147.95). I wear an Orient rose gold Moonphase when I’m trying to impress Gresh, and it’s a classy timepiece.
Toolkits
We very recently posted about a Wohngeist toolkit retailing for $2,895 (we’re not advising buying it, unless you feel a need to flush money down the toilet). A far better choice is any of several toolkits available at much more reasonable prices, like this one for $49.95. These make great gifts, and they won’t break the bank.
Buck Knives
Give someone a Buck knife, and you’ll have a friend for life. That’s how long the Buck will last, too. Buck makes a bunch of different knives, you can have them customized, you can have them engraved, or you can buy one off the shelf, so to speak. My personal favorite is the Buck 110 folder (shown in the photo below), but any Buck knife makes a wonderful gift. Buck 110 folders start at around $60.
Trickle Me Elmo Battery Tenders
There are few things as useful to a motorcyclist than a Battery Tender. I’ve been using these for decades. A motorcycle with a topped-off battery runs better, and I’m coinvinced routinely plugging your bike into a Battery Tender extends the battery’s life. I regularly get between 4 and 6 years out of a motorcycle battery, and the Battery Tender is the reason why. These things are inexpensive ($39.95), and if they wear out, that would be news to me. I’ve been using mine for about 15 years and it’s still going strong.
Stop and Go Mini Compressors
Get a flat on your motorcycle out in the middle of nowhere and you’ll wish you had one of these, and so will all of your motorcycle friends. It happened to me more than a few times (on the Three Flags Rally, in China, and out in the boonies exploring the Mojave Desert). The Stop and Go Mini Compressor will pay for itself the next time you need to inflate a tire out there, and if you’re one of those folks who drops the air pressure when you see a dirt road, this will get you back up to street pressures quickly.
Our Motorcycle Books
Hey, what can I say. If you’re going to buy a motorcycle book, why not buy one I wrote? They’re inexpensive and folks say they’re pretty good. If you’re one of those folks tempted to wait for the movie instead of reading the book, don’t hold your breath. There were some preliminary discussions for a movie series, but when I suggested Leonardo di Caprio play me, the studio responded with Danny De Vito and talks broke down (so don’t wait for the movies).
Take a look at this selection of outstanding moto stories, pick the ones you’d like, and Mr. Bezos will have them in the mail to you muey pronto!
Haix Boots
The problem with motorcycle boots is they’re uncomfortable when you get off the motorcycle, especially if you have to walk anywhere. About 20 years ago I picked up a pair of Haix boots (a favorite of police, firemen, and other first responders) and I never look back. They are the only boots I wear when I ride a motorcycle. A pair of Haix boots lasts about 10 years, and they are extremely comfortable. They’re a bit more than most combat boots at $259.99, but they last a long time and the increase in comfort makes them well worth the price of admission.
Bianchi Belts
I bought my Bianchi belt years ago and I think it is one of the best purchases I ever made. I wear it any time I need to wear a belt unless I have to dress up for a deposition or a formal event. The Bianchi is just plain comfortable, it doesn’t wear out, and for its intended purpose (supporting a holster) it is superb. You’d be surprised how much of a difference a good belt makes if you’re carrying a firearm (unless you already have a Bianchi belt, in which case you wouldn’t be surprised at all). But you don’t need to carry a gun to appreciate this belt. Like I said, I wear mine all the time. The Bianchi belt retails on Amazon for $66.02 (why they add the $0.02 is beyond me), and it’s worth every penny (even those extra two pennies Bezos tacks on).
Batdorf and Bronson Coffee
Batdorf and Bronson coffee is the best coffee in the world. Yeah, that’s my opinion, but try it and you’ll agree. Buy a selection of Batdorf and Bronson coffee for a holiday gift and you’ll make a friend for life.
So there you have it: Our 2022 gift recommendations. And don’t forget:
The best gift you can give to us is to continue clicking on those popup ads!
You’ve thought about reloading, you’ve read stuff from us and others about the benefits of reloading, and you want to do it. But how?
Hey, I was born into it. My Dad was a reloader and I had a pretty good idea what to do when I wanted to start, but the urge to do so didn’t hit until I was a young guy in the Army at Fort Bliss. I was lucky. The guy who ran the Fort Bliss Gun Club (Roy Johnson) had a room set up for just that purpose and he walked me through the process some 50 years ago. But Roy has gone on to his reward, you’re probably not stationed at Fort Bliss, and you want to get into the game. That’s what this blog focuses on, and in particular, the equipment you’ll need to get started.
Inside the Fort Bliss Gun Club. This is a fabulous place where I spent a lot of time as a young Army dude. Next time I’m in El Paso you can bet I’ll stop in again.
Reloading Advantages
There are three advantages to reloading: Cost, accuracy, and availability.
Generally, reloaded ammo costs less than factory ammo, and in some cases (especially for more exotic rifle ammunition), the savings are huge. For example, factory .416 Rigby ammo costs $170 for a box of 20 rounds; I can reload .416 Rigby ammo for well under a buck a round.
From an accuracy perspective, reloading is the only way to go. You can tailor a load to a particular firearm by varying bullet type, bullet seating depth, crimp, powder type, powder charge, brass, and primers to arrive at a combination that delivers superior accuracy (and it’s fun doing this). I have rifles that shoot 3-inch groups at 100 yards with factory ammo; with my custom reloads, I can get half-inch groups.
Today, if you reload and you’ve laid in a good stock of components, you can reload your way through any ammo shortages. Nobody has .45 ACP, 9mm, or .223 ammo in stock right now; I have enough components on hand to reload thousands of rounds. I’m on the range two or three times a week enjoying my shooting hobby while other folks are online whining about not being able to buy ammo.
What You Will Need
The things you will need to start reloading fall into two categories: The reloading equipment, and the reloading components. The reloading components are the things that combine to bring an empty brass cartridge case back to life (that includes the bullets, the propellant, and the primers). The reloading equipment includes the gear you need to take the components and turn them into a ready-to-fire cartridge.
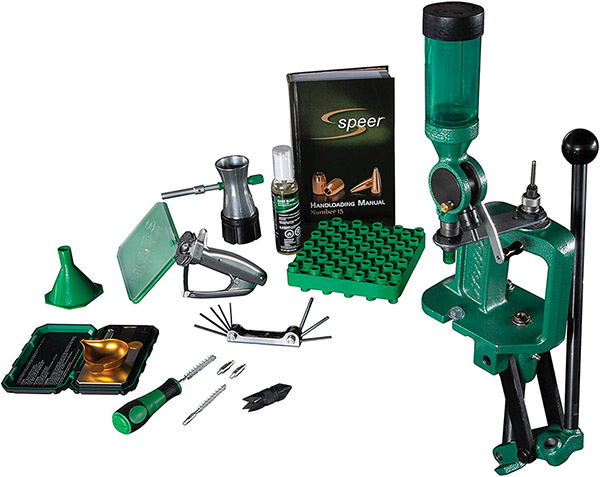
If you want to get into the reloading game, I believe the best way to do so is to buy a complete equipment reloading package from one of the suppliers like RCBS or Lee. That’s the RCBS kit shown in the big photo above. I’ll talk about it, the Lee kit, and a couple of others further down in this blog. First, let’s review each bit of gear.
The Reloading Press
That’s the lever-operated press that accepts the dies (more on that in a second) for reloading your ammo, and sometimes the press includes a mechanism for seating primers in the cartridge case after the old primer has been removed. In other cases, a separate priming tool is used. Presses are offered by RCBS, Lee, Lyman, Hornady, and other companies.
The Lee Challenger press. It’s a decent unit at a decent price, and an ideal way to get started in reloading.
Dies
The dies are cartridge specific. For handgun cartridges, the die set usually includes three dies; for rifle cartridges, the die set usually includes two dies. The good news is that die threads are pretty much standardized, and every company’s dies will fit every company’s reloading press. In other words, if you buy Lee dies, they’ll work on an RCBS press. If you buy RCBS dies, they’ll work on a Lee press. Dies are offered by several companies, with the most popular brands being Lee and RCBS.
A three-die pistol set from RCBS. The first die knocks out the old primer and resizes the fired case. The second die flares the case mouth to accept a new bullet. The third die seats the new bullet and, if you want, crimps the bullet in place.An RCBS two-die rifle set. The first die knocks out the fired primer and returns the case to its original dimensions. The second die seats the bullet and, if desired, crimps it in place.A three-die pistol cartridge set from Lee Precision. Lee includes the shell holder with their die sets.
Shell Holder
You will need a shell holder for the cartridges you wish to reload. That’s the piece that holds the cartridge case in place so the press can push it up into the die and then extract it from the die. RCBS does not include the shell holder with their die sets (so you’ll need to buy RCBS shell holders separately); just about all other die makers do (when you buy their dies, the die set includes a shell holder for that cartridge).
A shell holder. You need to buy these separately if you buy RCBS dies.
A Powder Dispenser
This is a device for dropping a precisely-metered powder charge into each cartridge case. There are fancy (read: expensive) electronic powder dispensers, but you don’t need those to get started and a lot of folks (myself included) don’t like them. A simple mechanical dispenser will work fine (as mine has been doing for 50 years). Both RCBS and Lee offer good powder dispensers; the Lee is substantially less expensive.
An RCBS powder dispenser on the left, the Lee powder dispenser on the right.
A Powder Scale
This is a simple balance beam scale to allow you to measure the weight of the propellant charge and adjust the powder dispenser to throw that charge. There are electronic scales, too, but they add complexity and considerable expense where none is required. Again, the dominant brands are Lee and RCBS.
A simple Lee balance beam reloading scale. These scales can measure to a tenth of a grain.
Cartridge Trays
When we reload, we use a cartridge tray (to hold the cartridges as we work through the process of reloading). A variety of manufacturers offer these.
An RCBS cartridge tray. These are available from several manufacturers. I’ve been using mine for nearly 50 years.
A Case Lube Pad
This is a simple foam pad. You put case lube on the pad and roll the brass cases on it to lubricate the exterior prior to running them through the resizing die (the first die used in the reloading process). If you have a straight wall pistol cartridge, you can buy tungsten carbide dies that don’t require lubing the cartridge cases. If you’re going to reload 9mm, .38 Special/.357 Magnum, .45 Auto, or .45 Colt, my advice is to spend the few extra bucks and get the carbide dies.
An RCBS case lube pad. You put a bit of case lube on the pad and roll the brass on it to lube the cases prior to running them through the resizing die.
Case Lube
This is the lube used as described above. To mention it again, if you’re going to reload straight wall pistol cartridges and you buy tungsten carbide dies, you won’t need case lube (or the case lube pad).
RCBS case lube.
Alternatively, you can buy spray-on case lubes, which eliminate the need for the case lube pad. I’ve tried spray-on case lubes and I prefer using the pad and case lube instead. Other reloaders like the spray-on approach better.
A Primer Seating Tool
Some reloading equipment companies incorporate a primer seating tool in their press; others offer separate primer seating tools. I have an RCBS press that came with the primer seating tool, but I like using a manual hand priming tool instead. Several manufacturers offer these; I use one from Lee.
The Lee hand priming tool. These work well. You can feel each primer seating and better control seating depth with these hand priming tools.
A Bench
You may already have a sturdy workbench where you can mount the reloading press; if not, there are reloading-specific benches available.
A Lee reloading bench. These work well if you don’t have a workbench for mounting your press.
A Reloading Manual
There are several available, including the excellent offerings from Sierra, Speer, Hornady, and Lyman. Don’t think you can skip this; a good reloading manual is a must-have item for any reloader. They all explain the reloading process at the beginning, and they include safe recommended load levels for nearly all cartridges. I’ve acquired several reloading manuals over the years and they are all good; my favorites are the ones from Lyman. Others are published by bullet manufacturers (these include the manuals from Hornady, Speer, and Sierra) and those manuals include loads only for their bullets. The Lyman manual is more generic. But like I said, they’re all good.
I have reloading manuals going back 50 years. The Lyman manuals are probably the best.
That’s the reloading equipment. In addition to that, you’re going to need the ingredients for the cartridges you want to reload. That includes the brass cases, the bullets, the powder, and the primers.
Brass Cartridge Cases
You can buy virgin brass online, you can buy once-fired brass at the range or at most gunstores, or you can do like most of us have done: Save your brass when you shoot factory ammo and reload it.
.35 Whelen brass waiting to be charged with propellant. This ammo costs $43 for a box of 20 factory rounds (and you can’t find anybody who has it in stock right now); I can reload it for under 50 cents a round.
Bullets
You’ll need bullets to reload your ammo. There are lots of options here, and they basically break down into either cast or jacketed bullets. I’m a big fan of cast bullets for handgun and reduced velocity rifle reloads, and I use jacketed bullets for full-bore factory level (high velocity) rifle loads. Most folks these days order bullets online from reloading suppliers like MidwayUSA, Graf’s, MidSouth, Powder Valley, Natchez Shooting Supplies, and others. Smaller gun stores are disappearing, and you usually don’t find decent prices at the big chain stores.
Cast bullets waiting to be loaded into .45 ACP cases.
Propellant
For lack of a better term, we usually call propellants “powder,” and there are a wide variety of powders available. The reloading manuals show which powders work best for the cartridge you wish to reload.
Unique propellant and my RCBS powder dispenser. The reloading manuals will help you select the powder you need. Unique is a good general purpose propellant I’ve used for a variety of handgun cartridges and a few cast bullet rifle loads.
Primers
The primer is the component that lights the candle when you pull the trigger. There are several primer suppliers. The trick today is finding them, as there has been a run on primers since the pandemic began. If you can find primers in a local shop, buy them. The same suppliers listed above for bullets also sell primers (they are all out of stock now, but that will change as supply catches up with demand).
Winchester primers being loaded into my Lee hand priming tool. Other primer makes include Remington, CCI, Federal, and a few more.
The Best Equipment Approach: A Complete Kit
As I mentioned at the start of this blog, I believe the best way to get into the game is to buy a complete equipment reloading package from one of the reloading equipment suppliers. My advice if you are a new reloader is to go with the Lee package. It’s the least expensive and if you decide that reloading is not for you, you’ve minimized your cash outlay. I should add, however, that I don’t know anybody who ever tried reloading who didn’t get hooked on it. It is a marvelous hobby, and I believe it is as much fun as shooting.
I’ve used reloading equipment over the years from all the manufacturers. My personal setup is centered around an RCBS Rockchucker, but equipment from any of the suppliers is good. Basically, you can’t go wrong in this game from an equipment perspective. With that said, let’s take a look at what’s out there.
The Lee Challenger reloading kit. These were sold out on Amazon (and everywhere else) when this blog was published. Keep an eye on the Amazon site; it’s a good place to order the kit.
There’s only one problem with the Lee Challenger reloading kit: It’s such a good deal (well under $200 for the entire kit) that literally everyone is out of stock right now. As you know, we’re going through unprecedented times in the shooting world (guns, ammo, and reloading components are sold out due to the civil insurrection in many large cities, a new anti-gun administration on the horizon, and the global pandemic). That will change, but at this instant, no one I could find has the Lee kit in stock.
The RCBS reloading kit. RCBS makes high quality equipment that will last a lifetime. It costs more, but it’s worth it.
I’ve been using RCBS equipment for the last 50 years, and I believe it to be the best. It is built to last. If I couldn’t get the Lee package as a newbie, or if your budget will allow it, I’d go with RCBS equipment. At about $400, it’s just over twice the price of the Lee kit, but it’s still a great deal compared to buying all the different equipment items separately. The RCBS package shown above includes an electronic scale instead of a beam scale, a powder trickler (it allows you to finesse adding individual powder kernels to attain a precise charge weight), and a couple of case preparation tools that the Lee kit doesn’t include.
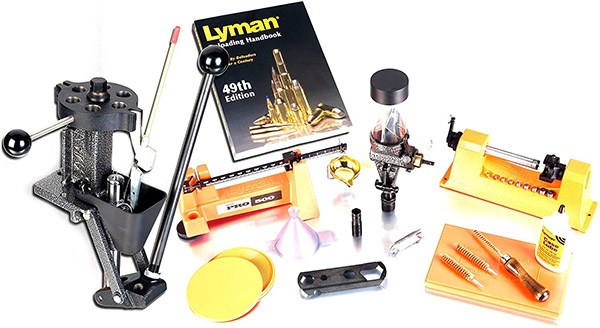
Lyman is another outfit offering a complete reloading kit:
Lyman’s reloading equipment package.
What’s a bit different about the Lyman kit is that it comes with a turret press, which allows you to mount all the dies in the press head and rotate them as you progress through the various reloading steps. I’m not a big fan of this approach; other folks are. The Lyman kit is just under $1000; the turret press and the inclusion of a case trimmer are what drive the price to that level.
Hornady’s reloading package. I have the least experience with Hornady reloading gear, and I’m not wild about their dies. Hornady bullets are fantastic.
The Hornady kit is about $550. That’s substantially less than the Lyman kit, but more than either the Lee or the RCBS kits.
So there you have it. Remember that no matter which reloading kit you buy, you’ll still need dies and a shellholder specific to your cartridge. You’ll probably want to purchase more equipment as your reloading interest develops, including more dies (so you can reload more calibers), case cleaning and polishing accessories, a micrometer, and more. But what we’ve outlined here will get you started and keep you in the game for years.
In this blog we’ve covered the equipment you’ll need to get into reloading. If you would like to read about how to use this equipment, we have you covered there, too. We have a bunch of information on reloading various cartridges on our Tales of the Gun page, and a complete series on reloading handgun ammo that you can review here:

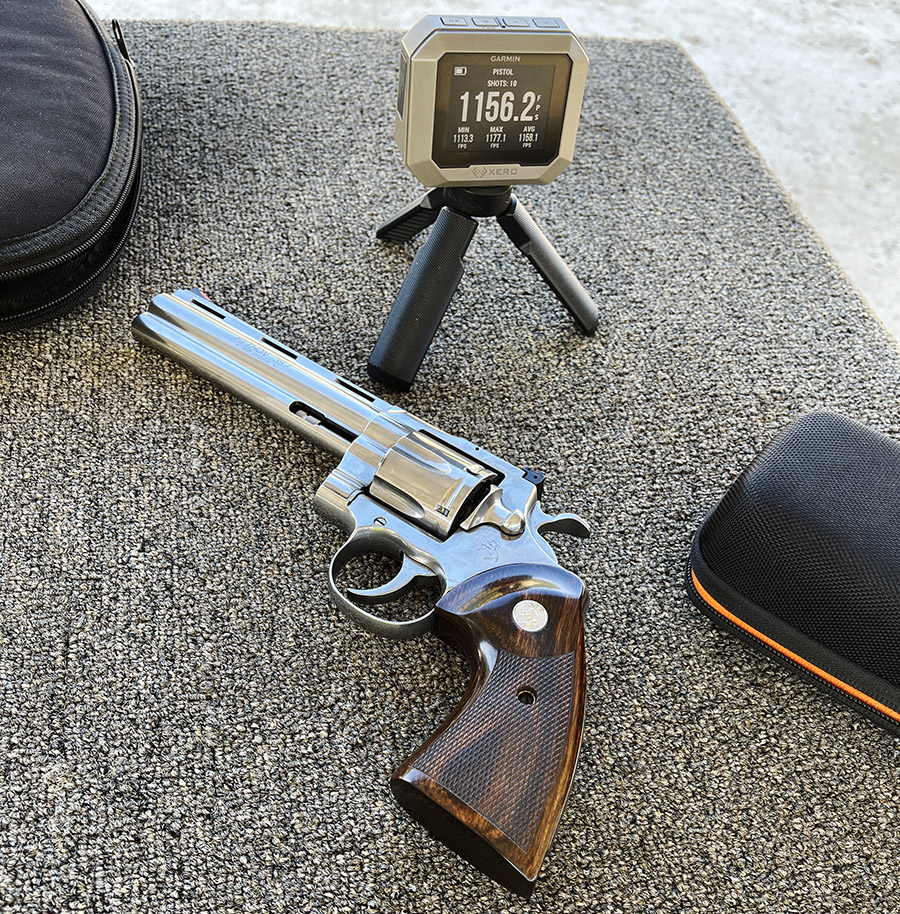
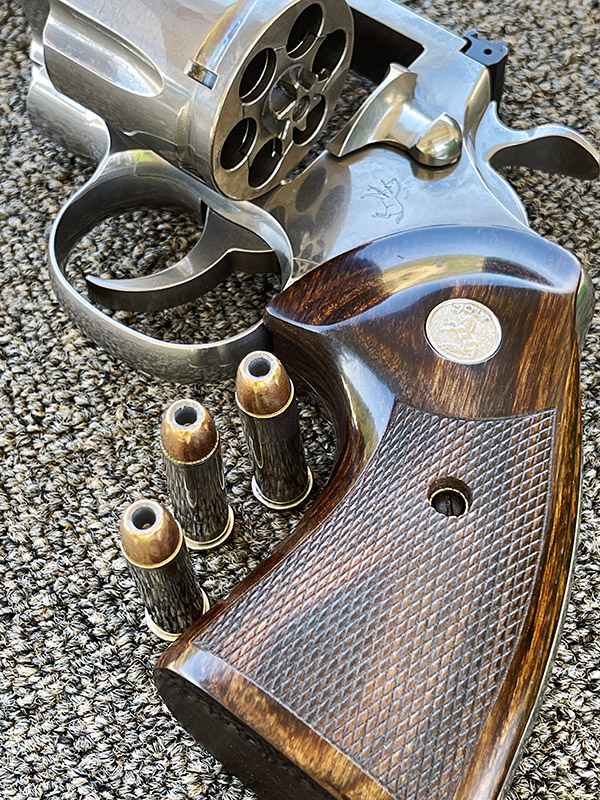

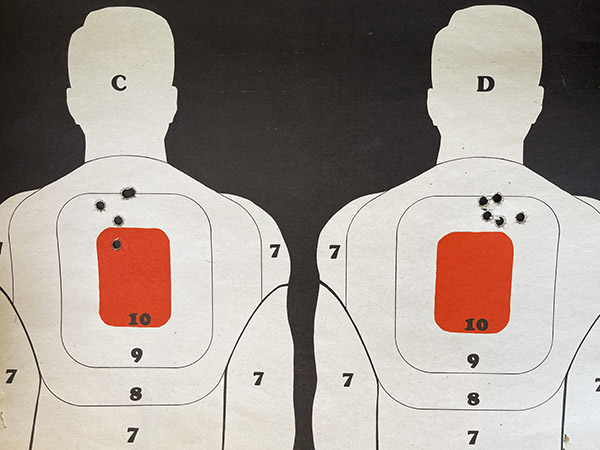
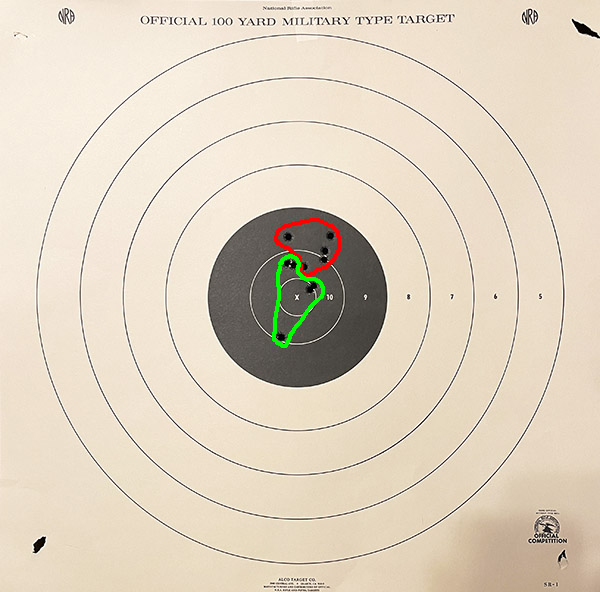
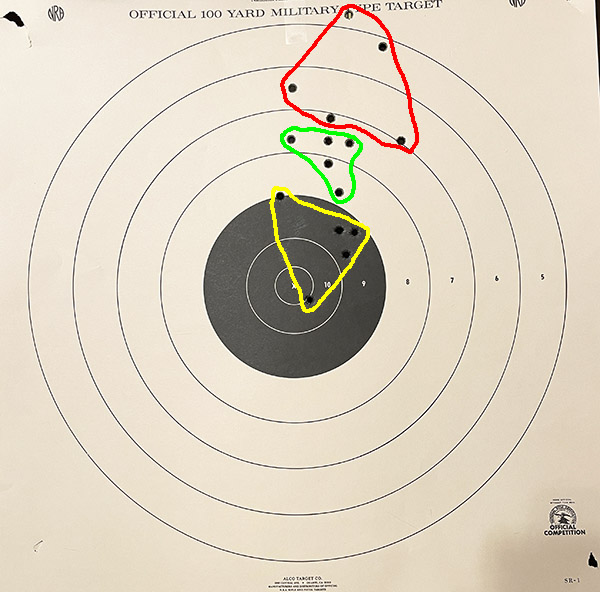
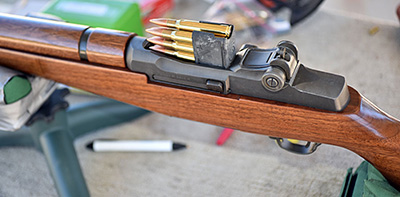

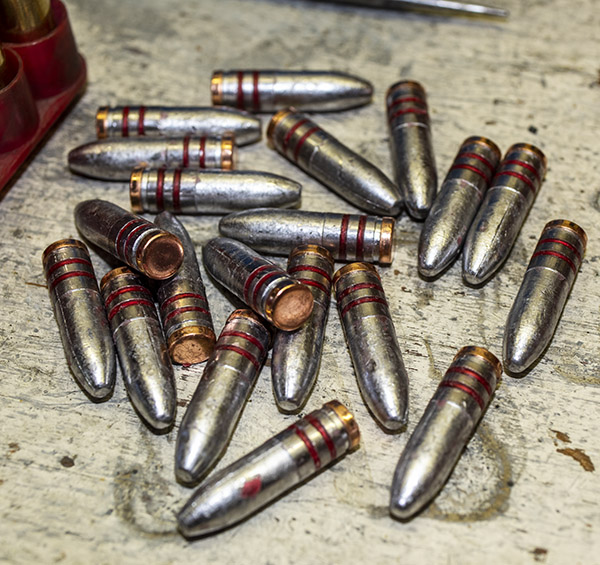
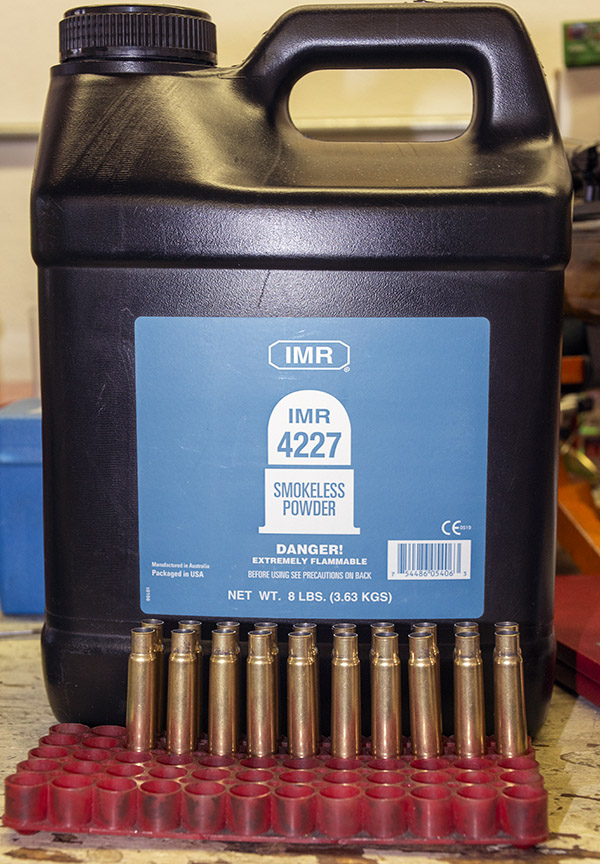
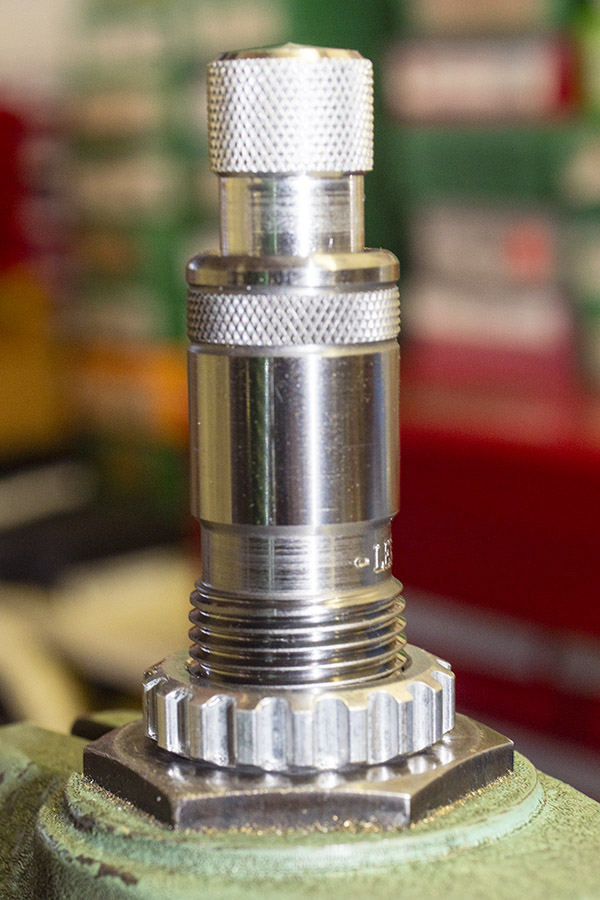
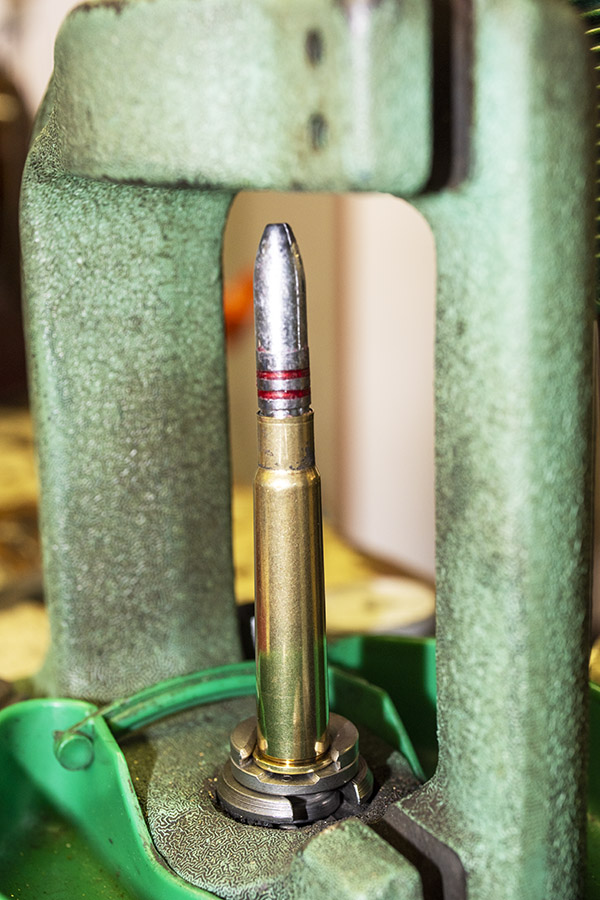
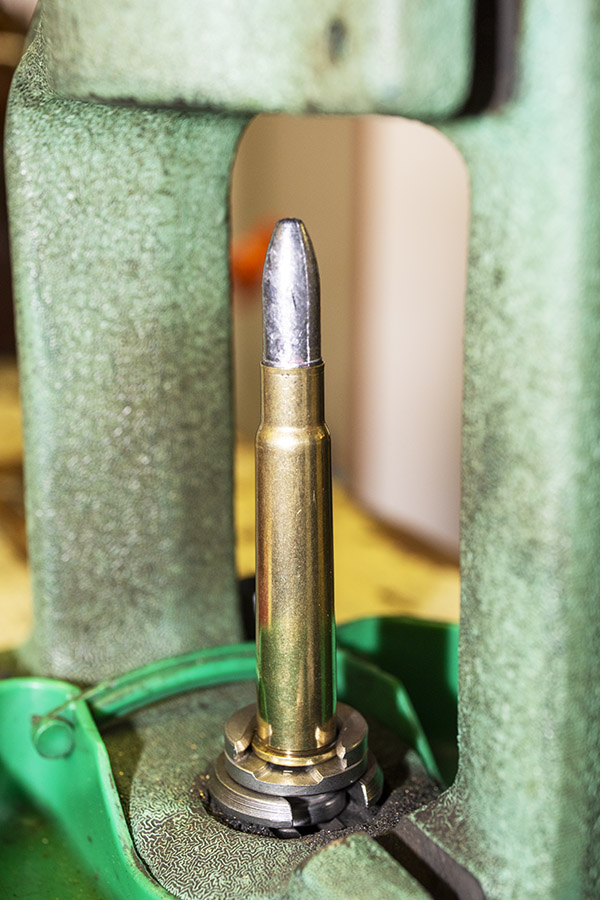
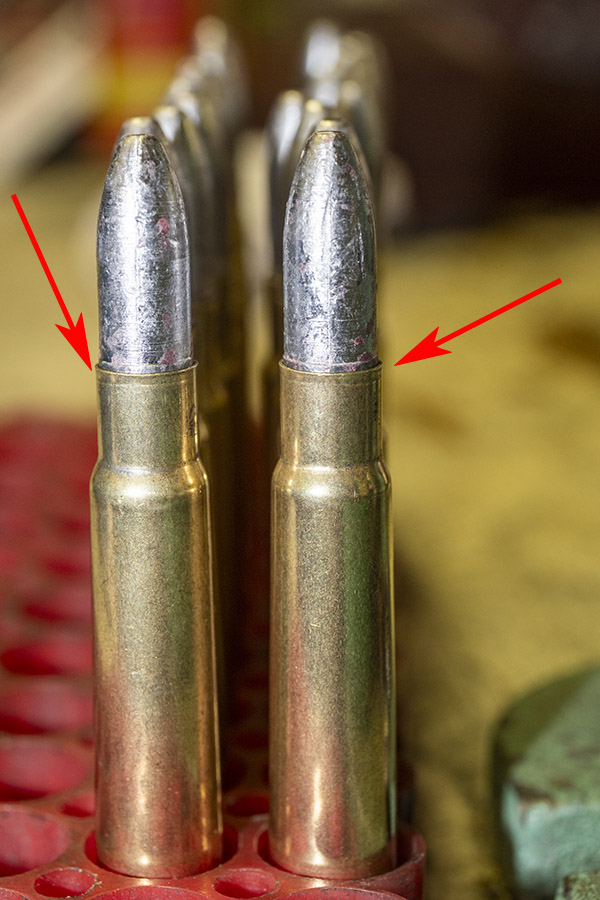
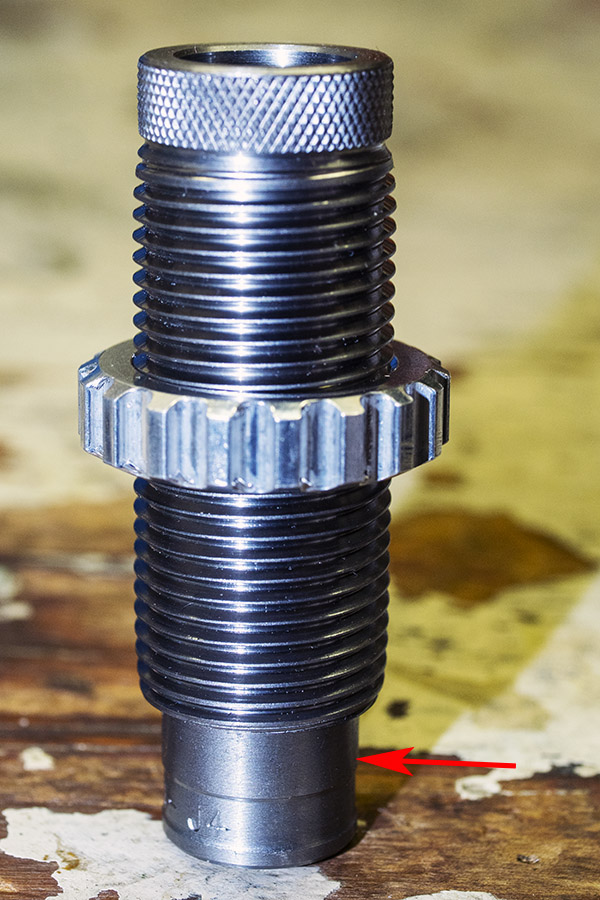
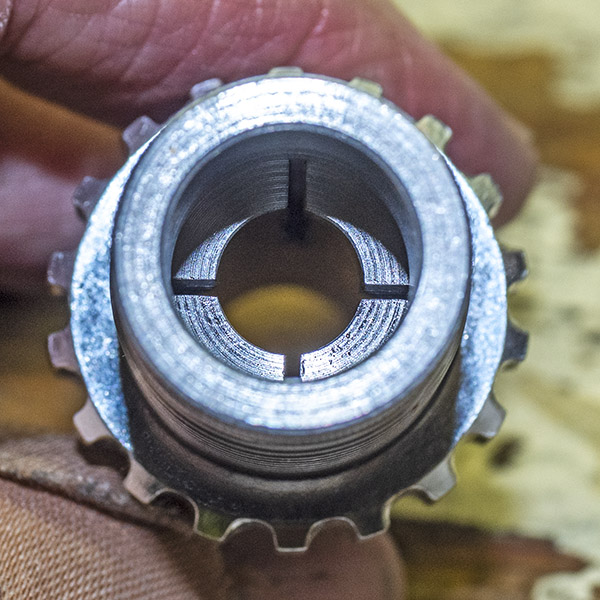
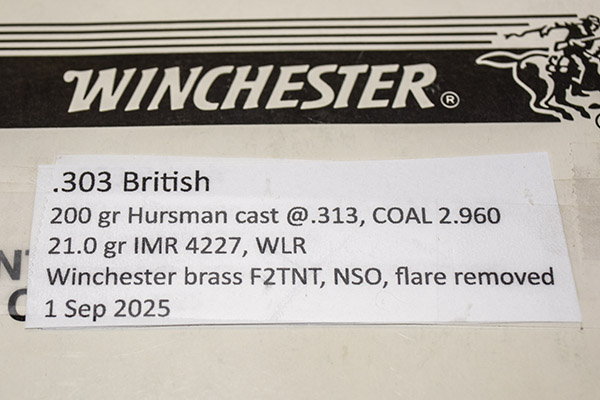
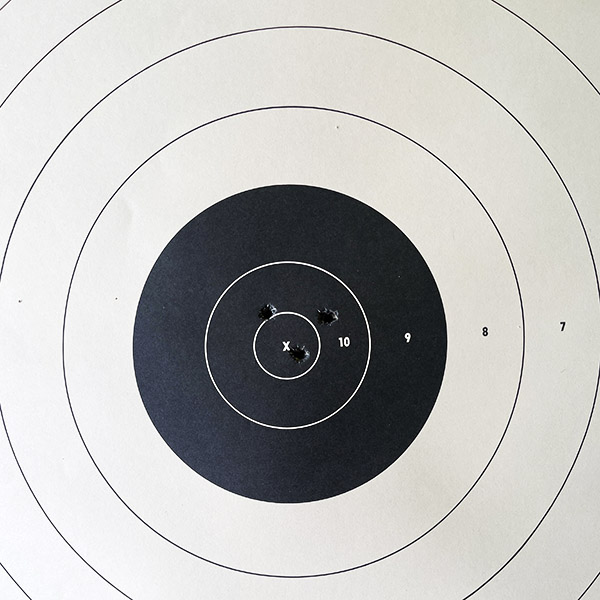

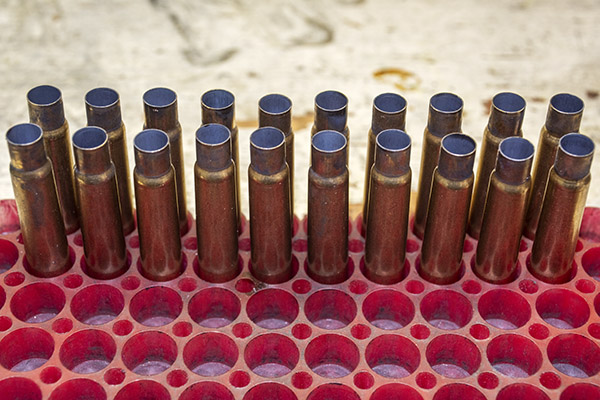

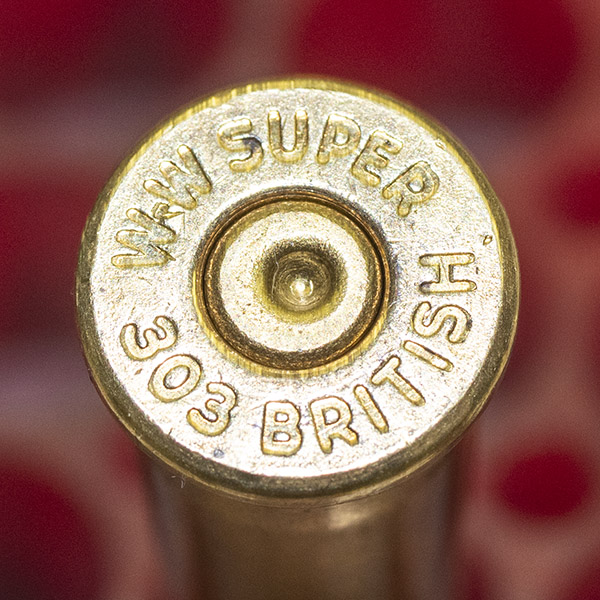

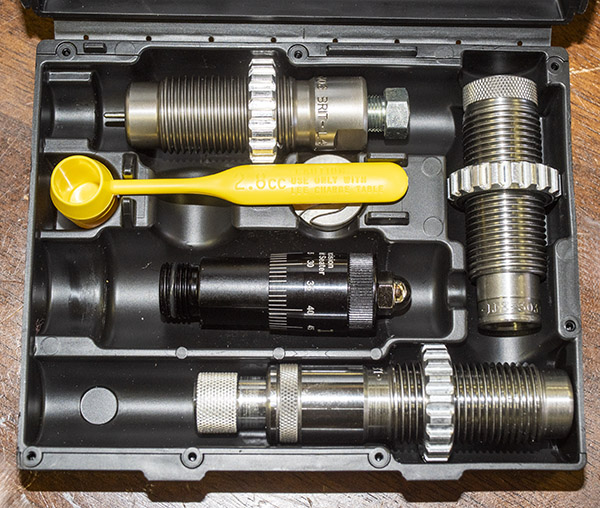
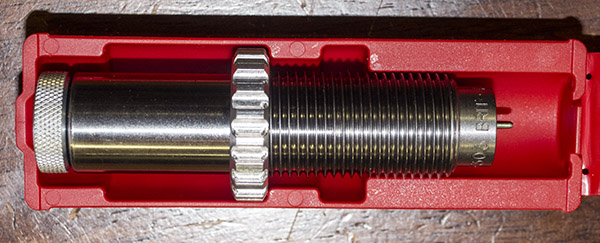
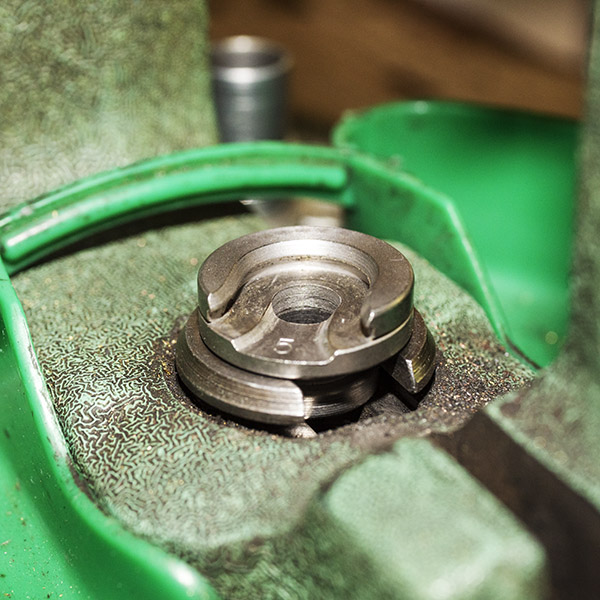
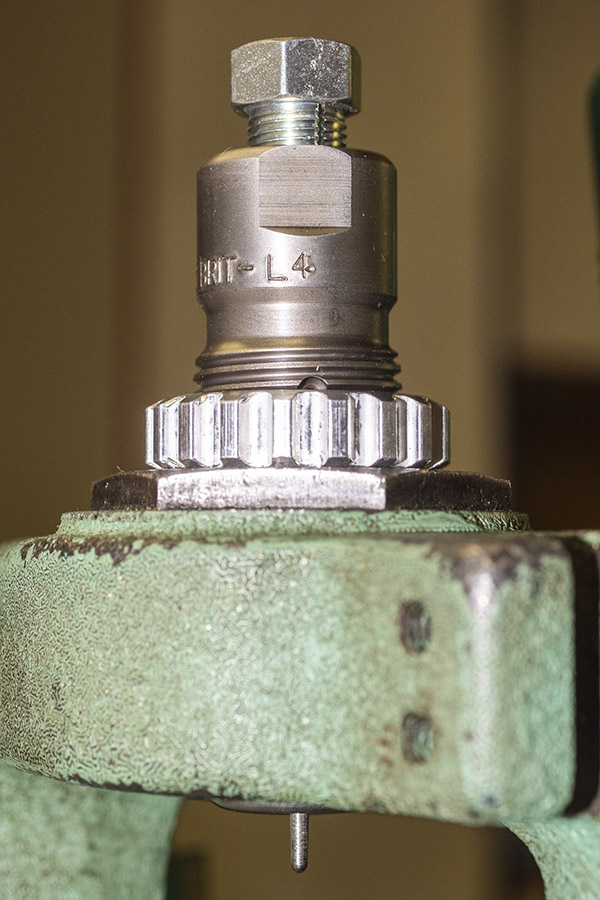
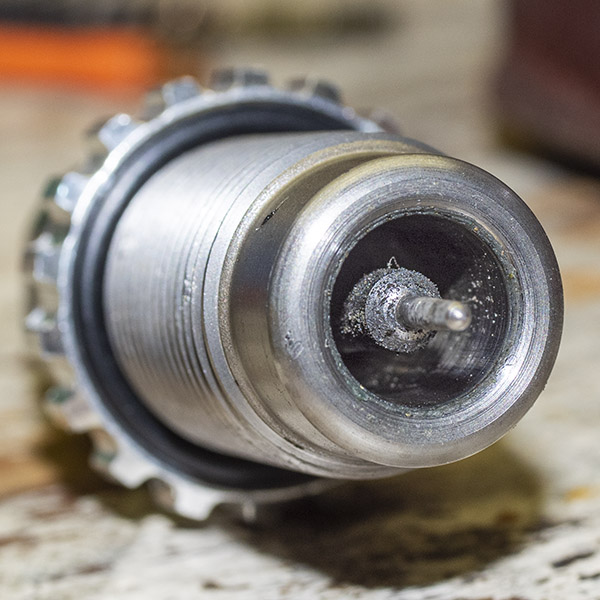
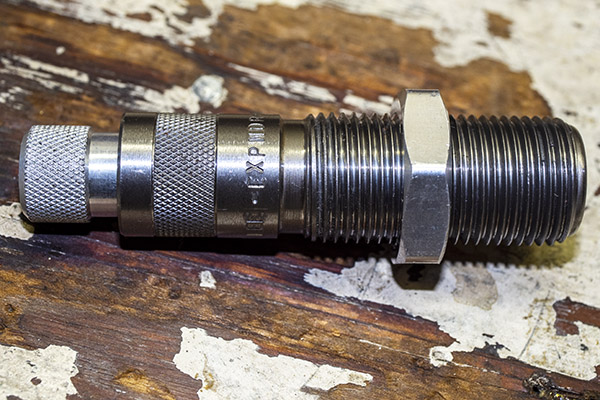
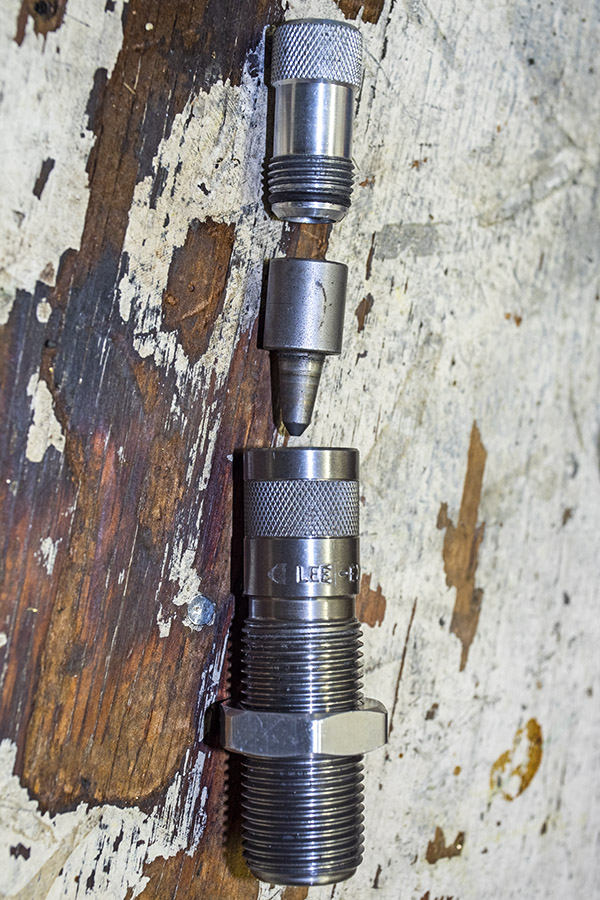
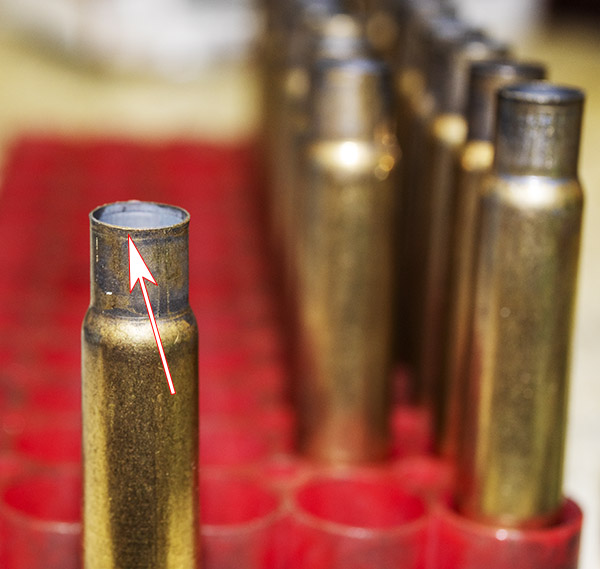
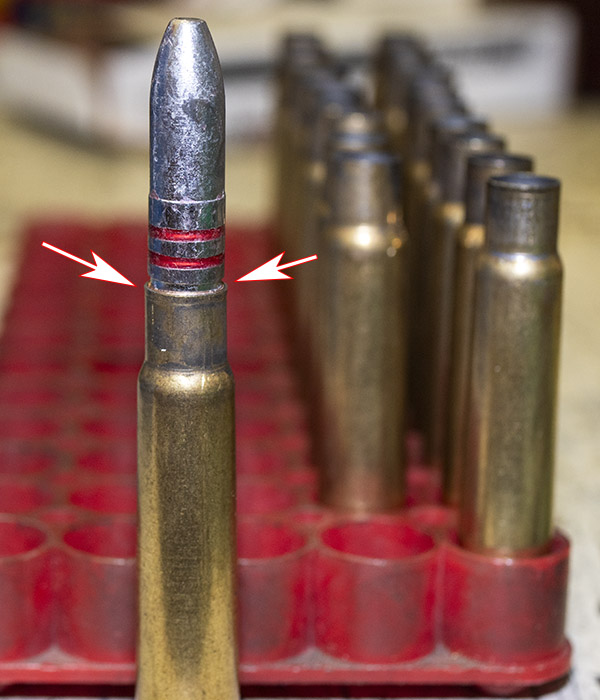
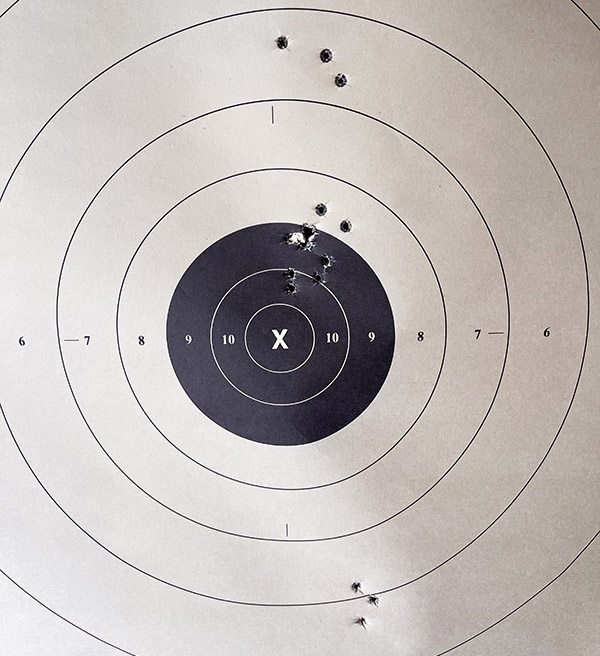
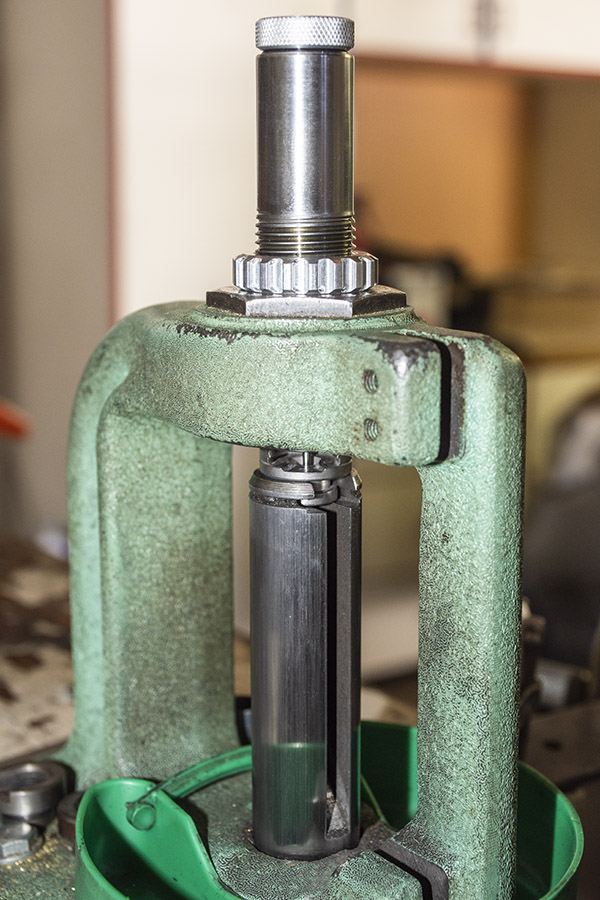
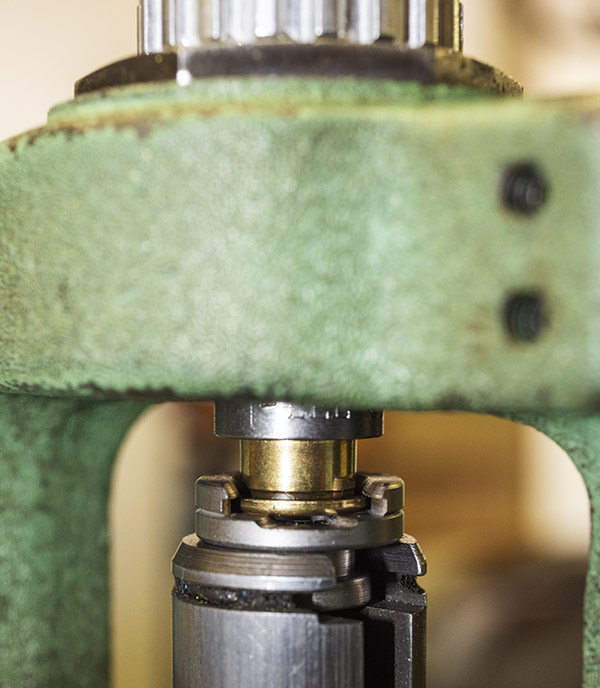
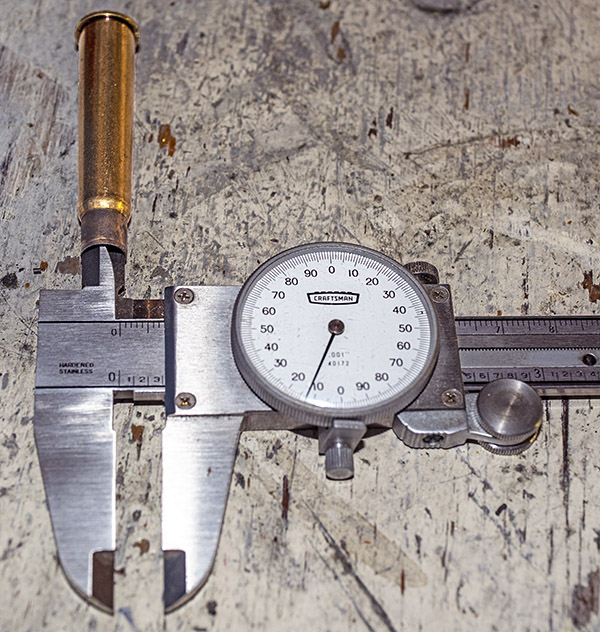
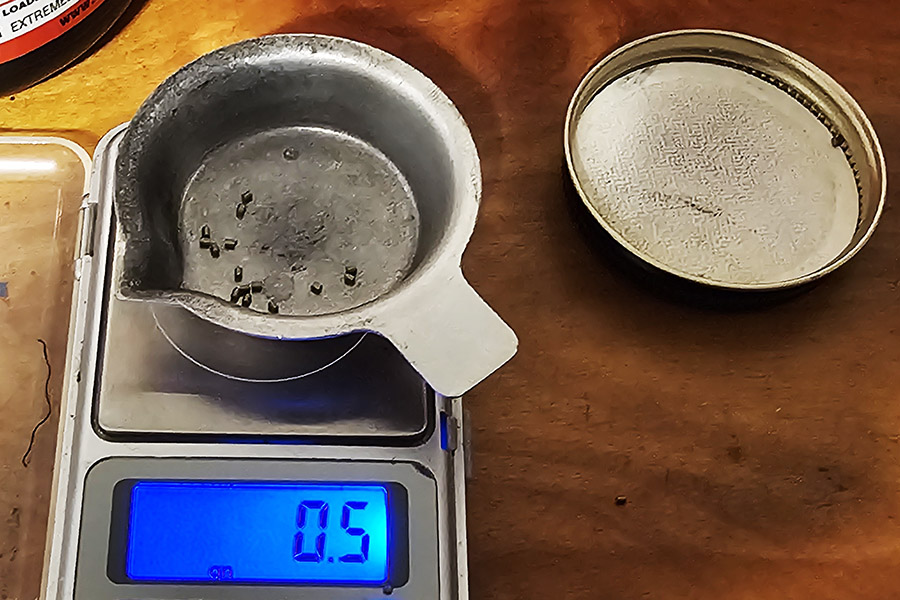

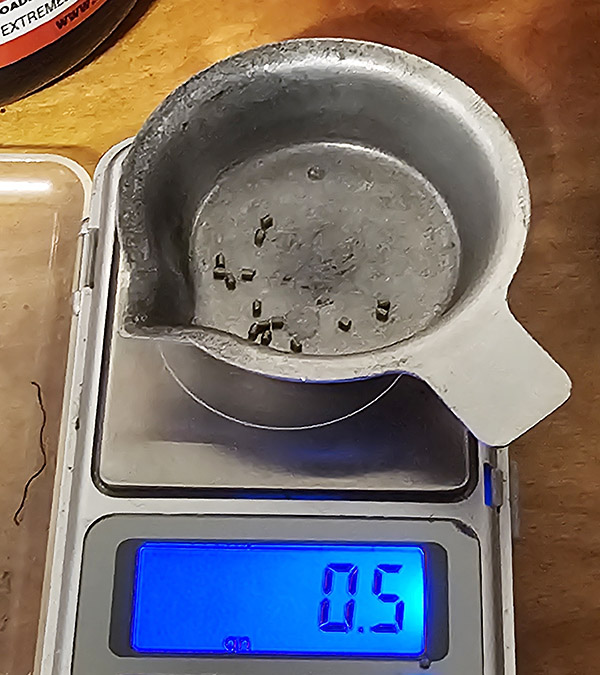

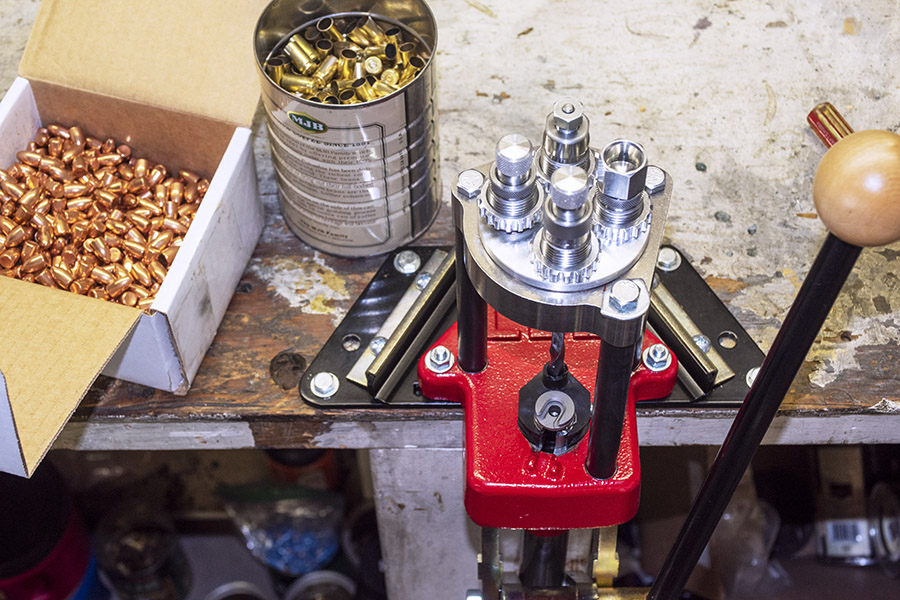

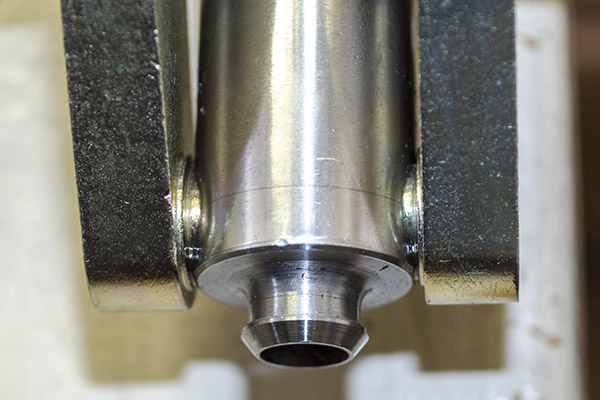
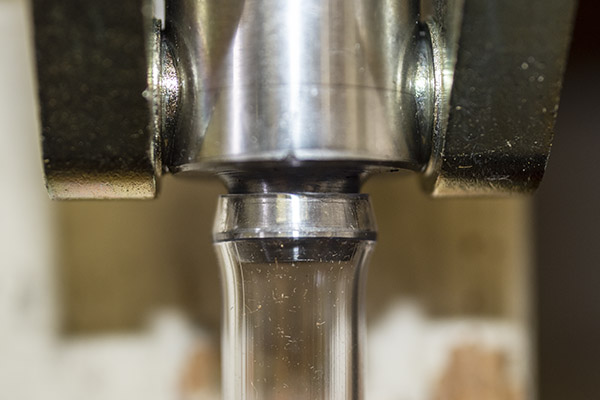

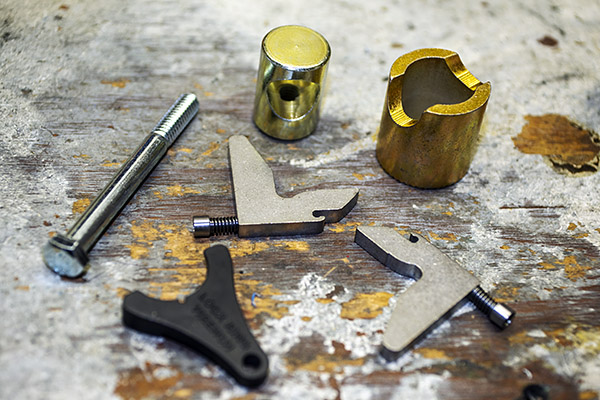
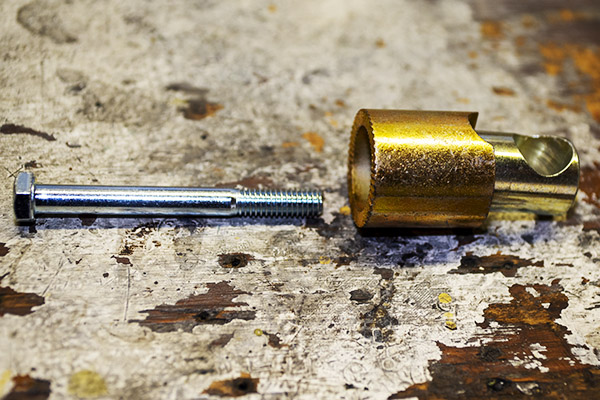
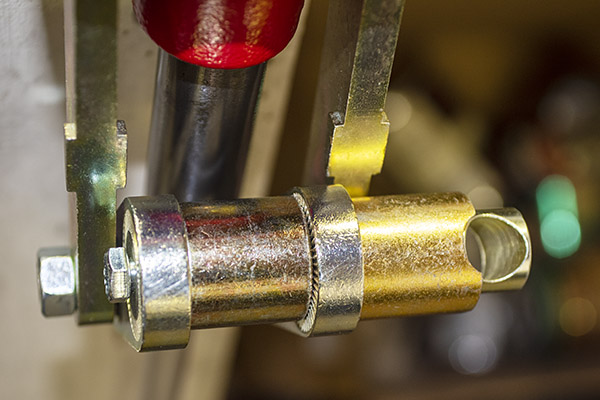
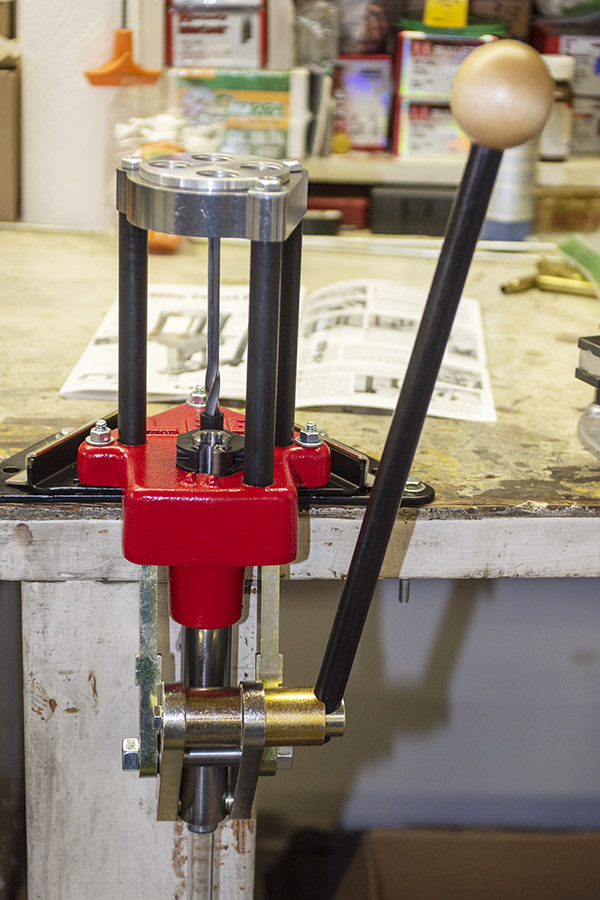
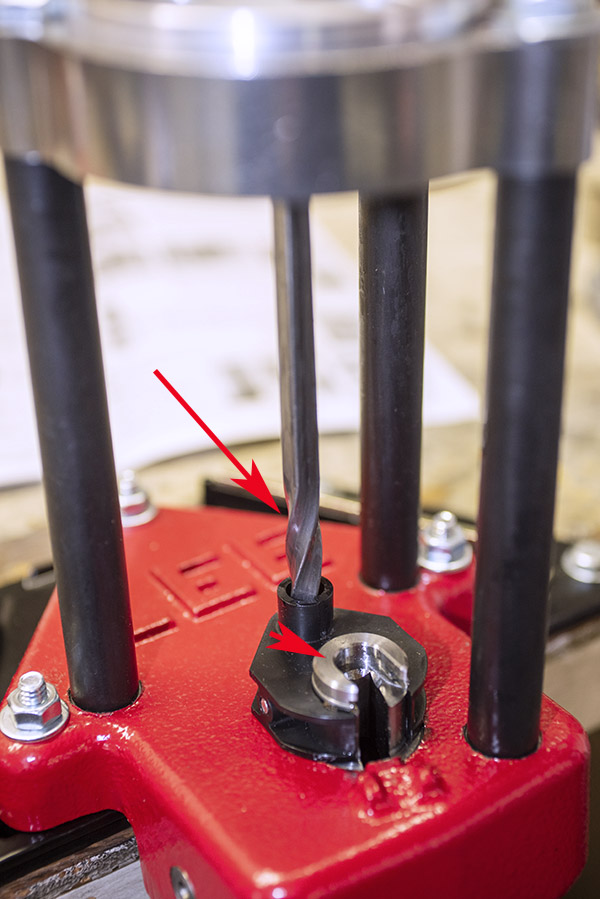
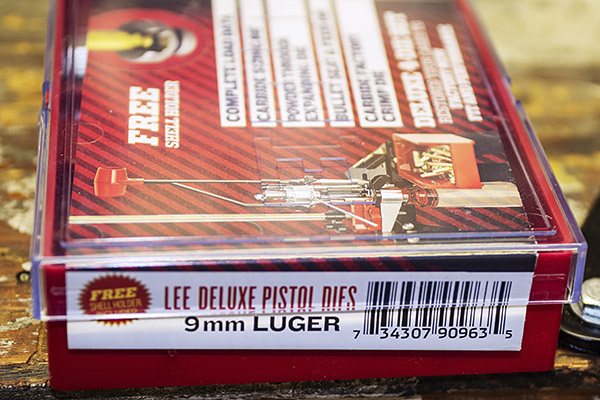
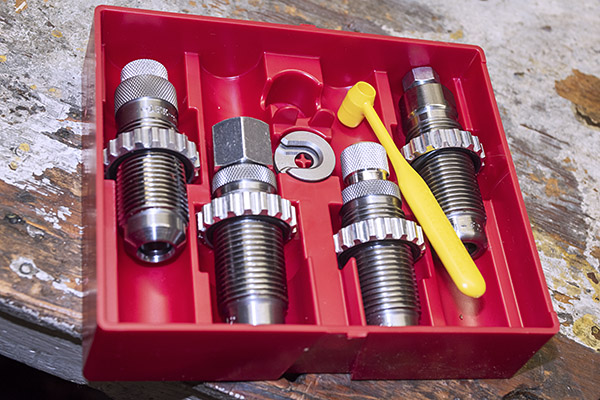
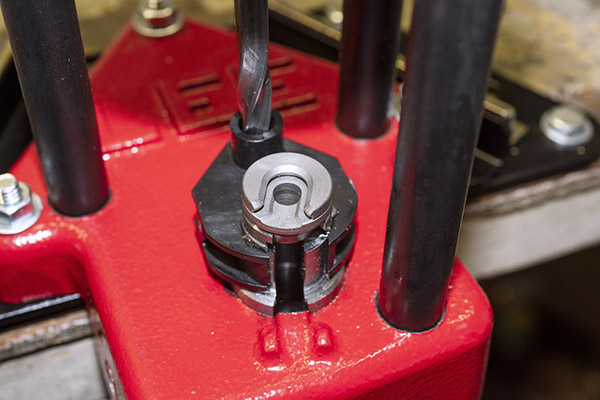

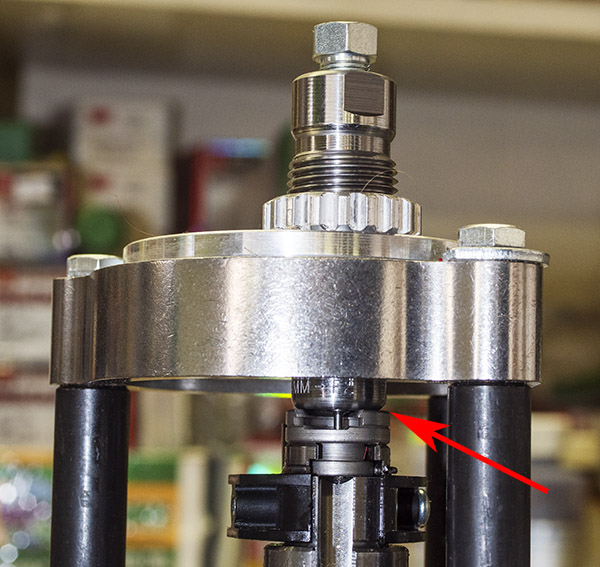
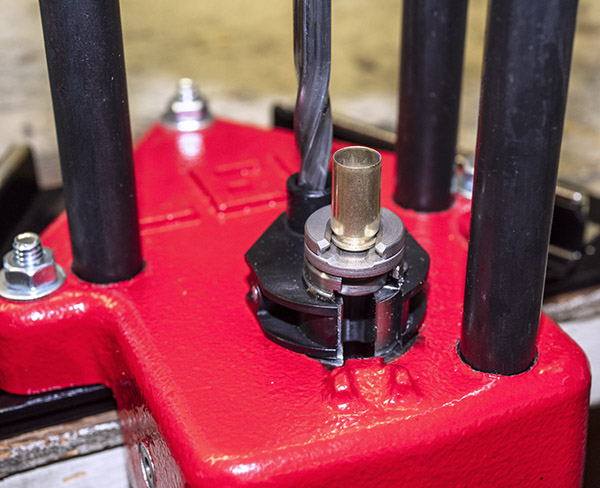
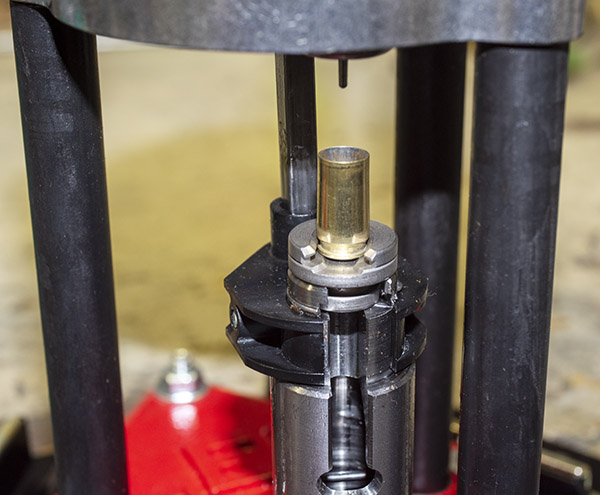
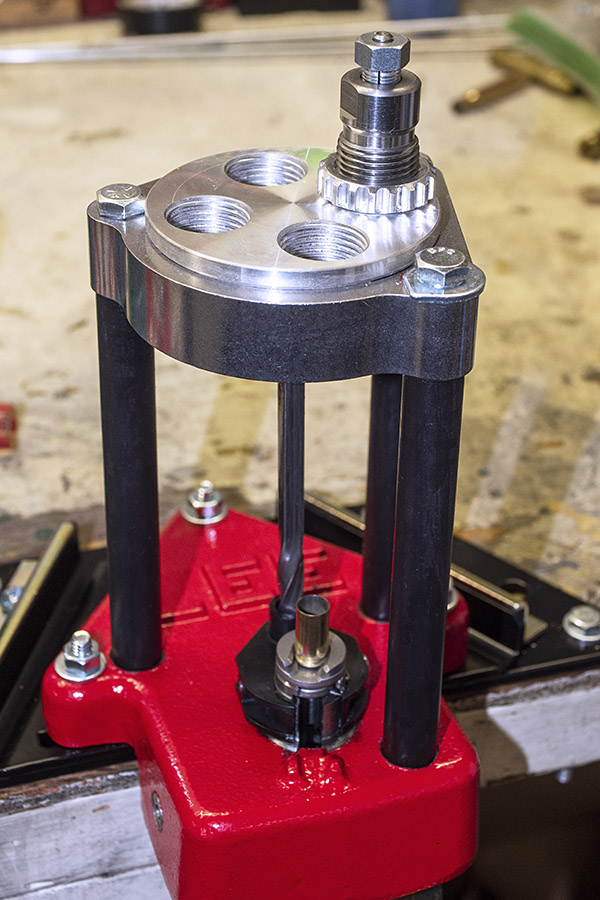
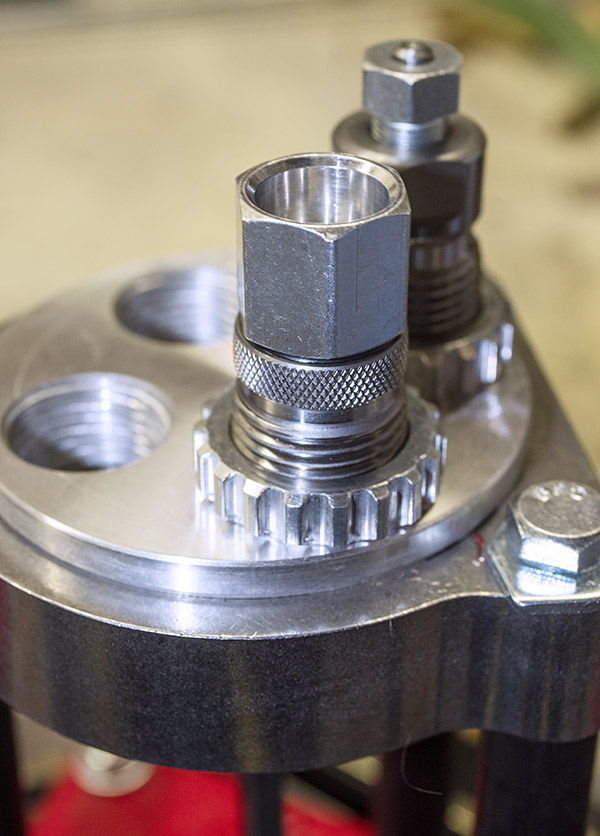
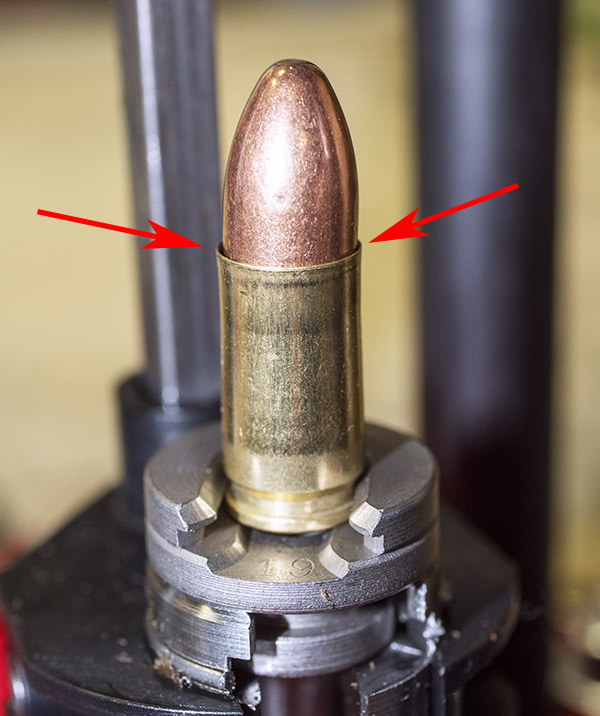
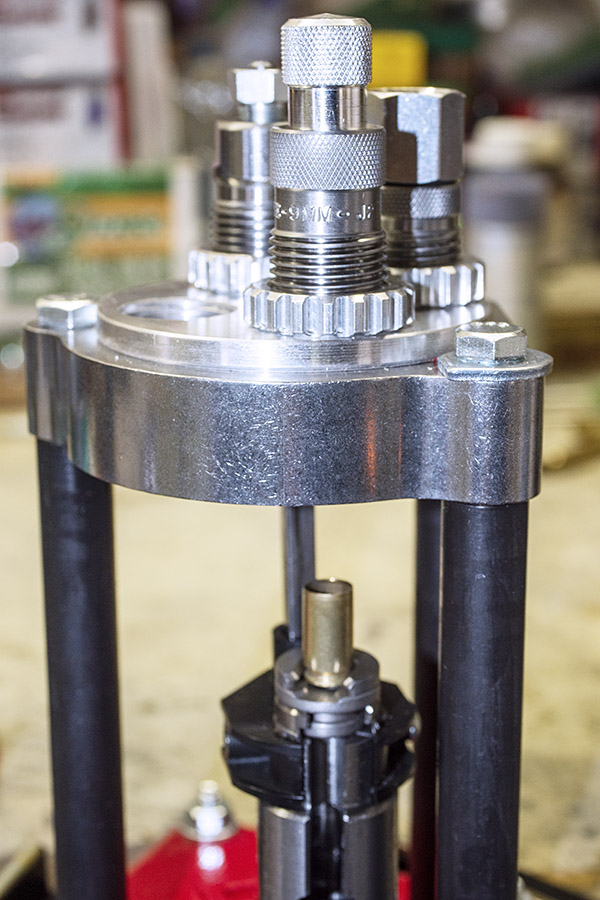
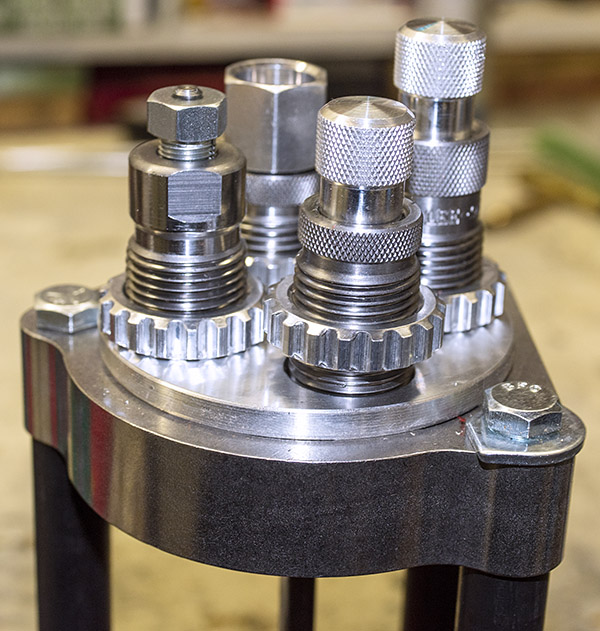

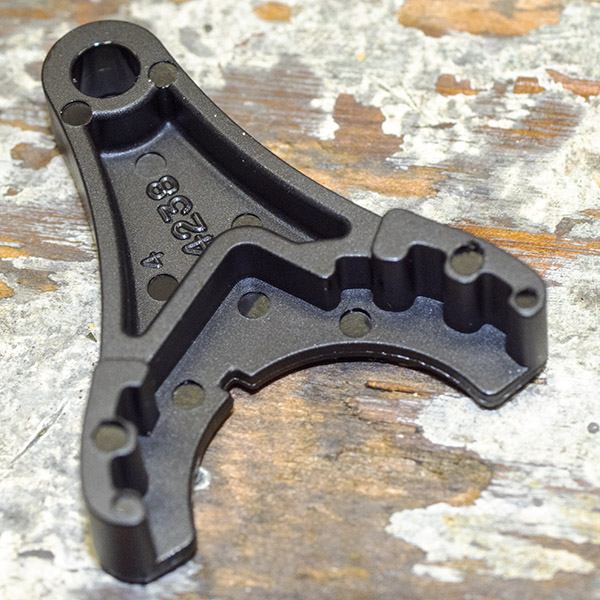


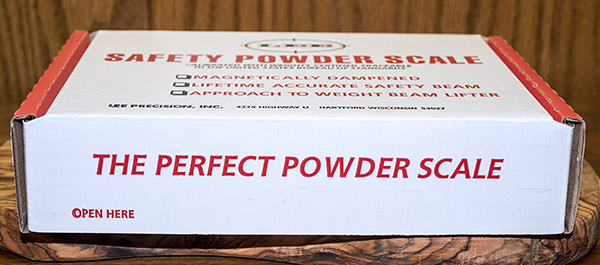
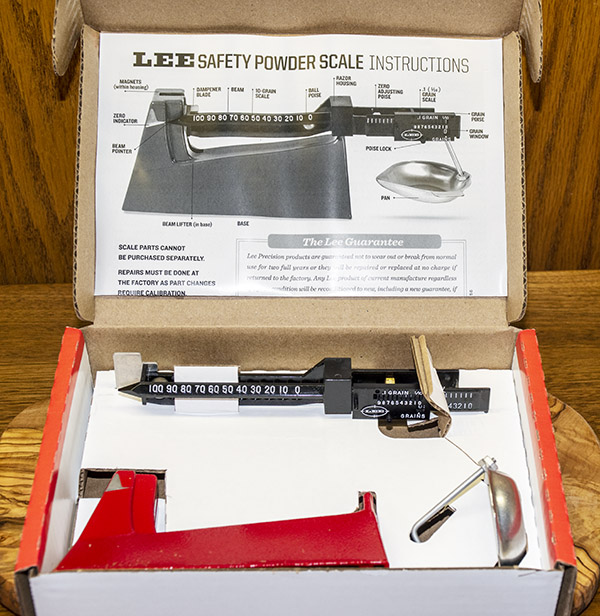
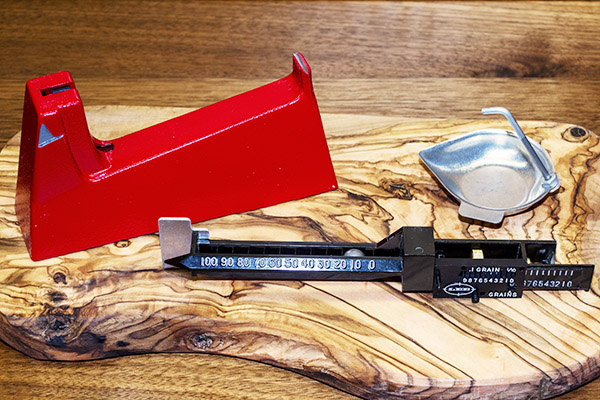
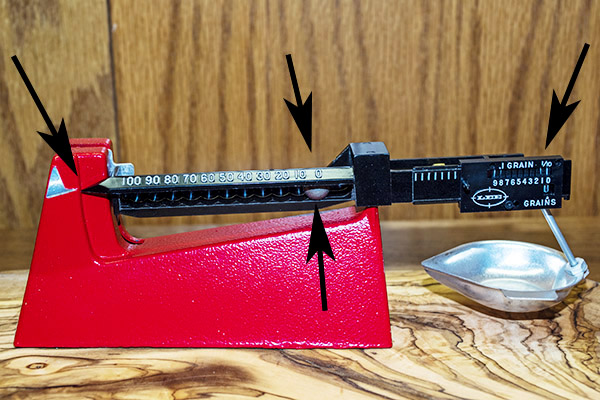
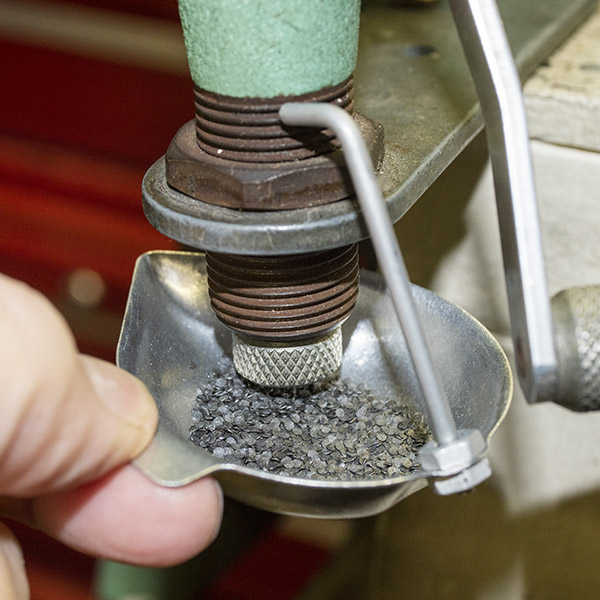
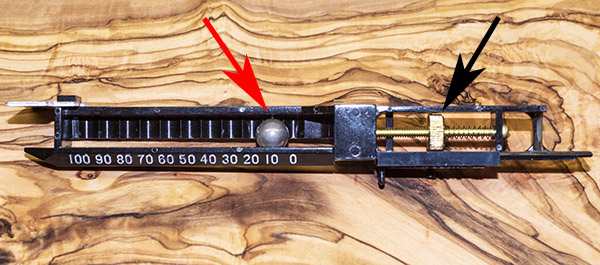
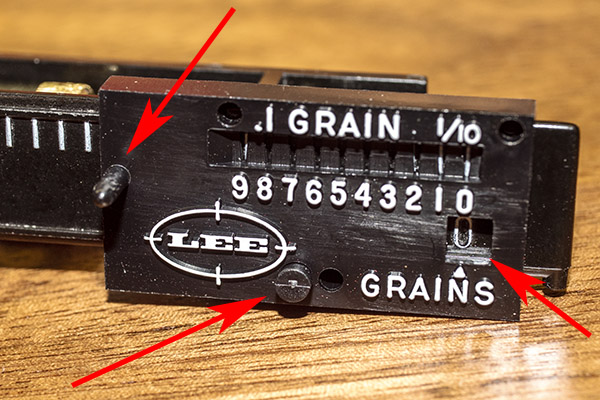
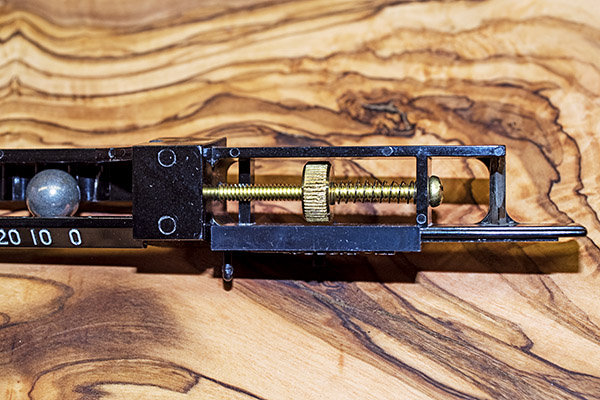
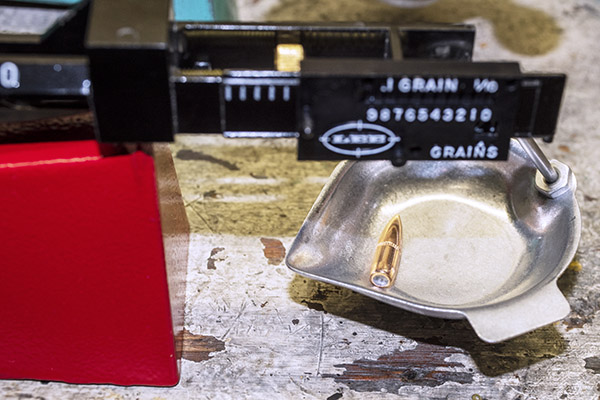
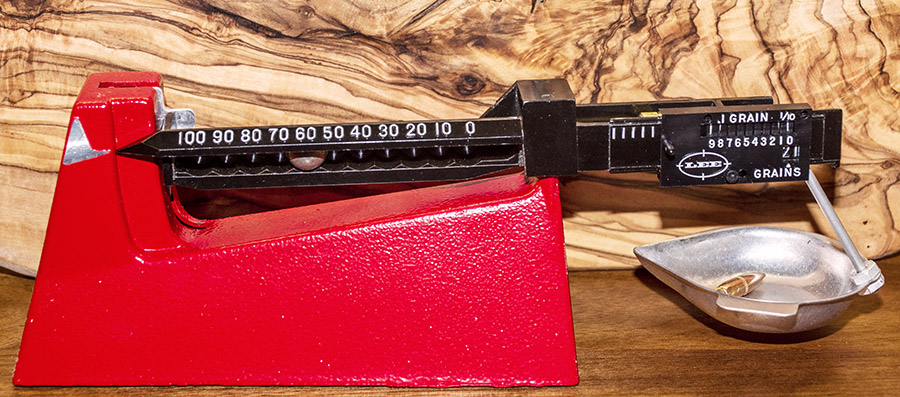
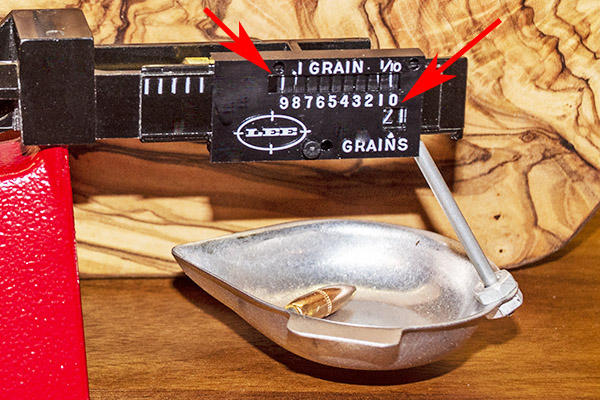
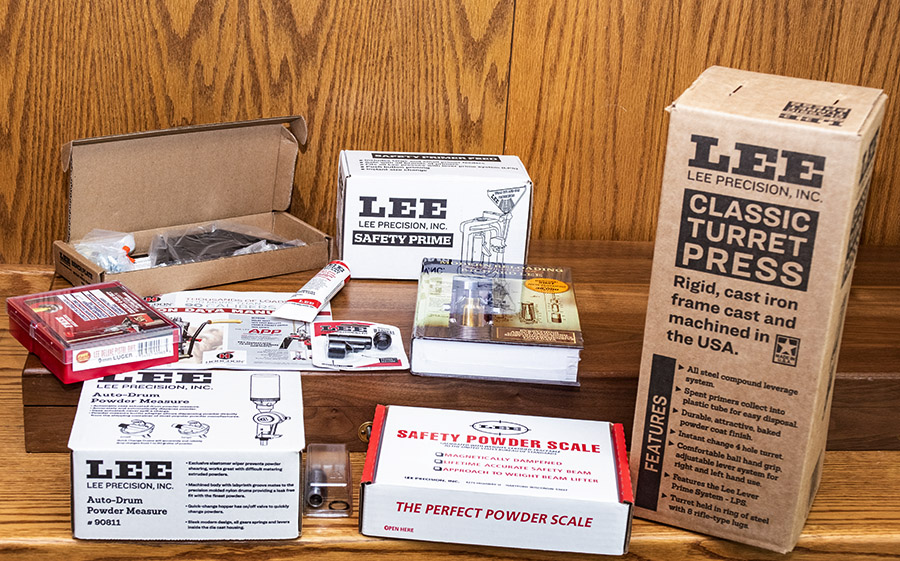
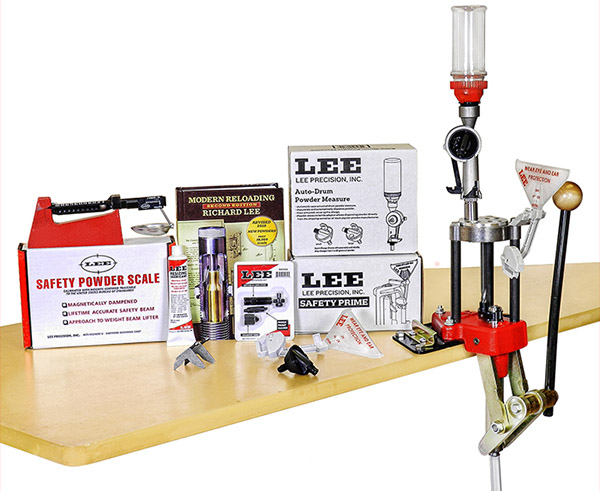
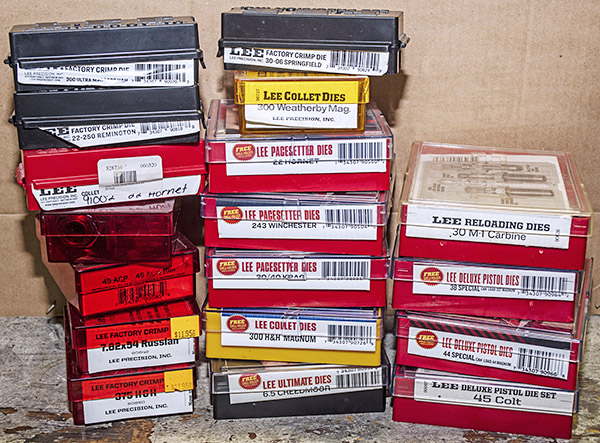
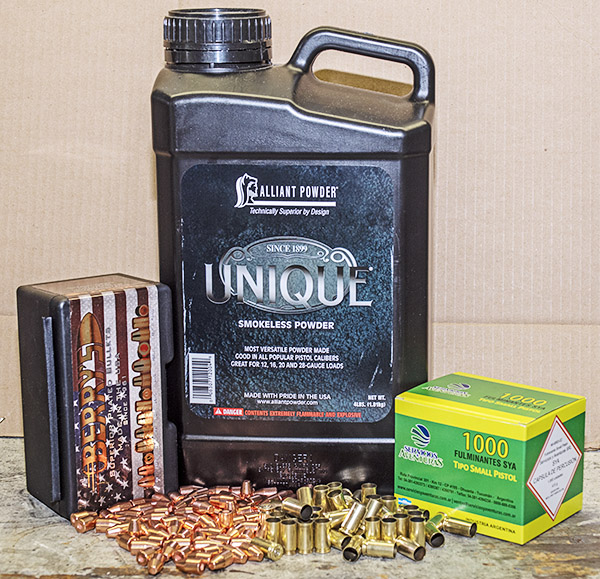
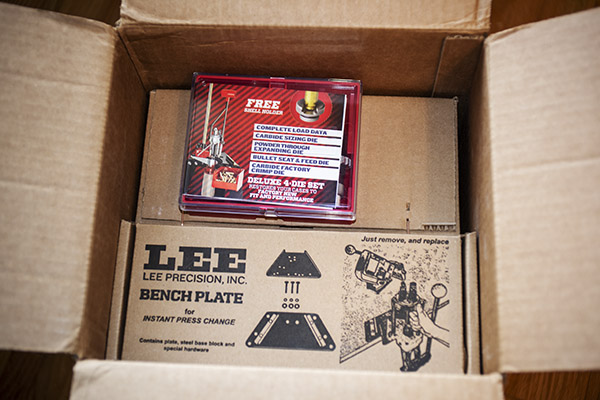
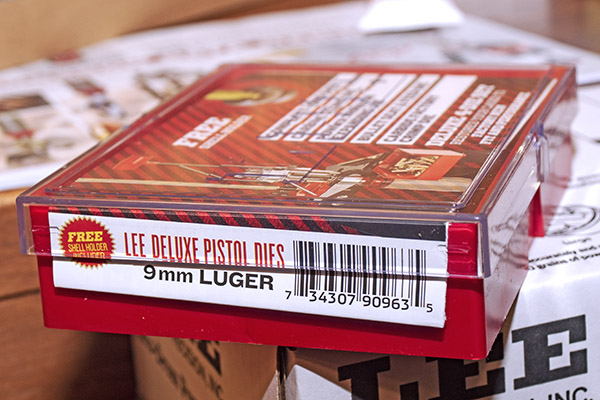
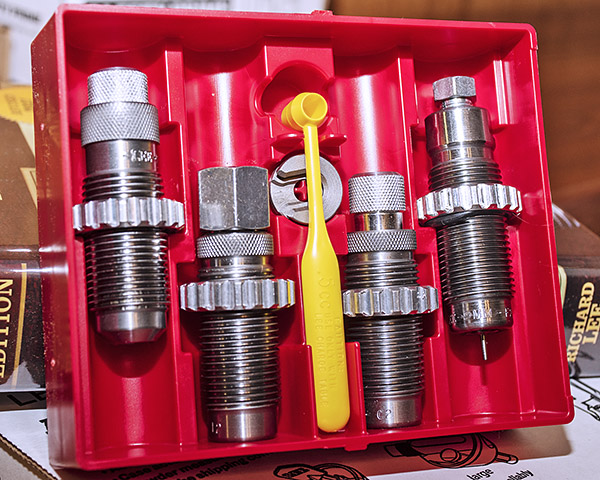
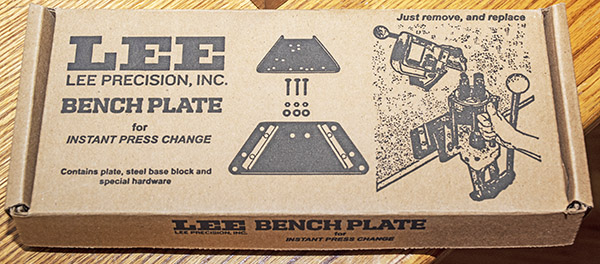
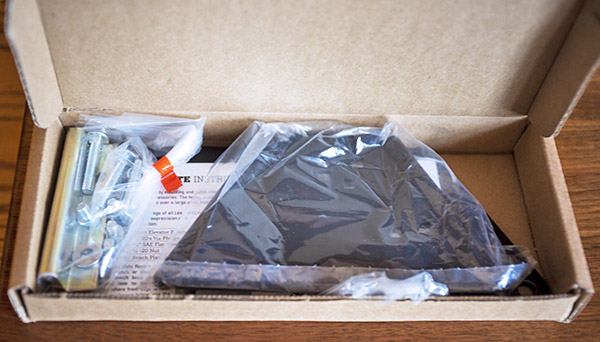
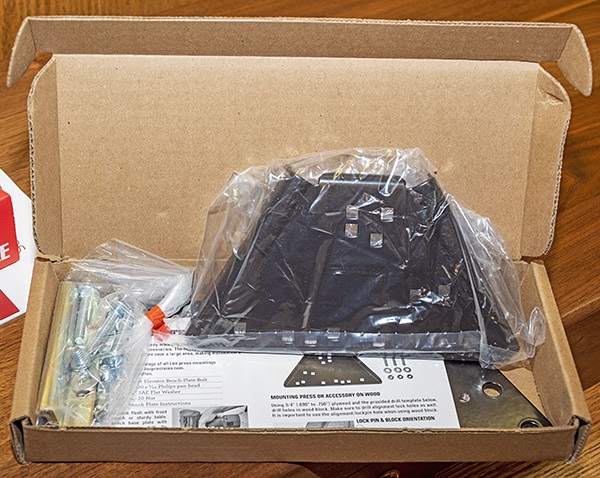

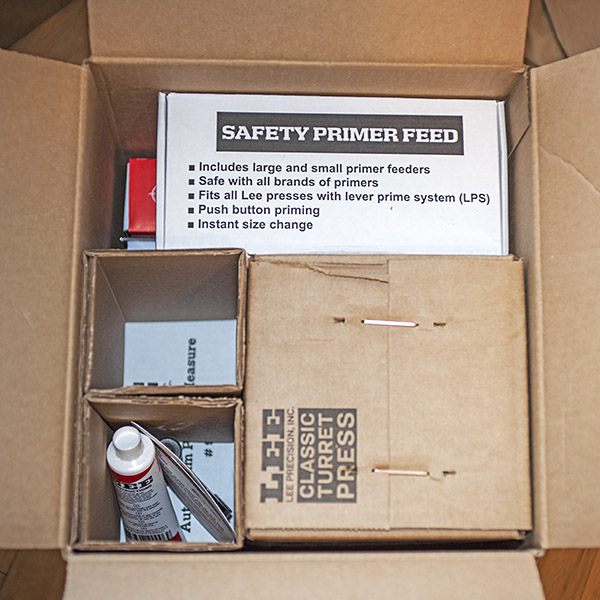
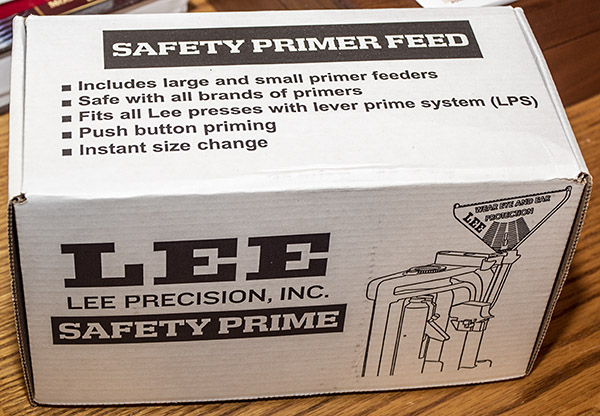
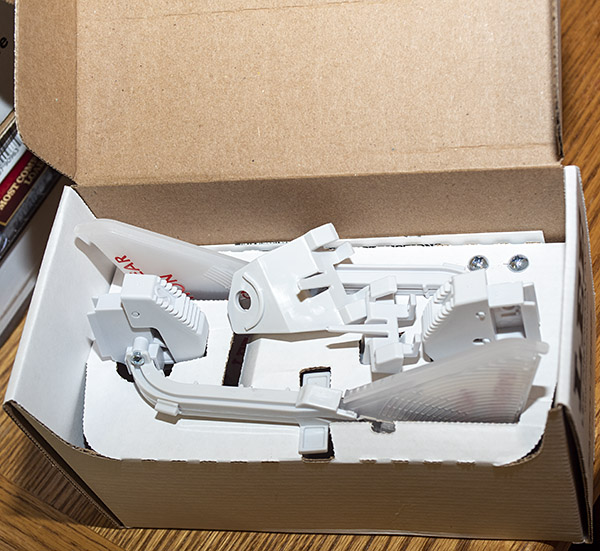
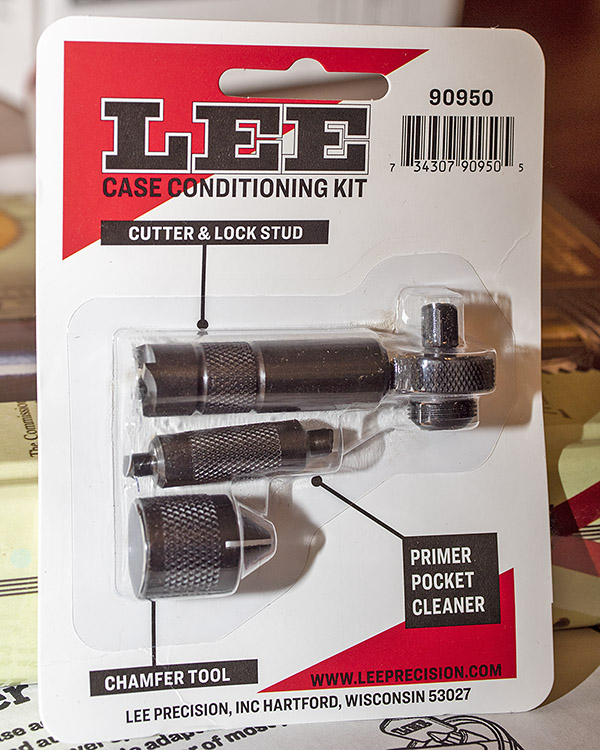
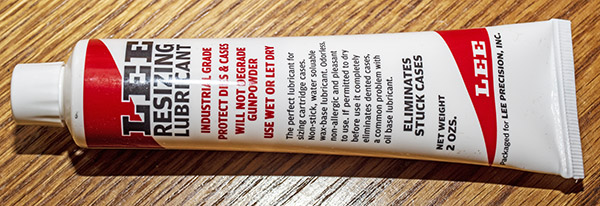
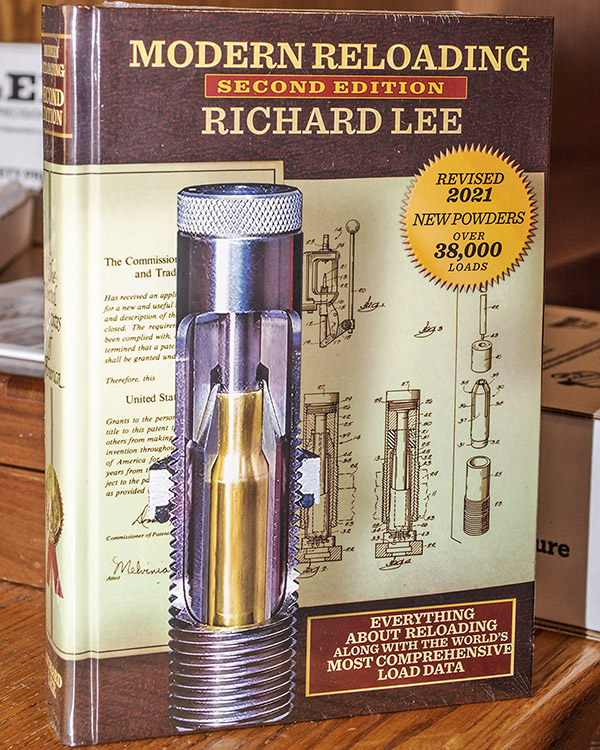
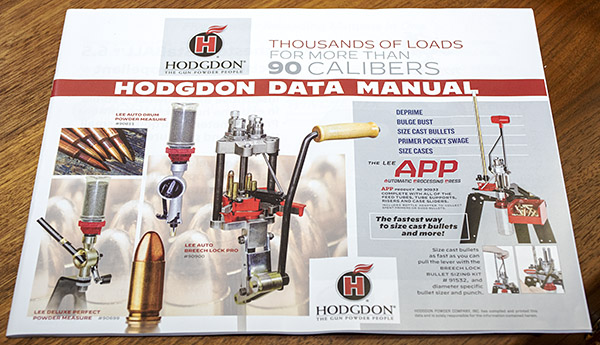
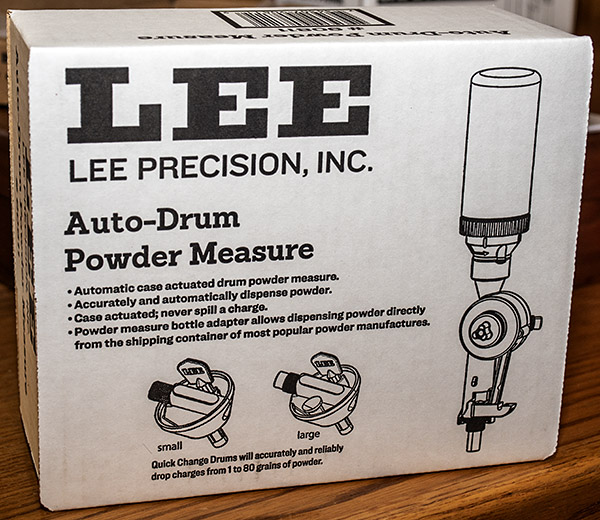
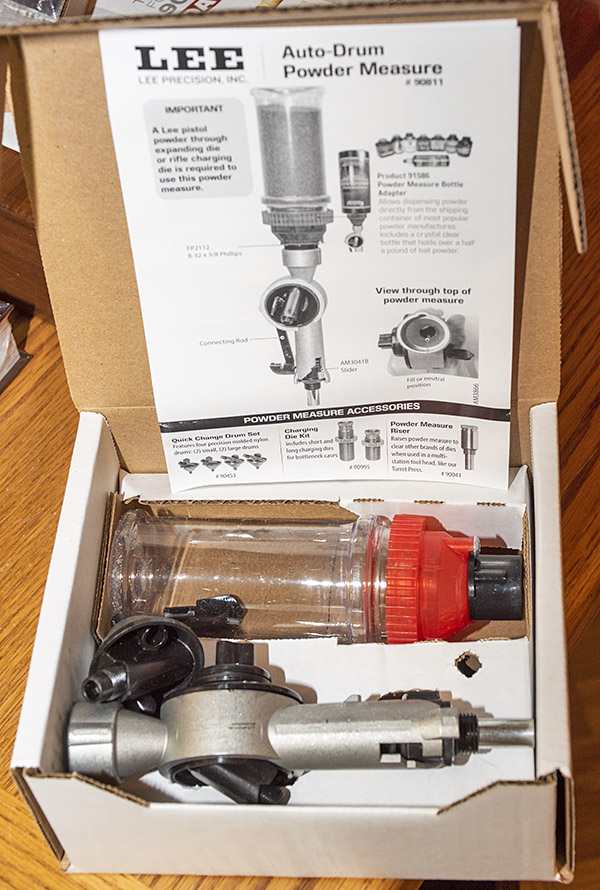
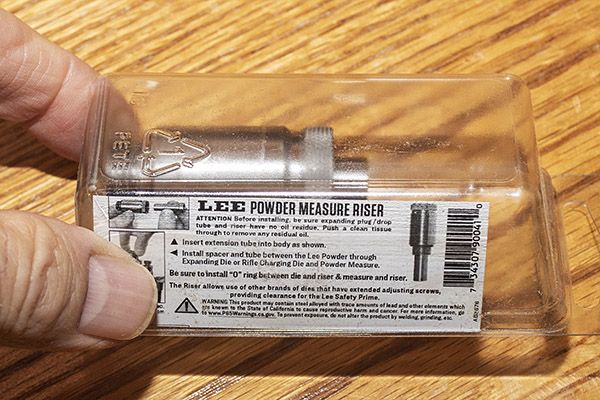
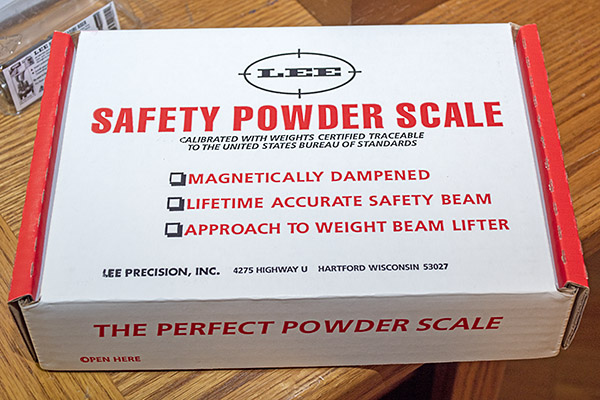
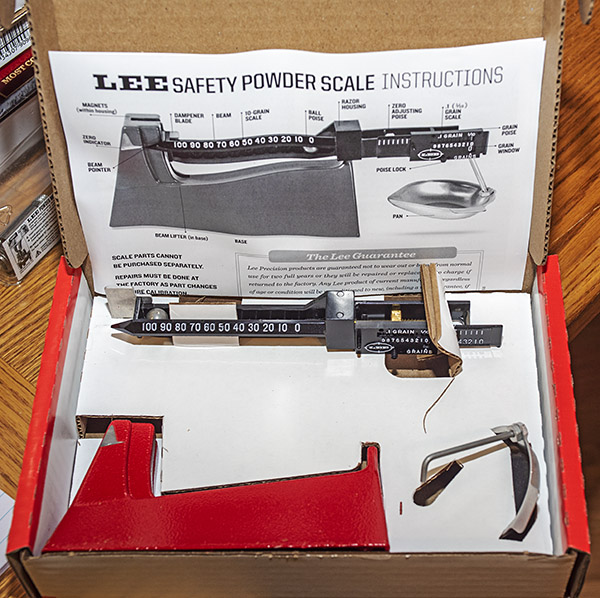
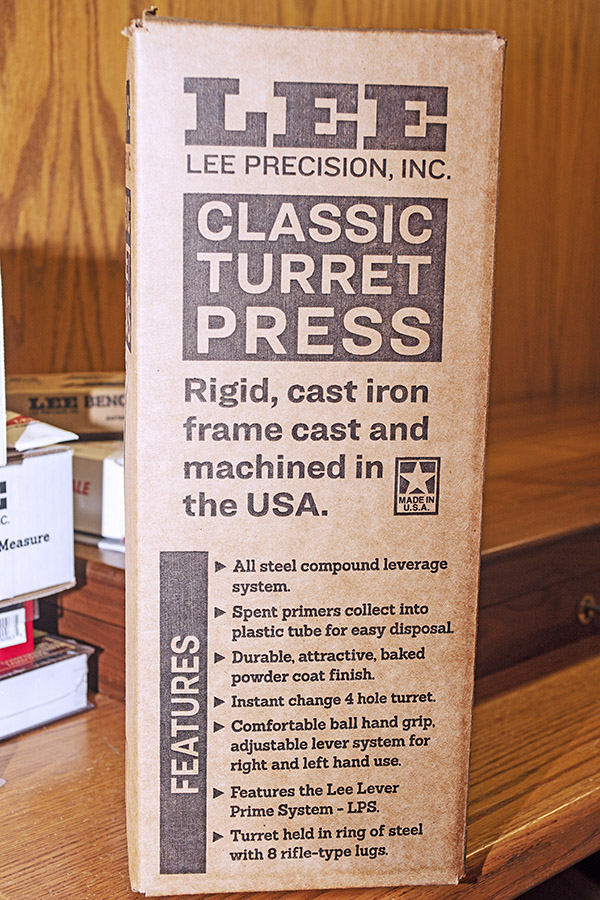

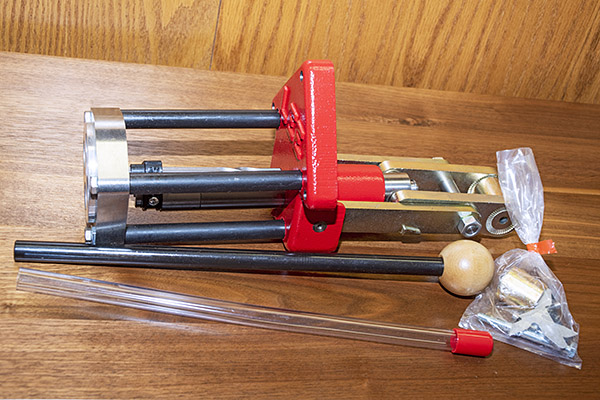
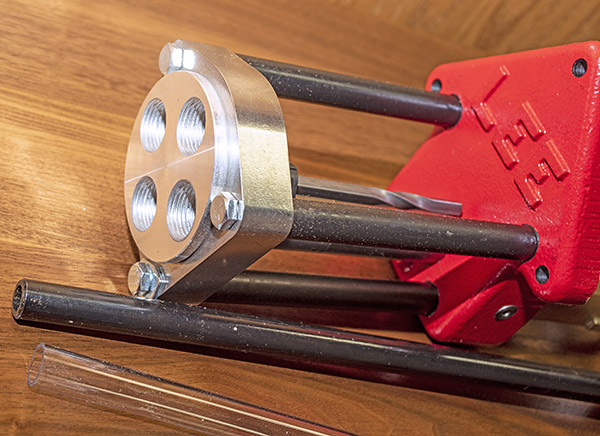
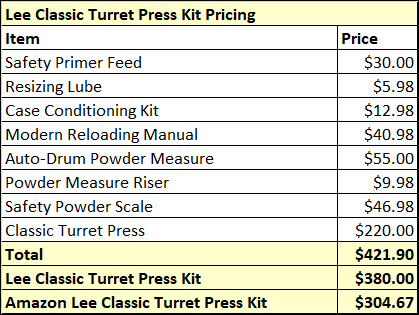

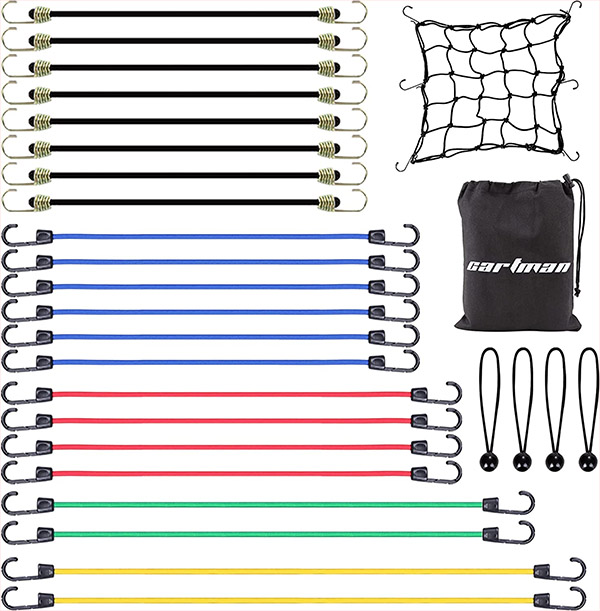


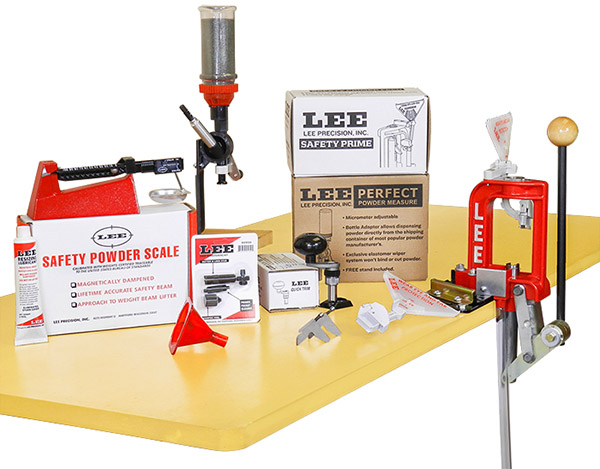
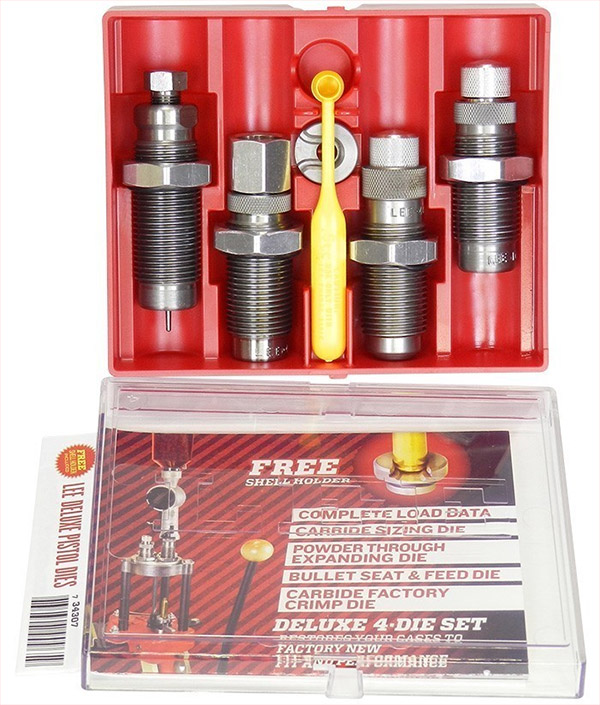


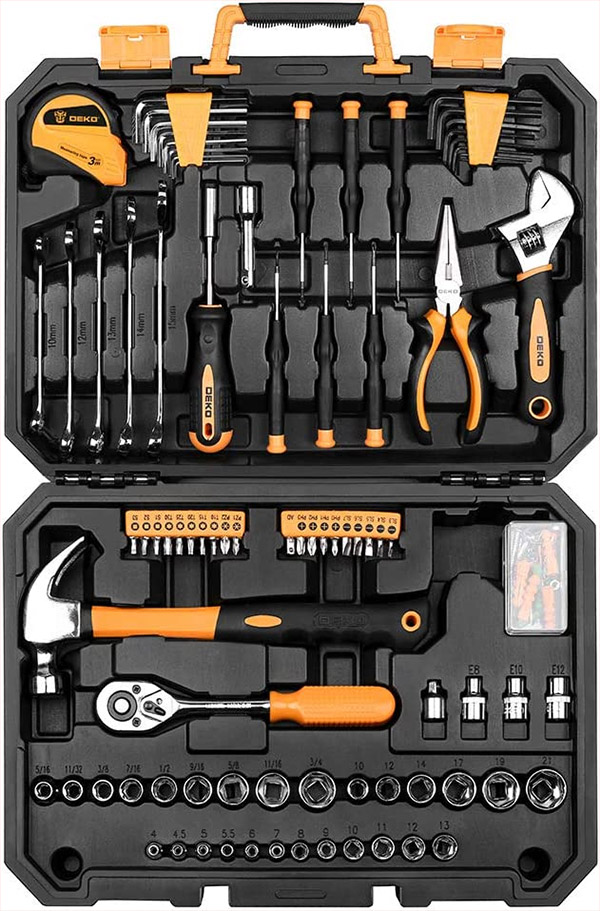
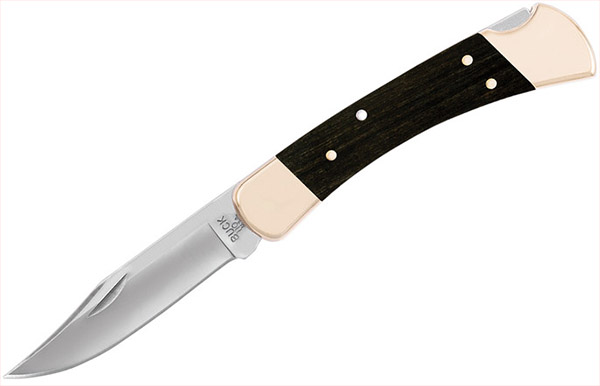
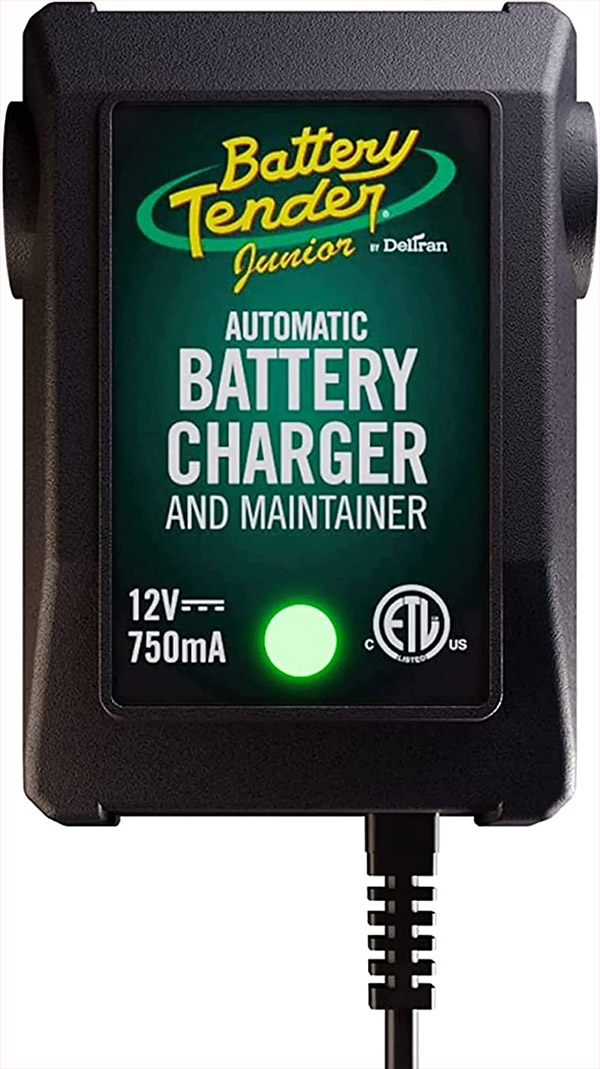
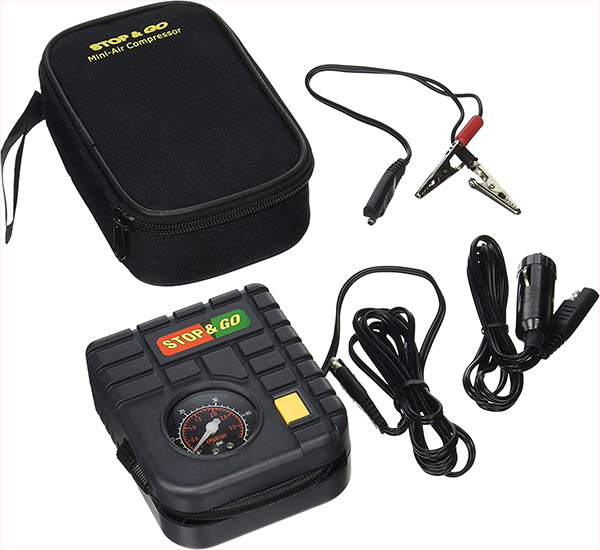


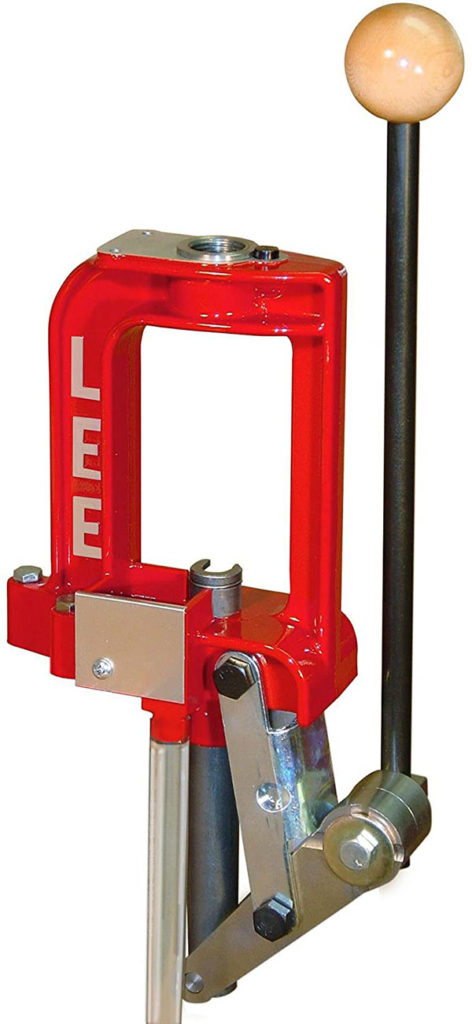
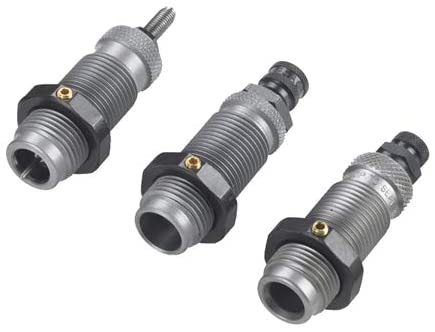
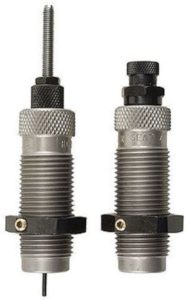
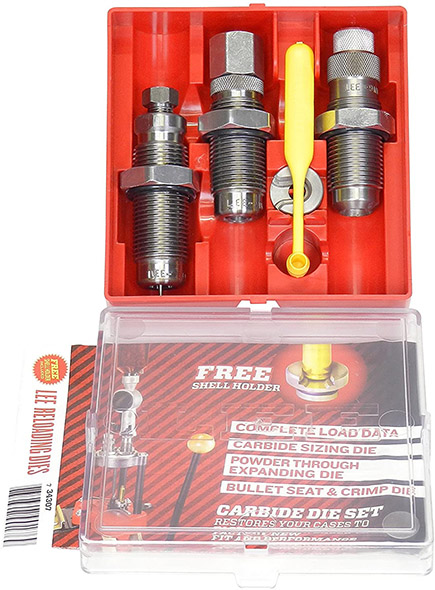
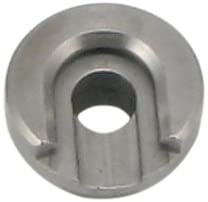
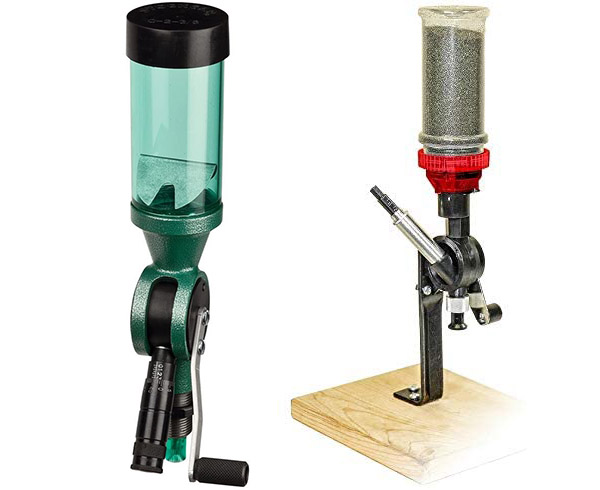
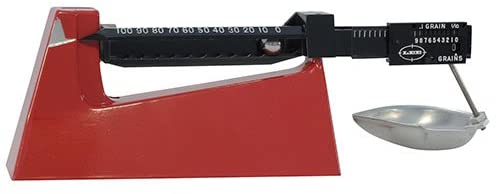

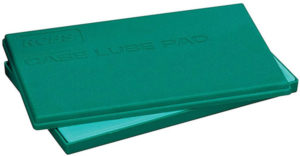

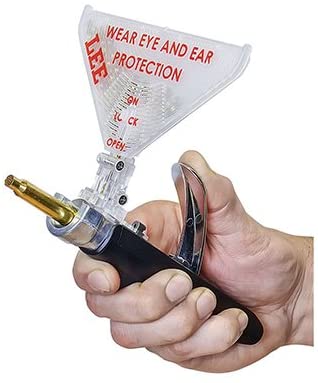
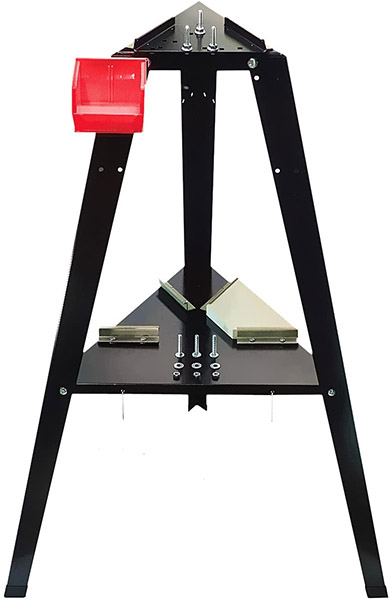
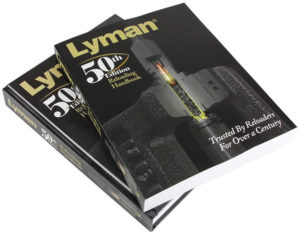
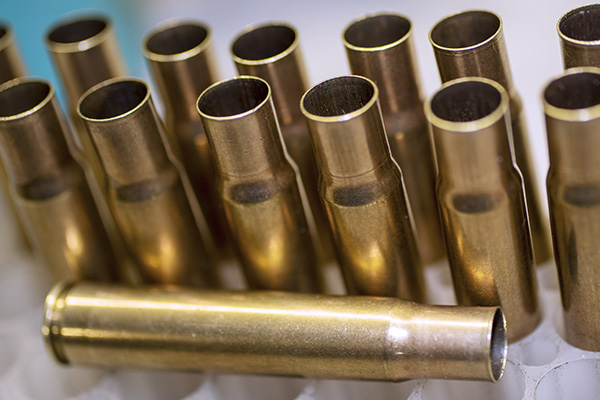
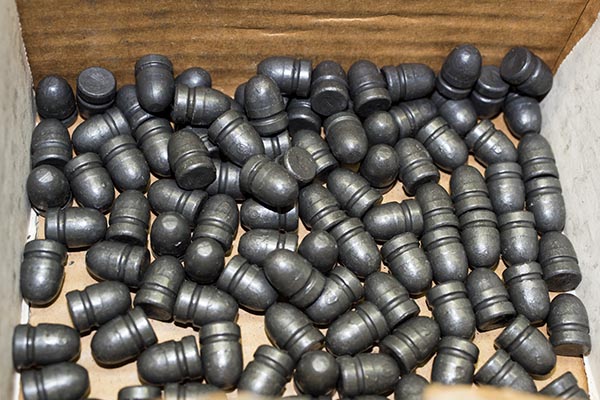
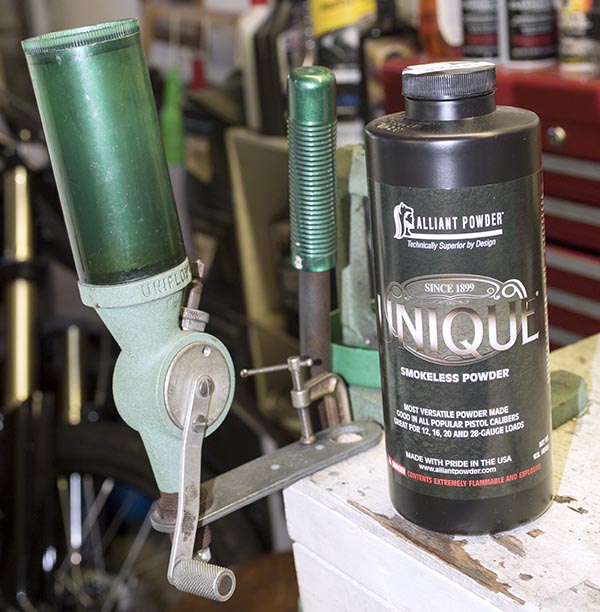
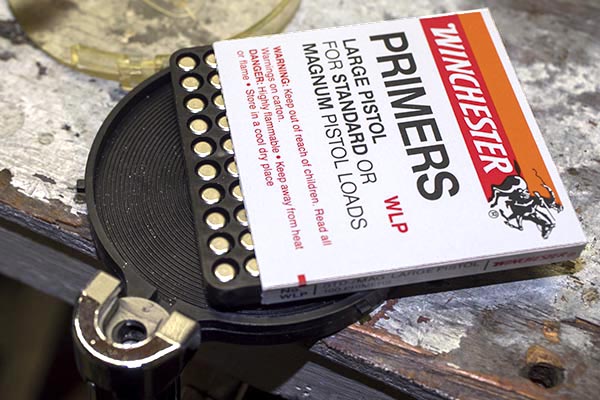
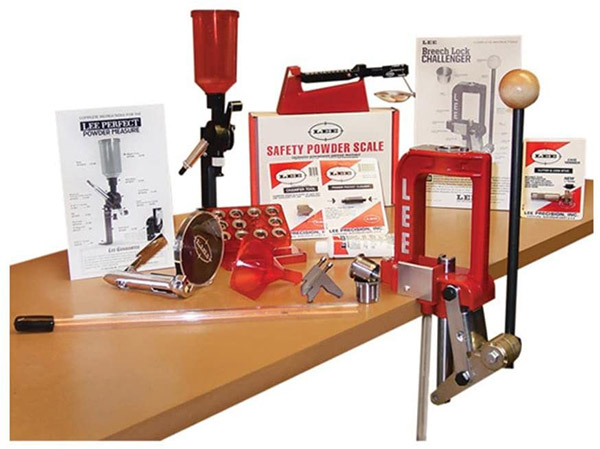
 Challenger reloading kit. These were sold out on Amazon (and everywhere else) when this blog was published. Keep an eye on the Amazon site; it’s a good place to order the kit.