You’ve thought about reloading, you’ve read stuff from us and others about the benefits of reloading, and you want to do it. But how?
Hey, I was born into it. My Dad was a reloader and I had a pretty good idea what to do when I wanted to start, but the urge to do so didn’t hit until I was a young guy in the Army at Fort Bliss. I was lucky. The guy who ran the Fort Bliss Gun Club (Roy Johnson) had a room set up for just that purpose and he walked me through the process some 50 years ago. But Roy has gone on to his reward, you’re probably not stationed at Fort Bliss, and you want to get into the game. That’s what this blog focuses on, and in particular, the equipment you’ll need to get started.

Reloading Advantages
There are three advantages to reloading: Cost, accuracy, and availability.
Generally, reloaded ammo costs less than factory ammo, and in some cases (especially for more exotic rifle ammunition), the savings are huge. For example, factory .416 Rigby ammo costs $170 for a box of 20 rounds; I can reload .416 Rigby ammo for well under a buck a round.
From an accuracy perspective, reloading is the only way to go. You can tailor a load to a particular firearm by varying bullet type, bullet seating depth, crimp, powder type, powder charge, brass, and primers to arrive at a combination that delivers superior accuracy (and it’s fun doing this). I have rifles that shoot 3-inch groups at 100 yards with factory ammo; with my custom reloads, I can get half-inch groups.
Today, if you reload and you’ve laid in a good stock of components, you can reload your way through any ammo shortages. Nobody has .45 ACP, 9mm, or .223 ammo in stock right now; I have enough components on hand to reload thousands of rounds. I’m on the range two or three times a week enjoying my shooting hobby while other folks are online whining about not being able to buy ammo.
What You Will Need
The things you will need to start reloading fall into two categories: The reloading equipment, and the reloading components. The reloading components are the things that combine to bring an empty brass cartridge case back to life (that includes the bullets, the propellant, and the primers). The reloading equipment includes the gear you need to take the components and turn them into a ready-to-fire cartridge.
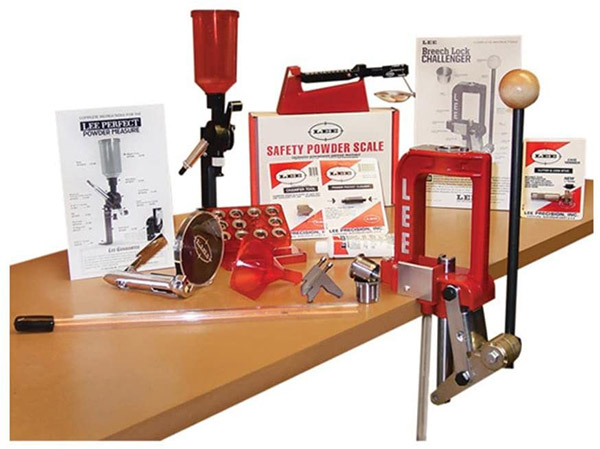
If you want to get into the reloading game, I believe the best way to do so is to buy a complete equipment reloading package from one of the suppliers like RCBS or Lee
. That’s the RCBS kit shown in the big photo above. I’ll talk about it, the Lee kit, and a couple of others further down in this blog. First, let’s review each bit of gear.
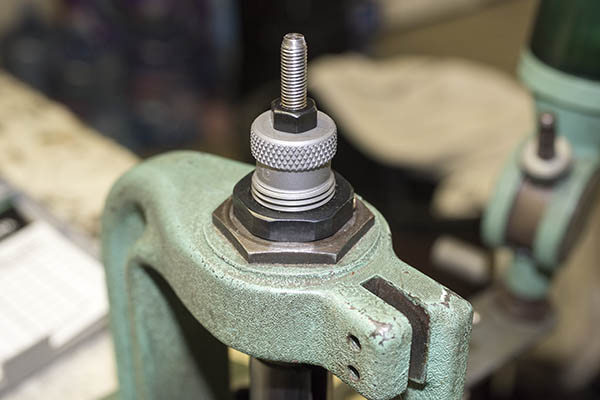
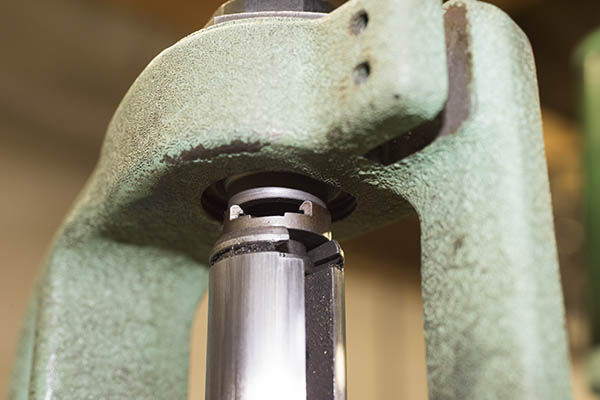
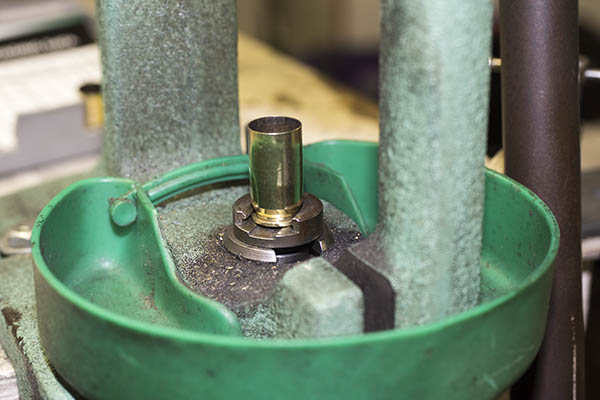
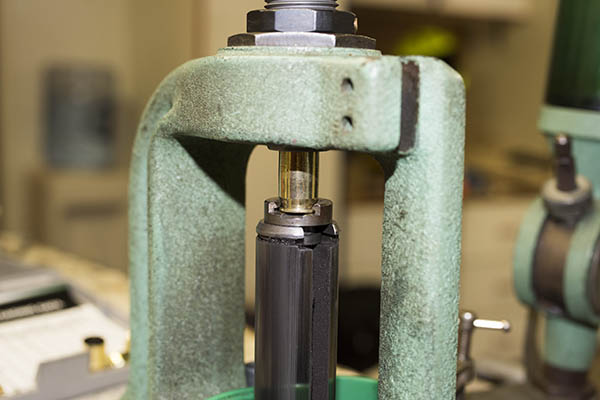
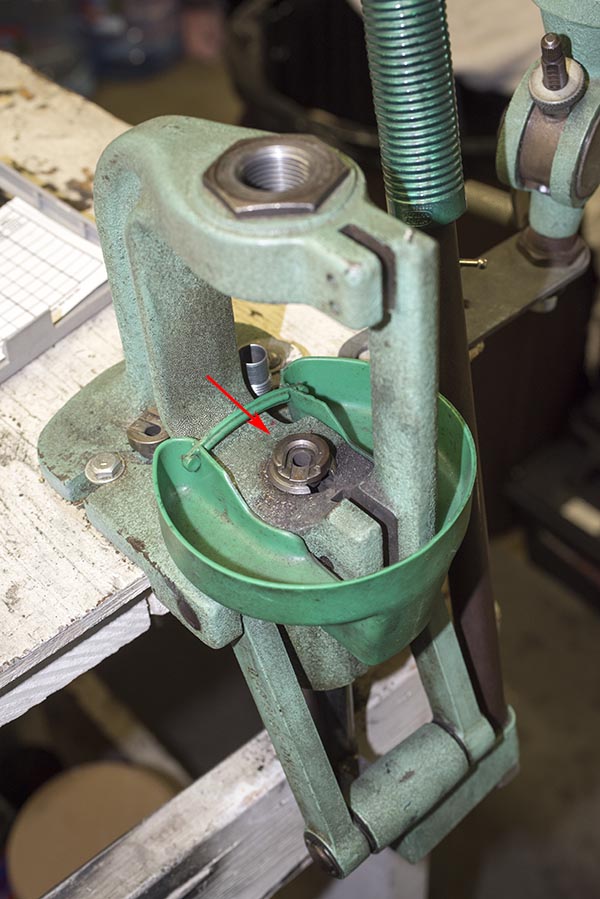
The Reloading Press
That’s the lever-operated press that accepts the dies (more on that in a second) for reloading your ammo, and sometimes the press includes a mechanism for seating primers in the cartridge case after the old primer has been removed. In other cases, a separate priming tool is used. Presses are offered by RCBS, Lee
, Lyman
, Hornady
, and other companies.
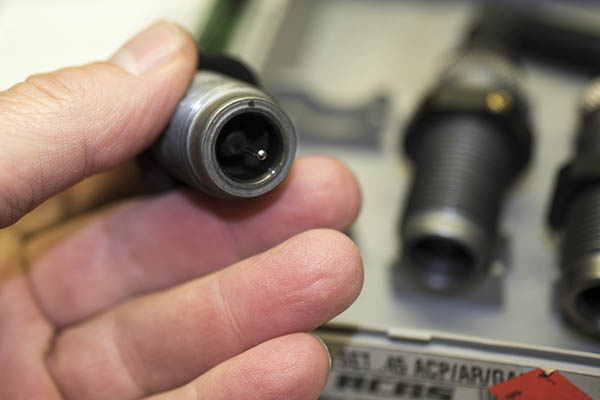
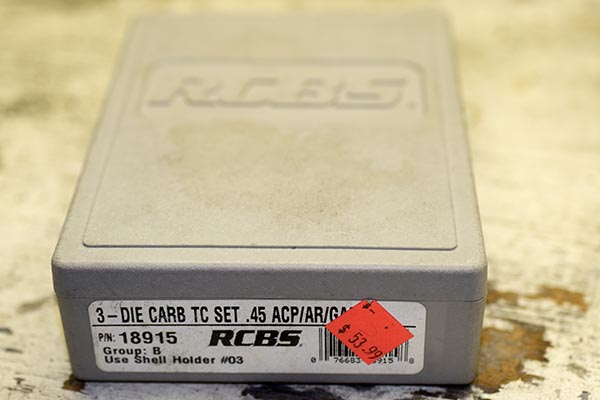
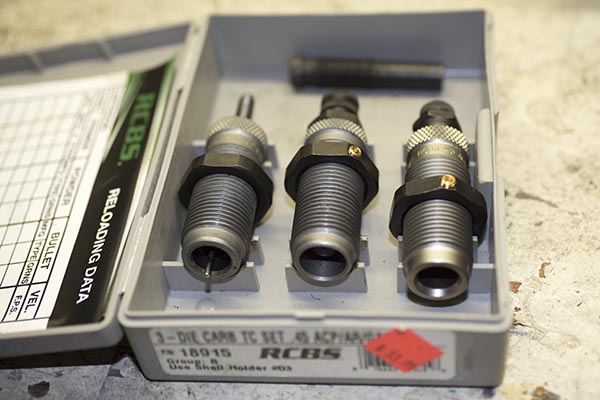
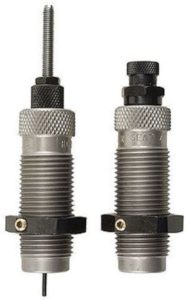
Dies
The dies are cartridge specific. For handgun cartridges, the die set usually includes three dies; for rifle cartridges, the die set usually includes two dies. The good news is that die threads are pretty much standardized, and every company’s dies will fit every company’s reloading press. In other words, if you buy Lee dies, they’ll work on an RCBS press. If you buy RCBS dies, they’ll work on a Lee press. Dies are offered by several companies, with the most popular brands being Lee and RCBS
.
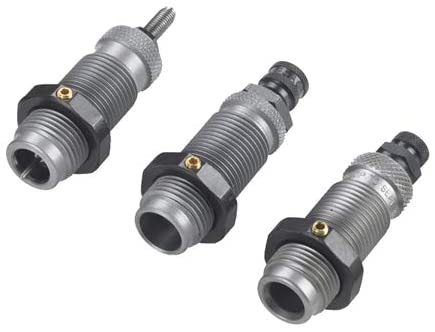
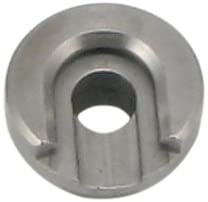
Shell Holder
You will need a shell holder for the cartridges you wish to reload. That’s the piece that holds the cartridge case in place so the press can push it up into the die and then extract it from the die. RCBS does not include the shell holder with their die sets (so you’ll need to buy RCBS shell holders separately); just about all other die makers do (when you buy their dies, the die set includes a shell holder for that cartridge).
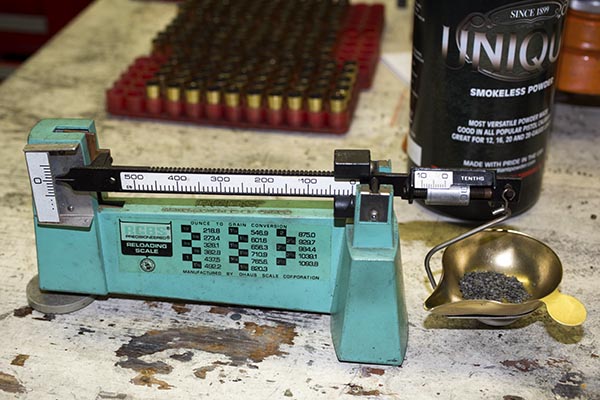
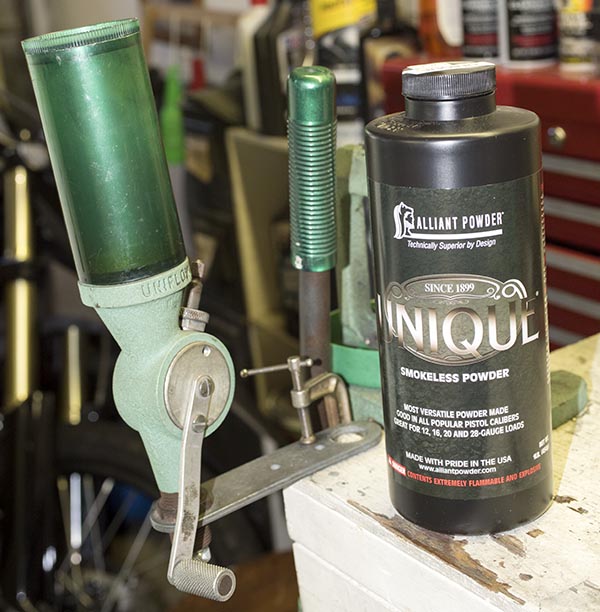
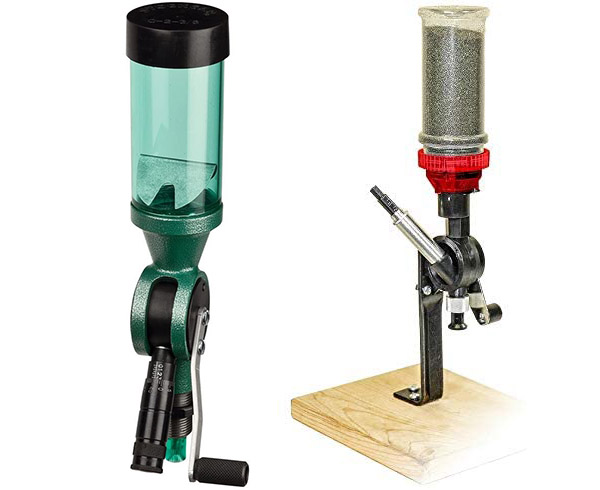
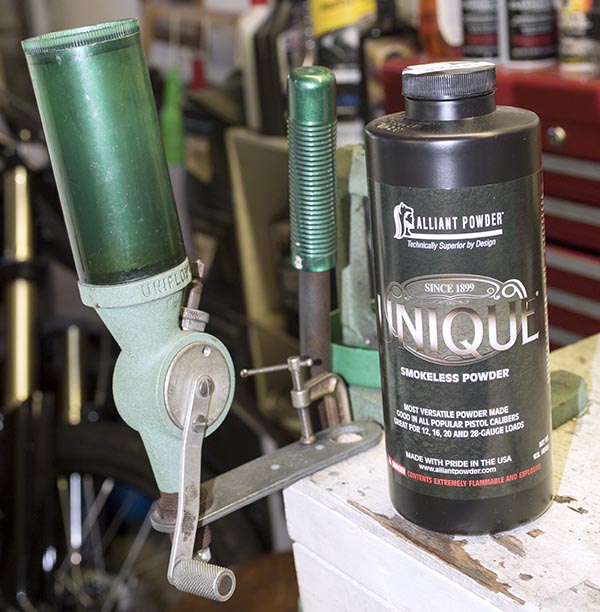
A Powder Dispenser
This is a device for dropping a precisely-metered powder charge into each cartridge case. There are fancy (read: expensive) electronic powder dispensers, but you don’t need those to get started and a lot of folks (myself included) don’t like them. A simple mechanical dispenser will work fine (as mine has been doing for 50 years). Both RCBS and Lee
offer good powder dispensers; the Lee is substantially less expensive.
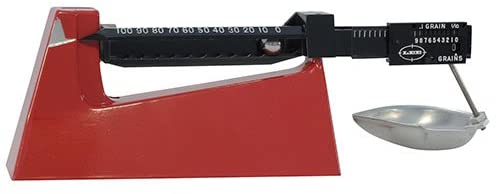
A Powder Scale
This is a simple balance beam scale to allow you to measure the weight of the propellant charge and adjust the powder dispenser to throw that charge. There are electronic scales, too, but they add complexity and considerable expense where none is required. Again, the dominant brands are Lee and RCBS
.
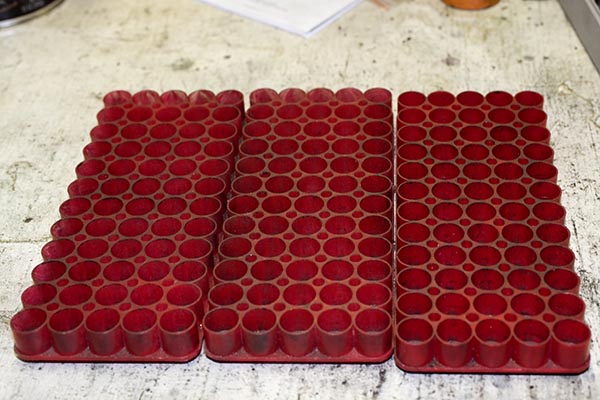
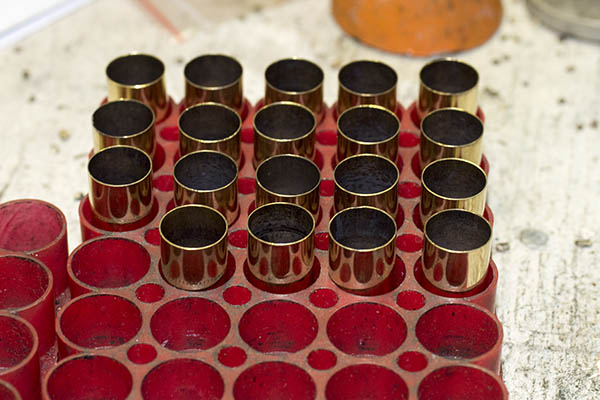
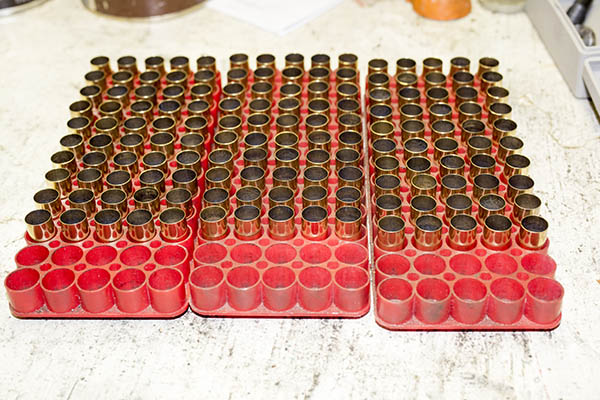
Cartridge Trays
When we reload, we use a cartridge tray (to hold the cartridges as we work through the process of reloading). A variety of manufacturers offer these.

A Case Lube Pad
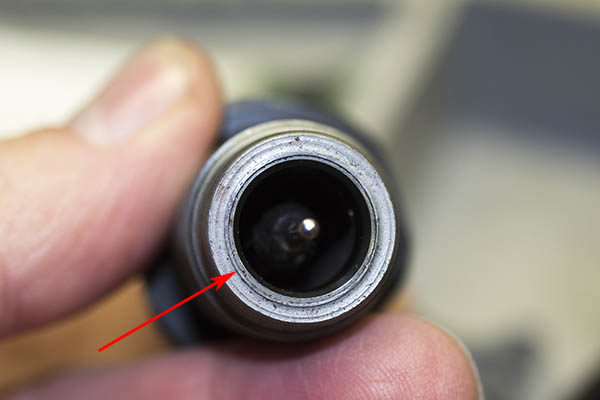
This is a simple foam pad. You put case lube on the pad and roll the brass cases on it to lubricate the exterior prior to running them through the resizing die (the first die used in the reloading process). If you have a straight wall pistol cartridge, you can buy tungsten carbide dies that don’t require lubing the cartridge cases. If you’re going to reload 9mm, .38 Special/.357 Magnum, .45 Auto, or .45 Colt, my advice is to spend the few extra bucks and get the carbide dies.
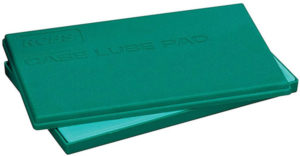
Case Lube
This is the lube used as described above. To mention it again, if you’re going to reload straight wall pistol cartridges and you buy tungsten carbide dies, you won’t need case lube (or the case lube pad).

Alternatively, you can buy spray-on case lubes, which eliminate the need for the case lube pad. I’ve tried spray-on case lubes and I prefer using the pad and case lube instead. Other reloaders like the spray-on approach better.
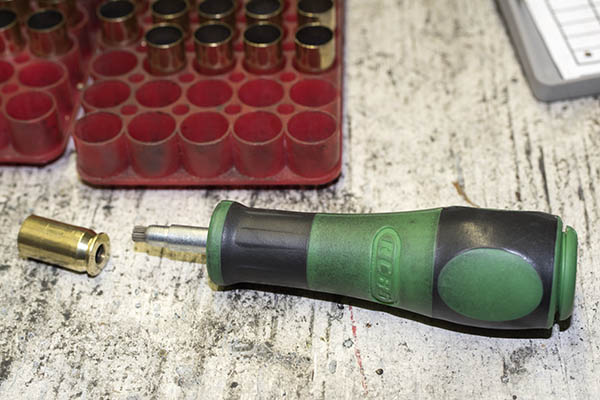
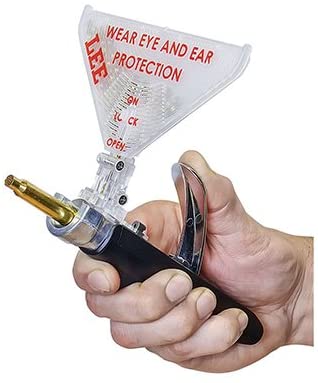
A Primer Seating Tool
Some reloading equipment companies incorporate a primer seating tool in their press; others offer separate primer seating tools. I have an RCBS press that came with the primer seating tool, but I like using a manual hand priming tool instead. Several manufacturers offer these; I use one from Lee.
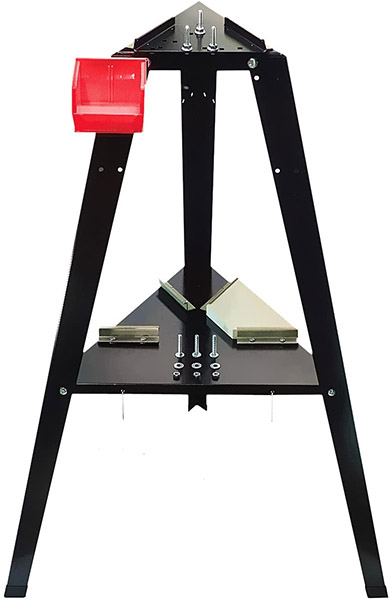
A Bench
You may already have a sturdy workbench where you can mount the reloading press; if not, there are reloading-specific benches available.
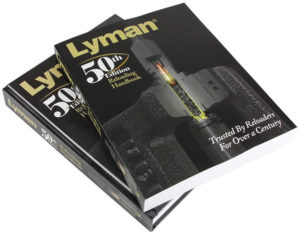
A Reloading Manual
There are several available, including the excellent offerings from Sierra, Speer, Hornady, and Lyman. Don’t think you can skip this; a good reloading manual is a must-have item for any reloader. They all explain the reloading process at the beginning, and they include safe recommended load levels for nearly all cartridges. I’ve acquired several reloading manuals over the years and they are all good; my favorites are the ones from Lyman. Others are published by bullet manufacturers (these include the manuals from Hornady, Speer, and Sierra) and those manuals include loads only for their bullets. The Lyman manual is more generic. But like I said, they’re all good.
That’s the reloading equipment. In addition to that, you’re going to need the ingredients for the cartridges you want to reload. That includes the brass cases, the bullets, the powder, and the primers.
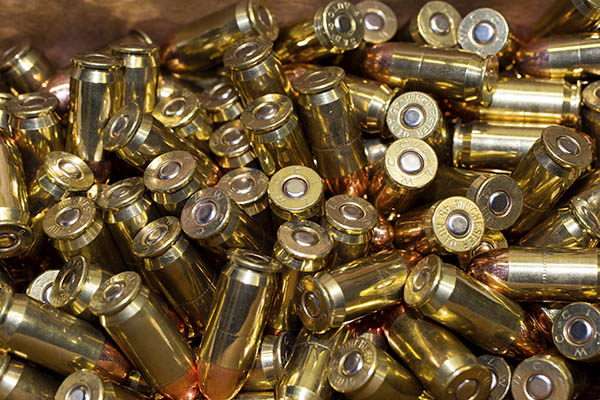
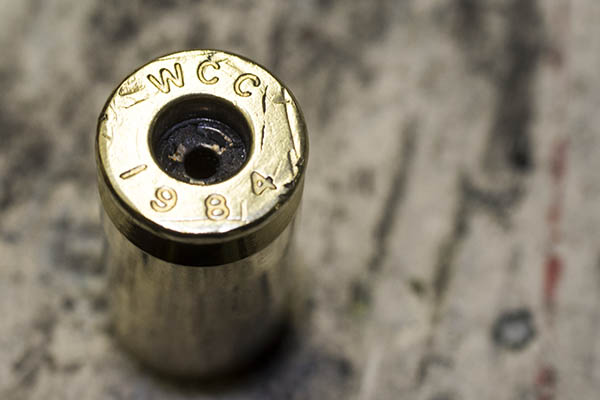
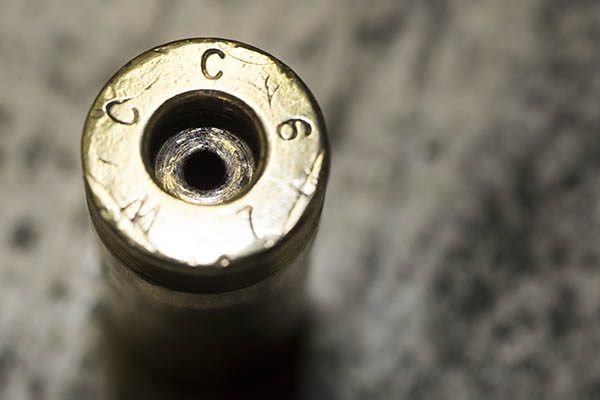
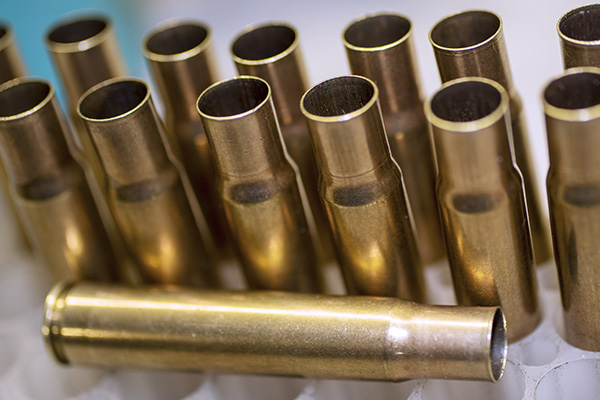
Brass Cartridge Cases
You can buy virgin brass online, you can buy once-fired brass at the range or at most gunstores, or you can do like most of us have done: Save your brass when you shoot factory ammo and reload it.
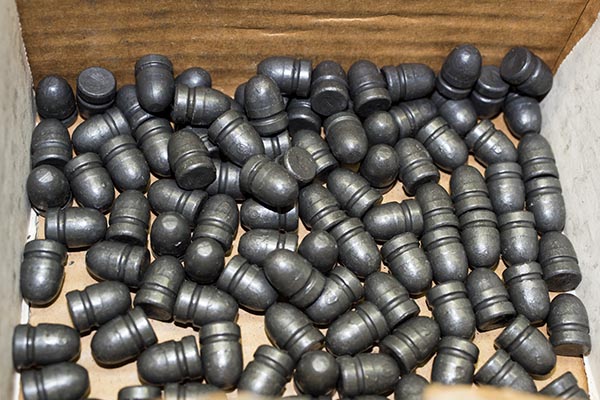
Bullets
You’ll need bullets to reload your ammo. There are lots of options here, and they basically break down into either cast or jacketed bullets. I’m a big fan of cast bullets for handgun and reduced velocity rifle reloads, and I use jacketed bullets for full-bore factory level (high velocity) rifle loads. Most folks these days order bullets online from reloading suppliers like MidwayUSA, Graf’s, MidSouth, Powder Valley, Natchez Shooting Supplies, and others. Smaller gun stores are disappearing, and you usually don’t find decent prices at the big chain stores.

Propellant
For lack of a better term, we usually call propellants “powder,” and there are a wide variety of powders available. The reloading manuals show which powders work best for the cartridge you wish to reload.
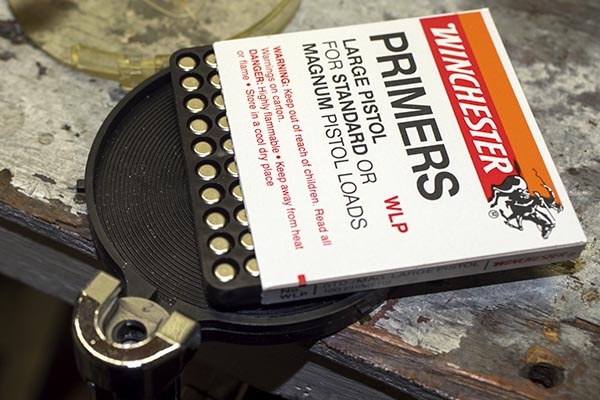
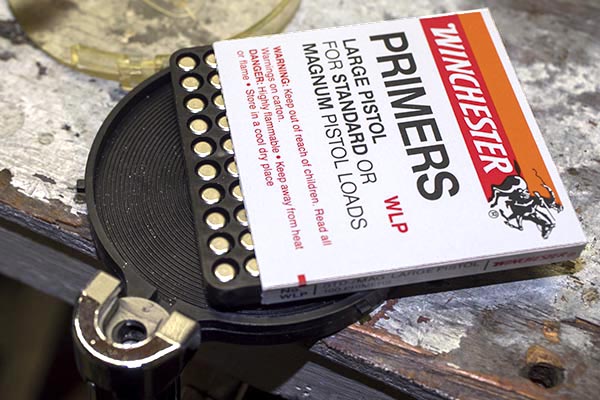
Primers
The primer is the component that lights the candle when you pull the trigger. There are several primer suppliers. The trick today is finding them, as there has been a run on primers since the pandemic began. If you can find primers in a local shop, buy them. The same suppliers listed above for bullets also sell primers (they are all out of stock now, but that will change as supply catches up with demand).
The Best Equipment Approach: A Complete Kit
As I mentioned at the start of this blog, I believe the best way to get into the game is to buy a complete equipment reloading package from one of the reloading equipment suppliers. My advice if you are a new reloader is to go with the Lee package. It’s the least expensive and if you decide that reloading is not for you, you’ve minimized your cash outlay. I should add, however, that I don’t know anybody who ever tried reloading who didn’t get hooked on it. It is a marvelous hobby, and I believe it is as much fun as shooting.
I’ve used reloading equipment over the years from all the manufacturers. My personal setup is centered around an RCBS Rockchucker, but equipment from any of the suppliers is good. Basically, you can’t go wrong in this game from an equipment perspective. With that said, let’s take a look at what’s out there.
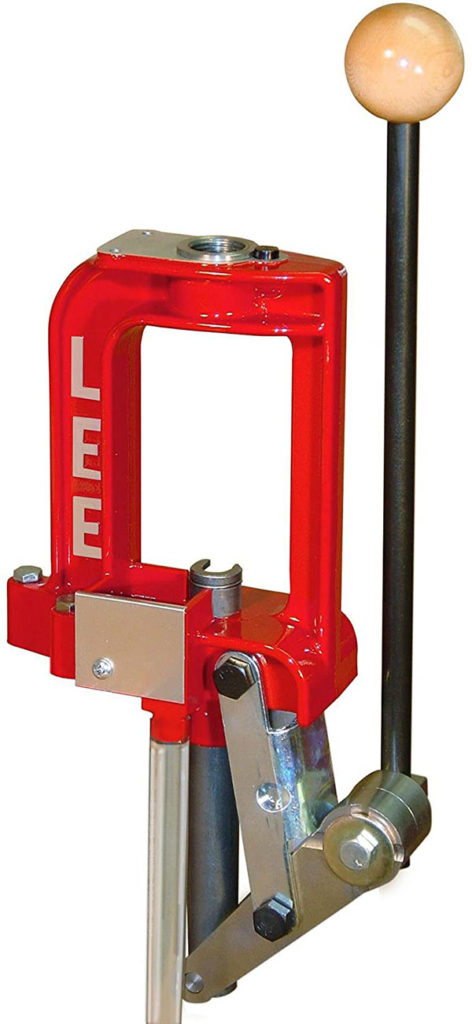
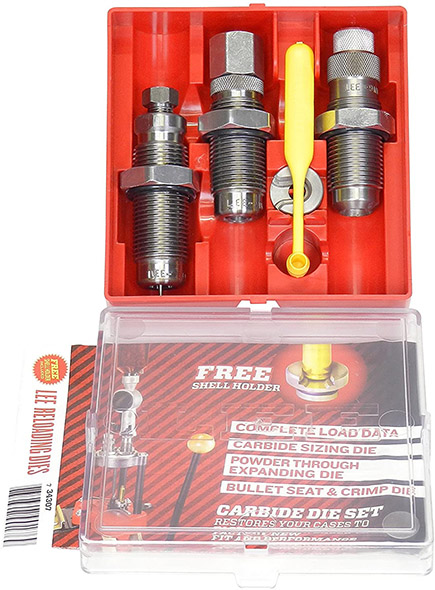
First, the Lee Challenger reloading kit:
 Challenger reloading kit. These were sold out on Amazon (and everywhere else) when this blog was published. Keep an eye on the Amazon site; it’s a good place to order the kit.
There’s only one problem with the Lee Challenger reloading kit: It’s such a good deal (well under $200 for the entire kit) that literally everyone is out of stock right now. As you know, we’re going through unprecedented times in the shooting world (guns, ammo, and reloading components are sold out due to the civil insurrection in many large cities, a new anti-gun administration on the horizon, and the global pandemic). That will change, but at this instant, no one I could find has the Lee kit in stock.
Next up is the RCBS kit:
 reloading kit. RCBS makes high quality equipment that will last a lifetime. It costs more, but it’s worth it.
I’ve been using RCBS equipment for the last 50 years, and I believe it to be the best. It is built to last. If I couldn’t get the Lee package as a newbie, or if your budget will allow it, I’d go with RCBS equipment. At about $400, it’s just over twice the price of the Lee kit, but it’s still a great deal compared to buying all the different equipment items separately. The RCBS package shown above includes an electronic scale instead of a beam scale, a powder trickler (it allows you to finesse adding individual powder kernels to attain a precise charge weight), and a couple of case preparation tools that the Lee kit doesn’t include.
Lyman is another outfit offering a complete reloading kit:
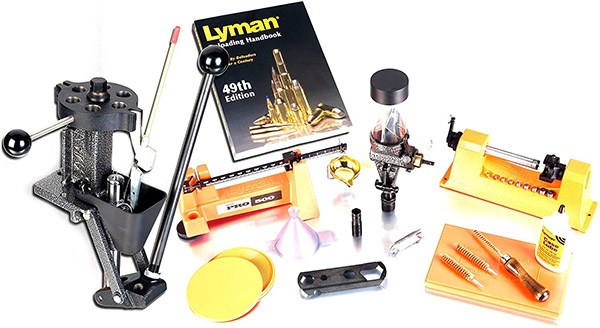
What’s a bit different about the Lyman kit is that it comes with a turret press, which allows you to mount all the dies in the press head and rotate them as you progress through the various reloading steps. I’m not a big fan of this approach; other folks are. The Lyman kit is just under $1000; the turret press and the inclusion of a case trimmer are what drive the price to that level.
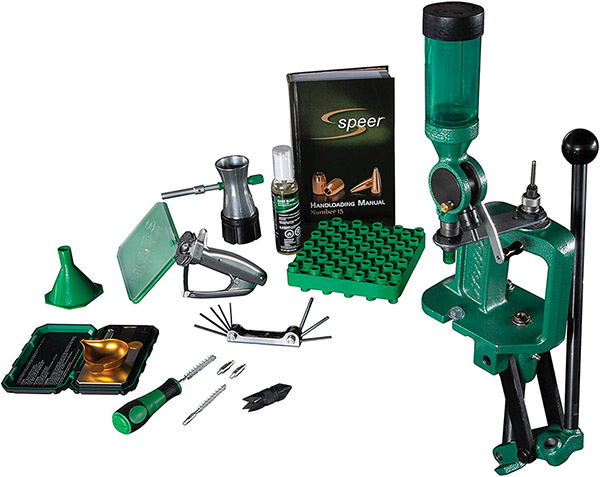
And Hornady has a kit as well:
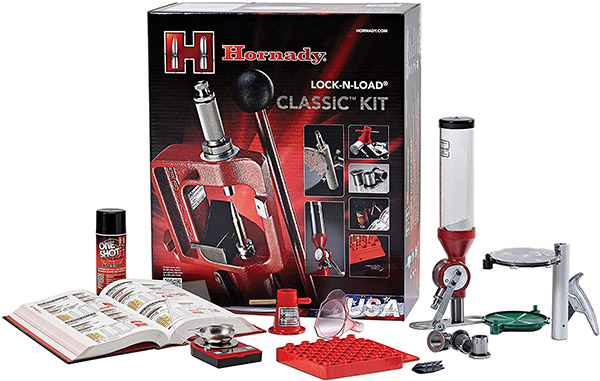
The Hornady kit is about $550. That’s substantially less than the Lyman kit, but more than either the Lee or the RCBS kits.
So there you have it. Remember that no matter which reloading kit you buy, you’ll still need dies and a shellholder specific to your cartridge. You’ll probably want to purchase more equipment as your reloading interest develops, including more dies (so you can reload more calibers), case cleaning and polishing accessories, a micrometer, and more. But what we’ve outlined here will get you started and keep you in the game for years.
In this blog we’ve covered the equipment you’ll need to get into reloading. If you would like to read about how to use this equipment, we have you covered there, too. We have a bunch of information on reloading various cartridges on our Tales of the Gun page, and a complete series on reloading handgun ammo that you can review here:
Reloading .45 ACP Ammo: Part I
Reloading .45 ACP Ammo: Part II
Reloading .45 ACP Ammo: Part III
Reloading .45 ACP Ammo: Part IV
If you would like to watch a quick video of yours truly reloading ammo with cast bullets for a Mosin-Nagant rifle, check this out:
Never miss an ExNotes blog!