
By Joe Berk
We’re just about there setting up and using the Lee Classic Turret Press Kit. We explained in prior blogs how to set up everything except for the safety prime, and that’s what we’re going to focus on here. The safety prime can be purchased separately; when you purchase the Classic Turret Press Kit it is in included. You literally get everything you need to start reloading with the Classic Turret Press Kit except the dies and the brass, bullets, primers, and powder. I chose a set of 9mm dies because it was my intent to load 9mm only on my classic turret press, but I like the press so much I’m going to buy additional turrets so facilitate changing from one cartridge to another. I really like the Classic Turret Press Kit
Help us bring more stories to you: Please click on the popup ads!
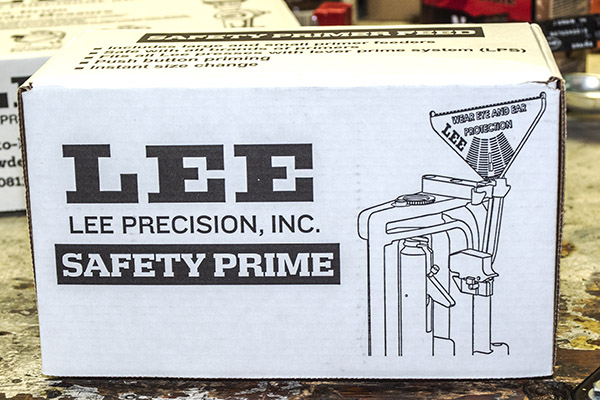
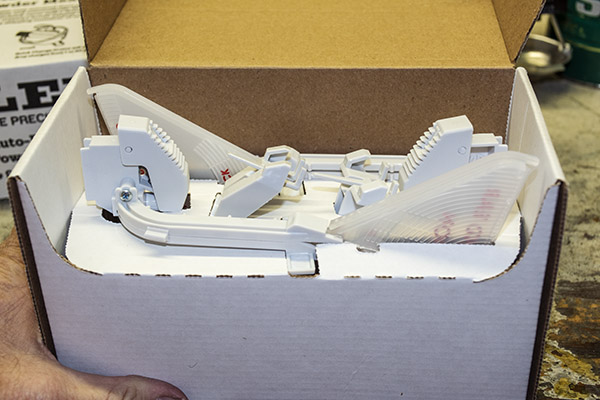
But I digress; back to today’s focus, and that’s on the Lee safety prime. It arrives packaged nicely, as has been the case with everything from Lee.
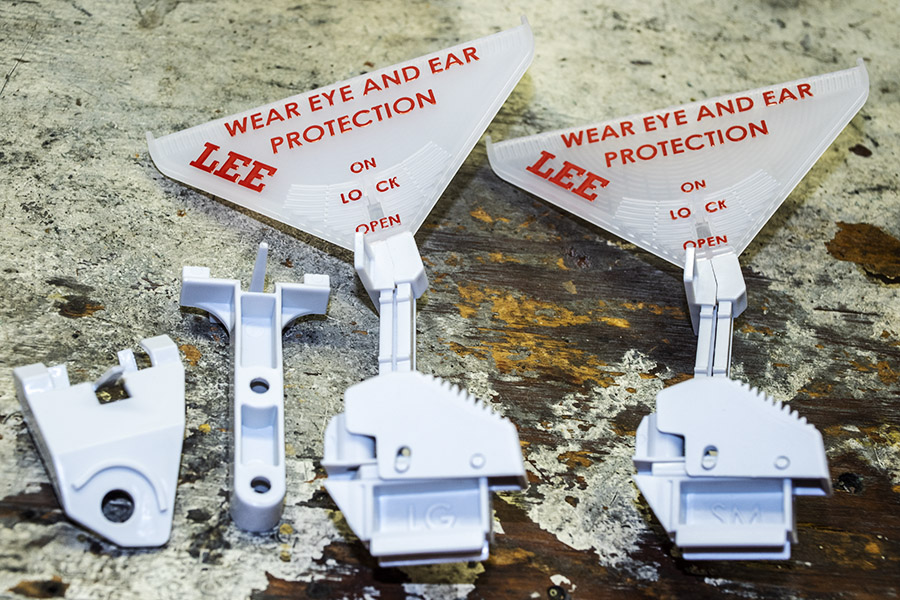
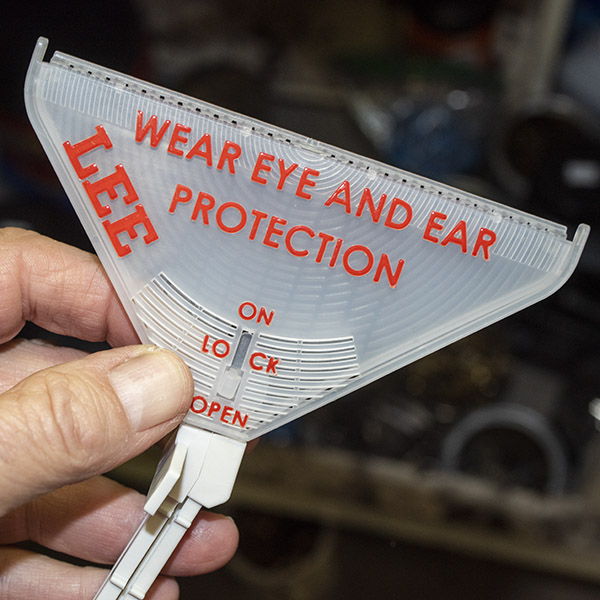
The Lee safety prime kit includes a primer two primer feed mounts, two primer trays, two primer feed chutes, and two primer triggers. The primer tray, feed chute, and trigger are provided as assembled units. One is for large primers, the other for small primers. They are marked accordingly. The two primer feed mounts you see in the photo below are included because the safety prime can be used on different types of presses. We’re installing this on a classic turret press, so we will only need one of the two brackets (the one on the left side of the photo below).
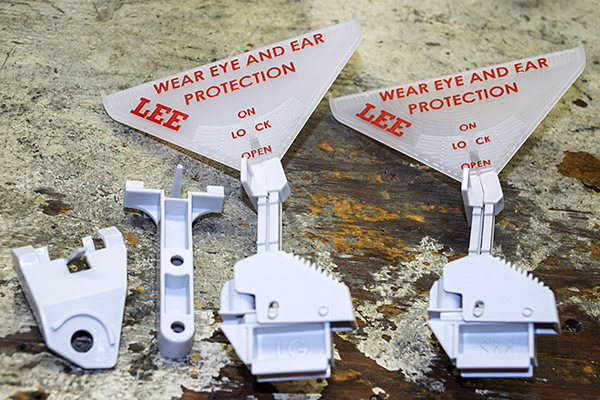
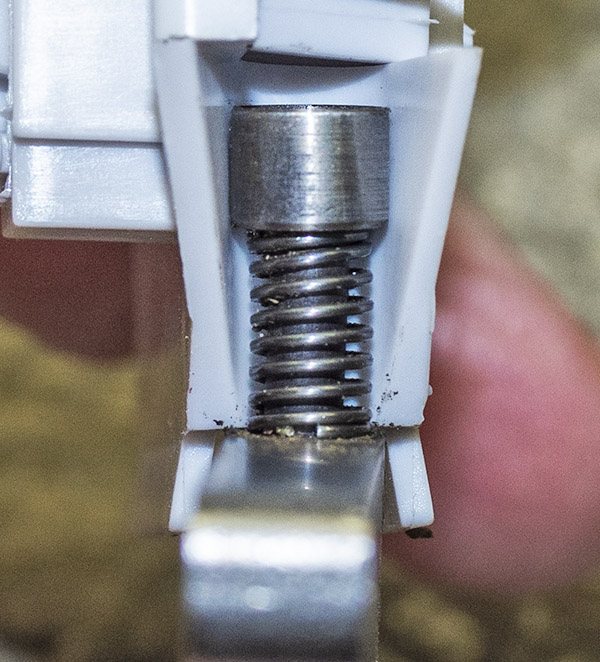
When we prepared the blog on installing the classic turret press, I showed but did not explain the two primer arms that Lee provides with the turret press. There’s one for large primers (either rifle or handgun) and one for small primers (either rifle or handgun. These mount easily; you simply drop them into the slot on the ram, they fall into place, and they pivot on an axle in the ram.
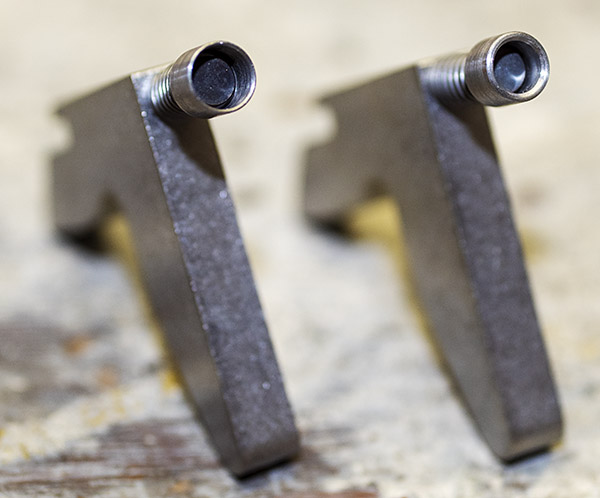
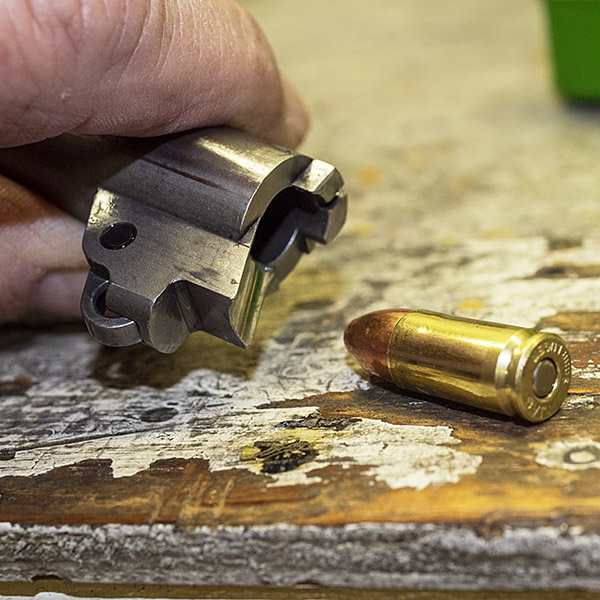
There’s an axle inside the press ram, as shown in the photo below. It’s the attach point for the primer arm. The primer arm drops into the ram when there’s no shellholder in the ram (if the shellholder is in place, you cannot insert the primer arm, so you need to remove the shellholder to install the primer arm).
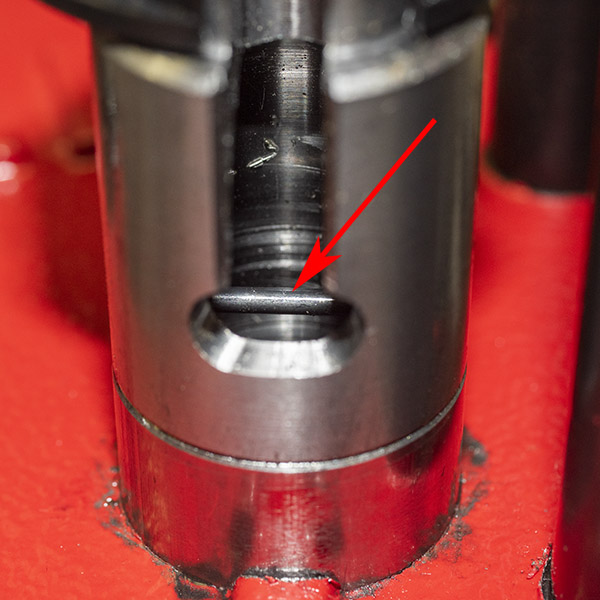
Once the primer arm is installed, reinstall the shellholder.
As the ram is lowered, in the last inch or so of its travel the primer arm contacts the press base and the arm rotates to place the primer directly below the cartridge case. When the press is lowered completely, the press arm seats the primer into the cartridge case in the shellholder. We’ll show and discuss this further below.
The next step is to mount the safety prime components on the classic turret press. There’s a 1/2-inch bolt and washer securing the top of press; it needs to be removed to install the safety prime mounting bracket.
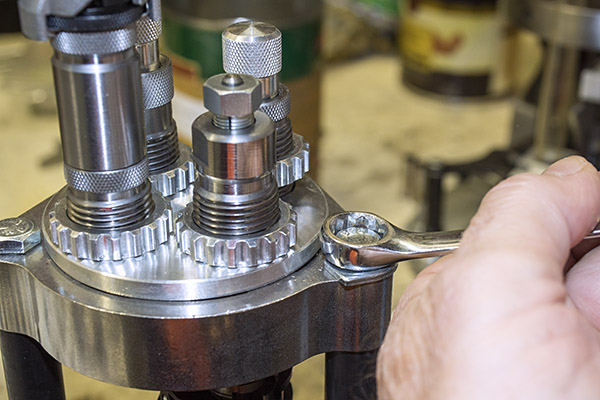
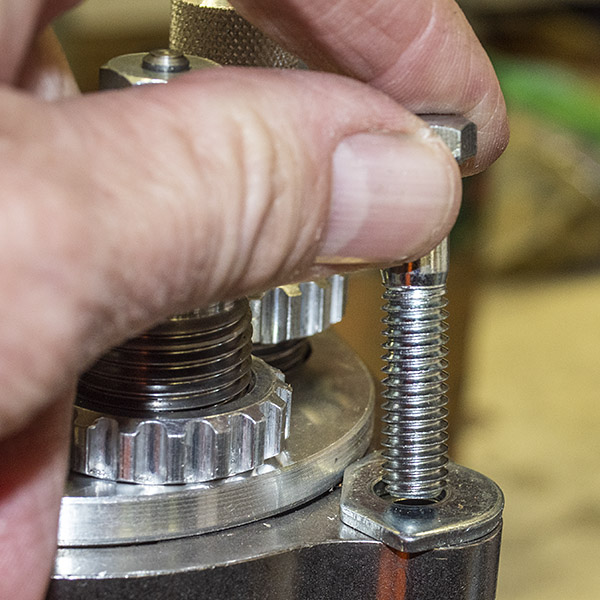
The 1/2-inch bolt and its washer are then installed in the safety prime mounting bracket, and the mounting bracket is installed on the press.

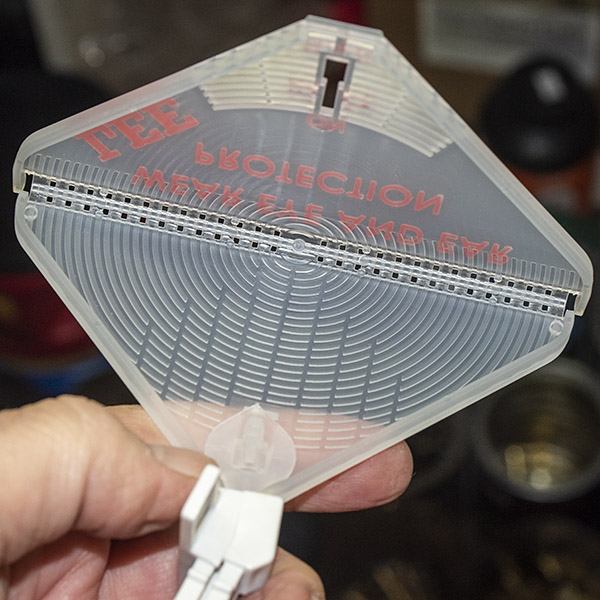
Next, we’ll show the safety prime tray, feed chute, and trigger. As mentioned above, as delivered from Lee the primer tray (the big triangular affair with the Lee name and appropriate warnings), the feed chute, and the trigger are already assembled. The primer tray is a press fit into the feed chute; you can leave them assembled as shown below. Note that the feed chute has slot near where it meets the primer tray; this area interfaces with the safety prime we mounted on the press.
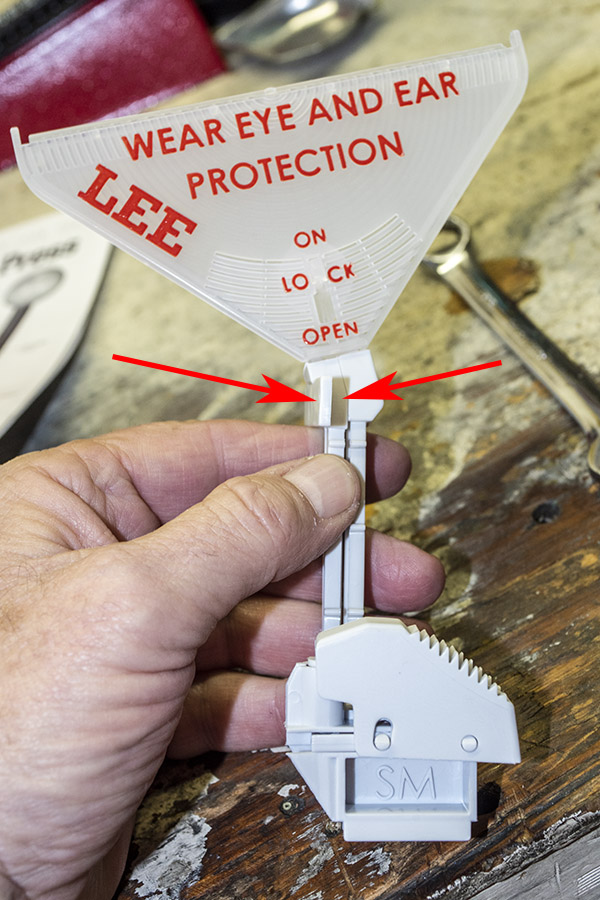
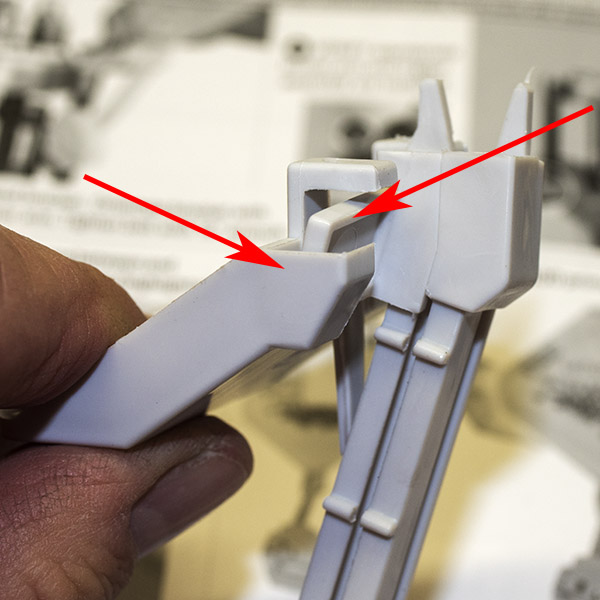
The feed chute fits into a loose joint on the safety prime mount. There’s a lot of relative motion between these two items, and that’s okay. Lee cleverly designed this loose joint so that it has six degrees of freedom. This very clever design allows the safety prime trigger to move up, down, left, and right, and it can rotate. We’ll see why that’s important in a bit.
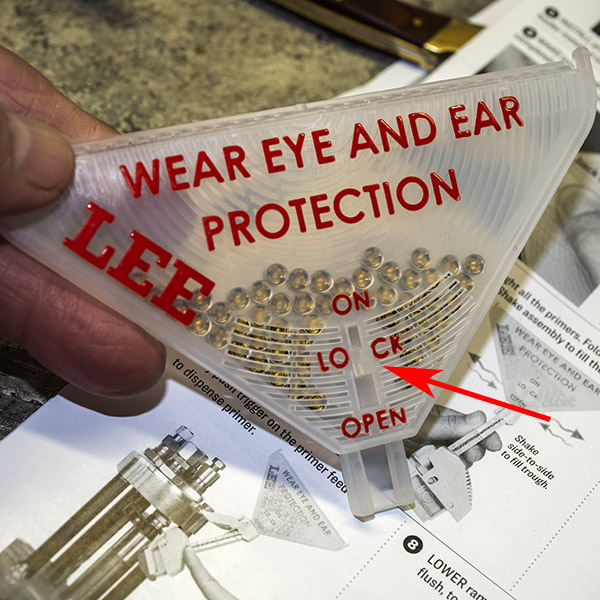
The Lee safety prime primer tray is a clamshell arrangement with a lock and an on-off switch. In the open position, it allows the primer tray to open so you can load primers into the tray. In the lock position, the tray is locked closed and it blocks primer entry into the tray. In the on position, it allows primers to feed into the feed chute.
When you want to load primers in the primer tray, you can do either remove the primer tray from the feed chute, or you can remove the entire primer tray, feed chute, and primer trigger from the press. To open the primer tray, place the lock in the open position, and open the tray’s clamshell.
Put the primers into the tray. You’ll notice that some face up, and some face down.
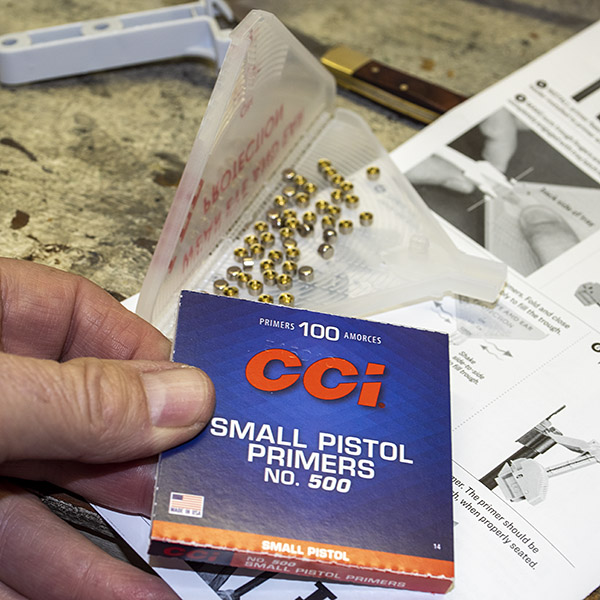
Once the primers are in the tray, and with the tray open, gently jiggle the primer tray back and forth. Don’t get too aggressive here or you’ll jiggle primers out of the tray. Just go easy, and after a few seconds, all the primers will face up. The jiggling allows the ridges in the tray to turn all the primers face up.
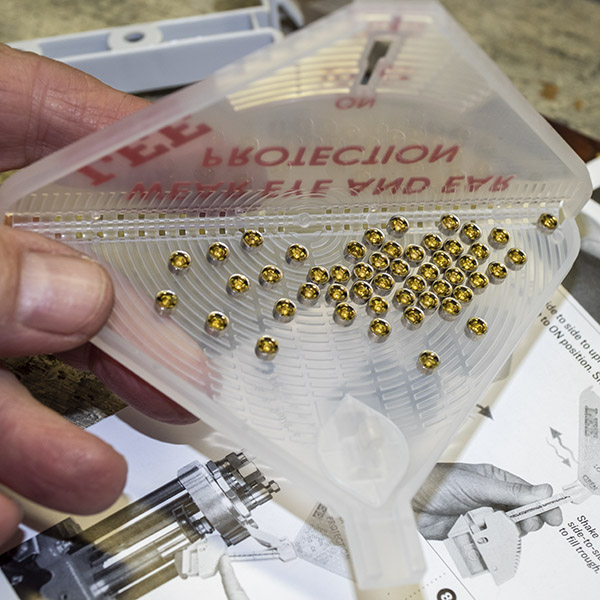
Once the primers are all face up, close the tray clamshell and put the lock in the lock position. This will prevent primers from leaving the tray until you want them to.
With the tray mounted on the feed chute, insert the primer tray, feed chute, and trigger assembly into the safety prime mount on the turret press.
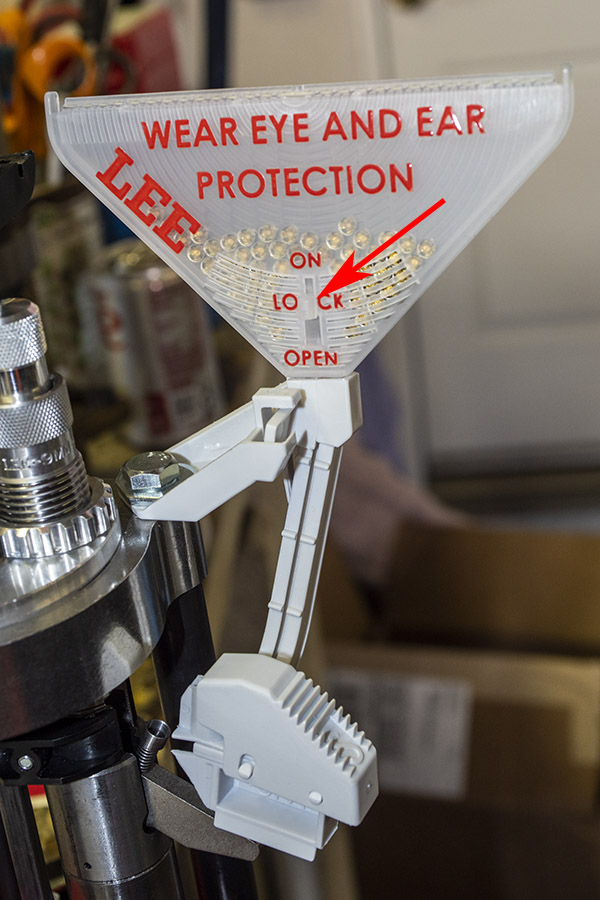
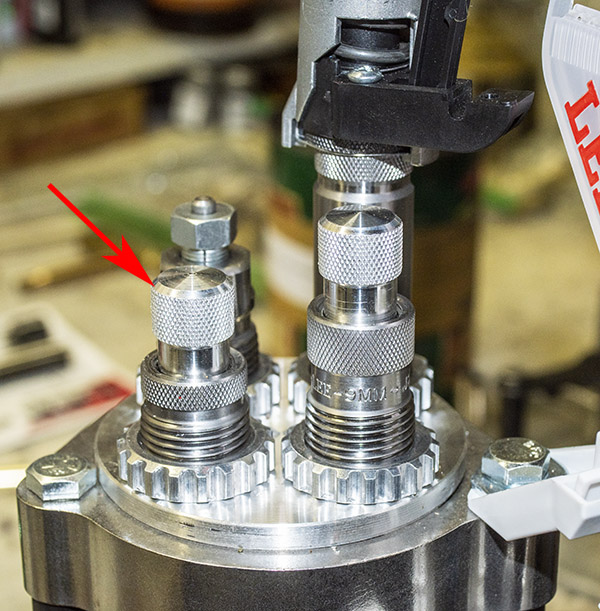
At this point, move the primer tray lock to the open position, and the primers will fill the feed chute. The entire affair can be moved around (within a limited range) to allow the safety prime trigger to find where it wants to be.
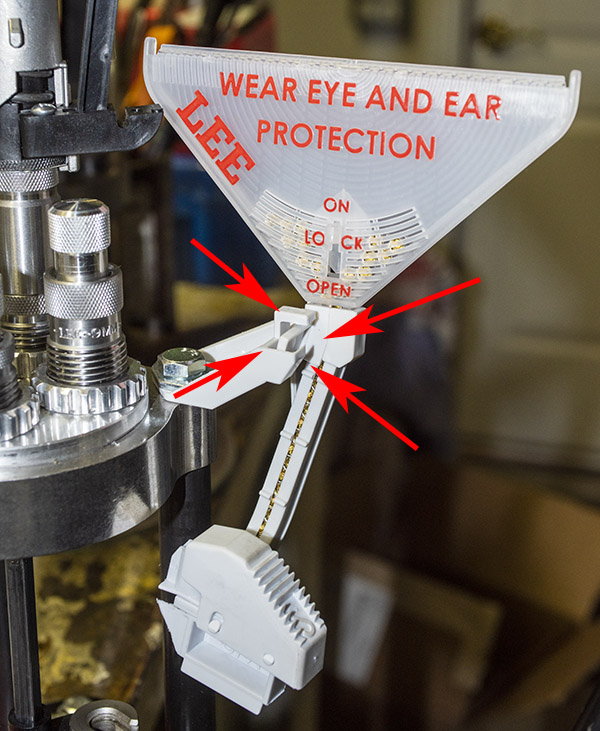
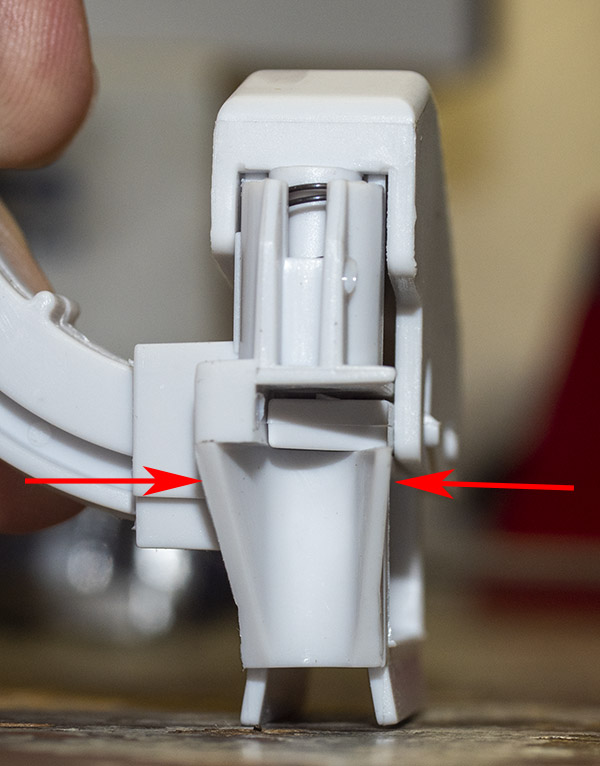
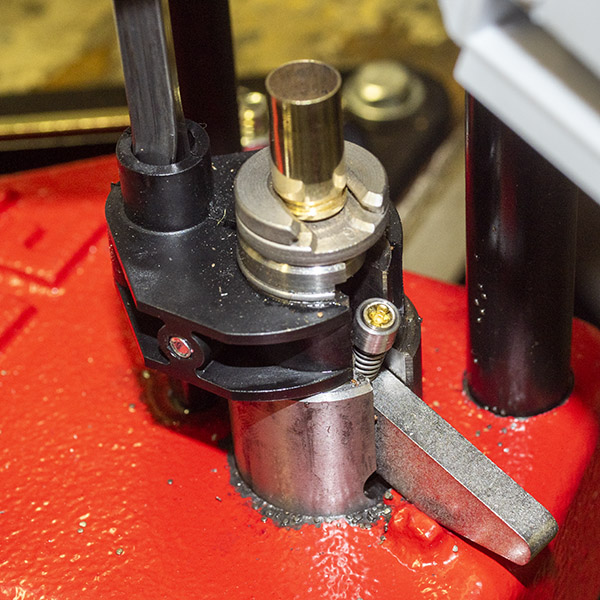
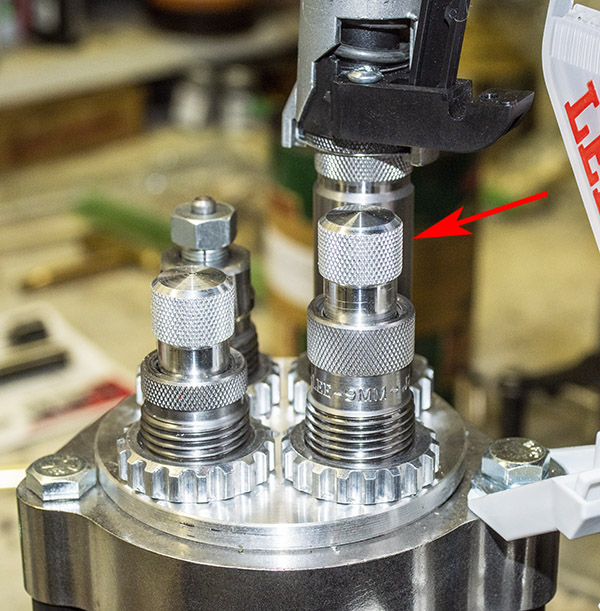
Here’s a macro shot of the forward end of the trigger. It includes guides (one on each side) that allow moving the trigger to make contact with the primer arm and correctly position itself.
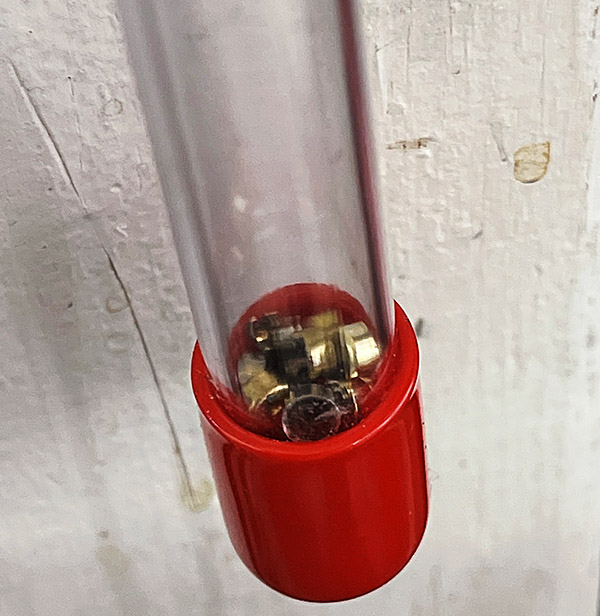
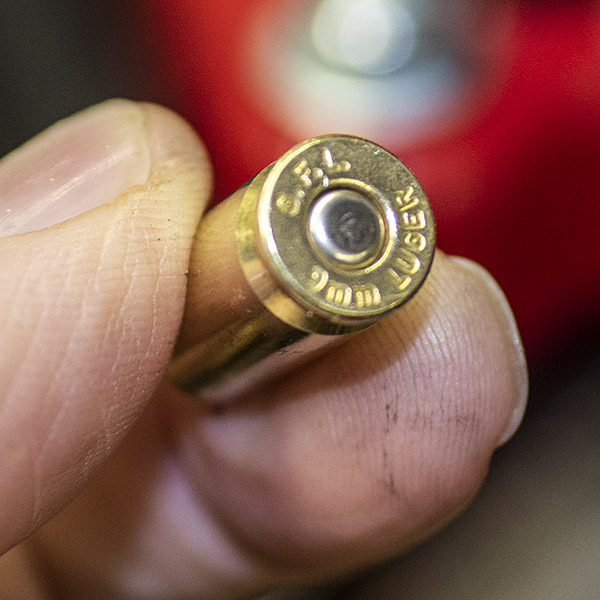
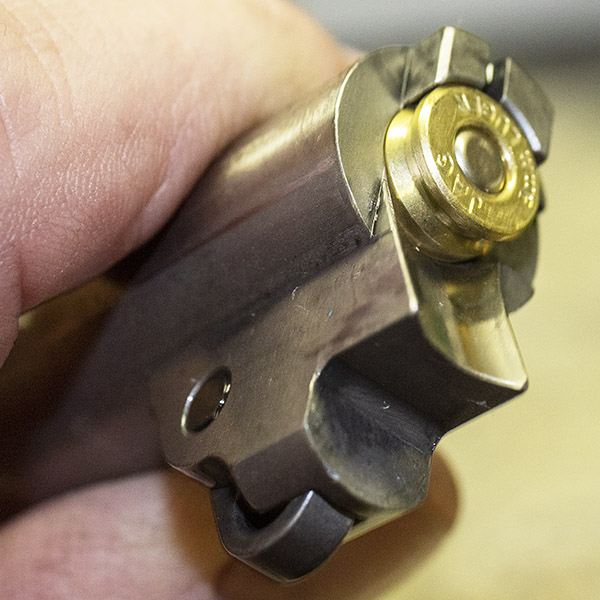
Here’s how this works. I positioned the sizing die directly above the ram, with the ram in the lowered position. I raised the ram a small amount and placed a 9mm cartridge case (one that I’ve already fired) in the shellholder. I then fully raised the ram, driving the fired case into the sizing die and decapper. I heard a satisfying “tink” as the primer fell into the primer catch tube.
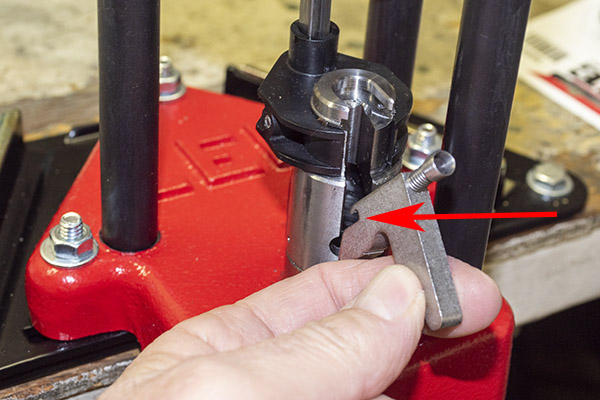
With the press in the fully-raised position, I pushed the primer trigger forward into the primer arm. That allowed the trigger to align with the primer arm. I then pushed down on the trigger. That’s the required motion on the trigger: Forward and then rotate downward, which places a fresh primer from the feed chute in the primer arm. I then allowed the trigger to swing away from the primer arm.
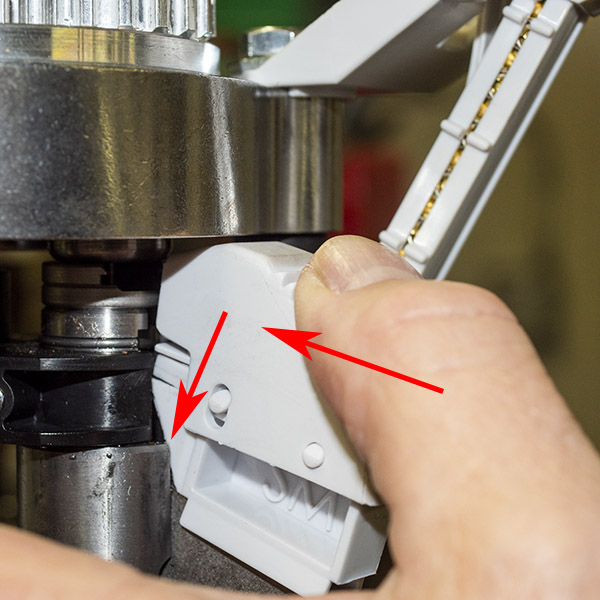
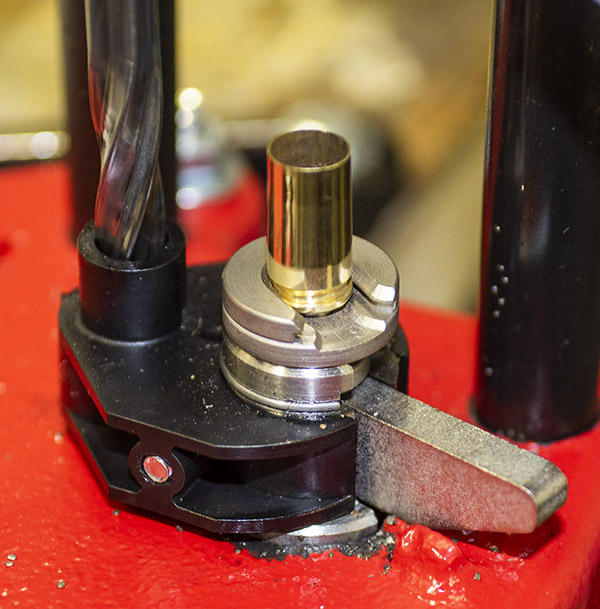
Voila! When the trigger was allowed to move away from the primer arm, there was a CCI 500 small pistol primer waiting to be seated. The safety prime moving away from this primer is a very important safety feature. If the primer in the primer arm fires when it is seated, the prior rotation of the safety prime trigger (and the rest of the safety prime assembly) keeps the other primers away from the one being seated, and prevents the other primers from sypathetically igniting.
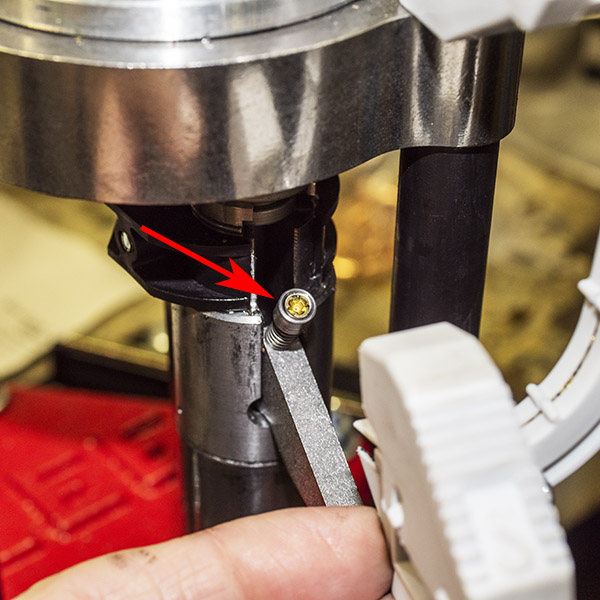
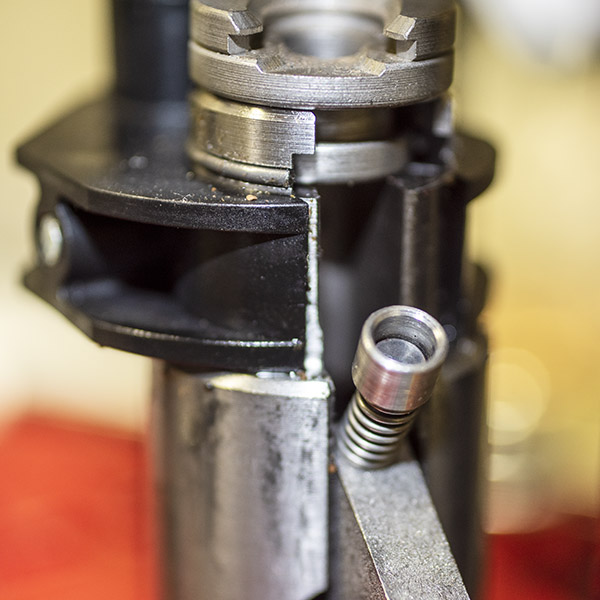
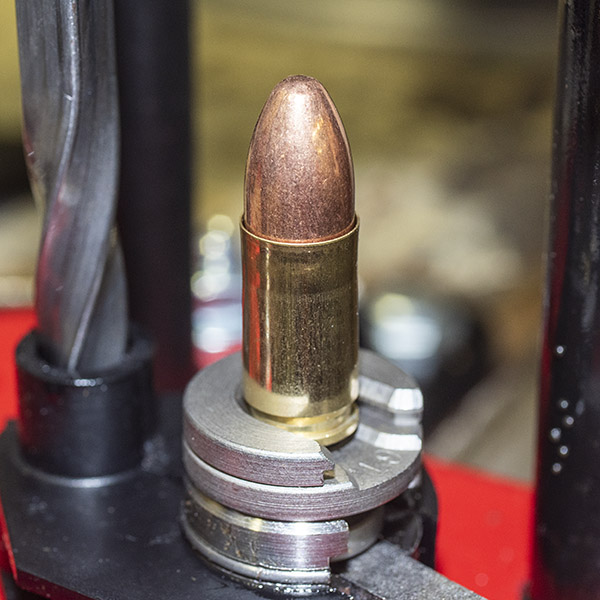
I then lowered the ram with a freshly sized case. As the ram moved down, the primer arm contacted the press base and began to rotate into the ram.
When the ram approached the last part of its travel, the primer arm positioned the primer directly beneath the deprimed and resized case. As I moved the lever up for to complete the stroke, I could feel the primer being seated.
Wow, this was cool stuff. I had already adjusted the Lee auto-drum powder measure to throw the correct charge of Accurate No. 5 powder (see our earlier blog). Now all I needed to do was to adjust the bullet seating die and the factory crimp die.
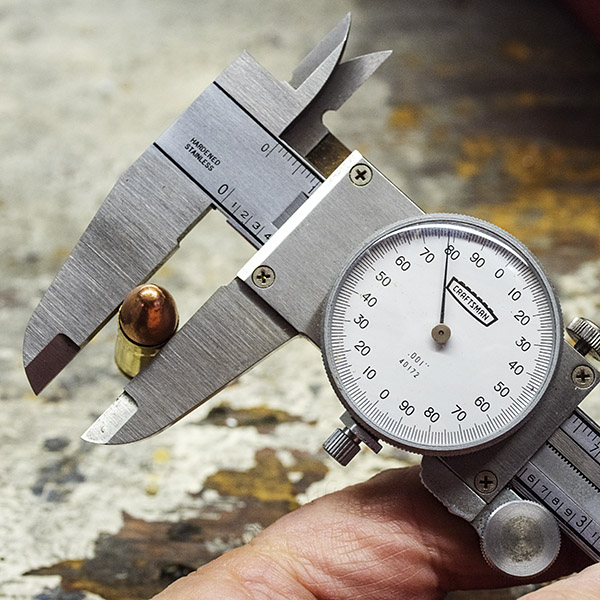
Adjusting the bullet seating die involved positioning the turret so the case was directly beneath the die. I wanted to seat the bullet to the desired cartridge overall length, but I didn’t want to crimp the bullet with the bullet seating die. That involved running the die all the way into the turret so that it contacted the shellholder, and then backing it out enough so the crimping feature in the die did not contact the cartridge case mouth. Then, the next step was to adjust the bullet seater (the knob on top of the bullet seating die) so that it achieved the desired cartridge overall length (in this case, I was shooting for 1.160 inches). The Lee Modern Reloading manual recommend 1.169 inches, but I didn’t want the cartridge to be that long. I made the adjustment by putting a bullet in the case mouth and repeatingly running the ram up, screwing in the bullet seater a little bit at a time between each stroke until it seated the bullet to a cartridge overall length of 1.160 inches. All this is explained in more detail in our earlier blog on using Lee’s Deluxe 4-die set.
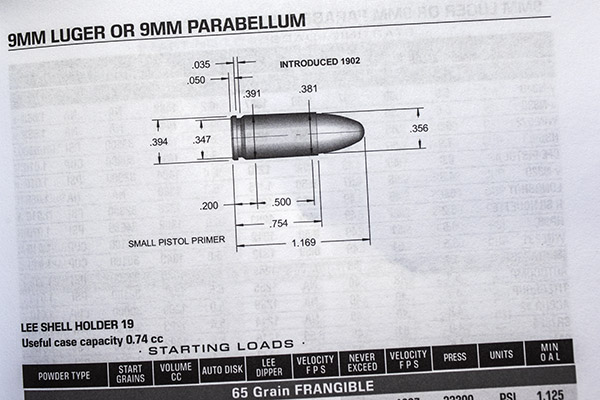
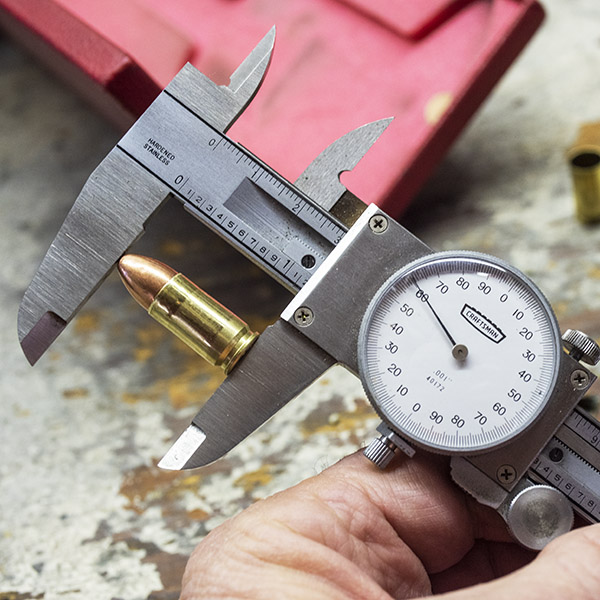
Now that I had the bullet seating die adjusted, the last step was to adjust the crimping die. That’s also explained in detail in our earlier blog on using Lee’s Deluxe 4-die set. What his entailed was raising the ram fully and then screwing the factory crimp die into the turret until it contacted the shell holder. I then adjusted the crimp by screwing in the crimping feature in the crimping die. Lee recommends a case mouth dimension of 0.381 inches; I wanted a case mouth outside diameter of 0.378 inches. I wanted a stronger crimp.
At this point, I was ready to start loading. I found it easy to do with the Lee Classic Turret Press Kit. After loading powder into the auto-drum powder measure and primers into the safety prime primer tray, and positioning the sizing die directly over the ram, I got into a rhythm. The sequence goes like this:
-
-
- Place a fired 9mm cartridge case in the shellholder.
- Raise the ram to resize and decap the case.
- Push the safety prime trigger down and into the priming arm.
- Lower the ram (this advances the turret to place the expander die over the ram) and seat the primer.
- Raise the ram to charge and flare the case.
- Lower the ram (this advances the turret to place the seating die over the ram) and place a bullet in the case mouth.
- Raise the ram to seat the bullet.
- Lower the ram (this advances the turret to place the crimping die over the ram).
- Raise the ram to crimp the bullet.
- Lower the ram (this starts the sequence again by advancing the turret to place the sizing die over the ram).
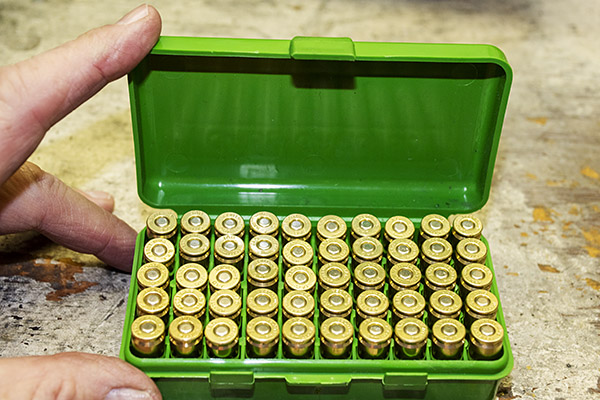
- Remove the reloaded cartridge and place it in the ammo box.
-
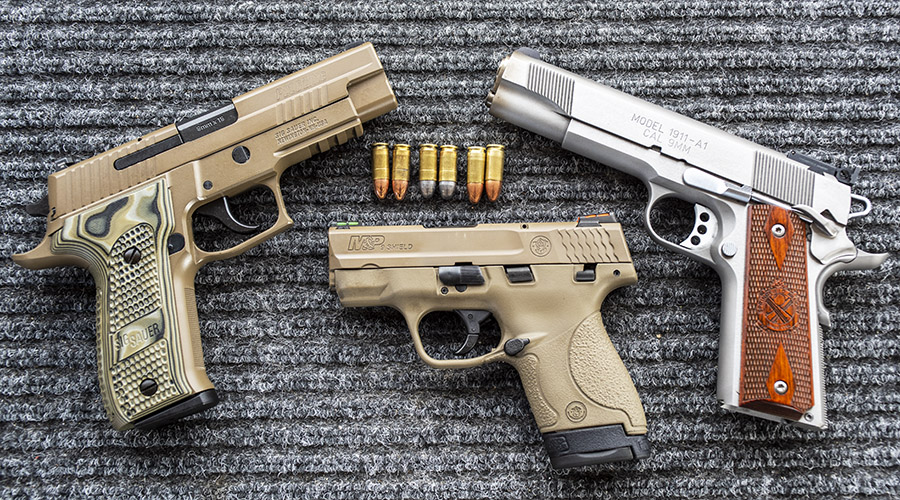
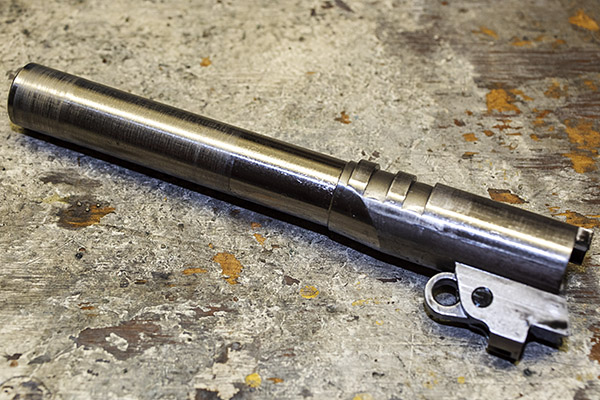
After the first few rounds, it was time for a fit check, also known as the plunk test. I shoot a lot of 9mm; it is one of my favorite cartridges. I have three 9mm handguns: A SIG P226, a Springfield Armory 1911, and a Smith and Wesson M&P Shield. Of these, the Springfield has the tightest chamber, so I use its barrel (after taking it out of the gun) for the the plunk test. If my reloaded 9mm rounds pass the plunk test in my Springfield barrel, they will feed and chamber in anything.
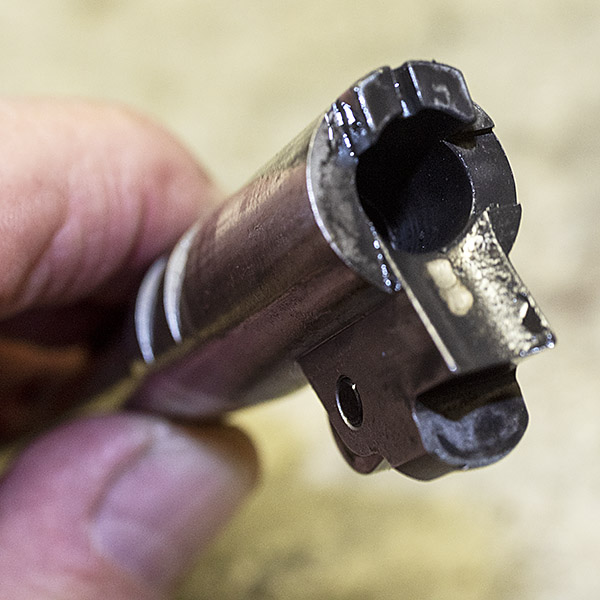
The plunk test is straightforward and highly technical. I drop a 9mm round into the chamber, and if it drops in easily with a nice plunk, it passes the first part of the plunk test.
The second part of the plunk test involves turning the barrel down, and if the round falls from the chamber with a nice plunk, it passes the second part of the test.
If the first few rounds pass the plunk test, I’ll then proceed to reload the rest of the ammo. That’s what I did here, and while I had the barrel out of the Springfield, I randomly selected a few more rounds and similarly plunk tested them. They were good to go.
You know, I still do the plunk test on all of my 9mm ammo because old habits die hard. Before I started using Lee’s Deluxe 4-Die set, I would occasionally experience plunk test failures, and what that meant is the rounds would most likely jam when I was on the range. With Lee’s factory crimp die, that just doesn’t happen. With Lee’s dies and this turret press, I suspect plunk test failures and jams will be a thing of the past. You probably realize by now I really like my Lee dies. And I absolutely love my Lee Classic Turret Press Kit.
After finishing the plunk test, we were off to the races. I loaded one box of 9mm ammo, which took less than 20 minutes. You can load high quality ammo quickly with the Lee Classic Turret Press Kit.
Next up…range firing the ammo you see above in a new S&W Shield, a SIG P226, and a Springfield Armory 1911. That blog will post in a few more days.
Stay tuned!
One of the best places to buy Lee reloading gear is on Amazon.
Never miss an ExNotes blog:
Here are links to our earlier blogs on Lee reloading equipment:
Lee Auto-Drum Powder Measure
Lee Classic Turret Press Kit
Lee Bench Plate
Lee’s Modern Reloading Manual
Lee Safety Powder Scale
Lee Classic Turret Kit Unpacking
Lee .44 Magnum Dies 1
Lee .44 Magnum Dies 2
Lee .44 Magnum Dies 3
Lee .357 Magnum Dies
Hey Joe,
You mentioned using Accurate #5 powder in your 9x19mm reloads. Can you share more info on this load?
Thanks!
Alan
Alan:
I will address this in the next and final blog in this series on the Lee Classic Turret Press, which will post in a few days. As a preview:
The Ranier 124-gr plated RN worked well with 5.8 gr of Acc 5 in my Shield. In the Shield, 5.6 gr of Acc No 5 with that bullet did not reliably cycle the action to lock the slide after the last shot, although this load worked well in my 1911 Springfield Armory and SIG P226. 5.2 gr of Acc 5 with that bullet would not cycle the action; it was too light in the Shield.
147-gr Boudreau powder coated flat nosed bullets testing is still underway. The first load tested with 4.8 gr of Acc 5 and this bullet performed well in the Shield.
124-gr plated RN Xtreme bullet testing is still underway.
The blog on this testing will post within the week.
Thanks for commenting.
Joe
I noticed the book said 1.169 was the finished length and you made it 1.160. Is that on purpose or am I reading it wrong?
It was on purpose. Later rounds were loaded even shorter at 1.140 and 1.150. When you do this you need to watch for pressure signs, but I did not see any. The problem with the 1.160 cartridge overall length was that the firat round would load into the magazine okay, but as subsequent rounds were loaded into the magazine, that initial round tended to go horizontal, and the tip of the bullet would drag inside the magazine.