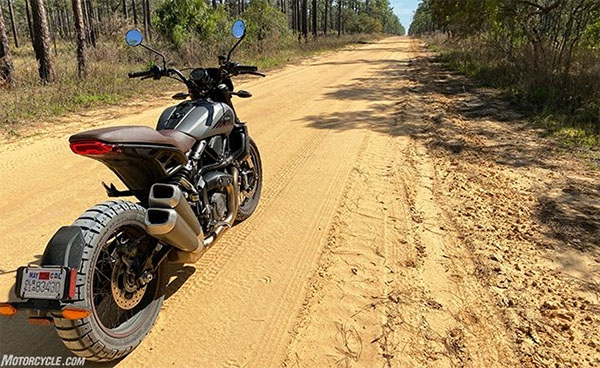
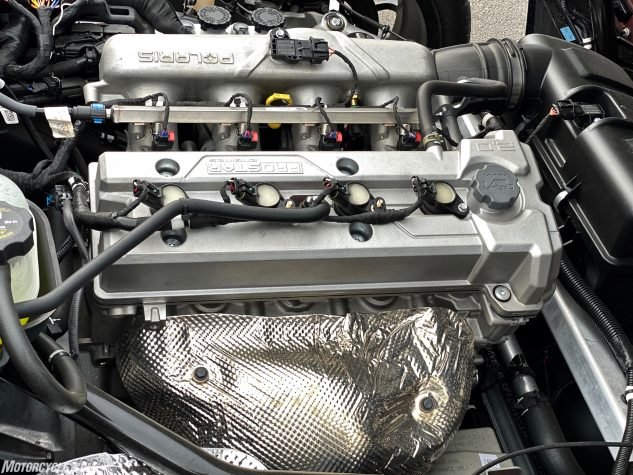
Joe has a new story published on Motorcycle.com! Take a look when you get a chance. I’ve always wondered what it was like to ride one of these 3-wheeled wonders, and now I know.
Category: Joe Gresh
Chinese food, anyone?
Man, we are through the looking glass, living in what feels like a bad science fiction movie. The freeways and malls are empty, parking lots are empty, and we are sheltered in place. To top it all off, Susie and I are recovering from two of the worst colds we’ve ever had, and you can imagine what we’ve been imagining. And it may have all started because some dude in Wuhan wanted to eat a bat. A bat!
This current situation will bring out the worst in us, and it will bring out the best in us. We’re already seeing some of the worst, with the accusations flying back and forth about where the virus originated, who did what to who (or who failed to do what and when), and on and on it goes. But we’ll get through it, and we’ll come out on the other side better. We always do.
I have good friends in China, and I feel for them. I think I feel for us, too, with the COVID-19 virus emerging here. The market is way down, on paper we’ve lost a ton of wealth, and people are losing jobs. I had a gig in Singapore and I would have been heading over there. Nope. Not now.
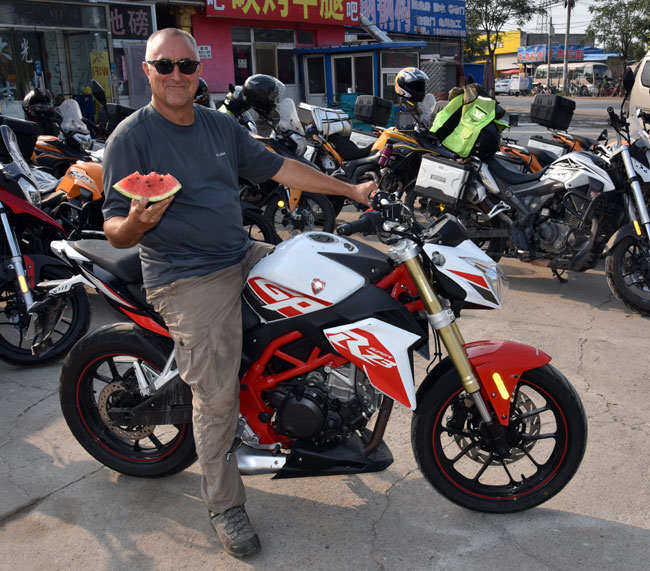
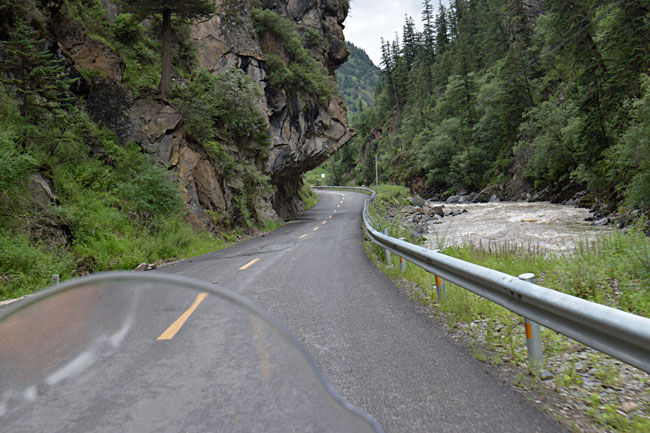
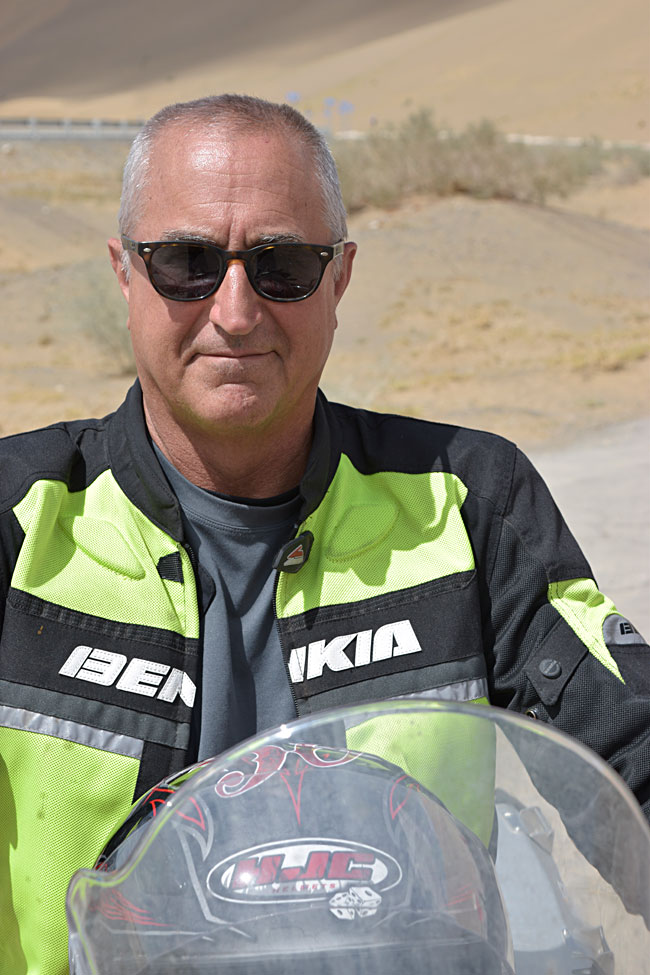
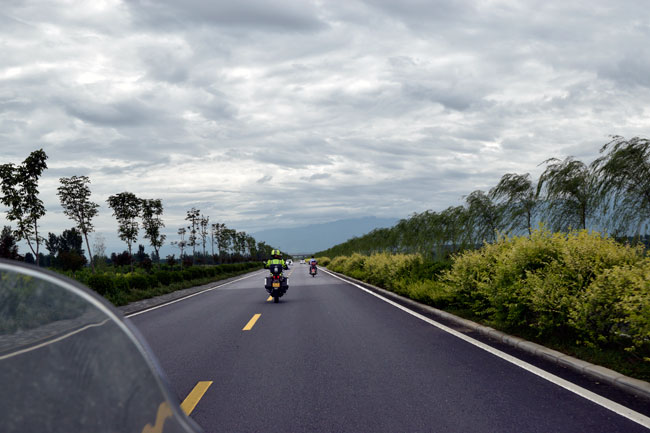
All the above aside, I find myself thinking more and more about my friends in China, and the ride Joe Gresh and I took across China. And the food we ate (we ate a lot of strange stuff, and a lot of watermelon). And the pretty girls. And the roads and the people. This summer it will be four years since that ride. It was the grandest ride I’ve ever done and the greatest adventure I’ve ever had. With that as an introduction and without a lot of narrative, I’ve got a ton of photos to share with you from that epic road trip. Enjoy, my friends…
Riding China was a good ride. I’d like to do it again someday. In the meantime, keep the faith, folks. Things will get better.
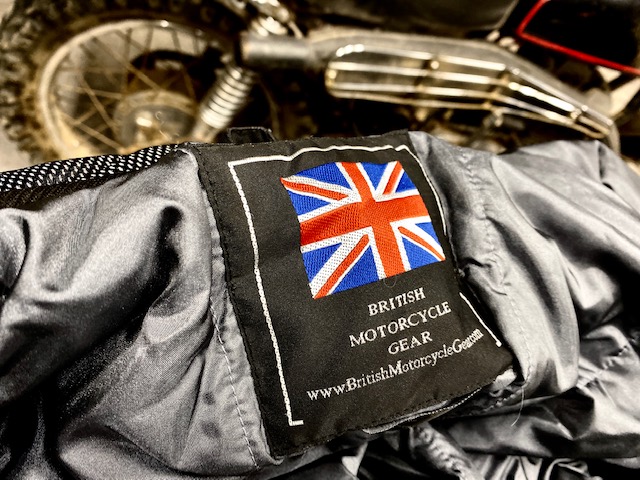
Hasty Conclusions: First Test of The British Motorcycle Gear Mercury Jacket
Here at Exhaustnotes.us we don’t have to wait until we know what we are talking about to give you our impressions of new gear sent to us for review. No, we can do whatever, whenever we want and right now I want to tell you about this swell jacket. You’ll get a longer-term review after Daytona Bike week.
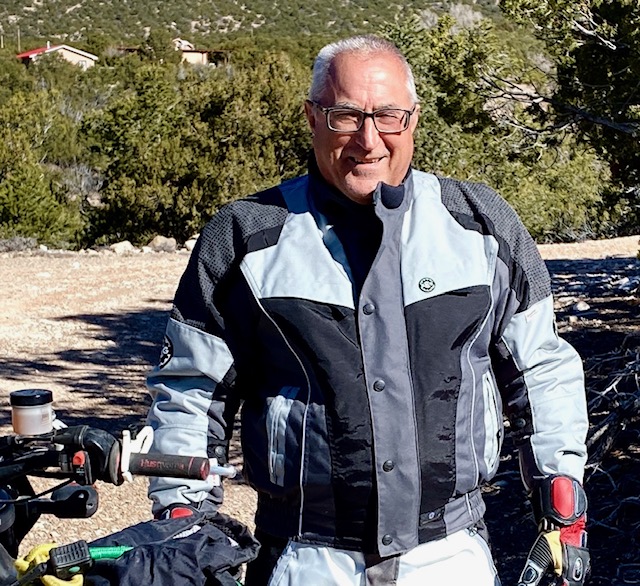
BMG’s Mercury jacket is warm. The thing comes with a liner made of something like plutonium or krypton. The (only) day I tried the jacket temperatures ranged from 45 degrees to 70 degrees Fahrenheit. My base layer was a cotton T-shirt, no logo. At 45 degrees I was a bit cold but nothing unbearable. As the temps got into the high 60’s low 70’s the jacket became warm. It was fine as long as your speeds were above 40-50 miles per hour.
I could have taken several steps as the weather warmed up. I could have taken the liner out. I could have opened the vents (which I did later on) but I’m lazy and just put up with the heat.
The collar on the BMG Mercury jacket is designed well. I can lock it in solid and it doesn’t chafe on my helmet when I rotate my head to preen. Some jackets catch helmet parts and make cleaning tail feathers a less rider-friendly operation.
The sleeves have both a zipper and hook-and-loop fasteners strips to seal off your wrists. This is great for me because I ride without gloves when I am operating a camera or getting on and off the bike frequently. Using the two closing methods you can achieve an airtight wrap and stop the cold from entering your arm area.
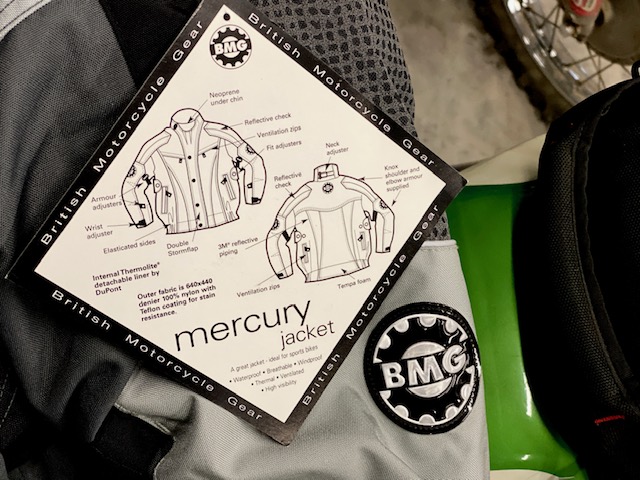
Closing the jacket is also a multi-level affair; a zipper, hook-and-loop strips then snaps should pretty much keep the coat from opening up in a crash. The jacket has light shoulder/elbow armor that doesn’t intrude on comfort. Which is fine by me, I don’t like heavily armored motorcycle gear.
There are two front and two rear vents that are not huge but when open make the jacket noticeably cooler. After getting a bit hot on slower trails I ran them open until around 5pm when New Mexico’s February temps start dropping. I closed the vents and had a snug, evening ride home, arriving back at Tinfiny Ranch around 55 degrees, the perfect temperature for using the Mercury fully deployed.
The Mercury comes with a lot of adjustable straps to control the shape of the thing. I didn’t mess with them because it was fine with the liner installed. I imagine in hot weather I’ll have to take the liner out and then those extra snaps and straps will help prevent flutter.
The British Motorcycle Gear Mercury Jacket really works well for New Mexico’s daily 40-degree temperature swings. I think if I combined it with a t-shirt and my electric vest I would be good down to the mid-30 degree range. Available from BritishMotorcycleGear.com at a list price of $250 the jacket is not outrageously expensive and appears well made. I’m taking it with me to Daytona’s Bike Week where I hope to gather more information on the Mercury’s rain proofing and function without the liner.
Zed’s Not Dead: Part 20
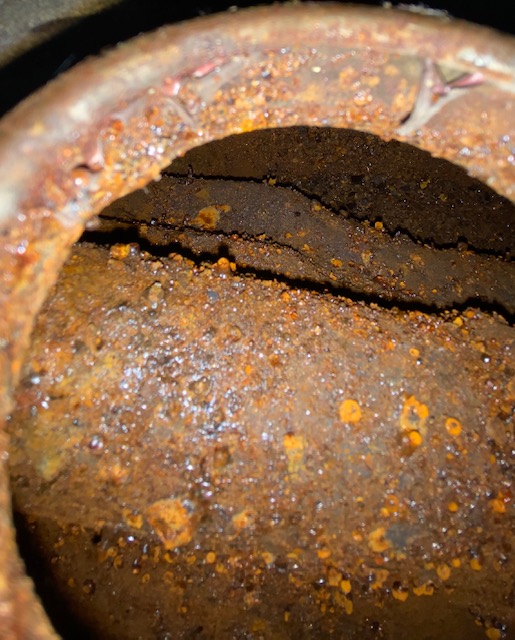
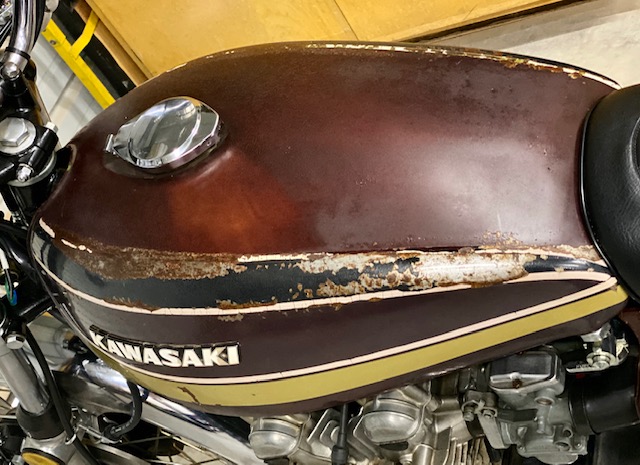
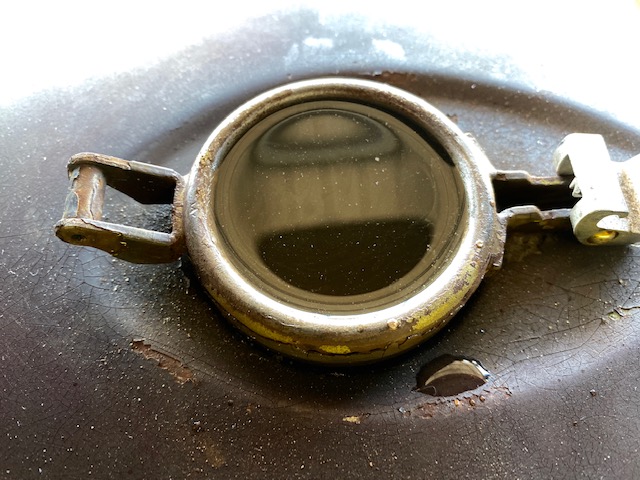
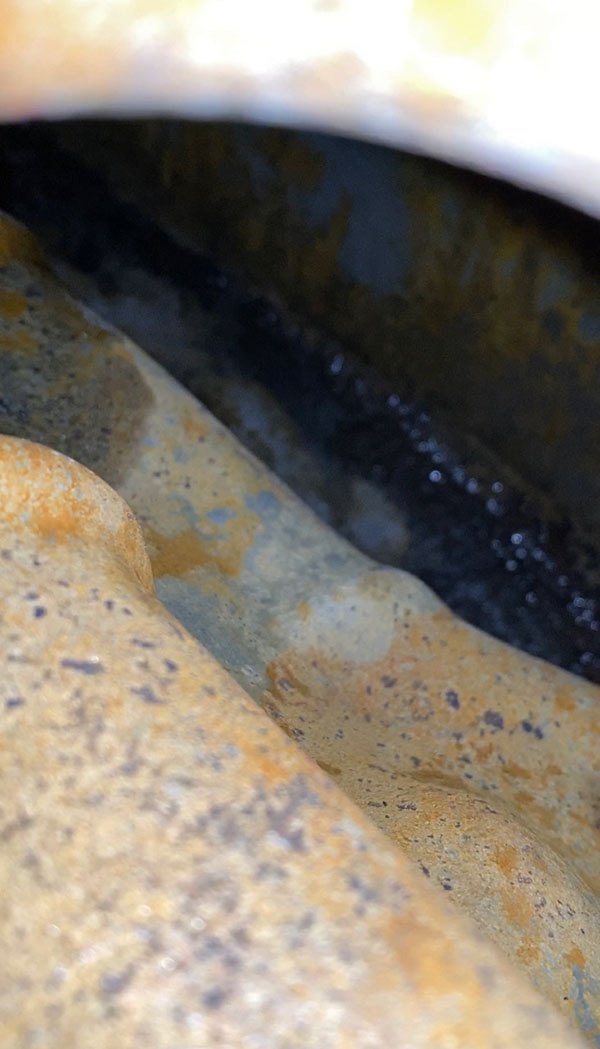
You may recall from Zed 19 I had to re-soak Zed’s gas tank as 10 days were not enough to dissolve the rust. I drained, dried and reloaded the tank with apple cider vinegar and let it sit for 4 more days. This is what it looked like originally:
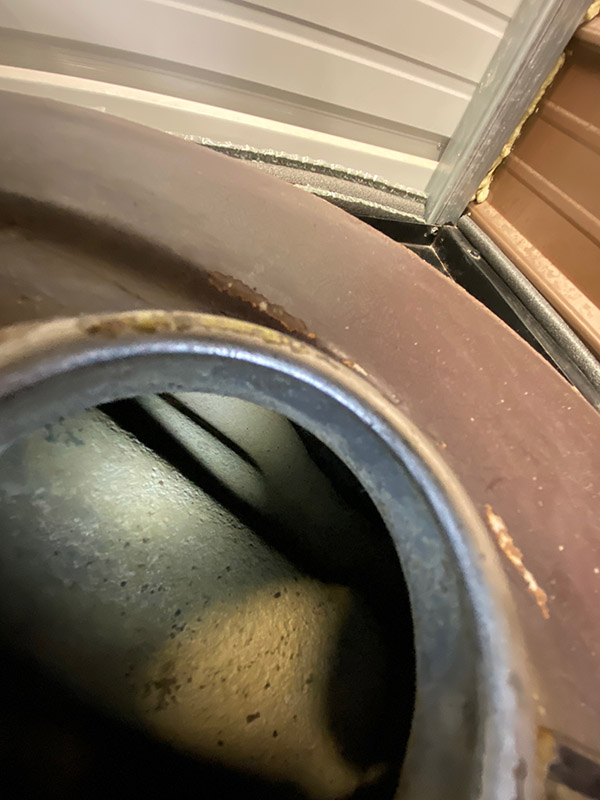
The second session really knocked most of the rust out. After rinsing I dumped a large box of baking soda into the tank and added clean rainwater sloshing it as I filled to mix thoroughly. I don’t know the chemical reaction that takes place but the baking soda neutralizes the acid, turning the metal a dull grey, almost white color. This treated metal does not flash rust and I’ve been going 3-4 years on another tank I cleaned like this without rust reappearing. It’s like the metal turns passive and stops reacting to oxygen.
If I wasn’t so hell-bent on riding this bike I think I would flush and cider the tank one more time but it looks good enough and I’ve got to ride! I connected a small hose to my shop vac and played it all over inside the tank. I can hear nothing when I shake the tank so at least there are no big chunks loose inside.
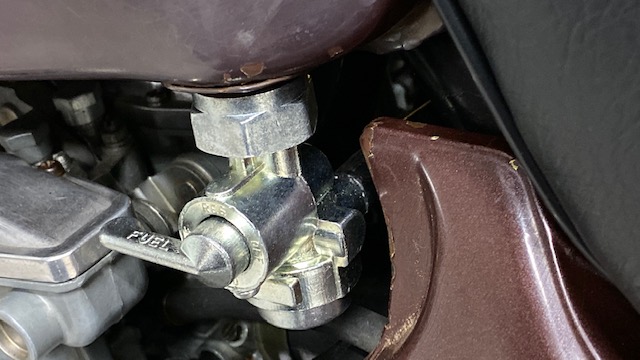
Proving that even the simplest life forms can learn I bought an entire new petcock for $23 rather than the rebuild kit for $8. This is real growth on my part. Usually I buy the kit, mess with it for hours then put it on only to have it leak. Only then will I buy the new one. Kawasaki uses a turnbuckle-type left-hand/right-hand thread on the Z1 petcock. It took about 145 tries to get it to tighten up facing the correct direction.
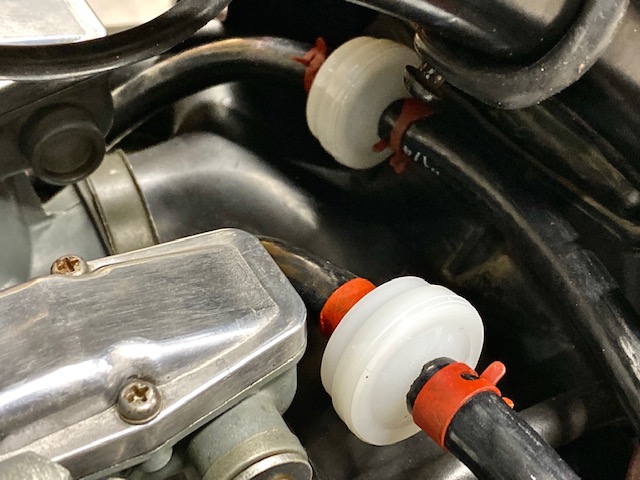
The new petcock has screens inside the tank and a bowl filter but with 40% of Zed’s tank out of my view-field I can only assume the entire tank is as clean as the places I can see. Inline fuel filters, one for each set of two carbs will hopefully catch any debris still in Zed’s tank.
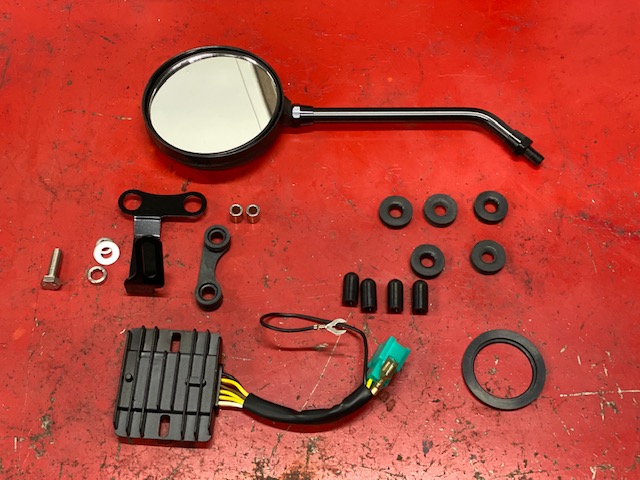
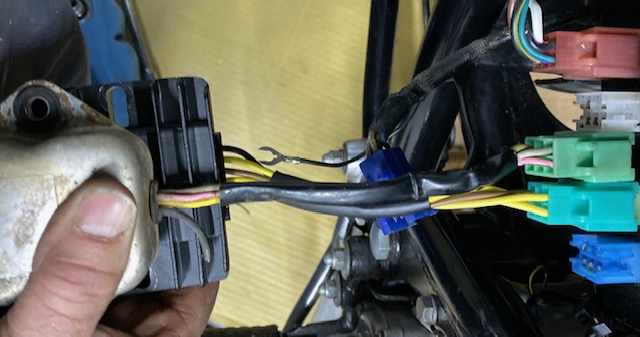
An update on the Z1 Enterprises regulator/rectifier: It works. The battery charges @ 14.8 volts which is still a tad high but much better than the 17 volts Kawasaki’s setup was doing.
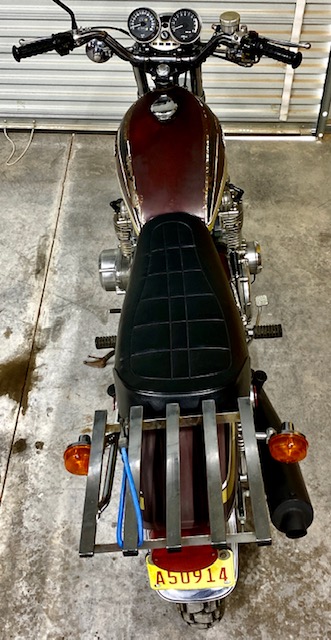
From the top Zed looks pretty well sorted. I took it for a ride and it ran really well for off the bench carb settings. It might be a little rich at idle or it might just be our 6000-foot elevation. I’m not going to tinker with it for now. I’d rather get some miles on the bike.
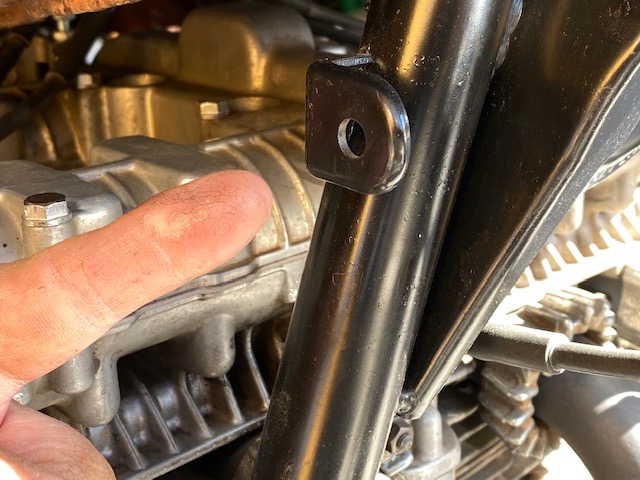
I don’t know what this bracket is for. Located on the right side down tube near the tach drive, it’d too light for a steering damper mount. Anyway, there’s enough stuff on the bike as is so I’m not going to worry about it.
I took Zed to my secret proving grounds and she ran through all 5 gears smoothly. The bike hit 90 MPH without even trying. I’ll need a better front tire to do any high-speed work. The brakes work ok. When you ride a SMR 510 Husqvarna all other motorcycle brakes seem like crap. After 33 miles there are small oil leaks at the tach drive and countershaft area. Maybe the clutch pushrod seal or sprocket seal is the culprit. That stuff is easy to fix.
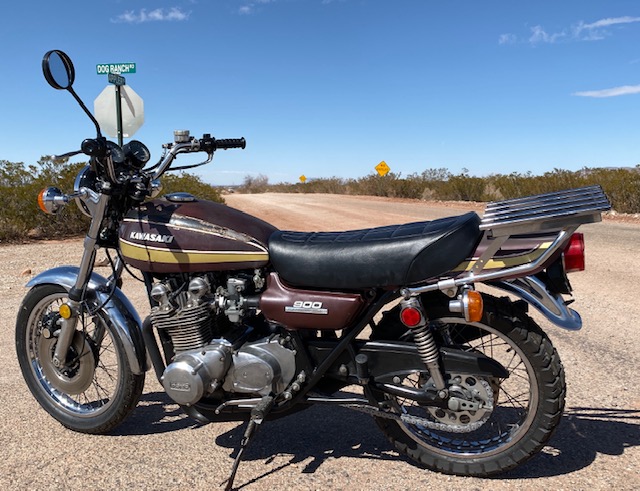
The patina on Zed is excessive, bordering on shabby. The bike sat outside for years and paint wise there’s nothing left to polish or wax. The finish is just not there. The pin striping is cracked and missing sections. I’m not sure what to do about that. On the one hand a ratty bike may be less attractive to thieves and old Z1’s are getting fairly expensive. On the other hand it does look pretty bad. I’ve seen my Enduro buddy Mr. French do some amazing work with rattle cans. Maybe I’ll give it a go. The paint can’t look any worse.
That’s it: from Dead to Zed in 20 easy sessions. Don’t worry, this won’t be the last you’ll hear of Zed. I’ll be doing some long trips on this bike, maybe Mexico, maybe ride to a few flat track races. I’ll update the blog if I do any more major work on the bike. The story of Zed’s resurrection may be ending but the story of Zed is just beginning.
And there you have it. If you’d like to run through the gears (i.e., the previous 19 installments of Zed’s Not Dead), you can do so here!
Zed’s Not Dead: Part 19
It’s time to clean out Zed’s rusty gas tank. Before I bought it Zed sat outdoors for a long, long time and heavy rust inside the tank had gotten out of control. Clean gasoline is critical when there are 4 carburetors to clog up. You know how I feel about tank liners and new Z1 tanks aren’t very expensive so I won’t be doing any heroics to save this one. If it doesn’t come clean I’ll go to plan B. I’m just looking for any excuse to buy one of Z1E’s beautiful painted body sets.
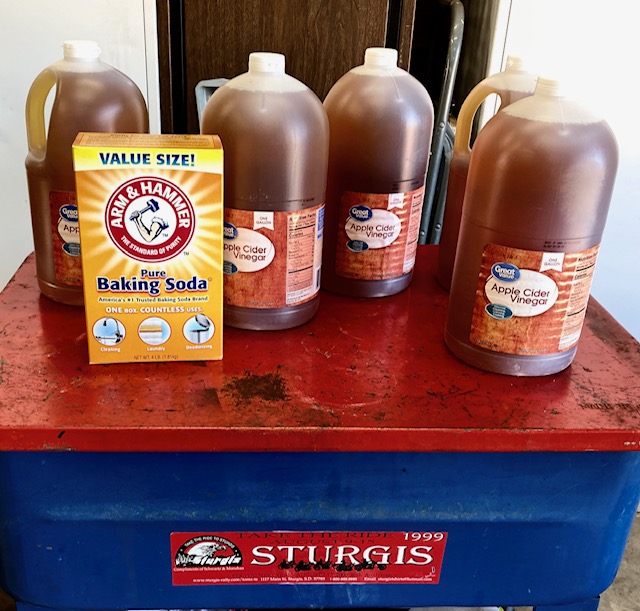
A few years back I read a story on using apple cider vinegar to dissolve rust. I used the stuff to clean Godzilla’s rusty tank and it worked great. Of course, Godzilla’s tank wasn’t nearly this bad. The cider vinegar is a very mild acid and works slowly so you don’t have to worry about eating a hole in your gas tank.
Available at Wal-Mart, cider and baking soda are the two ingredients used. I also pressure washed the inside of the tank to knock loose any flakey rust. After pressure washing I dried the tank with a heat gun and dumped in 4.25 gallons of apple cider vinegar.
With the tank jugged all you can do is wait. Zed’s tank was really bad so I left the cider in for 10 days. I dumped the rusty cider into a bucket and flushed the tank with water. The results were encouraging but the tank was still not shiny clean.
Normally this would be the time to pour in the box of baking soda and fill the tank with water to neutralize the acidic vinegar but Zed’s tank needs another dose of cider. Using the heat gun I dried the tank again then refilled it with a gallon of fresh vinegar and the rest with the murky cider I had dumped out of the tank. Vinegar is not cheap, you know.
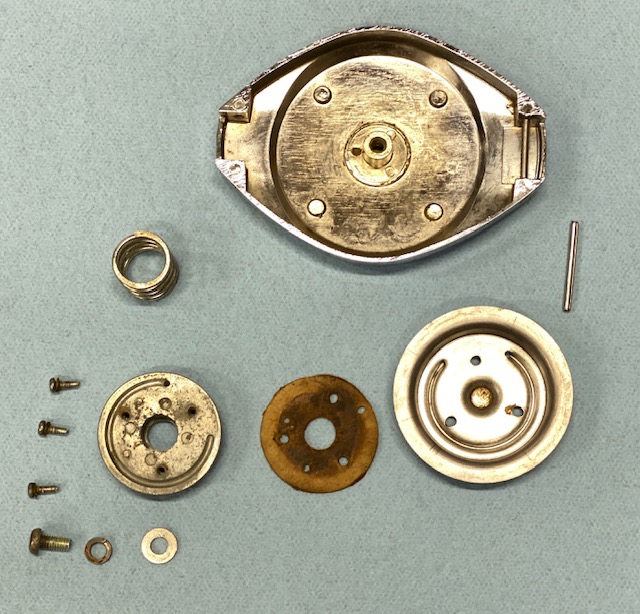
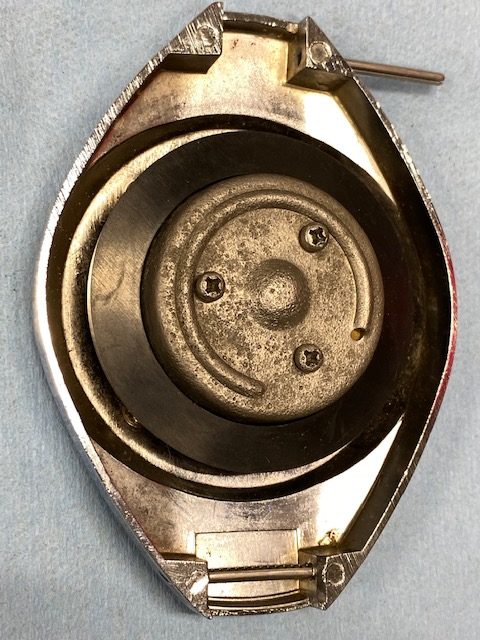
While the tank was soaking I dismantled and de-rusted the gas cap. I wasn’t sure which way the new rubber gasket went on the flange. One side is 1/32” wider than the other and manufacturers do stuff like that for a reason. The old gasket was no help. It had crumbled. Figuring I had a 50-50 chance of getting it right I installed the gasket wide-side towards the gas tank.
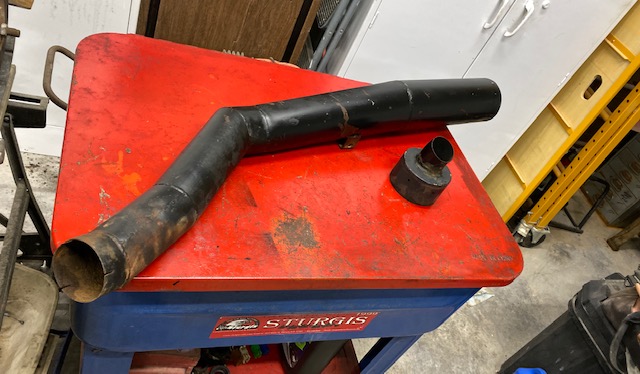
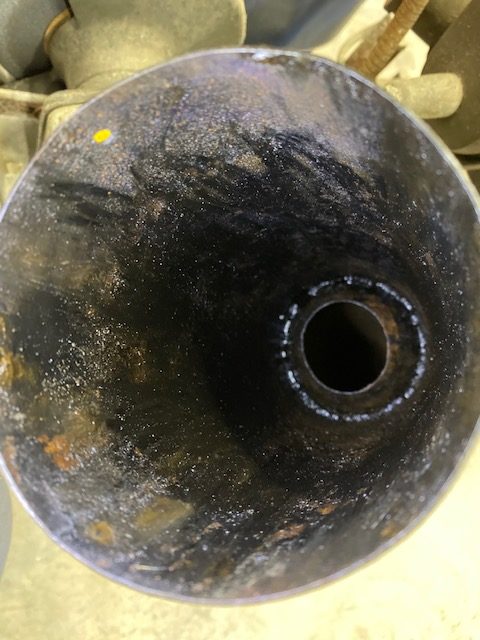
Zed’s exhaust was held on by coat hanger wire when I got the bike. The headers seem well made but the muffler section looks a bit crude. Not terrible but nothing like from a factory. It has an internal reverse cone 12” from the end of the muffler body. There was no baffle anywhere.
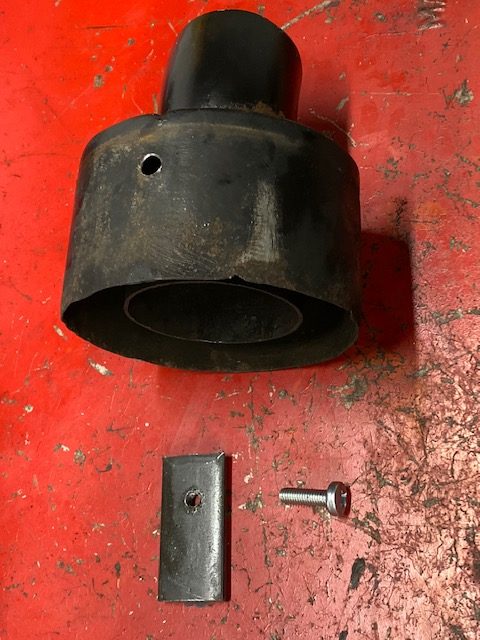
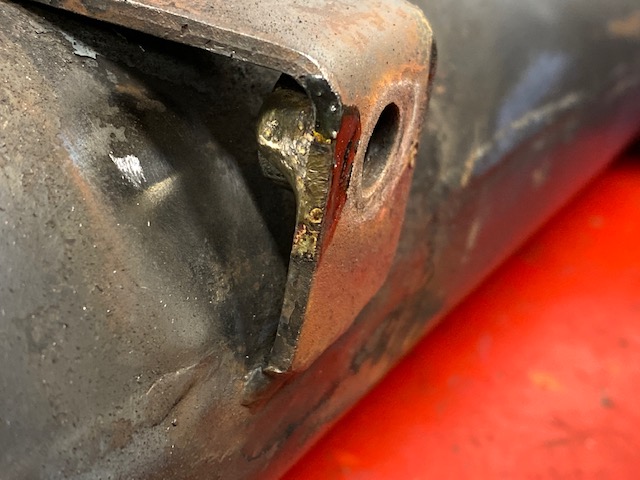
The muffler end cap was secured by a stripped sheet metal screw. I drilled and tapped a piece of flat stock for a 6mm screw. This backing piece gives the screw more meat to bite into. Then I set the backing piece into place and welded it to the end cap. I can’t weld and trying to stick a thick piece to thin sheet metal is hardest of all.
Where the muffler was held on by a coat hanger I brazed a 3/8-16 nut to act as a blind nut. This wasn’t critical but it will make muffler installation much easier as there is not much space for a wrench. It also eliminates one more variable when you are fumbling around trying to line things up.
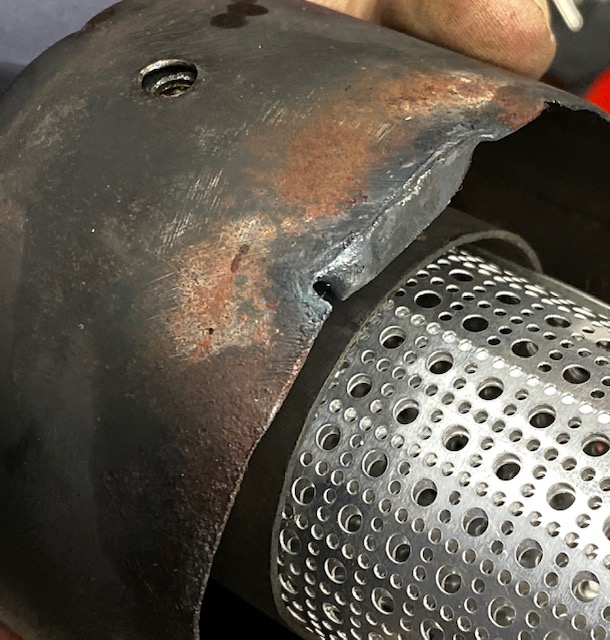
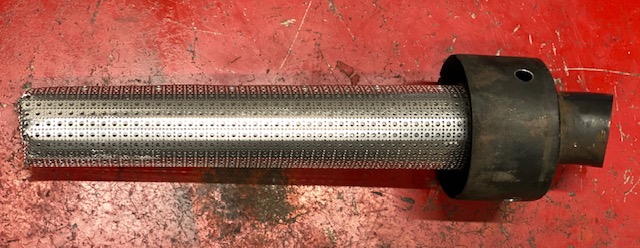
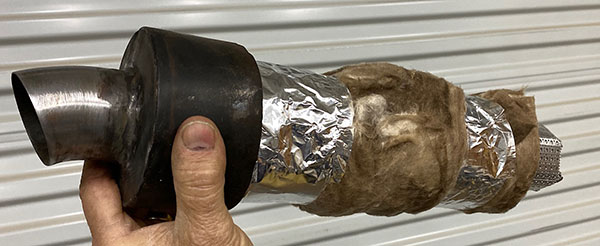
I made a baffle from perforated aluminum, rolling it over a 1-1/2” PVC pipe to form the tube. The baffle is long enough to protrude past the inner reverse cone for support and is wrapped in standard fiberglass insulation. The end of the baffle is folded in on itself and riveted. There are a lot of tiny holes in the baffle so I don’t think it will be too restrictive. I’m sure the Mansfield house insulation won’t last long but at least I tried.
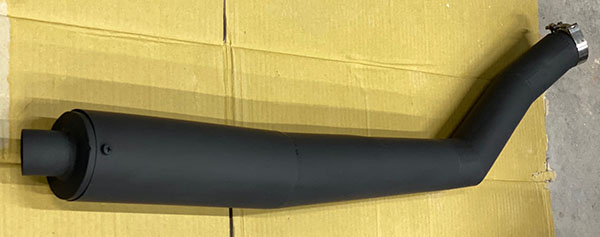
After all that pipe work I splashed some BBQ black on the muffler and it doesn’t look bad. As long as you don’t get within 25 feet.
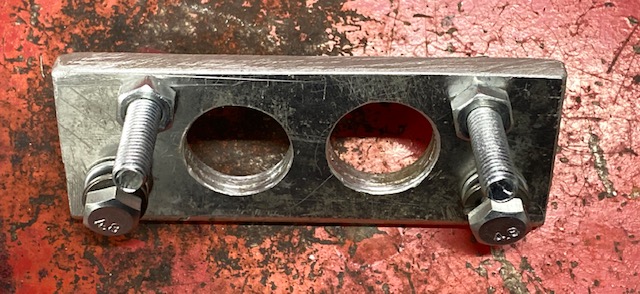
Zed was overcharging the battery to the tune of 17-volts so I bought a non-stock replacement unit from Z1E. The new unit eliminates the factory rectifier, having that function combined into the body of the regulator. Electrically, the unit is plug-n-play and the bolt holes from the old/new regulators line up but the wiring harness from the new unit was too short by about ¾”. There was no way to plug the regulator in and still have enough slack to reach the mounting holes under the battery box. I tried all sorts of finagling and considered rotating the regulator and using only one mounting bolt or drilling new holes closer to the harness socket. In the end I made a bracket to move the regulator. While I was at it I narrowed the bolt spacing between the slotted regulator mounting holes to make it easier to install.
All is mounted securely now and the unit plugs in just fine. It remains to be seen if it regulates. We will find that out in Zed 20.
Want more Zed? Just click here!
Zed’s Not Dead: Part 18
The pace has quickened here at Tinfiny Ranch. Lots of new parts from Z1 Enterprises arrived and lots of new ground was covered on Zed’s resurrection. We are going to ride like the wind soon. In Part 17 the ignition switch was giving me trouble but that’s been resolved with all new locks from Z1E. I had to dismantle the headlight area to replace the ignition and the under-seat area to install the new seat lock. The fork lock was easy. I should have gone with new parts in the first place. Ah well, if I didn’t do stupid things no one would understand me.
The luggage rack I bought from ebay fit Zed only in the broadest sense of the word. It was made to connect to the original grab bar on this tab but I don’t have the grab bar. That’s ok because it sat way too far back on the bike for me. Like 6 inches past the taillight. I lopped that tab off and shortened the rack where it mounts to the top shock bolt.
Without the tab or grab rail there was nothing to hold the rack from flopping down onto the rear fender. Using a New Mexico hammer-and-14mm deep socket-roll forming machine I knocked up two brackets that fit into the old grab rail mounting holes. I made a 1-inch spacer out of some solid steel round stock that had lain in Tinfiny’s driveway for several years.
The rack looks much better tucked in tight but cantilevered as it is, I’m not sure the tubing will be strong enough to hold much gear. I may redesign the rack with a long gusset running on the bottom of the tube that will incorporate the mounting tabs for a rearward set of blinker tabs. Moving the blinkers aft will allow me to use those toss-over, Pony Express style saddlebags.
Zed’s lower, right-side engine mount was missing and I’m getting tired of buying parts for this bike so I made a paper template and cut a chunk out of an old motorhome bumper that had also laid in Tinfiny’s driveway for years. I hate to disturb the junk buried around Tinfiny because it stabilizes the soil. You never know which part you pull out of the ground will cause a landslide. It’s like living atop a Jenga stack.
The mount is not as nice as a stock mount but it’s way on the bottom. No one will ever know.
I also bought a new seat! Replacement foam and a new seat cover added up to nearly the same as a whole new seat so I bit the bullet. It tasted like brass with a hint of lead. The seat came complete with brackets, rubber supports and seat latch. It was missing only the pivot pins that hold the seat on. Using my New Mexico hand-lathe, I spun down a ¼-20 stainless bolt to fit through the frame brackets. A hole for a cotter pin & washer keeps the seat pins from falling out.
Besides rebuilding the caliper and master cylinder in a previous Zed installment I replaced the rubber hoses and the missing hose support down by the fender. I also had to replace the solid pipe from the caliper to the lower brake hose.
Bleeding the brakes was fairly straightforward. So far nothing has leaked out of the rebuilt parts. The lever feels a bit mushy; I’ll let it sit a bit to let the air bubbles coalesce then try a little more bleeding.
I rigged the bike with a spare battery and tested all the electrical circuits. Amazingly, everything works. The alternator works a little too well putting out 17 volts to the battery! Not to worry, another $100 has a new Z1 Enterprises regulator/rectifier on the way. The new unit is not an exact replacement. The regulator/rectifier is all in one finned casting unlike the stock Kawasaki set up where the two functions are separate parts.
The last time I ran Zed way back in Zed’s Not Dead 10 it ran and idled great. Now the bike is popping and won’t run off choke. The poor quality of gas sold today turned dark red in a very short time so I have removed the float bowls and will blast the carbs with aerosol carb cleaner. Hopefully this will get the bike running normally as I don’t want to take those damn carbs apart again.
Read our earlier Zed’s Not Dead installments for the rest of the resurrection!
Zed’s Not Dead: Part 17
Repairing old motorcycles is both fun and unnerving. After a couple weeks waiting on shims I finally finished the valve adjustment on Zed. While I was poking around under the valve cover I noticed that one of the four cam idler sprocket bolts was a non-standard bolt.
Zed’s previous mechanic must have lost a bolt or stripped the threads and the replacement bolt was too long. Stacking washers took up the clearance for the errant bolt but it looked like hell. I wanted to install the correct length bolt. The damn thing was tight. Like break-the-bolt-off tight. As I gave it a semi-gentle tug it had that springy feel. I fear that if I put any more torque on the fastener it will twist off leaving me with a mess.
It worries me that in the 45 years since the Kawasaki left the factory someone probably removed the cams in Zed. There were a lot of performance part catalogs in the same shed Zed came from. I hope the guy didn’t screw up the engine. I decided to leave the offending bolt for a later day and after checking the clearances one more time I used a new gasket and buttoned up Zed’s top cover.
I’m bumping into my self-imposed 3000-dollar budget limiter so I’ve been making some hard choices. Tach and Speedo cables aren’t very expensive but after flushing out the cable housings and cleaning the cables I couldn’t see any fraying or signs of stress. I coated the cables with grease and will be reusing them so that’s another 25 bucks saved.
The Z1 Enterprises wiring harness was very complete, all except for the instrument light harnesses. Zed’s tach and speedo have two instrument lights per side. These bulbs are illuminated whenever the headlight is on so the rubber bulb holders were sort of crystalized from heat. They fell apart when I removed them. Half the rubber fell inside the gage and half stayed stuck on the instrument light socket. Luckily for me the Z1E harness came with a new warning light harness and I was able to steal the old warning light rubbers and repurpose them for gauge illumination.
Changing the sockets and rubbers was less trouble than I thought it would be. I had to cut off the bullet connectors to pull the trick off. After threading the wire through the rubbers I uncrimped the old bullet connectors and recrimped the wires with a bit of solder to make up for any weakness inherent in a reused crimp connector. I wanted to keep the original instrument light sockets & wires so the color code would be correct but one of the sockets had chafed wiring and corrosion inside. I borrowed a warning light socket from the old harness and hopefully no one will ever see.
On a Z1 the gauges foam padding is sandwiched between the gauge and the cast aluminum bracket. This padding had deteriorated and crumbled easily. I knocked out a few round pads from some sticky refrigeration insulation and applied them wherever it seemed like the right place to apply such a thing. Next I tested all the bulbs and assembled the gauge cluster.
I had a hard time figuring out the headlight shell/blinker stalk sequence but my Internet buddies helped me get the various parts in the correct order. The blinkers ground through this ground washer/spacer type deal but mine were both broken.
Ever thrifty, I used a couple of thick washers and made an aluminum spacer to replicate the broken ground washer’s function, if not their aesthetics. The headlight ears on Zed appear to be slightly bent, giving a wall-eyed look to the blinkers. Or, if you like, swept back for speed. I don’t think I’ll try to straighten the ears because chrome does not stretch well and I don’t want hairline cracks in the lustrous finish. Sometimes effective motorcycle repair requires knowing when to quit.
At times my thriftiness ends up costing me more in the long run but not often. I never had a key for Zed so I took the seat lock, fork lock and ignition switch to our local locksmith. He made a couple keys that fit and only charged $40 for the work. Now that the instrument cluster and headlight was back together it was time to throw a battery on Zed and see if anything worked. I used a car battery and a couple jumper cables, turned the key…and nothing. Flipping the key back and forth brought flashes of light from the neutral and oil pressure warning lights. By turning the key just so, and shaking it like a Polaroid picture I could get the lights to come on steady. I’ve ordered a new ignition switch at $75.
Amazingly most everything worked. The left rear blinker bulb wasn’t making good contact so I cleaned the socket and it worked. The horn was badly rusted inside so I’ve ordered a new one but other than those two things all other circuits are fine. The starter works but I didn’t run the engine. That crappy ignition switch will just make it cut out.
Zed is getting very close. Very close, my brothers. Except now I have to take the headlight and gauge cluster back apart when my new switch shows up. And then the seat lock. And then the fork lock. It’s two steps forward, one step back kind of action. One other cost saving measure that didn’t pan out was the used front tire. It looked fine when I first installed the thing but the tire has developed deep cracks in the rubber between the treads. Yet more stuff on order.
My latest Zed parts order is around $600 but this should be the last big pile of parts. It looks like it’s time to clean out Zed’s rusty gas tank and start thinking about all the cool places I’ll ride to on this beast.
Catch up on the Zed resurrection here!
The 5 Deadly Sins Of Motorcycle Restoration
My idea of a good restoration and your idea of a good restoration may differ, but you know deep down inside that I’m always right. I am the arbiter of cool. I am the final word, I am…Omni Joe. Here are 5 common restoration mistakes that drive me crazy:
Sin #1: Gas tank liners.
That sealer crap people pour into their motorcycle gas tanks is the worse invention of all time. Guys swear by this junk but don’t listen to those lazy bastards. When I read the words, gas tank liner and/or Caswell sealer in a motorcycle description I know an amateur’s hands have been fiddling the motorcycle. Who would pour that devil’s goop into a nice motorcycle gas tank? It makes me wonder what else they screwed up. The way to fix a leaking, rusty gas tank is to get rid of the rust and weld/braze any holes. Any other method is destined to fail. There’s no excuse for using devil’s goop, YouTube is lousy with videos explaining how to clean out a rusty gas tank and how to stop it from re-rusting.
Sin #2: Repainting serviceable original finishes.
Nothing annoys me like a guy posting up a 90% perfect, original-paint motorcycle and asking where he can get it repainted. Stop! If the paint has a few chips or is faded a tiny bit leave the damn thing alone. One of the most underused old-sayings is, “It’s only original once.” No matter how shiny and beautiful you think your topcoat turned out its still vandalism. There are many phony re-pop’s running around, don’t make your motorcycle one. By painting over your once desirable survivor you lower its historic value. Listen, I’m not against repainting really bad original body parts, lord knows my Z1 needs it but I know anything I do that covers over the factory work erases a story, and vintage motorcycles are commodities without a story.
Sin #3: Over restoration.
When the Japanese bikes that are considered classic today were first sold they had acceptable build quality. For some strange reason many motorcycle restoration experts go way overboard making the motorcycle a show bike that bears little resemblance to real motorcycles. Chrome back in the day was thin and yours should be too. Nothing depresses me as much as these tarted-up travesties. The nerve of some Johnny-Come-Lately with a fat wallet and no soul thinking he can render a better motorcycle than the factory. Keep it simple and try to match the level of finish that you remember. Otherwise, what’s the point? It’s already worth less because you damaged the original build by trying to improve the bike. Why pour money into the thing making it something it never was?
Sin #4: Giving a damn about numbers.
As people get deeper into the vintage bike hobby they grow ever more insane. It’s not enough to have the correct parts anymore: Now you must have the exact build date on the part to suit your motorcycle’s VIN number. This is madness. Nobody except lunatics and bike show judges will care that your sprocket cover was made a year or two after your bike left the factory. The only part number that matters is the one that can get your bike registered for the road. I’ve seen people on vintage groups debating a slight casting change or a vestigial nub as if it were the most important thing in the world. People like that have no business owning a motorcycle; they should go into accounting or better yet, prison.
Sin #5: Parking it.
The final and biggest sin of all is to restore a motorcycle and then park it. I can over look all the other sins, even tank sealer, if the owner rides his vintage motorcycle. Get the thing muddy. Do a burn out. Ride it to shows in the rain. Honor the motorcycle by using it. A show motorcycle that is too valuable or too clean to ride is nothing, less than worthless. The machine was built for you. It has a seat and controls for you. The engine wants to pull. Do the right thing by your motorcycle and your sins will be washed away, my brothers.
Keep up with the Zed restoration!
Meow Wolf
West of downtown Santa Fe, New Mexico towards the strip malls, chain stores, and old neon-lit motels, is a thing called Meow Wolf. I call it a thing because I’m not quite sure what it is and that’s after crawling through refrigerators, blue time tunnels, and playing musical mastodons. The amount of ingenuity per square foot is astounding.
There’s a detective story loosely connected to Meow Wolf. Immerse-ants will find private correspondence referring to all kinds of mysterious events. Feel free to open drawers or snoop in cabinets, cues are scattered everywhere but with so many people wandering around gaping at the strangeness it’s hard to get a look at them all. I sort of tried to follow the story but it will take several visits to figure it out. If you want to solve the story go to Meow Wolf when nobody is blocking your progress.
Besides the back story, Meow Wolf can stand alone if you don’t want to tax your brain trying to slot Lex’s school reprimand letter into the narrative. Nothing is what it seems to be so just wander around opening portals and being amazed at the way normal life can be altered by slight shifts in reality. It reminds me of that Monkees movie, Head.
Be prepared to crawl around on your hands and knees and push or pull on everything. At least half the stuff leads to somewhere else. One second you’re in a traditional living room, the next a spacecraft. If you can fit inside it goes somewhere cool. I loved the place and it’s given me many ideas on how to make our house forever un-sellable with a few modifications.
The closest things to Meow Wolf in the real world are those McDonald land playhouses found at suburban McDonald’s restaurants, except that Meow Wolf is not as sticky. They must have a crack janitorial crew. After two and a half hours I had use one of the many exits to make sure I wasn’t stuck in there. It’s artwork that you enter and sign in please, then try to imagine why it exists.
Next time you visit Santa Fe, New Mexico, visit Meow Wolf. There is talk of replicating Meow Wolf in Las Vegas, Nevada. I’m sure the Vegas one will be overdone and flashy but I like the little mom and pop alternate realities better.
Zed’s Not Dead: Part 16
The Rustoration of Zed, my 1975 Kawasaki Z1 900, has once again hove into view. After several months of pouring concrete in Bay 2 of the big metal shed then building a retaining wall to level the back yard and pouring a side patio to slow erosion, the time has come to push Zed a little further down the road.
I left Zed somewhat assembled as far as the running gear was concerned. Today we will tackle adjusting the eight valves. You really can’t get an easier engine to work on than the Z1. After measuring the valve gaps and determining which valves need attention (four in my case), the first things you’ll need are a few old 29mm shims to stand in for the shims you are about to remove. These placeholders keep the cam from contacting the valves in an unfriendly way when the engine is rotated to access other valves. I don’t have any extra 29mm shims so I cut some out of a 1/16 bit of aluminum flat stock. These temporary shims can be a much looser fit (thus easier to remove), as you will not be running the engine with them installed.
I bought the correct Kawasaki brand valve shim remover tool online for around $40. There are other style shim tools but this one works well enough and leaves both hands free for the fiddly task of extracting the shim from its holder. I had to grind a little clearance into the tool where it straddles the cast-in tool boss on the Kawasaki’s cylinder head. The tool boss castings were slightly different thicknesses so after grinding it to fit the largest one I had to shim it with a plastic tie-wrap on the smaller castings.
Now that you have measured all the valve clearances and removed the shims on the out-of-spec valves it’s time to play shuffle-shim. The shims are marked in millimeters and if the last guy who set the valves was not an asshole the markings will be readable on the side facing away from the cam. It’s a good idea to measure the shims with a micrometer but I don’t have a metric micrometer and it’s too much math to convert from inches. With my clearances I was able to relocate two shims leaving only two valves to go.
Holiday Cycles is our local Old School cycle shop. There are no dealerships; Holiday is an independent, pan-brand shop. The place looks like its been in business since 1939. I love it. You can see by the credit card sign that these guys don’t put up with bullshit. Holiday Cycles had one of the shims I needed and swapped me for mine. I’m not sure how they are going to make any money like that but I’m cheap so it really tugged at my heartstrings.
Next I went to Dave at the local Kawasaki dealership. Dave had shims but the Z1 is so old the shims were in his storage shed. I had to wait a day to pick up the next shim. I installed the new shims but the 3.00 mm one was too tight. That valve had a 2.95 shim and the gap was at .013 so I couldn’t understand why the 3.00 didn’t bring it down to .008. This is where measuring the shims comes into play. Dave told me that shims can vary a couple thousandths. Add in a bit of wear and it’s a crapshoot as to which replacement shim to get.
Trial and error has been my normal MO since forever so I ordered another 2.95 from Dave except he doesn’t want to go back to the storage unit right now so I am waiting on a call back. Once I get the valves set I’ll run the engine again to flush the carbs with fresh gasoline. Then I can get to work on the gauges and headlight area and try out the new electrical system. I really want to ride this bike before I die.
Read Parts 1 through 15 of the Zed’s Not Dead series!