My buddy Paul sent this to me. In our unending quest to bring our readers the latest in motorcycle technology, we are sharing it here. Check out this video of a Russian dude and his steam-powered motorcycle….a motorcycle that kind of looks like something Joe Gresh would cook up in the La Luz skunkworks.
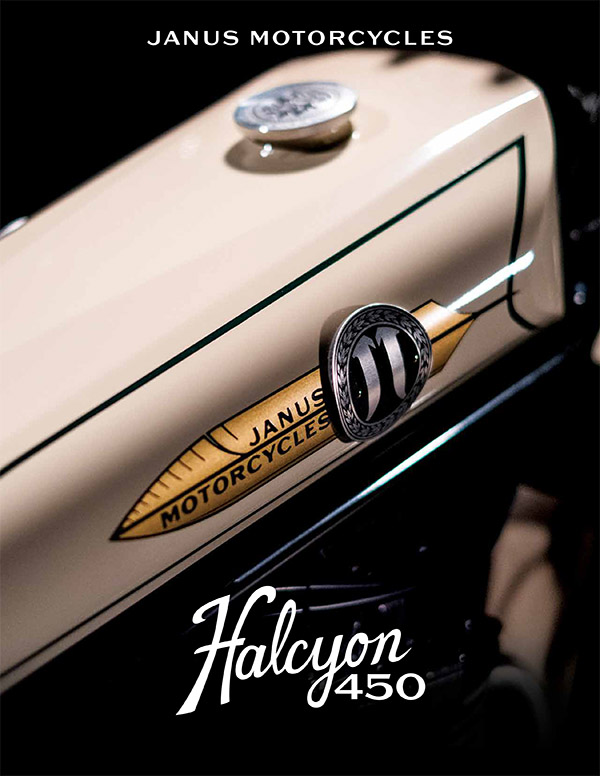
Janus, the Roman God of Transitions, symbolizes looking to the past and the future. It is a fitting name for Janus Motorcycles, a company building ultra-high quality modern motorcycles with classic styling from the 1920s and 1930s.
The Roman god Janus on display in the Vatican.
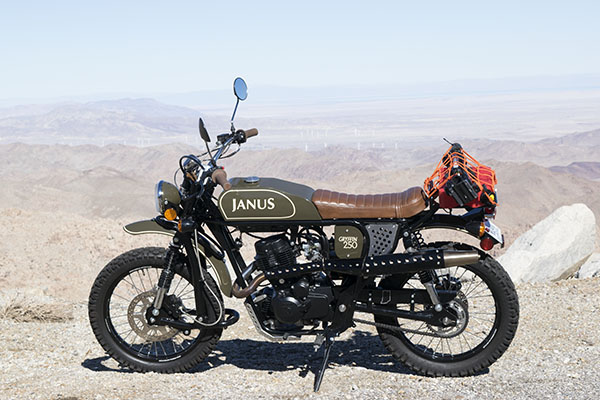
You may remember a couple of years ago I rode northern Baja with the Janus guys. It was a great ride (any ride in Baja is) and the Janus is a great motorcycle…a gem of a bike handcrafted in Goshen, Indiana. I had a wonderful time and I loved riding the Janus Gryffin.
The Janus Gryffin on Baja’s Rumarosa Grade.
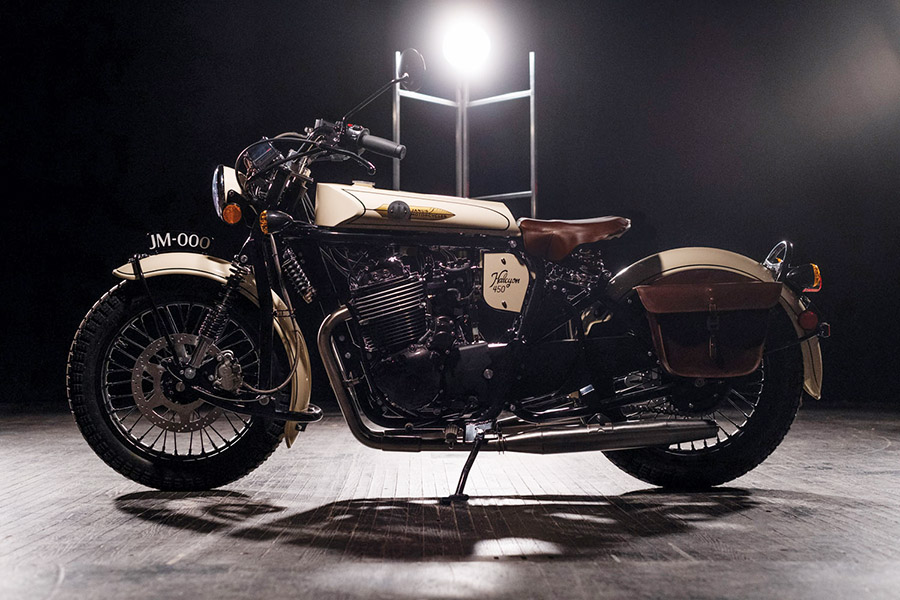
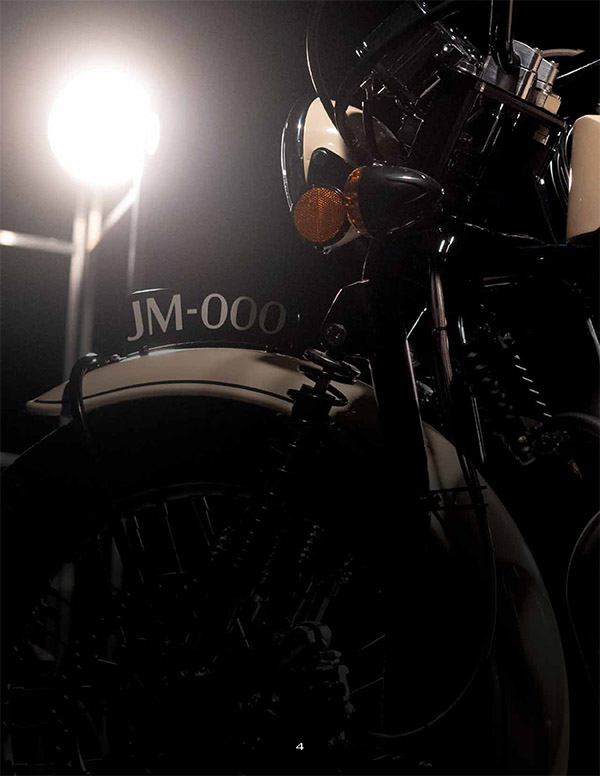
Well, those boys in Goshen don’t sit still. The bike I rode was powered by a 250cc CG Honda clone engine and it was a hoot, but the Goshen guys had bigger plans. Janus announced today that they are introducing a new Halcyon with a 450cc engine. I’ll let the press release below, the Janus videos, and the brochure do the talking. Watch both videos; you’ll enjoy them.
Janus Motorcycles Releases New Halcyon 450 Model
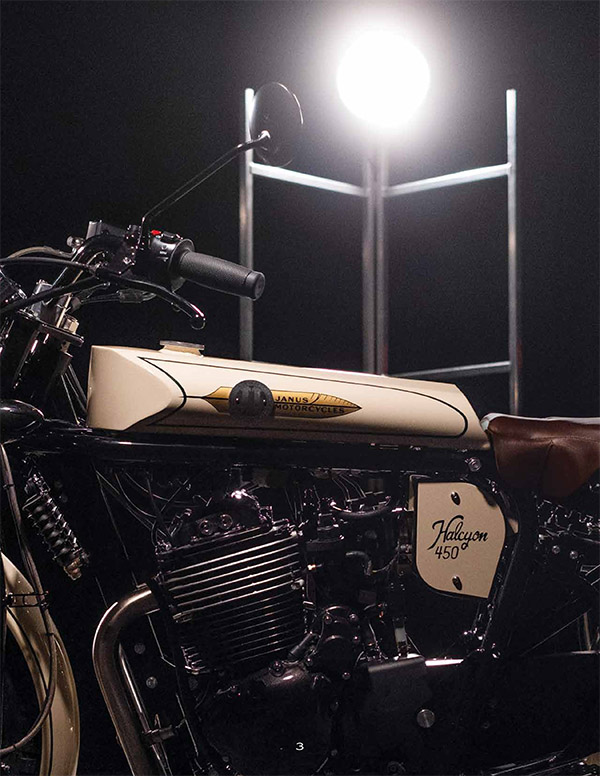
Goshen, Indiana (March 8, 2021) — After 18 months of confidential development, Janus Motorcycles of Goshen, Indiana is unveiling their newest model, the Halcyon 450. Building off the best of what they offered in their 250 line, the Halcyon 450 features a higher top speed, a rear suspension, performance brakes, and several new hand-crafted details.
“Our 250 series owners love the light weight, hand-built features, and classic lines of the 250 series. With the Halcyon 450, we’ve worked to refine those features while improving the top speed and ride comfort. We’re extremely proud of the result,” says General Manager Grant Longenbaugh.
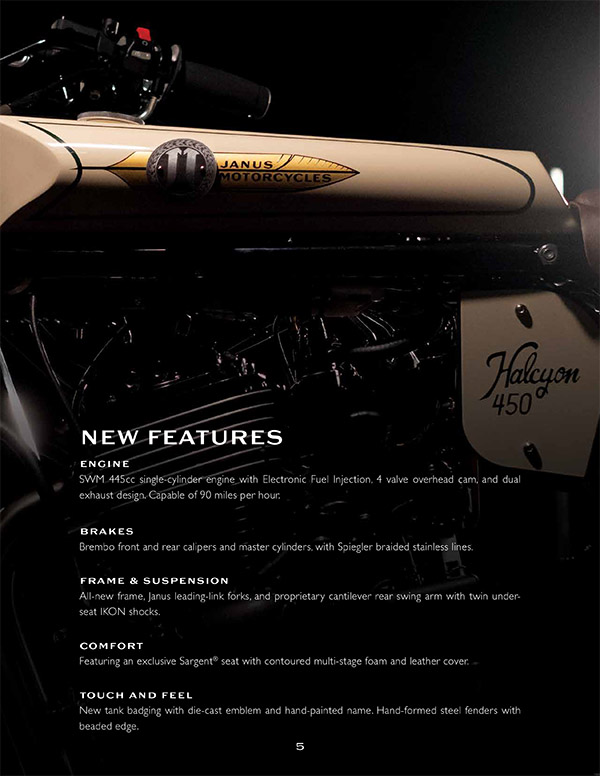
The Halcyon 450 features an SWM 445cc single-cylinder four valve engine with EFI, Brembo brakes, Sargent seat, and a new proprietary cantilever rear suspension.
Production is slated to begin in early June, with several units completed weekly.
Co-founder Richard Worsham says, “Like the 250, the 450 is a manifestation of what we believe is the spirit of motorcycling: the connection between the rider, machine, and landscape.” “We’re very excited to share that spirit with more and more riders,” he continued.
Janus Motorcycles uses a network of craftsmen in the Northern Indiana area (many of whom are Amish) to manufacture nearly all of their body work including the frame, fuel tanks, leather storage, and stainless steel exhausts. They are made to order and can be personalized with various paint, pinstripe, and finish options.
Janus was recently featured on Jay Leno’s Garage and the New York Times.
The 2021 Halcyon 450 starts at $13,500, and customers may reserve their bike with a deposit.
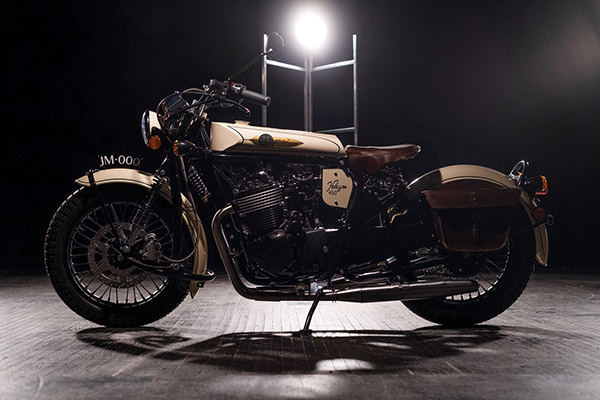
There you have it, folks. I like this new Halcyon, and the spec that stands out for me is the weight: Just 360 lbs! Watch the ExNotes blog; we’ll have more info on Janus and the new 450 in future posts.
If you would like to read about our Janus Baja ride on the 250cc Gryffin and Halcyon motorcycles, you can do so here!
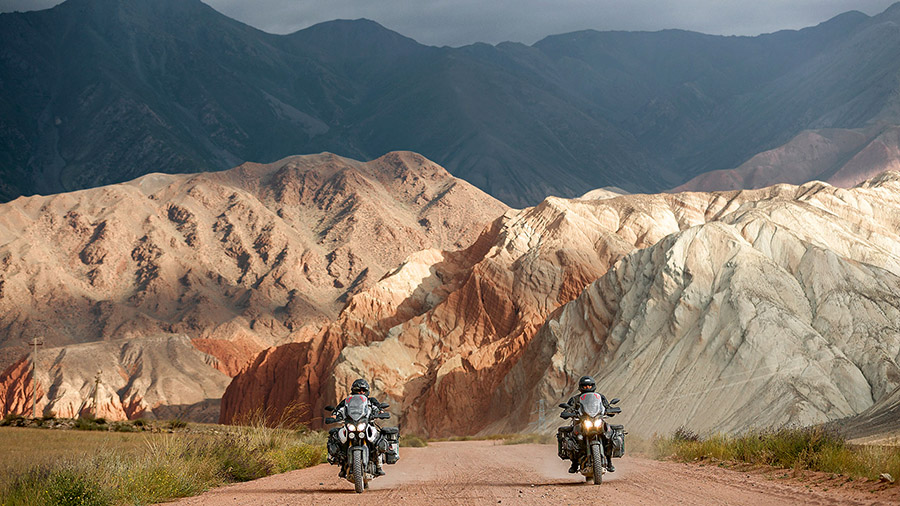
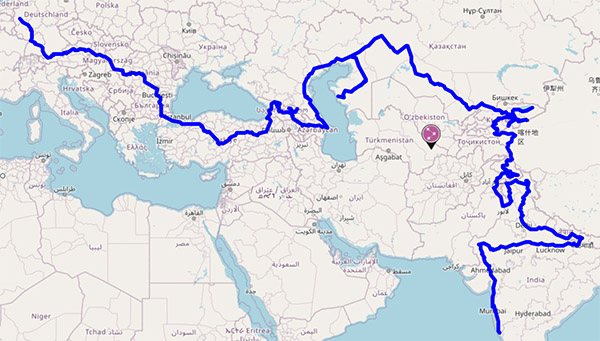
Himalaya Calling is the best motorcycle adventure travel series I’ve ever seen. Yes, that’s a strong statement, but this is a grand four-part series that I thoroughly enjoyed watching. It’s about two German guys (Erik Peters and Alain Beger) who rode Yamaha Teneres from Germany to India. No support mechanics, no movie star nonsense, mud and snow on the highest mountain passes in the world, and absolutely super photography and riding.
You can watch Himalaya Calling on Amazon Prime TV, or buy the show through the Amazon website. Trust me on this: You’ll love it.
Never miss an ExNotes blog. Subscribe here for free:
The date is 18 April 2021 and the event is the Salton Sea 400, an endurance motor scooter event that circumnavigates southern California’s Salton Sea. The Motor Scooter International Land Speed Federation is the group that put the event together (they do this sort of thing regularly), and I can tell you from personal experience that Alan Spears and the MSILSF crew are a good bunch of people. I rode a 150cc California Scooter (along with good buddies TK and Arlene) in a similar event around Death Valley a few years ago and it was a hoot.
The contact info is in the poster above and here (and you should register to run in the event). If you have a scooter and you’d like to run it around the Salton Sea, you might consider participating.
Here at ExhaustNotes we are not earthy crunchy, granola-eating oil-haters. Far from it as most of the fun things we like to do involve burning refined oil or playing with toxic products derived from oil. Hell, our entire 45-year working career depended on an oil-based economy. We’re not about to turn our backs on our old friend Petroleum. At the same time we enjoy building off-grid power systems isolated from The Man and his ever-increasing system development surcharges, power outages, readiness to serve fees and base facility charges.
It’s a shame that off-grid energy has been politicized along predictable fault lines because it really is nondenominational and serves everyone equally regardless of which clan they voted for. ExhaustNotes Off-Grid is not going to try to convince you to wear a tie-dyed shirt or stock up on ammunition for the coming civil war, but if you can shake off those tribal chains we think you’ll find off-grid energy appeals to the anti-government Far Right insurrectionist, the communist Far Left insurrectionist and that vast sea of reasonable anarchists who find themselves trapped between two crazy extremes.
At ExhaustNotes we are not electrical engineers, but with modern, home-based off grid equipment you don’t have to be. It’s so easy a child of 35 could do it. We go off grid not to make a point but because it’s more reliable than grid power, it’s nearly on par with grid cost-wise, the watts per dollar only get better the longer you operate your system, and it’s fun. One beauty of going off grid is its scalability: You can go full hog and cut the cord forever or take baby steps to energy independence.
This blog series will cover standard, easily-available systems found in houses or sheds. Grid-tied systems are not part of this series. There’s nothing wrong with grid-tie, but to my mind grid-tie systems defeat the purpose of going off grid in the first place: The Man still has his sticky fingers in your business. I’m going to ignore grid-tie because I don’t build those systems and I don’t want to get bogged down in things I know nothing about.
I’ll kick off with inverters. I have a bunch of the damn things. Inverters are kind of like backwards battery chargers. Instead of taking relatively high voltage alternating current (AC, the standard house power from the grid) and converting it into relatively low-voltage direct current (DC) to charge a battery, inverters change DC into AC. I say relatively high or low because the voltages we will be working with are 240-volt down to 12-volt. In the big picture, 240-volt is not that high. Many different voltages can be used in off-grid systems and sometimes the DC voltage is as high as the AC voltage.
AC voltage is fairly easy to step up or down using simple transformers. It’s the reason Tesla’s AC system beat out Edison’s DC system in the early years of electrification. Changing DC into AC and stepping up the voltage takes more electronic components. It requires an inverter.
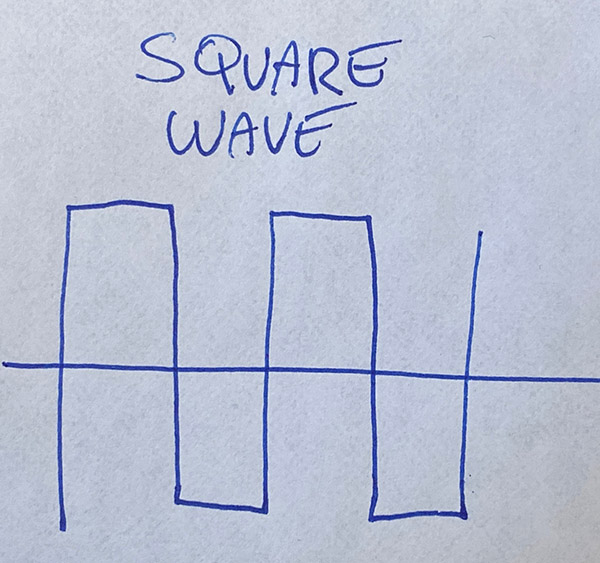
The simplest and cheapest inverters are called square wave inverters. These are getting harder to find due to inherent issues with their power output. Like all non-rotating inverters they flip the DC polarity back and forth 60 times a second (in the USA) to create alternating current then step that up to a higher voltage resulting in a square wave pattern. The null period between the two voltage peaks is blazingly fast, essentially zero. These inverters produce a waveform that is nothing like what you are getting from the grid. Square wave inverters will operate a lot of things but certain electronic equipment may not like it. Brush-type power drills, incandescent lights, resistance type heaters should work with square wave but I’m not promising anything.
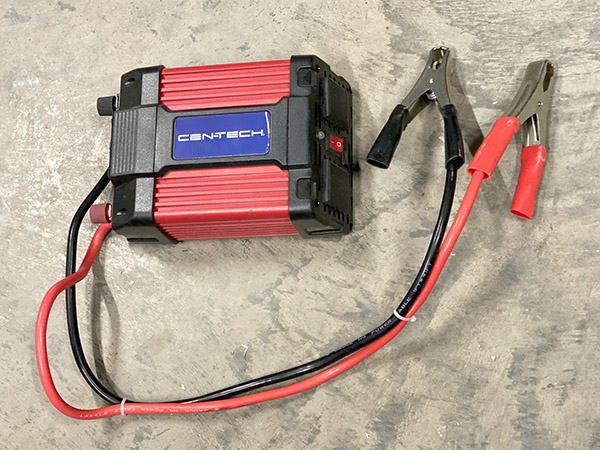
This is a cheap, Harbor freight 750-watt square wave inverter. Good for Christmas lights on your parade float.
If you test a standard, 120-volt square wave with a voltmeter it will probably show around 90 volts. This is due to that waveform switching back and forth instantly. Power under the curve is the closest way I can describe it: a normal grid waveform spends a lot of time rising and falling 60 times a second. The voltage rises, drops to zero then rises in reverse. For grid power 120 volts is an average. What this means is that over 1/60th of a second your electrical component is getting 120 volts some of the time, more than 120 volts some of the time, and no power at all some of the time. Electrical devices are built to this standard. A full, 120-volt square wave would most likely overheat whatever you plugged into it.
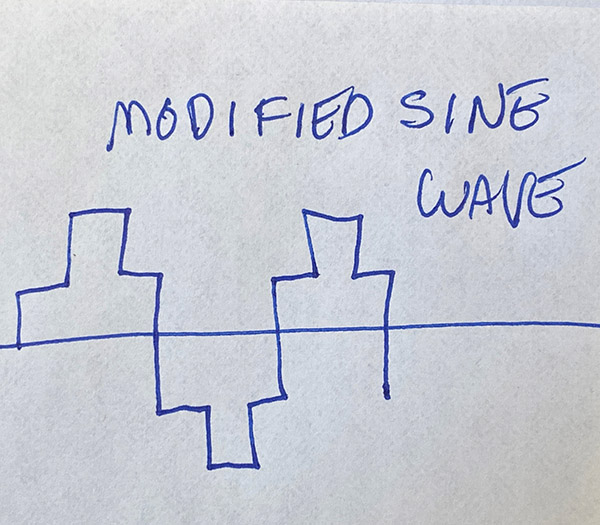
Modified sine wave inverters are an attempt to more closely mimic grid power. While a modified sine wave inverter is an improvement over square wave they are still sort of crude. Modified sine wave inverters are popular and will run most things but there’s still the possibility of frying a device if it happens to be really sensitive. Modified sine wave inverters cost a bit more than square wave inverters.
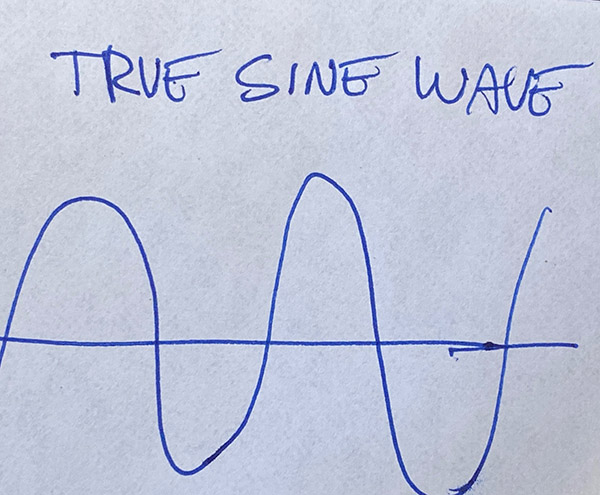
True sine wave inverters, also called pure sine wave inverters, are the most expensive and the closest thing you can get to grid power, maybe even better. These inverters produce a nice, clean waveform that looks the same as grid power to your electrical equipment. True sine wave inverters will run anything that you can run from grid power assuming the inverter has the capacity. True sine wave inverters used to be very expensive but the price has come down quite a bit. They still cost a lot more than a square wave.
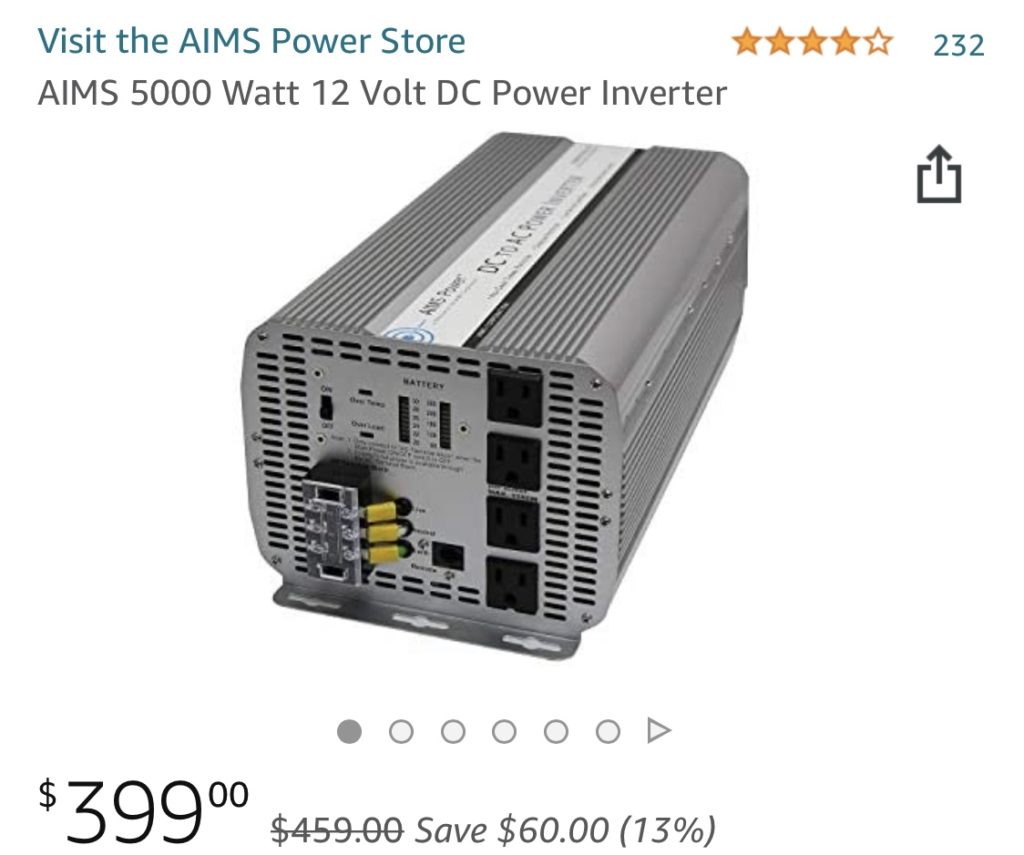
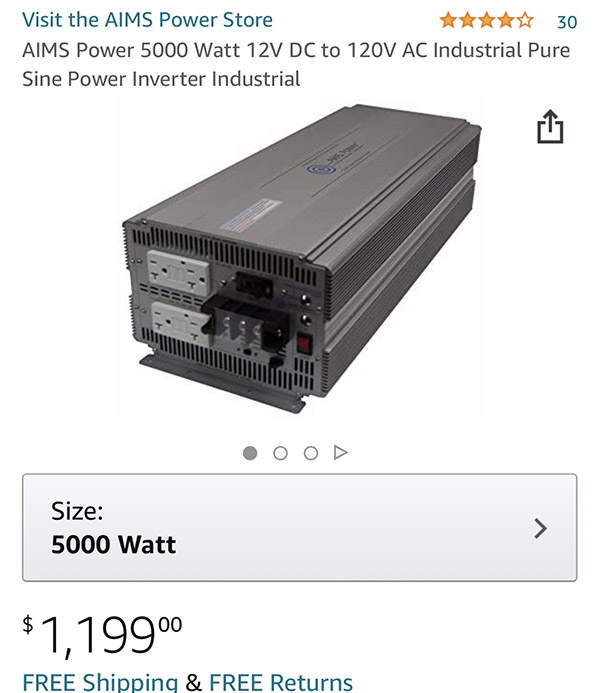
While a 12-volt, 5,000-watt true sine wave like this one costs 1200 dollars, three times as much.
If you can afford it, always get a true sine wave inverter. If you’re really skint get a modified sine wave inverter, just assume the risk when plugging anything like computers or microwave ovens into the thing. If you just want to run incandescent lights, maybe fluorescent lights and simple, no-circuit-board electrical things get a square wave but be warned: I nearly fried my air compressor on a square wave and burned up a cell phone charger on one. I don’t buy square wave inverters anymore.
Inverters are sized in output watts and input volts. They are labeled sort of tricky some times. You’ll find a unit may be 12,000 watts surge capacity but only 5000 watts continuous. To make life simple ignore surge capacity and use the continuous rating. Now that you’ve decided to get a true sine wave inverter (if you’re smart), determine what your average operating load will be in watts and plan for an inverter with twice as much output. For a small house or shed I’d go with 5000 watts.
Since inverters need a DC power source, like batteries, you’ll also need to choose what input voltage your inverter will draw from your storage batteries. 12-volt DC input is most common for smaller inverters but as inverter output rises the input voltage usually goes up also. 24-volt and 48-volt DC input is normal on larger inverters.
Higher input voltage from the batteries helps keep wire sizes and voltage drop within reason. A 12-volt input, 6000-watt inverter running at full chat will be sucking 500+ amps out of your 12-volt battery bank. A 500-amp load requires huge battery cables to carry the current and puts a lot of stress on electrical connections. Terminal posts tend to get hot with 500 amps flowing through them. At max load that same 6000-watt inverter with 48-volt input will be sipping a mere 125 amps from your 48-volt battery bank. The reduced current at 48-volts allows for smaller and cheaper cables. The cost savings is significant. Big copper battery cables are expensive. You can use the money you saved on cables for more batteries.
With smaller inverters output power is usually single-phase 120 volt AC. They often have standard duplex outlets built right into the machine. These are a good way to gain a little independence from the grid without having to mess with high voltage wiring: You simply plug things directly into the inverter and go to town. You’ll only be able to run 120-volt equipment but most house stuff is 120-volt.
Another option is 120-volt/240-volt split phase output. These inverters usually require hard wiring to the output and you’ll need a breaker panel. No easy plug-ins. This setup is nice if you have 240-volt things like an air compressor or small South Bend Lathe you want to operate from the inverter in addition to regular 120-volt equipment. A split-phase inverter is kind of like two single-phase inverters joined at the hip, the hip being the neutral leg in this case. One half the total output is available on each of two, 120-volt circuits and all the output is available at 240-volts. On a 6000-watt split-phase you’ll be able to draw 3000-watts of 120-volt power from one side, 3000-watts of 120-volt power from the other 120-volt side or 6000-watts at 240-volts. Note that you cannot draw 3000 + 3000 + 6000 watts all at the same time. You’ve only got 6000 watts total no mater how many ways you divide it up.
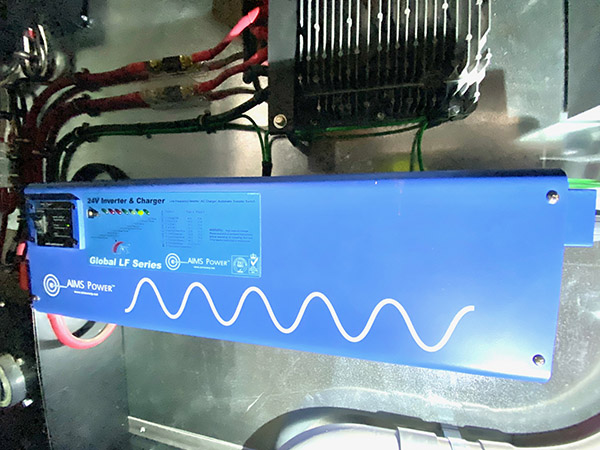
In my off-grid shed I run a 24-volt Aims 6000-watt, true sine wave, 120/240 split-phase output inverter that feeds a standard, household breaker panel. From the panel I have circuits for lights, outlets, and 240-volt outlets. I went with 24-volt input because I run LED, DC lights and a DC water pump. It’s harder to find these items in 48-volt. My system has been operating for two years without any problems. The inverter is kind of a watt-hog as it draws 3-amps “on” with no load attached. The Aims inverter has a pulsing, sleep circuit that reduces the no-load draw to 1 amp but it only senses one side of the 120-volt output. Turn on a load that is connected to the non-sensing side and nothing happens; the unit won’t wake up and make power. I don’t use sleep mode but it’s a good energy saving feature if you can make it work.
Another farkle I don’t use on the AIMS inverter is the pass-through relay. The pass through relay automatically stops the inverter when generator power is feeding your system. The generator power passes through the inverter relay and powers your shed/house/whatever. In addition the inverter can be set up to switch to battery charge mode when the generator is powering your load. I do the switching manually because I like to keep the inverter’s job as simple as possible.
The AIMS battery charge mode is great. If you kill the batteries you can input 240 volts from a generator and the inverter will become a 24-volt, 85-amp battery charger. This charger function is useful for cloudy or snowy days when your solar panels aren’t working. Of course I have my system set up for manual operation of the inverter charging. Like most inverters the AIMS shuts off at a selected low input voltage so as to not kill the battery bank completely or harm the inverter from operating on low voltage.
To give you an idea of what 6000 watts will do, I can run a small, wire feed arc welder or a ¾-horse air compressor. I use traditional power tools, a concrete mixer and a spot welder. I have yet to find something it won’t run, I just can’t run everything at once.
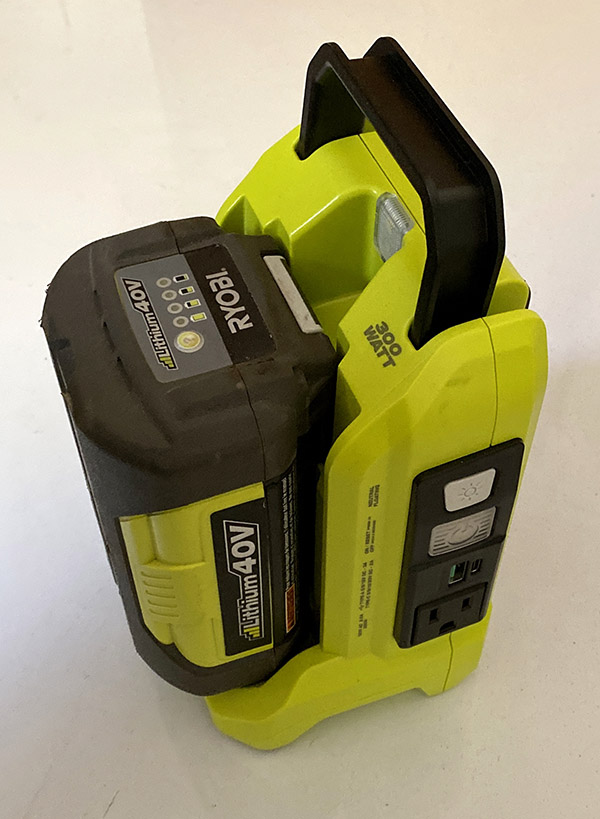
A super easy way to take the first steps on your path to grid independence is this little 300-watt, true sine wave, 40-volt input Ryobi. It doesn’t have a lot of power but if you already own 40-volt Ryobi tools like I do it makes a nice emergency back up power supply. You can run a lamp or an Internet router, maybe a small monitor or television. Also you can charge phones with a couple USB ports. Ryobi makes a 150-watt unit but 150 watts is too small to be much use.
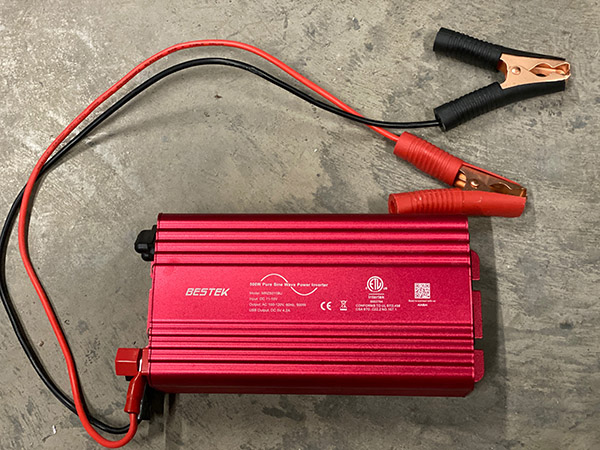
If you don’t have 40-volt Ryobi batteries this Bestek true sine wave, 500-watt, 12-volt input inverter will turn any 12-volt car battery into a 120-volt power source. If your power goes out during a big storm clip the leads onto your car battery and you’ll have back up power not reliant on The Man. Just remember to run the car every hour or so to recharge the battery or just leave the car running. At 500 watts you can do some damage with this thing (maybe even run a small refrigerator).
I mentioned earlier about rotating inverters. Back before the advent of fancy, complex inverters a brush-type DC motor turning an AC generator provided a simple, reliable method of inverting DC into AC. The waveform it produced was true sine. It wasn’t that long ago either as I worked on this type of inverter back in the 1970s. I’m guessing it wasn’t as efficient as the new ones and the frequency may drift a bit. The motor-inverter used a lot of copper compared to modern stuff but it worked ok. If you find an old rotating inverter in a junk pile grab it; it would be fun to mess with.
That’s enough inverter chat, it’s too much geeking for me. My head is spinning from typing about it. Hopefully this will help you decide which inverter will suit your needs. If you’re interested in this sort of stuff we’ll cover batteries, solar panels, generators, wind generators, loads, and how to tie the mess together in the future, so be sure to subscribe to our ExhaustNotes.us email alerts and you won’t miss a thing. Unless of course you want to miss a thing.
This is a blog that is sure to be controversial and elicit a few comments. It attempts to answer a very specific question: Which motorcycles are best for Baja?
As a qualifier, let me mention a few things up front:
Most of my Baja riding is on asphalt, and that necessarily colors my opinions. Yeah, there’s a lot of great dirt riding in Baja, but I am a streetster at heart. Your mileage may vary.
You don’t need to spend $30K on a Baja blaster. What good is driveway jewelry if you are afraid to get it dirty and if you’re constantly worried about where you parked? In Baja, a big, heavy motorcycle (ADV-styled or otherwise) puts you at a disadvantage. I am not a fan of huge displacement, tall, expensive motorcycles. For real world riding (especially in Baja), monster motorcycles are more of a liability than an asset. Even that new one that’s 20 years late to the party.
What I think you need in Baja is a comfortable bike with range. There are places where you can go more than a hundred miles between fuel stops, and you need a bike that can go the distance. That means good fuel economy and a good-sized fuel tank.
Luggage capacity is a good thing, but if your bike doesn’t have bags, you can make do with soft luggage. In fact, I’d argue that soft luggage is better, because it’s usually easier to detach and bring in with you at night.
With that said, here goes:
CSC’s RX3
Say what you want about Chinese bikes, and say what you want about smallbore bikes, I’m convinced my 250cc CSC RX3 was the best bike ever for Baja.
The RX3 tops out at about 80 mph and that’s more than enough for Baja’s Transpeninsular Highway (the road that runs from the US border all the way down to Cabo San Lucas). The bike is comfortable and it gets 70 mpg. The fuel tank holds over 4 gallons. I could carry everything I needed (including a laptop, a big Nikon and a couple of lenses, and clothes) in the bike’s standard panniers and topcase. I also carried tools and spare parts, but I never needed them. It was superbly well suited for Baja exploration, as I and more than a few others know. One more thought…before you pummel me with the inevitable “Ah need at least a thousand cc” comments, take a look at our earlier blog, Why a 250?
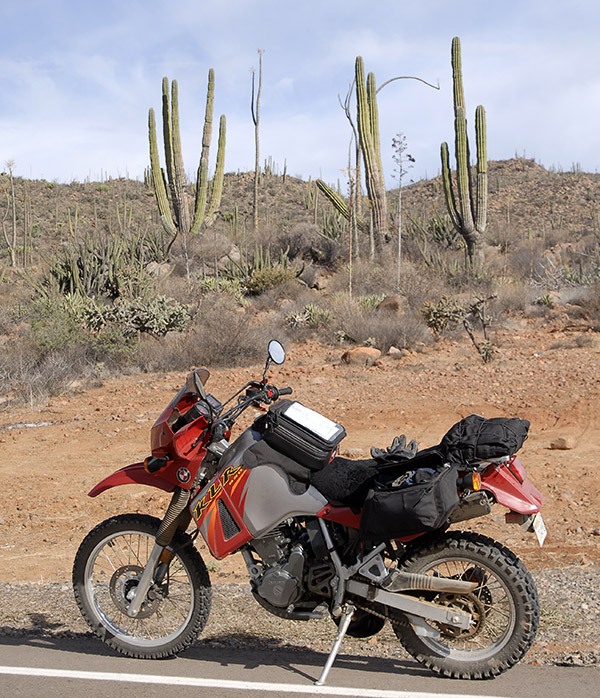
Kawasaki’s KLR 650
I owned a 2006 KLR 650 Kawasaki for about 10 years. I bought it new and I loved the thing. I think it is one of the best bikes I’ve ever ridden in Baja. Yeah, it was a little tall, but once in the saddle I had no problem touching the ground.
The Kawi didn’t come with luggage, but I bought the cheap Kawasaki soft luggage panniers and a Nelson Rigg tankbag and I was good to go (I didn’t need the obligatory KLR milk crate). Although the KLR was heavy, it did surprisingly well off road (especially running at higher speeds over the rough stuff), and I did more offroad riding with the KLR than I have with any of the other motorcycles I brought into Baja. It averaged 56 mpg, and with its 6-gallon gas tank, I could make the trek between El Rosario and that first Pemex 200 miles further south without stopping for fuel.
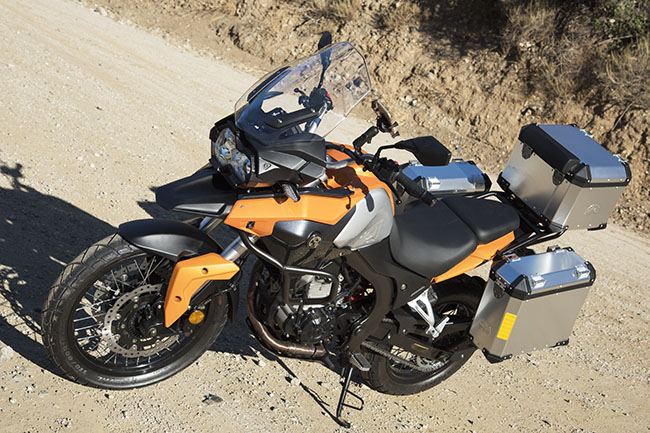
I’ve never taken an RX4 into Baja, but I’ve ridden both (the RX4 and Baja) enough to know that it would do well down there. Think of the RX4 as an RX3 with more top end, more acceleration, and a bit more weight. It’s got the luggage and the ground clearance for extended travels with some offroad thrown in, and it also gets about the same fuel economy as the RX3. Fit and finish on the RX4 is superior (it’s almost too nice to take offroad). The RX4 is a lot of motorcycle for the money. The pandemic hit our shores not too long after the RX4 did, or I would have seen more of the RX4 south of the border.
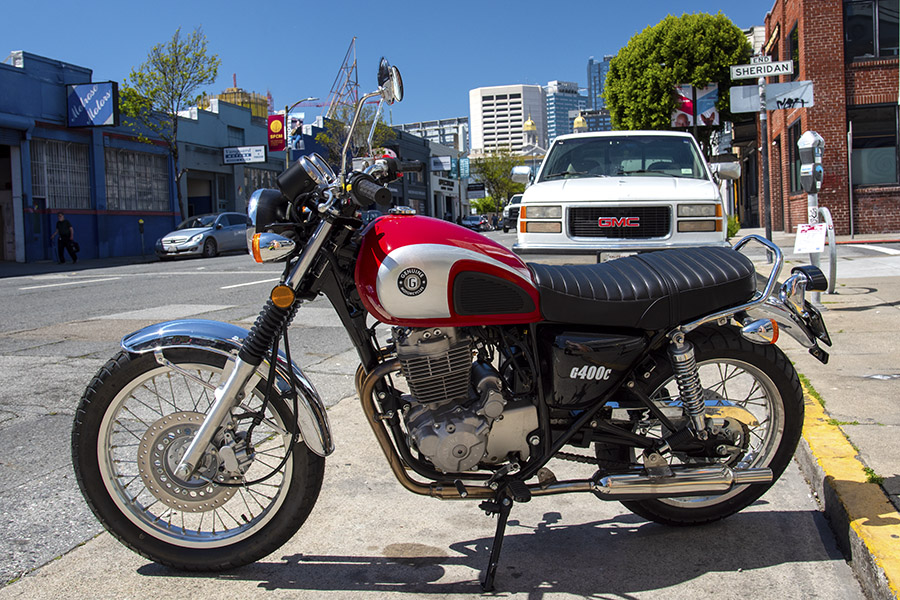
Genuine’s G400c
I rode Genuine’s new G400c in San Francisco, courtesy of good buddy Barry Gwin’s San Francisco Scooter Center, and I liked it a lot. It’s compact, it has adequate power, it has an instrument layout I like, and it’s a fairly simple motorcycle.
I think with soft luggage, the Genuine G400c would make an ideal Baja blaster, and the price is right: It rings in right around $5K. With its Honda-clone 400cc motor (one also used in the Chinese Shineray line and others), it has enough power to get up to around 90 mph, and that’s plenty for Baja. I rode a different motorcycle with this powerplant in China and I was impressed. I think this would be an ideal bike for exploring Baja.
Royal Enfield’s 650 Interceptor
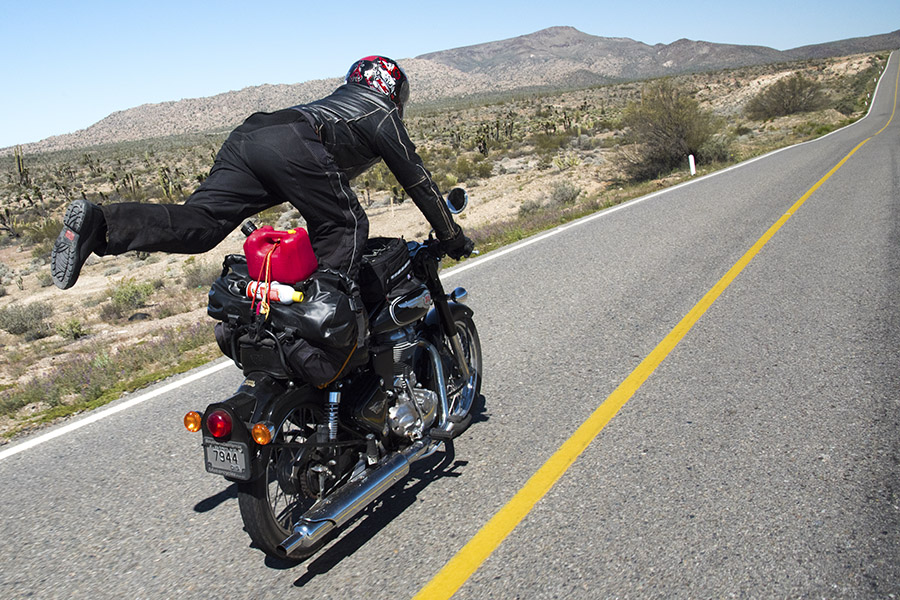
Yeah, I know, the new Enfield Interceptor is a street bike with no luggage. But with a Nelson Rigg tailpak and Wolf soft luggage, the Interceptor was surprisingly in its element in Baja. Gresh will back me up on this.
We had a whale of a time exploring Baja on a loaner 650 Enfield (thanks to Enfield North America and good buddy Bree), and I liked the bike so much I bought one as soon as I could find a dealer that didn’t bend me over a barrel on freight and setup. There’s one parked in my garage now. The bike is happy loping along at 65-70 mph, it’s comfortable (although I’ll be the first to admit it needs a sheepskin cover on that 2×4 of a seat), and it gets 70 miles per gallon. I wouldn’t take it off road (except maybe for that 10-mile stretch to go see the cave paintings in the Sierra San Francisco mountains), but like I said at the beginning of this conversation starter, I’m mostly a street rider.
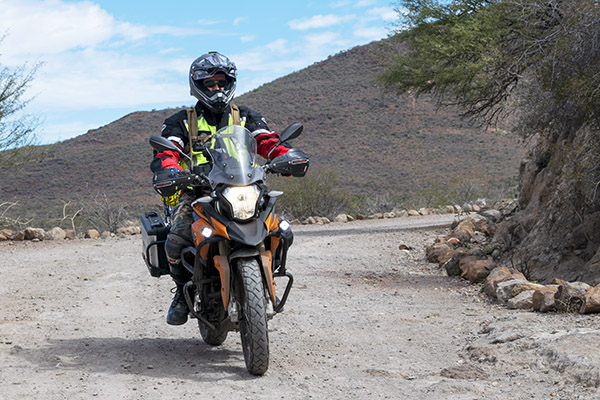
Royal Enfield’s 400cc Himalayan
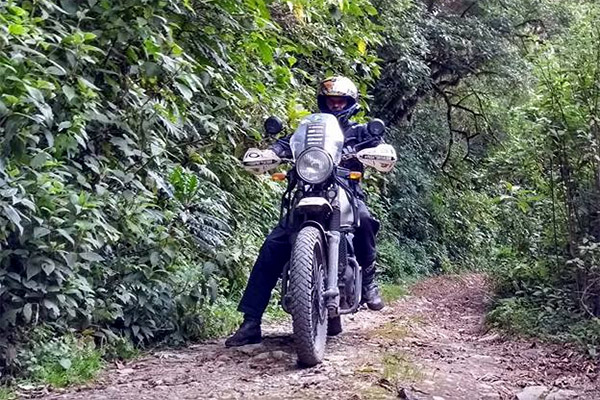
I’ve seen these but not ridden one yet. Good buddy Juan Carlos, a great guy with whom I rode in Colombia, has gone all over South America on Enfield’s new Himalayan and he loves it (that’s his photo below). Juan knows more about motorcycles than I ever will, and if Juan says it’s good, it’s good.
I like the look of the Himalayan and I like its single-cylinder simplicity (come to think of it, with the exception of the Enfield Intercepter, every bike on this list is a single). 400cc, I think, is about the right size for Baja. The price is right, too. Royal Enfield is making fine motorcycles that won’t break the bank. I think the Enfield Himalayan would be a solid choice for poking around the Baja peninsula, one that probably has the best off-road capabilities of any bike in this list.
I’m sure I’m ruffling a few feathers with this piece, and I’m doing that on purpose. I’ve been taking pot-stirring lessons from Gresh (that’s him in the photo at the top of this blog). We’d like to hear your comments if you disagree with any of the above. Do us a favor and leave them here on the ExNotes blog (don’t waste your time posting on Facebook as that stuff will scroll on by and be gone; ExNotes is forever).
All the above notwithstanding, I’ll add one more point: The best Baja motorcycle for each of us is the one we have. You can ride Baja on just about anything. I’ve been to Cabo San Lucas and back on everything from a 150cc California Scooter to a Harley Heritage Softail cruiser. They’re all good. Don’t put off a trip because you don’t think you have the perfect motorcycle for a Baja adventure. Baja is the best riding I’ve ever done.
Please visit our advertisers and click on the ads!
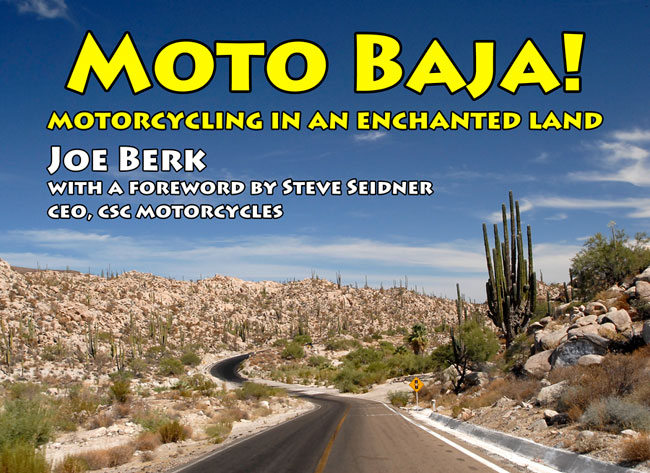
I’ve done a lot of riding on a lot of different motorcycles in Baja. You can read all about that in Moto Baja!
Heading into Baja? Make sure you insure with BajaBound, our choice for the best motorcycle insurance in Mexico!
Never miss an ExNotes blog. We cover an eclectic mix of topics, including motorcycles, travel, bicycles, construction, guns, reloading, all kinds of product reviews, and more. Subscribe here for free:
Take a look at this: A Colt Trooper Mk III chambered in .22 Long Rifle, an interesting and extremely accurate revolver. I picked it up maybe 30 years ago in a local gun store. The revolver was in their display case on the lower shelf and I almost didn’t see it. I wasn’t in the market, but when I saw the Trooper it grabbed my attention. It was marked $225, I offered $200, the guy on the other side of the counter said okay, and the Trooper was mine.
Deep bluing, crisp lockwork, and color case hardening on the hammer. It makes for a good-looking revolver. This one wears custom handgrips.
I didn’t realize it at the time, but the little Trooper is a phenomenally accurate handgun, maybe one of the most accurate I’ve ever shot. It groups as well as a Model 41 Smith and Wesson, a target handgun with maybe twice the sight radius.
The Trooper is based on a Colt that was originally a .38 Special, then it was chambered for the .357 Magnum, then it was redesigned as the Trooper Mk III, and then it was offered in .22. That was a thing back in the ’60s and ’70s, you know, offering full-sized revolvers but in .22, and it was a good thing. These are awesome target guns, relatively inexpensive to shoot, and just plain fun. And heavy. The Trooper kept the same external envelope (i.e., the exterior dimensions) as the far-more-powerful .357 Magnum Trooper, and that means there’s a lot more steel in the barrel and the cylinder.
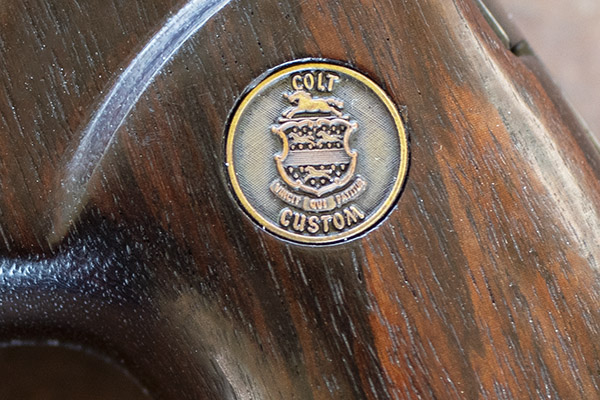
I bought my Trooper used, but it is in as new condition. It came with the original lighter colored (and checkered) walnut grips, but I saw the grips you see the revolver wearing in these photos about 15 years ago and I had to have them. The smooth grips look good and the medallions imply the gun went throught the Colt Custom Shop (it did not), but truth be told, the original grips offer a better hold and they fit the revolver better.
The grips say Colt Custom, but my Trooper was a regular production gun. The build standards were way higher back in the day.
One of these days I’ll get around to hogging out the interior of the custom grips and fitting them to the Trooper with AcraGlas, but that’s a project for the future. Or, I may put the original grips back on the gun (they’re around here somewhere).
The Troopers were available with a 4-inch barrel (like mine), a 6-inch barrel, or an 8-inch barrel, and they could be had with a high polish blue (like mine), a high-polish nickel, or a brushed nickel finish. If I knew then what I know now I would have purchased a matching blue steel Trooper Mk III in .357 Magnum. They were around $200 back in the day, and like my .22, the .357 would have been a sound investment. These guns go for five to eight times that amount today. You could argue that they make for a good investment, but that implies flipping the gun to realize the profit, and that’s not going to happen. I’ll keep this one forever.
You know, it’s hard to find new guns built to these same standards as regular service guns were 30 or more years ago. When I look at the deep bluing on my Trooper, that’s pretty obvious. The new Colt Python is one that rivals the Trooper for build quality, but it’s the exception.
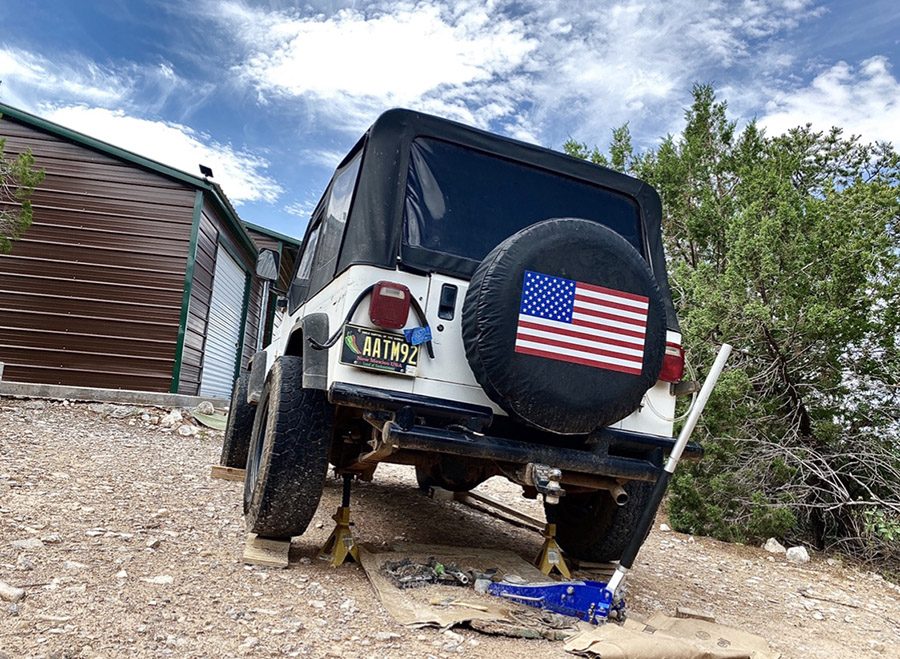
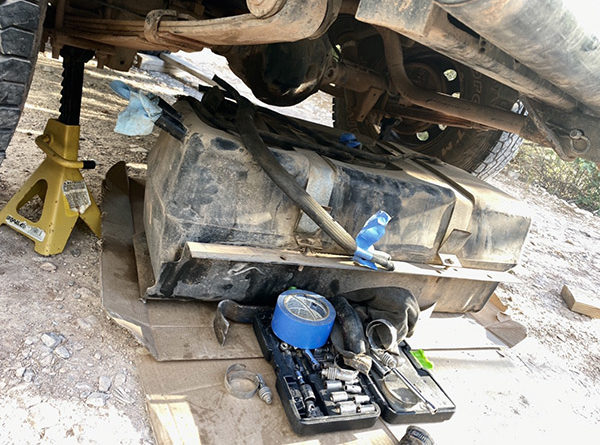
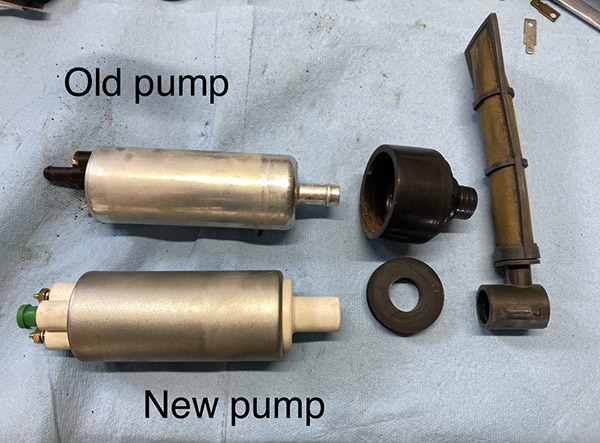
Brumby, my 1992 Jeep YJ, was a stinky ride whenever I filled the gas tank. It was so bad I tried to fill it less than 3/4 full to keep odors down. That worked for a while but the problem became worse as time stayed on its ever-forward push towards entropy. The thing got so bad raw fuel (is there any other kind?) would slosh out on rough roads.
In addition, the in-tank electric fuel pump kept getting noisier and noisier. If I let the tank drop below ½ it made a real racket that you could here over the flapping canvas roof and the squeaking suspension. These two issues combined left me with a usable tank capacity of between 1/2 and 3/4, or about 37 miles in layman’s terms. I knew I had to drop the tank and have a look at the situation.
The Jeep YJ tank is behind the rear axle and attached to a steel skid plate. After unhooking the fuel fill hoses, no easy feat, you have to use a floor jack to let the tank down. I siphoned out as much fuel as I could to make the tank lighter. Once you’ve got the tank lowered and a bit of clearance you can disconnect the rest of the fuel lines. Being fuel injected there are three lines: pressure, return and a small vent that goes to the charcoal canister I think.
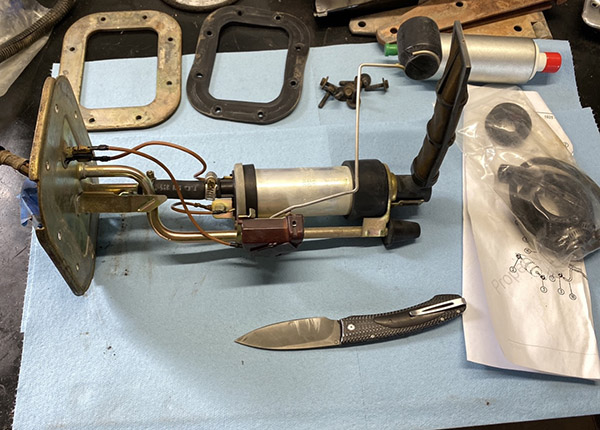
The big leak was at the fuel pump flange. The YJ’s tank is an aftermarket, rotocast plastic unit. This pump-to-tank area warps with age. There is no metal flange cast into the tank top to insure a flat gasket surface. Look for this feature on your next Jeep YJ gas tank purchase.
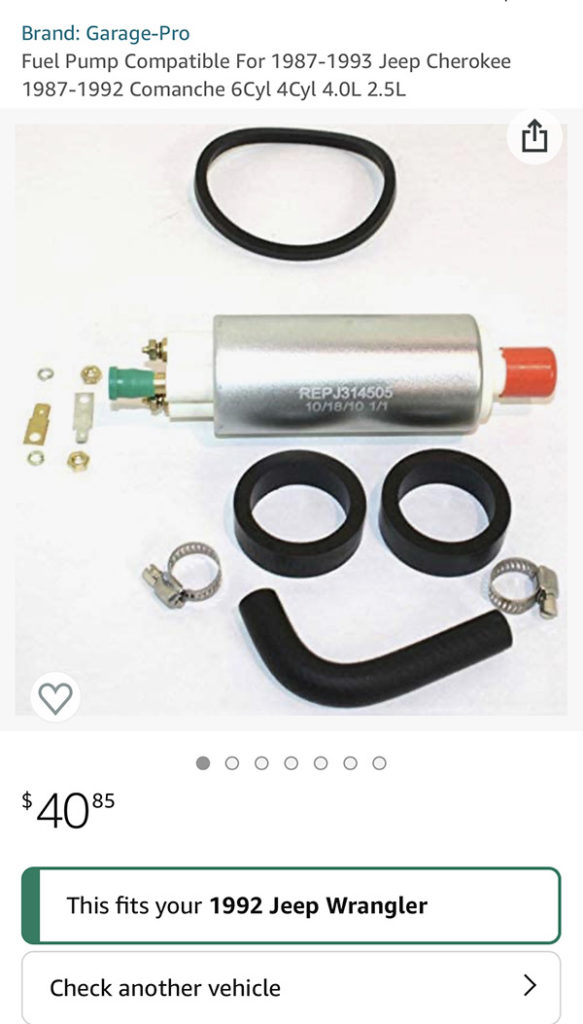
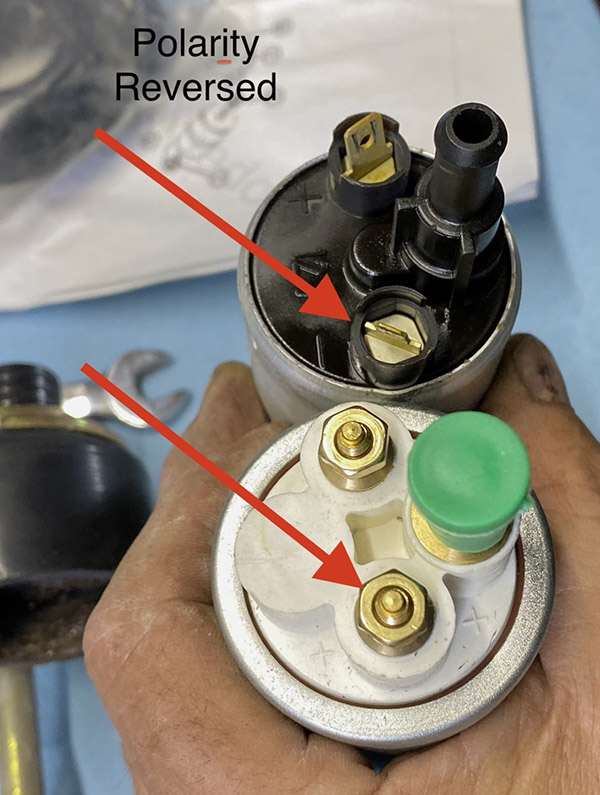
Removing the fuel pump assembly revealed that the replacement pump was not an exact replacement. The new fuel pump’s electrical connections were reversed but there was plenty of slack in the wires to reach. The bottom pickup of the new pump didn’t quite fit into the pickup screen correctly so I messed around with the extra rubber bushings that came with the new fuel pump until I got something that worked.
I managed to get the fuel pump installed into the new assembly in only a few hours. Remind me next time to spring for the complete pump assembly. When I reinstalled the pump assembly I used a new gasket and a steel backing plate that came with the gasket. Copious quantities of black RTV silicone filled the dips and voids of the warped plastic tank top.
I cleaned and re-painted the gas tank skidpan and attached the tank straps to the pan. Now the whole assembly is situated on the floor jack, rolled into position and jacked up into place only pausing long enough to connect the new rubber fuel lines (also from Amazon!).
Some YJ owners cut out the floor to replace the fuel pump. That’s a good idea but it isn’t very hard to drop the tank. For roadside emergency repairs a hatch cut into the floor would make replacing the pump a half-hour job instead of the two days it took me. I think I’ll do the hatch next time.
Brumby is running fine with its new fuel pump and I can fill the tank without fuel sloshing out onto the hot exhaust pipe. My fuel mileage has improved slightly without the constant loss of gasoline from the leaky tank. The old pump looked like original equipment and lasted 29 years. Stay tuned to ExhaustNotes for a follow up report when the new fuel pump quits.
This press release from BajaBound came in recently and we want to share it with you:
BIG NEWS! Baja Bound is very excited to announce our new Baja Saver Mexican auto insurance policy! The Baja Saver is a heavily discounted policy for travel in Baja California, Baja California Sur and Sonora that is available for six month or annual coverage. The Baja Saver offers up to a 60% discount compared to full territory Mexican insurance policies! Check out all of the Baja Saver features here:
Since the essential travel orders are still in place we are rolling this out as a great option for expats and folks commuting across the border for work. We look forward to getting back to everything we love about Baja and hope to see you south of the border soon!
¡Viva Baja!
We always use BajaBound Insurance whenever we visit Mexico, and we’ve found it to be the best.
I’ve spoken with several folks who are in Baja, and although there is an essential travel order in place, it’s not enforced. Folks tell me that they can easily cross the border in both directions. Baja John tells me that life is Baja is much the same as it is here in the US, with folks social distancing, restaurants offering outdoor dining and socially-distanced tables, and people wearing masks. John mentioned that on a couple of recent holidays, there were roadblocks north of San Felipe and Ensenada and if you couldn’t prove Baja residence, you would have to turn around, but the roadblocks were only present during the holidays.
Gresh and I have been talking about venturing into Baja in another two or three months. I am looking forward to it. In the meantime, if you want to vicariously relive a few of our adventures in beautiful Baja, check out our Baja and Epic Rides pages!
Sometimes people ask me about writing a book. It’s easier to get a book published than you might think. Basically, there are three approaches. You can go with a vanity publisher (not a good idea, in my opinion), you can go with one of the big publishing houses (tough to do, and I’ve found this doesn’t work very well for reasons I’ll explain below), or you can self-publish through Amazon.com or any of several other publishing outfits (this it not vanity publishing, and the self-publishing approach offers several advantages).
Vanity Publishing
The idea of a vanity publisher is that you pay a company to publish your book. You have to do all the marketing, and you have to print a minimum number of copies, so this gets expensive fast. I’ve never done this and everything I’ve heard about these outfits is strongly negative. My advice would be to not go this route. Yeah, doing so will allow you to say that you wrote a book and had it published, but that little bit of bragging rights will probably cost you $10,000 and it’s not likely you’ll ever recover it. I’ve never taken this approach, and I’ve heard from others that it doesn’t work out economically for the author. You will have a lot of copies of your book, most likely taking up space in your garage.
A Traditional Publishing House
You can market your concept to a publishing house and have them publish and market it and pay you a royalty on copies sold. This has been the traditional publishing route for more than a couple of centuries in the US. The first several books I wrote went this route.
The traditional publishing route is okay and if you play your cards right (which is to say, you are a skilled negotiator), you can secure a healthy advance against royalties. But it’s an approach with disadvantages that far outweigh the advantages:
You have to market your book idea to several publishers, hoping that one or more will be interested. Most publishers aren’t going to be interested these days. The big publishing house printed book market is down big time, and it’s likely it will stay that way. When’s the last time you saw a crowd at a bookstore?
For most of us, the income is meager. You would need a miracle to get a publisher to agree to give you even 10% of the published book price as a royalty.
You give up rights to your book. If you are not happy with publisher, you’re stuck.
You will have to market your book because the publishers generally do a poor marketing job (it will be one of many hundreds or thousands of their titles). Nah, wait a second, that’s not accurate. Publishers generally do a terrible job marketing your book. I realized this pretty quickly, and it was really brought home for me when I wrote a book about cost reduction. The CEO of a Fortune 500 aerospace company contacted me and asked about ordering copies for every manager in his organization. I thought I had gone to heaven when I heard that, and I quickly alerted the publisher’s marketing arm. I mean, the sale was already made…all they had to do was take the order. It was a big publisher (Wiley), and you’d think they would have jumped on the opportunity. They did exactly…nothing. Several weeks later the aerospace CEO called me to ask again, and I was horrified and embarassed that no one from Wiley had called to close the deal. They ultimately did, but I had to keep my boot firmly up their butt until the order came through. Bastards.
I’ve written 15 books, and I went the traditional route with established publishing houses on the first 9. I’d never go this way again. My good buddy Simon Gandolfi put it best when I asked him about publishers and, in particular, using an agent to promote your work. “Most publishers are incompetent crooks,” he said, and then he added “and most literary agents are competent crooks.”
Self-Publishing
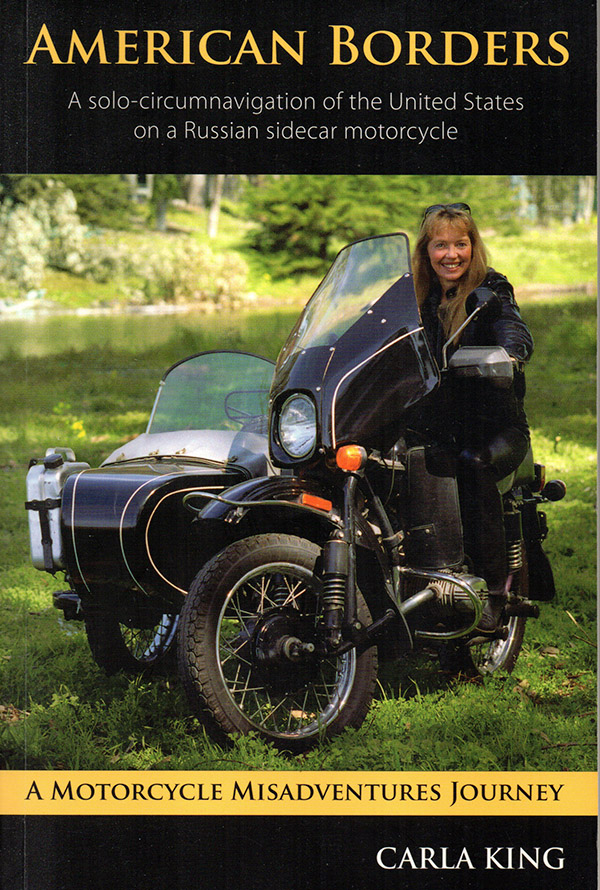
About 10 years ago I was on a press junket promoting Lake Tahoe as a motorcycle destination (good buddy J Brandon was one of the organizers). I rode up there on my KLR 650 Kawasaki. It was a good time and good riding (the roads in the Sierra Nevadas around Tahoe are some of the best in the world, and I got a couple of magazine stories out of the deal), but the thing that really made the trip worthwhile for me was meeting Carla King (that’s Carla in the photo at the top of this blog). Carla rode a KLR 650, so I knew she was a smart person. I had read Carla King’s book about her Ural ride around America (American Borders), and this was the first time I actually met her.
Our Tahoe group stopped for lunch on one of the organized rides at Walker Burger (it’s on Highway 395), and Carla and I talked shop. I told her the story about Wiley and how terrible their marketing department was, and she told me I was wasting my time if I wasn’t self-publishing.
I never heard of self-publishing until I met Carla, so I took one of her classes and I never looked back. My next seven books I self-published through Amazon using the tools Carla shared with me, and I made more money with them than I have on any of the other books I previously wrote.
Self-publishing has a lot of advantages:
It doesn’t cost you anything. Your books are only printed when people order them in the quantity they are ordered. You don’t pay anything.
Within limits, you set the price and the royalty you want on your book.
You get a substantial discount when you order the books for yourself, or copies of your books if you want to sell them yourself. I don’t too this too often, but if a dealer wants to order copies of, say, 5000 Miles At 8000 RPM, I buy the books, the dealer pays me, and Amazon ships direct to the dealer. I make good money on those books.
You select the physical size of the book you wish to publish. Amazon has half a dozen or so different sizes (that is to say, the book’s length and width), and they provide Word formats already prepared that you can download in the different book sizes. You add the text and the illustrations. Basically, they give you a free, downloadable Word template, and you just add your work.
Amazon is hooked up with Kindle (actually, you use a Kindle site for both Amazon and Kindle formats for your book), and you can also easily offer your book in an e-book format. I thought this was kind of silly, until I saw that a good half of my book sales were in the Kindle format.
Your book is listed on Amazon.com essentially as soon as you upload the manuscript and the book cover. People can then find and order your book on Amazon like any other book.
The income is way better than going with a big publishing house.
Your book becomes instantly available essentially all over the world.
Carla offers self-publishing training and has written extensively on the topic (see www.CarlaKing.com and www.selfpubbootcamp.com). I attended one of her seminars several years ago and it was a very worthwhile experience for me. If you have thoughts about writing a book, you might consider doing the same.