Part 1 of this series took us through brass preparation, Part 2 took us through priming, and here we are at Part 3, which discusses powder charging, bullet seating, and case mouth flare removal.
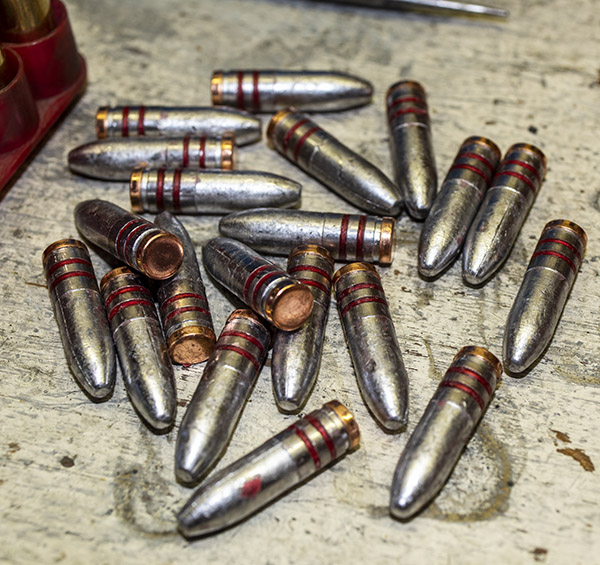
Cast 200-grain bullets, lubed, sized, and gas checked. These are from the Lyman 314299 mold.
I had previously mentioned that I shoot cast bullets in my military surplus rifles, and in particular, I like a gas-checked 200-grain cast bullet. Good buddy Roy Hursman cast these for me. Roy retired and sold his bullet casting gear. I hope I’m able to find somebody that does as good a job as Roy.
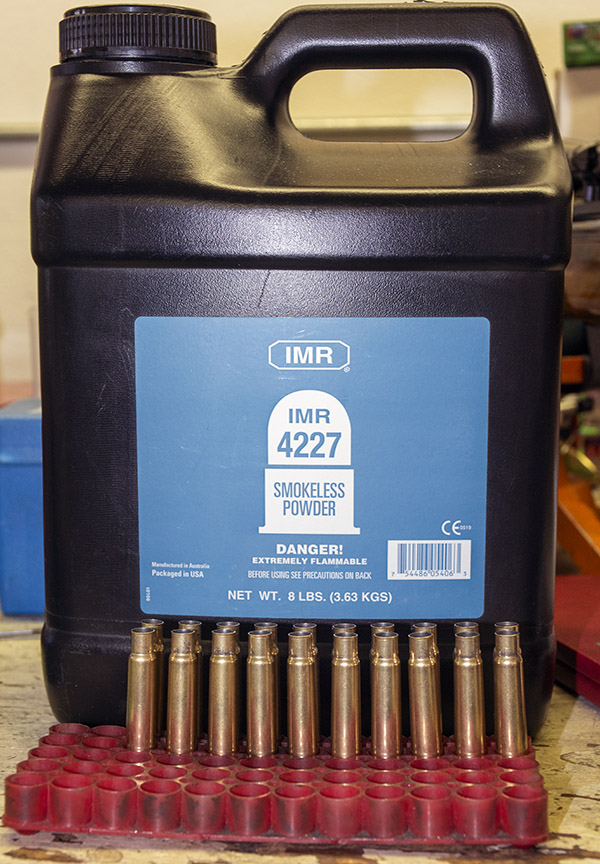
This 8-lb bottle of IMR 4227 propellant is good for nearly 2,700 rounds of .303 British ammo.
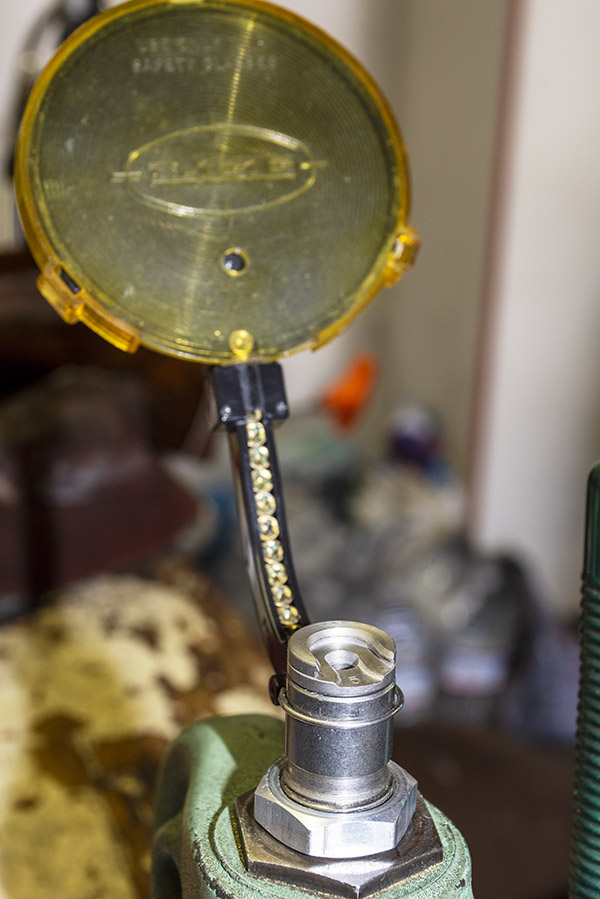
I use different powders in my rifle cast bullet loads. A good one is IMR 4227, which is what I used for this .303 British load. The secret sauce recipe is 21.0 grains of IMR 4227 with no fillers. I’d like to tell you that I developed this load after extensive testing, but I can’t. It was next to what the Lyman cast bullet manual said was the accuracy load with this bullet and IMR 4227 was in my ammo components locker, so it got the nod, and it worked. I felt no need to experiment any further; the load worked well and was very accurate. This 21.0-grain IMR 4227 load is near the lower end of the loads listed in the Lyman manual. The bullets exited the muzzle at about 1600 feet per second (as tested with my Garmin chronograph), and that’s good enough for me.
I use an RCBS powder dispenser, and once I had it set up to throw 21.0 grains of IMR 4227 propellant, there was no need to weigh the charge for each cartridge because the powder meters so well. I loaded the 20 rounds like it was pistol ammo, placing each empty brass case beneath the dispenser, charging the case, and moving on. After I had charged all 20 cases, I threw another charge into my scale’s powder cup and weighed it again to make sure the dispenser was still on the money. It was (the powder dispenser released exactly 21.0 grains).
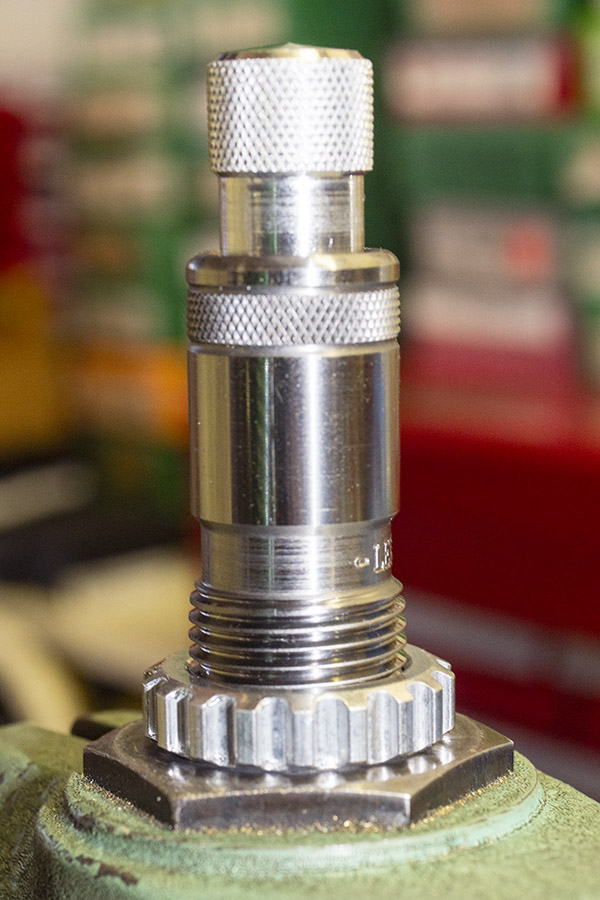
It was time to turn to the Lee Ultimate 4-Die set’s bulleting seating die. The first step was to install the bullet seating die in the press and screw it partially in.
The Lee .303 British bullet seating die. It includes a feature for a roll crimp if so desired. The knob on top adjusts the bullet seating depth.
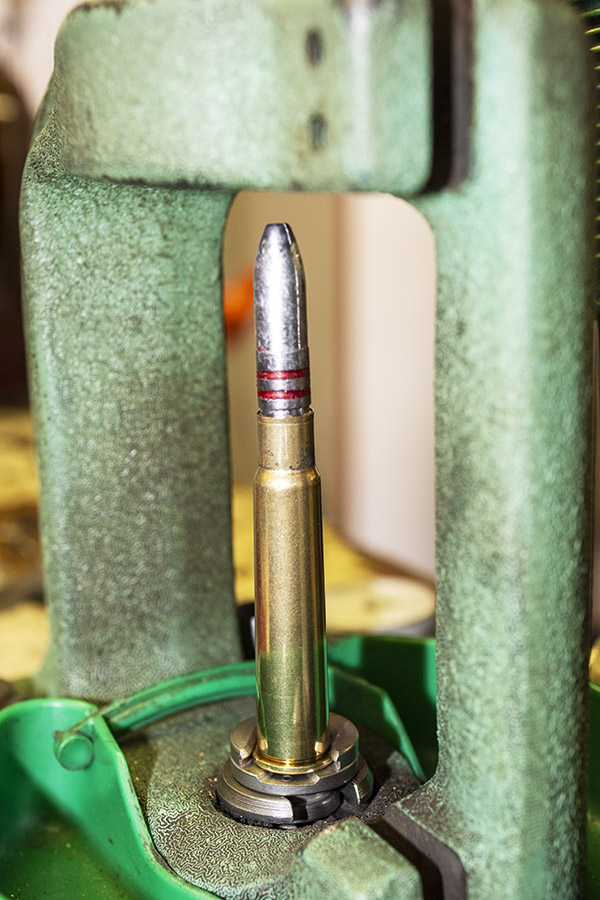
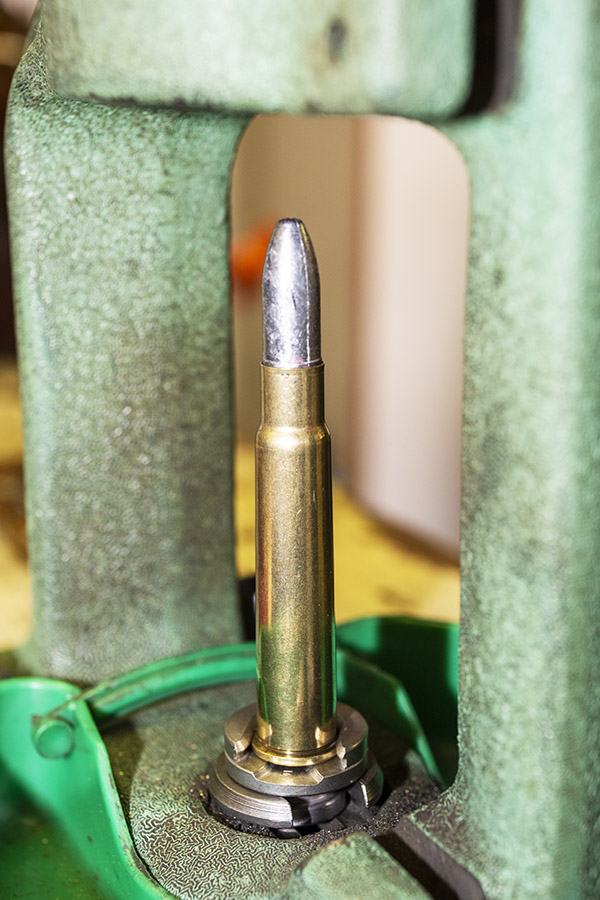
I placed the first bullet over a charged .303 British case (charged with IMR 4227, that is) and raised the ram in the press. Observing where the bullet went (i.e., how deeply it seated in the case), I lowered the die in the press a bit more, repeating the process until I attained the desired bullet seating depth. I wanted the bullets to be seated such that the cartridge mouth was just behind the bullet’s first driving band.
A cast bullet about to be seated in the cartridge case.A seated bullet, positioned exactly where I wanted it.
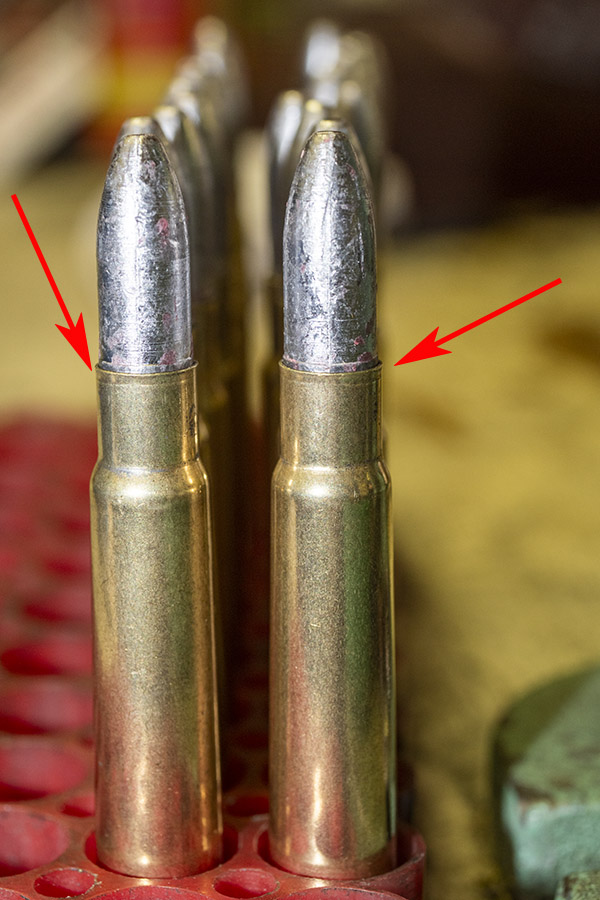
After seating all 20 bullets in the 20 charged .303 British cases, it was now time to remove the case mouth flare we induced in Part 1 of this series. I probably could have skipped doing so, because I did as I advised in Part 1 (I flared the case mouth just enough to allow the bullet to enter). Even without removing the flare, the cartridges would chamber because the flare was so small. But I like to go for the extra step of removing it just to make sure.
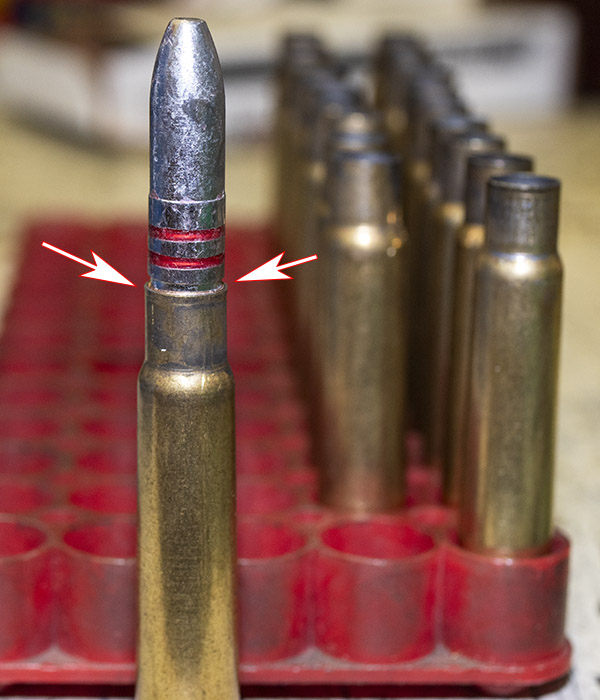
The red arrows point to the remaining flare after seating the bullets. This will be removed with the Lee factory crimp die in the next step.
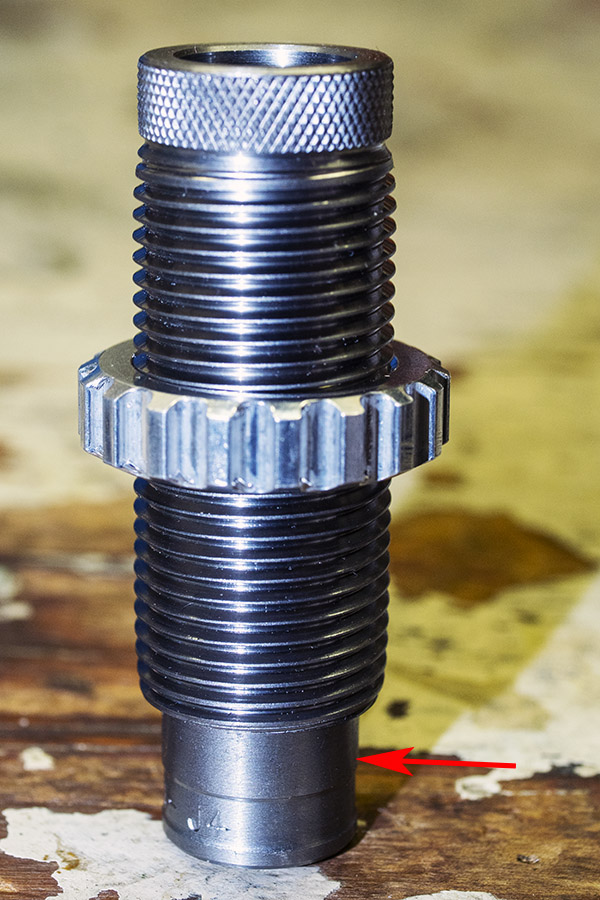
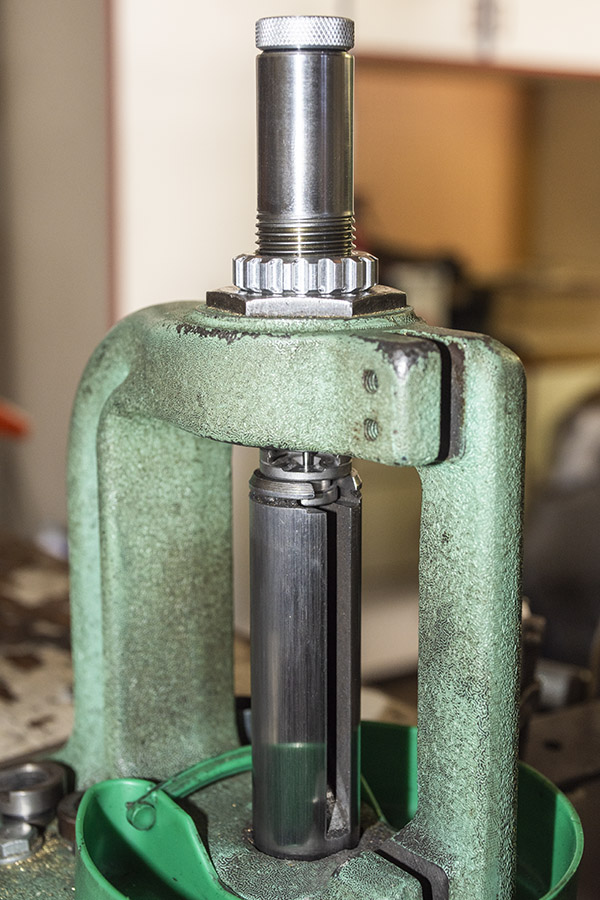
Lee’s factory crimp die (the fourth die provided in their Ultimate 4-Die set) is what I use for removing the flare. It can also be used (as the name implies) for crimping the case mouth on the bullet.
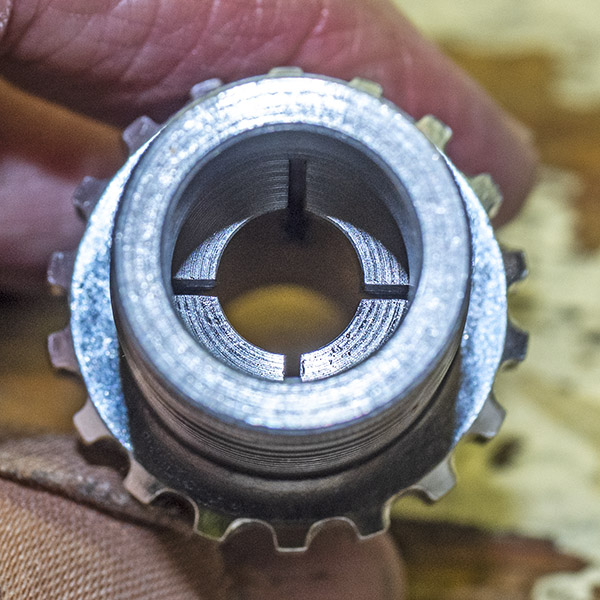
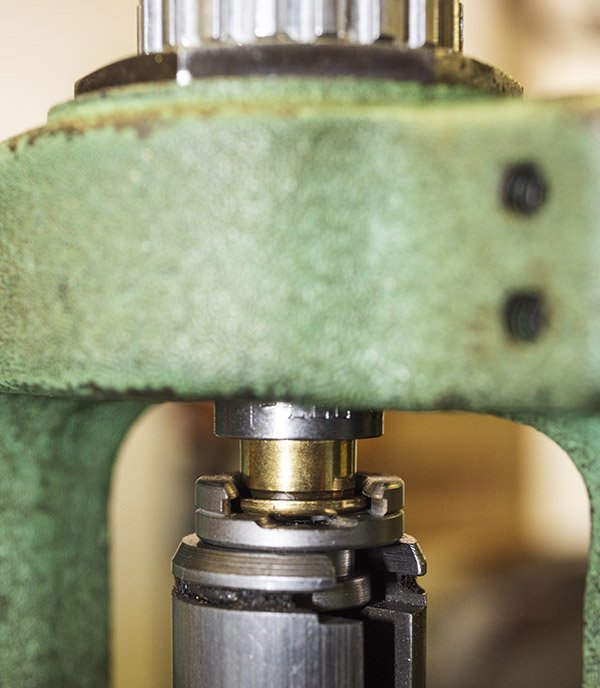
Lee’s factory crimp die. The arrow points to the cylinder that is pushed up into the die body by the shell holder when the press is fully raised. By adjusting how far the die body is screwed into the reloading press, you can adjust how much crimp is applied.The view from above the Lee factory crimp die. The cylinder shown in the photo above (see red arrow) cams into the four circumferential collets shown in this photo. These four collets apply force to the cartridge case. You can adjust the die to apply no force, just a small amount of force to remove case mouth flare (as I did to my .303 British cases), or to apply a crimp.
By adjusting how far the die is screwed into the press, you can control how much force is applied to the case mouth. You can screw it in just enough to remove the case mouth flare (as I did), or you can screw it further into the press to apply as firm a crimp as you want around the case mouth.
The Lee factory crimp die does not apply a roll crimp; it applies a concentric circular flat crimp around the case mouth periphery. Some folks think this makes the Lee factory crimp independent of case length. I don’t agree with that. On longer cases, the Lee factory crimp will press more case material radially inward than it would on a shorter case (theoretically, if the case were trimmed too short, the Lee factory crimp would apply no crimp). But it’s still more controllable than a roll crimp, and the amount of roll crimp applied is far more sensitive to case length than is the Lee factory crimp. And if you wish to apply a roll crimp instead of the Lee factory crimp, you can still do so with Lee bullet seating die. Just screw the die body in further (while backing off on the bullet seater on top of the die) until the reduced diameter step inside the die body contacts the case mouth enough to provide a roll crimp.
I ran all 20 cases through the Lee factory crimp die after adjusting the die. I adjusted the die to apply just enough radially-inward force to remove any remnants of flare from the case mouth.
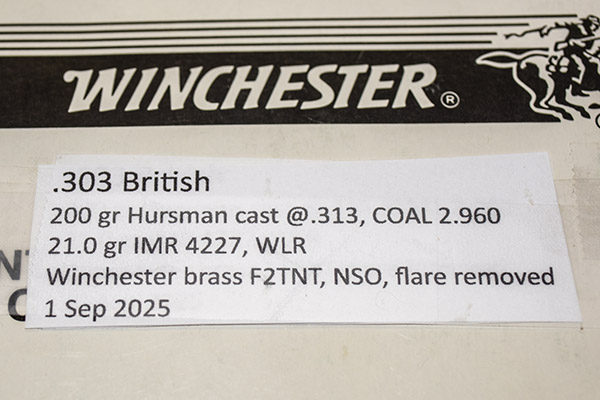
After completing all 20 .303 British neck-sized cartridges, I put them in a box and applied a label, as I do with all my reloaded cartridges.
Reloaded, boxed, and labeled. “F2TNT” is my code for fired two times, not trimmed. “NSO” means neck sized only.
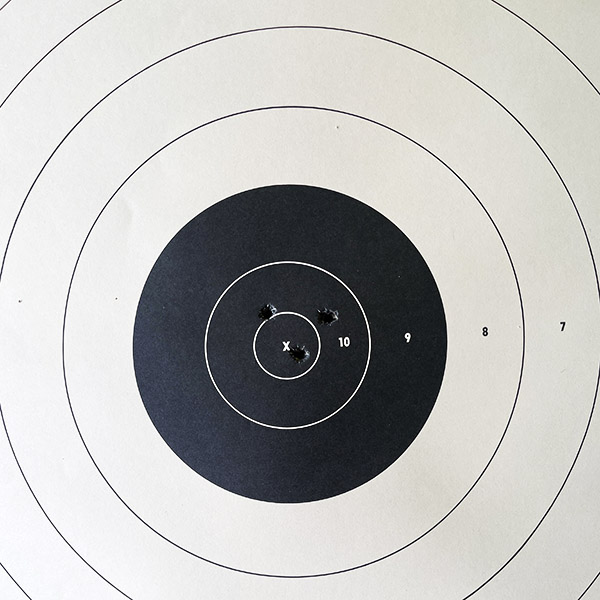
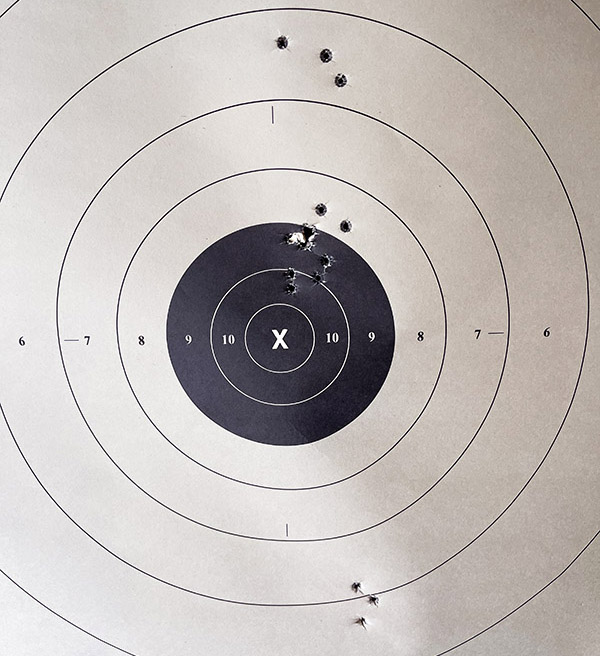
How did this ammo shoot? It did well, as the target below shows. I can’t show that my neck-sized-only reloads are dramatically better than full-length resized ammo, but I know I have the other advantages offered by neck sizing (not having to lube the cases, a quicker reloading process, and longer brass life). I am quite pleased with my Lee .303 British die set.
A perfectly centered, tight, 3-shot group at 50 yards, with light recoil and good accuracy. The Lee Ultimate 4-Die set does what it is supposed to.
More reloading, hunting, and shooting stories are here!
In Part 1 of this three-part series on using Lee Precision dies to reload the .303 British cartridge, we covered resizing, decapping, full-length resizing, neck sizing, and flaring the case mouth. Part 2 continues the reloading process.
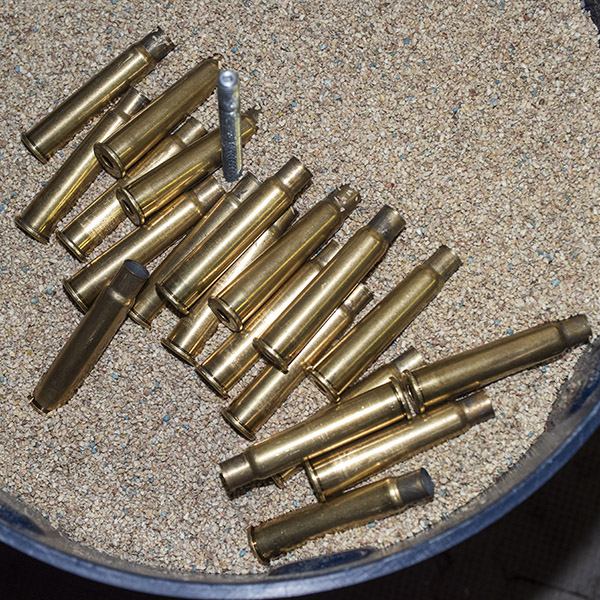
The next step for me (after the brass is resized and flared) is case cleaning. I use a Frankford Arsenal vibratory polisher. I’ll drop the brass in it and do other things for an hour or so as the brass is polished.
Resized cases in the Frankford Arsenal vibratory polisher. The media is made from corn cobs. I add Dillon’s polishing liquid to it prior to starting the polisher.Finished brass. I like it to be clean and well polished both for aesthetics and for accuracy. When the inside of the case neck is polished, it is free of any lubricant from the resizing operation, and case neck grip (or tension) will be consistent from round to round. Case neck tension variability will increase group size.
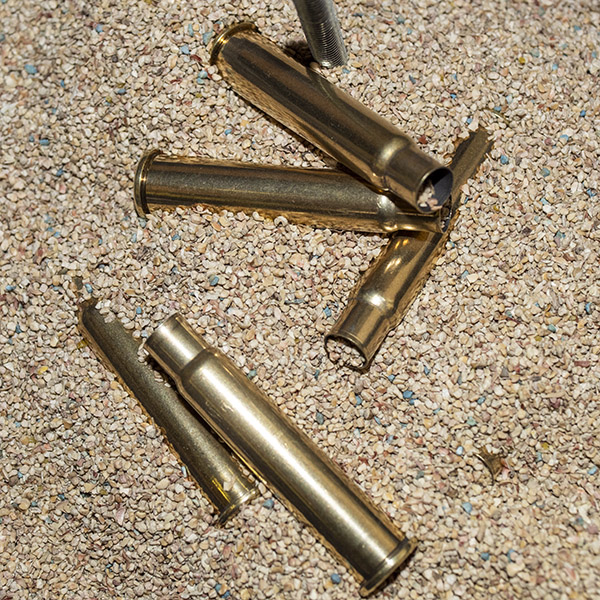
After the brass comes out of the polisher, I inspect each one to make sure there are not bits of the polishing media stuck in the primer hole. I’ve never tested to determine if this would interfere with the round firing or if it would cause a flyer, but it’s not the sort of thing that would help.
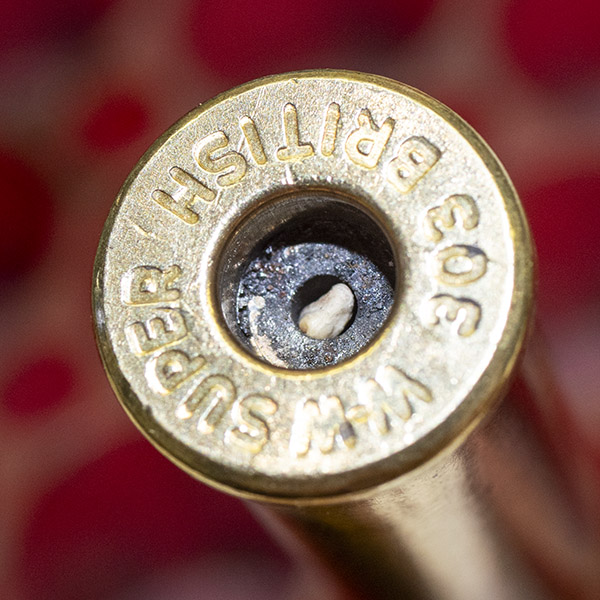
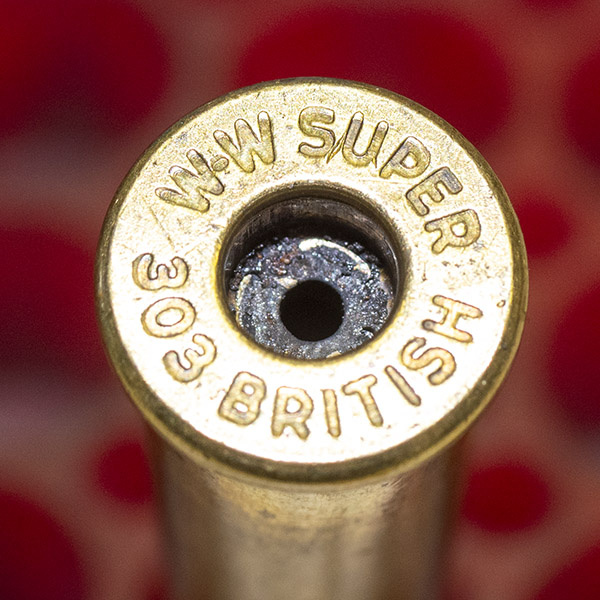
A primer hole with a bit of media stuck in it. Usually about 10% of the cases have media stuck in the primer hole after polishing. I push it out with a dental pick.A cartridge case with a clean primer hole (i.e., with no media stuck in the primer hole).
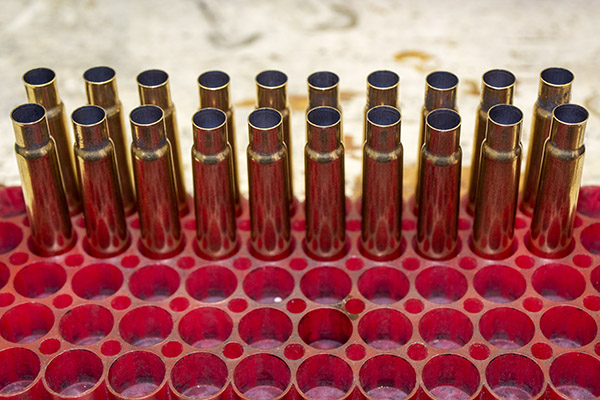
When all the cases are completely free of media and all the primer holes are clear, I’ll set them in a reloading tray, as you see below.
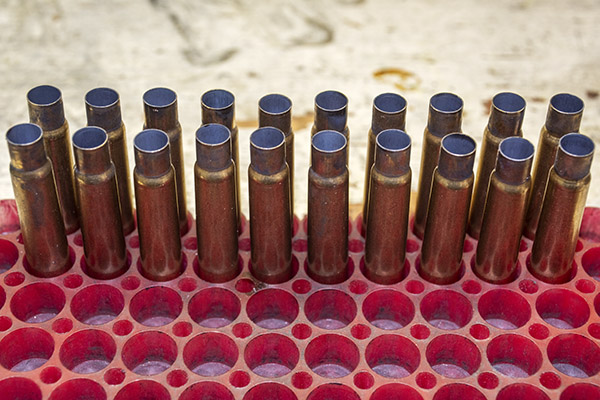
Twenty polished cases ready to be primed.
Next, I’ll prime the brass. There are a lot of tools available to do this. I use a Lee Auto Prime, an item that I bought a good 50 years ago. Remember that I mentioned that Lee gear is good? Lee no longer makes this item (I can’t tell you why) but they do have other priming devices available today. For me, this one just keeps on working, and I like how it works. It consists of three groups of parts: The primer tray and feed system, the case holder/primer seater assembly (it installs above the reloading press), and the ram that installs on the press ram.
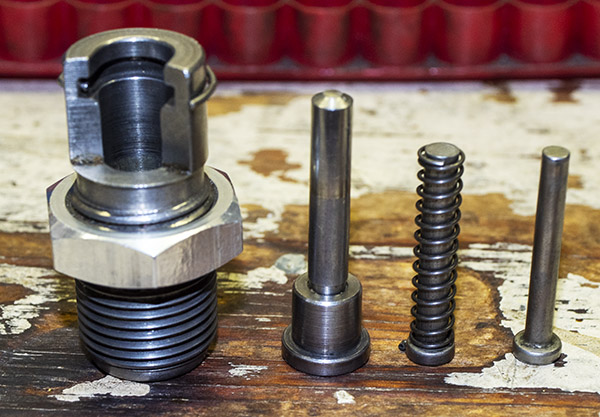
An old Lee Auto Prime, still in its original box. The two feed chutes on either side of the primer tray are used for either large or small primers. The primer seating assembly components are in the plastic container at the photo’s bottom.Lee Auto Prime components. From left to right: The die body, the priming ram, the two primer rods (one for small primers, the other for large primers), and the spring. The spring goes over priming rod selected for use (as shown here, the large primer rod). The priming ram is installed on the reloading press’s ram where the shell holder would normally be. One of the priming rods, with a spring over it, goes into the die body (see photo below).
I install the case holder/primer seater assembly on top of the ram, then I remove the shell holder on the reloading press ram and install the primer ram on top of the ram, and then I load the primer tray and feed chute.
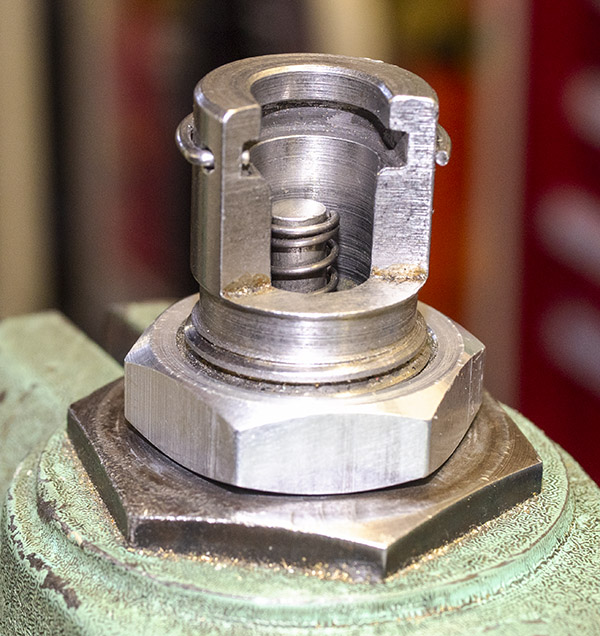
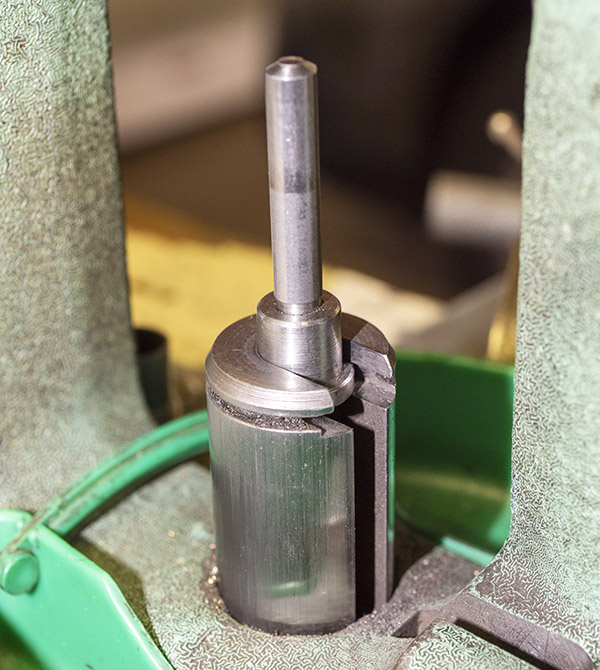
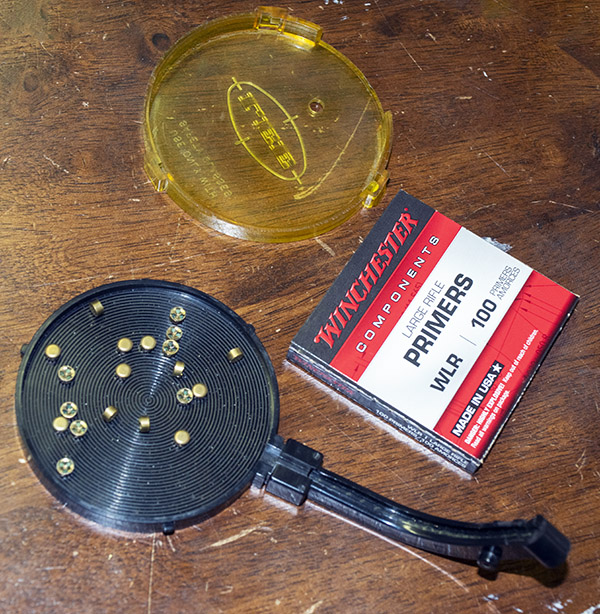
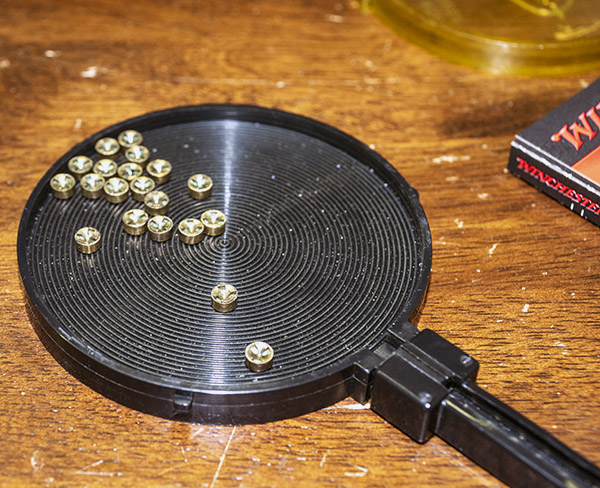
The Lee Auto Prime die body installed in the reloading press, with the priming rod and spring in place. The primer chute will go over the priming rod and spring, and the shell holder snaps into the die body over the priming rod and spring.The Auto Prime ram installed on the reloading press ram. It fits into the ram where the shell holder is normally installed.The primer chute installed on the primer tray, with 20 primers dropped onto the tray. Note that some primers are facing up, some are facing down, and some are on their sides.The tiny concentric ridges in the primer tray help to flip all primers such that they face up. By gently shaking the tray from side to side, all primers orient themselves to face up. If you shake too aggressively, you’ll drop some of the primers out of the tray. It sounds more complicated than it actually is, and after doing it once, you’ll get a feel for how much “shake” is needed.After getting all the primers into a face up orientation, I put the primer tray cover on the primer tray, and then use a toothpick or the previously-mentioned dental pick to obstruct the primer chute at the primer tray. Then, I’ll place the bottom end of the primer chute in the die body. Finally, I’ll slide the shell holder into the die body and remove the obstruction from the primer tray. The primers will slide down into the chute and the first primer will be in position over the priming rod.
Once the above is complete, I prime each case. I insert each case into the shell holder, and then gently run the press’s ram up. Doing so seats the primer. The beauty of this approach is you can feel each primer being seated, and the power of the ram makes sure each primer is fully seated. When the case is primed, I remove it and the primers in the chute slide down, forcing a new primer into position above the priming rod. I’ll repeat the process until all the cases have their primers seated.
Primed cases, ready to continue the reloading process.
After the above is complete, I’ll have a tray full of cases ready to be charged with propellant. We’ll cover that in Part 3.
One of my favorite rifles is the Enfield No. 4 Mark 2, a bolt action rifle just dripping with history and charisma. The No. 4 Mark 2 was the last in the Enfield rifle series, with a run of 59,000 produced by Britain’s Fazakerly armory for Ireland in the 1950s. It was the last Enfield in a long line of continuously improved rifle designs, and it includes a much-improved trigger design. Most of these Irish rifles were never issued and many were sold in their unfired, cosmoline-laden condition. Mine comes from that group. It’s the one in which I tested the reloaded ammo featured in this blog series.
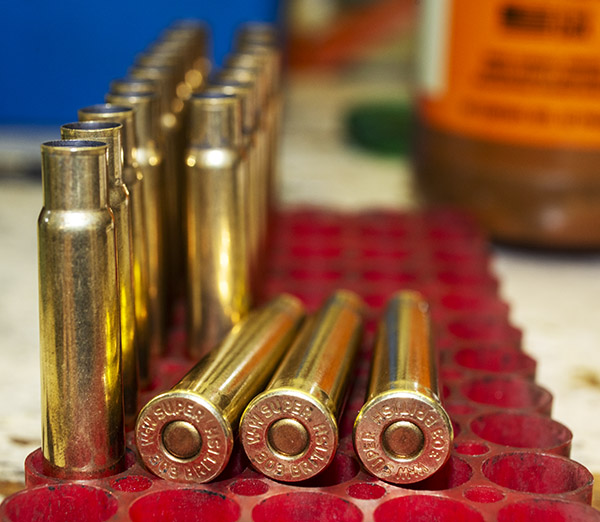
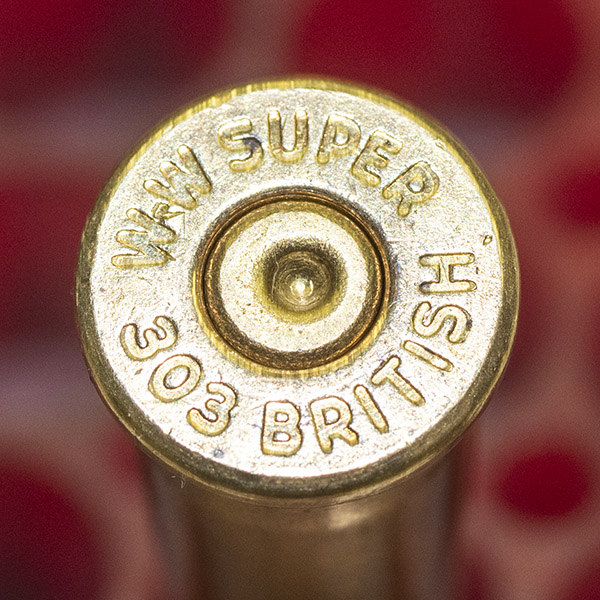
Once-fired .303 British cartridge cases. They almost look like scaled-down .375 H&H cases.A close-up view of the .303 British case after firing. These cartridge cases are ready for the reloading process.The headstamp. These are Winchester cases. Note the spent and indented primer, which will be removed in the case resizing process.
I have a stash of once-fired .303 British brass acquired from generous friends over the years. I will reload them with 200-grain cast bullets made by good buddy Roy Hursman, sized to 0.313 inches, which I also use in my Modelo 1909 Argentine Mauser and Mosin-Nagant rifle. I thought they might work well in the Enfield (and they did; I’ll tell you a bit about that here and provide much more detail in Part 3 of this series).
The cast lead bullets I load in my .303 British ammo. These weigh 200 grains. They have been lubed (the red grease in the lube grooves), gas checked (the copper cap on the base), and swaged down to 0.313 inches. They work great in the 7.65 Belgian Mauser, 7.62x54R Russian, and .303 British cartridges.
What I didn’t have in my shop was a set of dies in .303 British. I naturally turned to Lee Precision. I believe in Lee reloading equipment. I have their dies for the .22 Hornet, .22 250, .243 Winchester, 6.5 Creedmoor, .30 Carbine, .30 40 Krag, .300 H&H, .300 Weatherby, .38 Special/.357 Magnum, .44 Special/.44 Magnum, .45 ACP, .45 Colt, and probably a few others I can’t remember as I type this blog. I also use other Lee reloading equipment. I think their Classic Turret Press is the best reloading press of its type for loading handgun cartridges. The bottom line here is that I’ve never been disappointed with Lee products, and I say that as a guy who has been using Lee gear for 50 years.
I ordered Lee’s Ultimate 4-die set, and what I received surprised me. I received the four dies (which I expected) and a micrometer bullet seating attachment (which I did not). Each Lee die set also includes a little packet of case lube for the resizing operation (it’s not shown in the photos below). It’s a nice touch; Lee basically gives you everything but the reloading press and the components (bullets, brass, primers, and powder) to load a specific cartridge with each of their die sets.
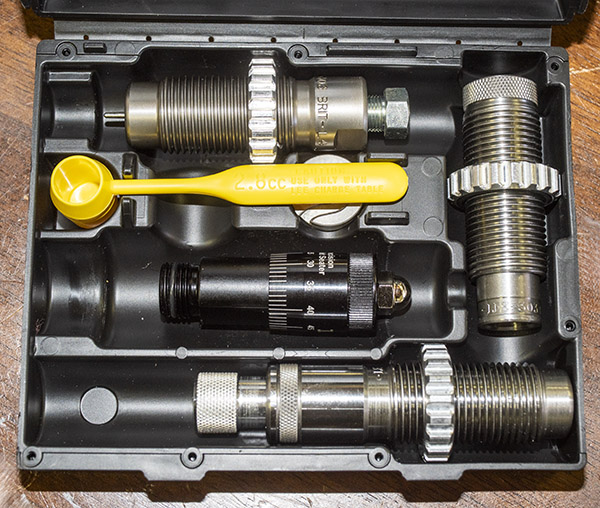
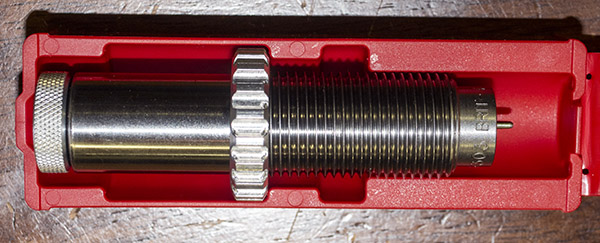
The Lee ULee Ultimate 4-Die set includes four dies normally included in a single box. My set included a micrometer bullet seating attachment not evaluated in this blog series (although I will evaluate it in a future blog). The fourth die (the collet die) was provided in a separate container (see below). In the photo above, we have the full-length resizing die (top), the bullet seating die (bottom), the factory crimp die (right), the micrometer bullet seating feature, the shell holder, and a measuring cup (not used by me). Lee also provides a small pack of case lube (not shown here).The Lee collet neck sizing die, used in lieu of the full-length resizing die to neck size the brass case.
I won’t get into the micrometer bullet seater in this three-part .303 British Lee die set review (that review will occur down the road a bit).
The Lee Ultimate 4-die set includes two resizing dies (a full-length resizing die, and a collet die for neck sizing only), a bullet seating die (that also includes a roll crimping feature), and a separate crimping die for applying what Lee calls a factory crimp. The die set also includes a shell holder (a nice touch, as other manufacturer’s die sets do not) and a powder scoop. I’ve never used the powder scoop; I use a more precise powder dispenser.
The once-fired brass I had on had was good stuff. It was in the original factory boxes and it was in good shape. Because the rifles it had been fired in previously were not my Enfield, I knew I would have to full length resize the brass first to return each case to factory dimensions. To do that, I mounted the Lee shellholder in my press, ran the press all the way up, and then installed the full-length resizing die, screwing it down in the press until it contacted the shell holder. I then retracted the press ram, turned the die another 1/8 of a turn into the press, and locked the die in place with its locking ring.
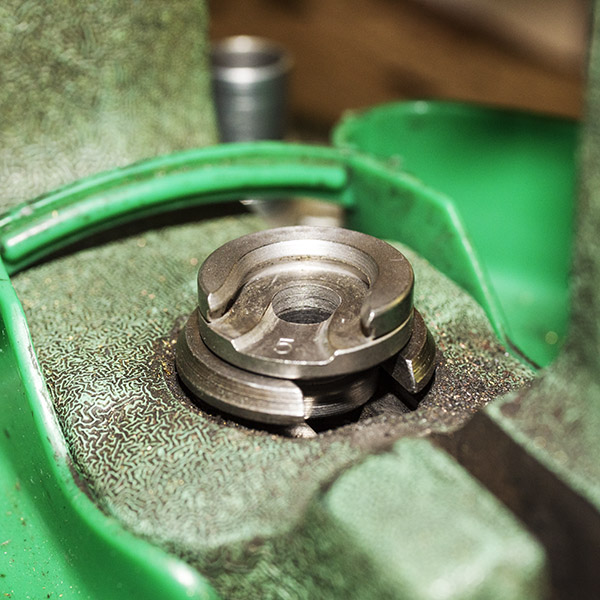
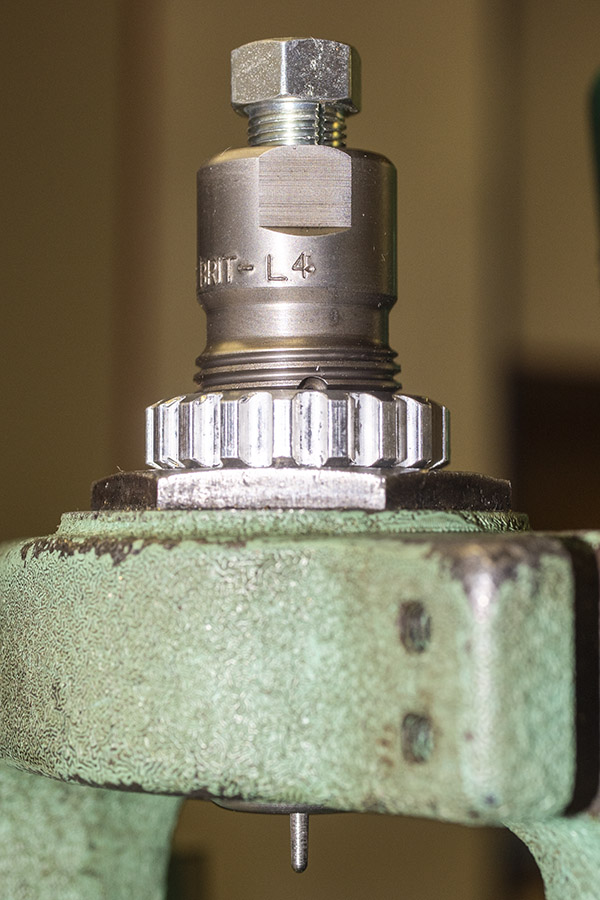
The Lee .303 British shell holder installed in my reloading press. It snaps into place. Dies and shell holders are typically interchangeable between reloading press and die manufacturers. I use a single-stage RCBS Rockchucker reloading press; Lee dies and shell holders fit it perfectly.Lee’s full-length resizing die installed in the press. This die simultaneously resizes a fired case to factory specification and punches out the spent primer. Note the locking ring on the die body.The business end of the Lee full-length resizing die after resizing a bunch of cases. This photo shows the decapping pin, which removes the old primer.
I lubed each case with the lube Lee provided and ran it through the full-length resizing die, which simultaneously brought the cases back to factory dimensions and removed each case’s spent primer. The full-length resizing dies does both steps in one operation.
I intended using cast bullets in the .303 Enfield, so for me the reloading process included an additional step: Flaring the case mouth. Case mouth flaring allows cast bullets to enter the cartridge case without the case shaving any lead from the bullet. To flare the case mouths, I use a Lee universal flaring tool I purchased decades ago. It’s a clever die set that uses a cone to impart a slight bellmouth to the case.
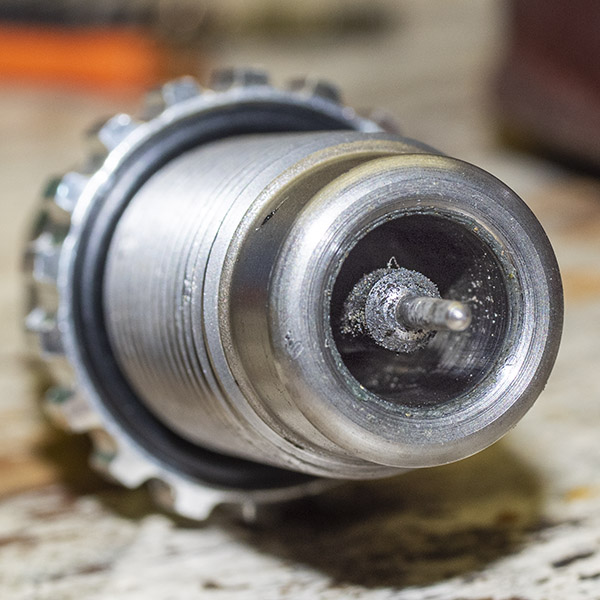
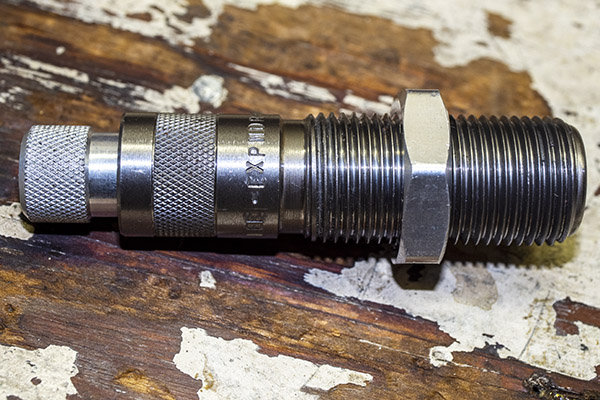
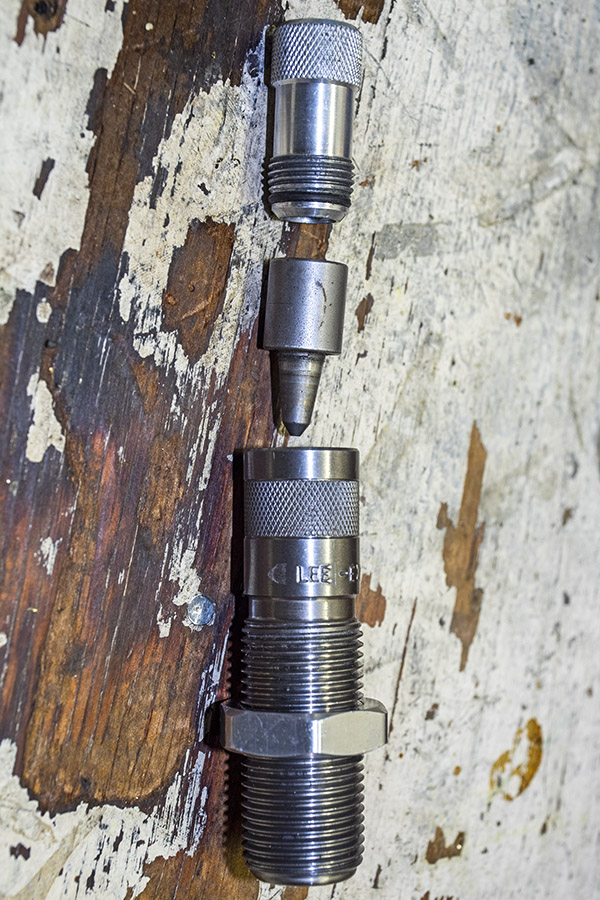
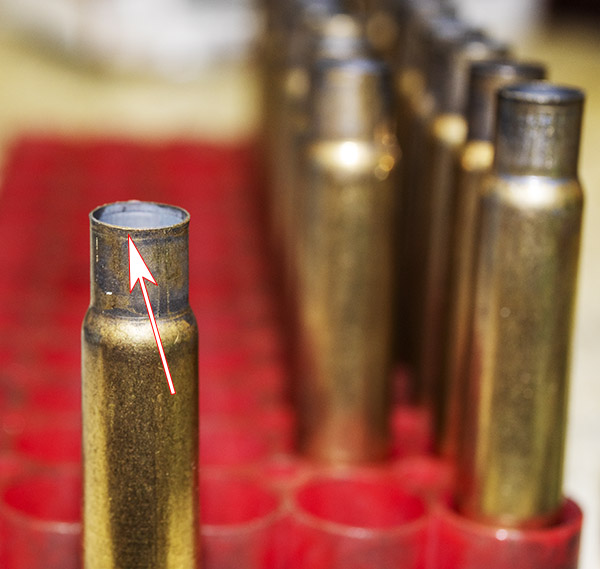
Lee’s Universal Case Mouth Expander. I bought this in the 1970s and I’m still using it.The Lee Universal Case Mouth Expander disassembled. The amount the case mouth is flared is determined by how far the die body is screwed into the reloading press, and by how far the adjuster (top item in this photo) is screwed into the die body. The cone (shown in the middle of this photo) is what flares the case mouth. Lee provides two cones; one of small-to-medium calibers (shown here), and one for larger calibers (not shown here).When empty cartridge cases are run into the Lee Universal Case Mouth Expander) it imparts a slight flare to the case mouth. If you do it right, you can barely see the flare (as is the case for the case shown here) and the bullet enters the case with no lead shaving.
The approach to case mouth flaring is to install the Lee Universal Case Mouth Expander in the press and adjust it to impart just enough flare to allow the bullet’s base to enter the case. You don’t need much flare (less is more here; too much will work harden the brass unnecessarily). I’ll jump ahead a bit and mention here that if you can find that happy spot where you flare the case mouth just enough to allow the bullet to enter the case, you won’t have to crimp the case mouth later to eliminate the flare.
A perfectly-flared case mouth, with just enough flare to allow a bullet to start into the case without shaving any lead.
After completing the above full-length resizing and flaring, I reloaded 20 rounds (like you see in the photo at the top of this blog). Then I did what I always do: I labeled the box of reloaded ammo. After that, I fired the reloaded ammo in my Enfield.
I’m not going to cover the rest of the reloading process in Part 1 of this series, but I will in Parts 2 and 3. I’m jumping ahead here by mentioning firing the full-length resized ammo because I wanted brass that had been fired in my rifle. Ammo fired in my rifle would be perfectly formed to my rifle’s chamber, which is minutely different than other rifles’ chambers. That’s because of rifle chamber dimensioning tolerances. The once-fired brass I had was fired in other rifles, so I needed to shoot it in my rifle so the cases conformed to my chamber.
How did the full-length resized .303 ammo shoot? Very well, thank you. Take a look.
This was the first time I had fired this ammo in my rifle, so I needed to dial it in. The first three rounds went low at 50 yards (the nice tight group at about 5:30 on the outer edge of the 6-ring), so I ran the Enfield’s ladder aperture sight up. Oops, too much, which resulted in the group high in the 6-ring. I went down half the distance on the rear aperture, and the next three rounds were just above the bullseye. Down a click or two more, and the rifle was on the money. In case you were wondering, I used 21.0 grains of IMR 4227 and a Winchester large primer (but more on the load in Part 2 of this series).
Having fired my full-length resized ammo in my Enfield, the fired brass could now be neck sized instead of full-length resized. The idea behind neck sizing is that the clearance between the chamber and the brass case is greatly reduced by neck sizing (as opposed to full-length resizing), and theoretically, neck sizing should result in increased accuracy because the case won’t be rattling around in the chamber. There are a couple of another advantages to neck sizing, too. One is that it works the brass less, so it should last longer. A third advantage is that you don’t have to lube and then clean the cases. They can be neck sized without using lubricant. I’ll say more on that in a moment. Not having to lube (and then cleaning the lube from the cases) greatly speeds up the reloading process.
Now that I had brass cases that had been fired in my rifle, I installed and adjusted the Lee collet die in my press. The collet die performs two operations. It has a decapping pin that punches out the spent primer, and it has a set of four collets that compress the case neck around a spindle to bring it back to new brass factory dimensions (that’s the neck sizing operation). You can adjust the die’s depth in the press to adjust the final inside diameter of the case neck, which is a very useful feature to have. Ideally, the resized case neck inside diameter should only be 0.001 to 0.002 inch smaller than the bullet diameter. That amount of case neck inside diameter undersizing will allow the case the grip the bullet firmly so that it won’t push into or pull out of the case. You could make it tighter and still seat the bullet, but doing so would expand the case mouth more with the bullet’s insertion, and that is not desirable. It would distort the case and possibly introduce non-concentricity or angular misalignment between the bullet and the case, and that would hurt accuracy.
The Lee collet die installed in my RCBS Rockchucker press. This die will neck size the case instead of full-length resizing it.A .303 case entering the Lee Collet Die. By adjusting the depth to which the Collet Die is screwed into the press, you can control the neck-sized-only cases’ neck diameters. I adjusted the die to provide a 0.312 neck inside diameter, which gives 0.001-inch interference between the bullet and the case neck.
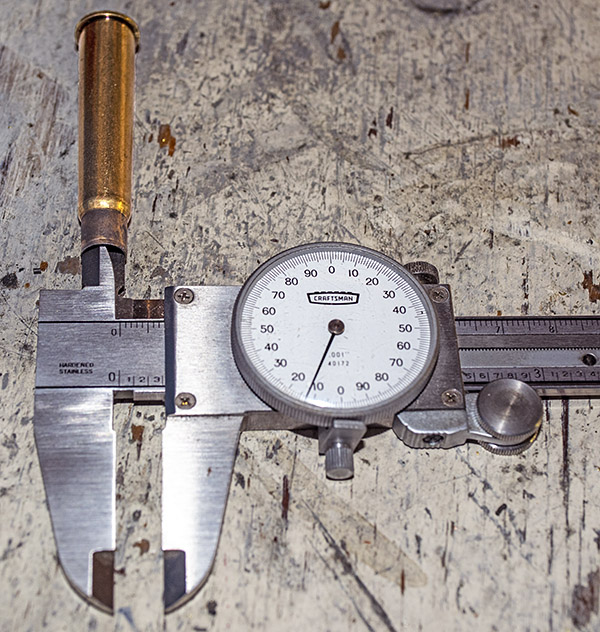
After completing the die seating depth adjustment, I had the case mouth diameter exactly where I wanted it: 0.312 inches. My cast bullets were at 0.313 inches, so I was good to go.
Not the world’s best photo (mea culpa). Parallax makes the inside diameter in this photo look like 0.313 inches; it was actually reading 0.312 inches. That’s what I wanted.
Next up will be our Part 2 of the Lee .303 British Ultimate 4-Die set review. Stay tuned.
So far, I am very impressed with this set of Lee dies. I’m not surprised, though. As I mentioned earlier, I’ve been using Lee equipment for decades, and it has always pegged the needle on my quality meter. These dies are good at any price. The fact that they cost less than any of the competitors’ products is a huge plus.