Shoemaker Holsters

By Joe Berk

Back in the 1970s I was a falling plate competitor. That competition involved knocking over a set of steel plates at a relatively short distance, usually with something in .38 Special or .45 ACP.  In those days, nobody competed with a 9mm; the 9mm pistols had not made the inroads they enjoy today. A lot of guys competed with 1911s or modified K-frame S&Ws; I was a bit of an oddball and I used an N-frame Smith and Wesson .44 Magnum (with light .44 Specials, as the shot-to-shot recovery was faster and the .44 Special easily knocked the plates down). We shot from the ready position, with the gun held at an angle to the ground.  The video below gives you an idea what the falling plate game looks like:

There were variations of this competition. The most exciting one was a bowling pin competition, which involved clearing a half dozen bowling pins from a table. In that one, you needed a .44 or a .45; the .38 Special didn’t have the energy to clear a bowling pin off the table.  Both competitions were all about speed; whoever knocked all the plates over (or blew away all of the bowling pins) in the shortest time won.

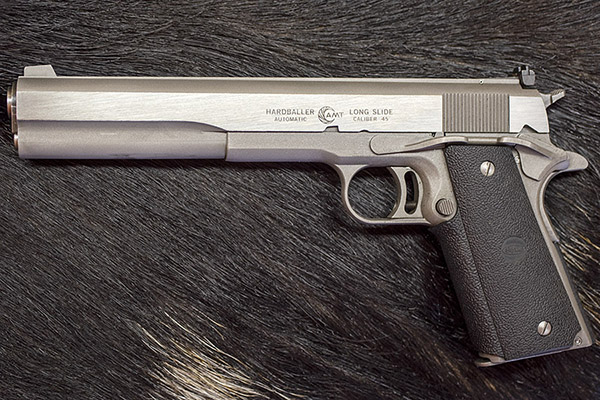
Other similar competitions involved drawing the gun from a holster, and I wanted to shoot my AMT Long Slide Hardballer, a really cool 7-inch-barreled 1911. It’s the one Arnold Schwarzenegger used in Terminator.

An AMT (Arcadia Machine and Tool) Long Slide Hardballer. The story on it is here.

I needed a holster long enough to hold the Long Slide AMT 1911, and at that time there were none on the market. Other holsters could hold either 5-inch or 4 ¼-inch 1911s, but nobody had anything for the 7-inch AMT.  Hold that thought. I’ll come back to it shortly.


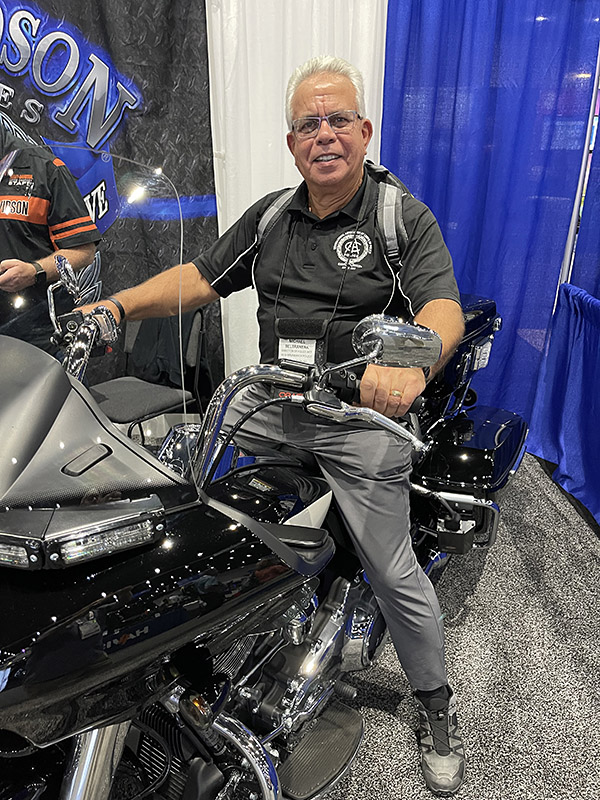
I’ve written about good buddy Mike here on the blog before. Mike and I have been buddies since junior high school. He went on to become Chief of the New Brunswick Police Department. We still talk every week. Mike deputized me a couple of times when he attended the International Association of Chiefs of Police conventions. I’d always ask for a gun, and the answer was always no.  But we had a lot of fun at those conventions.

The Director at the International Association of Chiefs of Police 2023 convention. I was his administrative assistant on that adventure. That story is here.

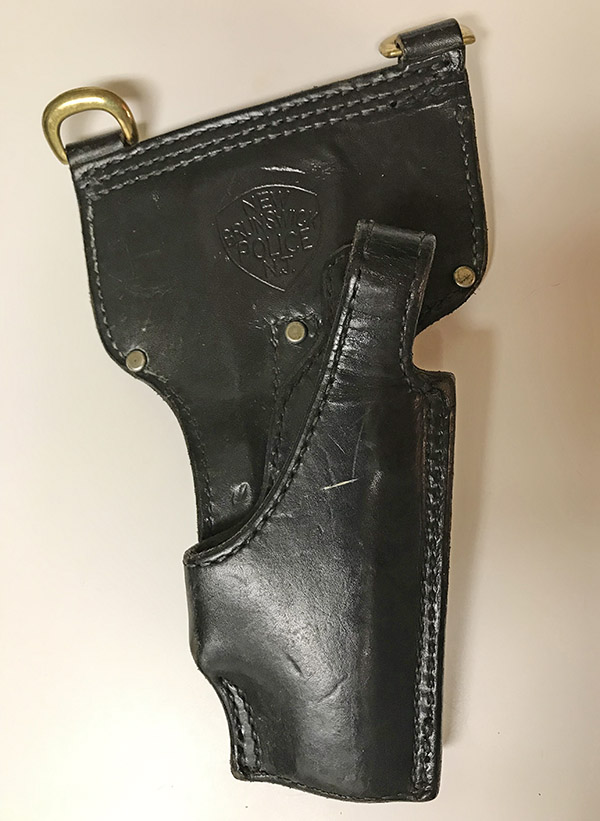
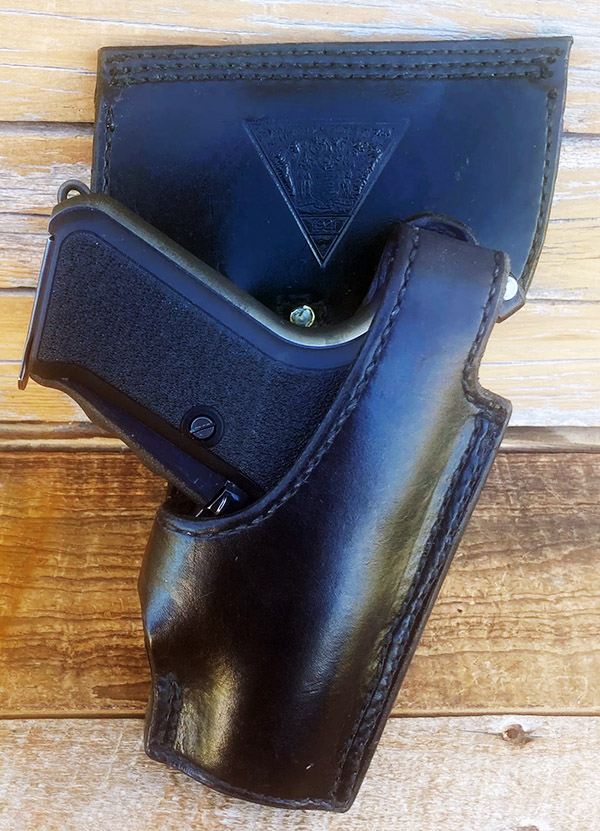
Mike called me last week. He was pumped up. He found his old New Brunswick Police Department duty holster from the days when they carried Heckler & Koch P7M8 9mm squeeze cocker semi-autos. That was the gun the New Jersey State Troopers adopted back in the ‘80s.

A New Jersey State Trooper Heckler & Koch P7M8 and its Tex Shoemaker holster.
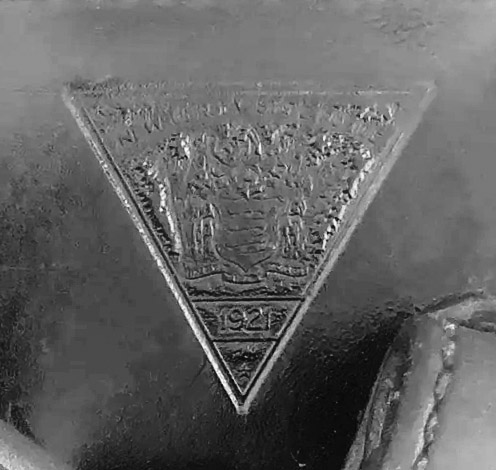
The NJSP emblem embossed on the Tex Shoemaker holster.

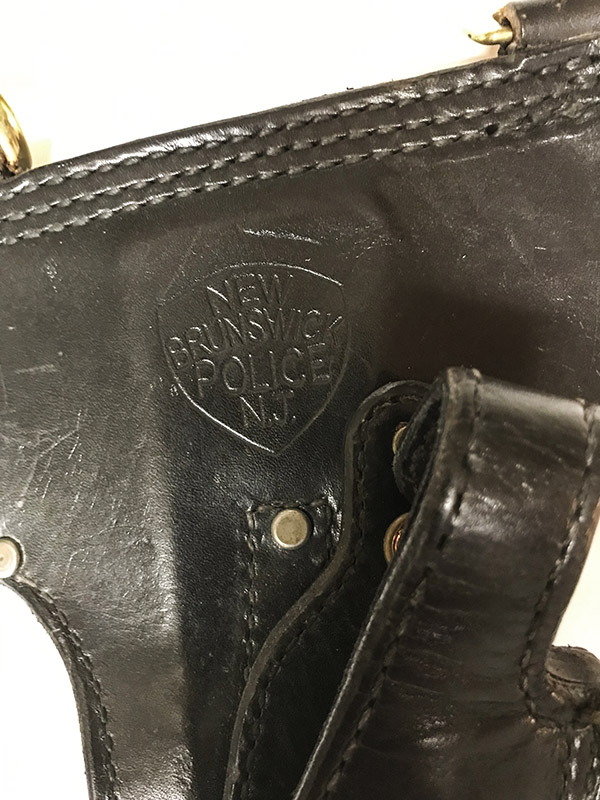
The New Jersey State Police had custom holsters crafted for their handguns by the Tex Shoemaker company, a legend in the holster business. They also had Shoemaker emboss the NJSP emblem in the leather. Not to be outdone, the New Brunswick Police Department also adopted the Heckler & Koch P7M8 9mm semi-auto, and they, too went to Tex Shoemaker for holsters embossed with the NBPD emblem. Mike had one when he served, and it was this holster he recently found. The Tex Shoemaker H&K police duty holsters have become collectible items, with this particular model appearing on Ebay for $300. Mike is going to donate his to the New Brunswick Police Department Headquarters display case. I think that’s pretty cool.

Good buddy Mike’s Heckler & Koch P7M8 Tex Shoemaker holster.
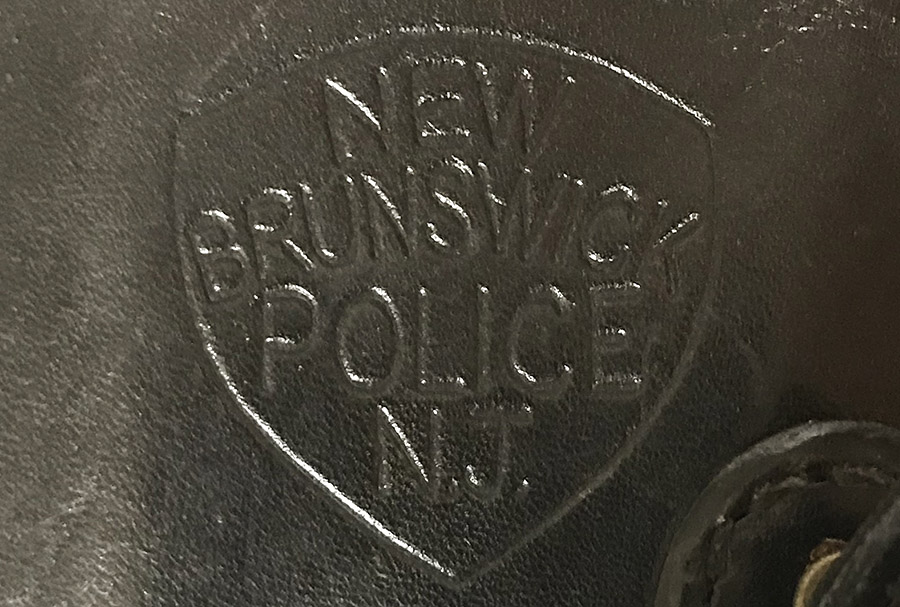
The Heckler & Koch P7M8 holster with an embossed New Brunswick Police department emblem.

So I was thinking about this story and Mike’s holster and then I remembered: Hey, I have a Tex Shoemaker holster, and mine is brand new. The Tex Shoemaker company was located in San Dimas, which is not very far from my home. They closed up shop in 2019 (I’m assuming it fell victim to the pandemic, the move toward plastic holsters, and competition from the plastic holster manufacturers).  Whatever the reason, it’s a pity.  Shoemaker’s was an old line holster manufacturer started by Tex Shoemaker, a former lawman who started out making holsters in his garage.  Their quality was unsurpassed.

When I needed a quick draw holster for my anticipated pistol competition (as described at the beginning of this blog), I couldn’t find anyone in the ‘80s who was making a holster for the AMT Long Slide Hardballer. I searched the yellow pages for holster companies (this was all pre-Internet), and that’s when I learned that the Tex Shoemaker company was nearby. I called them and explained what I wanted. I spoke with a nice guy who told me he didn’t know of anybody making a holster for the Long Slide 1911, but Shoemaker was experimenting with a new break-front holster that would handle all 1911 barrel lengths. He explained that it wasn’t on the market yet, but I could swing by and take a look at it.

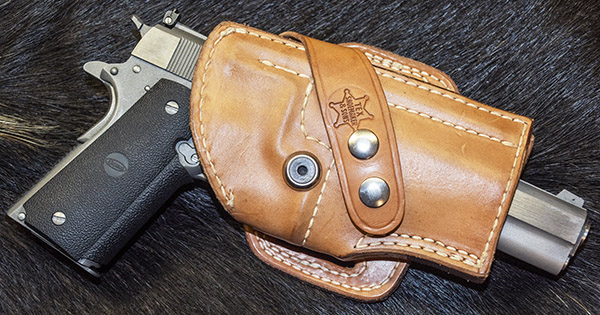
My AMT Long Slide in it’s Tex Shoemaker experimental holster.
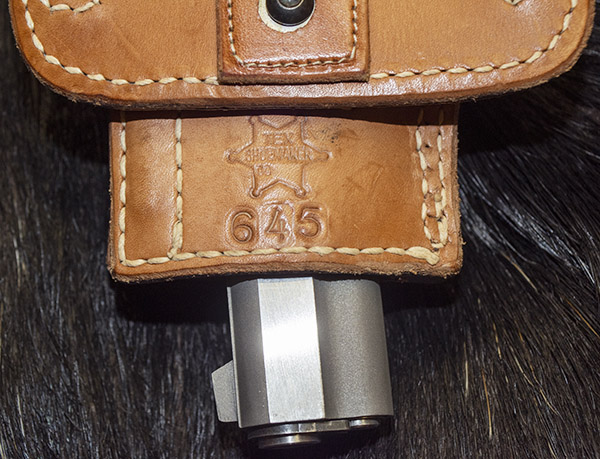
The Tex Shoemaker logo.

Sue and I rode over to Shoemaker’s that day.  It was a factory and they didn’t have a retail facility, so I walked up to the loading dock, looked up at a guy standing above me, and explained why I was there. A minute later that same nice guy I had spoken with on the phone appeared with the holster he told me about on the phone. I had my Long Slide with me and we tried the big 1911 in it; the fit was perfect. He also had two magazine holders (together they could hold four magazines).  The holster was just what the doctor ordered, and I told him that even though it wasn’t commercially available yet, I’d like to buy it.  He smiled, gave all three items to me, and told me there was no charge.

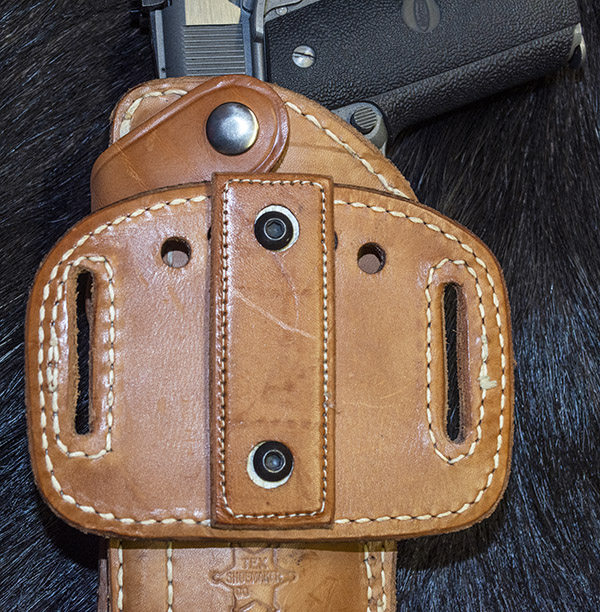
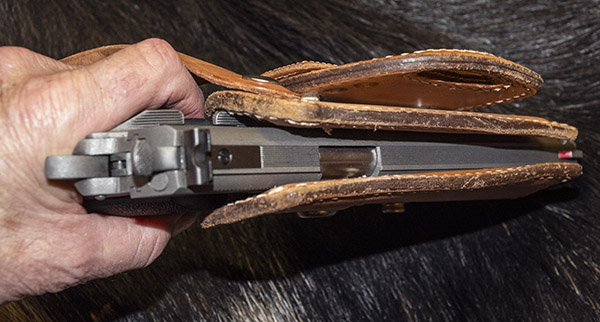
The Tex Shoemaker holster is adjustable for draw angle. It’s a cool feature.
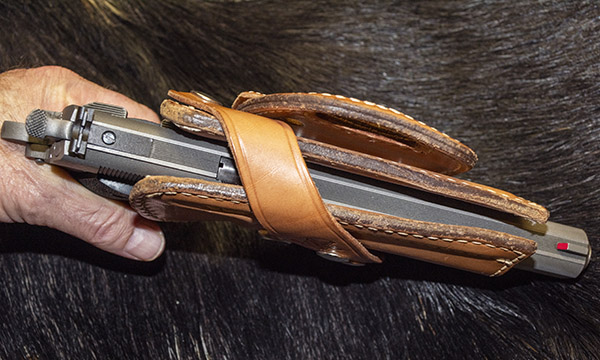
For normal carry, the pistol is secured with a cross strap.
For quick draw work, the cross strap is removed. The holster has a strong clamp spring inside the leather that secures the pistol. When drawn, the pistol can be snapped forward without withdrawing upward from the holster.
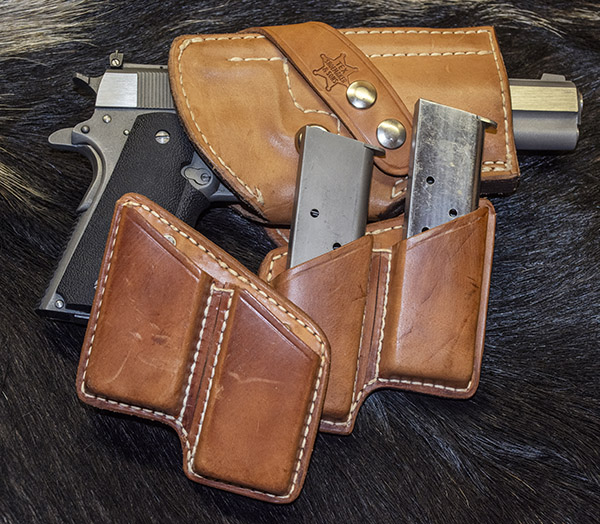
The Long Slide Hardballer, the Tex Shoemaker holster, and two Tex Shoemaker magazine holders.
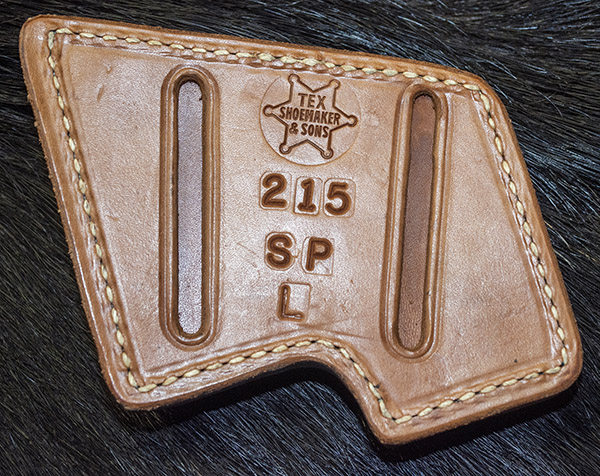
The Tex Shoemaker logo on the back of a magazine holder.

I was shocked when that nice man told me there was no charge, and then I realized I didn’t even know who he was.  I introduced myself, and as we shook hands, he told me his name: Randy Shoemaker.  Randy Shoemaker was Tex Shoemaker’s son.

I never pursued quick draw competition.  I had visions of shooting myself in the foot, and it just wasn’t something I wanted to do.  But I sure enjoy owning my Tex Shoemaker leather.   Maybe someday, I’ll enter the Quick Draw McGraw games.   In the meantime, here’s an unashamedly doctored video of me playing around a few years ago at the West End Gun Club.


Never miss an ExNotes blog:


Don’t forget: Visit our advertisers!


A Tale of Two 1911s

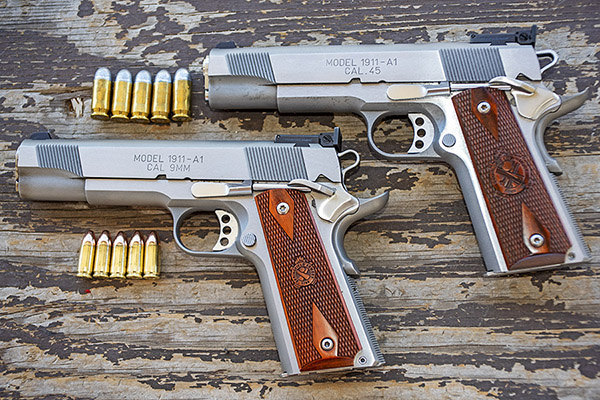
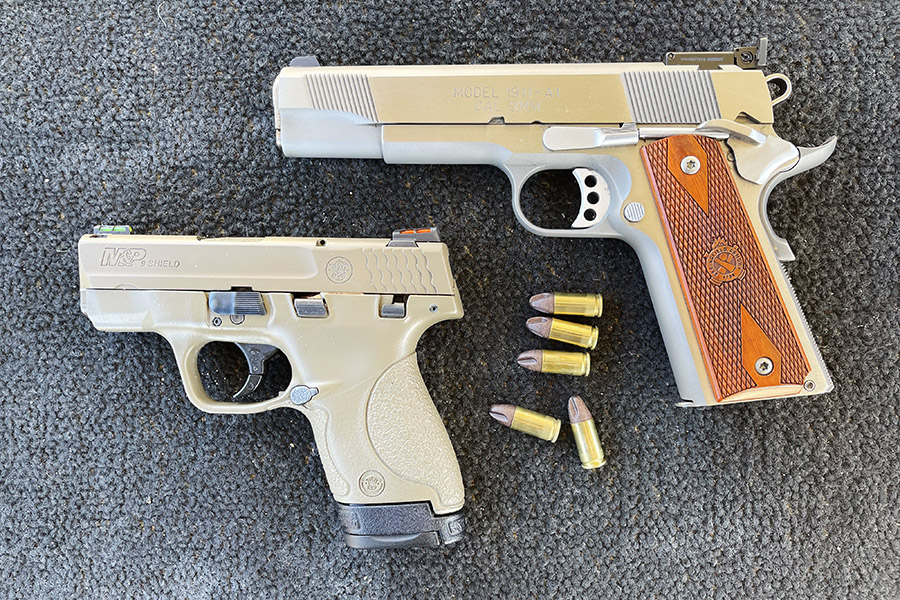
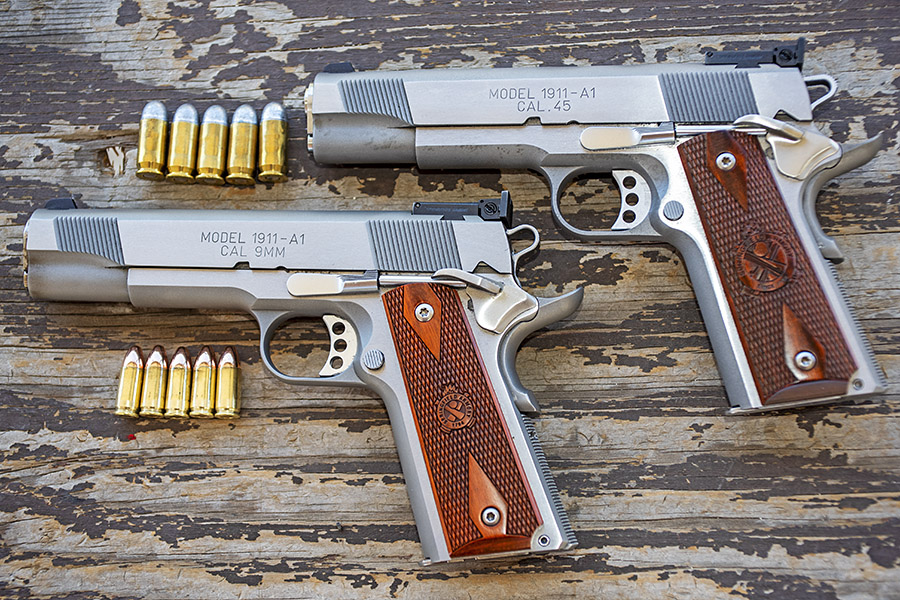
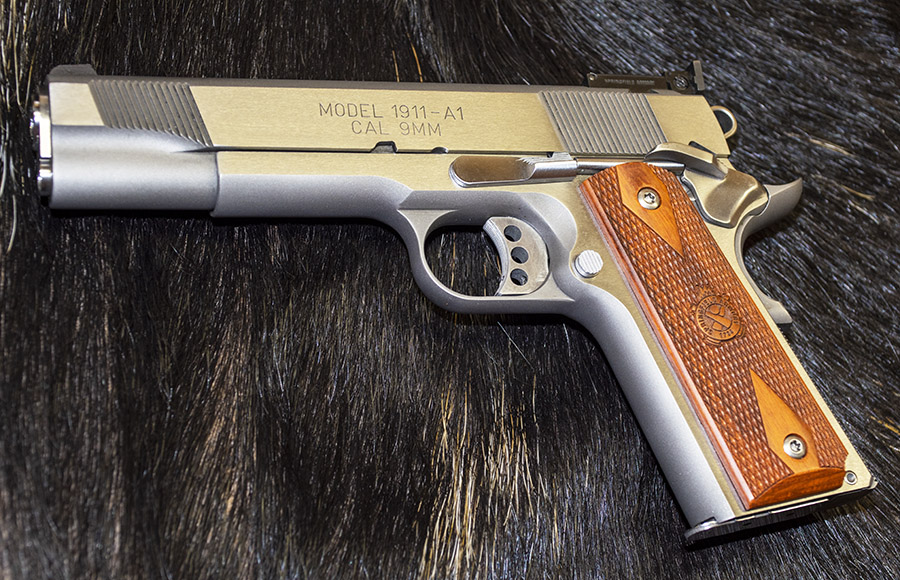
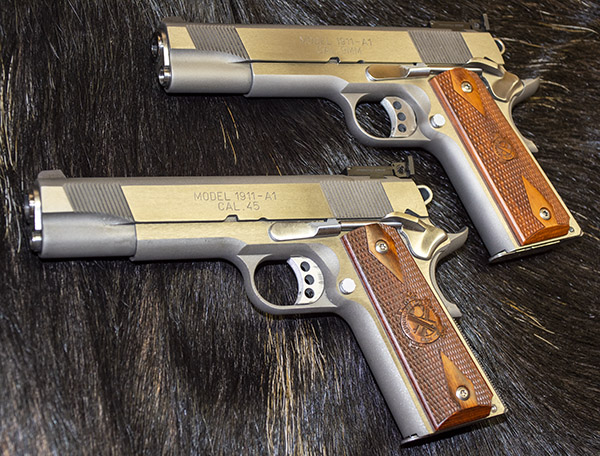
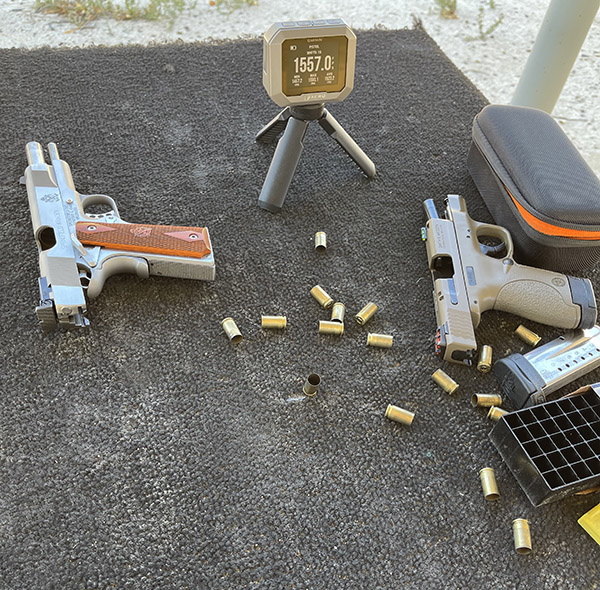
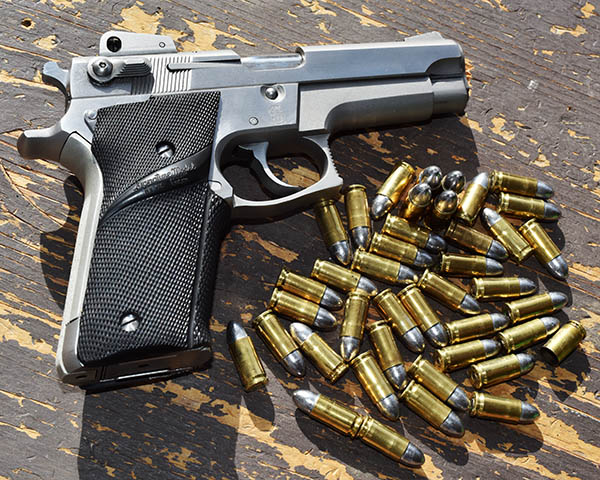
If I had a dime for every article and Internet post comparing the 9mm to the .45 ACP cartridge (and the guns that shoot them) I could probably pay cash for a new Ferrari.  That said, I make no apologies for this being another one.  In this case (and for this article), one of the variables I have sort of eliminated is the gun.  Both are Springfield Target model 1911 autos in stainless steel.  They’re the two pistols you see in the photo above.

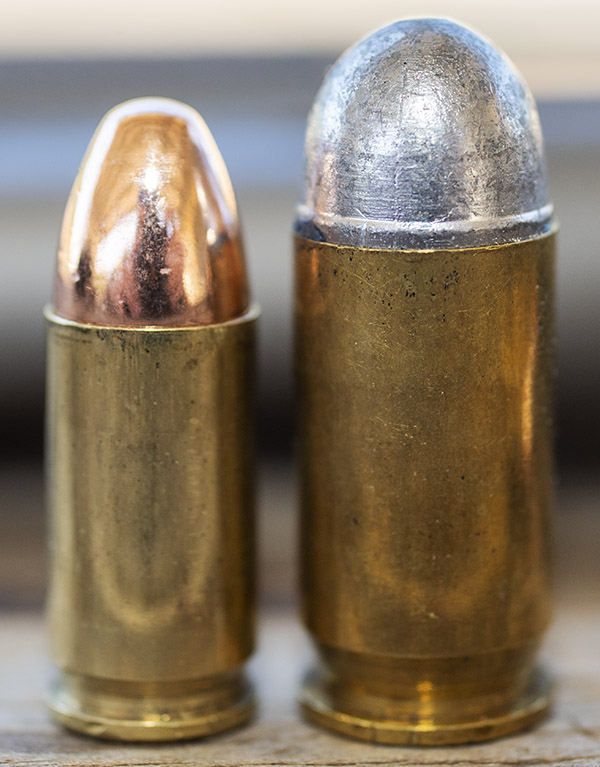
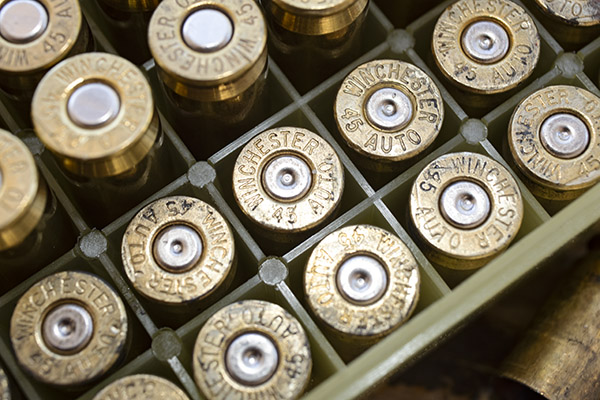
Here’s a macro photo of the 9mm cartridge (designed in 1901; also known as the 9×19 and the 9mm Luger) and the .45 ACP cartridge (designed in 1904).  Both of the rounds shown below are my reloads, which I prefer over factory ammo for many reasons.  We’ve written a lot about reloading both cartridges, and you can find those articles here.

I like these kinds of photos. The photo shows the 9mm cartridge (arguably the most popular handgun cartridge in the world) and the .45 ACP.

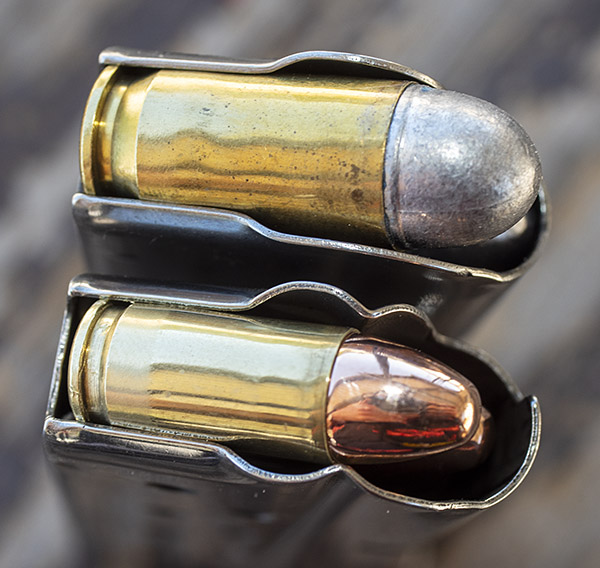
For this comparison, I used the Springfield Armory magazines that came with of the two 1911s.  Here’s what the ammo looks like in the magazines.

Loaded .45 ACP and 9mm magazines. The .45 mag holds 7 rounds; the 9mm mag holds 9 rounds. I’ve read that the average number of shots fired in an armed confrontation (not counting military actions) is less than two.

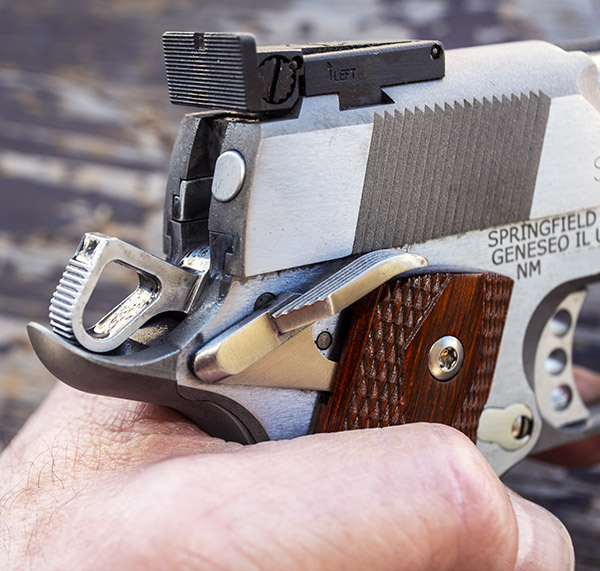
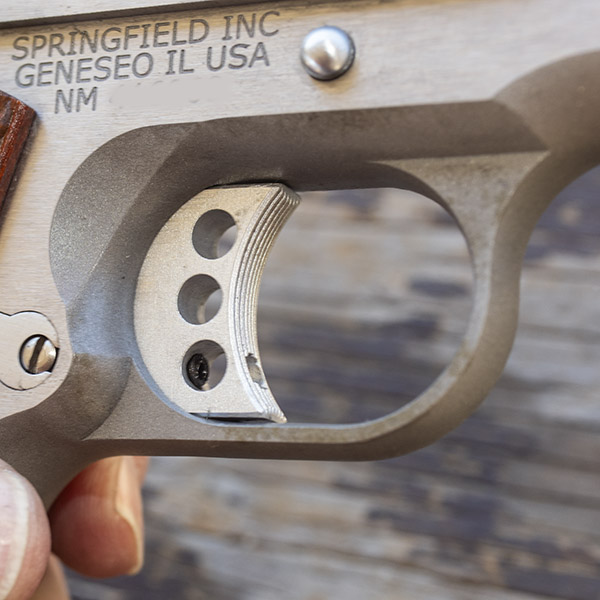
The Springfield target guns have nice features, including click adjustable rear sights, dovetailed and pinned front sights, ambidextrous safeties, target triggers, skeletonized hammers, and more.  I didn’t like the two-piece guide rods that came with both guns (you need a tool to unscrew the two-piece guide rods for takedown).  Another two-piece guide rod issue is that they constantly unscrew.  I immediately replaced those in both guns with one-piece guide rods.

A few of the features included on these Springfield 1911 target models are skeletonized hammers (a useless feature, in my opinion), a click adjustable rear sight (a very useful feature), an extended grip safety (another useless feature), and an ambidextrous thumb safety (yet another useless feature). I prefer wraparound Pachmayr-style rubber grips, but the Springfield Armory exotic wood checkered grips look cool.
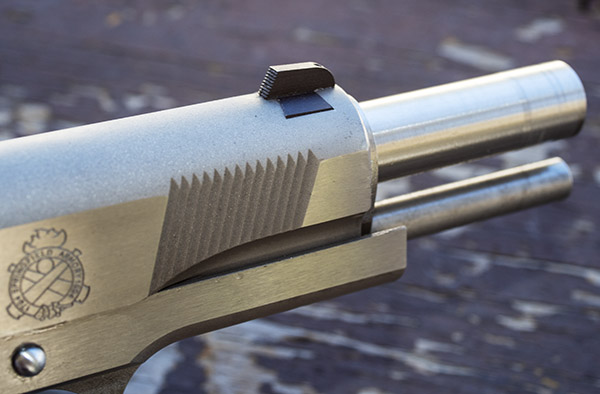
The Springfield Target model front sights are dovetailed and pinned to the slide. The one on my 9mm still came loose when the retaining pin backed out. The .45 front sight has stayed put. You can see the one-piece guide rod below the barrel; it’s a feature I added to both 1911s.

What has been a disappointment on the .45 Springfield was that the stainless steel was not properly passivated (it came this way from the factory).  The gun exhibited minor corrosion in a few spots after a while, which is unacceptable for a stainless steel firearm.  It’s the only stainless steel gun I’ve ever owned that did this.  The corrosion comes right off with a bronze bristle brush and the steel beneath it then looks pristine, but you shouldn’t have to do this with a stainless steel firearm, much less one purchased new.

My 9mm 1911 had a problem with its front sight.  The pin securing it in place backed out under recoil.  I contacted Springfield about that and they sent an oversized pin.  It similarly backed out.  I applied Loctite to the pin and very lightly peened the edges at the top of its hole in the front sight, and that seems to have fixed the problem.

Neither of the above issues should have been present.  I’ve purchased three new Springfield Armory firearms over the years and every one of them has had an issue.   My Springfield M1A rifle had two issues:  The magazines were extremely tight going into the receiver, and the ejected .308 cartridge cases were striking and damaging the stock.  I sent the rifle back to Springfield.  Springfield fixed the magazine fit issue (that fix worked) and they attempted to address the cartridges impacting the stock (that fix did not work).  The cartridge cases still hit the stock after being ejected (even after Springfield did a ham-fisted job removing wood in the impact area), so I put electrician’s tape on the stock where the spent cases impact before I take it to the range.  The rifle is quite accurate, but damn, you shouldn’t have to deal with issues like this on a new gun.  I believe these things speak to a generally sad state of affairs in Springfield’s quality assurance and process control.  But I’m going off track a bit.  Let’s get back to the topic of this article, and that’s the two 1911 Springfields.

Corrosion on the Springfield Armory .45 ACP 1911. I believe the stainless steel was improperly passivated.  I removed the tarnish/oxidation with a bronze brush and it has stayed off.
My .45 reloads. I’ve been shooting this same recipe for more than 50 years. It works, so why mess with it?  .45 ACP brass can be reloaded many, many times (and this brass has been).

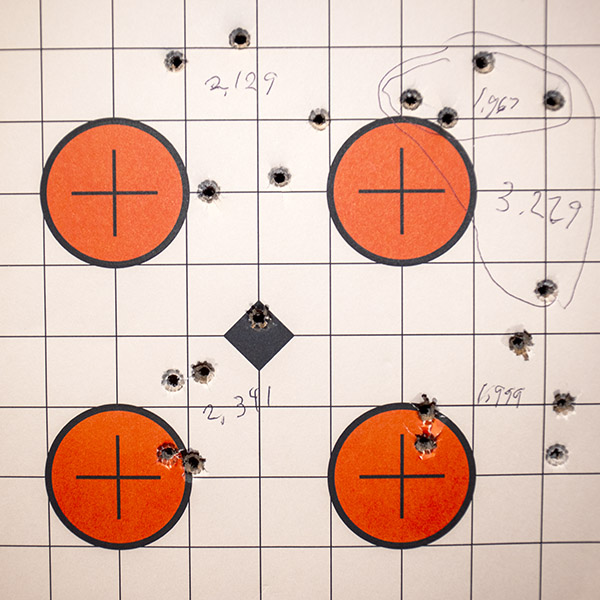
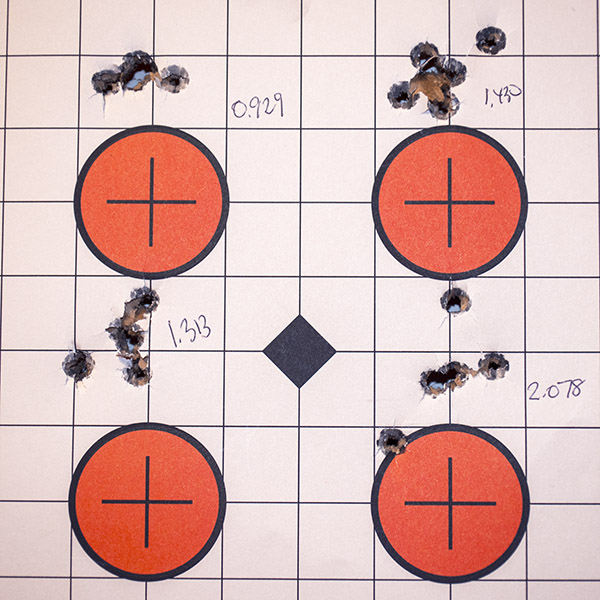
In my most recent outing with both 1911s, the .45 was significantly more accurate.  I believe that to generally be the case when comparing the .45 ACP and 9mm Luger cartridges, and this range day was no exception.  The 9mm load I used was a 124-grain Xtreme plated roundnose bullet over 5.5 grains of Accurate No. 5 propellant.  The .45 ACP load was a 230-grain Missouri cast roundnose bullet over 5.6 grains of Unique propellant (an accuracy load that always works for me).  I shot the targets shown below on the 50-foot West End Gun Club handgun range using a two-hand hold supported by a rest beneath my hands.

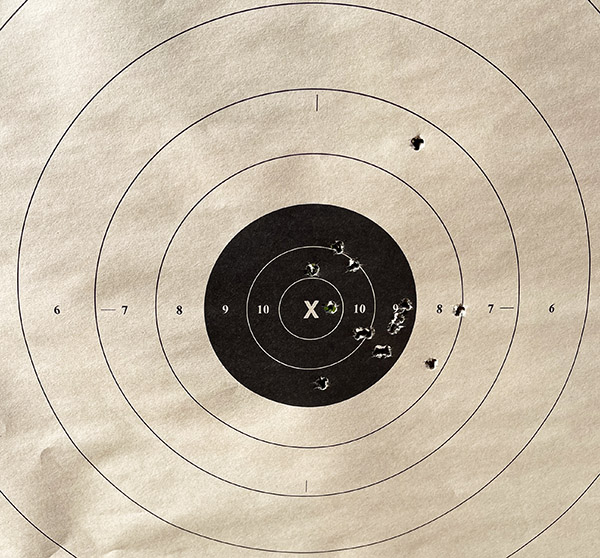
The 9mm 1911 grouped just over 2 inches, which is typical for this load. This same handgun has done much better with other loads, which is outlined in earlier blogs on 9mm cast bullet loads and 9mm jacketed bullets loads.

The 9mm grouped okay, but not great.  I’ve shot other loads in this handgun that were much more accurate, but I didn’t have any of those loads in the ammo locker the day I went to the range.  If you would like to know about this, you can read about my 9mm ammo development efforts with the 9mm 1911 (and other handguns) using cast bullets and jacketed bullets.

Groups with the Springfield Armory .45 ACP 1911. Point of aim was at 6:00 on each target. Shooter fatigue is what opened up the last group.

The .45 1911 grouped very well.  It’s a funny thing:  The 9mm 1911 has way less recoil than the .45 and the trigger on my 9mm 1911 has been tuned to perfection by good buddy TJ (you can read about that here), but I shoot better with a .45 (and I always have).  The .45 1911 barks like a Rottweiler and it kicks like a mule, but the thing is just flat accurate.

So there you have it:  Another take on the rehashed ad infinitum 9mm versus .45 ACP argument.  If you have an opinion, please weigh in with a comment or two below.


If you would like to read a bit more about how to shoot a handgun well, that story is here.


Never miss an ExNotes blog:


Don’t forget: Visit our advertisers!


SIG Alert

By Joe Berk

No, I’m not talking about the SIG Alerts we get here in California when there’s a traffic jam on our freeways.  This is about a sale at SARCO, a preferred military surplus outlet, on SIG police department trade-ins.  When police departments upgrade to different weapons, they sometimes sell their older handguns.  That’s what’s happening here.  What makes this sale special, in my opinion, is that the trade-in guns are 9mm SIG P226 sidearms.  You follow the blog, and you know that I consider the SIG P226 to be the world’s finest handgun.  With a SARCO price on the P226 at just over $700, I think it’s a great deal.

My SIG P226. I consider it to be the world’s finest handgun.

I’ve never seen SIG P226 police trade-in guns for sale.  It’s a hell of an opportunity to pick up a great handgun at a bargain price.   I once owned a Smith and Wesson Model 659 police trade-in and it confirmed what I thought about police sidearms.  They are carried a lot and shot very little.  That means there might be some cosmetic shortfalls (holster wear, etc.), but the guns’ internals are probably in superb shape.

A Smith and Wesson Model 659 police trade in that was a lot of fun. Like most police sidearms, it was carried a lot and shot little.

I’ve purchased military surplus equipment through SARCO before (in my case it was a replacement gas cylinder for my M1 Garand, which fixed my rifle’s cycling issue).  SARCO is a reputable outfit.

SARCO’s SIG P320 police trade-in pistols.

SARCO is also selling SIG P320 police trade-ins.  I don’t have any experience with that model, so I can’t tell you anything about it (other than that it’s SIG, so it’s probably good).  The SARCO price on the SIG P320 police trade-in is only $425; that’s a superb deal.

What might be fun is to pick up either handgun from SARCO and send it to good buddy TJ (at TJ’s Custom Gunworks) for a full cosmetics and action job.  That would be fun.  If you have ever entertained any thoughts about picking up a SIG or a custom pistol, this might worth looking into.


Never miss an ExNotes blog:


Don’t forget: Visit our advertisers!


SIG’s M18 versus the S&W Shield

I had a chance to fire the new SIG M18 9mm handgun, which was recently added to the California Department of Justice roster of approved handguns here in the People’s Republik.   I was impressed with the M18’s accuracy, grouping, comfort level, feel, and sights.  I love the desert tan colors.  I was not impressed with the trigger (more on that in a bit).

It was a good day on my local indoor pistol range, and as I was leaving, my good buddy Shannon asked where I’ve been (I hadn’t been there in a few weeks).  “Overseas,” I told her.  She then pointed to the new M18 SIGs they had in the display case and asked if I’d like to try one.  That reminded me of the old joke about the guy with the wooden eye.  I responded with an affirmative and rhetorical, “Would I?”

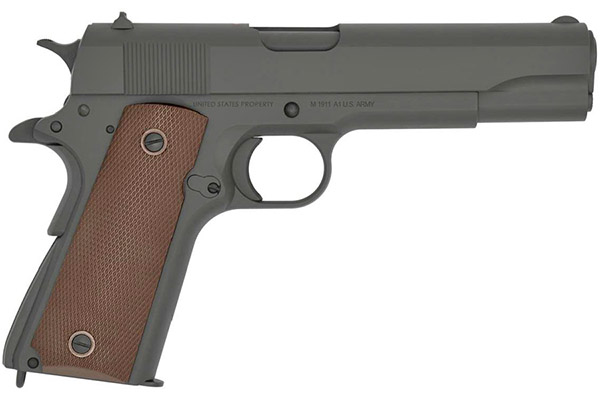
The venerable 1911. It’s chambered in .45 ACP.  All steel and with a Parkerized finish, as God intended. In my opinion, you can’t improve on perfection, but the Army had other ideas.

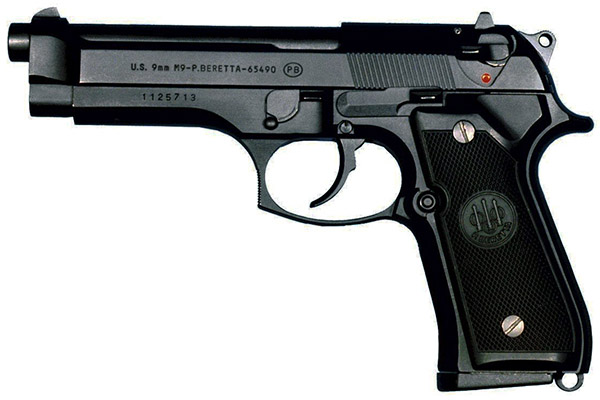
A bit of background:  The US Army and I have something in common:  We change handguns on a regular basis.  The Army had been using the venerable .45 ACP 1911 since about, well, 1911.   It served the Army well (and still serves well in certain special ops units), but the Army decided it wanted something better.  That led to adoption of the 9mm Beretta 92 (designated as the M9 for the military) in 1985.  I never cared for the Beretta, so I’ve never owned one and I can’t tell you anything about how it shoots or feels. The M9 had pushed out my beloved 1911, so I didn’t like it.  Period.  No handling or testing required.

The Army wanted a smaller pistol cartridge, and it settled on the Beretta M9. The M9 has an aluminum frame.  Bob likes it.

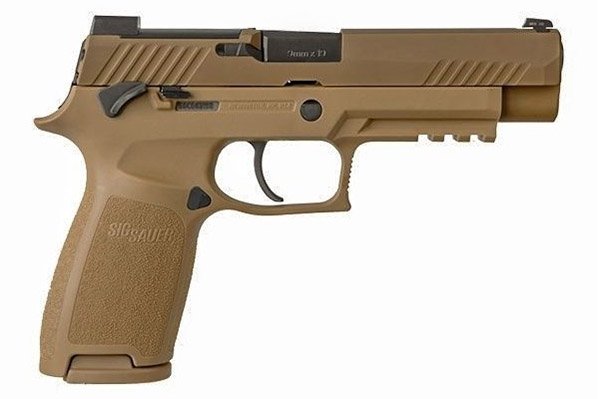
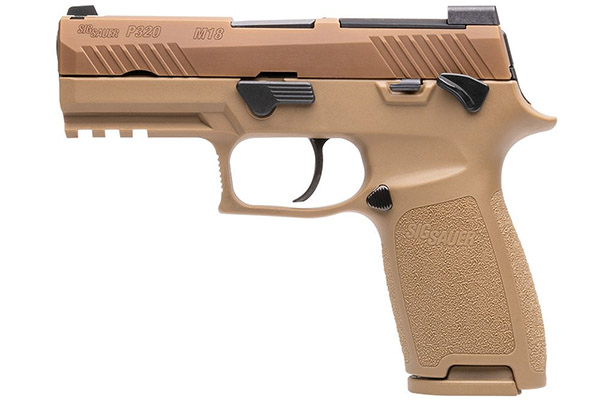
The Army quickly decided it didn’t much like the Beretta, either.  But the Army is big and it moves slowly when it’s not lobbying for more funding from Congress, and it wasn’t until 2017 that they decided to go with a militarized version of the 9mm SIG P320.  There are two versions of the new military handgun:  The M17, which has a 4.7-inch barrel, and the M18, with a 3.9-inch barrel.  Both are full sized handguns with magazines carrying a gazillion rounds, and until recently, neither was available to lowly and untrustworthy civilians here in the People’s Republik of Kalifornia.  Nah, scratch that.  Lowly or not, trustworthy or not, no California civilians could purchase either of the new SIGS, although weirdly, we could purchase the civilian gun from which it was derived, the SIG P320.  Go figure.

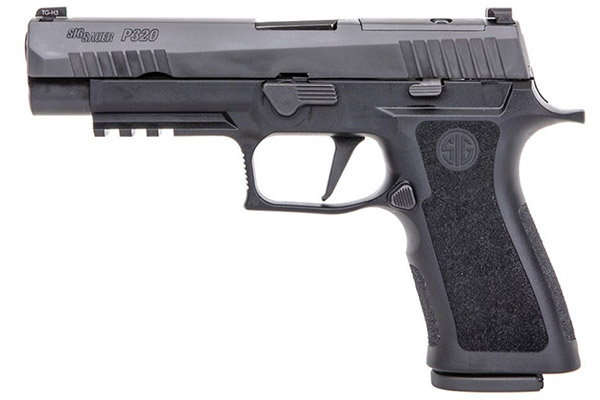
The SIG P320, the gun the M17 and M18 handguns are based on.  All three guns (the P320, the M17, and the M18) have a polymer gripframe.  You can tell they’re swell (I’m not going to explain that comment; you have to be old enough to get it).
The 9mm SIG M17. Note the longer barrel length.
The gun I fired: The SIG M18.

The SIG M18 recently appeared on the California Department of Justice approved handguns roster.   That’s just a bit on the weird side, too, because the M18 is the version with the shorter (i.e., slightly more concealable) barrel.   You’d think in their wholesome attempts to keep us pure our legislators would have approved the longer-barreled M17.  Maybe they will in the future.

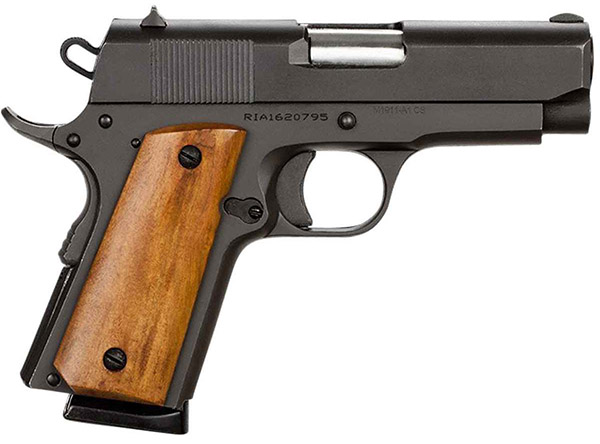
The Rock Island Compact 1911. This is a short barreled, shorter grip frame 1911 chambered in .45 ACP.
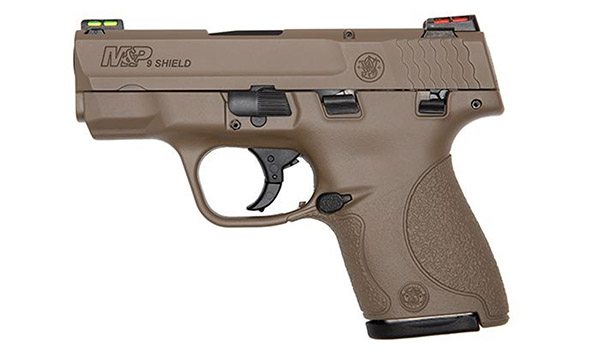
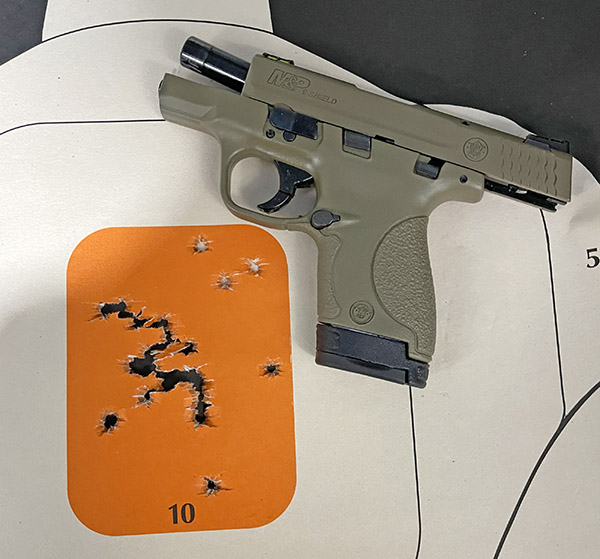
My Smith and Wesson Shield. It has a very short barrel compared to either the SIG M17 or M18, which makes my shooting with it a bit less accurate.

I had fun on the range.  I shot a box of .45 ammo in my Compact 1911, and then two boxes of ammo in my Smith and Wesson Shield.  I was doing pretty good with both, too.  It’s a pleasant way to spend an afternoon.  As I was leaving the range, Shannon told me about the new M18s they had in stock and offered a trial run, so I put a box of 50 rounds through one of them.

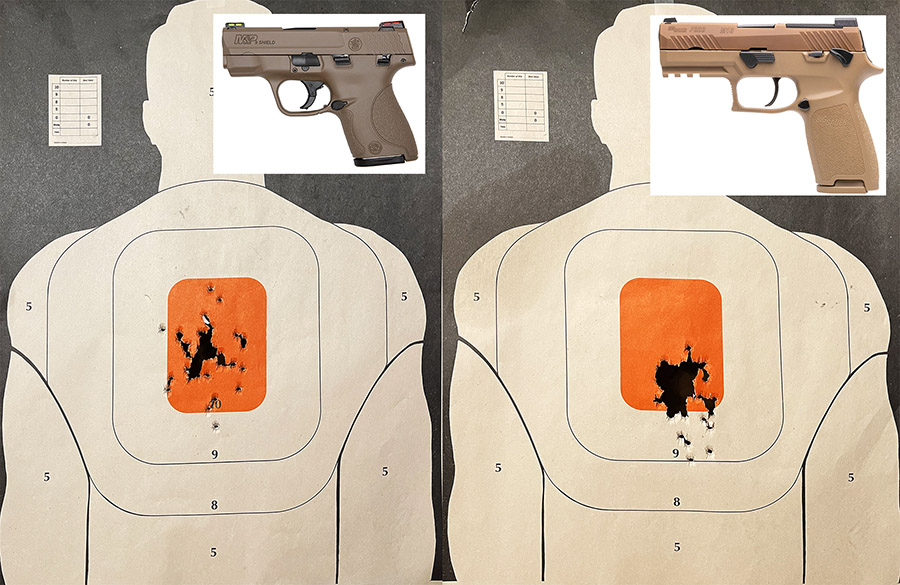
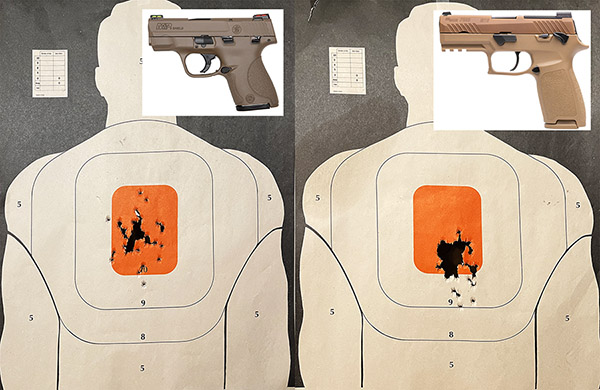
I used a 6:00 hold on the orange bullseye on both targets, and I fired 50 rounds at each. The Shield target is on the left; the SIG target is on the right. Both guns are good enough; the M18 is surprisingly accurate.

As I said above, I didn’t care for the M18 trigger (the M18 is a striker-fired handgun; give me a hammer-fired gun any day).  But the thing was accurate, even with the Joe Biden trigger (it was clumsy and creepy).  I put nearly all 50 rounds through a single jagged hole at my point of aim 10 yards downrange, and then I started hitting low with the last few rounds.   The few that dropped a bit below the orange bullseye were entirely due to me being tired and shaky (it wasn’t the gun; I was coming up on 200 rounds in that range session and I’m an old man).  The bottom line:  I like the new M18.  A lot.  I may buy one somewhere down the road, unless the M17 gets approved in California first.


Join our Milsurps group!


Never miss an ExNotes blog:

Please click on the popup ads and visit the folks who advertise with us.


The 9mm 1911 Resurrection

By Joe Berk

As mentioned in recent blogs on my 9mm Springfield Armory 1911, I took the gun to TJ’s Custom Gunworks to have it repaired and customized.  I have the gun back now and I am very satisfied with the work.

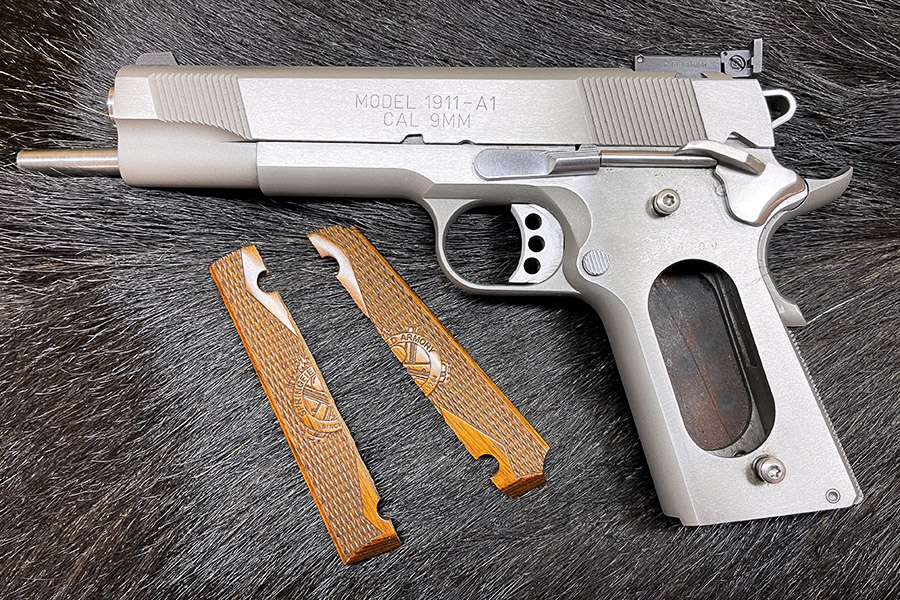
When I took the 1911 to TJ, I asked him to repair the damage I did to my 1911 and to add several custom touches.  That’s what he did, and I’ll describe them below.   Most of the photos in this blog are from TJ.   I took a few, too.

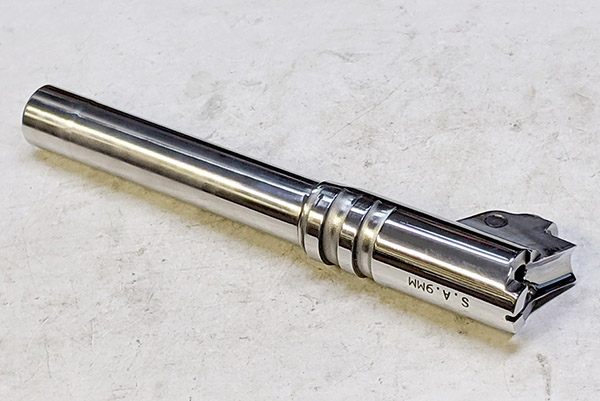
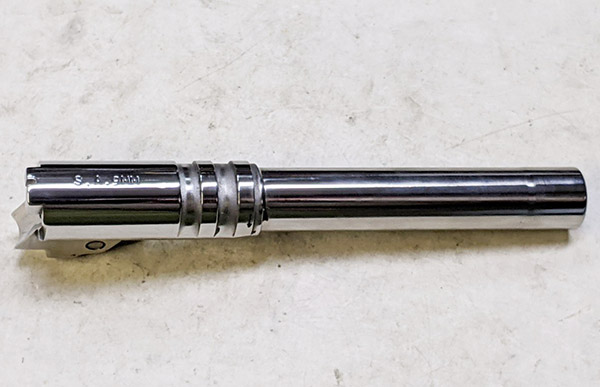
Fortunately, the 1911’s barrel was not damaged (the cartridge blew apart; the barrel and chamber survived).  TJ polished the barrel, the chamber, and the ramp.  The reinvigorated barrel looks great and it adds to the 1911’s appearance.

The polished 1911 barrel.
It looks great, doesn’t it?

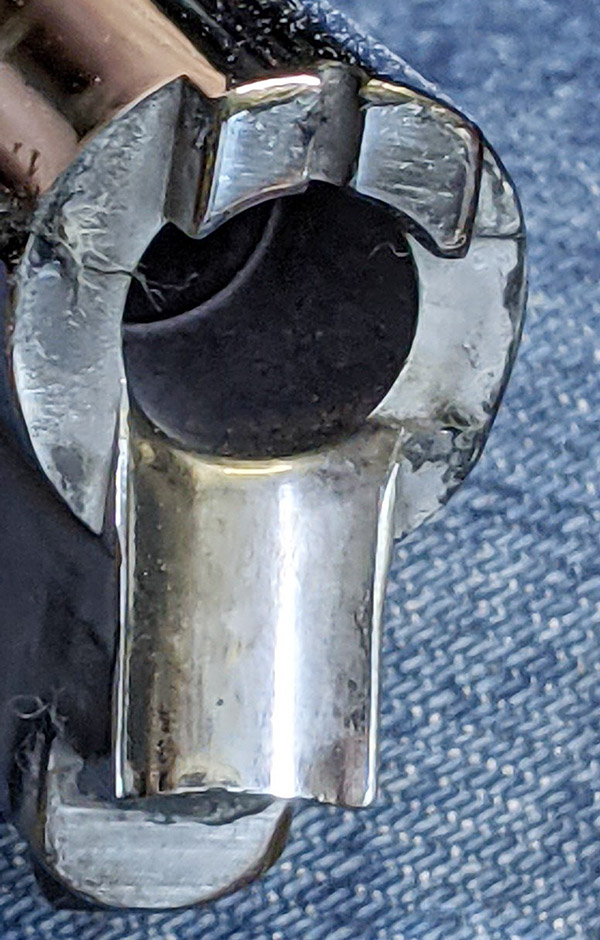
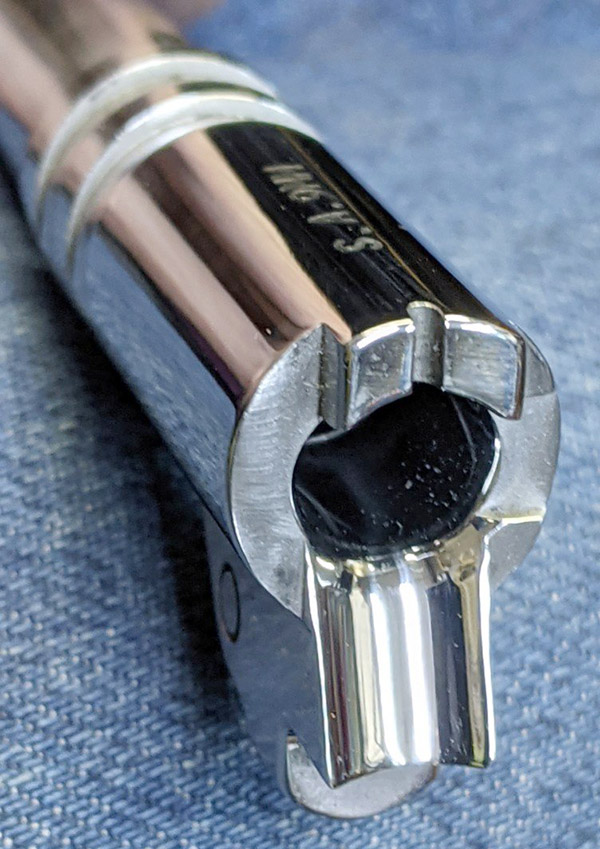
TJ polished the 1911’s ramp and chamber.  This helps to prevent feed failures and assists in extraction.  The polished ramp also helps to prevent bullet pushback into the case as the ramp is pushed from the magazine into the chamber.

The feed ramp before polishing.
The feed ramp after polishing.

The trigger was in bad shape after the 9mm cartridge went into its sudden unintended disassembly mode.  TJ cleaned it up, but I’m going to have him fit a new target trigger at some point in the future.

The rigger before TJ cleaned and finished it.
The trigger and its bracket after brushing and polishing.

While TJ was in the gun, he removed and replaced the Springfield Armory firing pin and firing pin spring (which he does on all the Springfield Armory 1911s that come into his shop).   Springfield uses a titanium firing pin and a heavier firing pin spring, which is a bad combination.  I’ve had occasional misfires with my Springfield, and the primers have previously always shown light firing pin strikes.  With the new Wilson firing pin and firing pin spring TJ installed, that problem is in the rear-view mirror (where it belongs).

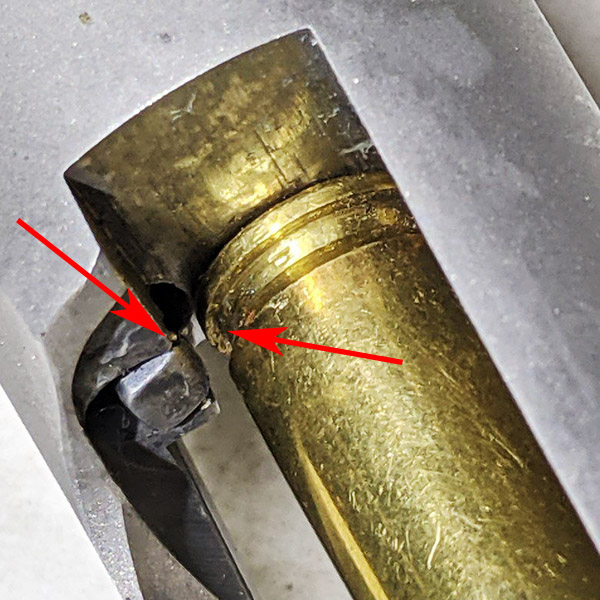
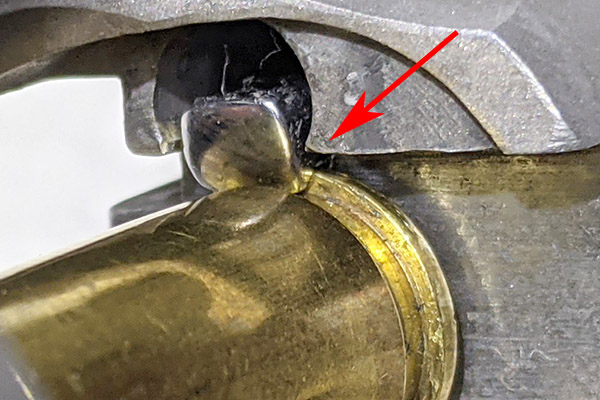
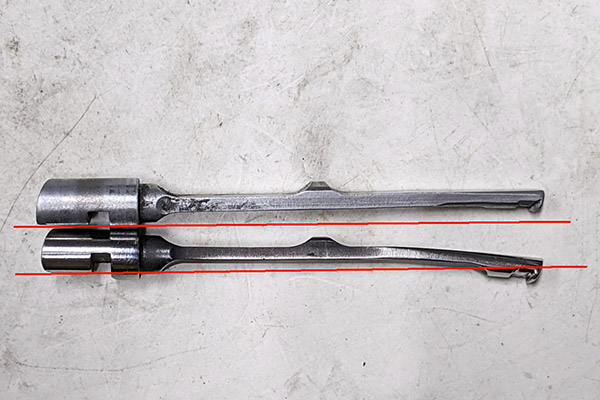
TJ found that the extractor on my Springfield Armory 1911 was terrible.  I thought that might be due the base of the cartridge bursting, but it was not.  It was just a factory goof up. The photo TJ included shows the extractor about as I remembered it before the event that set all this in motion.  The extractor had been extremely difficult to remove from the slide when I disassembled it for cleaning, but I never thought to check if it was engaging the cartridge (the gun had been ejecting).  You would think an outfit like Springfield would know what they are doing in this area, but apparently they did not.  TJ fit a new extractor to fix that problem.

This photo shows the original extractor not touching the cartridge case at all. It appears that the claw is just too short.
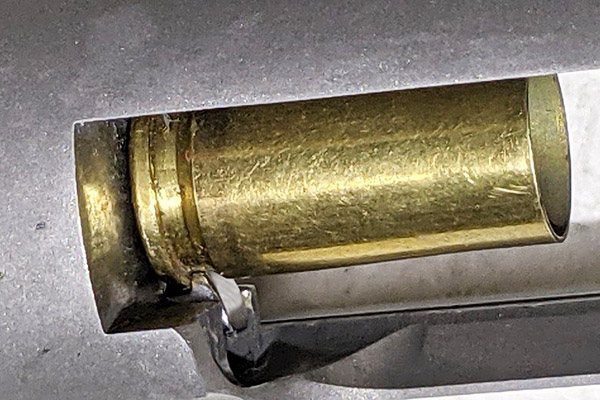
The new extractor TJ installed; note that it now has a firm grip on the case rim.
Another shot of the extractor on the case rim. It’s amazing the cartridges were extracting and ejecting before this fix.  They were flying everywhere.
The old extractor is on top; the new one is on the bottom. Note that the old extractor was not reaching in to engage the case.

Ejection is way better now.  The gun drops all the cases in the same spot just to my right (they don’t go flying all over creation like they used to).  It makes scooping up my brass a lot easier.

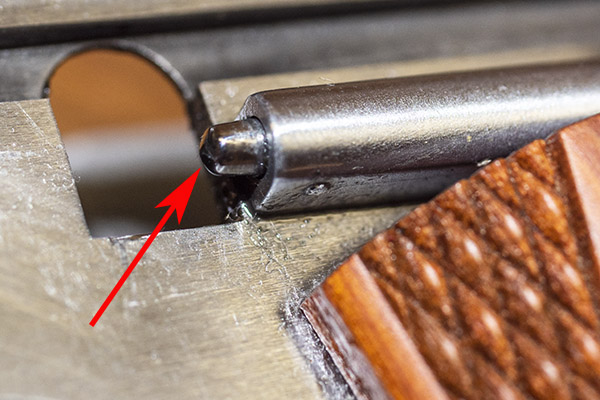
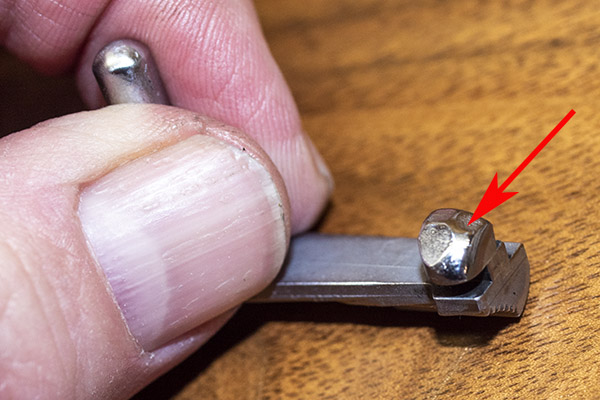
Reinstalling the slide release on my Springfield was difficult.  The slide release plunger was too long and the camming surfaces on the underside of the slide release were not cut at the correct angles.  TJ reconfigured both.  The slide release snaps into place in a very slick manner now.  There’s no more worry about scratching the receiver (the so-called idiot scratch) when the gun is reassembled.

The slide release plunger, as delivered by Springfield Armory, was originally too long. It made installing the slide release problematic. TJ shortened and recontoured it.
The slide release has a contoured bevel to push the slide release plunger in when the slide release is installed. As delivered by Springfield Armory, the angles were incorrect. TJ recontoured this area to make installing the slide release much easier.

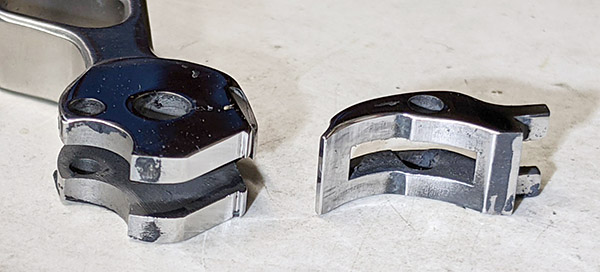
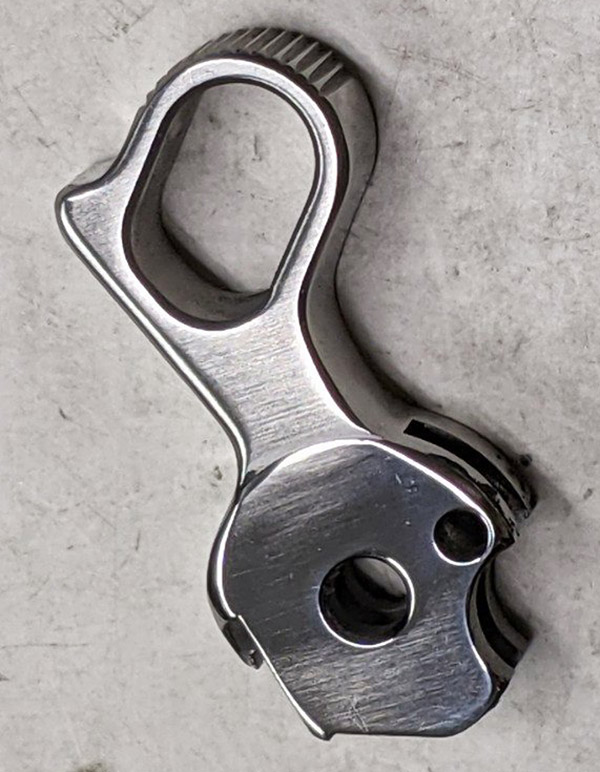
TJ polished and fit a new hammer, which looks better than the original.  He also lightened the trigger pull.  The new trigger is light and I like it.

A polished hammer and sear.
The new hammer. It looks good.

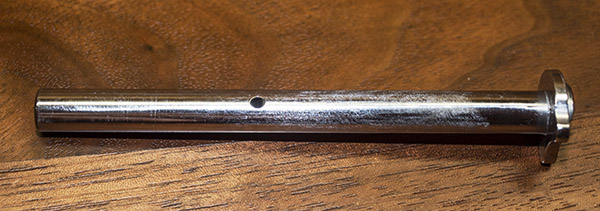
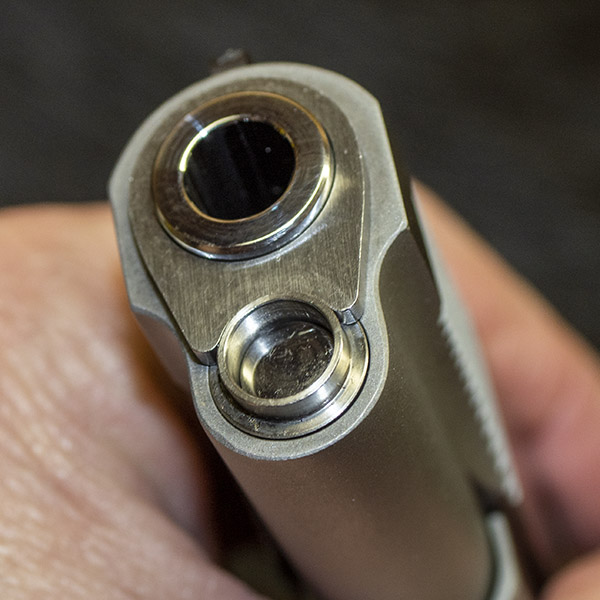
The Springfield Armory 9mm 1911 came from the factory with a two-piece guide rod, which I hated.  It would constantly unscrew, even after applying blue Loctite after each cleaning.  The stock Springfield guide rod needed an Allen wrench to unscrew and remove it (Springfield provided one with the gun).  The gun required doing this to be able to rotate the barrel bushing after depressing the guide rod plug.  In my opinion, two-piece guide rods are a solution to a problem that doesn’t exist.  I don’t know why manufacturers fit them to new guns and I don’t why anybody would want one. I asked TJ to fit a polished one-piece guide rod to my 1911, and to make it short enough so that I could rotate the barrel bushing for disassembly without having to unscrew the guide rod.  I like the new set up a lot better.

TJ installed a one-piece guide rod. I like it. The original two-piece guide rod was always unscrewing.
The new guide rod in its bushing. TJ modified it so I could disassemble the 1911 without having to unscrew the guide rod. Not the polished end of the new guide rod, and the polished barrel end.

Finally, TJ polished the slide-to-receiver interface points.  You can see this work in the photos below.

The 1911 slide underside.
The 9mm 1911 receiver.

While TJ had the gun, I ordered new grips and a replacement magazine from the Springfield Armory website.  The original crossed-cannon cocobolo Springfield grips were damaged when the cartridge burst, so I bought another set (they were reasonably priced at $32.95).  The Springfield site also advertised a set of double-diamond checkered cocobolo grips (without the Springfield logo) for $15, so I checked that box, too (I like having an extra set of 1911 grips on hand).  The grips and the new magazine arrived a few days after I ordered them.

I picked up the repaired and reinvigorated 1911 from TJ this week. I’ve already been to the range with it and it works well.  Watch the blog; I’ll post a range report in the near term.  I’ve also had a few more thoughts on what might have caused the burst round that started this adventure, and we’ll have another blog on that as well.  Here are links to our prior blogs on this topic:

KABOOM!

Thoughts on the 9mm Double Charge


Help us bring more content to you…please click on the popup ads!


Seeing double? Nope. I liked my 9mm 1911 so much that when I saw the same gun in .45 ACP, I bought it, too. Watch for a report on it in an upcoming ExNotes blog.

Never miss an ExNotes blog:
Home on the range…

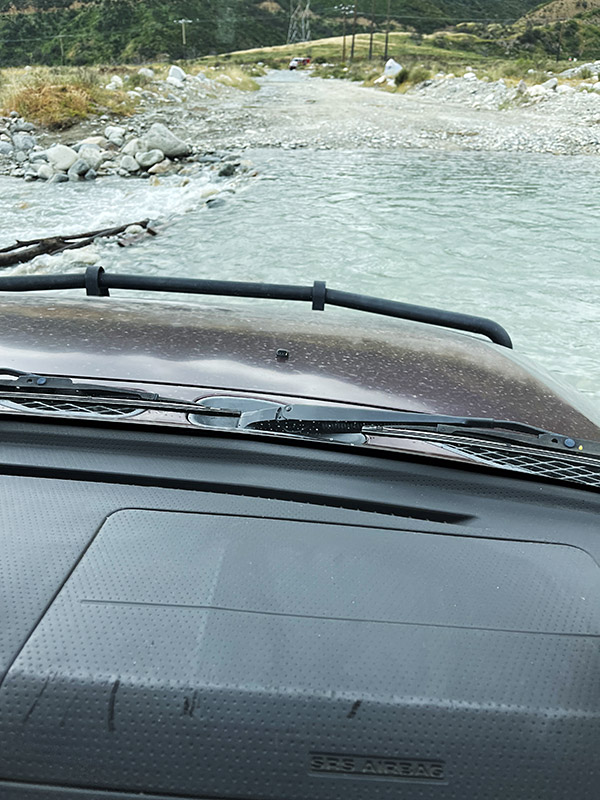
The stream crossing to the West End Gun Club has been too deep to cross in my Subie Outback since early January.  I tried it once back then and I wasn’t going to make that mistake again.

My January Meyer Canyon Road mishap. The Subie is not a submarine and I am not a U-boat commander, although we both came close that morning.

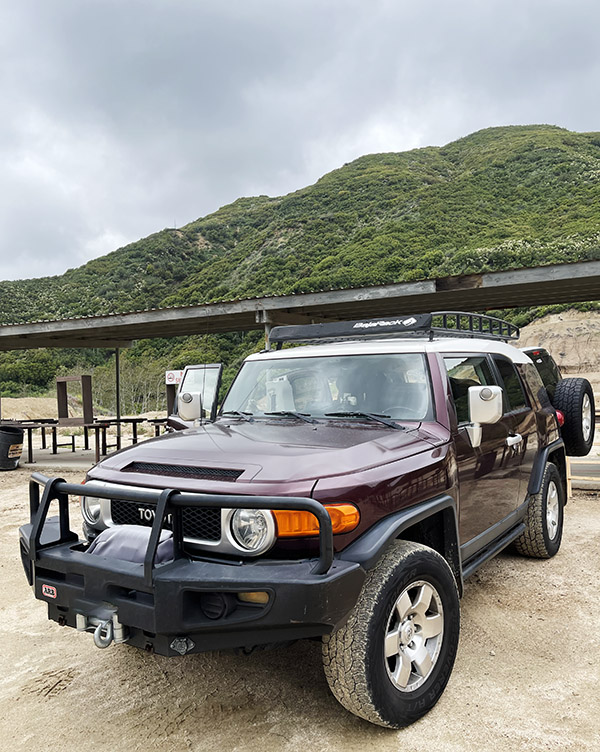
I’ve been going to the Magnum Range in Ontario (an indoor pistol range), watching the West End website for updates and occasionally driving out to check the stream.  The Magnum Range is a good place to shoot, but I missed shooting my rifles.  Then a good thing happened earlier this week:  Good buddy Duane offered to pick me up and attempt a stream crossing in his Toyota 4×4.  I was in.

Duane’s Toyota 4×4. It’s an impressive vehicle.

I’ve known Duane for years, going back to my work with CSC Motorcycles in their early days of the replica Mustangs and the RX3 250cc adventure bike. Duane and I both owned the CSC bikes and we traveled extensively on them.

Duane in the commander’s cupola.

The Meyer Canyon Road stream crossing was still deep and the water was moving swiftly, but Duane’s Toyota had no problem crossing it.

Entering the fray…

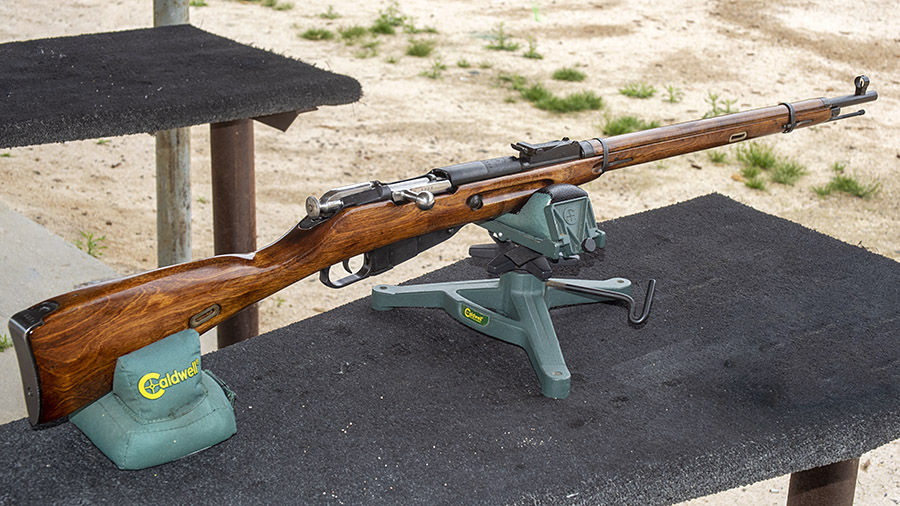
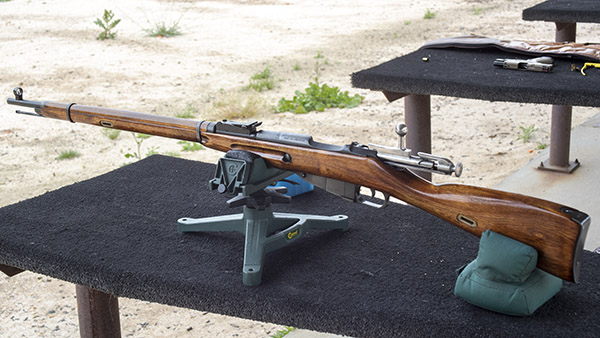
I knew which rifle I wanted to shoot when I received Duane’s email invitation:  My Mosin-Nagant 91/30.  It’s the one you see at the top of this blog.  The Mosin is a favorite.   It’s accurate, I reload 7.62x54R ammo, and it is fun to shoot.

My Mosin-Nagant 91/30. The Russians built 17 million of these rifles. They are becoming hard to get and prices have risen substantially.  These rifles are surprisingly accurate.

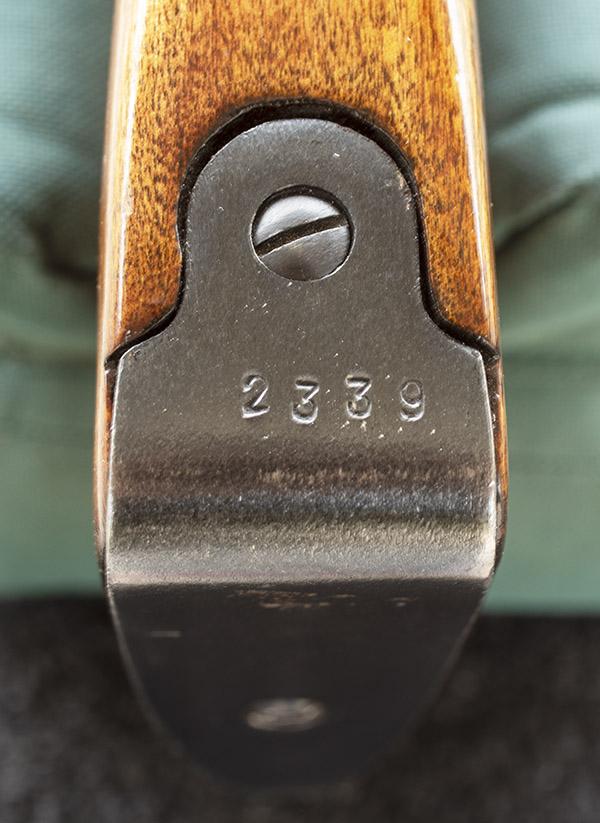
I’ve owned this Mosin rifle for maybe 10 years now.   It came about almost as an afterthought.  To me, the Mosins appeared to be cheap pieces of junk.  Then one day after a class about engineering creativity, a student asked about the cover photo on a book I wrote.  He told me he and his father owned a Mosin and enjoyed shooting the rifle.  I saw a Mosin on the rack at a sporting goods store a short while later for $139.  It looked crude, but for $139, I thought I’d take a chance.  The guy who sold it to me did not know there was a bayonet in the Mosin’s cardboard box, and when he put the rifle back in its box, the bayonet scratched the stock.   Neither of us knew this until 10 days later (after California’s silly waiting period).  The store offered to sell me a different Mosin, but that meant starting the 10-day waiting period all over again.  I viewed the scratch as an opportunity, and indeed it was.  I refinished the stock (10 coats of TruOil worked nicely).  Then I glass bedded the action, reworked the trigger, polished the bolt, and worked up a load.  It was fun and I learned much about the rifle.  Mine has matching numbers on the receiver, the butt plate, and the bolt.  I know it’s weird: I own some really nice rifles, but the Mosin is one of the ones I love the most.

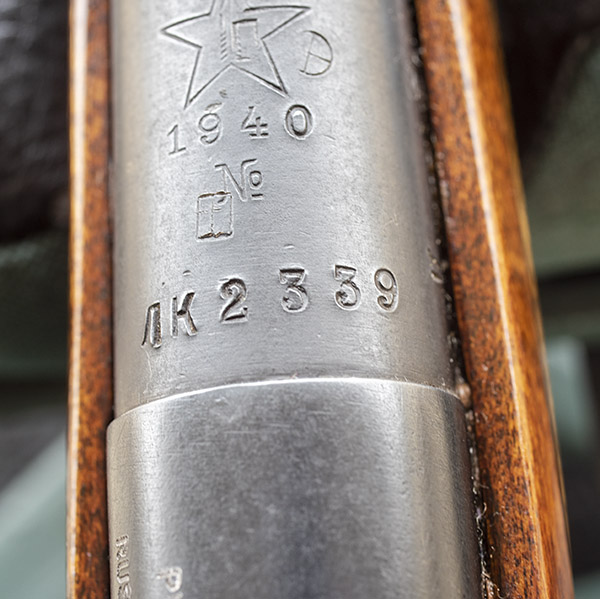
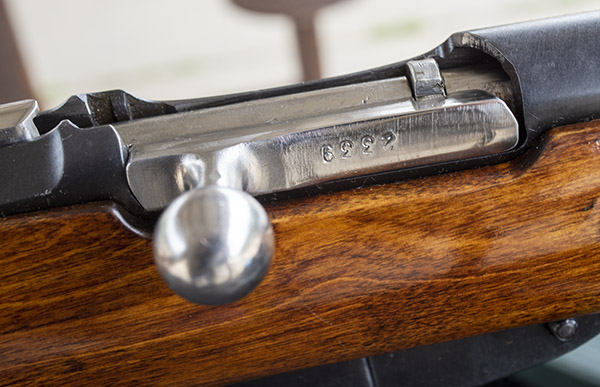
Serial Number 2339, built in 1940. Production rates ramped up sharply in 1940, but this rifle was built before that occurred. Fit and finish nosedived that year; mine is one of the good ones.
The Mosin’s buttplate.
The serialized (and polished) bolt.

When Duane and I arrived at the range, I set up a target at 50 yards.  Like always, shooting the Mosin felt good.   It had been too long.

Duane is a milsurp rifle enthusiast, too.  He has a beautiful 8mm Mauser K98 that his uncle took home from Germany after World War II.  I keep trying to buy it from him.  He keeps saying no.

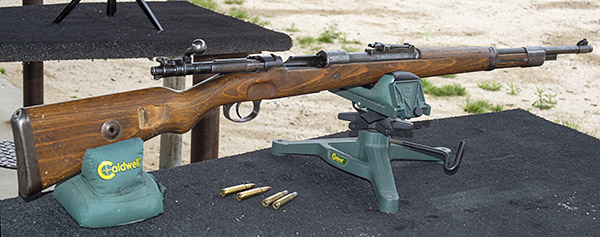
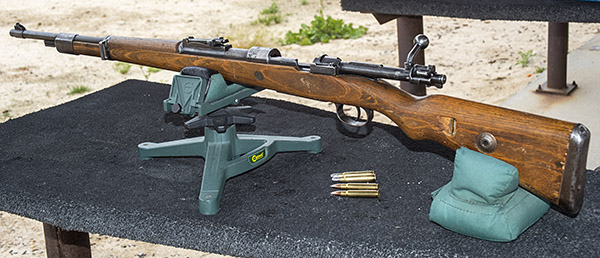
A World War II K98 Mauser.
Left view of the K98 Mauser.
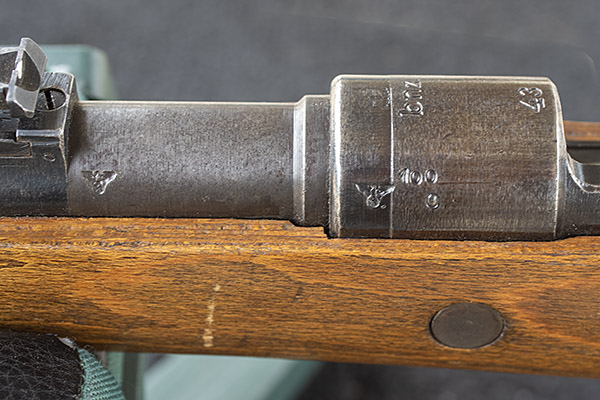
Nazi markings on the Mauser’s barrel and receiver.

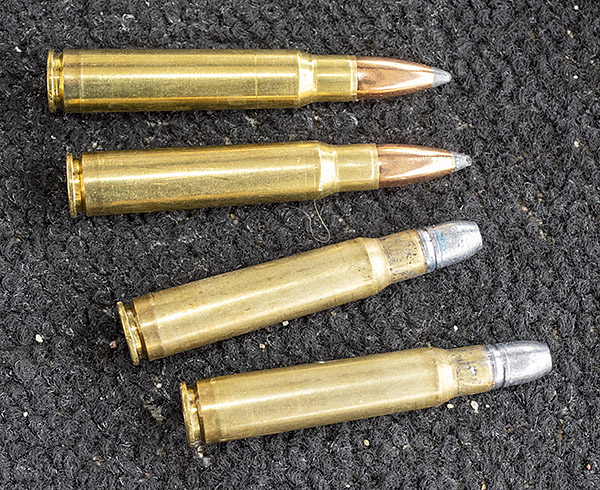
Like me, Duane is a reloader.  He had reloaded reduced loads for our outing.  A reduced load is one loaded for lower velocity, which means the rifle has significantly less recoil.  One of Duane’s loads had cast bullets.  The other had jacketed 150-grain bullets.  Both were loaded with Trail Boss powder, and both shot well.

8mm Mauser reloaded ammunition. The upper rounds have 150-grain jacketed soft point bullets, the lower rounds have 150-grain cast bullets.

As soon as Duane fired his first shots, I knew he had reduced-load ammo.  Check it out in the video below.

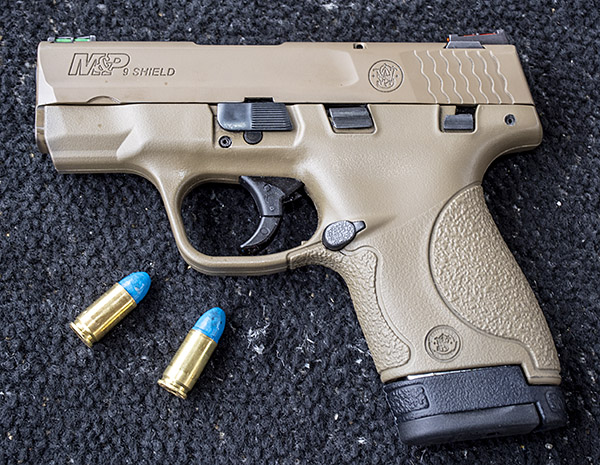
Duane and I both brought handguns, and to my surprise, we both decided to bring our Smith and Wesson 9mm Shields.  I’ve written about the Shield before, as well as the custom work TJ (of TJs Custom Gunworks) did on my Shield.   I shot my Shield at 50 yards.  Using a short-barreled 9mm concealed carry handgun at 50 yards is not a formula for accuracy, but I managed to keep all of my shots on the target.  The group was large, but at least they were on the paper.

My Shield in flat dark earth. I shot my reloaded ammo with Gardner powder-coated bullets.
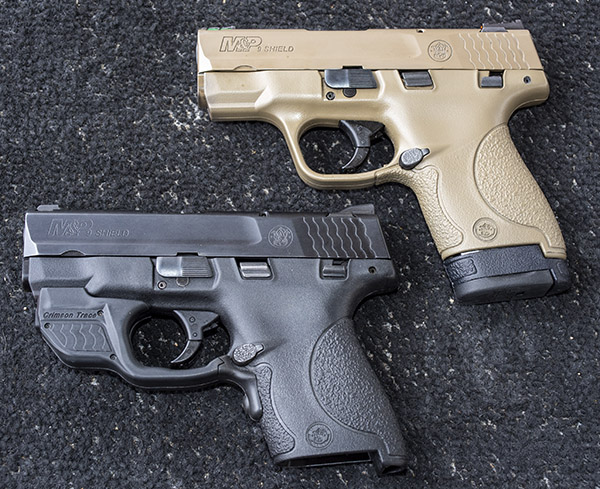
My Sheild and Duane’s. Duane’s has a Crimson Trace laser just forward of the trigger guard. The laser is actuated by a pushbutton below the trigger.

One of the things I like about my Shield is its bright sights.  Duane’s Shield has white dot sights and a green Crimson Trace laser mounted beneath the slide.  The laser is a cool touch for close in work.  My Shield has high visibility fiber optic sights (they catch light from the side and light up green and red dots).   They’re good if there’s any light at all.   If there’s no light, the sights don’t light, but if there’s no light, it’s not likely you’d be shooting.

A comparison of the sights on both Shields. My pistol’s Hi Viz sights are the best I’ve ever used on a handgun.

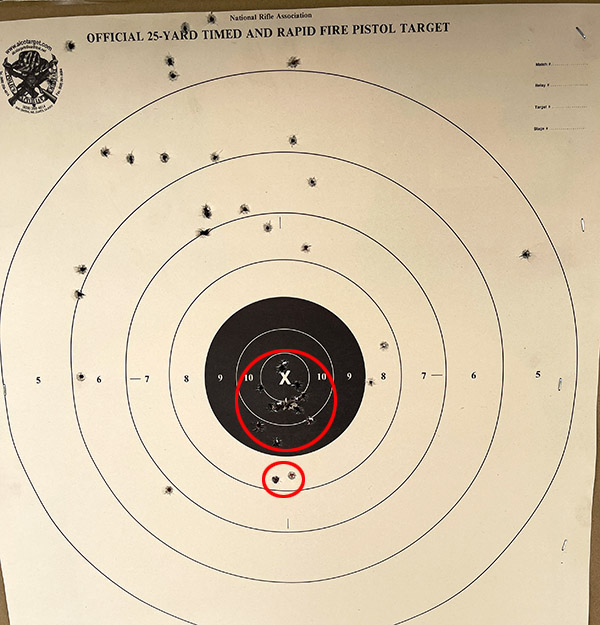
Before we called it a day, Duane let me try a couple of shots with his Mauser.  I shot at the same 50-yard target I’d been using with my Shield and the Mosin-Nagant.

The proof is on the paper. The upper red circle surrounds the shots I fired with my Mosin-Nagant (with one exception, all are in the 10 ring…that one exception was the first shot I fired). The circle around the two shots below were mine, fired with Duane’s 8mm Mauser and his reduced-load ammo. All the other shots were with the Smith and Wesson 9mm Shield.

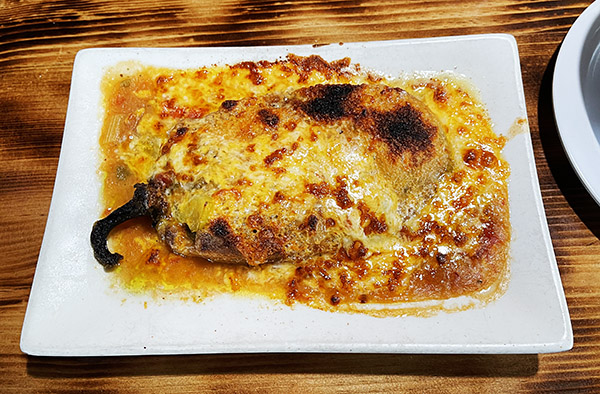
After the West End Gun Club visit, we stopped at our local Mexican restaurant. I had albondigas soup and a chile relleno.  As always, both were outstanding.

A toasted chile relleno. It was excellent.

Help us bring more content to you:  Please click on the popup ads!


Want more guns and ammo stories?   They are right here.


Never miss an ExNotes blog:


Thoughts on the 9mm Double Charge Issue

By Joe Berk

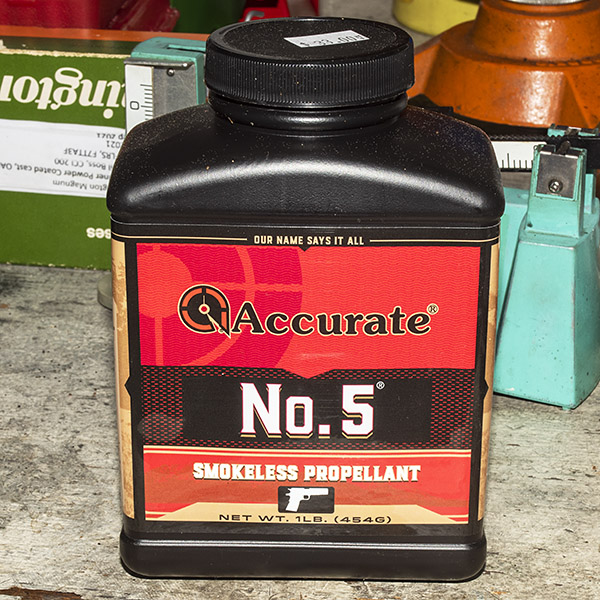
A few days ago I blew up my 9mm Springfield Armory 1911.  It was hellaciously frightening. I wrote a blog about it and I’ll provide a link at the end of this post.  My initial conclusion was that I had committed the cardinal reloading sin:  I double charged a case.  Instead of the intended 5.4 grains of Accurate No. 5 propellant, I cycled the round twice at the charging station and I inadvertently loaded 10.8 grains.  I know what you are thinking and that’s okay.  If I read about somebody doing this, I’d think they were a dumbass, too.  I’ll get back to that later.

5.4 grains of Accurate No. 5 behind a 125-grain powder coated bullet is good. 10,8 grains is not.

Thinking about the double charge issue more, several additional thoughts emerged.   Were there other possibilities?

One other possibility is that instead of the failure being due to a double charge, it might have been a squib charge (which would lodge a bullet in the bore) followed by another round.  This was dismissed for several reasons:

      • I knew it wasn’t preceded by a squib charge because the prior round felt normal.
      • If it was a squib charge, the following round probably would not have chambered.  Squib charges resulting from no powder and pressure being provided by the primer only (in a handgun) tend to push the bullet into the barrel a very short distance (the bullet doesn’t go into the barrel far enough to allow another round to chamber).
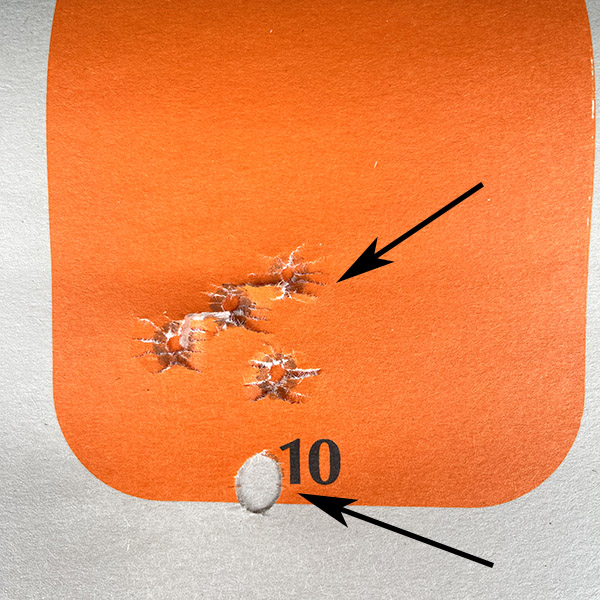
      • The were 5 holes on the target, which is the number of rounds I had fired.
      • The barrel was not bulged (TJ inspected it and pronounced it good).
Count them: 5 holes on the target. The fifth hole is the one at the bottom. This bullet was tumbling due to its low velocity. When the case blew out, the pressure vented elsewhere.

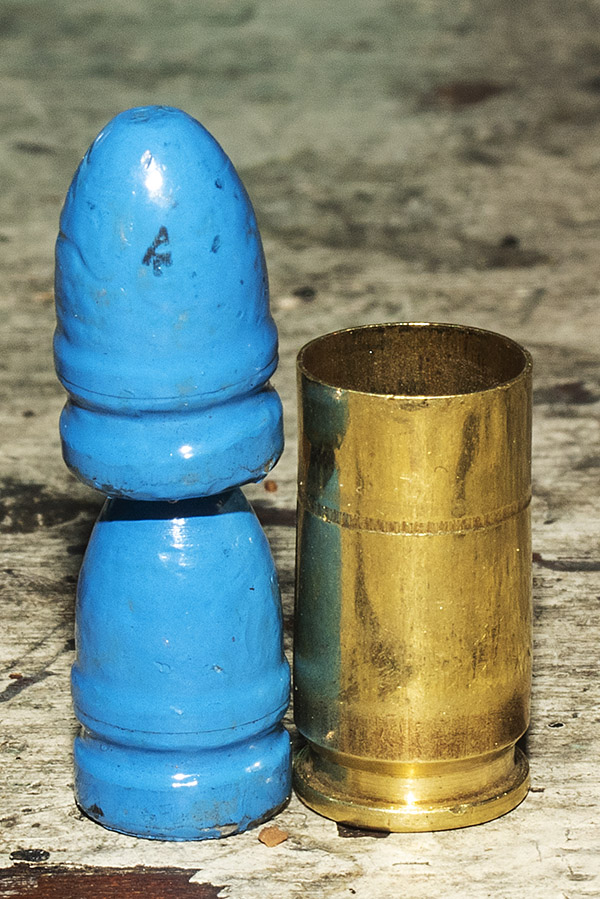
A friend asked if I could have seated two bullets in the case.  I set bullets (one on top of the other) next to a cartridge case.  I think you can see that seating two bullet in the case is not possible.  The bottom bullet would set higher in the case than you see in the photo below (the web near the case base and the thickness of the case “floor” would cause it to seat much higher in the case).  I would not have been able to seat the second bullet even if there was no powder in the case.

A photo showing that two bullets in a single case is not possible.

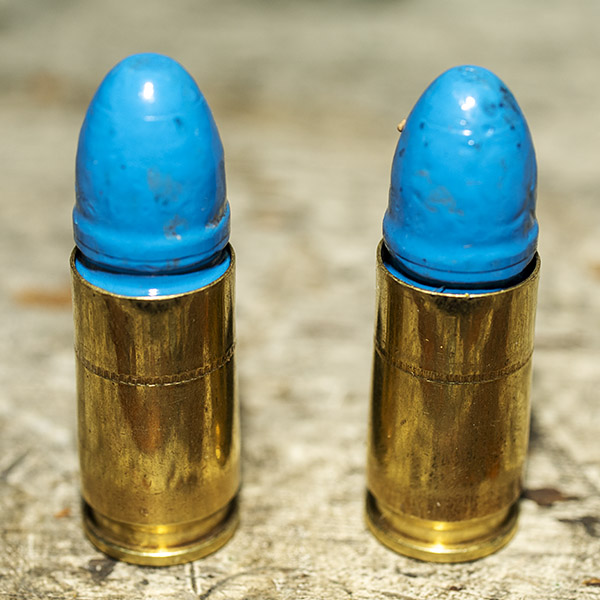
I pulled the bullets in the photo above from two cartridges using an inertia bullet puller.  Both had exactly 5.4 grains of Accurate No. 5 propellant, which is what I intended.  These are the pulled bullets on top of their cartridge cases:

125-grain powder coated bullets pulled from their cases and then placed back on top of their cases.

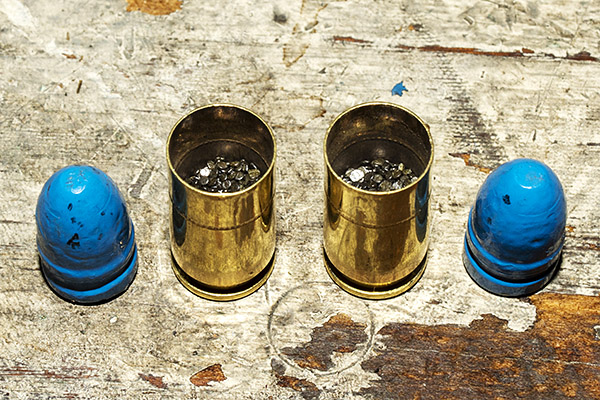
After I pulled the bullets and put the powder back in each case, you can see the level at which the right amount of propellent (5.4 grains) sets in the case.

5.4 grains of Accurate No. 5 in 9mm cartridge cases.

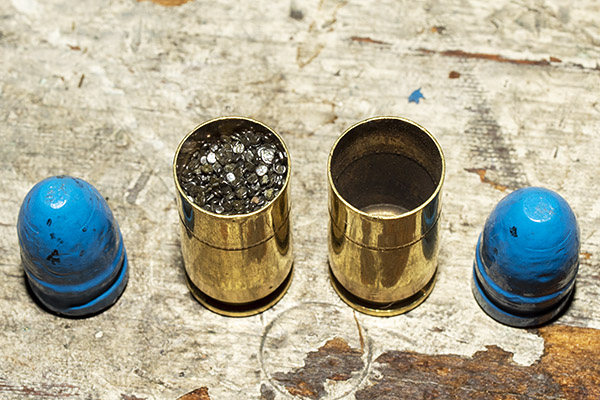
I wondered:  Would a double charge (i.e., 10.8 grains of Accurate No. 5) fit in a cartridge case without it spilling out of the case?  The answer is yes.  I took the powder from one case and poured it in the other.  The case can easily hold 10.8 grains of Accurate No. 5.  Take a look:

10.8 grains of Accurate No. 5 in a 9mm cartridge case.

It would be better if the powder was bulky enough that it would spill over the case rim if I double charged it.  I know that my 9mm Unique load sits higher in the case (my Unique load for the 125-grain bullet is 5.0 grains).

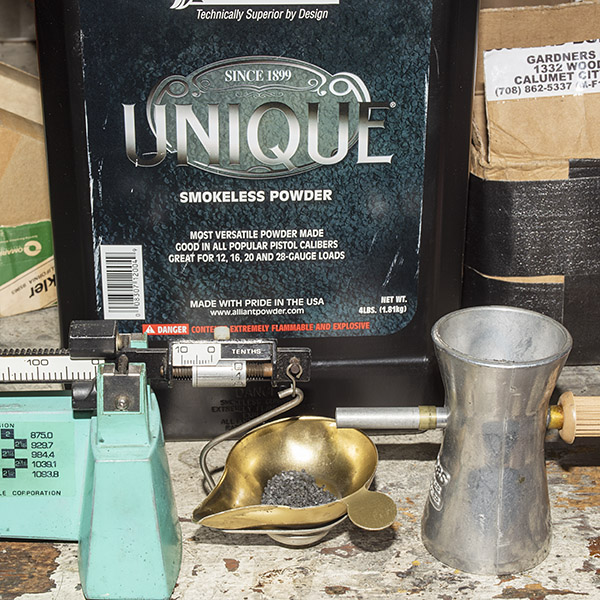
Trickling 5.0 grains of Unique onto the powder scale.

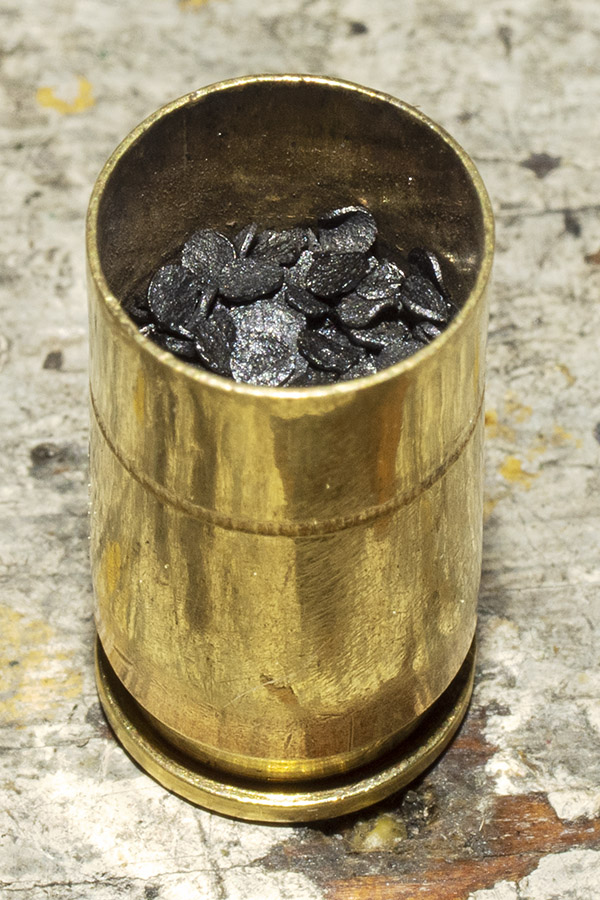
Here’s what 5.0 grains of Unique looks like in a 9mm case:

5.0 grains of Unique in a 9mm cartridge case.

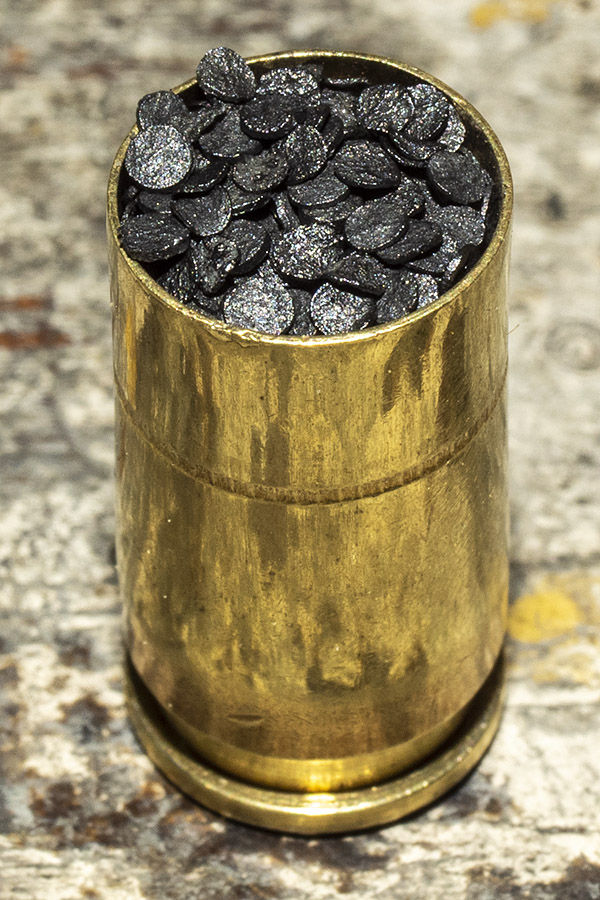
The question then was how much Unique can a cartridge case hold?  I was specifically interested in determining  if a double charge of Unique would overflow the case.  To answer this, I completely filled a 9mm case with Unique and weighed that amount of propellant:

A 9mm cartridge case completely filled with Unique.

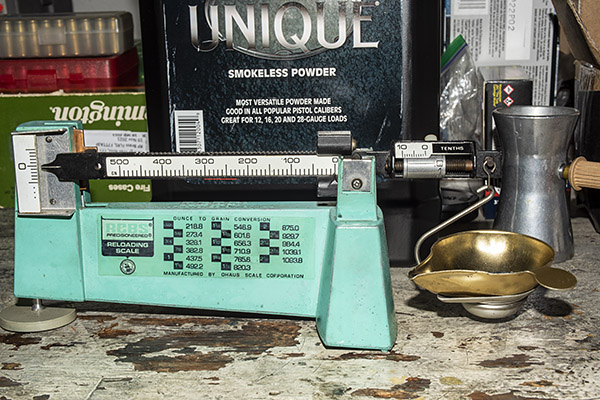
I weighed the amount of Unique held by a completely-filled 9mm cartridge case.  The filled 9mm case held 7.9 grains of Unique.

Weighing the Unique held by a completely-filled 9mm case.
A completely-filled 9mm cartridge case can hold a hair over 7.9 grains of Unique propellant.

A double charge of Unique would be 10.0 grains.  I concluded that a double charge of Unique would overflow the 9mm case, and this would provide an additional safeguard against an inadvertent double charge.  I was careless enough to not notice a case double-charged with Accurate No. 5.  I’d like to think I wouldn’t be careless enough to miss powder spilling out of the case, as would occur with Unique.  The next time I load 9mm ammo, it will be with Unique.

You might be wondering about the numbers here.  Bear in mind that Unique is a less dense propellant than Accurate No. 5.   10.0 grains of Unique occupies more volume than does 10.8 grains of Accurate No. 5.

The challenge now is what to do about the approximately 1400 rounds of 9mm and .45 ACP I already have loaded on the Lee Turret press.  I thought I might be able to quickly screen the rounds by weight, but that’s not going to work.  The weights of the powder, the brass case, and the bullet all vary, with the bullet (as the heaviest item) having the greatest variation.  On the 9mm cartridges, I found that the weight variation of the completed 9mm cartridges varies from 192 grains up to 198 grains.  The powder charge is 5.4 grains.  If a cartridge weighs 198 grains, would it just be at the upper edge of the weight distribution with the correct single charge, or would it be a 192-grain cartridge with a double charge?   It’s even worse on the .45 ACP rounds, because the weight variability of the completed cartridge is more than the 9mm, and those powder charges are in the range of 5.0 grains or 5.4 grains (they are lost in the case compared to 9mm ammo).  I can’t take the chance that there’s another double charge in there.  I’m breaking down and checking every cartridge.  It’s a lot of work, but it’s better than blowing up a gun.

This is the .45 ammo I loaded on the Lee turret press.   It’s 700 rounds. I have another 700 rounds of 9mm ammo similarly loaded.

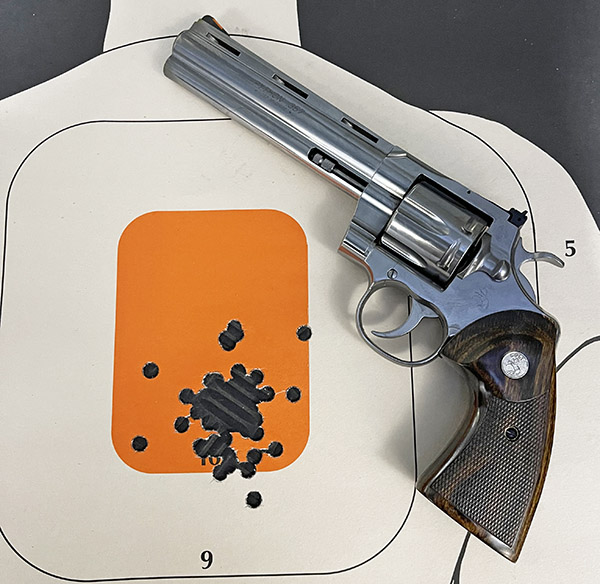
You might be wondering what it’s like to get back on the range after blowing up a gun.  I was afraid I might return with a very serious flinch (you know, when you jerk the gun in anticipation of it firing).  I’m happy to report (and maybe brag a little bit) that I’m just fine.  I had my 9mm S&W Shield out with ammo that I tore down, checked, and reloaded, and I also had my Colt Python (in which I shot .38 Special wadcutters).

An S&W 9mm Shield target shooting the 5.4 grain Accurate No. 5, 125-grain powder coated bullet load described in this blog.
A Colt Python target shot with 148-grain powder-coated wadcutters.  I’ve done better and I’ve done worse.

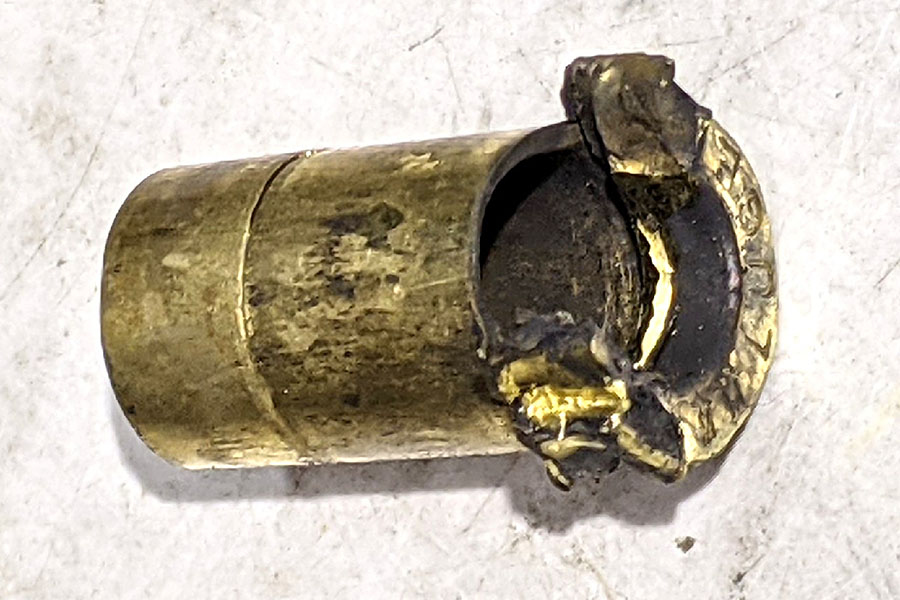
At this point, I’m convinced that I screwed up and double-charged the 9mm round I wrote about last week.  TJ (of TJ’s Custom Gunworks) disassembled the gun and pulled out the case you see in the photo at the top of this blog.  There was a lot of pressure in there (about 10.8 grains of Accurate No. 5’s worth, actually).   Like I said in the earlier blog, it’s an opportunity.  More good news is the barrel wasn’t damaged.  Even more good news is that TJ is doing an action and reliability job on my 1911.  TJ is replacing the two piece guide rod (two-piece guide rods are a solution to a problem that doesn’t exist) and doing a few more good things to this pistol.  I’ve already purchased and received replacement grips and a new 9mm magazine.  I’ll provide an update in a couple of weeks after I get the 1911 back, and I’ll do another blog on what it’s like disassembling and reassembling 1400 rounds of reloaded ammo.

Stay tuned!


Please click on the popup ads!


Never miss an ExNotes blog:

More reloading and firearms stories are here!

KABOOM!

By Joe Berk

It occurred in an instant, on the fifth and last round in the magazine.  It was as if a cherry bomb had gone off in my face.  I heard a voice yell “whoa!” and I realized the voice was mine.

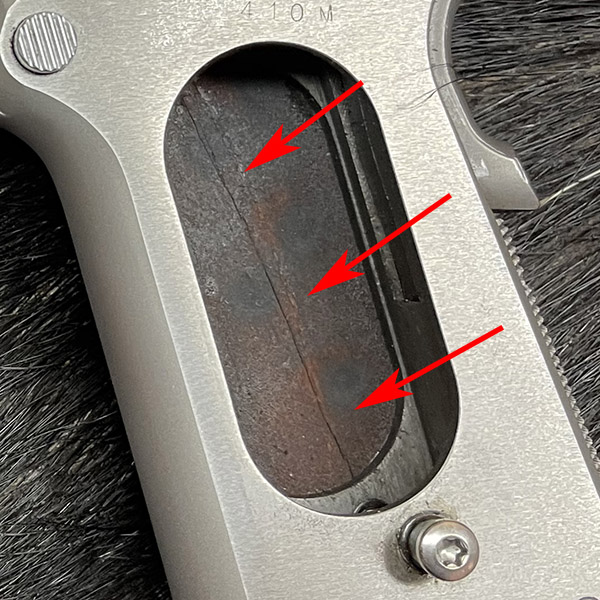
I stared at the smoking Springfield Armory 9mm 1911 in my hands, waiting for the pain, the blood, and whatever might follow.   My hands, still wrapped around the grips, were stinging.  I knew something bad happened, but I didn’t know how bad it was and I wasn’t especially looking forward to finding out.  My gun had blown up.   The entire gun was smoking and smoke continued to waft from places it wasn’t supposed to:  The grips, the line between the frame and the slide, the trigger, around the hammer, and the ejection port (which was closed; at this point, I didn’t know if there was a live round in the chamber).  Gray smoke curled out everywhere.

I slowly relaxed my grip and looked at my hands.  There was no blood, but my palms stung like they had been slapped with a baseball bat. As I eased my hold, the 1911’s left grip fell away in two pieces (as you can see in the photo at the top of this blog).  There were no cuts and there was no bleeding, but I had powder tattoos all over both hands.  I returned my focus to the gun.  It was still smoking.  It smelled funny, too.  Was that burnt flesh or just the powder and residual oil?

The first four shots from that magazine were delightfully tight, and I ordinarily would have felt good about seeing that.  On each of the preceding four shots (and the fifth one, for that matter), the front sight had been outlined against the blurred rear sight and the bright orange muzzle flash, the way things are supposed to look when the hammer drops.

The first four rounds were forming a nice group. The fifth was a disaster.

I was still afraid to look at my hands.  My face was now tingling and I knew I’d caught something.  I had safety glasses on and I could see okay; that was good.  I worked up enough courage to put the gun down and look at my hands more closely.  They seemed okay.  I knew from previous bad things happening that sometimes you don’t feel anything for a few seconds (the golden minute, I think they call it), but I looked again and I was okay.

The 1911’s right grip appeared to be intact (but it wasn’t; more on that in a second).  The slide was locked forward.  I tried to pull it back but it would only move about an eighth of an inch.  I pressed the magazine release and nothing happened.  I pulled on the magazine and it came out.  It was mangled; the front was bent in and the follower angled upward.  I still wasn’t sure if there was a live round in the chamber.  I cocked the hammer and dropped it a couple of times…and there was nothing.  I concluded it was safe to put the 1911 in its case.  I scooped up my marbles and left.  I didn’t even pick up my brass, and this was Remington brass that had only been reloaded once…that’s how shook up I was.

When I got home, I looked in the mirror.  I had one little spot on my right cheek that bled and had already stopped (I’ve done worse shaving).  I washed my hands to get the powder residue off (that took a while).  There were no cuts.  Dodged a bullet, I did.  Figuratively and literally.

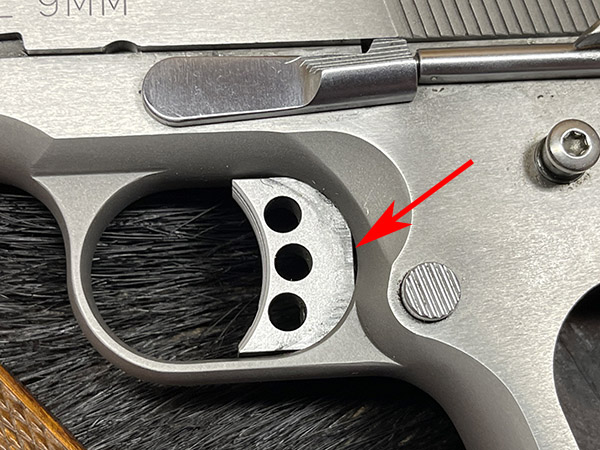
Once home, I examined the 1911 more closely.  The trigger was too far forward in the frame.  The event probably screwed up the trigger mechanism.  The right grip, which I thought was okay, had a hairline crack along its length.   Not that it matters; you can’t buy just one grip (you buy them in pairs).   The slide would not move to the rear more than a little bit; it was not coming off the gun.

The trigger moved far forward. You can see the outline on the trigger denoting where it was normally positioned.
The left grip fell off the gun when I released my grip. The right grip had cracked, but it remained in place.

What could have caused this?  There are a lot of possibilities.  The first (and most likely) is that I double charged a cartridge case when reloading.  In other words, I put twice as much propellant in the case as I should have.  Of all the reloading equipment I’ve ever used, it’s easiest to do this on the Lee turret press I’ve been raving about.  I’m not badmouthing Lee or their turret press; I’m simply making an observation.  If that’s what happened, it was entirely my fault.

I could have fired a squib load, had a bullet lodge in the bore, and then fired another bullet on top of it.  I’m pretty sure that is not what happened because of the holes on the target.   There are four clean holes from the first four rounds, and one lower, oblong hole from the fifth round (when the gun blew up).  You can see this on the target above.  The bullet didn’t have as much energy behind it and it had started to tumble.

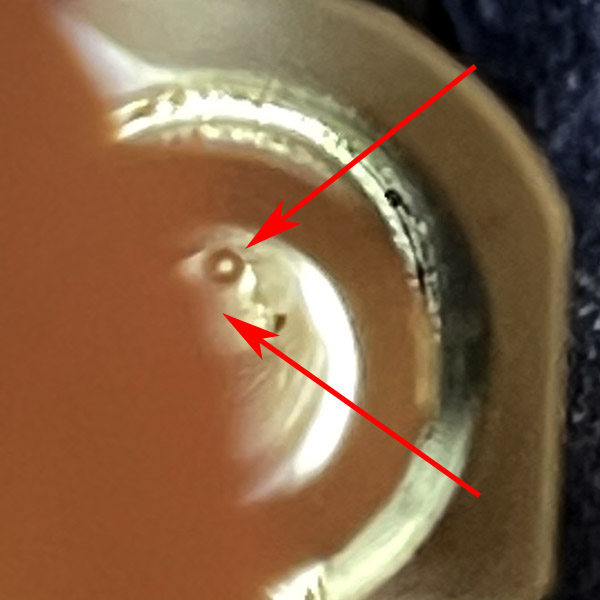
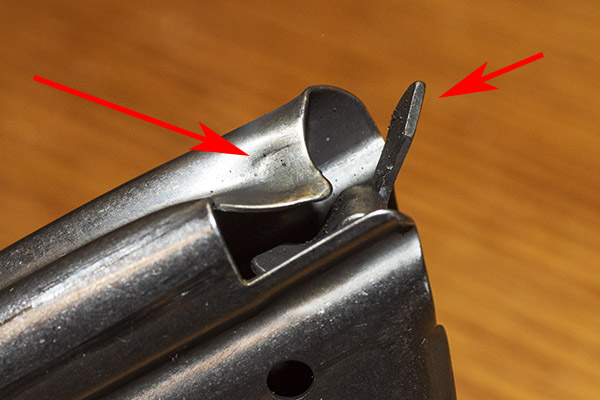
I could have experienced a case failure in which the rear of the case tore off, which would have allowed the hot gases to impinge on the gun internally.  There’s some evidence to suggest this.  I can look into the bore and see that the cartridge case is still present, but the interior of the case is partly torn away.   The lower third of the case’s base is gone (the upper two thirds are present).   In the area where the case’s base is gone, I can see the breech face and the firing pin.  I later found part of the cartridge case inside the magazine.

This was a tough photo to get (mea culpa on the image quality). You are peering down the barrel from the muzzle end. The upper arrow points to what’s left of the cartridge case; the front of the firing pin is visible. The lower arrow points to the breech face.

The gun could have fired out of battery.  That is to say, it may have fired without the slide being fully forward.   I can move the slide back about 1/16-inch, cock the hammer, and the trigger will release it.  I don’t know if it is doing that because the internals are damaged, or if it could do it before the event.  Or, there could have been grit in the chamber that prevented the cartridge from chambering completely.  When I look into the bore, I can see residual blue powder coating from the bullet that seems to be lodged between the case mouth and the forward edge of the chamber.

I cast around on the Internet a bit and I found several references to the 9mm 1911 Springfields having tight chambers.  I know mine has a very tight chamber.  Maybe a cartridge wasn’t resized completely and it failed to completely chamber?  If that happens, the slide won’t go all the way forward and the gun shouldn’t fire so I don’t think that’s likely, but who knows.

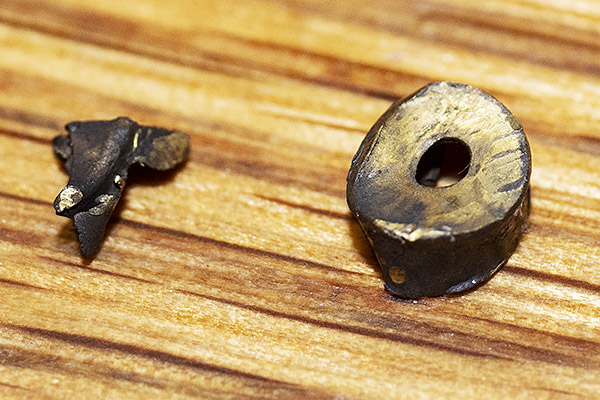
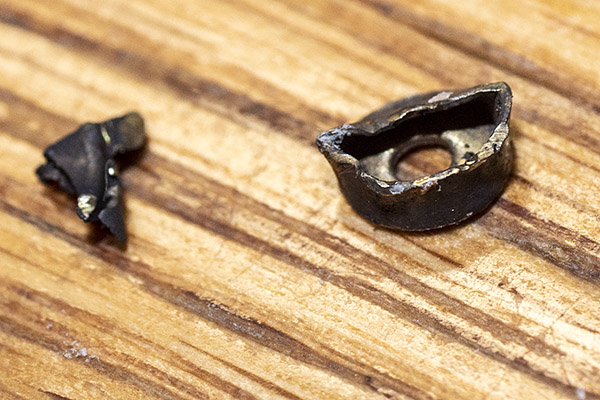
After I returned home, I examined the magazine again and I could see what I thought was an imprint of the primer on the magazine.  I shook the magazine and felt something rattling around inside.  It was the primer.  It had been flattened, and there was a hole where the firing pin had struck it.  I’m guessing the hole was caused by the excess pressure.

A mangled magazine. The left arrow points to the primer imprint. The right arrow points to the distorted follower.
The primer and a bit of brass residue.   These were inside the magazine.
An inside view of the primer. Note the circular cutout where pressure sheared the brass against the firing pin hole.

My Springfield 1911 is toast, at least for a while.  I have two ways I can go on this (well, three, if you count scrapping the 1911 altogether, but that’s not a choice I want to consider).  One option is to return the gun to Springfield Armory, but I don’t want to do that.  If the failure was a problem with the gun, I don’t want to have the same guys who screwed it up attempt to fix it.  Every gun I’ve ever bought from Springfield has required at least one warranty repair (including this one, but for a different issue).  Two of my friends bought 1911s from Springfield and they’ve had to go back for warranty repairs (one had to be returned twice when they didn’t fix the problem the first time).  I don’t know what Springfield’s warranty repair turnaround times are these days, but it’s probably measured in weeks or months.   The last thing that ruled out a warranty repair was that this event occurred with my reloaded ammo and that voids the warranty.  I’m not in denial here; it is likely my reloaded ammo is the reason this happened.

Nope, I’m going to go with the approach that’s always worked for me.  It’s the silver lining in this sad tale (that and the fact that I wasn’t injured).  I’m bringing the 1911 to TJ’s Custom Gunworks tomorrow.  I’ve already talked to TJ and he tells me my 1911 can be repaired.  The repairs will be on my dime, but I know the work will be perfect and I know the gun will literally be better than new.  I’ll have TJ do a bit of custom work while he has the gun, too.  TJ told me he’ll have to cut slide release off to remove the slide from the frame, and when he disassembles it, we’ll learn more.  I’m thinking a double charge is the likely culprit (which would be my mistake), but maybe TJ will find otherwise.  I’ll keep you posted.


I had a serious debate with myself about posting this blog.  It’s an interesting story; that puts it in the plus column. If I double-charged that case, that’s an admission of carelessness on my part and that puts it in the minus column.  In the end, if it helps other people from making the same mistake (assuming the fault lies with me), this blog will have served a purpose and that is why it is here.


Please click on the popup ads!


Never miss an ExNotes blog:

More good reloading and firearms stories are here.


Join our Facebook Milsurp Target Shooting group.

Shield Savvy

By Joe Berk

I promised an update on my Smith and Wesson 9mm Shield, and this is it.  I’ve put 2,500+ rounds through the Shield (all reloads with different bullets and powders).  Until I recently took my Shield to good buddy TJ, I was growing increasingly dissatisfied with the pistol’s frequent failures to extract, and I wasn’t alone.  If you Google “failure to extract” and “Smith and Wesson Shield” you’ll find a lot of people are having this issue.  My problem is in the rearview mirror, though, and my Shield is 100% reliable now.  That’s because of TJ.  I’ll get to that in a minute.

That target above?  It’s 50 rounds at 30 feet through my Shield, shooting offhand.  If you’re a reloader, here are the load specifics:

      • Jim Gardner 125 grain powder coated roundnose bullets (Jim sized these to 0.356 inch, which is his standard bullet).
      • Cartridge overall length 1.145 inches.
      • 5.4 grains of Accurate No. 5 propellant.
      • Lee factory taper crimp (light crimp; see below).
      • Ammo loaded on Lee Classic 4-Turret press.
      • Mixed brass.

Ordinarily, I tailor a load to the handgun, and I thought I would be able to do that relatively easily with the Shield.  I found that not to be the case.  The Shield seemed accurate enough with nearly every load I tried, but nearly all had reliability issues.  On the low end, the lighter loads didn’t have enough energy to cycle the action (a common enough problem on compact semi-autos).  Light, mid range, and hot loads all gave the Shield extraction issues.  The Shield experienced a failure to extract about every other magazine.   It was very frustrating.  I scoured the Internet forums for this issue and the opinions were all over the map.  Here’s a smattering of the drivel I found:

      • Don’t use Winchester ammo because the rims are smaller (I measured them; that was baloney).
      • Don’t use cast bullets because they hang up (I knew that was baloney).
      • Don’t shoot aluminum ammo (which I never do, anyway).
      • Don’t shoot 115-grain bullets.
      • Don’t shoot 125-grain bullets.
      • Don’t shoot 147-grain bullets.
      • Clean your gun after every round (seriously?).
      • Don’t limp wrist your gun (again, seriously?).
      • Don’t do this, don’t do that, don’t do this other thing…
      • Do this, do that, do this other thing…

It was all written by people who apparently love the sound of their keyboards clacking.  None of it was useful information.  I felt stupid for wasting my time reading it.


Help us keep the content coming:  Please click on the popup ads!


What I found was that the extraction problem occurred more with powder coated bullets than either plated or jacketed bullets.  Other than that, there wasn’t a lot of correlation between any of the load variables I could play with and the gun’s failure to extract propensity.  Then, during one range visit when I had a failure to extract, I fell back on my failure analysis background.  I put the loaded gun down on the bench (being careful to keep it pointed downrange) and took a photo with my iPhone.

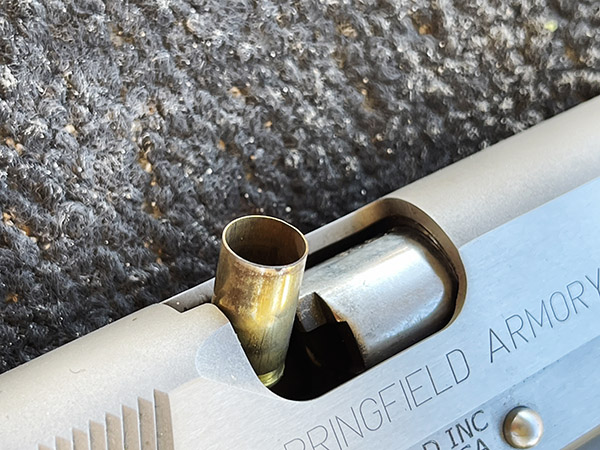
A cartridge case caught during extraction on the mouth of the case immediately below it.

Wow.  How about that?  It was apparent that the case being extracted was hanging up on the case mouth of the round still in the magazine, and it was a strong enough obstacle to pull the extractor off the rim.  This brought up a lot of questions in my mind centered on the crimp and the bullet.  The Gardner bullets have a slight ramped step just north of the crimp.   And when I crimp a bullet for a semi-auto, I put a slight taper crimp on it with the Lee taper crimp die.  I want enough of a crimp to remove the case mouth flare (part of the reloading process to assure the bullet will enter the case mouth without shaving lead or copper), and enough to assure the cartridge will chamber easily.  Maybe I didn’t have enough crimp, I thought, and that was causing the case being extracted to hang up.

One of my reloaded 9mm rounds with a taper crimp and a Gardner powder-coated bullet.

I examined my ammo and I thought it looked good (actually, I thought it looked great; like most reloaders, I enjoy looking at my finished ammo).  But, to make sure, I loaded another box with as much taper crimp as I could get out of the Lee die.  Lee is right when they say their taper crimp die makes it impossible to deform a case: I put a very pronounced crimp on all the cartridges in the next box of ammo.  But that wasn’t the answer, and it created a new problem.  With a semi-auto like the 9mm or the .45 Auto, the cartridge headspaces on the case mouth.  When I used a more pronounced crimp, I started getting misfires.  The rounds were going too far into the chamber, and the firing pin wasn’t igniting the primers reliably.  Nope, more crimp wasn’t the answer.

At this point, I was getting a little frustrated.  All these problems aside, I wanted to like my Shield.   I wanted to use it as my concealed carry weapon, so I needed the thing to be reliable.  Faced with this issue, I knew it was time for what works every time:  A visit to TJ’s Custom Gunworks.

TJ examined the Shield.  He observed that the magazine positions the first cartridge in the magazine unusually high in the gun, and that was probably aggravating the failures to extract.  But there’s not really anything you can do about that.  It’s the gun’s design.  It is what it is.

The Shield’s magazine sits relatively high.
A loaded round waiting to chamber when the Shield’s slide returns to battery.

TJ then took a look at the extractor.  It was pretty dirty with combustion residue, but he felt it should work.   TJ, honest as always, told me he could polish the ramp and the chamber (they come from the factory pretty rough), but he didn’t know if that would fix the failures to extract.  I asked TJ to proceed.

A photo from TJ showing how dirty my extractor was. Even though it was funky (shame on me), TJ felt it would not have caused the extractor to slip off the case rim.

Here are a couple of photos of the chamber and the ramp as they come from the Smith and Wesson factory.   The Shield always fed and chambered reliably; it was only the extraction that was an issue.  TJ explained that if the chamber is rough, it can hang on to the fired case as it is being extracted.  I’ve experienced that on other guns.  The Shield’s chamber and its ramp looked about like I’d expect them to look on a mass-produced pistol, which is to say not very good.  I asked TJ to work his magic on both the ramp and the chamber.

The Shield’s feed ramp and chamber as delivered from the factory. Rough, but not ready.
Another view of the factory Shield feed ramp. It looks like it might have been cut by hand with a dull chisel.

TJ did his usual excellent job, and here’s what things look like now.

Pure TJ magic.
What a good ramp looks like.  Slick.  Smooth.  Shiny.

TJ told me he also put a slight undercut on the extractor to allow it to get a better grasp on the case rim.

The Shield’s extractor, as seen from the bottom. This is the piece that pulls the fired case out of the chamber. TJ undercut the area indicated by the arrow to give the extractor a better grip on the case.

I picked up my Shield a few days later and went to the range that afternoon. The Shield is now what it is supposed to be.  You saw the target at the top of this blog.  I fired 50 rounds without a single failure to extract and eject.  The gun just feels a lot smoother and slicker now.  My Gardner bullet and Accurate No. 5 load is perfect.  And the recut extractor drops the cartridges in one nice small pile on the floor behind me.  Wow.  I’m impressed.  Then, just to make sure (and because I was having so much fun) I fired another box of 50 rounds (again, with ammo loaded on the Lee Classic Turret press using the load at the top of this page).

Another target, another 50 rounds. Reliable as death and taxes, and accurate. Now, the Shield is as it should have been from the factory (thanks to TJ).

The Lee Classic Turret press does a magnificent job, and now, so does my Smith and Wesson Shield.  It’s the way the pistol should have come from the factory.

It’s bothersome that most of my recent gun purchases have required additional work to get them to perform the way they should.  In my former life as an aerospace manufacturing guy, I used to manage organizations with machine shops.  I know it would cost a little more for the gun companies to do the kind of things TJ did to my Shield (and several other guns, for that matter).  I wish the gun companies would do that; they ought to just hire TJ as a consultant (he knows what they need to do).  The bottom line here? If you have a Smith and Wesson Shield and you want it to be what it is supposed to be, get in touch with TJ.

There are a lot of things I like about the Shield.  Accuracy and illuminated sights are at the top of the list.  You can get a feel for its accuracy from the targets shown here.  None of this was bench rested; it was all shooting offhand on an indoor range with banging and clanging and brass flying all around me.

I found that after firing a a box of ammo, gunshot residue tends to occlude the sides, front, and rear of the front sight, and that causes the red to glow a lot less.  But that’s a minor point.  The Shield’s high visibility sights are great.

Holstered, the S&W Shield is about the same size as the Rock Island Compact 1911.
Another Shield-to-Compact-1911 comparison: The holstered Shield on top of the holstered 1911. Length and height are about the same.
The Shield is narrower than the 1911, and much lighter. It should be easier to carry concealed.

I bought a Bianchi leather holster for the Shield.  It’s similar to the Bianchi I use with my Compact 1911.  When I put the Shield in its holster I was surprised:  It’s really not any smaller than my Compact 1911.  It’s a bit narrower, but by the time both guns are holstered, the overall width is about the same.  Where the Shield has a clear advantage, though, is weight.  And even though the Shield with its polymer frame is much lighter than the Compact 1911, the recoil is quite a bit less than the .45.  Now that the Shield has been made more reliable by TJ, it will make a good concealed carry gun.  Incidentally, TJ worked his magic on my 1911, too.  It’s one of the most reliable handguns I’ve ever owned.

Ten rounds from the Compact 1911, ten from the Model 60, and ten from the Shield. All are in the 10 ring, 28 of the 30 are in the X-ring.

Never miss an ExNotes blog:
Lee’s Classic Turret Press and the S&W Shield: Range Results

By Joe Berk

Check out that photo above.  It’s a flat dark earth Smith and Wesson M&P 9 Shield, with ammo reloaded using the Lee Classic Turret Press Kit.  Yep, this is a “two-fer” blog:  A first look at the Shield, and an evaluation of the first loads prepped with the Lee Classic Turret Press Kit.

I initially tried two loads in the Shield:

      • 124-grain plated roundnose Rainier bullets and 5.2 grains of Accurate No. 5 powder.
      • 124-grain plated roundnose Rainier bullets and 5.6 grains of Accurate No. 5 powder.

I wanted to start low and work up, partly because that’s good reloading practice and partly because the Shield was new to me and I didn’t know how it would work and what it would like.  The first reduced load (5.2 grains of Accurate No. 5 and a 124-grain plated bullet) wouldn’t cycle the Shield’s action.   I fired 50 rounds this way, one at a time.  I’d have to pull the slide back and release it after each shot.  For the Shield portion of the evaluation, I knew I needed to bump up the load.  For the ammo portion of the evaluation, every load fed and fired flawlessly.  The Lee turret press had done its job.

Bumping up to the 5.6 grains of Accurate No. 5 (still with the 124-grain plated bullet), the Shield’s action cycled but a couple of times the slide closed after the last round in the magazine fired.   I fired 50 rounds in this test, loading 5 rounds in the Shield’s magazine each time.  The Shield was pushing the slide back far enough to strip off a new round, but on two magazine loadings the slide did not go far enough  back to engage the slide stop after the last round. I needed to bump the charge a scosh more.  For the ammo eval, every load fed, fired, and ejected flawlessly.  Again, the Lee turret press had done its job.

The Lee Classic Turret Press, a phenomenal value and a great reloading setup.

At this point, I knew I needed to go a little higher on the powder charge with the 124-grain plated bullet, and I knew the Lee Classic Turret Press was making good ammo.  Everything fed and there were no jams.

The first rounds loaded to an overall cartridge length of 1.610 inches. I later moved that back to 1.140 inches.

I loaded the above 9mm ammo to an overall length of 1.160 inches, which is longer than I usually load 9mm.  The Lee manual has the cartridge overall length with a plated 124-grain Rainier bullet at 1.169 inches.  The cartridges would go in the Shield’s magazine and they fed fine when shooting, but when loading them in the magazine, the first cartridge tended to go horizontal instead of being angled up as others were loaded on top of it.  That hung up the magazine while cartridges were being loaded into it.  In the past, I had normally loaded 9mm at around 1.120 to 1.130 inches overall length.  I decided that for my next load I would go up to 5.8 grains of Accurate No. 5, and I would seat the bullets for an overall cartridge length of 1.140 inches.  I went home and in 20 minutes I had loaded another 50 rounds.  That Lee Classic Turret is fast.

50 rounds of custom-crafted 9mm ammo created on the Lee Classic Turret Press.

The popup ads keep us going…please click on them!


When I returned to the West End Gun Club, I set up a target at 50 feet, took out the Shield, and loaded the first magazine.  Loading to a cartridge overall length of 1.140 made it easier to load the magazine.  So far, so good.

Next, I fired 20 rounds to assess the ammo’s functionality.  Everything worked perfectly.  Every round fed, every round ejected, and life was good.  The Shield’s bright fixed sights were printing a bit to the left, so I held to the right on a fresh target and rattled off 30 rounds.

Thirty rounds at 50 feet from the Shield. Not too shabby for a belly gun.

The Shield’s recoil was not at all uncomfortable; it was way better than a .38 snubnose revolver.  The Shield is a very light pistol (19.0 ounces).  That’s lighter than the S&W Model 60 (23.2 ounces) or a Compact 1911 (33.4 ounces).  Those weights for the 1911 and the Model 60 may not sound like a lot, but (trust me on this) it’s enough to weigh on you at the end of the day.  I guess the Shield’s light weight is the big advantage of a Tupperware gun.  I like it, and I like the fact that the gun is pleasant to shoot.

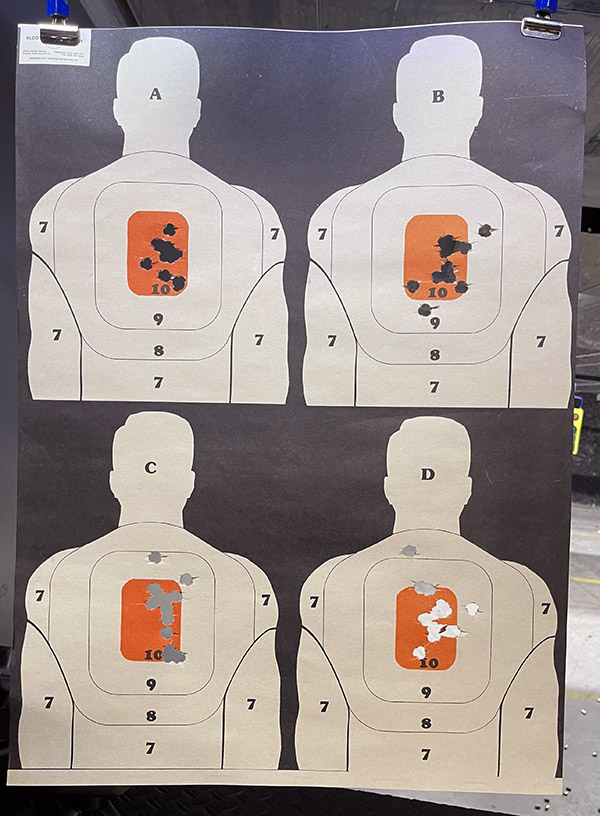
A few days later, I was on an indoor range and I set up the Alco target that has four mini-silhouettes on a single sheet.  I ran it out to 21 feet and put 50 rounds on target (dividing them roughly between the four targets), all shot offhand while standing.  The load was the same as the one mentioned above.  That’s 5.8 grains of Accurate No. 5 and a 124-grain plated Rainier roundnose bullet at an overall cartridge length of 1.140 inches, and for these, I used mixed brass.

The quad mini-silhouette from Alco Target in Monrovia, California, and 50 rounds fired standing at 7 yards.

I also tried two different powder-coated bullets with Accurate No. 5.  One was the 147-grain Boudreau flat nosed bullet with 4.8 grains of Accurate No. 5.  This is an accurate load in the Shield (even more so than the plated bullet load mentioned above), but it leaded the bore.  The other was the Boudreau 124-grain round nose bullet with 5.4 grains of Accurate No. 5; it, too, leaded the bore.  The plated bullets did not lead the bore at all so I think they are a better load.    I loaded more 147-grain powder coated bullets with a lighter charge to see if that would eliminate the bore leading, but they did not and I had cycling issues.  4.8 grains of Accurate No. 5 is what this 147-grain powder coated bullet wants.

The Shield with 124-grain powder coated roundnose bullets. These leaded the bore.
147-grain powder coated bullets. These, too, leaded the bore. They are accurate, though.
Another Alco quad mini-silhouette with 5-shot groups fired standing at 7 yards, this time with the 147-grain powder coated Boudreau bullet and 4.8 grains of Accurate No. 5.

Let’s talk about the Shield a bit.  My Shield is the first iteration (not the Shield 2.0, as that model is not sold in California).  The Shield has a 3 1/8-inch barrel.

The Shield’s 8-round magazine. The left arrow points to the spacer. It can slide up, as indicated by the right arrow.

The Shield’s magazine could be better.  It has a plastic spacer at the bottom, and that spacer rides up when loading the magazine.  Conceivably, it could interfere with seating the magazine in the gun.  In my opinion it is a poor design.  The collar slides down as easy as it slides up, so that’s good.  You get two mags with the Shield.  The one you see above holds 8 rounds and it has a grip extender that feels just right to me.  There’s another one that doesn’t have the grip extender and it holds 7 rounds.  I haven’t done anything with that one, other than checking to make sure it was in the box when I bought the gun.

The Shield’s sights are the best I’ve ever used.  They are bright and easy to see.  The sights let in light from the sides, and that design just flat works.  It’s the first gun I have ever shot with these sights.  They are better than my SIG P226s’s Tritium sights, and those sights are good.  The photo below isn’t enhanced; it’s what the Smith’s sights actually look like.

The Shield’s sights. They are the best I’ve ever used.

The Shield’s trigger, in a word, is terrible.  There are other triggers available for the Shield, but I will leave this one alone.  The trigger got a little better with use and a couple of cleanings (I’ve put about 600 rounds through the Shield so far).  The Shield is a striker-fired gun and the trigger is not what I would consider good, but it’s better than it was initially.  Compared to a good 1911 like the Springfield, it’s awful.  But, it’s good enough to get rounds on target (as you can see above).

The Shield’s slide release, out of the box, was super stiff and essentially unusable.  I could release the slide with two thumbs, but not with one.  I found it best to pull the slide back and let it go to release the slide.  This aspect of the design (or its execution) is poor, and requiring two hands to release the slide is not good for a defensive weapon.  A close examination of the slide stop showed that it was rough where it interfaced with the slide, so I judiciously worked it over with 600-grit sandpaper, and it releases more easily now.  I can release it with one thumb with no magazine in the gun, but it still takes two thumbs and a lot of effort with the mag inserted and that’s bad.  It’s surprising that Smith and Wesson would let this happen.

A SIG P226, the Smith and Wesson Shield, and a Springfield Armory 1911, all chambered in 9mm. Flat dark earth is the new black.

I had the SIG and my 1911 with me when I shot the Shield.  The Shield doesn’t look that much smaller in a group photo, but it is flatter and it will carry concealed better.  In subsequent blogs, I’ll explore different loads prepared on the Lee Classic Turret press fired in all three of the guns above.  I fired a few rounds through the Springfield, and they worked just fine; the same is true for the SIG P226.  Interestingly, the lighter loads that wouldn’t work in the Shield did work in the Springfield.  It’s counterintuitive, but compact handguns are tougher to make work well than are full size handguns. That’s because the recoil spring in a compact handgun has to be much stiffer than one in a full size gun.

The Shield’s sear deactivation lever.  You have to push it down to remove the slide and barrel.

To takedown the Shield, you do not simply unlock the slide takedown lever. There’s a sear deactivation release in the magazine well (identified with a red arrow in the photo above), and you have to push that down before you can turn the slide takedown lever for disassembly.  You can’t do it with your finger; you need a small screwdriver or a thin pen.  With the SIG, you just turn the slide takedown lever with the slide back.

Cleaning the Shield is a breeze.  You make sure the gun is unloaded, release the mag, lower the sear deactivation lever, rotate the slide takedown lever, and the gun comes apart.  The slide comes off the frame, and the spring subassembly and barrel come out.  That’s it.  Five parts (the magazine, the receiver, the barrel, the spring subassembly, and the slide.

The plated ammo I loaded on the Lee turret press didn’t lead at all.  Zero.  Zip.  Nada.  The powder coated bullets did, which surprised me.  All were accurate.

The bottom line?  Let me put it this way: I like the Shield; I love the Lee Classic Turret Press kit.  The Shield will get better with more shooting and I want to try more loads in it, but that 5.8-grains of Accurate No.5 and 124-grain plated Rainier roundnose load is a winner.  The Lee Classic Turret press and all its accessories were good to go right from the beginning.  Its design and quality are excellent.

The Lee Classic Turret Press…what can I say?  It’s awesome.  It’s fast, easy to use, inexpensive, and it makes great ammo.  I say it’s the best bang for the buck in the reloading world.  As an engineer I’m impressed; as a consumer and reloader I am delighted.  I have already fired several hundred rounds loaded on the Lee Classic Turret Press in my Shield, the Springfield, and the SIG and once I settled on a load, every one of them fed, fired, extracted, and ejected perfectly in three different handguns.  I had a box of 1000 124-grain plated 9mm bullets a few days ago; I like the Lee turret press so much they’re all gone now (they were either sent downrange or they’ve been loaded and labeled and they’re waiting their turn to go downrange).  I love reloading and shooting; I love it even more now that I’m loading with my Lee turret press.


A word of caution here…these loads performed acceptably in my guns.  Your firearms may vary and you need to develop your own loads.  Always start low and work up in any load development program.


Never miss an ExNotes blog:

More Tales of the Gun!


More information on Lee reloading gear.


Our earlier blogs on Lee equipment:
Lee Safety Prime
Lee Auto-Drum Powder Measure
Lee Classic Turret Press Kit
Lee Bench Plate
Lee’s Modern Reloading Manual
Lee Safety Powder Scale
Lee Classic Turret Kit Unpacking
Lee .44 Magnum Dies 1
Lee .44 Magnum Dies 2
Lee .44 Magnum Dies 3
Lee .357 Magnum Dies