

By Joe Gresh
Tidying up where we left off in Part 6, the new front brake pads arrived and everything wheel-wise went together. Bleeding the front caliper was uneventful and the brake stopped the wheel which is all you can ask in today’s crazy world.

It was time to tackle the Buell’s kickstand issue. If you’re keeping count, that’s three motorcycles I have had to modify the kickstand on.
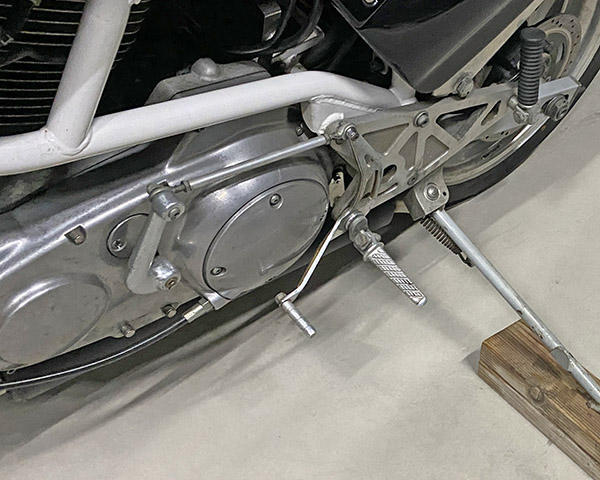
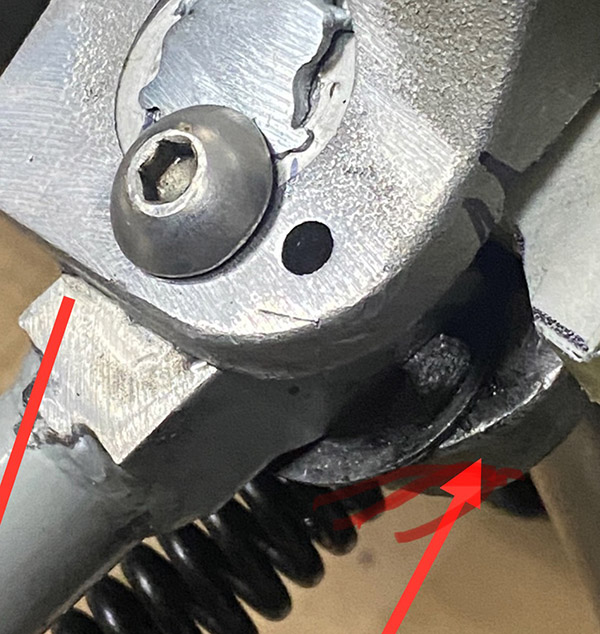
The Buell’s kick stand was an odd duck. It had the typical Harley locking style but where Harley used heavy, hard-wearing steel the Buell used soft, easy to consume aluminum.
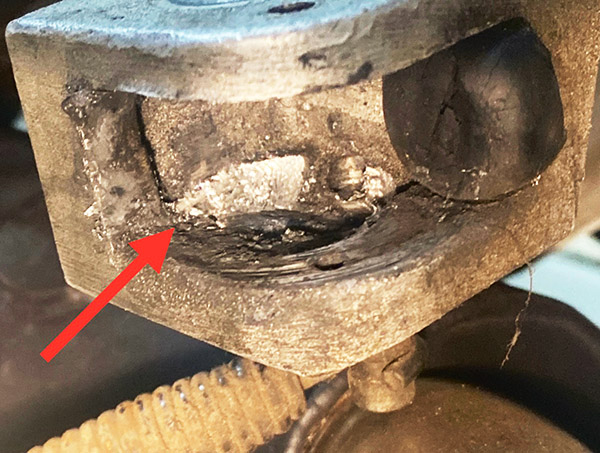
The material change is important because with only 13,000 miles my Buell kickstand locking groove was completely worn out. The notch the kickstand flopped into was gone and with the poor angles involved the bike was ready to fall over any minute. And it did.
I was going to take a stab at welding a notch in place but I couldn’t get the TIG torch in the narrow kickstand mounting boss. This was a job better left to the pros at Roy’s Welding. I took the aluminum side plate down to Roy’s and dropped it off.
A few days later I called Roy’s to see how things were going and I guess they couldn’t get their torch in between the kickstand mount either. Back I went to retrieve the still-boogered kickstand mount. I searched online for a few days but a left-side mounting plate was not available when I needed it.
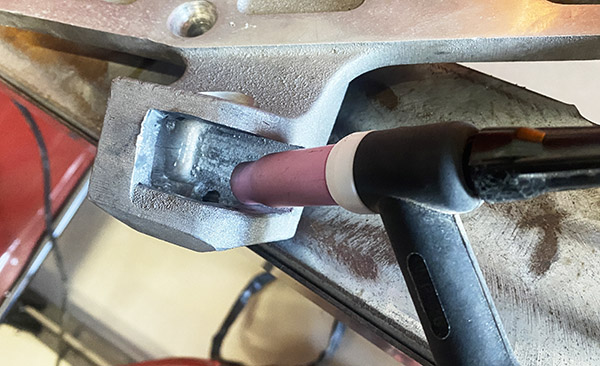
Left with no option I tried some of Harbor Freight’s ersatz aluminum welding rod. This material is kind of an aluminum solder. To weld with it you use an Oxy-acetylene torch and it kind of works.

You’ll need to clean the aluminum well and then using the torch to heat the work you sort of rub the rod into the metal. Take care not to overheat the work. It’s an easy process that you can stop anytime by removing the heat source.
I welded (if you can call it that) the original pivot holes closed then filled the worn spot inside the kickstand mount. It worked ok and I managed to get the filler pretty level inside the mount.
The original pivot holes stopped the stand at a 90-degree angle. This was fine and dandy when the stand had a notch to fall into. My new plan was to make the kickstand more like every other kickstand in the world instead of Harley style.
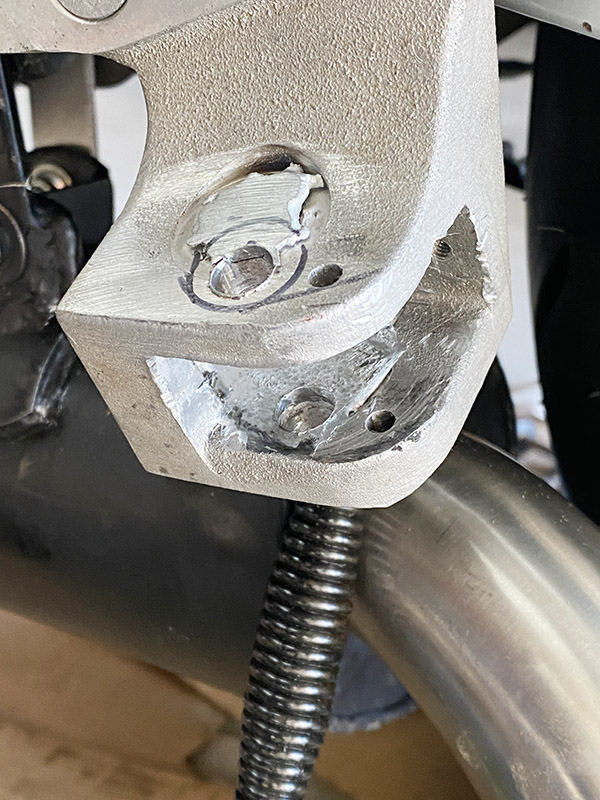
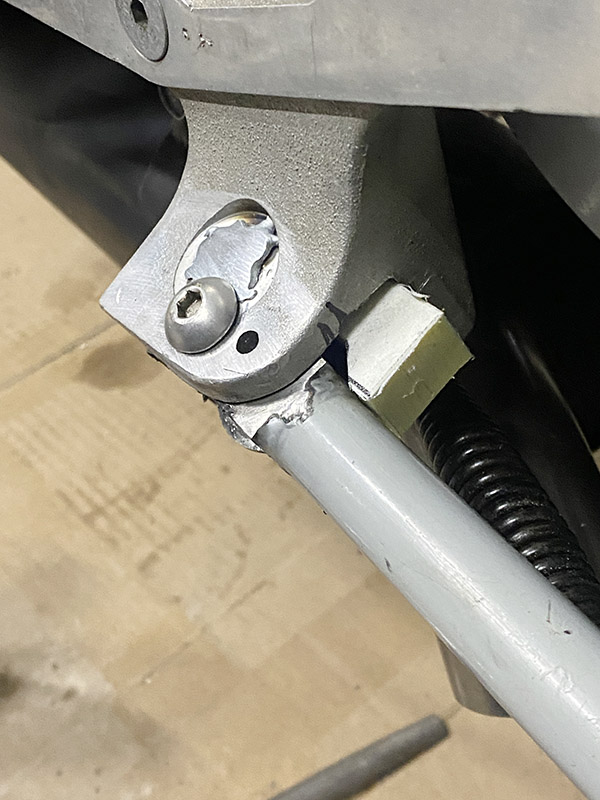
I re-redrilled the holes and a position that allowed the stand to swing forward and over center the return spring. This set up is pretty normal even in later Buells. I ground the stand a bit thinner to make room for a steel washer in the hope of protecting the soft aluminum filler material.
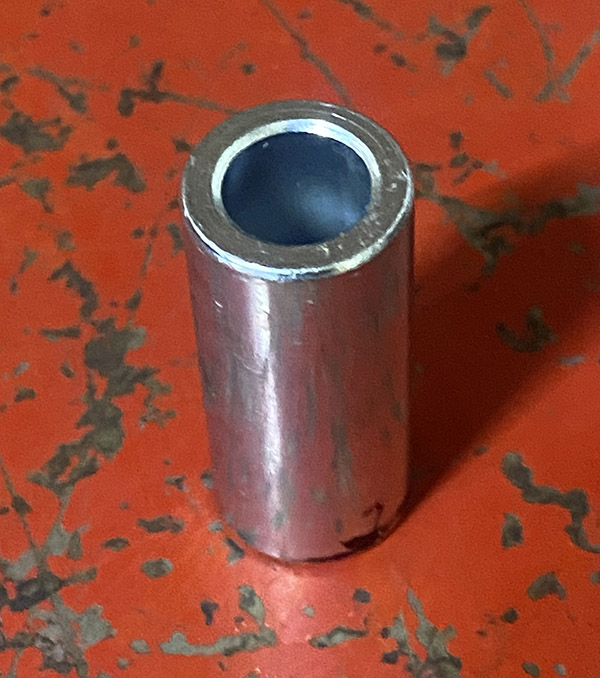
To allow movement for the old stand design the hole in the kickstand was oval shaped. This made for quite a bit of lean when deployed. My new design didn’t need the oval hole so I drilled it out and fitted a steel bushing. Now things were snug.
With the relocated pivot holes the end of the kickstand hit the swing arm in the up position. I used a piece of Starboard (plastic used in boat building) to make a new stop for the stand.
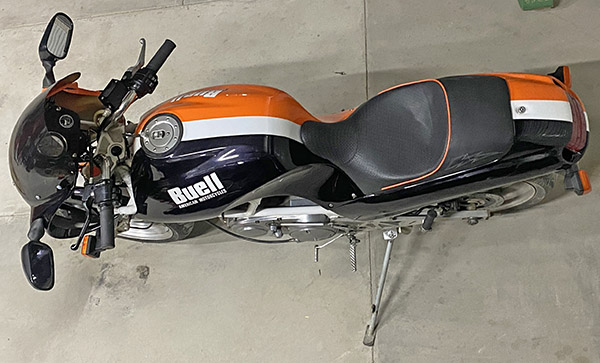
It all worked. The Buell stand is still in an odd, dirt-bike like location but it operates normally and the bike doesn’t fall over. So that’s a good thing.
More Gresh Buellishness!
Buell 1: More Cowbell
Buell 2: The Reckoning
Buell 3: An Own Goal
Buell 4: Striking Oil
Buell 5: Carb Blues
Buell 6: Oingo-Boingo
More gun stuff? You bet!
We need your support! Do what you can to help ExNotes stay in the black!

More Huber? Check out A Trip Into The Moment.

More Gresh and Berk? You bet! Check out A Cup O’ Joes!

Join our Facebook ExNotes page!