You’ve been following the Star resurrection, and if you haven’t, you can get the earlier Star stories here. This blog wraps up the last few bits and pieces on the Star. The resurrected Star is fully operational now and I’ve been making ammo on it. In a future blog, I’ll do a video showing the machine in action. I would have done it for today’s blog, but I’m out of empty cartridge cases. That’s a good problem…I’ve got to get to the West End Gun Club to shoot up some ammunition so I can reload again!
This blog covers the last few details, the last few bits and pieces I cleaned up, a part or two here and there, a few adjustments, and mounting the Star on my reloading bench…so here we go.
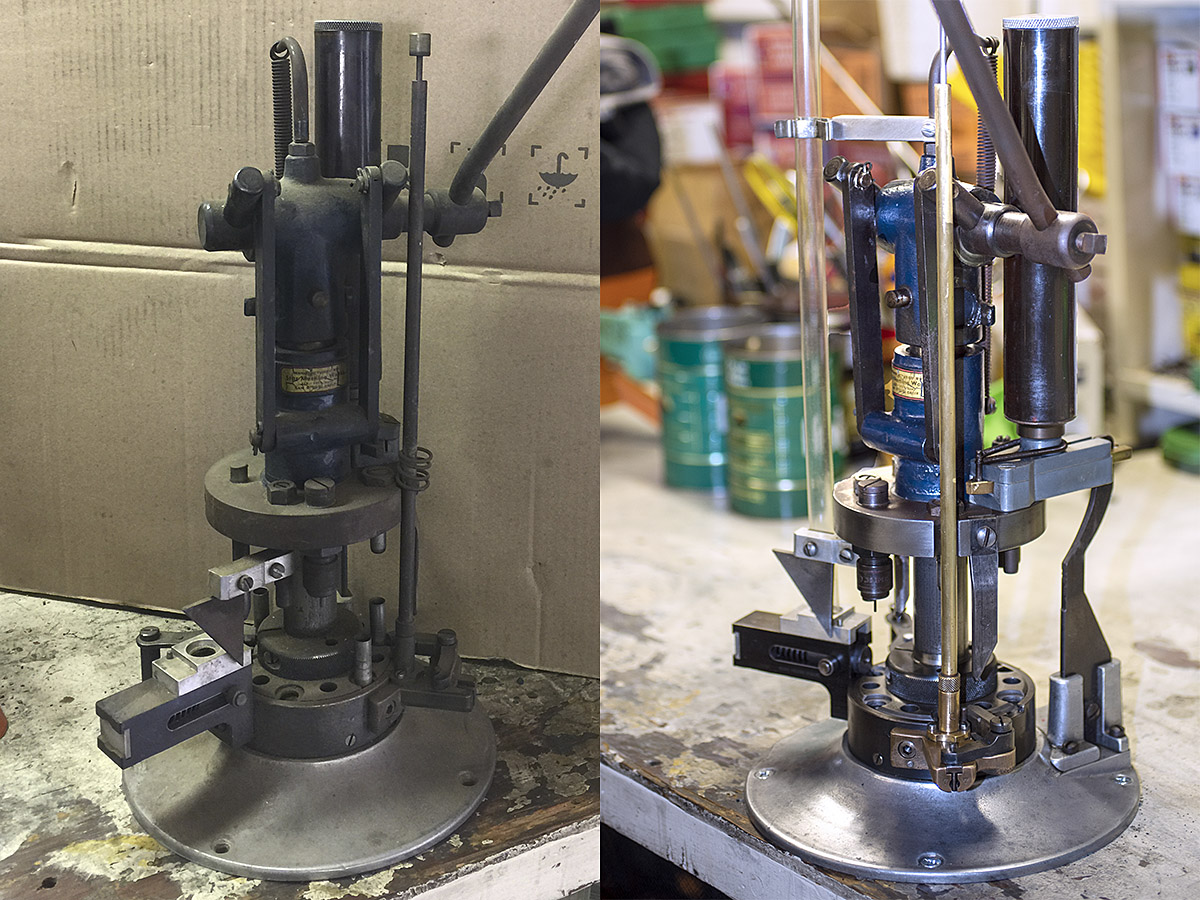
Mounting the Star
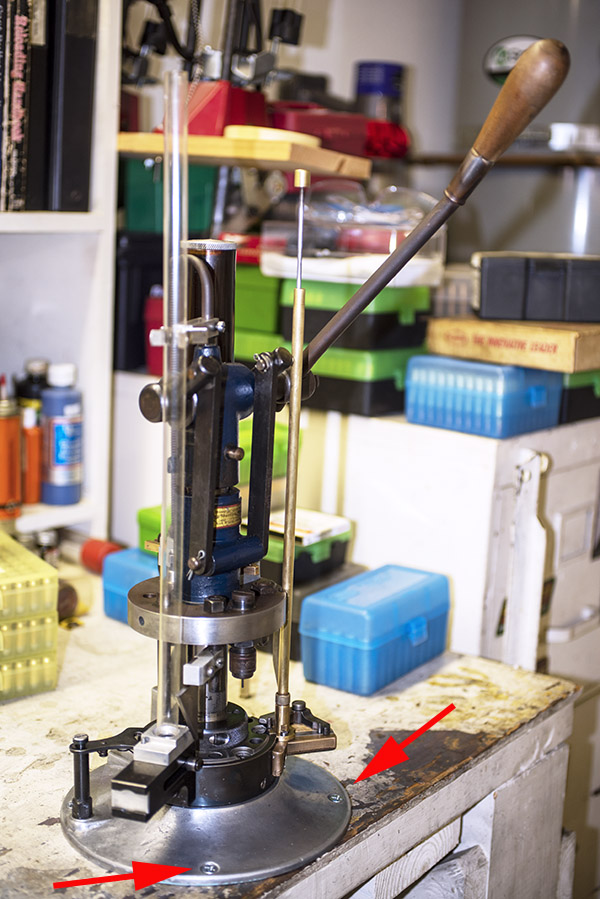
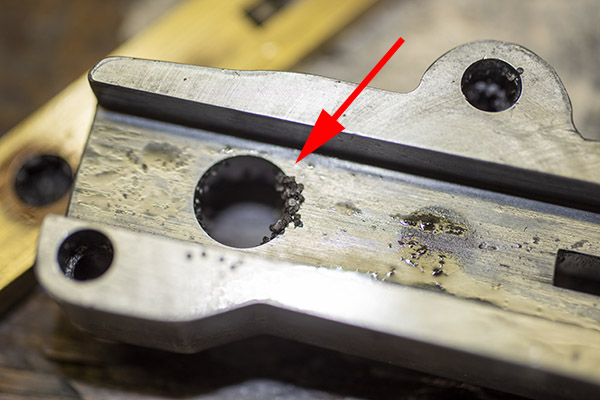
I needed to secure my Star reloader to my reloading bench. That necessitated drilling four pilot holes for the mounting screws, and two holes beneath the reloader (one for the finished rounds to drop through, and the other for the old primers to drop through). Here’s what the holes in the bench look like (the upper hole is for the finished rounds and the smaller hole is for the old primers).
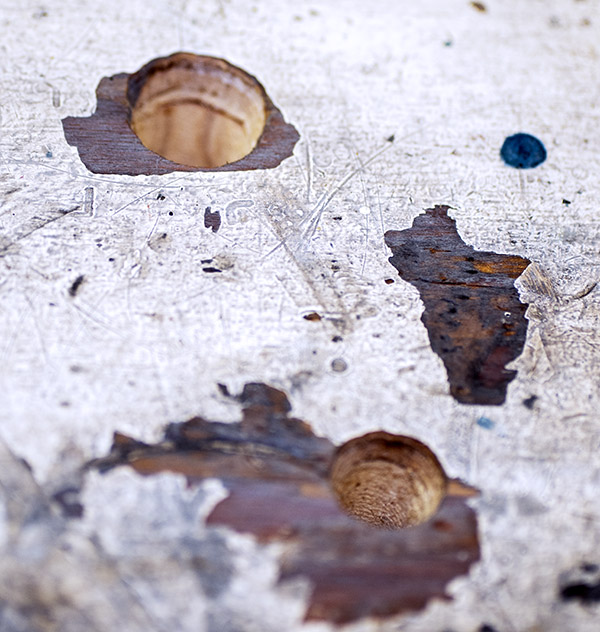
When the Star reloader operates, finished rounds drop from the bottom of the machine, which is why I needed that bigger hole you see above. When used primers are punched out of the fired case (we call this decapping), they, too, drop from the bottom of the machine. That’s what the little hole in the photo above is for.
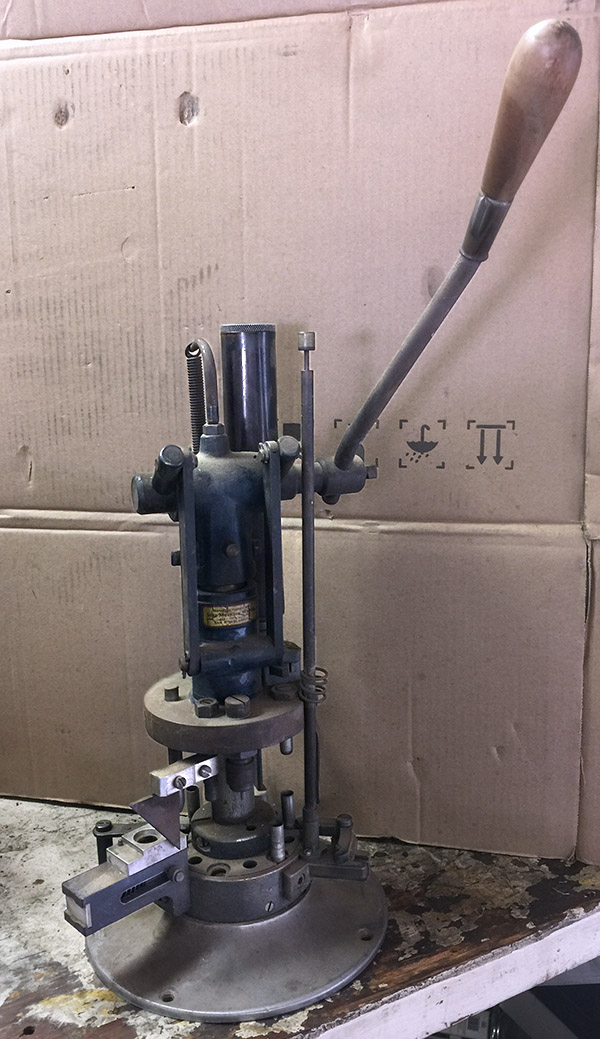
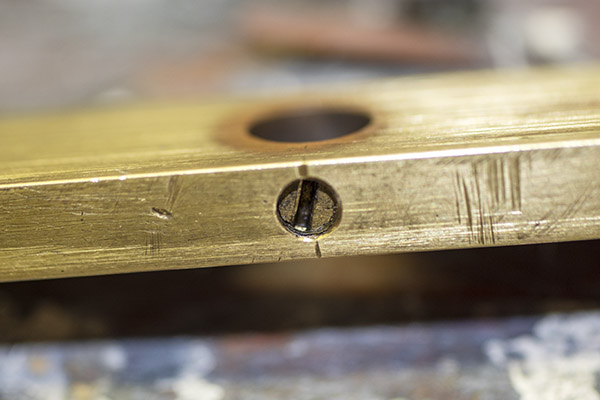
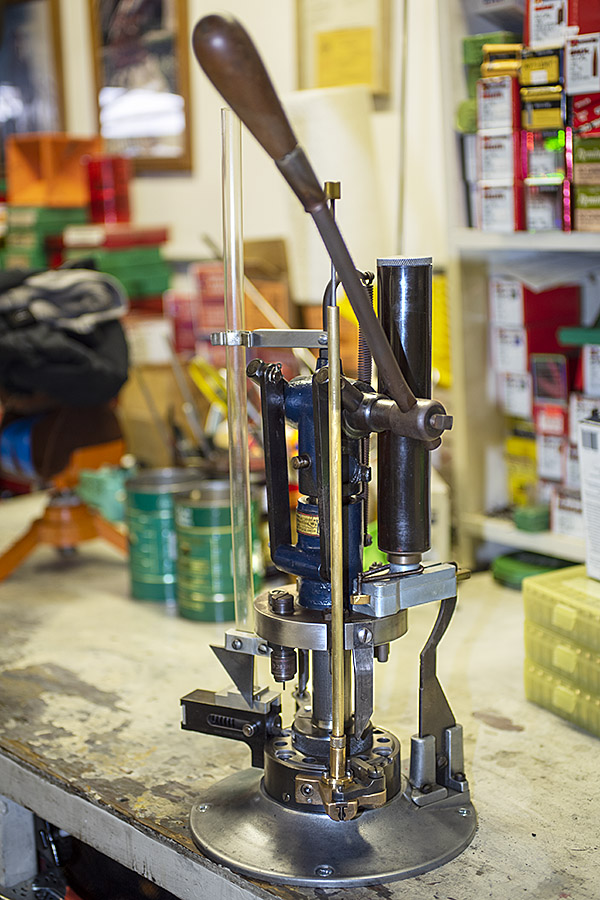
The finished Star mounts to the bench with four countersunk wood screws. It looks really good.
Tool Head
The tool head is the piece that holds the dies, the powder dispenser, and a few other things. It was basically rusted all over. I went to work on the sides with Scotchbrite and Kroil, and the tool head cleaned up nicely.
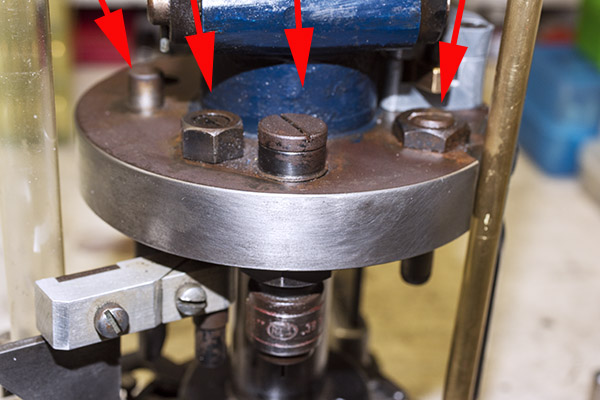
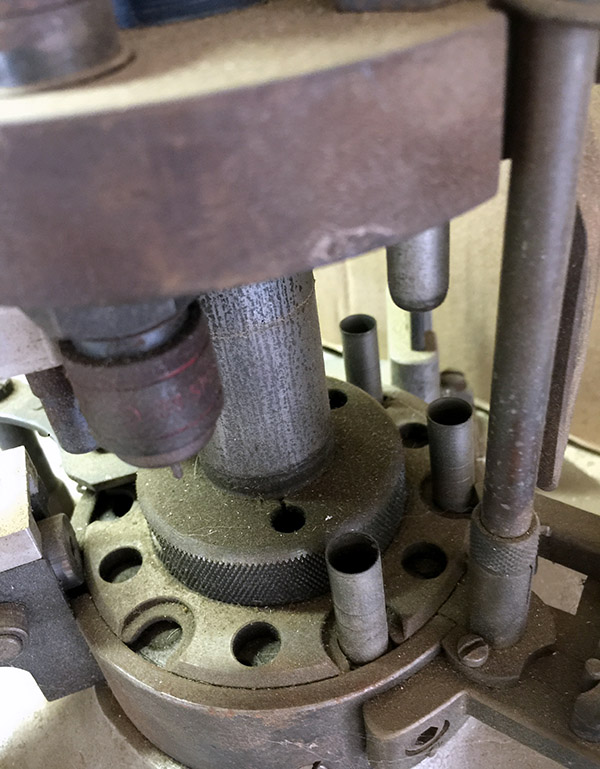
The arrows in the above photo point to key components that mount on the tool head. From left to right, we have the double charge safety (more on that in a bit), the priming lever actuator (which also mounts the came for the Hulse case feed mechanism), the decapping and resizing die (this brings the case back to its specification dimensions), and the case flaring die (this puts a bell on the case mouth to allow the new bullet to enter the case).
Primer Feed Cam
The primer feed cam is a knife-like looking thing that mounts to the tool head. As explained in the blog on the case feed mechanism, this cam moves up and down with the tool head and actuates a lever, which in turns pushes a slider with a primer underneath the decapped case. The primer feed cam was rusty so I cleaned it with Scotchbrite. The part was originally blued, so I applied cold blue to the part to bring it back to near-original condition. It looks good.
Powder Dispenser Corrections
When you reload, one of the things you have to pay attention to is the powder charge. Too little, and you can get a bullet stuck in the barrel; too much, you risk blowing the gun up. With propellants like Bullseye (which occupy very little of the available cartridge case volume), that’s a real serious concern. One of things I wanted to do was make sure that the Star’s powder dispenser was dropping the right amount of propellant. You may remember from our blog on the powder dispenser that my Star has a powder bar marked 2.7 GR BE, which is the bar for 2.7 grains of Bullseye. That’s exactly what I wanted, so it was time to make sure that’s what the dispenser was serving.
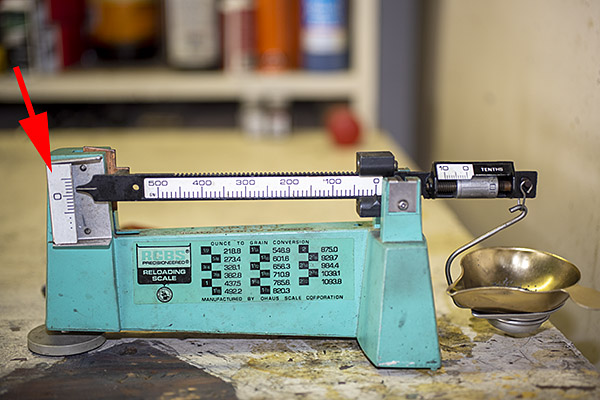
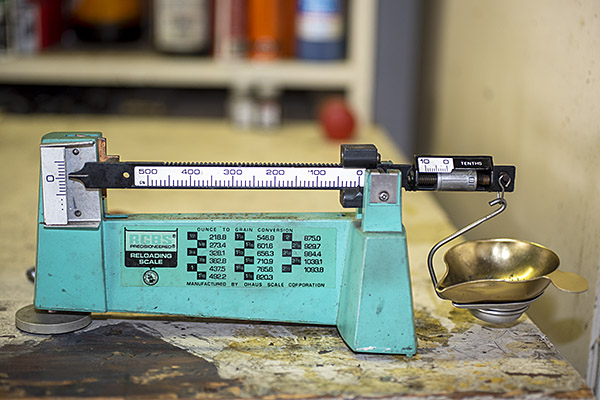
I added Bullseye powder to the powder hopper, cycled the powder slide a few times to throw a charge, and then I cycled it once more to capture a charge in my RCBS powder scale pan to weigh it. To my surprise, I found that the powder dispenser dropped about 2.2 grains of Bullseye instead of the 2.7 grains it was supposed to dispense.
I had an idea about what might be causing the problem, but before I tore into the powder dispenser, I thought I’d check with good buddy Bruce at Star Machine Works. Bruce knows more about these machines than any man alive. Bruce told me that in his experience, the Star 2.7 GR BE slides throw over the specified weight to give 2.9 to 3.0 grains, not under as I was experiencing.
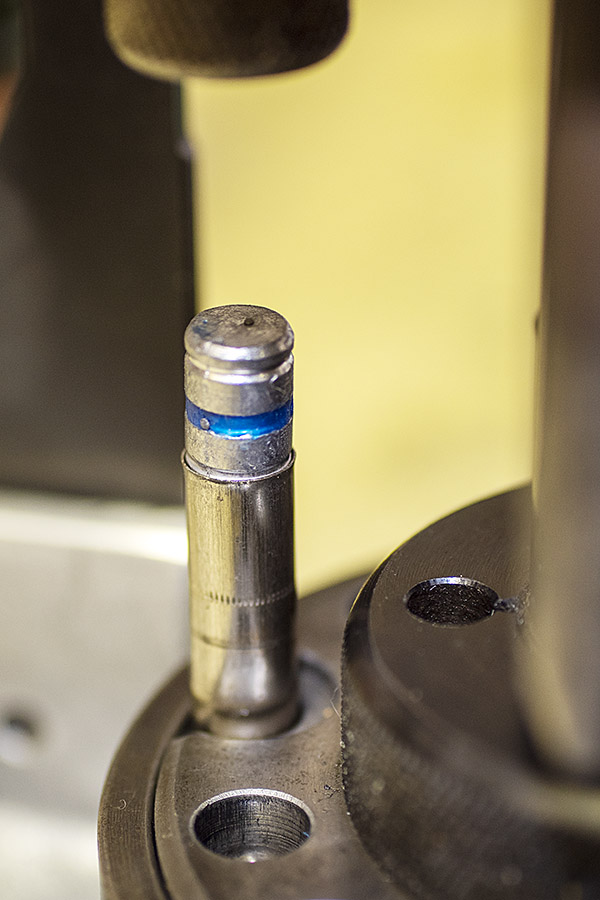
I thought this for a bit and realized I probably had residual oil in the dispenser from when I cleaned it, causing the Bullseye powder to clump up, and I was right. Take a look:
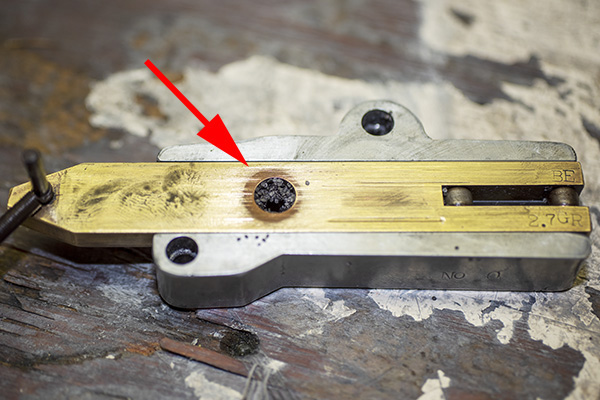
I cleaned the dispenser with alcohol to get all the oil out, let it dry, reassembled it, and tried it again. Yep, Bruce was right…it was throwing right at 2.9-3.0 grains of Bullseye. I thought that would probably be okay (0.3 grains of powder is probably about what a fly poops), but I knew that 2.7 grains was the secret sauce for good accuracy in 38 Special in my Model 52 Smith and Wesson, and that’s what I wanted. I was thinking about when I looked at the powder slide again, and what do you know, I was once again blown away by how clever these Star folks were. There was an adjustment in the powder slide. It’s a little set screw in the powder slide, and by screwing it in or out you can adjust the volume of the powder slide cavity (and therefore the charge weight). Very clever, indeed.

I screwed the set screw in to reduce the cavity volume by what I guesstimated would be 0.3 grains, and I got it right on the first try. The dispenser drops exactly 2.7 grains of Bullseye now.

On that issue of overcharging a case: The real concern is that you inadvertently double charge a case. That could be disastrous. The risk could be heightened, I think, by the fact that you have to manually advance the Star’s shell plate after each pull of the lever. The mechanism does not automatically advance each time, and if someone wasn’t paying careful attention, an inadvertent double charge could occur. Well, the Star folks thought of that, too. The Star reloader incorporates a gizmo called the safety cam.
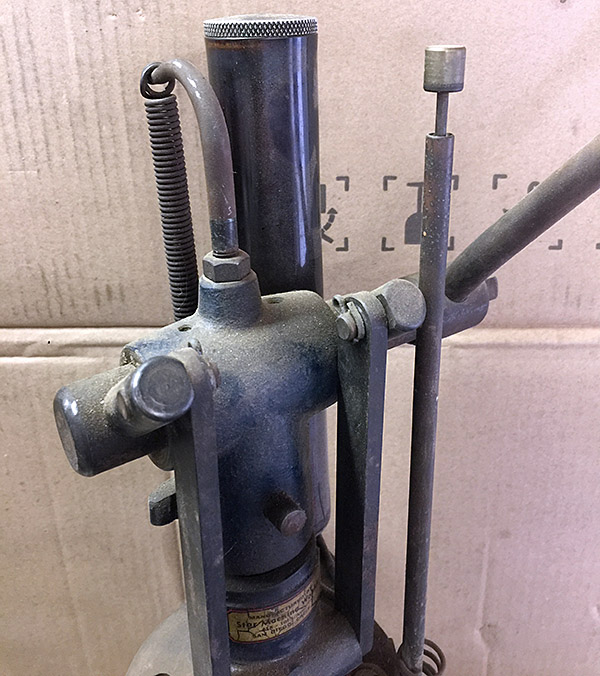
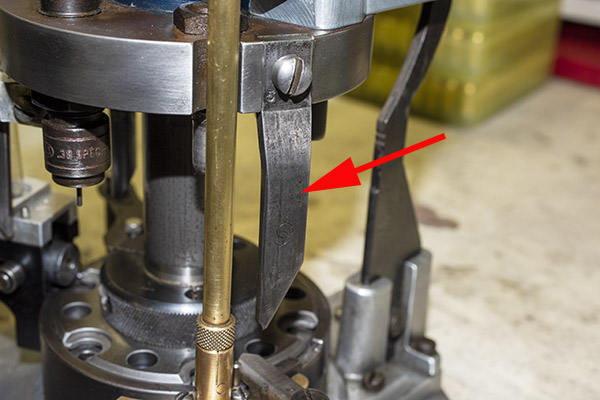
The Star Reloader Safety Cam
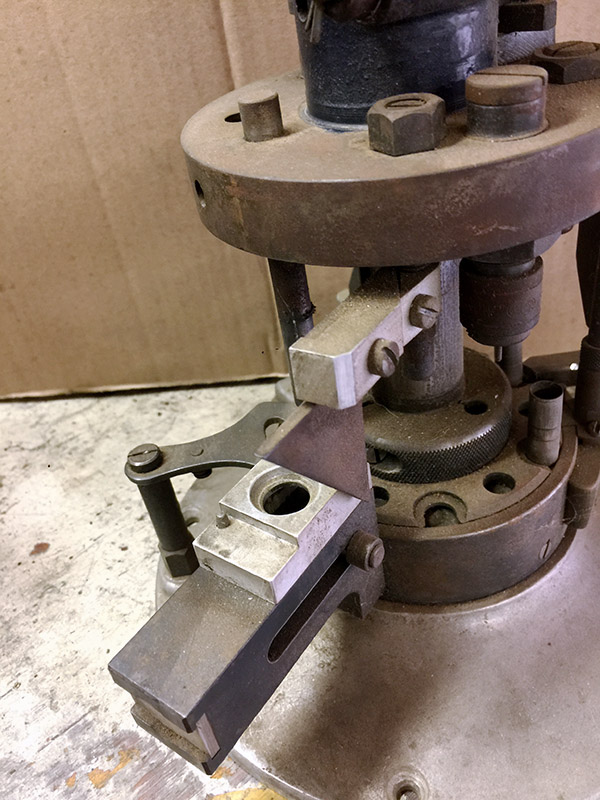
This thing is very clever, which seems to be a hallmark of everything on the Star. It’s a toggling guard sort-of-deal on the left side of the reloader that I cleaned with Scotchbrite and Kroil. You can see it in the photo below.
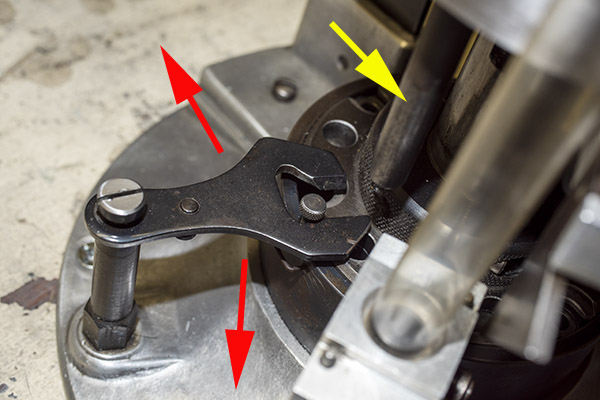
Take a look at the red and yellow arrows in the photo above. That blued-steel Y-shaped toggle guard translates back and forth on its pedestal. There’s a wire spring underneath the guard that makes it naturally flip to the position you see the photo above. Now, look at the post beneath the tool head (the yellow arrow points to it). If you attempt to operate the lever and lower the tool head (which would also operate the powder dispenser and drop 2.7 grains of Bullseye into the cartridge case beneath the powder dispenser), that post will hit the toggle and stop further tool head downward motion. When that happens, no powder will drop. We want that, because the case sitting below the powder dispenser has already been charged with propellant.
Okay, this is going to get a little complicated, so bear with me. The Star reloader’s shell plate does not automatically advance. You have to manually advance the shell plate as a separate action (it isn’t slaved to pulling the reloader’s lever). Now, imagine you’ve pulled the lever in the previous step, doing all the things that makes happen (knocking out the old primer, resizing the case, inserting a primer in the next case, flaring a case mouth, dropping 2.7 grains of Bullseye into the primed and sized case, and seating a bullet and crimping the case). Wow, that’s a lot. Now it’s time to manually rotate the shell plate to the next position. When we do that, the finished cartridge (new primer, new powder, new bullet, crimped bullet) advances into the safety cam toggle, rotating the toggle toward us.
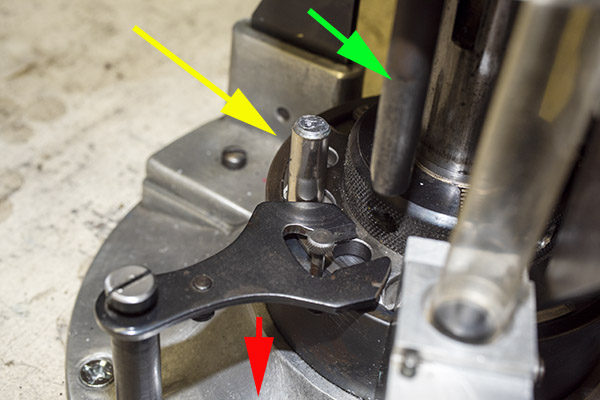
You can see all this in the photo above. The safety cam toggle rotates toward us (indicated by the red arrow), pushed there by the completed cartridge case just before that case drops through the reloader (the case is indicated by the yellow arrow). When the safety cam toggle moves toward us, the post mounted on the tool head (indicated by the green arrow) now has a clear shot at a hole in the shell holder (it’s no longer obstructed by the safety cam toggle), and the tool head can be fully lowered. The new cartridge drops through the reloader, through the hole in the reloading bench shown at the top of this blog, and into a box waiting below the bench. When the completed cartridge drops through the reloader and the lever is raised, the safety cam toggle’s spring pushes it back to the natural position, and the lever cannot be fully lowered again until the next cartridge case pushes the safety cam toggle to the safe position. It’s clever and it’s complicated, but it’s simple and it prevents dropping the tool head twice on the same cartridge (thereby preventing a double charge).
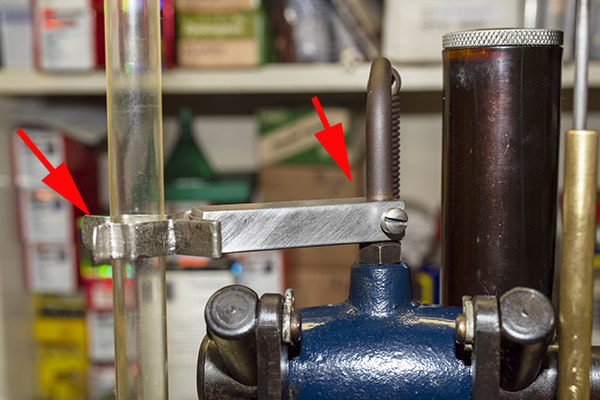
Seating and Crimping Die Adjustment
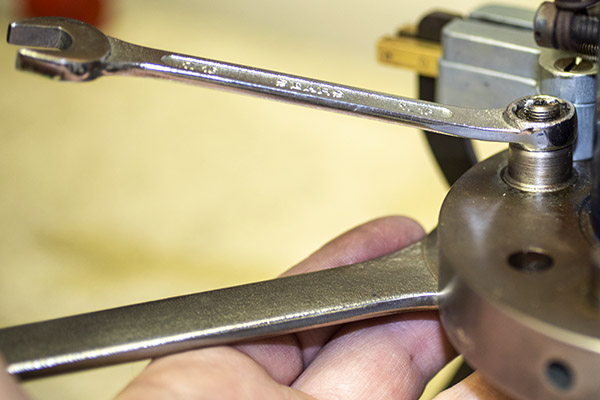
The final die in the tool head is the seating and crimping die. It does two things. It seats the new bullet in the cartridge case (it pushes the bullet in to the correct depth), and it roll crimps the cartridge case around the new bullet.
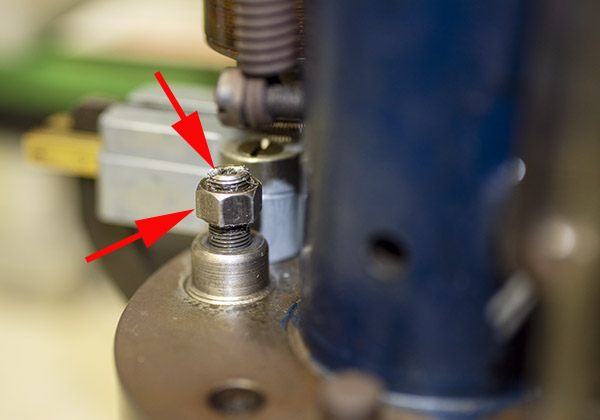
Seating depth and crimp are made through two adjustments. There’s a locknut on the seating die beneath the tool head to lock the die in place, and there’s another locknut on the seating post to lock it into position. Crimp is adjusted by positioning and locking the entire die in the tool head, and bullet seating depth is adjusted by how far the seating post is threaded into the die body and then locked in place with its locknut (see the red arrows in the photo below).
Case Feed Tube Support
The last item I needed to add was the case feed tube support. You may remember that I jury-rigged an external support from a coat hangar. It was definitely a bit of Bubba engineering, but hey, it worked. Good buddy Mike saw that, felt a wave of pity and a willingness to help, and asked me if I wanted a part that he had. I said yep, Mike shipped it to me, and here it is installed on my machine.
This project has come together very nicely. I just loaded another 50 rounds of .38 Special with the Star. I used a different bullet (the Hursman 158-grain cast flat point, which is what necessitated the bullet seating depth change described above). The Star sure did a nice (and fast) job. I loaded 50 rounds in less than 10 minutes. This thing is really cool and I am getting used to the tempo and the hand-eye-coordination/feel of the thing. At first, I felt like I almost needed another hand to operate the Star because there’s so much going on, but I got the hang of it very quickly. You only have to do three things each cycle:
-
- Advance the shell plate one position (you do that manually on these machines; the mechanism doesn’t advance the cases).
- Put a bullet in the charged shell at the back of the press.
- Pull the lever down and then bring it back up.
While doing the above, you need to pay attention to the powder magazine, the primer magazine, and the case feed tube to make sure each has not run out of the components it feeds. The Star reloader really is a slick device, and it works great.
As I mentioned in one of the earlier blogs on the Star, these machines ruled the roost for high-volume reloading for a cool half century. At one point back in the day, a Star reloader sold for north of a thousand dollars, and there was a 2-year wait to get one. It’s easy to see why. This is a nice piece of equipment. If you’re a gearhead, a gadget guy, a shooter, and a reloader (and I check all four boxes), you can’t help but love a Star reloader.
Do you enjoy reading about bringing old stuff back to life? You’ll love the Resurrections page!
See all the Tales of the Gun here!
Never miss an ExNotes blog!