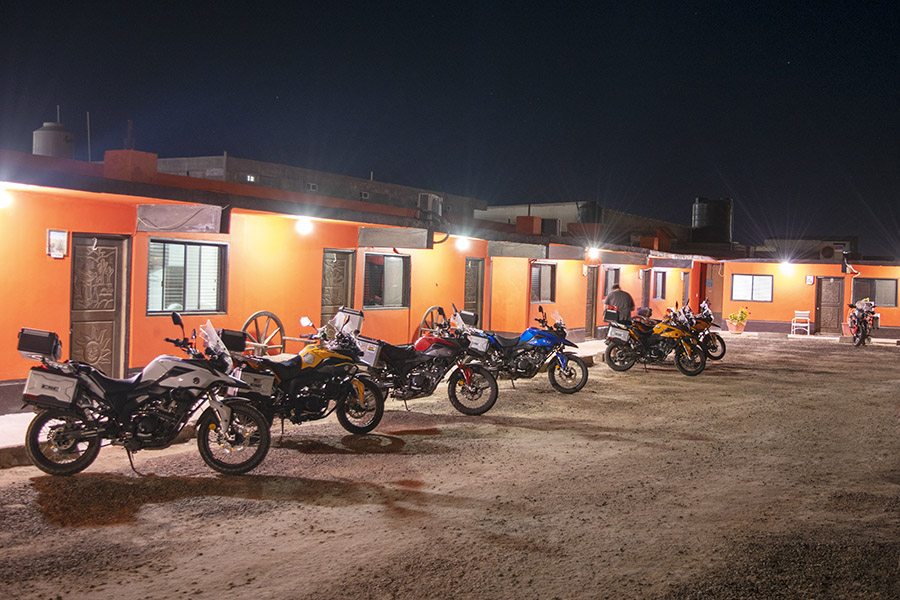
The turnaround point for our New Mexico trip was the Albuquerque Balloon Fiesta. We had talked about it for years, and it combined nicely with our stops in Tucson and Alamogordo (and the visit to Tinfiny Ranch). I shot all the photos in this blog with my iPhone. I had the big Nikon D810 and its boat anchor 24-120 lens with me, but my leg was acting up (an old motorcycle accident injury) and I couldn’t lug that thing around any longer on this trip. I might have shot better photos with the Nikon, or I might not have shot any at all if I didn’t have my cell phone. Adapt, improvise, overcome.
The deal on our visit to the Balloon Fiesta was a tour group. It’s really the only practical way to get in to see the balloons. Here’s the deal: Albuquerque’s population is 550,000 people (it’s the biggest city in New Mexico). The Balloon Fiesta, however, draws a cool one million visitors. Just getting to the field where the balloons lift off would take an hour or more due to the crush, and if you did that, you’d have to park far away to find a parking spot. If you’re part of a tour group, however, you ride on the tour group’s buses from your hotel to the balloon field, and they take you right up to the gate. The City of Albuquerque has done this event for years and they have it dialed. They designate special bus lanes during Balloon Fiesta week. Logistically, it’s a much better approach.
What the City can’t control is the weather, and hot air balloons are sensitive to the weather. If there are electrical storms, low visibility, rain, or high winds, the balloon’s won’t lift off. And there were plenty of all these conditions that week. Our tour grip told us we’d be making three trips to the balloon field, but there were no guarantees we’d get to see the balloons lift off during any of our visits. Two of our visits were early morning affairs (we arrived at the field before sunup), and another one was in the late afternoon.
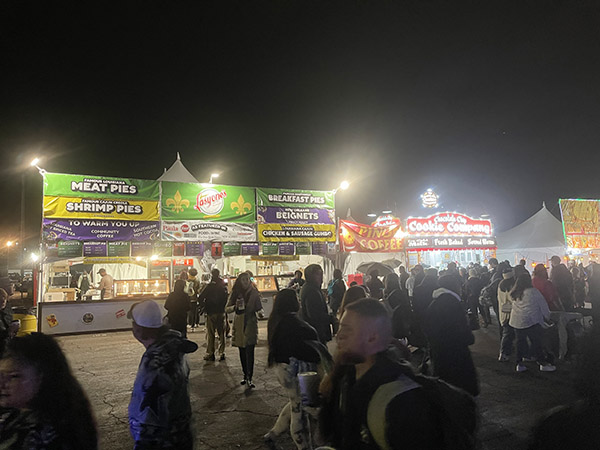
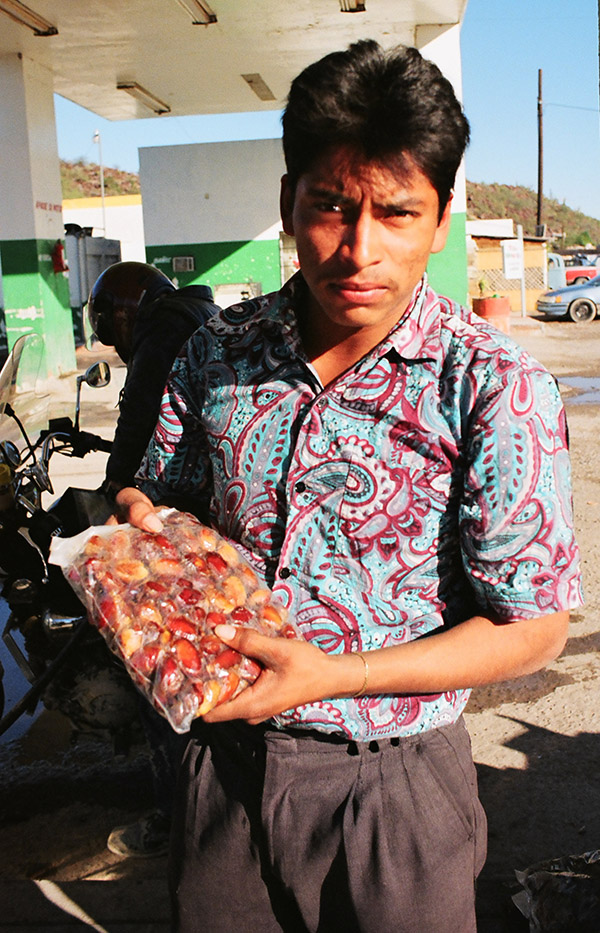
The Balloon Fiesta field periphery is lined with vendors.
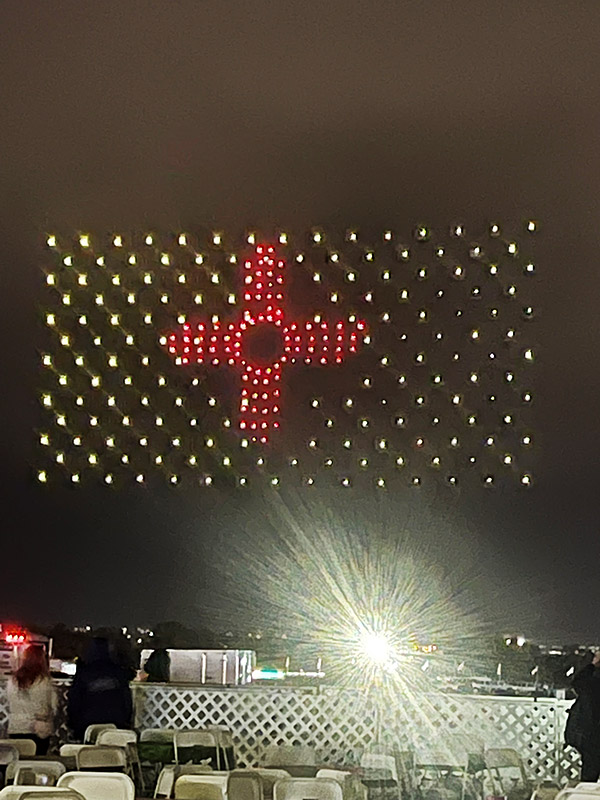
During our first early morning arrival, it was cold and too windy for the balloons to lift off. The balloon fiesta had a backup plan, though, and in the distant skie we observed a light display. At first I thought there was a large board with lights, but then the display lifted into the pre-dawn sky. I learned it was all down with multiple computer-controlled drones. That was impressive.
Cell phone photography is like halitosis…it’s better than no breath at all. Each of these lights is carried by a single drone. They were probably a mile away when I took this photo.
The images changed. We couldn’t see or hear the drones, and there was nothing from our location that would indicate they were drones. It was impressive.
A Puebloe Native American symbol, commandeered as the image on the New Mexico flag. This is the area where we had breakfast. Breakfast was a part of the tour package.
During our second visit, which occurred in the afternoon, the wind conditions weren’t acceptable and there was a thunderstorm moving in, which prevented the balloons from ascending. But it allowed a parachute display, and I grabbed a few photos of it.
Selection.com is a personnel agency.
Evidently the smoke generators the parachutists used create debris. One particle hit me in the face. Fortunately, it caught me in the cheek and not in my eye. That would have made for an interesting lawsuit.
Another photo of the parachutists.
Even though it was too risky for the balloons to inflate and ascend, there was a lot going on. It was fun walking around and taking iPhone pictures.
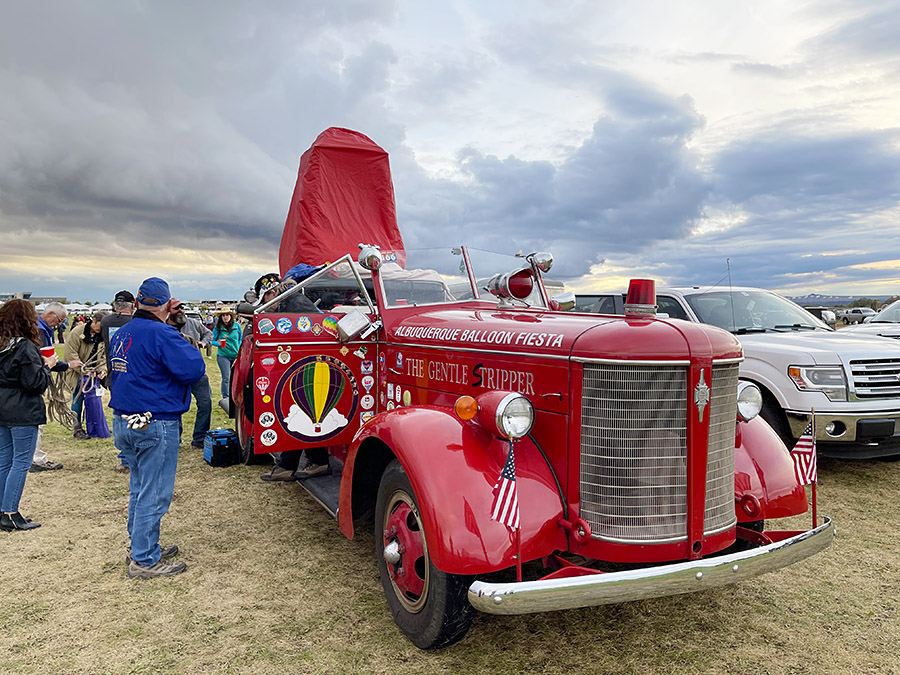
A fire truck at the Albuquerque Balloon Fiesta.
Our third and last visit to the balloon fiesta field was on a brisk Sunday morning and it was the charm. After being skunked on two prior visits, the word was out: The balloons had the okay to inflate and liftoff. The winds were suitably low, visibility was good, and there were no looming electrical storms. It was a go for a mass ascension, which kind of sounds like a religious experience. In a way, it almost was.
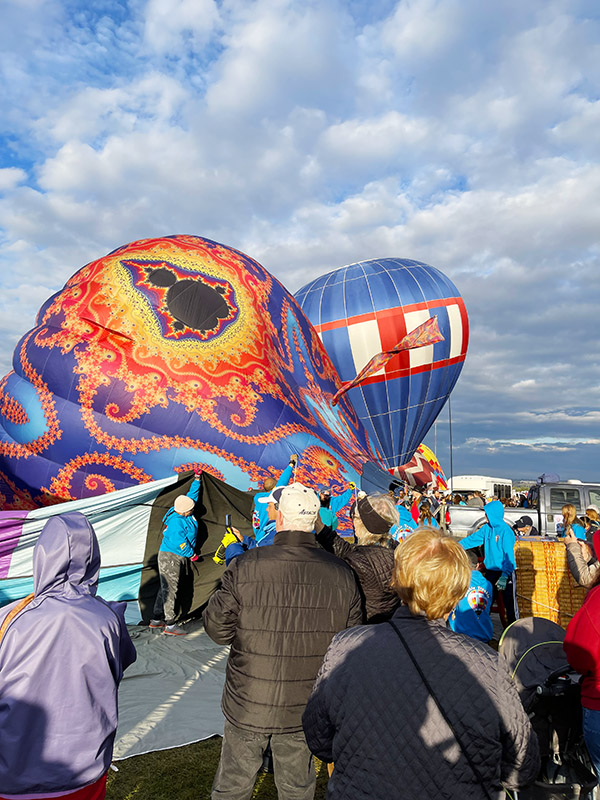
Balloons inflating after recieving the go ahead. You walk in amongst the balloons. It’s all very exciting.
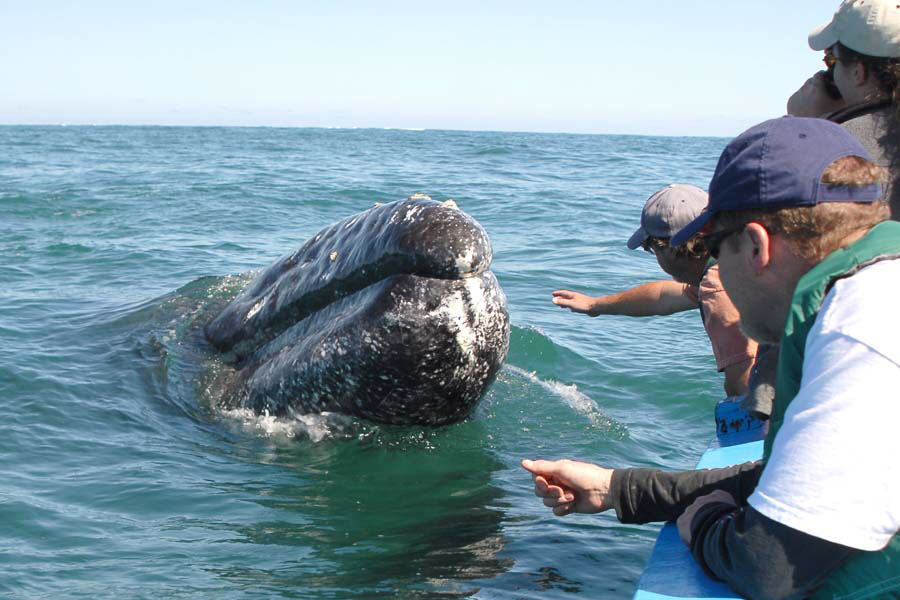
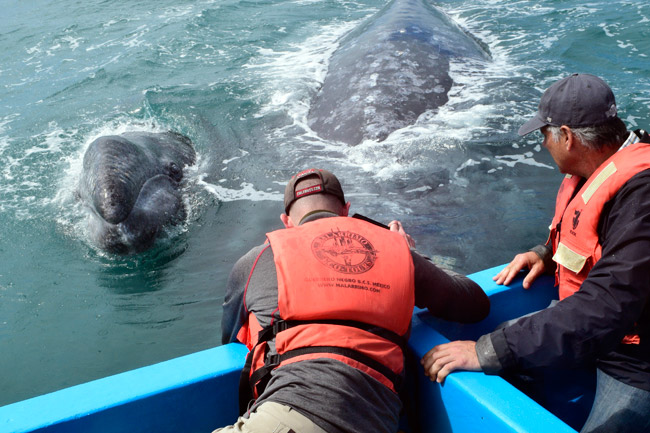
In a strange kind of way, being in the middle of the mass ascension kind of reminded me of seeing the whales in Baja. You go out in a small boat and for a while, nothing happens. Then you see a lone whale spout in the distance (like that one balloon you see going up in the photo above). Then, suddenly, there are whales spouting all around you, and then they are right up close to the boat. The balloon fiesta is a lot like that. Nothing happens at first, then you get very excited when you see that single first balloon ascend. Then, suddenly, balloons are going up all around you.
Our first balloon going up.Then, suddenly, there are balloons everywhere.The cell phone was doing a decent job for me. I would have liked having the D810 with me, but it was not meant to be. Maybe next time.The colors, and the vibrance, was off the charts. The balloon fiesta is a photographer’s paradise.Approximately 650 balloons ascended within about 30 minutes. It was impressive.Several of the balloons were more complex shapes, like this Felix the Cat version. There were turkeys and other shapes as well.This last photo is a panoramic shot, in which you manually sweep the camera through an arc (in this case, about 180 degrees). The iPhone does a suprisingly good job. The actual image is a little over 16,000 pixels wide.
A question several of my friends asked is: Did we go up in a balloon? The answer to that is no. You have to make a reservation far in advance to get a seat in one of the balloons (we had not), it costs several hundred dollars, and truth be told, I wasn’t too sure about doing it. Joe Gresh, whom we visited on our trek to Albuquerque, had done it in the past and he told us he and Colleen enjoyed it. Maybe next time.
If you have any thoughts about visiting the Albuquerque Balloon Fiesta, my advice is to go for it, and to do it through a tour agency for the reasons listed above. It’s a bucket list sort of thing to do. We went with the Road Scholars tour group, they did a great job for us, and they kept us busy for the three days we were in Albuquerque.
Please keep clicking on those popup ads…it’s what keeps the lights on!
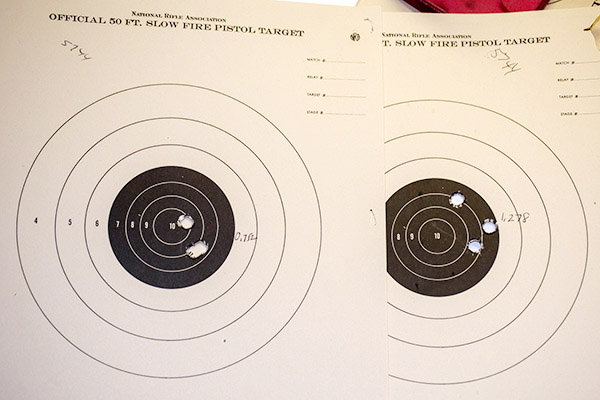
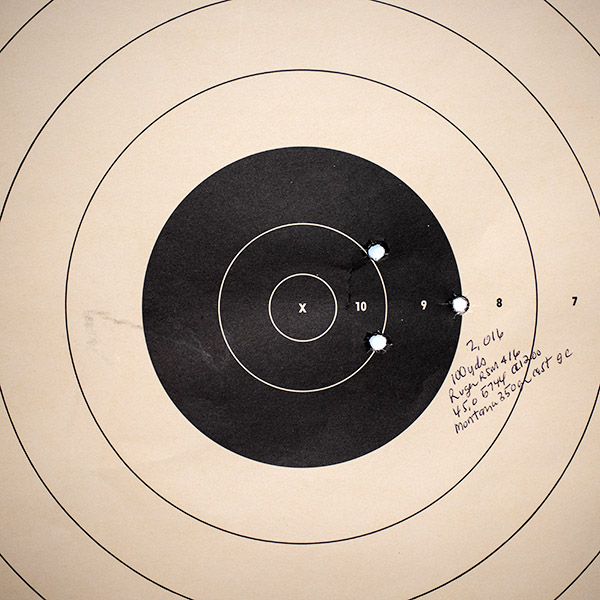
You’ll recall a recent blog where I waxed eloquent about Eleanor, my Ruger RSM .416 Rigby rifle. In that blog, I talked about reduced loads using 350-grain cast Montana bullets and 5744 and Trail Boss propellant. It was fun…the Trail Boss loads had milder recoil and “good enough” (but not stellar) accuracy. Take a look at these 50-yard targets:
The above target on the left was with 30.0 grains of Trail Boss; the one on the right was with 34.0 grains of Trail Boss. I could feel a tiny bit more recoil with the 34.0-grain load, but both were light loads with modest recoil. Weirdly, the point of impact shifted sharply to the right with the lighter load, but it moved back to the center with the 34.0-grain load (and it was slightly higher). The Trail Boss loads shot okay, but they weren’t running in the same league as the load I had shot the prior week with 5744 propellant and the same Montana Bullet Works 350-grain bullet, as you can see from the 50-yard targets below.
I could see what I was getting with the Trail Boss and I could see that it wasn’t grouping nearly as well as the 5744 loads at 50 yards, so that stopped my testing with Trail Boss (that, and the fact that I had used up all my Trail Boss cartridges).
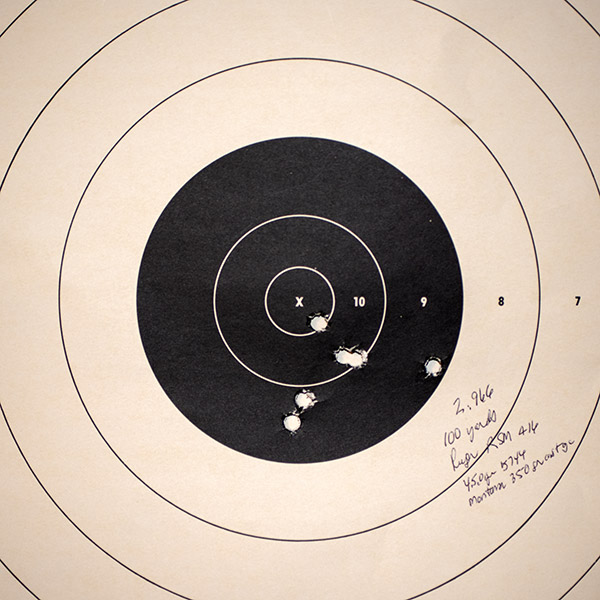
I was curious: How would Eleanor do at 100 yards? I still had some of the 5744 loads left, so I posted a couple of 100-yard targets and let Eleanor have her way. I first fired a 3-shot group and after looking through my spotting scope, I was surprised to see how well they grouped.
I thought maybe that target was a random success, and I didn’t want to ruin it by throwing more shots at it. So I fired another 3-shot group at the second target, and then another three at that same target. That’s the one you see below.
Before all you keyboard commandos start telling me that these results are nothing special, allow me to point out that these are 100-yard groups using open sights on an elephant rifle. I’m calling it good to go. Like I said earlier, when the elephants become an invasive species here in So Cal, I’m ready. The load is 45.0 grains of 5744 (it’s the load the Lyman Cast Bullet Handbook specified as the accuracy load, and they were right), the 350-grain Montana Bullet Works .416 bullet sized to .417 and crimped in the cannelure, Hornady brass, and a CCI-200 primer. I didn’t weigh each charge; I just adjusted my RCBS powder dispenser and cranked them out. If you were wondering, I use Lyman dies for this cartridge.
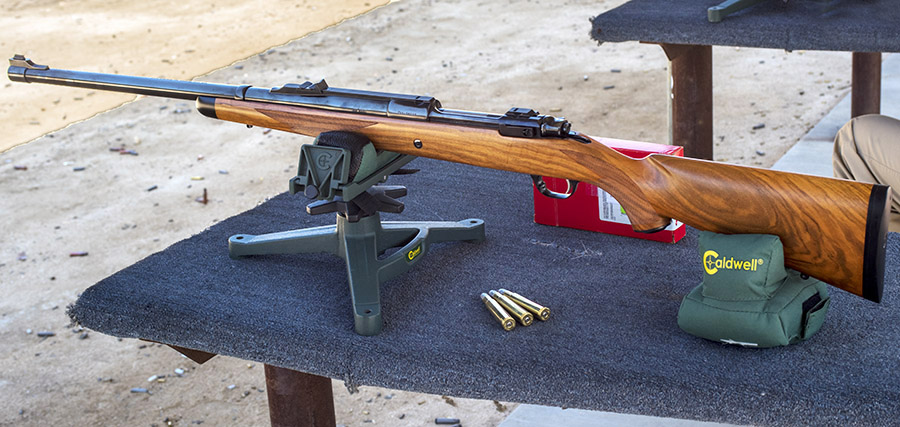
A bit more about Eleanor: The rifle is a Ruger 77 that the good folks from New Hampshire call an Express or RSM model (I think RSM stood for Ruger Safari Magnum). They made them in 375 H&H, 416 Rigby, and 458 Lott (kind of a magnum .458 Magnum). Ruger also made a similar one in a few of the standard calibers (7mm Mag, 30 06, and 300 Win Mag, and maybe one or two others). These rifles were a bit pricey when Ruger sold them in the late 1990s/early 2000s, but evidently not pricey enough. They were too expensive to manufacture, so Ruger stopped making them. When you see these rifles come up for sale today (which doesn’t happen very often), they command a premium. I wish I had bought one in 30 06 when they were first offered; to me, that would be the perfect rifle.
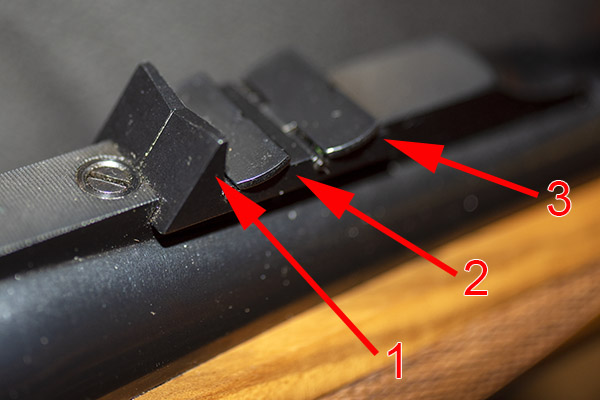
The rear sight on a Ruger RSM rifle is of the African “Express” style. The elevation adjustment consists of a fixed and two flip-up blades, and they all have a very shallow V. I guess the idea of that shallow V is that it lets you see more in case an elephant is charging. The sight has two flip up blades behind the fixed blade; as range increases, you flip up the second blade, and if it is an even longer shot, you go for the third blade. I got lucky, for me, the fixed rear sight blade is perfect with this load. I made a minor adjustment for windage, and the elevation is spot on with a 6:00 hold at both 50 yards and 100 yards.
Incidentally, that rib the rear sight sits on? It’s not a separate piece. It and the barrel were turned and milled from one solid piece of steel. It’s one of the reasons these rifles were too expensive to manufacture.
The front sight is the typical brass bead (you can sort of see it in the featured photo at the top of this blog), which I usually don’t like, but with these results I can’t complain. I’ve shot better groups with two or three other open sight rifles using jacketed bullets at 100 yards; this is the best any cast bullet has ever done for me.
Popups: Click on them to keep us going!
Want to see the first installment of the Eleanor story? It’s right here.
Tough to get to a gunstore to buy targets? Range fees for targets too high? Do what I do and order them online. They’re delivered right to your door and they’re less expensive, too.
Need a calipers for measuring your group size? This is a great place to find great calipers at a great price.
Want to check out Montana Bullets? Here’s a link to their website. Tell them Joe sent you. Trust me on this: These are best cast bullets I’ve ever used.
In 2019, just before COVID body slammed the world by stopping most travel while adding uncertainty, panic, and fear, I completed a 1,000+ kilometer motorcycle journey through the heart of Central Vietnam. This blog will be a 7-part series to highlight the beauties, wonders, and people of this magical land through the lens of a motorcyclist, philanthropist, and former soldier.
Asia. The largest continent in the World. Where the cultures are as vast as the geography. It had been some time since I was on this continent and the first time was purely by a decision that there would be better stories out of Asia than where I was supposed to be stationed, which was Texas.
It was 1992 and I was graduating AIT (Advanced Individual Training) as a U.S. Army Communications Specialist at Ft. Gordon in Augusta, Georgia. It was August and the heat and humidity were brutal. We were called into formation as this day we were to be given our orders for our first assignment as soldiers. As the Drill Sergeant called us up one by one, the anxiety in the air was intense. Would we go to Germany, remain in the United States, or maybe go to Korea? Most of us received stateside duties. As I eagerly opened my envelope, I learned my assignment was to report to Ft Hood, Texas. I was not happy at all, as my “Dream Sheet” consisted of Jamaica, Aruba, and Portugal (I figured why not try for a cool duty station even though I knew it was extremely unlikely).
The formation dispersed after about 15 minutes, and I noticed one of my peers on the burnt lawn looking distraught. He was set to be married and his fiancé was pregnant, and he now had orders to Korea for a year. It took me all of 2 seconds to look at him and say “Hey, wanna trade?” After a short chat with the Drill Instructor we made it happen. I often wonder how his days in Texas went, but I find it hard to believe it could have been more of an adventure than what was to be my first duty station as a soldier in the United States Army.
I got what I was looking for: A lot of stories and a hell of an adventure in Korea with the 2nd Infantry Division. I was posted on Korea’s demilitarized zone for a year. This story came to mind in December of 2019 as I groggily stepped off an airplane into the hot humidity of Da Nang, Vietnam to spend 3 weeks motorcycling around the country along the Ho Chi Minh Trail. It had been a long 26-hour trip from Los Angeles to what I was about to realize was a beautiful and unique country. The Vietnamese culture, although extremely beautiful, was much different then how westerners live. To see it from a motorcycle was an adventure few people experience.
Do us a solid and click on the popup ads…it’s how we get paid!
There are more ways to measure wealth than money. Sure, traditionalists rely on a strict net worth approach, adding up the figures on electronic statements in a system where the winner is whoever has the highest number. You can count all sorts of things, though. You can count friends, you can count grandchildren, you can count experiences: These are forms of wealth that won’t show up on that balance email from the bank.
When it comes to future projects I am a very wealthy man. I’ve got them lined up out the door and around the corner. And my account keeps growing; with compound interest my Project Bank doubles every seven years. Most of these projects will never see the light of day but they remain secure in my thoughts, if not in my actions.
On of my largest assets is the 4-speed Suburban project. When I bought the ’90 ‘Burb it came with a malfunctioning automatic transmission. I hate automatics and malfunctioning ones even more so. The 700R4 works in Drive and Reverse but not in 1-2-3. The truck runs fine and it will tote a 3000-pound load without complaint but that boring automatic has got to go. It’s a rare Suburban that came with a 4-speed from the factory and even rarer to see a ½-ton version. I’ve only seen one 4-speed ‘Burb and it was ¾-on. This project keeps earning interest and I’ve been training a weather eye on Internet sale sites for a cheap, manual transmission, 4X4 GM truck to steal the guts from. I found a late model, 4X4-IFS 1/2-ton truck with a 5-speed and a nice FI engine that ran well but the transfer case and transmission housing were broken and besides everything was on the wrong side for the old straight axle suburban.
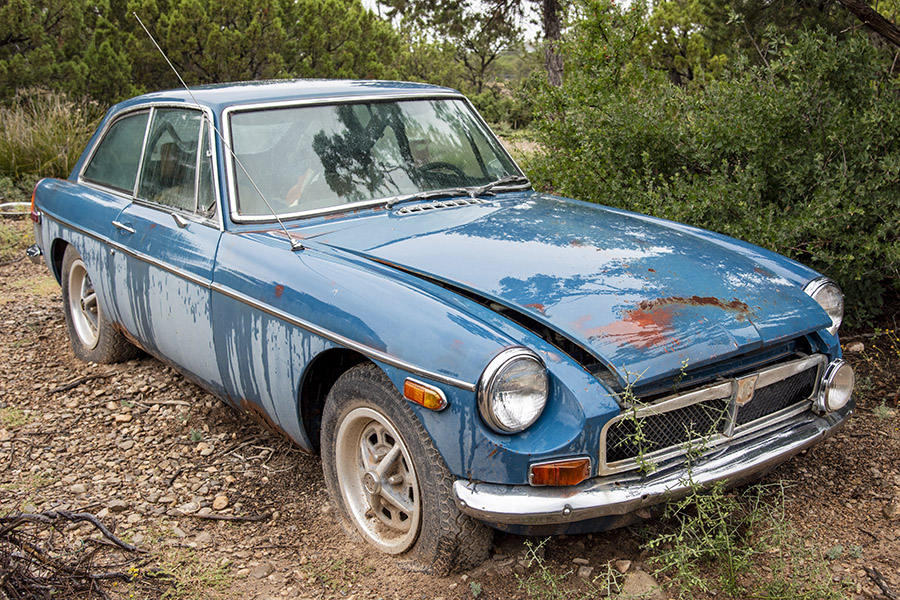
The chalky blue, 1974 MG GT came with Tinfiny Ranch and was listed as an out building on the deed. This car was on the chopping block until I started reading about MG’s with Buick 215 cubic-inch aluminum engine swaps. I really have to stay off the internet. The Buick engine triples the horsepower, doesn’t weigh much more than the iron 4-banger it replaces and sounds cool as hell revved up to 6000 RPM. This is one asset I kind of wish was not in my Project Bank as I’ve never been that interested in cars. Still, it’s there waiting on me.
Tinfiny Ranch itself is a huge source of endless work, but beyond the physical plant The Ranch continues to deposit surprises into my Project Bank. This Merry Tiller project revealed itself as I was hauling away two, multi-panel garage doors. The doors sections were stacked with spacers in the popular rat-paradise fashion and I gave chase to a couple fat rats but they got away from me in the thick brush down by the ravine. The Merry Tiller looks like it will come in handy for the raised-bed vegetable garden (yet another deposit in The Project Bank) I’m planning for the back yard. The engine on the tiller is not stuck and being a Briggs & Stratton I’m sure it will run so I’m leaving it in The Bank for safe keeping.
I will never be bored or lonely. My Project Bank is overflowing with cool things that need time and attention. After I level the back yard I’m going to build a shear wall for the shed, then I need to get back on the Zed. After that I’d like to pop a 6-cylinder + AX15 transmission into Brumby the Jeep. The Suburban needs new paint; I’m going to change it from black to white so it will be cooler inside. Better yet I’ll fix the air-conditioner, it’s all there except for the compressor. I really need a second rain barrel, too, as I’m leaving water on the table with only 2500 gallons of storage.
The projects pile one atop the other and the magnitude of the undertaking gives me a great sense of importance. When I die I want to be buried like a Viking in his ship except my grave will be filled with all the unfinished projects that kept me company while I was alive. You really can take it with you, mainly because no one else wants your junk.
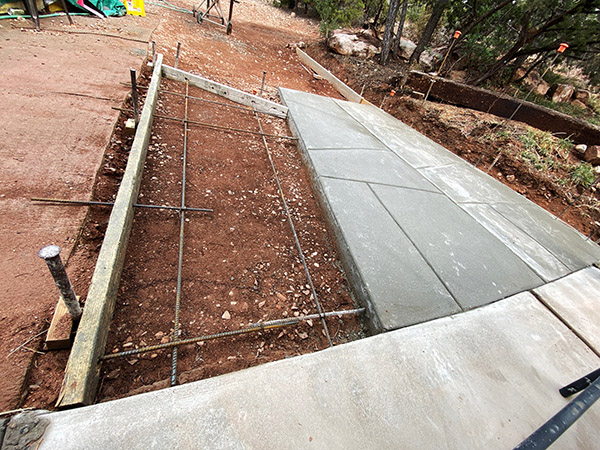
ExhaustNotes readers may think I pour a lot of concrete but that’s not really true. I do pour concrete frequently but only a little at a time. My limiting factor is how much total work I can get done in one day. That number dwindles as I grow older. I pour 30 to 40 60-pound bags of 4000 psi concrete on average. Any more and I start to have problems keeping up the finish work and any less is not worth getting the tools dirty. Cleanup takes a lot of time and if you don’t wash everything each time your tools become encrusted with dried concrete. It’s never fun to work with heavy, dirty tools.
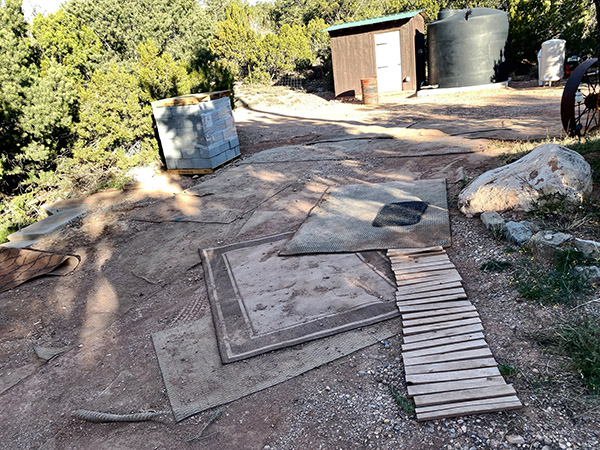
Take my latest project, the driveway in front of the little shack we call The Carriage House. In an attempt to class up the place I am removing the existing driveway, which consisted of remnants of old rugs thrown over dirt. We acquired the rugs from a Physical Therapy training center. The PT rugs were in great condition and very sturdily constructed. Best of all they were free. The rugs served us well for many years by adding a semi-pervious layer between our feet and the dirt below. Engineered earth is the technical term, I think, for fabric-supported fill.
Of course, old rugs aren’t the most perfect solution for driveways or everyone would be using them. You’d see them in Beverly Hills or New York City, not just in poverty stricken rural areas. After several years the rugs become impregnated with dirt and are impossible to vacuum, much less shampoo. Being semi-pervious you still get mud underneath the rug although you don’t sink in as far as you would if going bare earth.
For this driveway I’m using a decorative finishing method called No Need To Square. No Need To Square means just that: the concrete is formed and finished in a random pattern giving the illusion of being made from many individual pavers. No Need To Square frees the concrete from The Man’s rigid, conformist hierarchy. It allows the finisher to follow the jagged contours found in the crystalline structure of cast Iron like you see in those electron-microscope photographs. The only constant is the slope that steers water runoff towards the drainage ditch running alongside The Carriage House.
Just as a cubist must master fine arts before experimenting with abstract art, the concrete finisher must master the square before leaving it far behind. Unfortunately, I am neither an artist nor a concrete finisher so things can go pear shaped quickly if you don’t mind your grades.
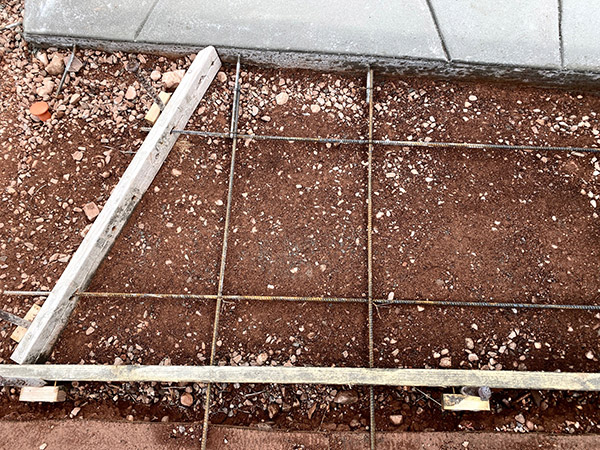
I’ve purchased a new tool for this driveway project: a belt-mounted tie wire spool. Tie wire is used to tie rebar together so that it doesn’t shift position when the concrete pours into the form or clumsy finishers kick it around when striking off. I owned a spool many years ago when I was a construction worker. My old one was more open, like a cage. You could see the wire in the spool, unlike this new one. I don’t know what happened to that old spool.
You’d think as often as I do little concrete pours I would have bought a wire spool sooner and I would have except for the price. The things are like $47 at Home Depot for an off-brand spool. I found a Klein brand spool on Amazon for only a dollar more than the clone version at HD. I’ve seen cheaper, plastic versions and they probably work fine.
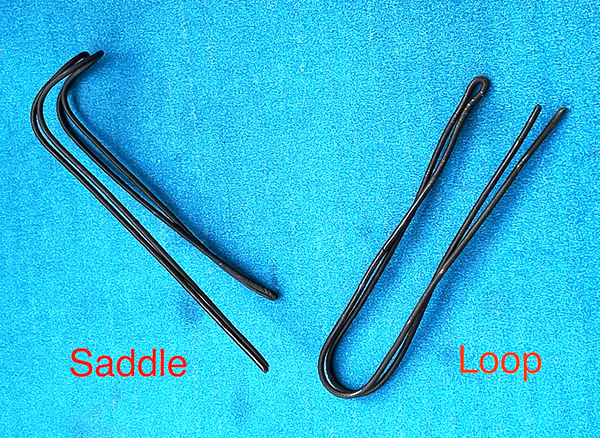
There are basically two types of ties for re-bar: the saddle for tying re-bars that cross at right angles and the plain old loop for tying straight pieces together. I like to make up a bunch of each type before starting to tie. Real iron workers make up saddles and loops as they go so because it’s faster and they don’t have to carry a bunch of little, pre-made bits. I’m never in a hurry. Sitting in a chair with New Mexico’s warm, winter sun shining down on me gives the pre-tying process a sort of Zen-like quality. Sometimes I fall into a trance and end up making 600 of the things.
If you’ve tied much wire you know how easily an unspooled roll of wire can unwind and get tangled up. Pulling wire from the center results in a pig’s tail that you need to straighten out before using. I always double up my wires, as a single strand is easy to break when twisting the rebar tight. The doubling method uses twice as much wire but it makes for a secure grid of rebar. It’s also easy to get stabbed with tie wire and the spool allows you to wind it back inside for the safety of everyone involved on the project.
I’m going to tackle the driveway in two parts: the southern and northern wings. I’ll do the southern (higher) side first. That will give CT somewhere to park while I work on the northern (lower) section. I expect to be working on the southern section for a month or so before the weather gets too cold and I take a break and go back to tying up loose ends on motorcycles.
Help us help you: Please click on the popup links!
We’re introducing something new here on ExNotes. We publish new content every other day (sometimes more often, sometimes less often, but we’ve been pretty good about bringing you new stuff). But what about the days we don’t publish? We’ve published about 1200 blogs in the last four years, and a lot of them received super responses. So, on the in between days when when we don’t publish new material, we’re going to select some of our favorites from the past. This is the first. Every one of these reruns we’ll be preceded by The Wayback Machine in the title.
Enjoy, my friends. And don’t forget:
Click on the popup ads!
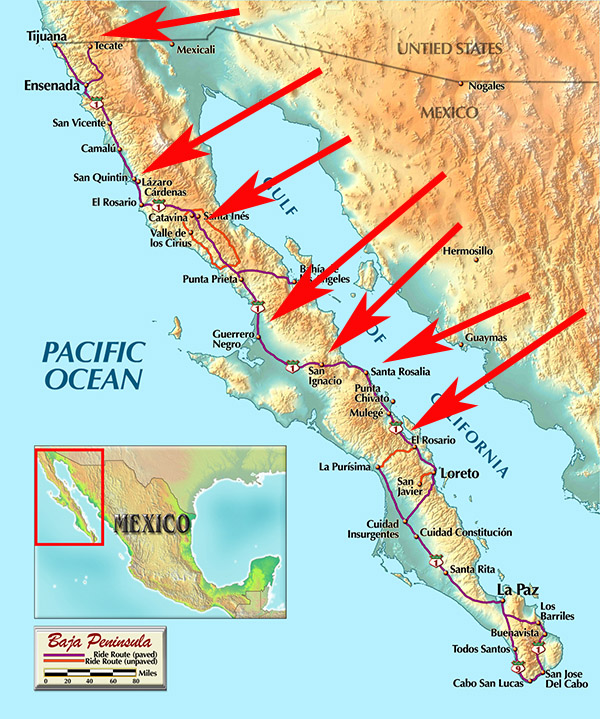
Baja is a motorcycling paradise and I have a bunch of favorite destinations there. Seven of them, to be precise, although truth be told, I like everything in Baja except for Tijuana and maybe La Paz and Loreto. That said, my favorites are:
Tecate
San Quintin
Cataviña
Guerrero Negro
San Ignacio
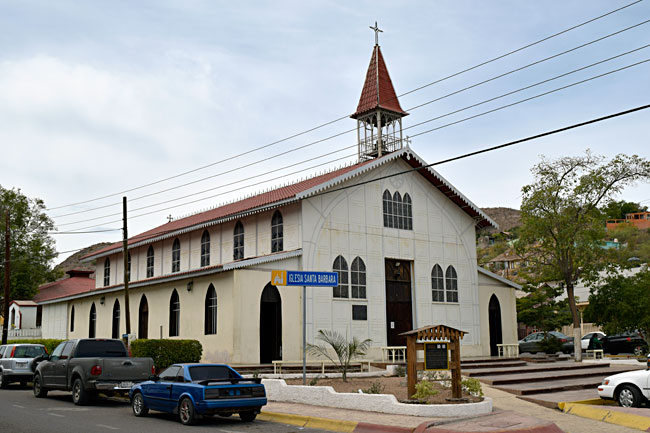
Santa Rosalia
Concepcion Bay
Here’s where they are on a map:
So what’s so great about these places? Read on, my friends.
Tecate
Tecate is the gateway to the middle of northern Baja, and it’s the easiest point of entry. Both Tijuana and Mexicali are too big and too complicated, and the Mexican Customs guys are too official in those bigger cities. Tecate is a friendly place. The last time I picked up a tourist visa in Tecate, the Customs officer tried to sell me salsa he and his family made as a side gig. That’s what the place is like. I love it.
If you’re into fine dining (not as in expensive dining, but just great food), it’s hard to go wrong anywhere in Baja. Tecate has some of the best, from street taco vendors to Malinalli’s to Amore’s. I could spend a week just in Tecate. It’s that good.
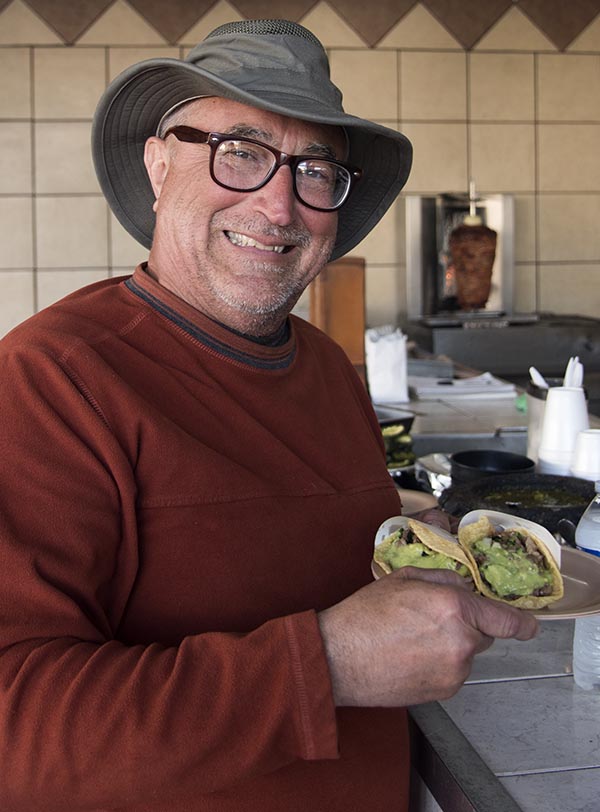
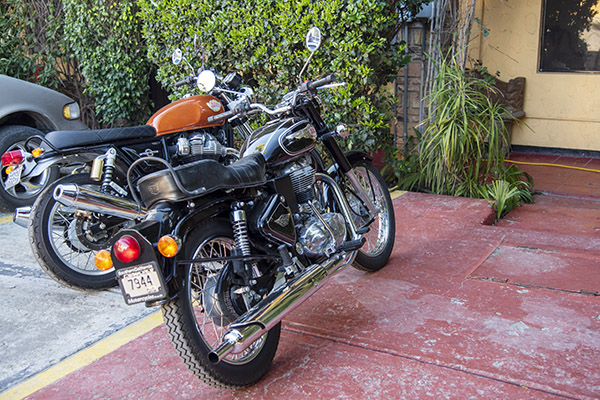
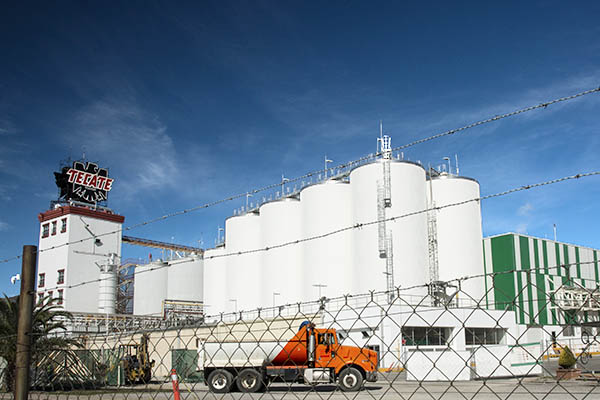
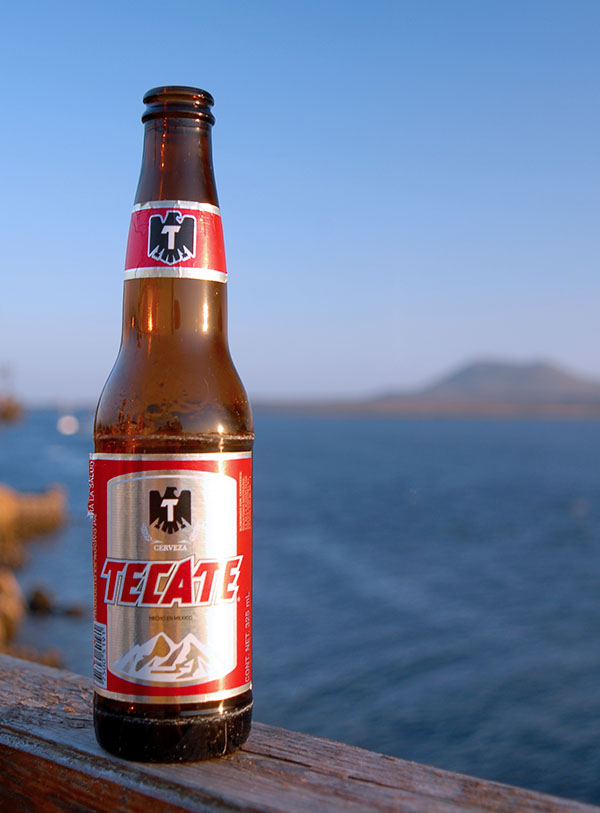
Uncle Joe Gresh with street tacos in Tecate. Wow, were they ever good.The buffet at Malinalli’s is regional, awesome, and inexpensive. It’s a hidden treasure.Dos Joes’ motos on an Enfield expedition that took us through Tecate.The Tecate brewery dominate the Tecate skyline and is visible from just about anywhere in town. A can of ice cold Tecate with sea salt around the rim and a bit of lime juice…life doesn’t get any better.
San Quintin
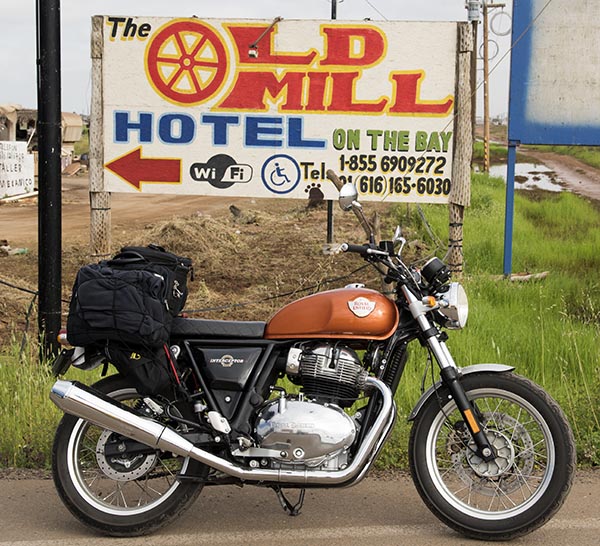
San Quintin is 186.4 miles south of the border on Baja’s Pacific coast. It’s usually a quiet ag town that has a lot of things going for it, including interesting hotels, good food, and Bahia San Quintin. The Old Mill hotel and its associated restaurant, Eucalipto, is my personal favorite. The hotel is about 4 miles west of the Transpeninsular Highway, and what used to be a harrowing soft sand ride to it is now easy peasy…the road is paved and riding there is no longer a test of your soft sand riding skills. The Eucalipto restaurant is second to none.
What could be better than an ice cold Tecate overlooking Bahia San Quintin after a day’s riding in Baja? We once saw a California gray whale from this very spot.
A man, a motorcycle, and Mexico….the sign on the Transpenisular Highway pointing toward Bahia San Quintin and the Old Mill Hotel. The bike? That’s the 650cc Royal Enfield, perfect for riding Baja. But then just about any motorcycle is perfect for riding Baja.Bahia San Quintin at dawn. It’s an awesome spot.Uncle Joe enjoying breakfast in the Old Mill’s Eucalipto. It is an exquisite restaurant.
You’ll notice at the top of my scribblings about San Quintin I said it is usually a quiet town. The one exception for us was when there was a labor riot and we were caught in it. The Mexican infantryman about 80 miles north of San Quintin told me the road was closed, but his English matched my Spanish (neither are worth a caca), and without me understanding what I was riding into, he let me proceed. It’s not an experience I would care to repeat. But it’s the only event of its type I ever experienced in Old Mexico, and I’d go back in a heartbeat.
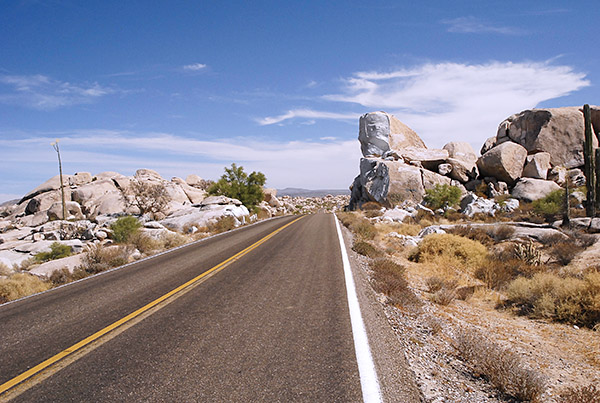
The Cataviña Boulder Fields
Ah, Cataviña. Rolling down the Transpeninsular Highway, about 15 miles before you hit the wide spot in the road that is Cataviña you enter the boulder fields. Other-worldly is not too strong a description, and if the place wasn’t so far south of the border it would probably be used more often by Hollywood in visits to other planets. The boulders are nearly white, they are huge, and the juxtaposition of their bulk with the bright blue sky punctuated by Cardon cactus.
Pastel geology. The area really is as beautiful as the photos depict it to be.
I get a funny feeling every time I enter this part of Baja. Not funny as in bad, but funny as in I feel like I’m where I belong. I once rolled through this region in the early morning hours with my daughter and she told me “you know, it’s weird, Dad. I feel like I’m home.” She understood (as in completely understood) the magic that is Baja.
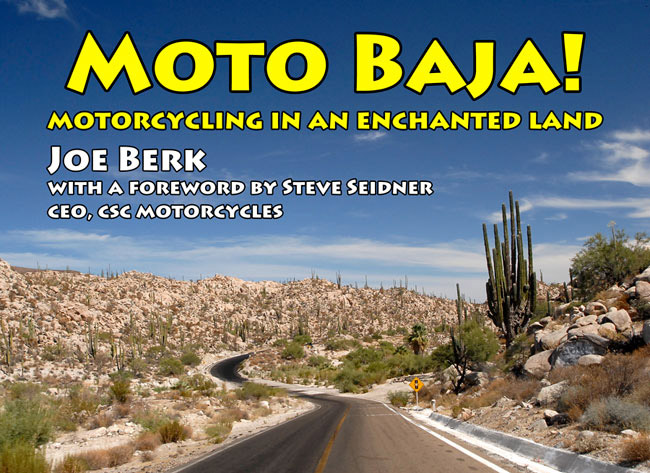
I like the area and its stark scenery so much that one of my photos became the cover of Moto Baja! I grabbed that shot from the saddle at about 30 mph on a CSC 150 Mustang replica, which I subsequently rode all the way down to Cabo San Lucas (that story is here).
You should buy a copy or three. They make great gifts.
Every time I roll through Cataviña with other riders, the dinner conversation invariably turns to how the boulders formed. When I was teaching at Cal Poly Pomona, I asked one of my colleagues in the Geology Department. He know the area as soon as I mentioned it. The answer? Wind erosion.
Guerrero Negro
The Black Warrior. The town is named after a ship that went down just off its coast. It’s a salt mining town exactly halfway down the peninsula, and it’s your ticket in for whale watching and the best fish tacos in Baja (and that’s saying something). I’ve had a lot of great times in Guerrero Negro. It’s about 500 miles south of the border. You can see the giant steel eagle marking the 28th Parallel (the line separating Baja from Baja Sur) a good 20 miles out, and from there, it’s a right turn for the three mile ride west into town. Malarrimo’s is the best known hotel and whale watching tour, but there are several are they are all equally good. It you can’t get a room at Malarrimo’s, try the Hotel Don Gus.
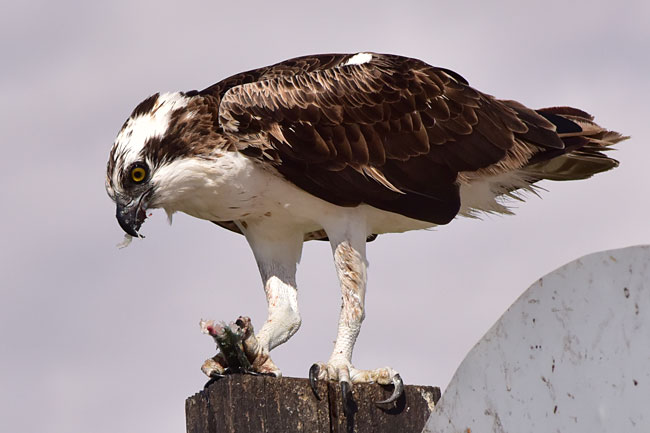
CSC RX3 motorcycles at the Hotel Don Gus. We used to do annual Baja tours with CSC…those were fun times and great trips, and introduced a lot of folks to the beauty of Baja.What it’s all about…getting up close and personal with the California gray whales. They are in town from January through March.Tony, taco chef extraordinaire. You might think I’m exaggerating. I’m not.It’s worth the 500-miles trek to Guerrero Negro just to savor Tony’s fish tacos. You might think I’m exaggerating. But like I said above…I’m not.Man does not live by fish tacos alone, so for breakfast or dinner, it’s either the restaurant at Malaririmo’s or the San Remedio, a block north of the main drag into town. You won’t be disappointed at either.Sue’s photo of a Guerrero Negro osprey enjoying some sushi.
After you leave Guerrero Negro and continue south, the Transpeninsular Highway turns southeast to take you diagonally across the Baja peninsula. About 70 miles down the road (which is about half the distance to the eastern shores of Baja and the Sea of Cortez along Mexico Highway 1) you’ll see the turn for San Ignacio. It’s another one of Baja’s gems.
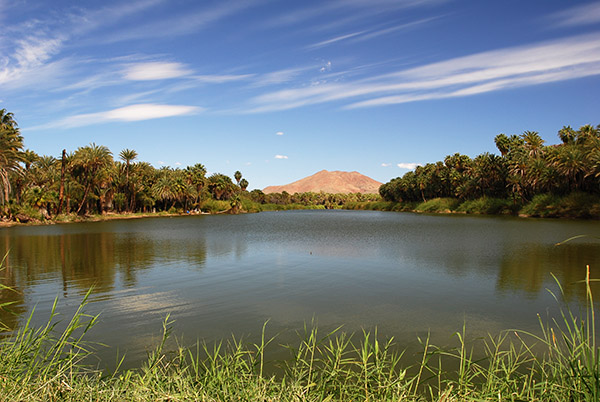
San Ignacio
San Ignacio is an oasis in the middle of the desert that forms much of Baja. The Jesuits introduced date farming to the region hundreds of years ago, and it’s still here in a big way. Leave Guerrero Negro, head southeast on Mexico Highway 1, and 70 miles later you run into a Mexican Army checkpoint, a series of switchbacks through a lava field, and when you see the date palms, turn right.
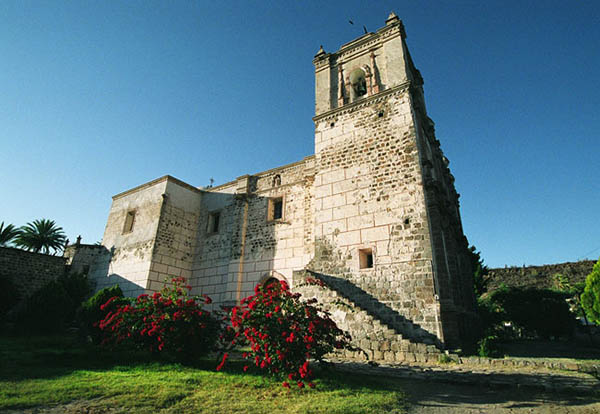
An oasis is usually formed by a volcano, and when a volcano is done discussing politics, it forms a lake. That’s the San Ignacio volcano and its lake, visible on the left as you ride into town.The San Ignacio church, built as a mission in the 1700s, dominates the center of San Ignacio. It’s a beautiful spot, one of the most photogenic in all of Baja.Another photo of the San Ignacio Mission. You’ll want to grab some photos in San Ignacio.Dates? Nope, not on that trip, but dates are one of the things San Ignacio is known for. I’ll bet they are delicious.
San Ignacio has a town square that’s right out of central casting, there’s a little restaurant that serves the best chile rellenos in all of Mexico (I’m not exaggerating), and the place just has a laid back, relaxing feel about it.
Santa Rosalia
You know, this town is another one of Baja’s best kept secrets. As you travel south on Highway 1, San Ignacio is the first town you encounter after traveling diagonally across the peninsula. Folks dismiss it because it’s an industrial town, but they do so in ignorance. There’s a lot of cool stuff in this place.
The ride into Santa Rosalia a few years ago with novelist Simon Gandolfi, Arlene Battishill, J Brandon, John Welker, and yours truly. That’s a dead fish I’m holding. We did a round trip to Cabo San Lucas on 150cc Mustang replicas, just to say that we could.
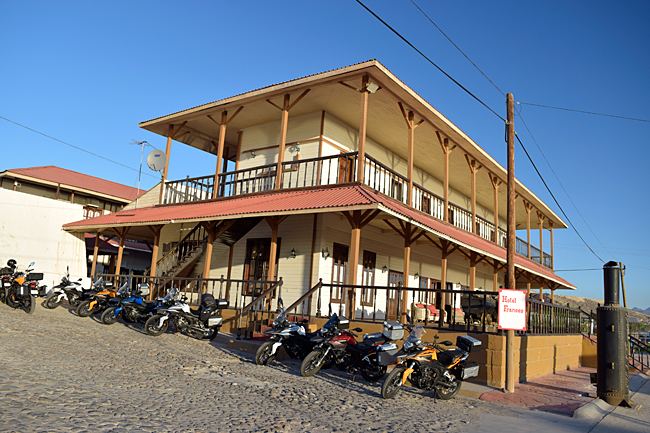
One of the things that’s unique about Santa Rosalia is the all-wooden architecture. The town was originally built by a French mining company (Boleo) and they built it they way they did in France. Like the Hotel Frances, which sits high on a mesa overlooking the town and the Sea of Cortez. I love staying there.
The Hotel Frances. It used to be a brothel.
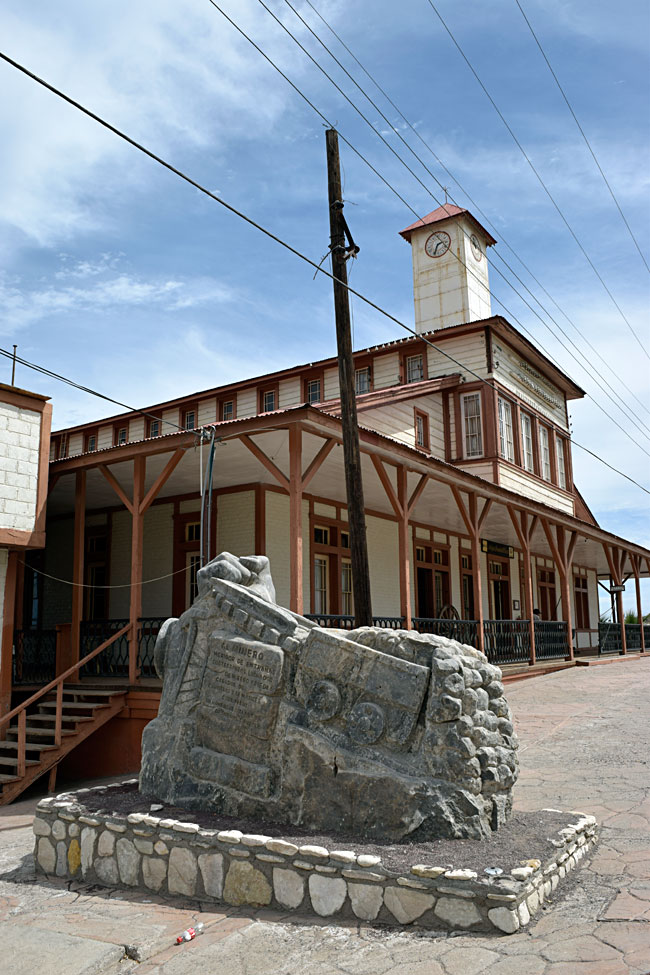
There’s a cool mining musuem a block or two away from the Frances, and it’s worth a visit, too.
The mining museum in Santa Rosalia.
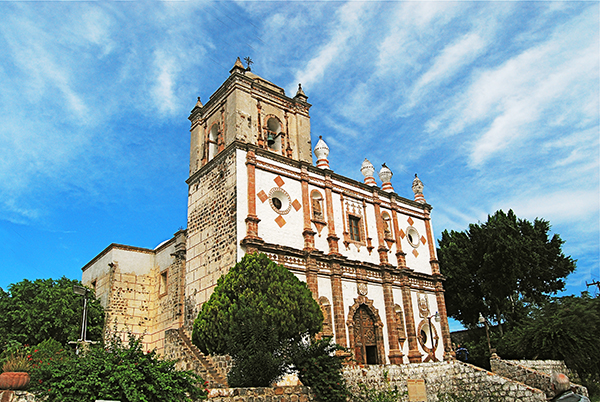
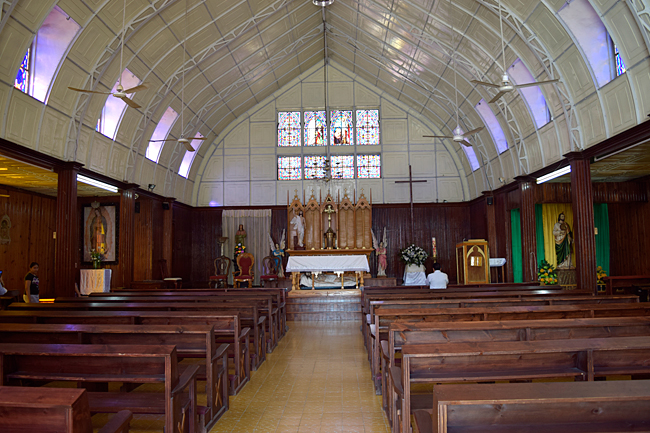
There are many cool things in Santa Rosalia, and one of the best is the Georg Eiffel church. It was designed by the same guy guy who did the Eiffel town.
Santa Rosalia’s church. It’s an unexpected delight. And I’m not even Catholic.Inside Santa Rosalia’s Georg Eiffel church.Stained glass. Photos ops abound in Santa Rosalia.
I’ve heard people dismiss Santa Rosalia as a gritty, industrial place not worth a stop. Trust me on this: They’re wrong. It’s one of my favorite Baja spots.
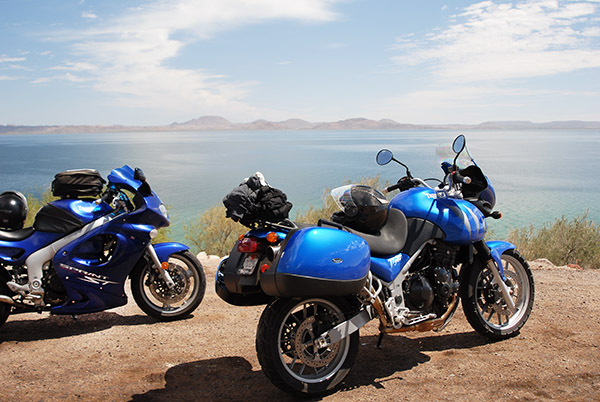
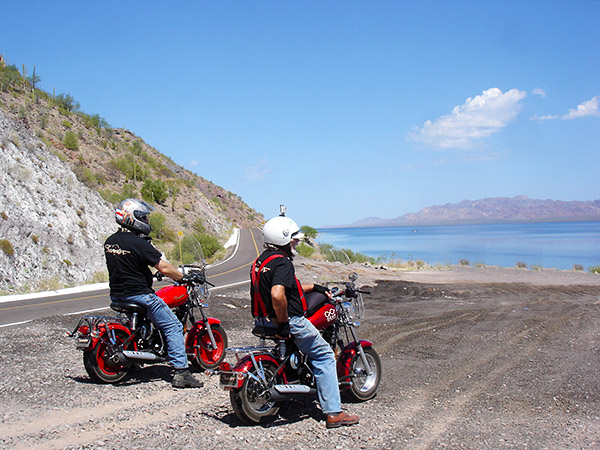
Bahía Concepción
Concepción Bay is easily the most scenic spot in Baja. It’s just south of Mulege (another delightful little town, and the subject of an upcoming ExNotes blog). Bahía Concepción runs for maybe 20 miles along the eastern edge of the Baja peninsula. I’ve seen whales from the highway while riding along its edge, the beaches are magnificent, and the photo ops just don’t stop. The contrast between the mountains and Cardon cactus on one side and the pelicans diving into bright green water is view from the saddle you won’t soon forget.
On one of many rides along Bahía Concepción, good buddy Joe Lee and yours truly rode our Triumph Triples. This is a favorite shot of mine.Besides “wow,” what can I say?World-famous novelist and motorcycle adventurer Simon Gandolfi andn yours truly on 150cc scooters. We were on our way back from Cabo San Lucas when we stopped for this Bahía Concepción photo. Hardtail 150cc scooters. Up and down the length of Baja. I think about that ride every time I see a GS parked at a Starbuck’s.
So there you have it: My take on seven favorite spots in Baja? How about you? Do you have any favorite Baja destinations? Let us know here in the comments sction!
So, I had just finished a certification exam that required more studying than I care to discuss. It was December 2008, and I was mentally exhausted and in much need of a beach vacation to reward myself for passing this rigorous exam. At the time I happened to be visiting Montreal and decided to hit up a travel agent to see what deals were available. My only criteria were sun, beach, and relaxation. It is rare that I ever take time to slow down, even on vacation. It seems most of my vacations leave me more exhausted than relaxed (even though they are pretty rewarding). At this juncture in my life I needed a “time out” to bask in the accomplishment of passing that exam, so I wasn’t looking for anything too adventurous.
The travel agent in Montreal listened to my criteria and recommended Mexico or Cuba. As a citizen of the United States, I thought I was not allowed in Cuba and when asking the agent, she assured me it was not a problem. Cuba was much less expensive than Mexico, it would meet my beach requirements, and it was off the beaten path since Americans were not formally supposed to travel there. Cuba it is!
The flight to Havana was a short 3 hours from Montreal and I was already yearning for a Cuban cigar and a glass of Havana rum while admiring sights along the white sand beaches. Once the flight began to descend it hit me as I could see the last of the Florida Keys fading away from the plane window “Wow, I wonder how much that travel agent really knew about the embargo for Americans.” I was about to find out.
Feeling a little bit nervous as I entered the immigration queue, I saw those ahead of me enter this little glass box. The doors closed, they showed their travel documents, and once the doors opened on the other side they were officially in Cuba. As it became my turn I entered the glass box, it closed, I showed my American passport when the immigration agent looked at it. He said “Uno momento” and went in back to gather with four other agents who looked at me, then at my passport, and began passing it around like a Mickey Mantle rookie card. Ahhhh, this is how my Locked up Abroad episode would begin I thought.
The Cuban people love Americans, and it is so rare an occurrence to see an actual American passport that it draws a lot of curiosity and attention, something I wasn’t particularly looking for. When the agent went to stamp my passport, I quickly remembered about the embargo. A Cuban stamp in my passport would not go over well when I returned to the United States next week.
“No Stamp por favor” I said nervously. He laughed said no problem and opened the glass box for me to enter Cuba. I made it! This is so cool!
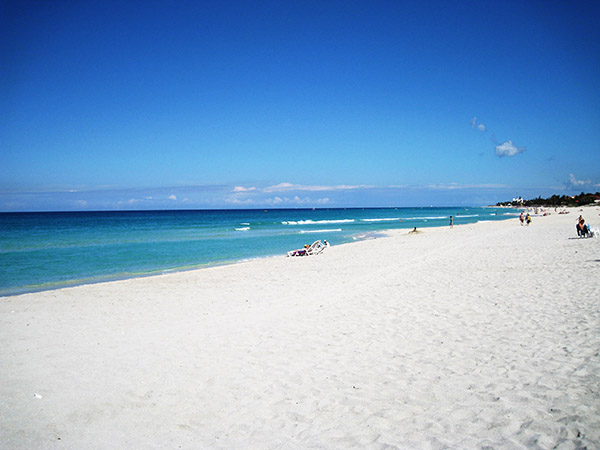
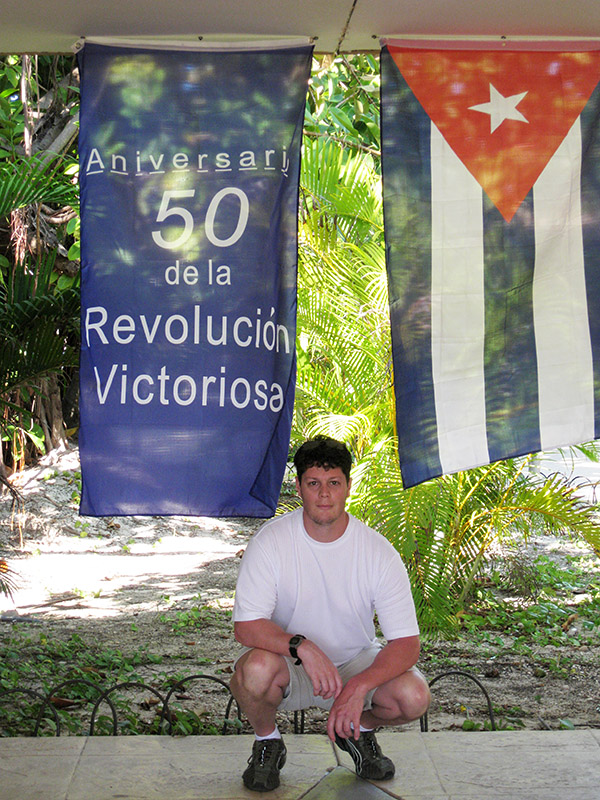
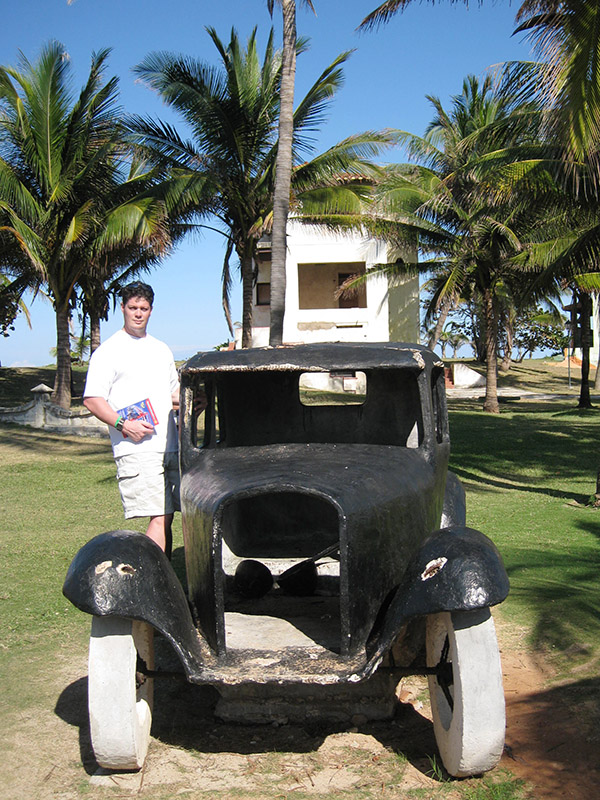
What little I knew of Cuba was that my entire wallet was now useless. Health insurance, credit cards, ATM access: Nothing would be accepted in this country due to the embargo. I had about $200 Canadian and reservations to an all-inclusive resort to ensure I could enjoy a week relaxing and not worryimg about the limitations due to lack of cash. This idea worked perfectly, with the exception that my travels would be limited to short day trips near the resort in Veracruz, and it wouldn’t allow me to visit Havana.
This was all fine with me. I was able to relax at the beach while still having the ability to leave the resort to take in some local food and sights. This included cigar stores, drooling over the 1950’s cars that were still in pristine condition, and of course soaking up some much-needed sun. The resort where I was staying was filled with Canadians and whenever they had those silly contests in the evening they would always ask where the person was from. I was tempted every time I was called upon to grab the microphone and loudly say “The United States of America,” and then I would revel in the silence that was sure to follow that statement. For once I listened to my Dad’s advice (Don’t do anything stupid, Mike). For the entire trip I identified as a Canadian from Toronto (I couldn’t say Montreal as I didn’t speak French) and I successfully avoided the temptation to say otherwise.
As the week came to a close, I had a great tan. I was relaxed and refreshed both mentally and physically. Mission accomplished!
Once we began our descent into Montreal a revelation hit me: I still had to re-enter the United States, with a tan, in January, from Montreal. Would the US Immigration agent know I was in Cuba?
When the plane hit the tarmac, I did what any mature person who thought they were about to get into trouble does. I phoned my Mom and let her know that I may have overstepped, and she may be receiving a call from the US State Department in reference to my traveling shenanigans. After hanging up the phone I felt a tap on my shoulder. It was a friend I had made at the resort. He happened to be sitting behind me and overheard the conversation with my mom. He let me know that I could use him as an alibi and that he was a member of a health club in Montreal that had tanning beds. That seemed to be a solid response to any questioning I might soon face. I’ll go with that, I decided. I began to feel a bit more confident as I nervously crossed into Vermont. The US Immigration officer had no questions for me and simply said “Welcome home Mr. Huber,” as he waved my car onward. It was only about 10 degrees that night, yet I still could feel the warmth from the Cuban sun glowing while breathing a sigh of relief I happily drove by the “Welcome to The United States of America” sign. Cuba let me accomplish all my relaxation goals and tacked on a pretty cool story along the way.
If you would like to read more about motorcycling in Cuba, take a look at Christopher Baker’s Mi Moto Fidel.
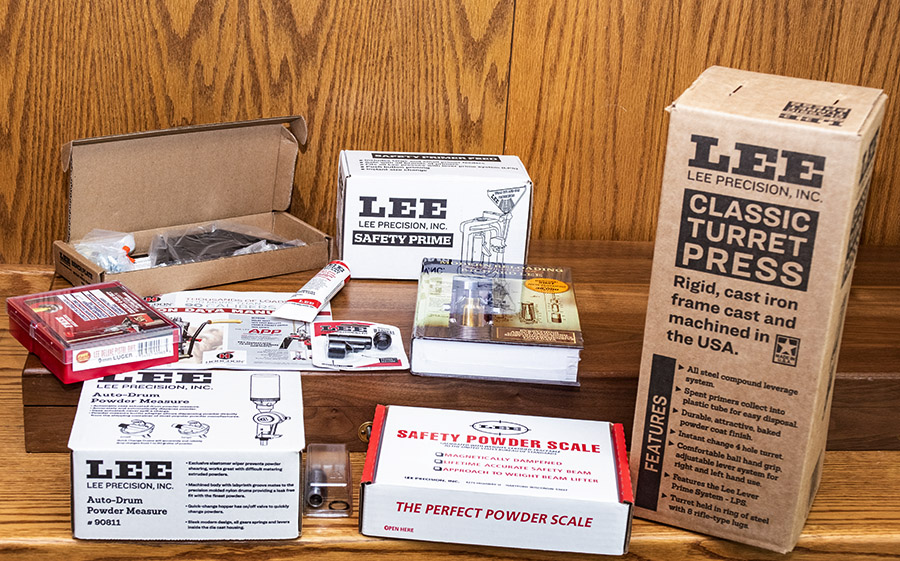
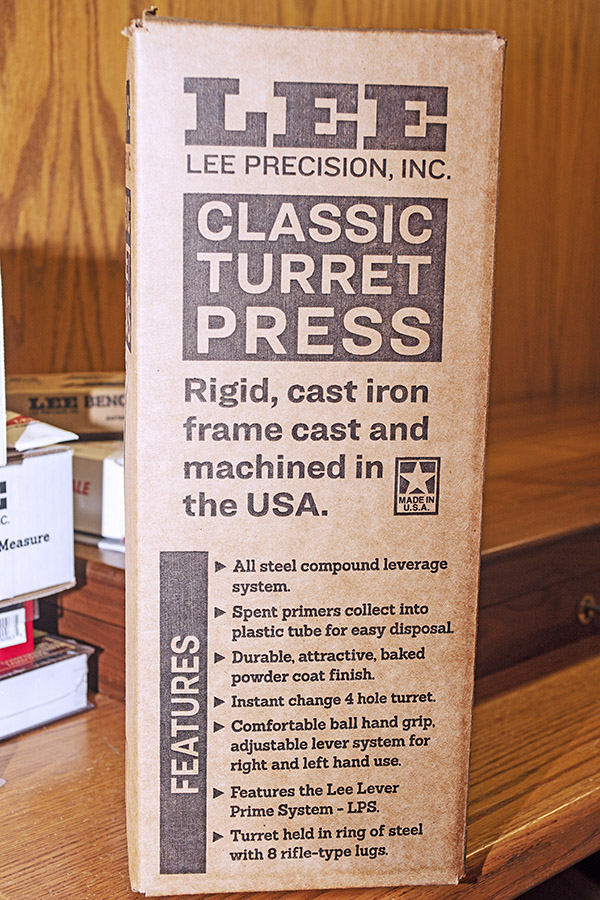
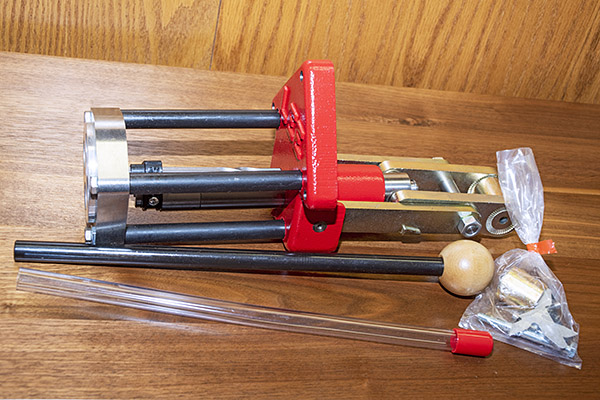
We’re writing a series of blogs on the Lee Precision Classic Turret Press Kit, and this first one focuses on unpacking and taking an initial look at the kit. I think the YouTube kids call this a “reveal.” I’ll just call it unboxing and seeing what’s in the box. I thought I could do a single blog on the Classic Turret Press Kit, but there’s too much included in the kit and too much that’s new to me to handle in one blog. We’re going to instead do a series of blogs: One on each item that’s included with the kit, a blog on setting the press and dies up, a blog on reloading with the Lee equipment, and a blog on how the ammo reloaded with the Classic Turret Press Kit performs. There’s a lot here. You’ll get a feel for just how much in this initial blog on the Classic Turret Press Kit.
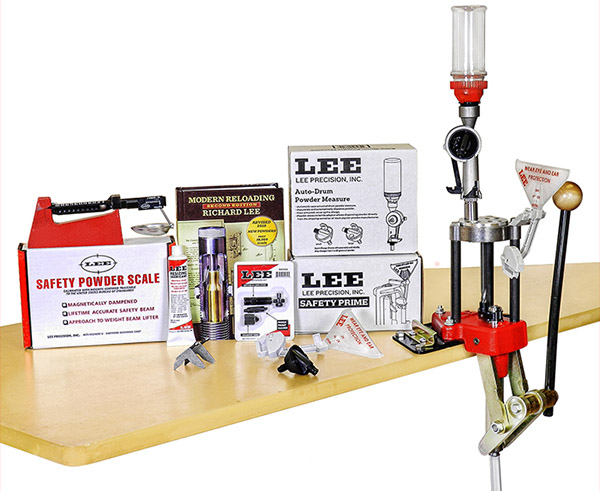
Here’s the picture on Lee’s website for the kit, which Lee advertises for $380.
The photo above shows everything set up, but the photo doesn’t do justice to the excitement associated with getting this kit, taking everything out of the box, and opening it. Nor does it convey what I expect to be the satisfaction I’ll experience with using the Lee equipment. That will be the subject of future blogs. Think of this first blog as Christmas morning. That’s what opening and unpacking the Lee kit felt like to me.
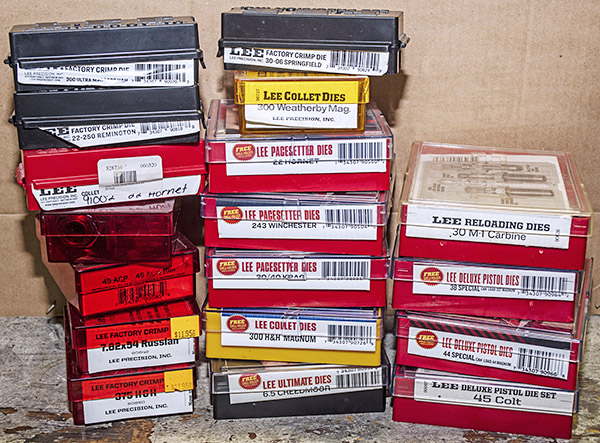
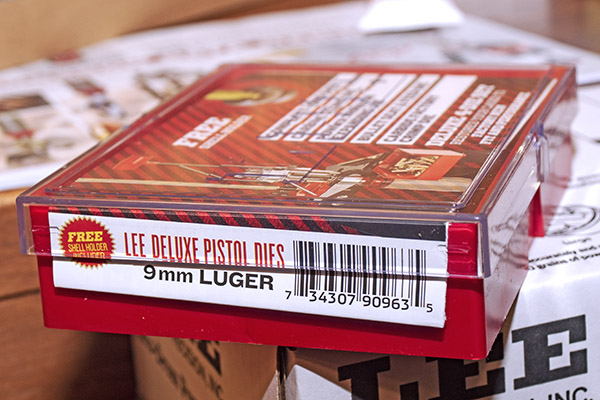
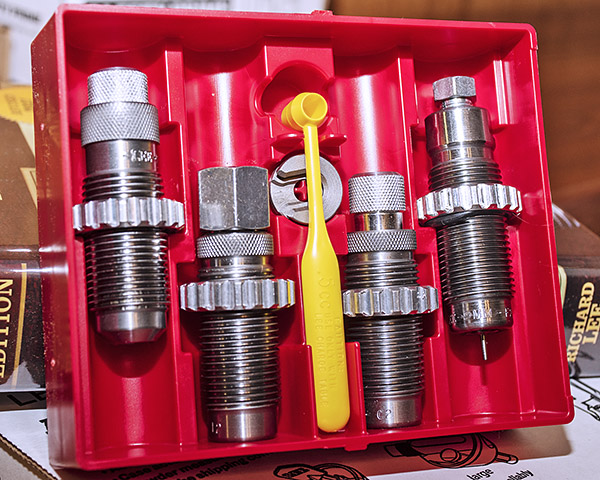
ExNotes blog readers will recall that good buddy Jose left a comment on one of our Lee Deluxe 4-die set blogs. Jose told us about his Lee turret press. He wrote a guest blog or two for us here on ExNotes and he is a Ruger No. 1 aficionado, which means he stands tall with me. After reading Jose’s comments, I had to check out the Lee Classic Turret Press Kit myself, and after poking around on Lee’s site a bit and seeing what the Lee kit included, I knew I wanted one. I specifically wanted to set it up for 9mm using Lee’s Deluxe 4-die set. I’ve been using older 9mm dies from various die makers, and my reloads would sometimes jam. With my old dies, the crimps were inconsistent, and I knew from my experience with Lee’s .357 and .44 Magnum Deluxe dies I wouldn’t have that problem with Lee equipment. I have the Lee Deluxe handgun die sets in 38 Special/357 Magnum, 44 Special/44 Magnum, .45 Colt, and .30 Carbine, and the ammo I reload with those dies is exceptional (better than anything I loaded with other manufacturers’ dies). I use Lee dies for several rifle cartridges, and I have more than a few other bits of Lee equipment. I’ve been pleased with all of it.
Lee advertises that their Classic Turret Press Kit includes everything needed to start making ammo, except for the dies and, of course, the components (brass, powder, primers, and bullets). I have plenty of components, and the thought of wringing out the Lee gear, writing about it, and testing the ammo in a couple of my favorite 9mm handguns checked all the boxes for me. This will be a fun project and I want to share the excitement with you.
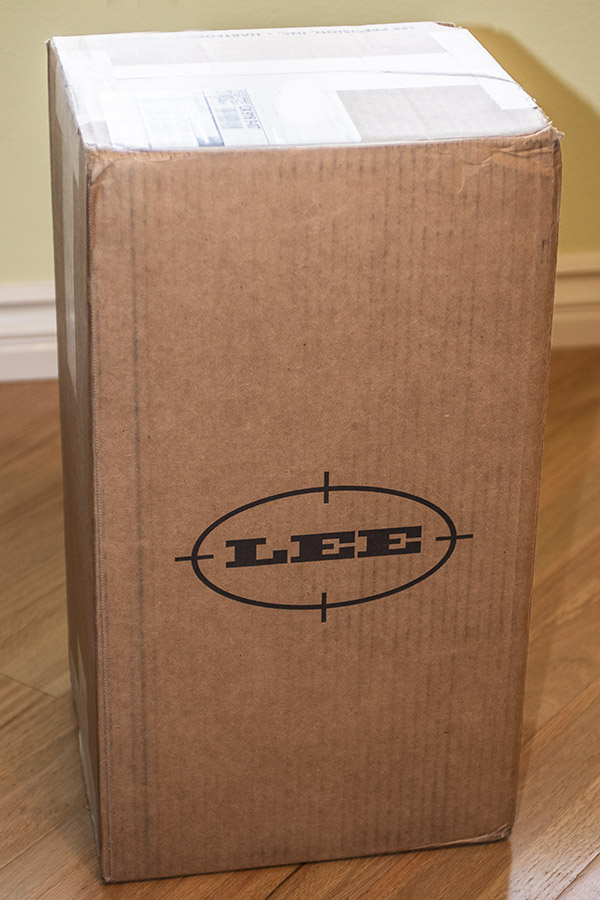
I placed my order with Lee for the Classic Turret Press Kit, the Bench Plate Kit (something I saw on their website that appealed to me), and the 9mm dies. It all arrived a few days later, well packed in a single box. I was impressed with how fast it arrived (it shipped during the holiday season) and the packaging. The Lee folks have done this before; it’s first class customer service.
This is the right time of year to open a box full of goodies and examine the contents. I was a kid on Christmas morning. This was fun!
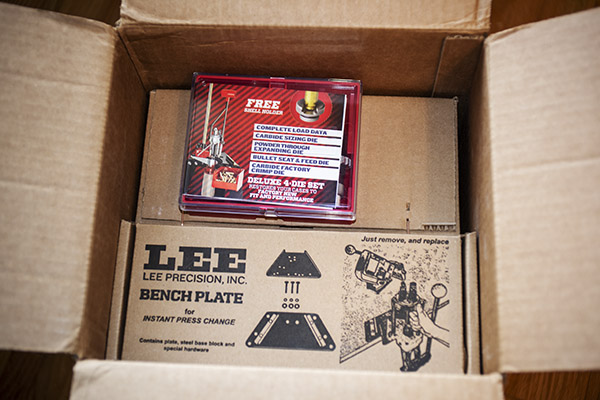
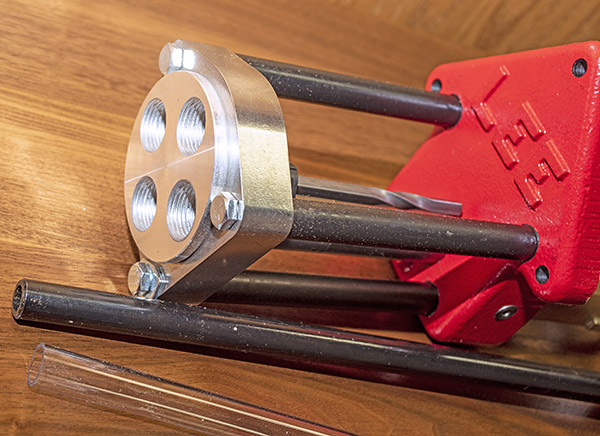
When I opened the outer container, I saw my 9mm Deluxe 4-die set and the Lee bench plate.
As I mentioned above, I’m a firm believer in Lee’s Deluxe dies. I can’t wait to put these to work making 9mm ammunition for my SIG P226 Scorpion and Springfield Armory 1911.
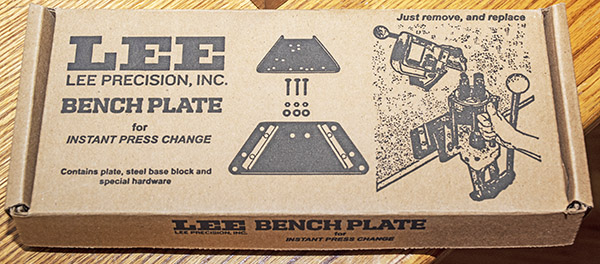
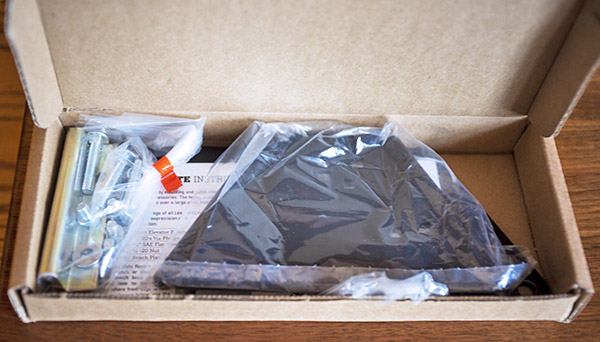
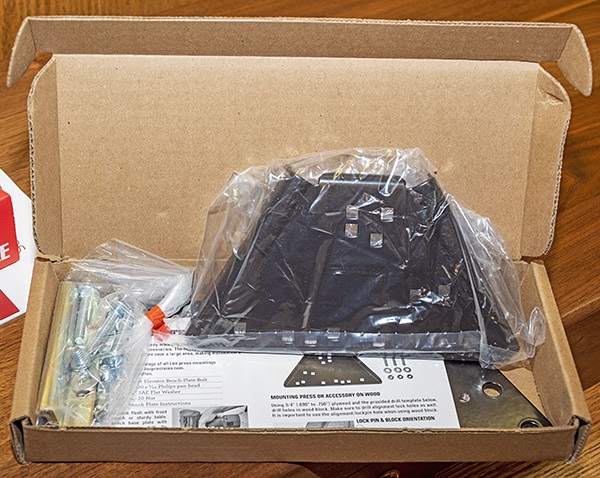
The idea behind the Lee Bench Plate is that it’s a quick detach/attach mount for a Lee press. It’s not included with the Classic Turret Press Kit (it’s priced at $39 on Lee’s website), but I like the idea of being able to quickly remove the press from my reloading bench. You’ll get a complete report on setting up and using the Bench Plate in a future ExNotes blog.
After unpacking the 9mm dies and the bench plate, I pulled out the Lee Classic Turret Press Kit. This was like one of those Russian dolls. I was peeling the onion and enjoying it.
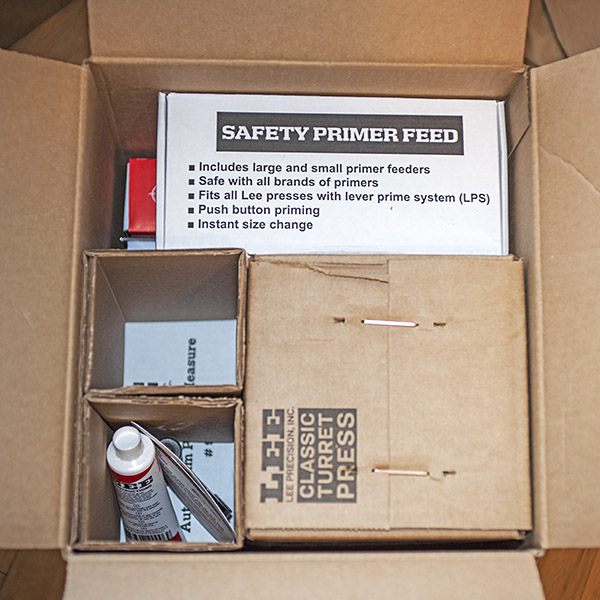
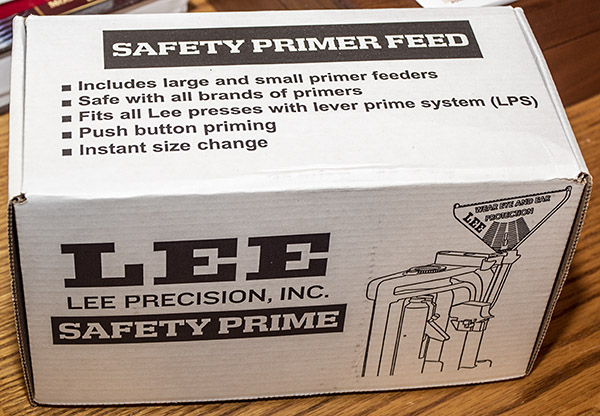
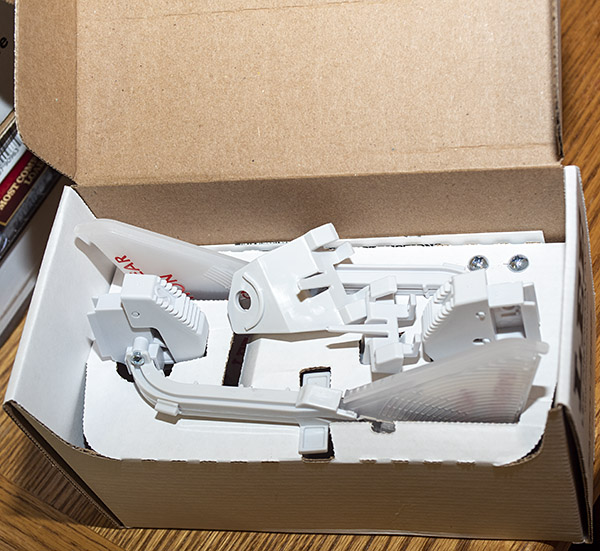
The Lee Safety Primer Feed (shown in the two photos below) is a device I have not used before. I’ll explain how it works in a future blog. I have three other Lee priming devices and I’ve been using them for decades with no problems. The Lee Safety Primer Feed sells for $30.
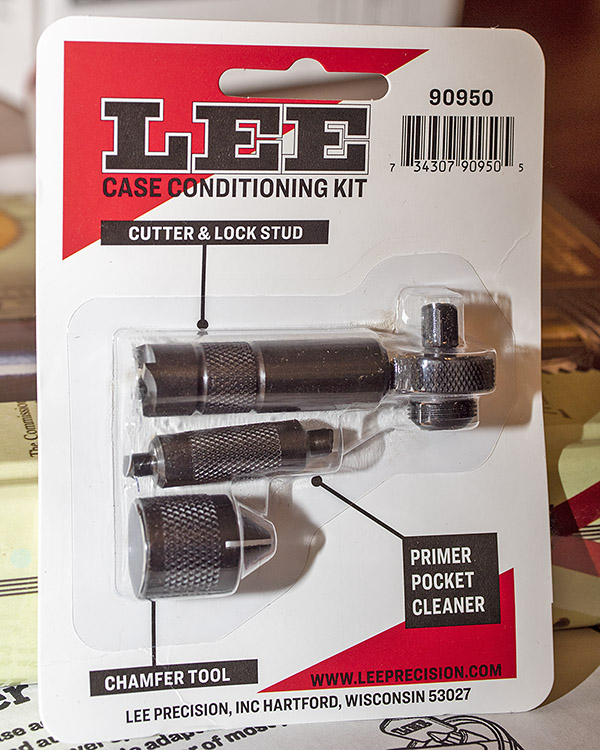
Lee includes their Case Conditioning Kit (see the photo below) with the Classic Turret Press Kit. The Case Conditioning Kit consists of a primer pocket cleaner, a case cutter and locking stud, and a chamfer to bevel the case mouth after it has been trimmed. I have not used these tools from Lee before; it will be interesting to see how they perform. I have other equipment that performs these tasks, but I had to buy those items separately. With the Lee Classic Turret Press Kit, it’s all included. The Case Conditioning Kit lists for $12.98 on the Lee site.
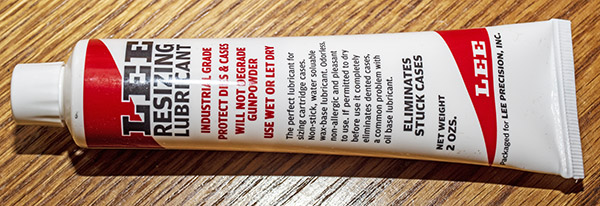
I won’t need the Lee Resizing Lube shown below because my new Lee 9mm dies include a carbide resizer (which negates the need for case lubrication). Not having to lube the cases is a good thing. On rifle cases, though, lube is necessary, so I’ll put the lube to good use on those. The price for Lee’s Resizing Lube is $5.98.
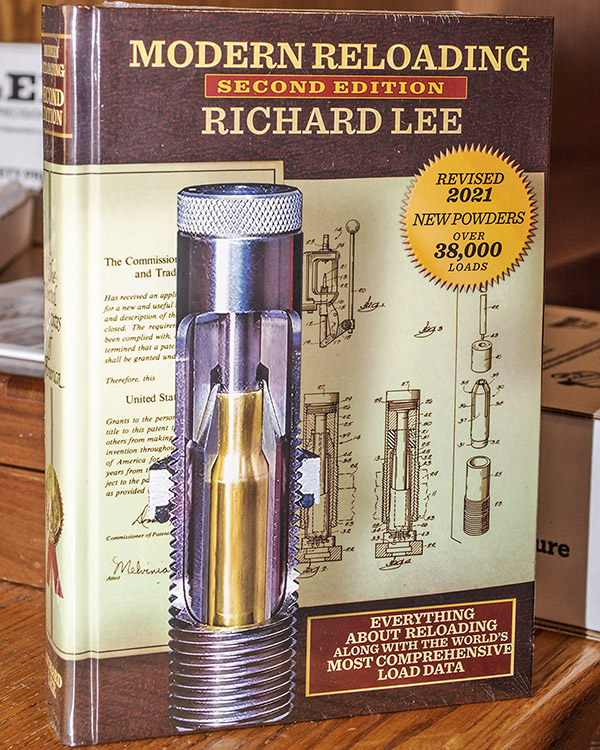
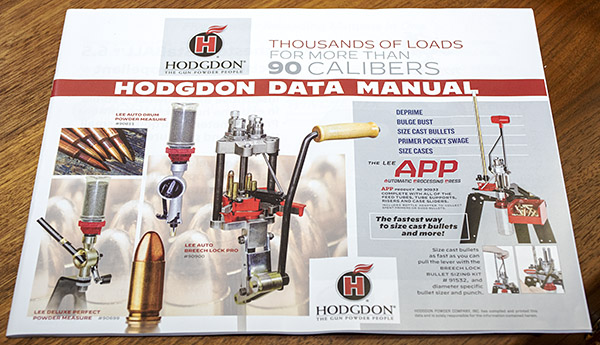
The Lee Classic Turret Press Kit includes Lee’s Modern Reloading manual (a sizeable book, comparable to the manuals from Hornady, Speer, Sierra, and other reloading component companies), and a Hodgdon reloading pamphlet. I’m looking forward to reviewing the Lee manual. I’ve been reloading a long time, but I still learn something new every time I pick up a reloading manual. If you were to buy the Lee Modern Reloading manual separately, it sells for $40.98. Lee also includes the Hodgdon Data Manual with the Classic Turret Press Kit. I’ve seen the pamphlets from Hodgdon before; I’ll take a look at this one and share my impressions in a subsequent blog.
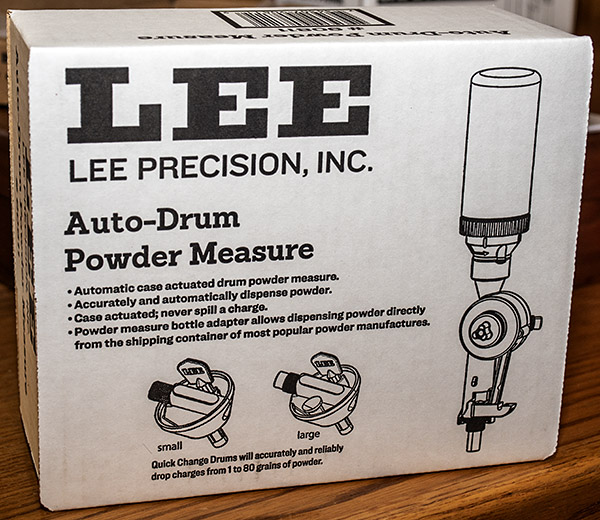
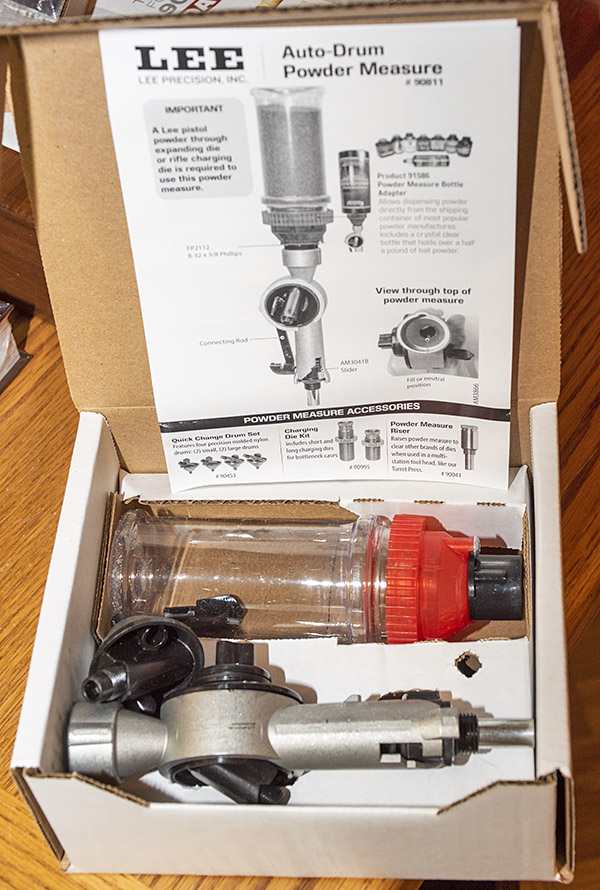
Next out of the box was Lee’s Auto-Drum Powder Measure. I’ve used an older Lee version of this device. I’m not familiar with how the new one works, but I’m looking forward to finding out. The Auto-Drum Powder Measure is infinitely adjustable. That’s a good thing. The older version used a charging plate with discrete increments; infinite adjustment is a much better way to go. The Auto-Drum Powder Measure automatically charges the case with with each stroke of the press. If purchased separately, the Auto-Drum Powder Measure sells for $55.00.
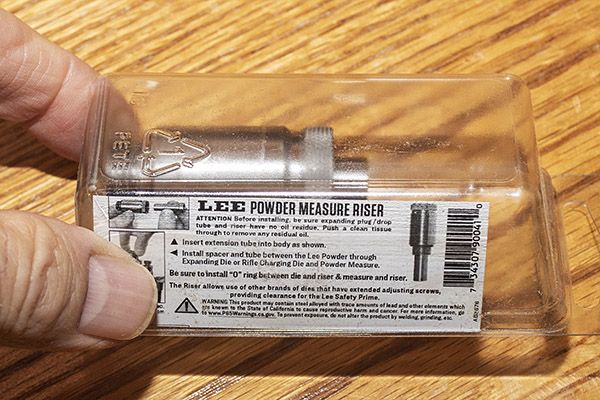
Lee includes a Powder Measure Riser in the Classic Turret Press Kit (see the photo below). This is used with the Auto-Drum Powder Measure to position the powder dispenser above the priming mechanism (it allows adequate clearance). The Powder Measure Riser sells for $9.98 on the Lee site.
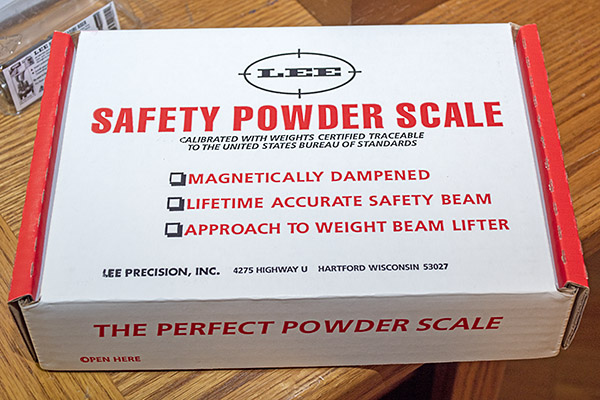
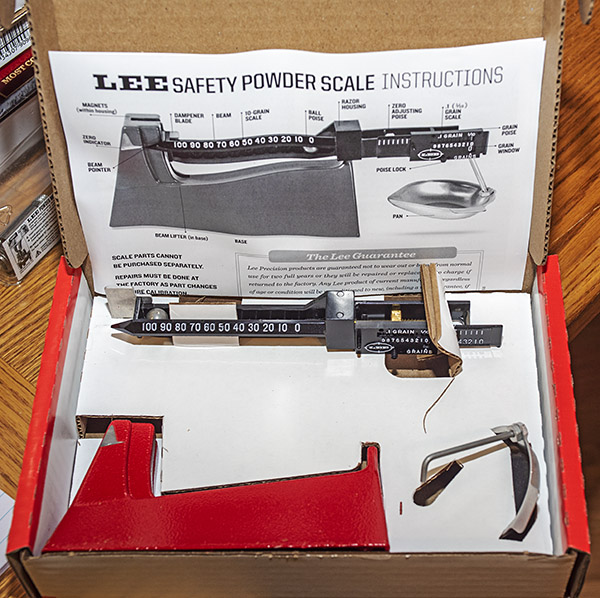
There’s a balance beam scale (the Lee Safety Powder Scale) in the Classic Turret Kit. This is a standard reloading scale. The Safety Powder Scale is $46.98 on the Lee site. You might wonder: Why use a simple mechanical scale when there are digital scales and digital powder dispensers? The reasons are simplicity, reliability, and cost. I have friends that use digital scales, and they report inaccuracies induced by nearby metal objects (have any of those on your reloading bench?), slow operation, and of course, much greater expense. For me a simple balance beam scale works best; it’s what I’ve been using for 50 years. The Lee Safety Powder Scale is new to me, and I’ll report how it works.
The Classic Turret Press is massive. It’s beefy, it’s heavy, and it looks to be well built. What you see below is the press, along with the operating handle, a spent primer catch tube (a nice touch), the four position turret head, and the hardware required to assemble it.
So there you have it: The Lee Classic Turret Press Kit. You might have noticed that I listed the cost for each item above separately, along with a link to the appropriate Lee page. I thought it would be interesting to sum the prices and compare the total to Lee’s Classic Turret Press Kit price:
At Lee’s price of $380 for the Classic Turret Press Kit, it’s a good deal compared to buying the items separately. But Lee goes a step further. They recognize that retailers often sell the individual items and the Classic Turret Press Kit at lower prices, and Lee states on their site that you can find lower prices by visiting a Lee retailer. One of the best places to find lower prices is Amazon. I encourage you to explore Lee’s website, and to take a look at Lee gear on Amazon.
This project is going to be fun, folks. Keep an eye on the ExhaustNotes blog as we put the Lee Classic Turret Press Kit through its paces.
Like what you see here? Don’t forget to help us by clicking on the popup ads!
There are many more shooting and reloading stories on Tales of the Gun. Hope on over and take a look.
In the spirit of complete disclosure: Lee liked our blogs on the .357 Magnum and .44 Magnum Deluxe 4-die sets and they asked us to similarly review the Classic Turret Press Kit. Lee provided the kit to us at no charge. But rest assured: That won’t color our judgment or what we report. You will get the complete story, warts and all.


 On of my largest assets is the 4-speed Suburban project. When I bought the ’90 ‘Burb it came with a malfunctioning automatic transmission. I hate automatics and malfunctioning ones even more so. The 700R4 works in Drive and Reverse but not in 1-2-3. The truck runs fine and it will tote a 3000-pound load without complaint but that boring automatic has got to go. It’s a rare Suburban that came with a 4-speed from the factory and even rarer to see a ½-ton version. I’ve only seen one 4-speed ‘Burb and it was ¾-on. This project keeps earning interest and I’ve been training a weather eye on Internet sale sites for a cheap, manual transmission, 4X4 GM truck to steal the guts from. I found a late model, 4X4-IFS 1/2-ton truck with a 5-speed and a nice FI engine that ran well but the transfer case and transmission housing were broken and besides everything was on the wrong side for the old straight axle suburban.
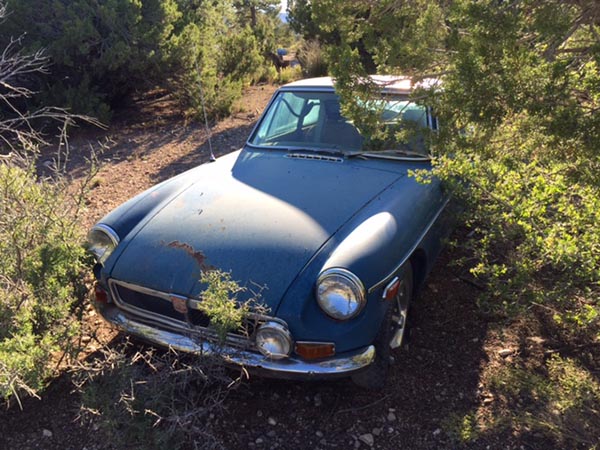 The chalky blue, 1974 MG GT came with Tinfiny Ranch and was listed as an out building on the deed. This car was on the chopping block until I started reading about MG’s with Buick 215 cubic-inch aluminum engine swaps. I really have to stay off the internet. The Buick engine triples the horsepower, doesn’t weigh much more than the iron 4-banger it replaces and sounds cool as hell revved up to 6000 RPM. This is one asset I kind of wish was not in my Project Bank as I’ve never been that interested in cars. Still, it’s there waiting on me.
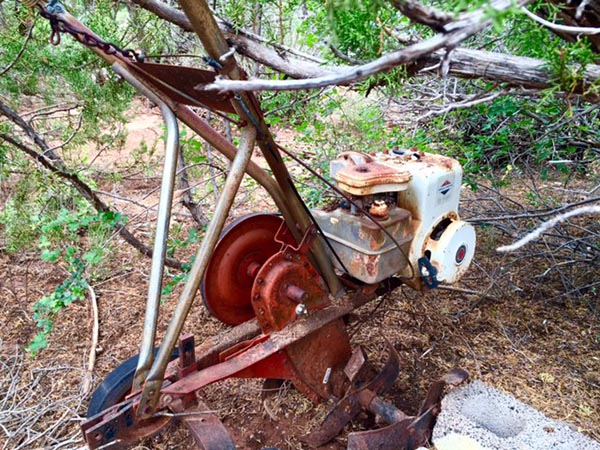 Tinfiny Ranch itself is a huge source of endless work, but beyond the physical plant The Ranch continues to deposit surprises into my Project Bank. This Merry Tiller project revealed itself as I was hauling away two, multi-panel garage doors. The doors sections were stacked with spacers in the popular rat-paradise fashion and I gave chase to a couple fat rats but they got away from me in the thick brush down by the ravine. The Merry Tiller looks like it will come in handy for the raised-bed vegetable garden (yet another deposit in The Project Bank) I’m planning for the back yard. The engine on the tiller is not stuck and being a Briggs & Stratton I’m sure it will run so I’m leaving it in The Bank for safe keeping.
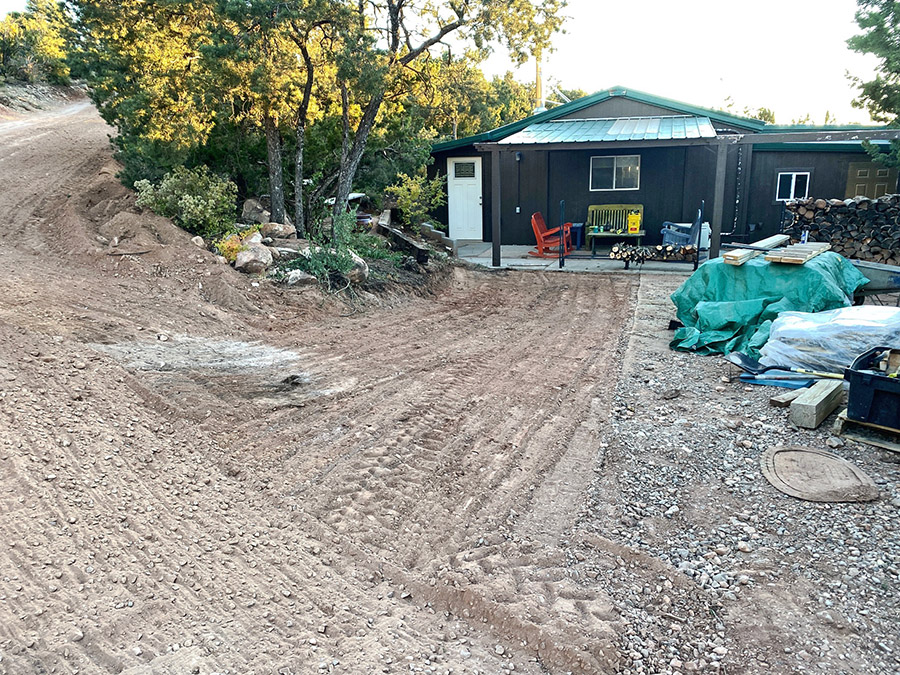


 This was all fine with me. I was able to relax at the beach while still having the ability to leave the resort to take in some local food and sights. This included cigar stores, drooling over the 1950’s cars that were still in pristine condition, and of course soaking up some much-needed sun. The resort where I was staying was filled with Canadians and whenever they had those silly contests in the evening they would always ask where the person was from. I was tempted every time I was called upon to grab the microphone and loudly say “The United States of America,” and then I would revel in the silence that was sure to follow that statement. For once I listened to my Dad’s advice (Don’t do anything stupid, Mike). For the entire trip I identified as a Canadian from Toronto (I couldn’t say Montreal as I didn’t speak French) and I successfully avoided the temptation to say otherwise.