I’ve always been afraid of (and morbidly curious about) spiders, so when Bobbie Surber posted the photo you see above of a spider in her Ecuadorean hotel room’s bathroom, it had my attention. I don’t think I could stay in a hotel room where a spider like that put in an appearance. I know I’m a big tough guy who rides motorcycles and made it through jump school in a prior life, but spiders creep me out. I’m deathly afraid of the things.
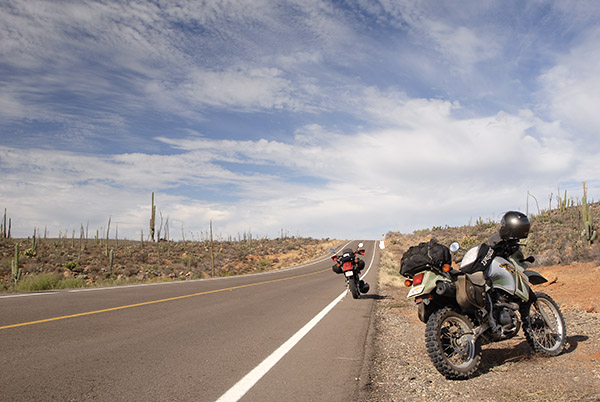
Which doesn’t mean I’m going to pass up an opportunity to get a photo of one. Baja John and I were rolling through Baja a decade and a half ago on our KLRs (I loved that motorcycle; it was one of the best I ever owned). We were doing maybe doing 60 mph when I somehow spotted a tarantula creeping along the pavement’s edge. I had to turn around and get a photo (it’s the one that sometimes graces the scrolling photo collection you see at the top of every ExNotes blog). Baja John, being a curious sort, did a U-turn and parked his KLR by the side of the road, too. I had my old D200 Nikon with its first-gen 24-120 Nikon lens (not a good choice for a spider macro shot, but it did the job).
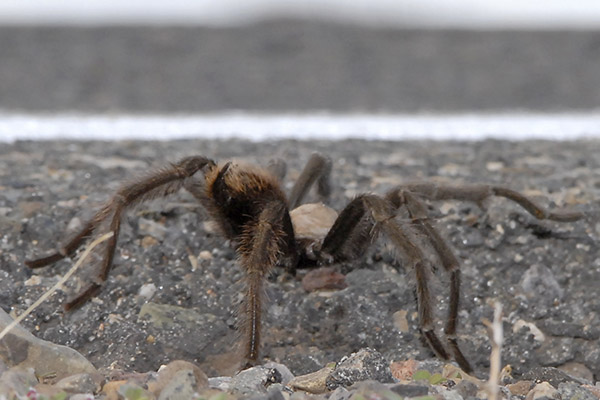
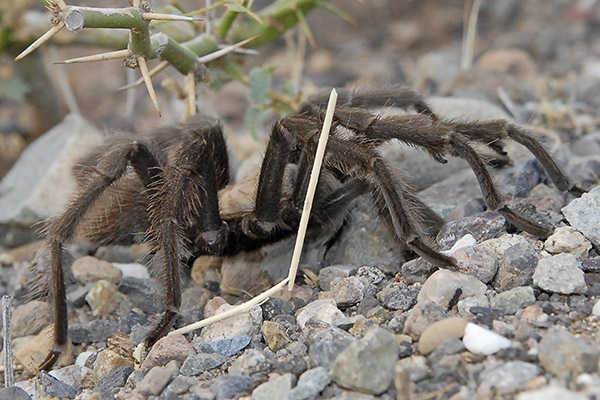
The KLRs of Baja John and yours truly stopped along the Transpeninsular Highway for an impromptu tarantula photo shoot. Those KLRs were great bikes.A Baja tarantula minding his (or her) own business.Cover and concealment, tarantula-style.
Before you knew it, I was snapping away while Baja John and I were crouched down in front of the hairy thing. The tarantula’s ostrich-like behavior was kind of funny. It hunkered down with a weed over its six or eight (or whatever the number is) eyes, thinking because the weed covered its eyes it was concealed. At least for a while. Then it realized we were still there and it charged. I’m not kidding. The thing charged at us with startling speed. Both of us did our best impersonation of Looney Tunes cartoon characters, our feet moving faster than we were, trying to run backwards from the crouched position, screaming like little girls. We made it, and the spider scurried off to wherever it thought was a better spot. Baja John and I, thoroughly adrenalized, laughed so hard I thought I was going to pee my pants.
I’m an old fart who really doesn’t give a rat’s ass about what anybody thinks of me anymore, so I’ll tell you that I am scared of spiders on some basic, fundamental, hardwired-into-my-psyche level. That said, I know that some of you younger guys who read ExNotes probably still worry about being perceived as tough macho men (you guys who haven’t achieved my level of self-awareness and acceptance yet). Because of that, I’ll share with you a technique I’ve used for decades. You know the deal…your significant other spots a spider, usually in the bathtub, and the job of sending it to the promised land naturally falls to you, the man. You’re as scared as she is, but your ego won’t let you admit it. There’s a spider there, and militant feminism be damned, it’s your job (as the man) to “get it.”
Here’s where the story turns to my other favorite topic: Guns. I’m helping you out here, guys. Here’s an excuse to pick up another firearm. You can thank me later.
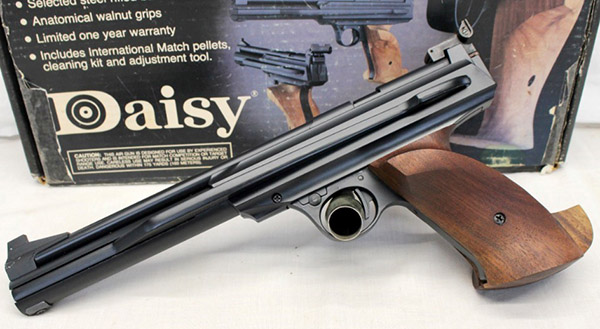
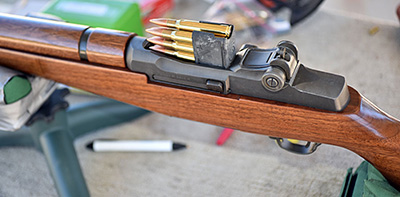
What you need is a pellet pistol. Preferably a manually-cocked model that doesn’t require a CO2 cartridge. My weapon of choice is the Daisy 777 air pistol. It’s a fantastic gun and it is quite accurate (I used to compete with one in bullseye air pistol competition, but I digress…back to the story at hand).
When your lovely significant other comes to you announcing a spider in the bathtub, choke down those feelings of fear, revulsion, and inadequacy. Here’s what you do: Grab your air pistol. Cock it, but (and this part is very important) do not put a pellet in the chamber. While maintaining a firm grip on the weapon, point it at the offending arachnid with the muzzle approximately one inch away from your target. Do not stand directly under the spider (for reasons that will become clear momentarily, this is also very important). Take a deep breath, let it halfway out, and while maintaining focus on the front sight and proper sight alignment, gently squeeze (do not jerk) the trigger. A high-speed jet of compressed air will exit the muzzle, strike the spider, and break it up into legs, thorax, abdomen, and other body parts. They will float to the ground and in most cases, the separate parts will continue twitching (adding to the excitement, the thrill of the hunt, and proof of your masculinity). Mission accomplished, as old George W liked to say. Your job (which was to “get it”) is done. You can now turn to your sweetheart, smile, and ask her to clean it up.
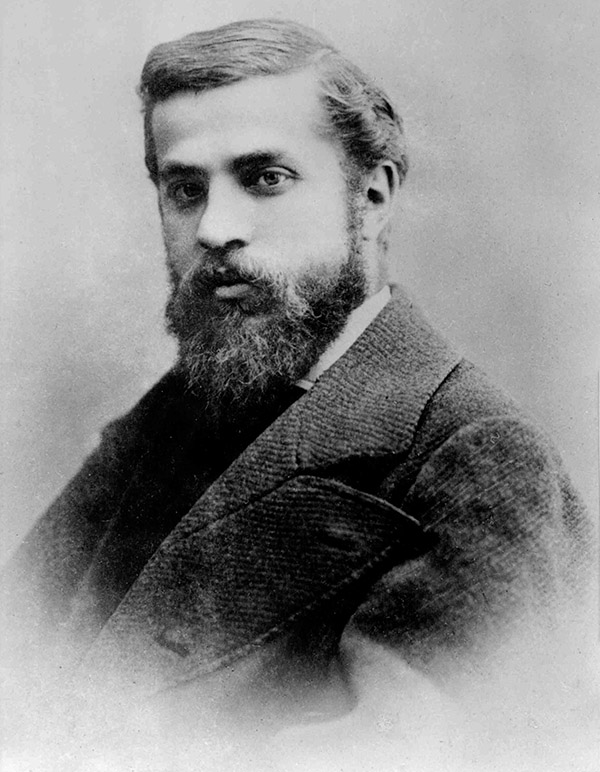
About two years ago Sue and I visited Spain and Portugal. I posted more than a few blogs during that trip, but not enough on Antoni Gaudí. Gaudí was a Spanish architect who lived from 1852 to 1926. He was clearly a genius. I wish I had known more about him before we went to Barcelona; I would have appreciated what I was seeing more. Better late than never, and after our trip I started reading and studying his life. This was an amazing man.
We visited three of Gaudí’s works in Barcelona: The Park Güell, the Casa Milà apartment building, and the Sagrada Familia.
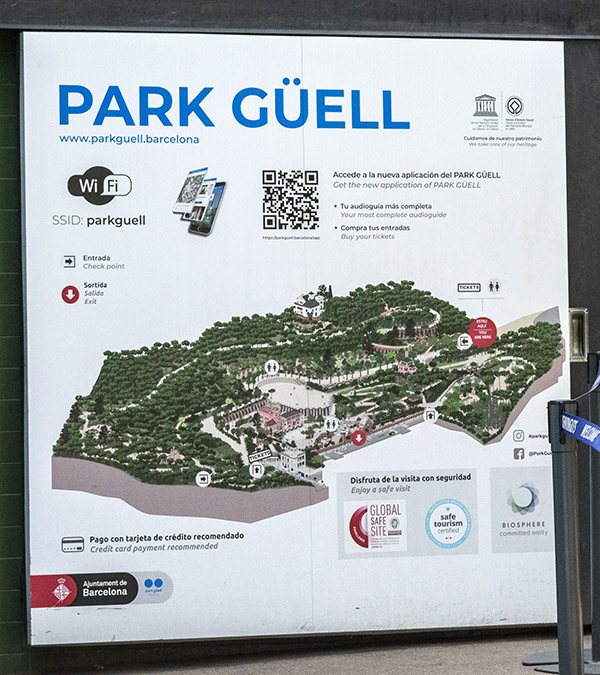
Park Güell
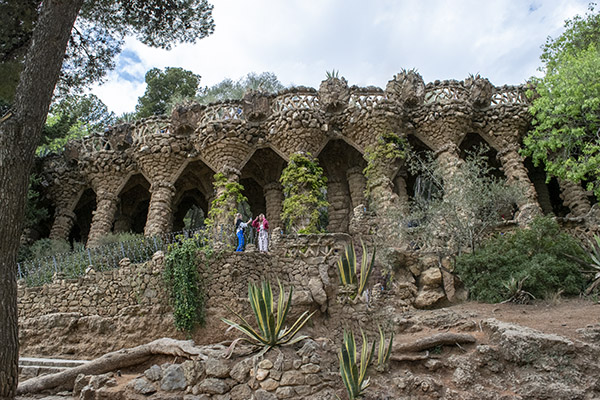
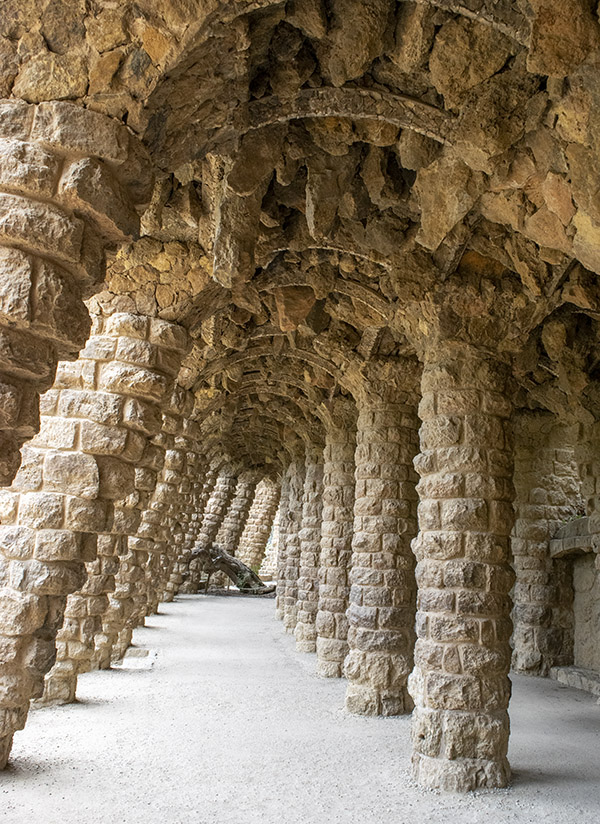
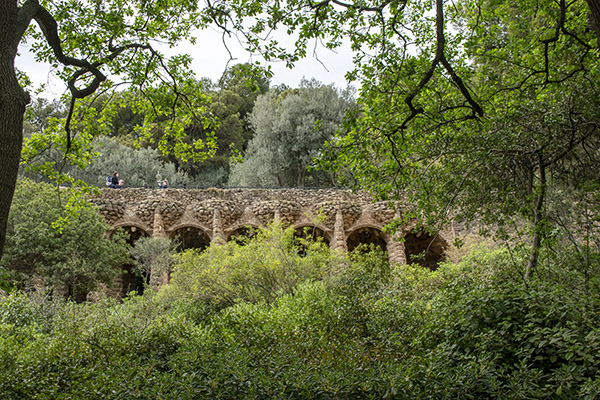
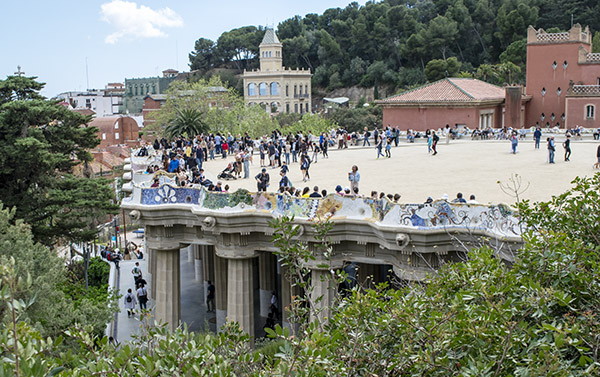
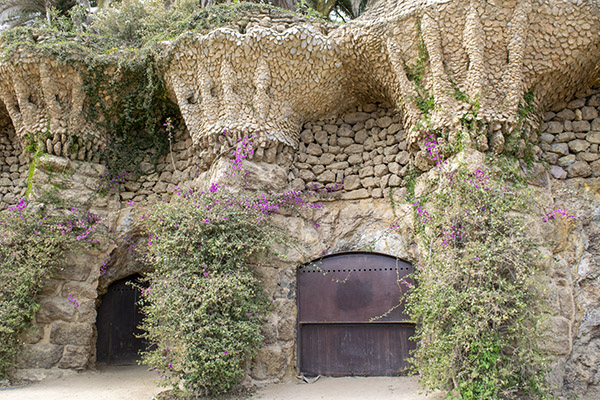
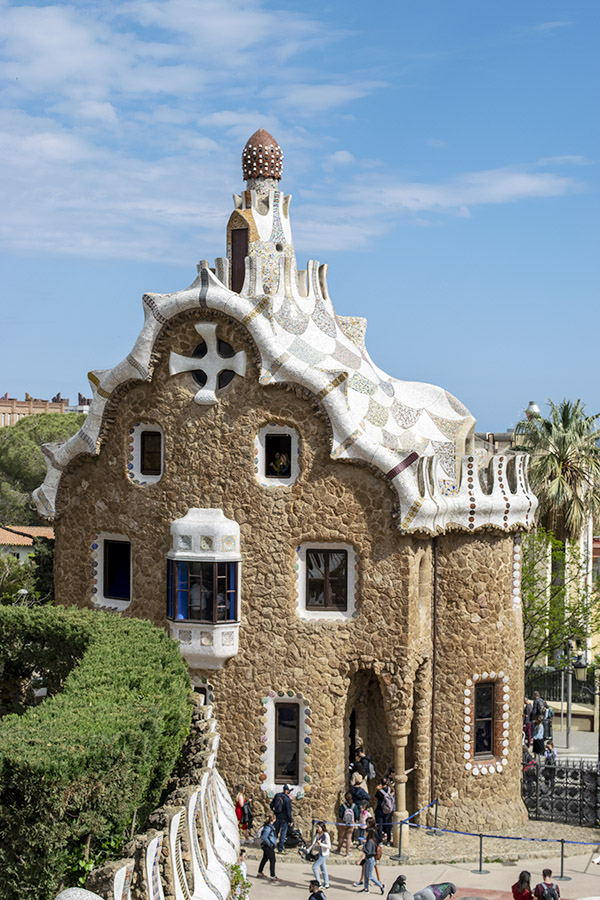
One of our first stops in Barcelona was the Park Güell. Park Güell was commissioned by Eusebi Güell in 1900, a Catalonian businessman, when he enlisted Gaudí to incorporate several properties he already owned into the park. The photo ops were everywhere we turned, from the sculpted tunnels to the paths to the buildings and the sculptures.
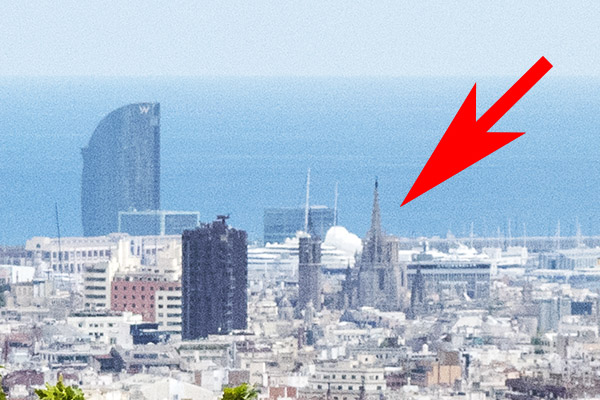
When wandering Park Güell, I noticed that we could overlook the city of Barcelona and see all the way to the Mediterranean. I snapped a photo or two, without realizing that my photo included the Sagrada Familia (it’s in a photo below, identified by a large red arrow). I’ll talk about that more in the next part of this blog.
If you look closely, you can see the Sagrada Familia from Park Güell.
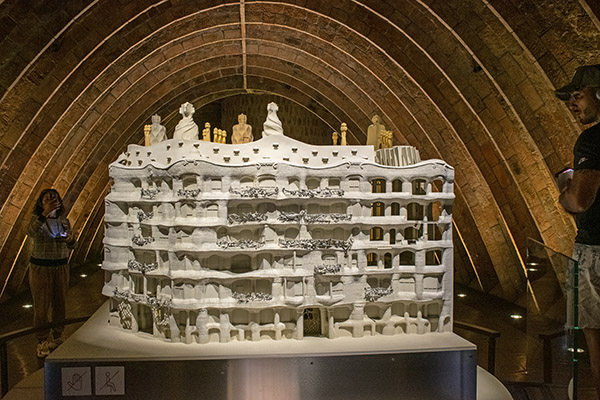
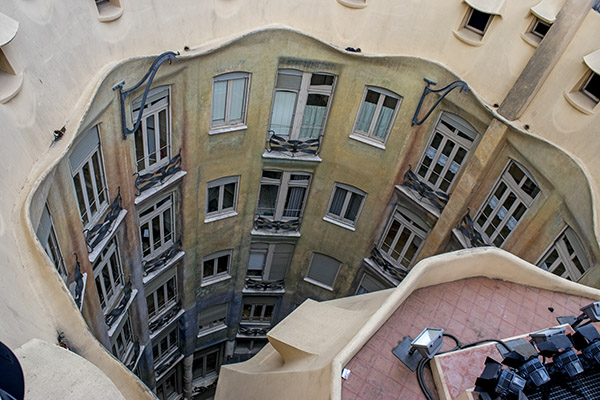
Casa Milà
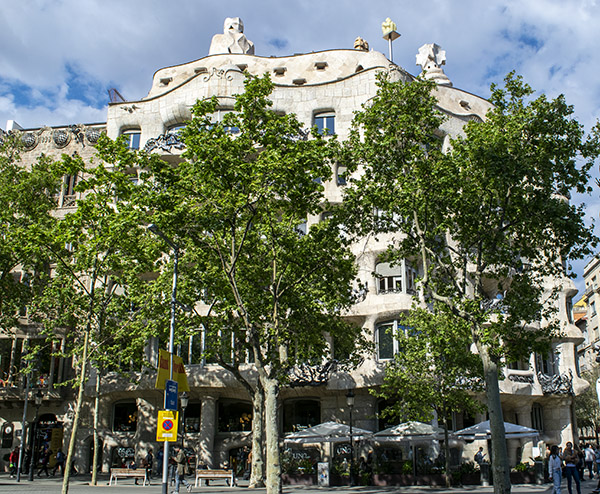
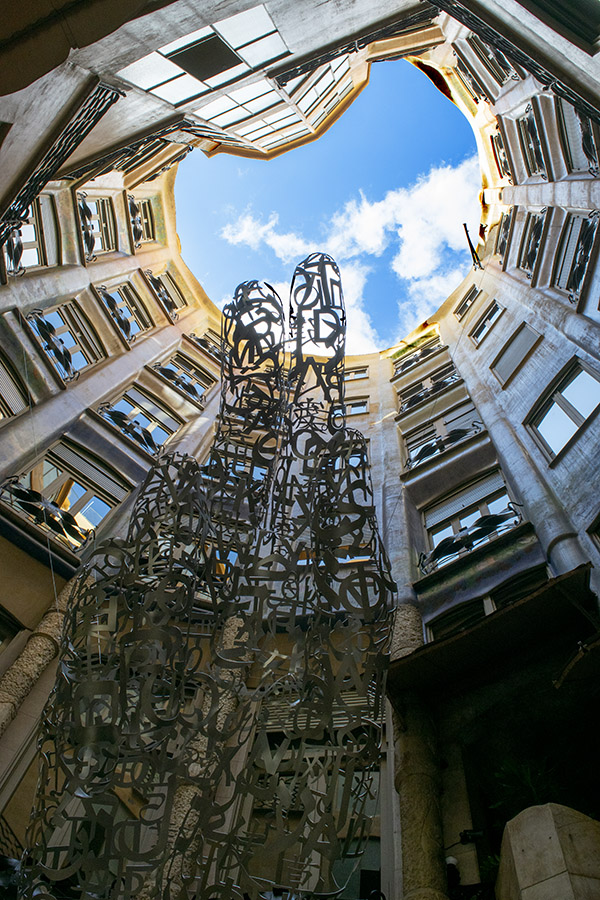
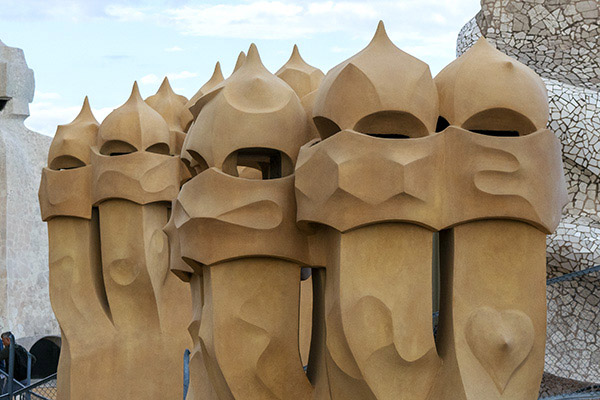
Casa Milà is another famous Gaudi work. Completed in 1912, it was initially an apartment building. Today it is a UNESCO World Heritage site. Like Park Güell, Casa Milà suggests a Dr. Suess-like whimsiness in its design. The structure is a giant loop, with an opening surrounded by the apartments. The roof contains many sculptures, with some that double as chimneys. When we visited Casa Milà, our guide asked if one reminded us of anything. It did. You’ll see it one of the photos below. George Lucas saw it, and it became the inspiration for Star Wars storm troopers. Another one of the photos below shows a model. Gaudi preferred to design with models and use these as the basis for the larger work.
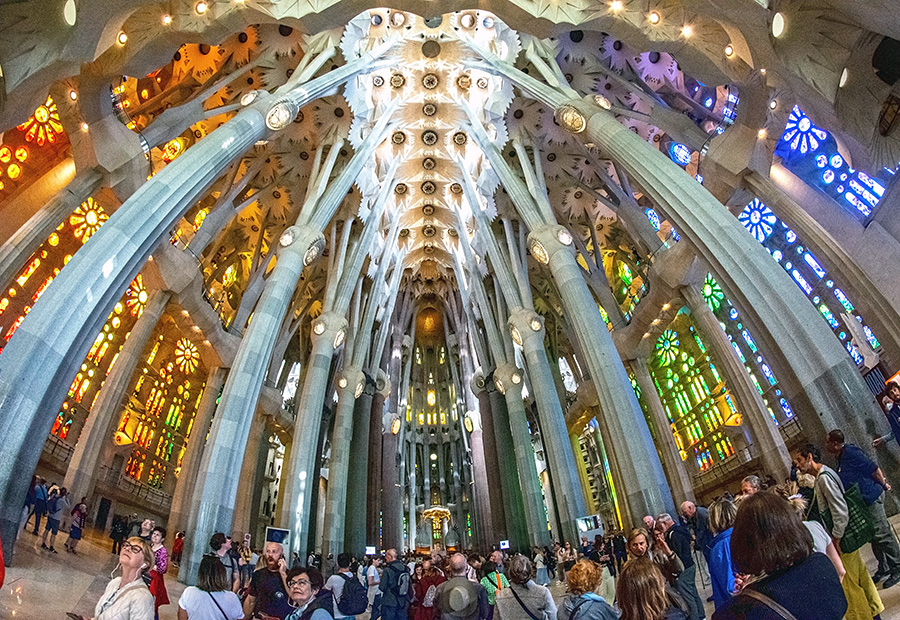
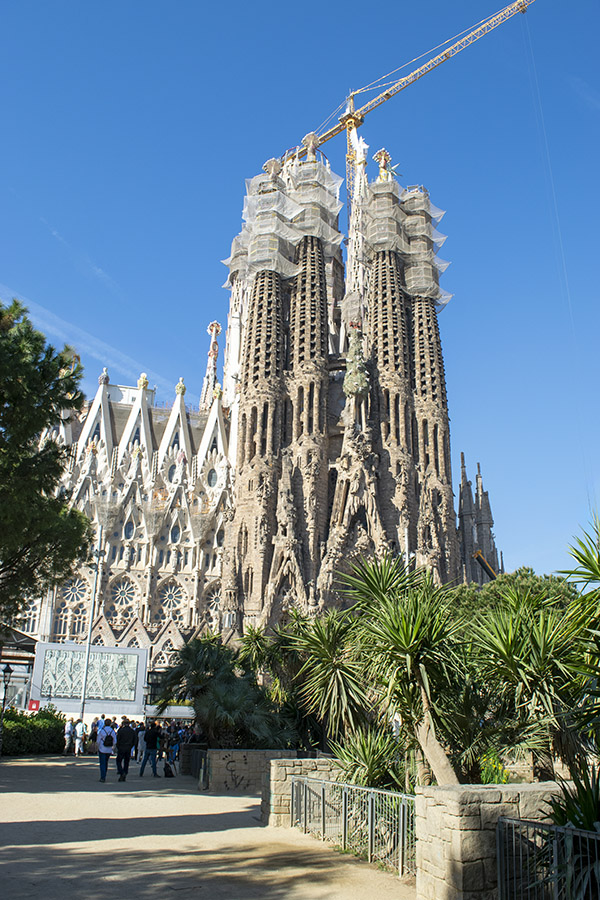
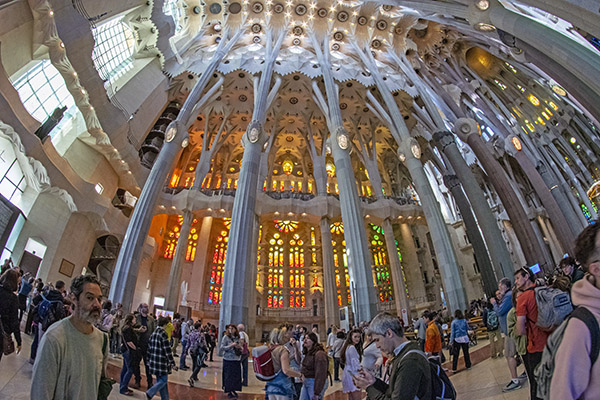
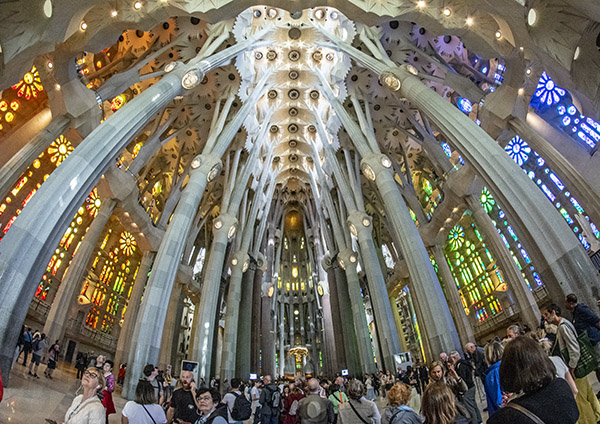
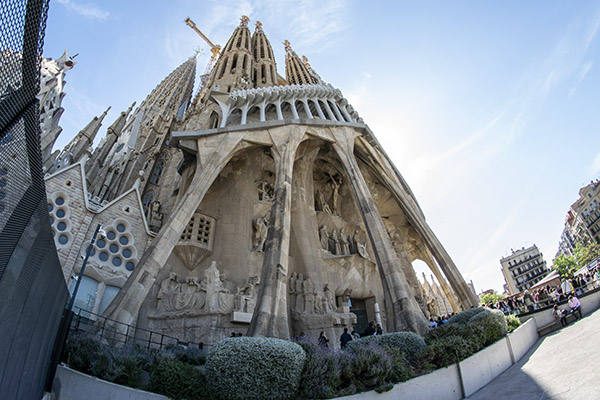
The Sagrada Familia
Talk about a long-running construction project: Barcelona’s Sagrada Familia temple has been under construction for 140 years, and it’s not finished yet. We heard that it would be finished in another 15 years, but who knows?
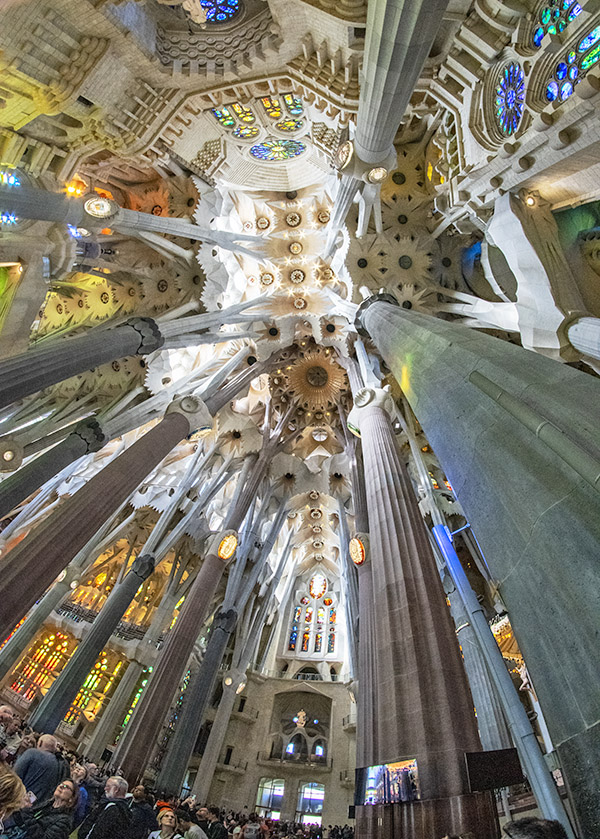
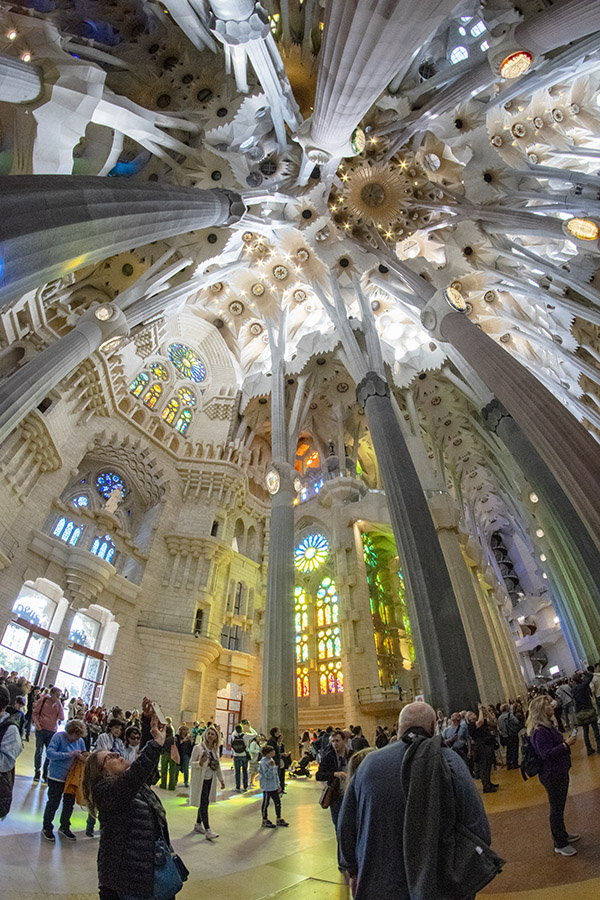
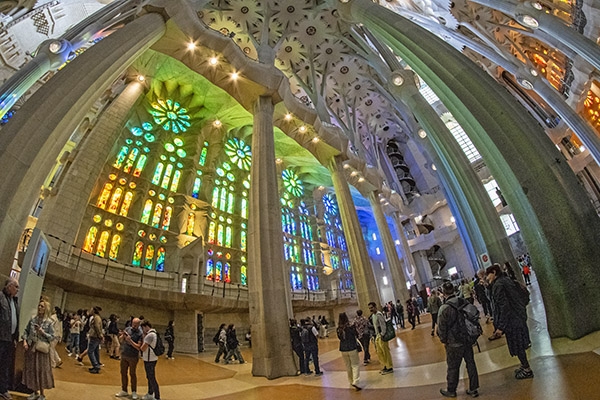
The construction schedule notwithstanding, the Sagrada Familia is an active church, and if entering it does not make you a believer, nothing ever will. To say it is impressive would be a massive understatement. You have to see the Sagrada Familia to understand the excitement, the grandeur, and the genius of its design. The exterior has that same Dr. Suess/Harry Potter mystique. Once you are inside, the feeling is not one of being in a building; it is more like being in a well-illuminated and immense living creature. The illumination comes from the building’s stunning stained glass, designed with colors tuned to the light from Barcelona’s sunrise and sunset.
Words like those you are reading here don’t do justice to the Sagrada Familia. It is a place that has to be personally experienced to get a feel for its magnificence. I’ll return to Barcelona someday, and you can bet that I’ll visit the Sagrada Familia again.
Antoni Gaudí was a bit of a dandy in his younger days. In his later years, he stopped taking care of himself and basically dressed like a homeless person. He died as a result of being struck by a Barcelona streetcar. When he was injured, people did not realize who he was (they thought he was a vagrant). Antoni Gaudí’s remains are entombed in the Sagrada Familia, perhaps his greatest and certainly his most widely-known work. The Park Güell, the Casa Milà apartment building, and the Sagrada Familia are not the only projects Antoni Gaudí created. I’d like to search for and visit more of Gaudí’s works when I return to Spain.
When Sue and I visited Spain and Portugal, I didn’t take my Nikon D810 and it’s 24-120mm lens (as I usually do). The weight of that camera and lens has become too much for me to carry around. I won’t bore you with the specifics of my age-related infirmities; I’ll simply share that I’m not what I used to be. But I’m still kicking and typing, and for this trip, it was my much smaller and lighter Nikon D3300 and its smaller 18-55mm lens. I also had a lightweight, non-zoom, non-metering Rokinon 8mm fisheye lens, which I used more than I expected to (it proved to be a very capable lens). The D3300 and these two lenses (along with a bit of post-production PhotoShop tweaking) created the photos above. The interior photos were all shot at high ISO (in the range of 800 to 3200), which accounts for the graininess in some. Mea culpa.
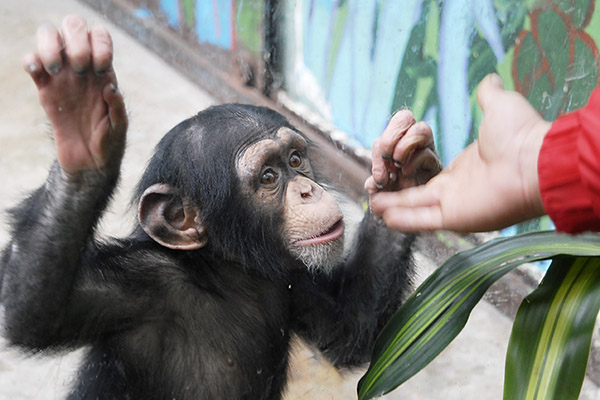
Facebook and Meta were slammed in court yesterday, with a mega-million-dollar award going to a plaintiff claiming harm from Fecebook’s intentionally-addictive interface. I can see both sides of that argument, and I’m saying that as a guy who is hopelessly addicted. I can spend hours scrolling mindlessly through all the stupid stuff I see on Facebook (especially, for reasons that would take team a team of psychiatrists to unearth) videos of baby gorillas.
There’s a Facebook feature showing friends who are currently online, which I never paid much attention to. There’s another feature that allows you to call (through your computer and the Facebook interface) friends who are currently online. You can probably guess where this is going. I saw that Mike Huber was online yesterday morning, and I decided to give the Facebook telephone option a try.
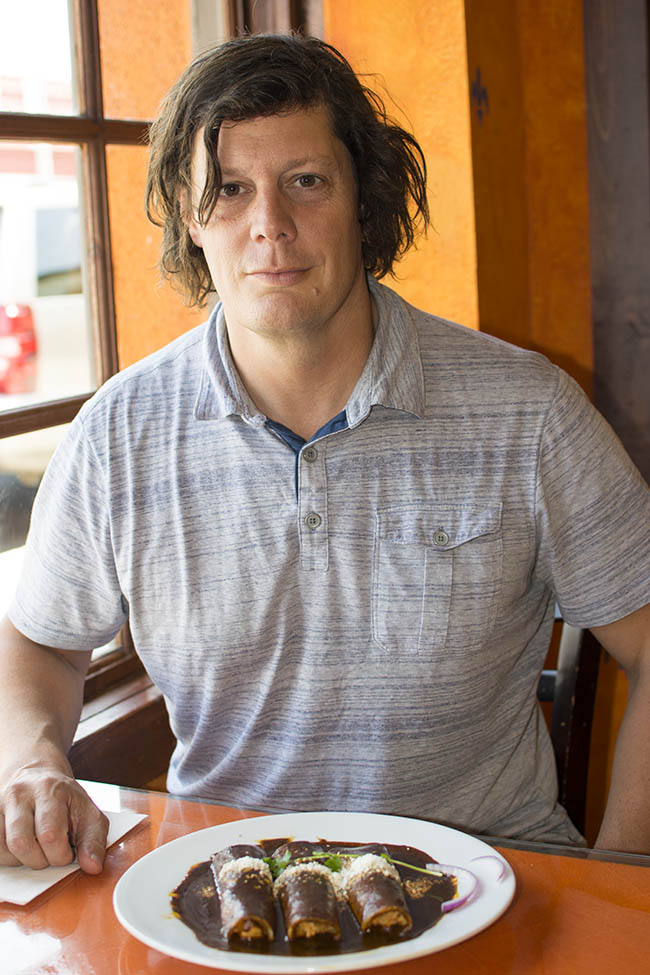
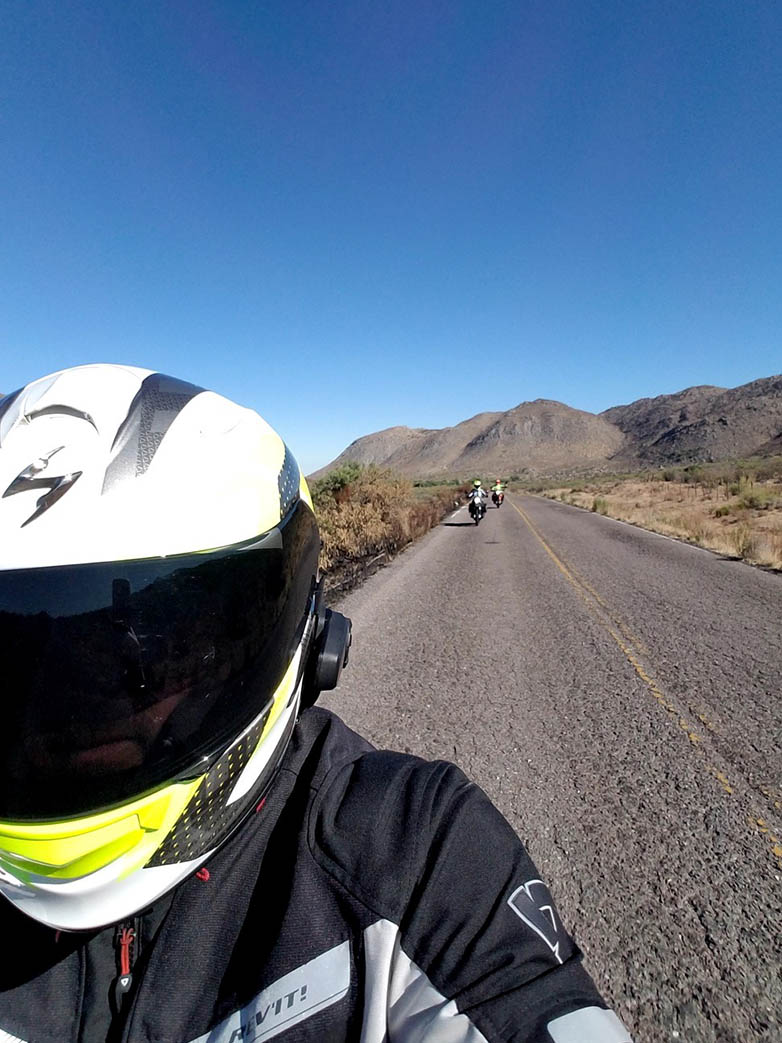
A few rings later and Mike and I were conversing, clear as a bell, about a variety of topics. Mike is in Colombia for a few more days, and we had a great time talking about that wildly-beautiful country. Oddly enough, Mike ran into Buffalo Bonker down there in Colombia. I first met Mike on one of the CSC Baja rides when we were filling our gasolina tanks in Cataviña. Buffalo was also on that ride 8 years ago. It’s interesting how these motorcycle-based chance encounters can become lifelong friendships.
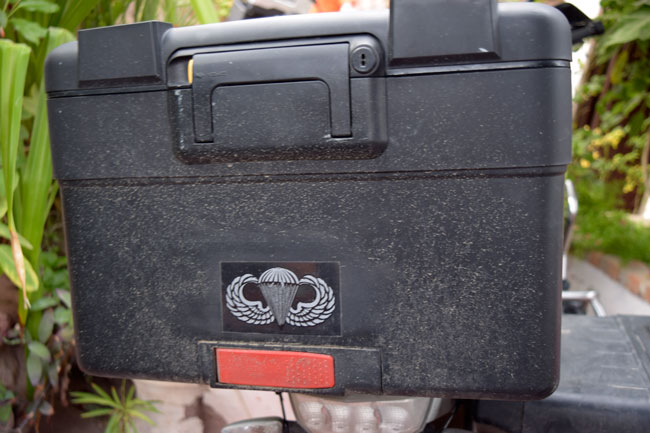
Lunch with Mike Huber at Las Casitas in Bell, California. It was as good as it looked!Mike Huber’s top case and jump wings. It led to a conversation that led to a great friendship.A Buffalo self-portrait in Baja.
That had me thinking about my trips to Colombia. I love the place. I did a lot of blogging while I was there. If you don’t see any friends you can call on Facebook, if you’re tired of listening to warped news shows pretending to be objective, or if you just want to see a bunch of cool photos and a few videos of my Colombian adventures, today is your lucky day…
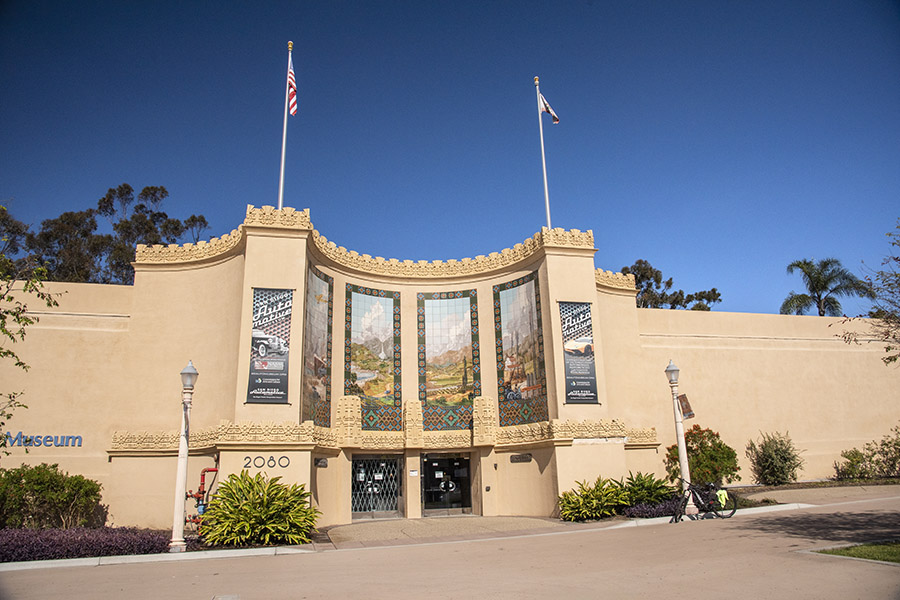
The building you see above is the San Diego Automotive Museum. Take a good look at it…the sculpted trim, the mosaic panels, and its architectural splendor. We’ll touch on those topics again at the end of this post.
Our travels this year have focused mainly on motorcycle museums. Why, then, you might ask, an automotive museum? The name (i.e., an automotive museum) suggests four-wheeled transport. But the San Diego Automotive Museum popped up when I Googled motorcycle museums, and when subsequently searching the definition of “automotive,” I learned that the word can be used to describe anything related to or concerned with motor vehicles, including motorcycles. In the case of the San Diego Automotive Museum, it does indeed relate to motorcycles. In fact, much to my surprise there are as many motorcycles in the San Diego Automotive Museum as there are cars.
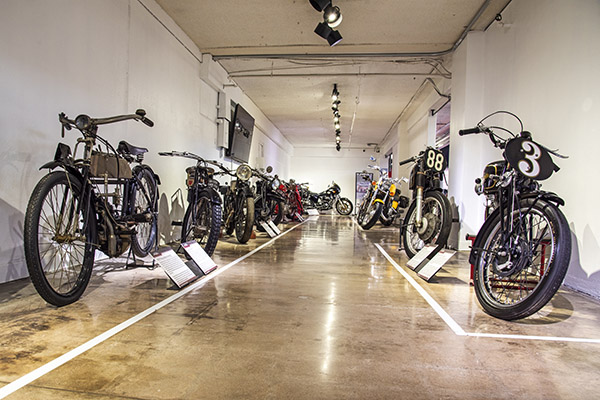
The main motorcycle display area in the San Diego Automotive Museum. In addition to the dozen or so motorcycles in this hall, the Museum has other motorcycles displayed in other locations.
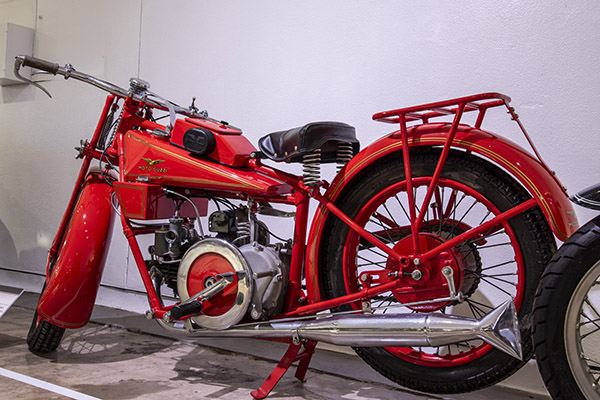
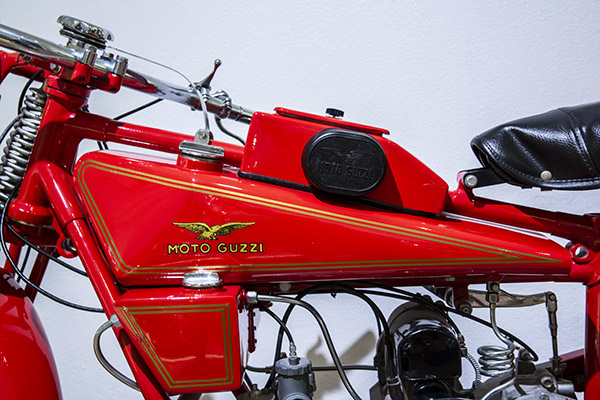
Some of the motorcycles in the display hall were ones I had never heard of, and as a guy who’s been fascinated with motorcycles since the early 1960s, that’s saying something. I’ve been doing some great things with Cycle Garden in Indio, California recently for Motorcycle Classics magazine, and I’ve always been interested in the V-twins from Mandello del Lario, so any day I see anything associated with that marque is a good day. Ever hear of the Dondolino? Yeah, me neither. It almost sounds like an Italian restaurant’s signature dish.
The Moto Guzzi Dondolino, and to be specific, this is a 1951 model. It means a small swing, as one would have for a child. The Dondolino…I like that. Check out the bologna slicer flywheel.Another shot of the Dondolino, this time a close of the fuel tank.
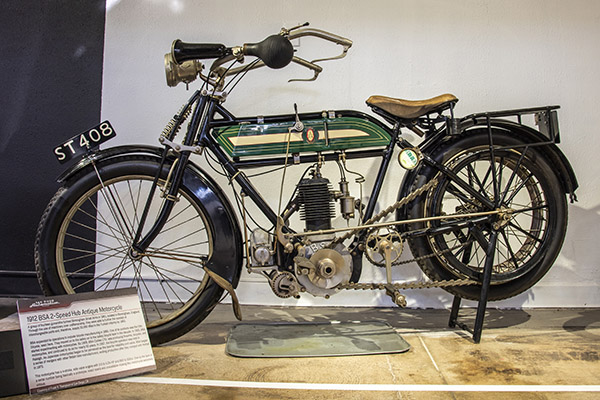
Another one that was fascinating for several reasons, not the least of which was its paint treatment, was a 1912 BSA single. Surprisingly, the Museum operations manager told me flash photography was okay (in most museums it is not). It was hard getting decent photos in the display hall, even though I shoot raw photos (not jpegs), as the raw photo format preserves all photo data (jpegs compress the data). The display hall was lit with tungsten lighting, which always make getting good color balance difficult. Even though the the raw photos allow for color temperature adjustments in Photoshop, it was tough getting these right.
The 1912 BSA single. Check out the bulb horn.
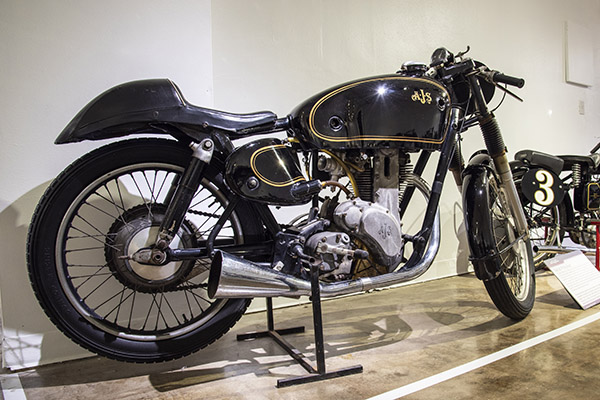
The Museum has a beautiful AJS motorcycle on display. Some of you older folks and more serious students of the motorcycle may know of the original A.J. Stevens and Company of Great Britain, which manufactured motorcycles from 1909 to 1931. AJS sold to Norton, and ultimately became part of Norton Villiers in 1966. That company went belly up a few years ago. Several organizations picked up the Norton name and tried to make a go of it; to my kn0wledge, none succeeded (although I haven’t checked in the last month or so, so maybe yet another Norton-named manufacturer snuck in). The AJS name has been revived as a small bike manufacturer, or rather, a name attached to 125cc motorcycles made in China by Jianshe.
A 1948 AJS 7R “Boy Racer.” The colors are classic. Note the megaphone exhaust.
You know, AJS is indirectly (and partly) responsible for the CSC name. When founded in 2010, today’s CSC was initially known as the California Scooter Company. The California Scooter Company manufactured Mustang replicas (the Mustang was a small American motorcycle made in the 1950s). The name, California Scooter Company, caused us no end of grief because people would look at the little Mustangs and ask, “is it a motorcycle or a scooter?” We always explained how “scooter” was a slang term for a motorcycle. I wanted to tell people they were too stupid to ride if they didn’t know the difference (but in an unusual display of politeness I never did). Ultimately, we shortened “California Scooter Company” to “CSC” based on the industry’s history of three-letter acronyms for company names. You know: BMW, BSA, KTM, AJS, etc. Then the questions changed to “What does CSC stand for?” I couldn’t resist that one and my answer was immediate: Chop Suey Cycles.
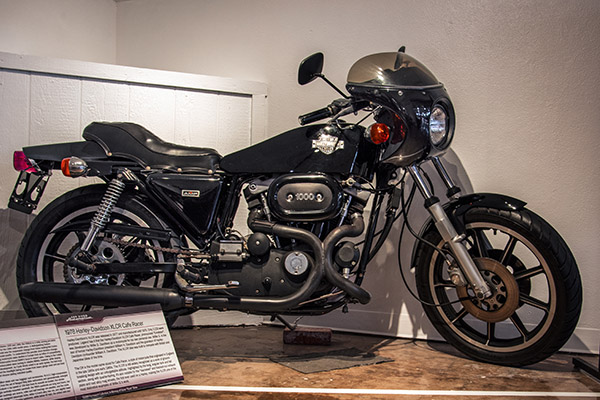
To get back to the main attraction (the San Diego Automotive Museum), both ends of the main motorcycle display hall are anchored by big American V-twins. One is a 1978 XLCR Harley Cafe Racer, which I think is one of the most beautiful motorcycles Harley ever made. The other end of the display hall has a garish chopper, one from a company appropriately named Big Dog. In an act of photographic mercy, I didn’t get a photo of it.
The Harley Cafe Racer. Always wanted one, never bought one. They were a shade over $3,000 in 1978 when new. I came close to buying one back then, but I didn’t pull the trigger.
Moving outside the motorcycle exhibit hall and into the rest of the Museum, as mentioned earlier there are motorcycles displayed throughout the other displays. One of the first is a Dan Gurney Eagle. Dan Gurney was a famous automobile racer who formed a company that mounted Honda engines in a frame in a manner that positioned the rider low in the bike. The seating arrangement was said to improve handling. Maybe it does. To me, it just weird, and rider visibility has to be terrible. I think I would look weird (or weirder than usual) when stopped with my legs splayed out to the sides.
A Dan Gurney Eagle. Weird, huh? The concept never caught on.
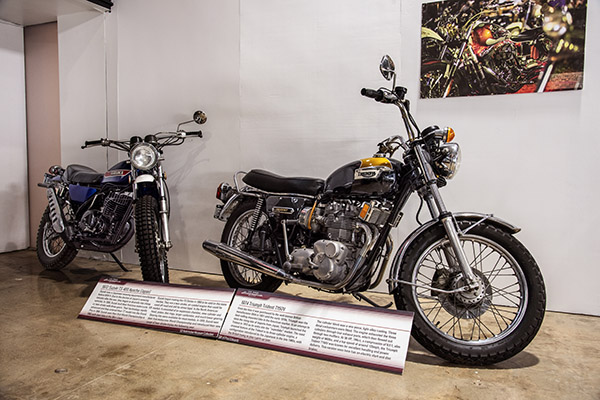
As soon as you enter the Museum, there’s a 1974 Triumph 750 T150V Triple on display (along with a two-stroke Suzuki 400cc dual sport). The Triumph Trident was supposed to be Triumph’s answer to the Honda 750 Four, but it was too little, too late. The Honda was far ahead of its competition. Triumph ultimately went out of business a few years later.
A 1972 Suzuki Apache and the Triumph Trident 750.
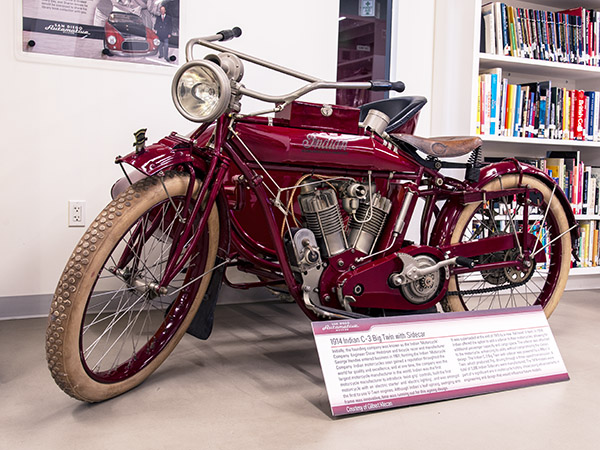
The San Diego Automotive Museum has a library, and our host explained to us that they are often visited by elementary school classes. Students use the library for homework assignments related to automotive topics. There are a couple of interesting motorcycles in the library. One is a Scott two-stroke (another motorcycle I had never seen before); the other is a 1914 Indian V-twin with a sidecar.
A 1927 Scott Flying Squirrel.A 1914 Indian C-3 with Sidecar.
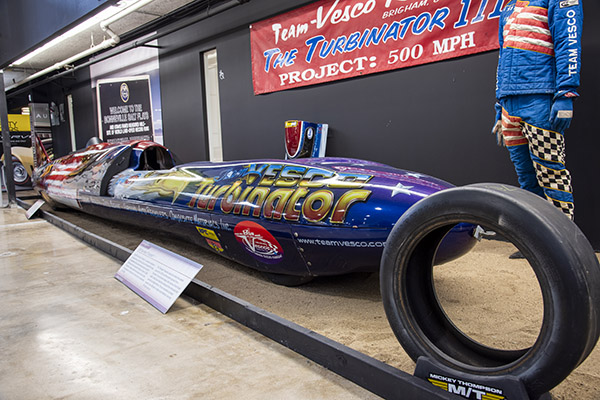
In the Museum’s main display area, there’s a land speed record streamliner that at first I thought was a motorcycle. You know, kind of like the land speed record Triumph that hit 247 mph back in the 1960s (Triumph included a “world’s fastest motorcycle” decal on every bike). But this vehicle wasn’t a motorcycle; it actually had four wheels beneath its narrow body work. The Vesco Turbinator is powered by a helicopter engine, and it set a world speed record for wheel-driven (as opposed to jet propelled) vehicles.
The Vesco Turbinator. It set a world speed record for wheel-driven vehicles, cracking the 500-mph barrier.
I poked around a bit on the Internet and found this very cool YouTube of the Turbinator’s Bonneville speed run:
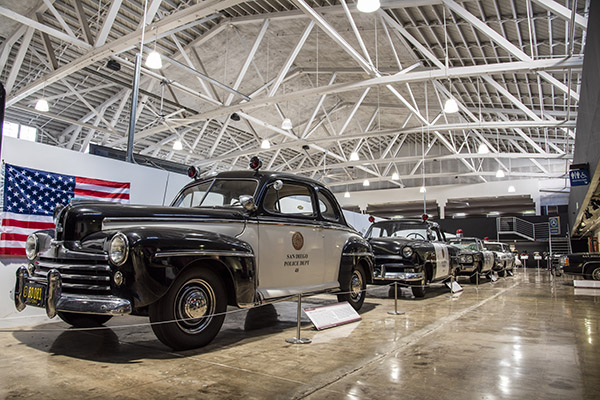
There were several kinds of cars on display, including an interesting collection showing the evolution of police cruisers.
The San Diego Automotive Museum has an impressive display of police cruisers.
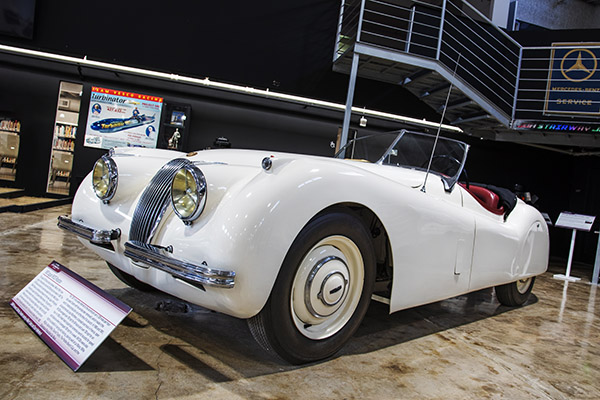
One of my dream cars has always been the XK-120 Jaguar, and the San Diego Automotive Museum had one on display.
This sure is a beautiful automobile.
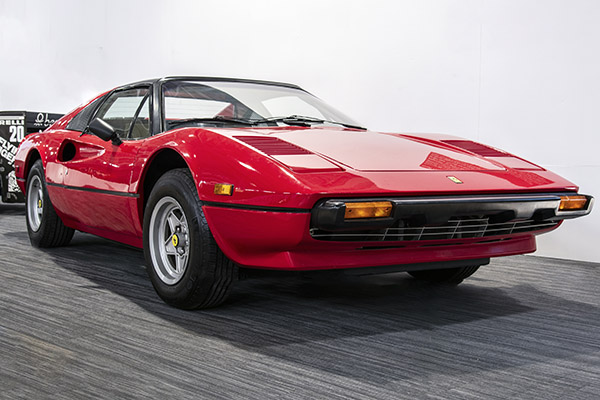
Do you remember Tom Selleck’s first television series, Magnum P.I.? The Museum’s displays include the Ferrari 308 from that show.
Thomas Magnum’s Ferrari. It was beautiful then and it’s beautiful now. I was surprised at its small size.
When I first moved to southern California nearly 50 years ago, we had traffic, but not like we do today. We read a lot of stories about billionaires leaving California, but as far as I can tell, it feels like a lot more people are here now. I think our population is increasing. High density housing and traffic are out of control. Back in the 1970s, it was no big deal to hop on my Electra Glide, head south, and arrive in San Diego two hours later. Today, that same trip is at least three hours, and that certainly was the case when Sue and I visited the Automotive Museum a few days ago. We have more freeways than we did 50 years ago, but the traffic is horrendous and it still takes longer to get anywhere. That said, our ride the other day was an easy hundred-mile stint south on Interstate 15 to California State Route 163, and then a right turn into Balboa State Park.
Although the drive down to San Diego was long, I didn’t mind. It had been at least 30 years since I’ve been to Balboa Park. It’s a national treasure. The Park covers 1200 acres, and it is one of the oldest parks in the U.S. The land was originally reserved in 1835. Balboa Park contains 17 museums and 18 botanical gardens. It also has theaters, restaurants, and the world-famous San Diego Zoo. The whole affair is managed by the San Diego Parks and Recreation Department.
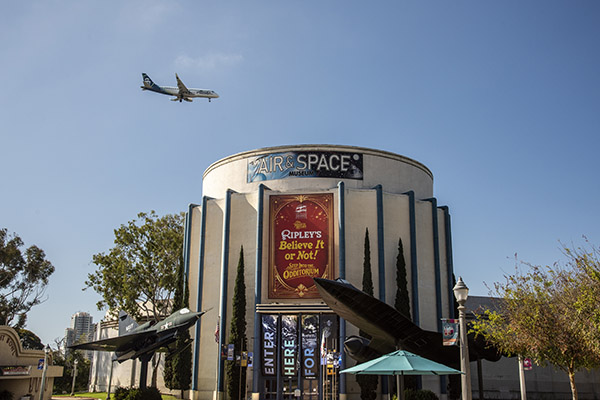
As we chatted with our new friends in front of the San Diego Automotive Museum, they told us about the Air and Space Museum facility originally being built by the Ford Motor Company. It is directly under the flight path in to San Diego’s Airport. From the air, the Air and Space Museum looks like a Ford V-8.
After visiting the Automotive Museum, Sue and I wandered outside and shot a few photos of the building (including the one at the top of this blog). It was a glorious day, the kind that makes living in southern California a treat: 70 degrees, essentially no humidity, and not a cloud in the sky. As I wrestled with the big Nikon 810 and its 24-120 lens, we noticed two older gentlemen sitting at a table in front of the Museum. They watched me taking photos, and that led to a 45-minute conversation about life in general, getting old, being retired, enjoying days like the one we were enjoying, and Balboa Park. The two were both nearly 80 years old. One had been the architect for the Automotive Museum’s remodeling a few decades ago; the other had designed and built the ornate trim you see around the top of the Museum. They regaled us with stories about the Automotive Museum building, the Museum’s donors, and more. It was a pleasant morning, made all the more interesting with this conversation.
The way to take in Balboa Park (if you haven’t been here before) is not to do it the way we did (i.e., driving down for a half-day visit to the San Diego Automotive Museum). A better way to enjoy Balboa Park is to spend several days in San Diego. San Diego is one of the world’s great cities, and Balboa Park is its crown jewel.
You could spend a week just in Balboa Park, but there are many other fun things to do in and around San Diego, many of which we’ve written about before. The San Diego Zoo is one of the world’s great zoos, and it’s good for a full day (or two). There’s the USS Midway Museum, which can only be described as magnificent. The Deer Park Winery and Auto Museum is just a few miles up Interstate 15, with its magnificent collection of convertibles and wines. Mexico is just a few miles south, with Tijuana on the other side of the border, Tecate and its culinary delights an hour or so to the east, and all of Baja starting as soon as you cross the border. Baja is magnificent; it offers some of the best riding in the world. The restaurant scene in San Diego can only be described as spectacular, but don’t get waste time or money in the high-priced tourist eateries in San Diego’s Embarcadero area. If you want authentic Italian cuisine, navigate your way to Volare’s (it’s one of San Diego’s best kept secrets).
So there you have it: The San Diego Automotive Museum and a few other San Diego attractions. If you haven’t been to this magnificent city, San Diego is a destination that should be on your bucket list.
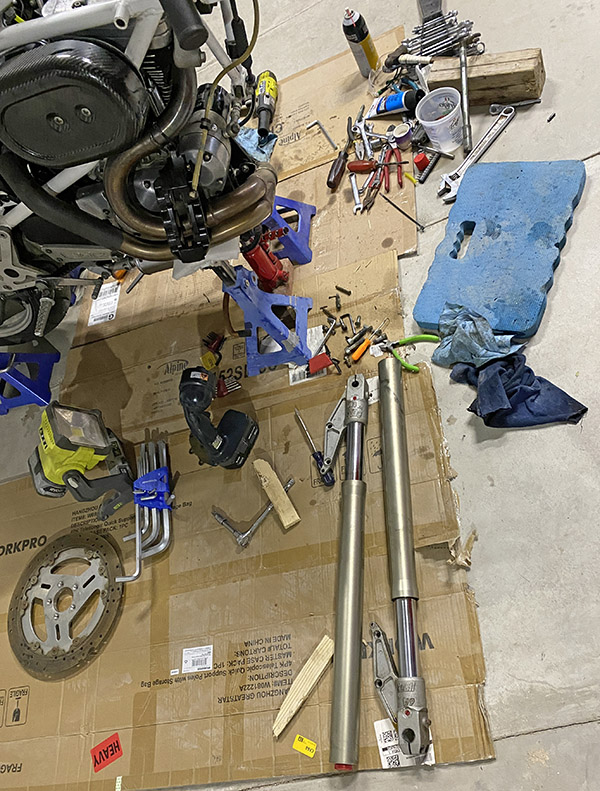
I have two motorcycles with upside down forks. Both of these motorcycles have leaking fork seals. Coincidence? I think not. I have no love for USD forks and one of the reasons I wanted a Buell Cyclone was the conventional forks those bikes came with.
I don’t care for upside down forks. They seem to leak more than conventional forks.
Alas, I ended up with a Thunderstorm, which is mostly the same as a Cyclone except for the forks. Mine were leaking, which is not unexpected for a 30-year-old motorcycle.
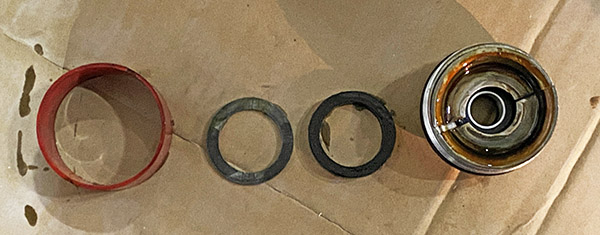
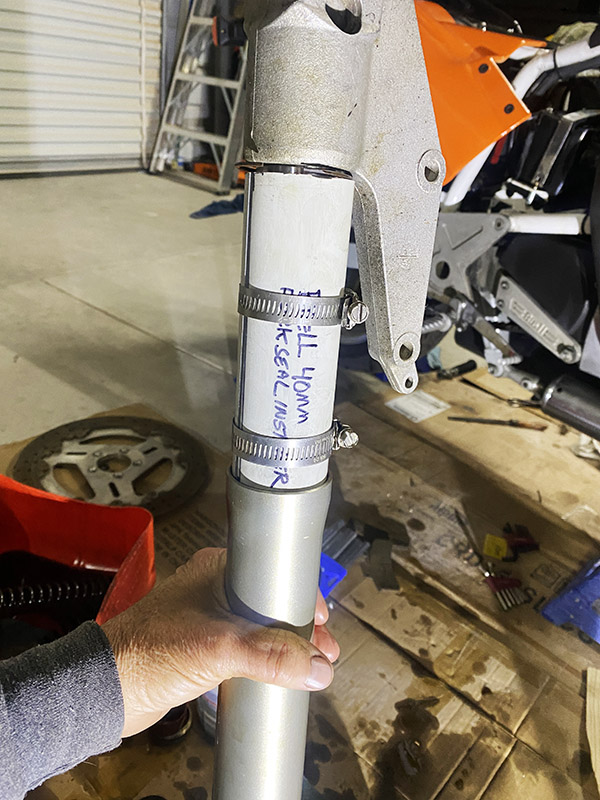
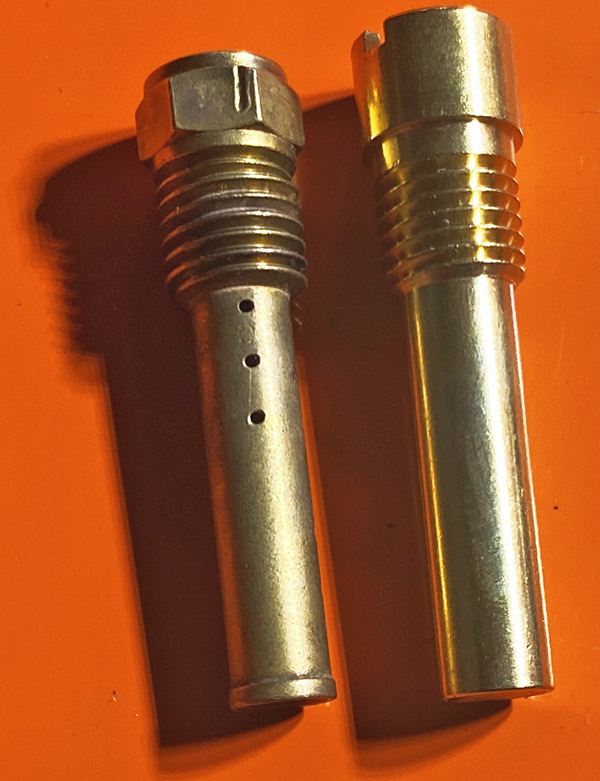
I try to lay out the parts in the order they are removed. Until I kick the cardboard and the bits scatter. This is the fork cap-retainer-plastic spacer-metal washer top of the tube parts.
New fork seals were kind of hard to find. I tried contacting the OEM manufacturer, White Power (that name didn’t age well), but I got no response. Through the wonder of the internet, I found a company in England that had the seals.
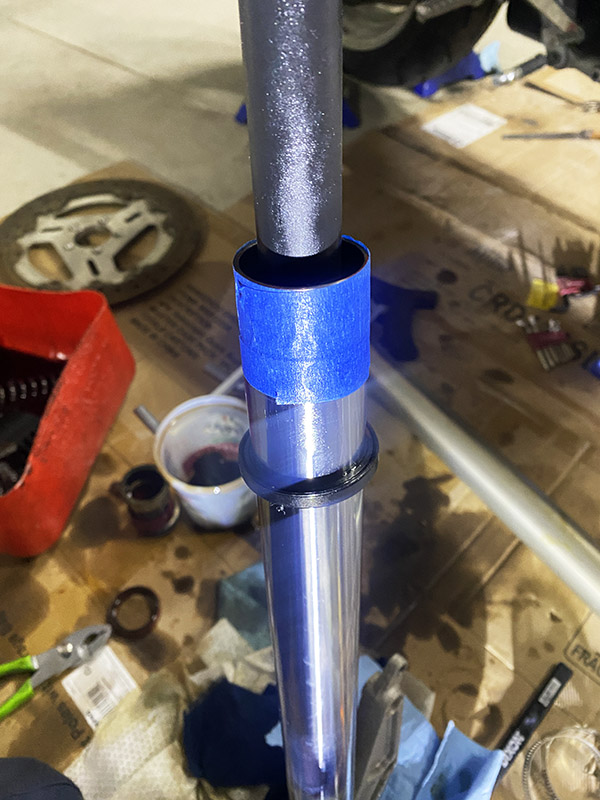
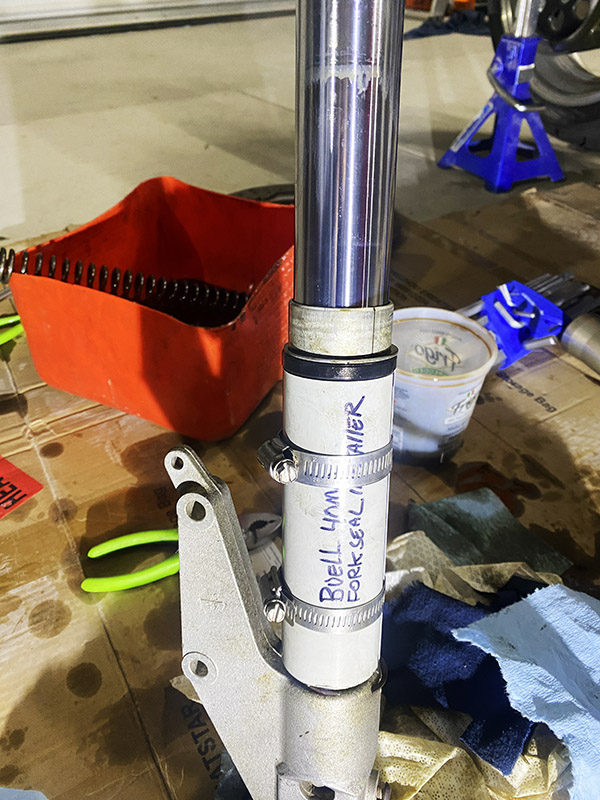
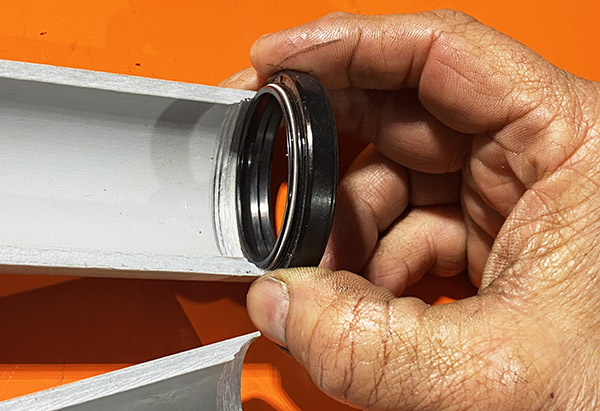
Always tape over ridges so the seal doesn’t get cut or damaged when sliding it into the tube.The seal installer in action. Sliding the fork tube presses in the fork bushing, a spacer and the seal in one motion.After pressing the two halves are removed. Next is the seal retaining clip (which is all that holds the forks together).
The seals were reasonably priced at $14 per set, but the shipping was expensive. I bought three sets since the shipping was the same. Now I have enough Buell S2 fork seals for the rest of my life. On a side note: a week after the seals were delivered FedEx sent me a $20 invoice for “fees.” I haven’t paid the fee yet; I’m not sure, it may be a scam. The fees may be re-named tariffs.
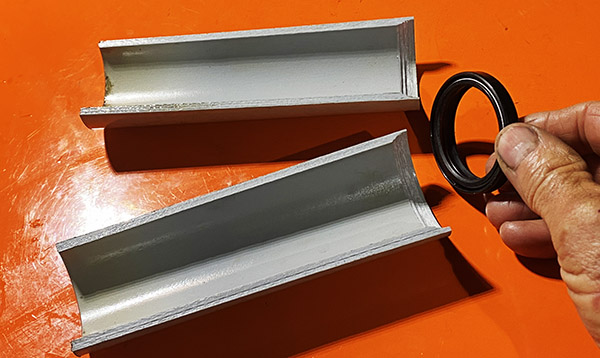
Without this relief cut the seal installer would smash the seal lip.Buell seal installer. PVC tube machined to fit seal lip then cut in half.
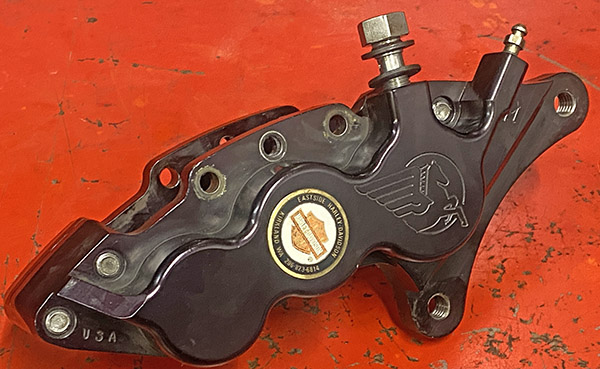
The Buell has a large front disc. To remove the wheel, you have to remove the brake caliper. To remove the brake caliper, you have to remove the brake pads and then retract all six of the caliper pistons back inside their respective bores.
The old Performance Machine brake caliper pistons were pretty crusty, and I didn’t want to push all that mess across the bore seals into the caliper. Removing the brake disc from the wheel allowed enough wiggle room to get things apart.
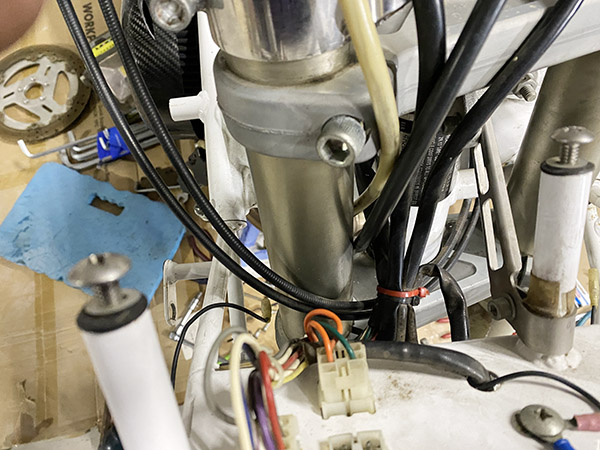
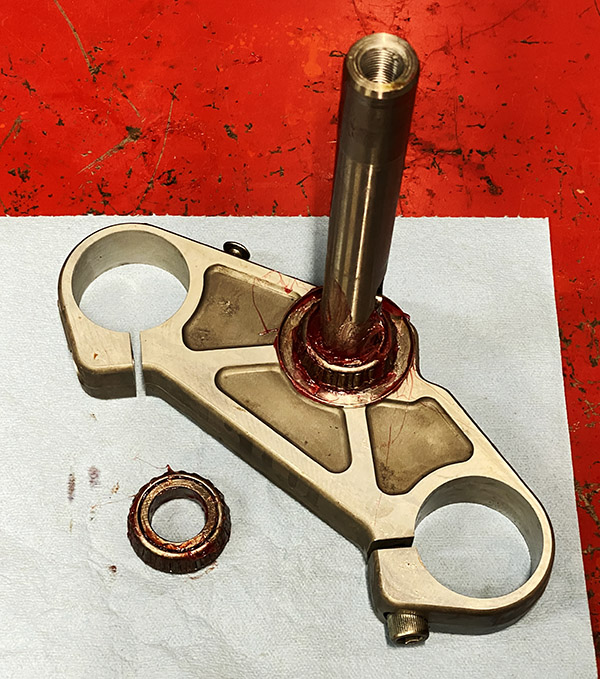
The WP forks were super tight in the triple clamps. I used a wedge to expand the fork tube bores and still it was a struggle to slide the forks out. Once out, disassembly was fairly straightforward (although oily) experience.
These triple clamps really grip the fork tubes. You almost don’t need pinch bolts.
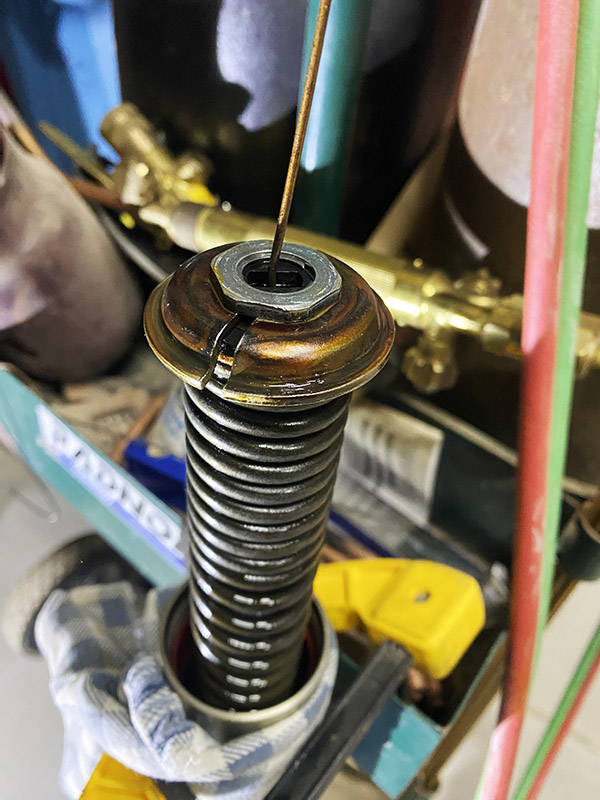
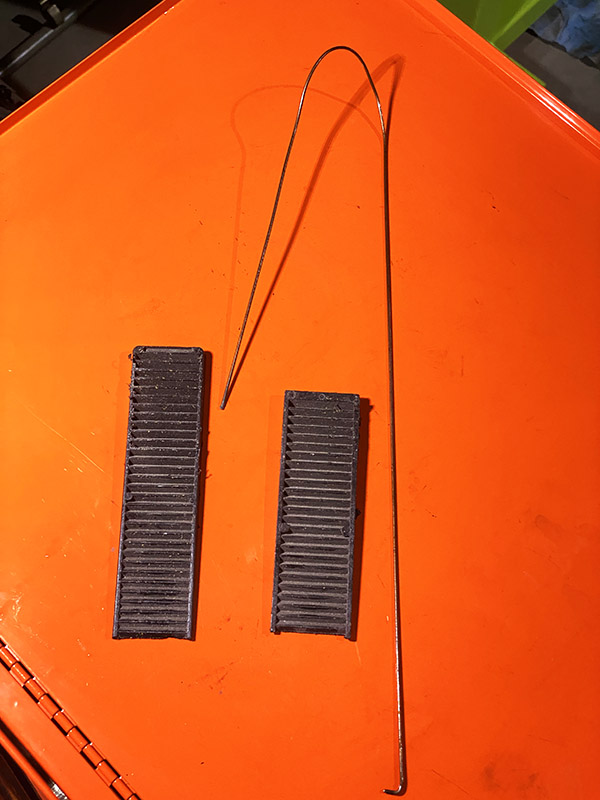
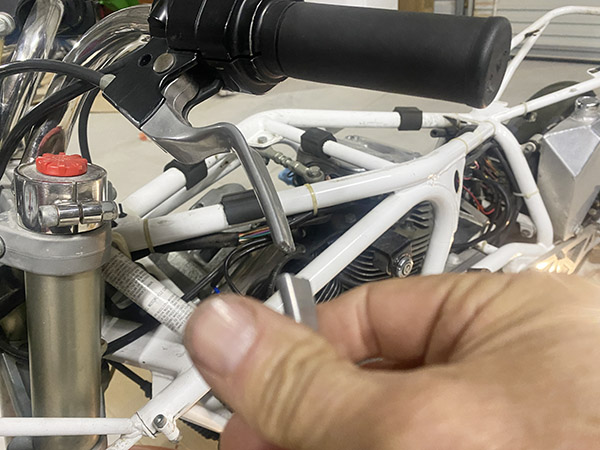
You’ll need to make a seal installer to press the new seals into the forks. I made mine from PVC tubing in the hope of avoiding scratching the sliders. The new seals fit well, and the hardest part was compressing the fork spring while holding the damper rod up with a bent wire and using a third hand fitting the damper rod spring keepers. My Buell shop manual describes this process as a two-man job. And it really is.
It took a couple days to figure out how to one-man a two-man job. I ended up employing an oxy-acetylene welding cart as a prop to hold the fork. The T-handle on the cart was in a convenient location and height to loop the damper-rod holding wire over and I still had two hands free to compress the spring and slip in the keepers.
After the seals are in place the fork spring retainer goes on. Note the wire holding the damper rod and the welding cart holding the fork. This setup leaves both hands free to compress the fork spring and fit the retainers.More Buell specialty tools. Wire to hold damper rod, wedges to spread triple clamps.
The Buell manual called for 7-1/2 weight fork oil. I should have ordered fork oil online, but I didn’t, so I called around and the local Honda shop had some. It’s a 20-mile drive to the Honda shop. The Honda fork oil bottles are confusingly labeled. What looks like 7 weight ended up being 5 weight, but I wanted to get the front end put back together. So I poured a pint of 5 weight into each fork leg. Stay tuned for a follow up report if I can feel any difference between 5 and 7 weight fork oil.
While the forks were off, I re-greased the steering head bearings. They still had a little grease remaining but thinly applied. I walked out the old stuff and smooshed in fresh grease. That left just the front caliper to clean up.
Re -greased steering head bearings. I don’t like the design of the cup under the bottom bearing. It seems like it would hold water. I might bend a drain channel into the low side.
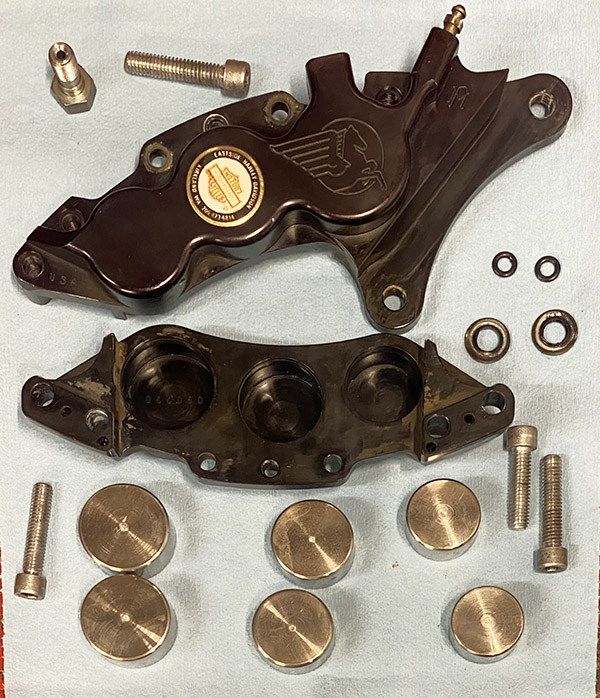
The caliper came apart easily, but the pistons did not. I used to have a big pair of reverse pliers (the jaws expand rather than close when the handles are squeezed). I would use these pliers to grab inside the hollow pistons and pull them out of the caliper. I would, that is, if I could find them. I spent a few hours looking for the pliers and finally gave up.
A snap ring Oliver was pressed into service and I managed to get all six pistons out. Performance Machine uses chromed steel pistons and the bit of piston that was exposed to the elements had corroded. Finding new pistons would be an impossible task and a new caliper would cost $600, so I polished the corroded pistons on the buffing wheel.
Except for the chromed pistons, the PM caliper is a nice looking unit. Note the piston diameter change to apply evenly distributed wear.Performance Machine caliper back together and waiting on brake pads
I’ve had good luck piston polishing. Yes, they re-corrode, but the section of piston covered with brake fluid doesn’t corrode. I look at it as an ongoing maintenance item rather than a bad part. You’ll have to wait for new brake pads to arrive to see if the caliper leaks in Buell Fever Part 7.
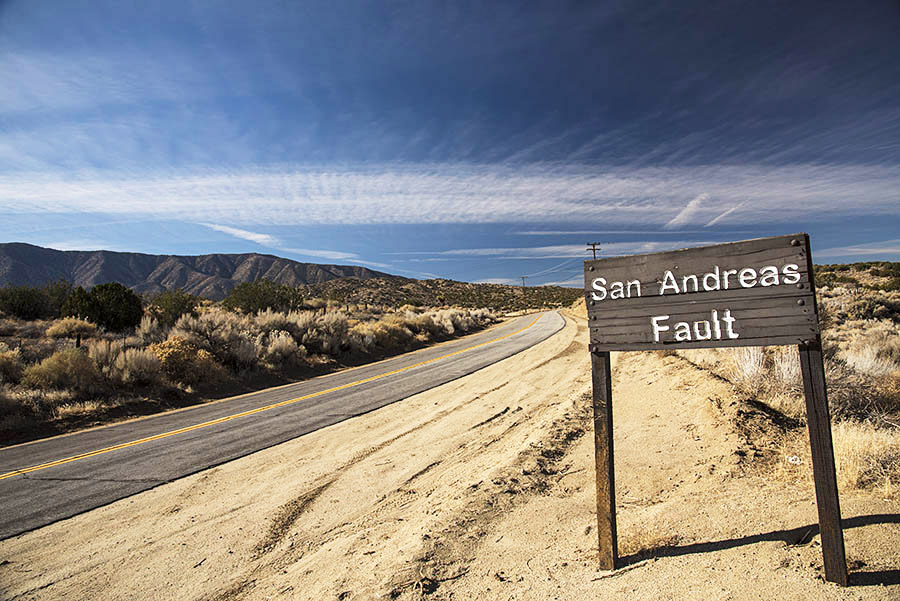
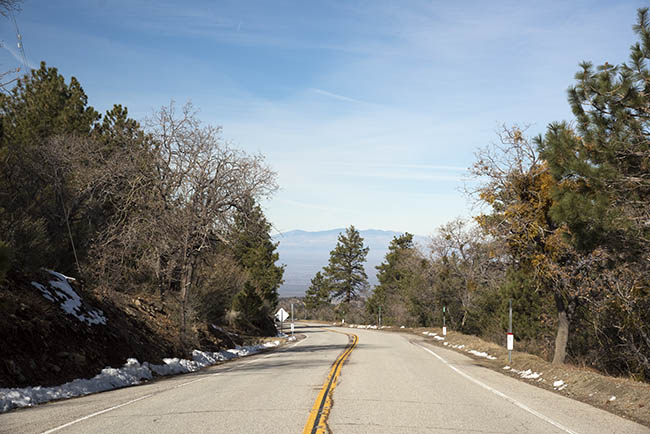
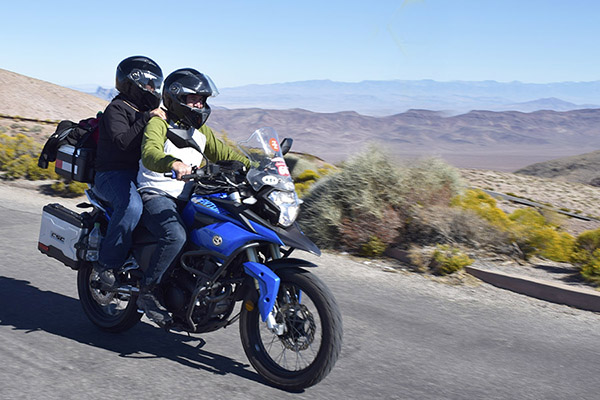
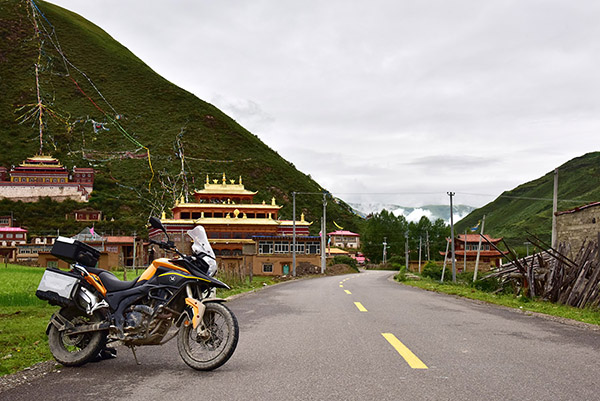
The photo above is another one of my all-time favorites from one of my all-time favorite local motorcycle rides here in southern California. It’s a circumnavigation of the San Gabriel Mountains, and it takes you right over the San Andreas Fault.
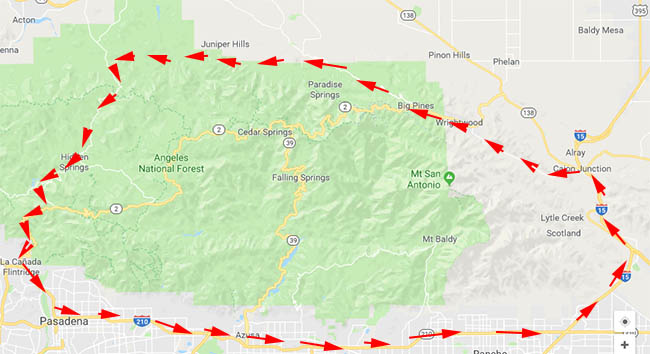
The route. This is a beautiful ride. It takes 4 or 5 hours to complete.
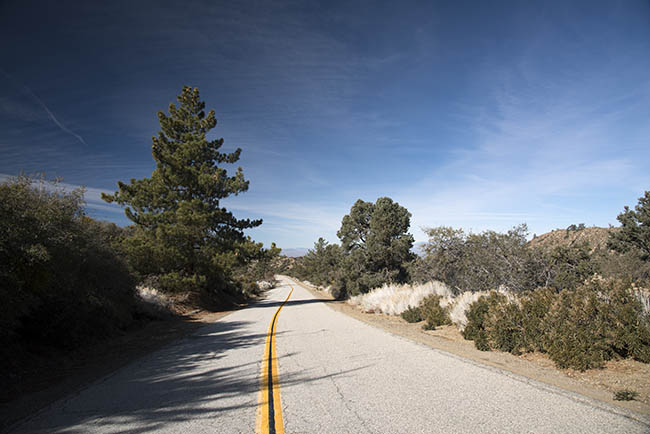
The ride is beautiful, especially on the northern side of the mountains along the southern edge of what we call the High Desert.
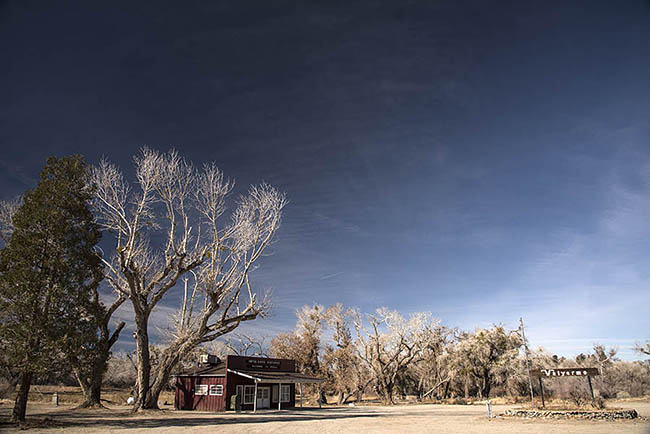
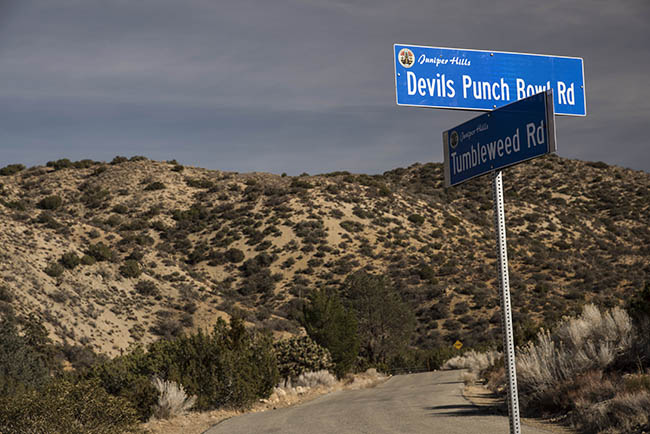
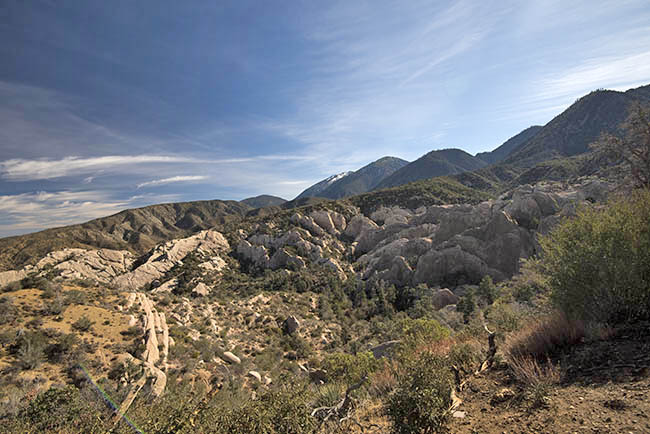
Valyermo, a nice spot to stop for a photo.Scenes on the north side of the San Gabriels. Note the snow still on the sides of the road.Descending toward the High Desert.The intersection of Devil’s Punch Bowl Road and Tumbleweed. Turn left and it will take you to the Devil’s Punch Bowl on the San Gabriel’s northern slope.The Devil’s Punch Bowl.
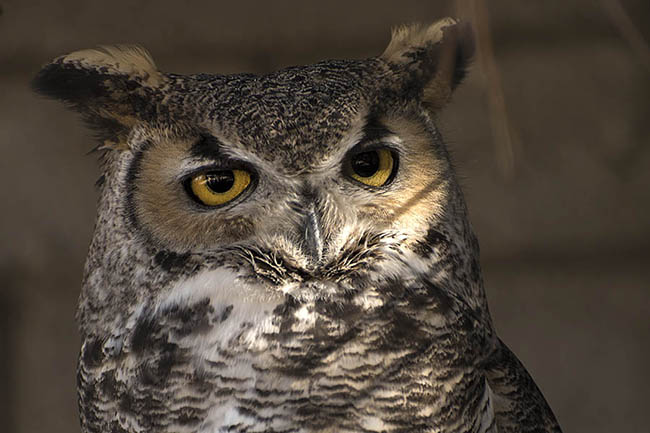
If you’re taking this ride, there’s a cool ranger station at the Devil’s Punch Bowl County Park. The park has several exhibits, including Squinty, an owl with an injured eye park personnel rescued.
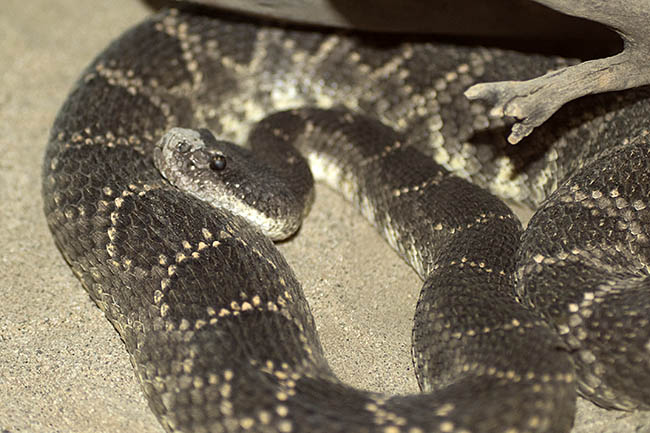
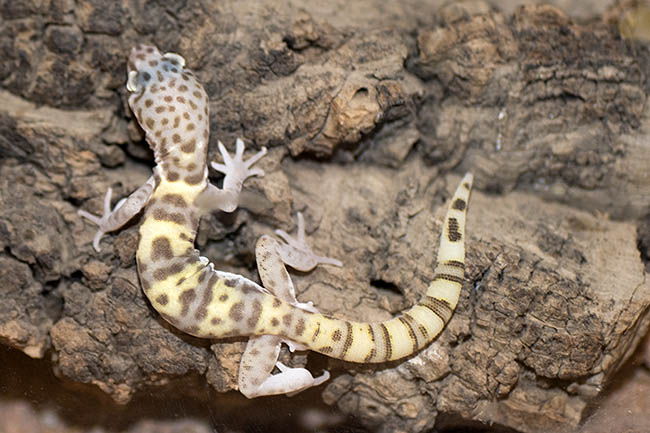
Squinty says hello.Yes, indeed. A Western Diamondback in a cage. There are many, many more in the hills and in the desert.A Western Banded Gecko at the Devil’s Punch Bowl County Park. These are very beautiful.
We have a bunch of other phavorite photos here on the ExNotes site. The Phavorite Photo series came about as a result of a suggestion from good buddy Peter. Peter, thanks much!
Earlier Phavorite Photos? You bet! Click on each to get their story.
Part of the reason I bought a Buell was because my life has become too predictable. Except for the Husqvarna, you stand a good chance of getting where you’re going on my old bikes. And the Buell is not disappointing. Lots of fun stuff is happening as I work on getting the bike back on the road.
It’s such a joy to tinker on a single-carb motorcycle. There are no racks and synchronizing to deal with, you only have to do a thing once instead of four times, but watch out for those aftermarket parts. The kit I bought was okay, but the emulsion tube was not drilled properly. And then I managed to pinch the bowl o-ring. It was cheaper to buy another kit than a single bowl gasket, so I did that. Unfortunately, that kit’s bowl o-ring was too small. No matter how I stretched it, it kept popping out of the bowl groove. I ended up reinstalling the pinched o-ring. It was a futile effort to keep my mechanical standards up.
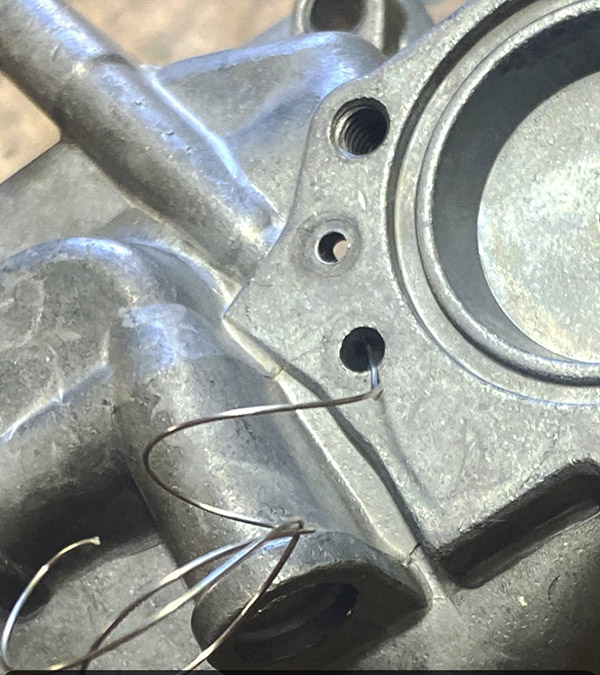
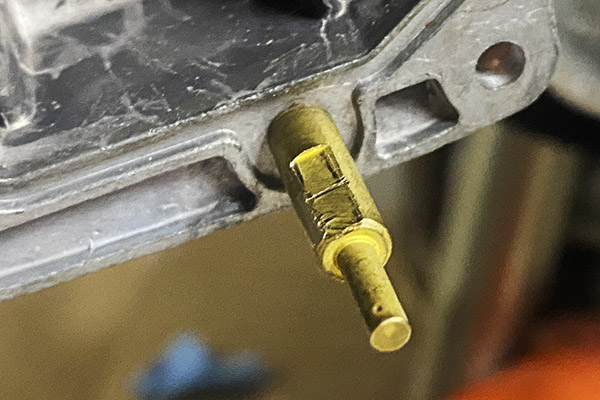
It wouldn’t be a Harley without baling wire. The choke tube is plastic and was fragile after all these years. The choke knob was falling out of its slot. I broke the tube finger tightening the thing. Wire to the rescue!The accelerator pump plumbing was clogged. I fished a small bit of wire through the passage to clear it.The carb kit emulsion tube (right side) was not drilled correctly. I try to use all the old stuff if possible. So this was no great loss.This brass nozzle sprays fuel from the accelerator pump. Supposedly the tube is removable for cleaning but it seems well stuck and I started to chew it up a bit so I stopped.
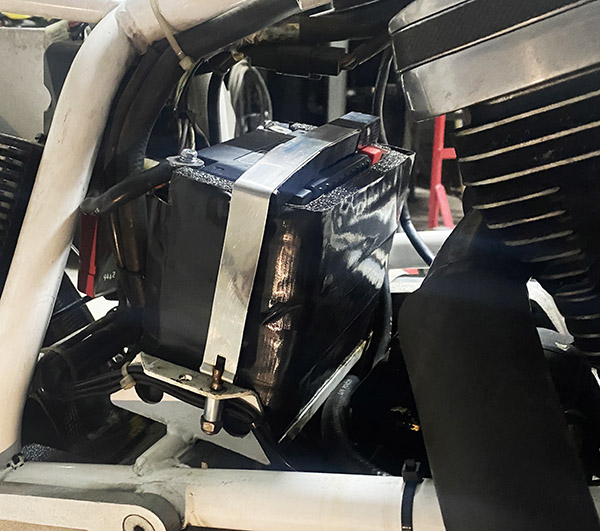
I’m a big fan of lithium batteries, so I bought a Vevor brand close in size to the original lead-acid battery. The Vevor was a bit small and the factory battery location is not far from the rear cylinder exhaust header. To help with the heat I wrapped the sides and front with foam, then wrapped gorilla tape around the mess to hold the foam insulation.
It looks a little rough but an insulated battery is a happy battery.
A neat feature on the Vevor is the dual posts (four total). There are positive and negative posts on both sides of the battery; if your cables are in the wrong place, just flip the battery around. I added a spacer on the hook side of the battery strap to keep it tight and a small tube spacer in the bolt side (less threading to do on the hold down bolt), which makes installation 12 seconds faster. When you ride a Buell every second counts. The battery seems secure; hopefully, it will stay put. With the Vevor battery (supposedly 400 cranking amps) in place and the carb back on, I needed to hear the Buell run. The oil tank level was between the high and low marks. The oil looked clean, like it had just been changed.
I removed the spark plugs, put the coke machine key in the ignition, and spun the engine over to clear any excess oil from my previous cylinder lubing. With the sparkplugs back in the cylinder heads I pulled the choke, hit the right turn indicator button, and nothing happened.
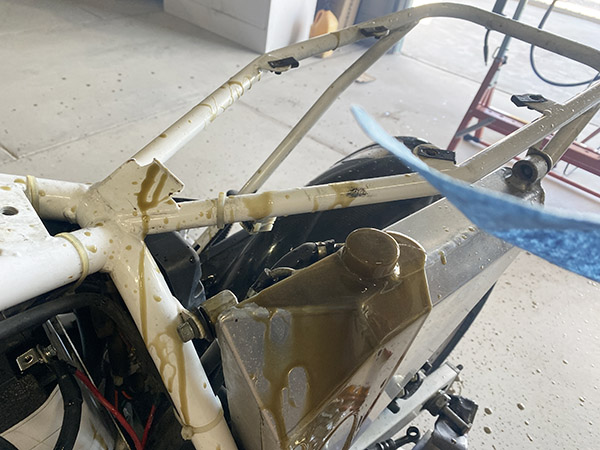
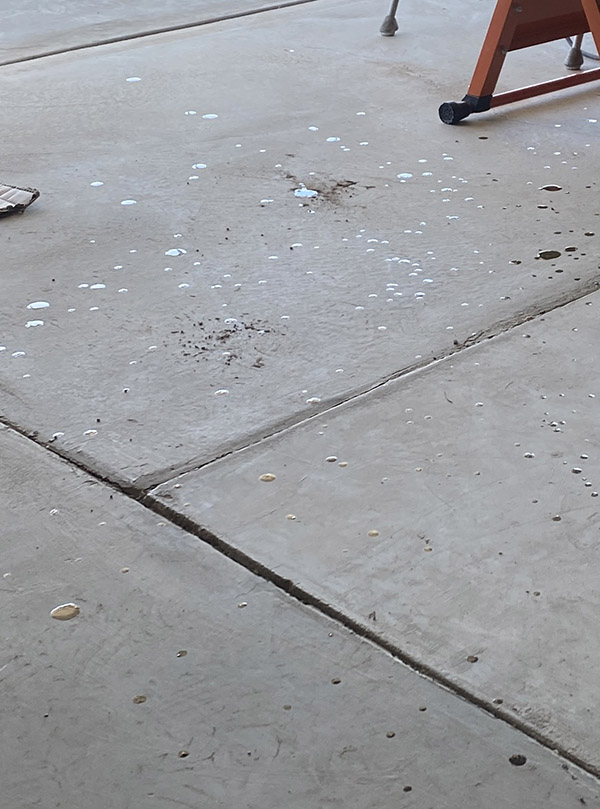
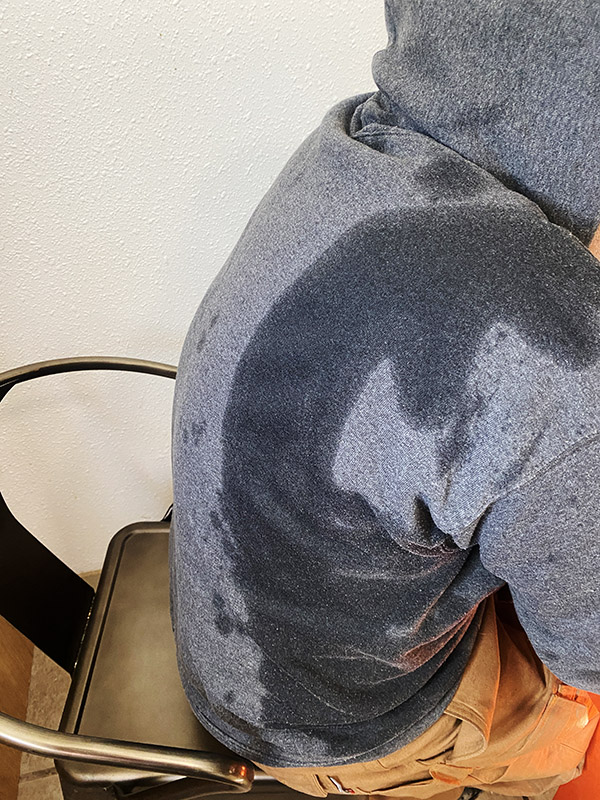
Harley handlebar switches are so weird. Pushing the starter button on the inside of the blinker switch worked better, and the Buell fired up in a couple revolutions. The engine popped and farted a few times. Lots of smoke came out the tail pipe but all things considered, it was running good. Then came a loud pop followed by a geyser of oil spewing from the oil tank. The oil broadcast in a 15-foot fan covering the general area with great dollops of thick oil. The spots were viscous, so they stood proud of my clean concrete floor. Except for the spot I was standing. I received a blast of spraying oil that covered my sweater and left a clean, Joe-shaped silhouette on the concrete floor.
My nice, clean floor got its first baptism-by-Harley.My nice, clean floor got its first baptism-by-Harley.My sweater took the brunt of the oil explosion.
What a mess. How long the Buell had been sitting was unknown, but the oil tank must have slowly drained into the crankcase. Some helpful person topped off the tank with fresh oil and I squirted the stuff all over the place. I drained the tank. There must have been a gallon in there if you include the oil on the ground. Once the oil level was correct, I fired the Buell and it settled down to the hit and miss syncopation Harley likes to call idle.
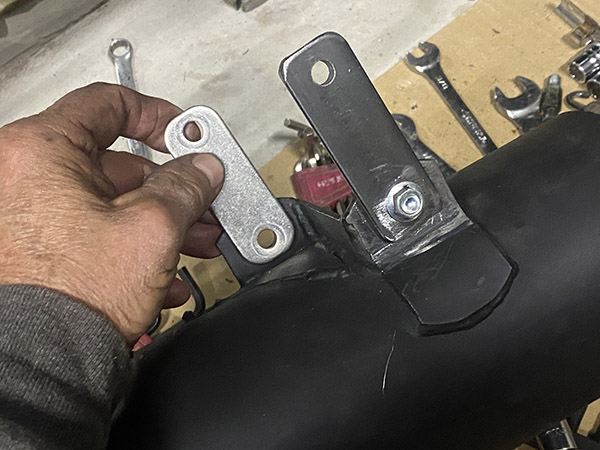
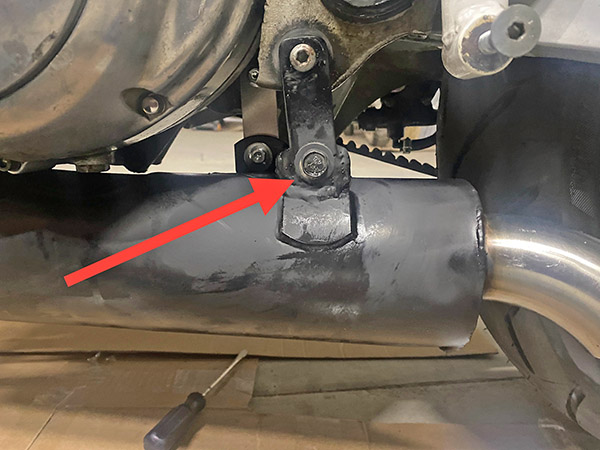
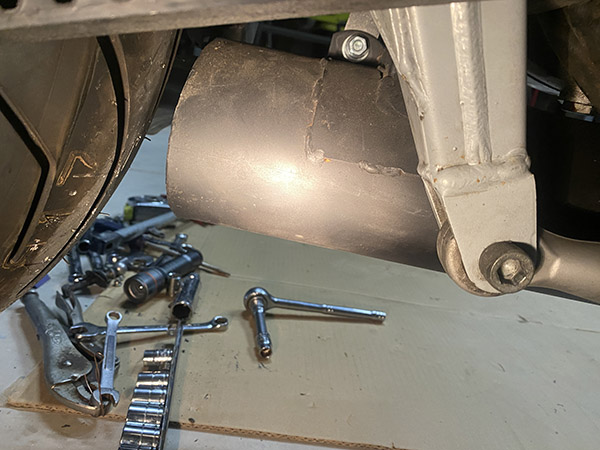
Back to other issues. I didn’t like the way the muffler was held into the bike. The setup relied on the front clamp combined with two rear brackets that bolted up in a parallelogram-like deal. The only thing that held the muffler in place was fastener tension. To achieve a more secure mounting I made a thicker bracket out of mild steel and welded it to the Muffler. Now in order for the muffler to slide back my crappy weld would have to break. Which it just might.
Since I don’t have the equipment to weld stainless steel I made a mild steel bracket for the muffler.The bracket welded to the muffler. Now the muffler can’t work loose and rub the tire.
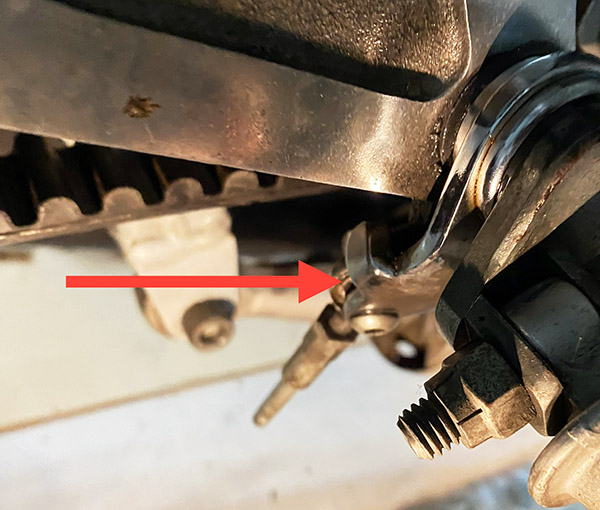
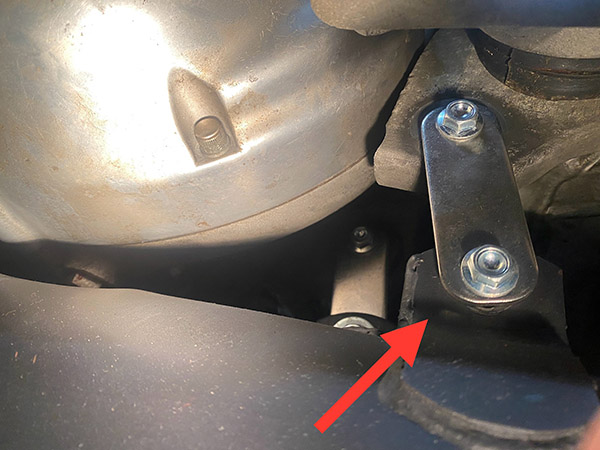
The rear brake on the Buell was stuck. There were several issues contributing to this problem. The first was the brake pedal. It was bent where the master cylinder pushrod attached in a way that made the rod move dramatically sideways when the brake was applied. I used Harley tool 0-U812 (a big crescent wrench) to adjust the brake pedal. Now the push rod moved in a straight line concentric with the master cylinder.
This replacement rear brake assembly was close but off in meaningful ways. The seller refunded my money and didn’t want me to ship it back.This part of the brake left was bent causing the master cylinder pushrod to go off course.It’s still a little bent but the pushrod articulates correctly now.
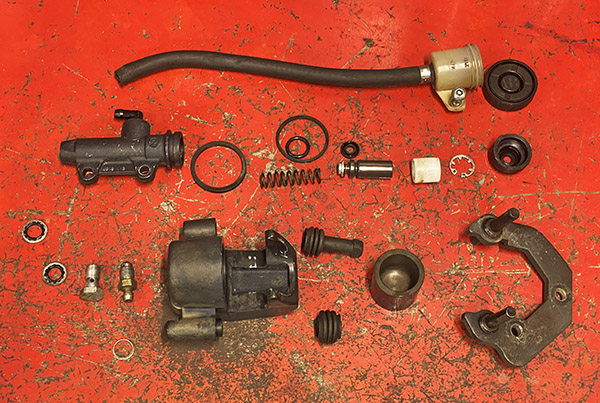
The clone master/slave kit I bought on Amazon that was supposed to fit was just off enough to be completely useless, so I decided to rebuild the original stuff.
All the original brake parts cleaned up well. So far no leaks.
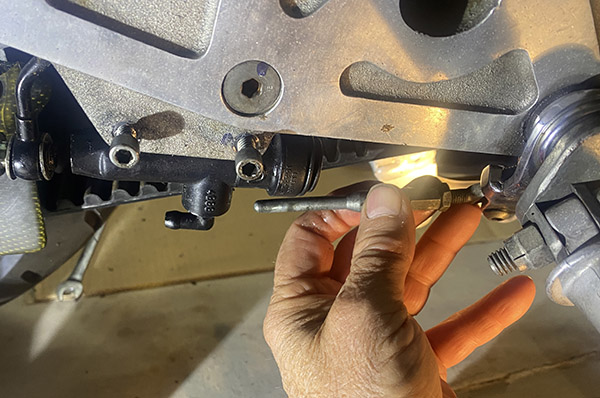
The piston inside the master cylinder was stuck but a few raps with a hammer had the piston moving and I dismantled the master/slave. I was having trouble finding seals for the Brembo components, so I cleaned everything and reassembled the brakes.
Bleeding the brakes wasn’t going well. I could get pressure at the banjo bolt on the master cylinder but nothing at the slave. Shooting brake cleaner into the brake line did nothing. The hose was clogged. Out came the battery to access a hose clamp bolt, and I removed the brake line. Removing the brake light switch gave me a mid-point spot to shoot cleaner. The metal brake line was clear, the clog was in the rubber line. I soaked the line in an ultrasonic parts cleaner then worked a 0.30 flux core welding wire through the rubber line. It took a bit of finagling but the wire made it through. Then it was just a matter of soaking with brake cleaner and shuttling the 0.30 wire back and forth until the line was clear. Blowing the lines with compressed air got rid of any stragglers inside the hose. A quick reassembly and I had pressure to the slave. Bleeding the system was a straightforward proposition. The rear brake works.
Next on the list is fixing the kickstand and broken clutch lever.
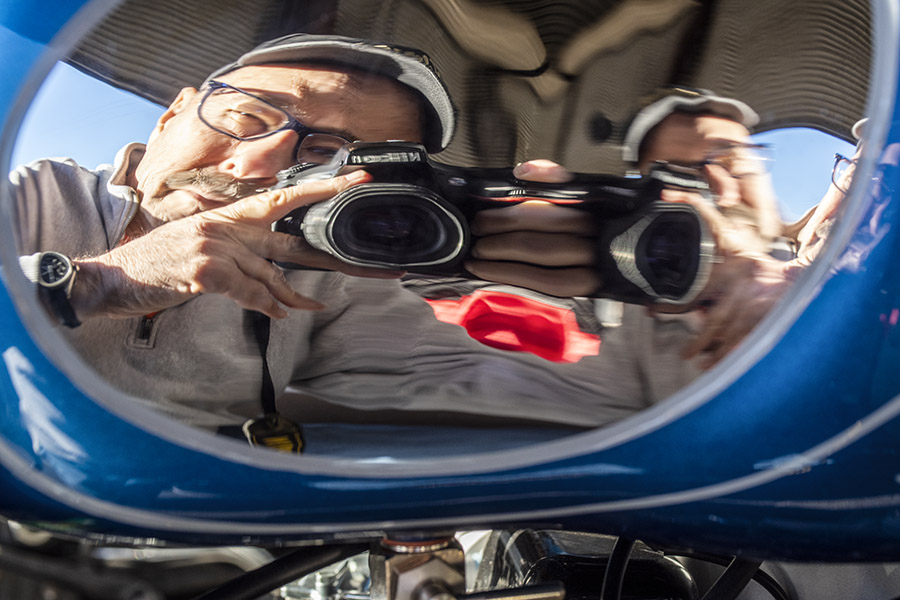
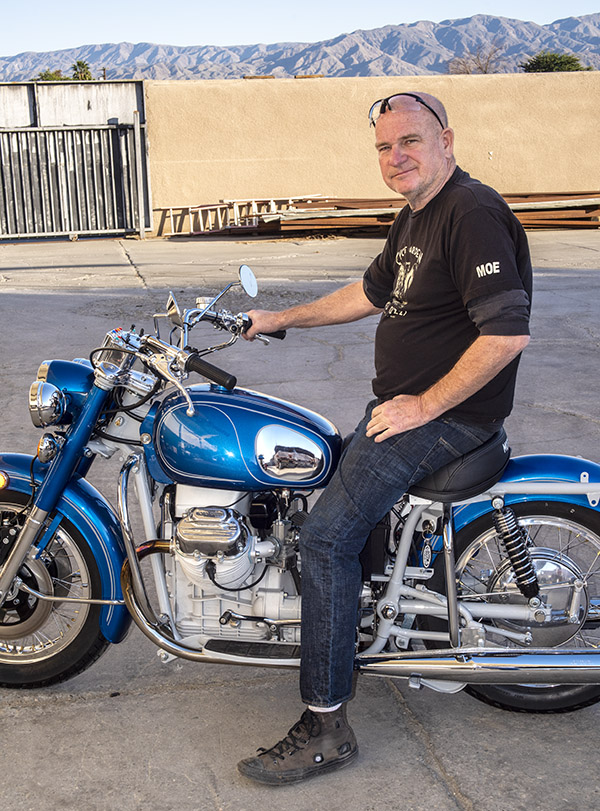
The saying is “if I was any happier there would be two of me.” The photo above kind of captures the feeling. It’s how I feel every time I visit with the Cycle Garden team in Indio, California.
When I first heard that one of Moe Moore’s custom Moto Guzzi motorcycles went for $40,000 to $50,000, I was shocked. Then I realized a new Harley full dresser inhabited the same realm. Per Google’s AI:
A new top-of-the-line Harley-Davidson (CVO™ model) generally costs between $45,000 and over $50,000 for the 2025/2026 model years, with models like the CVO™ Street Glide® and CVO™ Road Glide® starting around $44,999 to $51,999.
Then the question became: Which one would I prefer owning? That’s a no-brainer. It’s the Guzzi. The one featured in this blog is a case in point. It’s not a stock motorcycle by any stretch of the imagination. But wow, would I ever love to own it! More than a Buell, even.
Before I get into that, though, I need to tell you a little bit about Cycle Garden and what they do, and what I’ve been doing with them.
Moe Moore, head honcho at Cycle Garden. He’s a nice guy. All the folks at Cycle Garden are nice people.
I am in the process of writing a series of How To articles for Motorcycle Classics magazine (and I’m loving every minute of it). I did the first on how to lace a wheel (with help from good friend Kenny Buchanan of Buchanan Spoke and Rim). The next was on drum brake servicing, and it will appear in the March/April issue of Motorcycle Classics (due out any day now). And I have three more that are written and awaiting publication (things have a long lead time in the print publication world). I’m really enjoying the plant visits, the interactions, the photographing, the writing, and the ego-stroking that accompanies seeing each of these pieces in print. I’m especially loving being around the vintage motorcycles. You’ve seen the blogs on Emma Booton’s Triumph. Don’t tell this to the magazine, but seeing the vintage Guzzis at Cycle Garden is so cool I’d almost write those How To pieces for free. I’m especially enjoying hanging around and learning about Guzzi maintenance from Moe, Steve, and Lindsay.
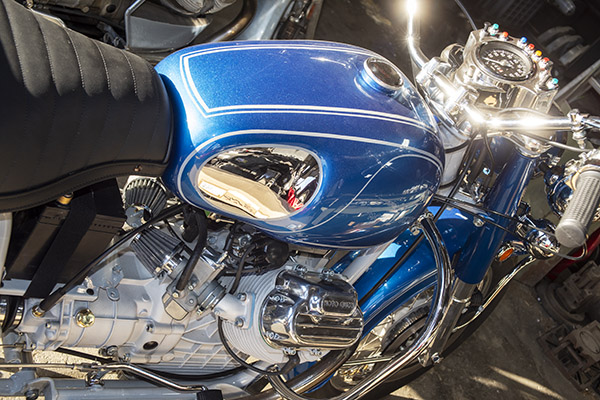
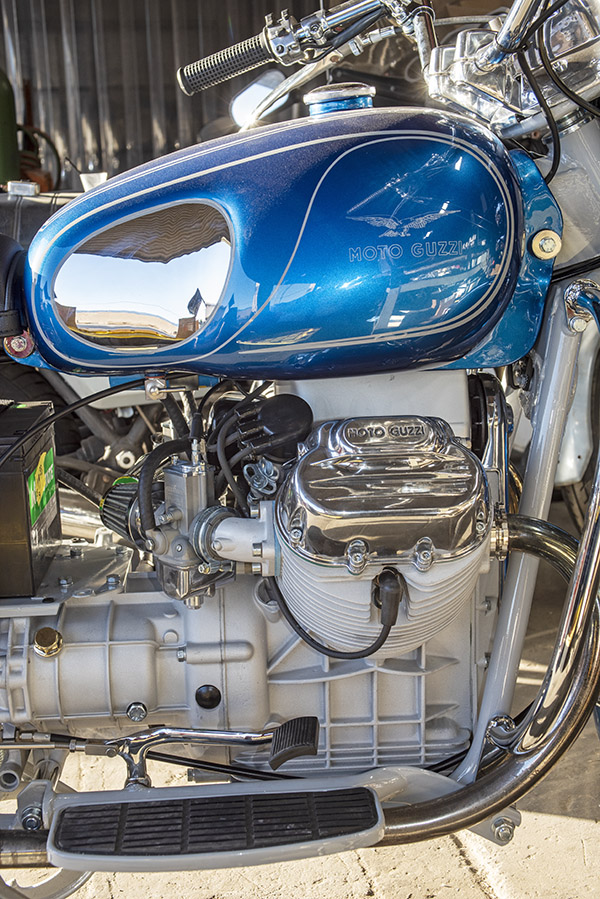
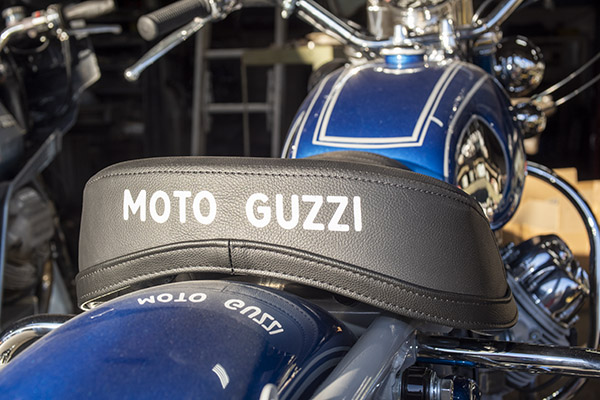
This resto-mod 1974 Guzzi police motorcycle is beyond stunning. I’ll let Moe tell the story on it. There’s a YouTube at the end of this blog in which he does that, but first, a few photos…
Yessir buddy…that is a beautiful motorcycle. The bike is 52 years old this year.The colors are magnificent. Lindsey did the painting. Steve did the engine work.Awesome. Just awesome.
Here’s the promised YouTube. There’s more Moe Moore coming up on the ExNotes blog and in Motorcycle Classics magazine, so as the saying goes…stay tuned!
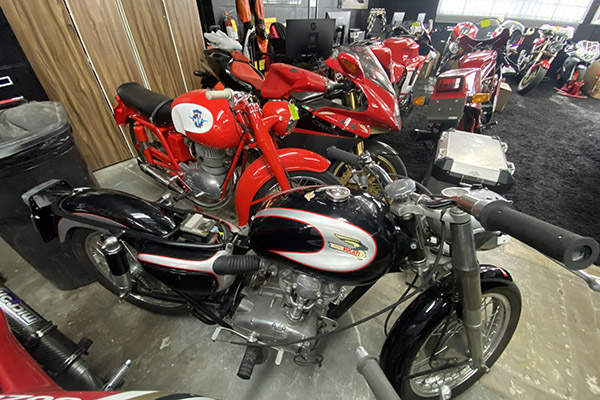
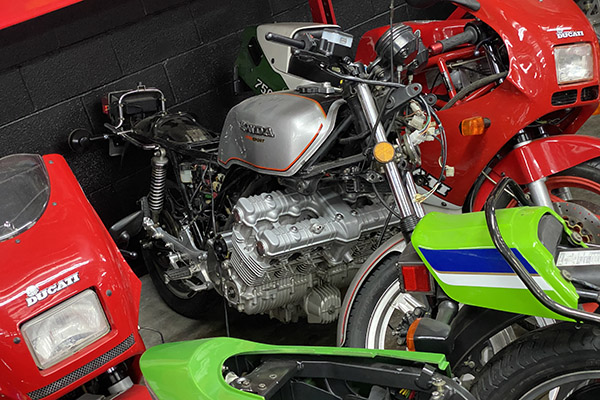
I have an interest in old or unusual motorcycles, to put it mildly. So it was strange that I never heard of Iconic Motorbikes out of Panorama City, California. My recent Buell Fever led me from online search to online search to Iconic’s website.
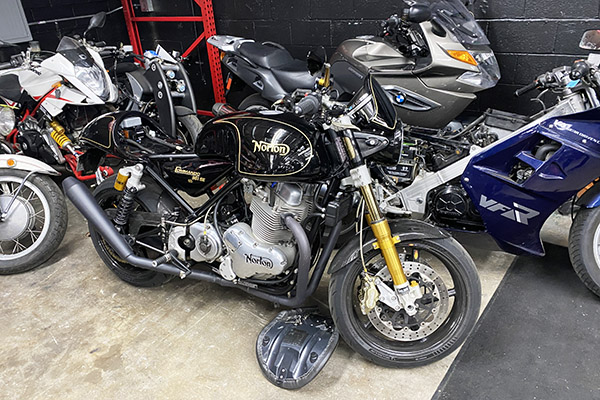
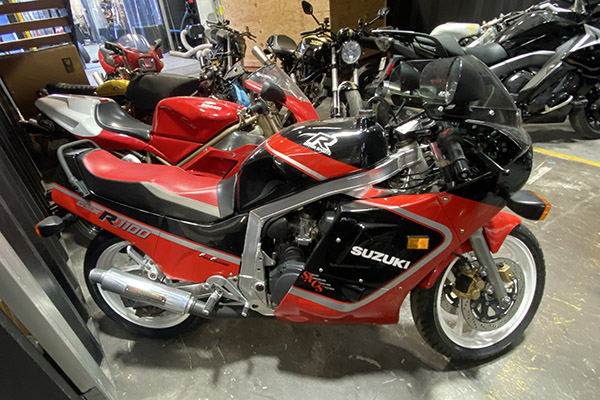
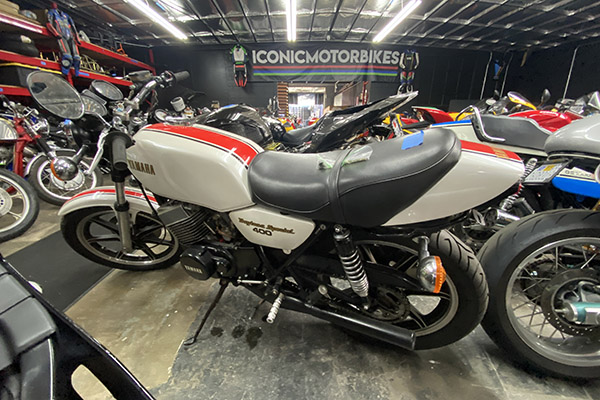
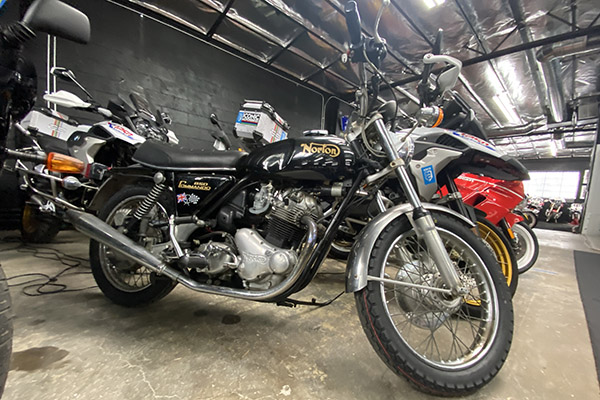
Rare, updated Norton still using the old bottom end. Norton has gone through some owners.An un-wrecked, oil-air cooled slabby GSXR.Yamaha Daytona 400. The last of the air-cooled RDs.Super condition Norton. The real deal before the owner shuffle began.MV grocery getters!A cannibalized CBX. Probably with a fortune as is.
It’s a good thing I didn’t find their site earlier or I’d be homeless, living in the streets surrounded by my collection of fantastic motorcycles. Iconic has a lot of cool bikes.
And for Buell’s, they got ’em. Plenty to choose from, and all at reasonable prices. The process works like this: you register to bid on the Iconic website and in no time you’re blowing money on cool motorcycles.
Even MV’s crates are beautiful. I wonder what swag is inside?
The site is set up for auto-bid: you put in your highest offer and Iconic bids for you as your chosen motorcycle’s price rises. This releases you from having to watch the bidding and gives you more time to pour concrete.
In my case all the Buells I bid on went over my budget. Don’t despair if you don’t get your dream bike: Iconic’s website has a section just for you called Buy It Now.
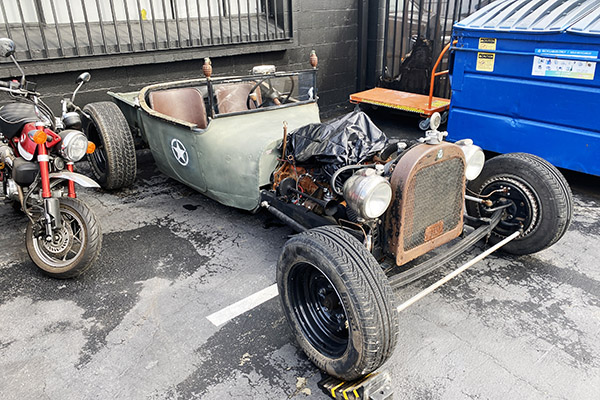
The odd rat-rod at Iconic’s Panorama City location.
Iconic’s Buy It Now section is full of bikes that didn’t make their reserve price on the auction side of the site. That’s where I found my VR1000-esque Buell. You can still make offers in Buy It Now, Iconic will contact the seller with your offer. Or, like me, you pay the asking price and the bike is yours. Most of the bikes in Buy It Now are not outrageously over-valued. There are a few kite-flyers, but you never know. Not all the motorcycles for sale are in Panorama City; some bikes are at other locations around the US.
Once the deal is made you pay Iconic for the bike and go pick it up (at Iconic or the owner’s location), and you’re done. It’s a pretty easy process. Iconic will also ship the motorcycle to wherever you want for an additional cost.
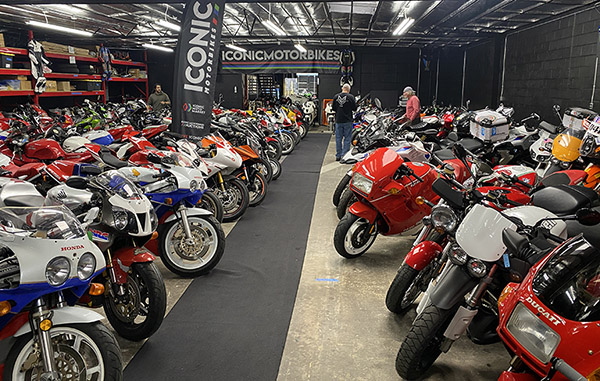
Wall to wall and two stories high. If you can’t find your dream bike in this lot you’re having a nightmare.
I liked Iconic for the huge selection and their extremely detailed reports on the condition of the motorcycles on auction. It’s like having a trusted friend go check on a bike for you like my buddy Deet did when I bought the RD350.
I wasn’t buying a piglet in a poke when I bought the Buell and I am using their list of recommended repairs as a check list while working on getting the ’95 Buell Thunderbolt back on the road.
Iconic’s huge location in a warehouse district of Panorama City, California, is a candyland of motorcycles. There are at least 300 motorcycles stuffed cheek-by-jowl and two floors up, all of them cool. Leave your wallet at home if you visit Iconic or you’ll leave with a bike you didn’t know you wanted.
I give the buying process at Iconic high marks. It’s almost too easy to blow money on motorcycles there, so use their site wisely, my brothers.
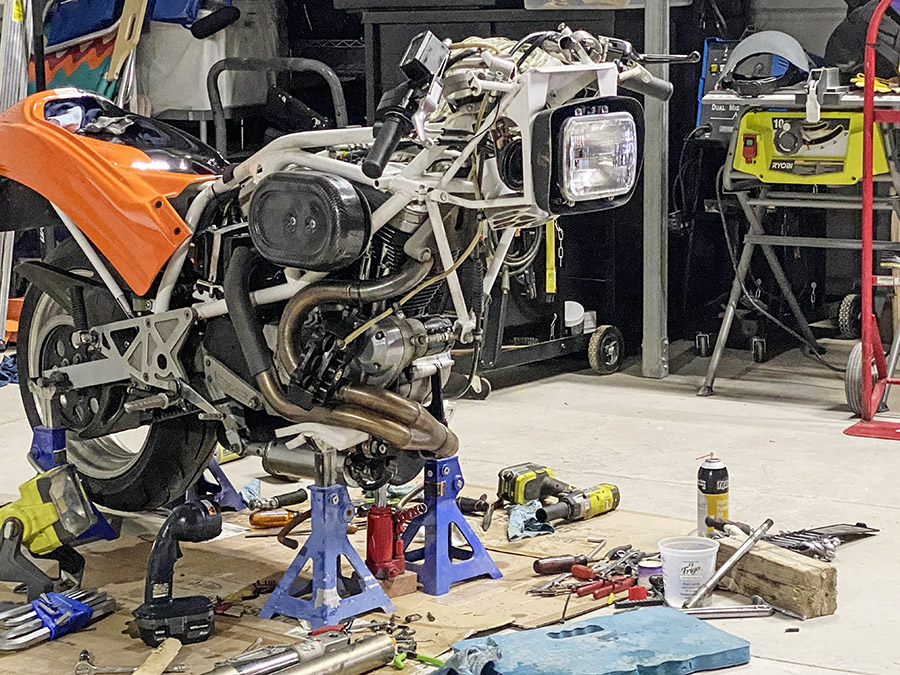
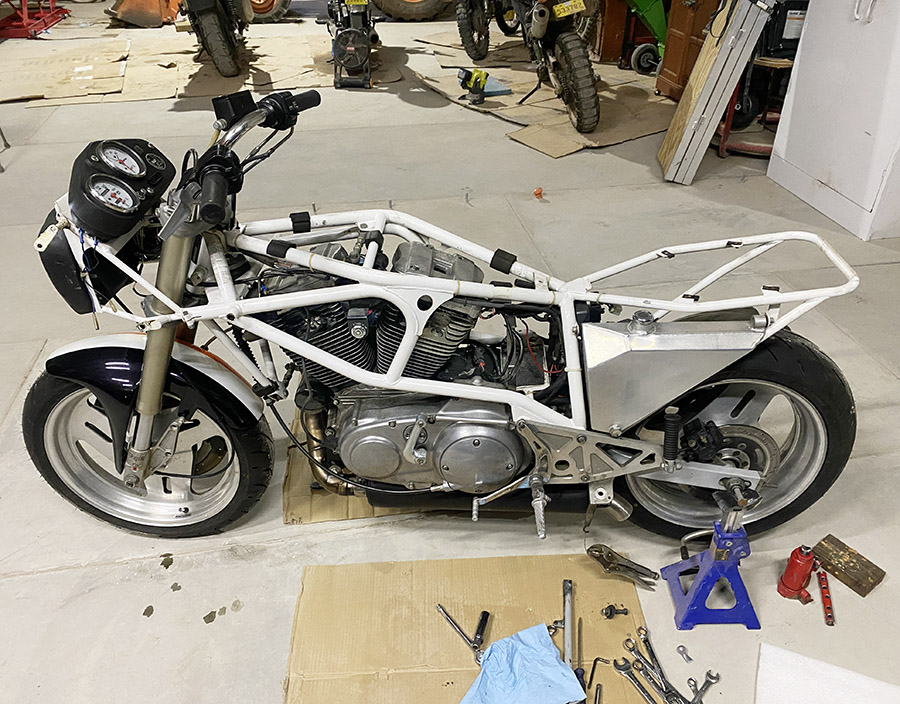
I’ve been ordering parts for the Buell as I dismantle the beast for service. I really like the way Erik Buell wrapped his tube frame around the 1200cc V-twin Harley lump. The bike is all engine and actually looks even better with the bodywork removed.
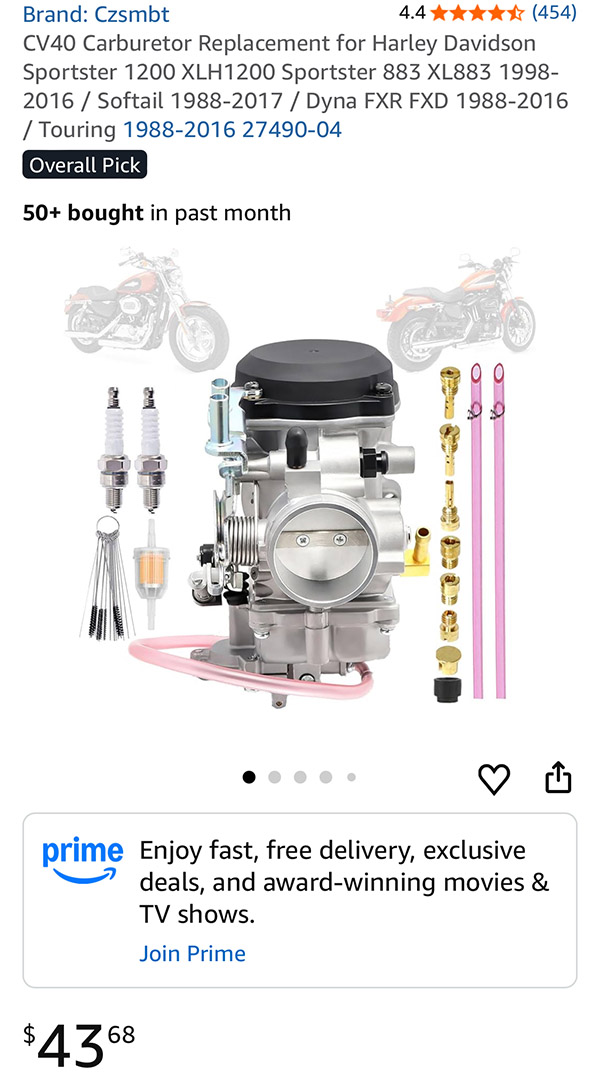
A new carb for $44! Tariffs? Never heard of her.
I’ve got the carb off and apart. It looks pretty clean inside, and the bike probably would have run fine, except for the rubber tip on the float needle. It has a pronounced ridge that may or may not have caused a flooding issue.
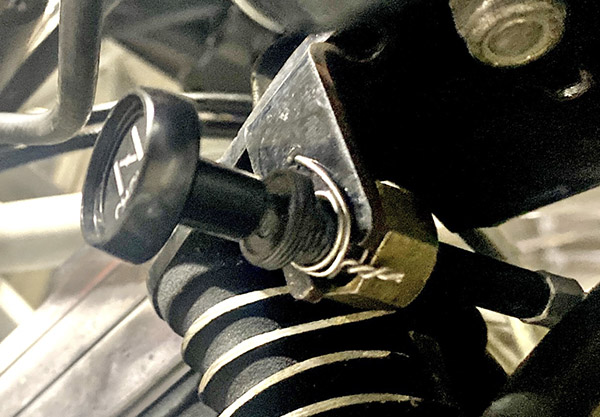
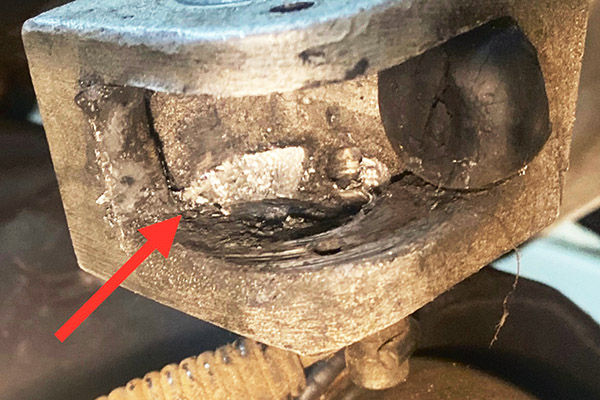
The kickstand culprit. This worn area was the locking boss. It’s wiped out so no locking. I may weld it up and relocate the pivot to allow for over-centering (eliminating the lock system).
The Buell has a strange kickstand (another bike with a goofy kick stand; see the Husqvarna kickstand story here on ExhaustNotes). The stand has an elongated mounting hole that allows the stand arm to pivot up and down in addition to the normal fore-aft motion. This extra motion was designed to allow the square pivot end of the stand to drop into a notch cast in the frame mounted, aluminum foot peg/kickstand boss. That’s a mouthful but when you see it it’s easy to grasp the concept. When new this setup made for a locking stand when deployed with the bike’s weight bearing on the stand.
The operative words here are “when new.” On my Buell the notch area inside the kickstand boss is worn out and the stand no longer locks. As built the stand doesn’t over-center and naturally stay in place like normal kickstands. You know where this is going. Fixing the kickstand was on my Buell to-do list. I should have made it job one.
Kickstands break levers. Ask me how I know.
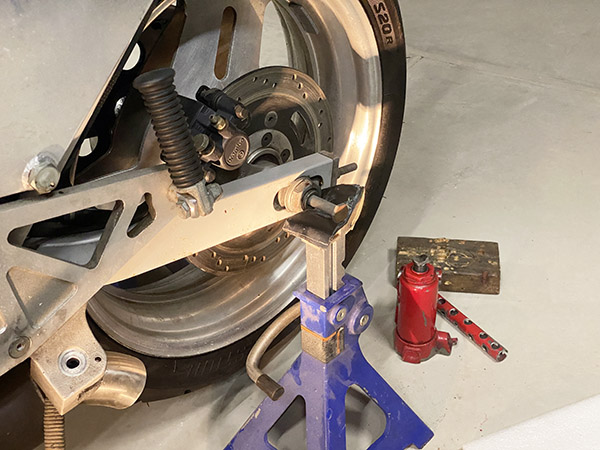
As I was removing the carb (standing on the right side of the bike) the Buell started rolling forward. As it fell left I held onto the frame as best I could but the bike hit the ground hard breaking the clutch lever. The right mirror, which is also a faring mount, took a hard hit and things look a bit off from the cockpit. I have the bike on jackstands now and it’s stabilized.
Jack stands after the horse has left the barn. At least I stopped dropping the bike.
Luckily, I had most of the bodywork removed and the only bits left, the front fender and fairing, are unscathed. $20 will get me two new levers (Harley parts are cheap!) but I think I’ll just weld the broken tip back on. You know, to keep it original.
Back to the carb. The Buell motor is a stock 1995 Sportster mill and there is a huge parts aftermarket serving the Sportster. The carb kit was $13! I can get a complete, clone carburetor with new spark plugs, fuel filter and jet cleaning tool for $44! I know, I know, it’s Chinese but who’s to say the original isn’t Chinese? The Amazon clone carb reviews are positive: just bolt it up and the bike runs great. I bought the kit but that new carb was tempting.
This 1995 Sportster is quite a bit different than my old 1968 Sportster. The bottom end looks similar but everything else is different. What I thought was a pressure feed for oiling the top end seems to be a vent as the hose ends under the battery with the hose end left open to the breeze.
There’s also a rubber grommet with an open hole in the filtered side of the air cleaner. I suspect a crankcase vent hose went there but I’m not sure. As is, the hole allows unfiltered air into the carburetor so that’s not good. I’ll plug the hole or figure out what goes in it.
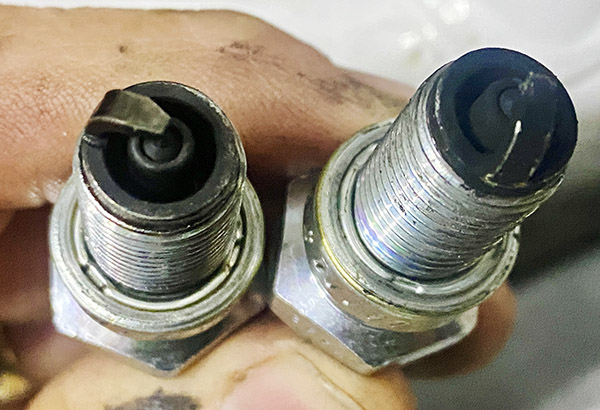
Plugs look a little sooty. I’ll clean them up and flog the bike to blow out the soot.
I don’t know how long the Buell sat so I pulled the iridium spark plugs (sooty) and squirted some motor oil in the cylinders so the rings don’t have to scrape on dry bores. When I get a battery, I’ll give the motor a spin with the plugs removed to blow out any excess lube.
Apparently, the White Power front forks on the 1995 S2 are different from the following years. I’m having trouble finding fork seals and have emailed White Power directly. No response yet. If I had a 1996 S3 fork seals are everywhere for the damn things.
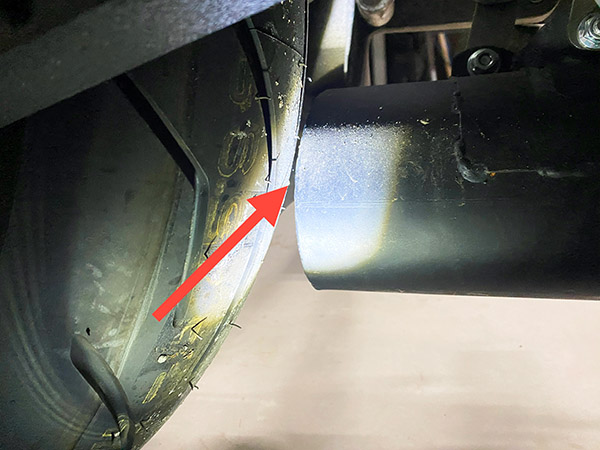
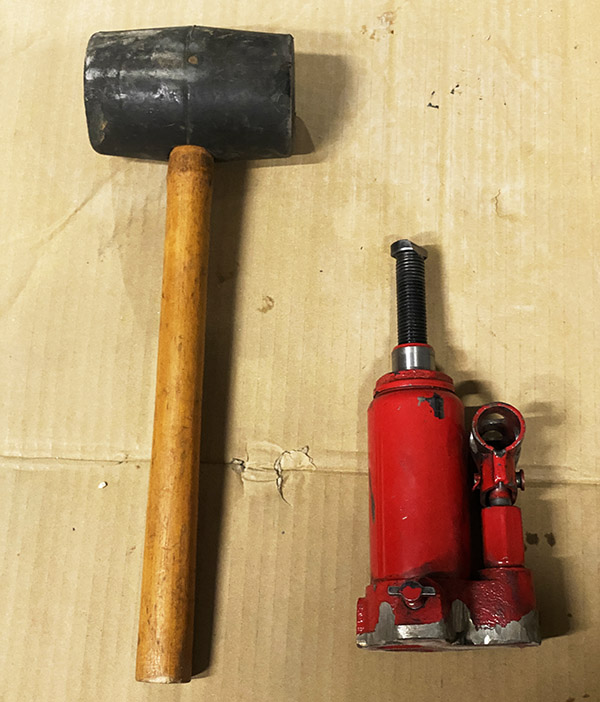
For me, the rear tire was a little too close to the Buell’s underslung muffler. Like a 1/8″ gap. It looks like the muffler slid back a bit from the header pipe. I loosened the pipe clamp and mounting bolts then beat the muffler forward with a rubber mallet.
Does this tire gap make me look crashed? Not much clearance, Clarence.Hammers and jacks gained quite a bit of clearance. I have no faith in this fix.Buell tools. Anvil and forge not shown.I think the permanent fix is to make these brackets a bit longer so the muffler fits the header better. Then weld the brackets on the muffler side to prevent the parallelogram effect when the bolt clamping inevitably loosens.
A jack under the header pipes pushed the header into a more agreeable position and I tightened the bolts. This beating gained about 3/4″ but I’m sure it won’t hold. The muffler looks like a new one or freshly painted. The angle of the header pipe isn’t quite right. The tail of the muffler needs to drop about 1/4″ which means slightly longer muffler brackets. Once the bike is operational, I may do some exhaust re-engineering.
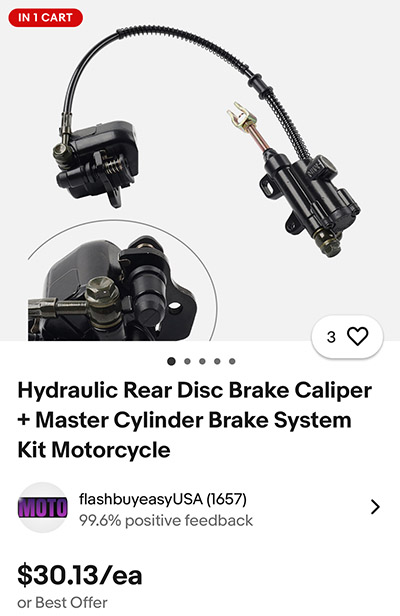
$30 seems cheap but then I’m approaching the end so I’m risking less.
The rear brake Brembo master cylinder is stuck and will need to come apart along with the rear caliper. Seals for the rear brake components are another hard to find item. I did find a Brembo clone master cylinder/caliper/brake line set up that may fit for $30 so I bought that. Watch for the ExNotes Brembo-clone brake system review.
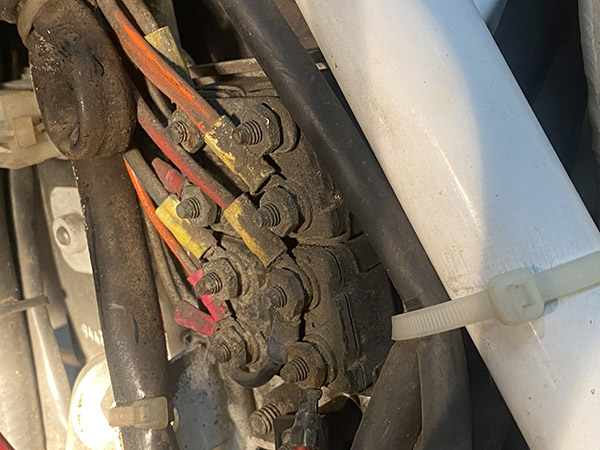
Wiring straight out of 1960. I love it.
Except for the damage I’m causing by dropping the Buell, it looks to be in good shape. I probably could have poured gas in the thing, popped a battery in and gone for a ride. Who needs a rear brake anyway? I’ll be dismantling the front end soon to measure the fork seals and to give the steering head bearings a shot of grease.
That 6-mile Cyclone (the one I didn’t win) is looking more and more like a steal!