Okay, so having served in the United States Army I am always aware of my surroundings, my gear, and most importantly physical security of these items. This is even more true nowadays as a fulltime traveler on my motorcycle. This involves not leaving sensitive items on the motorcycle overnight and parking it near me (usually line of sight) or in a garage. These habits have kept my gear safe over the past six years of traveling, not just in the United States but across the globe.
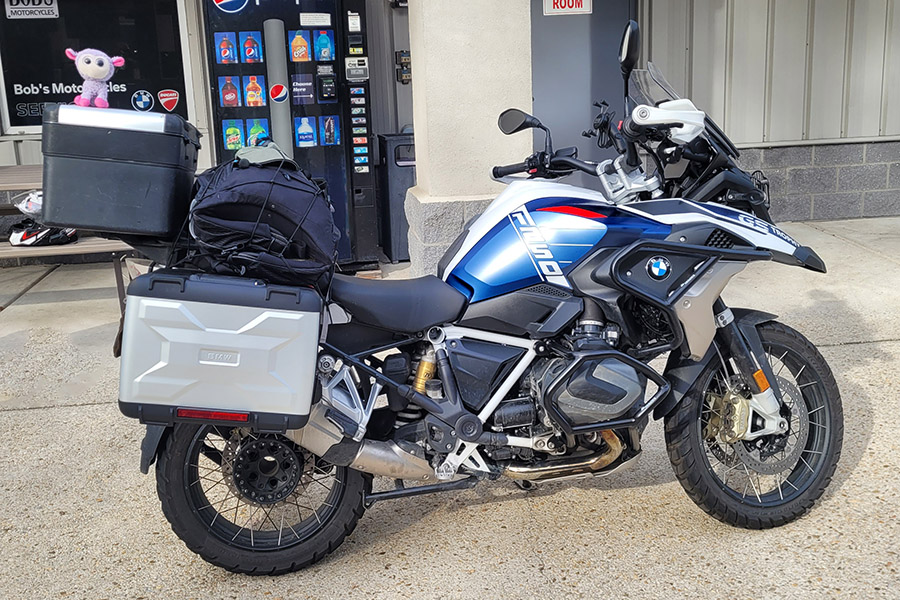
Upon waking up in Baltimore on November 2nd and looking out the window from my bedside I instantly was shocked to see that my BMW GS1250 was not in the parking spot where I had left it the day prior. My heart sank. Not only was the bike gone but so was a lot of my gear. Non-sensitive items thankfully were inside my friend’s house where I was staying. I combed the parking spot to see if I could find any pieces from the bike or any type of clue as to what happened. There was nothing. The bike was just gone.
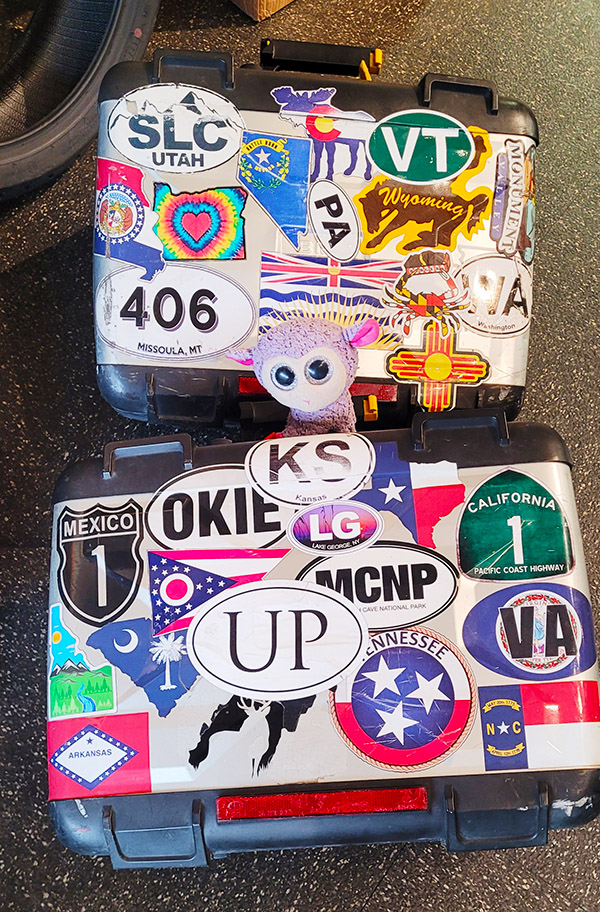
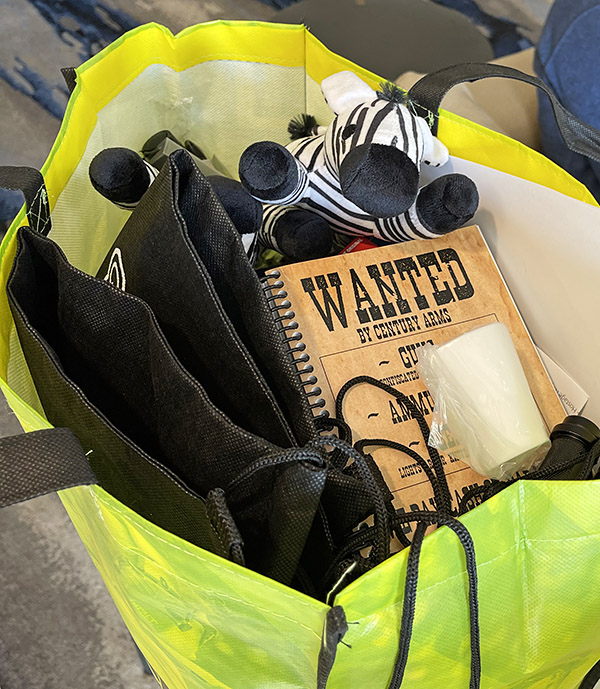
I was devastated to say the least. The GS1250 still had its temporary tags on it; that’s how new it was. What hurt me even more was the panniers with dozens of stickers identifying where I had traveled. They were gone along with some sentimental items from the Army that were kept locked in them.
Within five minutes of calling the Baltimore police, three officers showed up, took the report, and fully understood my pain. They issued an alert for the missing motorcycle, which was my home.
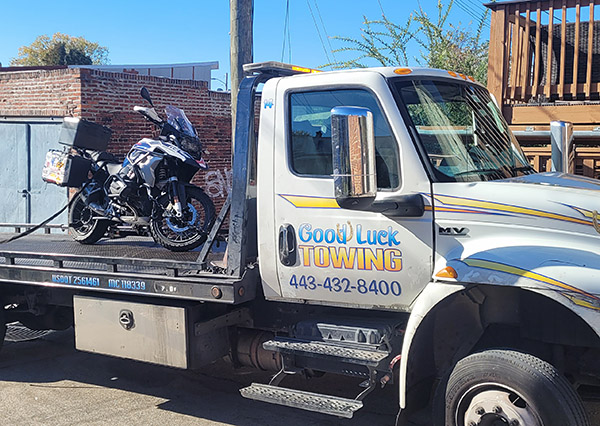
It only took two hours and my phone rang. They had found the BMW two blocks away. I quickly ran down to meet the officer and was anxious to view what was left of the bike (if anything) and my gear. The bike had a few thousand dollars in damage, mostly from whoever took it snapping the steering lock to push it into this dark alley. Amazingly, most of my gear was intact, but the panniers were destroyed from the thieves prying them open with a crowbar (I’m assuming). Some of the gear was still hanging off the panniers and some of it was thrown all over the alley. Fortunately, my losses only included my raingear, air mattress, tool kit, and my fishing pole. I asked the officer to alert the Coast Guard as obviously the thieves were going to blow up the air mattress and go fishing in Chesapeake Bay. Even in times of darkness I find humor to lighten the mood, if for nothing else but my own sanity.
So the police found my bike, but it wouldn’t start due to the steering lock being destroyed. That began a painful day of finding a local BMW dealer, calling a tow truck, and beginning the paperwork for the insurance claim. I was still extremely distraught and depressed over the whole incident, and rightfully so. Over the years my mindset has changed from the “woe is me” negative thinking to a more positive one of “maybe this is meant to be and had the bike not been taken I possibly could have been injured or killed in a wreck that day.” It sounds cheesy, but I do believe this. Having a positive outlook helps take a bit of the pain away, even if momentarily.
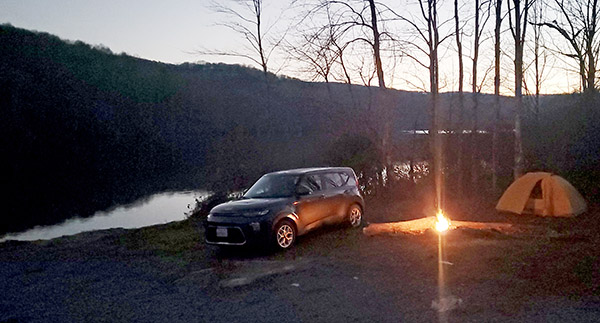
Luckily for me I have incredible friends pretty much all over the world. The decision to rent a car was a no brainer. It would be a fun way to kill a couple of weeks and Kia Kamp while the bike was being repaired. I could continue the “Mike Huber friends and family tour.” This would not only occupy my time but reassure me that even though I was going through a difficult time, being surrounded by beautiful friends would provide the inspiration and confidence to move forward. This is not to say that a few times a day I don’t feel an emptiness in my gut. Having traveled so much of the world and especially doing so by motorcycle where I am so exposed has provided much more good than bad throughout the years. If you get off your couch and go live sometimes bad things happen, but more often than not you meet wonderful people and build relationships with new friends for life.
Lessons Learned
Sadly, this isn’t the first time I had a motorcycle stolen. I had a brand new Suzuki GSXR750 stolen when I was in college at Boston University. That moto was never recovered, but I immediately bought a caliper lock for my next motorcycle. This provided comfort, but it would not stop three or four big guys from simply picking the bike up and throwing it in the back of a truck. I stopped using the caliper lock when I bought my first BMW GS (in hindsight, this was not a good move). I didn’t think stolen BMWs were in as much demand as the Japanese motos.
There are motion alarms, airtags, and a ton of other security devices out there that I am sure I will be writing about in the near future. For now the bike is back and the panniers have a clean canvas to start over and begin adding new stickers. My travels will continue after a brief hiatus as we await BMW parts from the Motherland.
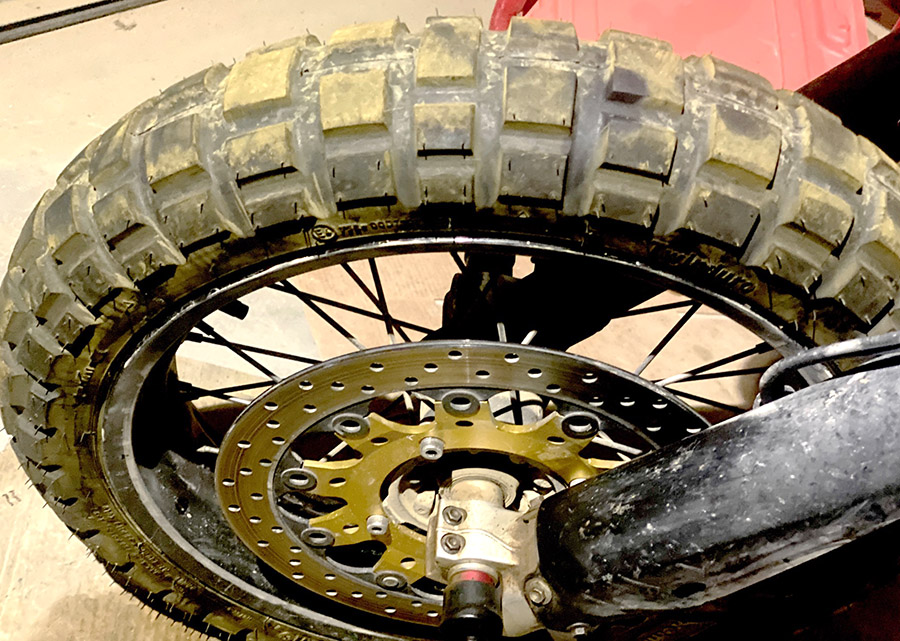
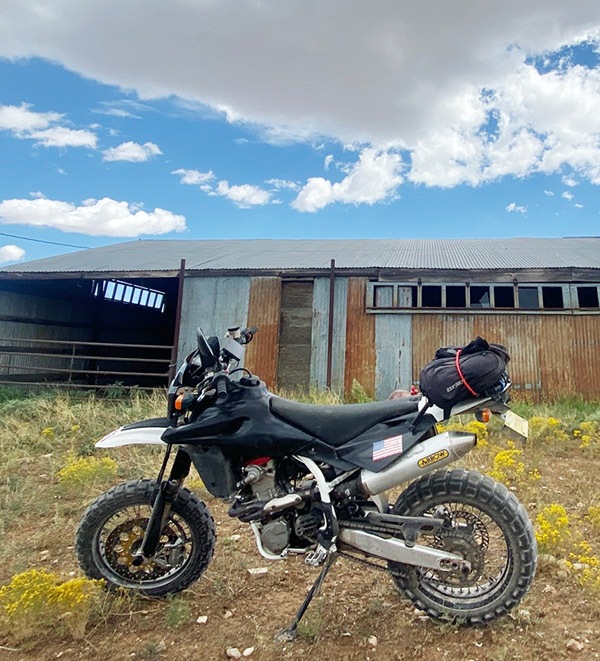
I’m probably the worst person to review a motorcycle tire. Round and black are my two major criteria for tire performance. If the tire meets those benchmarks it’s okay by me. I’m not sensitive enough and I don’t ride fast enough to push any tire to its limits and I couldn’t tell you if brand A is better than brand B on the street if my life depended on it. Which is why the Continental TKC-80 is such a revelation on the Husqvarna SMR510.
It’s not easy to find a decent 17-inch front tire for the dirt. The front tires I had been running on the SMR510 were those hokey, 70%-street/30%-dirt or 80%-street/20%-dirt tires that are all really just street tires with a few extra adventure-grooves cut into the tread pattern. The street-based tires worked well on the street (see my criteria above) but were horrible on the dirt. The Husky’s front end would push through corners completely devoid of grip or feedback. I had to sort of square off turns: enter straight, come to a near stop, change direction and exit under throttle.
I don’t need the Husky for street duty now that the Kawasaki ZRX1100 is running. Long time ExhaustNotes readers may recall my failed efforts to convert the Husky’s tiny, 17-inch front wheel to a more dirt appropriate 21-inch size. That was a real debacle that cost me hundreds of dollars resulting in the 17-inch wheel going back on the front of the motorcycle.
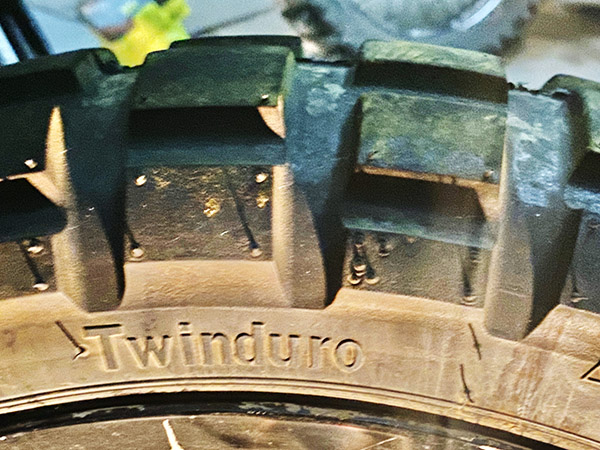
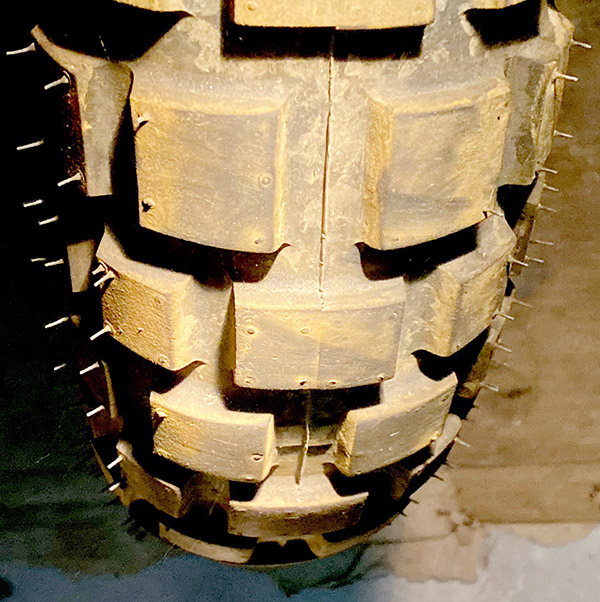
Having wasted so much blood and treasure on the front wheel conversion and coming up empty I decided to try the tire everyone told me to get in the first place: Continental’s mostly off-road TKC-80. Originally made for giant, 600-pound ADV bikes I figured the TKC-80 should hold up well on the lightweight Husqvarna.
The improvement is so dramatic even I can tell something good happened between the Husqvarna’s handle grips and the ground. The Husky actually steers in the dirt now. It goes in the general direction you point the handlebars. I can take a corner in the dirt leaning the bike over like I’m on pavement and the front end feels planted. It’s like I have a whole ‘nother end of the motorcycle to work where there was nothing but push before. Soft sand is no problem, graded roads with a thin layer of dust and pebbles feel almost grippy. I haven’t been in the mud yet but the 80 has to be better than the slick tires I was running.
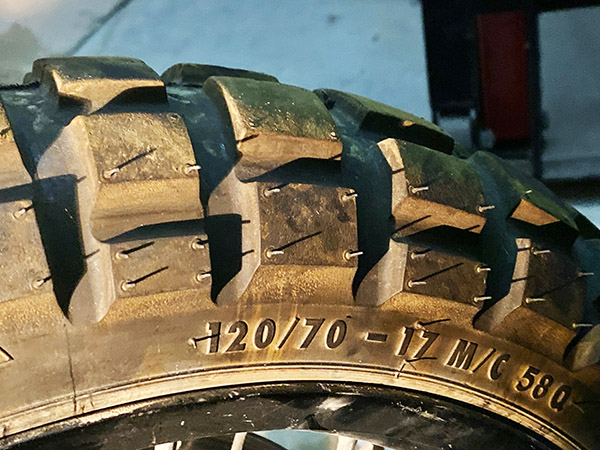
Needless to say I’m sold on the TKC-80, so naturally there is some confusion (on my part) about the future availability of the 80 series. Apparently, there was a recall on a bunch of Continental tires including the 80 series due to tread cracking. The best I can sort out from the Internet is that TKC tires built between January 2019 and April 2022 are affected by the recall. I’m not even going to look at the date code on my tire because I’m not taking it off. One of my moto-insider buddies says Continental is discontinuing the TKC-80 series. I haven’t found confirmation on that but as of today you can still buy them. I have noticed that TKC-80s online have gone up quite a bit since I bought mine at $120 a copy.
If you own one of the Super Motard type bikes with 17-inch rims and want to play around in the dirt without having to convert your front wheel to 21-inch, the TKC-80 is your tire. There is no cheaper or easier way to improve the front end of your motorcycle. I can’t speak to the TKC- 80’s longevity as I only have around 500 miles on mine and it shows little wear. If the thing lasts 2000-3000 miles it’s well worth it for the offroad performance. Hopefully I’ll be able to buy another one in the future because it’s about the only option for a 17-inch knobby that will fit the Husky’s wide rims.
Never miss an ExNotes blog:
Help us bring more to you: Please click on the popup ads!
I had a chance to fire the new SIG M18 9mm handgun, which was recently added to the California Department of Justice roster of approved handguns here in the People’s Republik. I was impressed with the M18’s accuracy, grouping, comfort level, feel, and sights. I love the desert tan colors. I was not impressed with the trigger (more on that in a bit).
It was a good day on my local indoor pistol range, and as I was leaving, my good buddy Shannon asked where I’ve been (I hadn’t been there in a few weeks). “Overseas,” I told her. She then pointed to the new M18 SIGs they had in the display case and asked if I’d like to try one. That reminded me of the old joke about the guy with the wooden eye. I responded with an affirmative and rhetorical, “Would I?”
The venerable 1911. It’s chambered in .45 ACP. All steel and with a Parkerized finish, as God intended. In my opinion, you can’t improve on perfection, but the Army had other ideas.
A bit of background: The US Army and I have something in common: We change handguns on a regular basis. The Army had been using the venerable .45 ACP 1911 since about, well, 1911. It served the Army well (and still serves well in certain special ops units), but the Army decided it wanted something better. That led to adoption of the 9mm Beretta 92 (designated as the M9 for the military) in 1985. I never cared for the Beretta, so I’ve never owned one and I can’t tell you anything about how it shoots or feels. The M9 had pushed out my beloved 1911, so I didn’t like it. Period. No handling or testing required.
The Army wanted a smaller pistol cartridge, and it settled on the Beretta M9. The M9 has an aluminum frame. Bob likes it.
The Army quickly decided it didn’t much like the Beretta, either. But the Army is big and it moves slowly when it’s not lobbying for more funding from Congress, and it wasn’t until 2017 that they decided to go with a militarized version of the 9mm SIG P320. There are two versions of the new military handgun: The M17, which has a 4.7-inch barrel, and the M18, with a 3.9-inch barrel. Both are full sized handguns with magazines carrying a gazillion rounds, and until recently, neither was available to lowly and untrustworthy civilians here in the People’s Republik of Kalifornia. Nah, scratch that. Lowly or not, trustworthy or not, no California civilians could purchase either of the new SIGS, although weirdly, we could purchase the civilian gun from which it was derived, the SIG P320. Go figure.
The SIG P320, the gun the M17 and M18 handguns are based on. All three guns (the P320, the M17, and the M18) have a polymer gripframe. You can tell they’re swell (I’m not going to explain that comment; you have to be old enough to get it).The 9mm SIG M17. Note the longer barrel length.The gun I fired: The SIG M18.
The SIG M18 recently appeared on the California Department of Justice approved handguns roster. That’s just a bit on the weird side, too, because the M18 is the version with the shorter (i.e., slightly more concealable) barrel. You’d think in their wholesome attempts to keep us pure our legislators would have approved the longer-barreled M17. Maybe they will in the future.
The Rock Island Compact 1911. This is a short barreled, shorter grip frame 1911 chambered in .45 ACP.My Smith and Wesson Shield. It has a very short barrel compared to either the SIG M17 or M18, which makes my shooting with it a bit less accurate.
I had fun on the range. I shot a box of .45 ammo in my Compact 1911, and then two boxes of ammo in my Smith and Wesson Shield. I was doing pretty good with both, too. It’s a pleasant way to spend an afternoon. As I was leaving the range, Shannon told me about the new M18s they had in stock and offered a trial run, so I put a box of 50 rounds through one of them.
I used a 6:00 hold on the orange bullseye on both targets, and I fired 50 rounds at each. The Shield target is on the left; the SIG target is on the right. Both guns are good enough; the M18 is surprisingly accurate.
As I said above, I didn’t care for the M18 trigger (the M18 is a striker-fired handgun; give me a hammer-fired gun any day). But the thing was accurate, even with the Joe Biden trigger (it was clumsy and creepy). I put nearly all 50 rounds through a single jagged hole at my point of aim 10 yards downrange, and then I started hitting low with the last few rounds. The few that dropped a bit below the orange bullseye were entirely due to me being tired and shaky (it wasn’t the gun; I was coming up on 200 rounds in that range session and I’m an old man). The bottom line: I like the new M18. A lot. I may buy one somewhere down the road, unless the M17 gets approved in California first.
The Carrizozo Mudchuckers and I took a spin over to Jerome, Arizona last week. The trip was around 1200 miles all in and we ran late getting home, which meant I had to ride 100 miles in the dark. Normally I avoid night riding because most of my motorcycles have terrible headlights and my night vision was dim before I had both my cataracts replaced with new lenses. Plus, at night you can’t see anything except the road ahead. It’s pretty boring.
For the Jerome trip I was riding the Kawasaki ZRX1100; that bike has the best headlight out of every motorcycle I own. To my surprise the night ride was not as bad as I thought. I could see fairly well and made it home without running into an elk. Which got me thinking about the shorter days of fall and the fact that I sort of enjoyed that 100 miles of darkness. Could I improve on the acceptable Kawasaki headlight?
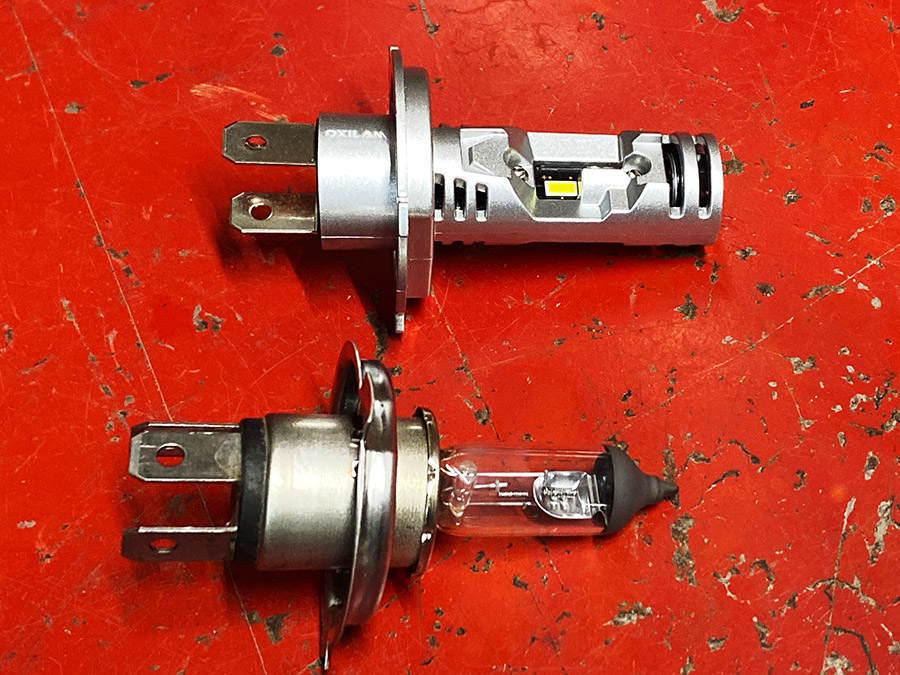
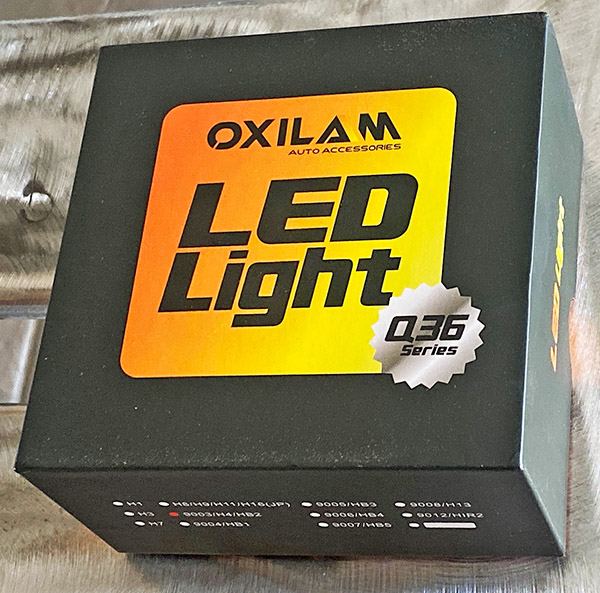
Enter the Oxilam LED H4 bulbs I purchased on sale from Amazon at $39, shipping included. They are a tad pricey but you do get two of them. Oxilam’s ad copy makes wild claims about 500% brighter and 10,000-hour life span. I can’t speak to the lifespan but the bulb sure doesn’t look 500% brighter.
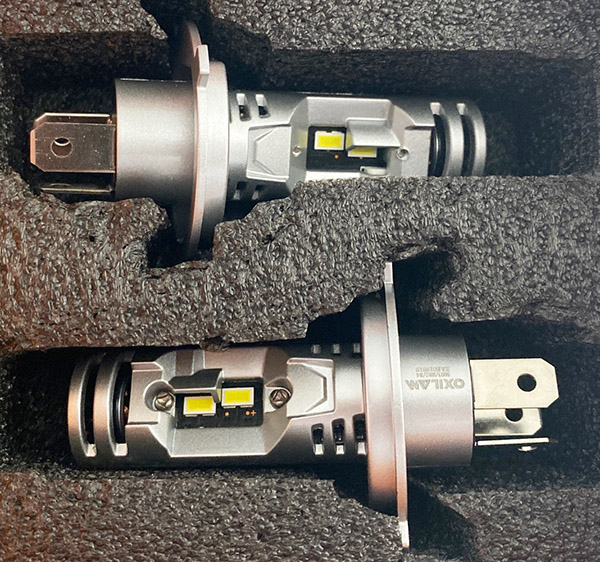
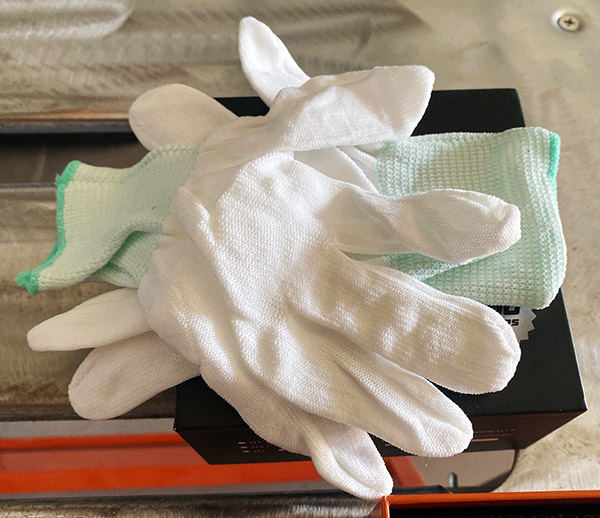
The Oxilam came securely packaged in a nifty carton with a fitted foam insert. Included in the box was a pair of gloves so that you don’t get your greasy fingers all over your nice, new bulbs. It’s a beautiful product presentation and gives a real sense of value to the whole operation.
Installation was easy as pie: remove your old bulb and insert the new one. The dimensions of the Oxilam are nearly the same as a standard H4 bulb so you don’t have a big heat sink or cooling fan jutting out the back of your headlight housing.
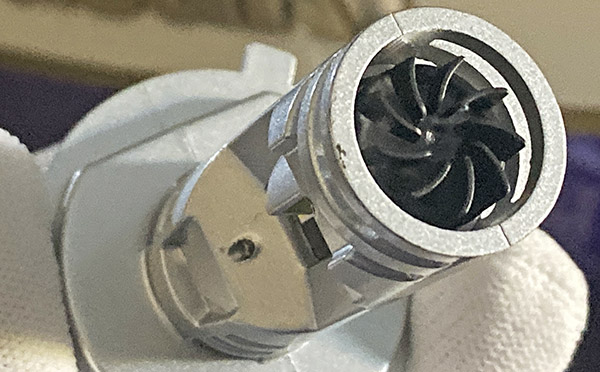
The Oxilam has a tiny cooling fan built into the front of the bulb. That worries me a bit but I’m rolling the dice here. Some reviews of the Oxilams claim the fan to be noisy. I don’t see how such a tiny fan can make much noise and I can’t hear it.
I couldn’t find a watt rating anywhere except an ad copy line stating the bulb draws a similar amount of current as a standard H4 so computers will not act up thinking a bulb is out. Lumens are a claimed 18,000 so I guess that’s good.
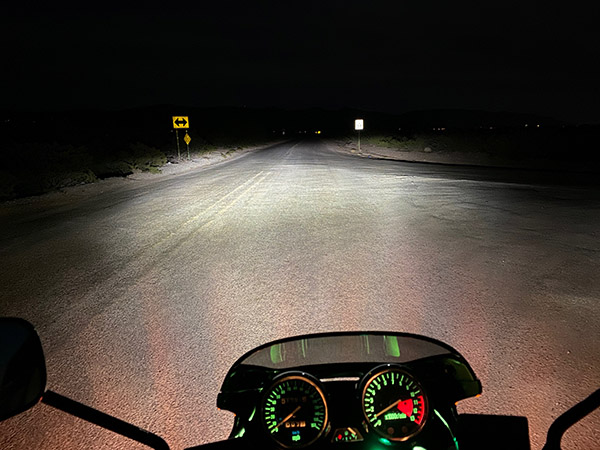
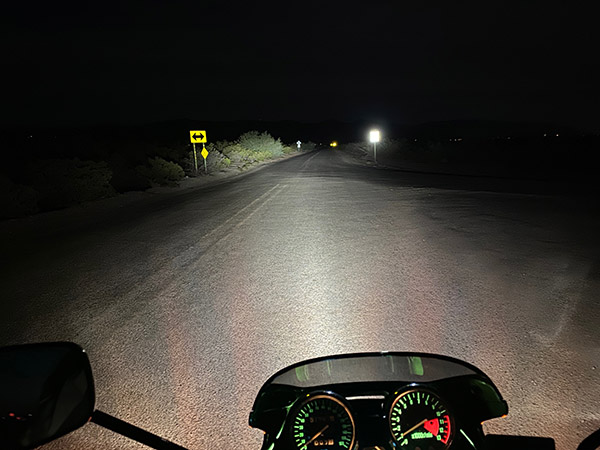
Maybe not 500% brighter but the Oxilam LED bulb is noticeably brighter than the original 24 year-old halogen bulb it replaced. Low beam is a lot better with a sharp cutoff so you don’t blind oncoming cars. Low beam is wide and bright. The 6500 kelvin white light makes colors pop a bit more at night. Grass looks greener and the road edge is more obvious. The light produced is evenly distributed without any hot spots. It’s really wonderful. The Oxilam is worth it to me for the improved low beam performance.
High beam was also improved but not as dramatically as low beam. High beam seemed to reach a little farther out than stock and the white color was nice. One drawback to the increased lighting power was that reflective road signs were very bright on high beam, bright enough to cause me to drop back to low beam until the sign was passed. Installed in the ZRX lens there is an overly bright spot 10 feet ahead of the front wheel, I feel those lumens could be put to better use 100 feet down the road. I suspect the Oxilam will project differently depending on which headlight housing it is installed.
The Oxilam bulbs are worth the $39 to me. With my creaky vision I need every advantage I can get at night. It was actually not bad riding in the dark with the Oxilam and the new bulb will extend my riding time by a few hours each day. That’s got to be worth something, right?
The International Association of Chiefs of Police…it’s an organization most folks have never heard of, but it’s been around for 130 years. My good buddy Mike is a member and he invited me along as his guest to the 2023 IACP convention (Mike and I have known each other since the 7th grade, and that means we’ve been friends for more than 60 years). It’s the third or fourth time I’ve attended the IACP show, and it’s always great. The IACP convention was in San Diego this year, and any time I have an opportunity to visit that beautiful town, I’m in. Susie and I rolled south in the Subie; Mike had already flown in. All kinds of companies have exhibits at the IACP convention, and many federal and state law enforcement agencies have displays. The United States Secret Service was there and they had one of the presidential limos on display. The photo at the top of this blog is yours truly reflected in the presidential limo’s deep black paint.
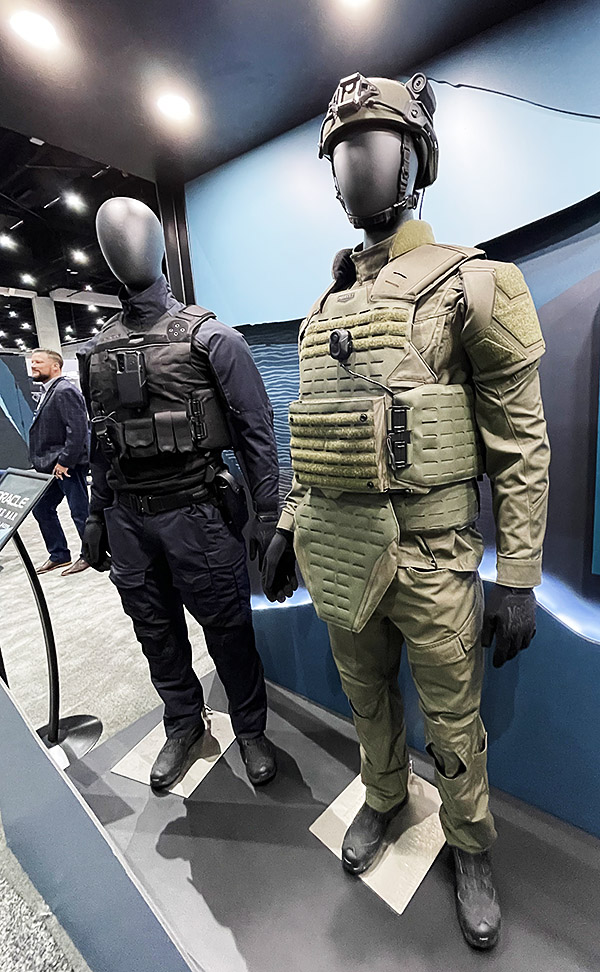
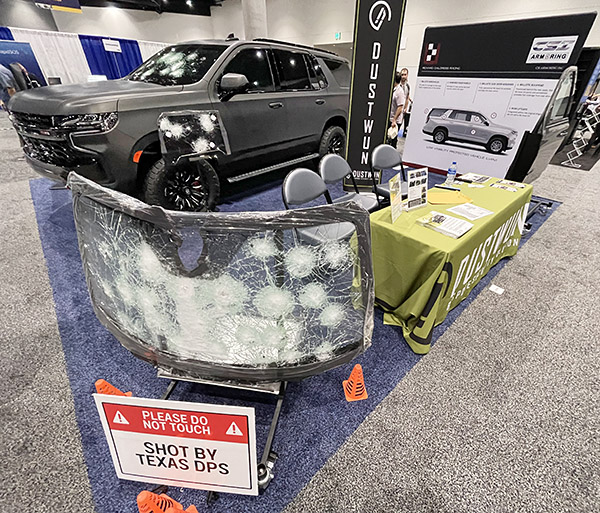
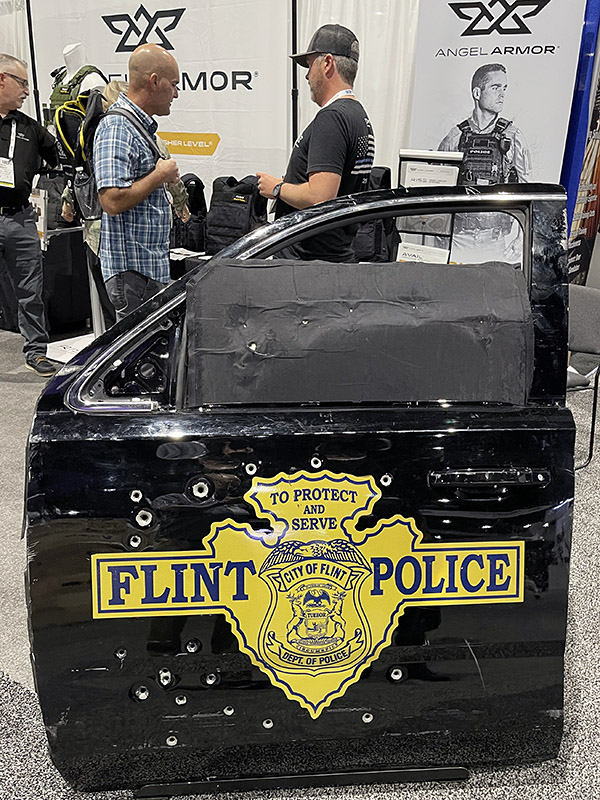
So who exhibits at the IACP? All kinds of government organizations and all kinds of businesses. Many of the exhibitors were software companies (including Microsoft) specializing in data base and other police applications. There were several outfits advertising armor plating for people, automobiles, war wagons, and more.
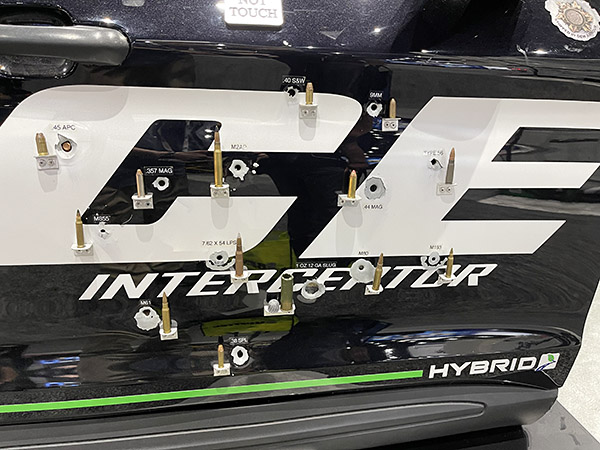
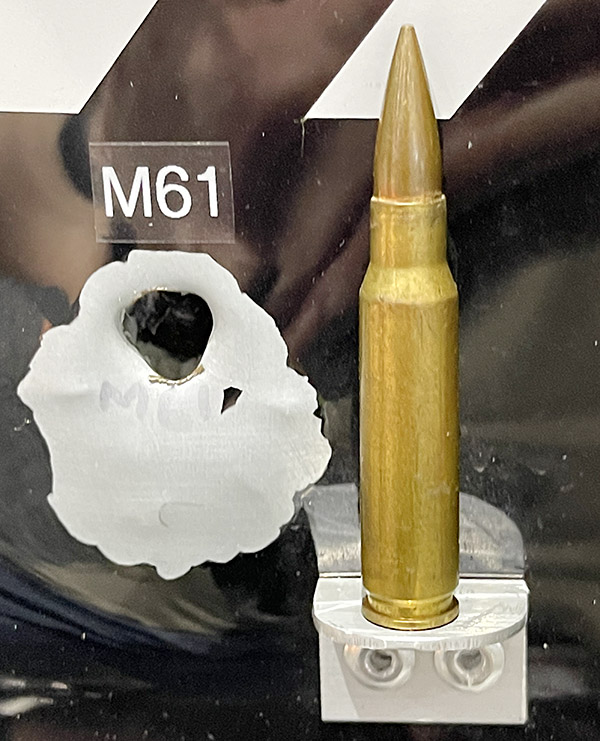
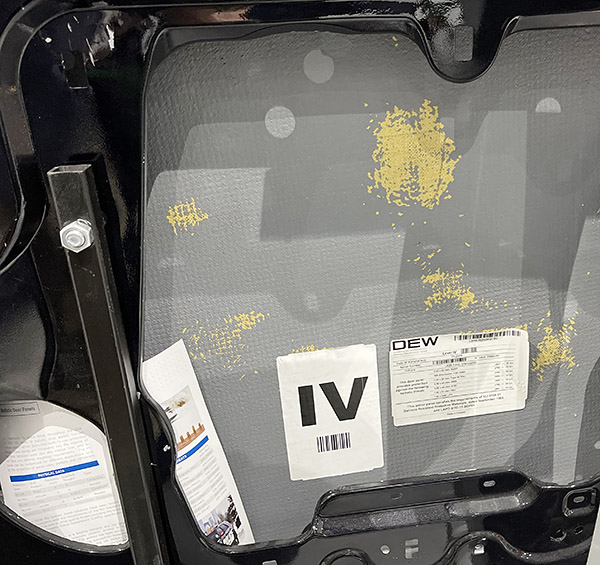
Body armor in your choice of colors. I’d wear it, but it would make me look fat.Impressive. Bullet proof glass may become an optional accessory for civilians here in the Peoples Republik of Kalifornia.Another bullet proof barrier supplier. Check out the photos below.Here’s another bulletproof barrier company, with several of the cartridges its material can stop displayed.A close-up photo of one of the cartridges.The above door interior. None of the bullets made it through.
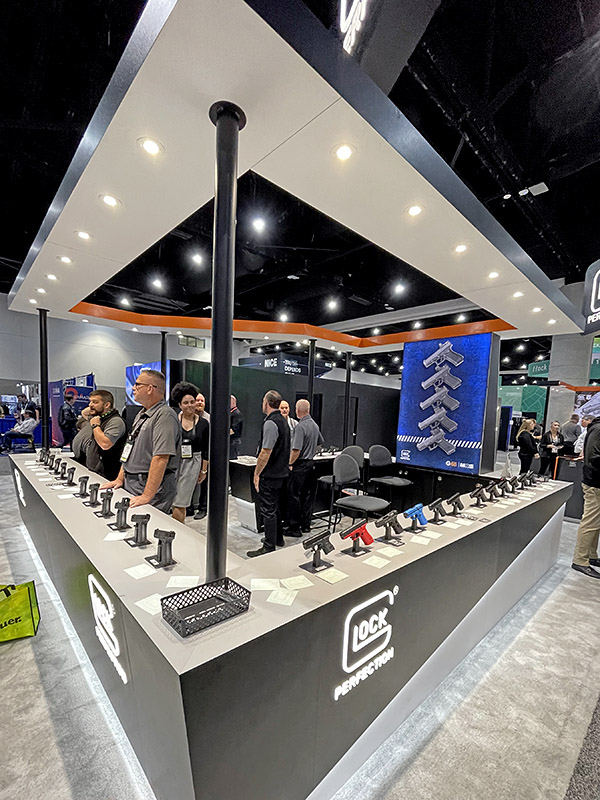
As you might expect, gun companies also display at the IACP convention. The ones I saw this year included Glock (with the largest display), SIG Sauer, Beretta, and a few different AR manufacturers. Surprisingly, Smith and Wesson wasn’t there (if they were, I missed them), nor was Colt (not many police departments carry Colt handguns these days).
Glock’s booth at the IACP convention. These guys had a lot of visitors. Glocks are popular and they are relatively inexpensive.
The Beretta and SIG booths were quiet. There was a lot of activity at the Glock exhibit. I spent some time at the Glock booth talking to one of their reps, and he was informative when I asked about using cast bullets in a Glock. I’d previously heard that Glock advises against using cast bullets in their pistols, and I asked if that was true. Glocks have barrels with polygonal rifling, and as such, there are no lands and grooves (there are just raised and lowered areas that twist along the barrel’s length). The Glock rep explained to me that they do indeed recommend not using cast bullets, as the lead has nowhere to go when it accumulates in the bore. When the barrels experiencing leading, it constricts the bore, and this raises pressures higher than what would be experienced in a conventionally-rifled pistol barrel. He said if you clean the barrel often enough (so that leading does not accumulate), shooting cast lead bullets would probably be okay, but how many shots can be fired before this becomes a problem is too dicey a proposition for Glock to provide a number. I also asked about copper plated (as opposed to jacketed) bullets, and the Glock rep told me that they advise against using those as well. To me, it’s not a big deal, as I don’t own a Glock, I always clean my guns, and virtually every firearm manufacturer advises against shooting reloaded ammo anyway. Eh, what do they know? The only time I ever shoot factory (i.e., non-reloaded) ammo in my handguns is when I have to requalify for my concealed carry permit.
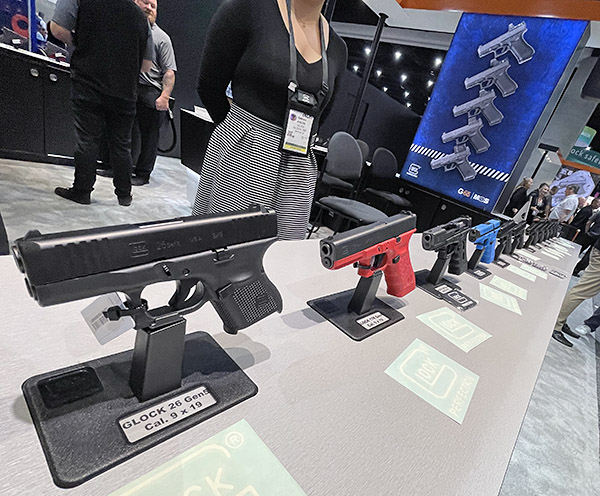
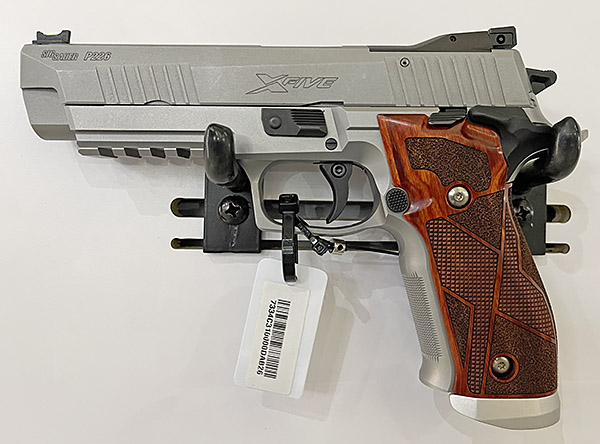
Glock pistols. I don’t follow Glock, so I don’t know what their different models are. The red and the blue guns are training guns.SIG Sauer’s 226 X-5. This is an impressive handgun.
I saw the new SIG target model (the 226 X5) and I fell in love with it. Unfortunately, the X5 is not available to us here in the Peoples Republik of Kalifornia (it’s not on the California Department of Justice roster of approved handguns). The SIG X5 is expensive at $2219, but I’d buy one in a heartbeat if it was sold here. It fits like my hand like a glove and the trigger is superb. The grips are nice, too. The X5 has all steel construction, so it’s heavier than the standard 226 (which has an aluminum frame). I sure wish it was available here. On the plus side, SIG’s M18 is now available in California. It’s the Army’s new sidearm. It has a striker firing mechanism (there’s no hammer), so the trigger pull is not what I would call good (as is the case, in my opinion, with all striker-fired handguns). The M18 is about $700 and I am tempted. I like SIG handguns.
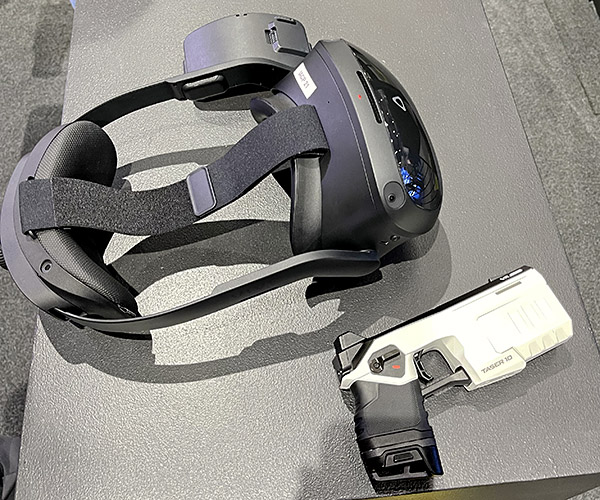
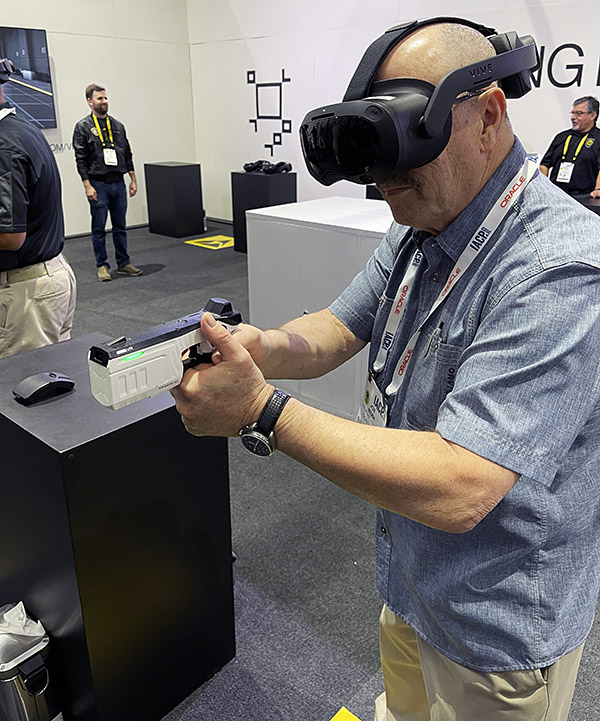
There were taser manufacturers and firearms training simulator manufacturers at IACP, too. The photos below show a taser virtual reality simulator. You wear a headset that covers your eyes and hold a taser gun. I think the company was Axon. They had about 20 stations for people to try it. The rep explained that you have to fire twice…once in a noncritical area and then again in another non-critical area. When you do that on the simulated bad guy in the virtual reality headset, the bad guy goes down. Sometimes you have to fire more than two times because your suspected felon doesn’t cooperate and keel over immediately. You get about 15 runs against assorted bad guys, and I toasted every one of them. Then there’s an officer needs assistance call where you roll up on a police officer having difficulty subduing a bad guy. I fried that bad guy, too. It was fun.
Virtual reality and a taser. It was awesome.Me, in my VR world.
Another company, Sim Lab, had a target gallery with moving silhouette targets and your choice of either a SIG or a Glock (I went with the SIG). I did pretty good on that one, too, and after I had toasted their bad guys the Sim Lab rep said I was a good shot. That made this IACP convention one of the best ever for me.
The Sim Lab setup. I opted for the SIG M18. I may get a real M18 one of these days.
After I shot the Sim Lab course, the rep asked if I wanted a video. Hey, does a man in the desert want water? Does a California resident want gas prices below $5 a gallon. “You bet,” I answered, and I fired the course again. It was fun. (Pro Tip: The video looks better if you expand it to full screen.)
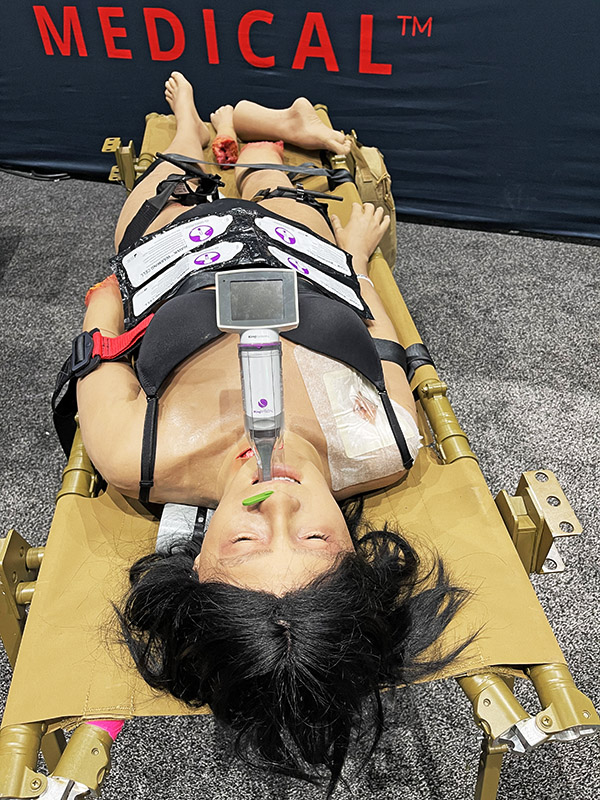
There were a couple of first aid equipment manufacturers at IACP 2023, and the exhibits were surprisingly lifelike. And gruesome. You couldn’t walk by their exhibits without looking (and taking a photo or two).
This young lady is having a bad day. She lost a leg, she lost a hand, and someone slit her throat.
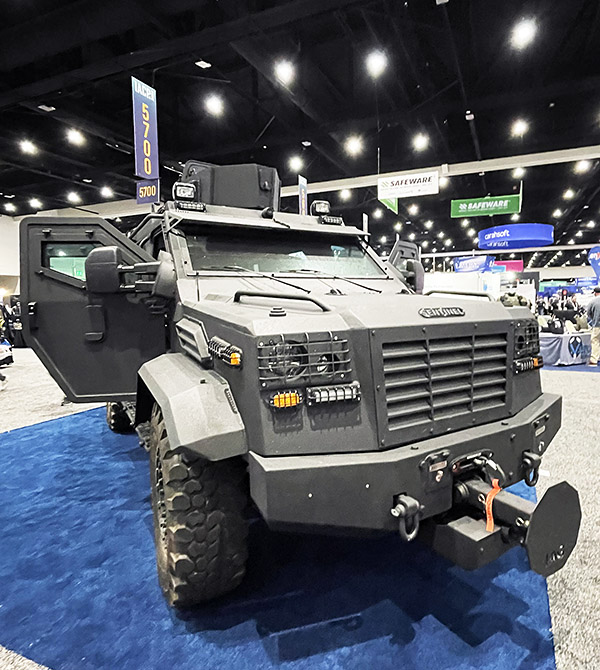
There were several vehicles on display. One was the Riverside County Sheriff’s command center. It was awesome. There were also armored vehicles. They were really cool. And there were police motorcycles.
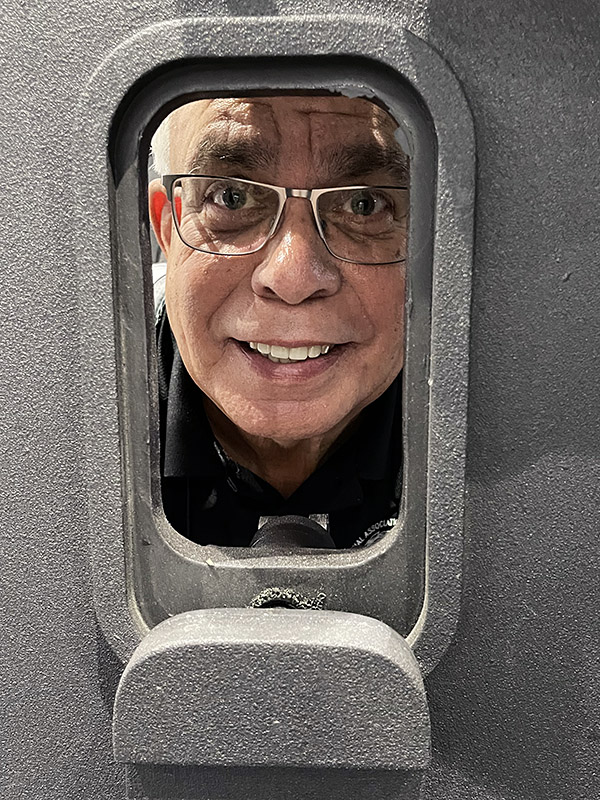
The Riverside County Sheriff’s Mobile Command Post. It is impressive.An armored vehicle with a battering ram. Check out the gun port on the right door.Good buddy Mike peeking through the gunport.
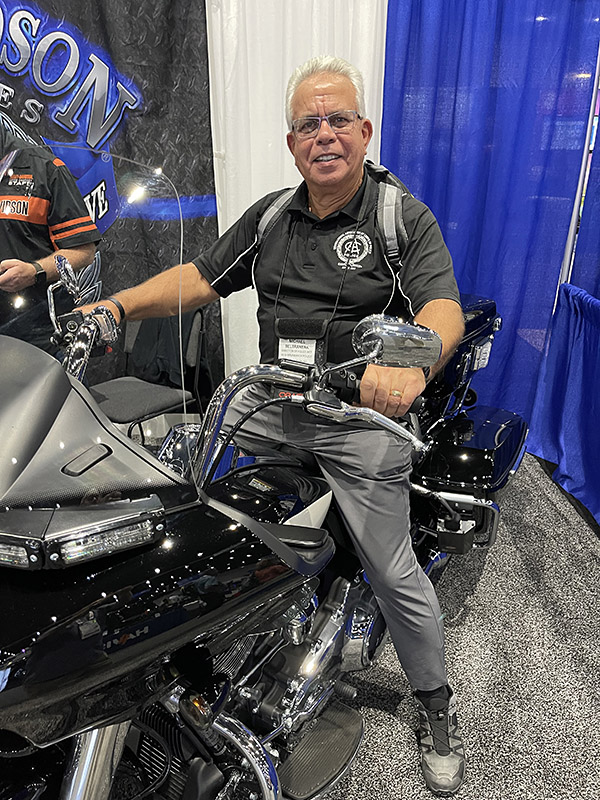
Harley and BMW were the only two police motorcycle suppliers in attendance (which is probably fitting, as they are the only two gasoline-powered motorcycle manufacturers selling to US police departments). Mike and I both sat on the Harley. Its weight (840 pounds) could only be described as oppressive. I guess I’ve grown weaker in my old age. I could barely get the thing off the side stand. I’ve owned a couple of Harley full dressers. No more, though. For a lot of reasons, my Harley days are in the rearview mirror.
Mike on the police Harley. We both agreed: It’s a porker.
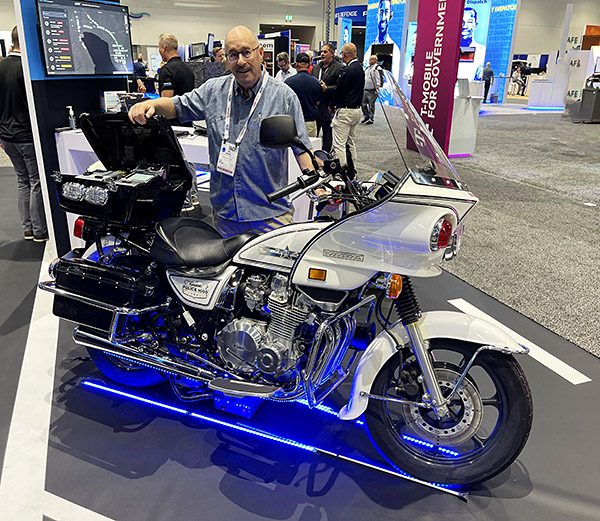
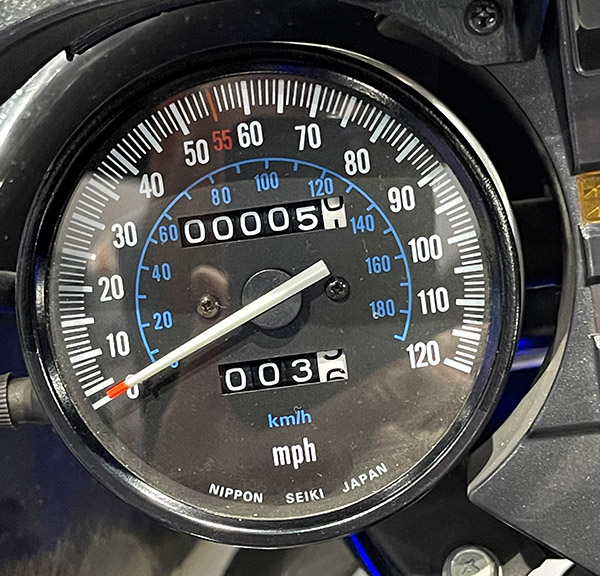
The Kawasaki KZ1000P, an iconic police motor if ever there was one, went out of production at least 20 years ago. But there was a pristine one on display. It was in a booth advertising communications equipment, and that company used it to showcase the early police comm equipment they used to manufacture. The Kawasaki (although it was 20 years old) was immaculate, as it should be. The odometer showed only 5 miles. Mike and I were both impressed. I would like to own this bike.
Yours truly with the no-longer-manufactured KZ1000P Kawasaki.The real deal, with just 5.3 miles on the odometer.
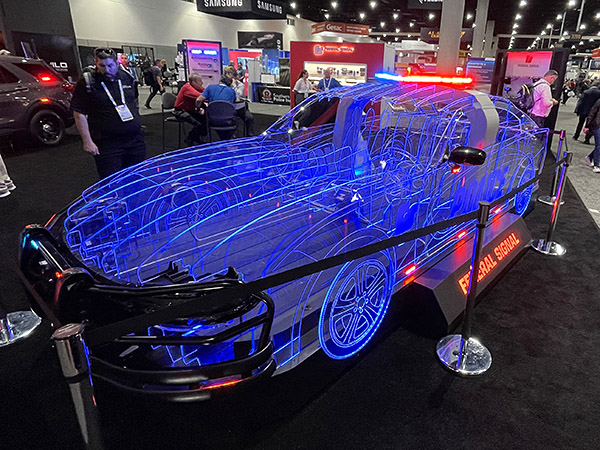
There was a company displaying an artistic Lucite arrangement lit up. It was interesting. I can’t remember who the company was, so I guessed it bombed as an advertisement, but it was cool. In the photo below, it shows Federal Signal. I’m not sure what they do. But if I ever needed a Lucite car bit of artwork, they would be my guys.
A Lucite car.
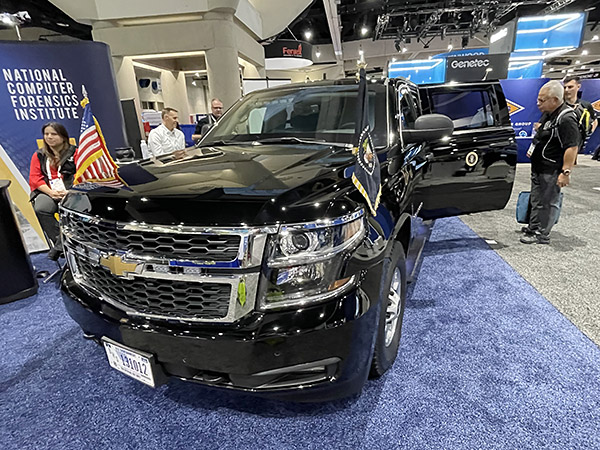
The United States Secret Service had what was probably the most interesting exhibit. It was one of the President’s Chevy Suburbans, complete with the presidential insignia and flag. I sat in the rear seat. There were real Secret Service agents there and they were nice guys. We joked with them a bit about taking care of Old Joe, because we sure didn’t want Kamala in the White House. They tried not to laugh, but I sensed strong agreement.
Hail to the Chief! The window glass on this SUV is at least an inch thick.
Boston Dynamics was there with a couple of their robotic dogs. You might have heard of Boston Dynamics. They were featured on 60 Minutes (the television show) a couple of years ago. The robotic dogs were cool. There was a real police dog there, too. It was not sure what to make of the robots.
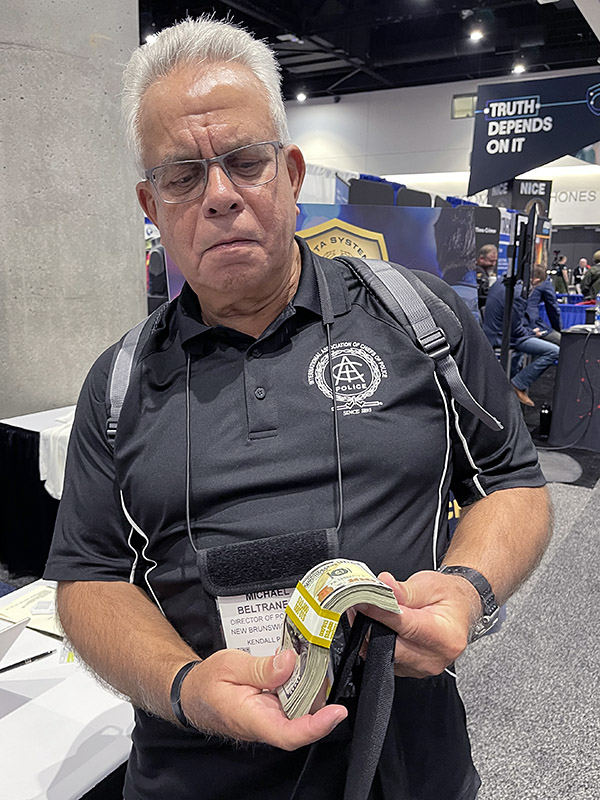
One of the exhibits had a large table full of counterfeit $100 bill bundles. This was another cool exhibit that I have no idea what they were selling. But it was cool and it made for a couple of cool photos.
Money money money. I’m not sure what these guys were selling.Thumbing through a stack of hundred dollar bills.
One of the great things about these kinds of conventions are the goodies. Many of the exhibitors had bags (mine was from Blauer), and nearly all the booths had goodies. I was a grownup playing trick or treat, and I didn’t even need to wear a costume. Ordinarily, I don’t pick up much in the way of goodies at trade shows, but I have four grandchildren now and I was scooping it all up for them. At least that’s my story, and I’m sticking with it. I will tell you I won’t need to buy another pen for probably another 50 years.
The goodies bag. It was heavy by the end of the day. The grandkids will be pleased.
Mike and I had a super time wandering around in the IACP convention. So much so, in fact, that we reached the end of the day without eating lunch (and for me, that’s unusual). That was okay, because it made us look forward to dinner as we left the convention. As always, the dining in San Diego was superior. Whenever Sue and I visit another city, we don’t go to the touristy restaurants; we always search for the local favorites (and Sue does a stellar job in finding these). Valero’s got the nod our first night in town; it’s a small, family run Italian restaurant, and it was excellent. I had eggplant parmigiana, Sue had angel hair pasta with pesto sauce and mushrooms, and Mike had the pasta puttanesco. I’d never heard of that last one and when Mike translated the name to English I didn’t believe him initially, but he was right. I’ll have to try that one on our next visit. And there will be a next visit. Valero’s was outstanding.
Eggplant parmigiana that tasted as good as it looks.Angel hair with pesto sauce and mushrooms. It was awesome, too.Pasta puttanesca. It’s on the list for the next visit. Mike enjoyed it.
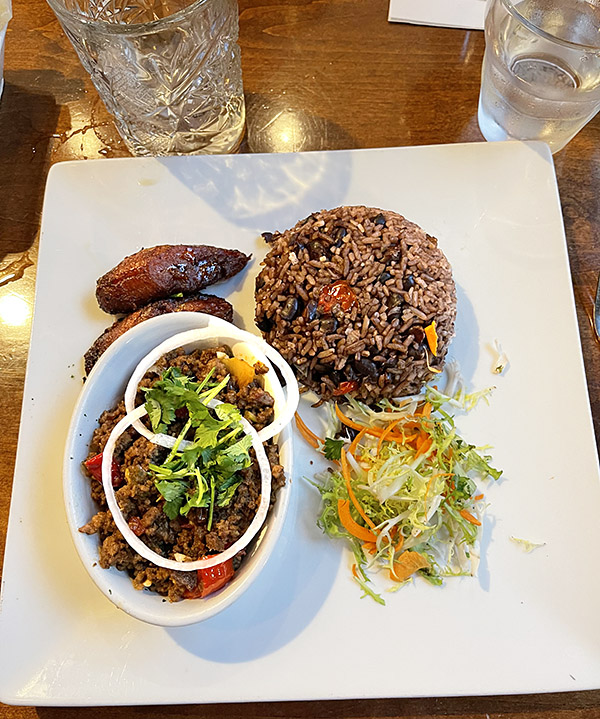
Our second night in town brought us to the Havana Grill, a Cuban restaurant not far from Old Town San Diego. It, too, was a local favorite and it was excellent.
Picadillo, which is beef seasoned with onions, peppers, garlic, olives, and raisins. I had it for dinner and it was fantastic.
So there you have it: A great visit with good buddy Mike, a super time at the International Association of Chiefs of Police Convention, and a great couple of days in San Diego.
In October of 2017, Susie and I visited Bangkok. I had a gig in Singapore and we opted to swing by Thailand on the way home. It was an awesome visit and I had a lot of fun taking pictures of Bangkok motorcycles, Thai women, a few Thai guys, food, and more. I thought I would rerun that series (with a few updates) for you here on the ExNotes blog. In as many of these posts as I can, I’ll tell you about the motorcycling scene in Bangkok, too.
Our first morning in Thailand! Sue and I were up with the sun and we walked around the block to get a few photos after a great breakfast in the Grand Pullman Hotel.
Sunrise in Bangkok. When it comes to smog, Bangkok is what California used to be.
The evening before was fun. We arrived at the hotel late at night, and because we had opted to stay on the executive floor, the hotel staff rolled out the red carpet for us. When we went to the check in counter and told the staff our names, they whisked us up to the top floor, brought us into the executive lounge, poured us each a glass of wine, put several kinds of appetizers in front of us, and seated on us on a comfortable sofa. Two young Thais basically interviewed Sue and me, they disappeared for a moment, and then they reappeared with our room keys. It was a pretty cool experience, and it was unlike any hotel check-in we’ve ever had.
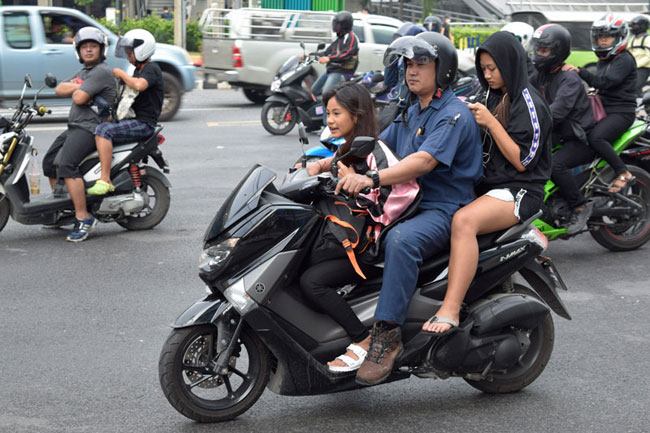
That morning we walked around a bit taking in one of the world’s busiest streets in one of the world’s most exotic cities. The number of motorcycles on every street had our attention immediately. Something we had not seen before anywhere else in the world were the motorcycle and motorscooter taxis. People used motorcycles and scooters for taxi duty, as you will see in a few of the photos below.
A Thai motorcycle taxi rider waiting for a fare. Motorcycles are commonly used as taxis in Thailand.Another Thai taxi, this time a rider on a scooter. The orange vests signify that these bikes are for hire. You have to be a daring person, I think, to hail a ride on the back of the Thai two-wheeler.A Thai family on a scooter. And a few other scooters, all waiting at a traffic light on Sukhumvit Road, the main road through Bangkok.The ubiquitous Honda CG clone engine. These power motorcycles made all over Asia. They are probably one of the more reliable engines ever made.ATGATT: All the gear, all the time. Well, some of the gear. Maybe some of the time. Can you imagine what the emergency ward in any Bangkok hospital must look like?Street food, Bangkok style. Thai food was surprisingly good. But we weren’t risk takers…we only ate in restaurants.
The fun was just beginning. I’ve been pretty lucky all of my life and my work has carried me to some pretty exotic locales. I’ve seen a lot of the world and most of it has been on someone else’s dime. That’s what this Thailand adventure was. A client brought me to Singapore to teach a failure analysis course to a group of their defense ministry engineers (I wrote a book about failure analysis a couple of decades ago and it’s been providing adventures like this ever since). The heavy lift on this trip was the airfare to Singapore (which the client covered); swinging by Bangkok and stopping off there on the way home only cost a bit more. It’s a great way to travel. I had my trusty Nikon D3300 with me (I love that camera), and I put it to good use on this trip.
I think I’m going to run this Bangkok series every day starting today and for the next six days to maintain the story’s continuity (there will be seven Bangkok posts in total). If it’s too much, hey, just check back in when it’s convenient for you.
I first started welding when I was around 12 years old. My Pop gave me a few tips and handed me an oxy-acetylene torch. He showed me how to set the mixture with a haze of blue slightly beyond the core blue flame. He told me the filler rod is used to cool the puddle, not to melt into the gap. And he told me to keep moving when laying down a bead or you’ll burn through. With these simple lessons I never learned another thing about welding. When I worked at SWATH Ocean building aluminum boats I did a bit of MIG and TIG welding as needed for my electrical work. I could make a passible bead but I never knew why or how it worked.
At SWATH the real welders would set up the machines so that even an idiot like me could weld without an understanding of welding. We used giant, high-frequency start, Syncrowave machines that crackled all the telephone lines in a 500-foot radius. Orange colored MIG (metal inert gas) spool guns tied to large power supplies were strategically placed throughout the vessel making it super easy to attach brackets or braces as needed. During working hours the air inside the boats sparkled with aluminum dust and smelled astringent from the inert argon gas. We used to joke that cigarette smokers were the healthiest workers at SWATH because they breathed through a filter.
Over the years I’ve lost the muscle memory for welding and my beads are a jumbled mess. My hands are shaky, my near vision is compromised and I can no longer make presentable welds using any process. I’ve decided to educate myself on welding in general and welding processes that didn’t exist 40 years ago. Thanks to the global economy, welding machines (like most electronic products) have dropped dramatically in price. The advent of the small inverter welder for home use has been a giant leap forward.
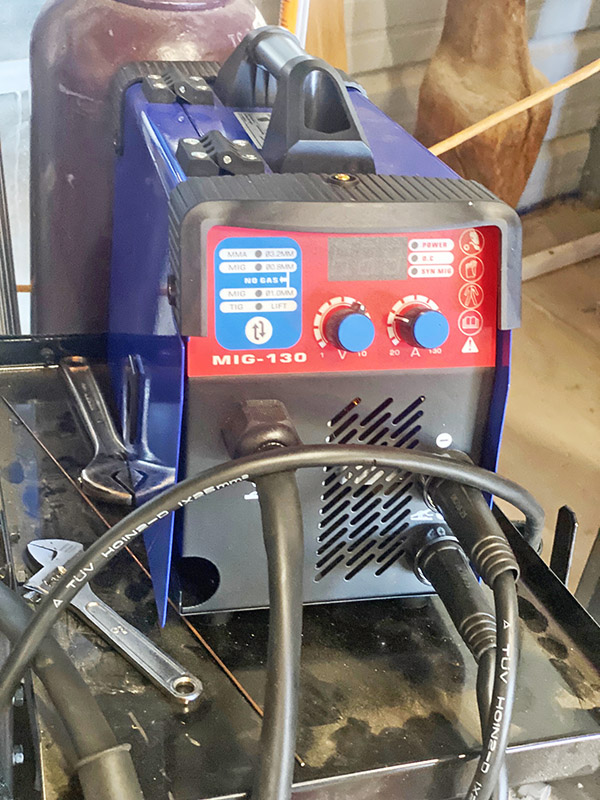
I purchased this Vevor 130 multi-process machine from Amazon for only $120, shipping included. The Vevor runs off a standard 115-volt wall receptacle. In the past (where I spend most of my time) a machine with this capability would be ten times the price. The “multi” in multi-process refers to the Vevor’s ability to weld with flux core spooled wire, stick weld or TIG weld. The unit came with all the cables and guns needed for each type of welding process. It did not come with a cart, argon bottle or flow meter. The Vevor is meant for welding steel but there are some stick (also called MMA for Manual Metal Arc) rods available that will weld stainless. You might be able to weld stainless with the Vevor TIG (tungsten inert gas) torch but I haven’t tried it yet.
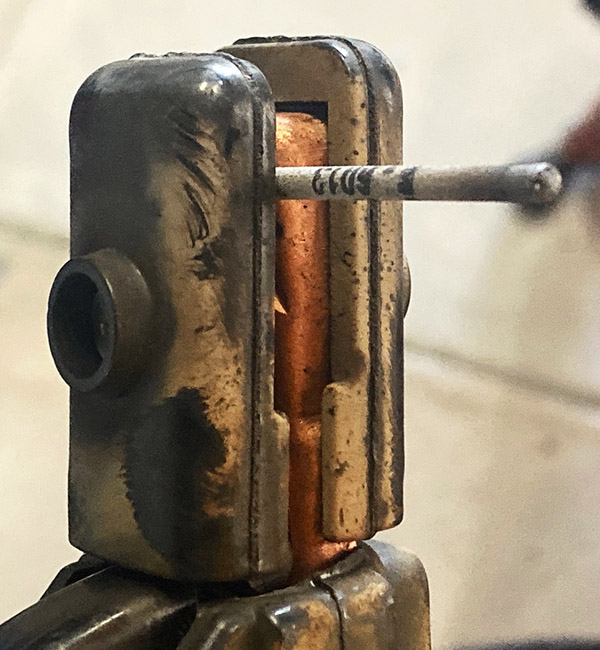
In stick mode the Vevor is a pretty standard welder like the ones that have been around forever. The old buzz boxes put out alternating current unless you bought an expensive AC/DC box. I had a Miller 225 AC/DC unit that suffered from a lightweight transformer and it was a bitch to strike an arc with the thing. As soon as the stick drew current the voltage would drop and weld the stick to your work. My Pop’s old Lincoln AC welder weighed a ton and I could strike an arc easily with that machine. Hysteresis matters when it comes to the old-style arc welders.
The Vevor puts out DC current all the time and being so light it’s hard to get the thing going in MMA/stick but if you scratch around long enough you can get an arc struck. Once burning, the Vevor seems to work like any other arc welder. Rated at a doubtful 130 amps, my Vevor tripped the 15-amp breaker in the shed at around 90 (indicated) amps. You’ll need at least a 20-amp rated receptacle to access all 130 amps, maybe even a 30-amp socket. Like all welding, stick welding is an acquired skill. The rod is continually getting shorter so you have to move your torch hand closer and closer to the work to maintain the correct distance. When your glove starts smoking it’s time to stop and get another rod. You’ll need to practice quite a bit before you make decent looking beads with stick. There is also a bit of splatter with stick.
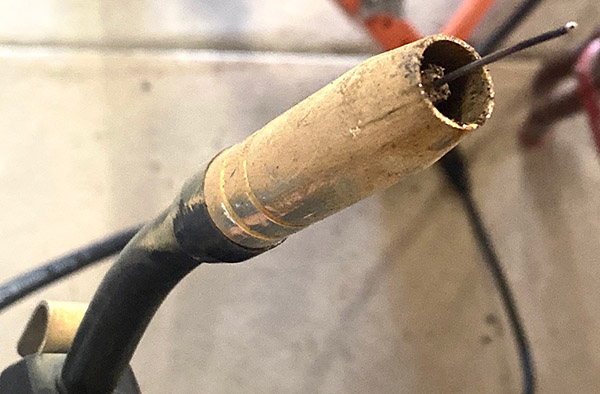
Flux welding is a lot like stick, except instead of flux-covered rods you use a spool of steel wire with the flux inside. Flux core seems the easiest process to me. Setting up the machine is important but once you’ve got the wire speed and amperage right it’s pull the trigger and go. And go you can because you don’t need to stop and clamp a new rod in the holder to replace the ones you’ve consumed. The welder keeps feeding wire to the gun at a pre-set pace and your hand maintains the same distance the whole way through. Eventually the spool will run out but that’s after many feet of weld beads. Flux core also starts easy, for me anyway.
Flux core also splatters a bit like stick, maybe less. It’s no big deal (you can knock off the slag and balls of spooge afterwards). I am a total rookie at flux welding so I’ll need a lot more trial and error to get things right. Most YouTubers will tell you to buy a better roll of flux wire as the roll supplied with these cheap welders is not so great. After I run out I’ll buy a name brand roll of flux core to see if it makes a difference.
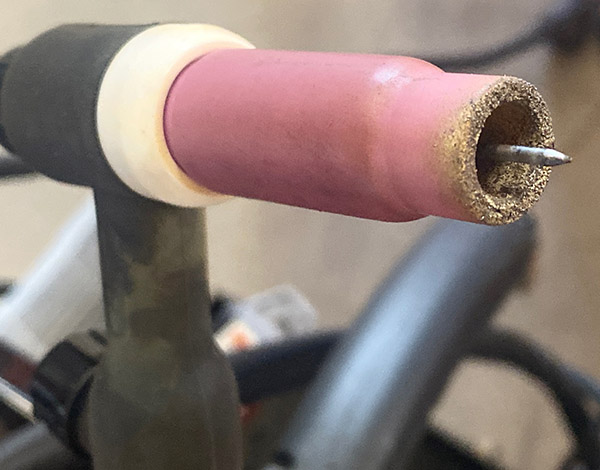
TIG (tungsten inert gas) welding is the coolest process of all. TIG usually uses an argon gas bottle to supply a flow of shielding gas to your weld. The actual process of welding is similar to oxy-acetylene welding except the torch is electric. With argon you don’t need flux but your material needs to be fairly clean. Unlike stick welding, you can’t just plow through rust and contaminated metal. TIG uses a tungsten rod as an electrode, but the rod is super tough and does not get consumed very fast.
My biggest problem with the Vevor in TIG mode (besides the fact that I am a terrible welder) is I forget to turn on the argon gas at the torch handle resulting in a burned mess and contaminated tungsten. More expensive machines do this automatically. The Vevor uses TIG lift, a method to strike an arc that seems to work fairly well most of the time. The expensive machines I mentioned above have a high-frequency start that keeps you from sticking the tungsten into the work and contaminating the rod. The TIG lift system works pretty well, I have no problem getting a TIG arc started with the Vevor.
With TIG you’ll usually need to add in filler rod just like torch welding. This is another hang up for me as my control of the filler rod is shaky. I often stick the rod onto the tungsten then I have to stop and clean the tungsten before going on. Dirty tungsten produces a crazy arc that wanders around or shoots out the side. The melted weld puddle is all over the place. It’s like playing whack-a-mole when this happens.
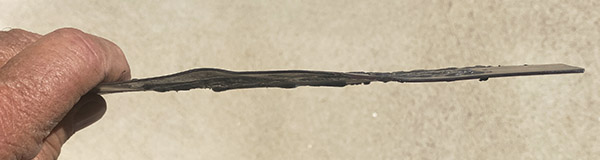
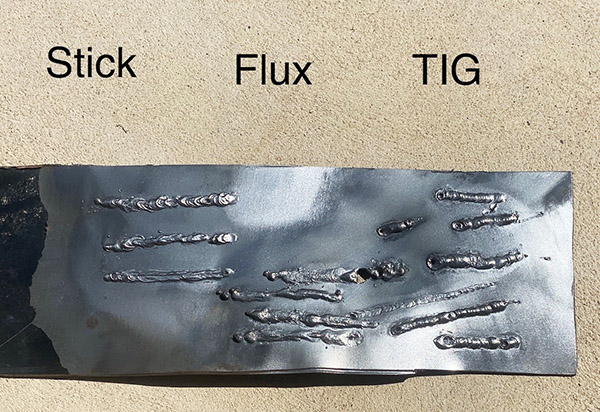
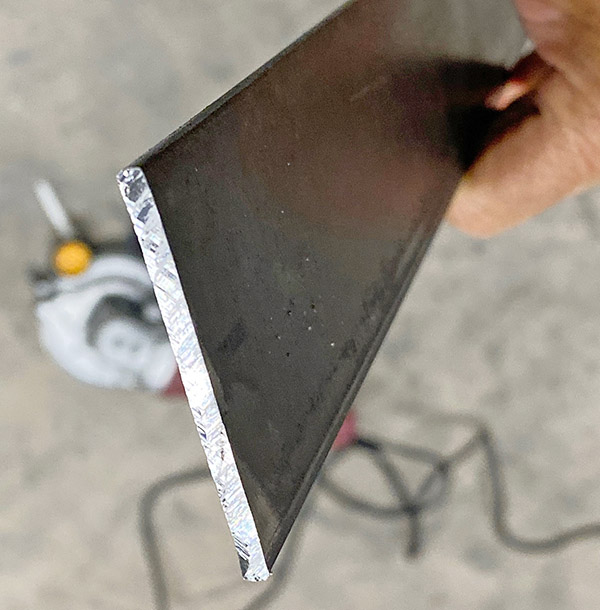
As I’ve said before, I’m a terrible welder so don’t hold these sample beads against the Vevor 130. A welder who knows what he’s doing will have no problem making decent beads with this machine. I am practicing on thin sheet metal mostly because I have a lot of it I cut out of an old file cabinet, and welding thin metal develops a better feel for heat control. I’m constantly burning through thin stuff. In these sheet metal samples the TIG produced the best-looking welds, although all of them are horrible.
As you can see from the backside, penetration on the thin steel was not an issue. Everything I did was too hot and was on the verge of burning through.
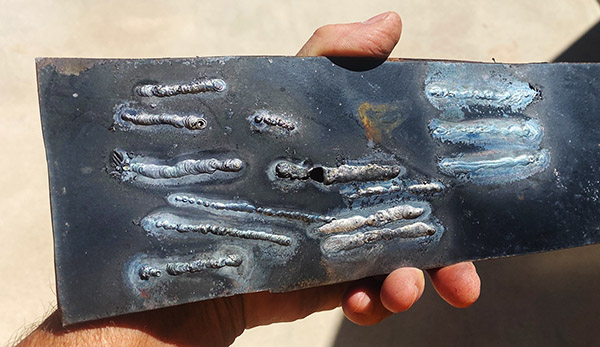
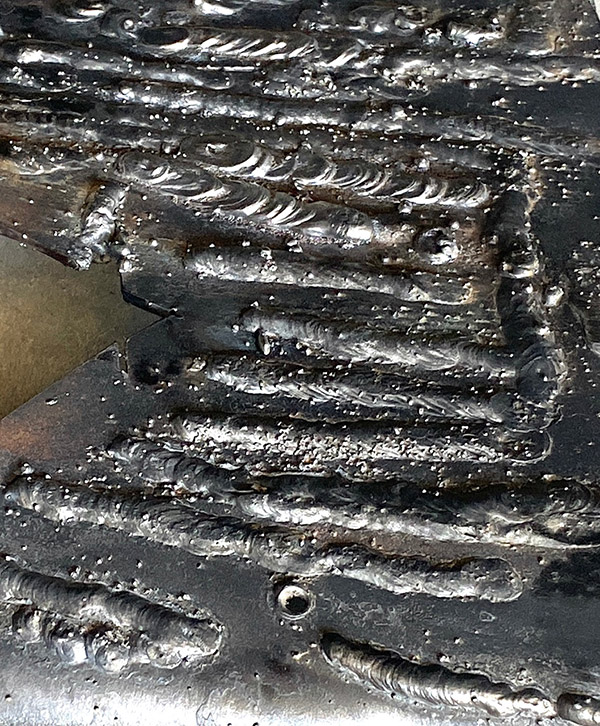
The above samples are on 1/8-inch thick steel. It’s an assortment of stick, TIG and flux core. If you look closely, you’ll see fleeting moments when everything was going well, followed by disaster. I give the $120 Vevor 130 high marks for economy and it really does weld all three processes. I haven’t yet welded long enough to overheat the machine, a common problem with cheap welders. If you want to weld 8-hours a day, you’ll need to spend a few thousand dollars.
I’ve been watching tons of how-to-weld videos and I plan on taking a welding class at NMSU next semester (Go Aggies!), my goal being to sort this mess out and produce some decent welding before I die. Note: All the samples in this story are just running beads. It’s harder to actually stick two pieces of metal together. Hang around ExhaustNotes.us long enough and you’ll see if I ever do become Vulcan.
Here at ExNotes, we cover a lot of topics: Motorcycles, motorcycle touring, product reviews, concrete, guns, reloading, and more. And coffee. The thought occurs to me we’ve written a lot about coffee, from the primo Batdorf and Bronson beans provided by good buddy Ren to just about everything else. About now, you might be wondering: Where is this blog going?
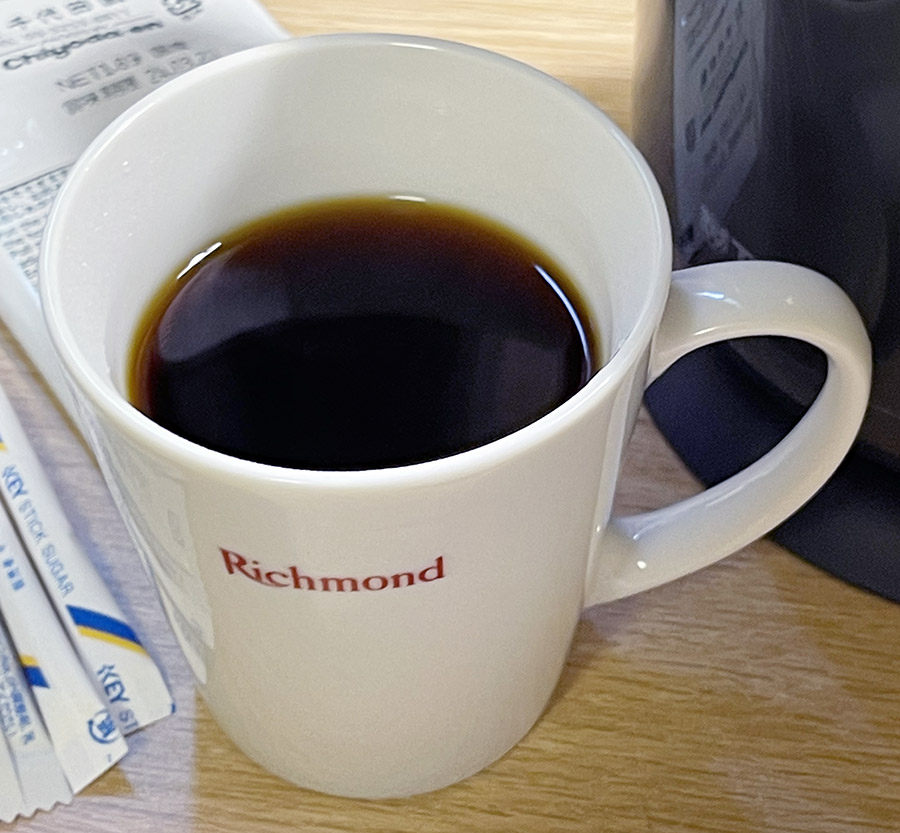
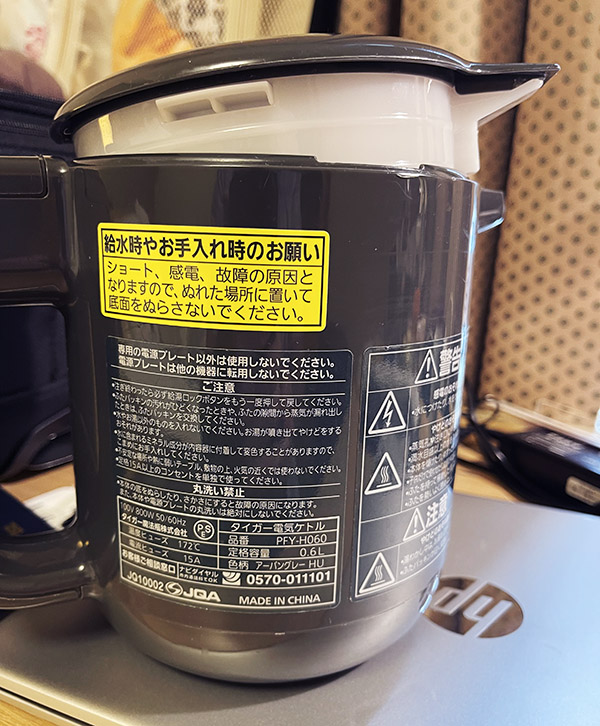
Well, I was recently in Tokyo. I gave a class in Singapore and Sue and I thought as long as we had invested the 20+ hours to get there, we might as well stop in Japan on the way home (neither of us had ever visited Japan before). I’ll post a blog or two about the land of the rising sun in the coming days, but for now I wanted to talk about making coffee in our Tokyo hotel room. On these Asian trips, I’m usually up by 2:00 or 3:00 a.m. (there’s a 16 hour time difference between Japan and LA, and my biological clock doesn’t handle it well). They don’t serve coffee in the hotel lobbies over here, so you either make coffee in your hotel room or you don’t have coffee. For me, not having coffee has never been an option.
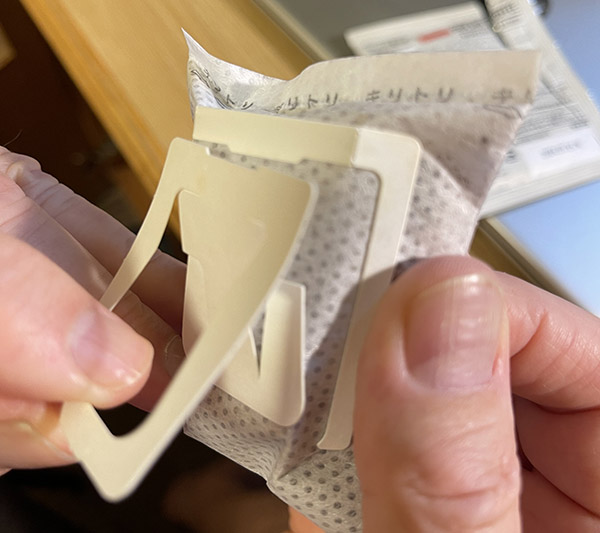
If you’ve read Riding China, you know that Gresh and I became experts at making coffee at places in China so remote they had to pipe in water and air. Our coffee was always prepared using instant Nescafe, which is almost a crime against nature for folks who enjoy a good cuppa Joe. Nescafe reminds me of that old engineering saying: Halitosis is better than no breath at all. But when it comes to making coffee in a hotel room, the Japanese had a better idea. It took me a while to dope it out and I finally had to read the instructions to do so. When I did, I realized: Clever people, these Japanese are. Take a look.
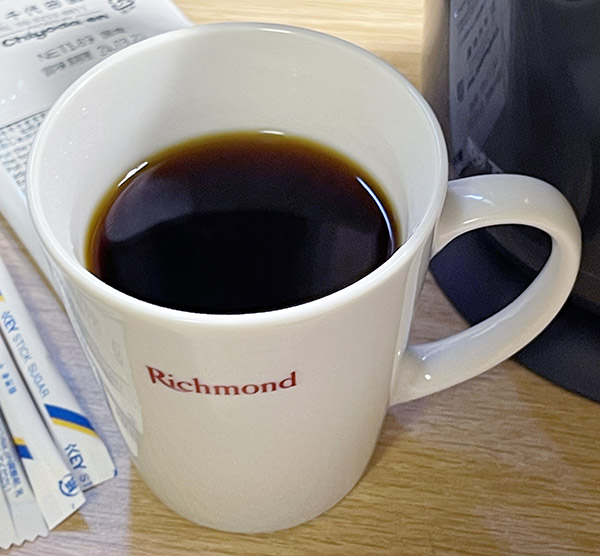
The water heater for making coffee. I thought the coffee bag would to into the white gizmo below the lid. I was trying to find a way to open it up. When I spotted the Phillips head screws securing it to the lid and I thought I needed a screwdriver, I realized I was on the wrong track. There are no English instructions anywhere on this pot.The bag of coffee. How the hell does it fit into the coffee pot?Ah, the flip side. No instructions in English, but there are pictures. I panicked initially when I couldn’t find the holding fixture the pictures show.Could it be? A cardboard fixture built into the coffee bag?Ah, these people are very, very clever. You heat the water in the pot, mount the coffee bag with its included cardboard mounting fixture in your cup, and pour the hot water over the coffee.It’s genius. Pure genius.And it was a damn fine cup of coffee, too!
Gresh and I sure could have used this when we rode across China. Next time, I guess, if I can find a place to buy these coffee bags. And you know what? As soon as I wrote that last line, I remembered: Amazon is your friend. I did a search on drip bag coffee, and wow, here they are!
I couldn’t let a story about coffee get by without a commercial or two…the first one being for our book, A Cup O’ Joes. Have you picked up a copy yet?
And the second commercial…how about Riding China, from which you can learn all about how two die-hard coffee drinkers struggled across the Gobi Desert, the Tibetan Plateau, and more in China, the land where people don’t drink coffee?
Harbor Freight’s economy brand, Chicago Electric, has been much improved over the years. Back in the 1990s you were lucky to get a few months use out of a CE tool before it burned up. Of course, what did you expect from a 10-inch circular saw that cost 15 dollars? They were sort of one-use tools, bought for a particular job then tossed in the trash after the job was done. This early crappiness has tainted the Chicago Electric brand and there might still be a few dud CE products out there.
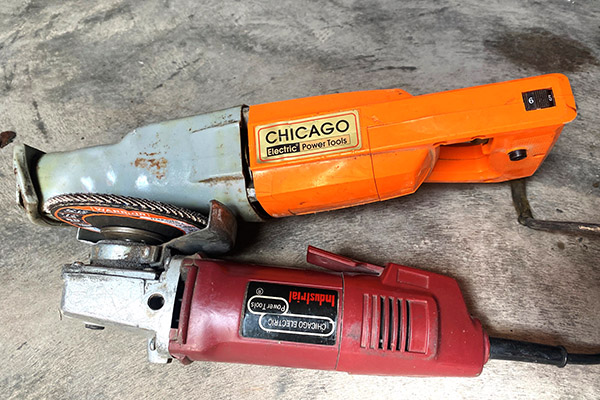
I’ve had pretty good luck with more recent Chicago Electric stuff. Their paddle-switch 4-inch grinder has lasted 10 years for me and is still going strong. I have a Chicago Electric sawsall that is pretty old and it has held up well. You no longer get smoke pouring out of a Chicago Electric tool the first time you plug it in.
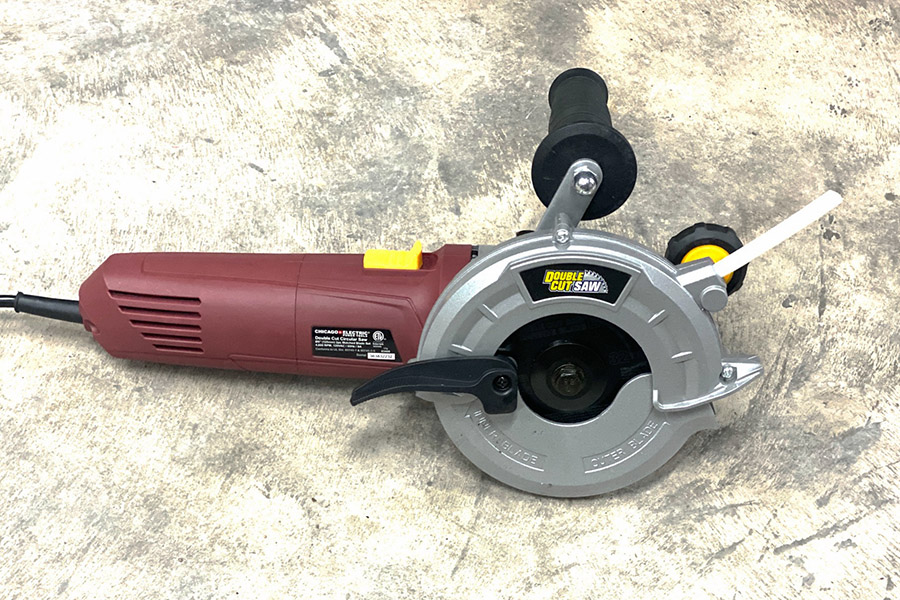
This Chicago Electric Double Cut saw is marked down on clearance at 44 dollars. In Harbor Freight land a clearance item usually means the tool is being discontinued and when they are out they are out. I had to get my local HF technician go into the back of the store and rummage around to find one. You may have to visit several stores to find one. Clearance tools are usually superseded by a similar tool with a possible upgrade in quality or just bold new graphics so if you can’t find a Double Cut saw just wait a bit and another one with a different part number will appear. Although, it won’t be $44.
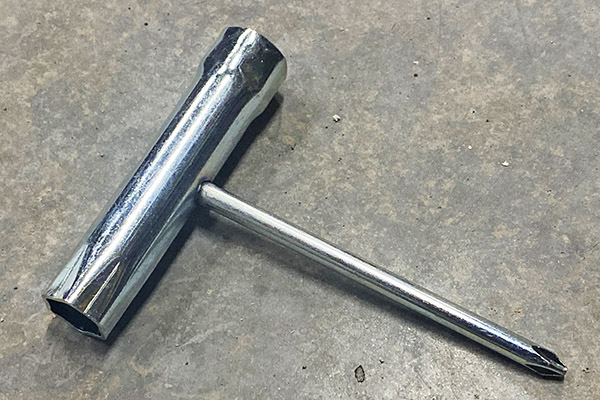
I’m impressed with the improved quality of the CE Double Cut saw. The castings, both metal and plastic look well made and finished nicely. This saw has a bit of heft so at least there is some copper and steel in the thing. The saw comes mostly assembled, you only need to put the grab handle on and feed a lube stick into the nifty feed hole provided. Like most CE power tools the cord is stiff and plasticky I guess it’s better than the SO type of cord with the easily damaged jacket. The saw comes with a nice little wrench for changing the two (included, carbide-tipped) blades.
Ergonomically, The saw has some issues for me. The power switch is an odd, push down and forward, deal that takes some getting used to. You have to hold the switch on, this puts your hand close to the front of the saw and your other hand is holding the grip nearby. I would move the switch aft on the tool to give better hand separation and thus more steering control. By necessity, the saw blades are almost completely shielded which makes seeing your cut line impossible. There is a V- notch in the front of the blade housing that gives an Idea of where the cut will be. If you want a precision cut you’ll need to rig up a fence. By the way, don’t even think of removing the shields as the Double Cut puts out metal particles when it plows through steel. Wear safety goggles!
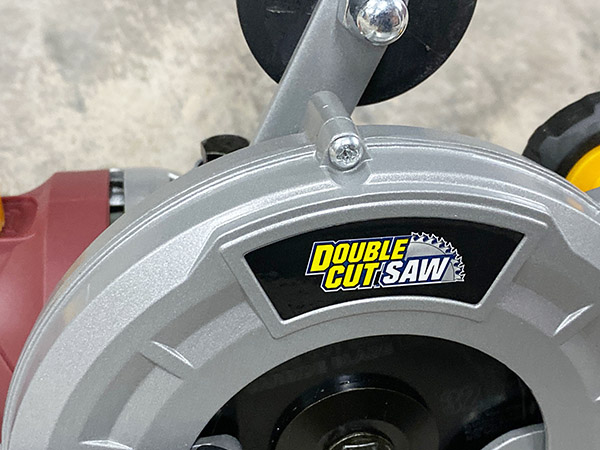
What makes the Double Cut somewhat unique is the two, counter-rotating blades. This arraignment cancels out any kickback or climbing out of the cut. Cutting round stock is a breeze, as the material doesn’t try to spin when the blade makes contact. The saw feels wonderfully neutral in action and not the least bit scary cutting steel. The saw is useable on most any material: steel, aluminum, and wood. There is a blade lube feature for use on stickier metals like aluminum or sappy woods. I bought the saw for metal.
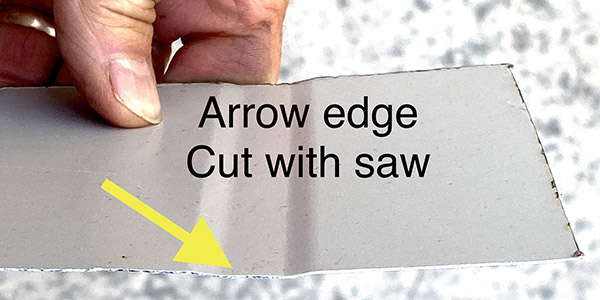
I’ve used the saw on 1/8” mild steel and it cut like a hot knife through I Can’t Believe It’s Not Butter. Again, there’s a fine mist of metal particles generated while cutting so wear those goggles. The finished cut is clean with no sharp flashing like with a 4-inch abrasive cut off wheel. On sheet metal roofing the saw cuts as fast as you can push leaving a clean, square edge to slice your finger on when you hoist the panel onto the roof. If you do metal roofs you need this saw.
I probably should take the saw apart and grease the internals but the thing might fly apart on disassembly so I’ll use it as is for the foreseeable future. The depth of cut is only 1-1/4’ but really, if you tried cutting steel that thick you’d probably burn up the saw. Blade depth adjustment is in your hands as there is no hinged foot to set the blade. I don’t know how long the blades will last cutting steel and if the saw is truly discontinued you might want to stock up on replacement blades available at your local Harbor Freight store.
The verdict is in and I pronounce the Double Cut a fine deal at only 44 dollars. If you work with thin-ish metals, say 1/8” to sheet metal this could be your saw. For complex cuts I still use the 4” grinder with an abrasive, metal cutting blade because the line of sight is better, you can see exactly where the blade is. Harbor Freight isn’t the only company that makes this type of saw. Other brands are available, here’s one online at Amazon and the saw looks about the same.
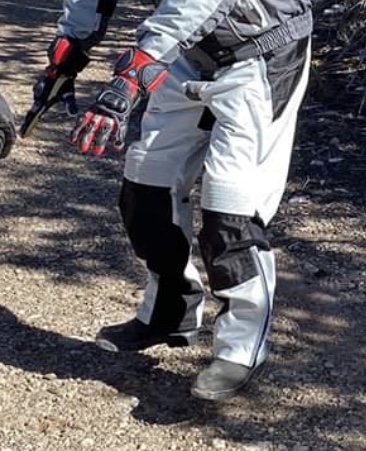
As any loyal reader of ExhaustNotes.us knows, I recently got all new riding gear from British Motorcycle Gear. In this blog we tackle BMG’s Adventure pants, a lighter weight alternative to BMG’s Pioneer pants. When I say lighter weight I don’t want to mislead you; the Adventure pants are still heavier than denim jeans.
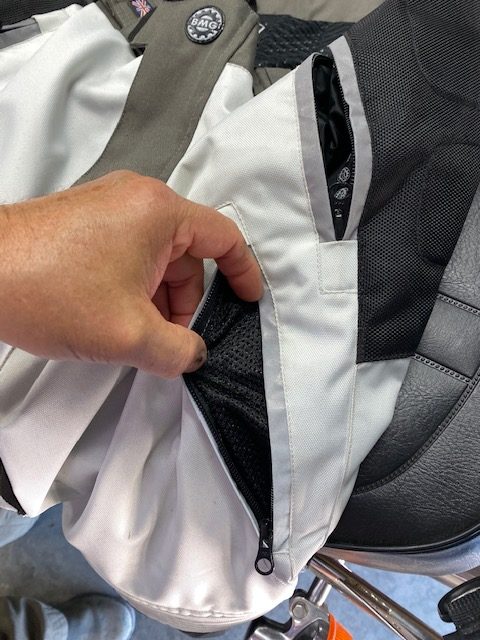
The Adventures have two zippered vents on the front side that let in a lot of air when you stand up on the pegs like a real adventure rider is prone to doing whenever there is a camera around. Sitting down like a lazy chopper rider, the vent flow is less powerful but you can still feel it. There is a mesh liner that combined with the 500 denier shell gives a good compromise between protection and sweating.
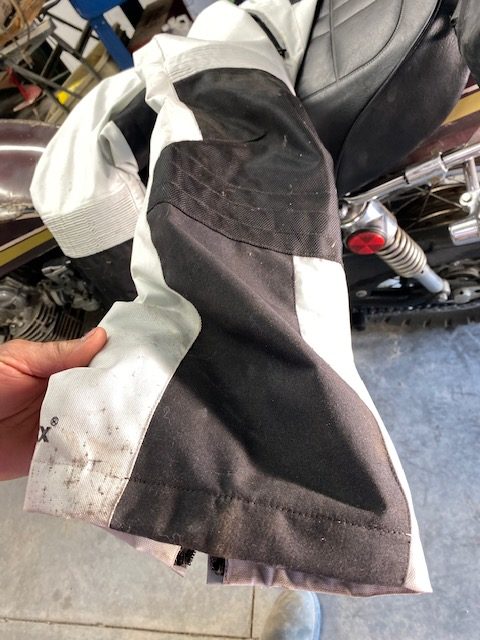
One feature that stands out for me is the heat resistant, Nomex inner-calf panels. The high-mount, left-side Husqvarna exhaust system has burned a hole through several of my rain pants and street slacks. So far I haven’t been able to melt the Adventure pants.
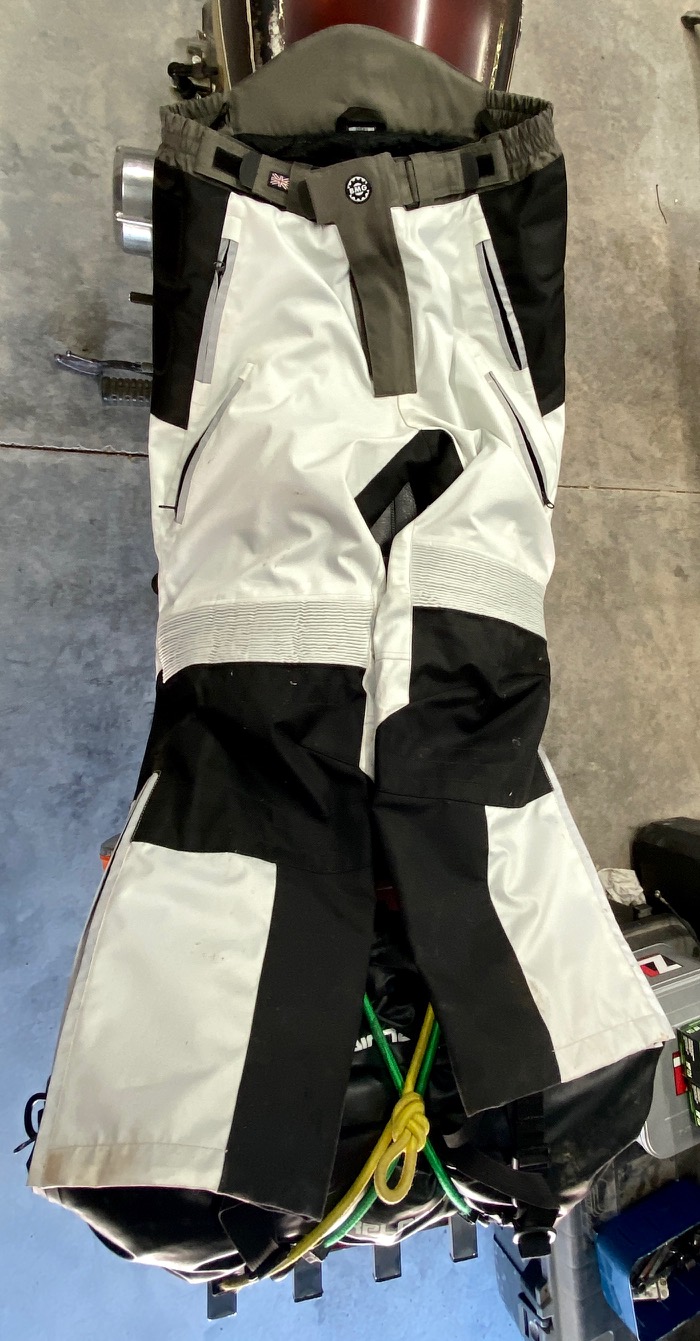
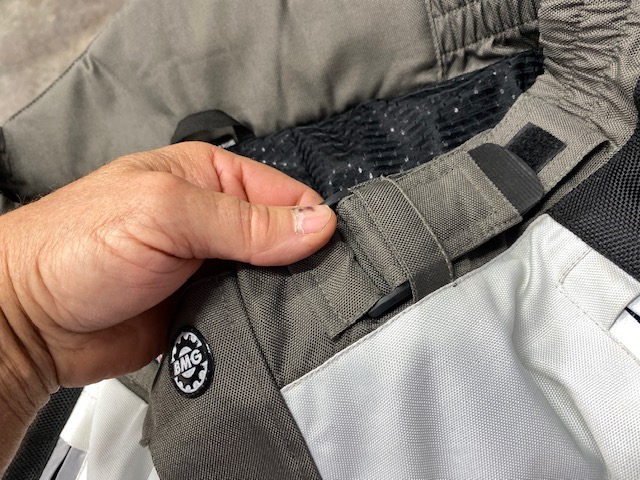
Another feature I like on the Adventure pants are the three belt loops. I’d like to have a few more loops but three loops beat none because I wear a belt. You’d have to have a misshapen body like mine to appreciate the extra security a belt gives you in big-air situations. There’s nothing more embarrassing than getting pantsed by gravity.
On the sides of the Adventure pants are waist adjusters. These are handy for postprandial riding when your belly is bloated from too many carbohydrates. My odd combination of fat waist and short legs make finding motorcycle pants to fit a real challenge. I’ve been riding motorcycles for 50 years and the BMG Adventure pants come the closest to fitting in all those years. The 29-inch legs could be a 1/2 –inch shorter but as long as I have my belt it’s not a problem.
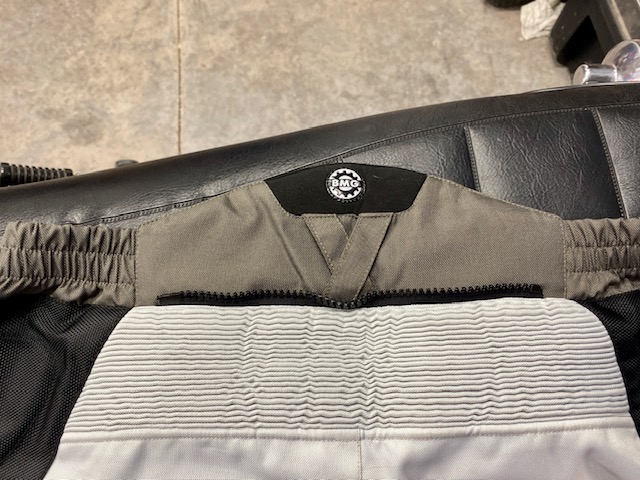
My Adventure pants came without armor, which is fine with me. I also have the much heavier-duty, armored BMG Pioneer pants to test but that will have to wait for cooler weather. The Adventures have long leg zippers but I didn’t need them to enter or egress the pant. If you are a weirdo who puts their boots on first, then your pants you will find the zippers handy. There is a short piece of zipper on the backside that can connect to BMG’s line of jackets. I never use those back zippers but I bet they stop drafts pretty well. The back zipper will also keep your jacket from riding up in a crash and possibly save a few square feet of road rash. Hmmm…maybe I should start using that zipper!
I’ve worn the Adventure pants down to 40 degrees with only a thin thermal underwear layer and was warm and comfortable. For my personal thermostat 40 to 80 degrees F was right in the Adventure pant wheelhouse. Above 90 and into the 100’s the Adventure pants are a bit too warm for my taste. Really, for motorcycle riding above 100 degrees shorts and flip-flops are the only way to go. Just kidding.
For New Mexico use the BMG Adventure pants are a great 3-season bit of riding kit. If you live where it rarely gets to 90 degrees or above then you can call them 4-season pants. I feel safer wearing them on a motorcycle than I do in plain old dungarees. The retail price is not out of this world when you consider the price of Levis jeans or cigarettes. Just punch in the code BMGJOES when checking out, and you’ll get an 11% discount on everything (except gear that’s already on sale, and Halcyon mirrors and goggles). Check out the British Motorcycle Gear website; I know you’ll enjoy it.