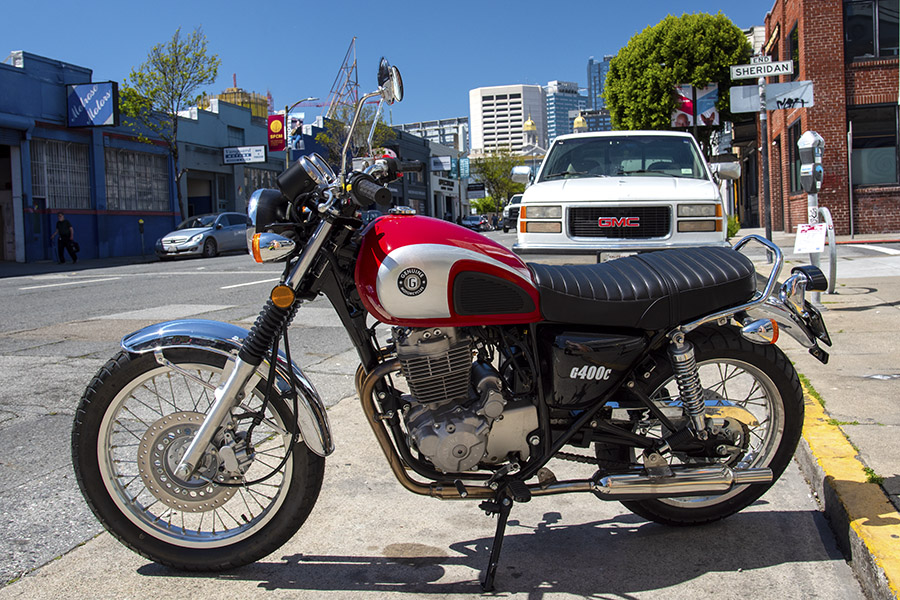
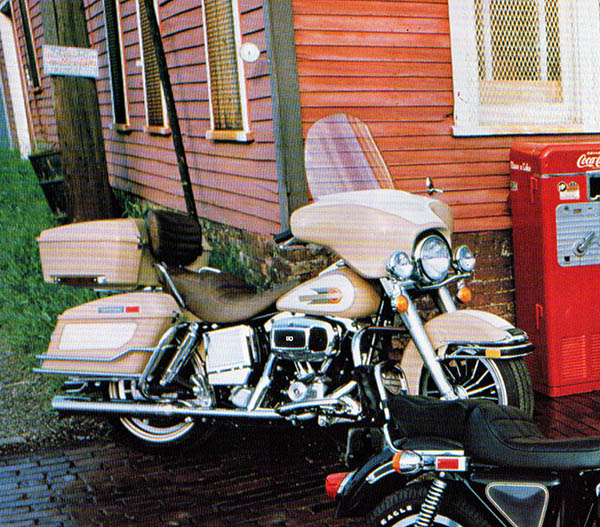
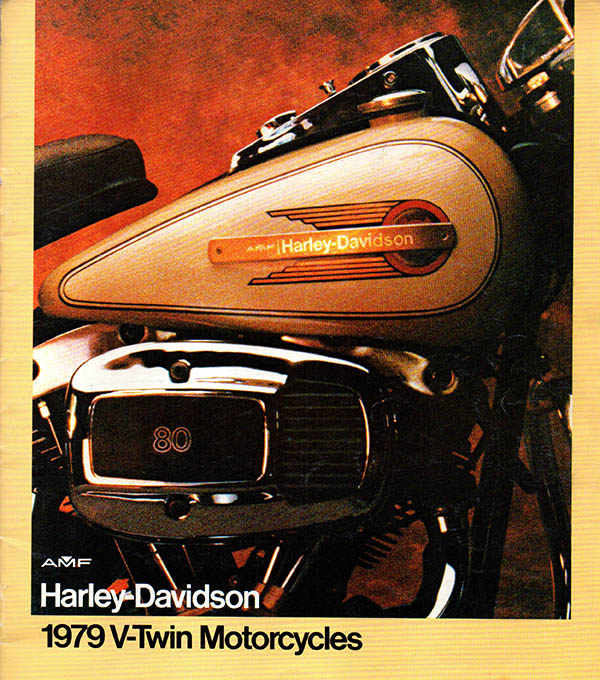
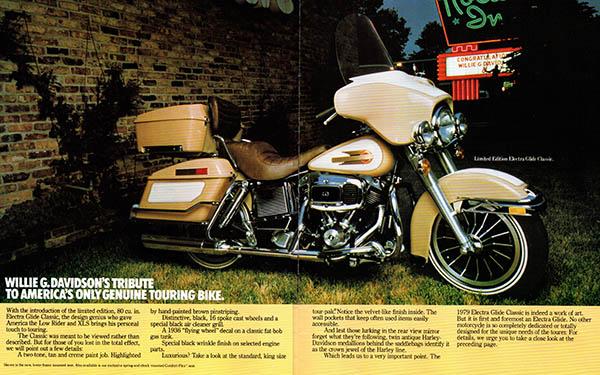
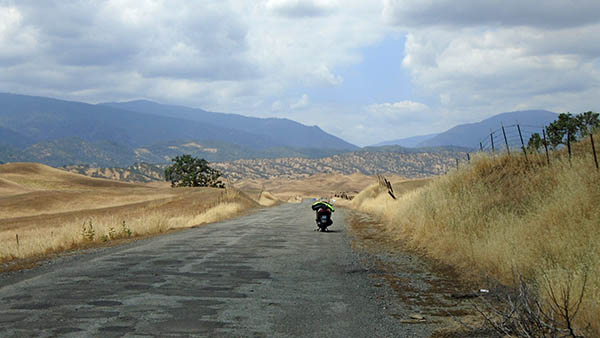
It was beautiful, it was something I always dreamed about owning, and I couldn’t ride a hundred miles on it without something breaking. I paid more for it than anything I had ever purchased, I sold it in disgust two years later for half that amount, and today it’s worth maybe five times the original purchase price. I wish I still had it. I’m talking about my 1979 Harley-Davidson Electra-Glide, of course. That’s the tan-and-cream motorcycle you see in the photo above, scanned from my original 1979 Harley brochure. The motorcycle is long gone. I had the foresight to hang on to the brochure.
All of the photos in this blog are from that brochure. I wasn’t into photography in those days, but I wish now that I had been. The Harley’s inability to go a hundred miles without a breakdown notwithstanding, I hit a lot of scenic spots in the Great State of Texas back in 1979. The Harley’s colors would have photographed well. The only photo I can remember now is one of me working on the Harley with the cylinder heads off. It seems that’s how the Harley liked to be seen. But I’m getting ahead of myself.
So the year was 1979, I was young and single, and I was an engineer on the F-16 at General Dynamics in Fort Worth doing the things that well-compensated, single young guys did in those days: Drinking, riding (not at the same time), chasing young women, and dreaming about motorcycles. If you had mentioned gender-neutral bathrooms, man bun hairstyles, a universal basic income, democratic socialism, sanctuary cities, the Internet, or something called email in those days (especially in Texas), no one would have had any idea what you were talking about, and if you took the time to explain such things, you would have been run out of town after being shot a few times. Texas in 1979 was a good time and a good place.
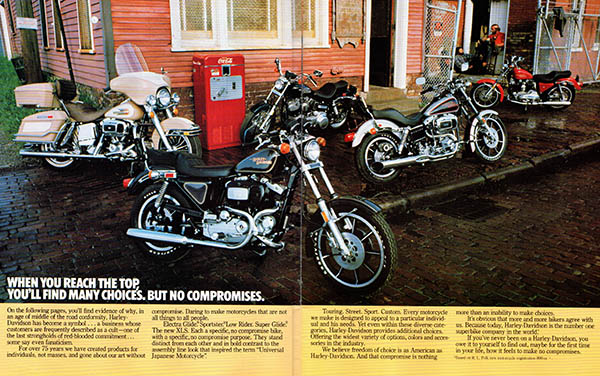
I stopped often at the Fort Worth Harley dealer, and Harley was just starting to get into the nostalgia thing. I had sold my ’78 Bonneville and I had the urge to ride again. Harley had a bike called the Café Racer and I liked it a lot, but I took a pass on that one. Then they introduced the Low Rider and I loved it, but when sitting on the showroom Low Rider I turned the handlebars and one of the handlebar risers fractured (Harleys had a few quality issues in those days). Nope, it wouldn’t be a Low Rider. Then they introduced the Electra-Glide Classic, that stunning bike you see in the photos here. It was a dagger that went straight to my heart. I was stricken.
The Electra-Glide Classic was Harley’s first big push into the nostalgia shtick and it stuck. At least for me it did. My first memory of ever being stopped dead in my tracks by a visually-arresting motorcycle was with a Harley Duo-Glide full dresser when I was a kid (it was blue and white), and the Classic brought that memory home for me. The Classic’s two-tone tan-and-cream pastels were evocative of the ‘50s, maybe a Chevy Bel Air (even though those were turquoise and white, a color Harley later adopted in the early ‘90s with its Heritage Softails). The whole thing just worked for me. I had to have it.
I sat on the Classic and it was all over for me. I fell in love. I knew at that instant that I was meant to be a Harley man. I turned the handlebars and nothing broke. There was a cool old sales guy there named Marvin, and I asked what the bike would cost out the door. He already knew the answer: $5,998.30.
Hmmm. $5,998.30. That was a lot of money. I was riding around in a new CB-equipped Ford F-150 that had cost less than that amount (hey, it was Texas; Breaker One Nine and all that). My internal struggle (extreme want versus $5,998.30) was apparent to old Marvin.
“You know you want it,” Marvin said, smiling an oily, used-car-salesman, Brylcreem smile (these guys all went to the same clothing stores and barbers, I think). “What’s holding you back?”
“I’m trying to get my head wrapped around spending $6,000 for a motorcycle,” I said.
Marvin knew the drill. He was good at what he did. He probably made a lot more money than I did.
“Are you single?” he asked.
“Yep.”
“Working?”
“Yep.”
“Got any debt?”
“Nope.”
“So what’s your problem?”
“It’s like I said, Marvin,” I answered. “I’m trying to justify spending six grand on a motorcycle.”
“You’re single, right?”
“Yep.”
“Well, who do you need to justify it to?”
And, as Tom Hanks would say 30 years later in Forrest Gump, just like that I became a Harley rider.
Yeah, the bike had a lot of quality issues, the most bothersome being a well-known (after you bought one, that is) tendency for the new 80-cubic-inch Shovelhead valves to stick. I first stuck a valve at around 4,000 miles (all of a sudden my Classic was a 40-cubic-inch single, and Harley fixed it on the warranty). I asked Marvin about that, and the answer was, “Yeah, this unleaded gas thing don’t work too good with the new motors. Put a little Marvel Mystery Oil in each of the tanks, or maybe a dime’s worth of diesel, and you’ll be okay…”
Seriously? Marvel Mystery Oil? Diesel fuel?
But I wanted to be good guy, and I did as directed. It wasn’t enough. A valve stuck again at 8,000 miles, Marvel Mystery Oil and that dime’s worth of diesel notwithstanding. Another trip to the dealer, and another valve job. I could see where this was going. The bike had a 12,000 mile warranty.
“So, Marvin,” I began, “what happens the next time a valve hangs up?”
Marvin smiled a knowing smile. “It all depends which side of that 12,000 miles you’re on.” Somehow, Marvin’s Texas accent made it not hurt as much.
Sure enough, at 12,473 miles, a valve stuck for a third time. This one was on me. I pulled the heads, brought them to the dealer, and paid for that valve job. You know, you can just about fix anything on a Harley with a 9/16 wrench and a screwdriver. It was easy to work on. But it wasn’t just the valves sticking. The rear disk brake had problems. The primary cover leaked incessantly. And a bunch of other little things. I’m not kidding. The mean time between failures on that bike was about a hundred miles, and I’d had enough. I called the bike my Optical Illusion. It looked like a motorcycle.
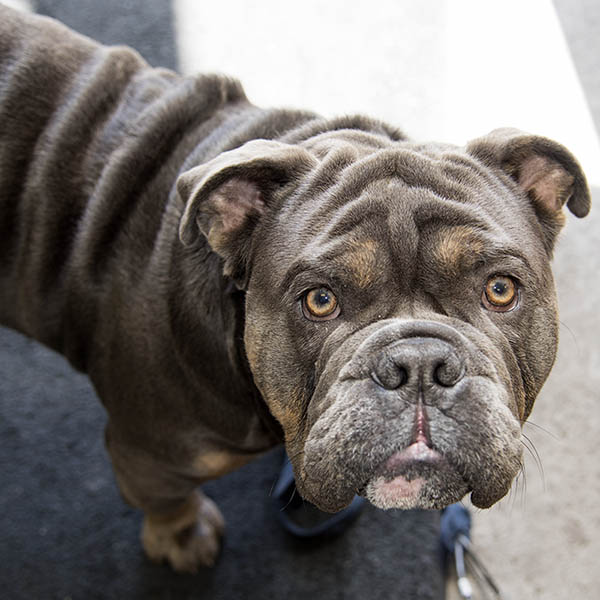
One other thing about the Harley sticks out. I took it with me when I moved to California, and at one of the dealers one of the many times when it was in for service, the dealer’s mascot did what I suddenly realized I had wanted to do. That mascot was a huge, slobbering St. Bernard. It sauntered over to my bike and took a leak on the rear wheel. “Oooh, better hose that down,” the service manager said. “That will eat up the aluminum wheel.” I had to laugh (hell, everyone else was) as the guy sprayed water from a garden hose all over the bike. That dog had beat me to it. He did what I had felt like doing the entire time I owned the bike. The kicker is that even though the service manager sprayed the bejesus out of the bike in a vain attempt to remove all traces of the St. Bernard’s territorial claims, it was all for naught. From that day on wherever I went if there was a dog within a hundred yards, it did the same thing. My Harley was a two-tone tan-and-cream traveling fire hydrant.
Good Lord, though, that Harley was beautiful. Park it anywhere and it would draw a crowd. Half the people who saw it wanted a ride, and if they were female I was happy to oblige. It was big and heavy and it didn’t handle worth a damn, but it sure was pretty. The only time I almost crashed I was riding through a strip mall parking lot admiring my reflection in the store windows. That’s how good-looking it was. I wish I kept it.
Read about our other Dream Bikes!

 In all passions you will find lovers and users. The vintage motorcycle passion, looking backwards towards a rose-tinted youth seems to have more than its share of both. Most vintage motorcycle enthusiasts are into the hobby because they either had a particular model or dreamed of owning a particular model way back when they were freshly weaned from the teat of childhood. Powerful first impressions drill that Yamaha RT1 or Kawasaki Z1B into a youngster’s brain like the clean, soapy scent of their first girlfriend’s hair.
 Bob, that’s awesome. We’re glad you’re enjoying
 Motorcycle road racing in America has not met expectations for quite a while now. Our guys are no longer dominating GP racing as they did in decades past. MotoAmerica, our premier road racing league has made strides by reinstalling the 1000cc bikes as the premier class and bumping the 600’s down to B-team. Hiring my Internet-buddy Andrew Capone as rainmaker for the series is another great move towards professional sponsorship and revenue generation. I’ve never raced on pavement but I rank as an expert spectator due to the sheer number of road races I’ve attended. I’ve got a few ideas on how to make MotoAmerica better and I’m not shy about cranking them out.
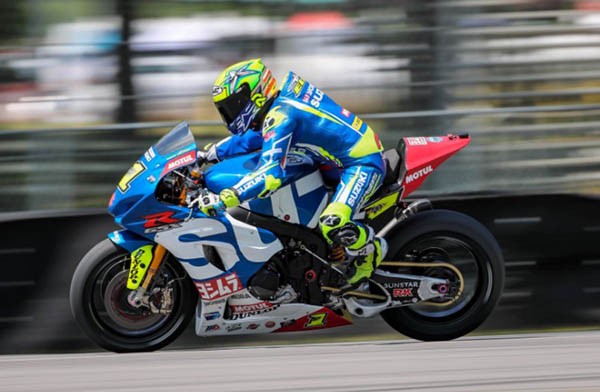 American road racers are never going to get back atop the pinnacle of GP racing until they test themselves against the world’s best. It’s expensive for a US rider to got to Europe so why not bring Europe to the USA? What if all the contract issues could be solved and MotoAmerica paid start money to a few of the GP guys? Pay Rossi to start a few races, Marquez or Dovizioso would be a huge draw. I’m guessing the increased gate alone would pay for Rossi. This harkens back to when European motocross stars were paid to compete over here. American racers gained first hand experience on where they needed to be in order to defeat the best. There is no physical barrier preventing our top AMA racers from competing on even terms with world-class GP racers. Show our greyhounds the European rabbit and they will move heaven and earth to stay on their tail.
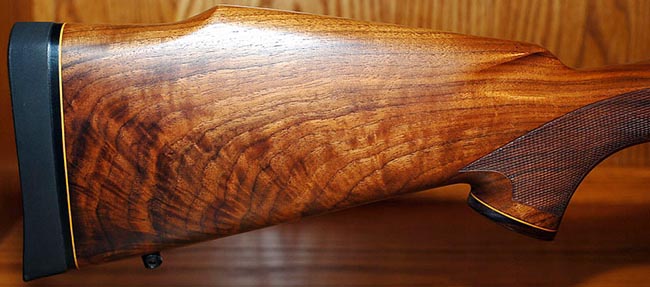


 If you roll along dusty, unpaved county road A011 through the desert shrubbery of New Mexico’s south-central region, and you roll with purpose, you will fetch up on the shores of Kilbourne Crater. Kilbourne was formed by a maars-type volcanic eruption. In a maars eruption a crater is created by hot magma coming into contact with the water table. When the two meet, the rapidly heated water turns to steam, expands and blows huge chunks of ground skyward. By huge I mean 2.5 kilometers across 1.8 kilometers wide and 125 meters deep. It’s a big hole and it must have made quite a racket when it blew its stack 20,000 to 80,000 years ago.
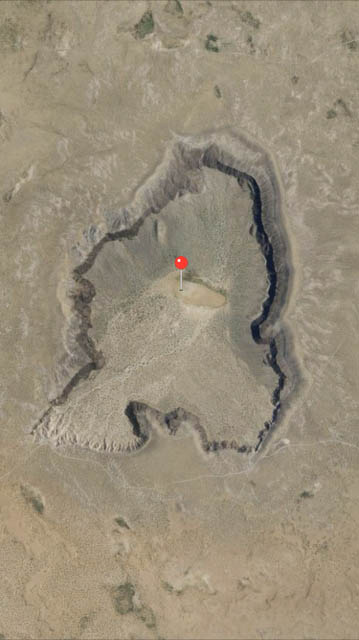 Maars volcanic eruptions don’t form the classic Hanna-Barbera, cinder cone shape or leave behind crowd-pleasing lava flows. At first I thought a meteor caused the crater but the crew at Southwest Expeditions had several guest speakers situated under a billowing tent to set me straight. They also had a van if you didn’t want to burn your own fuel to get to the crater. I saved $2.57. In addition to downloading a heck of a lot of information about volcanism into the assembled masses they served us a fine chicken-taco lunch.
 Lunch was fabulous except for one thing. That thing being a giant jar of sliced jalapenos. No one was eating them because the lid was too tight. I gave it a good twist but the lid would not budge. I’m not the strongest guy in the world but I can open a damn jalapeno jar, you know? I finally gave up and handed it to this big guy that looked like Chief from the movie One Flew Over The Cuckoo’s Nest. I swear, he took the lid in his fingertips and the lid spun off easy as pie.
 It put a damper on my lunch I tell you. I ate moody qua-moody. Am I getting old? Will I need a Clap-On soon? Life Alert? After the jar debacle it was probably best that Southwest Expeditions canceled our hike down into the crater. The temperature was 92 degrees and the wind was howling. No sense crushing anyone else’s sense of self-worth.
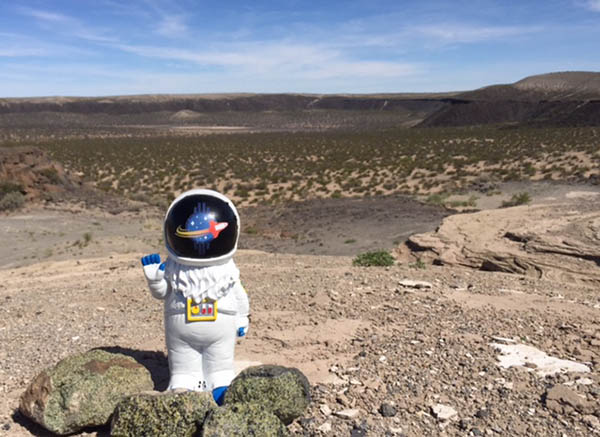
 The reason for all of this activity in the middle of nowhere was the 50th anniversary of astronauts Conrad, Bean, Gibson, Carr, Irwin and Schmitt training in Kilbourne Crater for their upcoming Apollo 12 Moon mission. That would be the second Moon landing. Kilbourne was chosen for its dust, the rough terrain and the multitude of geologic examples found at the site.
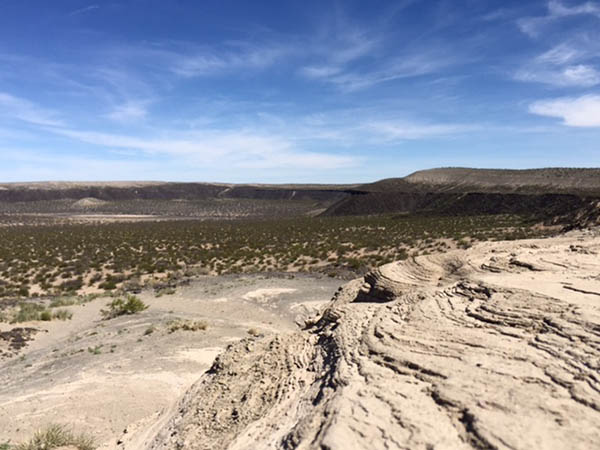 Other Apollo missions trained at Kilbourne: Apollo 13, 14, 15 (canceled), 16 (renamed 15) and 17 crews all did their time in the hole. NASA’s budget and our will to explore the Moon waned and the Apollo missions kind of ran out of steam. Which, in a suitable ending is what created their moon-mission training ground those many years ago. Maybe one day NASA will return to Kilbourne and use its dusty, rocky landscape to train another generation of astronauts. I hope to see America once again become a space-faring nation and that those astronauts will be heading to Mars.