Power Custom Base Pin

By Joe Berk

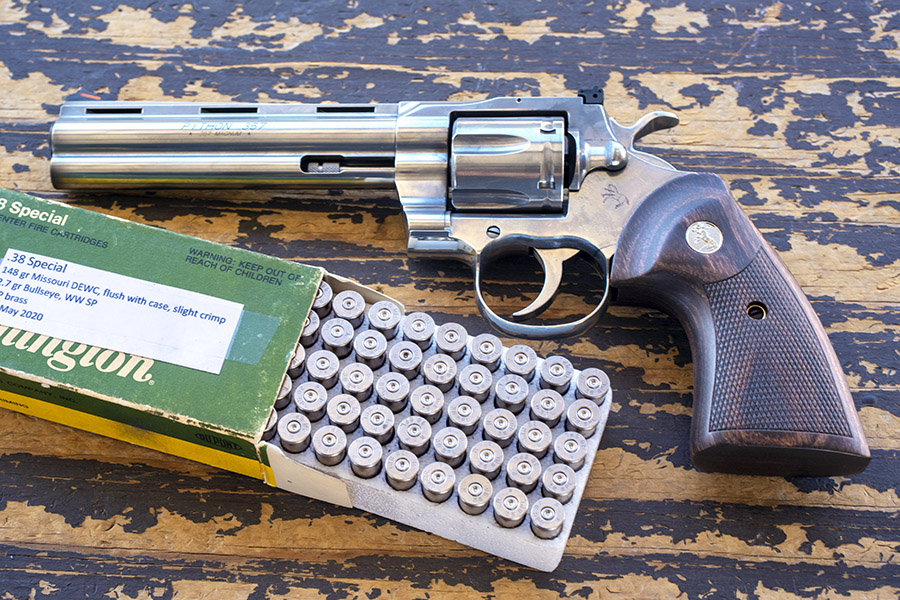
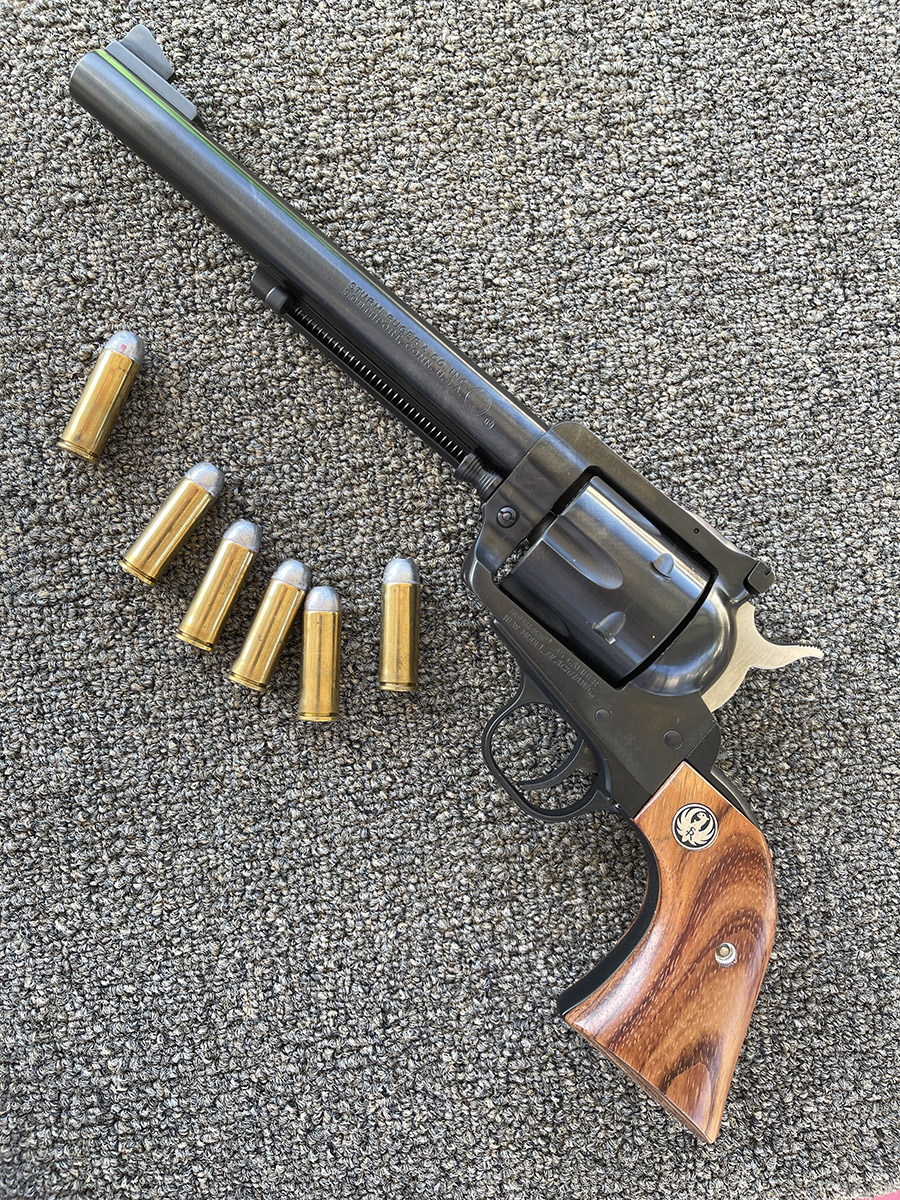
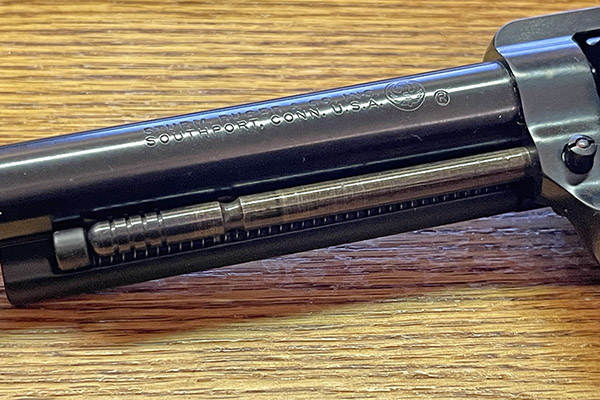
One of the very few areas in which the Ruger Blackhawk design can be improved is cylinder shaft retention.  I experienced this problem many decades ago on a Ruger .357 Blackhawk, and back in those days, the easiest thing to do with a problematic firearm was to sell it (that’s not so easy these days).  I don’t want to sell any of my guns, especially my 200th Year Ruger .45 Colt Blackhawk.  It’s the one you see in the photos above and below.

Before I go too much further, let’s address terminology.  The Blackhawk cylinder rotates around a shaft that Ruger identifies as a base pin assembly.  That’s okay, I guess; Ruger makes a lot of guns and they can call their parts whatever they want.  I tend to use more precise and descriptive terminology.  I call the part the cylinder rotates around the cylinder shaft, and that’s what I’ll refer to it as in this blog.

To get the point of this blog, I had a problem the last time I had the Blackhawk on the range (which was only the second I had fired the gun).  I shot my 850 fps, 5.9 grains of Red Dot, and 200-grain cast bullet loads (which is a mild load), and suddenly, the gun would not cock.  On closer examination, I found that the cylinder shaft had jumped forward.  It was the return of a condition I had experienced on another Ruger Blackhawk back in the 1970s and then had completely forgotten about.

The cylinder revolves around a shaft that is held in place by a spring-loaded, frame-mounted lock.  Under heavy recoil, the cylinder shaft wants to stay where it is due to inertia as the gun recoils.  The spring-loaded lock engages a notch in the cylinder shaft, and it’s supposed to prevent that from happening.  Sometimes, though, the recoil is too much.   The spring-loaded lock is cammed out of place by the cylinder shaft inertia, and the cylinder shaft slides forward in the frame.

The left arrow points to the cylinder shaft. The right arrow points to the spring-loaded cylinder shaft retention pin. To remove the cylinder, push the retention pin to the gun’s right, and the cylinder shaft can be pulled forward. This allows removal of the cylinder for cleaning.
Under recoil, the cylinder shaft’s inertia can cause it to displace the cylinder shaft retention pin, and that allows the cylinder shaft to slide forward in the revolver frame (as you see here). When that occurs, the revolver hammer cannot be pulled all the way to the rear to cock the gun.

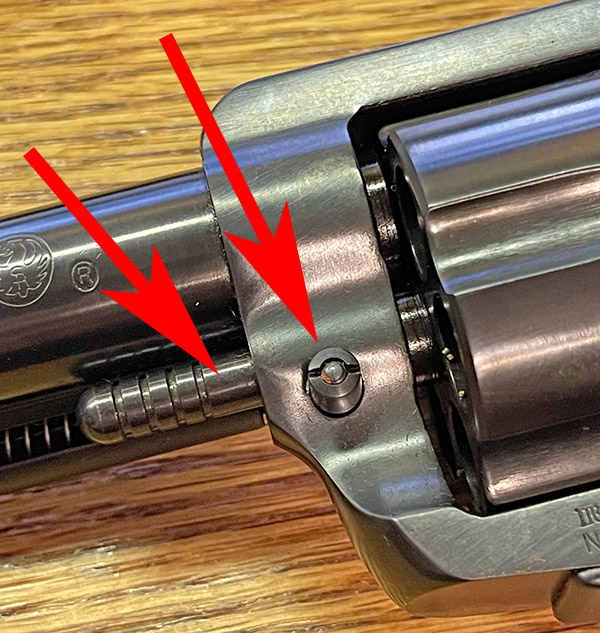
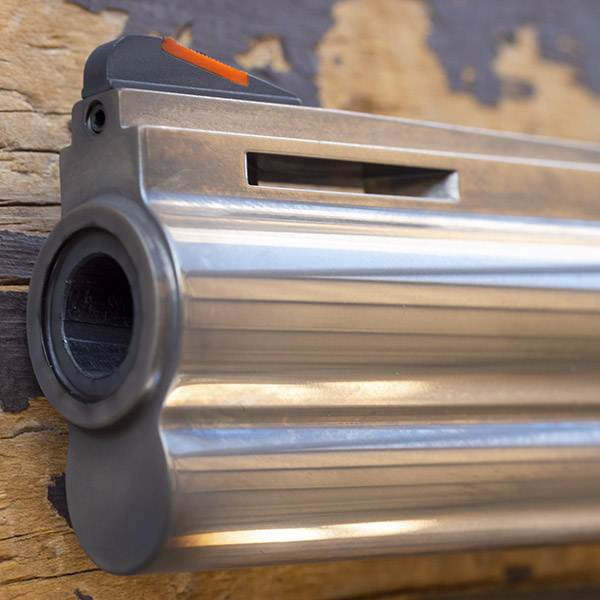
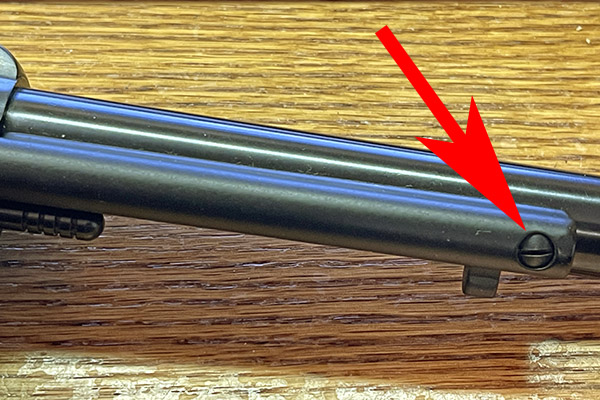
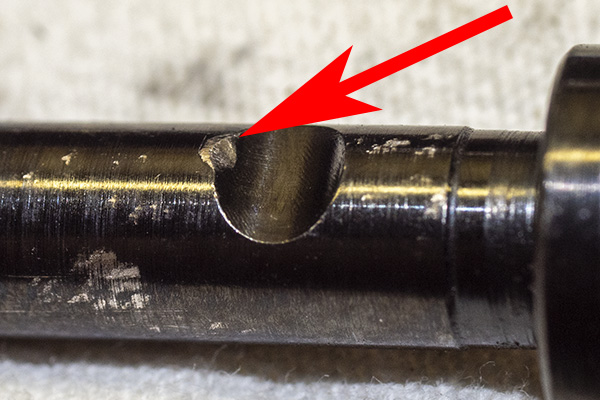
When the cylinder shaft slides forward in the frame, the spring-loaded pin at the other end of the cylinder shaft moves forward, too.  It shifts to a position that interferes with upward motion of the revolver’s transfer bar when attempting to cock the gun.  You can see the area of interference in the photo below.

When the cylinder shaft slides forward in the revolver frame, a spring-loaded pin on the end of the cylinder shaft moves with it. When that occurs, the cylinder shaft’s aft end pin no longer pushes on the transfer bar (indicated by the red arrow). The result is that the transfer bar is no longer held to the rear. When attempting to cock the gun, the transfer bar’s upward motion is blocked by the firing pin.

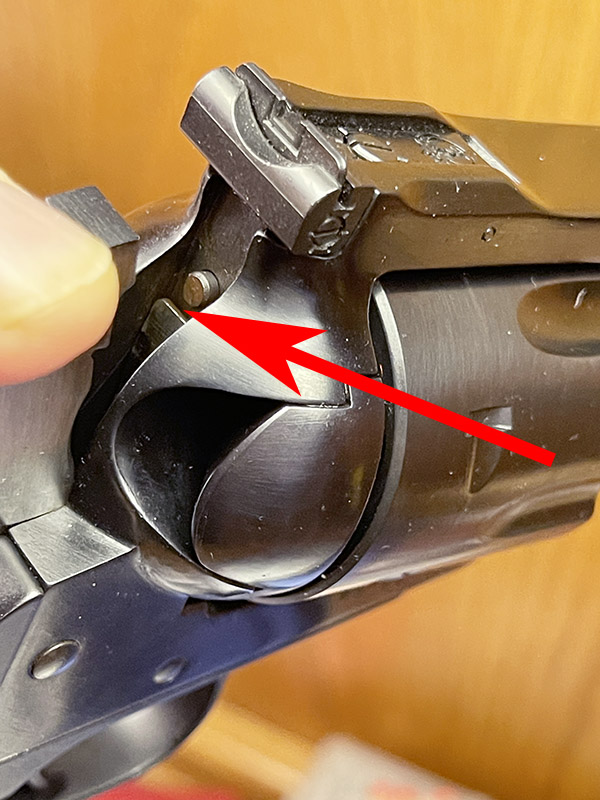
The transfer bar is designed to prevent the hammer from contacting the firing pin if the trigger is not pulled.  This feature prevents an unintended discharge is the gun is dropped.   The transfer bar is normally pushed to the rear by a spring-loaded pin in the back of the cylinder shaft, but when the cylinder shaft slides forward, that no longer occurs.  The result is that the transfer bar (no long held to the rear) catches on the firing pin, and the gun will not cock.

The Fix:  The Power Custom Base Pin

So what’s the fix to the cylinder shaft moving forward in the revolver when it recoils?  That would be a product called the Power Custom replacement base pin (note that Power Custom uses Ruger’s terminology for the cylinder shaft).  I bought one and this blog focuses on the good, the bad, and the ugly (and which, with a nod to Clint Eastwood, somehow seems fitting for a blog on a part that goes into a Western-styled six shooter).

The Power Custom replacement base pin (upper component) and the stock Ruger cylinder shaft. The little pin on the right end of each is what pushes the transfer bar to the rear, preventing interference with the firing pin when the revolver is cocked.  Note the Power Custom’s larger grip on the left.

Installation

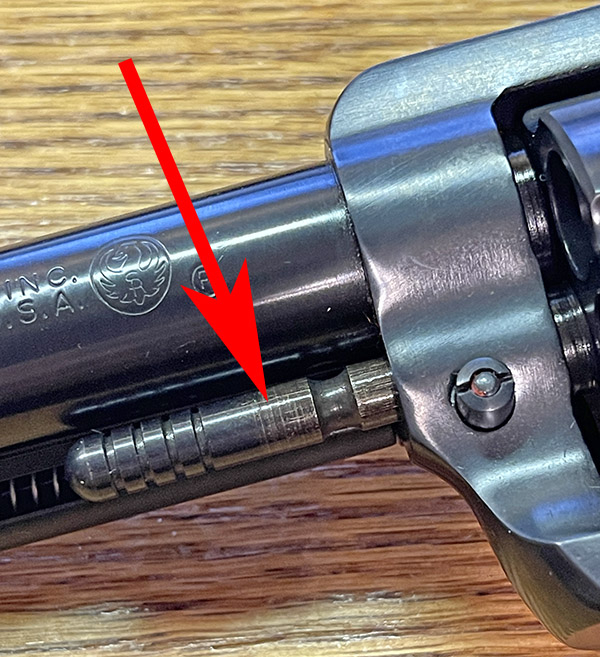
When I started to remove the Ruger’s cylinder shaft so I could install the Power Custom part, I discovered something I had forgotten.  The ejector rod subassembly has to come off to allow cylinder shaft removal.   Without doing so, the cylinder shaft cannot move far enough forward for removal.

A fully-extended cylinder shaft. The ejector rod and its housing had to be removed to remove the cylinder shaft.
The screw that allows removing the ejector rod housing.

Removing the ejector rod subassembly was easy enough to do, and after doing so, I pulled the original Ruger cylinder shaft and replaced it with the Power Custom part.

The Good

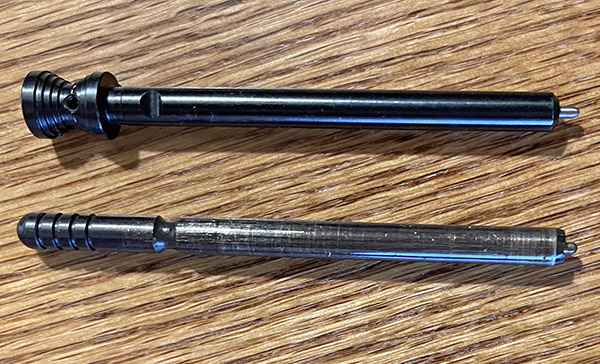
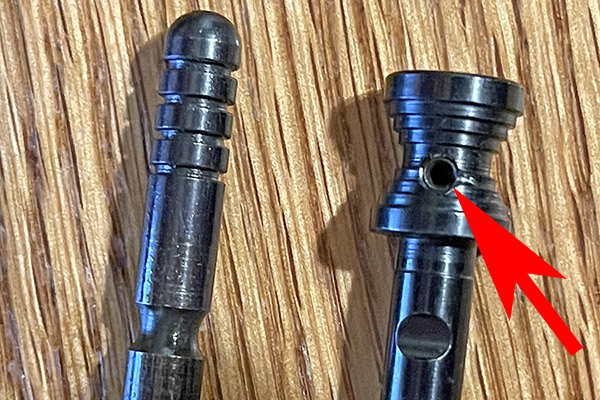
The Power Custom replacement base pin (which replaces the original cylinder shaft) has a tighter fit in the revolver frame and the cylinder.  The Power Custom part has a diameter of 0.2492 inches; the stock Ruger cylinder shaft has a diameter of 2.480 inches.  I could feel the decreased cylinder wobble as soon as I installed the Power Custom part.  Theoretically, this should translate into improved accuracy.

The Power Custom replacement has a different, larger-diameter, stepped grip.   There’s more to grab onto when you want to slide the cylinder shaft forward to cylinder removal.

The Power Custom grip contains a set screw that can be tightened against the revolver barrel (which I did not use).  The idea is the tighter fit and the set screw act to prevent the cylinder shaft from being inertially driven forward under recoil.  Power Custom recommends using a drill bit through the set screw hole to spot face the barrel, which would give the set screw a better place to seat.  I didn’t like that idea, and I didn’t tighten the set screw on my gun.

A set screw on the Power Custom base pin assembly. I opted not to use the set screw.  Note the slot in the Power Custom part for the cylinder shaft release, and note that it is unmarred.

Finally, although the Power Custom base pin has a larger grip, the overall part is shorter in length than the stock Ruger part.  This allows greater ejector rod travel, which is better for case ejection.  Sometimes with the stock Ruger cylinder shaft, the cases aren’t fully ejected due to carbon fouling in the cylinder, and spent cases have to be pulled manually from the cylinder after they are partially ejected.  This shorter overall length is a good idea, I think.

The Bad

I already mentioned the set screw business above, and Power Custom’s barrel spotfacing recommendation.  I didn’t like the idea of having to use a set screw.

Power Custom provides a tiny Allen wrench for use in tightening the set screw.  With the stock Ruger cylinder shaft, the cylinder shaft can be moved into the cylinder removal position with no tools, and should the need arise, the cylinder can be removed in the field.  With the Power Custom part, an Allen wrench is needed.  I don’t want to carry around a tiny Allen wrench.  Is this a real concern?  Maybe.  In the last 50+ years, I have had to remove Blackhawk cylinders a time or two while wandering around in the boonies.  To me, this is a disadvantage.

This brings us to the principal bad, and it’s my fault (for reasons I’ll explain momentarily):   The Power Custom base pin did not reliably stay in place under recoil in my Blackhawk.  Note my comment above:  I did not tighten the set screw in the Power Custom base pin.  If I had, it probably would have stayed put.  And on the plus side, it doesn’t jump out of position nearly as often as the Ruger cylinder shaft does.

The Ugly

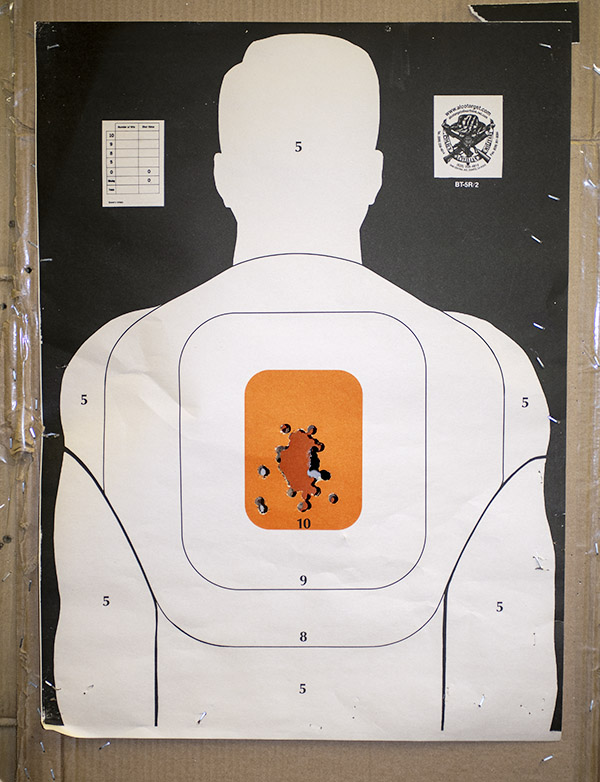
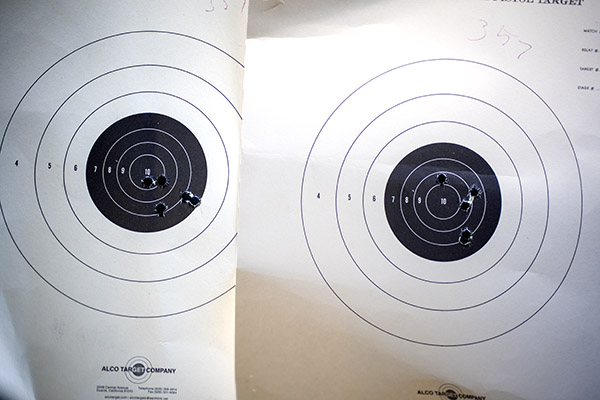
Once the new Power Custom cylinder shaft was installed, I grabbed some ammo and headed to my local indoor range.  How did the Blackhawk shoot with its new cylinder shaft?  From an accuracy perspective, I could not tell the difference.  This is a 10-yard target, depleting a box of my reloaded .45 Colt ammo in the process.

Thanks again, Command Sergeant Major Hickman!  My point of aim was at 6:00 on the orange bullseye.  At 30 feet, the revolver was shooting high, and the rear sight was all the way down.

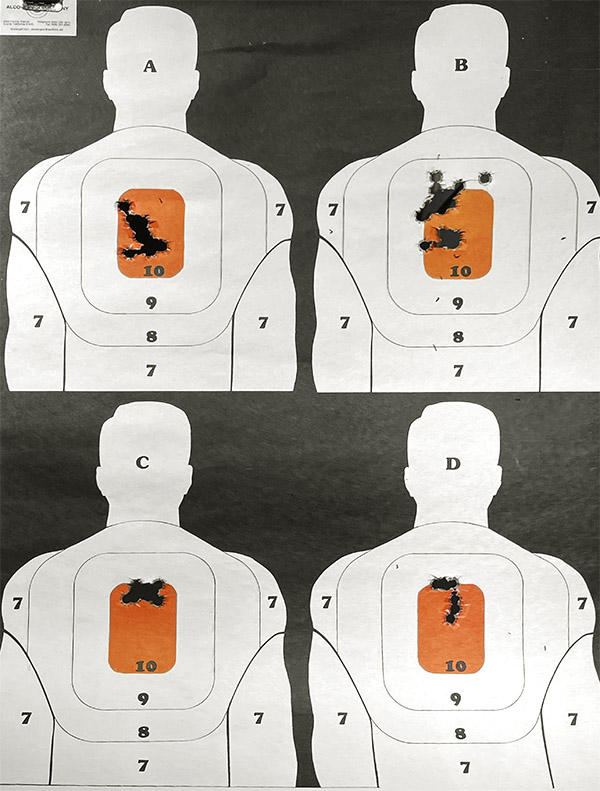
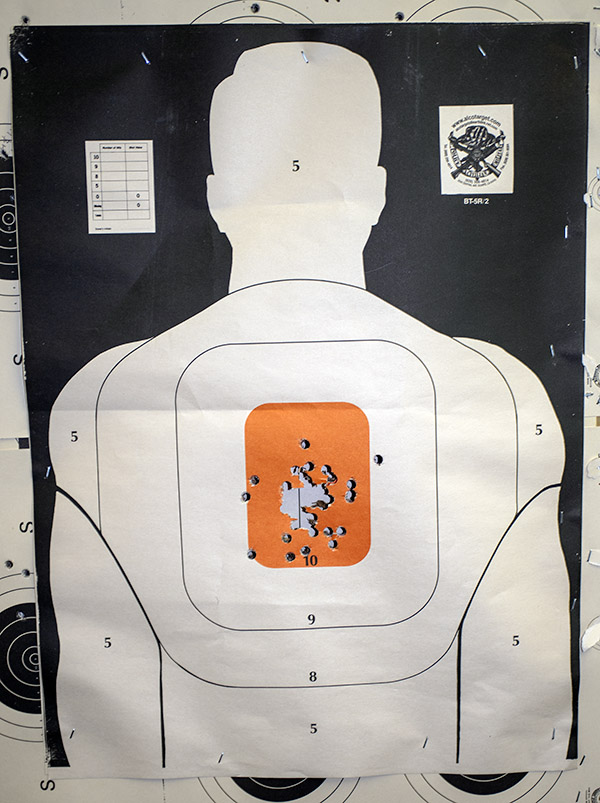
During my indoor session on three different targets (using up a couple of boxes of the 5.9-grain Red Dot reloads), the new Power Custom cylinder shaft jumped over the retainer twice.  If I had tightened the set screw against the barrel, that probably would not have happened, but to mention it one more time, I don’t like the idea of having to rely on a set screw to hold the cylinder shaft in place.

When I returned home, I pulled the Power Custom base pin.  I could see that it had deformed slightly in the groove that engages the mating retention feature in the revolver frame.  I then pulled the extractor subassembly to get a better photo.

A gouge on the new Power Custom cylinder shaft. It wasn’t there when new (see earlier photo of the new part). I believe the Power Custom base pin steel should be heat treated to a higher hardness.  The part’s softness and not using the set screw is what allowed this to occur.

My conclusion is that the Power Custom base pin should be heat treated to a higher hardness. If it had been, it would not have deformed when forced against the revolver’s cylinder shaft retention feature.   But that may be irrelevant.  The Power Custom base pin’s principal locking feature is the set screw, and I didn’t use it.  And as I mentioned above, while it did shift forward a couple of times, it doesn’t exhibit this behavior nearly as often as the stock Ruger component does.

I emailed Power Custom about the deformation I noted in their cylinder shaft, and to the company’s great credit, they put a replacement base pin in the mail to me the next day.  That’s great customer service.


More gun stories?  You bet!

Tales of the Gun


Buy one for yourself (or for a friend):  Get The Gatling Gun!


Join our Facebook ExNotes page!


Never miss an ExNotes blog:


Help us keep the lights on:

Colt’s New Python Range Tested

The Colt Python is an iconic handgun that stands out as the pinnacle of the gunmaker’s art. They were originally offered by Colt as their premier .357 Magnum revolver in a run that spanned decades and offered several variants:  Blue steel, nickel-plated steel, brushed stainless steel, bright stainless steel, and barrel lengths of 2 1/2, 4, 6, and 8 inches.  For a brief period, they even offered one chambered in .38 Special only.   That all ended a few years ago when the revolver market subsided and black plastic, semi-auto 9mm gangbanger guns held sideways took over the silver screen (there’s absolutely no accounting for some folks’ taste, I guess).  Then, in a surprise move, Colt introduced a re-engineered Python last year, in stainless steel only, with either a 4 1/4-inch or 6-inch barrel.  I had to have one, and about a month ago, I scratched that itch.

The new Python carries a hefty $1499 price tag and they are just about impossible to find.  And when you do see one, it is always substantially above MSRP.  I don’t see the prices coming down on these guns, either.  The original Pythons sell for $3K or more (mostly more), and with guns in high demand now and for the forseeable future, I think you’ll always always be able to get your money out of a Python if you ever wanted to sell it.  I don’t see the prices going anywhere but up, and like I said, it is near-impossible to find a new Colt Python. But I know people in high places, I got a hell of a deal on my Python, and I am enjoying it enormously.  Just looking at it is fun.

I went to my gun club a few days ago to shoot the new Python for the first time, and in a word, it was spectacular.  I’ll get to that in a second.

My Python has a 6-inch ventilated rib barrel. The revolver is polished stainless steel and it looks great.  The roll marks on the new Python are very similar to the original Pythons.   Very classy, in my opinion.

One of the reasons Colt stopped making the original Pythons a few years ago is they were too expensive to manufacture, as they required too much hand fitting of the revolver’s internal components.  Colt’s re-engineering effort made all but one internal part capable of being CNC-machined to final dimensions, and in the modern Python hand-fitting is required for only one component.  What that did was dramatically improve the double action trigger pull, and somewhat degrade the single action trigger pull.  The double action trigger is short and sweet, and the hammer travel is only about half what it used to be.  The single action trigger pull is, well, different.   Read on, my friends.


Help us keep the content coming:  Please click on the popup ads!


Single action, by design on the new Python, has a some take-up and you can actually see the hammer move a little further to the rear when you squeeze the trigger shooting single action.  Think of it as a single action trigger that adds a little bit of double action to the dance before it releases the hammer.

I thought there was something wrong with the revolver, but my contact at Colt told me the new Pythons were designed that way to meet the California and Massachusetts drop test requirements. It is definitely not a “breaking glass” single action trigger; it’s closer to pulling the trigger on a Glock (that’s not intended to be a compliment). Double action, though, is absolutely outstanding. It’s a shorter pull than any other double action revolver I’ve ever fired and I like it.   I suppose some people might think it’s a good thing that the gun meets the drop test requirements of left-leaning governments.  Me?  I’d go with Door No. 1 and refrain from dropping my loaded $1499 revolver.

Anyway, the single-action trigger threw me for a loop, but I adjusted to it quickly during a dry firing session.  I don’t notice it anymore, and as you’ll see below, it sure hasn’t hurt accuracy.

Fit and finish on the new Python are top notch.  You can see that in the photos on this blog, which I shot during and after an extended range session.  I probably should have taken pictures before I fired the new Python (when the gun was factory immaculate), but hey, it is what it is.

The new Python has a red ramp front sight, which I like. There is no white outline rear sight (it’s plain black). The combination works well, as the targets you see here show.  The Python also has a recessed crown, unlike the original one, which was flush.  The recessed crown better protects the bore.

My first shots were 50 rounds I put through the gun using my standard .38 Special target load (2.7 grains of Bullseye and a 148 gr wadcutter, loaded on my Star reloader), all fired single action. I shot from the 50-foot line and it was windy as hell. I had to stop a few times to walk downrange and add more staples to the target because it was starting to come loose, and the target stand was swaying toward and away from me as the wind rocked it.  I was shooting, literally, at a moving target.

A complete box of .38 Special wadcutter ammo…50 rounds fired at 50 feet firing single action.   All those extra staples were needed to keep the wind from tearing the target off the stand.

I was surprised (and pleased) at how stunningly accurate the new Python is. I hadn’t touched the sights, and it was punching holes right where I wanted right out of the box.  It put an entire box of ammo into the bullseye with a standard 6:00 hold and the sights left as they came from the factory.  That’s a first for me, and I’ve been doing this a long time.  The bottom line: The new Python is accurate.

.38 Special ammo loaded with 148-grain wadcutter bullets. The bullet’s “wadcutter” nose profile cuts a clean hole in the target.  I used mixed brass shooting the new Python for the first time.

Then I shot another box of 50 cartridges (using the same .38 Special target load I used for the target above), but this time shooting double action. Let me make the point again:  These two boxes were the first time I ever fired the new Python. Here’s my second 50 rounds on the target, fired double action.

Another 50 rounds at 50 feet, this time shooting double action. Not too shabby, if I do say so myself. The new Python’s double action trigger is superb.

Eh, one shot went out of the bullseye (it’s that one in the 9-ring, just outside the 10-ring, on the right). Like I said, it was windy out there. But still, for me, this was phenomenal double action shooting.  It’s the best I’ve ever done shooting double action, actually.

Then I thought I’d try two 5-shot groups on the 50 foot standard pistol target with .357 ammo (all targets shown here were shot at 50 feet). As you know, a .357 Magnum handgun can shoot either .357 Mag ammo or .38 Special ammo.  I brought along some of my standard 357 Magnum reloads (15.7 grains of Winchester 296 powder and a 158 grain Hornady jacketed hollow point bullet).  This is a load I’ve been using since my Army days and it does well in any .357 Magnum revolver I’ve ever owned. It came from the pamphlet Winchester published in the 1970s for their powders. It performed superbly well in the new Python.

.357 Magnum shots at 50-foot targets. Point of aim was 6:00 for all shots. Bring it on…fire and brimstone…the new Python handles full power .357 Magnum loads well.

It’s easy to forget how powerful the .357 Magnum cartridge is unless you fire it back-to-back with the .38 Special.  The .38 Special is a very manageable cartridge with moderate recoil, especially in a big, heavy, 6-inch handgun like the new Python.  When I shot the .357 Magnum loads, I was instantly reminded that the .357 is a real barn burner.  Think big recoil and lots of muzzle flash and blast.  It was cool, and the big Python handled full power magnum loads well.

As I already mentioned, it was very windy and gusty on the range (two tractor trailers were on their side on I-15 when I drove out to the club). I was the only guy out there (I’m probably the first guy to visit our range with the new Python, too). On a calm day, I’m sure I could do better than the targets you see above.

I finished up another box of .38 Specials shooting 158 gr cast flatpoint Hursman bullets (also loaded with 2.7 gr of Bullseye), shooting at one of those green star target things you throw on the ground (my daughter bought it for me a few years ago and I think the thing is going to last forever). I walked it out to 50 yards with repeated hits, and I’ll bet I didn’t miss but two or three times out of 40 or so rounds.

There were no malfunctions of any kind in the approximately 150 rounds I fired through the new Python.  No light strikes, no misfires, and no jams.  And like I’ve been saying, accuracy was stellar.  It’s almost like the new Python is laser guided.

A prancing pony…the rampant Colt logo that has adorned Colt firearms for more than a century and a half. Long may it live!

You know, there’s an old saying:  You get what you pay for.  To that, I would add the qualifier:  Sometimes.  In the case of the new Colt Python, this is one of those times.  I love the new Python.  It’s an iconic firearm and if you are thinking about getting one, my advice is this: Do so. You won’t be disappointed.


You can see our earlier blog on good buddy Python Pete’s 8-inch, original Colt Python here.  And please check out our other Tales of the Gun stories here.


Never miss an ExNotes blog!


Need targets?  Order them the way we do and have them delivered to your door!


Want to load your own ammo?  Here’s a good place to get started in the reloading game!


Check out our resurrected Star reloader for prepping high-quality .38 Special ammo!


Want to see more on .38 Special and .357 Magnum accuracy loads in a Ruger Blackhawk?  Check this out!


Keep us afloat:  Please hit those popup ads!