Buell Fever Part 5: Carburetor Blues

By Joe Gresh

After years and years of tinkering with engines, my whole life really, I’ve come to the conclusion that I am not very good at fixing carburetors. The Buell’s multiple personality disorder carburetor has really illuminated my carb inadequacies.

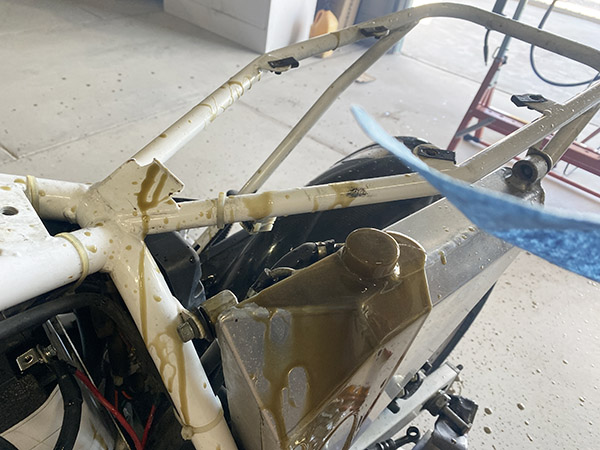
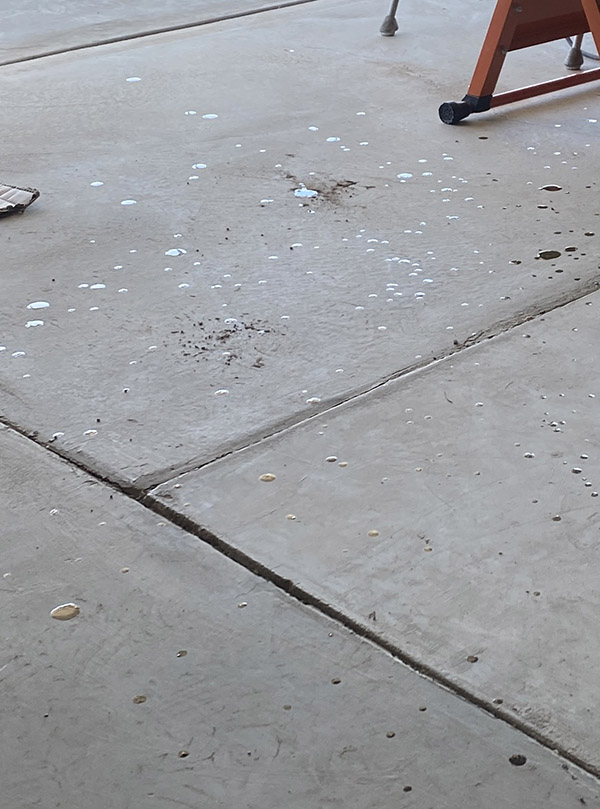
Considering it sat for who knows how long the Buell carburetor was fairly clean inside. I blasted it out with spray carb cleaner and installed a few new parts just because it was apart. The bike started up easy and seemed to run ok. And then the oil tank blew all over the place. I got sidetracked cleaning up oil and it was a few days before I got around to starting the Buell again.

The aftermarket needles have slightly longer springs. I’m not sure this matters.

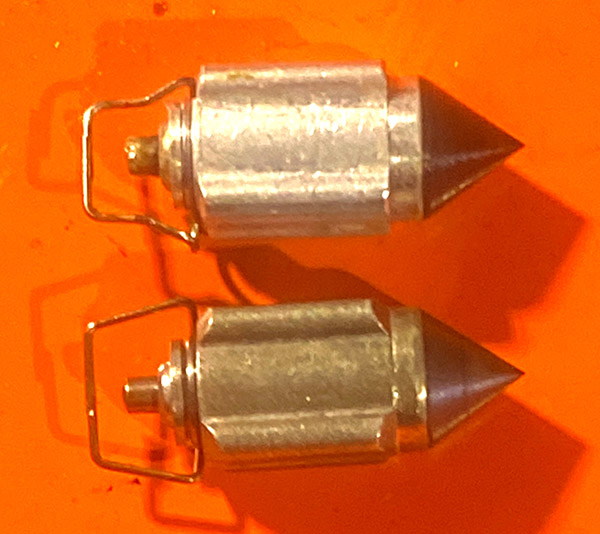
After a few moments of running, the bike started getting richer and richer. Black smoke poured out the muffler along with popping and farting sounds. I shut the engine off and fuel began leaking out the carburetor intake mouth. This was unfortunate because I installed a new needle and float earlier.

Off the carb came for the second time. I re-checked the float level, installed another new needle and bench tested the carb. No leaks. Plugging the carb back into the motorcycle and reconnecting all the bits, I turned on the fuel valve from the remote tank and gas poured out the carb. It was like there was no needle at all.

The seat didn’t look too bad to me but I could not get the thing to stop leaking.

Third time: I pulled the carb and put the old float and needle back into the carb, maybe the aftermarket stuff is junk, right? I re-installed the carb. No leaks. Good. Started the engine. Bike ran rich and the longer it ran the richer it got. Lots of backfiring and flames. Fuel started running out the carb.

At this point I gave up and ordered a new carb from Amazon. It was on sale for $38. I pulled the carb again and it sat on the bench for two days. You have to understand, there is no simpler carb than the one on this Buell. Despite appearances my pride can be hurt. If I can’t fix the Buell carb, then I can’t fix any carb. I decided to take one last shot.

For some reason, the float bowl o-ring enlarged from my ham-fisted ministrations. Stuffing the ring into the bowl groove became a Sisyphean task: push one side in and the other side popped out. I didn’t want to wait for an internet gasket, so I drove down to our friendly neighborhood Harley shop, Liberty Cycles on Highway 70.

Liberty is a real old school Harley shop. Independent, scruffy, populated by guys that might beat you up for mistaking the year Panheads were first manufactured. 99% of the bikes in the shop were big twins. Sportster riders are suspect. I asked Father Time, a grizzled, white-bearded mechanic for a bowl of-ring.

Father Time dug around in various drawers and came up with the o-ring, handed it to me and said “Just take it.”   Maybe these guys aren’t so scary.

Harley needle-seat burnishing tool. A center punch on a Ryobi cordless.

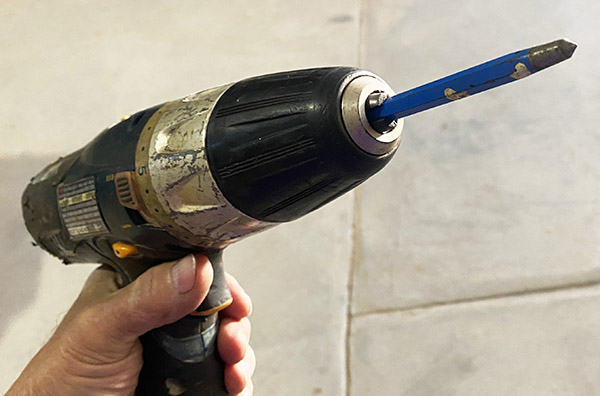
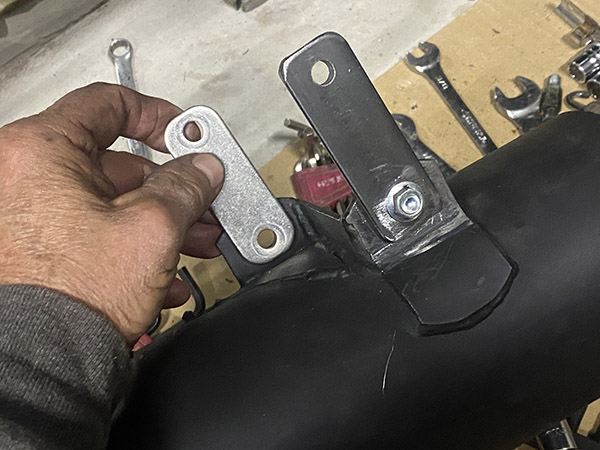
On the bench, the needle seat looked okay to me but I wanted a more polished look. Using a center punch on a drill motor I burnished the seat to make it smoother. Back go all the pieces after checking float level. No leaks. Start the bike and it runs good for a few moments then starts loading up on fuel again. It’s maddening but at least fuel is not leaking out of the carb. Progress.

After a steel-to-brass burnishing session the seat looked smoother. Most importantly the carb stopped flooding.

After a steel-to-brass burnishing session the seat looked smoother. Most importantly the carb stopped flooding.

The enrichener plunger was dingy but not terribly dingy. It was enough to cause problems.
After cleaning the plunger sealed off the enrichener circuit, greatly reducing black smoke.

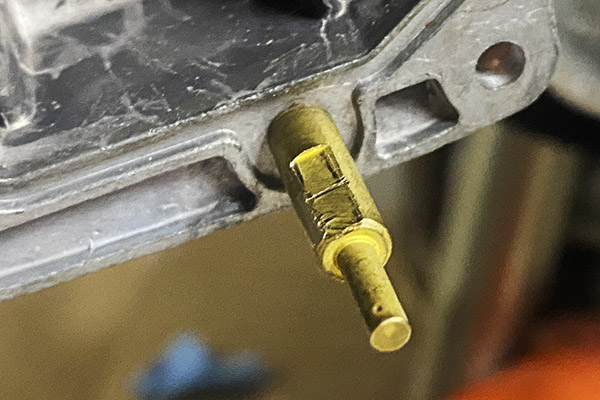
Fourth time pulling the carb. I removed the enrichment plunger; it looked a little dingy. Maybe the plunger is not seating? I used 800-grit wet-or-dry sandpaper to remove any deposits and cleaned the enrichener bore. Reassembled again and installed on the Buell. Bike starts up and runs well for a few minutes. Install the air cleaner, fire up the bike and after a minute or so the bike starts running rich, black smoke pours out the muffler.

Arrow points to the float bowl vent. This is the only vent as there is no bowl overflow tube.

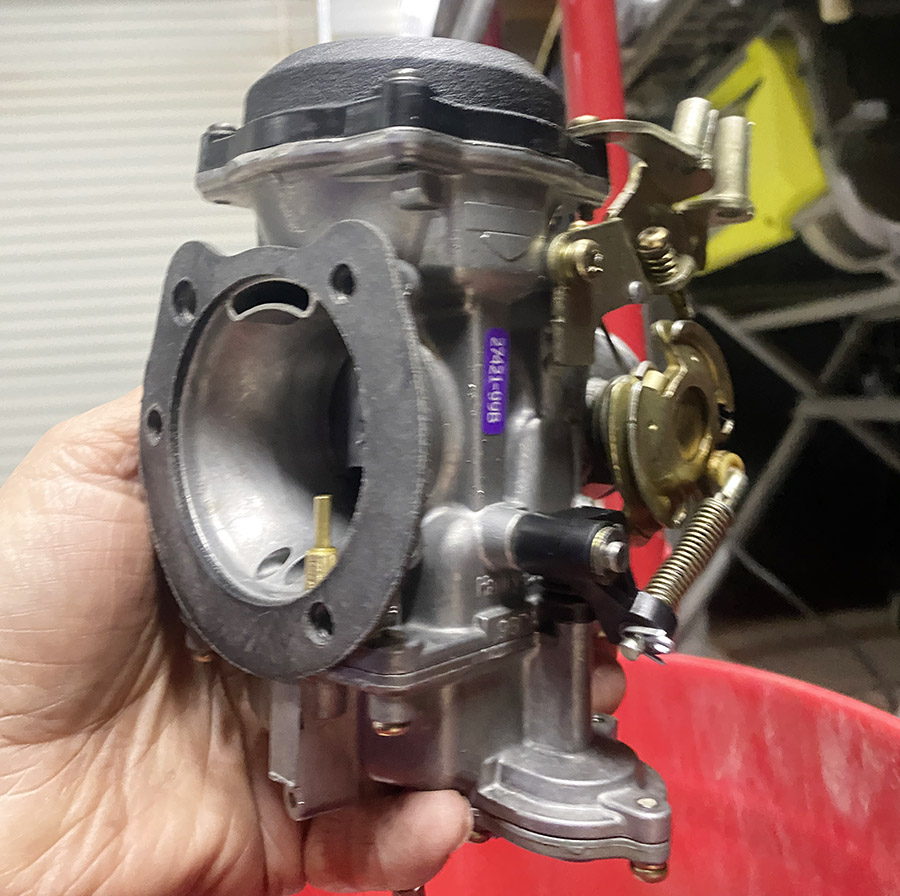
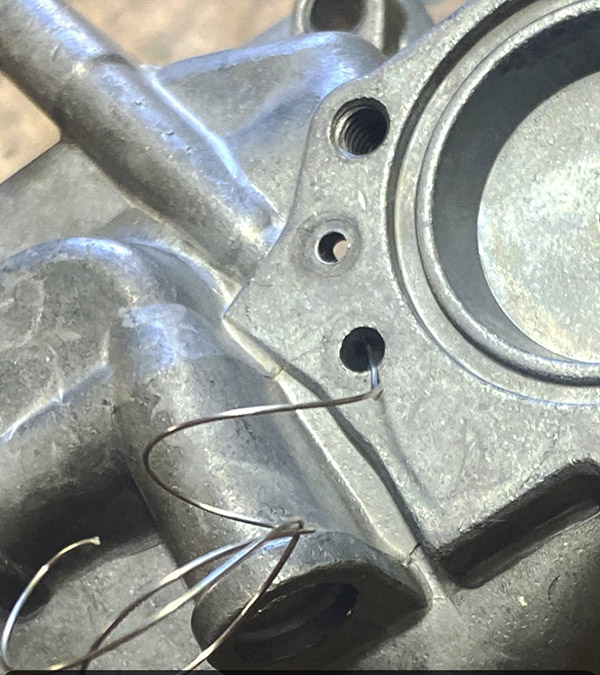
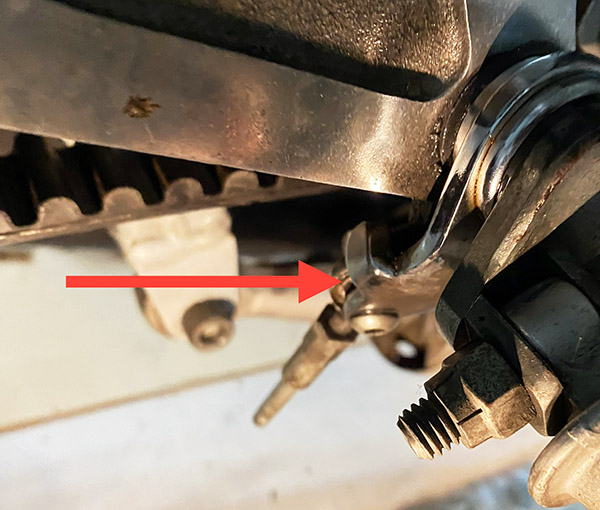
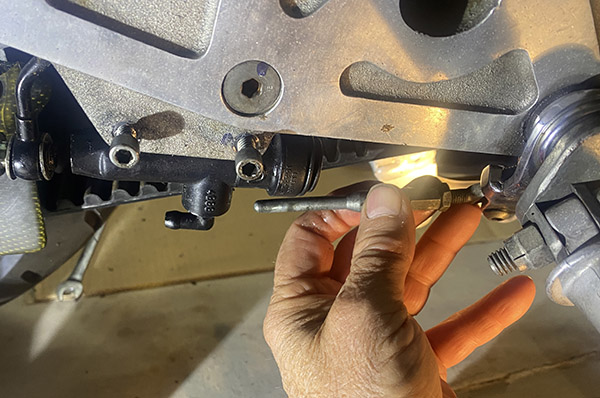
Fifth time pulling the carb, thank goodness it’s easy to do on the Buell. I examine everything. My repair manual shows a float bowl overflow tube in the bowl. My float bowl has no overflow hose. My bowl has no tube. This is why fuel runs out of the carb throat when it floods. A normal carb would piss the fuel into the ground. Which got me thinking: How does the float chamber vent to atmospheric pressure?

The air cleaner back plate blocked the bowl vent. I didn’t grasp this until much later in the process.

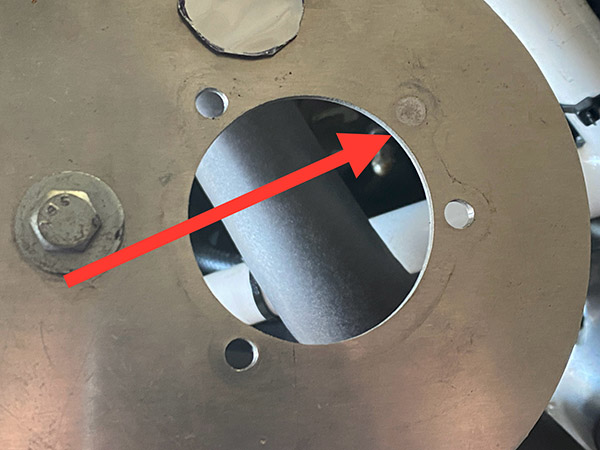
Facing the intake side of the carb there is a hole at the 10-o’clock position. This is how the float chamber vents and this is the hole that is covered up when the air cleaner is installed. It sounds easy and logical reading this now, but it took hours of confused staring at the Buell to figure out what was happening.

Drilling a vent hole in the air cleaner back plate allows for atmospheric pressure in the float bowl.

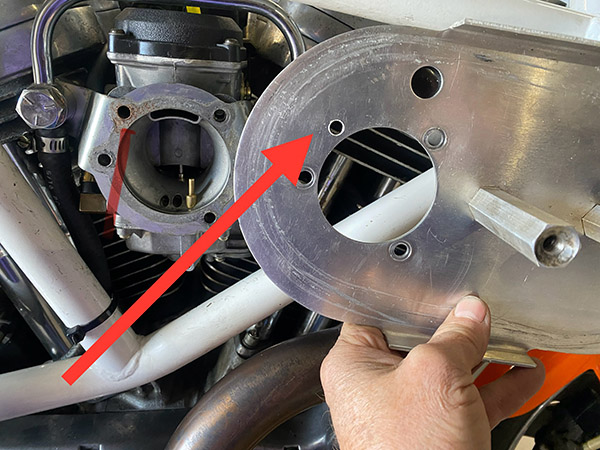
I drilled a hole in the air cleaner where the vent exits the carb. Reassembled the entire mess yet again and started the bike. It ran better but was missing on one cylinder. With a single carb if you have one cylinder missing it pretty much has to be ignition, so I removed the spark plugs. They were covered in fluffy black soot. Chunks of soot nearly bridged the electrode gap on the front cylinder sparkplug.

A quick session with a wire wheel and douching the plugs with carb cleaner had them looking like new. I reinstalled the plugs and the bike started up easily, ran smooth, both cylinders ticking off nicely. It idled well, as well as any Harley idles. Maybe I have finally fixed the thing.

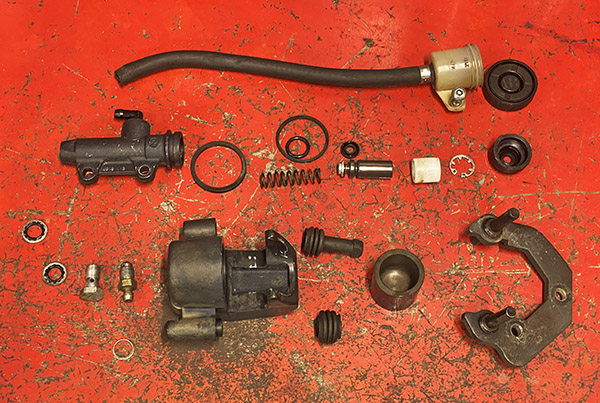
To recap, the carb had three issues:

      1. The first was the needle seat. It must have had some microscopic flaws that prevented the rubber needle tip from sealing. The leaking needle caused a rich condition.
      2. The next issue was the enrichener plunger. It was not seating completely. This allowed extra fuel into the intake, causing a rich condition.
      3. The final issue, extra confusing because sometimes I had the air cleaner installed and sometimes I had it removed, was the blocked float bowl vent. Without a vent to atmospheric pressure the float chamber is under a vacuum. I’m not sure but I think the bike runs rich as extra fuel is sucked in. The vent on the fuel tank becomes the atmospheric pressure inlet.

The Buell seems to be running fine now but after pulling the carb so many times, I’m a bit gun shy. I’ll call it fixed with reservations.

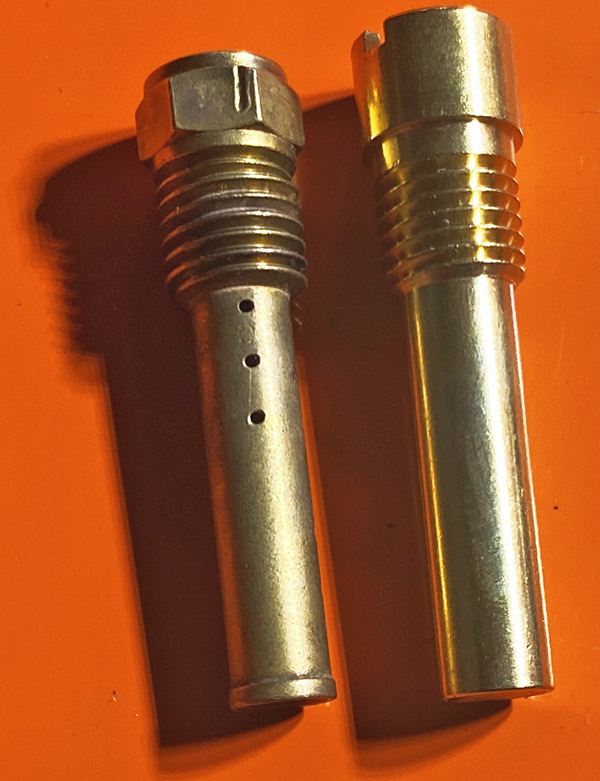
I haven’t received the Amazon carb yet but if the thing has a bowl overflow and the parts interchange I’ll be swapping the bowl. The Buell leans left on the kickstand, the carb towards the (downhill) intake manifold. Without a float bowl overflow, a sticking needle could run gas into the engine. Not good.

A smarter man could have figured out the Buell carb in less steps. He would have analyzed the symptoms and made a logical plan to address them. I am not that man. I threw everything at that damn carburetor until something stuck. I had to grind through obvious processes until the correct answers were all the answers that remained.


In the trades we call this Buell Hand. It comes from adjusting the idle mixture screw between the hot exhaust headers.


Join our Facebook ExNotes page!


More Joe Gresh?   It’s right here:


Help us keep the lights on:

Buell Fever Part 4: I’ve Struck Oil!

By Joe Gresh

Part of the reason I bought a Buell was because my life has become too predictable. Except for the Husqvarna, you stand a good chance of getting where you’re going on my old bikes. And the Buell is not disappointing. Lots of fun stuff is happening as I work on getting the bike back on the road.

It’s such a joy to tinker on a single-carb motorcycle. There are no racks and synchronizing to deal with, you only have to do a thing once instead of four times, but watch out for those aftermarket parts. The kit I bought was okay, but the emulsion tube was not drilled properly. And then I managed to pinch the bowl o-ring.  It was cheaper to buy another kit than a single bowl gasket, so I did that. Unfortunately, that kit’s bowl o-ring was too small. No matter how I stretched it, it kept popping out of the bowl groove. I ended up reinstalling the pinched o-ring. It was a futile effort to keep my mechanical standards up.

It wouldn’t be a Harley without baling wire. The choke tube is plastic and was fragile after all these years. The choke knob was falling out of its slot. I broke the tube finger tightening the thing. Wire to the rescue!
The accelerator pump plumbing was clogged. I fished a small bit of wire through the passage to clear it.
The carb kit emulsion tube (right side) was not drilled correctly. I try to use all the old stuff if possible. So this was no great loss.
This brass nozzle sprays fuel from the accelerator pump. Supposedly the tube is removable for cleaning but it seems well stuck and I started to chew it up a bit so I stopped.

I’m a big fan of lithium batteries, so I bought a Vevor brand close in size to the original lead-acid battery. The Vevor was a bit small and the factory battery location is not far from the rear cylinder exhaust header. To help with the heat I wrapped the sides and front with foam, then wrapped gorilla tape around the mess to hold the foam insulation.

It looks a little rough but an insulated battery is a happy battery.

A neat feature on the Vevor is the dual posts (four total). There are positive and negative posts on both sides of the battery; if your cables are in the wrong place, just flip the battery around. I added a spacer on the hook side of the battery strap to keep it tight and a small tube spacer in the bolt side (less threading to do on the hold down bolt), which makes installation 12 seconds faster. When you ride a Buell every second counts. The battery seems secure; hopefully, it will stay put.  With the Vevor battery (supposedly 400 cranking amps) in place and the carb back on, I needed to hear the Buell run. The oil tank level was between the high and low marks. The oil looked clean, like it had just been changed.

I removed the spark plugs, put the coke machine key in the ignition, and spun the engine over to clear any excess oil from my previous cylinder lubing. With the sparkplugs back in the cylinder heads I pulled the choke, hit the right turn indicator button, and nothing happened.

Harley handlebar switches are so weird. Pushing the starter button on the inside of the blinker switch worked better, and the Buell fired up in a couple revolutions. The engine popped and farted a few times. Lots of smoke came out the tail pipe but all things considered, it was running good.  Then came a loud pop followed by a geyser of oil spewing from the oil tank. The oil broadcast in a 15-foot fan covering the general area with great dollops of thick oil. The spots were viscous, so they stood proud of my clean concrete floor. Except for the spot I was standing. I received a blast of spraying oil that covered my sweater and left a clean, Joe-shaped silhouette on the concrete floor.

My nice, clean floor got its first baptism-by-Harley.
My sweater took the brunt of the oil explosion.

What a mess. How long the Buell had been sitting was unknown, but the oil tank must have slowly drained into the crankcase.  Some helpful person topped off the tank with fresh oil and I squirted the stuff all over the place. I drained the tank.  There must have been a gallon in there if you include the oil on the ground.  Once the oil level was correct, I fired the Buell and it settled down to the hit and miss syncopation Harley likes to call idle.

Back to other issues. I didn’t like the way the muffler was held into the bike. The setup relied on the front clamp combined with two rear brackets that bolted up in a parallelogram-like deal. The only thing that held the muffler in place was fastener tension.  To achieve a more secure mounting I made a thicker bracket out of mild steel and welded it to the Muffler. Now in order for the muffler to slide back my crappy weld would have to break. Which it just might.

Since I don’t have the equipment to weld stainless steel I made a mild steel bracket for the muffler.
The bracket welded to the muffler. Now the muffler can’t work loose and rub the tire.

The rear brake on the Buell was stuck. There were several issues contributing to this problem. The first was the brake pedal. It was bent where the master cylinder pushrod attached in a way that made the rod move dramatically sideways when the brake was applied. I used Harley tool 0-U812 (a big crescent wrench) to adjust the brake pedal. Now the push rod moved in a straight line concentric with the master cylinder.

This replacement rear brake assembly was close but off in meaningful ways. The seller refunded my money and didn’t want me to ship it back.
This part of the brake left was bent causing the master cylinder pushrod to go off course.
It’s still a little bent but the pushrod articulates correctly now.

The clone master/slave kit I bought on Amazon that was supposed to fit was just off enough to be completely useless, so I decided to rebuild the original stuff.

All the original brake parts cleaned up well. So far no leaks.

The piston inside the master cylinder was stuck but a few raps with a hammer had the piston moving and I dismantled the master/slave. I was having trouble finding seals for the Brembo components, so I cleaned everything and reassembled the brakes.

Bleeding the brakes wasn’t going well. I could get pressure at the banjo bolt on the master cylinder but nothing at the slave. Shooting brake cleaner into the brake line did nothing. The hose was clogged.  Out came the battery to access a hose clamp bolt, and I removed the brake line. Removing the brake light switch gave me a mid-point spot to shoot cleaner. The metal brake line was clear, the clog was in the rubber line.  I soaked the line in an ultrasonic parts cleaner then worked a 0.30 flux core welding wire through the rubber line. It took a bit of finagling but the wire made it through. Then it was just a matter of soaking with brake cleaner and shuttling the 0.30 wire back and forth until the line was clear. Blowing the lines with compressed air got rid of any stragglers inside the hose.  A quick reassembly and I had pressure to the slave. Bleeding the system was a straightforward proposition. The rear brake works.

Next on the list is fixing the kickstand and broken clutch lever.


Join our Facebook ExNotes page!


More Joe Gresh?   It’s right here:


Help us keep the lights on:

Rolling Art: A Magnificent Guzzi!

By Joe Berk

The saying is “if I was any happier there would be two of me.”  The photo above kind of captures the feeling.  It’s how I feel every time I visit with the Cycle Garden team in Indio, California.

When I first heard that one of Moe Moore’s custom Moto Guzzi motorcycles went for $40,000 to $50,000, I was shocked.  Then I realized a new Harley full dresser inhabited the same realm.  Per Google’s AI:

A new top-of-the-line Harley-Davidson (CVO™ model) generally costs between $45,000 and over $50,000 for the 2025/2026 model years, with models like the CVO™ Street Glide® and CVO™ Road Glide® starting around $44,999 to $51,999.

Then the question became:  Which one would I prefer owning?  That’s a no-brainer.  It’s the Guzzi.  The one featured in this blog is a case in point.  It’s not a stock motorcycle by any stretch of the imagination.  But wow, would I ever love to own it!  More than a Buell, even.

Before I get into that, though, I need to tell you a little bit about Cycle Garden and what they do, and what I’ve been doing with them.

Moe Moore, head honcho at Cycle Garden. He’s a nice guy. All the folks at Cycle Garden are nice people.

I am in the process of writing a series of How To articles for Motorcycle Classics magazine (and I’m loving every minute of it).  I did the first on how to lace a wheel (with help from good friend Kenny Buchanan of Buchanan Spoke and Rim).  The next was on drum brake servicing, and it will appear in the March/April issue of Motorcycle Classics (due out any day now).  And I have three more that are written and awaiting publication (things have a long lead time in the print publication world).  I’m really enjoying the plant visits, the interactions, the photographing, the writing, and the ego-stroking that accompanies seeing each of these pieces in print.  I’m especially loving being around the vintage motorcycles.  You’ve seen the blogs on Emma Booton’s Triumph. Don’t tell this to the magazine, but seeing the vintage Guzzis at Cycle Garden is so cool I’d almost write those How To pieces for free.  I’m especially enjoying hanging around and learning about Guzzi maintenance from Moe, Steve, and Lindsay.

This resto-mod 1974 Guzzi police motorcycle is beyond stunning.  I’ll let Moe tell the story on it.  There’s a YouTube at the end of this blog in which he does that, but first, a few photos…

Yessir buddy…that is a beautiful motorcycle. The bike is 52 years old this year.
The colors are magnificent. Lindsey did the painting. Steve did the engine work.
Awesome. Just awesome.

Here’s the promised YouTube.  There’s more Moe Moore coming up on the ExNotes blog and in Motorcycle Classics magazine, so as the saying goes…stay tuned!


Check out Cycle Garden!


Join our Facebook ExNotes page!


More Joe Gresh?   It’s right here:


Help us keep the lights on:

Returning to Vietnam – Ha Giang Loop: Part 5

By Mike Huber

I had stopped at the perfect place for my morning coffee.  Not only did the owner know of less chaotic roads, but the coffee shop was at the exact location to turn off to hit these mostly unexplored roads.  I quickly finished my coffee and was out the door in minutes.

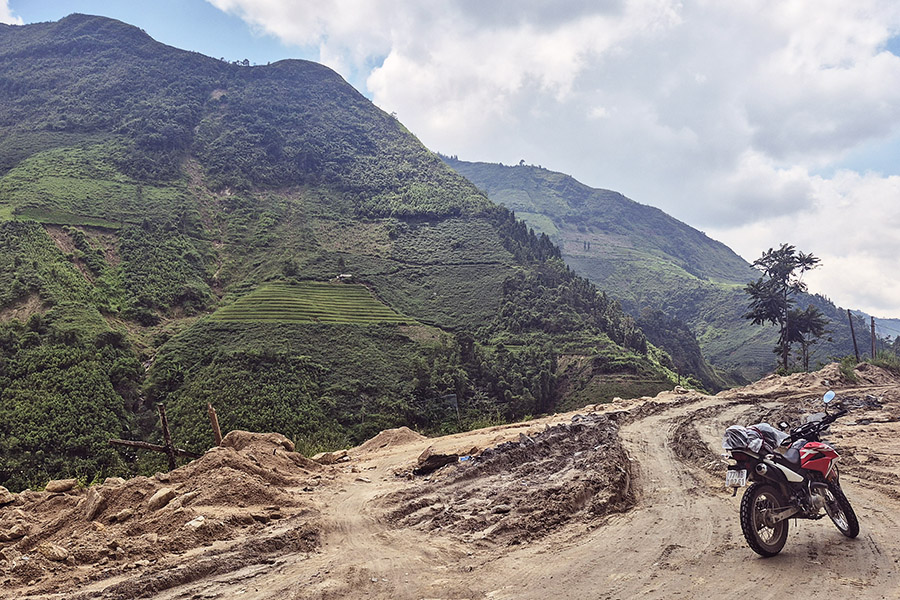
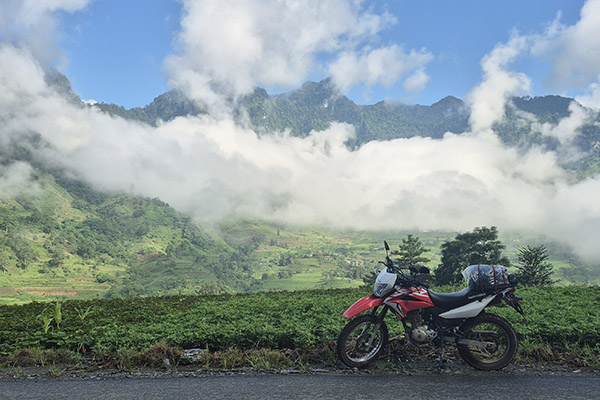
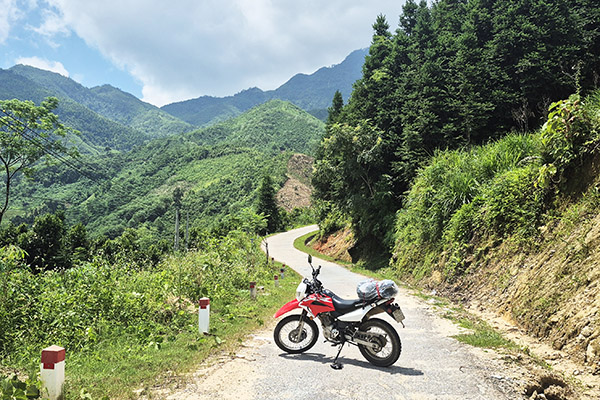
This would be the Vietnam I was looking for. No congestion, no traffic stops, just miles of mountain switchbacks.  This new chosen path didn’t come without a bit more adventure, too.  Over the next five days I didn’t see one Westerner or tourist.  None.  The village homestays I chose were so far off the beaten path I don’t even think many of the locals had ever seen a Westerner. Communication was strictly between my charades and some Google Translate.  The more rice wine I drank at the end of the evening, the less I relied on Google and the more colorful my charades became.
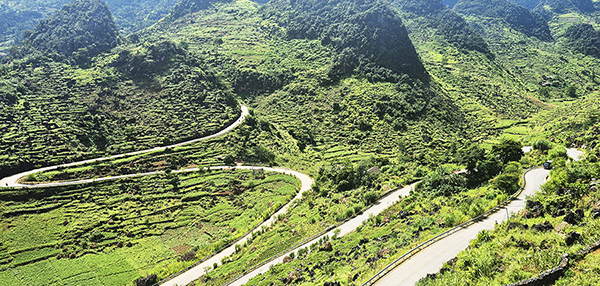
The roads were beautiful as the paved switchbacks disappeared into the lush jungle mountains and became dirt.  Some had precarious places with mudslides that consumed the dirt along these roads.  On more than one occasion I would be filled with confidence as I successfully negotiated these obstacles, only to be put in my place as a 10 year old girl on a scooter would overcome the same obstacles (but one-handed as her other hand was busy texting). Talk about an instant ego check.

The days actually became very isolating with the empty mountain roads, and even emptier villages where I found myself staying. On more than one occasion I found myself alone in a rundown hotel room having ramen for dinner by boiling water from a tea kettle.  Those moments were overshadowed by the adventure that always arrived the following day as I chose new mountain roads. It was exactly the experience I desired while motorcycling Vietnam.

For the next five days I hardly saw pavement or even other vehicles. When I would stop for a break at a viewpoint or for a drink of water there was absolute silence.  Even if there had been noise, the dense jungle would have absorbed it.  The jungle even consumed the sound of my moto crashing into the rocks when I occasionally lost focus.  It wasn’t dense enough to absorb my pain-induced swearing as I reinjured my broken rib from my Thailand crash.

After nine days I returned to the sensory overload of Hanoi, which came in the form of massive traffic and chaotic roundabouts. I had completed the Ha Giang Loop.  It was such an epic road.  The greater accomplishment was leaving the tourist trap loop and experiencing the true, raw, and mostly unexplored roads of Vietnam.


Catch up with Huber’s Vietnam adventure ride:

Ha Giang Loop: Part 1
Ha Giang Loop: Part 2
Ha Giang Loop: Part 3
Ha Giang Loop:  Part 4


We need your support!  Do what you can to help ExNotes stay in the black!


Coming up…more on Cycle Garden and their impressive work on Moto Guzzi and other Italian motorcycles!


More Huber? Check out A Trip Into The Moment.

More Gresh and Berk?  You bet!  Check out A Cup O’ Joes!


Join our Facebook ExNotes page!


Help us keep the lights on:

Returning to Vietnam – Ha Giang Loop: Part 4

By Mike Huber

Awakening the following day, I was eager to begin my second day on the Ha Giang Loop in northern Vietnam. Thankfully, the remainder of my first day on this road went without further incidents with local law enforcement.

As I continued northward in this beautiful mountainous region there wasn’t a day that went by where I wasn’t pulled over at least once.  The officers I had paid the 8 million Dong to were true to their word as each time I was pulled over at license checkpoints the officer would pull out their phone and scroll through the many photos of tourists until I would stop them. “Right there!  That’s me.  See?  I paid.”

The police officers then signaled me to be on my way.  Outside a few verbal warnings to slow down, the police check points just became part of my daily routine as my journey continued.

Hitting the Vietnamese North Pole was one of my objectives along this ride. Starting off early in the morning was the best way to go.  The early start was not only to avoid police check points and tourist traffic, but also to watch the mystical fog burn off the mountains as I weaved my way north. The roads were in pristine condition.  The only thing more pristine was the green mountain views that unfolded as I powered through the corners.  It was wonderful to have the road to myself, outside of the few meandering water buffalos that lazily crossed in front of me every so often.

Every day as afternoon approached, the police check points would appear. After a few days of constantly being pulled over to scroll through the police text thread, point out my photo, and on occasion be given a breathalyzer  test (Vietnam has zero tolerance for driving under the influence), it began to get old.  The road was filled with rental scooters.  Most carried Westerners.

After four days of riding along the Ha Giang Loop, I reached my limit.  I’d had enough of tourists, police stops, and crowds.  Tigit Rental had written a solid itinerary, but at this point I needed more solace. I pulled into a coffee shop to see if there was another route I could take to deviate from the Ha Giang Loop (and there was).  I hit smaller, less traveled roads. The coffee shop owner must have seen the frustration on my face as I zoomed through maps and roads to explore on my phone.

Using Google Translate with the shop owner, I described what I was looking for in terms of roads and a Vietnam experience.  She quickly pointed out a direction.  The roads she identified were remote and they met my criteria.  The path would also send me north along the Chinese border, and then loop down to Hanoi.  This would get me away from the Ha Giang Loop chaos.


Catch up with Huber in Vietnam:

Ha Giang Loop: Part 1
Ha Giang Loop: Part 2
Ha Giang Loop: Part 3


More Huber? Check out A Trip Into The Moment.


Join our Facebook ExNotes page!


Help us keep the lights on: