Zed’s Not Dead: Part 20

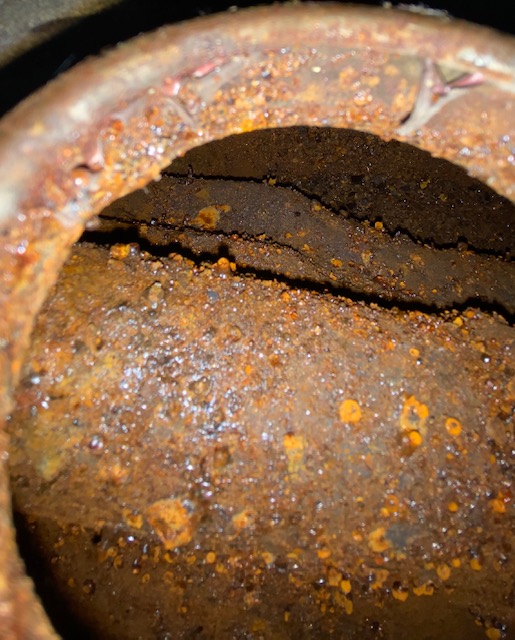
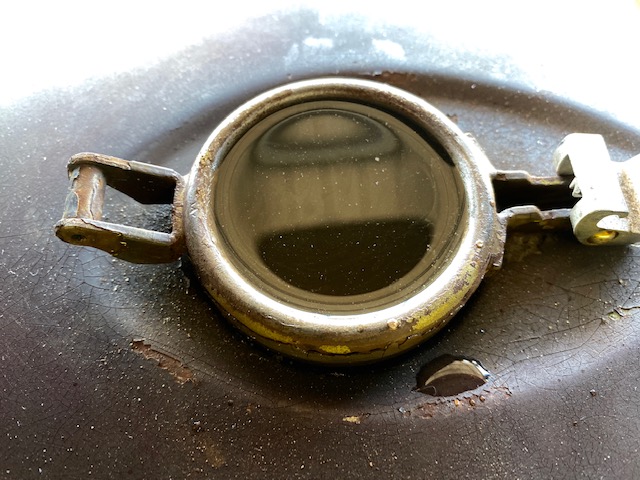
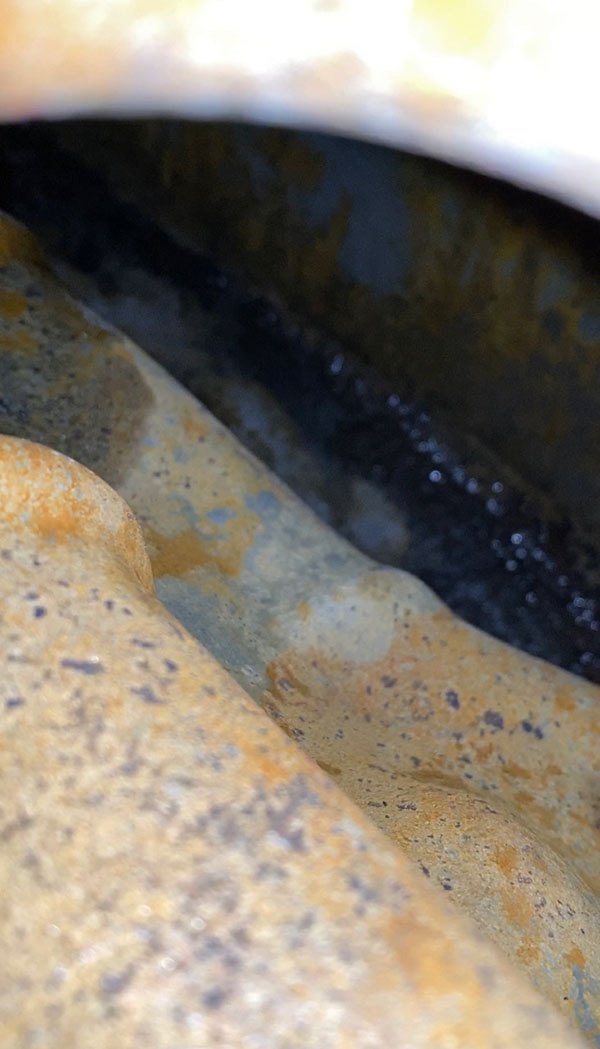
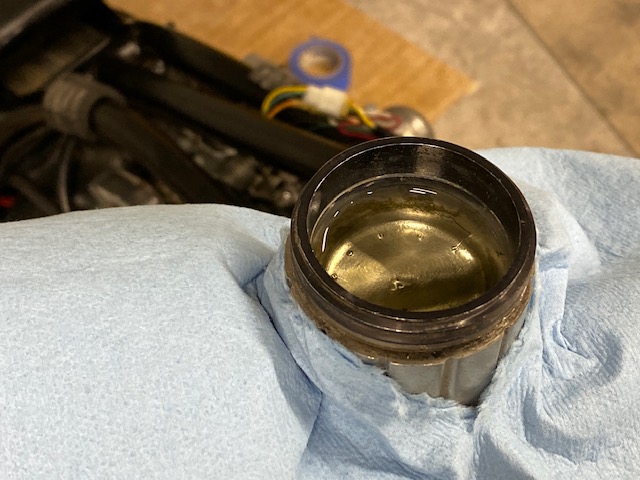
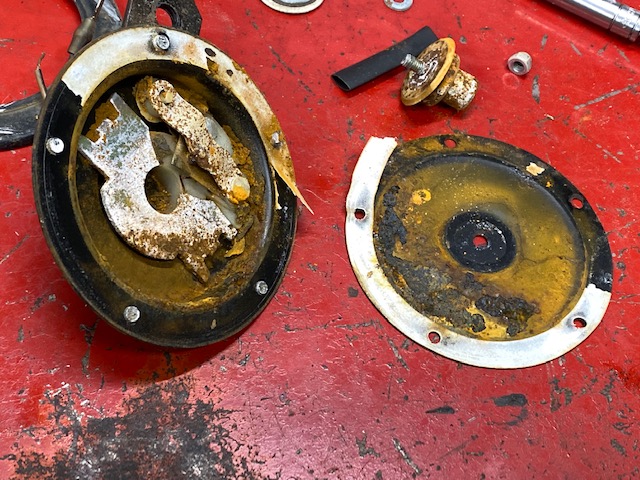
You may recall from Zed 19 I had to re-soak Zed’s gas tank as 10 days were not enough to dissolve the rust. I drained, dried and reloaded the tank with apple cider vinegar and let it sit for 4 more days. This is what it looked like originally:
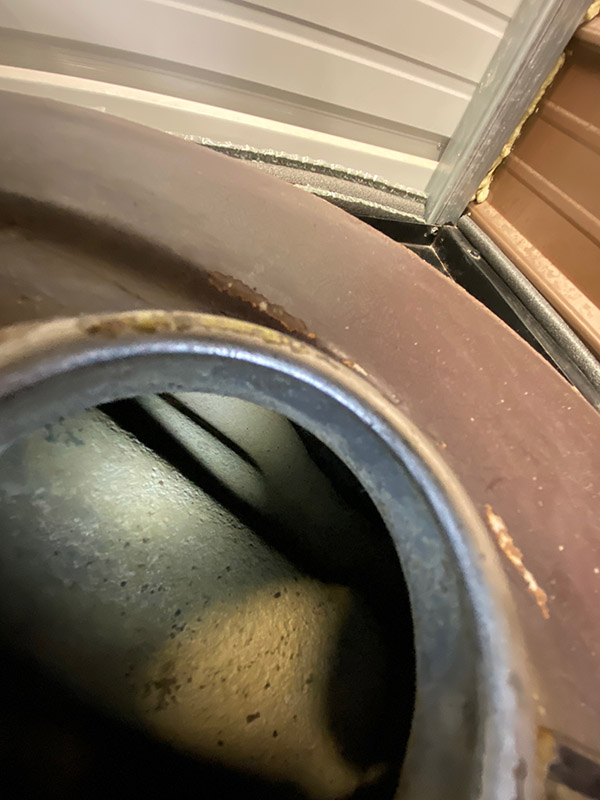
The second session really knocked most of the rust out. After rinsing I dumped a large box of baking soda into the tank and added clean rainwater sloshing it as I filled to mix thoroughly. I don’t know the chemical reaction that takes place but the baking soda neutralizes the acid, turning the metal a dull grey, almost white color. This treated metal does not flash rust and I’ve been going 3-4 years on another tank I cleaned like this without rust reappearing. It’s like the metal turns passive and stops reacting to oxygen.
If I wasn’t so hell-bent on riding this bike I think I would flush and cider the tank one more time but it looks good enough and I’ve got to ride! I connected a small hose to my shop vac and played it all over inside the tank. I can hear nothing when I shake the tank so at least there are no big chunks loose inside.

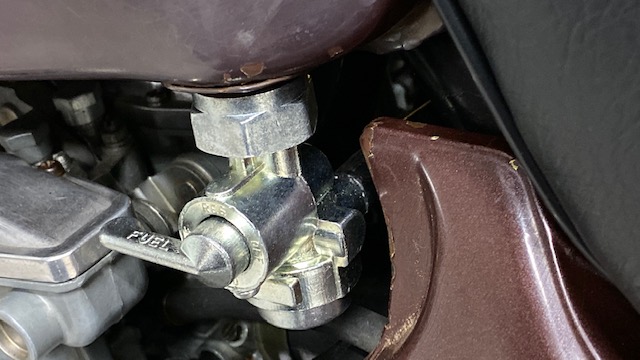
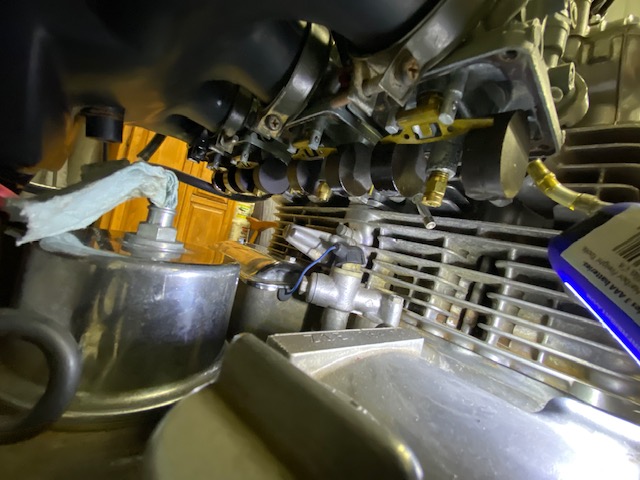
Proving that even the simplest life forms can learn I bought an entire new petcock for $23 rather than the rebuild kit for $8. This is real growth on my part. Usually I buy the kit, mess with it for hours then put it on only to have it leak. Only then will I buy the new one. Kawasaki uses a turnbuckle-type left-hand/right-hand thread on the Z1 petcock. It took about 145 tries to get it to tighten up facing the correct direction.

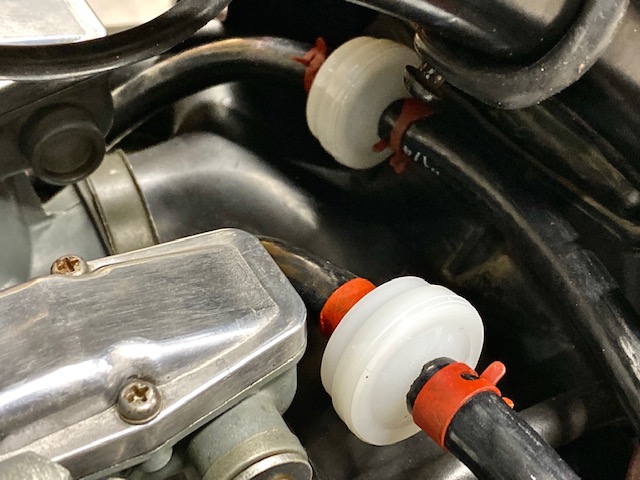
The new petcock has screens inside the tank and a bowl filter but with 40% of Zed’s tank out of my view-field I can only assume the entire tank is as clean as the places I can see. Inline fuel filters, one for each set of two carbs will hopefully catch any debris still in Zed’s tank.

An update on the Z1 Enterprises regulator/rectifier: It works. The battery charges @ 14.8 volts which is still a tad high but much better than the 17 volts Kawasaki’s setup was doing.

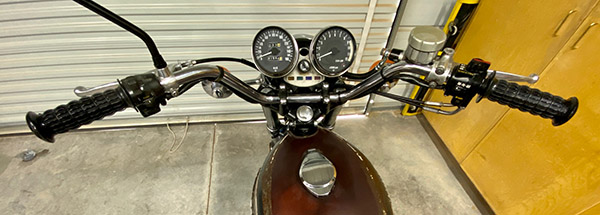
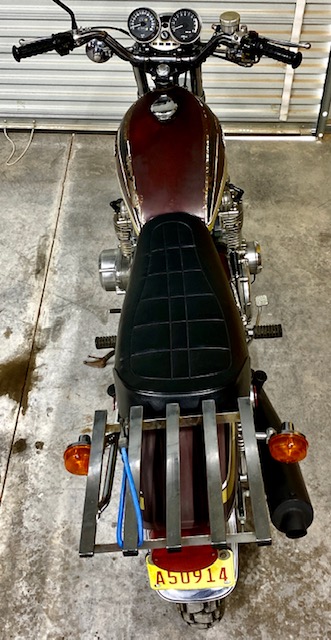
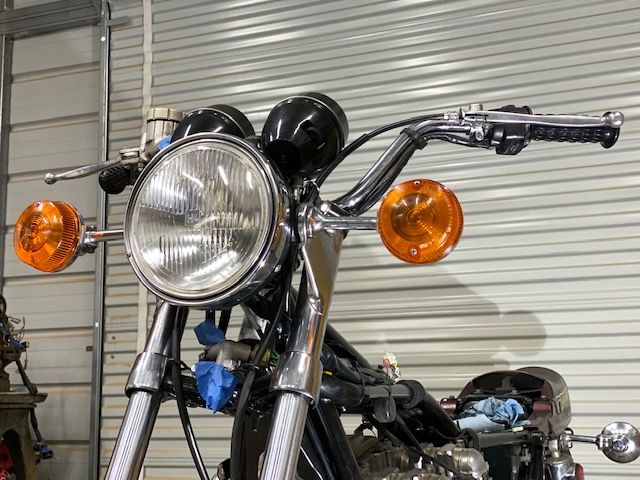
From the top Zed looks pretty well sorted. I took it for a ride and it ran really well for off the bench carb settings. It might be a little rich at idle or it might just be our 6000-foot elevation. I’m not going to tinker with it for now. I’d rather get some miles on the bike.

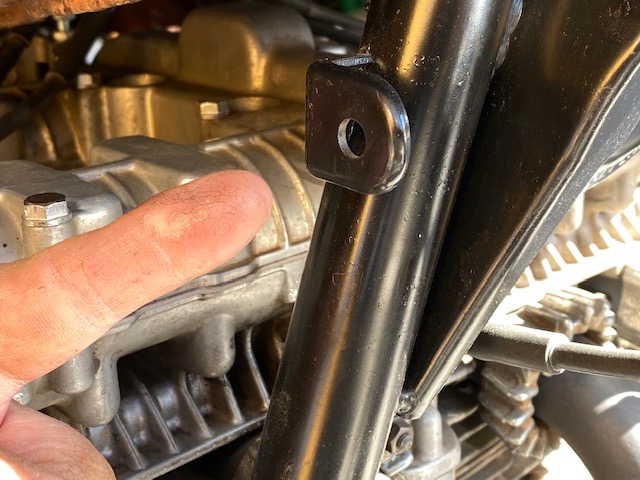
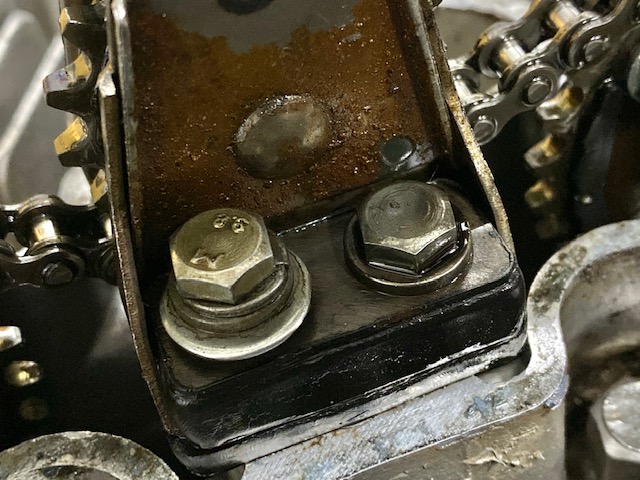
I don’t know what this bracket is for. Located on the right side down tube near the tach drive, it’d too light for a steering damper mount. Anyway, there’s enough stuff on the bike as is so I’m not going to worry about it.

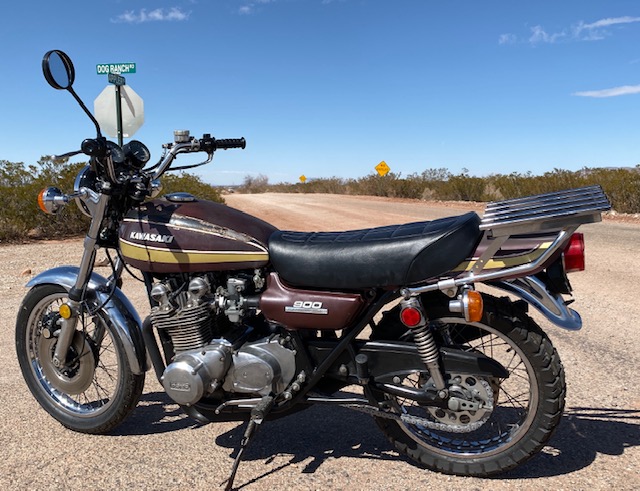
I took Zed to my secret proving grounds and she ran through all 5 gears smoothly. The bike hit 90 MPH without even trying. I’ll need a better front tire to do any high-speed work. The brakes work ok. When you ride a SMR 510 Husqvarna all other motorcycle brakes seem like crap. After 33 miles there are small oil leaks at the tach drive and countershaft area. Maybe the clutch pushrod seal or sprocket seal is the culprit. That stuff is easy to fix.

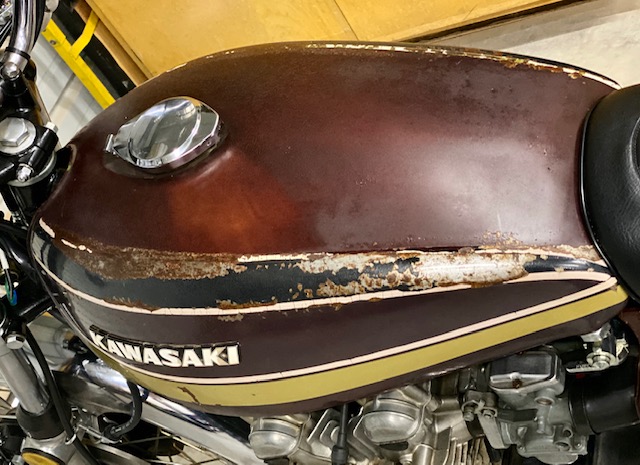
The patina on Zed is excessive, bordering on shabby. The bike sat outside for years and paint wise there’s nothing left to polish or wax. The finish is just not there. The pin striping is cracked and missing sections. I’m not sure what to do about that. On the one hand a ratty bike may be less attractive to thieves and old Z1’s are getting fairly expensive. On the other hand it does look pretty bad. I’ve seen my Enduro buddy Mr. French do some amazing work with rattle cans. Maybe I’ll give it a go. The paint can’t look any worse.


That’s it: from Dead to Zed in 20 easy sessions. Don’t worry, this won’t be the last you’ll hear of Zed. I’ll be doing some long trips on this bike, maybe Mexico, maybe ride to a few flat track races. I’ll update the blog if I do any more major work on the bike. The story of Zed’s resurrection may be ending but the story of Zed is just beginning.


And there you have it.  If you’d like to run through the gears (i.e., the previous 19 installments of Zed’s Not Dead), you can do so here!

Zed’s Not Dead: Part 19

It’s time to clean out Zed’s rusty gas tank. Before I bought it Zed sat outdoors for a long, long time and heavy rust inside the tank had gotten out of control. Clean gasoline is critical when there are 4 carburetors to clog up. You know how I feel about tank liners and new Z1 tanks aren’t very expensive so I won’t be doing any heroics to save this one. If it doesn’t come clean I’ll go to plan B. I’m just looking for any excuse to buy one of Z1E’s beautiful painted body sets.

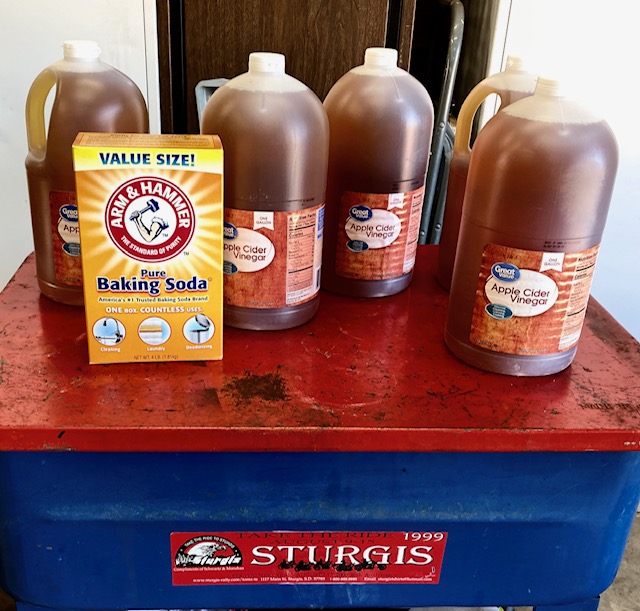
A few years back I read a story on using apple cider vinegar to dissolve rust. I used the stuff to clean Godzilla’s rusty tank and it worked great. Of course, Godzilla’s tank wasn’t nearly this bad. The cider vinegar is a very mild acid and works slowly so you don’t have to worry about eating a hole in your gas tank.

Available at Wal-Mart, cider and baking soda are the two ingredients used. I also pressure washed the inside of the tank to knock loose any flakey rust. After pressure washing I dried the tank with a heat gun and dumped in 4.25 gallons of apple cider vinegar.

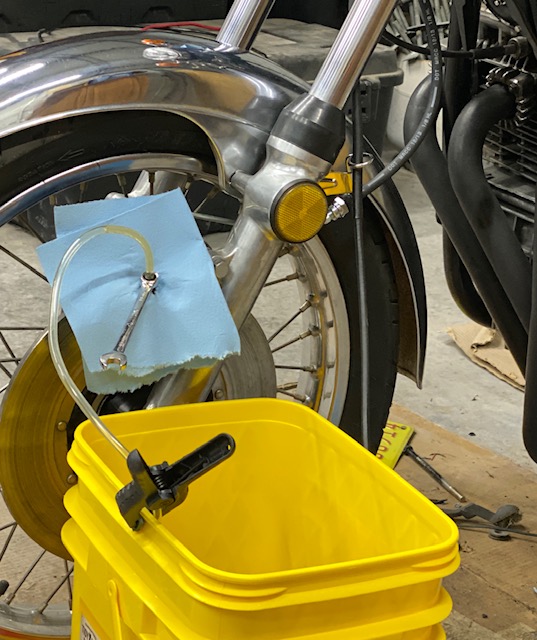
With the tank jugged all you can do is wait. Zed’s tank was really bad so I left the cider in for 10 days. I dumped the rusty cider into a bucket and flushed the tank with water. The results were encouraging but the tank was still not shiny clean.

Normally this would be the time to pour in the box of baking soda and fill the tank with water to neutralize the acidic vinegar but Zed’s tank needs another dose of cider. Using the heat gun I dried the tank again then refilled it with a gallon of fresh vinegar and the rest with the murky cider I had dumped out of the tank. Vinegar is not cheap, you know.

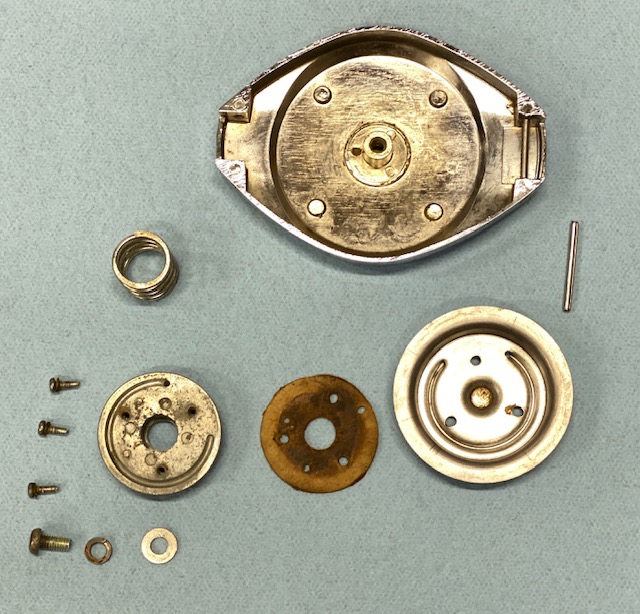
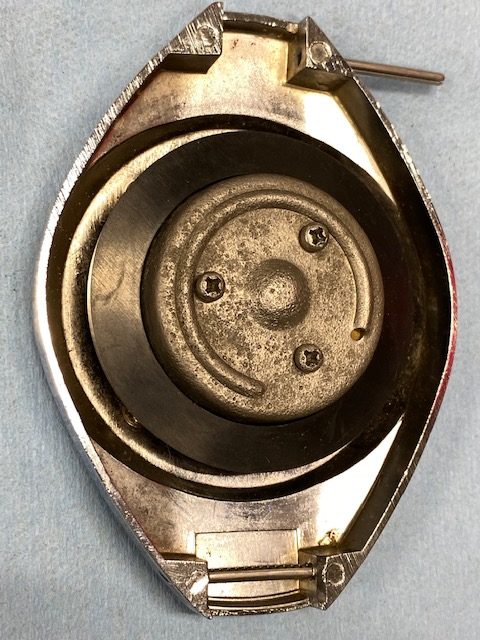
While the tank was soaking I dismantled and de-rusted the gas cap. I wasn’t sure which way the new rubber gasket went on the flange. One side is 1/32” wider than the other and manufacturers do stuff like that for a reason. The old gasket was no help. It had crumbled. Figuring I had a 50-50 chance of getting it right I installed the gasket wide-side towards the gas tank.

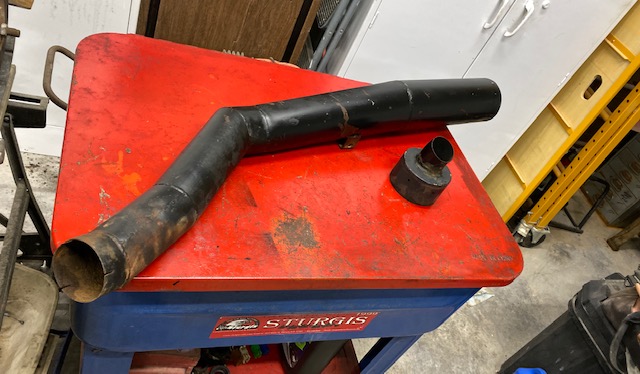
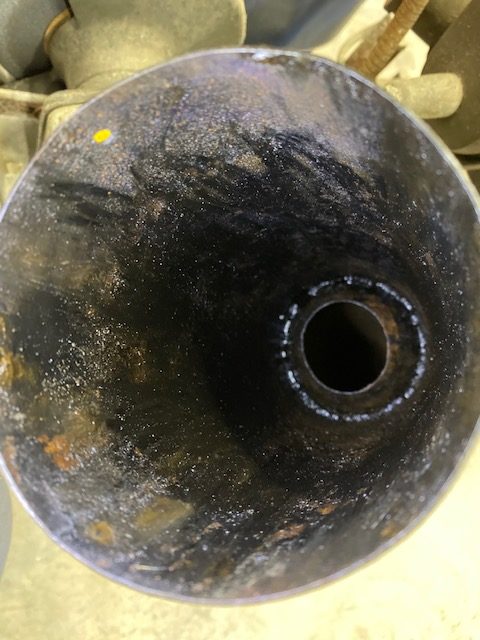
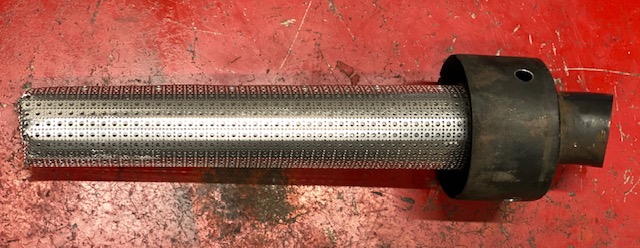
Zed’s exhaust was held on by coat hanger wire when I got the bike. The headers seem well made but the muffler section looks a bit crude. Not terrible but nothing like from a factory. It has an internal reverse cone 12” from the end of the muffler body. There was no baffle anywhere.

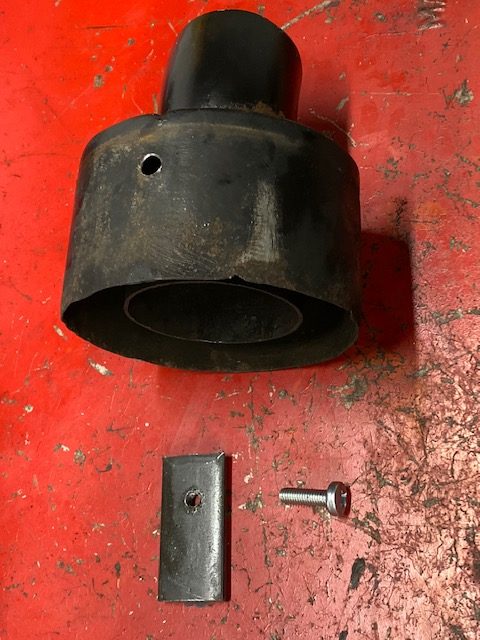
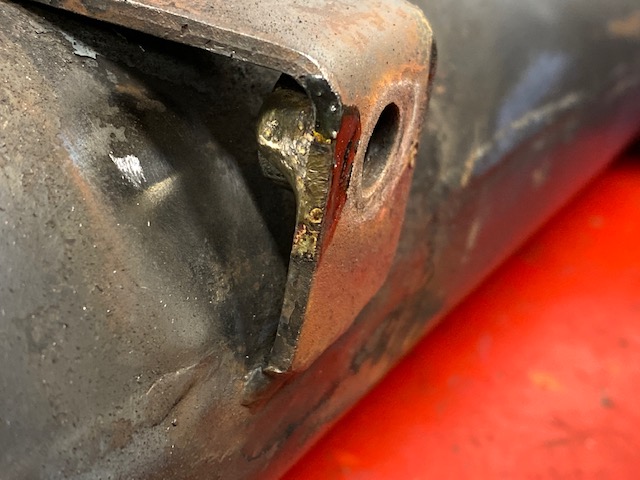
The muffler end cap was secured by a stripped sheet metal screw. I drilled and tapped a piece of flat stock for a 6mm screw. This backing piece gives the screw more meat to bite into. Then I set the backing piece into place and welded it to the end cap. I can’t weld and trying to stick a thick piece to thin sheet metal is hardest of all.

Where the muffler was held on by a coat hanger I brazed a 3/8-16 nut to act as a blind nut. This wasn’t critical but it will make muffler installation much easier as there is not much space for a wrench. It also eliminates one more variable when you are fumbling around trying to line things up.

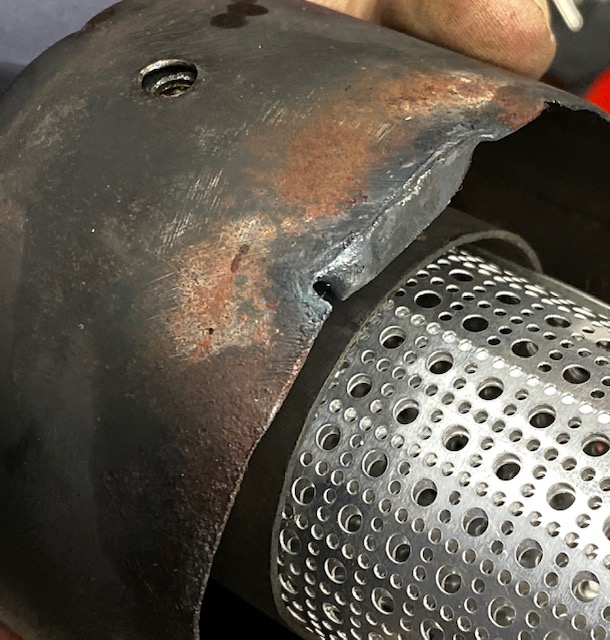
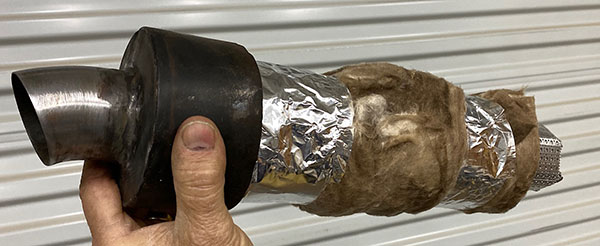
I made a baffle from perforated aluminum, rolling it over a 1-1/2” PVC pipe to form the tube. The baffle is long enough to protrude past the inner reverse cone for support and is wrapped in standard fiberglass insulation. The end of the baffle is folded in on itself and riveted. There are a lot of tiny holes in the baffle so I don’t think it will be too restrictive. I’m sure the Mansfield house insulation won’t last long but at least I tried.

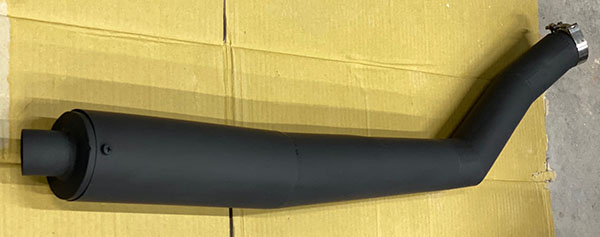
After all that pipe work I splashed some BBQ black on the muffler and it doesn’t look bad. As long as you don’t get within 25 feet.

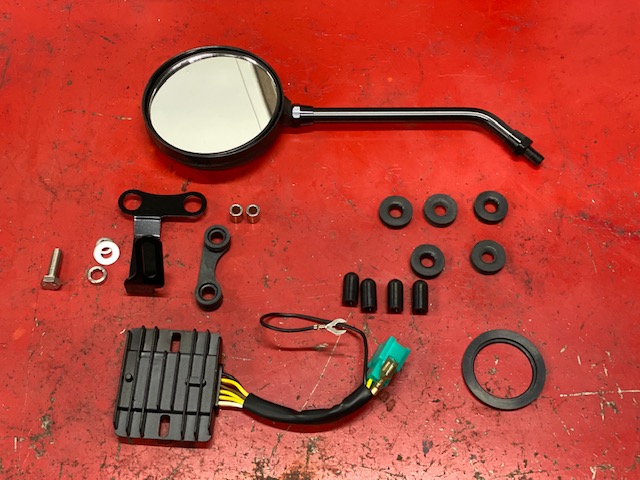
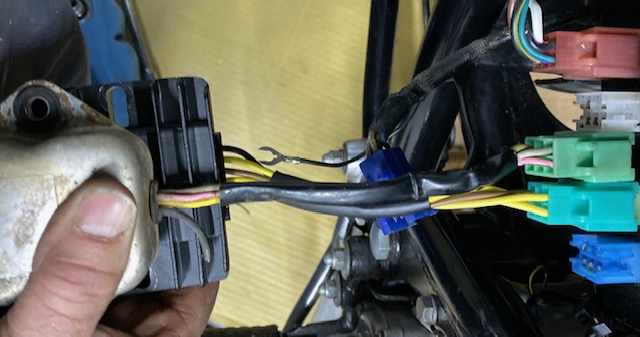
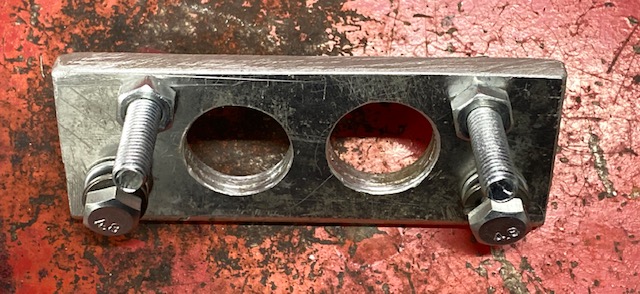
Zed was overcharging the battery to the tune of 17-volts so I bought a non-stock replacement unit from Z1E. The new unit eliminates the factory rectifier, having that function combined into the body of the regulator. Electrically, the unit is plug-n-play and the bolt holes from the old/new regulators line up but the wiring harness from the new unit was too short by about ¾”. There was no way to plug the regulator in and still have enough slack to reach the mounting holes under the battery box. I tried all sorts of finagling and considered rotating the regulator and using only one mounting bolt or drilling new holes closer to the harness socket. In the end I made a bracket to move the regulator. While I was at it I narrowed the bolt spacing between the slotted regulator mounting holes to make it easier to install.

All is mounted securely now and the unit plugs in just fine. It remains to be seen if it regulates. We will find that out in Zed 20.


Want more Zed?  Just click here!

Zed’s Not Dead: Part 18

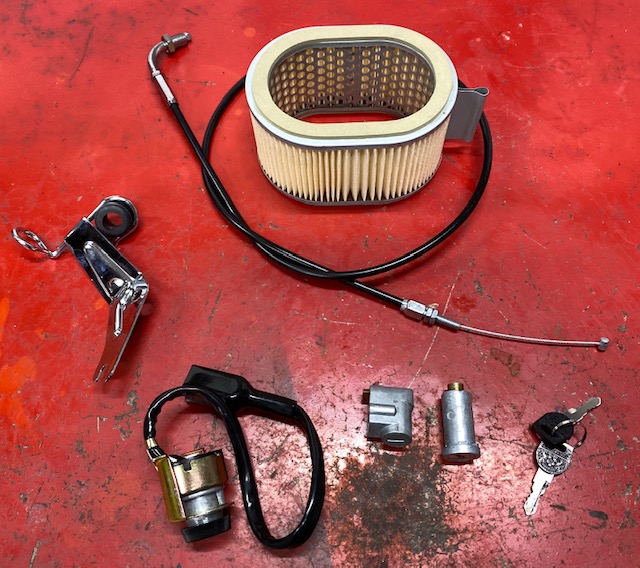
The pace has quickened here at Tinfiny Ranch. Lots of new parts from Z1 Enterprises arrived and lots of new ground was covered on Zed’s resurrection. We are going to ride like the wind soon. In Part 17 the ignition switch was giving me trouble but that’s been resolved with all new locks from Z1E. I had to dismantle the headlight area to replace the ignition and the under-seat area to install the new seat lock.  The fork lock was easy. I should have gone with new parts in the first place. Ah well, if I didn’t do stupid things no one would understand me.

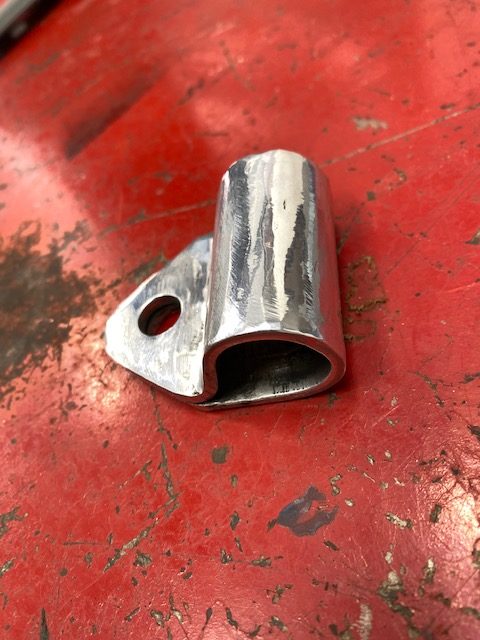
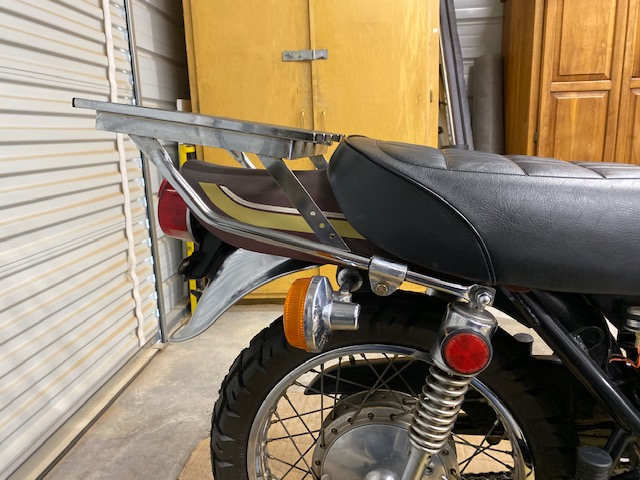
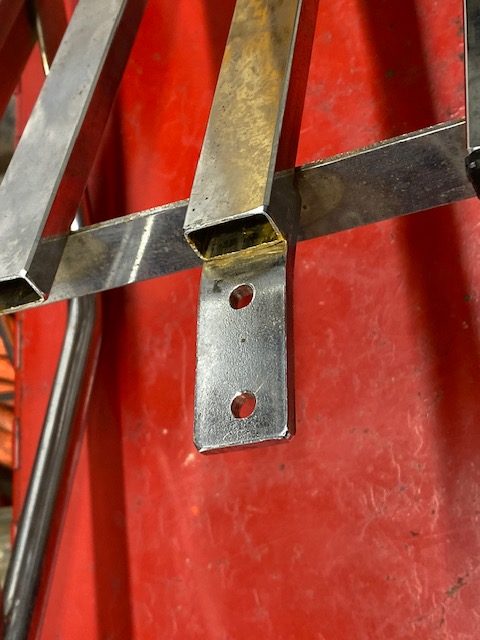
The luggage rack I bought from ebay fit Zed only in the broadest sense of the word. It was made to connect to the original grab bar on this tab but I don’t have the grab bar. That’s ok because it sat way too far back on the bike for me. Like 6 inches past the taillight. I lopped that tab off and shortened the rack where it mounts to the top shock bolt.

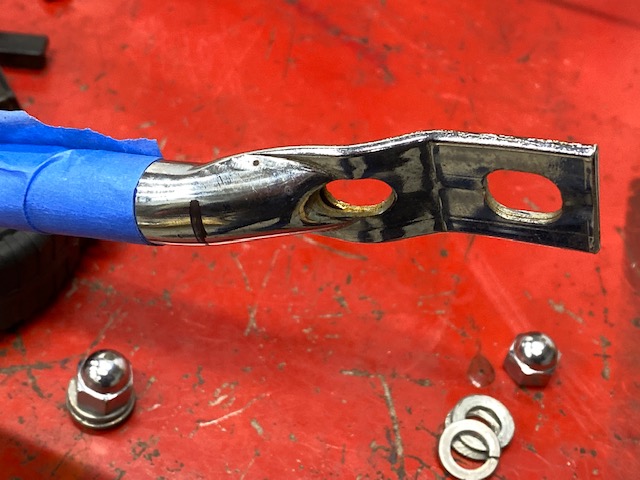
Without the tab or grab rail there was nothing to hold the rack from flopping down onto the rear fender. Using a New Mexico hammer-and-14mm deep socket-roll forming machine I knocked up two brackets that fit into the old grab rail mounting holes. I made a 1-inch spacer out of some solid steel round stock that had lain in Tinfiny’s driveway for several years.

The rack looks much better tucked in tight but cantilevered as it is, I’m not sure the tubing will be strong enough to hold much gear. I may redesign the rack with a long gusset running on the bottom of the tube that will incorporate the mounting tabs for a rearward set of blinker tabs. Moving the blinkers aft will allow me to use those toss-over, Pony Express style saddlebags.

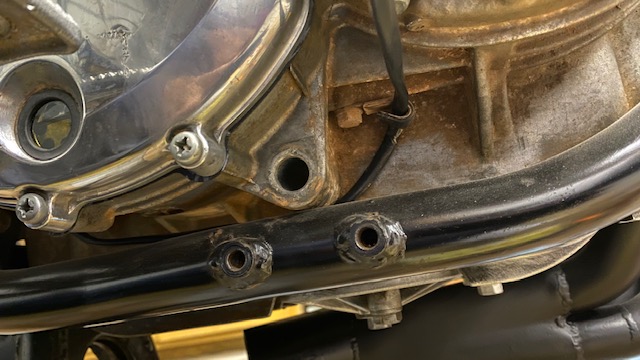
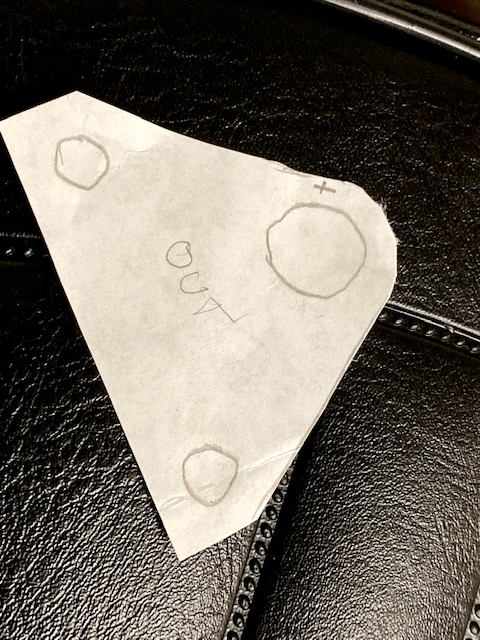
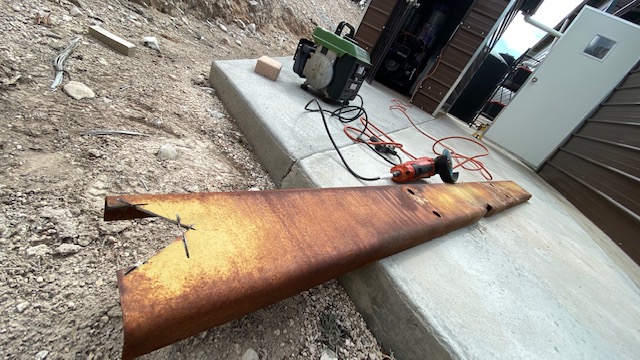
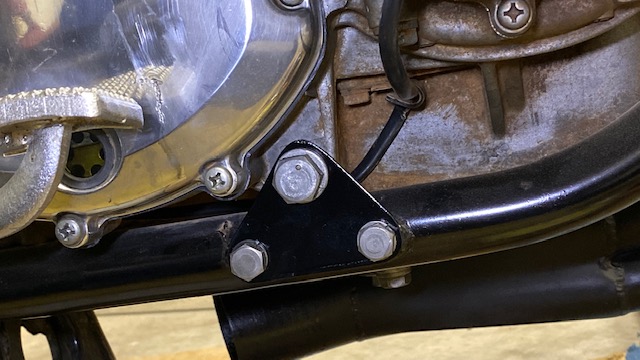
Zed’s lower, right-side engine mount was missing and I’m getting tired of buying parts for this bike so I made a paper template and cut a chunk out of an old motorhome bumper that had also laid in Tinfiny’s driveway for years. I hate to disturb the junk buried around Tinfiny because it stabilizes the soil. You never know which part you pull out of the ground will cause a landslide. It’s like living atop a Jenga stack.

The mount is not as nice as a stock mount but it’s way on the bottom. No one will ever know.

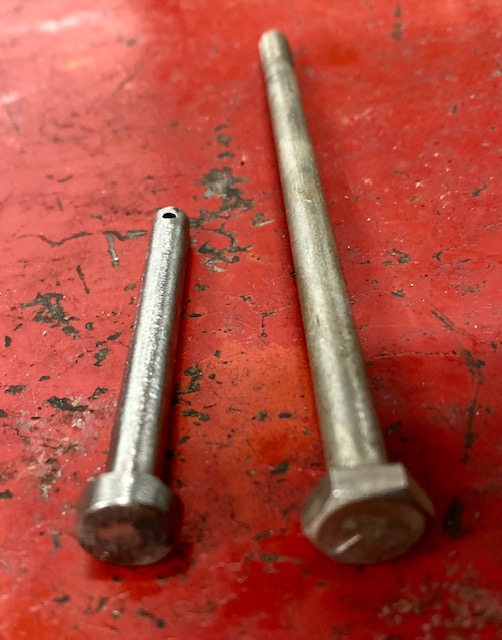
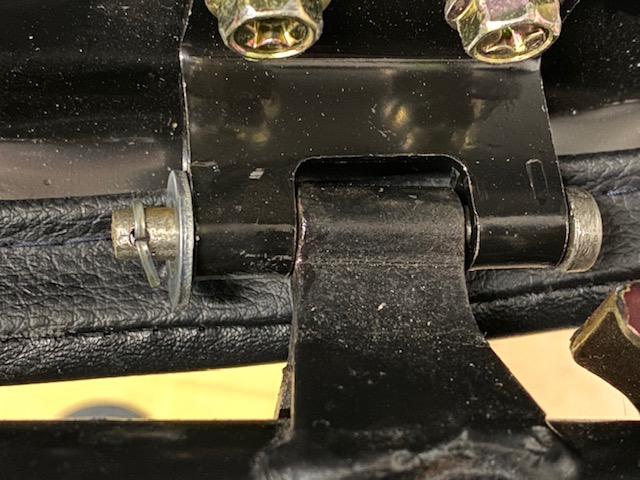
I also bought a new seat! Replacement foam and a new seat cover added up to nearly the same as a whole new seat so I bit the bullet. It tasted like brass with a hint of lead. The seat came complete with brackets, rubber supports and seat latch. It was missing only the pivot pins that hold the seat on. Using my New Mexico hand-lathe, I spun down a ¼-20 stainless bolt to fit through the frame brackets. A hole for a cotter pin & washer keeps the seat pins from falling out.

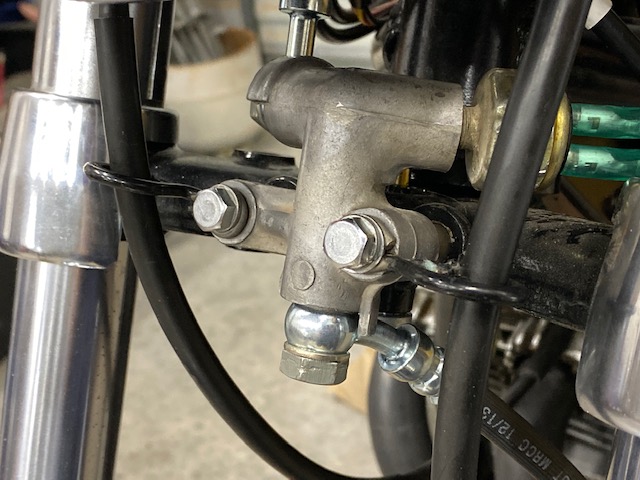
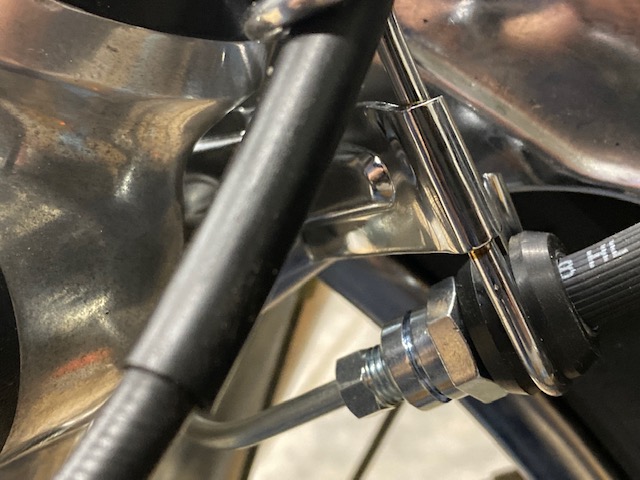
Besides rebuilding the caliper and master cylinder in a previous Zed installment I replaced the rubber hoses and the missing hose support down by the fender. I also had to replace the solid pipe from the caliper to the lower brake hose.

Bleeding the brakes was fairly straightforward. So far nothing has leaked out of the rebuilt parts. The lever feels a bit mushy; I’ll let it sit a bit to let the air bubbles coalesce then try a little more bleeding.

I rigged the bike with a spare battery and tested all the electrical circuits. Amazingly, everything works. The alternator works a little too well putting out 17 volts to the battery! Not to worry, another $100 has a new Z1 Enterprises regulator/rectifier on the way. The new unit is not an exact replacement. The regulator/rectifier is all in one finned casting unlike the stock Kawasaki set up where the two functions are separate parts.

The last time I ran Zed way back in Zed’s Not Dead 10 it ran and idled great. Now the bike is popping and won’t run off choke. The poor quality of gas sold today turned dark red in a very short time so I have removed the float bowls and will blast the carbs with aerosol carb cleaner. Hopefully this will get the bike running normally as I don’t want to take those damn carbs apart again.


Read our earlier Zed’s Not Dead installments for the rest of the resurrection!

Zed’s Not Dead: Part 17

Repairing old motorcycles is both fun and unnerving. After a couple weeks waiting on shims I finally finished the valve adjustment on Zed. While I was poking around under the valve cover I noticed that one of the four cam idler sprocket bolts was a non-standard bolt.

Zed’s previous mechanic must have lost a bolt or stripped the threads and the replacement bolt was too long. Stacking washers took up the clearance for the errant bolt but it looked like hell. I wanted to install the correct length bolt. The damn thing was tight. Like break-the-bolt-off tight. As I gave it a semi-gentle tug it had that springy feel. I fear that if I put any more torque on the fastener it will twist off leaving me with a mess.

It worries me that in the 45 years since the Kawasaki left the factory someone probably removed the cams in Zed. There were a lot of performance part catalogs in the same shed Zed came from. I hope the guy didn’t screw up the engine. I decided to leave the offending bolt for a later day and after checking the clearances one more time I used a new gasket and buttoned up Zed’s top cover.

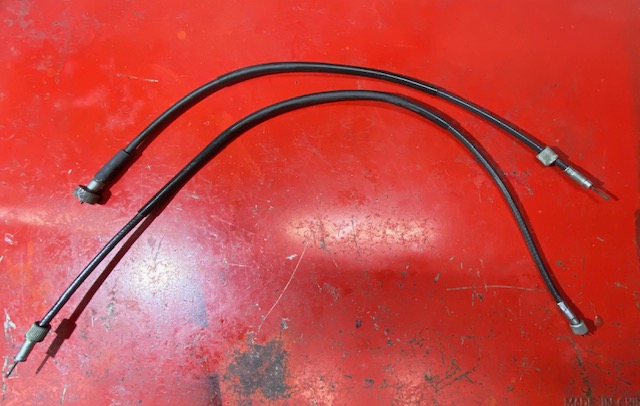
I’m bumping into my self-imposed 3000-dollar budget limiter so I’ve been making some hard choices. Tach and Speedo cables aren’t very expensive but after flushing out the cable housings and cleaning the cables I couldn’t see any fraying or signs of stress. I coated the cables with grease and will be reusing them so that’s another 25 bucks saved.

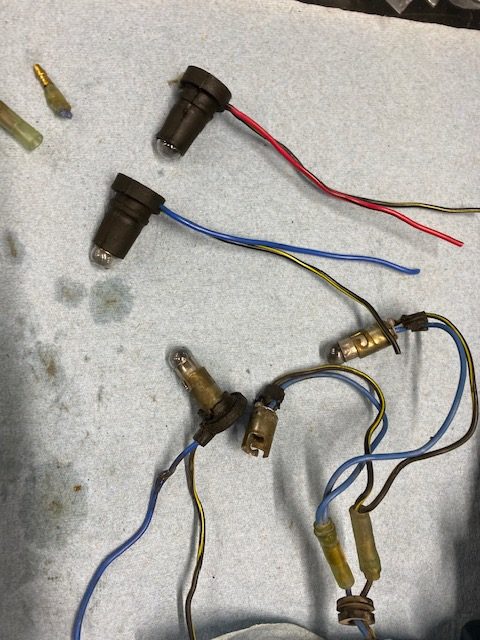
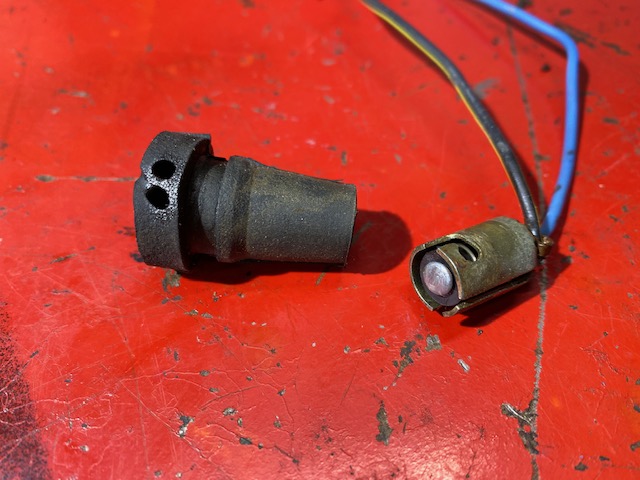
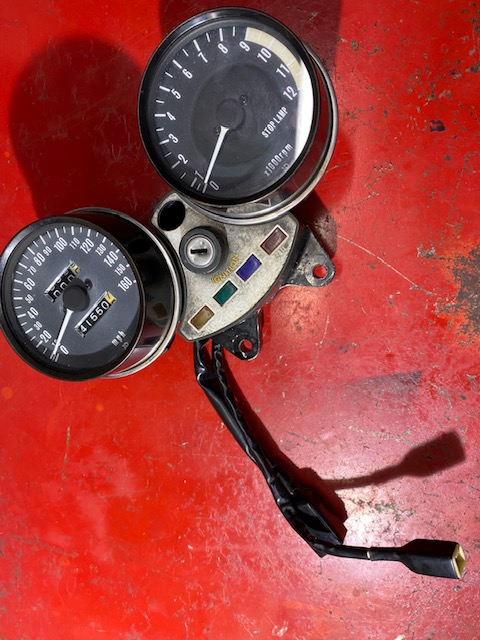
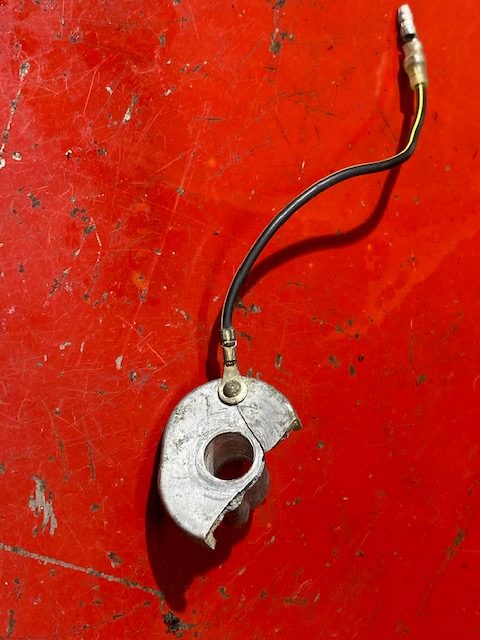
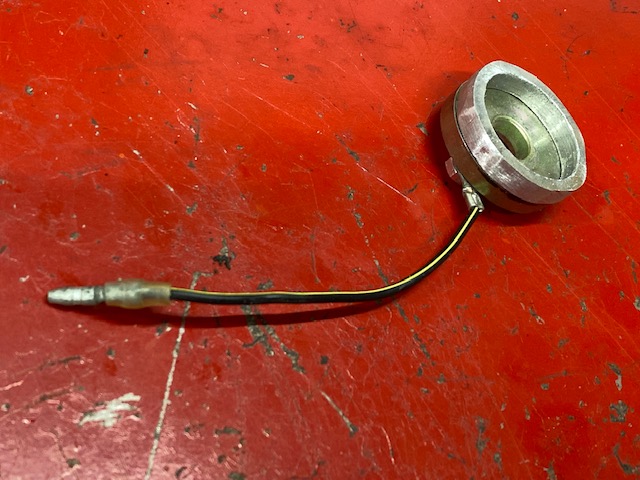
The Z1 Enterprises wiring harness was very complete, all except for the instrument light harnesses. Zed’s tach and speedo have two instrument lights per side. These bulbs are illuminated whenever the headlight is on so the rubber bulb holders were sort of crystalized from heat. They fell apart when I removed them. Half the rubber fell inside the gage and half stayed stuck on the instrument light socket. Luckily for me the Z1E harness came with a new warning light harness and I was able to steal the old warning light rubbers and repurpose them for gauge illumination.

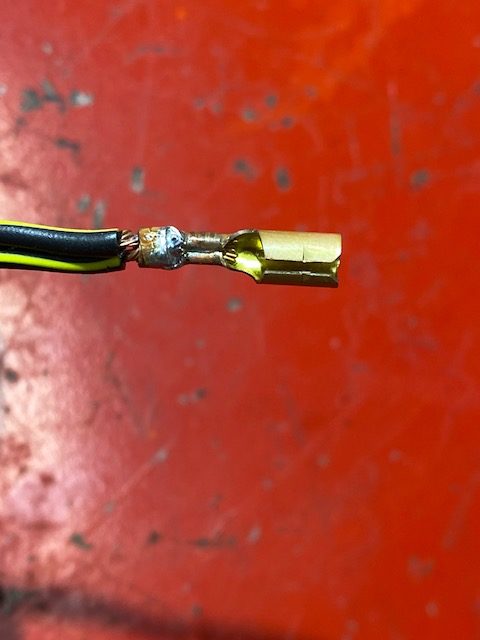
Changing the sockets and rubbers was less trouble than I thought it would be. I had to cut off the bullet connectors to pull the trick off. After threading the wire through the rubbers I uncrimped the old bullet connectors and recrimped the wires with a bit of solder to make up for any weakness inherent in a reused crimp connector. I wanted to keep the original instrument light sockets & wires so the color code would be correct but one of the sockets had chafed wiring and corrosion inside. I borrowed a warning light socket from the old harness and hopefully no one will ever see.

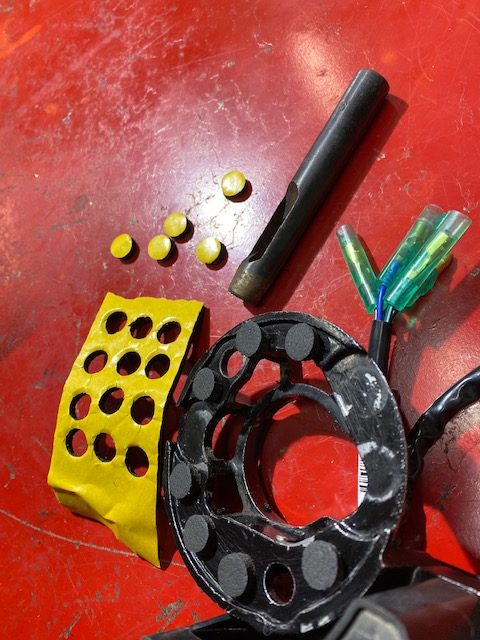
On a Z1 the gauges foam padding is sandwiched between the gauge and the cast aluminum bracket. This padding had deteriorated and crumbled easily. I knocked out a few round pads from some sticky refrigeration insulation and applied them wherever it seemed like the right place to apply such a thing. Next I tested all the bulbs and assembled the gauge cluster.

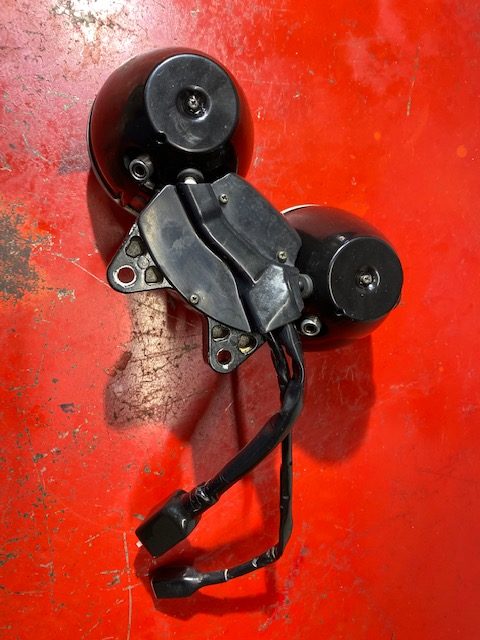
I had a hard time figuring out the headlight shell/blinker stalk sequence but my Internet buddies helped me get the various parts in the correct order. The blinkers ground through this ground washer/spacer type deal but mine were both broken.

Ever thrifty, I used a couple of thick washers and made an aluminum spacer to replicate the broken ground washer’s function, if not their aesthetics. The headlight ears on Zed appear to be slightly bent, giving a wall-eyed look to the blinkers. Or, if you like, swept back for speed. I don’t think I’ll try to straighten the ears because chrome does not stretch well and I don’t want hairline cracks in the lustrous finish. Sometimes effective motorcycle repair requires knowing when to quit.

At times my thriftiness ends up costing me more in the long run but not often. I never had a key for Zed so I took the seat lock, fork lock and ignition switch to our local locksmith. He made a couple keys that fit and only charged $40 for the work. Now that the instrument cluster and headlight was back together it was time to throw a battery on Zed and see if anything worked. I used a car battery and a couple jumper cables, turned the key…and nothing. Flipping the key back and forth brought flashes of light from the neutral and oil pressure warning lights. By turning the key just so, and shaking it like a Polaroid picture I could get the lights to come on steady. I’ve ordered a new ignition switch at $75.

Amazingly most everything worked. The left rear blinker bulb wasn’t making good contact so I cleaned the socket and it worked. The horn was badly rusted inside so I’ve ordered a new one but other than those two things all other circuits are fine. The starter works but I didn’t run the engine. That crappy ignition switch will just make it cut out.

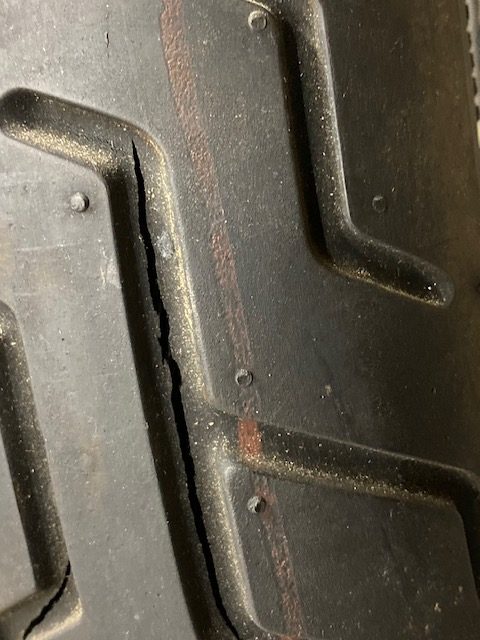
Zed is getting very close. Very close, my brothers. Except now I have to take the headlight and gauge cluster back apart when my new switch shows up. And then the seat lock. And then the fork lock. It’s two steps forward, one step back kind of action. One other cost saving measure that didn’t pan out was the used front tire. It looked fine when I first installed the thing but the tire has developed deep cracks in the rubber between the treads. Yet more stuff on order.

My latest Zed parts order is around $600 but this should be the last big pile of parts. It looks like it’s time to clean out Zed’s rusty gas tank and start thinking about all the cool places I’ll ride to on this beast.


Catch up on the Zed resurrection here!

The 5 Deadly Sins Of Motorcycle Restoration

My idea of a good restoration and your idea of a good restoration may differ, but you know deep down inside that I’m always right. I am the arbiter of cool. I am the final word, I am…Omni Joe. Here are 5 common restoration mistakes that drive me crazy:

Sin #1: Gas tank liners.

That sealer crap people pour into their motorcycle gas tanks is the worse invention of all time. Guys swear by this junk but don’t listen to those lazy bastards. When I read the words, gas tank liner and/or Caswell sealer in a motorcycle description I know an amateur’s hands have been fiddling the motorcycle. Who would pour that devil’s goop into a nice motorcycle gas tank? It makes me wonder what else they screwed up. The way to fix a leaking, rusty gas tank is to get rid of the rust and weld/braze any holes. Any other method is destined to fail. There’s no excuse for using devil’s goop, YouTube is lousy with videos explaining how to clean out a rusty gas tank and how to stop it from re-rusting.

Sin #2: Repainting serviceable original finishes.

Nothing annoys me like a guy posting up a 90% perfect, original-paint motorcycle and asking where he can get it repainted. Stop! If the paint has a few chips or is faded a tiny bit leave the damn thing alone. One of the most underused old-sayings is, “It’s only original once.” No matter how shiny and beautiful you think your topcoat turned out its still vandalism. There are many phony re-pop’s running around, don’t make your motorcycle one. By painting over your once desirable survivor you lower its historic value. Listen, I’m not against repainting really bad original body parts, lord knows my Z1 needs it but I know anything I do that covers over the factory work erases a story, and vintage motorcycles are commodities without a story.

Sin #3: Over restoration.

When the Japanese bikes that are considered classic today were first sold they had acceptable build quality. For some strange reason many motorcycle restoration experts go way overboard making the motorcycle a show bike that bears little resemblance to real motorcycles. Chrome back in the day was thin and yours should be too. Nothing depresses me as much as these tarted-up travesties. The nerve of some Johnny-Come-Lately with a fat wallet and no soul thinking he can render a better motorcycle than the factory. Keep it simple and try to match the level of finish that you remember. Otherwise, what’s the point? It’s already worth less because you damaged the original build by trying to improve the bike. Why pour money into the thing making it something it never was?

Sin #4: Giving a damn about numbers.

As people get deeper into the vintage bike hobby they grow ever more insane. It’s not enough to have the correct parts anymore: Now you must have the exact build date on the part to suit your motorcycle’s VIN number. This is madness. Nobody except lunatics and bike show judges will care that your sprocket cover was made a year or two after your bike left the factory. The only part number that matters is the one that can get your bike registered for the road. I’ve seen people on vintage groups debating a slight casting change or a vestigial nub as if it were the most important thing in the world. People like that have no business owning a motorcycle; they should go into accounting or better yet, prison.

Sin #5: Parking it.

The final and biggest sin of all is to restore a motorcycle and then park it. I can over look all the other sins, even tank sealer, if the owner rides his vintage motorcycle. Get the thing muddy. Do a burn out. Ride it to shows in the rain. Honor the motorcycle by using it. A show motorcycle that is too valuable or too clean to ride is nothing, less than worthless. The machine was built for you. It has a seat and controls for you. The engine wants to pull. Do the right thing by your motorcycle and your sins will be washed away, my brothers.


Keep up with the Zed restoration!

Meow Wolf

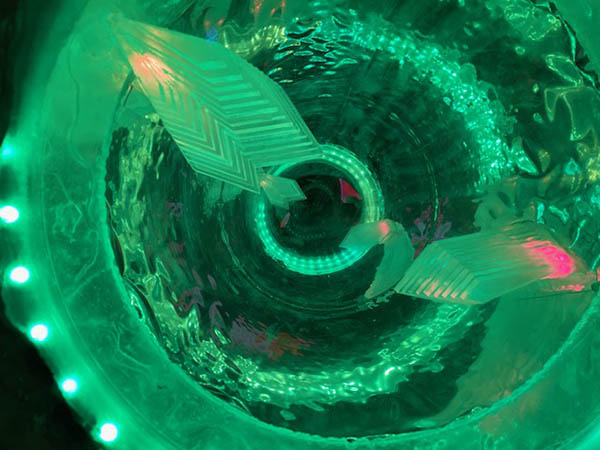
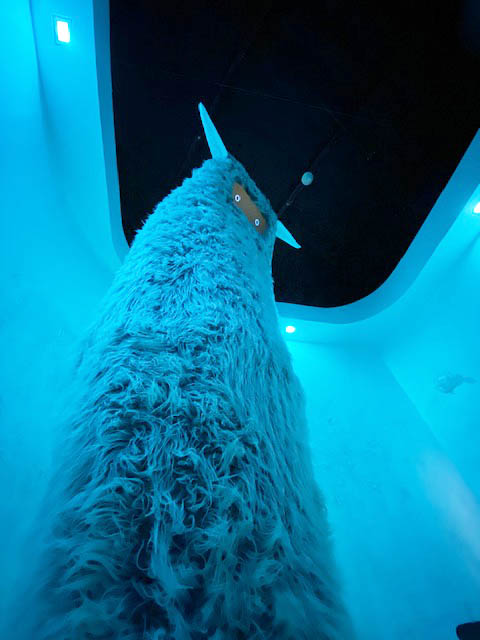
West of downtown Santa Fe, New Mexico towards the strip malls, chain stores, and old neon-lit motels, is a thing called Meow Wolf. I call it a thing because I’m not quite sure what it is and that’s after crawling through refrigerators, blue time tunnels, and playing musical mastodons. The amount of ingenuity per square foot is astounding.

There’s a detective story loosely connected to Meow Wolf. Immerse-ants will find private correspondence referring to all kinds of mysterious events. Feel free to open drawers or snoop in cabinets, cues are scattered everywhere but with so many people wandering around gaping at the strangeness it’s hard to get a look at them all. I sort of tried to follow the story but it will take several visits to figure it out. If you want to solve the story go to Meow Wolf when nobody is blocking your progress.

Besides the back story, Meow Wolf can stand alone if you don’t want to tax your brain trying to slot Lex’s school reprimand letter into the narrative. Nothing is what it seems to be so just wander around opening portals and being amazed at the way normal life can be altered by slight shifts in reality. It reminds me of that Monkees movie, Head.

Be prepared to crawl around on your hands and knees and push or pull on everything. At least half the stuff leads to somewhere else. One second you’re in a traditional living room, the next a spacecraft. If you can fit inside it goes somewhere cool. I loved the place and it’s given me many ideas on how to make our house forever un-sellable with a few modifications.

The closest things to Meow Wolf in the real world are those McDonald land playhouses found at suburban McDonald’s restaurants, except that Meow Wolf is not as sticky. They must have a crack janitorial crew. After two and a half hours I had use one of the many exits to make sure I wasn’t stuck in there. It’s artwork that you enter and sign in please, then try to imagine why it exists.

Next time you visit Santa Fe, New Mexico, visit Meow Wolf. There is talk of replicating Meow Wolf in Las Vegas, Nevada. I’m sure the Vegas one will be overdone and flashy but I like the little mom and pop alternate realities better.

Zed’s Not Dead: Part 16

The Rustoration of Zed, my 1975 Kawasaki Z1 900, has once again hove into view. After several months of pouring concrete in Bay 2 of the big metal shed then building a retaining wall to level the back yard and pouring a side patio to slow erosion, the time has come to push Zed a little further down the road.

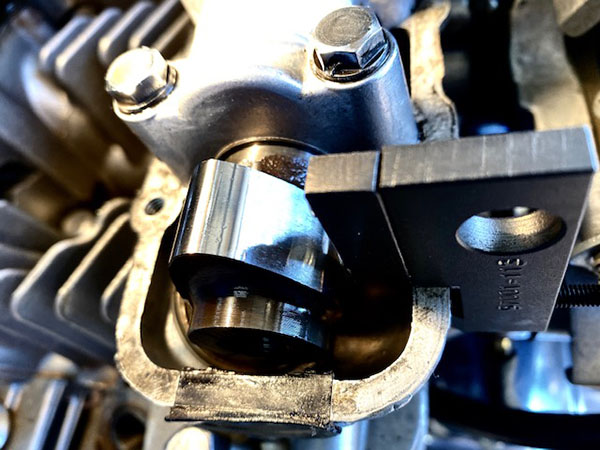
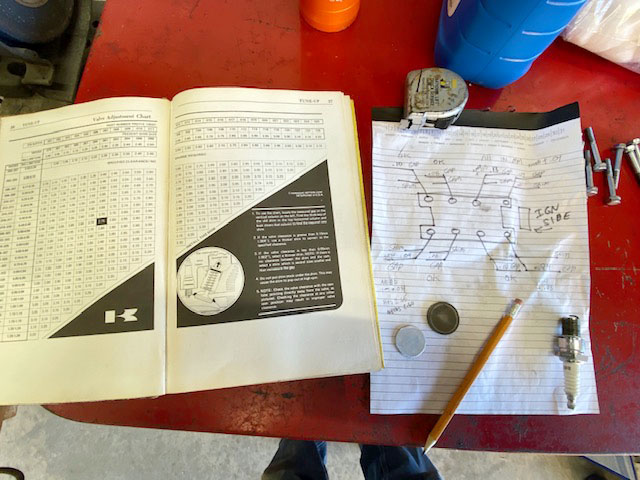
I left Zed somewhat assembled as far as the running gear was concerned. Today we will tackle adjusting the eight valves. You really can’t get an easier engine to work on than the Z1. After measuring the valve gaps and determining which valves need attention (four in my case), the first things you’ll need are a few old 29mm shims to stand in for the shims you are about to remove. These placeholders keep the cam from contacting the valves in an unfriendly way when the engine is rotated to access other valves. I don’t have any extra 29mm shims so I cut some out of a 1/16 bit of aluminum flat stock. These temporary shims can be a much looser fit (thus easier to remove), as you will not be running the engine with them installed.

I bought the correct Kawasaki brand valve shim remover tool online for around $40. There are other style shim tools but this one works well enough and leaves both hands free for the fiddly task of extracting the shim from its holder. I had to grind a little clearance into the tool where it straddles the cast-in tool boss on the Kawasaki’s cylinder head. The tool boss castings were slightly different thicknesses so after grinding it to fit the largest one I had to shim it with a plastic tie-wrap on the smaller castings.

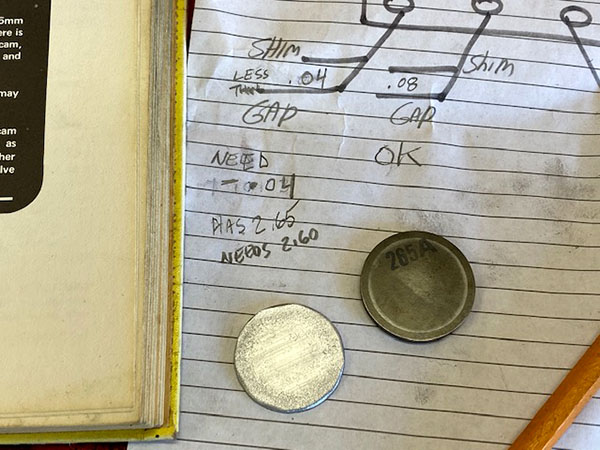
Now that you have measured all the valve clearances and removed the shims on the out-of-spec valves it’s time to play shuffle-shim. The shims are marked in millimeters and if the last guy who set the valves was not an asshole the markings will be readable on the side facing away from the cam. It’s a good idea to measure the shims with a micrometer but I don’t have a metric micrometer and it’s too much math to convert from inches. With my clearances I was able to relocate two shims leaving only two valves to go.

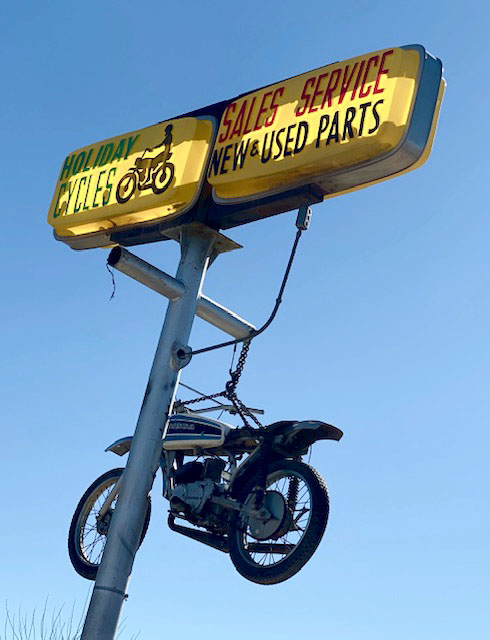
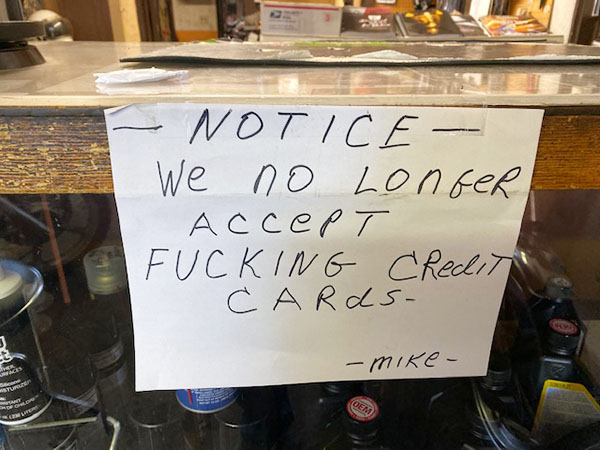
Holiday Cycles is our local Old School cycle shop. There are no dealerships; Holiday is an independent, pan-brand shop. The place looks like its been in business since 1939. I love it. You can see by the credit card sign that these guys don’t put up with bullshit. Holiday Cycles had one of the shims I needed and swapped me for mine. I’m not sure how they are going to make any money like that but I’m cheap so it really tugged at my heartstrings.

Next I went to Dave at the local Kawasaki dealership. Dave had shims but the Z1 is so old the shims were in his storage shed. I had to wait a day to pick up the next shim. I installed the new shims but the 3.00 mm one was too tight. That valve had a 2.95 shim and the gap was at .013 so I couldn’t understand why the 3.00 didn’t bring it down to .008. This is where measuring the shims comes into play. Dave told me that shims can vary a couple thousandths. Add in a bit of wear and it’s a crapshoot as to which replacement shim to get.

Trial and error has been my normal MO since forever so I ordered another 2.95 from Dave except he doesn’t want to go back to the storage unit right now so I am waiting on a call back. Once I get the valves set I’ll run the engine again to flush the carbs with fresh gasoline. Then I can get to work on the gauges and headlight area and try out the new electrical system. I really want to ride this bike before I die.


Read Parts 1 through 15 of the Zed’s Not Dead series!

404 Not Found: Blowing The Lid Off

If you haven’t already joined the Facebook page, Fans of Motorcyclist Magazine’s Washed Up Writers, I encourage you to do so. FOMMWUW is a place for former Motorcyclist mag writers to post their new stuff and for fans to see that their old favorites did not die just because Bonnier killed the motorcycle magazine business in America. One of the washed up writers posted a helmet review from his site. The review was ok. It covered fit and finish, noise and weight. Conclusions were drawn but that’s not what I took away from the review: It was the inspiration for this blog.

Way back when moto-magazines still held thrall over the motorcycle advertising landscape writers were professional and paid fairly well. One of those writers, Dexter Ford, wrote the most important motorcycle magazine article since…since I don’t know when. The story was called Blowing The Lid Off and the amount of time and money spent researching this one story dwarfs what we Internet bloggers can devote to a hundred topics.

Blowing The Lid Off combined applied scientific research, traffic accident studies and logical thinking to destroy the long held belief among motorcycle riders that a more expensive helmet was a better helmet. Ford didn’t mince around with fit and finish. He cut right to the chase: How well does the helmet protect your head in a motorcycle crash. New ways of testing helmets were devised. Whole new parameters were used instead of the old metrics. Ford’s story changed the way helmets were rated by proving that stronger helmets weren’t always better in a motorcycle accident. One of the cheapest helmets tested (Shark brand, if I remember correctly) protected a simulated human brain better than the most expensive brands available.

Rotational forces, multiple impacts, using statistical areas of contact instead of a fixed point on top, the story was complete and completely unheard of: A masterwork. Ford had so perfectly executed his Mona Lisa that Motorcyclist Magazine lost a huge amount of advertising money from (expensive) helmet manufacturers. The toxic corporate fallout from Blowing The Lid Off contaminated friendships, leaked emails and ultimately cost Ford his job at Motorcyclist. It was a real mess but that story is best told by those who were actually involved.

I met Dexter Ford on the Best Western Motel-Arkansas-Harley Ride boondoggle. (Even though I wrote about wheel spokes coming loose, that was not the story that soured The Motor Company on my writing). We had drinks and dinner at the schmoozefest portions of the ride. Shooting the breeze with Ford was so damn funny I actually had to beg him to stop as my uncontrollable laughing was making me look like a drunken idiot. The other moto-journos at the table must have thought I’d lost my mind.

Ford and I got along famously on that ride but we had a little falling out towards the end of the Best Western tour. He was a proponent of the sanctity of the writer’s craft. He believed it was a calling and the worthiest of all pursuits. I’ve always approached writing from the rear entrance and with not much respect for the act-of so I told him that digging a perfect ditch was just as valuable as anything I could ever type. I can be a jerk when I want to be.

After that, Ford was not exactly dead to me but the fun times and hilarious asides dried up. I probably should not have said the thing about the ditch but I’m a laborer at heart and will always take the side of the man in the hole.

I tried to find Blowing The Lid Off online but after 10 minutes of searching I could not find a link that worked. Maybe one of you guys can post up a link or it’s saved in an archive somewhere. Failing that, screen shots of the story could be uploaded somewhere safe. It would be a shame if the greatest investigative motorcycle writing ever disappeared from the moto-world.

Dream Bike: Triumph T160

The mid-1970’s Triumph T160 is one of the best looking motorcycles ever. The swoopy tank, the perfect stance, the soft-edged thrum of its exhaust. I’ve wanted a T160 since I first saw one. They weren’t popular where I grew up so I didn’t get to see a real live 750 until they were already out of production.

The T160’s engine is actually a BSA engine. But then again the BSA engine was a 500cc Triumph engine with an extra cylinder grafted on so who stole what? Not that it matters because the only real difference between BSA and Triumph’s versions of the 750cc three-banger was a slight forward slope to the BSA cylinder bank.

The older BSA triples are cool in a Jetsons kind of way. The square tank and the ray gun silencers didn’t sell well in the USA so BSA chromed the heck out of the thing and made it into a fire breathing hot rod. I’ve never seen one on the road, only in museums.

Triumph had the same problem with its modern-looking but slow selling triple. If I understand history correctly Triumph sent bodywork beauty kits to the USA to fix slow sales. These kits made the Triumph Trident look pretty much like any other Triumph made in the last 60 years.

The triple engine design consisted of typical British engineering: Why use one part when 32 parts will do the job just as well? The top deck of the crankcase had a gaping opening that the cylinder spigots fitted into. It looks weak to me. I’m surprised the crankcase doesn’t oil can at high compression levels. The center main bearing bolted in from the top, which is pretty strange. The sum of the triple’s complicated, ancient collection of parts worked amazingly well together, winning many road races against more advanced designs.

I would take any of the triples if you gave me one but the only one I would buy is the final Triumph T160 version. The T160 has an electric starter and the thing actually works on the few I’ve seen. Disc brakes front and rear means you don’t have to sacrifice stopping power to revel in the past. The styling of the T160 looks fresh 45 years after it rolled off of the assembly line. I like it better than the Vetter version.

Beginning with the 1970’s Japanese Superbikes steamrolled everything in their path. When it comes to big bike, high horsepower nostalgia most American motorcyclists of a certain age go for a Kawasaki or Honda. Today, the relatively cheap price of a T160 reflects the lower esteem British bikes were held in at the time. If you want one like I do, Triumph/BSA triples are within reach of the average person. $5000 should get one in ridable condition with not-embarrassing cosmetics. $10,000 will buy a show bike. The T160 pushes all the right buttons for me and if I didn’t already have 47 projects lined up I would have grabbed this recent listing. Let me know if you need me to go pick it up for you.

What’s On Your Shelf?

Before the Internet I used to read books. Not just motorcycle magazines, although they were a great source of ideas, but real books. I shot a close-up photo of our bookshelf the other day for a Wastebook post. It was just for fun but looking at the photo I realized the impact some of the titles had on my typing. I never started out to write. I never dreamed of writing the Great American Novel. I fell into typing by osmosis and now I can’t stop. Once I was roped in I mostly tried to emulate my favorites. Find a writer you like and think like them. I don’t try to copy or mimic my favorites, I channel them as I type.

First up is A Confederacy of Dunces by John Kennedy Toole. Mr. Toole killed himself long before ACOD was published. It pisses me off that he chose that path for strictly selfish reasons: I wanted to read more of his stuff. ACOD is a huge, rambling thing full of recognizable personalities, disgusting situations and incredibly funny passages. The Levy pants story will be pleasing to anyone who has held a job (no matter how briefly) and the hot dog cart bit is familiar to anyone who ever tried to sell Christmas cards door to door.

The Best of S. J. Perelman is a collection of essays from The New Yorker. This is a guy you will want to steal from after the first verb. People will look at you like you’re crazy when reading this book on an airplane because you really will be laughing out loud. (Not to be confused with the nearly meaningless LOL, which is often used on the web for things that aren’t actually all that funny.) Perelman’s short bits cover a wide range of topics but always end up absurd. If I could write as well as him in today’s media environment I still wouldn’t be making any money but at least I’d have cigarettes.

The Portable Dorothy Parker is another collection of stories written for The New Yorker. That mag must have been something. At a time when women were routinely named Dorothy she did play reviews, poems, screenwriting and managed to get herself blacklisted. Less bitter than H. L. Mencken, Dorothy’s stories can be safely read both by people with suicidal tendencies and regular folks.

It seems like there are a lot of collected works on this shelf. CT organized it. The unseen hand of her masterful brain is behind the curtain. Anyway, don’t blame me. The Best of Robert Benchley is another collection in the smart, funny but down to earth mold. Benchley also wrote for The New Yorker (what a murderer’s row!) and he dabbled in Vanity Fair during slack times. When these stories were originally written the intention was to parcel them out slowly. Each issue of The New Yorker was an event. Best-Of collections hit you with a fire hose of quality that overwhelms your brain and maybe numbs your senses a bit.

The Commitments, The Snapper and The Van are three full-length books crammed into one small space. I’ve read The Commitments and The Van for sure. I can’t remember if I read The Snapper so I’ll have to get my magnifying glass out and check. If you only have time to read one of these stories by Roddy Doyle make sure it’s The Van. The Van is like Trainspotting except with food trucks instead of heroin.

The Best Short stories of O. Henry should be required reading for anyone thinking of writing for fun or…fun. O. Henry invented the ending-with-a-twist that featured large in last century’s story telling. We seem to have gotten away from these surprising finishes like, “Darn! She shouldn’t have cut her hair!” Now stories just kind of fade out with a pale, rictus arm reaching out of a lake or it’s revealed that the two main characters are father and son.

Finally, we come to Hunger by Knut Hamsun. This book was published in 1890 yet the ensuing 130 years have not dulled the edge of the humor in this book. Fittingly for this blog, the protagonist is a failed writer and we follow his slow starvation and descent into a delirium world. It’s funnier than it sounds. If you want to be a successful writer, learn a trade is what I took away from reading Hunger.

These are some of the books I use as inspiration when I’m faced with replacing a transmission in a Jeep or trying to work the self-checkout in Wal-Mart. At the emotional level, living in today’s world is no different than when these authors were writing. Life still becomes more ridiculous the deeper you dig into the thing and all we can do is shake our heads and crack wise. Wait here while I go sell my pocket watch.