ExNotes Long Term Test: Vevor Diesel Heater

By Joe Gresh 

Towards the end of last year’s heating season the Vevor 12-volt, 5kw diesel heater started shutting down and giving an error code. The big blue, start/stop button on the front of the machine blinks the code number between pauses. I counted an error No. 8, which the owner’s manual said was a problem with the temperature sensor. This was a little disappointing because I had only run 10 gallons of diesel through the heater. (It runs a long time on a gallon, like 8 hours) I didn’t mess with it at the time as it was warming up and I was busy doing other vital, yet unimportant tasks.

Fast-forward to winter, 2024 and it’s cold again so I figured I’d better fix the heater. I looked up a new temperature sensor for $4 on Amazon and after waiting a few weeks the thing came all the way from China. Installing the new temperature sensor changed nothing. The heater kept shutting down with an error code No. 8.

Utube Academy provided some more ideas, one of which was the fuel pump was not functioning good enough to keep the fire going.  I bought a new fuel pump on Amazon for $18 and installed it. After bleeding the air out of the pump the heater turned on for a few minutes and then shut down showing error code No. 8 again.

Another Utube suggestion was that the glow plug was bad, failing to ignite the diesel fuel. While looking up the glow plug @ $19 I found a complete new heater for $90 with free delivery. I stuck the new heater in the shopping cart and it showed up a few days later.

The new heater was almost an exact duplicate of the Vevor unit and in fact it had a more advanced keypad display instead of a blue button. The replacement unit swapped out easily and in no time I had heat in the shed.

A few more weeks passed and the new glow plug showed up. Taking the unit apart to gain access to the plug was easy and I pulled the wires off of the glow plug so I could put a socket on the thing. That wasn’t a good idea. Turns out the wires are non-removable and you need a special 12mm slotted deep socket to unscrew the plug. When I pulled the wires off I actually broke the glow plug ceramic. The special socket for the plug was helpfully included in the box with the new glow plug. Unfortunately, I didn’t realize this before destroying the old glow plug. That’s just how I roll.

None of this mattered because once I started taking the heater apart I noticed the exhaust port was almost plugged with diesel soot.

It was so clogged I had to take the fuel feed pipe and the combustion chamber apart to clean out all the soot.

The gaskets tore when I dismantled the fuel feed and the combustion chamber so I had to order new gaskets from Amazon @$16. If you’re keeping count I now had almost as much in parts as a heater costs.

These Chinese diesel heaters are pretty simple to work on and after cleaning the combustion chamber and exhaust pipe it was only a few minutes to put the whole thing back together. I rigged it up for a test run and the heater put out plenty of hot air and ran for as long as I wanted to hear it run. It seems to be fixed but I don’t understand why it sooted up so soon. Maybe there was another issue that I have inadvertently fixed while swapping out parts? Maybe not. Keep clicking on ExhaustNotes and I’ll report on this situation as it develops.


Never miss an ExNotes blog:


Don’t forget: Visit our advertisers!


ExNotes Product Review: Generic Chinese Starter Relay

By Joe Gresh

There is a Facebook group called The Dull Men’s Club and somehow it ended up on my newsfeed. A few of my FB friends are members of the Dull Men’s Club and scrolling through the page it occurs to me that most of the stuff I write about would be perfect for the club. My life has become an endless series of tiny battles to keep motorcycles running. You may think I tinker with the bikes to have something to write about but no, my clunker motorcycles really are a pain to keep running.

The Husqvarna SMR510 in particular requires 5 or 6 hours of fettling for each hour of riding. You may recall the story I wrote about the bike’s kickstand (classic Dull Men’s Club content) and how the bike wouldn’t start. I took the bodywork off and tightened connections, I unplugged and cleaned multi-pin connectors and gave the headlight wiring a re-org to gain a little room behind that crowded area. The bike was starting ok after the work I did.

I took the Husky on a test ride through the mountains stopping frequently and it started fine at least seven times. I figured I had the problem licked and when I got home after a few hundred miles I tried the starter one last time. The Husky wouldn’t start. It wouldn’t start after I let it cool down. It wouldn’t start the next day. Again, I jumped the battery positive directly to the starter terminal and the bike roared into life. I knew the battery was okay so I did what I normally do when I don’t know what the problem is: I bought parts.

The starter relay on the Husky is an odd one to me but apparently the part is used on a lot of ATV’s, small engines and Chinese motorcycles. I looked on a Husqvarna parts site and the relay was $43, plus shipping. On Amazon a duplicate Chinese relay was $7, shipping included. If you’ve followed my moto-journo career at all I imagine there is not a lot of suspense as to which relay I bought.

Even to my naturally cheap psyche the $7 relay seemed too good to be true. So I bought two of them just in case the first one didn’t live up to expectations. Kind of like the old “We’re gonna need a bigger truck” punch line but with relays. The clone relay looked exactly the same as the Husky part except the molded, rubber band mounting bushing was clocked 90 degrees off. I pulled the rubber from the original part and it fit onto the clone perfectly. Things were looking good.

This relay is sort of nifty as it has a main fuse and a spare fuse piggybacked onto the starter relay making for a nice, lightweight, compact…thing. The stock Husky relay had a 20-amp main fuse. The generic unit came with a 30-amp fuse. I pulled on the 30-amp fuse to replace it. And I pulled. I pulled harder. I grabbed the fuse with a pair of Leatherman pliers and gave the fuse a mighty tug.

The relay flew apart; parts went everywhere as the plastic bit holding the main fuse broke away from the body of the relay. The tangs of the 30-amp fuse were still embedded in the fuse holder. I gathered the bits and tried to reassemble the relay but it was too far gone. Good thing I bought a second generic relay.

The fuse in the second relay was as tight as the first one so I decided to use the opportunity to upgrade the Husqvarna’s power supply by 10 amps and left the 30-amp fuse in place. It may never blow without melting the wiring harness. I’ll deal with that situation when it arises.

A: Plunger, B: Plunger spring, C: coil, D: start contacts, E: spark shield, F: coil bracket

I took the broken relay apart to see what was in the little black box and it was just like a normal starter relay but in reduced dimensions. I suspect the plunger contact on the OEM relay is not making good contact but there is no easy way to dismantle the relay without destroying the thing.

It’s been five days and I’ve started the Husky each day without a problem. Of course, this proves nothing and I’ll have to bang the bike on some trails to see if the starting issue has really been fixed. One positive outcome from all this jerking around is that I understand the relay wiring now and if it won’t start again I plan to bypass the stock Husky starter circuit and install an entirely new, stand-alone starter circuit/ main fuse with a second push button and relay.  It will be a perfect story for The Dull Men’s Club.


Never miss an ExNotes blog:


Don’t forget: Click on those ads and visit our advertisers!


ExNotes Product Review: Harbor Freight 30-Inch, 5-Drawer Mechanic’s Cart

By Joe Gresh

The Harbor Freight/US General 5-drawer tool cart has been on my radar for many years. It always seemed like a pretty good deal at $189 and if you bought the thing when it wasn’t on sale (every few weeks) the price would go up to $269. Paying full price at Harbor Freight is to be avoided at all costs and HF’s unrelenting cycle of blowouts, parking lot sales and clearances has trained their customers to wait them out. This particular mechanic’s cart sale was a Black Friday thing and I debated picking one up but managed to tamp down the urge.

I thought I was in the clear until HF declared an extension to Black Friday, at which point I gave in and went down to their store to pick up one of the damn things. This wasn’t a spur of the moment deal. I have a homemade rollaway box full of tools I rarely use but can’t get rid of and another really cheap top and bottom combination setup also filled with odd bits and lathe tools.

My previous mechanic’s cart is a cut down rolling file cabinet, the type used in offices by the type of secretary born sometime in the 1950s. The file cabinet thing was never great, but it made a good workbench to repair the Husqvarna’s transmission. After that transmission job the cart slowly became covered in tools making it hard to dig through the junk to find a 10mm socket. It became a poorly organized catchall.

The US General 5-drawer cart comes to you mostly assembled. You have to put together the wheels and the lower shelf, along with the uprights and some corners for the top box. The instructions are good enough except for the part about lifting the box up onto the legs. The manual says to not attempt this alone. I’m always alone and the box was heavy and too bulky. I got the thing off the ground but accuracy was suffering and I was worried about scratching the paint or pinching my fingers.

Taking the drawers out to lighten the box was one option. Plan B was to lay the box on its side and slide the frame into position as the frame weighed much less than the box.  Now I had the cart on the ground, so I lifted the thing upright pivoting on the wheels. It was still a strain but easier than lifting the entire box. You get a lot of steel for $189 at HF. After the thing was upright, I tightened all the bolts that hold it together.

The 5-drawer box is really nice. The paint (five colors to choose from; I got KTM orange) looks thick and applied well. The box comes with drawer liners in each drawer and in the bottom shelf.

The wheels appear heavy duty and are probably overkill. HF included a nice, extra-mile feature by providing the swivel casters with grease fittings for the ball bearings in the swivel part. Also included on the two casters are brakes so if you’re working on an incline the box won’t roll away.

The drawers use two methods to secure them from sliding open under transport. The first is a latch on the front of each drawer that you must slide to the side in order to open the drawer. I’m not sure I like these latches. I want the drawers to open without the added finger motions. I may disable these latches.

The second method of drawer retention includes two, spring-loaded lock bars that slide down onto the backside of the drawers when the top of the box is closed. The box comes with four round-Coke-machine type keys so you can lock your stuff if you work in a shop full of shifty characters.

For such a low price the 5-drawer box doesn’t seem cheap at all. I think it’s Harbor Freight’s best toolbox value. Two gas charged struts are used to hold the top in the open position and the unit came with a handy side shelf to store your unguents and the various toxic chemicals that mechanics use in their daily course of events.

My particular 5-drawer had a slight flaw: one of the drawer slides was not in its track correctly and was binding. I had to remove the drawer and slot the slide into the track after which the drawer worked fine. I’m not sure that I didn’t cause the problem when I set the box on the side and lifted the cart upright with all the bolts loose. Maybe it flexed and popped out. With everything tight the box feels sturdy without any wobble.

I give the US General 5-drawer mechanic’s cart high marks and can recommend it if its size suits your needs. Now I’ve got to sort out that mess of jumbled tools and organize my new toolbox, a process that has already begun.


Never miss an ExNotes blog:


Don’t forget: Visit our advertisers!


ExNotes Moto-mods:  Kawasaki ZRX1100 Petcock

By Joe Gresh 

I should have listened to the guys who knew.  They told me the vacuum operated fuel petcock on the ZRX1100 was a source of problems and that I should convert it to a standard on-off-reserve manually operated type. In my defense the new vacuum petcock lasted six months or so before the ZRX became hard to start after sitting idle for longish periods of time.

The vacuum petcock stopped sealing and the ZRX’s last line of defense was the float needle in the carburetors. In an ideal world these needles should stop the flow of gas and you wouldn’t even need a fuel shut off valve. We don’t live in an ideal world, however.

I tested my bad-petcock theory by removing the fuel line. A steady stream of fuel poured out of the hose. There is no “Off” position on the standard Kawasaki petcock so I drained the gas tank and set about converting the petcock to manual.

In practical terms the bike was starting hard because it was flooded. Constant velocity carbs, like the ones fitted to the ZRX, are a little harder to clear a flooded condition. Normally you’d hold the throttle wide open to get a lot of air flowing through the cylinder, thus blowing out the excess fuel. With CV type carbs opening the throttle only opens a set of butterfly valves. The actual throttle slides are independent of the twist grip and require engine vacuum to operate. Add low-vacuum cranking speed that struggles to raise the throttle slides and a flooded engine that doesn’t want to start and you’ve got a sticky wicket.

I bought this generic fuel petcock on Amazon for around $10 and figured if it didn’t work I wasn’t out much money. The hole centers lined up and the valve bolted into the Kawasaki tank without issue.

The new petcock came with these tiny plastic fuel filters fitted to the main tank standpipe and the reserve opening at the bottom of the tank. I got rid of these as they looked sort of restrictive and I planned on installing an inline filter on the bike to simplify the hose connections.

The original style vacuum petcock had a 3/8” hose barb that mated to a 5/16” barb on the carburetors. This mismatch required the factory to specify an unusual molded hose that was 3/8” on one end and 5/16” on the other. The new, manual petcock had a ¼” hose barb. These universal inline filters have both ¼” and 5/16” barbs to fit a wider range of machines. I trimmed off the 1/4″ barb on one side of the filter and had a nifty filter that fit both the petcock size and the carburetor size.

I know what you’re thinking, which is that the new petcock at ¼” won’t pass enough fuel. Maybe you’d be right if I drag raced or rode extended periods at high speed. At 50 miles per gallon the thrifty ZRX1100 gets plenty of fuel through the smaller line. I did a few full-throttle passes at an undisclosed test location and the bike did not want for fuel.

The new petcock hose barb exited 90 degrees rearward compared to the stock petcock, which exited down. This orientation required the fuel hose to run straight back and over the carburetor before turning down and routing under the bank of four carbs. The extra length made for kind of a loose hose so I used a couple rubber-covered clamps to secure the hose and tuck it in out of the way.

The new petcock makes starting easier but the Kawasaki ZRX is still reluctant to cold start. Which is odd because the bike always started on the first push. Maybe it’s just the fact that winter is here at the ranch and I’m starting the ex-Florida bike colder than usual. This is the first New Mexico winter for the ZRX and it takes three or four pushes on the button to get the bike to light off, a great improvement over the 25 or so with the old, leaky petcock. I never got around to adjusting the ZRX carbs; I just cleaned them and stuck them back on the bike as I had a long trip planned and wanted to get some shakedown miles on the bike. Maybe a carb sync is in order.

I’ll try adjusting my starting ritual to see if I can come up with a protocol that will save some wear and tear on the Kawasaki starter motor. Keep your eyes glued to ExhaustNotes.us for important updates as they become available.


Never miss an ExNotes blog:


Don’t forget: Visit our advertisers!


Getting Your Kicks: ExNotes Motorcycle Mods

By Joe Gresh

I bought the 2008 Husqvarna SMR510 in 2009. I forget the exact mileage on the bike but it was around 800-ish, I think. The Husky was essentially a new motorcycle and the bike sat very tall for a guy with stubby legs.  The seat height wasn’t my biggest problem though, the real issue was the diabolical kickstand the manufacturer cursed the Husky with.

The stand was both too short and angled wrong so that when deployed its contact point was only a few inches left of the centerline of the motorcycle. On the stand, the bike would lean way over, unloading the rear suspension to the point the rear wheel was nearly off the ground. This meant the bike fell over a lot. The slightest breeze would pivot the bike onto the stand and knock the Husky onto its left side.

That’s not all that was wrong with the Husky’s kickstand. The foot of the stand was only a millimeter or two wider than the 7/8-inch steel tube the stand was made from. Parking the Husqvarna on anything other than solid concrete was an iffy proposition. If the bike was on sand or dirt the stand would punch through the ground and the bike would fall over. I learned that in the dirt you had to lean the thing against a tree if you wanted to park.

One of the first things I did to the bike was add a gigantic chunk of steel to the bottom of the stand in order to spread the load a bit on soft terrain. I angled the new foot outboard, effectively moving the contact point an inch further from the centerline. The new foot also moved the contact point forward a bit to help even out the fore-aft balance. It kind of worked. The bike fell over less but it still fell over.

The SMR510’s high seat was a pain to climb onto so I decided to raise the rear shock bolt about ½-inch which lowered the back of the bike a full inch. Now I could reach both feet to the ground on tippy-toes or one foot flat. The lowering also improved the kickstand angle and stability although it caused trickle-down issues.

The Husky is blessed with an ultra plush rear suspension. The bike is a Cadillac on rough dirt trails. With the shortened ride height the bike leaned less on the stand in fact it was almost too vertical. Now when I got on the bike the rear would sag pushing against the stand causing the bike to lean hard right. To get the stand folded up I had to lean the bike much further to the right like a 45-degree angle so that the arc of the stand-swing would clear the ground. Even if I wasn’t sitting on the Husky to fold the stand up I had to hold the bike well over center. I dropped it a few more times.

Things stayed like this for many years. My method of mounting the SMR510 was to first fold the stand up then swing my leg over the back of the seat, scratching the rear fender with my boot and settle down into the saddle as the suspension sagged and my feet hit the ground. It was an ok system when I was younger and more flexible.

Unfortunately frailty creeps up on all of us over time. The last few years it became harder to swing my leg high up over the rear of the Husky. The pack I keep strapped to the rear fender made the situation worse. I had to change my methodology and begin a more right-angle frontal assault, high-kicking my leg over the seat like a hurdler or John Cleese at the Ministry of Funny Walks.

You can guess how well that worked: to get on the Husky I had to flip the stand up, hold the bars with one hand, step back far enough to give my leg clearance and kick as high as I could while stepping forward into the bike. Most of the time it worked but if you didn’t get your foot high enough it would smack into the seat and push the bike over. The Husky falls well and all, but still. Getting off the bike was no easy feat either. In fact, I dropped the Husky more dismounting the motorcycle than mounting, although it was a close run thing, percentage-wise.

It got to where I didn’t want to ride the Husqvarna because I dreaded getting on or off of the bike. It all came to a head a few weeks ago when the Mud Chuckers and I did a 140-mile pavement loop with a 40-mile dirt section in the middle. We pulled into the café at Mayhill for a lunch stop but the place looked closed. Neither of us actually checked the door because we didn’t want to go through the trouble of climbing off our bikes.

The parking lot at the Mayhill Café has a slight slope to it and I rolled the bike backwards to leave. The Husky wouldn’t start. Nothing. No clicking. The instrument panel and fuel pump energized so I figured something was wrong with the starter motor circuit. I made the fatal error of positioning the kickstand side downhill. I slid my butt off the seat and started to drag my tired leg over the top of the seat Normally not a big problem. The added distance created by the parking lot falling away meant my leg needed to go even higher to clear the seat and the bike began to topple over onto me. I was bunny hopping with the one leg on the ground and the other leg still not clear of the seat. Events rapidly overtook my hop-speed and the bike fell over. Luckily I was still wearing my helmet because when I fell backwards I smacked my new helmet on the asphalt pretty hard. I think I would have cracked my head open otherwise.

As I was lying on the ground with the Husky on my leg I cursed a torrent of bad words, some of them even I didn’t know the meaning of. It was like I was speaking in foul-tongues except the Holy Spirit was not the one doing the talking. We got the bike off of me and picked it up. I told Mike, “I’m not riding that @#@ing motorcycle again until I fix that #$@@-%ing kickstand.”  We push started the bike and I rode home. So I guess I did ride it again after all.

The starting problem turned out to be a loose connection at the start relay but to be sure I took all the bodywork off and disconnected all the multi-pin plugs on the wiring harness and gave them each a shot of silicone. I relocated the horn to gain a bit more wiring room behind the headlight and changed the old, crumbling air filter for a new one. The Husqvarna was running fine. Except for that diabolical kickstand.

The main problem with the kickstand is that when deployed it is too close to the centerline of the wheels. The reason for this is the kickstand-mounting lug on the frame is angled wrong. Instead of the stand swinging out it sort of swings down. All of the Husky’s kickstand issues stem from this one critical design flaw.

I don’t want to mess with the Husky’s frame so I decided to hacksaw a wedge out of the stand (below the return spring mount) and closed the wedge so that the stand would project about 4 inches further outboard.  I welded the join as best I could not being able to see the weld or the seam.

Moving the foot outboard made the bike lean over too far so I borrowed a few inches of tubing from an old Yamaha handlebar to extend the length of the stand.

I made a plug to insert into the tubing where the old stand and the handlebar piece join, a couple holes drilled into the tubing allowed me to butt-weld the insert and weld the thin tubing together without burning through.

I made a new, lighter foot and cut a new angle on the end of the stand to suit

And it is wonderful. Parking the bike is so easy when it doesn’t fall over from the slightest breeze. My new mounting technique (with the stand in the down position) is to put my left foot on the peg, grab the bars, stand on the foot peg, swing my leg easily over the rear pack, settle down into the seat and with my left foot, swing the stand up. Easy-Peasy. It sounds like I should have been able to do this all along but the geometry just didn’t work that way.

Putting up with the old kickstand for 14 years shows how a bad idea can keep loyal followers. It took that hard fall In Mayhill to jar me into action. There is no free lunch, however. The new stand angle awkwardly juts out from the side of the bike and will most likely break when I crash on that side. I’m hoping my shoddy welding will be like a fuse and it will break at the join before something important breaks.

The kickstand mod has made me fall in love with the Husqvarna again. It’s such a light, powerful bike you feel like there’s not much you can’t do with it. Now that I can easily get on and off the bike those feelings of dread are distant memories.

I’ll see you on the trails.


More motoliterature from Dos Joes?   You bet!


Never miss an ExNotes blog:


Don’t forget:  Visit our advertisers!


ExNotes Product Review: Continental Twinduro TKC-80 Motorcycle Tire

By Joe Gresh

I’m probably the worst person to review a motorcycle tire. Round and black are my two major criteria for tire performance. If the tire meets those benchmarks it’s okay by me. I’m not sensitive enough and I don’t ride fast enough to push any tire to its limits and I couldn’t tell you if brand A is better than brand B on the street if my life depended on it. Which is why the Continental TKC-80 is such a revelation on the Husqvarna SMR510.

It’s not easy to find a decent 17-inch front tire for the dirt. The front tires I had been running on the SMR510 were those hokey, 70%-street/30%-dirt or 80%-street/20%-dirt tires that are all really just street tires with a few extra adventure-grooves cut into the tread pattern. The street-based tires worked well on the street (see my criteria above) but were horrible on the dirt. The Husky’s front end would push through corners completely devoid of grip or feedback.  I had to sort of square off turns: enter straight, come to a near stop, change direction and exit under throttle.

I don’t need the Husky for street duty now that the Kawasaki ZRX1100 is running.  Long time ExhaustNotes readers may recall my failed efforts to convert the Husky’s tiny, 17-inch front wheel to a more dirt appropriate 21-inch size. That was a real debacle that cost me hundreds of dollars resulting in the 17-inch wheel going back on the front of the motorcycle.

Having wasted so much blood and treasure on the front wheel conversion and coming up empty I decided to try the tire everyone told me to get in the first place: Continental’s mostly off-road TKC-80. Originally made for giant, 600-pound ADV bikes I figured the TKC-80 should hold up well on the lightweight Husqvarna.

The improvement is so dramatic even I can tell something good happened between the Husqvarna’s handle grips and the ground. The Husky actually steers in the dirt now. It goes in the general direction you point the handlebars. I can take a corner in the dirt leaning the bike over like I’m on pavement and the front end feels planted. It’s like I have a whole ‘nother end of the motorcycle to work where there was nothing but push before. Soft sand is no problem, graded roads with a thin layer of dust and pebbles feel almost grippy. I haven’t been in the mud yet but the 80 has to be better than the slick tires I was running.

Needless to say I’m sold on the TKC-80, so naturally there is some confusion (on my part) about the future availability of the 80 series. Apparently, there was a recall on a bunch of Continental tires including the 80 series due to tread cracking. The best I can sort out from the Internet is that TKC tires built between January 2019 and April 2022 are affected by the recall. I’m not even going to look at the date code on my tire because I’m not taking it off. One of my moto-insider buddies says Continental is discontinuing the TKC-80 series. I haven’t found confirmation on that but as of today you can still buy them. I have noticed that TKC-80s online have gone up quite a bit since I bought mine at $120 a copy.

If you own one of the Super Motard type bikes with 17-inch rims and want to play around in the dirt without having to convert your front wheel to 21-inch, the TKC-80 is your tire. There is no cheaper or easier way to improve the front end of your motorcycle. I can’t speak to the TKC- 80’s longevity as I only have around 500 miles on mine and it shows little wear. If the thing lasts 2000-3000 miles it’s well worth it for the offroad performance. Hopefully I’ll be able to buy another one in the future because it’s about the only option for a 17-inch knobby that will fit the Husky’s wide rims.


Never miss an ExNotes blog:


Help us bring more to you:  Please click on the popup ads!


The Motorado Vintage Motorcycle Meet, Santa Fe, New Mexico

By Joe Gresh

We were flying low and slow, like vatos do, heading north from Mountainair, New Mexico. The Mud Chuckers, one on a Buell 1000, one on a Kawasaki Vulcan 750 and me on the 1974 Yamaha RD350. It had been a few years since the last Motorado event and we decided to ride up as a group. Covid and inertia combined to equal a 4-year gap since the last Motorado event. Last year in 2022 we held an unofficial Motorado rump-meet at the traditional location. About 15 old bikes showed up and no one drank beer because the pub was closed. There was a swap meet going on and we drew some interested lookie-loos. It was better than nothing for sure and I was prepared to go do it again this year but the real Motorado got on the pipe.

Saturday’s weather was warm and sunny and none of us felt in the mood to go very fast so we burbled along at 50 miles per hour enjoying the beautiful, two-lane New Mexico scenery. Traffic was typically light.  Three cars passed us. At this stately pace the old two-cycle, twin cylinder Yamaha RD350 progressed 58 miles for each gallon of gas. That number would be a lot more impressive except the ancient, 1950’s era Sportster motor powering Mike’s Buell did 68 miles per gallon. Long stoke, four stroke, no poke, no joke.

A Vulcan 750, an RD350, and a Buell.

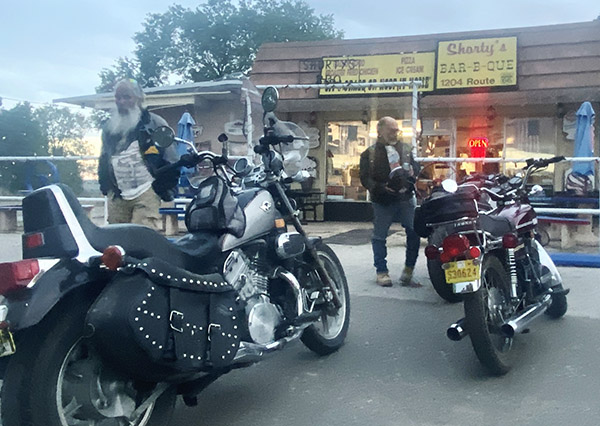
The unofficial, official motel for Motorado 2023 was the Sunset Motel in Moriarity, New Mexico. The Sunset is laid back and low slung just like us. You don’t get breakfast at the Sunset but you do get a monster homemade muffin, which is almost the same thing. After getting settled in our rooms we rode off to get dinner at Shorty’s BBQ joint.

Shorty’s has the best BBQ brisket in Moriarity but the place is always in kind of an identity crisis. The first time I ate at Shorty’s the walls were covered with Jesus stuff, bible quotes and crosses.  A few years later I stopped by and the entire restaurant was a shrine to Donald Trump. The Mud Chucker’s are about as far from liberal as you can get, but are also not too fond of The Donald so I feared the worse going in, but the décor had changed again. Now the place was Jesus-lite® without a single reference to our 45th President and a marked reduction in Christian symbolism. You get to experience Shorty’s political and spiritual evolution through the walls of his establishment and eat a great brisket sandwich to boot.

Late September in New Mexico is prime motorcycle riding season. The mornings are cool, gradually warming to hot afternoons. Elevation changes and drifting clouds create a seesawing temperature landscape. The Mud Chuckers were moving slowly on Sunday morning and I’m of that certain age where I no longer care whether I arrive anywhere at any particular time, so we managed to pull out of the motel around 11 a.m. From the Sunset, it’s a straightish shot up Highway 41, through Galisteo to Highway 285 and then north a few miles to the Motorado.

There was a good crowd at the 2023 Motorado. It looked to me as though they had not lost any attendance despite the 4-year layoff. All brands of old bikes were represented and several shops had booths selling whatever it is they sold. I hit the Motorado T-shirt booth first but they weren’t set up to take credit cards and I had a limited amount of cash on hand.  Once again it was no T-shirt for me. This whole T-shirt thing is out of control.

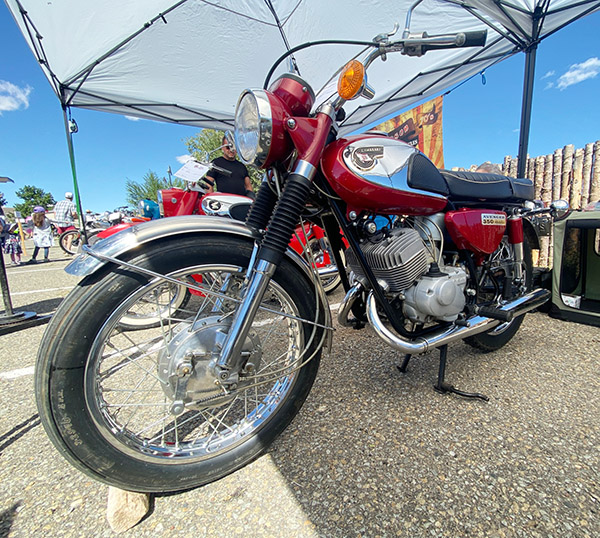
One of my dream bikes, a Kawasaki Avenger 350. These disc valve two strokes were pretty fast back then and still fast today.
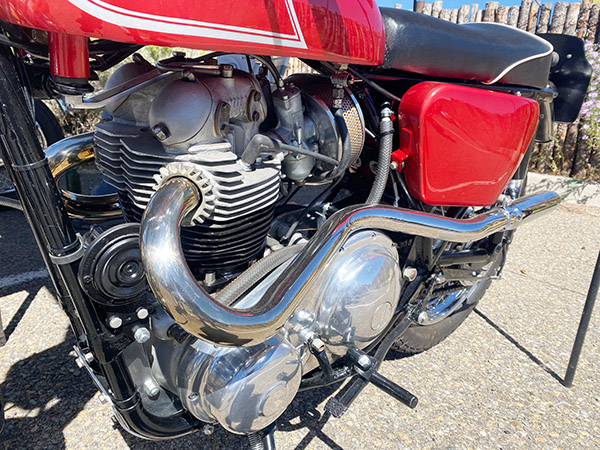
High pipes on a Norton P-11.  This is pre-isolastic mounting so you get to feel every vibration the parallel twin puts out.
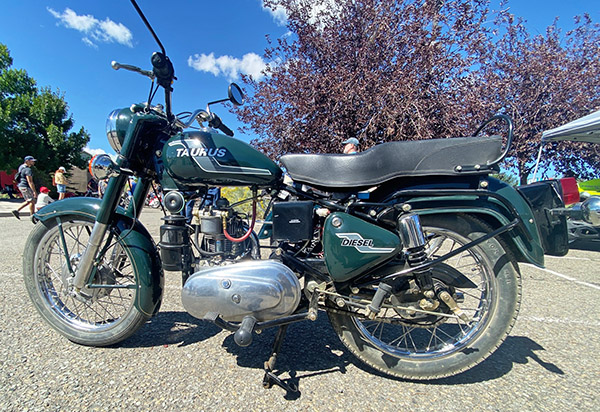
Every Motorado I see a bike I never knew existed. Here’s a Taurus diesel that looks a lot like Royal Enfield running gear strapped to a diesel engine.
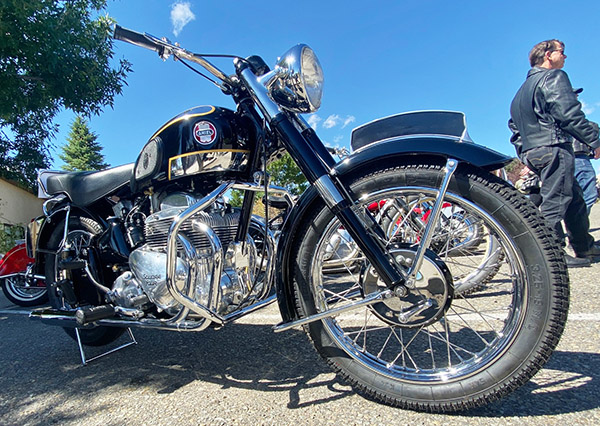
This over restored but still beautiful Ariel Square Four was a stunner. I hung around to hear it run but got tired of waiting.
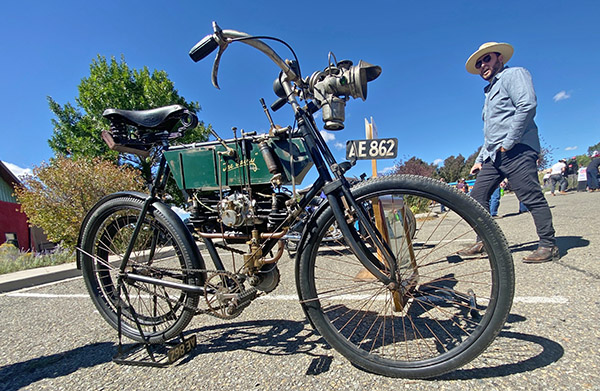
The oldest bike at the event, a 1906 Fairy opposed twin. Not sure of the horsepower but they made 2-1/2 to 8 horsepower models. I bet the 8 was a real screamer.
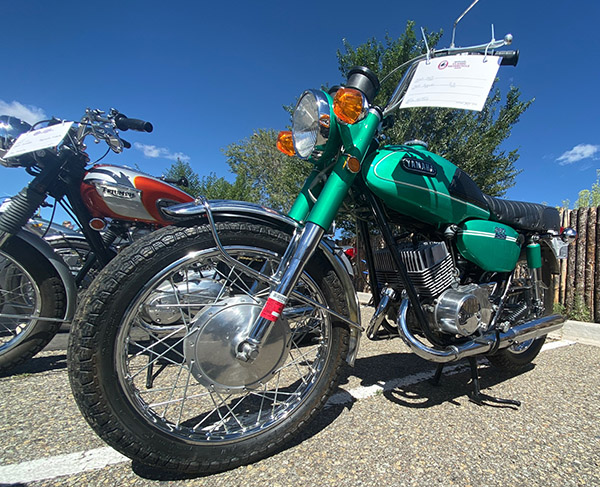
This bike is the great grand-daddy to the RD350. Two generations behind the RD it’s still a sweet looking bike.

After a few passes we had seen pretty much all the bikes in the show and the swap meet. The Chuckers and I took the long way home on the Turquoise Trail through Madrid, New Mexico and got back to the Sunset motel at Sunset. Moriarity rolls up the sidewalks on Sunday night and all the regular places were closed so we retreated to a 24-7 truck stop that had the worse spaghetti ever made, and then we called it a night. It’s tough eating night-spaghetti.

The morning ride from Moriarity was brisk bordering on cold and our rag-tag group made the 200-mile rode low and at our now standard slowpoke speed. I’m very happy the Motorado is back in business and barring another world-stopping pandemic I hope they stage many more years of vintage shows. As long they hold the meet I’ll be riding an old bike up to Santa Fe to check out the hardware. I’ll see you there next year. Swing by the Sunset Motel and we can ride the last 50 miles together.


Never miss an ExNotes blog:


Help us bring more to you:  Please click on the popup ads!


ExNotes Review: Oxilam LED H4 Headlight Bulb

By Joe Gresh

The Carrizozo Mudchuckers and I took a spin over to Jerome, Arizona last week. The trip was around 1200 miles all in and we ran late getting home, which meant I had to ride 100 miles in the dark. Normally I avoid night riding because most of my motorcycles have terrible headlights and my night vision was dim before I had both my cataracts replaced with new lenses. Plus, at night you can’t see anything except the road ahead.  It’s pretty boring.

For the Jerome trip I was riding the Kawasaki ZRX1100; that bike has the best headlight out of every motorcycle I own. To my surprise the night ride was not as bad as I thought. I could see fairly well and made it home without running into an elk. Which got me thinking about the shorter days of fall and the fact that I sort of enjoyed that 100 miles of darkness. Could I improve on the acceptable Kawasaki headlight?

Enter the Oxilam LED H4 bulbs I purchased on sale from Amazon at $39, shipping included. They are a tad pricey but you do get two of them. Oxilam’s ad copy makes wild claims about 500% brighter and 10,000-hour life span. I can’t speak to the lifespan but the bulb sure doesn’t look 500% brighter.

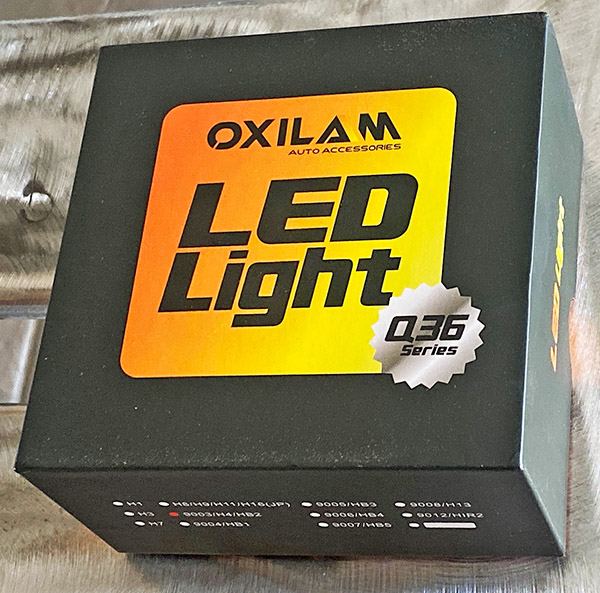
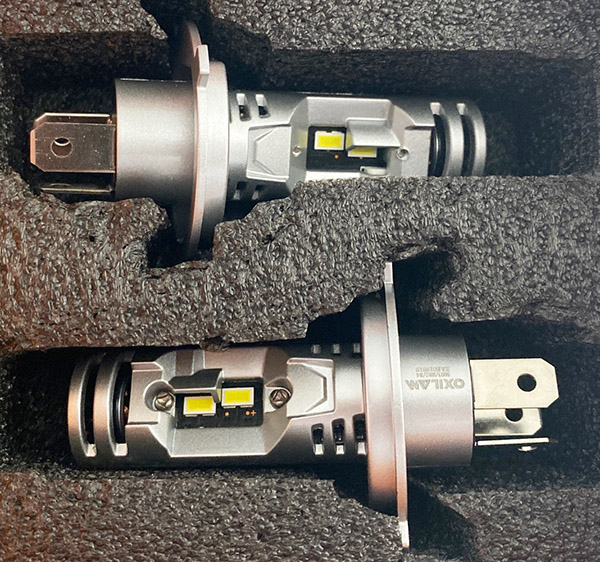
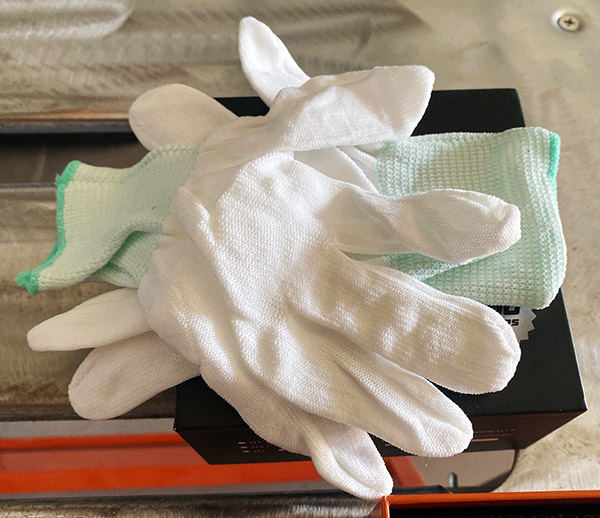
The Oxilam came securely packaged in a nifty carton with a fitted foam insert. Included in the box was a pair of gloves so that you don’t get your greasy fingers all over your nice, new bulbs. It’s a beautiful product presentation and gives a real sense of value to the whole operation.

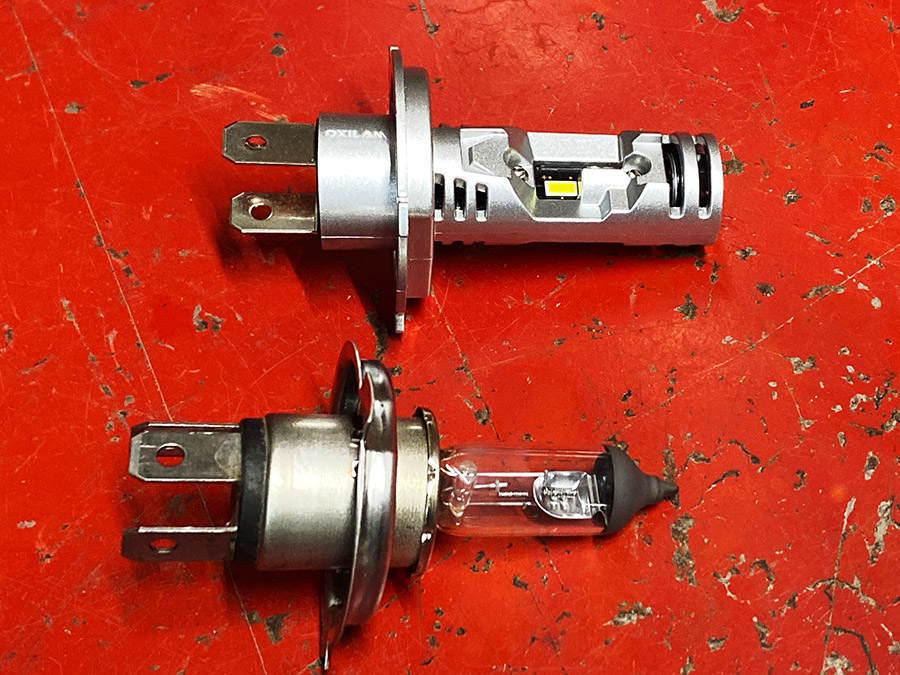
Installation was easy as pie: remove your old bulb and insert the new one. The dimensions of the Oxilam are nearly the same as a standard H4 bulb so you don’t have a big heat sink or cooling fan jutting out the back of your headlight housing.

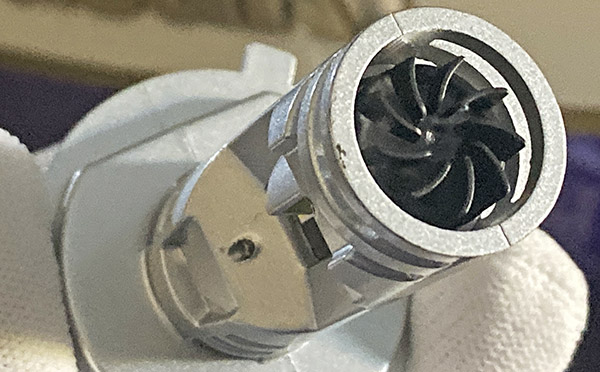
The Oxilam has a tiny cooling fan built into the front of the bulb. That worries me a bit but I’m rolling the dice here. Some reviews of the Oxilams claim the fan to be noisy. I don’t see how such a tiny fan can make much noise and I can’t hear it.

I couldn’t find a watt rating anywhere except an ad copy line stating the bulb draws a similar amount of current as a standard H4 so computers will not act up thinking a bulb is out. Lumens are a claimed 18,000 so I guess that’s good.

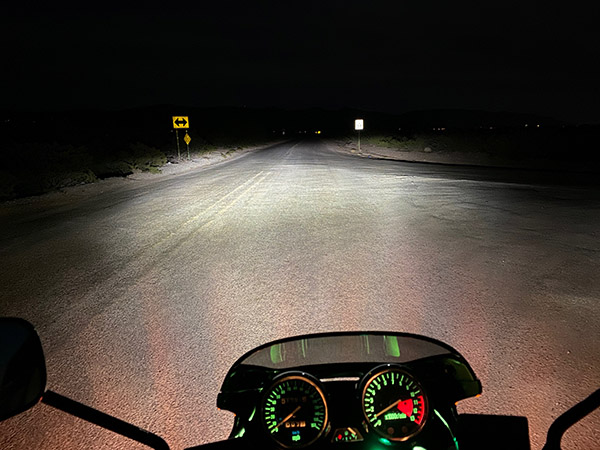
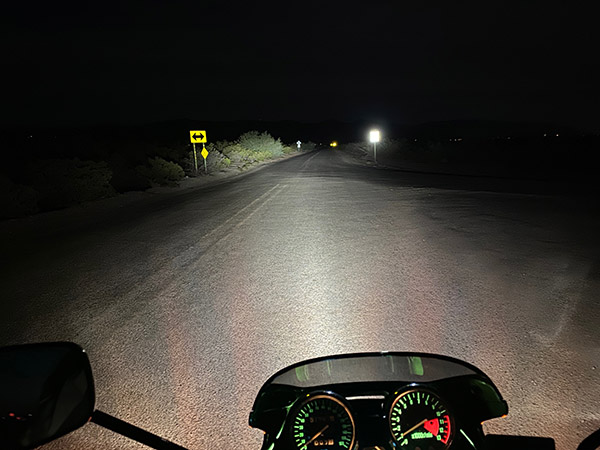
Maybe not 500% brighter but the Oxilam LED bulb is noticeably brighter than the original 24 year-old halogen bulb it replaced. Low beam is a lot better with a sharp cutoff so you don’t blind oncoming cars. Low beam is wide and bright.  The 6500 kelvin white light makes colors pop a bit more at night. Grass looks greener and the road edge is more obvious. The light produced is evenly distributed without any hot spots. It’s really wonderful. The Oxilam is worth it to me for the improved low beam performance.

High beam was also improved but not as dramatically as low beam. High beam seemed to reach a little farther out than stock and the white color was nice. One drawback to the increased lighting power was that reflective road signs were very bright on high beam, bright enough to cause me to drop back to low beam until the sign was passed. Installed in the ZRX lens there is an overly bright spot 10 feet ahead of the front wheel, I feel those lumens could be put to better use 100 feet down the road. I suspect the Oxilam will project differently depending on which headlight housing it is installed.

The Oxilam bulbs are worth the $39 to me. With my creaky vision I need every advantage I can get at night. It was actually not bad riding in the dark with the Oxilam and the new bulb will extend my riding time by a few hours each day. That’s got to be worth something, right?


Don’t forget:  Visit our advertisers!


Becoming Vulcan Part 1: The Vevor 130

By Joe Gresh

I first started welding when I was around 12 years old. My Pop gave me a few tips and handed me an oxy-acetylene torch. He showed me how to set the mixture with a haze of blue slightly beyond the core blue flame. He told me the filler rod is used to cool the puddle, not to melt into the gap. And he told me to keep moving when laying down a bead or you’ll burn through. With these simple lessons I never learned another thing about welding. When I worked at SWATH Ocean building aluminum boats I did a bit of MIG and TIG welding as needed for my electrical work. I could make a passible bead but I never knew why or how it worked.

At SWATH the real welders would set up the machines so that even an idiot like me could weld without an understanding of welding. We used giant, high-frequency start, Syncrowave machines that crackled all the telephone lines in a 500-foot radius. Orange colored MIG (metal inert gas) spool guns tied to large power supplies were strategically placed throughout the vessel making it super easy to attach brackets or braces as needed. During working hours the air inside the boats sparkled with aluminum dust and smelled astringent from the inert argon gas. We used to joke that cigarette smokers were the healthiest workers at SWATH because they breathed through a filter.

Over the years I’ve lost the muscle memory for welding and my beads are a jumbled mess. My hands are shaky, my near vision is compromised and I can no longer make presentable welds using any process. I’ve decided to educate myself on welding in general and welding processes that didn’t exist 40 years ago. Thanks to the global economy, welding machines (like most electronic products) have dropped dramatically in price. The advent of the small inverter welder for home use has been a giant leap forward.

I purchased this Vevor 130 multi-process machine from Amazon for only $120, shipping included. The Vevor runs off a standard 115-volt wall receptacle. In the past (where I spend most of my time) a machine with this capability would be ten times the price. The “multi” in multi-process refers to the Vevor’s ability to weld with flux core spooled wire, stick weld or TIG weld. The unit came with all the cables and guns needed for each type of welding process. It did not come with a cart, argon bottle or flow meter. The Vevor is meant for welding steel but there are some stick (also called MMA for Manual Metal Arc) rods available that will weld stainless. You might be able to weld stainless with the Vevor TIG (tungsten inert gas) torch but I haven’t tried it yet.

In stick mode the Vevor is a pretty standard welder like the ones that have been around forever. The old buzz boxes put out alternating current unless you bought an expensive AC/DC box. I had a Miller 225 AC/DC unit that suffered from a lightweight transformer and it was a bitch to strike an arc with the thing. As soon as the stick drew current the voltage would drop and weld the stick to your work. My Pop’s old Lincoln AC welder weighed a ton and I could strike an arc easily with that machine. Hysteresis matters when it comes to the old-style arc welders.

The Vevor puts out DC current all the time and being so light it’s hard to get the thing going in MMA/stick but if you scratch around long enough you can get an arc struck. Once burning, the Vevor seems to work like any other arc welder. Rated at a doubtful 130 amps, my Vevor tripped the 15-amp breaker in the shed at around 90 (indicated) amps. You’ll need at least a 20-amp rated receptacle to access all 130 amps, maybe even a 30-amp socket. Like all welding, stick welding is an acquired skill. The rod is continually getting shorter so you have to move your torch hand closer and closer to the work to maintain the correct distance. When your glove starts smoking it’s time to stop and get another rod. You’ll need to practice quite a bit before you make decent looking beads with stick. There is also a bit of splatter with stick.

Flux welding is a lot like stick, except instead of flux-covered rods you use a spool of steel wire with the flux inside. Flux core seems the easiest process to me. Setting up the machine is important but once you’ve got the wire speed and amperage right it’s pull the trigger and go. And go you can because you don’t need to stop and clamp a new rod in the holder to replace the ones you’ve consumed. The welder keeps feeding wire to the gun at a pre-set pace and your hand maintains the same distance the whole way through. Eventually the spool will run out but that’s after many feet of weld beads. Flux core also starts easy, for me anyway.

Flux core also splatters a bit like stick, maybe less. It’s no big deal (you can knock off the slag and balls of spooge afterwards). I am a total rookie at flux welding so I’ll need a lot more trial and error to get things right. Most YouTubers will tell you to buy a better roll of flux wire as the roll supplied with these cheap welders is not so great. After I run out I’ll buy a name brand roll of flux core to see if it makes a difference.

TIG (tungsten inert gas) welding is the coolest process of all. TIG usually uses an argon gas bottle to supply a flow of shielding gas to your weld. The actual process of welding is similar to oxy-acetylene welding except the torch is electric. With argon you don’t need flux but your material needs to be fairly clean. Unlike stick welding, you can’t just plow through rust and contaminated metal. TIG uses a tungsten rod as an electrode, but the rod is super tough and does not get consumed very fast.

My biggest problem with the Vevor in TIG mode (besides the fact that I am a terrible welder) is I forget to turn on the argon gas at the torch handle resulting in a burned mess and contaminated tungsten. More expensive machines do this automatically. The Vevor uses TIG lift, a method to strike an arc that seems to work fairly well most of the time. The expensive machines I mentioned above have a high-frequency start that keeps you from sticking the tungsten into the work and contaminating the rod. The TIG lift system works pretty well, I have no problem getting a TIG arc started with the Vevor.

With TIG you’ll usually need to add in filler rod just like torch welding. This is another hang up for me as my control of the filler rod is shaky. I often stick the rod onto the tungsten then I have to stop and clean the tungsten before going on. Dirty tungsten produces a crazy arc that wanders around or shoots out the side. The melted weld puddle is all over the place. It’s like playing whack-a-mole when this happens.

As I’ve said before, I’m a terrible welder so don’t hold these sample beads against the Vevor 130. A welder who knows what he’s doing will have no problem making decent beads with this machine. I am practicing on thin sheet metal mostly because I have a lot of it I cut out of an old file cabinet, and welding thin metal develops a better feel for heat control. I’m constantly burning through thin stuff. In these sheet metal samples the TIG produced the best-looking welds, although all of them are horrible.

As you can see from the backside, penetration on the thin steel was not an issue. Everything I did was too hot and was on the verge of burning through.

The above samples are on 1/8-inch thick steel. It’s an assortment of stick, TIG and flux core. If you look closely, you’ll see fleeting moments when everything was going well, followed by disaster. I give the $120 Vevor 130 high marks for economy and it really does weld all three processes. I haven’t yet welded long enough to overheat the machine, a common problem with cheap welders. If you want to weld 8-hours a day, you’ll need to spend a few thousand dollars.

I’ve been watching tons of how-to-weld videos and I plan on taking a welding class at NMSU next semester (Go Aggies!), my goal being to sort this mess out and produce some decent welding before I die. Note: All the samples in this story are just running beads. It’s harder to actually stick two pieces of metal together. Hang around ExhaustNotes.us long enough and you’ll see if I ever do become Vulcan.


Please visit our advertisers!


ExNotes Product Review: Waymo Self-Driving Cars

By Joe Gresh

There is a megacity out in the Arizona desert. It runs for miles and miles, ever expanding into the scrublands. Phoenix, Chandler, Tempe, Scottsdale and other towns have merged into one, giant, golf course subdivision splattered with Wal-Marts, drug stores and tilt-up warehouse mattress vendors. It’s hot, dry and thirsty. I don’t understand why so many people willingly bake in the sun. Waymo, the self-driving taxicab company has found a way to eliminate a few of those people.

ExNotes tested the Waymo’s plying the streets of downtown Tempe. Laid out in a grid pattern with tall buildings blocking radio signals Tempe would be a tough test for Waymo. How the system works is you download an app and enter your information. Next you order a car telling Waymo where you are and where you want to go. How long you wait for a car depends on traffic or rider loads. CT and I took Waymo rides three times and the usual wait was 5 or 10 minutes. The Waymo cars we rode in at Tempe are made by Jaguar and look like any generic, white SUV-ish car, except the Waymo’s bristle with cameras and sensors on all four corners and the roof.

Let me cut to the chase and tell you the actual driverless-car part worked great. You can sit in the front seat or rear seat, once inside with your seatbelt on you push the start field on the dash display. The Waymo will watch for traffic and pull out onto the street just like a person is driving. The car still has a steering wheel that spins around as the car makes corners. The Waymo doesn’t pussyfoot around, either. It accelerates right up to speed and takes curves with a bit of hustle. It stopped at stop signs, circled roundabouts and waited patiently at traffic lights.

I felt totally comfortable sitting in the passenger seat letting the computer drive. I suspect that’s because I’ve been installing autopilots in boats for 50 years. From the first Metal Marine Pilot to the latest digital units tied into GPS and radars. I’m used to sitting at the helm with the boat steering on its own. Of course there are a lot less things to run into on the water compared to downtown city streets, but I saw the Waymo as just a fancier version of electronic stuff I’ve dealt with for years.

As there is no driver, there is no need to tip. The short Waymo rides we took cost around $4 each and the money is charged through the app. You get in, arrive at your destination and get out. Oddly enough, the technology of the self-driving car wasn’t where Waymo fell down on the job.

Our problems came during the pick up process. Waymo’s app will tell you to walk 700 feet this way or head 350 feet south on Fifth Street feet while you’re waiting for the car. You can watch the car’s progress on the app and judge arrival time. After following the apps instructions we found it best to ignore the app and stay in one spot and wait until we could see the Waymo, and then walk towards it.  Pick up was usually fairly close but one time the car waited for us about a block and a half away.

We were walking all over trying to find the thing. Waymo’s app has a toot horn feature and we used this to echolocate the car. Upon our arrival the car decided it had waited long enough and drove off. We were 15 feet away. It’s kind of dumb because Waymo knows your location via the phone app. It knows how far away you are and can see you moving towards the car. Also, Waymo needs a “Pick me up where you dropped me off” feature to cut down on walking time. As the software is configured now Waymo might drop you at the front door of your destination but when you call for a pickup the car might be down by the river.

Long time ExNotes readers will know I’m not the sort of guy known for embracing the future. But being a motorcyclist I can see the advantages of ever-vigilant computers replacing the brain-dead car drivers that kill us so often. I’d rather ride in a megacity full of Waymos than the usual collection of phone texters, blind drunks and road ragers.

It’s still early times in the self-driving car business and the road driving part is already amazingly good. I could tell no difference between the Waymo and a human driver. The weather was perfect in Tempe so I can’t speak to how the car would perform in a snowstorm or on icy roads. Maybe it defaults to park? I can see personal self-driving cars becoming popular if we can figure out all the legal ramifications and who gets the blame in an accident. But it’s not like we don’t have accidents now. I say bring on the future.