Tokyo Road: Part 1

By Mike Huber

I believe I am skipping ahead a couple countries I experienced in 2025, but I really wanted to write about one of my favorite ones (that being Japan). This country opened me up to its unique culture and really welcomed me. As with previous places I visited, I did minimal to no planning ahead, outside of my arrival in Tokyo. This is the best way to travel, with no schedule or time constraint pressures.

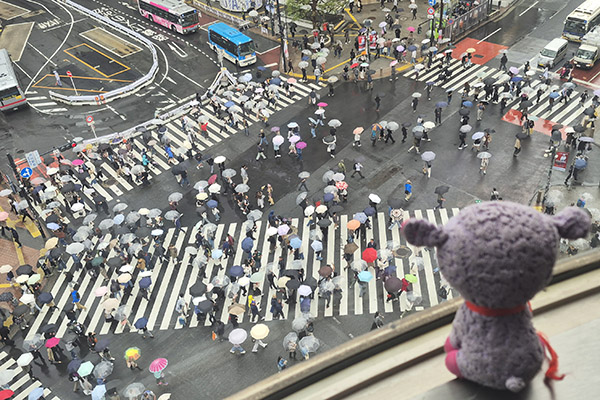
I am usually comfortable with no planning, but before arriving in Tokyo (one of the largest cities on earth), I was feeling overwhelmed. Within 30 minutes of landing I learned there was no need for those feelings, though. Tokyo is one of the most organized, safest, cleanest, and well laid out cities I have ever visited. As I traveled through Japan for the next five weeks, I learned the people are some of the most beautiful in the world, and that is coming from someone who has seen quite a bit of the world.

Being overly social and making friends everywhere, I happened to have a friend in Tokyo. I met Maico when I was traveling through Peru in 2012 and we kept in touch over the years. She owns a cute little coffee shop called Ami Cono (AmiCono) just two train stops outside Shibuya Crossing (a popular tourist destination).

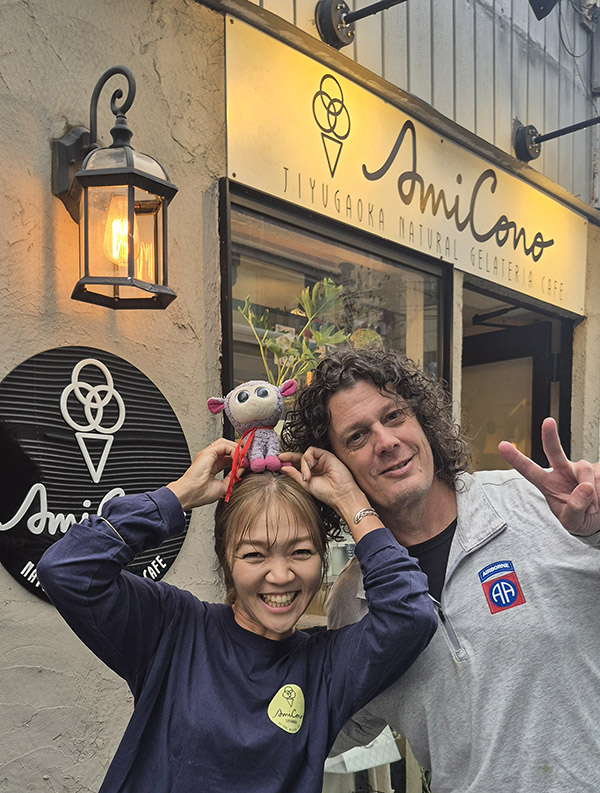
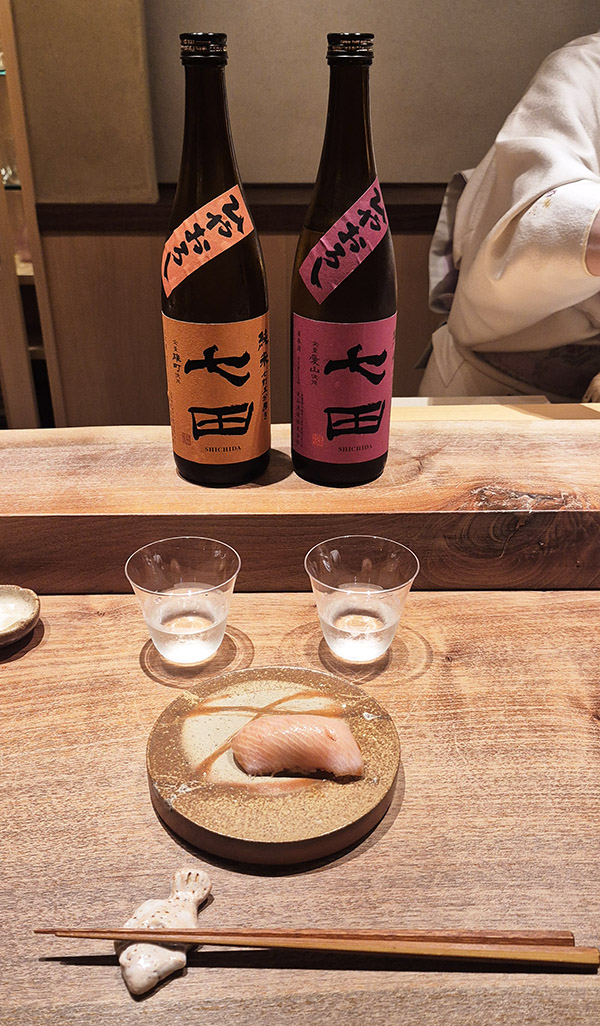
I met Maico at her gelato shop and as we were reconnecting, she offered to take me out to dinner. Of course, I wanted sushi and she knew just the place! The restaurant was called Hiro Ishizaka, it was Michelin rated and much more than I expected. We spent the better part of three hours there as the owners (a husband and wife team) kept an endless train of sushi and saki coming at us until we couldn’t eat anymore. I feel fortunate Maico was able to get us a reservation, as they only served six people per evening.

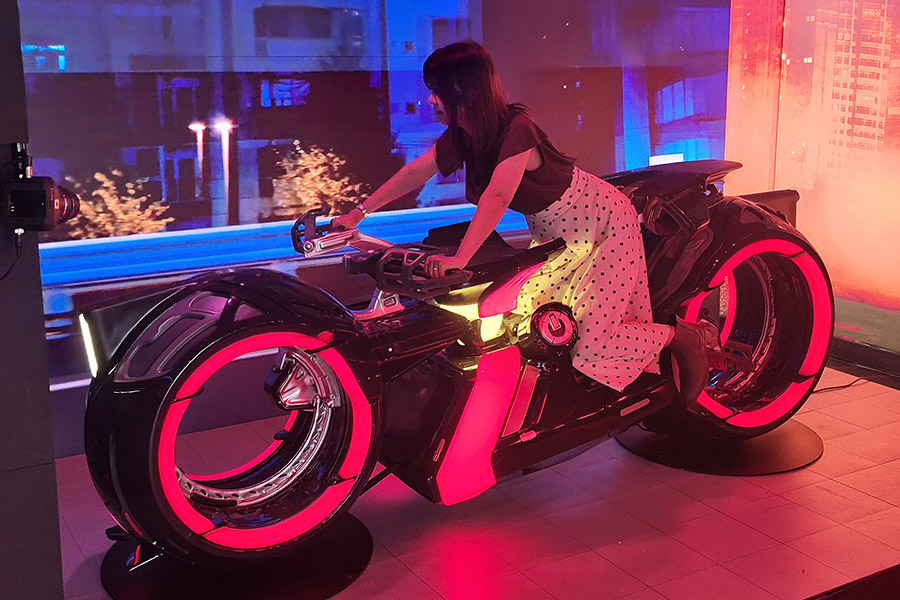
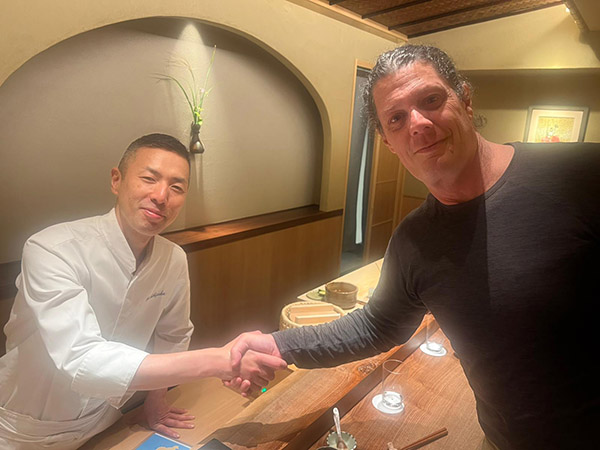
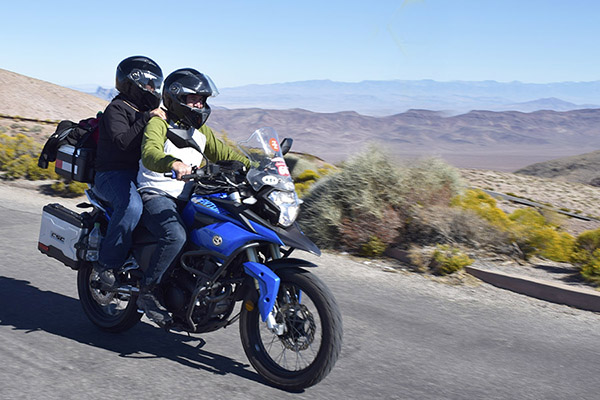
As the evening came to a close, the other two couples left and Maico and I stayed to chat with the owners. It turned out the husband was a motorcyclist and being that I was about to rent a motorcycle that Monday for a week (or so), he and I had a deep conversation (mostly through Google Translate) on different roads to ride.

It was a great welcome to a new country. I was now armed with the knowledge of some great motorcycle roads and a few other highlights to add to my ever-growing list. I was ready to ride Japan!


We need your support!  Do what you can to help ExNotes stay in the black!


More Huber? Check out A Trip Into The Moment.

More Gresh and Berk?  You bet!  Check out A Cup O’ Joes!


Join our Facebook ExNotes page!

ExNotes Book Review: Operation Wrath of God

By Joe Berk

I like to read, and when I hear about a good book, odds are I’ll pull up Amazon and order a copy.  The Wall Street Journal had a positive review on Operation Wrath of God, and that was enough for me.  The WSJ is the only paper we take any more, having given up on the LA Times, the NY Times, and local Daily Bulletin rag.  The other papers were just too biased in their reporting (and people wonder why print is dead).

Operation Wrath of God is about secret ties that have existed for decades between the Israeli Mossad, the European intelligence services, and our intelligence community.  The premise is that although the Europeans were outwardly incensed when the Israelis struck back at the terrorists for the Munich massacre (and continued for years to do so on European soil), they (and we) continued to share current intel on their whereabouts. On the Munich massacre, you may recall that was when the bad guys murdered Israeli Olympians.

Even though European governments and their press had their noses bent out of shape at the retaliatory Israeli actions, these same European governments continued to provide the Israelis detailed information about where the terrorists were located.  Basically, the Europeans made things a lot easier for the Israelis to strike back, even though European governments publicly condemned the Israelis for doing so.  The author makes the case that the Israeli Mossad provided such good intelligence on nearly everything going on in the world, it made sense to keep the lines of communication flowing both ways.

The book covered essentially all the major Israeli intelligence operations related to the Israeli payback, and parts of it read almost like a novel. That’s the good news in this book review.  The bad news is that a lot of the book is painfully redundant.  I found myself annoyed at reading essentially the same stories two or three times.  The text comprises 255 pages (with another almost 90 pages of acknowledgements, citations, and index materials).  I think the same information could have been presented much more concisely.

That said, Operation Wrath of God was a good read and I’d recommend it to anyone interested in these topics. I’m glad I bought it.


Join our Facebook ExNotes page!


Interested in an easier read?   It’s right here:


Help us keep the lights on:

Challenges Abroad

By Mike Huber

Even though I was an IT (information technology) Project Manager for 12 years, a weak point of mine happens to be IT.  Yes, IT.

As an IT team leader one of my greatest strengths is not only placing others in positions where they can excel, but ensuring I do the same for myself. Living in Colombia I happened upon a new challenge. One morning my laptop refused to connect to the Wi-Fi. The laptop I had been using the past two or three years was gifted to me by a friend. This laptop had sort of “fallen off a truck,” or was “found in the alley.”

My guess is the problem I was now faced with was due to the organization it “belonged to” running an audit. I am certain the audit didn’t dig the Colombian IP address, so the laptop was terminated. I now had to purchase a new laptop here in Medellin, Colombia. Shouldn’t be a big deal, right?

Not the case, of course.

Finding a mall in Medellin wasn’t difficult. It was a huge modern three-story mall with nothing but IT and telecom stores. It was a bit overwhelming. I Googled reviews as I walked through the mall and it didn’t take long to settle on a store. I found a representative that spoke decent English to bridge the gap with my never-ending Spanish stumbling. He recommended a few basic machines. I began more research on reviews and picked out a basic laptop that would suffice (mainly for writing ExNotes pieces).

After installing Windows and basic MS apps, I returned to my apartment and noticed something was off. The keyboard was in a different format. It was a Spanish QWERTY layout. OK, not a huge deal: I could learn a new keyboard. What really confused me is they loaded the software for a standard American keyboard. This meant the keys did not match many of the symbols. I learned this on my own, but not before walking the streets of Medellin with my laptop asking locals to assist me. No one else could figure it out, either. This was becoming frustrating, but some relief that it wasn’t my incompetence that caused it.

Returning to my apartment, and after a bit more Google research, I learned to toggle the keyboard to the QWERTY format to match the keyboard, which is where it will stay. Yes, I am sure I could exchange the laptop and hunt down one with a normal keyboard, but what fun would that be?

I will be in South America for quite some time (more on that in another blog), so I thought I would just embrace the change. Also, it is now easier for me to do “¡” and “¿” symbols to impress the locals.


We need your support!  Do what you can to help ExNotes stay in the black!


Coming up…more on Cycle Garden and their impressive work on Moto Guzzi and other Italian motorcycles!


More Huber? Check out A Trip Into The Moment.

More Gresh and Berk?  You bet!  Check out A Cup O’ Joes!


Join our Facebook ExNotes page!


Help us keep the lights on:

Rough Ryder 854 and a Custom PWB Holster

By Joe Berk

The knife du jour is the Rough Ryder 854, which is a gigondo folder that looked like something I couldn’t live without when I saw it on the Chicago Knife Works site.  I’m hooked on the large folders, and at a price of $14, this thing seemed too good to ignore.

The Rough Ryder 854. No one has these in stock anymore. It’s a lot of knife at any price.
Yessiree…a real pig sticker!

The problem, however, was that the design was defective, or the quality was terrible, or maybe it was both.  It was a subtle defect, one that most folks wouldn’t notice until they stabbed themselves with the tip.

The Rough Ryder logo. I like it.

I first saw the knife online somewhere, and then I looked for it on Amazon.  I hit paydirt and I used my Prime membership to skirt the shipping costs.  Two days later it was at my front door.  It looked beautiful, but the blade stopped a little bit short of the knife being fully closed.  That’s not good, I realized.  I tried squirting WD 40 and then adding oil to the knife’s pivot point, but the blade still stopped a bit short of being fully closed.  Back it went to Amazon.

But I like the knife.  It looked good and it felt good.  So I called Chicago Knife Works and ordered the same knife from them.  I called first, and asked if they would examine the knife before it shipped for the problem the first one had.  Sure, they said.  No problem.  Chicago Knife Works is always slow in shipping, though, so I waited the obligatory four or five weeks before it arrived.  But finally it did, and I was like a kid at Christmas time when it landed in my mailbox.

You can guess where this story is going.  The new Rough Ryder had the same disease.  It wasn’t as bad as the first knife, but the blade didn’t fully close.  If I ran my finger along the knife handle’s edge, the blade tip still ran proud, and I still saw it could stab me if I wasn’t careful.

The red arrow on the left shows the area I relieved, thinking it would allow the blade to go further into the knife when folded. I was wrong. The red arrow on the right shows the knife’s liner lock, which prevents the blade from inadvertently closing after it has been opened.

The engineer in me took over.  I examined the open blade profile and saw a bump stop.  If I ground that down, I thought, the blade would more fully close.  So I started grinding with my Dremel.   That didn’t work.  I ground some more of the blade stop off, and things didn’t improve.  I examined the blade’s profile and the knife again, and I realized there was another stop of the blade (on the other side of its pivot point) that also controlled where the blade came to rest when the knife closed.   But I couldn’t get to that one.  Hmmm.  Time for Plan B.

What’s weird (and what’s an ingrained character flaw) is that I was really stressing out over this $14 knife.  I’ll do that sometimes, and this was one of those times.  I’ve been a lot less annoyed at things that are a lot more expensive and aren’t perfect. I should have just returned the Rough Ryder.  But I was fixated on fixing the thing.  In the Diagnostic and Statistical Manual of Mental Disorders reference manual, it’s identified as Gresh’s Disease.

When thinking about potential fixes, I realized if I couldn’t get the blade to close any further, I could reprofile the blade to get rid of the tip, or, to be more accurate, to lower the blade’s profile so that the new tip would be below the knife’s scales when closed.  So that’s what I did.  The stone came out, I went to work, stroking the blade tip and checking how the blade closed every few strokes.  Voilà, problem solved.

The blade tip lay above the scales when the knife was closed. I ground it down in the area indicated by the red arrow. Problem solved.
A band aid fix, to be sure, but sometimes band aids work.

In the meantime, good buddy and craftsman extraordinaire Pauly bought the same knife.  The guy is lucky; his Rough Ryder 854 closed the way God intended it to, and it did not have the same problem mine had.  But he didn’t stop there.  What the knives needed (both his and mine) was a holster.

The Rough Ryder and the holster Paul made for me.
P.W. Berkuta Made. It’s a cool stamp.

I’ve known Paul longer than I’ve known any living person on the planet.  Literally.  We were next door neighbors back in New Jersey when I was born.  Paul has always been good at creating things, and it turns out that leatherworking is among his many talents.  Paul created custom holsters for these knives, and they look and work as good as anything I’ve ever seen.  What’s really cool is the holster takes advantage of the knife’s curves.  The holster is formed to the knife’s coke bottle profile, which secures the large folder when it is in the holster.  It’s a hell of a nice gift.


We need your support!  Do what you can to help ExNotes stay in the black!


More Huber? Check out A Trip Into The Moment.

More Gresh and Berk?  You bet!  Check out A Cup O’ Joes!


Join our Facebook ExNotes page!


Help us keep the lights on:


Citizen Base 30 Chronometer

By Joe Berk

It was an impulse buy, the kind of purchase that folks who send out marketing emails hope to induce, and it my case, it worked spectacularly well.  My new Citizen chronograph is rose gold (something I’m a sucker for), with a leather band (something else I’m a sucker for), and both the leather band and the watch face are Navy blue (something I’m…well, you know where this is going).  As it was over $100, there was free shipping (something that always gets my attention).  And finally, there was the sale price:  $144, down from $395.  I am a soft touch for great deals on wristwear, weapons, and other assorted toys that find their way into the ExNotes blog.

All that was cool, but after I clicked buy now and typed in my credit card info, I studied the chronograph bezel markings.  I was intrigued by the notation “Base 30 Pulsations.”  You can see it on the outer bezel between the 12:00 and 2:00 positions.   As much as I like watches in general  and chronometers in particular, I had never heard of such a thing before I bought the watch you see above.

It was off to Googleville, and like always, Google came through.

The Base 30 Pulsation system came about in the early days of watchdom as a tool for doctors to quickly measure a person’s pulse rate.  The way it works is that you start the stopwatch (the chronometer) and count 30 heartbeats for whoever’s pulse you’re taking.  When you hit 30 beats, you stop the chronometer.   The chronometer’s second hand will point to the patient’s pulse rate.  If the pulse rate is the normal 60 beats per minute, the second hand will point to 60 on the outer bezel, which makes sense because if you had 30 beats in 30 seconds, well, your pulse rate would be 6o beats per minute.  This is cool stuff.

That got me to thinking:  Are there other chronometers out there with bezels marked in the 30 Base system?  Yep, and some are even by Citizen.  They have an identical model to the one you see above in stainless steel with a brown leather band and an ivory face:

I’d seen the above watch (the ivory-faced one) in the display case at my local Costco, but I can’t remember what they were asking for it and I couldn’t find it on the Costco website.  I’m pretty sure it’s still in the store.  If you can’t find one at your local Costco, there are a bunch of retailers selling them on Ebay.

I also found a couple more stainless steel Base 30 versions of the Citizen in different colors on Amazon:

Amazon’s prices were in the $250 to $275 range for the above watches.  Those might be decent prices, but Jomas (www.Jomashop.com) has them all beat at $144 (which is what I paid for mine).


A man with a watch knows what time it is. A man with two watches is never sure.

– Anonymous


Join our Facebook ExNotes page!


More selected ExNotes goodness?   It’s right here:


Help us keep the lights on:


Buell Fever Part 6: Oingo-Boingo

By Joe Gresh

I have two motorcycles with upside down forks. Both of these motorcycles have leaking fork seals. Coincidence? I think not. I have no love for USD forks and one of the reasons I wanted a Buell Cyclone was the conventional forks those bikes came with.

I don’t care for upside down forks. They seem to leak more than conventional forks.

Alas, I ended up with a Thunderstorm, which is mostly the same as a Cyclone except for the forks. Mine were leaking, which is not unexpected for a 30-year-old motorcycle.

I try to lay out the parts in the order they are removed. Until I kick the cardboard and the bits scatter. This is the fork cap-retainer-plastic spacer-metal washer top of the tube parts.

New fork seals were kind of hard to find. I tried contacting the OEM manufacturer, White Power (that name didn’t age well), but I got no response. Through the wonder of the internet, I found a company in England that had the seals.

Always tape over ridges so the seal doesn’t get cut or damaged when sliding it into the tube.
The seal installer in action. Sliding the fork tube presses in the fork bushing, a spacer and the seal in one motion.
After pressing the two halves are removed. Next is the seal retaining clip (which is all that holds the forks together).

The seals were reasonably priced at $14 per set, but the shipping was expensive. I bought three sets since the shipping was the same. Now I have enough Buell S2 fork seals for the rest of my life. On a side note: a week after the seals were delivered FedEx sent me a $20 invoice for “fees.” I haven’t paid the fee yet; I’m not sure, it may be a scam. The fees may be re-named tariffs.

Without this relief cut the seal installer would smash the seal lip.
Buell seal installer. PVC tube machined to fit seal lip then cut in half.

The Buell has a large front disc.  To remove the wheel, you have to remove the brake caliper. To remove the brake caliper, you have to remove the brake pads and then retract all six of the caliper pistons back inside their respective bores.

The old Performance Machine brake caliper pistons were pretty crusty, and I didn’t want to push all that mess across the bore seals into the caliper. Removing the brake disc from the wheel allowed enough wiggle room to get things apart.

The WP forks were super tight in the triple clamps. I used a wedge to expand the fork tube bores and still it was a struggle to slide the forks out. Once out, disassembly was fairly straightforward (although oily) experience.

These triple clamps really grip the fork tubes. You almost don’t need pinch bolts.

You’ll need to make a seal installer to press the new seals into the forks. I made mine from PVC tubing in the hope of avoiding scratching the sliders. The new seals fit well, and the hardest part was compressing the fork spring while holding the damper rod up with a bent wire and using a third hand fitting the damper rod spring keepers. My Buell shop manual describes this process as a two-man job. And it really is.

It took a couple days to figure out how to one-man a two-man job. I ended up employing an oxy-acetylene welding cart as a prop to hold the fork.  The T-handle on the cart was in a convenient location and height to loop the damper-rod holding wire over and I still had two hands free to compress the spring and slip in the keepers.

After the seals are in place the fork spring retainer goes on. Note the wire holding the damper rod and the welding cart holding the fork. This setup leaves both hands free to compress the fork spring and fit the retainers.
More Buell specialty tools. Wire to hold damper rod, wedges to spread triple clamps.

The Buell manual called for 7-1/2 weight fork oil. I should have ordered fork oil online, but I didn’t, so I called around and the local Honda shop had some. It’s a 20-mile drive to the Honda shop. The Honda fork oil bottles are confusingly labeled. What looks like 7 weight ended up being 5 weight, but I wanted to get the front end put back together.  So I poured a pint of 5 weight into each fork leg. Stay tuned for a follow up report if I can feel any difference between 5 and 7 weight fork oil.

While the forks were off, I re-greased the steering head bearings. They still had a little grease remaining but thinly applied. I walked out the old stuff and smooshed in fresh grease. That left just the front caliper to clean up.

Re -greased steering head bearings. I don’t like the design of the cup under the bottom bearing. It seems like it would hold water. I might bend a drain channel into the low side.

The caliper came apart easily, but the pistons did not. I used to have a big pair of reverse pliers (the jaws expand rather than close when the handles are squeezed).  I would use these pliers to grab inside the hollow pistons and pull them out of the caliper. I would, that is, if I could find them.  I spent a few hours looking for the pliers and finally gave up.

A snap ring Oliver was pressed into service and I managed to get all six pistons out. Performance Machine uses chromed steel pistons and the bit of piston that was exposed to the elements had corroded. Finding new pistons would be an impossible task and a new caliper would cost $600, so I polished the corroded pistons on the buffing wheel.

Except for the chromed pistons, the PM caliper is a nice looking unit. Note the piston diameter change to apply evenly distributed wear.
Performance Machine caliper back together and waiting on brake pads

I’ve had good luck piston polishing.  Yes, they re-corrode, but the section of piston covered with brake fluid doesn’t corrode. I look at it as an ongoing maintenance item rather than a bad part. You’ll have to wait for new brake pads to arrive to see if the caliper leaks in Buell Fever Part 7.


Join our Facebook ExNotes page!


More Joe Gresh?   It’s right here:


Help us keep the lights on:

Phavorite Photos: The San Andreas Fault

By Joe Berk

The photo above is another one of my all-time favorites from one of my all-time favorite local motorcycle rides here in southern California.  It’s a circumnavigation of the San Gabriel Mountains, and it takes you right over the San Andreas Fault.

The route. This is a beautiful ride. It takes 4 or 5 hours to complete.

The ride is beautiful, especially on the northern side of the mountains along the southern edge of what we call the High Desert.

Valyermo, a nice spot to stop for a photo.
Scenes on the north side of the San Gabriels. Note the snow still on the sides of the road.
Descending toward the High Desert.
The intersection of Devil’s Punch Bowl Road and Tumbleweed. Turn left and it will take you to the Devil’s Punch Bowl on the San Gabriel’s northern slope.
The Devil’s Punch Bowl.

If you’re taking this ride, there’s a cool ranger station at the Devil’s Punch Bowl County Park.  The park has several exhibits, including Squinty, an owl with an injured eye park personnel rescued.

Squinty says hello.
Yes, indeed. A Western Diamondback in a cage. There are many, many more in the hills and in the desert.
A Western Banded Gecko at the Devil’s Punch Bowl County Park. These are very beautiful.

We have a bunch of other phavorite photos here on the ExNotes site.  The Phavorite Photo series came about as a result of a suggestion from good buddy Peter.  Peter, thanks much!


Earlier Phavorite Photos?  You bet!  Click on each to get their story.


Join our Facebook ExNotes page!


Never miss an ExNotes blog:


Help us keep the lights on:

Buell Fever Part 4: I’ve Struck Oil!

By Joe Gresh

Part of the reason I bought a Buell was because my life has become too predictable. Except for the Husqvarna, you stand a good chance of getting where you’re going on my old bikes. And the Buell is not disappointing. Lots of fun stuff is happening as I work on getting the bike back on the road.

It’s such a joy to tinker on a single-carb motorcycle. There are no racks and synchronizing to deal with, you only have to do a thing once instead of four times, but watch out for those aftermarket parts. The kit I bought was okay, but the emulsion tube was not drilled properly. And then I managed to pinch the bowl o-ring.  It was cheaper to buy another kit than a single bowl gasket, so I did that. Unfortunately, that kit’s bowl o-ring was too small. No matter how I stretched it, it kept popping out of the bowl groove. I ended up reinstalling the pinched o-ring. It was a futile effort to keep my mechanical standards up.

It wouldn’t be a Harley without baling wire. The choke tube is plastic and was fragile after all these years. The choke knob was falling out of its slot. I broke the tube finger tightening the thing. Wire to the rescue!
The accelerator pump plumbing was clogged. I fished a small bit of wire through the passage to clear it.
The carb kit emulsion tube (right side) was not drilled correctly. I try to use all the old stuff if possible. So this was no great loss.
This brass nozzle sprays fuel from the accelerator pump. Supposedly the tube is removable for cleaning but it seems well stuck and I started to chew it up a bit so I stopped.

I’m a big fan of lithium batteries, so I bought a Vevor brand close in size to the original lead-acid battery. The Vevor was a bit small and the factory battery location is not far from the rear cylinder exhaust header. To help with the heat I wrapped the sides and front with foam, then wrapped gorilla tape around the mess to hold the foam insulation.

It looks a little rough but an insulated battery is a happy battery.

A neat feature on the Vevor is the dual posts (four total). There are positive and negative posts on both sides of the battery; if your cables are in the wrong place, just flip the battery around. I added a spacer on the hook side of the battery strap to keep it tight and a small tube spacer in the bolt side (less threading to do on the hold down bolt), which makes installation 12 seconds faster. When you ride a Buell every second counts. The battery seems secure; hopefully, it will stay put.  With the Vevor battery (supposedly 400 cranking amps) in place and the carb back on, I needed to hear the Buell run. The oil tank level was between the high and low marks. The oil looked clean, like it had just been changed.

I removed the spark plugs, put the coke machine key in the ignition, and spun the engine over to clear any excess oil from my previous cylinder lubing. With the sparkplugs back in the cylinder heads I pulled the choke, hit the right turn indicator button, and nothing happened.

Harley handlebar switches are so weird. Pushing the starter button on the inside of the blinker switch worked better, and the Buell fired up in a couple revolutions. The engine popped and farted a few times. Lots of smoke came out the tail pipe but all things considered, it was running good.  Then came a loud pop followed by a geyser of oil spewing from the oil tank. The oil broadcast in a 15-foot fan covering the general area with great dollops of thick oil. The spots were viscous, so they stood proud of my clean concrete floor. Except for the spot I was standing. I received a blast of spraying oil that covered my sweater and left a clean, Joe-shaped silhouette on the concrete floor.

My nice, clean floor got its first baptism-by-Harley.
My sweater took the brunt of the oil explosion.

What a mess. How long the Buell had been sitting was unknown, but the oil tank must have slowly drained into the crankcase.  Some helpful person topped off the tank with fresh oil and I squirted the stuff all over the place. I drained the tank.  There must have been a gallon in there if you include the oil on the ground.  Once the oil level was correct, I fired the Buell and it settled down to the hit and miss syncopation Harley likes to call idle.

Back to other issues. I didn’t like the way the muffler was held into the bike. The setup relied on the front clamp combined with two rear brackets that bolted up in a parallelogram-like deal. The only thing that held the muffler in place was fastener tension.  To achieve a more secure mounting I made a thicker bracket out of mild steel and welded it to the Muffler. Now in order for the muffler to slide back my crappy weld would have to break. Which it just might.

Since I don’t have the equipment to weld stainless steel I made a mild steel bracket for the muffler.
The bracket welded to the muffler. Now the muffler can’t work loose and rub the tire.

The rear brake on the Buell was stuck. There were several issues contributing to this problem. The first was the brake pedal. It was bent where the master cylinder pushrod attached in a way that made the rod move dramatically sideways when the brake was applied. I used Harley tool 0-U812 (a big crescent wrench) to adjust the brake pedal. Now the push rod moved in a straight line concentric with the master cylinder.

This replacement rear brake assembly was close but off in meaningful ways. The seller refunded my money and didn’t want me to ship it back.
This part of the brake left was bent causing the master cylinder pushrod to go off course.
It’s still a little bent but the pushrod articulates correctly now.

The clone master/slave kit I bought on Amazon that was supposed to fit was just off enough to be completely useless, so I decided to rebuild the original stuff.

All the original brake parts cleaned up well. So far no leaks.

The piston inside the master cylinder was stuck but a few raps with a hammer had the piston moving and I dismantled the master/slave. I was having trouble finding seals for the Brembo components, so I cleaned everything and reassembled the brakes.

Bleeding the brakes wasn’t going well. I could get pressure at the banjo bolt on the master cylinder but nothing at the slave. Shooting brake cleaner into the brake line did nothing. The hose was clogged.  Out came the battery to access a hose clamp bolt, and I removed the brake line. Removing the brake light switch gave me a mid-point spot to shoot cleaner. The metal brake line was clear, the clog was in the rubber line.  I soaked the line in an ultrasonic parts cleaner then worked a 0.30 flux core welding wire through the rubber line. It took a bit of finagling but the wire made it through. Then it was just a matter of soaking with brake cleaner and shuttling the 0.30 wire back and forth until the line was clear. Blowing the lines with compressed air got rid of any stragglers inside the hose.  A quick reassembly and I had pressure to the slave. Bleeding the system was a straightforward proposition. The rear brake works.

Next on the list is fixing the kickstand and broken clutch lever.


Join our Facebook ExNotes page!


More Joe Gresh?   It’s right here:


Help us keep the lights on:

Returning to Vietnam – Ha Giang Loop: Part 5

By Mike Huber

I had stopped at the perfect place for my morning coffee.  Not only did the owner know of less chaotic roads, but the coffee shop was at the exact location to turn off to hit these mostly unexplored roads.  I quickly finished my coffee and was out the door in minutes.

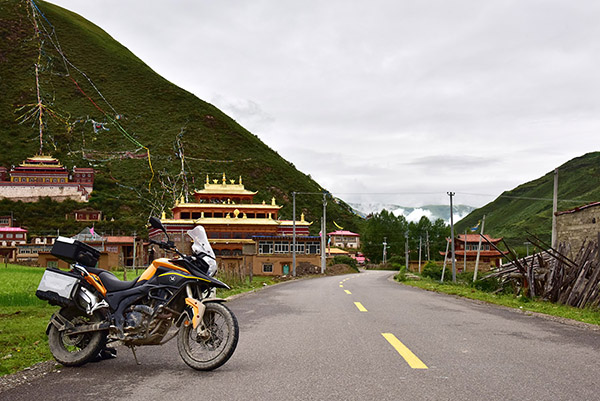
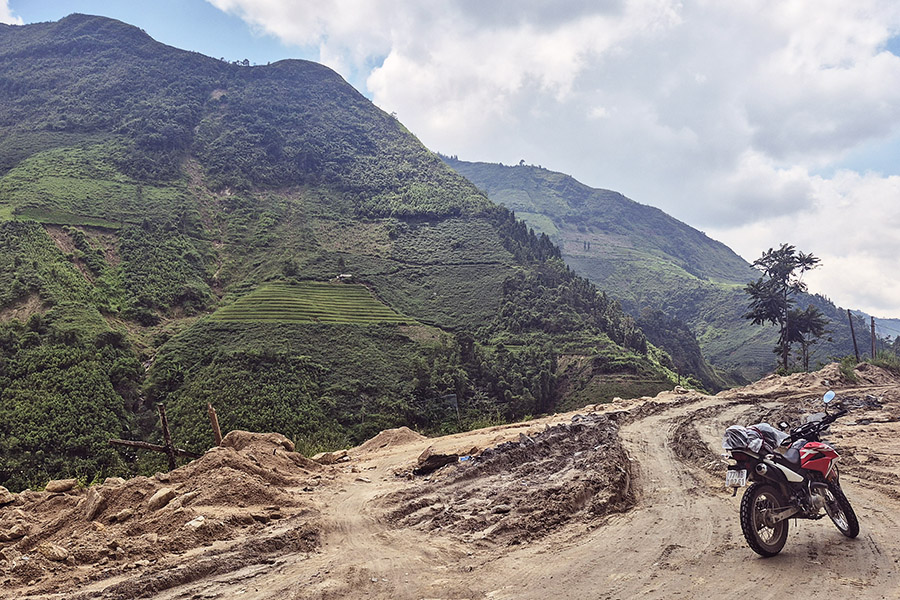
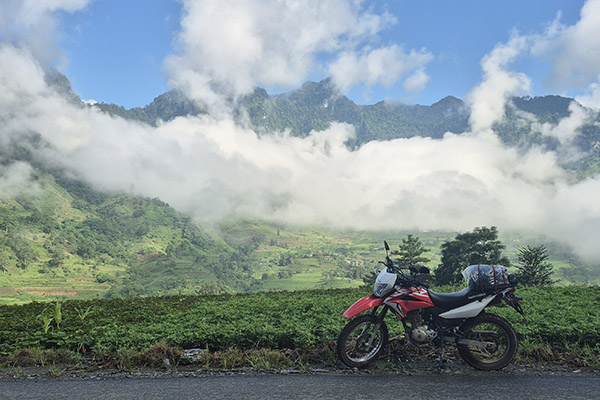
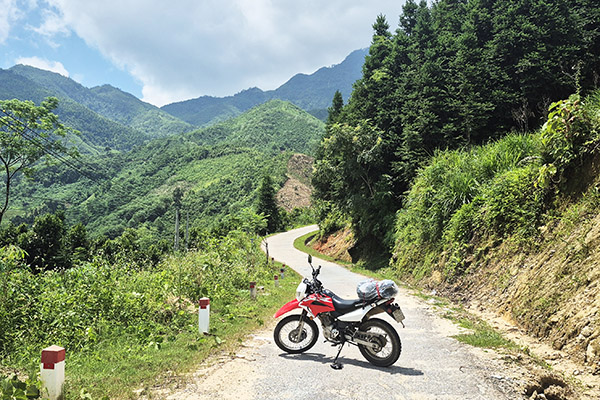
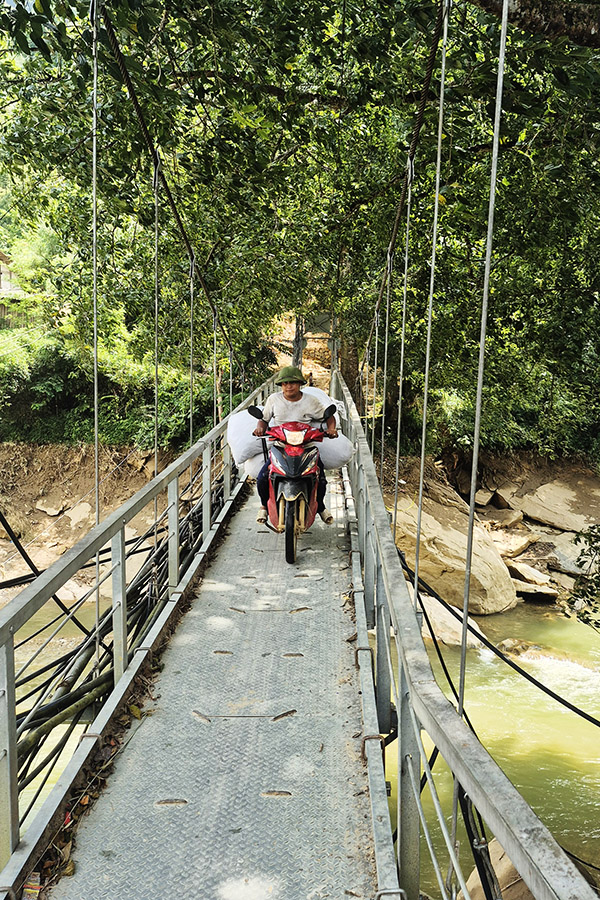
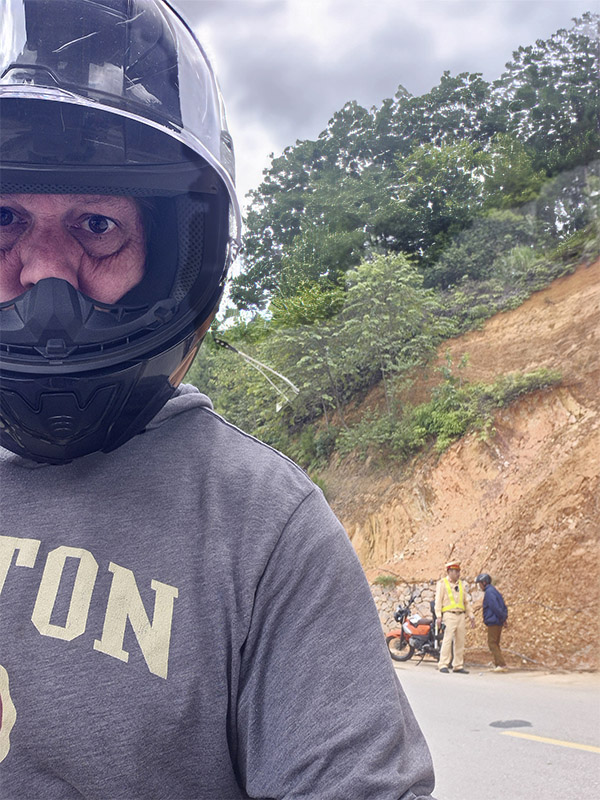
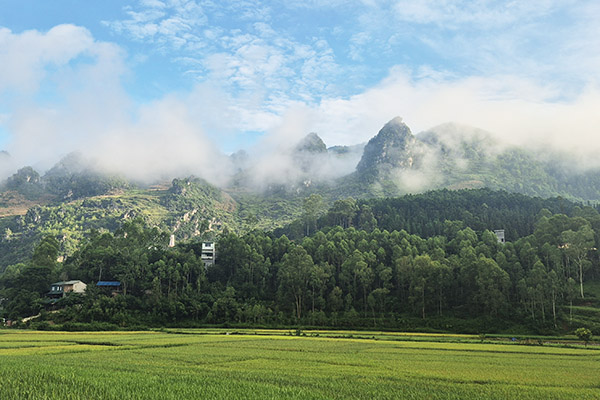
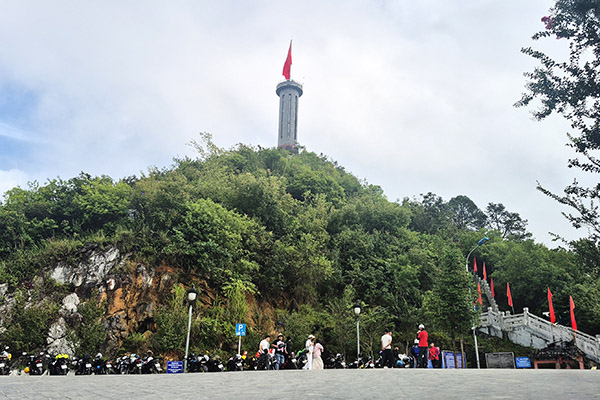
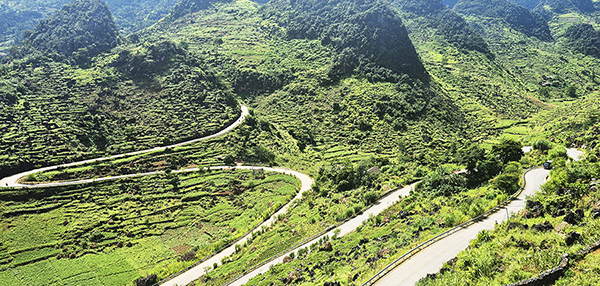
This would be the Vietnam I was looking for. No congestion, no traffic stops, just miles of mountain switchbacks.  This new chosen path didn’t come without a bit more adventure, too.  Over the next five days I didn’t see one Westerner or tourist.  None.  The village homestays I chose were so far off the beaten path I don’t even think many of the locals had ever seen a Westerner. Communication was strictly between my charades and some Google Translate.  The more rice wine I drank at the end of the evening, the less I relied on Google and the more colorful my charades became.

The roads were beautiful as the paved switchbacks disappeared into the lush jungle mountains and became dirt.  Some had precarious places with mudslides that consumed the dirt along these roads.  On more than one occasion I would be filled with confidence as I successfully negotiated these obstacles, only to be put in my place as a 10 year old girl on a scooter would overcome the same obstacles (but one-handed as her other hand was busy texting). Talk about an instant ego check.

The days actually became very isolating with the empty mountain roads, and even emptier villages where I found myself staying. On more than one occasion I found myself alone in a rundown hotel room having ramen for dinner by boiling water from a tea kettle.  Those moments were overshadowed by the adventure that always arrived the following day as I chose new mountain roads. It was exactly the experience I desired while motorcycling Vietnam.

For the next five days I hardly saw pavement or even other vehicles. When I would stop for a break at a viewpoint or for a drink of water there was absolute silence.  Even if there had been noise, the dense jungle would have absorbed it.  The jungle even consumed the sound of my moto crashing into the rocks when I occasionally lost focus.  It wasn’t dense enough to absorb my pain-induced swearing as I reinjured my broken rib from my Thailand crash.

After nine days I returned to the sensory overload of Hanoi, which came in the form of massive traffic and chaotic roundabouts. I had completed the Ha Giang Loop.  It was such an epic road.  The greater accomplishment was leaving the tourist trap loop and experiencing the true, raw, and mostly unexplored roads of Vietnam.


Catch up with Huber’s Vietnam adventure ride:

Ha Giang Loop: Part 1
Ha Giang Loop: Part 2
Ha Giang Loop: Part 3
Ha Giang Loop:  Part 4


We need your support!  Do what you can to help ExNotes stay in the black!


Coming up…more on Cycle Garden and their impressive work on Moto Guzzi and other Italian motorcycles!


More Huber? Check out A Trip Into The Moment.

More Gresh and Berk?  You bet!  Check out A Cup O’ Joes!


Join our Facebook ExNotes page!


Help us keep the lights on:

Returning to Vietnam – Ha Giang Loop: Part 4

By Mike Huber

Awakening the following day, I was eager to begin my second day on the Ha Giang Loop in northern Vietnam. Thankfully, the remainder of my first day on this road went without further incidents with local law enforcement.

As I continued northward in this beautiful mountainous region there wasn’t a day that went by where I wasn’t pulled over at least once.  The officers I had paid the 8 million Dong to were true to their word as each time I was pulled over at license checkpoints the officer would pull out their phone and scroll through the many photos of tourists until I would stop them. “Right there!  That’s me.  See?  I paid.”

The police officers then signaled me to be on my way.  Outside a few verbal warnings to slow down, the police check points just became part of my daily routine as my journey continued.

Hitting the Vietnamese North Pole was one of my objectives along this ride. Starting off early in the morning was the best way to go.  The early start was not only to avoid police check points and tourist traffic, but also to watch the mystical fog burn off the mountains as I weaved my way north. The roads were in pristine condition.  The only thing more pristine was the green mountain views that unfolded as I powered through the corners.  It was wonderful to have the road to myself, outside of the few meandering water buffalos that lazily crossed in front of me every so often.

Every day as afternoon approached, the police check points would appear. After a few days of constantly being pulled over to scroll through the police text thread, point out my photo, and on occasion be given a breathalyzer  test (Vietnam has zero tolerance for driving under the influence), it began to get old.  The road was filled with rental scooters.  Most carried Westerners.

After four days of riding along the Ha Giang Loop, I reached my limit.  I’d had enough of tourists, police stops, and crowds.  Tigit Rental had written a solid itinerary, but at this point I needed more solace. I pulled into a coffee shop to see if there was another route I could take to deviate from the Ha Giang Loop (and there was).  I hit smaller, less traveled roads. The coffee shop owner must have seen the frustration on my face as I zoomed through maps and roads to explore on my phone.

Using Google Translate with the shop owner, I described what I was looking for in terms of roads and a Vietnam experience.  She quickly pointed out a direction.  The roads she identified were remote and they met my criteria.  The path would also send me north along the Chinese border, and then loop down to Hanoi.  This would get me away from the Ha Giang Loop chaos.


Catch up with Huber in Vietnam:

Ha Giang Loop: Part 1
Ha Giang Loop: Part 2
Ha Giang Loop: Part 3


More Huber? Check out A Trip Into The Moment.


Join our Facebook ExNotes page!


Help us keep the lights on: