ExNotes Review: The Source

By Joe Berk

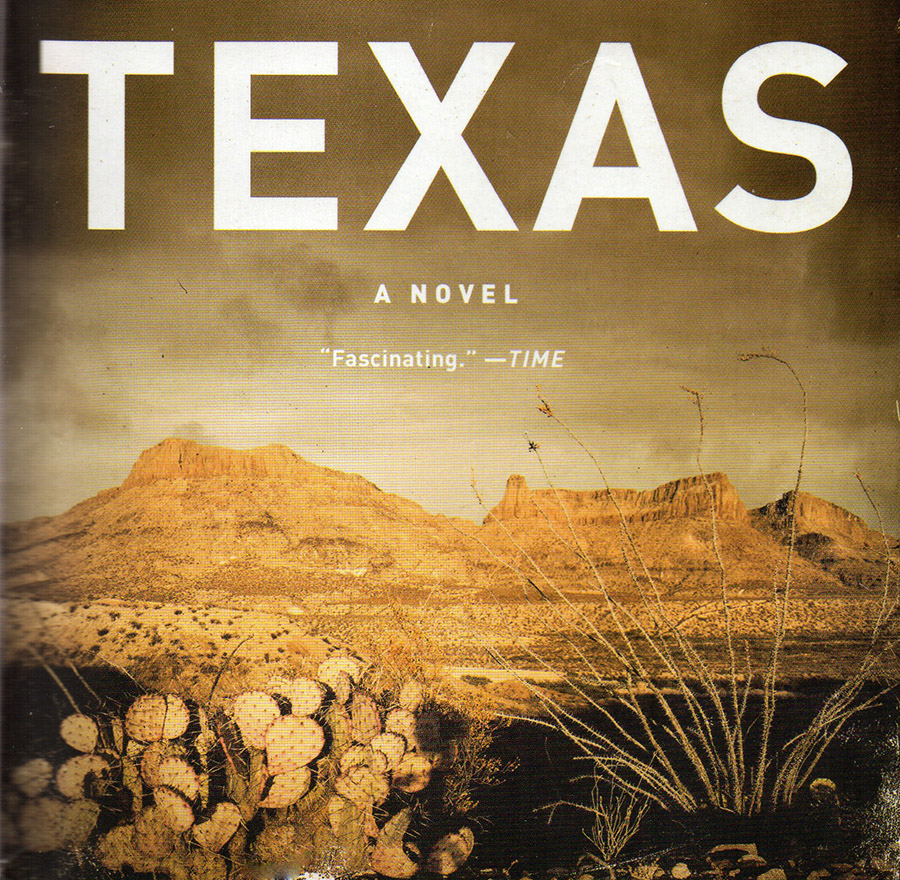
Did you ever read a book twice?  I’ve done so a few times, but never with as long a time between readings as James Michener’s The Source.  I first read it when I was 14 years old.  And then I read it again last month.  That’s a gap of nearly six decades.   What surprised me enormously was that I remembered a lot of it from my first reading.

You might wonder:  Why would a 14-year-old kid, a gearhead even then, read The Source?   I had been to Israel with my Dad a year earlier, which was quite an opportunity back in those days.  Dad was a trapshooter, and he was on the US Olympic team to Israel’s Maccabiah Games.  It was quite a trip, and seeing the places I had only heard about in Sunday school was a real adventure.  The Source cemented a lot of what I had seen in Israel in my mind.  It brought my visit into focus.  Normally, I would have had my nose buried in Cycle magazine, but that trip to Israel broadened my horizons.  Our most recent trip to Spain and seeing cities and places where the Spanish Inquisition (which figured prominently in The Source) rekindled my interest, so I bought a new copy of The Source on Amazon and I read it again.

The only difference I could discern between the book I read 58 years ago and the one I read last month was the price and the cover photo.  Today’s The Source cover photo features the Dome of the Rock, one of Islam’s holiest sites.  Back in the day, the cover featured a Jewish menorah (a candelabra), which figures prominently in our faith.

The Source is a novel with an historical context.  It’s the story of an archeological dig set in Israel just before Israel’s War of Independence in 1947-1948, but the dig and its characters provide the framework for a series of stories as the tell is excavated.  A tell is a mound created by succeeding civilizations building one on top of another, and in The Source, the generations stretch all the way back to prehistoric times.

At 1,080 pages The Source is not a light read, although Michener does a great job morphing from one story into the next.  If you enjoy a good read, if you are interested in Israel, and if you want to know more about the beginnings and evolution of the world’s three great religions, you might want to pick up a copy of The Source.


Never miss an ExNotes blog:

The Rimfire Series: Winchester Model 62

By Joe Berk

The gun that has been in my family the longest is a Model 62 Winchester chambered in .22 Short, Long, and Long Rifle.  I remember it being in the gun cabinet when I was a little boy and being told never to play with it (you can guess how well I listened to that advice).

I could go into a bunch of technical details about the Model 62, and I’ll provide a little bit of that below, but that’s not my intent with this article.  I decided to instead focus on the rifle, how it shoots and handles, a little bit of its history, and what it means to me.

The starboard side of my Winchester Model 62 rifle. It’s a sleek and lightweight .pump-action 22.
A port side view of the Model 62 on the range at the West End Gun Club.

When Dad had the rifle up until the time I went into the Army (and that would be in 1973), the rifle’s metalwork was flawless.  Then I disappeared from the scene for about 10 years (the Army, work, and other things).  I guess during that time my father stopped paying attention to the rifle.  Dad passed in 1982, and when I came home for the funeral, the metal parts had taken on the patina you see here.  New Jersey is a unforgiving and humid place; if you don’t keep your toys oiled, they corrode quickly.  But the Model 62 still looks good and it shoots well.

Shooting in RAW (the camera, that is), a macro lens, and even lighting bring out the inherent beauty of this fine old rifle.

I like the Model 62 Winchester’s straight grip stock.  It felt right to me when I was a kid and it influenced my future preferences in firearms.  I have more than a few rifles with that same straight grip stock now…a Winchester 1886 .45 70 clone made by Chiappa in Italy, several Ruger No. 3 rifles, and a few Marlin lever guns.

The Model 62 is what we call a “takedown” rifle.  A single thumb screw secures the stock and trigger group to the rest of the gun.  It’s a cool approach.

The Model 62 taken down. The stock and the trigger group detach from the barreled action with a single thumbscrew on the left side of the receiver.
I rotated the photo 90 degrees clockwise to provide a better look at the rifle after take down.
A macro view of the aft portion of the Model 62 after it has been taken down. The large thumbscrew in the center of this photo allows disassembly.
The Model 62’s barreled action after take down.

The sights on the Model 62 are old school.  They’re Lyman front and rear.  Nothing fancy, but they work well.  A simple gold bead up front, and a drift adjustable rear with a stepped ramp for adjusting elevation.  But I’ve never had to adjust them.   Either they came zeroed from the factory, or the guy who owned the rifle before Dad adjusted the sights, or Dad adjusted them.

Winchester used Lyman sights front and rear back in the 1930s. This front sight has a brass bead. It tarnished enough so that it looks black when I align the sights, and that works for me. Bright brass beads reflect light and pull the shots to one side.
The Model 62 rear sight. Simple, elegant, and traditional.

I think my Nikon 810 and the Sigma 50mm 2.8 macro lens do a good job in bringing out the rifle’s vintage beauty.  You can see it in the next few photos.

The Model 62’s bolt lifts up and slides to the rear when the pump is actuated. The spent brass ejects upward.
Another shot of the retracted bolt, showing the mechanism that ejects the spent brass case.
Rollmarks on the right side of the barrel: “Made in U.S.A. Winchester Repeating Arms Co. New Haven, Conn. Patents Pending.” Cool stuff.
The receiver from the left side. Patina, they call it. I could have it reblued, but then it wouldn’t be original, and like they say, it’s only original once.
The pump action forearm with its distinctive pre-war oval shape. Post-war forearms were straight. This one is much classier.

When I was a kid and my parents weren’t home, I sometimes snuck out of the house with the Model 62 and a box of .22 ammo.  We had a couple of acres in New Jersey that ran into the woods with a stream behind the house (the stream fed Farrington Lake, which emptied into Raritan Bay on the Atlantic Ocean).   You might think having a couple of acres in central Jersey with property bordered by a stream was a sign of wealth, but it wasn’t.  It’s what people did in the 1950s: You bought a couple of acres and built a house, and that’s what my Dad did.  He didn’t pay somebody else to build a house; he actually built our house.  Today you’d have to be rich to own those two acres.  Back then it was the path you took if you didn’t have money.

Those were good days and good times.   One time a kid from my junior high came home with me (Bob Dixon, if you’re reading this, drop us a line).  Mom and Dad weren’t home yet, so Bob and I grabbed the Model 62 and headed into the woods.  There was an old cellar door laying in the mud next to the stream and Bob thought it would be a good idea to flip it over.  “You know, there might be a snake or something under there…”

A New Jersey water snake. This one was about five feet long. We used to think these were water moccasins.

We did, and what we saw shocked the hell out of both of us: A monstrous, scaly, and scary reptile.  Being kids, we were convinced it was a water moccasin.  Today, I realize it was probably a water snake.  But it was huge and we did the only thing any kid would have done in similar circumstances, and that was to put the Model 62 to good use.  Call me Bwana.  (On a recent trip back to New Jersey’s Farrington Lake, I saw another one of those frighteningly large snakes and I wrote about it here.)

Loading the Model 62 is pretty straightforward.  The rifle has a tubular magazine that holds a ton of ammo.  As you see from the rollmarks above, it will shoot .22 Long Rifle, .22 Long, and .22 Short.  I don’t know how many rounds of each it will hold, but it is a lot.  I only load five rounds at a time, so it’s kind of a moot point to me.  Come to think of it, I can’t remember the last time I saw .22 Long or .22 Short ammo anywhere.  It’s all .22 Long Rifle these days.

The tubular magazine below the barrel. The arrow points to the knurled knob that opens the magazine.
A macro shot of the tubular magazine’s knurled knob and its bayonet lock. Twist the knob and the plunger can be pulled forward for loading.
When the magazine’s inner plunger is pulled forward, the loading port can receive ammo.
A Federal .22 Long Rifle being loaded into the Model 62.

So how accurate is this nearly 80-year-old pump action .22?  I’m glad you asked.  I had not shot it in three or four years, so I grabbed three different kinds of .22 ammunition I had in my ammo locker:  Older Federal copper washed high velocity ammo, CCI standard velocity ammo good buddy Greg gave me a few years ago, and Aguila standard velocity target ammo I bought from a local sporting goods chain when it was on sale.

I’m just about to the end of this box of .22 Long Rifle Federal ammo. Look at the price!
The accuracy load: CCI standard velocity .22 Long Rifle ammo. This is good stuff.
Aguila .22 Long Rifle target loads. Previous testing at 50 yards showed this worked best in my Ruger 10/22 (a Rimfire Series blog on that rifle will follow in the near future).

My U-boat Subie and I braved the Meyers Canyon water crossing to get to the West End Gun Club, I went to the .22 range and set up a table, and I tested the Model 62’s accuracy at 50 feet from a bench rest.  I fired three 5-shot groups at an old 50-foot rimfire target I found in my stash.   Here’s how it went:

Test results at 50 feet. The top right target was the first target of the day, and it was predicably the largest group (the bore was unfouled, and I was not yet in form). The Model 62 did best with CCI standard velocity ammo. This is not too shabby with open sights on an 85-year-old rifle.

A bit more info on the Model 62 Winchester:  This Model 62 carries the serial number 94XXX, which puts its date of manufacture at 1939.  My father bought the rifle when he was a kid; he would have been 13 years old in 1939.  Winchester manufactured 409,000 Model 62 rifles from 1932 to 1958, with a two-year break during World War II.   In 1939, production switched over to the Model 62A.  The Model 62A incorporated engineering changes to reduce production cost (mine is the original Model 62, not the 62A).  When Winchester introduced the Model 62 in 1932, the rifle’s suggested retail price was $17.85.  Presumably, the price had climbed a bit by 1939.  Family lore has it that Dad paid $8 for the rifle.  Sales of recently completed auctions on Gunbroker.com show the price for a Model 62 today ranges from $300 to $3000.   That’s quite a spread, but to me it’s irrelevant.  This rifle is not for sale at any price; one day it will go to one of my grandsons.

Model 62 Winchesters show up for sale on Gunbroker.com pretty much all the time, so if you want one they are available.  More good news is that the Model 62 is legal here in the Peoples Republik of Kalifornia.

The Rossi Model 62.

More good news is that Rossi, a Brazilian firearms manufacturer, offered their Model 62 (a fairly faithful reproduction of the Winchester Model 62) from 1970 to 1998 and the Rossi rifles can still be found.   Rossi discontinued the Model 62 when they were acquired by Taurus, but the Rossi rifles still show up on the auction site gunboards. Sometimes you see one in a pawnshop or a gunstore’s used gun rack. I’ve never handled or fired the Rossi so I can’t say anything about them, but if I came across one at a reasonable price I would jump on it.  You might consider doing the same.


Never miss an ExNotes blog:


Check out our other Tales of the Gun Rimfire Series articles here.

The Wayback Machine: A Walk Across Spain (Part 1)

By Bobbie Surber

The Camino de Santiago, also known as the Way of St. James, is a network of pilgrimage routes that lead to the shrine of the apostle Saint James the Great in the cathedral of Santiago de Compostela in Galicia, Spain. The Camino has been a popular destination for Christian pilgrims for more than a thousand years, and it is now visited by people of all faiths and backgrounds from around the world.

There are several routes of the Camino de Santiago, including the Camino Frances (French Way), which is the most popular, and the Camino Portugués (Portuguese Way), which starts in Lisbon or begins in Porto for a two-week shorter Camino. The Camino de Santiago is a long-distance walk or hike that typically takes 30-40 days to complete, depending on the route and the pace of the individual pilgrim.

Along the way, pilgrims stay in Albergues (pilgrim hostels) or other types of accommodation and follow the yellow arrows and shells which mark the way. The Camino de Santiago offers a unique opportunity to experience the beauty of the Spanish landscape and culture and to challenge oneself physically and spiritually.


Please click on the popup ads!


I walked seven different Camino Routes with my first Camino in 2012 and the last in September 2021. My last walk found me starting in Pamplona, Spain, a vibrant city never lacking a reason for a fiesta, a city known worldwide for the Running of the Bulls every July.  I ended my journey in Leon, Spain. With my added side trips, I walked over 300 miles, experiencing high desert plateaus, the Rioja wine region, the blissful Logrono’s tapas, the magnificent Burgos Cathedral, the Meseta’s emptiness, and the joy of Leon.

I was on a multi-month motorcycle/camping trip through Arizona, Utah, Colorado, Wyoming, and Montana. When riding, there are times when every part of your brain is laser-focused on the road ahead of you and who might try to run you over from the back or side, but every now and then, the ride is so peaceful that you have time to turn a portion of your brain to the gift of “I wonder.” This led me to reminisce over my six prior walks along different Camino routes in Spain, Portugal, and France. Once released, an avalanche of memories and images flowed to the point that I knew I would be booking my flight to Europe as soon as I stopped my ride for the day.

A quick Google Flights search gave me what I needed, and I soon had a ticket. This was another solo walk, my favorite way for most hikes. My arrival in Pamplona was early enough that I decided to start my Camino right from the Pamplona Airport, bypassing one of my favorite cities in Spain.

The morning had the hope of the fall weather yet to come as I headed slowly up the first of several foothills with the goal of a 10-mile walk for my first day. The gravel crunched satisfactorily underfoot as I quickly adjusted my backstraps to climb up to an iconic ridge that all pilgrims look forward to, the Alto del Perdón, a mountain pass in the province of Navarra in northern Spain, about 12 miles outside of Pamplona. I had returned to the Camino Frances trail after nine-year of absence, taking in beautiful views of the surrounding landscape and a chance to rest and recharge. The mountain pass is named after a sculpture of the Virgin Mary and the phrases “Señora del Camino” (Lady of the Way) and “Perdón” (Forgiveness), which are inscribed on the base of the sculpture. The windswept ridge and the massive wind turbines in the background contrast the sculptures that represent a pilgrimage from the Middle Ages. I took my first full breath after 18 hours of travel and an excellent 8-mile walk to this point. I thought about my intentions for this walk, what I hoped to gain and whom I would miss in the coming weeks of a long walk across most of Spain.

Reluctantly leaving the ridge late afternoon, I knew it would be challenging to reach my Albergue for the night. The steep loose gravel trail reminds me that my knees are not what they used to be, and motorcycle riding for the prior months did little to prepare me for the rigors of this walk. Soon the village of Uterga appeared with another climb up to her main street. My arrival timed perfectly to watch the evening stroll of the locals begin, kids running in the square, little old ladies with perfectly quaffed hair and well-put-together outfits ambling in deep conversations. Adults were sitting in outdoor cafes having a drink, visiting each other, and enjoying the last dregs of daylight. I wanted to plop my disheveled self within their mist and order my first long-awaited glass of Vino Tinto, but I pulled myself together and made the last of my walk to my Albergue in short order.

This first night’s stay found me in a dorm room in a private Albergue with its small restaurant and bar. After showing my pilgrims pass (issued to show you are walking the Camino) and paying 12 Euros for my place in the dorm room, I quickly dumped my backpack on my bed, looked in the mirror, confirmed I looked like a wreck, dashed for the bar, and ordered my first of many good Rioja wines. Settling in, I met my first group of fellow pilgrims. A portly German fellow in his mid-fifties that I would painfully learn would serenade us throughout the night with his epic snoring. Also, a group of Italian bicycle riders. They were loud, and all were talking at once with what would become the usual question:  Why is an American woman walking the Camino alone?  Well, that’s a question for another day! I order my second glass of wine and move into the restaurant for the start of the evening’s Pilgrim meal, an inexpensive three-course meal with portions that could feed a small family, and your choice of bottled water or a bottle of wine, Good God, man, why would you order the water?  I certainly did not.

I had equal feelings of contentment and joy seeping in as German, Italian, and Spanish conversations swirled around me—fellow pilgrims sharing their day’s success and physical hardships. Many of the pilgrims had started 60 miles back on the French side of the Pyrenees, had survived the celebrations of Pamplona, and were still in high spirits so early in their walk. I listened to their stories and their countless toasts made in several languages. I left the room while the wave of conversation and laughter reminded me of how lucky I was to be on this walk for a 7th time. This surely was the beginning of an epic adventure and the hope of what Spain had in store for me.


Never miss an ExNotes blog:

ZRX RX: An ExNotes Resurrextion, Part 6

By Joe Gresh

I probably shouldn’t badmouth them because they seem to have the business model sewn up and are industry giants, but Partzilla sucks. I’ve ordered quite a few ZRX parts from them and several things they do annoy me.  First, I get CT to order everything because it just works out better. Next, many parts you take the time to look up on their parts diagrams are not priced unless you go through the hassle of signing in to their website. Comparison shopping is difficult. The worst is when the page shows the part as available and in reality they don’t have it. This happened to me with the reed valve gaskets. The site said available (which is not the same thing as in stock) but I’ve been waiting about 3 weeks. CT emailed Partzilla about the situation and got a semi-snarky email in return. Is it better to lose a sale or lose a customer?

I get my Kawasaki parts from Southwest Suzuki Kawasaki in Alamogordo now. It’s actually faster than Partzilla and they give me a little discount if the part is outrageous (like those float needles). I go see Dave or Taylor at Southwest with part numbers I get off the Internet and the stuff is there within a week. Maybe the massive vertical integration of the ‘Zilla monster has reached an evolutionary dead end. I’m done with them, no matter that they’ve bought the first three pages of results on Google.

Rant over.

My Chinese petcock showed up and it looks exactly like the original Kawasaki petcock and fit perfectly. Unfortunately, when I tried to connect the old fuel line it had a pinhole leak right where the line expands from 5/16-inch to 3/8-inch.  I don’t know why Kawasaki went with the oddball molded fuel line. A 5/16-inch line will provide plenty of fuel to the 1100cc Kawasaki engine.

This is horrible but there are reasons why it is horrible. First, the OEM Kawasaki fuel line would need to be ordered and I don’t want to wait for it. Second, The original line connects to a plastic T-fitting between the No. 2 and No. 3 carburetors. Knowing my luck with old plastic fittings, I feared that replacing the hose entirely would lead to a broken T-fitting, which would mean pulling those damn carbs again. Then there’s the wait for a new T-fitting. I decided to let sleeping T-fittings lie and added a 3/8-inch to 5/16-inch hose barb adaptor complete with an ugly pipe connection between the two. Then I ran a new 3/8-inch line to the petcock. I mean to fix this mess later on but it works and doesn’t leak.

I gave up on getting the gaskets for the reed valves and made two block-off plates to seal the air intake to the exhaust ports. Then I spun up a little aluminum plug to seal the hole in the airbox where the reeds connected. I didn’t take photos of this part because I was in a hurry to hear the bike run.

I installed the rest of the radiator plumbing and started to fill the Kawasaki radiator with coolant and found the slippery green stuff running out the bottom as fast as I put it in. The front log manifold was pissing coolant, which was odd because I had replaced the four O-rings with new Kawasaki parts. This log manifold is behind the header pipes and not easy to access. Off came the pipe and the O-rings looked like they were deformed a bit.

My mistake was lubing the O-rings on the pipe manifold. This made them too slippery and when the pipe was pushed into position the rings slid out of the pipe O-ring grooves. I gave the rings a through examination and decided to clean all traces of lube from the pipe and O-rings. I shoved the thing back together, reconnected the hoses and it leaked as much as it did last time.

I pulled the log manifold for the third time and cussing up a storm. I tossed the new Kawasaki O-rings and dug some Harbor Freight O-rings out of an assorted kit I bought years ago. I was so frustrated I managed to cross thread one of the bolts that hold the manifold onto the engine block. Back off comes the manifold. For the fourth time. Remember, I’m doing all this behind the header pipes and I can barely get my fingers between the pipes.

I managed to get a tap started into the cross-threaded hole and using the tip of a finger to hold the tap and needle nose pliers to turn it, I ran the tap into the hole and straightened out the cross-threaded bit. Amazingly, the hole holds tension and I got the manifold back in place and the hoses connected. The manifold didn’t leak.

With the radiator full of coolant I started the bike.  It smoked quite a bit but after a few minutes the smoke eased off. I had set the idle screws at 1-1/2 turns out but the bike seemed rich. The idle mixture screws are accessible with the carbs on the bike but you need a special, shorty screwdriver to turn them. I made one out of bits and pieces. Make sure you have some sort of identifier so you can count the turns by feel. I used a small screw as my tactile-pointer and reset the screws to 1 turn out.

I tossed the seat on the bike and went for celebratory tacos at the Alomar Diner in Tularosa. The bike ran fair if a little rich. After I ate the tacos the bike wouldn’t start. What with everything having been messed with in the preceding weeks I wasn’t sure where to begin. So I kept cranking. And Cranking. And cranking.

Then I started smelling gas so I held the throttle wide open and cranked some more. The bike started making sounds like it wanted to start. I kept cranking. The Kawasaki sputtered to life stinking of fuel. I rode the bike home and it was running rich. I calculated my fuel mileage as 36 miles to a gallon. The ZRX1100 fuel tank vent was whistling like a teapot on boil and gave a gush of pressure when I opened the gas cap. This led me to believe there was a problem with venting.

Inside the ZRX gas cap is some sort of check valve assembly. It consists of two little red rubber valves and I couldn’t figure out how tank pressure was supposed to vent out. The ZRX has a vacuum operated petcock and with only a little pressure the shutoff diaphragm can be overridden. It’s a fine line. Naturally, removing the source of the problem is easier than making it work as intended so I removed the check valves and the bike whistled no more.

The bike was running much better and if anything was now lean-ish off idle. I did a 200-mile test loop through the mountains and the old ZRX1100 returned 53 miles to a gallon.

The Rex is running pretty well right now. I hate to do it but I’m going to buy four more Kawasaki O-rings for that coolant manifold and try again. Even though they aren’t leaking I don’t trust the Harbor Freight O-rings for longevity. I’ll order a new OEM fuel hose and I might take a stab at installing it. I also want a new fan switch O-ring for the radiator. I’m also going to set the idle mixture screws to 1-1/4 turns to see if it helps the off-idle lean spot, The ZRX stumbles a bit off the start. Once all this is sorted, watch for a ride report on the ZRX1100 in a future ExNotes blog.


See the earlier ZRX stories (and other Resurrection stories) here.

ZRX RX: An ExNotes Resurrextion, Part 5

By Joe Gresh

 The pressure of getting the ZRX1100 finished by July has eased off a bit. The Carrizozo Mud Chuckers may not be able to make July’s Laguna Seca races. I may have to go alone, which isn’t a bad thing, or skip the modern bikes and go to the vintage races held a week after. I’m leaning towards the vintage races as I really don’t have much interest in motorcycle road racing and the vintage bikes hold my attention just by existing. That doesn’t mean I’m backing off the ZRX1100 resurrexion project. I’m full speed ahead and will stay on the job until I am able to ride Rex again.

One of the things that worried me on the ZRX was the 24-year-old radiator. Kawasaki makes a quality motorcycle but how long can a radiator last? I found an aftermarket radiator on eBay for only $80 dollars with free shipping. You know how I like a deal. The radiator arrived securely packed and undamaged. It was welded aluminum and the workmanship looks excellent.

Unfortunately, there are a few problems with the fit of the aftermarket radiator. The top mounting ears are slightly too wide apart. When fitted with the original rubber isolator grommet the ears squeeze in as you tighten the bolts. It will need a thicker rubber isolator and that will require a longer spacer and bolt in order to avoid squeezing the rubber flat.

The next issue is the top tabs that hook into the expanded metal radiator bug screen are slightly too low. When the bottom screw holes are lined up the screen misses the top tabs completely; they hook into thin air. I slotted the screw holes to lower the screen on the radiator and it seemed to work although it looked like hell.

After those problems I found the blind holes in the side of the radiator that secure the radiator side covers were not centered correctly. You could get one bolt started or the other, but not both at once. This was fairly critical as the side covers also incorporate the bottom radiator mount and horn mounting bolts. To fix this I will need to fabricate new radiator side supports along with horn mounts. I decided to punt and cleaned up the original radiator and installed it. The aftermarket radiator might see future use but I’m not in the mood to do the fabrication right now.

The new Kawasaki water pump fit perfectly and I was able to install the hard plumbing pipes and hoses. This included the log manifolds located on the front and back of the cylinder block. I ordered a set of silicone hoses that fit fairly well except one hose was missing. Fortunately, it’s the easiest one to get to and it is straight, so I reused the old hose. I can fix it later if it springs a leak.

When I bought the ZRX used all those years ago the previous owner had dropped the bike moving it around. There is a small scuff on the headlight faring and the front brake lever was bent out at an awkward angle. I rode the bike like this for years. I decided that since I had the brakes apart I may as well straighten the lever. A little heat from a propane torch is all you need. Don’t go hog wild or you’ll melt the aluminum.

After closer examination I could see why the old float needles were leaking. There was a ridge worn into one and another had the rubber tip flaking apart. I ordered a new set of four needles for $28 (shipping included) from China but could not get an accurate delivery date. I was getting nervous about our trip so I went down to the local Kawasaki dealer. The dealer had Kawasaki-OEM needles for only $39 each. It killed me but I dropped $156 and bought the four needles.

With new needles in hand I checked the float levels. The range given in my book was 18.5mm ± 2mm from the float bowl flange to the bottom of the float. Mine were all sitting a bit high at 18mm. I readjusted them to 20mm anticipating needle wear and seating. After the carbs were back together I checked the floats on the bench and no fuel leaked out. I hope this status holds. Two days later my needles from China showed up. They look identical to the Kawasaki needles and even came with the tiny wire bail that fits over the float to pull the needle down when the float drops. My $156 needles required reusing the wire bail from the old needles.

I can see why so many ZRX riders convert the original air box to pod-type filters. It’s a challenge getting the carbs back into position. You have to mount both throttle cables and the choke cable, then feed the cables through the frame as you battle to slide the carb assembly between the manifolds and the  air box rubbers. It took at least an hour fighting to get the things in.  Then, once you feel like you have succeeded, there’s the not-small matter of fitting the springs onto the air box rubber groove. None of this would be difficult if there were access. The two inside boots were out of reach and too crowded for my fingers. I managed to get the springs in place using a couple of screwdrivers and a lot of bad language.

While waiting on parts I tackled the fuel tank. Amazingly the inside of the gas tank was not rusted. It had stinky old yellow muck inside but was otherwise in good condition. This might be due to my diligent addition of fuel stabilizer several times over the course of the ZRX’s long slumber. I rinsed the tank using fresh gas and after 4 flushes the inside was pretty clean.

The fuel filter on the petcock was brittle with age (or fuel stabilizer) and crumbled to the touch.  The filter is not sold as a separate part so I bought an entire petcock for less than a few Kawasaki gaskets. Again, from China. I didn’t pay attention to the delivery date and the petcock was promised between June 7th and July 15th. This was a huge window, so I bought a rebuild kit and it didn’t show up, either. Panicking, I went to the local dealer and ordered the inner packing and the gas tank O-ring figuring I could at least make something work. As you can see, I’m using a shotgun approach to parts as time grows short.

The petcock rebuild kit showed up a day before the Kawasaki stuff did and I managed to get a petcock assembled. My main issue with this plan is that since there is no interior fuel filter I’ll have to fit an inline filter. This is not as easy as it sounds because the Kawasaki uses a large 3/8” fuel barb and the 3/8” inline filters I’ve found are too large to fit under the carbs or below the petcock. Maybe my new petcock will show up soon and solve the problem for me.

The big holdup now is the gaskets for the reed-valve pollution plumbing located on the valve cover. The law of unintended consequences says that I should have left the reed valves alone when I painted the valve cover. But I didn’t. They tore when I removed the reeds to paint. I ordered the gaskets weeks ago and they have not arrived.

The reed valves allow fresh air to be drawn into the exhaust ports when there is a vacuum pulse at the exhaust port. Kind of like a smog pump without the pump. The reeds connect to a carb-vacuum-actuated valve that is supplied via the air box. I’m guessing this is some sort of backfire control. I can eliminate all this junk and I might do just that but I will need to make a blank plate to replace the reeds and a blob of high heat silicone to replace the gaskets.  Then I’ll need to plug the hole in the air box. It would be faster to bolt the junk back on as the bike ran fine with it.

I also installed the new battery and tested the electrical system. I tested the lights and horn and they seemed to work then I bumped the engine over to see if the electric starter still functioned. Maybe in Part 6 this motorcycle will start.


Like what you see?  Please thank us by clicking on a few of the popup ads.


Never miss an ExNotes blog:


More Resurrections are here.

Life as a Digital Nomad: Part 4 (Panama)

By Mike Huber

Having just left my new home in Nicaragua and boarding a local bus on a 26-hour ride to Panama had me almost second guessing my decision.  The bus was full, and the bathroom already looked like a scene out of Poltergeist.  Now, all this I was able to tolerate, but what really got my goat was that they had TVs every few rows.  You’d think “OK, we’ll watch a few movies to pass the time.”  Not on this bus.  They had a Kirk Cameron movie (Fireproof) on repeat AND in Spanish.  I had never seen this movie and by the 2nd time it rolled on I was ready to just set up camp inside the destroyed bathroom just to get a reprieve from it.

I eventually fell asleep with the help of some Flor de Caña that I smuggled onto the bus. After what felt like forever the bus came to a stop, and I noticed everyone was getting off.  I was still half asleep when I was ushered off the bus.  Still bleary eyed I looked at my watch.  It was 4:00 a.m. We were at the border of Nicaragua and Costa Rica and the border crossing didn’t open until 7:00 a.m.  I was beginning to understand why the bus ride would take 26 hours.  After sitting on the concrete for 3 hours the border finally opened, and we were welcomed into Costa Rica.

Once back on the bus my anxiety increased as we all wondered what type of obstacles we’d have to overcome to enter Panama. Entering through the Panama border was less time consuming but again the bus emptied and everyone was guided into a small room with their luggage, where we all had to open each item as dogs systematically sniffed through all the luggage, piece by piece.  Then, once back on the bus, we continued the journey to Panama City.  Fireproof was probably on its 8th showing.

The further south we traveled the landscape continued to change, as did the neighborhoods.  In Nicaragua the houses were in mostly poor condition but by the time we were in Panama they were more like those you’d find in the United States, modern and well maintained.  This was due to the Panama Canal which draws in an unreal amount of revenue for the country.

As we pulled into the terminal, I was exhausted and ready to exit the bus. Fireproof was still playing on the TVs overhead and I couldn’t leave fast enough.  It was a short taxi ride to the hotel I had picked in downtown Panama City. I quickly learned that in 2012, almost anywhere outside Panama City was difficult to find an affordable place to stay with solid wi-fi to perform my work duties.  This was frustrating as I hit wall after wall, all the while residing in a Marriott, which was not what I envisioned life in Panama would be.

After 3 days of continued failed attempts at finding a suitable home, it was time to decide to move on or return to Nicaragua.  I honestly think the thought of another 26-hour bus ride back to Nicaragua with Fireproof playing nonstop was the key factor in deciding to move onward.  But to where was the question. I was at the end of Central America so this meant I would have to fly to my next destination.  Looking at a map the logical choices were Columbia or Ecuador. I left it up to a coin toss to determine which it would be. The coin landed on heads, so Ecuador it was.  That day I booked a flight to leave in 3 days.

This decision left me with limited time to tour Panama City.  I am not huge on tourist spots but the one place I wanted to see was the Panama Canal.  It didn’t feel right to be there without seeing this engineering marvel, and I am glad I did.  The canal was extremely impressive, and they had grandstands you could sit in to watch the massive ships pass through the initial two steps of the Miraflores Locks.  These two locks manage to raise ships 54 feet higher as they let the water rush in.  The ships traveling through the locks must surrender their boats to a Panamanian captain (to include raising Panamanian Flag on their masts). Many boats were extremely large and had very little leeway on either side as they steered through the canal, so the captain piloting the boats must be certified and skilled in navigating the tight canal locks.

The remainder of the days spent in Panama consisted of getting in some short runs along the waterfront and starting the preparation for the next stop in Quito, Ecuador.  Research showed that the wi-fi in Quito was fast and reliable.  This put me at ease since the pace I was going for was a minimum of one month per country.  This pace would allow me enough time to settle and fully absorb the culture instead of just being in a vacation mode.  I wanted to be immersed in the culture and was determined to stay in Quito for that minimum length of time.  Upon landing in Quito, I instantly knew that a month there wouldn’t be enough and would require me to adjust my schedule yet again.


You know what to do:  Please click on the popup ads!

Mike Huber Stops By

By Joe Berk

Good buddy Mike Huber rolled through So Cal a few days ago and spent the night at Casa Berkowitz.  It was a fun visit.

Mike Huber on the UberMoto. Mike’s current GS is his second one.

I first met Mike on one of the CSC Baja expeditions, and the circumstances of our meeting hit on shared interests (motorcycles and Baja) and a shared background (we are both alums of the Benning School for Boys).

An August 1972 jump school postcard purchased at the Benning School for Boys Post Exchange.

The CSC crew (me and maybe a dozen fellow RX3 riders) had stopped for gasolina on the 200+ mile stretch between Baja’s El Rosario and Guerrero Negro.  Cataviña is about 130 miles south of El Rosario, and for a long time it has been the only place to buy fuel on that section of Mexico’s Highway 1.  There were no gas stations then; enterprising Mexican capitalists sold it from bottles on the side of the road (capitalism rules, my friends).  Today there is a Pemex in Cataviña, but that’s a relatively recent development.

Refueling in Cataviña. That’s good buddy Tuan, an RX3 rider and one of my former students at Cal Poly Pomona.

You can imagine the scene…a dozen bikes crowded around a handful of people selling fuel out of jugs.  Or maybe you don’t have to imagine it; just take a look at the photo above.  It was a hot day, we’d been on the road a while, and we were two days into a seven-day trip.  I looked at the other bikes around me and on one of the motorcycle tailpacks I saw a decal that commands instant and profound respect from anyone who’s been there:  The winged parachute emblem showing that the bearer graduated from the US Army Airborne School at Fort Benning, Georgia.

Mike’s jump wings on the back of his first GS. It was this emblem that first alerted to Mike and his background. Mike’s done 19 jumps (5 in jump school and another dozen when he served with the US Army’s 82nd Airborne Division).
When the jump wings fell off, Mike replaced them with an 82nd Airborne Division decal. The “AA” stands for “All American.”   I learned that when I asked one of my jump school instructors; he first told me that for us trainees, it stood for “Almost Airborne.”   Then he told me the real story.

That’s weird, I thought.  I had only known the guys on this ride for a few days, I’d seen all of their bikes, and if any had been adorned with jump wings I would have picked up on it immediately.  I was pondering how I had missed that when I looked at the guy standing next to the bike.  It was Mike Huber, whom I had not met yet.  My next befuddled thoughts were that I thought I had met everyone.  Where did this guy come from?  Then I looked at the motorcycle.  It wasn’t an RX3.  It was a BMW GS 1200.  The two machines looked enough alike that I had not noticed the difference when Mike worked his way into our herd of turtles at the gas stop in Cataviña.  I looked up at Mike again and he was grinning.  He knew I was confused and I think he was enjoying my being perplexed.

Mike’s current GS 1200. It’s a stunning motorcycle.

Mike and I hit it off immediately.   He stayed with us a couple of nights later in Mulegé (at good buddy Javier’s magnificent Las Casitas Hotel), and we’ve kept in touch ever since.   Mike did a guest blog or two for us here on ExNotes, and he became one of our regular writers last year.

When Mike told me he would pass through our neck of the Peoples Republik, I told him we wanted him to stay the night and enjoy a barbequed salmon dinner with us.

The port saddlebag on Mike’s GS.
And the starboard pannier. Mike gets around, as you know from his blogs here on ExNotes.

We had a great visit.  The Tecate cerveza (and later, the Spanish wine) flowed freely.  Sue crafted a desert we recently learned about on an olive plantation in Spain (see our most recent blog), and it was awesome.

The post-dinner treat: More vino, and chocolate gelato topped with orange-infused olive oil from the Basilippo plantation in Spain. Olive oil on ice cream sounds strange, but take my word on this: It’s wonderful.

As always, it was great to spend time with my good friend and fellow scribe Mike.  The next morning after a good breakfast Mike was in the wind again, headed north toward Ojai, the Bay area, and beyond.  You will be able to read about those travels right here, on your favorite motorcycle blog.

Good times and good friends, folks.  It’s what life is all about.  That, and clicking on the popup ads.


Never miss an ExNotes blog:

Enjoy the Day

By Joe Berk

It was 50 years ago that I joined the U.S. Army.  I went to college on an ROTC scholarship and graduated with a Regular Army commission, the same as the people who graduate from West Point.  Three days before graduation, the Army told me my first duty assignment would be staying at Rutgers and getting a master’s degree, all courtesy of Uncle Sugar.  Guys I went to high school with were going to Vietnam; the Army sent me to grad school.  It didn’t feel right, but it was what it was.

The ROTC scholarship was a sweet ride; grad school was an even better deal.  Uncle Sam picked up the entire tab, paid me a housing allowance, and I drew my full pay as a second lieutenant.  As I recall, it was something like $436 per month.  I couldn’t believe how sweet life was and how I was rolling in dough (grad school was actually easier than undergraduate school). Three of the guys I went to high school with were killed in Vietnam.  Several more served over there.

Memorial Day has always been a special day for me, and not just because of what I wrote about above or my time in the Army.  I think about the guys I knew and I remember them.  You don’t have to have served to do that; all of us should take the day, enjoy it, and think about the people this special day honors: Those who were killed in action fighting America’s wars.

Enjoy the day, my friends.

ZRX RX: An ExNotes Resurrextion, Part 3

By Joe Gresh

Labor rates at motorcycle shops are well over $100 an hour and that fact got me thinking about the value of old motorcycles. Take my 1999 ZRX1100: The basic bike is sound but there are many minor issues that add up to a lot more money than the motorcycle is worth. If you took the bike to a shop, that is.

Fixing a bike yourself means you can take more risks. You can reuse iffy parts that a dealer mechanic cannot. The brake system on the Rex was in sad shape. All the calipers were stuck and the master cylinders were stuck, too. If I worked for a shop as a motorcycle mechanic I’d tell the customer they need all new parts. I couldn’t take the risk of my rebuilt caliper failing or coming back for a leak.

The bores in a brake caliper are not super critical as the sealing is done mostly on the piston walls. Unfortunately, my caliper pistons were not in great shape. I polished them as much as I could and cleaned up the bores. New o-rings and dust seals will hopefully keep them from leaking.

The master cylinder bore is much more critical because it forms the sealing surface for the piston and seals. Luckily the bores on the clutch and both brake caliper master cylinders were in good shape.

The rubber bits for the front and rear master cylinders looked ok-ish to me so I reused those parts. I’m to the point that I prefer old OEM bits to new aftermarket bits if I can get away with them.

The levers have a pressed in dust seal and I didn’t have a tube the correct size for the job so I turned out a short piece of PVC tubing to push the dust boot into place.

I ordered a new clutch master seal kit as I tore the original dust boot dismantling the thing. I also bought a clutch slave kit but the bore was so bad by the time I had it remotely smooth the piston was loose in the bore. I have ordered a new clutch slave cylinder.

All in, there were 18 hydraulic pistons in the ZRX that needed service. A shop mechanic would never re-use the stuff I did. It may come back to haunt me later.

I bought two new, made in Malaysia Continental tires for the Rex as the ones on the bike were made in 2009. The old tire sidewalls had small weather checking. I would have run the old tires if I was just bopping around town but I have a few long trips planned so at $200 for the pair I figured I’d better bite. The Harbor Freight tire changer made the job tolerably easy. Still not as easy as having a shop do it.

The fork seals were leaking so I popped in a new set of fork seals and replaced the fork oil and while I had the front end apart I dropped the lower triple clamp and pumped in some much needed grease to the steering head bearings.

I also bought a new front sprocket and new X-ring chain for the Rex. The chain had a new style master link that worked by pressing the side plate on using small nuts then breaking off the studs that stick out. If it works it will be a good idea, if not I’ll probably break my engine cases when the chain lets go.

If I had taken the ZRX1100 to a shop by this point I would have already exceeded the value of the motorcycle. A shop would need to put in all new brake components to cover their butt. I’m willing to risk my life on shoddy equipment to save money and I’m nowhere near done with the bike or spending money, as you’ll see in future blogs.


Keep the hits coming:  Please click on the popup ads!


More Resurrections are here!

Life as a Digital Nomad: Part II (Exiting the Wheel)

By Mike Huber

It was May 2012, Boston was becoming extremely boring, and the thought it might be time to expand my horizons began to grow inside my head.  Still remaining as a “work from home” employee and having traveled throughout most of the United States with not so much as a hiccup in missing calls or people asking “Hey, where are you working from today?”  Most wouldn’t expect any type of a response outside “my living room” or “the kitchen table” since that is what everyone was doing and to think an employee was winding up roads in New England on an Italian sport bike or hanging out in Haight Ashbury in a coffee shop while leading a project team call was unthinkable. Now, many will read this and think I wasn’t working and just touring the country while attending a call here and there.  While that perspective isn’t totally wrong, it isn’t fully accurate, either. My organization was giving me awards every quarter, to include project manager of the year.  While this was all happening, our company was constantly laying people off to the point where morale was extremely low.

Even with my newfound freedom I felt myself being dragged into the depths of depression due to the constant threat of layoffs. It was time to take this working from home to the next level.  That being the “what if I don’t have a home” plan.  It wasn’t much of a plan, but more of an execution of an idea born over a few beers in a dark Boston bar two years earlier.


Want more content?  Please keep us going by clicking on the popup ads!


As with everything in life the first step is the scariest, but also the most critical to set the wheels in motion.  After thinking this over for a bit the most effective way to ensure I followed through with my plan of setting myself free geographically was to rent out my Boston condo.  This was easier than I expected, and had it rented through a management company in under two weeks.  June 1st my new tenant would move in.  This was it.  I was going to not have a home for at least a year. A timeline was now drawn for me to sell everything I owned and find out where my new “home” would be.

Somehow, I knew that returning to Boston wasn’t going to be in the cards.  Having a massive fire sale seemed the best way to clear my life of material possessions that were now just clutter, and there was a lot of clutter to be cleared.  With time being short it was an emotionless task to sell, donate, and give away almost everything.  Paying for a storage unit for an unknown amount of time seemed pointless.

Once everything I owned was condensed into a small box of keepsakes and my travel backpack it was time to decide where to go.  As I looked around the condo (which echoed because it was empty), I was left with the question that I probably should have started with before taking all these drastic actions.  Where the Hell am I going to go?  This is one of those “I may have screwed up” moments.

Originally the semi sorta kinda plan was to just drive around the United States and spend a month or so in each state and see what became of it.  As I was looking at a map figuring out a few first stops on my new journey my phone rang.  It was a 617 Boston number and instantly thought it was a spam call.  Well, this is one call I am glad I didn’t push to voicemail.  It was one of my relatives whom I had gifted a Magic Jack plug a year or so ago.  He was calling to catch up and let me know he was had just moved to a house in the jungles of Nicaragua and had internet service that was just as fast as in the USA.  My jaw dropped and I threw the map of the United States into the trash can that was already overflowing with trinkets and other items that I felt would never be needed again.

Feeling so lost in the United States (on many levels), a new environment would not only be healthy mentally for me but might propel my work motivation (which was currently nonexistent).  Right about this time most of my friends and family were sure I had lost my mind.  Going to Nicaragua on a one-way flight for an undetermined amount of time seemed reckless and a sure way to lose my job (some even felt my life would be in jeopardy).

Having previously traveled much of Central America, I knew most of these concerns were unfounded or pulled from a news article where one person had a bad experience.  The news never really covers the thousands who traveled to this part of the world and had nothing but wonderful things to say about the people, the culture, and the sights that many will never know.  Having grown up in Maine (where for many fear to even venture to Boston) it was incomprehensible for them that I would move to Nicaragua.

As I arrived in Maine, I parked the Ducati in the garage, closed the door, and wondered when I would next see that beautiful machine.  Little did I know that it would be a year and a half before I would hear the magical dry clutch clacking again. Later that day I boarded a flight out of Logan Airport.  With reality setting in I stared out the window.  I was really doing this. Nicaragua was going to be my new home.