We’ve written two Indiana Jones in China blogs so far, one on the lost Roman Legions at Liqian and the other on the Gobi Desert’s Buddhist grottos of Mo Gao. Today’s focus is on a third Indiana Jones episode, and that’s the one about Xi’an’s Terra Cotta soldiers. I visited the Terra Cotta soldiers a quarter century earlier on my first-ever trip to the Ancient Kingdom. They had only recently been discovered at that time and we (Susie and I) actually met the man who first unearthed what would become the Eighth Wonder of the Ancient World. I was eager to see the porcelain antiquities again.
We’d been on the road in China on our Zongshen motorcycles about three weeks when we entered the ancient city of Xi’an. It was the adventure of a lifetime, simultaneously exhausting and exciting, and the ride into Xi’an was one of the best parts of the entire trip. We rode on a road that was exclusively built for two-wheeled transport and the photo ops were amazing.


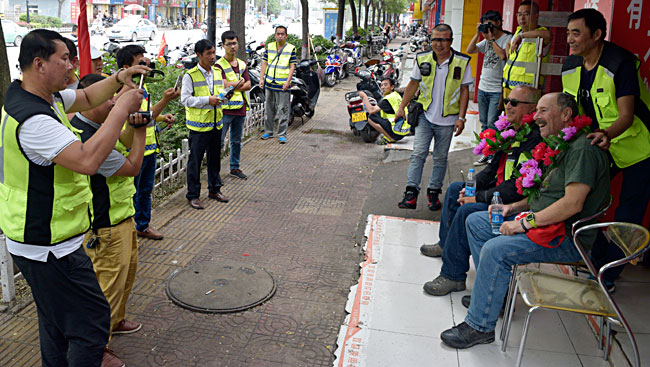
On the ride to Xi’an, as had been the case wherever Gresh and I went in China, we were celebs. And we were treated as such. There was a large group waiting to welcome us at the Xi’an Zongshen dealership, complete with the obligatory cold watermelon refreshments and floral necklaces. Folks wanted photos. They actually stood in line to photograph me and Gresh, and then they stood in line to get in the pictures with us. It was all quite amazing.


So, on to the main attraction, and that was the Terra Cotta soldiers. This is another one of those wild stories that actually happened. It could be the plot for yet another Indiana Jones movie. It seems that when emperors of the Qin Dynasty died thousands of years ago, their personal armies were slaughtered and buried with them. The idea was they would provide protection in the afterlife. I know, it doesn’t make a lot of sense, but that was the custom. Maybe it made the emperors feel good knowing they weren’t dying alone. I don’t think the guys in the army could have liked it too much, though.
One of the emperors wanted to try a new approach, which I’m sure endeared him to his troops. This enlightened emperor wanted life-sized porcelain figures of each of his soldiers, and he decreed that the porcelain figures (rather than the real soldiers) would be buried with him when it was his time to check out. That probably sounded like a real good deal to the troops. And that’s what he did, with one life-sized porcelain soldier custom crafted for each of his 8,000 live soldiers. It’s believed that each was carefully modeled to duplicate the face and other body parts of each soldier. It was the ultimate government “make-work” program of its day.
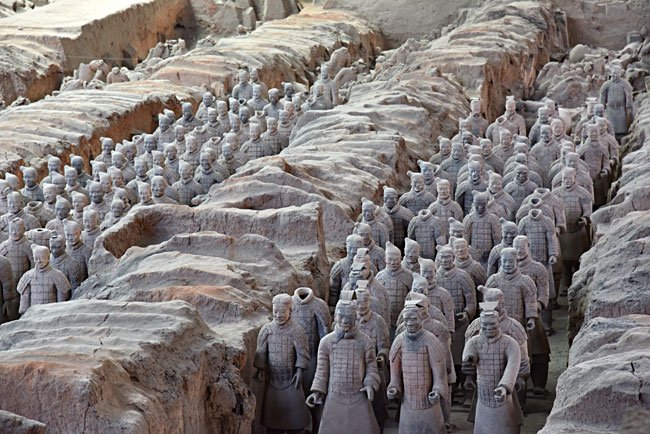
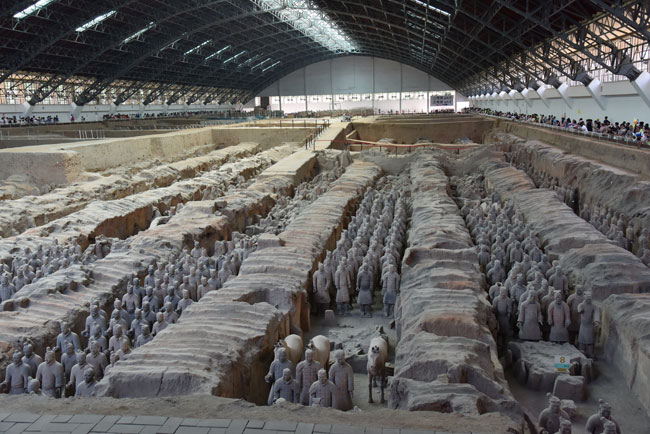
When the Emperor kicked, all the porcelain soldiers were buried with him. They weren’t just buried, either. They were buried in attack formation, facing east toward China’s traditional enemy (that would be Japan).
And then, all of this was lost in time. For two thousand years. Cue up the Indiana Jones music, folks. This could be the plot of the next movie.
About 40 or so years ago, a Chinese peasant was digging a well in Xi’an and he came upon a strangely-shaped rock that looked like a human head. He told somebody, who told somebody, who told somebody, and a few days later a guy from the Chinese government showed up. You know, to see what was going on in Xi’an. “I’m from the Government, and I’m here to help,” and all that. That was how the Terra Cotta soldiers, the Eighth Wonder of the Ancient World, were discovered and uncovered.
Seeing the Terra Cotta soldiers again was great, but truth be told, I enjoyed it a lot more when Sue and I were there several years earlier. We actually met the man who dug the well and discovered it all, and Xi’an was a lot less commercialized when we first visited the place. Now, to get to the Terra Cotta soldiers you have to walk through an outdoor mall that has a McDonald’s, a Starbuck’s, and about a zillion trinket stores. Ah, civilization.
Don’t take the Terra Cotta soldiers off your bucket list because I liked it better seeing it with my wife a long time ago. Trust me on this. It’s not the Eighth Wonder of the Ancient World because someone thought that would be a catchy marketing slogan. The place really is a marvelous thing to see. What’s even more amazing is knowing that what’s been uncovered is only 10% of what they think is down there. Like I said, this is real Indiana Jones material, with McDonald’s and Starbuck’s tossed in for good measure.
Later that night when we went to dinner, we parked in an underground garage. The Chinese are industrious, and there was a car detailing service in the parking area. You know, to wash and detail your car while you were eating. I thought that was clever. The business ran with military precision, and we happened by just as the car cleaning shift was changing. The young guy in charge had his troops lined up and he was briefing them on whatever they were going to do that evening. I wondered if the soldiers who protected the Emperor 2000 years ago stood the same kind of formation.
When I was in the Army, I had a sergeant who started every morning formation with “I have good news and bad news.” I thought of those 8,000 Chinese soldiers, the Emperor’s personal army, and their learning about the boss’s burial plans 2000 years ago. I would have liked to have been there when they heard their “good news and bad news” morning formation brief.
“The bad news, men, is that you are all being replaced by porcelain dummies. The good news is that it won’t happen until the Emperor kicks the bucket, and those porcelain dummies are the ones who will be buried with him. You’re off the hook!”
Want to read our other Indiana Jones in China adventures? Here’s the one on the Mo Gao Grottos, and here’s the one on the Lost Legions of Liqian.
Don’t miss a single ExNotes blog! Sign up here: