A Tale of Two Rugers

By Joe Berk

Rifles, that is…two Ruger rifles.  I’ve written about them before, but it’s been a while since I shot either one and with the stream crossing to the West End Gun Club almost manageable these days (more on that later), I thought I would take them out to the 100-yard range.  I shoot handguns regularly (at least a couple of times a week) on the indoor 50-foot pistol range closer to home, but there are times when the high-powered-rifle-on-a-football-field-length-range itch needs to be scratched.

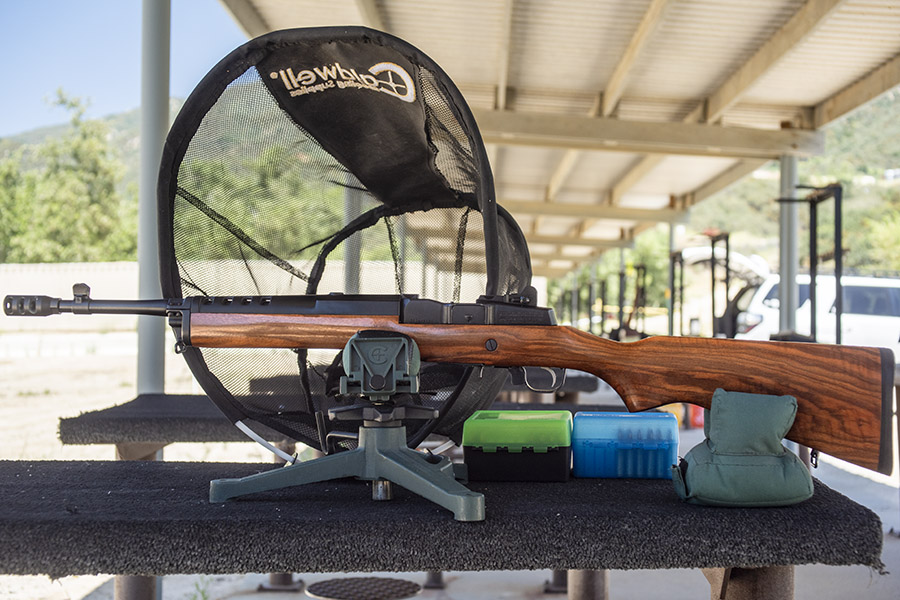
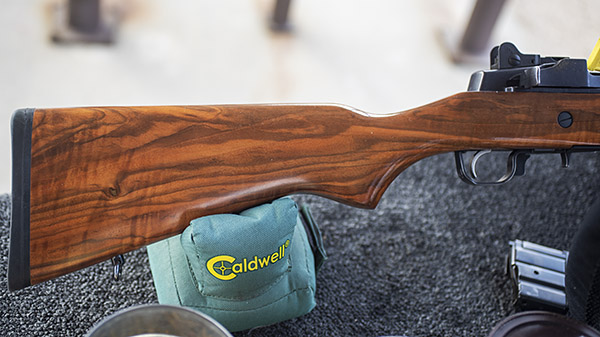
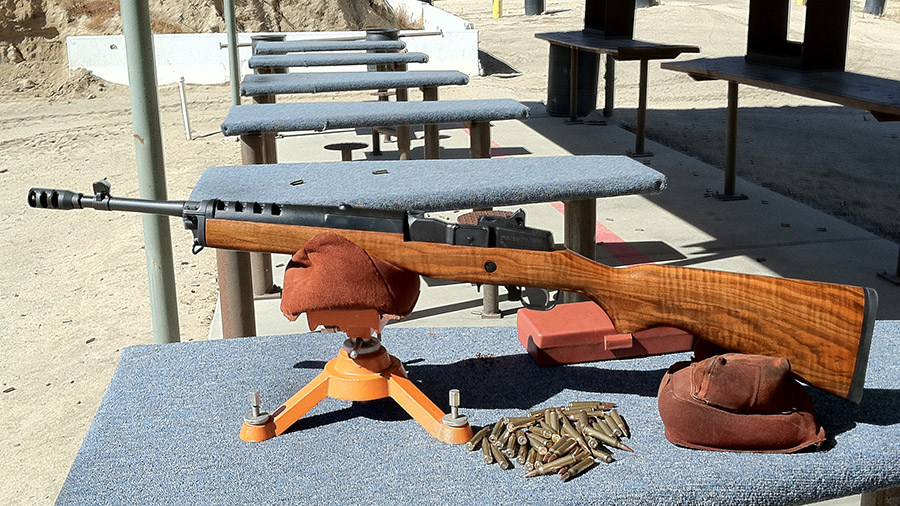
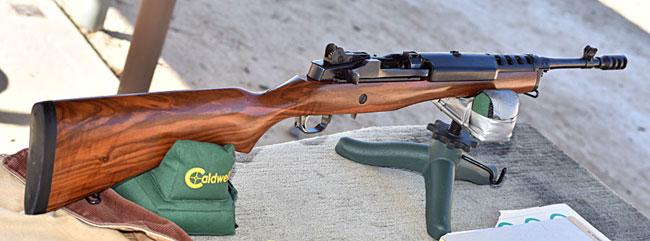
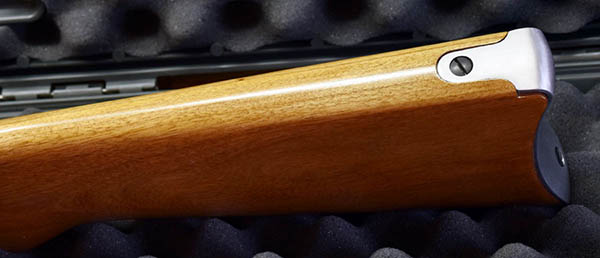
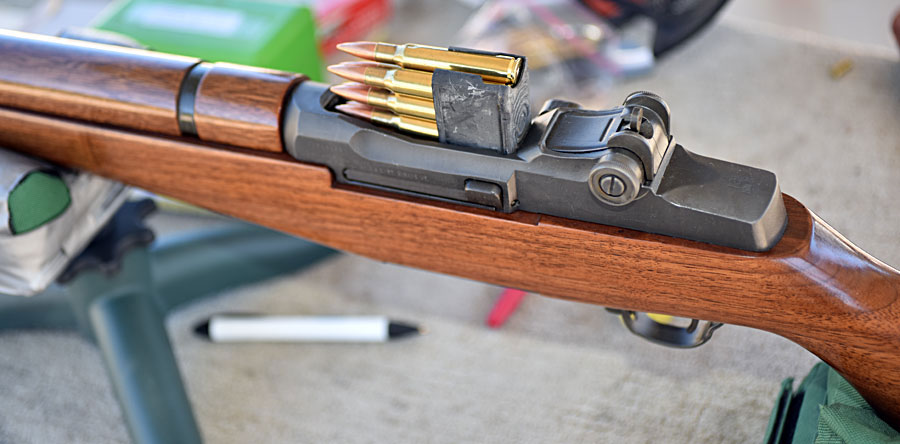
The two Ruger rifles in this article are two of my favorites:  A Davidson’s Circassian-stocked Mini 14 (the one in the photo above) and the Ruger GSR (GSR stands for Gunsite Scout Rifle).  The Davidson’s Mini 14 1was a 2009 offering with (as the name implies) a Circassian walnut stock.  Back then the Circassian Mini’s $700 price seemed high, but I’ve been at this for a while and I know that when a gun’s price seems high it only means I’m buying too soon.  The price will always catch up with the calendar, and that’s certainly been the case with this rifle.  It originally came with two 30-round mags and a flash suppressor.  California being what it is meant I couldn’t own the rifle as Ruger built it.  I had to leave the 30-round mags with the out-of-state dealer, and because of the flash suppressor, it had to ship to the Class III dealer here in La La Land.
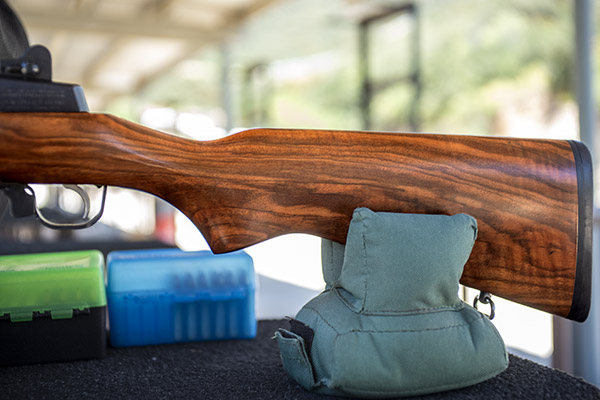
Circassian walnut from the port side. It sure looks good.
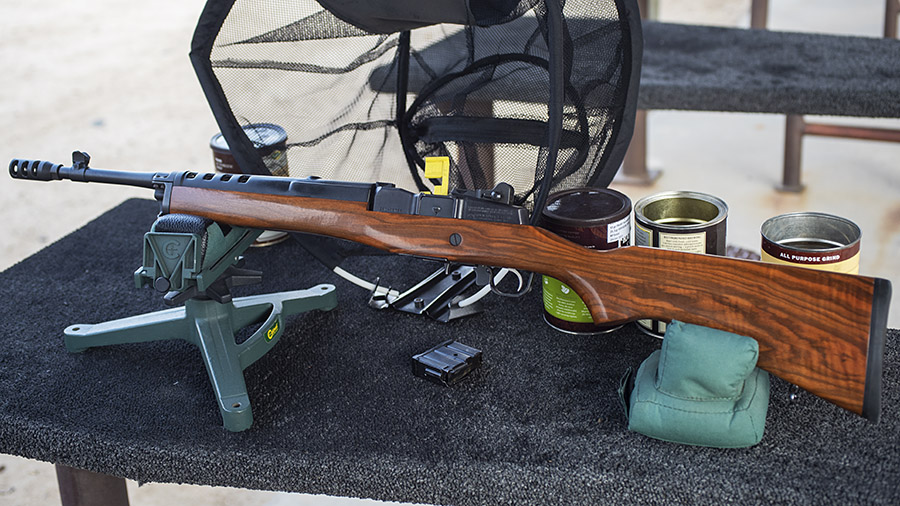
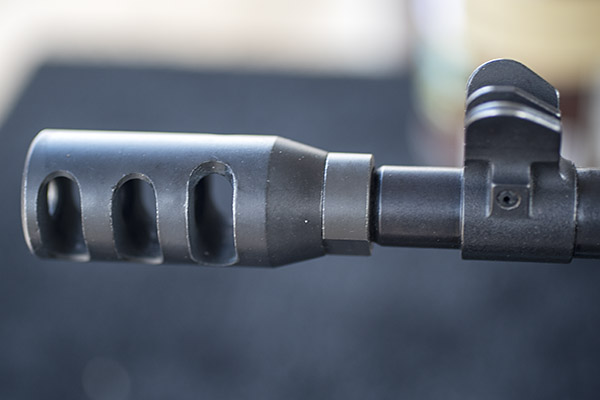
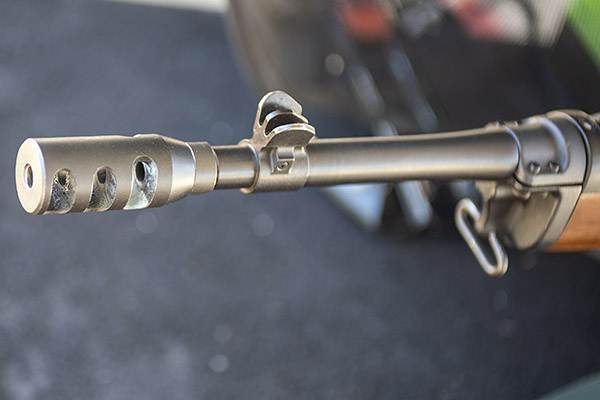
The California-legal muzzle brake. I wonder what the California legislators were smoking when they passed that law.

The California Class III dealer replaced the flash suppressor with a muzzle brake (which I think looks even more intimidating and I had to buy a 10-round La-La-Land-legal magazine for my Mini.
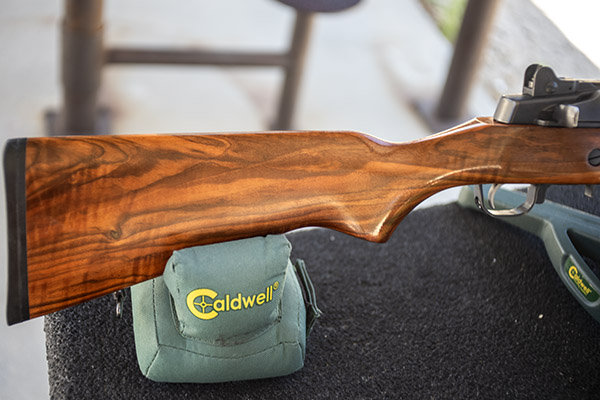
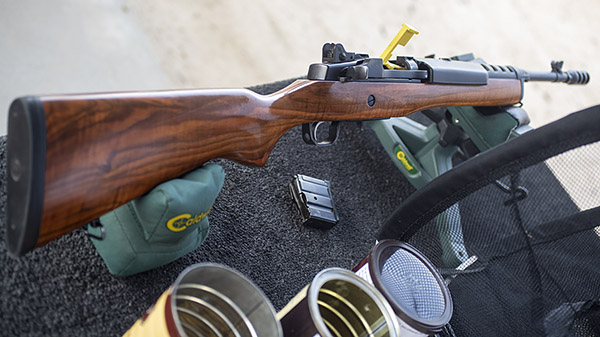
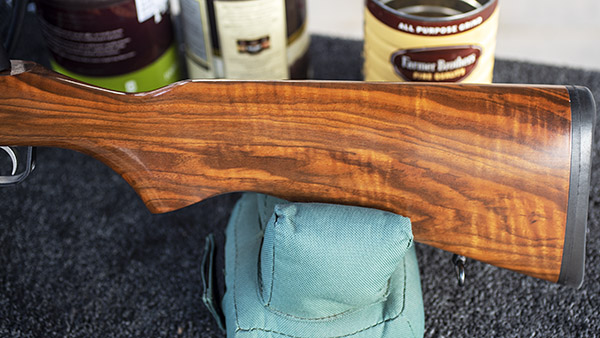
Circassian walnut from starboard side. This is the fanciest Mini 14 I’ve ever seen.

You might be wondering:  Where can I get a Mini with a stock like this one?
The short answer is:  You can’t.  I watched the gun sale websites for months looking for a Davidson’s Circassian Mini 14 until I found one with nice wood (most had straight-grained, broomstick grade wood).  When I saw the one you see here, I pounded (and I’m glad I did).    You just don’t see Mini 14 rifles with wood like this one.  It’s all mostly black plastic stuff on the range these days, which is almost a crime against nature.
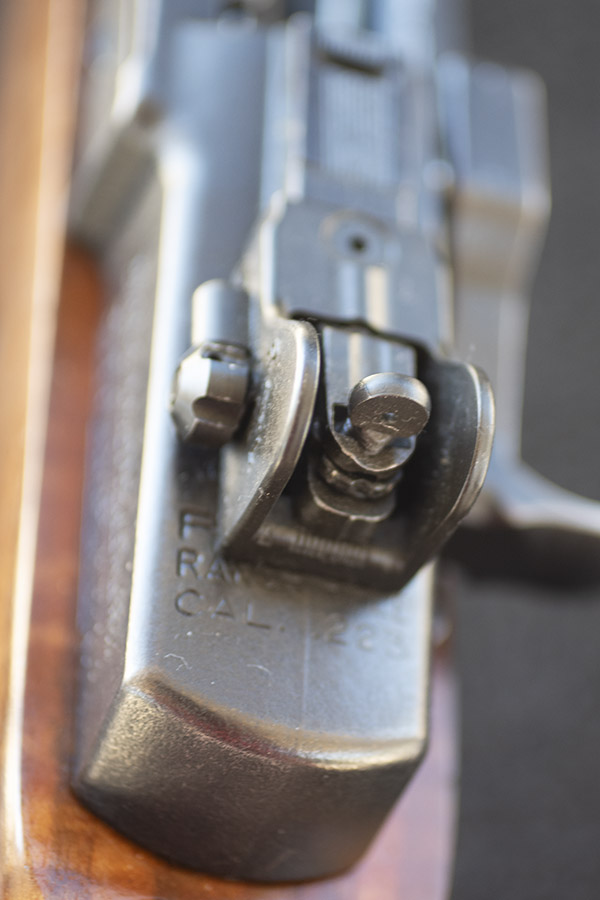
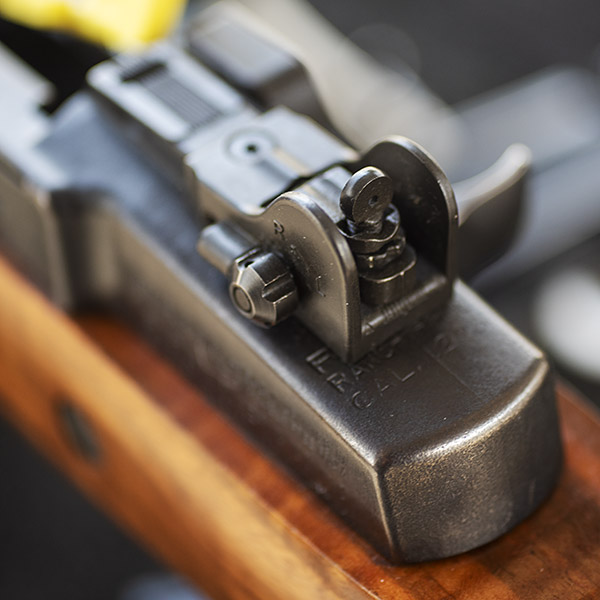
The Techsites rear sight on my Mini 14. It has a slightly smaller aperture and better adjustability than the stock Mini 14 rear site.

I’ve done a few mods to my Mini 14 to improve its accuracy, and I’ve detailed this in prior blogs (I’ve provide a link at the end of this article).  The Reader’s Digest version is I’ve added a Techsites rear aperture sight to replace the Ruger sight, I’ve glass-bedded the action, and I’ve done a fair amount of experimentation to find the right load.

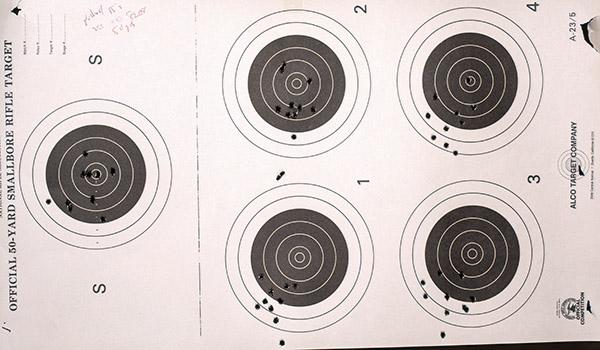
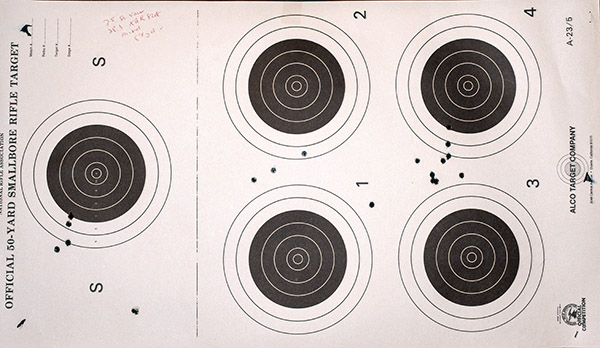
So how does the Circassian Mini 14 shoot?  It does very well.  I grabbed two loads:  A full metal jacketed load with Hornady’s 62-grain bullet, and another with Hornady’s 55-grain V-Max bullets.  You can see the results below.
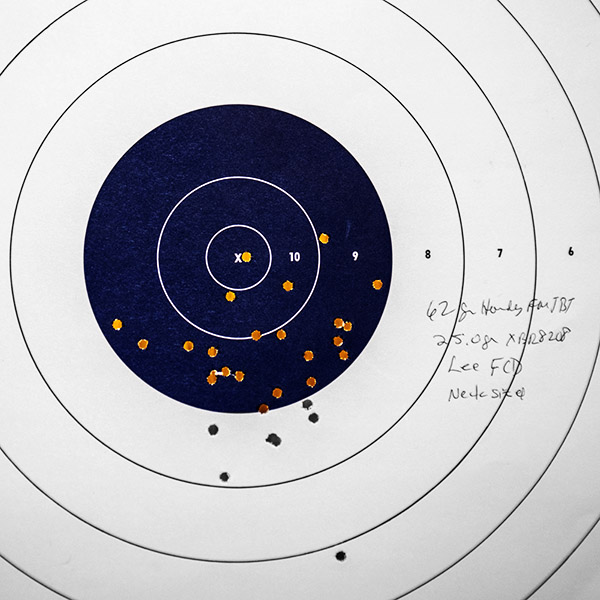
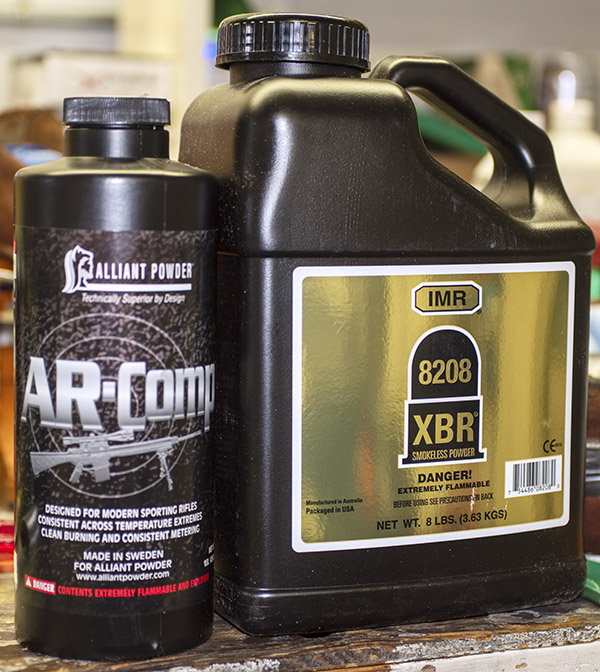
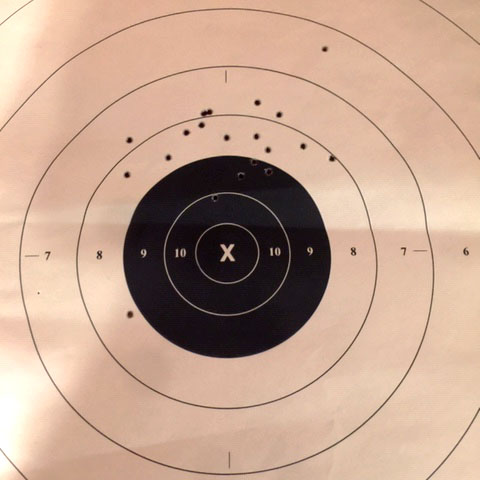
A bunch of shots at 100 yards with one of my favorite loads:  The 62-grain Hornady full metal jacket boattail bullet and 25.0 grains of XBR 8208 propellant.   This ammo was necked sized only, which usually is more accurate in my Mini 14.  I held at 6:00 on all targets shown here.
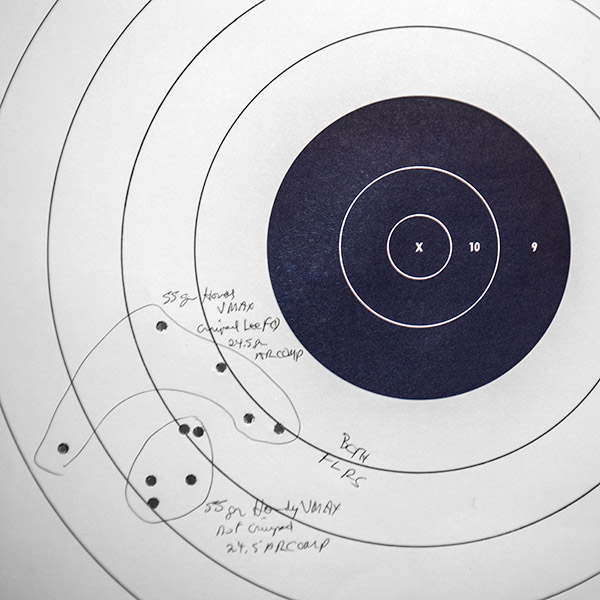
Another 100-yard Mini 14 target with two different loads, both using the 55-grain Hornady VMax bullet and 24.5 grains of ARComp propellant.  The very tight 5-shot group was shot with bullets that were not crimped.  The larger group was the same load, but the bullets were crimped.   Surprisingly, both loads were full length resized.  As mentioned in the photo above, neck-sizing usually provides better accuracy in this rifle.

The second rifle in this Tale of Two Rugers story is the Ruger GSR in .308 Winchester.   This is an amazing (and amazingly accurate) rifle, but it didn’t start out that way.

How I purchased this rifle is kind of a funny story.  I had oral surgery to start the process of installing two fake teeth, and the doc knocked me out with anesthetics.   They warned me I would be in no shape to drive home, so good buddy Jim Wile volunteered to do the driving.  Jim’s gone on to his reward (RIP, Jim).  On the ride home, in a drugged but conscious state, I told Jim about this new GSR rifle Ruger had introduced, and we somehow managed to convince ourselves we each needed one.  They say you should not buy guns when you’re under the influence.   Like Hunter Biden, though, I didn’t heed that advice and Jim followed my lead.
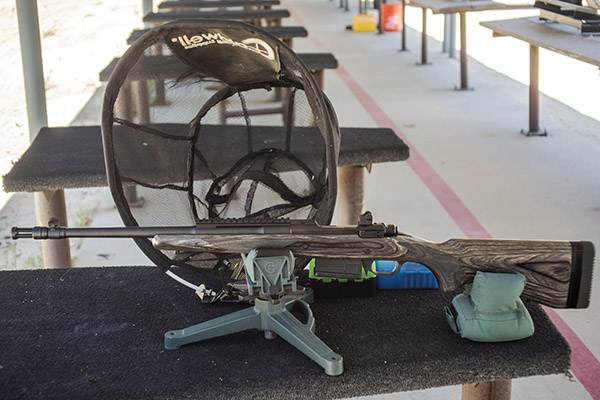
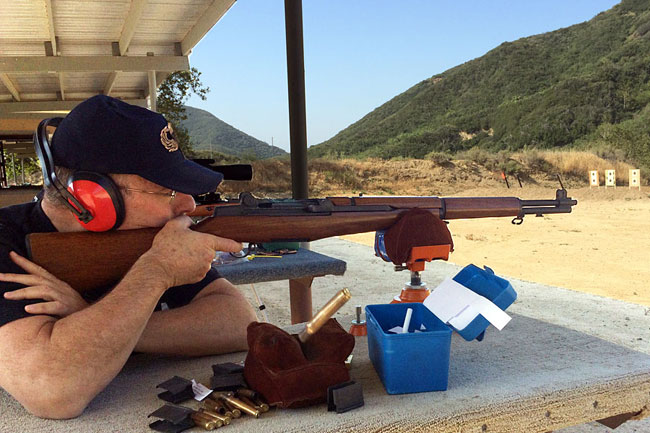
The Ruger GSR on the range at the West End Gun Club.

The GSR is Ruger’s interpretation of the Scout rifle concept first put forth by a gun writer named Jeff Cooper.  Cooper’s concept was a short-barreled rifle that would hold a scope in a forward location and make for a sort of do-anything long gun.  Steyr built the first commercially available Cooper-inspired Scout rifle, and then about a decade later Ruger followed suit.  Mossberg has one now, too (good buddy Johnny G has one).  The Steyr is crazy expensive, the Ruger started out at a reasonable price but has since gone kind of crazy (along with everything else), and (in my opinion) the Mossberg is the best value (it’s a fine rifle and one I’ll probably own some day).
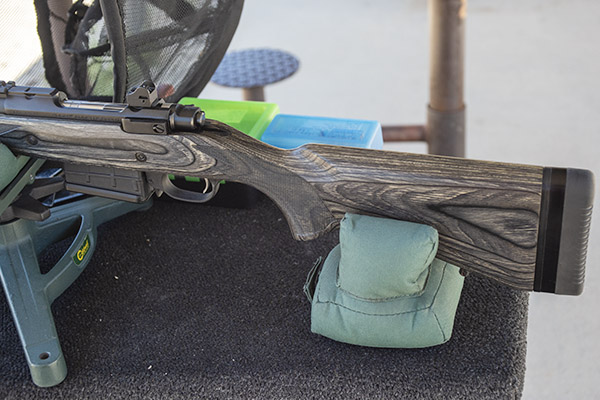
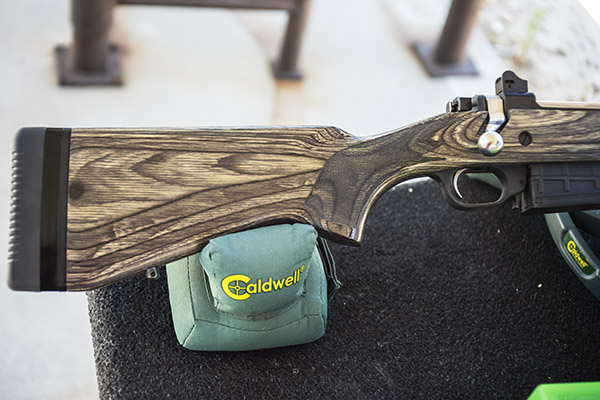
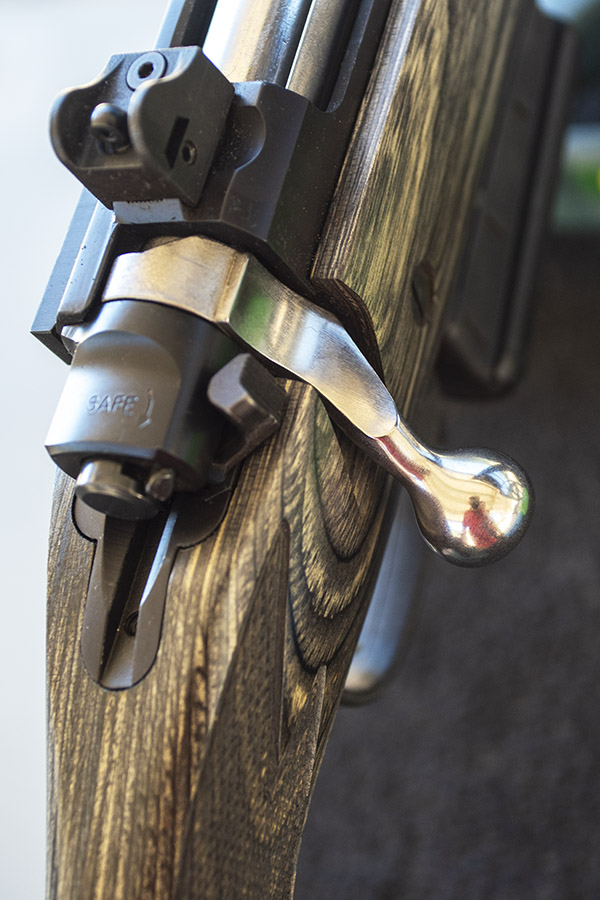
The left side of the Ruger GSR. Note the laminated stock, which provides a very stable bed for the barreled action.
The GSR as seen from the right.
A Ruger .308 selfie.
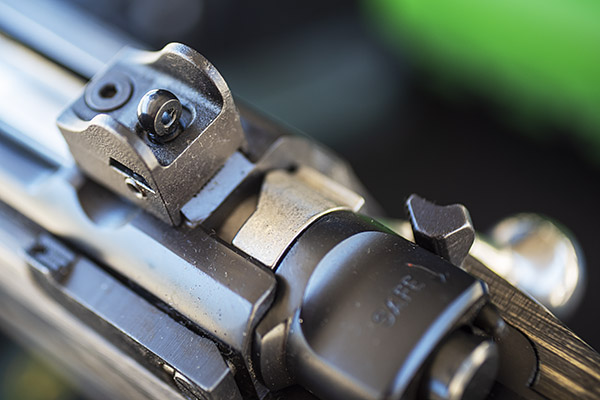
The Ruger’s aperture rear sight. It’s similar to the original Mini 14 site. Techsites doesn’t offer a replacement rear site for the GSR; if they did, I would have a Techsites rear sight on this rifle.
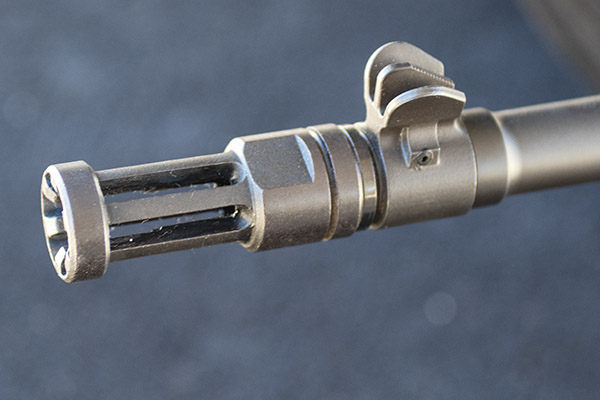
The Ruger GSR flash suppressor. It’s the same type that originally came on the Mini 14. On a bolt action rifle, it’s legal in Calilornia; on a semi-auto, it is not.

When I first took delivery of the GSR, it was a real disappointment.  As had been the case with half the guns I bought in the last couple of decades, it had to go back to the manufacturer.  The problem was that the rifle printed way to the right, and there wasn’t enough adjustment in the rear aperture to get it back to the point of aim.   I returned it to Ruger, they greatly relieved the stock around the barrel, and I had it back in about a week.  When I took it out to the range the same week it was returned, I was astonished by its accuracy.
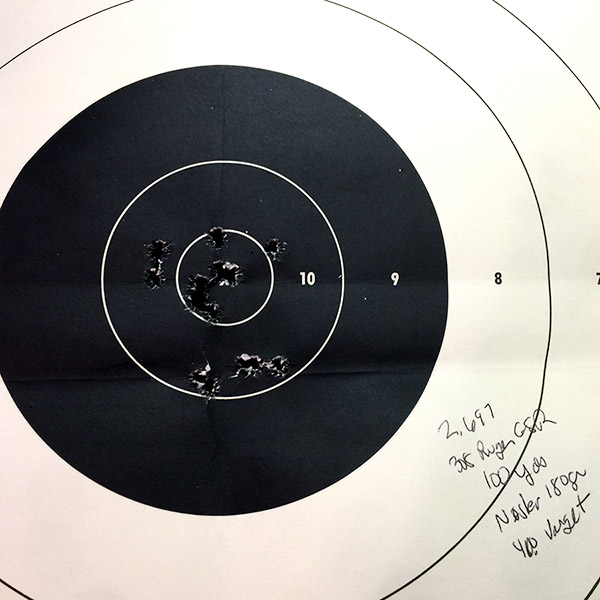
A target I shot a few years ago. The GSR can be amazingly accurate. The difference between the two groups is probably due to how I held the rifle. The upper group is one of the best I’ve ever shot with open sights.

But that group above was then and this is now.  I had not fired the GSR in a few years.  I grabbed two loads for this rifle (a load I had developed for my M1A Springfield, and a box of Federal factory ammo with full metal jacket 150-grain bullets).
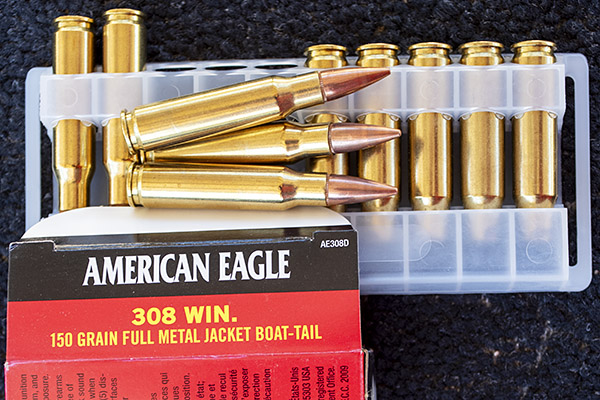
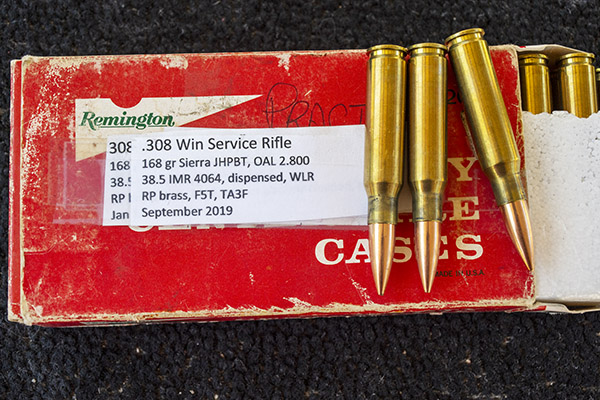
Federal American Eagle .308 ammo. I bought a bunch of this a few years ago for the brass; this ammo was about the same price as .308 brass.
My reloaded ammo. This load shoots extremely well in my Springfield Armory M1A.

I only fired a couple of 5-shot groups at 100 yards with the GSR.  It was getting late in the day, I was getting tired, I had not fired the rifle in a long time (shooting is a perishable skill), and I realized I wasn’t giving the rifle a fair shake.
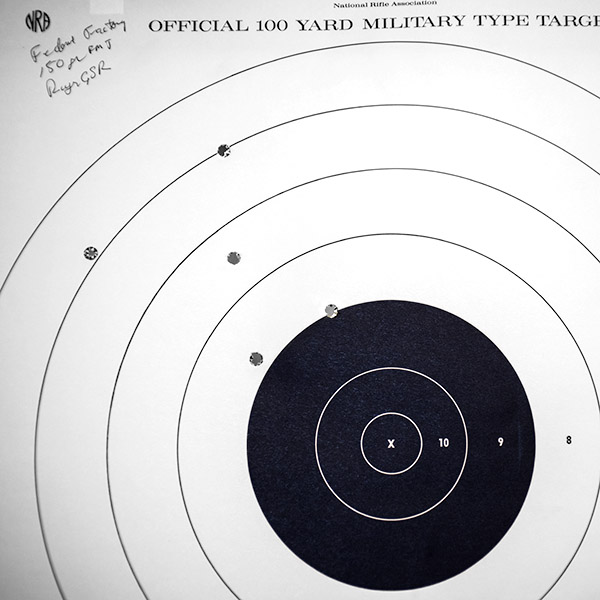
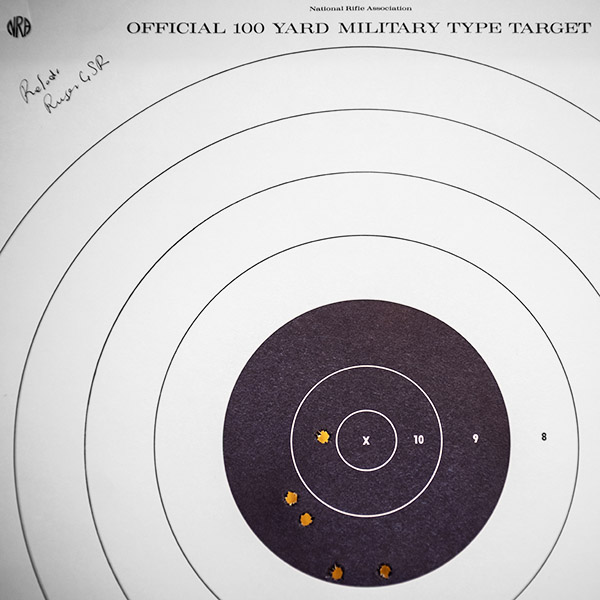
With the same rear sight adjustment used for the previous GSR target shown a couple of paragraphs above, the Federal factory 150 grain load shot high and to the left.  The group is considerably larger than the load with 180-grain Noslers and Varget propellant.
Another 5-shot group, this time with 168-grain Sierra hollowpoint bullets and IMR 4064 propellant (the accuracy load for my Springfield M1A).   The load doesn’t perform as well in my GSR as it does in the M1A, but it’s still substantially better than the Federal factory ammo.   It’s why I reload.

That stream crossing I mentioned at the start of this blog?  Lytle Creek flows across the dirt road going into Meyers Canyon, and it can be a real challenge at times.   With all the rain and snow we’ve had this past winter, the reservoirs are full and the snow up in the San Gabriels is still melting.  You may remember the blog I wrote about the time I high sided my Subie attempting a crossing.   The stream is down a scosh since then, but it’s still not an easy crossing.  Here’s a video I made on the way out on this trip after visiting the range with the Mini 14 and the Ruger GSR.

I’ll be shooting the GSR more in the coming weeks now that I’m back into the swing of shooting a .308 off the bench, so watch for more stories on it.  I think I can do better than the groups you see above.


More stories on good times at the West End Gun Club are here.

Mini 14 Bench Cleanup

When you’re a reloader you get a bunch of odds and ends components and you go on a jag to load them all just to get the stuff off the bench.  Oddball bullet dribs and drabs, brass you don’t want to bother cleaning, trimming, or sorting, that sort of thing.   I had a bunch of the above laying around crying out to become .223 ammo, I hadn’t been to the range with my Mini 14, and it was time to shoot up the leftovers.

First, a bit about the rifle.  It’s what Davidson’s called the Mini 14 Tactical, and it was a limited run they had Ruger make with Circassian walnut stocks.  I looked at a bunch of them on Gunbroker before I spotted the one you see here and I pounced (most had very plain walnut).

An unusual Mini 14 with a Circassian stock. I get a lot of compliments on this rifle. It’s not for sale.

This is a rifle that gets compliments every time I bring it to the range.  I’ve written about my Mini 14 before here on the ExNotes blog and I know what it takes to make this puppy group.  This wasn’t going to be one of those days; like I said, I was just using up remnants from reloading sessions for other rifles.

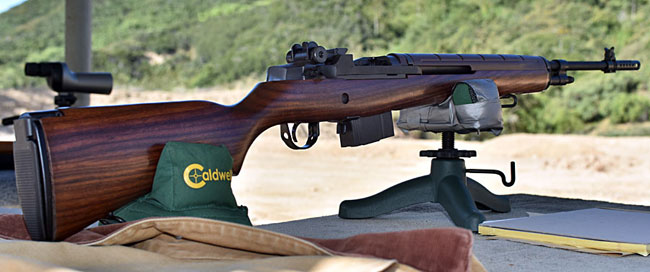
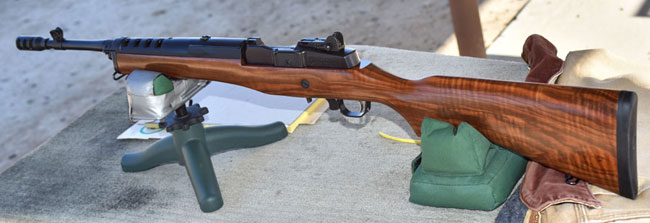
The left side of the Mini 14’s Circassian walnut stock.
The right side. This sure is a nice-looking Mini 14.

The Davidson’s Mini 14s came with 30-round mags and a flush suppressor, both of which are apparently favored by folks who rob gas stations and convenience stores (our legislators have their heads so far up their fourth points of contact they haven’t seen daylight in decades).  I replaced the flash suppressor with a muzzle brake to make the rifle much less intimidating.

You might laugh at a muzzle brake on a Mini 14. It works, though. Fire a Mini 14 with a muzzle brake and then fire one without and you’ll feel the difference.

I also installed the Tech Sights Mini 14 rear aperture sight, which I like a lot better than the standard Mini 14 rear sight.

The Tech Sights rear aperture sight. If you have a Mini 14 and you don’t have one of these, you’re missing the boat.

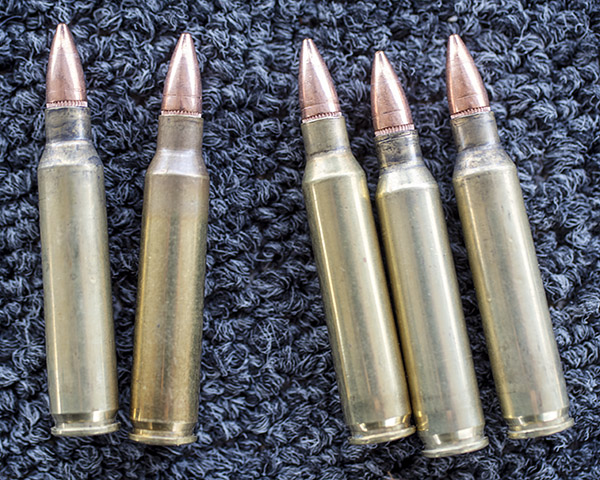
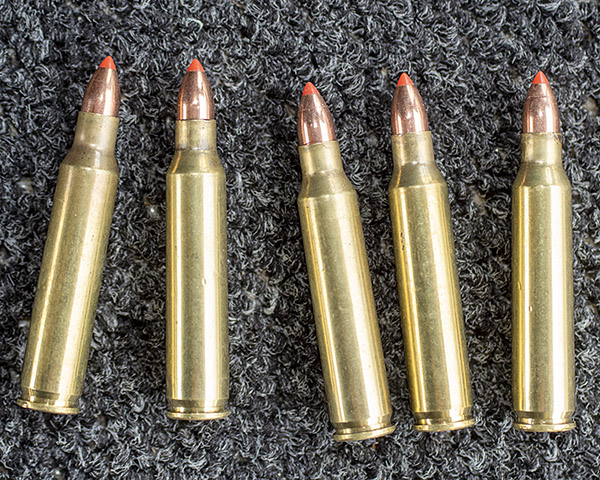
I loaded three configurations of ammo.   The first was a new load I had developed using XBR 8208 propellant.   For reasons I can’t remember, I had a bunch of Hornady 55-grain full metal jacket bullets I had pulled from another load.  If you look closely at the photo below, you’ll see the circumferential ring where the collet puller grabbed the bullets.  My thought was that pulled bullets would degrade accuracy, which is why they were tucked away and ignored for a long time.  The load was 25.3 grains of XBR 8208, mixed brass previously fired in the Mini 14 (neck sized only for this load), and Winchester small rifle primers.  I seated the bullets about midway in the cannelure, but I didn’t crimp.   For this load, I didn’t tumble or trim the brass, either.

55-grain bullets loaded in .223 Remington brass for the Mini 14. Note the circumferential bullet puller collet marks just above the cannelure.

Surprisingly, the above load shot relatively well.  If the marks on the bullets affected accuracy I couldn’t see it.  I shot a few 10-shot groups at 50 yards just to get into the swing of things, and then I fired a 10-shot group at 100 yards (which I’ll get to at the end of this blog).   The 10-shot group at 100 yards wasn’t too shabby.  The rifle shot low left (my aim point was at 6:00), but I hadn’t adjusted the sights for this load.

50-yard groups with the above load. The flyers are do to operator error. The groups showed promise at 50 yards, and I knew I would test them at 100 yards.

For the next load, I had a few 35-grain Hornady V-Max bullets I normally use for my .22 Hornet.  This is a bullet I guessed would not do well in the much-higher-velocity .223 Remington cartridge, and I was right.  Some of them grouped okay at 50 yards, but they were right on the edge of instability.  A few tumbled and went wide.  I didn’t bother firing these at 100 yards; if they were flaky at 50 yards, they would be positively flaky at 100.

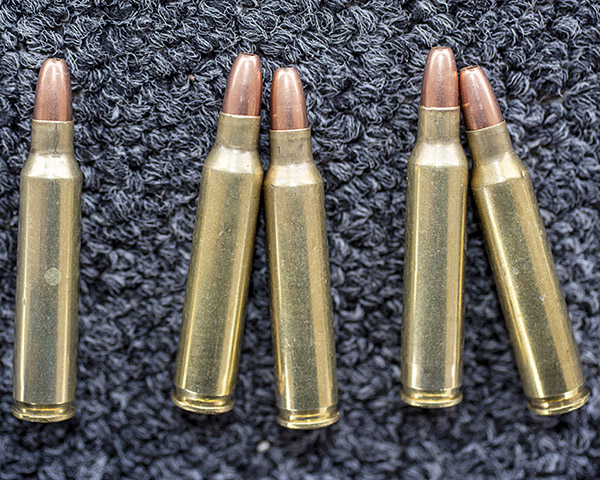
.223 Remington cartrdiges loaded with 35-grain Hornady VMax Hornet bullets. The ammo looks good, but it was not a good load for the Mini 14.
The 35-grain VMax loads at 50 yards. The bullets were right on the stability threshold.

The last group was one I put together using another set of leftover Hornet bullets, the 46-grain Winchester jacketed hollow point bullet.  They shot poorly when I tested them in my Ruger No. 3 Hornet, and they were really terrible in the .223 Mini 14.   I suspect they were breaking up in flight.  Several went wide or through the target sideways.

46-grain Winchester hollowpoint jacketed bullets loaded in .223 brass. This didn’t work out at all.
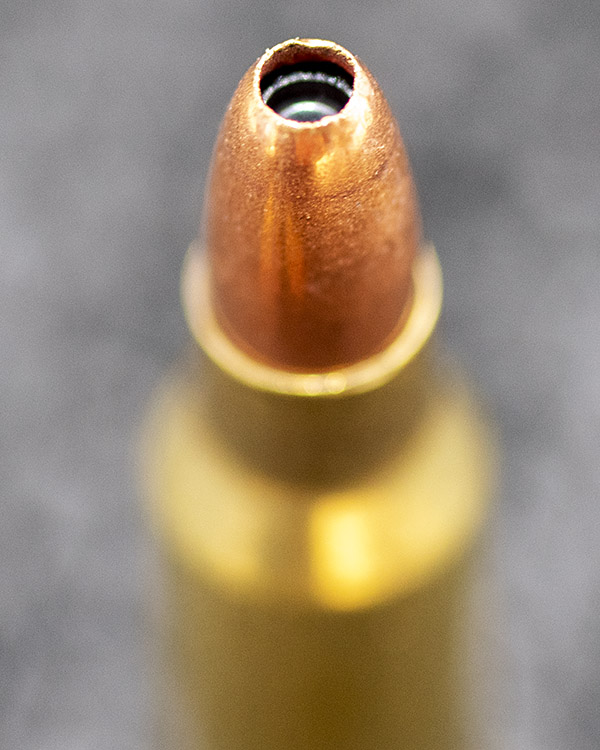
A huge hollowpoint. It might work well on prairie dogs in the .22 Hornet, but these bullets weren’t stable and didn’t group well in the .223 Remington cartridge.

The 46-grain Winchester groups were huge at 50 yards and I could see on the target that they were unstable.  At least one tumbled.  Some never even made it to the target.

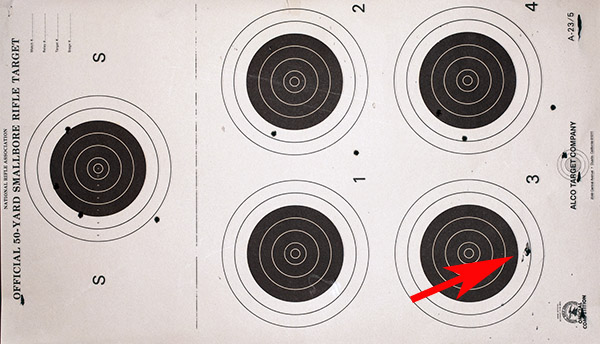
The above load’s poor performance was predictable, but I’m one of those guys who has to pee on the electric fence. You know, just to make sure.  The arrow points to a spot where a bullet went through the target sideways.

After testing the above bullets at 50 yards, I knew that the Hornet bullets were a no go.   Actually, I kind of knew that before I tested the load.  But I had the bullets and I thought I would give it a try.

I wanted to see how the pulled 55-grain Hornady bullets would do at 100 yards, so I moved a target out to 100 yards they did relatively.   The group centroid shifted from my usual Mini 14 load, but it was fairly tight for iron sights with junk/untrimmed mixed brass.

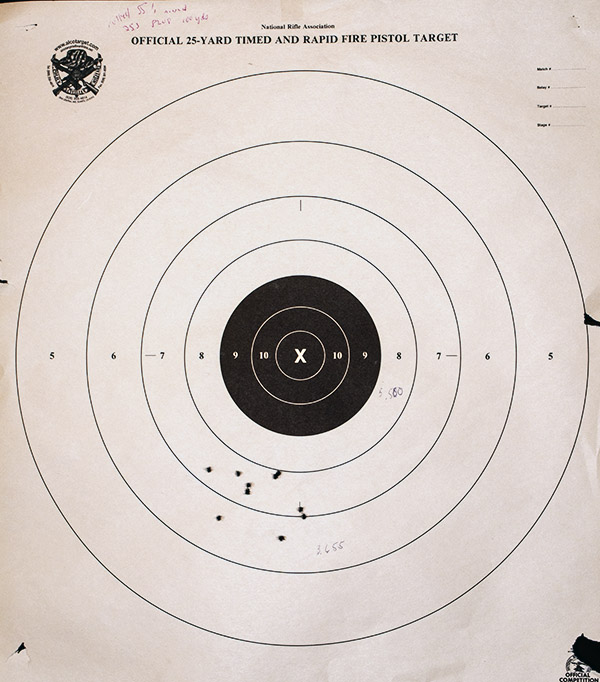
55-grain full metal jacket boattail pulled Hornady bullets, 25.3 grains of XBR 8208 propellant, Winchester small rifle primers, and mixed brass provided a 3.65-inch 10-shot group at 100 yards. The black bullseye is 5.50 inches in diameter. I was pleased with these results.

Well, you live and you learn.  I cleaned off the reloading bench, I had a little fun, and I now know from personal experience that 35-grain and 46-grain Hornet bullets won’t do very well in the .223.  Sometimes it’s good to learn what doesn’t work as well as what does.


More guns and reloading content?  Like fancy walnut?  Hey, it’s all right here!


You can’t beat free…sign up here and never miss an ExNotes blog.

The Mini 14 and Lee’s Factory Crimp Die

I love the Ruger Mini 14 and I’ve written several blogs on it (I’ll give you a link at the end of this blog).  The Mini 14 is not the most accurate rifle I’ve ever shot, but there’s something about it that just makes it fun.  I think if Ruger had introduced the Mini 14 a few years earlier it might have been the next US service rifle instead of Mattel’s M-16.  That statement might get a few trolls’ shorts in a knot, but hey, they’re young.  They’ll get over it.

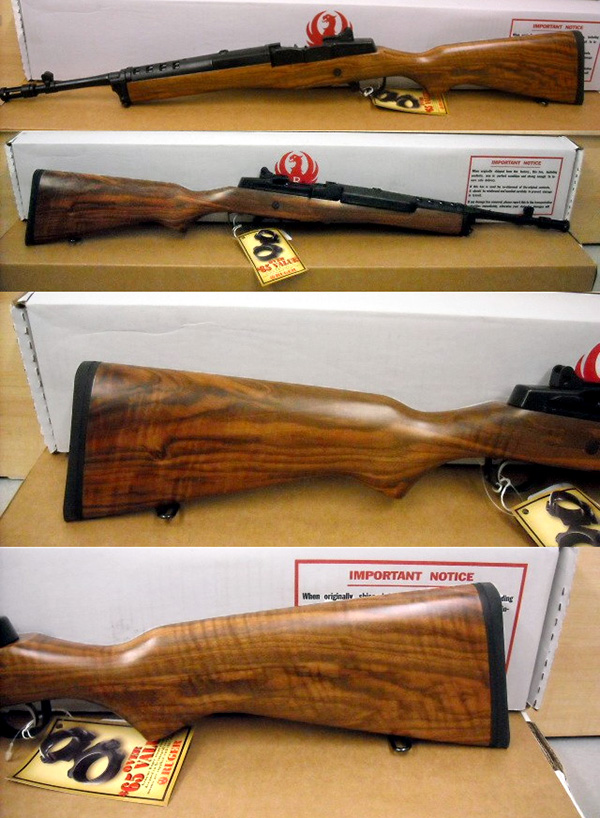
Photos from the original GunBroker.com ad for my Mini 14. It was a limited production item with a Circassian walnut stock. Very few had wood this highly figured.

I took my Mini to the West End Gun Club a couple of weeks ago to see what impact (if any) a new Lee factory crimp die had on accuracy.  Usually when I reload rifle cartridges with jacketed bullets I don’t crimp.  Part of this is because it’s a bit difficult to get a consistent crimp if the brass is not trimmed to exactly the same length, and part of it is I often find I don’t need to trim my brass to get good accuracy.  That’s not to say case neck tension isn’t critical (it is; lube a couple of bullets before seating them and see how far out of the group they print).  But it you don’t crimp, you rely on friction between the case neck and the bullet to control the case’s grip, and friction is a tough thing to control.  Crimping should make the grip on the bullet more consistent (or so the theory goes).  Crimping is also thought to provide more complete combustion, reducing pressure variability and the inaccuracies associated with it.

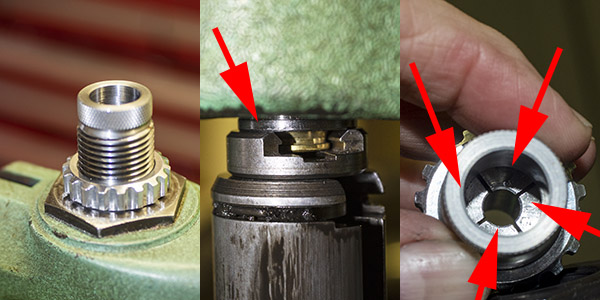
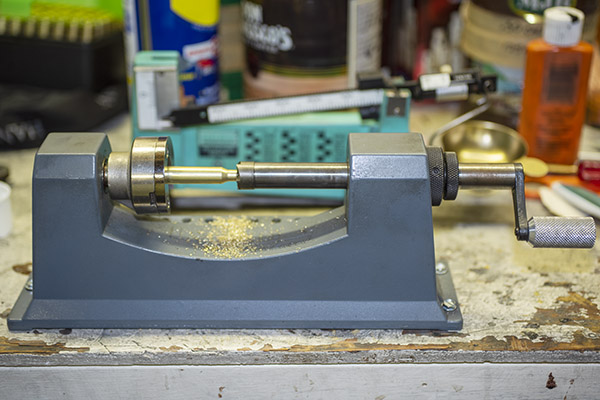
Conventional reloading dies rely on a reduced diameter in the bullet seating die, which rolls the case mouth into the bullet to achieve a crimp (such a crimp is called a roll crimp).   Lee’s factory crimp die uses a different approach.  It has four collets (each forms a quadrant) that work at 90 degrees to the case to crimp the brass.  The collets are activated by the die’s base during the reloading press upstroke.

A .223 Lee factory crimp die. This is the last step in the reloading process. The die is screwed into the press after the bullet has been seated to the desired depth (left photo); the amount the die is screwed into the press controls the interface between the shell holder and the die (center photo). When the ram is fully raised, the die has collets that compress the brass horizontally around the case mouth (right photo), thereby crimping the bullet in place in the same manner as factory ammunition.
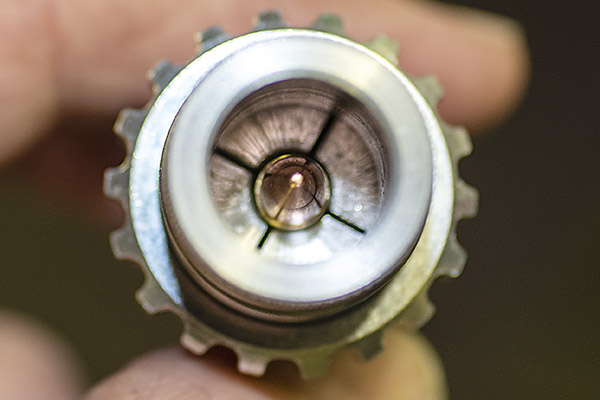
The view from above. The collets squeeze the brass around the bullet to crimp it in the case.
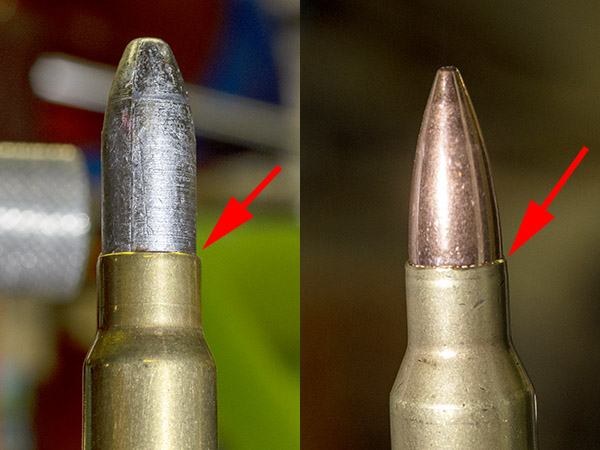
A 7.65x53mm Belgian Mauser round with a cast bullet roll crimped in place (left), and a .223 Remington/5.56mm NATO cartridge crimped with the Lee factory crimp die. The difference is subtle, but you can see it if you look closely.

I loaded 15 rounds crimped in the Lee factory crimp die, and I used another 15 rounds without the crimp.  I shot two targets at 100 yards from a rest using iron sights, with 15 rounds for each target. The target on the left is with no crimp, the one on the right is with the Lee factory crimp die (and I used a heavy crimp). The brass was fireformed in this rifle and neck sized only to get a good fit in the Mini 14’s 5.56 NATO chamber, which (as you know) is slightly larger than the .223 Remington cartridge.  In prior load development work, I found that neck sized only brass is much more accurate in the Mini 14.

15 uncrimped .223 rounds at 100 yards (left target) and 15 rounds crimped with the Lee factory crimp die (right target).

The first five shots using uncrimped reloads all went into the left target’s 10-ring, so I thought I was doing pretty well. Then I switched to the Lee factory crimp die ammo on the right target. The first shot felt weird, and it did not fully extract. I think it was the one that went way low. The next four all went into the 10 ring. On the next five rounds (again, using the Lee die ammo on the right target), the first one did the same thing (it failed to extract and it went low).  I fired one more magazine of Lee crimped ammo and all five worked okay.

Somewhere in those first two magazines of the Lee crimped ammo, I had two light primer strikes that did not fire. I extracted and chambered them again and they fired on the second attempt.  I didn’t know why those two rounds had light primer strikes.  Maybe the round had not fully chambered? Maybe because the Lee factory crimp die distorted the case mouth or something and it didn’t fully chamber?  Or maybe something was interfering with the firing pin’s travel?  I didn’t know and I wouldn’t find out until I disassembled rifle.

Then I fired 10 more uncrimped rounds at the target on the left and I had one failure to eject. My Mini 14 sometimes acts funny like that with the neck sized brass. It’s not a duty gun, so I thought I could live with an occasional failure to eject.  But I don’t like it.

So back to those misfires.  In the past, I’ve had to clean debris from around the firing pin, and it looked to me like it might be time to do that again. That could account for the two light firing pin strikes I had.

One other thing…I had painted the front sight with red nail polish, and that actually made the front sight’s top edge harder to see.  I want to go back to the plain blued front sight.

I also want to adjust the Lee factory crimp for less of a crimp. These first rounds used a max crimp. I didn’t trim the brass for this test because it was only fired once, but I don’t know how even (in length) it was. I used bulk Remington loaded ammo to get the brass (having fired it previously in the Mini 14) because a couple of years ago that stuff actually cost less than unprimed brass.  But inexpensive bulk ammo is not precision made and I suspect the case length had some variation (my suspicions were later confirmed, as you’ll read below).

A Lyman case trimmer I’ve been using for nearly 50 years. The Lee factory crimp die does not require case trimming, but the cases had enough length variability that I decided to trim them anyway. Cases that are too long can interfere with the bolt fully closing and raise chamber pressures.

When I reloaded the rounds fired in this test, I checked a few case lengths after neck sizing. The “trim to” length (per the Hornady manual) is supposed to be 1.750 inches, with a max case length of 1.760 inches. These cases (after two firings and neck sizing) were all over the map.  They ranged from 1.752 to 1.780. That alone could account for some of the anomalies described above.  I ran them all through the trimmer and reloaded a hundred for the next range visit. I backed off a bit on the Lee factory crimp die, too, as my good buddy Robby suggested.

I gave the Mini 14 a good cleaning and I was surprised at how filthy it was. This is not a rifle that I clean religiously…I’ll shoot it on several outings before cleaning (heresy, I know, but hey…it is what it is).  I wanted to grab a few photos of what a funky Mini 14 can look like, but my hands were so dirty and greasy I didn’t want to handle my Nikon camera.  After the most recent range visit, I Hoppes No 9’ed the Mini 14 bore for a couple days to get all the copper out (you know, until the patches came out with no green).

There were bits of what appeared to be very thin sheet brass in the bolt around the firing pin as well as a whole bunch of greasy carbon residue in the bolt. That could account for the couple of misfires. Removing the firing pin is not an easy job (it takes a special tool I don’t have or want); the drill here was to shpritz the hell out of the bolt with carb cleaner and work the firing pin back and forth to push the nasty stuff out. The thin brass bits might have been primer cup material.  Or they might have been chips from the extraction operation that found their way into the bolt and were peened flat. There’s no way of telling, as some of that ejected brass ends up in the next county (a trait Mini 14s are famous for).  By the way, when you’re working with that carb cleaner, you need to do it outdoors where there’s plenty of fresh air.  It’s highly flammable and if I use that stuff indoors, I get lightheaded and nauseated pretty quickly.

There was a lot of carbon gunk in the stock channel clear back into the action.  There was also a lot of carbon in and on the guide rod, as well as around the extractor. This could account for the occasional failures to eject. I blew it all out with WD 40 (in the stock) and carb cleaner (for the metal pieces).  There was so much carbon residue in the stock’s barrel channel that I thought I might have a leak around the gas port, but I didn’t see any carbon residue around the gas port and I’ve got the Allen bolts around that part tightened as tight as I dare go. I tried the smaller diameter aftermarket gas ports last year, but every one of them gave me unreliable function, so I went back to the stock port.

I’ve got a little more than a pound of ARComp, and that has been my “go to” Mini 14 powder for several years. When things started to get tight last year, my reloading outlet had an 8-pound bottle of XBR 8208 (it was the last bottle of anything he had). I had never heard of that powder before but I figured it would work in something, and in poking around on the Internet I found that 8208 gets the nod as a great powder for the .223 cartridge. The hundred rounds I just loaded are with ARComp, but I think I will do another 100 or so with different 8208 charges to see how they do. I’ve still got several hundred 62-grain Hornady full metal jacket bullets and I have another 500 55-grain bullets that just arrived from Midway. And I have small rifle primers and a potful of .223 brass. Unlike a lot of folks, I’m in good shape for .223 for a while (and no, I don’t want to sell or trade any components).

What’s the bottom line to all this?  Did the Lee factory crimp die improve accuracy?  The short answer is: I don’t know yet. I think it does, but I had too many other things going on with the rifle and the brass to be sure. If you ignore the first two rounds that went low, I think the accuracy edge goes to the Lee crimped ammo. Bear in mind that I was shooting with iron sights at 100 yards, so the differences may be more due to me than anything else. There were only four rounds outside the 10 ring with the Lee ammo; the uncrimped ammo had six rounds outside the 10-ring. But again, it’s iron sights at 100 yards, so who knows?

I’m going to share this post on Facebook, and you can bet some yahoo will tell me that he shoots 1/2-inch groups at 200 yards with open sights on his Mini 14 all day long.  Hey, it’s the Internet.  You have to ignore those buttheads.  As far as the Lee factory crimp die’s accuracy edge goes, I think it’s real.  I’ll find out for sure (maybe) the next time I go to the range.  Everything in the Mini is clean, lightly oiled, and ready for action. We’ll see what happens on the next outing, and you’ll read about here on the ExNotes blog.


Those other Mini 14 blogs I mentioned above?  You can find them here!


Never miss an ExNotes blog…sign up here for free!

The Quest for Mini 14 Accuracy Continues…

If you follow the ExNotes blog, you know I’m still chasing accuracy improvements for my Mini 14.  The latest upgrades include glass bedding the receiver and installing a smaller gas port.  They helped, as will be described here.   What’s next?  Read on.
The Accuracy Systems International Gas Port Kit

I bought a new set of Mini 14 gas ports from Accuracy Systems International, an outfit that specializes in Mini 14 accuracy upgrades.   The gas port is essentially an orifice that restricts the flow of combustion gas to the rifle’s op rod.   The stock Ruger gas port orifice is huge (it’s probably something like 0.090 inches in diameter).  That is because Ruger wants the rifle to function with any kind of ammo, but the huge stock gas port throws spent brass into the next county and it slams the barreled action around in the stock (that hurts accuracy, as the receiver may not be sitting in the same spot after each round).  The ASI gas port kit costs $30, but it’s more like $40 after including the shipping and handling charge.  That’s a rip because the thing fits in a business envelope, but hey, it is what it is.

Glass Bedding the Mini 14

I bought an Acraglas bedding kit from Brownells and glass bedded the receiver in the stock.  I’ve glass bedded bolt action rifles before, but I had never done a Garand-type action.   There’s no recoil lug like a bolt action rifle has, so the glass bedding involved delicately laying in the epoxy on the interior sides of the stock and the area above the stock that mates with the receiver. This was something new for me, and I don’t mind telling you that I was plenty nervous about getting the barreled action out of the stock after the epoxy cured.  I need not have worried; the release agent worked like it was supposed to and the bedding job turned out well.  There is zero movement between the receiver and the Mini 14’s Circassian walnut stock now, and that’s what I wanted.

Tuning The Mini 14 Gas Port

After the bedding job, it was time to start playing with the different gas port orifices.  The Accuracy Systems International kit includes four gas ports (0.035, 0.040, 0.045, and 0.050 inches), and the drill is to find the smallest one that works.  The stock Ruger gas plug orifice is huge (as mentioned above), and ejection from a stock Mini 14 can only be described as violent.  I tried the 0.040 and then the 0.045, but both would occasionally fail to fully cycle. With the 0.050 orifice, the rifle didn’t have any failures.  I noticed that sometimes the last round out of a magazine just lays the brass on top of the follower after being extracted. That’s no big deal. My Mini 14 now throws the brass about 20 feet to the right (maybe less, because the brass was landing on concrete and rolling around a bit).  It’s a substantial improvement.

100 Yards From The Bench

I first fired at a 100 yard target from a bench rest.  Surprisingly, the bedding and the new orifice only shifted the group a little.   The rifle now shoots a bit high, but the group size (absent a couple of flyers, one high and one low, most likely due to me) is about the size of the 9-ring on a 100-yard target (and that’s an improvement). Most of the dispersion is lateral, and that’s a change from what the rifle used to do.  If I practiced a bit more, I’d do better.  If I drop the rear sight a couple of clicks I should be right on the money.  This was my 100-yard target from the bench:

The accuracy wasn’t the greatest I’ve ever achieved with an iron-sight rifle (my 80-year-old Mosin-Nagant will consistently keep its hits in the 10-ring), but it was an improvement over what the Mini 14 had done prior to the bedding job and the smaller gas port orifice.   Things are moving in the right direction.

The B-21 Department of Corrections Target

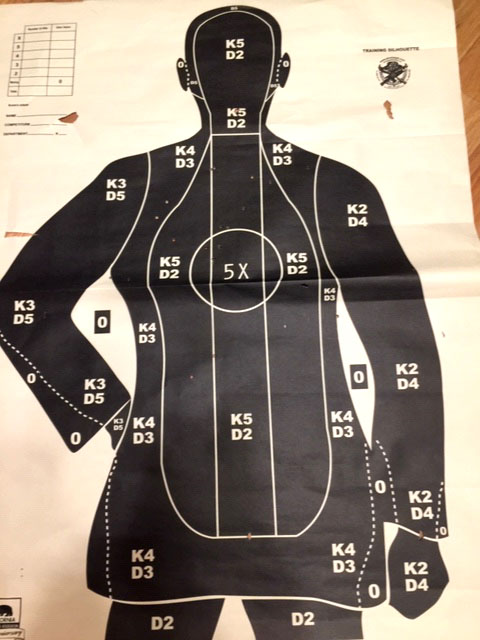
Next up was the California Department of Corrections B-21 target my CDC buddy told me about.  The California CDC uses the Mini 14 as an issue weapon, and the B-21 is their periodic qualification target.  I bought some of these targets at Alco last week and I wanted to see how I would to.  My CDC friend told me that CDC officers qualify with their Mini 14 rifles at 50 and 100 yards, from both the standing and kneeling position.

I put my target out at 100 yards and tried shooting from the kneeling position.  It felt very awkward to me and I was terrible.  Oh, I put rounds on the target, but this kneeling position is not my cup of tea. I used to be able to do it when I was in the Army, but I weighed 50 lbs less and I bent a lot easier in those days.  I’m not even sure what knee is supposed to be on the ground.  Maybe I need Colin Kaepernick to tutor me.

Then I went to the standing position, shooting offhand, and I found I could keep my shots in the bottle (as my CDC buddy described the target). I might be able to qualify as a CDC officer if I could get on top of this kneeling position business. The little .223 holes on the target below are a hard to see (my apologies for the cell phone photography), but trust me, they’re on there.  All the ones that are outside the bottle were from the kneeling position.

You know, when I first saw that B-21 target, I was amused at how big it is (it’s literally life-sized).   Try shooting it offhand from the standing position with iron sights, though, and the old B-21 suddenly gets a lot smaller.   At 100 yards, I couldn’t see any of the lines on the target.  It was just a big black mass, and I tried to hold in the center of it as I fired.   It was swimming in the sights, but I was able to connect.  Mind you, I had not shot offhand like this in years.  The rifle seems to be grouping a little high shooting offhand (as it did from the bench).  But it is, as the saying goes, close enough for government work.

What do you think?  Would I be able to run with the big dogs in the CDC?  My CDC buddy told me I’d qualify expert.  Maybe he was just being nice.

Future Mini 14 Accuracy Improvement Thoughts

I am thinking about what else might make a difference in accuracy on the Mini 14. The action is bedded and I’ve experimented with different loads until the cows came home (for your information, my best load is with a max ARComp charge and the Hornady 162 grain full metal jacket bullet). I sort and trim the brass I reload (and that makes a difference).  I’ve found the gas port that works best (it’s the 0.050-inch orifice).  So what’s left?

I’m wondering about the fit of the .223 cartridge in the chamber. The Mini 14 has a loose chamber to make sure everything feeds reliably, so I’m wondering if it’s too loose for optimal accuracy. My thought is to try neck sizing only. That’s when you only size the cartridge neck down (to hold the bullet in place) but leave the rest of the brass case enlarged, as it came from the rifle after the last firing.  I know you usually would not do that in a semi-auto rifle, but I’m guessing there’s plenty of room in that chamber. I’m thinking I’ll load 20 rounds with neck sizing only and see how that goes.  I guess I could try chambering an empty case previously fired in the Mini 14 and see if it chambers and extracts easily. If it does, neck-sized-only loaded rounds probably will, too.

Sometimes you can seat the bullets out further in the case to improve accuracy.  You can’t mess around with bullet eating depth on a Mini 14, though. If you seat the bullets out any further, the cartridges won’t fit in the magazine, so that’s out as a potential accuracy improvement.

Next up is the muzzle brake. This thing has a gigondo muzzle brake (see the photo above) that I had installed to replace the stock flash suppressor.  I had to do that to bring the rifle into the People’s Republik of Kalifornia (a flash suppressor on a semi auto rifle is illegal in California, a stupid law if ever there was one). The muzzle brake does not make contact with the bullet on the way out of the barrel, but I’m wondering if it somehow disturbs the bullet’s flight as it exits the muzzle. I think I’ll Google “muzzle brake impact on accuracy” and see if there is anything out there on this.  (Note: I did, and there’s evidence that this can happen.)

The other thing I’m wondering is if the guy who installed the brake damaged the muzzle when he installed it. I can’t see the muzzle in there. It’s not going to be easy to get it (the muzzle brake) off the barrel, but that may be the next step.  The muzzle brake has to be affecting the barrel’s harmonics, too, because it is so massive. Maybe I’ll just take it off and see what that does.
The Mini 14’s bolt feels loose when the rifle is in battery, but my Garand is like that, too, as well as many of the bolt guns I have. I don’t know if that is playing an accuracy role.  There’s nothing I can do about it, though, so that’s something that will remain a mystery.

I’m wondering about the front sight, too.  It’s wide.  At 100 yards, the width of the front sight blade is three or four times the diameter of the bullseye.  My M1A has a much thinner blade for the front sight, and it seems to be a lot easier to shoot small groups with it. Looking at the 100-yard bullseye target shown above, most of the Mini 14’s dispersion is left and right; I’m thinking a thinner front sight might cut down on that lateral dispersion.

I’ve put a lot of lead downrange with my Mini 14, probably something well north of 10,000 rounds.  Maybe the barrel is just worn out.  Eyeballing it, though, it looks good, and accuracy keeps getting better with incorporation of some of the things I’ve done.  But that’s a lot of shooting.  It could be that a new barrel would make a difference.

Any other ideas?  Hey, let’s hear your comments.  I’ve shared what I know, and I could use your help.


See our other Tales of the Gun reports (including more on the mighty Mini 14) here.
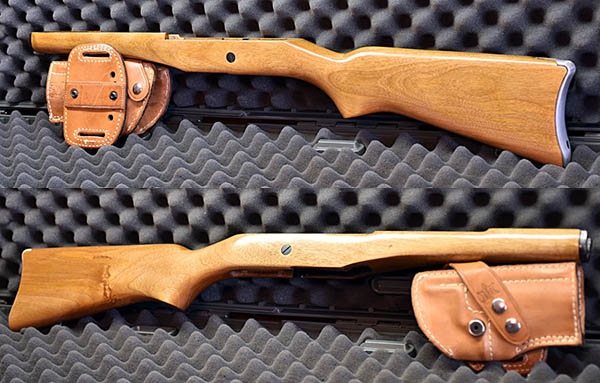
Refinishing the Mini 14

A couple of years ago I spotted a beat-up old Mini 14 rifle stock in the used parts junk pile at my favorite local gunstore, and I thought it might be fun to refinish it.  It was for the earlier series Mini 14 and I didn’t own one, but the stock looked like it needed me.  It was dinged up but didn’t have any gouges, and the anodized aluminum buttplate had multiple scratches.  I asked John, the guy behind the counter, what he wanted for the stock, and we were both in a quandary.  John’s brow furrowed.  He was searching for a price that wouldn’t be insulting, but I could see that he was eager to unload something that had all the earmarks of becoming a permanent resident.  There were several old timers in the shop (there always are; it’s that kind of place).  All eyes were on John and me.
“I don’t know…maybe $25?” John said.

I recoiled as if struck by an arrow.  It’s all part of the game, you know.   All the eyeballs were on me now.  It was like being in a tennis match.

“I don’t know, John,” I answered.  “I was going to offer $30, but if you gotta have $25, then $25 it is…”

Everybody laughed and I went home with a Mini 14 stock that looked as if it had been to Afghanistan.  I wished I had the foresight to grab a few “before” photos of it, but I did not.

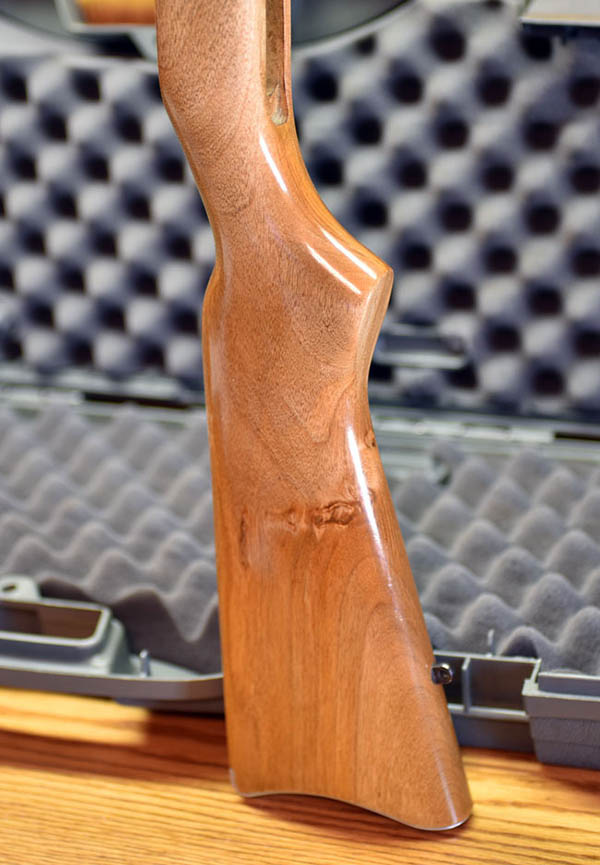
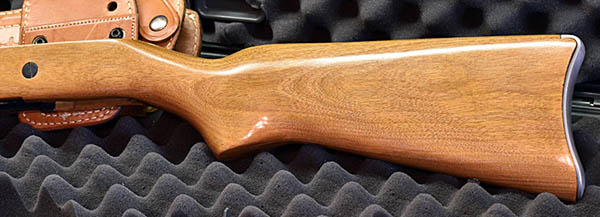
Like I said, the stock was decrepit, but I wanted a refinishing project and now I had one.  I removed all the metalwork, I stripped the finish (you can see how to do that in our series on the Savage 340 refinish), I steamed out the dents (same story there; it’s covered in the Savage 340 stock refinish series), and then I went to work on it with 200, 320, 400, and 600 grit sandpaper.  The buttplate was hopelessly scratched all to hell, so I did the same thing with the same grades of sandpaper and I decided to leave the aluminum bare.  In one of my prior aerospace lives, I worked at company that made interior doodads for aircraft, and the approach I just described was one we frequently used for doorknobs, latches, and the other metal chotchkas you see in aircraft cabins.  That particular company was not a good place to be (my boss was a butthead), but I liked working with the crew of Armenians who handled all of our finishing work.  Whenever I had an idea about making an improvement, those guys were quick to tell me that wasn’t how they did it in the old country, and I went with their expertise (it was the right thing to do).  But I digress; that’s a story for another time.

Mini 14 stocks are birch, which is a light wood, and the question was do I want to stain the birch for a darker look, or leave it unstained for a lighter look?  I went for Door Number Two, and I think it turned out well.  I used the same approach described in the Savage 340 blog, taking care to use very light coats applied with a fresh bit of T-shirt cloth each time and waiting a day between applications.  This one has 10 coats of TruOilTruOil is good stuff.

I had a beautiful rifle stock, but no rifle to go with it.  One of my good buddies told me his brother had a Mini 14 that was in rough shape, so I gave the refinished Mini 14 stock to him to send to his brother.  It was a fun project and I really liked the way this one turned out.


Check out our other Tales of the Gun stories!

A tale of three Garands…

This is a tale of three Garand-style rifles, told from my laptop while waiting to make a connection in Taipei.  Yep, I have time on my hands (5 ½ hours, to be precise).  I had this Garand tale from an earlier writeup, so I thought I would polish it up a bit and post a gun story on the ExhaustNotes blog.

The M1, the M1A, and the Mini 14

The three Garand rifles?  They’re all based on John C. Garand’s brilliant rifle known as the M1, so I guess I’ll start with a description of that firearm first. The M1 Garand is a gas-operated, semi-automatic rifle, described by General George S. Patton as the greatest battlefield implement ever invented. In a period when all other armies were using bolt-action rifles, our ability to deliver serious semi-automatic firepower without having to turn a bolt was a major advantage.

My M1 mutt.

The Garand design operates by porting a bit of the combustion gas to a cylinder that drives an operating rod, and then the operating rod unlocks and cycles the bolt. Garand’s genius is evident in the mechanical interactions between the bolt, the operating rod, and the rifle’s receiver. The angles and camming surfaces are such that when the operating rod pushes the bolt rearward, the bolt first rotates and unlocks before it extracts and ejects the spent cartridge case. After it has done that, the rifle’s main spring drives the operating rod forward again, the bolt picks up and chambers a new round, and everything locks into place. It’s very clever. There is no software and there are no electrons carrying any signals. It’s all driven by good old-fashioned, straightforward mechanical stuff.

Several armories and companies manufactured Garands, and serious collectors look for Garand rifles based on their manufacturing pedigree. My M1 Garand is nothing fancy or collectible. It’s a mutt, a hodgepodge of components with an Israeli-manufactured receiver, an Italian Beretta trigger group, and other parts of mixed origin. But it shoots well and I love shooting it, and the Garand is a rifle with a soul. It’s like taming a living beast when you shoot it. It roars, it kicks, it makes mechanical noise, and it sends things flying.

Check out the spent cartridge case just ejected…it’s in the lower center of this photo! My daughter took this photo with her cell phone.

M1 Rifles Standing Guard

I was surprised to see Garands still on guard duty a few years ago when I was on a secret mission in Turkey. I grabbed some cool photos of Turkish sailors and soldiers (young Turks, you could call them) guarding Ataturk’s tomb in Ankara…

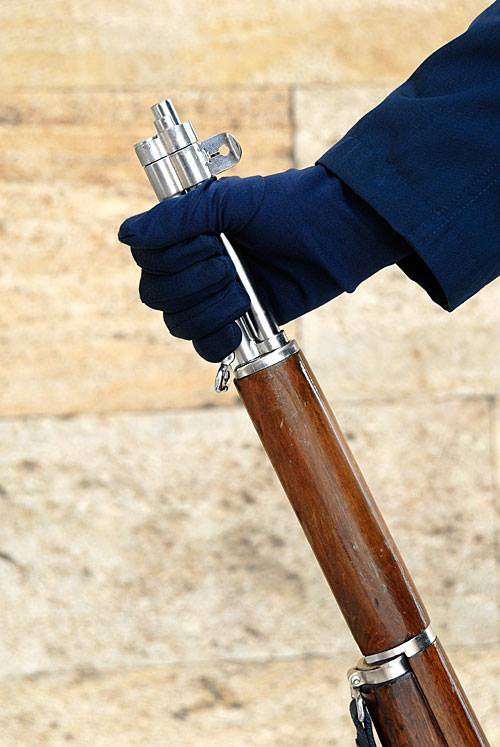
Standing guard in Ankara, Turkey, with an M1 Garand.
An M1 Garand in Ankara.

Garand originally designed the M1 to fire a cartridge with a 0.27-inch diameter projectile, but when it was fielded, the Army opted to chamber it in .30 06. We already had machine guns and the Springfield 03A3 chambered in .30 06, and sticking with the same round made sense. The M1 Garand soldiered on during World War II and the Korean War for us, and it’s still soldiering on in ceremonial units (like those Young Turks you see above).

The M14 and M1A

After the Korean War, the US Army developed the M14 rifle to replace the Garand. The M14 is essentially a shortened M1 Garand with a magazine (you insert the ammo into the bottom of the rifle). The basic Garand operating concept is the same. The M14 switched from the mighty .30 06 round to the 7.62 NATO round (the .308 Winchester cartridge). The M14 shoots the same bullet, but the 7.62 brass cartridge case is a little bit shorter and the bullet is about 100 feet per second slower than it would be if it was fired from a .30 06. The shorter cartridge case allows the 7.62 NATO round to operate in a machine gun with a higher cyclic rate of fire, and that was one of the reasons we went with it.

The M14 started development in the 1950s and it officially replaced the Garand as the US Army infantry rifle in 1961. I first trained with the M14 when I joined the Army, and I loved it. It was a full-sized rifle with real sights and a real walnut stock (no black plastic silliness in those days), and it fired a serious cartridge. Unlike the Garand, the M14 had a selector switch that allowed it to fire full auto. With those features, what’s not to like?

In addition to being a great service rifle, the M14 was one hell of a target rifle. The M14’s .308 Winchester cartridge is inherently more accurate than the M1 Garand’s .30 06 round (heresy to some, I know, but I’ll stand by that statement). Civilian competitive shooters wanted the M14, but it wasn’t going to happen. So private industry did what America does best: It engineered a solution. The company was the Springfield Armory (not to be confused with the U.S. government’s Springfield Arsenal), and they created and sold semi-auto-only versions of the M14 to the public. Springfield Armory called the new rifle the M1A (not to be confused with the M1 Garand).  I know, there’s a lot of “not to be confused” stuff here. It’s complicated.

I always wanted an M1A, and when I spotted one in our local gun shop with nice horizontal figure in the walnut stock, I pulled the trigger (pardon the pun).  The finish on a standard Springfield Armory M1A is crude (it’s a single coat of boiled linseed oil on a not-very-smoothly-finished stock). The figure in my rifle’s stock indicated the wood had potential, so I went to work applying multiple coats of TruOil (one hand-rubbed coat each night, just like we used to do in the Army).  It turned out well and it shot well, but I reasoned it could do better, so I sent it back to Springfield to have it glass-bedded and I added National Match sights. The glass-bedding stabilizes the action in the stock (it’s a technique for making a rifle more accurate), and the National Match sights have a smaller aperture at the rear and a thinner front sight (that makes it easier to shoot tighter groups).  It worked for me; those two changes dropped my M1A’s 50-yard groups from 1.5 inches to 0.5 inches.

A modern Springfield Armory M1A, the civilian version of the M14, which was the successor to the M1 Garand.
10 coats of hand-rubbed TruOil and the M1A’s horizontal stripes stand out.

The thing about both of the above rifles is they shoot big cartridges. The Garand’s .30 06 and the M14’s 7.62 NATO rounds have serious recoil and muzzle blast.  Again, American inventiveness to the rescue: Enter another mechanical genius and business leader extraordinaire, Bill Ruger. Ruger developed what is essentially a scaled-down version of the M14 chambered for the 5.56 NATO cartridge (which is essentially the .223 Remington round). That’s the same cartridge used in the M16. It fires a much smaller bullet than either the M14 or the M1, and the recoil and muzzle blast are substantially lower.

A Favorite:  The Mini 14

Ruger called his Garand-based rifle the Mini 14 (it was a smaller version of the M14). It came on the market in the early 1970s and it was an instant hit. I’ve owned several Mini 14s (and fired several more) over the last 5 decades, and I love the things. They are not known for their accuracy, but they are accurate enough and they are a lot fun to shoot.

A Ruger Mini 14 with a muzzle brake and a Circassian walnut stock. This one is from a limited run Ruger made with Circassian walnut about 10 years ago. It’s very collectible and it always gets compliments at the range.
Not the world’s most accurate rifle, but accurate enough.

The Mini 14 never made it into the US military in a major way (it’s rumored that some special forces units were armed with Mini 14s), but it is used by many US police agencies (including the San Bernardino County Sheriff’s Department, one of the best there is), the French military, and the militaries of a few other countries. I believe that if Ruger had come to market with the Mini 14 a few years earlier, it might have become the US Army’s standard rifle instead of the M16 (and that would have been fine by me).  That last statement is bound to raise a few eyebrows, but hey, this is the Internet.  If you disagree, that’s why we have a Comments section.

I’ve fired thousands and thousands of rounds through my Mini 14, and it is the cartridge I reload the most frequently. The small .223 bullets are inexpensive and reloading is as much fun as shooting.  My Mini 14 is the rifle I shoot most and one of these days I suppose I’ll wear out the barrel, but I’m not worried. I’ll just have a new one fitted and shoot another zillion rounds.


More Tales of the Gun?   Just click here!


Never miss an ExNotes blog:


Keep us afloat:   Hit those popup ads!