Not as measured by the compass, mind you, but as measured in dollars. A 1980 Honda CBX recently sold at auction in Las Vegas for a whopping $49,500. Wow.
The CBX originally debuted in 1979, and production continued through 1982. The first two years featured naked bikes (no windshield, no fairing, and no bags); the last two years were equipped with bags, fairings, and a little bit of detuning to make them a bit more reliable. The bikes were (and are) impressive, with wide engines (the engine was a straight six mounted across the frame), six carbs, six headers, and 24 valves. I think those CBX Hondas were and still are beautiful.
When the CBX first came out in 1979, I was living in Fort Worth. I rode my Triumph over to the local Honda dealer, and the guy let me take a silver one out (by myself) for a test ride. I immediately headed to Loop 820. It’s where I used to open up my ’78 Bonneville, which would touch an indicated 109 miles per hour. Naturally, being a wise-beyond-my-years 28, I did a top end run with the brand new CBX. I don’t remember what its speedo went up to, but I do remember running out of resolve at something north of 135 miles per hour (the bike still had more left). The CBX was an impressive motorcycle.
I turned it around and headed back to the dealer, and when I arrived, I leaned the bike over on its side stand and left the engine running. It was leaking oil from the left valve cover, and it was kind of pulsing out like I had nicked an artery. The sales guy came up, eager to close a deal, and asked what I thought of it. “Not for me,” I said, pointing to the oil leak. “It’s already leaking oil.”
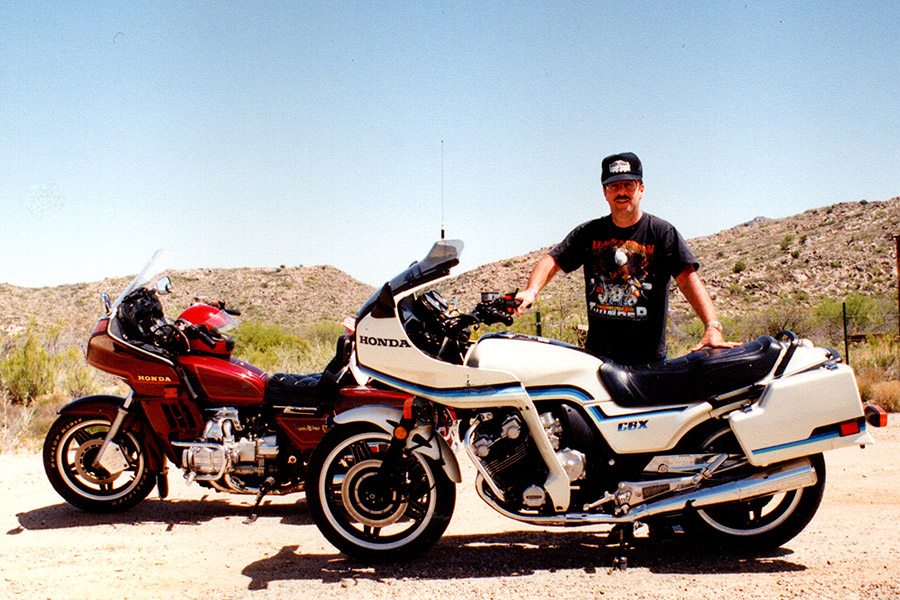
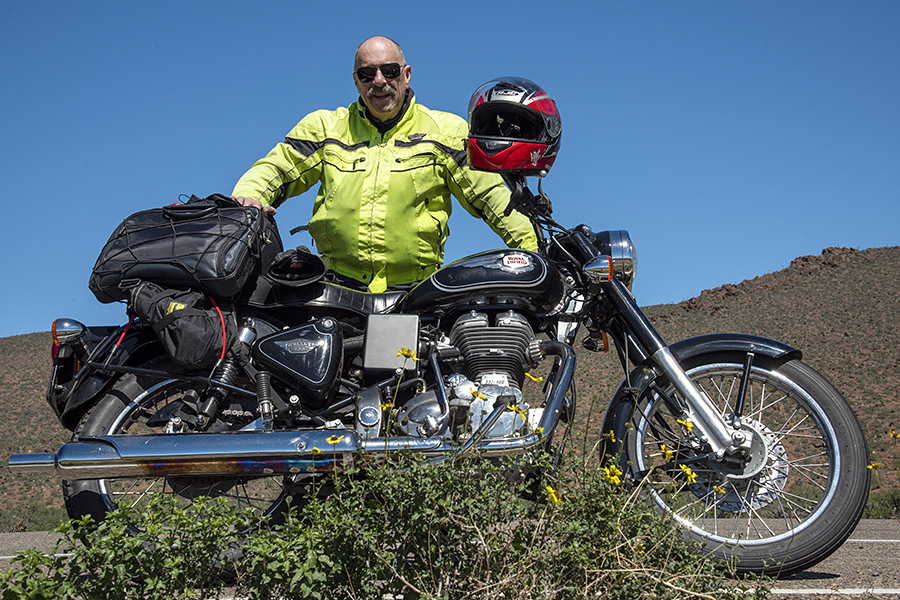
But the CBX bug had bitten. About a dozen years later, I had moved to southern California and I rode a ’92 Harley Softail (didn’t everyone back then?), and I saw a pristine ’82 CBX at Bert’s MegaMall in Azusa. It was $4500, and I had to have it. I bought that bike and rode it for another 10 years, and I did some serious touring on it. That’s me you see in the photo at the top of this blog somewhere in Arizona with good buddy Lou and his Goldwing.
The CBX was an amazing machine, and I felt that way the entire time I owned it. I sold it when Honda stopped stocking parts for the CBX because I was worried that if something complicated broke, I’d have a $4500 paperweight. I put it in the CycleTrader and it sold the next day. I thought I had done well because I sold it for what I had paid for it 10 years earlier. If I only knew what they’d be going for today.
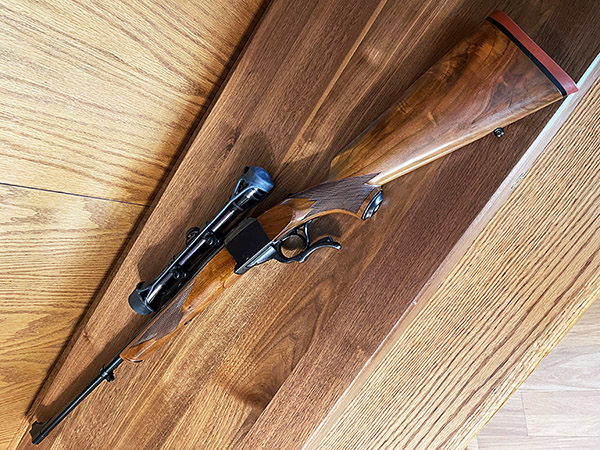
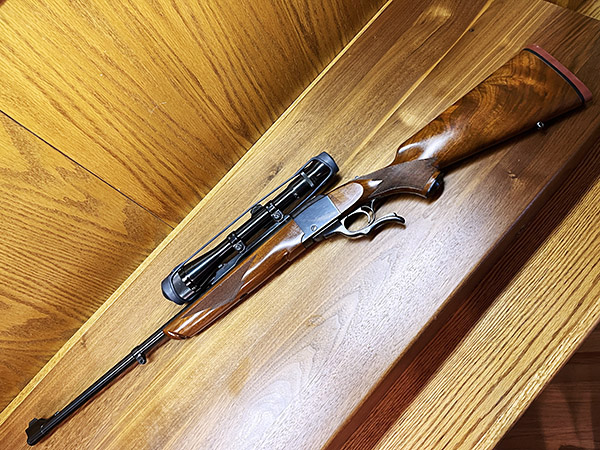
I’ve been a Ruger No. 1 fan for close to 50 years. It started with one I’ve written about before, and that is a Ruger No. 1A chambered in the awesome .30 06 Government cartridge. I’ve spent time on the range and I’ve hunted with this rifle, and it is probably my all-time favorite firearm.
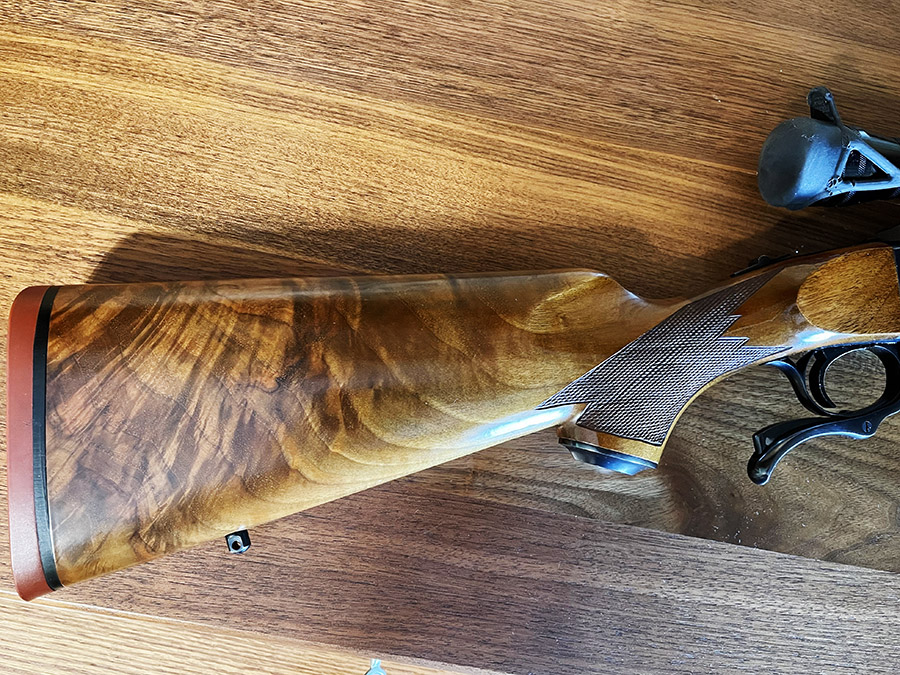
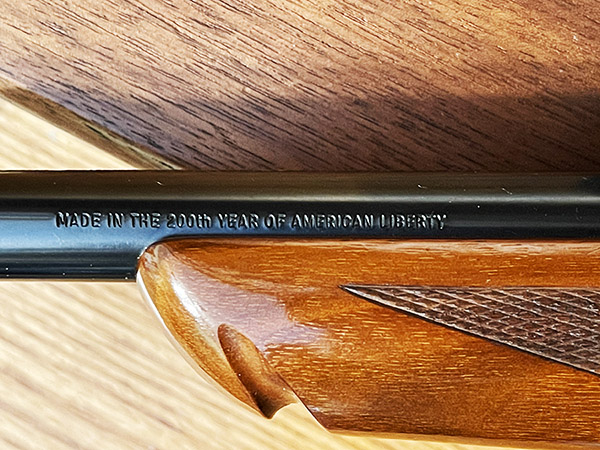
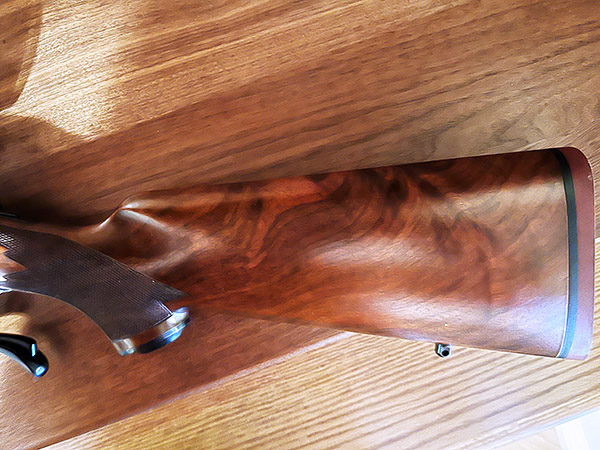
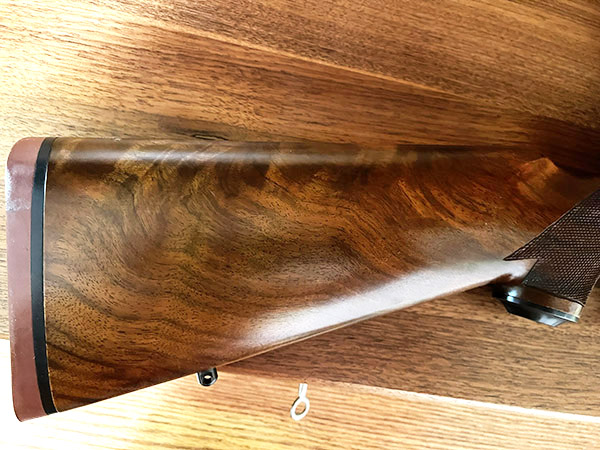
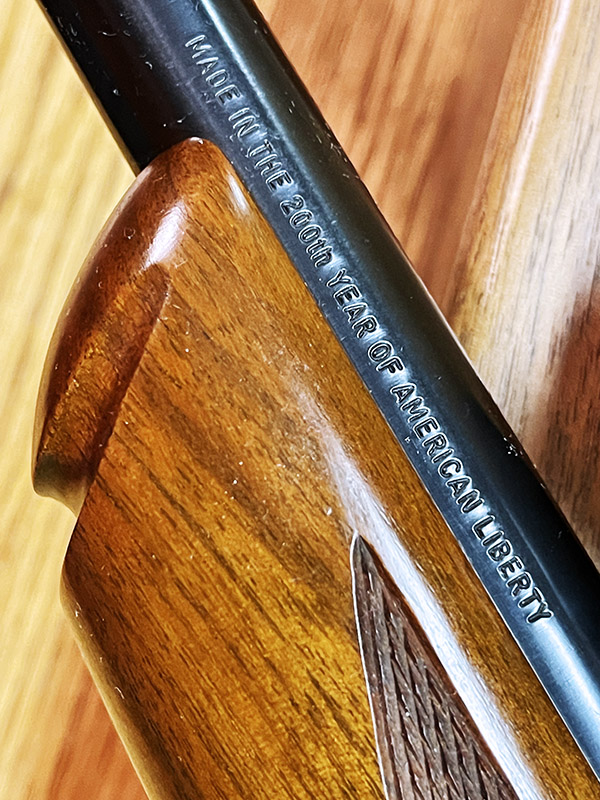
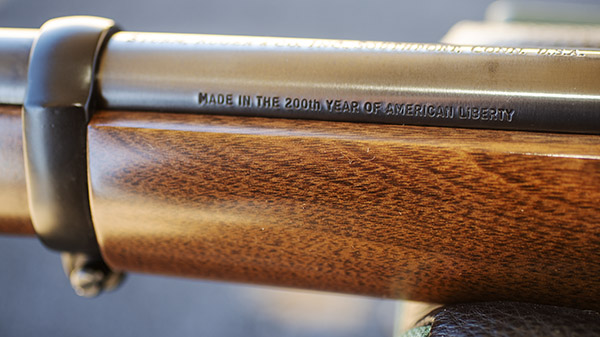
What attracted me to the No. 1 was my father’s fascination with the rifle (he never owned one, but he wanted to), the beautiful and exquisitely figured walnut Ruger used on these rifles, and their style. To me, they just look right. My fixation started in 1976. Ruger roll-stamped every firearm they manufactured with “Made in the 200th Year of American Liberty” that year.
Rugers with this roll-marked stamp are known as Liberty or Bicentennial guns.Like I said, the walnut on my Ruger .30 06 is exquisite on both sides.As I said, the highly-figured walnut is exquisite on both sides of this .30 06.
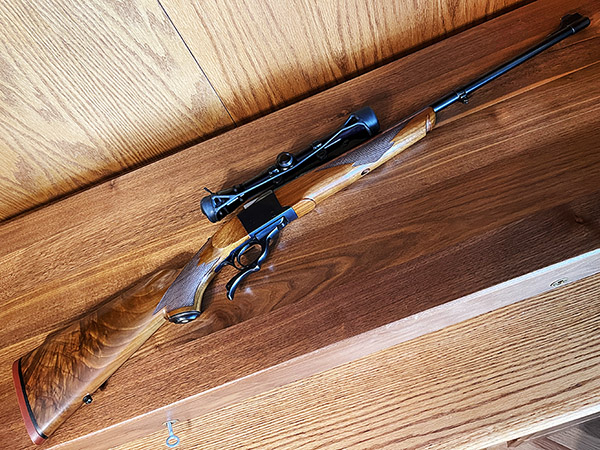
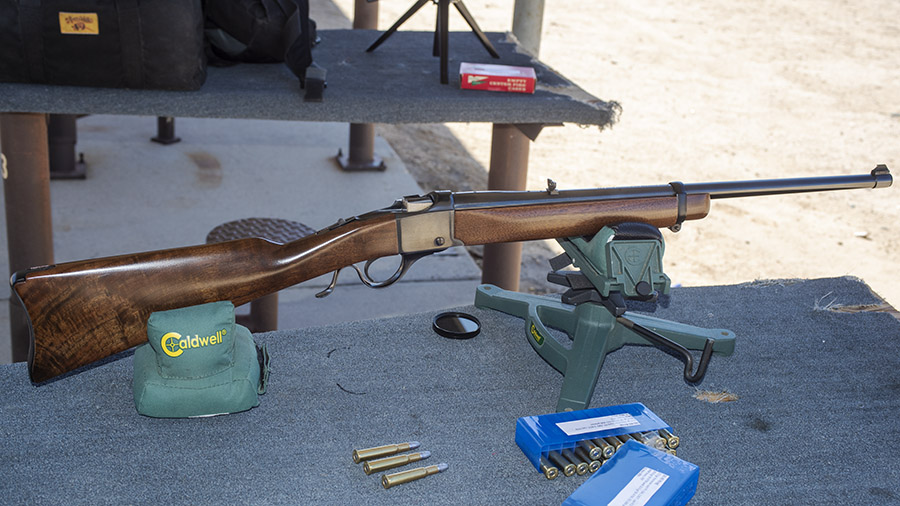
The Ruger No. 1 came in different configurations, and the ones you see here are what Ruger called the 1A. They had 22-inch barrels, iron sights, and the Alex Henry fore end (that’s the fore end with the notch at the front). There are all sorts of suppositions about what why the notch was originally included on the Farquharson rifles that influenced the Ruger No. 1 design, but no one seems to know for sure. I just like the look of the thing. To me, these rifles are elegant. They’re not particularly light, but they’re short and it’s easy to get around in the woods with one. Back in the day, I bought a straight 4X Redfield scope and a still prefer a 4X non-variable scope for hunting (even though it’s tough to find one these days; high-powered variable scopes are all the rage).
Those west Texas days back in the ’70s were good. We spent a lot of time (essentially every weekend) out in the desert north of Fabens chasing jackrabbits and coyotes, and the No. 1 you see here sent a lot of those critters to the Promised Land. Jackrabbits were grand fun. It was hard to believe how big some of them were.
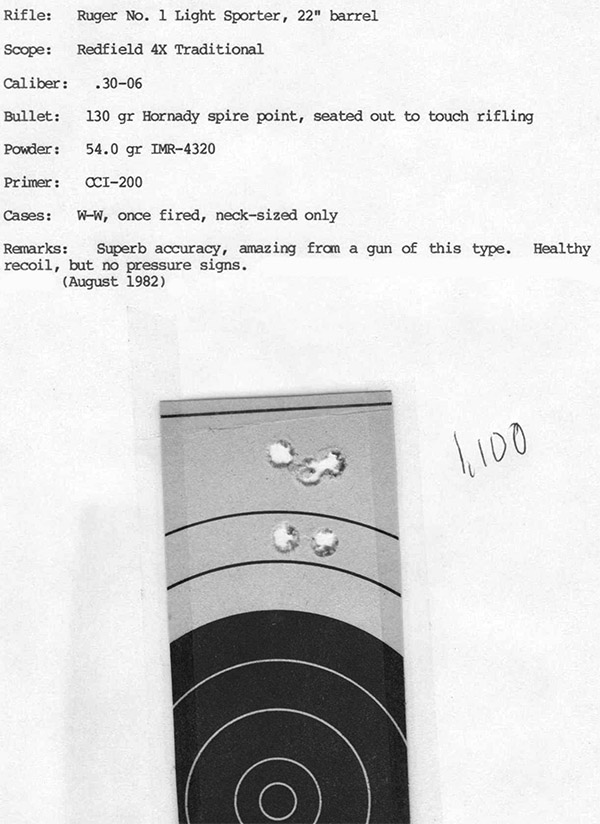
The accuracy load for my .30 06 No. 1 is the 130-grain Hornady jacketed softpoint bullet over a max load of IMR 4320 propellant. IMR 4320 is no longer in production, but I’ve got about 10 pounds of it so I’m good for a while. The rifle will put that load into an inch at 100 yards all day long, and the 130 grain Hornady bullet seems to be perfect for jackrabbits. Yeah, I know, that’s maybe a little more power than needed for Peter Cottontail, but hey, like Donald Rumsfeld used to say: You go to war with the army you have.
Gee whiz…a group I shot 40 years ago!
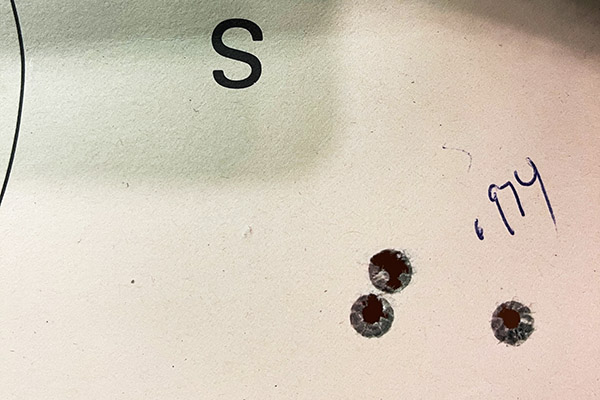
The .30 06 also does well with other loads. I was on the range with the ammo I had on hand a week or so ago with heavier bullets and I was pleased with the results. I tried 180 grain Remington bullets loaded on top of 48.0 grains of IMR 4064. Those loads shot low and had perceptibly heavier recoil, but they grouped under an inch at 100 yards.
Three shots at 100 yards with the Ruger .30 06 No. 1A. The load was the 180 grain Remington jacketed soft point bullet and 48.0 grains of IMR 4064, with military brass and a CCI 200 primer.
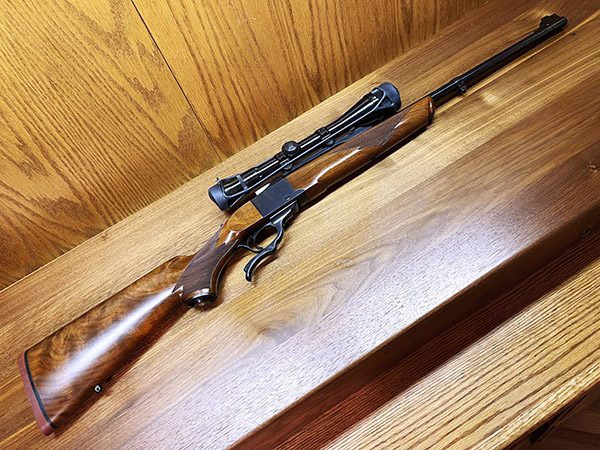
The title of this blog is A Tale of Two Bicentennial No. 1 Rugers, and that brings us to the second rifle. I was in Ohio on a secret mission about 15 years ago and the guy I visited there learned of my interest in guns. He took me to a local shop that only sold through an online auction (that was the gunshop’s business model). When we arrived, I quickly noticed another Ruger No. 1A, this time chambered in .243 Winchester. It was a bicentennial rifle, it looked to be a near twin to my .30 06 1A, and I had to have it. I tried to buy it while I was there and have shipped to my FFL holder in California, but the owner confirmed what my friend told me…I had to bid on it at auction. I did, and I won the auction at $650. Bear in mind that these rifles’ list price in 1976 was $265, and they typically sold at $239 back then. If you think I got scalped, think again. I won the auction, and the MSRP on these rifles today is something around $2,000. And the ones made back in the 1970s are, in my opinion, of much higher quality in terms of walnut figure, checkering, and other attributes.
A .243 Winchester Ruger No. 1. It wears a period correct El Paso Weaver 4×12 telescopic sight.The left side of the .243 No. 1.Ruger used to put fancy walnut on the No. 1 rifles. Today, not so much.A fancy walnut, red pad Ruger No. 1. Sweet!Like the .30 06 No. 1 featured above, this .243 is also a Liberty gun.
Most recently, good buddy John gave me a bunch of assorted brass and I started loading bits and pieces of it. I loaded the .30 40 Krag and wrote about it a week or so ago. There were a few pieces of .243 Winchester brass and that had me thinking about the .243 No. 1 in this blog. You see, I bought that rifle, stuck it in the safe, and never fired it. That was a character flaw I knew I needed to address.
I thought I had a set of .243 dies, but I was surprised to find I did not. I had some ammo, so I guess at some point I had .243 dies. I bought a new set of Lee dies, and I already had some .243 bullets. And as it turns out, the Lyman reloading manual lists IMR 4350 as the accuracy load for 60 grain bullets, and I had some. I only loaded six rounds (using the brass John gave to me), and I thought I needed to buy .243 brass (everybody is sold out of .243 brass right now). Then I started poking around in my brass drawer and it turns out I have five boxes of new Winchester 243 brass. I swear I’m gonna find Jimmy Hoffa or an honest politician in my components storage area one of these days.
The Tula factory ammo I had didn’t shoot worth a damn. Tula is cheap ammo, this stuff was old, and it grouped around 2.9 to 3.5 inches at 100 yards. I also had some very old reloads that had 100 grain Sierra bullets and 34.0 grains of IMR 4064, and it did only marginally better. The six rounds I loaded myself with the brass good buddy John provided was better. At least I think it was better. I used 65 grain Hornady V-Max bullets and 43.2 grains of IMR 4350 powder. I had one good group and one lousy group. But hey, Rome wasn’t built in a day, and I’m just getting started. I’ll buy some heavier 6mm bullets (.243 is 6mm), I’ll try them with a few different loads, and you’ll get to read about it here on the ExNotes blog.
More stories on Ruger single-shot rifles (the No. 1 and the No. 3) are here.
In a previous life I managed operations that sold aircraft components to Boeing. And I’ve taught related courses to Boeing companies and Boeing suppliers. Boeing’s emphasis on quality assurance, safety, and reliability was extreme and Boeing went far beyond what any other organization required. That’s why I was so surprised a few years ago when facts began to emerge detailing how Boeing concealed flight control augmentation systems information on their new 737 Max aircraft.
When I returned home from another secret mission a couple of nights ago and we tuned into Netflix, a documentary on Boeing’s 737 Max failures popped up when Netflix opened. Downfall: The Case Against Boeing had just been released that day.
Downfall: The Case Against Boeing is an inside look at the events surrounding the two crashes that occurred shortly after the 737 Max began flying. It’s about the 737 Max, its two crashes, Boeing’s resistance to revealing MCAS (that’s Boeing’s acronym for Maneuvering Characteristics Augmentation System), the aircraft’s susceptibility to a single-point failure, Boeing’s prioritizing sales over safety, the Federal Aviation Agency’s inadequate response, and more.
I thought Downfall: The Case Against Boeing was extremely well done. If you get a chance, this is a show worth viewing.
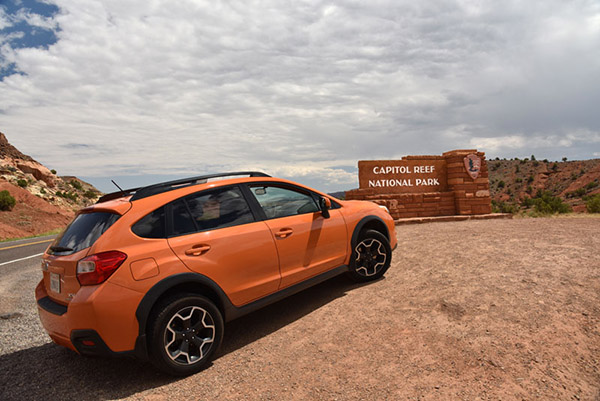
Utah, hands down, is the most beautiful state in the Union. I’ve been to every state in the US except North Dakota, and unless there’s something hiding up there, Utah gets my vote. There are places in Utah with scenery and riding that are as close as you can get to heaven without a one-way ticket. There’s Zion National Park (to be covered in a future blog), there’s Bryce Canyon National Park, Grand Staircase-Escalante National Monument, and Capitol Reef National Park (which I’ll cover in this blog), there’s Cedar Breaks National Park (a topic for a future blog), there’s Kodachrome Basin State Park (another future blog), there’s Flaming Gorge National Park (that’s coming up in another blog), and there’s Arches National Park (to be yet another blog). And then there’s the Dinosaur Highway. I’ve been to all of them, and I’m telling you, if you like road trips it doesn’t get any better than Utah.
Panguitch on the western end of this trip, and Hanksville on the eastern end. It is a grand ride.
There’s a reason I’m touching on Bryce, Grand Staircase-Escalante, and Capitol Reef in one blog. Two reasons, actually: State Routes 12 and 24. These two roads run through all three National Parks, and they are two of the best roads I’ve ever ridden. If you want to plan this grand adventure, start in Panguitch, ride Utah SR 12 and 24, and spend the following night in Hanksville, Utah. I’ve got good places to have dinner in both towns, and I’ll share them with you in this blog. It’s a full day’s ride to get from one to the other (maybe longer if you want to stop and see the sights).
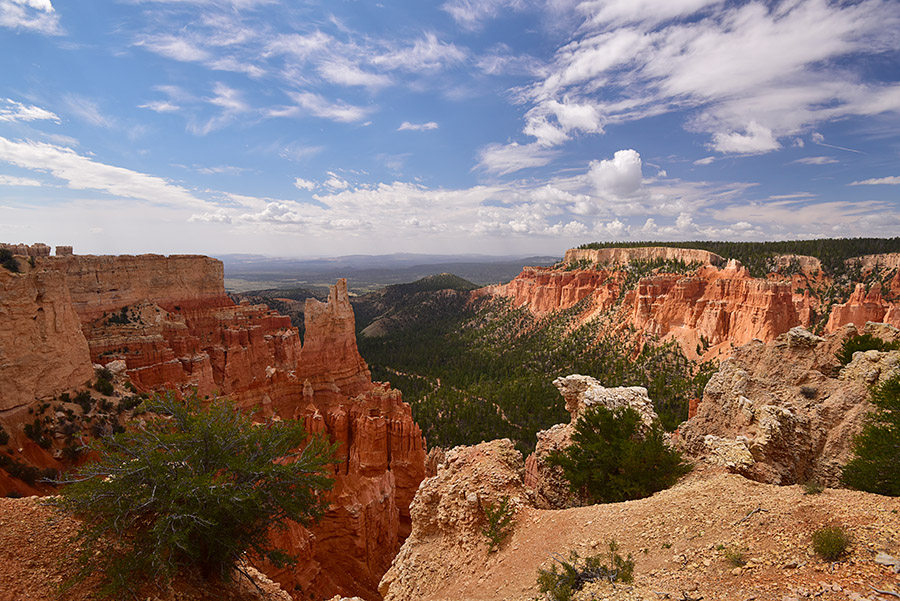
The large featured photo at the top of this blog is in Bryce Canyon National Park. This is another photo in Bryce. Unlike Zion ((where you are in a basin looking up at the rock formations), in Bryce you are up top looking down into the colorful canyon. Bryce has stunning views.
This is the most beautiful stretch of the planet I’ve ever ridden. The colors and the riding are stunning. Think bright blue skies, vibrant and verdant pine trees, and multi-colored pastel rock formations. The formations include stunning pinnacles called hoodoos, plus arches, large rock mounds, exposed vermillion cliffs and monstrous domes and folds in the Earth’s surface. Although the region was once alive with dinosaurs, you most likely won’t see fossils. But you will see an artist’s palette of pleasing pastels: reds, pinks and browns due to iron in the sandstone, yellows and creams created by limonite, and purples presented by pyrolusite. Whatever the chemistry, the display through this stretch is dazzling.
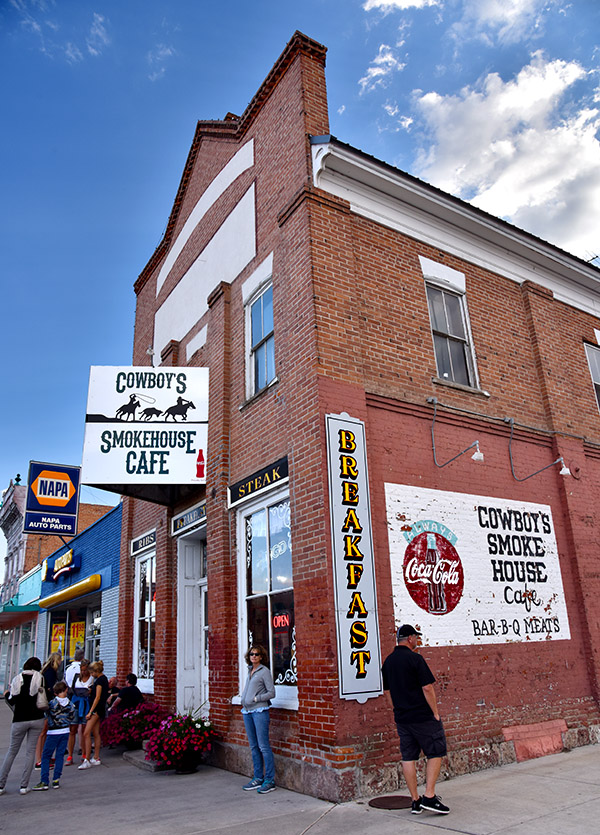
The spot for dinner in Panguitch is the Cowboy’s Smoke House Cafe. You’ll probably have to wait to get in. Trust me: It’s worth it.
You can ride US 89 from Panguitch to pick up SR 12 at its western end. Head east and in just a few miles you’ll be at Bryce Canyon National Park. Bryce is one of America’s jewels, with hoodoos arranged in several natural amphitheaters. An early morning start will help capture dramatic photos; the sun will be low in the eastern sky and the resultant lighting makes the colors pop. Native American Paiutes thought these hoodoos were ancestors turned to stone. Take a long look at some of these formations and you’ll see why.
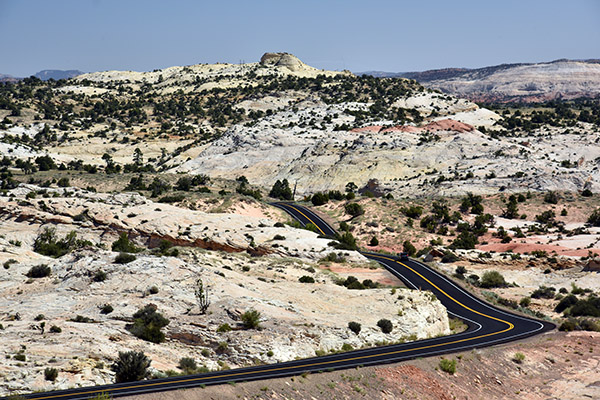
Stay on SR 12 after Bryce and you’ll skirt Grand Staircase-Escalante National Monument on tantalizing twisties. All of SR 12 is breathtaking; it is something out of a dream. It takes you through a series of red rock formations and then winds along a ridge with sheer drops on either side. Forget about guard rails and shoulders; you’ll feel as if you are riding the sky. Cook a corner too fast on this stretch and you’ll wish you were wearing a parachute. This area, more than any other I have ever ridden, is a near-religious experience.
The red rocks of Utah along SR 12.It was tough to keep going on Utah SR 12…I wanted to stop after every corner for photos.One of many scenes along Utah SR 12. You need to ride this road. It’s one of the best.
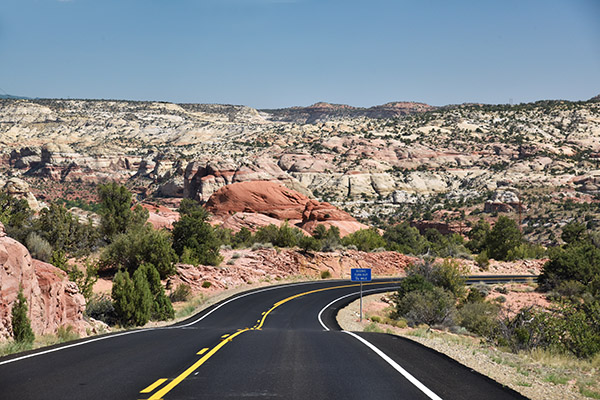
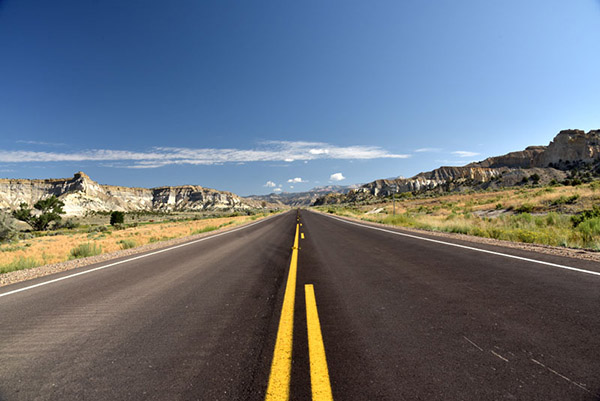
State Route 12 tees into SR 24, but you’ll be able to see Capitol Reef National Park long before you get to SR 24. Head east on SR 24 toward Hanksville and you’ll ride through much of the accessible portion of Capitol Reef. It’s perhaps the least known of Utah’s national parks, but its scenery is as stunning as any of the other parks.
Capitol Reef and Utah SR 24.
Only a portion of Capitol Reef is visible from SR 24, but it is outstanding. Hundreds of miles of unpaved roads into Capitol Reef offer similar scenic views. The park’s unique white sandstone domes (similar to the U.S. Capitol building) were formed by a warp in the Earth’s crust 65 million years ago. “Reef” refers to any barrier to travel, and when you see these formations, you’ll certainly understand the name.
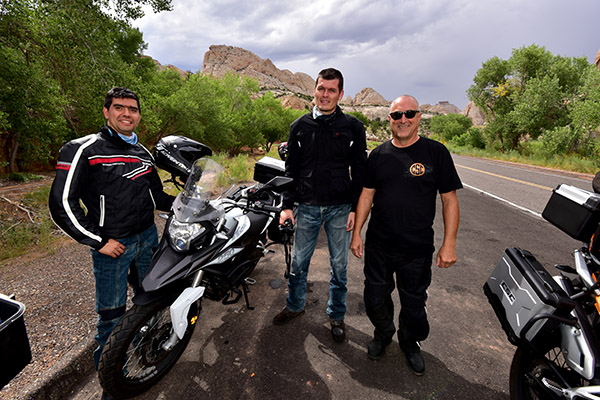
Another scene along SR 24 heading east.Gabriel, Juan Carlos, and Uncle Joe along SR 24 after rolling through Capitol Reef. We rode 5000 miles through the western United States on brand new 250cc CSC motorcycles. It was a great ride with great guys.
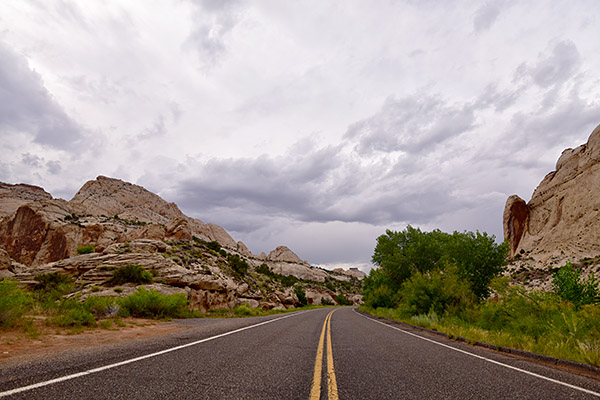
State Route 24 follows the Fremont River through Capitol Reef National Park, and as it twists and turns on its way to Hanksville, you’ll be thanking me for turning you on to these very special roads. The Whispering Sands hotel is a good, clean place to spend the night, and Duke’s Slickrock Grill is a great place for dinner. Try the trout; it’s wonderful. And don’t miss the photo op standing next to Duke.
Want to discover more great moto destinations? We’ve got you covered!
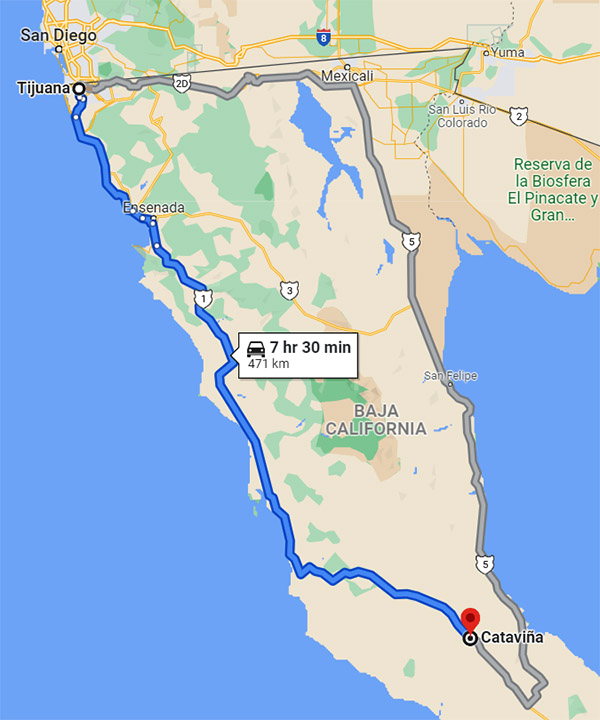
Located 297 miles south of the US border, Cataviña makes for a good spot to stop after your first day’s push into Baja. You might also try to make it all the way to Guerrero Negro, but that’s another 140 miles. When traveling in Baja through the mountains and all the small towns from Ensenada to El Rosario, you can’t grind out big miles like you can on a US freeway. And, trust me on this, you don’t want to travel at night in Baja. A 300-mile day in Baja when you’re starting at the US border is a good day, and that puts you smack dab in Cataviña.
Cataviña’s location on the Baja peninsula.It’s a full day’s drive from TJ to Cataviña.
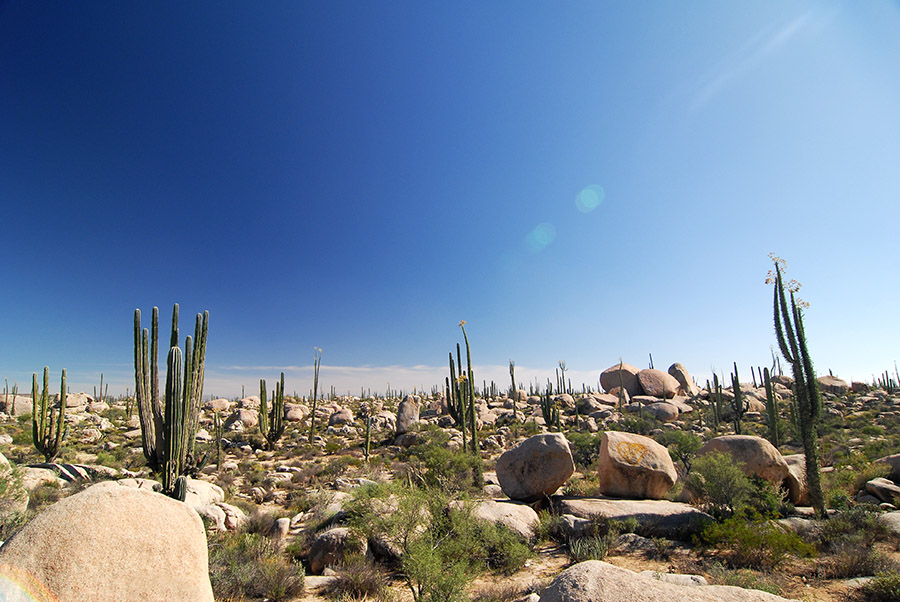
What’s cool about Cataviña is that it is in one of Baja’s boulder fields, as depicted in the big picture at the top of this blog. Those are just flat wild…the stark landscape, the giant boulders, the Cardon and Cirio cacti…it’s all impressive. The boulders were formed by wind erosion, which is kind of amazing. I didn’t believe that at first, but I checked with one of my Cal Poly colleagues in the Geology Department (I’m a retired university professor) and he confirmed it for me. Wow.
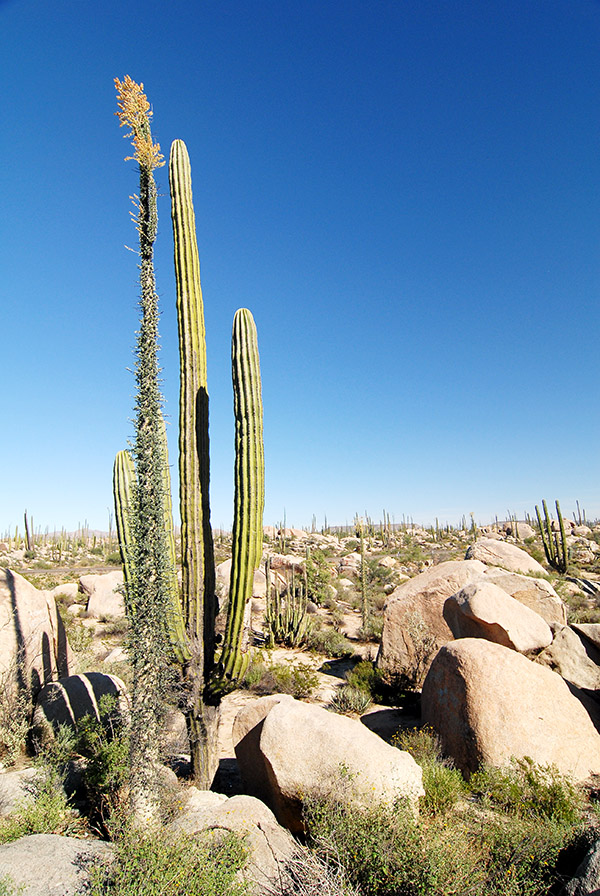
That’s a Cirio plant in front (the long thin one), and a giant Cardon cactus behind it, all in the boulder fields of Cataviña.
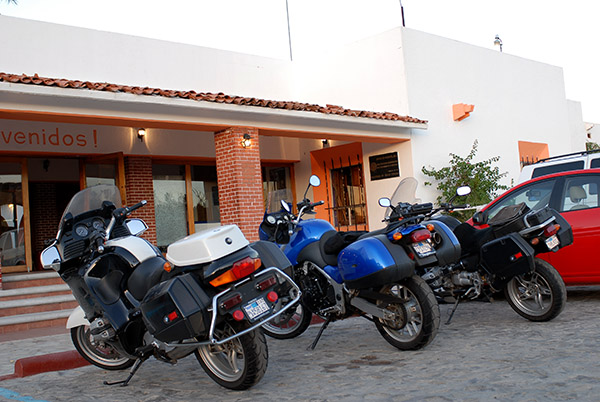
There’s only one decent hotel in Cataviña and it’s the Hotel Mision Cataviña. It’s gone through a number of name changes in the 30+ years I’ve been traveling in Baja (the La Pinta, the Desert Inn, and maybe one or two others), but the hotel has stayed the same and that’s a good thing. The Hotel Mision Cataviña has a good restaurant and bar. It also has a nice swimming pool, and that pool has been just what the doctor ordered for me and my friends on more than a few occasions riding Mexico Highway 1 through Baja.
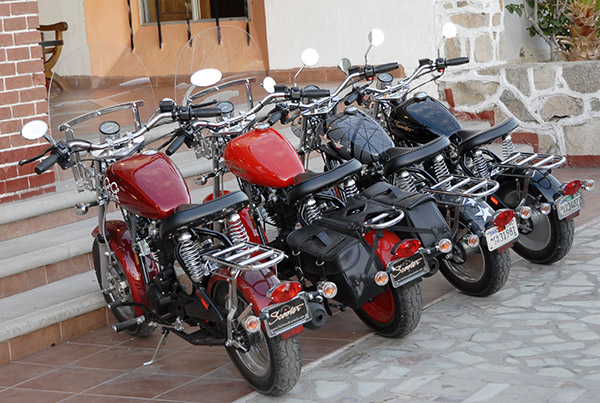
Parked in front of the Hotel Mision Cataviña. I’ve toured Baja on all kinds of bikes. The blue Triumph Tiger was my ride on this trip.My friends and I once rode all the way to Cabo and back on 150cc CSC Motorcycles Mustang replicas. You can read about that adventure here. We spent the night in Cataviña.
At around $80 a night it’s a bit pricier than most other Baja hotels, but it’s still inexpensive by US standards. There’s really nothing else in the Cataviña area for either hotels or restaurants other than a concrete-floored hotel on the other side of the highway. We had to stay in that other hotel once when the Hotel Mision Cataviña was full. That was more than 20 years ago and my wife still mentions it when she gets mad at me. Take my advice on this: The Hotel Mision Cataviña is where you want to stay.
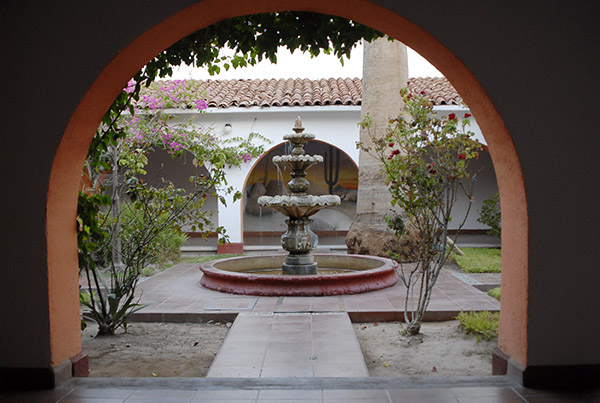
One the Hotel Mision Cataviña’s coutyards. It’s a classy place.
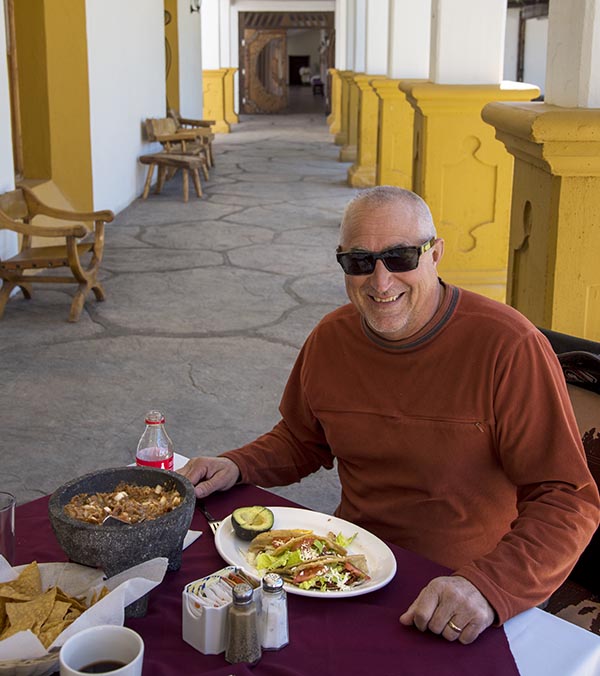
I enjoy eating in the Hotel Mision Cataviña’s restaurant even if I’m just passing through. If you let the staff know you’re in a hurry, they’ll get you in and out. If you don’t, things kind of run on a Cataviña pace. That’s cool if you’re staying for the night; it’s not if you’re trying to make Guerrero Negro. I’ve done that, but it is a very long day. The restaurant and bar have kind of an arched brick roof in the dining room. It’s fun. As you might imagine, they are well stocked with Tequila and Tecate.
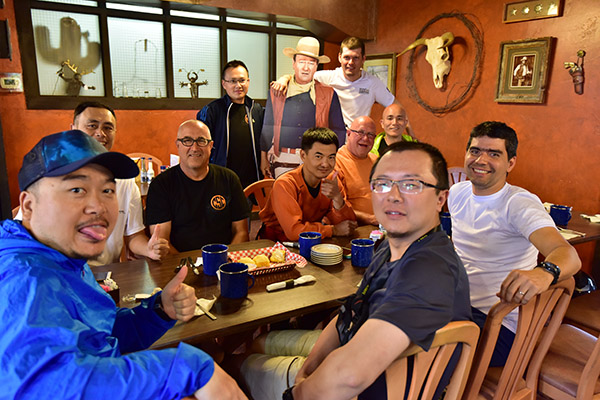
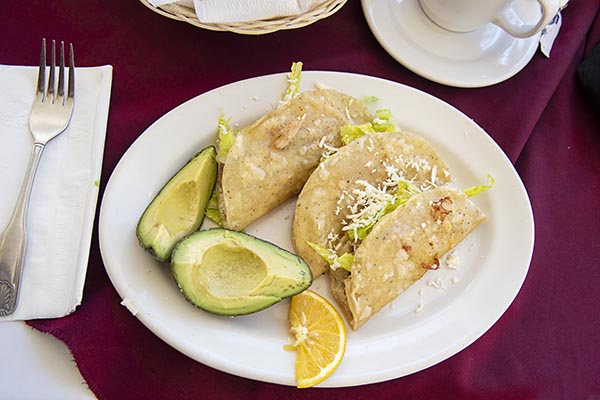
Joe Gresh enjoying chicken tacos during a brief stop at the Hotel Mision Cataviña restaurant.They look good, don’t they?
If you’re traveling with a bunch of guys and you don’t mind sleeping 8 or 9 to a room, the Hotel Mision Cataviña built a separate just to the north of the main hotel and it has a dormitory style room. I don’t know what it costs, but it’s got to be (on a per head basis) cheaper than one of the double rooms. The rooms are nice. The place is clean, it’s air conditioned, and its comfortable. The only issue with the new building is that the hotel runs a diesel generator all night, and if you stay in the new building, it might keep you up.
Fuel is less of a concern today than it used to be. We used to buy bottled gasoline from enterprising guys by the side of the road, but there’s a convenience store just across Highway 1 from the hotel now with gas pumps, so I think getting gasolina today is less of an issue.
If you would like to know more about the Hotel Mision Cataviña, you can do so here.
Headed into Baja? Make sure you insure with the best, and that’s BajaBound!
Check out our reviews of other Baja hotels and restaurants, destinations, and more on our Baja page!
Never miss an ExNotes blog! Sign up here for free!
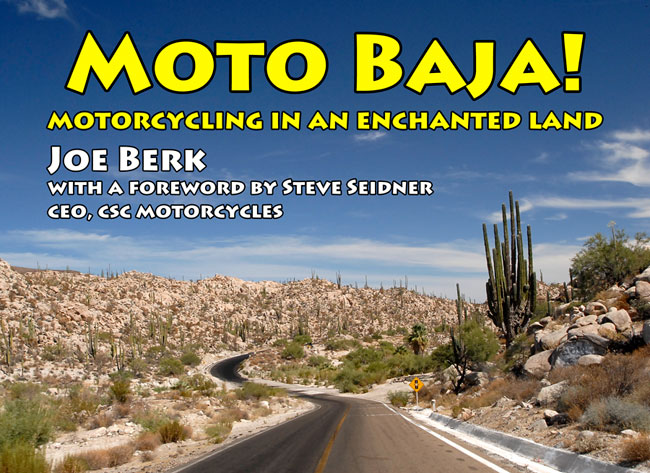
Want to know more about some of our moto trips in Baja? Pick up your own copy of Moto Baja!
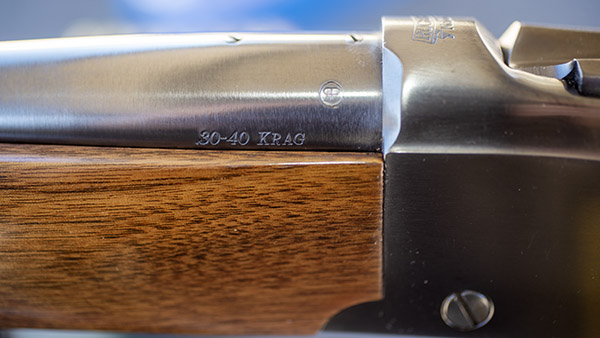
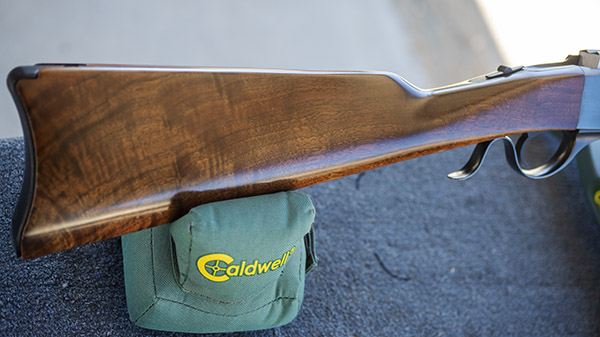
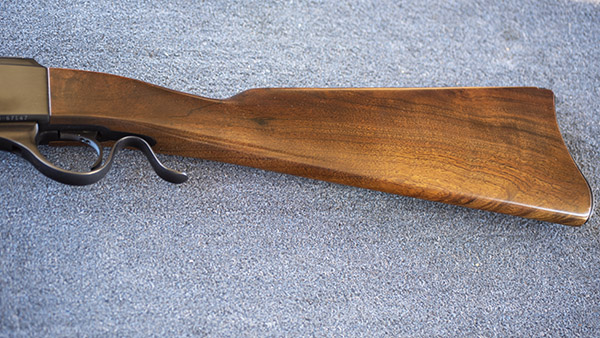
I am a fan of both the No. 1 and the No. 3 Ruger single shot rifles. The No. 1 is the more elegant rifle with a fancier lever, a pistol grip stock, checkering, a rubber shoulder pad, a slick quarter rib, fancier walnut, and more. The No.3 was the economy version without checkering, plain walnut, an aluminum (and later plastic) shoulder pad, and a no frills look. When I started collecting these rifles in 1976, the No. 1 was chambered in contemporary cartridges and priced at $265. The No. 3 came in classic chamberings; in 1976 that included .22 Hornet, .30-40 Krag, and .45-70. Ruger listed the No. 3 at $165, and you could buy them all day long for $139. Which I did. In 1976, I bought No. 3 rifles in all three chamberings. All had the “Made in the 200th Year of American Liberty” inscription.
Take a look at the finish on this Ruger No. 3. It’s better than how they came from the factory.
I was younger and dumber in those days, and I stupidly sold all three rifles within a year of purchasing them. The Hornet went to Army buddy Jim, the .45-70 went to another Army buddy also named Jim, and the .30-40 was traded for something else I can’t remember. If you’re reading this blog, you realize the phrase “stupidly sold” is redundant. We have all sold guns we wish we kept.
Ruger has to have one of the best fonts ever for chambering designation.
I wanted to undo the wrong I did, and about 15 years ago I started a search to replace my No. 3 rifles. The .45-70 was the easiest to find and the .22 Hornet followed shortly thereafter. The prices had gone up (used, they were going for about $650-$700 back then). The .30-40 Krag was tougher to find. I’m assuming it was because Ruger made fewer of them. Then I spotted something I had to have: An unfired .30-40 No. 3 advertised on Gunbroker, and it had significantly nicer wood then No. 3 rifles typically have. I had to own it and I paid top dollar. When I called the shop, I used my American Express card instead of a certified check because I was eager to get it. I had to pay a 4% premium, but that turned out to be a good thing (more on that in a second).
Unusually highly-figured walnut on a No. 3 Ruger.
The shop that sold it to me did something stupid. They shipped the rifle in the original box with no additional padding and they didn’t insure it. You could get away with shipping a No. 1 Ruger in the original box, as they were stout and contained big pieces of foam padding. The No. 3 had a flimsy cardboard box in keeping with the No. 3’s lower price. You can guess where this story is going.
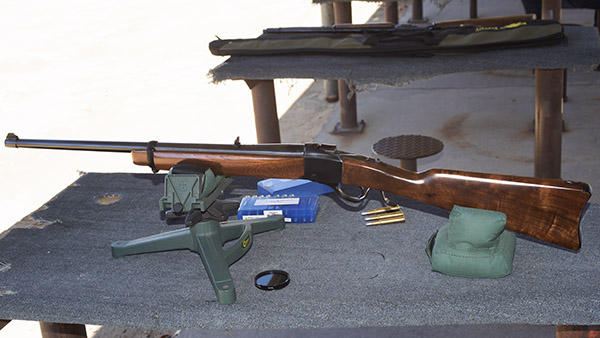
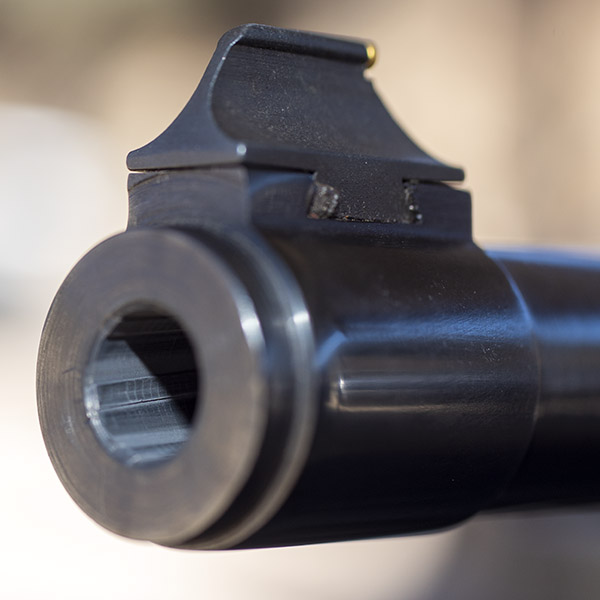
A view of the No. 3’s port side at the West End Gun Club.
Yep, the rifle arrived with the stock broken at the wrist. Wow. The wood was as beautiful as it looked in the Gurnbroker.com ad, but it was busted. I had a brand new, unfired 200th year No. 3 in .30-40 Krag with nice wood and its collector value was ruined. Like the box, I was crushed.
I called the shop owner, who turned out to be a real prick. “It’s your problem, and it’s between you and the US Post Office,” he told me. “You didn’t tell me to insure it, so I didn’t. Once it leaves here, it’s yours.” I told him I was going to have the stock repaired and I offered to split the cost with him, but he kept repeating his mantra: Once it leaves here, it’s yours.
Keep us publishing: Please click on the popup ads!
I told this sad story the next day during our usual geezer gathering at Brown’s BMW in Pomona, and good buddy Dave asked if the gun shop had asked me about insurance. “Nope, he never asked and I didn’t mention having it insured. I guess I just assumed it would be.” Dave explained that I was right to make that assumption, so I called the shop owner again, I explained to him I had learned about insurance responsibilities, and I again offered to split the repair cost. He said no again.
Then I remembered I had used my credit card. I called American Express, I explained the situation, and I told them it would cost about $275 to have the stock repaired and refinished. Not a problem, the guy on the other end of the line said, and just like that, he took $275 off the charge and said that the shop owner had 30 days to appeal. He didn’t, and that was that.
I sent the rifle off and when it came back I was both pleased and disappointed. I had asked the place I use for such work to match the original Ruger finish, but they did not. Instead, it was a much deeper and more glorious oil finish. It was nicer than the original finish, but it wasn’t original. That was good news and bad news. I had planned to keep the gun in its unfired condition, but now that it was busted, repaired, and refinished, it would be a shooter (that was the good news).
You can just barely see where the crack was in the stock wrist, but that’s because I used flash for this photo. In normal light, you really can’t see it.
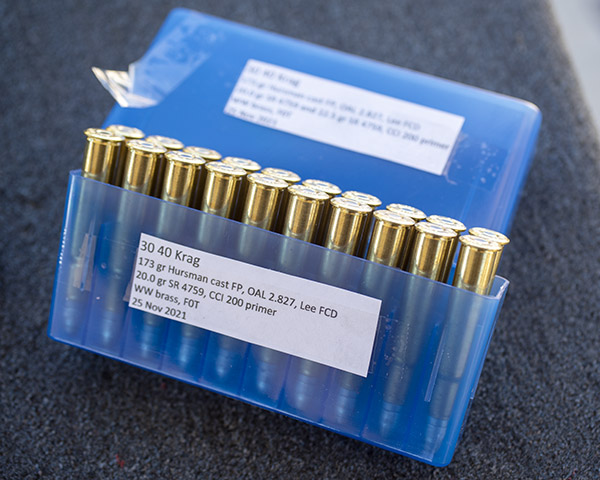
I didn’t shoot the No. 3 immediately. This all happened 15 years ago before I retired and before COVID hit. I recently decided I needed to shoot the .30-40, so I ordered unprimed brass and Lee’s Ultimate four die set. Both were initially unavailable, but they came in and I was in business. I already had large rifle primers, a stash of what has to be one of the best powders ever for cast bullets (SR 4759), and a bunch of 173-grain gas checked bullets.
.30-40 Krag ammo in new brass, loaded by yours truly.Ready for the range.
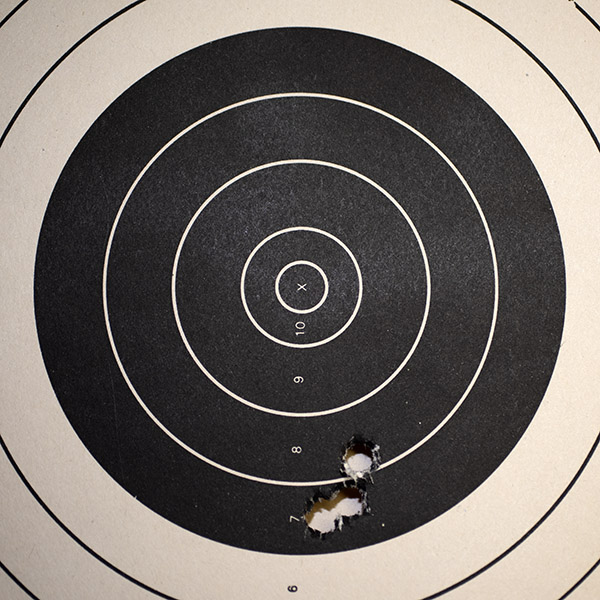
I seated the cast bullets to the crimping groove and used the Lee factory crimp die, and the cartridges looked great. I tried a number of different SR 4759 powder charge levels in the Lyman cast bullet manual. When I fired on the 50-yard line at the West End Gun Club using the rifle’s open sights, I found that 20.0 grains of SR 4759 is my accuracy load.
I held at 6:00, and the rounds shot very close to point of aim at 50 yards. The target was mounted on its side, as you see it here.Very modest bore leading in the No. 3. That SR 4759 load with the 173-grain bullet is accurate even with the Ruger’s factory iron sights.
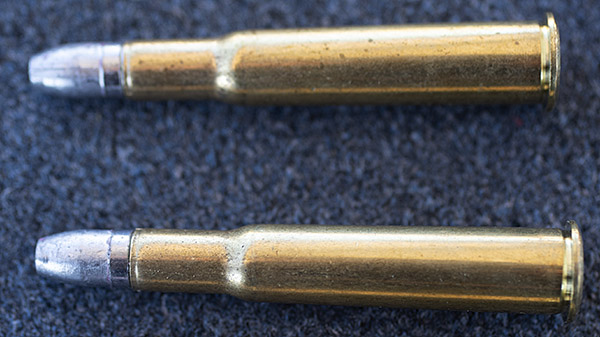
The .30-40 Krag is an interesting cartridge. It was the US Army’s standard chambering after they phased out the .45-70 Springfield. The new rifle was the 1892 Krag-Jorgensen rifle made at the Springfield Arsenal. It was the first military cartridge designed for smokeless (as opposed to black) powder, and it originally fired a 230-grain jacketed bullet. The .30-40 is a rimmed cartridge that looks a lot like the 7.62x54R Russian cartridge (which came out just one year earlier). The ballistics of both are fairly close to the .308 Winchester (which is the 7.62 NATO round we currently use).
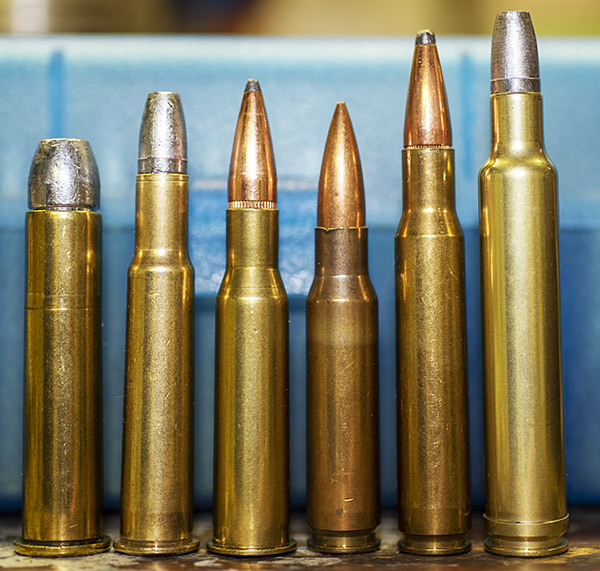
.45-70, .30-40 Krag, 7.62x54R Russian, .308 Winchester (7.62 NATO), .30 06, and .300 Weatherby cartridges. The .300 Weatherby is the fiercest recoiling cartridge in the group when loaded with jacketed bullets at factory velocities (the cartridge shown here is loaded with a cast bullet). With the exception of the .300 Weatherby, Gatling guns have been chambered in each of these cartridges. Modern mini-guns are electrically-powered Gatlings chambered in 7.62 NATO (.308 Winchester).
After our experiences in the Spanish-American War, our government load plant created and issued a hotter version of the .30-40 Krag in an attempt to match the speed and ballistics of the Spanish 7mm Mauser round, but the Krag rifles started cracking bolts. All the .30-40 Krag ammo was recalled and reconfigured with the original, lower pressure load. The .30-40 Krag was also used in the Gatling gun. You can read about that here:
The .30-40 Krag only lasted about a decade in US government service. It was replaced with the .30-03 in 1903 (which was soon replaced with the .30-06, which became one of the most popular hunting cartridges ever). The history of this fine old cartridge is interesting; shooting it with cast bullets in a sleek Ruger No. 3 is good old fun. I might never have known that if the stock had not broken.
Shortly before the pandemic began, Uncle Joe and yours truly borrowed two Royal Enfields from Royal Enfield North America and toured Baja. One was the new 650 Interceptor, and I liked it so much I bought one when I came home. The other was a 500cc Bullet, and, well, you might want to read the blogs to understand how we felt about it. Truth be told, the Bullet was probably better than we perceived it to be (that was because the dealer did a half-assed job prepping it for us). Nah, that’s not fair (it implies the dealer did half of what he should have). But there’s no expression for 10%-assed, and even that might be giving the dealer too much credit. But I don’t want to spoil the story for you. You can get to the Enfield adventures here.
Never miss an ExNotes blog…subscribe here for free!
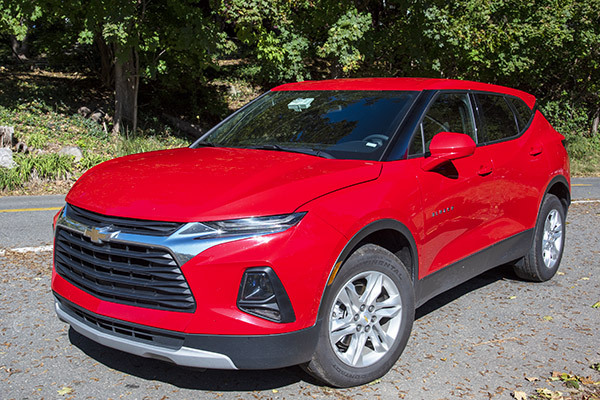
On my most recent content safari we visited New York, New Jersey, and Pennsylvania. That’s why you’ve seen blogs for Niagara Falls and Steamtown National Historic Site. We had a Chevy Blazer in fire engine red, and it was comfortable and fuel efficient.
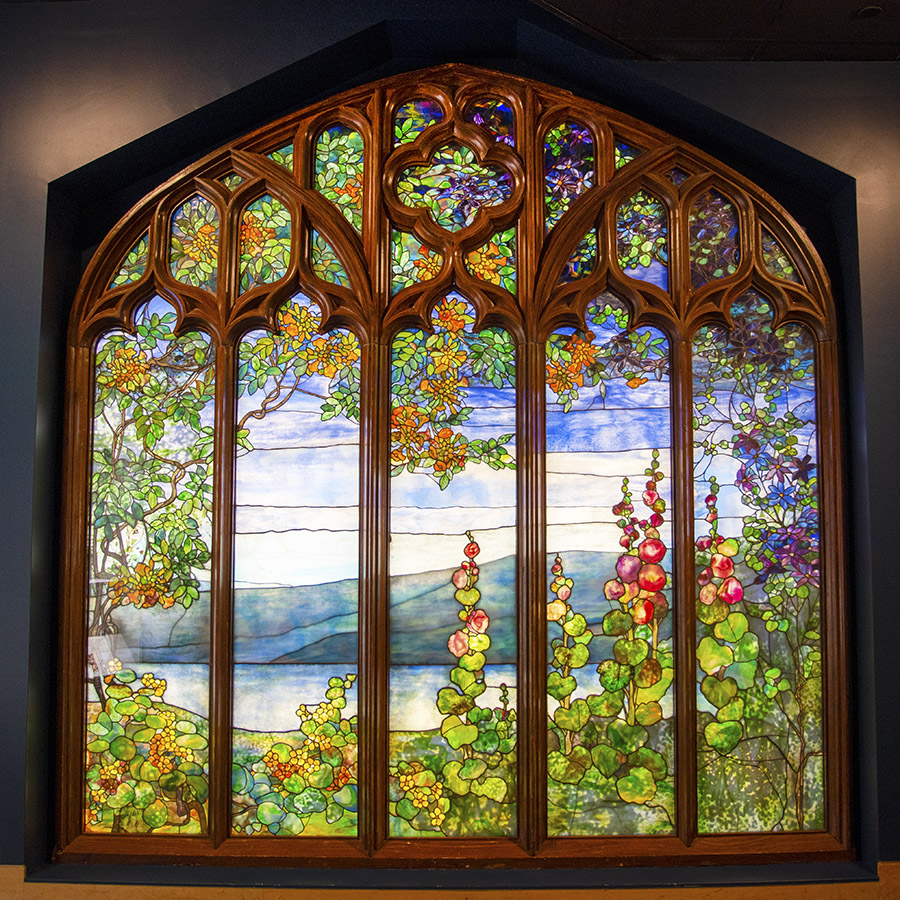
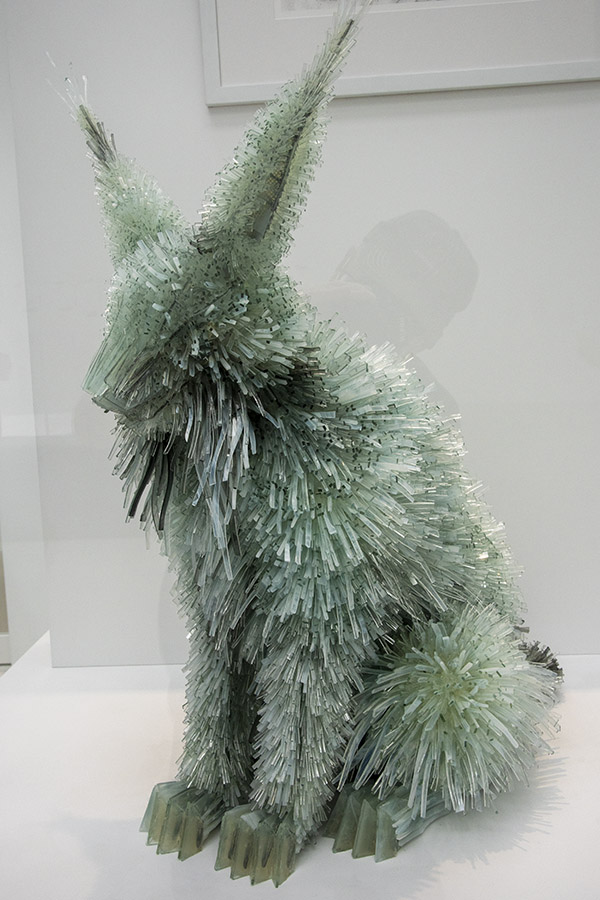
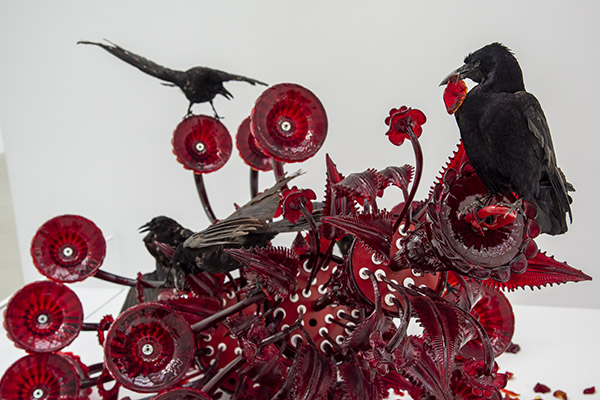
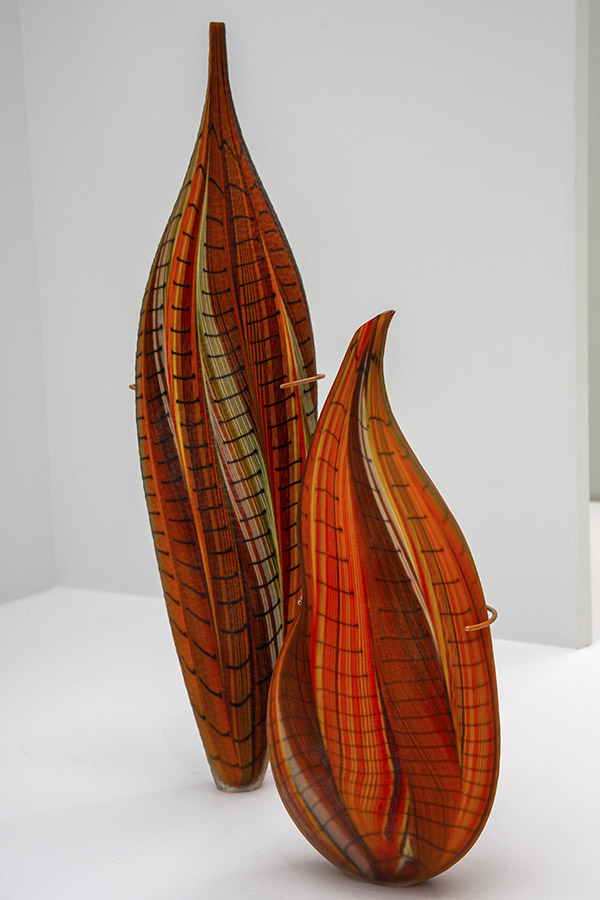
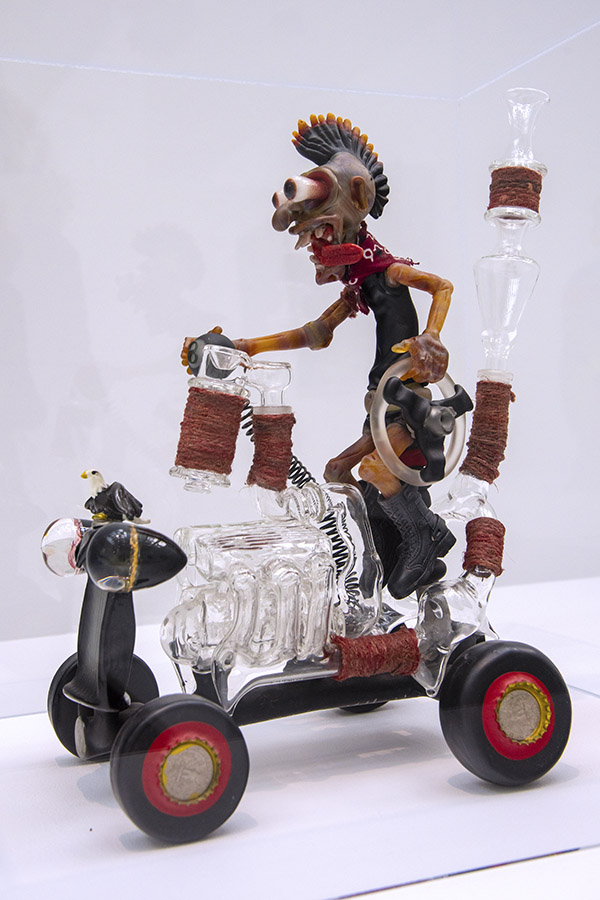
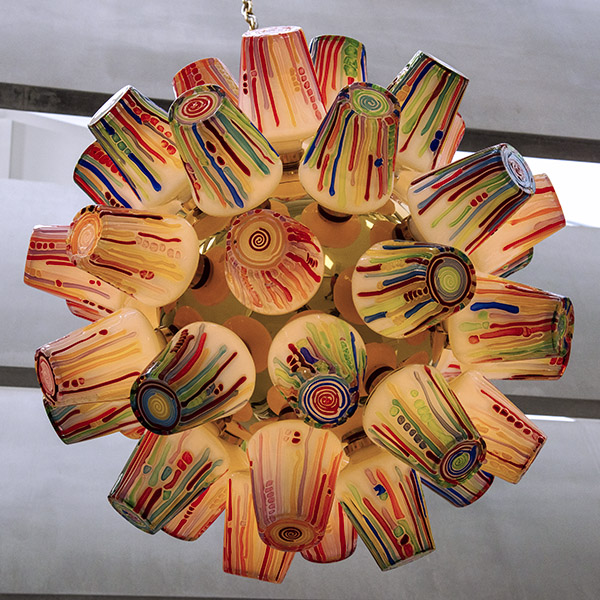
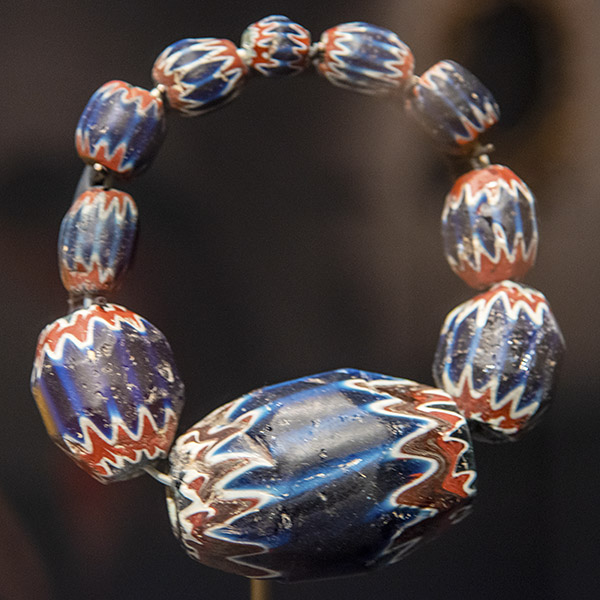
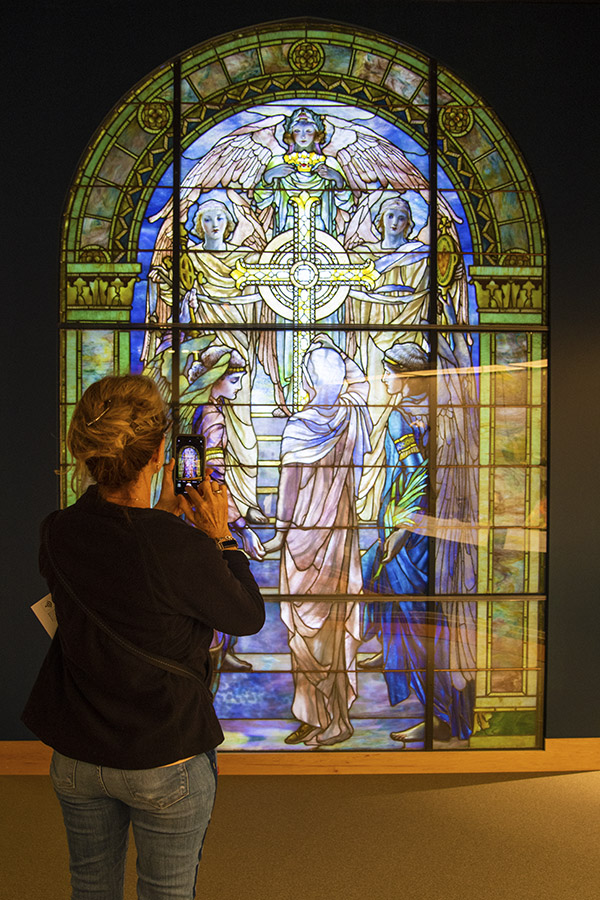
We rolled into Corning, New York, a company town if ever there was one. Corning’s population is a scant 10,696 people, and many of them work for the Corning company. The roads in upstate, rural New York were beautiful, and we were there while the leaves were changing color. Our destination was the Corning Museum of Glass. Corning is home to the Corning corporation. I knew it would have photo ops, especially after our visit to the Chihuly Garden and Glass exhibit in Seattle a couple of years ago. Take a look:
I wanted Italian food for dinner that evening and in a quick online search we found what promised to be a good spot. When we arrived the Italian place was closed. So we went with a less high-tech, old-fashioned approach for selecting where to eat. We walked around downtown Corning and looked for a place that was crowded.
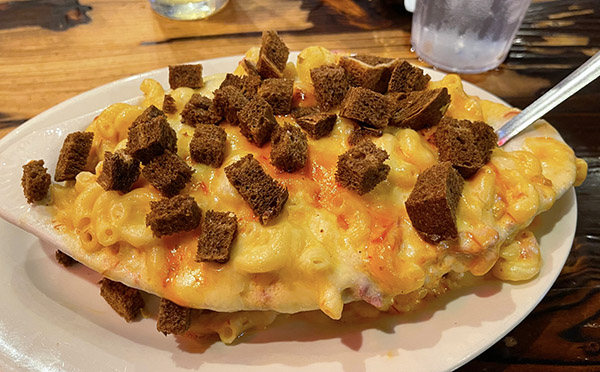
Mooney’s answered the mail. It’s a bar that also serves food. The menu mentioned a Reuben (I love Reuben sandwiches), but the waiter explained that their Reuben was different. Mooney’s specialty is macaroni and cheese, and they had a Reuben-based mac and cheese dish. He suggested the appetizer portion, and that worked.
My dinner was huge, and even with help from my wife and sister, we only could take in about half of it. It was a high end, gourmet mac and cheese (who knew such a thing even existed?) with bits of pastrami mixed in and toasted rye cubes on top. Wow, it was delicious!
Never miss an ExNotes blog: Sign up here for free!
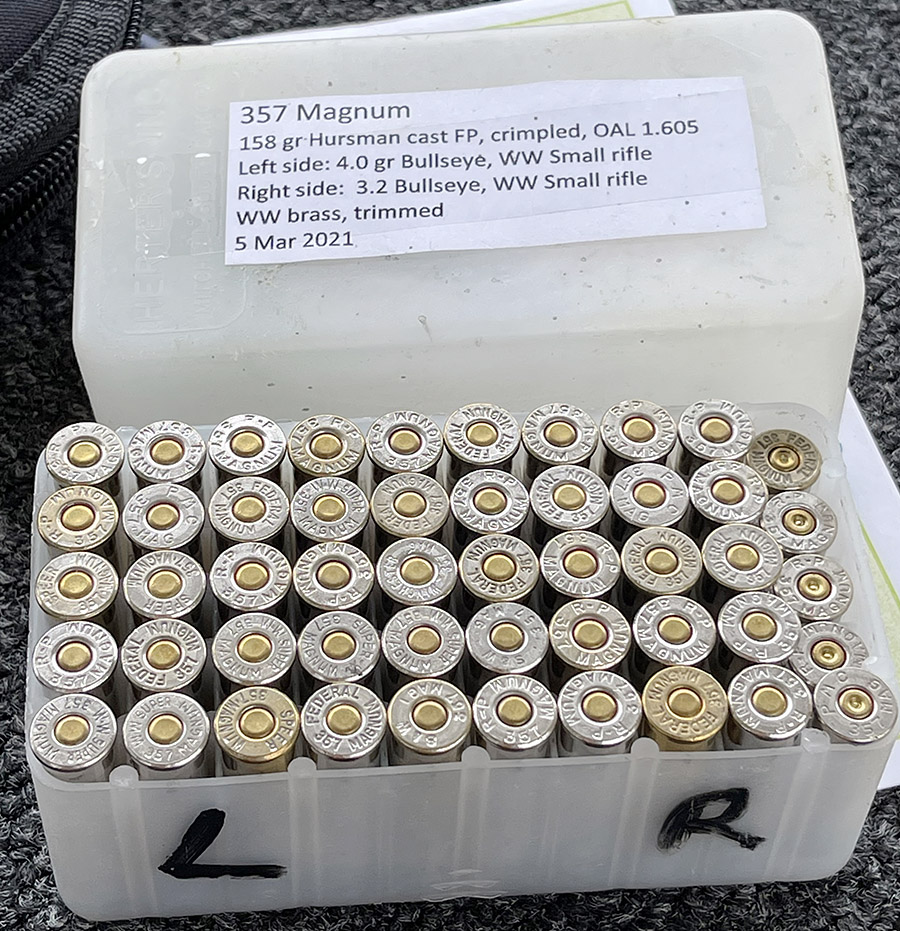
With reloading components still hard to find, the question emerges: Can you use rifle primers in handgun cartridges? If you’re flush with rifle primers but hurting for pistol primers (as I am), it’s a logical question. To evaluate this, loaded a box of .357 Magnum ammo for my Colt Python. I tried to different loads of Bullseye (not an ideal .357 Magnum propellant, but it’s what I had available) and Winchester small rifle primers.
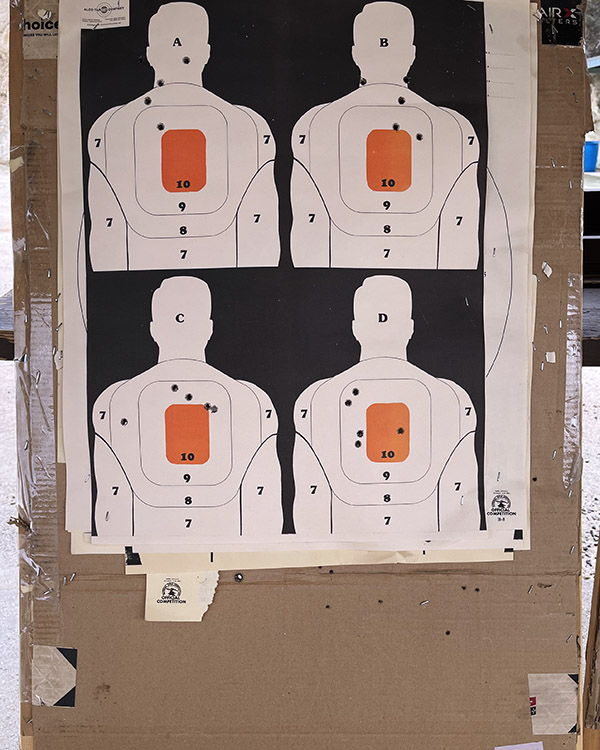
I thought I would simultaneously test for accuracy and reliability on Alco 4-silhouette targets at 25 yards, firing single action at the top two targets and double action on the bottom two targets. The first load was 3.2 grains of Bullseye, a 158 grain cast flatpoint bullet, and Winchester small rifle primers.
Accuracy was mediocre (if you’re ever assaulted by four little men with orange bullseyes painted on their chest, you’d be good enough for government work, but you won’t be taking home any accuracy trophies). The upper two little orange guys were fired single action, and every round discharged. The bottom two little orange guys were fired double action, and on those two targets, I had two misfires. That’s two misfires in 10 rounds, and that’s not good. When I fired the two misfired rounds a second time, they discharged normally.
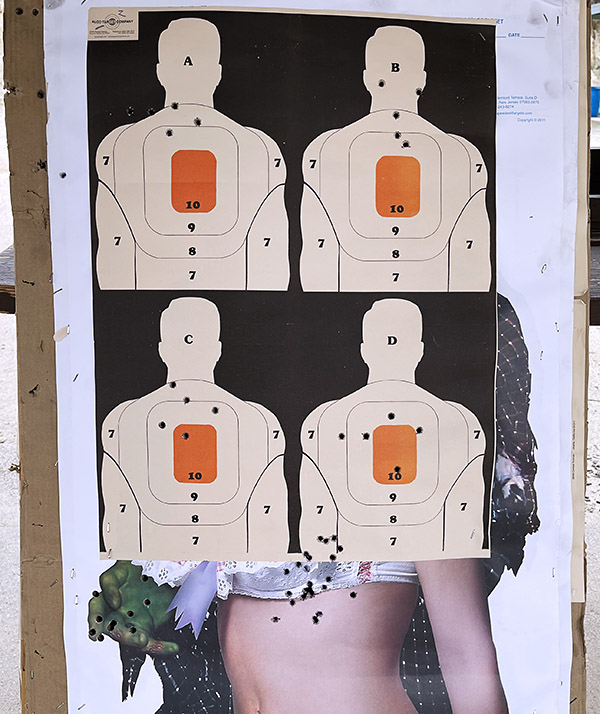
The next target was a repeat of the first, except the ammo I shot at it had 4.0 grains of Bullseye. Everything else was the same. The top two targets were fired single action and the bottom two were fired double action. All rounds fired normally.
You can ignore the shots below the bottom two targets. I was just shooting up some ammo I had left loaded with different combos. The lower left group on the zombie’s green hand were .38 Special 148 grain wadcutter loads (with 2.7 grains of Bullseye); the ones between the two targets were .38 Special loads with the 158 grain flat point bullets and 4.5 grains of Bullseye (a very hot .38 Special load).
The propellant’s name notwithstanding, none of the above were not particularly accurate loads.
As to the primary question: Will rifle primers work in handgun cartridges, my take on this is yes, if fired single action. In double action, ignition is unreliable. On handguns with heavy hammers, you’re probably okay if firing single action. That’s true on the Colt Python, and it’s definitely true on single action Ruger Blackhawks (I have a .30 Carbine Ruger Blackhawk and I always load .30 Carbine ammo with rifle primers).
I suppose it’s possible that the two rounds that misfired double action in the Python may have been suffering from primers that were not completely seated, but I don’t see a need to continue testing. I learned enough from this quick look.
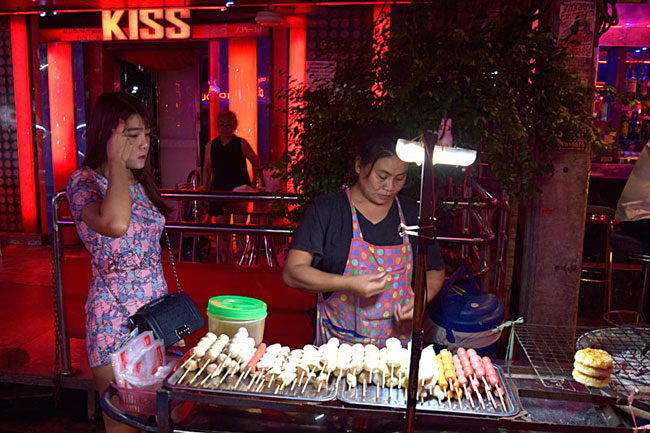
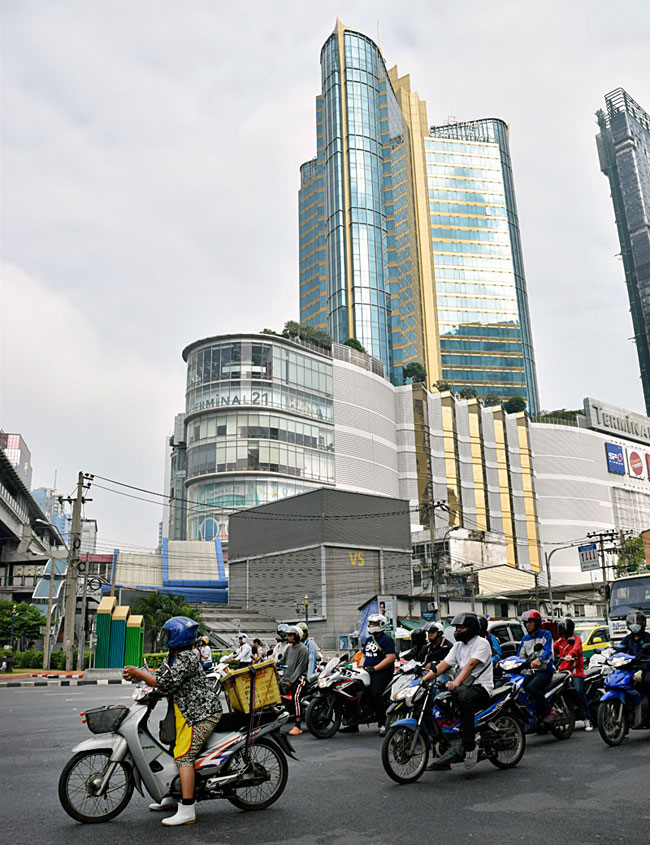
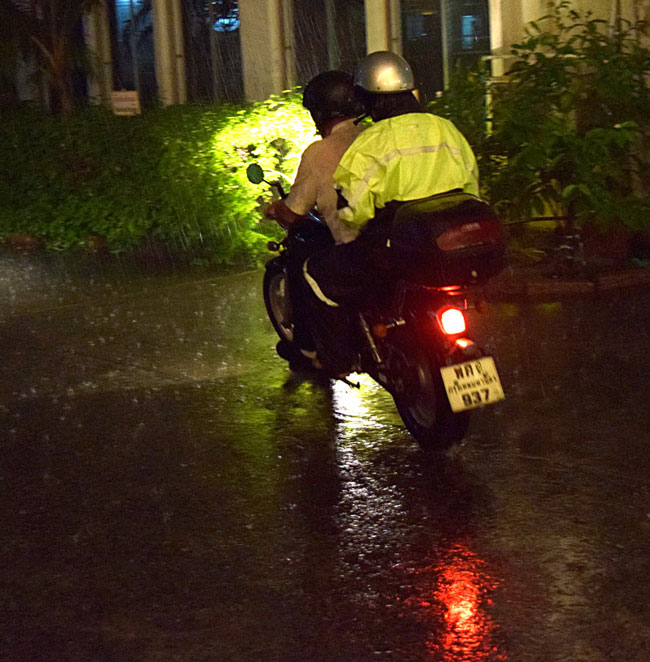
I miss a lot of things about our pre-COVID days, and one is the foreign travel. I love heading to exotic cities all over the world, and one at the top of my list is Bangkok. I’ve been there a few times on assorted secret missions. These photos are from a blog I wrote for CSC Motorcycles a few years ago, and I thought I would share them here.
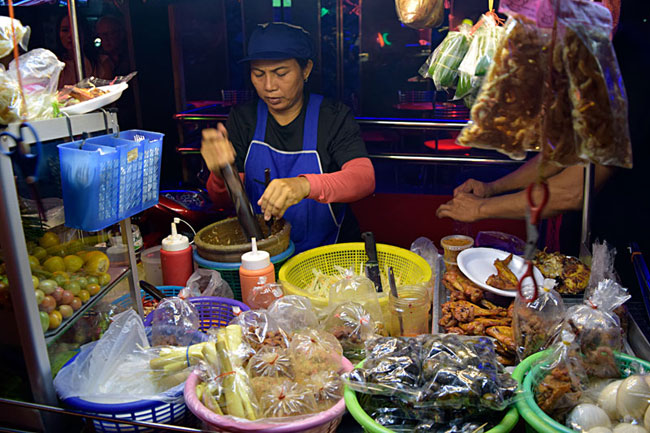
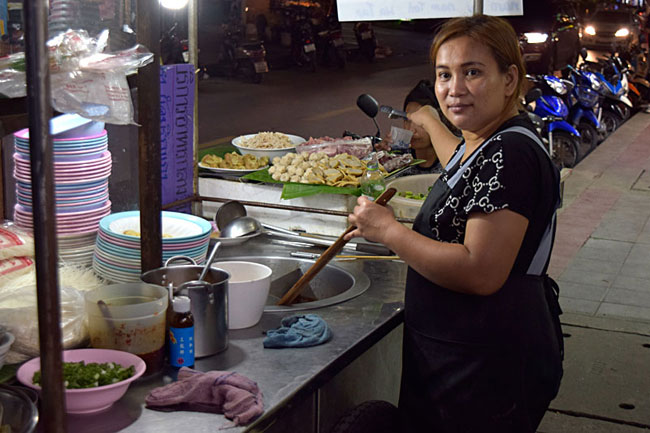
Soi Cowboy (“soi” sort of means street) is a famous Bangkok road that played a role in the movie Hangover II and another movie named, well, Soi Cowboy (a movie I haven’t seen, although I’ll look for it). It’s sort of an entertainment district with a lot of clubs. There were a lot of photo ops centered on two of my interests – food and two-wheeled transportation. With that as an intro, here we go.
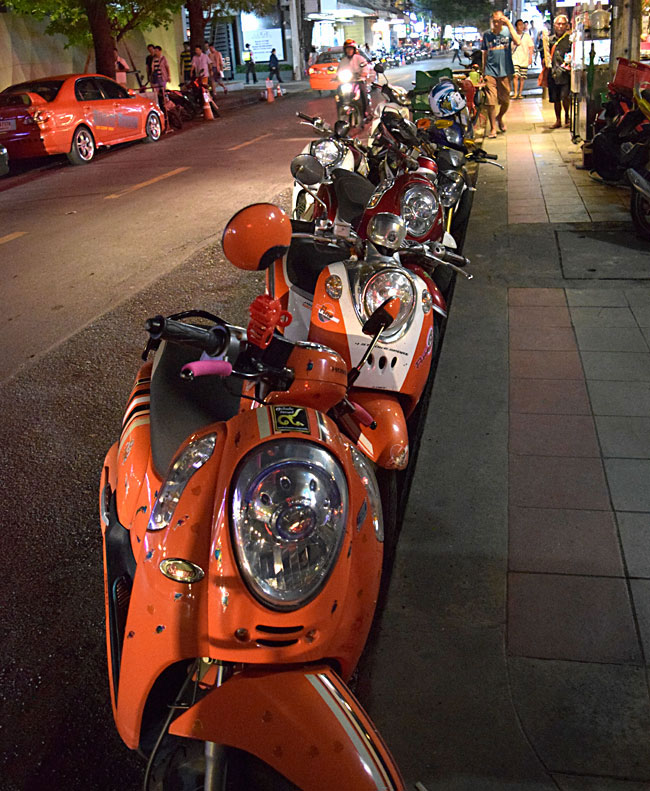
These guys in orange vests are motorcycle taxi dudes. They carve paths through traffic as if it wasn’t there. It’s an amazing thing to see.One of the many food carts and clubs on Soi Cowboy.Another food cart. I had my Nikon D3300 (a relatively small but incredibly capable DSLR) on its “auto ISO” setting, which basically means it runs the ISO up as high as it thinks it needs to be to get a good shot. Some of these photos were at ISO 12,800.Scooters and small-displacement motorcycles dominate Bangkok. Here are a few scooters lined up on Soi Cowboy.More Thai street food.A look down Asoke (that’s the street name) from a pedestrian overpass. Soi Cowboy is just off of Asoke.The Bangkok grand prix.Good buddy Kevin and friend. Rain? Not a problem!A Thai SUV.A Thai taxi scooter in action. Scenes like this are common throughout Bangkok.
One more thing, and that’s a video I shot just off Soi Cowboy showing the scooter action in vibrant downtown Bangkok. It sure was fun.
Never miss an ExNotes blog…subscribe here for free!