If your TT250 won’t idle…

When you don’t run a carbureted bike for a while and it runs rough or won’t idle, it’s probably because the slow jet is clogged.  It’s not from dirt or contaminants getting into the fuel; it’s from the fuel itself.   The fuel congeals when the bike sits for an extended period (we’re talking months here), the jet clogs, and your bike just won’t idle or run well at small throttle openings.  That often occurs if you let your bike sit over the winter.  One way to potentially avoid this is to close the petcock and run the bike out of fuel when you’re done riding.   I don’t do that, though, mostly because I don’t want to let the bike idle for an extended period and, truth be told, I’m lazy.

I wrote the CSC maintenance tutorials for the TT250, so I had a bit of a leg up doing this myself on my TT250 when I had the problem recently.  I hadn’t ridden my TT250 in a few months, it was hard starting and I couldn’t get it to idle when I finally did get it to start.  I knew what was going on immediately:  It was the slow jet clogging.   All carbed bikes will do this (it’s not a problem unique to the TT250).

Everything I’m showing you here is right out of the CSC TT250 carb maintenance tutorial.  That tutorial covers everything about the carb. This blog is specifically focused on cleaning the slow speed jet to address the idling and slow speed roughness issue.

I find the best way to do this is to pull the carb off the engine.  To do that, you’ll need to remove the bike’s side panels.  Close the fuel petcock and remove the fuel line from it to the carb (you’ll spill a little gas, so don’t do this around open flame or heat).  Like a lot of maintenance actions on modern motorcycles, half the job is just removing stuff that’s in the way first.

Disconnect the duct that goes to the airbox and pull it off the carb.
You don’t have to disconnect the duct at the airbox end; just take off the end that attaches the carb.
Unscrew the top of the carb.
Remove the slide from the carb.
Working from the left side of the bike (opposite the carb) remove the bolt securing the rear brake fluid reservoir and let it hang free. You need to do this to get to the carb mounting bolt on the left side.
Unbolt the carb from the cylinder head. The nut on the right is easy to get to; the nut on the left side of the carb is a bitch to get to, which is why we moved the brake fluid reservoir out of the way.

At this point, you can remove the carb from the bike, and then the float bowl from the carburetor.  This will provide access to the jets.  Some folks might think that you can remove the float bowl with the carb still on the bike, but I’ve not found a way to do that.  It’s best to do it the way I describe here.

Undo the three screws securing the float bowl to the carb.
Remove the float bowl. You’ll spill a little gas here, so be careful.

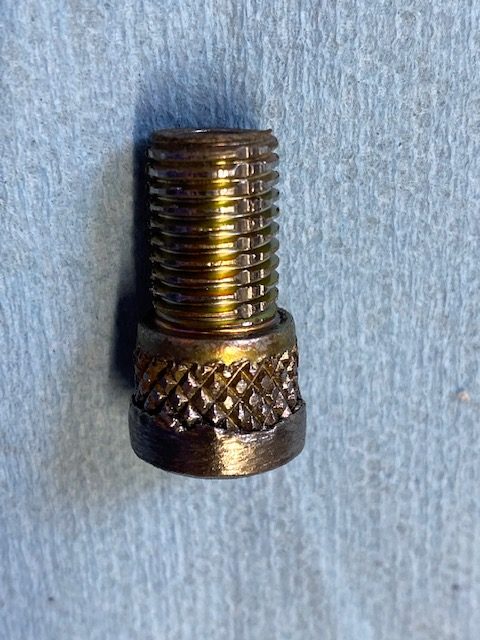
After have removed the float bowl, you’ll be able to see the jets.  The one we’re interested in here is the slow jet.   Remove it with a flat-bladed screwdriver.

The slow speed jet is the main character in this “won’t idle worth a damn” story.

After removing the slow jet, clean it thoroughly.  This involves cleaning all the orifice holes on the sides of the jet, and the main hole through the inside diameter of the jet.   You need to use a thin wire to do this.  Just blowing it out with carb cleaner or WD 40 won’t dislodge the tiny bits of congealed fuel.  There are tools to do this (CSC Motorcycles sells them).  I used a small diameter brass wire and it got the job done.

Use a wire to clean the slow jet and then blow it out with carb cleaner or WD40.
Looking down the bore of the slow jet.
Make sure you use the wire to get everything out of all the holes.

Once the slow jet is clean, reinstall the jet in the carb.   There’s no adjustment here; just screw it in taking care not to overtighten it.

After you’ve done the above, assembly is the reverse of disassembly.  Your bike should start easily, idle, and run well at small throttle openings.

Golden Spike National Historic Park

To continue our Utah exploration, this blog is on the Golden Spike National Historic Park in Promontory, Utah.   This is where the Transcontinental Railroad came together, with the Union Pacific building from the east, and the Central Pacific building from the west.   The Transcontinental Rail Road was completed on 10 May 1869.  It’s quite a story, and Golden Spike National Historic Park does a grand job in telling it.

Heading into Gold Spike National Historic Park.
The National Park Service advises not listening to your GPS, but to instead watch for the signs.
Jupiter and No. 119. Both locomotives were built in the eastern, industrialized US.
Keep going in one direction, and these tracks would lead to Council Bluffs, Iowa. Head in the opposite direction and you’ll arrive in Sacramento.
Jupiter and its coal tender. Both this locomotive and No. 119 (see below) are not the originals. They were reverse engineered from photographs and completed in 1979.
No. 119. Neither Jupiter nor No. 119 were supposed to be the locomotives that met at this site. Antelope was replaced by Jupiter when it hit a fallen tree trunk along the way to Promontory. No. 119 replaced another locomotive when the first one was chained to the rails in Piedmont, WY, by workers who had not been paid.
A reenactment of a famous cowcatcher kiss.
Another view of Jupiter.
And another. If you are a photography enthusiast, Utah is a target-rich environment.
No. 119 basking in the Utah sunshine.
I had a new wide-angle lens when I shot these photos.
Colorful Jupiter. Both originals, Jupiter and No. 119, died a death that didn’t quite fit their historical significance: They were both sold for scrap (at less than $1000 each) in the early 1900s.
And finally, headed back to Ogden, Utah, on State Route 183.

Susie and I arrived late in the afternoon at Golden Spike National Historic Park to catch their last presentation of the day.  We hung around for a bit taking a few more photos and were about to leave when one of the docents suggested we stay a little longer.  They were about to move the locomotives back to their garage, or barn, or whatever you call the structure where you park a locomotive.   We were glad we did, and I grabbed this video.

Italian meat sauce and lasagne…

I’m sheltered in place, I’ve got enough ammunition reloaded to arm an infantry platoon, I’ve been reading a lot, and I’ve been sending and receiving lots of email.  Some of that email has been from good buddy Sergeant Zuo over in Lanzhou, and one of the things Zuo mentioned he’s been doing is developing his culinary skills.  I’ve been doing the same, and I thought I might share one of my favorite recipes with you.

Whoa, you might say…all this manly man stuff about motorcycles, international travel, guns, reloading, and…well, you know.  Cooking?

You bet.  For me, it started back in the ’70s, when I was an engineer at General Dynamics in Texas on the F-16.  I couldn’t get a date to save my life, I was single, and I was lonely.  And there were all those beautiful young Texas ladies.

One of my good friends was constantly dating a variety of beautiful women.  So one day I asked him:  What’s the secret?

Good buddy John was only too happy to put me on the right path.  “Don’t ask them out for dinner,” he said.  “Invite them over to your place for dinner, and you cook a meal.  No one can resist that…”

Hmmm….

Well, it worked.  Every time.   And today I’m married, two kids, two grandkids with a third on the way, and yep, I love to cook.

So here’s one of my favorite recipes:  Italian meat sauce and lasagna.   It’s not the original dinner good buddy John cued me to (that was bacon-wrapped filet mignon, and that’s a story for another time).  But this one is even better, I think.  You can use the meat sauce with anything Italian (ravioli, spaghetti, stuffed shells, and more).  Today’s focus is on lasagne and it works well.

Italian Meat Sauce Ingredients

What you’ll need is:

1 16-once can of diced tomatoes (my preference is Contadina, but these days, I’ll take whatever is on the shelves)
1 8-0unce can of tomato paste
2 stalks of celery (sliced)
1/2 onion (chopped)
3 cloves garlic (crushed)
1 lb ground beef (browned and chopped)
1 Italian sausage
1 teaspoon Italian seasoning
1 teaspoon oregano
2 bay leaves
1/4 to 1/2 teaspoon red chili pepper flakes (depending on how much zing you want in your sauce)

Getting started. I don’t usually eat the sausage, but having it in the crockpot adds tremendous flavor to the sauce.
You can leave this out if you don’t want a tiny kick to the sauce, but I think it adds something to the mix. I generally use a little more than a quarter of teaspoon.
We usually get the leanest ground beef we can find.
Brown the meat in a frying pan.  As the ground beef simmers, I’ll chop it up with a plastic spatula.  PRO TIP:  I think the sauce is better if you chop the meat into the tiniest pieces you can get while it is browning.
I chop the onion into pieces like you see here.
Sliced celery in Italian meat sauce?   Yep. Try it.

So when everything is prepped, add it all to the crockpot, stir it a bit, and then start the crockpot. I start my Italian meat sauce in the morning and I’ll let it cook for about 5 hours on the crockpot’s high setting.

After everything is in the crockpot, stir it before turning the crockpot on.

While it’s cooking, the house will fill with this delicious Italian meat sauce aroma.  That’s part of the fun.  When the sauce is ready, it’s delicious.

The finished Italian meat sauce. It’s exquisite.  It’s far better than anything that comes out of a can or a bottle.

PRO TIP:  Slice up a half a green pepper, and add it to the crockpot before you start cooking.   It adds another flavor dimension.

Lasagne

Like I said above, you can use the Italian meat sauce with any recipe calling for it.  One of my favorites is lasagna.  All you’ll need in addition to the ingredients listed above is a box of lasagna noodles.

Lasagne Ingredients

1 box lasagna pasta
16 ounce container of ricotta cheese
Shredded parmesan cheese
1 container of sliced mozzarella cheese
Italian meat sauce (as prepared above; you’ll need the entire pot)

Follow the directions on the pasta box and boil the noodles.  I usually drop a little bit of olive oil in the boiling water to keep the noodles from sticking to each other.  The box will probably tell you to boil the noodles for 8 minutes.  Don’t go over that or the noodles will get too soft.

After the noodles boil, drain in a colander and we’re ready to start.
Place one layer of noodles in a baking pan.
Place a layer of meat sauce on top of the noodles; then, put ricotta cheese on top of the meat sauce.
Place slices of mozzarella cheese on top of the ricotta cheese as shown here.  Add another layer of noodles and repeat the layering with meat sauce, ricotta cheese, and mozzarella cheese.  Repeat this layering until the bowl is nearly full.  Sprinkle a little bit of Parmesan cheese on top.
Cover the pan with aluminum foil and preheat oven to 375 degrees.
Bake at 375 degrees, covered, for 40 minutes. I like to remove the aluminum foil and put the oven on broil for a couple of minutes to brown the cheese on top just a bit.

And there you have it.  It’s good, it’s easy, and you’ll have plenty of leftovers.

Aztec Ruins, New Mexico and Motorcycle Classics magazine

This was exciting…Susie and I were tooling through New Mexico on  our way to Mesa Verde in Colorado when we spotted a sign for Aztec Ruins National Monument.   We’d never been there.  In fact, we had never even heard of the place.  But it’s there, it’s real, and it’s a grand destination.  The result?   Well, hey, check this out!

The Browning Firearms Museum

Ogden’s Finest. It was a good morning to be a Harley, I think. A little wet, maybe, but still a good day to be out and about.

You know, you could do a pretty cool adventure ride lasting a couple of weeks without ever leaving Utah.  I know we’re stuck at home, self-isolating and all that, so it’s a good time to share past adventures and photos of great trips.  I’ve traveled a lot, and I think Utah is one of the best destinations on the planet.  It is probably the most scenic and interesting state in the country.

About that photo you see above…Susie and I rolled into Odgen one day back in 2015 to visit their museums, and these Ogden motor officers were parked out front. It was a great photo op, so I asked, they said okay, and the photo you see above is the result.  It was raining that morning, but that never stopped me from riding and it didn’t stop these motor officers, either!

Ogden has four museums and an art gallery in their old railroad station, and it’s one heck of a deal. For a very minimal entrance fee, you get to see the Browning antique car collection, the Browning firearms museum, the railroad museum, the cowboy museum, and an art gallery.  If you don’t have Ogden on your destinations list, maybe you need a new list!

Entering the Browning Firearms Museum. This museum alone makes Ogden a must-see destination.

Our focus in this blog is the Browning firearms museum.  John Moses Browning, who did much of his work in Ogden, was perhaps the world’s most prolific arms inventor.  This museum highlights his creations as well as many other interesting guns. I was in my element here!

Handguns, rifles, machine guns…Browning’s creations cover it all.
An 1886 Winchester. That buttplate is punishing with the 1886’s .45 70 cartridge.
The 1911 .45 ACP semi-auto handgun, one of Browning’s best-known inventions.
A few of Browning’s single-shot rifles.
More cool Browning single-shot rifles. The second one from the top is a Browning B78. I have one of those rifles.
A close up of the Browning 1878 stock.
A display of Winchester rifles.
An ornately-engraved Browning 9mm Hi-Power handgun. It was a later design than the 1911.

The lighting in the Browning museum was dim, and that’s why the photos you see in this blog are perhaps a bit below what I try to present on the blog. I was shooting at a very high ISO without flash, as most of the displays were behind glass.  The photos are not great, but they are pretty good considering the lighting.

There were a lot of interesting firearms on display, and then we migrated over to the car collection and the railroad museum. Those will be the subjects of subsequent blogs. Trust me on this…if you’re ever in Ogden, you don’t want to miss this place.

After a great lunch in downtown Ogden, we talked about where we’d go next, and Susie suggested Promontory Summit. We had learned a bit about it in the railroad museum, and we were only about 45 miles away. It’s where the railroad construction crews completed the railroad that reached across the United States. That’s coming up, so stay tuned!

The apple doesn’t fall far…

Years ago I wrote a book about police and military motorcycles, and while I was writing it, good buddy Mike found a photograph in the New Brunswick Police Department archives of Ralph Dowgin, a New Jersey State Trooper.  The photo is awesome, and Paladin Press (my publisher) instantly knew it would be the cover:

The Trooper on the cover of my book was Ralph Dowgin, who later rose to high rank in the New Jersey State Police.  Coincidentally, the Dowgin family lived one town over from us in New Jersey when I was a kid.   My Dad knew Ralph Dowgin and spoke of him in reverential tones, so when Mike found the Dowgin photo it was extra special to me.

Yesterday, while on Facebook, another photo popped up that had my immediate and complete attention.  Check this out, and then let me tell you the story behind it:

You might be thinking:  Okay, it’s a picture of a guy on a vintage Honda Scrambler, but what’s your point?
Let me tell you:  The man on that Honda Scrambler is Gerry Dowgin.  The photo on the top of this blog has Ralph Dowgin on the cover of my book, and the photo below it has Gerry Dowgin on the cover of Vintage Japanese Motorcycle Magazine.   Gerry is Ralph Dowgin’s son!
Gerry is about four years older than me, so we didn’t know each other growing up, but he knew my cousin Sandy and we knew a lot of the same people in central Jersey.  I just wrapped up a nice telephone conversation with Gerry.  He invited me to ride with him when I’m back in New Jersey, and I invited him to ride with me when he’s out in California.  What a small world we live in!

Good times, folks, and I’m really looking forward to meeting Gerry in person!

Baja Sportbike Touring in 2004

My good buddy Bryan sent an email to me earlier today asking if I still had the photos from our 2004 Baja ride posted anywhere.  Wow.  2004.  That trip was 16 years ago this month.  Where does the time go?

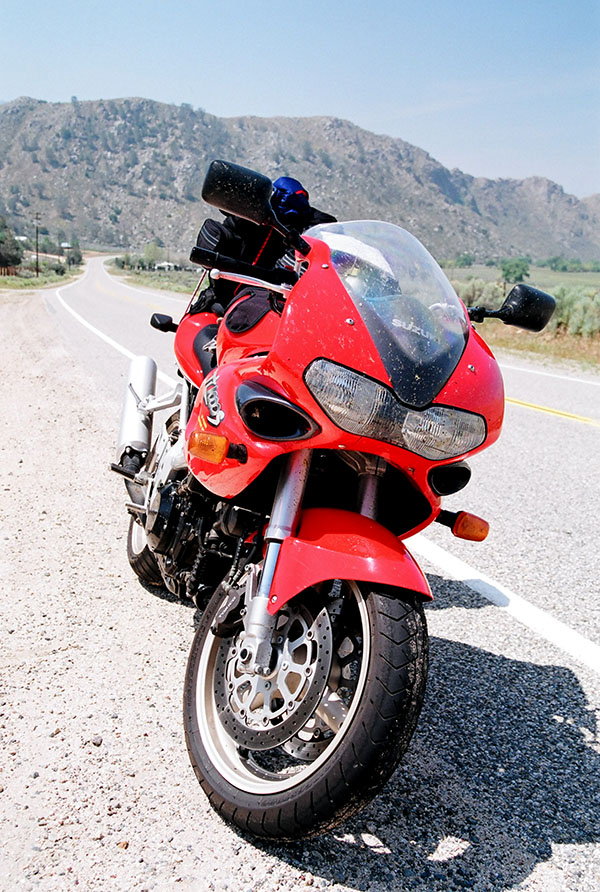
Anyway, by way of background, there were three of us on that ride:  Yours truly, my good buddy Marty (who you’ve seen in other spots here on the ExNotes blog), and another good buddy, Bryan.   This was to be an unusual trip, as we did it on sports bikes.  Marty had his K1200RS BMW (which, by the way, he still has), Bryan was on his VFR 750 Honda, and I was on my TL1000S Suzuki (which was probably the fastest motorcycle I’ve ever owned).  I used to have a site called MotoFoto.cc and I had this trip posted there, but that site came down when I started the CSC blog.  This trip was on the old MotoFoto site, and when Bryan asked about it, I thought I’d post it here.   So here you go…the original web post from 2004!


This trip was a quick, 1550-mile, 4-day motorcycle tour from Los Angeles  to Mulege in the Baja peninsula in January 2004.  Mulege is about 700 miles south of the border.   I shot all of the photographs on this page with the Sony Mavica CD400. It was digital photography state of the art, sort of, back in the day.

This was my fifth or sixth trip into the Baja’s interior, and I have to tell you that it just keeps getting better. The roads are fantastic, the scenery is awesome, and, well, read on.

We stuck to Mexico’s Transpeninsular Highway (Highway 1). Here’s a typical restaurant in one of the northern Baja agricultural towns. Bryan and Marty are getting ready to continue south into the Baja. Picking the good restaurants was easy…we just looked for the ones with lots of cars parked out front.
Bryan and Joe, stopped at a deserted Baja structure. Most of the Baja peninsula is very desolate.
The roads in Baja are awesome, with long, flat, high-speed straights, and lots of twisties through the mountains. It gets really desolate and interesting south of El Rosario.
We stopped for gas in Catavina, but the town’s generator was shut down for maintenance (as it is nearly every day). Marty is getting his BMW filled up the old-fashioned way. This was an adventure…real Indiana Jones stuff.

We were on our way to Guerrero Negro to see the whales.  The riding was fabulous, as it always is in Baja.  The TL1000S was an admittedly poor choice for touring, but it was fun.

The roads in Baja are awesome.  There’s a long stretch before the Pemex station about 20 miles north of Guerrero Negro, and the road runs straight as an arrow to the horizon for a good 30 miles.  I ran the Suzuki at 145 miles per hour for nearly the entire stretch as the sun descended.  It was a glorious ride until I ran out of gas, and when I did, it was as if someone had shut the ignition off on the Suzuki.  No sputtering, no surging, just a sudden shutdown.  I was carrying an extra gallon of fuel on the TL, and that got me to the gas station.

Marty and Joe, just before getting on the bus to see the whales.
This is Victor, who talked to us about the whales on our way out to Scammon’s Lagoon. Bryan shot this photo.
Another one of Bryan’s photos, showing the boats we used for watching the whales.
One of the many whales we saw on this tour.  I shot these photos, as mentioned above, with the Sony Mavica camera.  It was not really too good for this kind of photography because of the delay between pressing the shutter button and the camera reacting.

On the way in to Guerrero Negro, I had been telling Bryan and Marty about this fabulous fish taco truck.  They were probably tired of hearing me rave about fish tacos by the time we arrived, but when we did, wow, Tony did not disappoint us.

The real McCoy.  Wow, are they ever good…Antonio’s has been selling fish tacos in Guerrero Negro for 11 years (and that was in 2004). I stop there every time I go by.
Antonio, taco chef extraordinaire…circa 2004.
Bryan is a convert. So is Marty.  In fact, they both wanted to stop on the way back through Guerrero Negro just to get another fish taco.
One of the many roadside shrines erected in memory of someone who died along this route. You see these every few miles along the Transpeninsular Highway.

After Guerrero Negro, the whales, and Tony’s fish tacos, we continued south and then east, crossing the peninsula toward the Sea of Cortez.  San Ignacio lies about halfway along that stretch.  It’s a great place to stop and grab a few photos.

The mission in San Ignacio. This building is over 300 years old. San Ignacio is a small town just off the Transpeninsular Highway. If you are ever driving this route, you have to stop in San Ignacio to see the mission. It is one of the Baja peninsula’s most interesting areas, and every one I have ever taken there has fallen in love with the place.
The entrance to the San Ignacio mission.
A macro shot of the door to the San Ignacio mission.
The Virgin of Guadalupe, at the San Ignacio mission.

From there, it was on to Santa Rosalia and then Mulege on the Sea of Cortez. Mulege is a fun town, and the tiny Las Casitas hotel is just outstanding. The rooms were great, and the margaritas and dinners were off the charts.

We stayed at the Las Casitas hotel in Mulege, which is a hopping spot.

After we checked into the Las Casitas, we followed the road all the way to the Sea of Cortez just to check the place out.  It was a cool place.  It was a dirt road and the TL1000S was a handful, but it was cool.

Bryan and Marty on the Sea of Cortez. We had just driven several miles down a very rough dirt road to get to this spot. It was worth the effort.
Checking our route for the next day with the Sea of Cortez in the background.
The river running through Mulege. The date palms were introduced by the Jesuits hundreds of years ago. Mulege is one of several oases in Baja. It is an incredibly scenic spot.
Joe and Bryan, taking in the Mulege scenery.
The mission in Mulege. This building served as a prison at one point during its life. Life was so good there, though, that the convicts were released during the day to go to work and none ever tried to escape.
Another shot of the Mulege mission.
Joe and Bryan, with the first of many margaritas and Negra Modelos in the Las Casitas restaurant. The first of many. Actually, the first of too many.
Marty and Bryan enjoying their dinner in Las Casitas.
A painting in the Las Casitas bar.

On our way back north, we stopped in Santa Rosalia because I wanted the guys to see it and we hadn’t really spent any time there on the way south. Santa Rosalia is a bustling fishing town on the Sea of Cortez.

Santa Rosalia has a French heritage, and all the buildings are constructed of wood. It is a colorful little town.
Here’s a shot of the stained glass windows in Santa Rosalia’s interesting, Georg Eiffel-designed church. The little Sony did a pretty good job here, with the meter set to the spot-metering mode. Like all of the shots on this page, this is a hand-held photograph.
Another of the stained glass windows in the Santa Rosalia church.

We had a pretty rough drive on our third night in Baja. All of the books I’ve read advise not driving at night in Baja, and for good reason.  We rode 130 miles on a moonless night to get to Catavina.  Riding at night in Baja is not an experience I recommend. The roads are not lit and it’s amazing how dark it gets out there. Then, just to make things more interesting, the white lines marking the road’s edge disappeared about 20 miles before Catavina on those winding mountain and desert roads. Throw in stray cattle and blind corners, and, well, you get the idea.  We made it to Catavina safely and stayed in the La Pinta Hotel.

We stayed in Catavina on our last night in Baja at the La Pinta Hotel.  We were tired and sore from riding edgy sports bikes for three days. The photo above shows us getting ready to depart just as the sun was rising, with 400 miles to go.

It would have been nice to take more photos as we continued on through Tecate, but we were tired and just after crossing the border we were caught in a rainstorm near San Diego. We waited in a McDonald’s, so that’s about it for our Baja photos from this trip.


Want to  know more about Baja?  Hey check out these pages!

Epic Motorcycle Rides
Baja
Berk’s Works


Want to read more about Baja?  Here you go!


Thinking of riding Baja yourself?  You’ll need to get insurance, and BajaBound is the best there is!

Henry’s home, and an interview with Dan

California’s 10 days are up, and Henry is in the house!

Henry, of course, is my new brass-framed .45 70 Single Shot from the rifle manufacturer of the same name.  I haven’t shot it yet, but I’m ready.  Eager, too.  This is going to be fun.

To continue the story and as promised, a few days ago I interviewed Daniel Clayton-Luce, Henry’s Director of Communications.  As you know from reading our earlier blogs, I am impressed with Henry and I purchased one of their new Single Shot rifles. I picked up my Single Shot yesterday (practicing all the required social distancing rules, of course), and wow, it is one fine firearm.  Take a look.

With me, it’s always been about the wood.   I’ll get better photos when I’m basking in the grand and glorious sunshine at the West End Gun Club (and I’m not sure just yet when that will be), but here are a few teaser shots.

Like I said above, I haven’t shot the Henry yet.  But my first impressions are very, very good.  The wood is stellar (both the stock and the fore end), the wood-to-metal fit is way better than what I’m used to seeing on production guns, the action feels crisp and tight, and the brass frame and buttplate are classy.  The trigger is a little heavy, but it is breaking-glass crisp, and the rifle shoulders well.  The quality is off the charts.  It’s that good.

So, about that interview with good buddy Dan from Henry USA…let’s get to it.  My first questions were these: What prompted Henry to enter the single shot rifle market, and did Henry do so by purchasing the old Harrington and Richardson design and production equipment?

Dan explained to me that the new Henry Single Shot is a Henry through and through, it has no relation to the H&R design, and I would absolutely notice a difference in quality between it and the H&R guns. He sure was right. I am a collector and admirer of fine rifles (I’ve focused primarily on Ruger No. 1 and Ruger No. 3 rifles), and I think I know a bit about what goes into a good rifle. For me, the Ruger No. 1 has been the gold standard, especially the earlier ones made in the late 1960s and 1970s. I’m here to tell you that the new Henry is equal to those rifles, and perhaps even better. The fit, the finish, the wood, the bluing, and the overall feel of my Henry is absolutely top notch. Surprisingly, the new Henry brass-framed .45 70 (at an MSRP of a little over $600) is less than half the cost of a new Ruger No. 1. I am impressed. Dan told me that Henry decided to enter the single shot market with a premium offering, and after examining my new rifle, I can tell you that “premium” is the right adjective. My Henry Single Shot is stunning.

I told Dan that I thought entering the single shot rifle market had to be a risky venture (H&R went out of business, Ruger’s No. 1 sales have declined significantly, and the rage today seems to be black plastic Rambo wannabee guns). Dan told me that bringing the Henry Single Shot to market wasn’t as dicey a proposition as it might appear. Henry USA felt there was a strong desire in many shooters to get back to the basics, and shooting doesn’t get more basic than only having one shot. You need to make that one shot count, Dan said, and there’s an inherent challenge that makes a successful hunt with a single shot rifle more rewarding. It forces you to slow down, take your time with each shot, and think about the fundamentals. Dan didn’t have to convince me. I knew exactly what he was talking about.  My first rifle was a single shot and I’ve been addicted to them ever since.

Dan told me the Henry Single Shot is doing well. Sales are good, and the rifle is a flexible platform (it is easy to introduce new calibers). In viewing the Henry USA website, I saw that the Single Shot is offered in .223, .243, .30 30, .308 Winchester, .357 Magnum, .44 Magnum, and .45 70.  They have shotgun versions, too, in .410, 20 gauge, and 12 gauge. I suggested that Henry consider adding .22 Hornet to the mix (the .22 Hornet is a classic cartridge and it is one of my favorites, as you know from our earlier blogs on the Ruger No. 3 and my vintage Winchester Model 43). Dan said they would take a look at that and I immediately put my oar in the water…I told Dan when they bring out a .22 Hornet I want the first one off the production line (with fancy walnut, of course).

I asked Dan if they were going to offer replacement barrels to allow changing from one caliber to another. There are no plans to do so, he told me, and I can see the logic in that. Henry offers two models of the Single Shot rifle, one with a brass frame and one with a steel frame. The brass frame models are offered in chamberings that operate at lower pressure (.45 70, .357 Magnum, and .44 Magnum). If the barrels were interchangeable, there’s a risk someone might mount the barrel for a higher-pressure cartridge (e.g., .308 Winchester) on a brass frame. I get it.

I asked about folks using Henry rifles in competition, and Dan told me they are popular in both SASS (Single Action Shooting Society) and cowboy silhouette. There are no kits on the market for slicking the actions on a Henry lever gun (as exist for Marlin rifles), but the Henry rifles still have a good presence in these events.

Henry’s website says that Henry is the leading lever action manufacturer. Dan said that’s true, both from the perspective of quantity of rifles and sales revenue. That’s impressive. Marlin and Winchester have been around for more than 150 years, and Henry has already surpassed them,

My next question was on takedown and cleaning. I’ve owned Marlin and Winchester lever guns, and the difference in disassembling the two for cleaning is significant. On the Marlin, you only have to remove one screw (the lever pivot screw), and then the lever, the bolt, and the ejector are easily removed to provide access to the breech. Disassembling a Winchester is much more complex. Dan told me the Henry lever guns are like Marlins in that regard. That’s a good thing. On that same topic, I spent some time looking at Henry’s web-based maintenance videos. As a guy who’s done a few of those for CSC Motorcycles (I know what it takes to make a good video), I was impressed. The Henry videos are excellent.  They cover disassembly, reassembly, sight adjustment, cleaning, and more. This is good stuff.

Anthony Imperato is Henry’s President and CEO (that’s Mr. Imperato you see in the photo above). In the video on the Henry website he comes across as a cool guy, so I asked the question: What’s he really like? Dan told me that Anthony is a personable, good-natured, hands-on leader and a genuine nice guy. He’s a shooter, too. That was good to hear. When I work with the best motorcycle companies (like CSC or Janus), it’s always good to see that the top people are riders as well as business leaders. Dan told me that the overwhelming majority of the nearly 500 employees at Henry are shooters and hunters. It sounds like a team I would like to join. If I was younger and looking for a place to make a difference, I’d send a resume to Henry.

Henry USA started as a small manufacturing operation in Brooklyn, New York.  Henry outgrew the Brooklyn facility and moved manufacturing to Bayonne, New Jersey.  In 2016, Henry opened a second plant in Rice Lake, Wisconsin to manufacture the Single Shot.  Henry has grown to nearly 500 employees and they now offer a wide range of rifles, shotguns, and accessories.  Take it from me, folks:  Henry is the real deal, a genuine Made-In-America success story.

I asked Dan about the make/buy mix on their guns, and he told me 100% of the parts in a Henry are made in the U.S. The walnut comes from Missouri and is finished in North Carolina. There must be something about the soil and the water in Missouri; all the best wood from custom riflesmiths comes from Missouri. And North Carolina has a long heritage of making high end furniture, so it’s a natural fit for those good Southerners to craft the Missouri walnut for Henry. Henry uses a spray varnish on all but their modern version of the original Henry rifle (those rifles have an oil finish).  I examined my Henry carefully, and the finish is flawless.  I’m pretty picky about that sort of thing, having finished a few rifles myself.  These folks have it wired.   Henry does its own machining, too, including the barrels.

Dan and I spoke about their different models for a bit, and I asked which one is the most popular. The best-selling of all the Henry rifles is their H001, the .22 lever action rifle. In the Single Shot series, it’s the .45 70 (I guess great minds work alike). Dan told me every Henry has a lifetime warranty that follows the gun. New, used, or inherited, Henry stands behind the rifle for life. That says a lot. Henry tests every rifle for safety and functionality. They don’t test for accuracy, but they don’t need to. I know from firing good buddy TK’s beautiful brass-framed .44 Mag Henry lever gun that they are very accurate. When TK let me shoot his .44, I put five slugs through a hole you could cover with a quarter. In fact, it was that morning on the range a few years ago with TK that first planted the Henry seed in my mind.

I was going to ask Dan why someone would buy a Henry instead of a Marlin, a Winchester, or a Ruger, but I already knew the answer.  It’s for all the reasons you see above.  Good walnut, classy looks, a good trigger, real craftsmanship, a great price, accuracy, a lifetime warranty, and it’s all made right here in the USA.  It just doesn’t get any better than this.  The Henry .45 70 Single Shot is a beautiful and handy carbine that looks and feels the way a gun should.  It’s 7 pounds and .45 70 chambering will make for a bit of kick on the bench with the 405-grain Missouri bullets, but that’s okay.   On a hunt, I’ve never felt the recoil or even heard the gun fire when the hammer drops.  That’s what intense concentration does; you folks who have experienced it already know that.  The look?  Henry nailed it.  There’s something about polished brass, blue steel, and fancy walnut that simply feels right on a fine firearm, and Henry has made this a fine firearm indeed.


Stay tuned to the ExhaustNotes blog for the .45 70 Henry range test.  Sign up here and never miss an ExhaustNotes blog!


Check out our earlier Henry Single Shot stories here:

Developing a Henry .45 70 Load:  Part 2
Developing A Henry .45 70 Load:  Part 1
The Henry Is In California
Henry Rifles:  Made in America Or Not Made At All


Want more gun stuff?  Hey, just click here!


Would you like to know more about Henry USA?  Here you go, folks!

A Joe Gresh burnout…

Joe Gresh recently returned from Daytona and while he was there he rode an Indian FTR 1200 Rally.    Joe created one of his outstanding videos and we’re sharing it here on the ExNotes blog.

Joe does a pretty mean burnout, as I learned one day in Port Orford, Oregon. That’s a story for another time, and no, I didn’t capture it on video. But it’s a hell of a story.  Maybe one for another time.

Locked out abroad: Mike in Baja

You guys and gals will remember my good buddy Mike, whom I met on one of the CSC Baja runs a couple of years ago.   It was a chance meeting…we stopped to buy bottled gas from one of the roadside entrepreneurs in Catavina and I noticed one of the bikes had a set of jump wings on the tail box.  We had been on the road a few days already and I wondered why I hadn’t noticed the Airborne insignia before, and then I realized it was because I hadn’t noticed the bike was a BMW GS, not a CSC RX3 (that’s how much the bikes look alike, I guess).  I looked around and there was Mike (a new face in the crowd), waiting for fuel just like the rest of us.  You meet the coolest people in Baja, and you meet the coolest people on motorcycles.  I liked Mike immediately.

Mike is a former US Army Paratrooper (my kind of Amigo), an adventure rider, a good friend, and one hell of a guy.  You’ve seen him here on the ExNotes blog before.  Mike lives on his motorcycle (a big BMW GS) and travels all over, working as an untethered project manager and writing regularly.  It’s a cool (and an enviable) lifestyle.

I received an email from Mike yesterday offering this guest blog, and I wanted to share it with you.


Joe,

Thought this would make for an interesting story for your blog. I know its been an interesting story for us! Let me know what ya think. Few colorful pics for it as well.

Hope you are doing well. I am sure you are fully prepared. 🙂

Mike

PS. Be cool if we could get Chris Hansen to read the blog “take a seat over there, would you like some lemonade” HAHAHA


Locked OUT Abroad- Mexico- Extended Stay

My girlfriend, Bobbie Surber and I both work remotely, so in late February we thought a 4-6 week adventure moto trip through Baja would be a great way to kick off spring. We could get some great riding in, explore camping along the beautiful beaches, and really just clear out the cobwebs from any winter blues and lack of activity we had been experiencing.

The trip started out great in San Felipe in a wonderful off grid solar AirBnb casita, with a lovely host (we only travel Saturday and Sunday as we are heads down working Mon-Fri in AirBnBs). We continued camping, riding, and staying in AirBnBs all through Guerro Negro, Muleje, La Ventana, Todo Santos, and Loreto. We were spending a week in each location to fully absorb the unique cities, people, and culture while soaking up the incredible desert roads, ocean views, and all while meeting new riders that will become lifelong friends along the way.

As we had just arrived in Loreto on March 15th we really began to notice the COVID-19 virus was really starting to ramp up in the United States to the point travel alerts were being issued globally and we began to see fellow travelers from Canada and the EU being requested to return home by their countries.

In Loreto, we were still a solid 3-day ride away from the US Border when on March 19th a Level 4 travel advisory was issued to either return to the United States or hunker in place for an indefinite period. At the same time people in America were hoarding toilet paper and individual states were beginning to “shut down” one by one. We took this quite seriously and given what information was being provided at the time a team decision had to be made by us. It was a long 2-3 days of going back and forth in open dialogue between both of us on different ideas, plans, and solutions. None of which either of us were thrilled with.

We both agreed returning to the United States was not a wise decision, however, we did not want to stay a 3 day drive away from a border crossing in the event there was a health emergency for either of us. We decided to reach out to our 1st Baja AirBnB host in San Felipe and she graciously offered her casita up for us to hunker down in which would place us within a 2 hour drive from the US Border should there be an emergency where one or both of us may need to return home. This seemed like a perfect staging area. The virus seemed to be less in the Baja, perhaps due to lack of testing, but nonetheless it was a peninsula so geographically it made sense that the impacts would be less. There was also an abundance of supplies (to include toilet paper, which I am still confused as hell on why there was a run on that particular item).

So now to our current state of affairs. We are in self-quarantine in San Felipe with our new AirBnB friend, Victoria and are continually evaluating the situation in the United States looking for a safe opportunity to return home, and are quite frightful for the new reality we are returning to. Confident in both our analytical and decision making abilities I am looking forward to writing Part II of this, hopefully sooner than later.


Mike, that’s an awesome input and we sure appreciate hearing from you.  Thanks very much.  Your photos and descriptions made me realize just how much I miss Baja.  Sue and I would have been down there this month had it not been for this CV19 business.  As soon as we return to normal, I’m headed south and we’ll be down there.  Ride safe, take care, and thanks again!