Yamaha RD350 Part 7: Clutch Without The Cargo

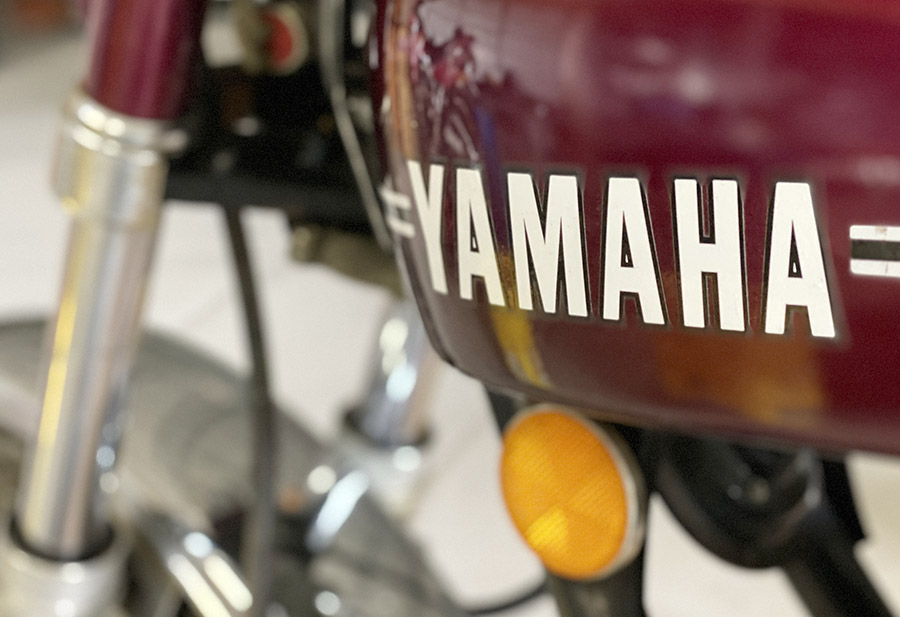
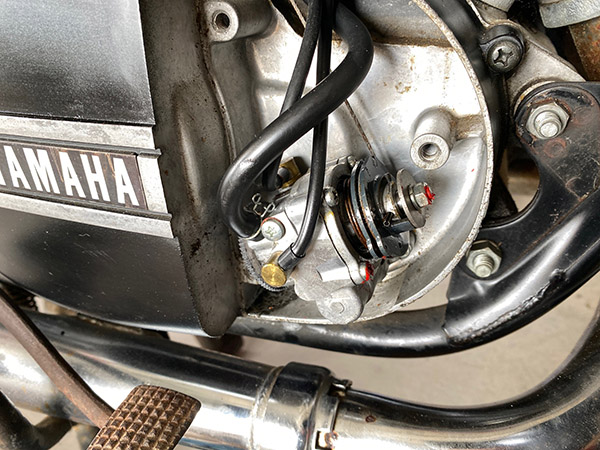
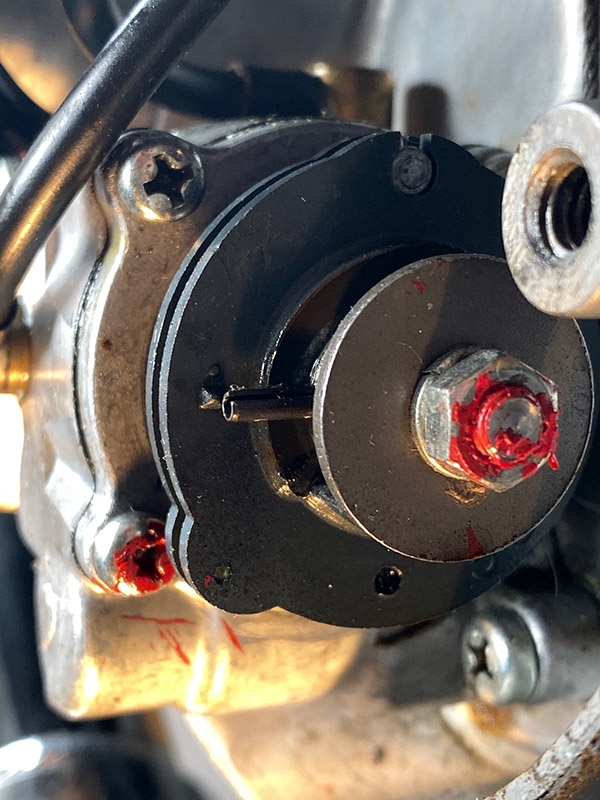
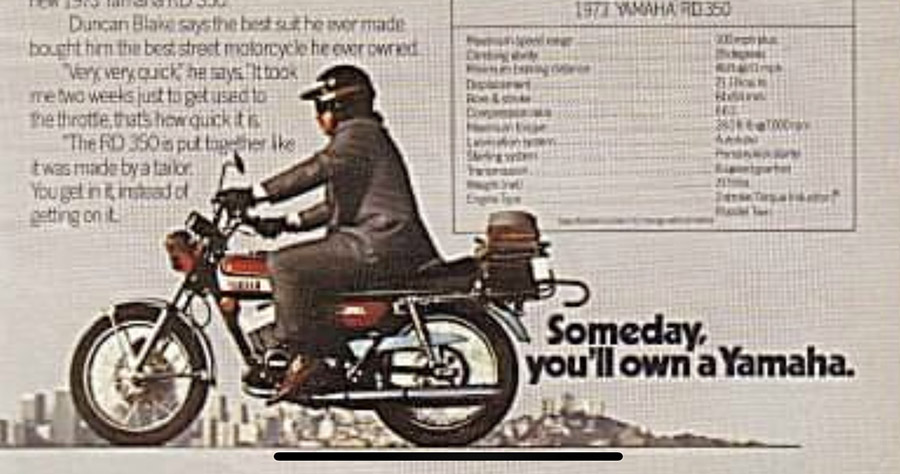
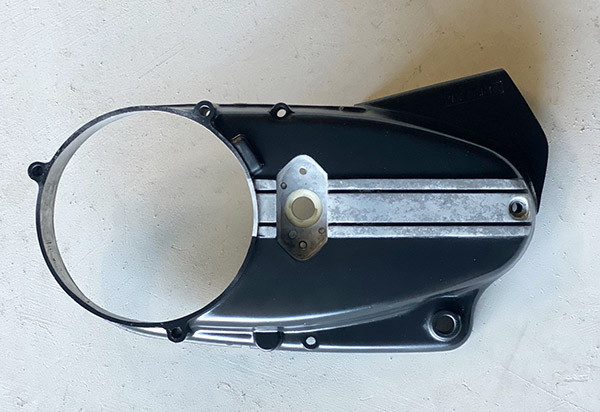
The clutch cable on the RD350 was at max adjustment on the lever perch and the clutch action was a bit stiff so I removed the left side engine cover to clean things up. The cover locating dowel on the bottom was a little corroded so it took some wiggling and wobbling to get it free. Inside I was rewarded with an ignition/alternator assembly that looked nearly new. The screw heads are un-boogered and the cad plating looks like new.

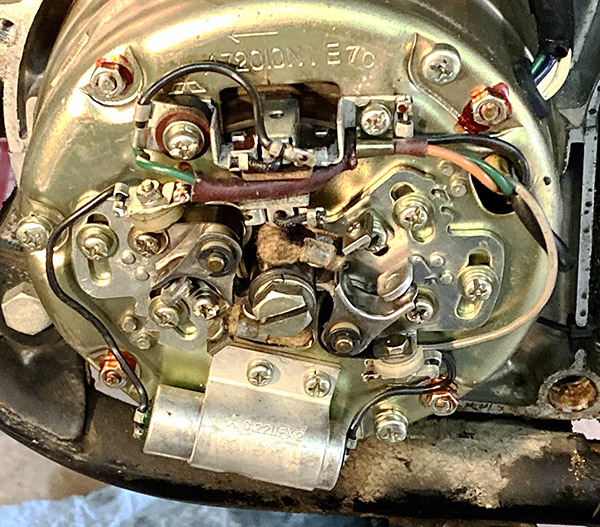
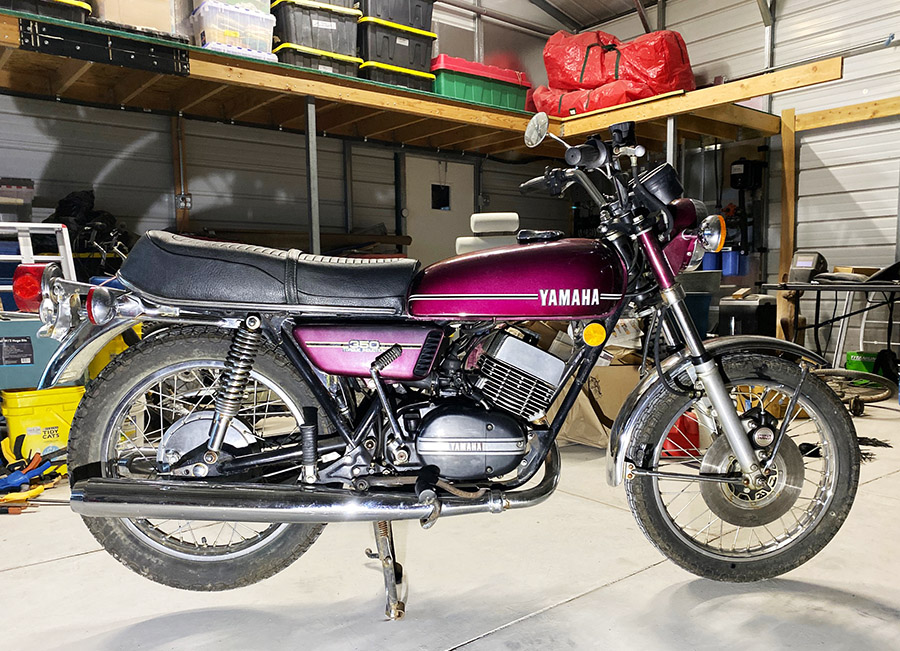
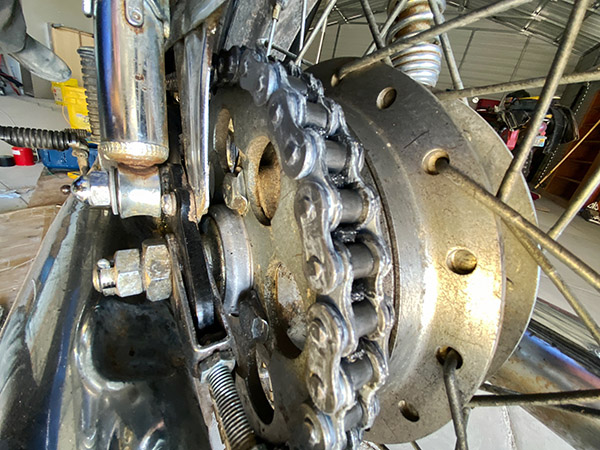
I paid quite a bit for this motorcycle but it’s been worth it as the bike has seen very few ham-fisted sorties into the mechanical aspects of the thing. The sprocket area was well covered in chain grease so I needed to bag up the alternator and clean the area.

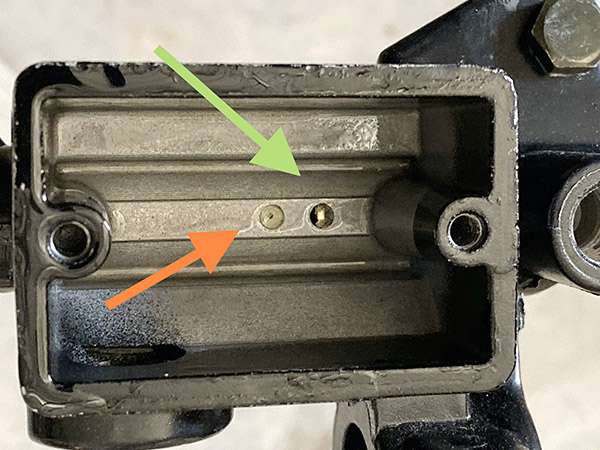
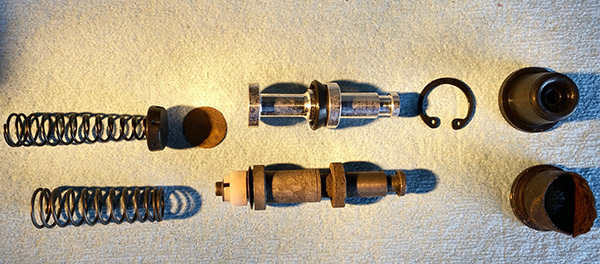
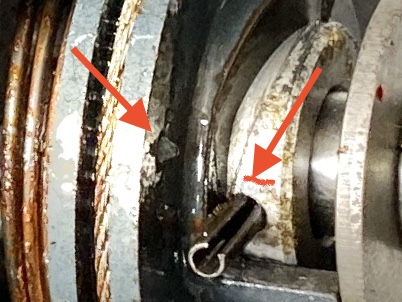
Cleaning the clutch release and countershaft sprocket area revealed that the parts were also nearly new. I dismantled the clutch actuator and cleaned up the cover.

I encourage others to leave original finishes alone but the left side cover was missing a lot of paint and had that white corrosion patina that speaks to poor maintenance. A rattle can of Rustoleum satin black matched the original engine color well so I gave it a little squirt. Note I did not polish the bare aluminum parts or touch up the points cover. That stuff wasn’t too bad.

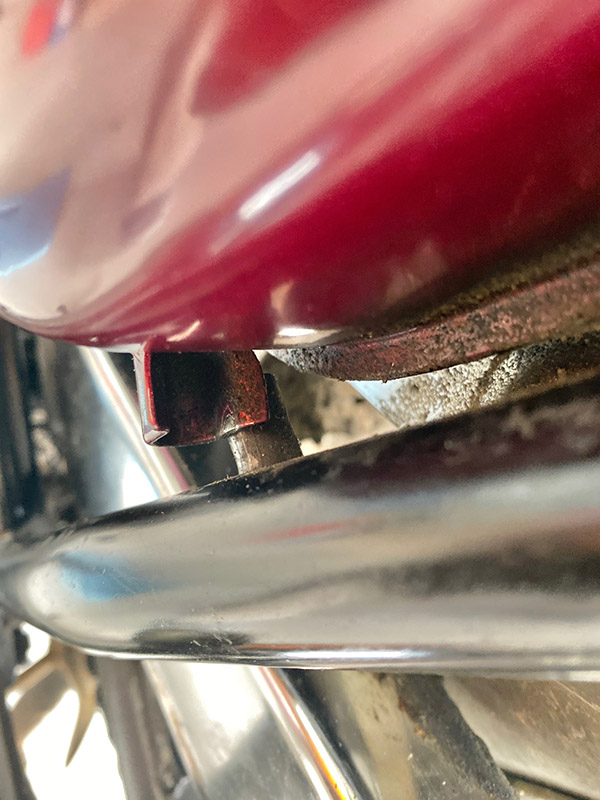
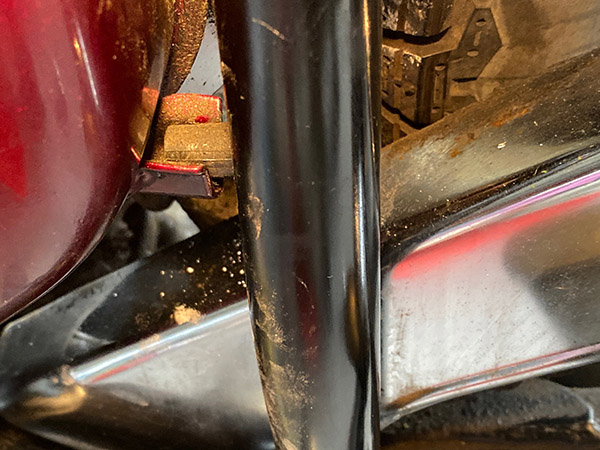
While I had the clutch helix cover apart I decided to install a new chain. I’m not one of those, replace-it-all-or-you’ll-die, type of guys. If the sprockets look unworn I’ll slap a new chain on the old sprockets. I realize this is hearsay in the Big-Sprocket boardrooms but those guys are in the sprocket selling business. The RD sprockets look like new so don’t worry, it will be fine. One glitch was the old tire is a 3.75-18 IRC, the bike calls for a 3.50-18. The narrow swingarm of the RD can barely accommodate the extra ¼ inch. I had to adjust the chain a wee bit tighter than I like to keep the tire from rubbing the front of the gusset. That problem will be solved when I replace the tires.

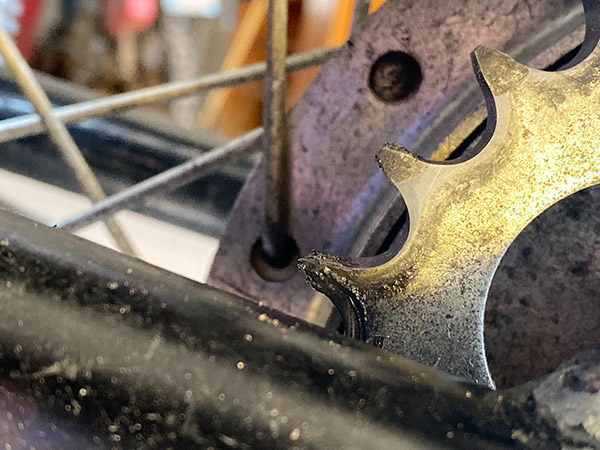
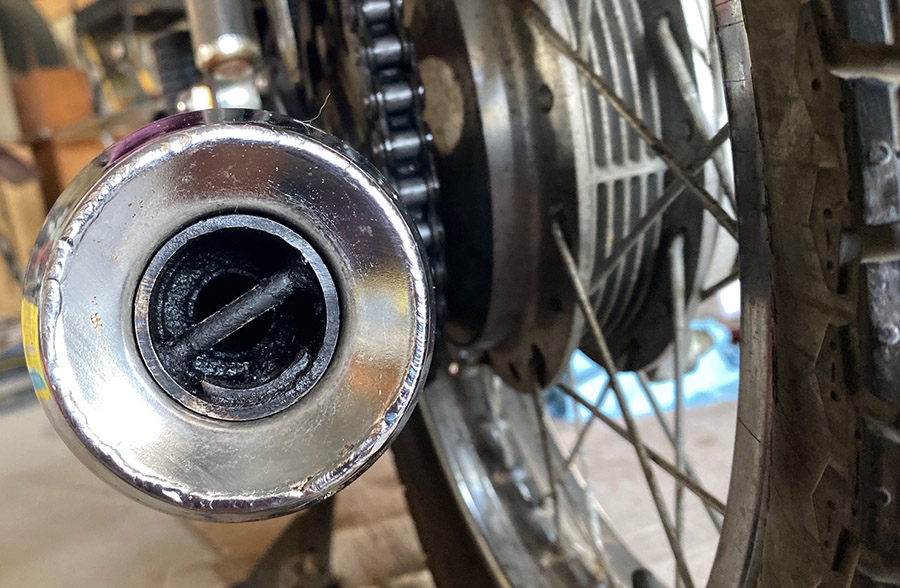
The RD350 uses a 530-size chain; that’s a pretty heavy chain for a 350’s weight and power. Once these items wear out I plan on going with one of the many 520 chain conversion kits for the RD350. With small displacement engines you don’t want to waste power spinning a heavy chain.

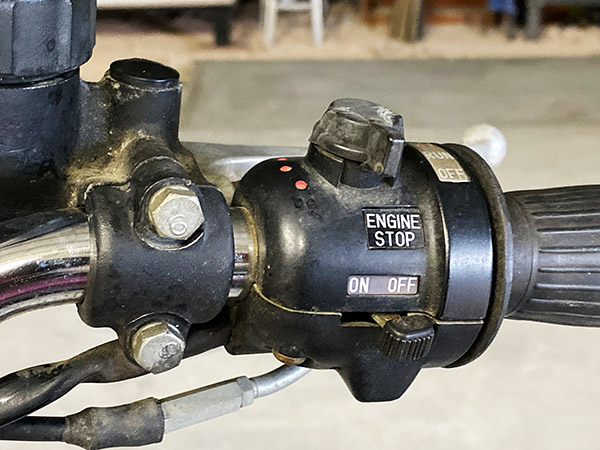
After greasing the clutch release helix and clutch cable, along with the perch pivot the clutch is much smoother and easier to pull in. The RD350 is geared kind of high in first gear so you’ve got to give it some revs and slip the clutch to get it off the line without bogging the thing.

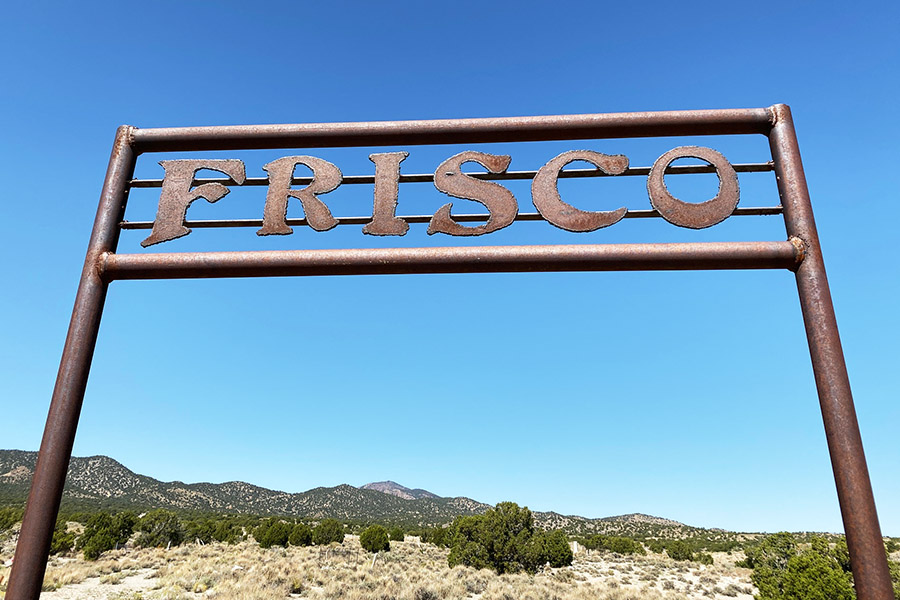
With the new chain and the clutch adjusted I figured I better get the bike legal because there’s no way I’m not going to ride it. I burbled down to DNA title services in Alamogordo with all my paperwork and it was a breeze to swap the title. In New Mexico we have privately run tag agencies in addition to state run agencies. The lines are much shorter at the private places and there’s an incentive to sell you a tag or they make no money. I had my choice of yellow, blue or black tags. I chose yellow because it’s old school New Mexico, like black tags are in California. The transfer, taxes and a two-year sticker cost $265 US dollars.

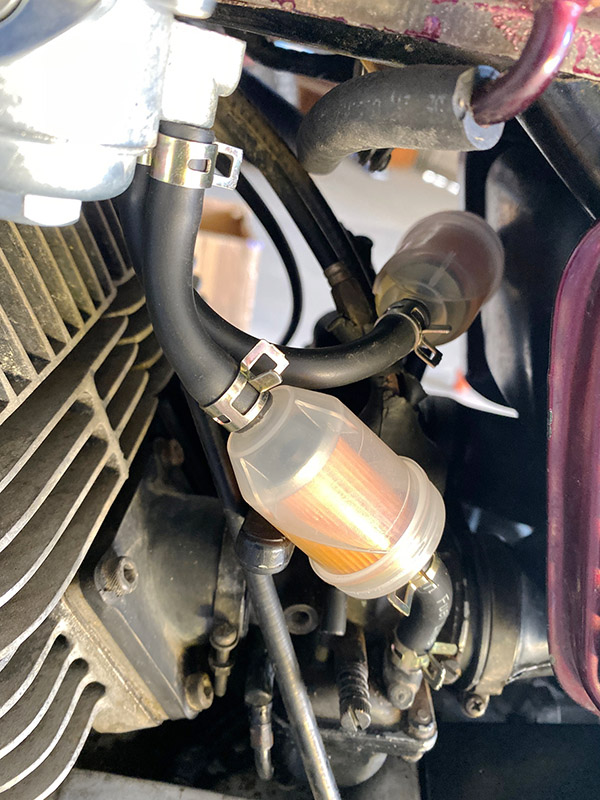
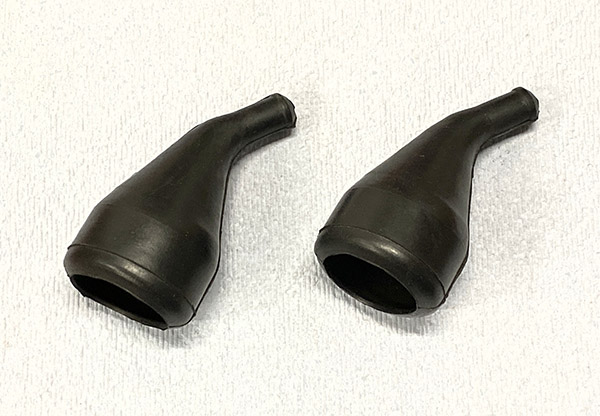
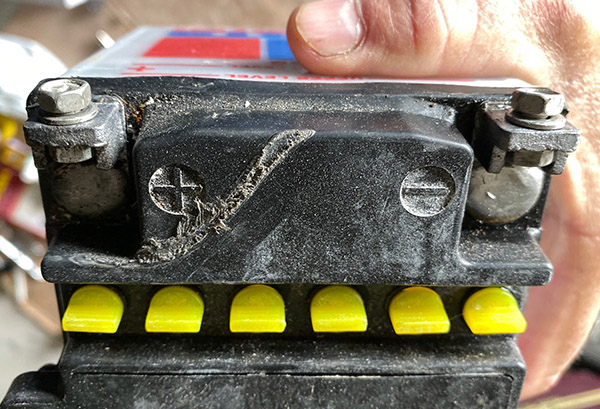
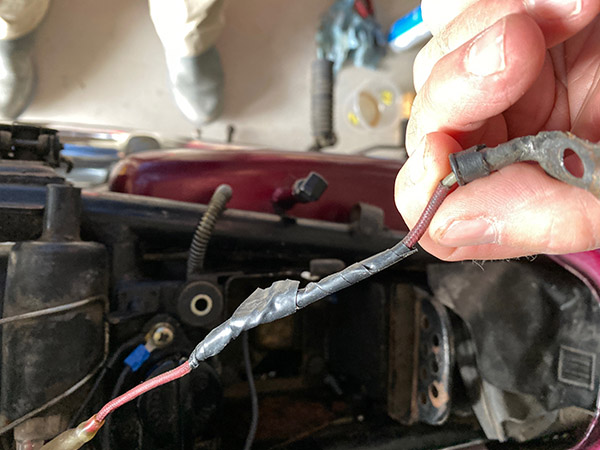
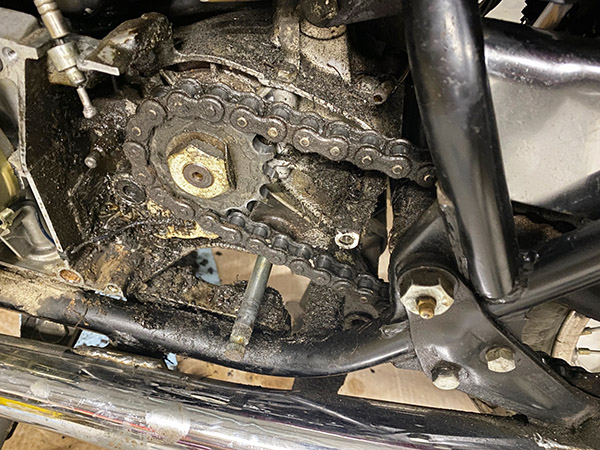
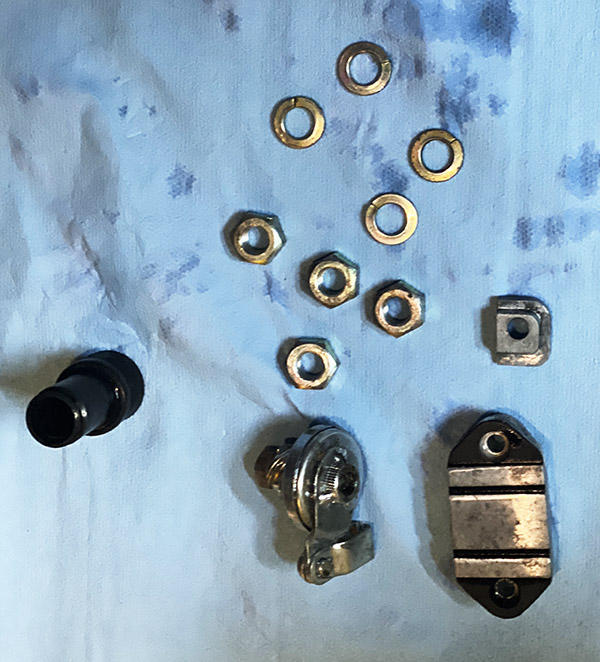
Arriving home from the title place there was gas leaking from the petcock. Close examination revealed that the hoses were leaking at the petcock barbs. I replaced the leaking fuel hose and added two huge fuel filters along with those springy, compression hose clamps. We will see it the leaks have stopped next ride.

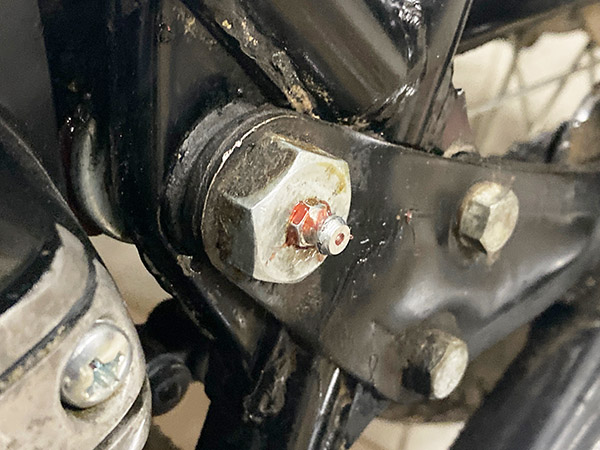
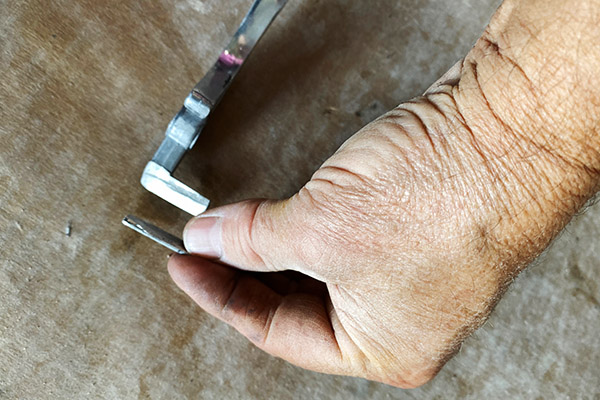
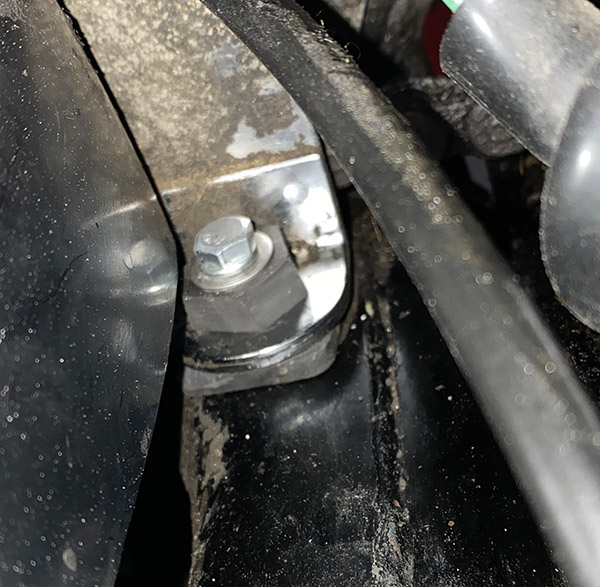
I replaced the funky original Japanese swingarm and brake pedal grease fittings with normal ones that fit the grease gun everybody else on the planet uses. All of the areas were free breathing and took grease ok which makes me think they’re not clogged with hardened old muck.

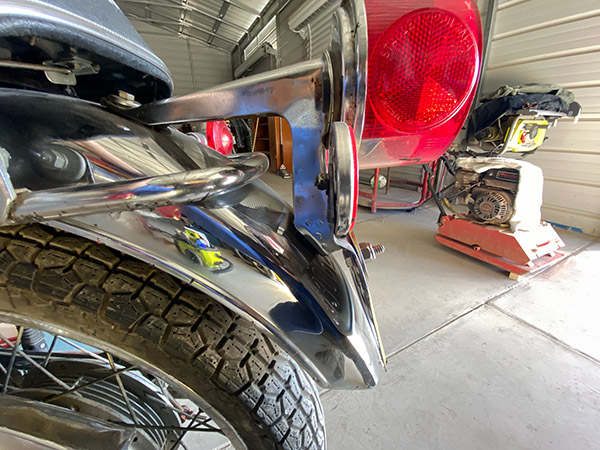
I still have quite a bit of work to do on the RD350 but it’s rideable as is. I don’t trust the old tires, besides being too big the rear tire is very out of round and who knows how old the tubes are? The front end needs new oil and seals and the steering stem needs greasing. The rear shocks are like pogo sticks. I’ll get to it when I get to it, you know?


More Joe Gresh Resurrections are here!


Never miss an ExNotes blog…get a free subscription here!

Phavorite Photos: Alone in China

We were somewhere in China approaching Aba after leaving the Tibetan Plateau, and somehow it was just Gresh, Sergeant Zuo, and me.  I can’t remember why we were separated from the rest of our group.  Honking along at a brisk pace and blitzing through one area after another, the photo ops were flying by and I wanted to capture at least some of them with my Nikon.

I finally caught up with Zuo and Gresh and flagged them over.  I asked if I could go back a mile or two and they said they would wait.  We had passed a Buddhist temple with a gold roof.  The overcast skies, the green mountains, the asphalt, my orange and muddy RX3…all the colors clicked.  I needed to commit that memory to the SD card.

When I turned around, I was surprised at how long it took to return to the spot you see above (I think we were on China’s G317 highway, but it might have been the G213).  Then I felt fear:  What if Gresh and Zuo didn’t wait for me?  I don’t speak the language, I had no cell coverage, and I wouldn’t be able to find my way back to wherever.  It was like being in outer space. It was just one of those crazy psycho unreasonable moments that sometimes hits when you realize you’re not in control of the situation.  I snapped a few photos, they looked good enough on the camera’s display, and I wound out the RX3 to get back to my compañeros as quickly as possible.  They had waited.  I was in clover.

About a month later as we approached Beijing some of the street signs were in both Chinese and English, and it was obvious Beijing was directly ahead.  Gresh told me he felt better because if we had to we could find our way home.  I guess I wasn’t the only one having those “out in the boonies” feelings.  It happens.


Earlier Phavorite Photos?  You bet!  Click on each to get their story.


Never miss an ExNotes blog…sign up here for free!

Yamaha RD350 Part 6: Rubber Match

One day many years ago, when I was around 12 or 13 years old, I took my metallic blue Honda Mini Trail on the road. My older buddy, Russ Adamson, who was legal on a Honda CL100, was with me on the street adventure. My Mini Trail didn’t have a tag, I didn’t have a license or any business on the pavement, but that didn’t stop us. I just wanted to ride, to be free without being hassled by The Man, like Peter Fonda said in those biker movies from the late 60s/early 70s era. Unfortunately, The Man had other ideas. I made it all the way to Milam Dairy road in the town of Medley, about 10 miles from home, when I was pulled over for obvious reasons.

The cop was a real stickler for details. He arrested me and called a tow truck to haul away the mini bike. I sat in the back of the patrol car looking out the window as he took me to the cop shop. Russ checked out ok so he was allowed to ride back home. At the cop shop the other cops looked at my cop like he was crazy. “You’re arresting him?” My guy held firm to his principals. I was booked, finger printed and was going to be put in a jail cell when one of the cops said, “You can’t put him in a cell, just let him sit here behind my desk.” I didn’t know exactly where I was, South Miami I think. We had driven a long way to the station. I called my house but nobody was home so I sat there wondering what prison food would taste like.

The situation was so unusual I didn’t know I should be scared. Other cops were stopping by and talking with me, trying to keep me in good spirits. I had quite a few spectators. I was a real celebrity collar. Some cops would just look at me and shake their heads in disbelief. One of the cops told me, “We’ll see you back here in a few years on a big Harley,” and then laughed at his joke.

Russ had gone to my house and told my mother what happened but he wasn’t sure who arrested me. Miami in the area I was pinched had several overlapping police departments. There is Metro Dade, Medley Police, Sheriffs and a few others. My mom started calling the various forces patrolling the city.

“Your mother is coming down to get you,” the desk cop told me. Mom came in the police station as angry as I ever saw her. I figured I was done for: no more mini bike. Astonishingly she was not angry with me. She read the riot act to any and all cops within earshot. Turns out I was like 30 miles from home. In lieu of bail, Mom had to show her voter’s ID card to spring me and all the way home she was mad as hell. But not with me.

Events were getting out of hand. My mother called Charles Whitehead, a writer for the local Miami paper and he wrote a humorous column titled, Dangerous Joe Rides Again.  In it he joked about the police arresting and fingerprinting a little kid. Whitehead claimed that a desperate crime spree was stopped by the brave actions of the police. Remember, this was before kids routinely shot up schoolyards. I think Whitehead was pining for a gauzy, Norman Rockwell, soda fountain type of police encounter. The upshot was Whitehead felt the cop should have tossed the mini bike in the trunk of his patrol car and taken me home. Which would have been worse for me by far. By arresting me the cop took all the attention away from my stupid actions and took it on himself.

With my mom and dad by my side I had my day in traffic court. After a long day of waiting we were the very last case on the docket. I was charged with driving without a license and having an unregistered vehicle on the highway. Neither of which you normally get arrested for. Since I had no license I couldn’t lose it or get points against it. I plead no contest. I don’t remember the fine but it was like $100 I think. That was a lot of money. I never did manage to pay them back.

This old story came to mind when I rode the untagged RD350 down to the La Luz post office to sign for a package of new rubber carb tops from India. India makes a lot of parts for RD350’s. I haven’t switched over the title so the RD is still in the previous owner’s name. I haven’t registered it for a tag because I’m still working on it and to get a tag you have to buy insurance. The title was safely at home so I had no proof the bike was even mine. It was as if I hadn’t learned a thing from that arrest so long ago.

Like that Honda Mini Trail, the urge to ride the RD350 defies common sense. I think that’s the appeal of vintage motorcycles: they make you feel like a kid again. I just want to be free, to go where I want without being hassled by The Man, you know? The bike still needs a lot of work but I think I’ll focus on getting it legal next. It’s obvious I lack the willpower to stay off the thing. Dangerous Joe indeed.


More Joe Gresh!

Endurofest 2021: Part 2

The second day after my crash at Endurofest 2021 I woke up in Beaver, Utah and my entire body felt like each bendy-joint had been shot through with formaldehyde. The two ibuprofen I had taken last night were joined by another two this morning. There’s safety in numbness, my brothers. Fawlty Towers had a nice little breakfast included with the room. I had a premade, Jimmy Dean sausage biscuit sandwich and a plastic-wrapped blueberry muffin. By the time I made it out to the bikes I was feeling fairly good but I vowed to take it easy and try to avoid crashing again.

Luckily our day’s route was an easy one. We rode 50 paved miles to an abandoned mining town named Frisco. Frisco is 20 miles south of Milford, Utah and was by all accounts a rough place to call home. The local graveyard told a sad story of infant death with the average age of the little ones only a few months. One of the oldest inhabitants died at 39. There’s not much water or shelter near Frisco but a large silver mining operation kept the townspeople busy for their short lives. Zinc, copper, lead and gold were also dug out of the rocky ground.

We poked around the ruins of the Frisco mine, there’s metal everywhere. It’s a great place to get a flat tire. Then we headed back north to Milford for some Chinese food. One of the DT250s started acting up on the return ride to Milford so we lost two DT250s as one healthy 250 followed the ailing 250 back to Beaver. They almost made it home before the sick 250 seized. I mean like a few blocks from home.

It was getting on in the afternoon so the rest of us decided to forgo Milford’s Chinese food and get a mystery burrito at the local stop-n-shop. The egg-roll sized burritos were in a glass warmer case and the tin foil wrapping covering each burrito was tagged with prices ranging from $1.99 to $2.79. There was no way to determine what you were getting until you unwrapped the thing and bit into it. I got a $1.99 and it turned out to be bean and cheese.

Leaving Milford we took the dirt road over Soldier Pass back to Beaver. It was a nice, 30-mile graded road with a few sandy spots. I welcomed the break and did not fall over the entire way. In the afternoon we took a graded dirt road high into the mountains east of Beaver. At 11,000 feet, Godzilla (my RT1B) was struggling along in first gear.

The third day of Endurofest I was feeling much better. Riding these old dirt bikes requires flexibility and the first two days I was tight, steering the bike instead of riding it. As I loosened up the bike could move around as needed and my control increased. The beating on my body lessened and I was rolling with the terrain. I started to feel it, you know? We did a loop into the western foothills along a fairly easy route with only a few rocky sections thrown in.

I left Beaver Sunday after the morning ride, leaving the remaining riders another afternoon of trail riding.  The Flagstaff Endurofest was the last time I had ridden Godzilla and the rust was evident, hence my crash. It took a full three days before I felt confident on the bike. It looks like I’ll have to add a few days of dirt riding/de-rusting to my preparation list before next year’s Endurofest.


Never miss an ExNotes blog…subscriptions are free!

Endurofest 2021: Part 1

After a Covid-cancelled year in 2020 Endurofest came roaring back in 2021. Unfortunately the 2-year lay-off has already eroded my meager off-road skills.

On our very first ride I managed to do a header in a rough rocky section. I was bouncing along ricocheting from rock to rock when a combination of tired arms, inattention and poor riding skills pitched Godzilla’s front wheel sideways and down I went on my right side.

It was a hard landing on rocks and for a moment I couldn’t move, like in those dreams where you can’t move except I was awake. Or maybe I wasn’t awake.  It was probably only a few seconds. As my senses returned I rolled over onto my back and looked up at the brilliant blue Utah sky in wonder. How did I get here?

My foot was pinned under the motorcycle and Larry had to lift the bike off me. I stood up pretty well and managed to get Godzilla started. I went very slow the rest of the trail.

Never one to miss plugging sponsor’s freebies, my BMG jacket and ancient, Speed & Strength helmet from The Helmet House took the brunt of the crash and I am only a little sore. Godzilla suffered a bent foot peg and a damaged front food platter.

I really need to ride more dirt to stay sharp. Dirt riding, like any skill, improves with repetition so I’ll go attack some more rocks.

I think we have about eight Enduros at this year’s fest. Down a bit but understandable considering the crappy year our entire planet had in 2020. It’s just good to see your old friends and shoot the breeze without worrying about dying.

Endurofest headquarters this year is at the Beaver, Utah Quality Inn. It’s a great location if you’re into a Fawlty Towers kind of management. I showed up early and the manager was freaking out saying “I can’t put you in the room the people haven’t left yet!” There was no panic from my end. I mean, I get it. Just asking.

I got a suspicious look when I asked for a room with two beds. “There’s only one of you. Why do you want two beds?” I don’t know why but I defended my request,”My buddy Hunter might show up.” That seemed to satisfy Basil so the deal went down as planned.

This blog may be riddled with errors as I’m typing it on a cell phone and can’t actually read what it says.  More riding tomorrow!


Never miss an ExNotes blog!

Yamaha RD350 Part 5: Stop Me If You’ve Heard This…

I have a bunch of projects stacked up here at Tinfiny Ranch but I really wanted to take the RD for a spin. One little problem: the front brake was not working on the motorcycle. I can ride with a lot of stuff out of commission on a motorcycle, like no air in the tires or a spark plug fouled but I can’t ride without a front brake. So I played hooky from my responsibilities and dug into the brake system.

Installing the aftermarket brake caliper was a doddle, it fit perfectly. The same was true of the aftermarket master cylinder on the right handlebar. The issue came when I filled the brake reservoir with DOT3 and started bleeding the air. I got nothing, zip, nada. Not amount of pumping and bleeding would produce a drop of brake fluid at the caliper.

I thought maybe the new master cylinder was bad so I loosened the master cylinder banjo nut and gave the lever a squeeze. Brake fluid shot out all over my RD’s beautiful purple paint. I was fast with the water hose rinse so no damage was done; at least now I knew something was plugged.

Taking the entire system apart revealed both upper and lower rubber hoses were plugged solid with dried up brake fluid. It took a length of bailing wire worked back and forth to clear the hoses. Then I squirted brake cleaner aerosol through the lines until they ran clear. I also blew out the brake switch manifold, as it was easy to get to with the rest of the brake system dismantled. Before you get all Internet Outraged, I have new rubber brake lines on order. The cleared hoses are temporary just to see if the bike runs ok.

Putting everything back together I could bleed the system and got fluid out of the caliper but the lever didn’t want to build much pressure. I read somewhere that if you pull the lever back to the handlebar and tie it off leaving it that way will get air out of the system. I don’t see how it can but I tried it. It didn’t work.

The next day I tried bleeding the brake again. I was getting good fluid without any air but the lever needed rapid pumping to get pressure on the disc. In short it sucked. I started thinking that there must be something wrong with the new master cylinder and took it apart. Everything looked good inside the bore. The piston and seals looked new.

Reassembling the master cylinder I noticed the lever didn’t completely release from the piston. There was no free play. No play at the master usually makes the brakes pump up not the other way around but I was open for ideas. The after market unit did not have a free play adjusting screw like the stock Yamaha master. I had two ways of adjusting the free play: Grind the lever where it contacted the piston or cut a sliver off the lever stop so that it could travel farther from the handgrip.

I cut a thin sliver from the stop and gained a bit of play. Putting the master back on the bike and bleeding the system again yielded the same results. There was no pressure until the last bit of lever travel.

This led me to examine the inner workings of the reservoir. It seemed like the return hole, the orifice that allows the fluid to return to the reservoir at rest, was bypassing a lot of fluid for the first 75% of lever travel. Plugging the return with my finger (the red arrow) immediately made good pressure at the lever.

You and I both know you can’t very well ride a motorcycle with your finger in the reservoir. It’s not conducive to proper control. I debated plugging the return hole and drilling another further up the bore to make the piston build pressure sooner and was nearly ready to attempt it when a tiny little voice in my head said, “You’re screwing up, Gresh.” I’ve never heard that voice. Must be old age.

At that point I gave up and ordered an Ebay rebuild kit for the stock Yamaha master cylinder. It irked me to no end that the kit cost more than an entire new, non-working master cylinder. The kit showed up and of course it was not at all like the original. The piston differed where the spring connected. The original had a plastic bobbin to seat the spring where the new kit simply lets the spring push directly onto the seal. I suspect the spring will eventually cut through the seal. When that happens tag my tombstone with “He rebuilt master cylinders.”

Until that day I’ll have brakes because the rebuilt master cylinder bled as normal. The RD350 has a killer front brake now. I’m serious: the RD350’s braking is only a step or two behind most modern bikes. It’s amazingly good and will stand the bike on its nose.

Finding a stock air filter was impossible so I sprung for a foam-type Uni filter from Dennis Kirk. It was on sale but still pricy and it fit the RD air box well; if anything it’s a bit too snug. Along the same air-flow lines I pulled the baffles out of the mufflers for cleaning. They were not very dirty leading me to believe the mileage on the bike is lower than the 20,000 the title states.

With a clear exhaust pipe, fresh new air cleaner and working brakes I took the RD for a 15-mile, unregistered spin and the thing ran like a dreidel. I ran through the gears and got to 80 miles per hour in short order. Everything seems to work and the next step will be to repack the steering bearings, replace the fork seals and install new brake hoses. The carbs might need a little synchronizing and I’ll work on that once I get around to lubing all the cables.


More Joe Gresh Resurrections!


Never miss an ExNotes story…subscribe here for free!

ExhaustNotes Product Review: Sata Line Wrenches

I have a set of metric line wrenches somewhere. Craftsman brand, I believe. I used to do brake jobs at JC Penny on 49th Street in Hialeah so I have most everything you would need to work on metric and SAE brake systems. The cover image is a shot of the flare nut on the RD350’s brake switch manifold and is a reminder of the results you get when you can’t find the correct tools.

I feel pretty terrible about the situation. The RD350 is in super original condition with very few rounded and buggered fasteners. The flare nut on the brake manifold was as installed from Yamaha those many years ago. It was pristine. Not a mark on it: a perfect, six-sided masterpiece. Unfortunately, the brake hoses were clogged solid with hardened brake fluid and so they needed to come off.

And then I put a regular open-end wrench on the thing and rounded the corners. Sure, the nut came loose but at the cost of my emotional well being. My sense of self-worth took a huge hit. Anyway, I unplugged the rubber brake hoses and got the RD’s front brake working temporarily although I’ll need new hoses.

Much like letting smoldering horses out of a barn after it burns down, I ordered a set of Sata metric line wrenches, also called flare-nut wrenches. I’ll find my Craftsman set eventually but the RD350 is pristine right now. I don’t want to be the guy that ruins it.

The Satas, like practically everything we buy today, are made in China. They look really well made. I haven’t put extreme pressure on the wrenches but that’s mostly because flare nuts deform easily. You can’t put much oomph on them. A casual glance and you’d mistake Sata for Snap-On products (some of which are also made in China). The chrome work is smooth and glossy. The 10mm and 14mm fit snugly. I haven’t tried the other sizes.

The Satas are flank drive, meaning the wrench grips the flats of the nut instead of the corners. Flank drive wrenches are less likely to round off nuts and bolts. Flank drive has been around forever and most wrench manufacturers employ the design.

I’m pretty happy with the Satas. For a measly $10 you get a decent set of wrenches that are plenty strong for the weak nuts they will be turning. Another advantage to the Satas is that they resemble expensive tools so most likely your drunk and obnoxious riding buddies will never know that you cheaped out.


Never miss an ExNotes blog!

ExhaustNotes Shed Slab Review: By The Numbers

I’ve finally finished the new floor in The Shed® at Tinfiny Ranch©. I didn’t really want to mix and pour the floor myself but events out of my control lead to that fateful decision. To understand how the floor ended up like it ended up you have to have an understanding of those aforementioned events.

The first thing everyone asks me is why didn’t I pour the floor first. It’s a valid question. The reason the shed went up on graded dirt had to do with time and money. Money was a problem because we had just bought Tinfiny ranch and our house budget allowed for a building or a slab, but not both.

Time was a problem because we were moving from a 3000 square foot rental house into a 600 square foot garage converted into a one bed, one bath home. All that junk from the big house had to go somewhere and renting a storage shed was out of the question. We were done renting crap.

We ended up buying a 30 X 50 Eagle Building for $13,000. Eagle buildings are the best square foot per dollar on the market and that price includes assembly on your land. The buildings are designed with a continuous steel sill that can be set up on bare ground as long as the ground is fairly even. No foundation needed.

The bad part about Eagle buildings is that they are not super heavy duty. They are a little stronger than a typical metal lawn building but not nearly as strong as a Mueller type building. Mueller buildings are very sturdy but cost twice as much as an Eagle and are delivered to your land on a series of pallets. You have to assemble the building yourself. Muellers also require a pre-poured slab with a foundation and all the attendant costs associated. I priced a 30 X 50 Mueller at $23,000. The foundation and slab was $26,000 from a local contractor. That $49,000 left you with a nice slab and numerous stacks of steel: you still had to build the building. I got a price of $6000 to assemble the Mueller from another local contractor.

Besides the fact that we couldn’t afford the Mueller and all that the Mueller involved, it would have been many months before we had storage for our junk. Three weeks after we bought the Eagle Building it was erected on Tinfiny Ranch and full of the junk we had dragged across country along with furnishings from the big rental.

I tried to get a local guy interested in pouring the shed floor but the job must have seemed too involved what with the building already in place and full of junk. I gave up for a year; just let the situation stay as is for a while. Then mice started burrowing under the edge of the building and wreaking havoc.

One of my Internet buddies is fond of saying, “Do it right or don’t do it at all.” He’s right, of course, but “Don’t do it at all” was not an option. That left “Do it wrong.” Sometimes in life stupid moves are the only moves you have left.

I started shunting junk towards the middle of the shed and pouring small sections whenever I felt in the mood. The solar power junction area was the first section I completed which allowed me to finish the off grid power system and shut that damn generator off.

The shed needed a foundation so I poured 16-inch J-bolts every 4 feet or so and once they were set I could excavate under the edge and pour a section of footer. I may not have needed the support from the J-bolts but the Eagle was flimsy and if the thing sagged or buckled even a little it would be a bear to fix.  I erred in favor of not buckling the shed.

Progress was slow because there was so much stuff stored in the shed I could barely make room for a pour. When she wasn’t working CT and I would go through the hundreds of plastic tubs and each time we got rid of a few. Pieces of furniture neither of us liked were donated to the thrift store. Slowly I made headway and had enough room to build a loft where a couple hundred tubs of really good junk could be moved. The floor space kept increasing and I kept pouring.

The job was not a continuous thing. I might work on it one week and leave it for a month, or 4 months. Mice were a blessing and a curse. Once they chewed up an item or tub full of clothing it was an easy decision to take it to the dump. The dust was incredible; each breeze sent a cloud of fine sand whirling around the interior of the building.

I’ve been sporadically working on the shed floor for 3 years. It was overwhelming at times but as I got closer to the finish line I kicked it into high gear: This last month I could smell the barn if you don’t mind that sort of lame wordplay. It’s funny, I have no common recollection of the work I did. I mean, if I think about it I can remember pouring each slab but I feel no personal connection, the slab is just a slab, like it has always been there or I hired a guy to do the job. It’s enough for me that the floor is done and done wrong. Let’s take a look at the numbers:

    • Number of individual slabs poured: 35
    • Average number of 60# bags per pour: 42
    • Thickness of floor: 4-inches
    • Thickness of footing: 8-inches
    • Thickness of sheer wall footing 10-inches
    • Number of 60# bags of concrete used: 1500
    • Total weight of concrete: 90,000 pounds
    • Amount of concrete in square yards: 22.5
    • Number of loads mixed @ 120# each: 750
    • Number of 16-inch J-bolt piers: 45
    • Estimated man-days to pour slabs: 80
    • Cost of concrete: $4410
    • Number of feet of ½” rebar: 250
    • Number of feet of 3/8” rebar: 1600

Never miss an ExNotes blog!


More Joe Gresh is here!

Yamaha RD350 Part 4: Stealing Moments

I’ve been on a tear lately. The shed floor is nearly done and I’m laying down some slabs, man. That doesn’t mean I haven’t managed to sneak in a little tinkering on the 1974 Yamaha Rd350. I mean, once the slab is poured and finished you’ve got to let it cure for a day. Green concrete is very fragile.

I wanted to drain the RD 350’s fluids before getting too far along. Which was kind of good because I discovered the oil tank wasn’t slotted into the rubber frame peg correctly. That meant taking out the battery to access the oil tank bolts.

It was no trouble at all to pull the tank, drain it and re-slot it onto the frame peg. The original feed hose drooped underneath the carburetors then rose over the clutch cover forming a trap. I didn’t like the looks of the trap so I shortened the feed hose a bit and routed it without a loop.

When I pulled out the battery to fix the oil tank I noticed the top of the battery had a melted spot. This melted spot corresponded with a melted positive wire to the battery. I suspect the battery is the wrong one. It looks too tall and there was a section of old inner tube covering the battery. I see no evidence of arcing on the seat pan but something melted the positive wire as it has been wrapped with electrical tape.

After refilling the oil tank I needed to bleed out any air in the feed line to the autolube pump. The pump area was shockingly clean. It looked like a new motorcycle inside.

I sent Deet photos of the pump as I was well pleased and wanted to show the thing off. Zooming in on my photo Deet noticed that the autolube pump was not adjusted correctly. The pin and dot are supposed to line up at idle.

The oil pump cable was adjusted as loose as the lock nuts would allow. This RD is near perfect except where mechanics have fouled it up. Resetting the pump was quick and now the pin lines up with the mark at idle.

The chain guard was sort of floppy because the front mount was missing its bolt and the rubber bushing, along with the spacer. I cobbled one together from bits and pieces; it will work until I find the correct parts.

The more I mess with the RD350 the more amazed I am at how unmolested it is. All the case screws look perfect (except for the ignition and pump screws).  Opening things reveals factory fresh assembly. It’s almost too perfect: I’ve got to up my mechanical game to treat this motorcycle with the care it deserves.


More on the RD350 story and other Joe Gresh Resurrections is here!


Never miss an ExNotes blog…sign up here for free!

Yamaha RD350 Part 3: Possession is Nine-Tenths of The Law

The RD350 made a convoluted journey but at last it has arrived at Tinfiny Ranch. Originally I was going to fly out to my buddy Deet’s house in North Carolina and spend time there getting the bike in top shape for the ride back to New Mexico. That was a good plan but I’ve been stretched pretty thin around the ranch and the incomplete projects have been outnumbering the completed ones by a wide margin. Did I really want to take another motorcycle apart? Now? Not to mention that my New Mexico tag lady cannot issue temporary tags since some kind of rule change in August. That meant I would have to ride across most of the southern states with a license plate borrowed from one of the other bikes. Scenes from the movie Deliverance played in the theater of my mind.

Hunter (left) and Deet (right).

Plan B was for me to drive out to North Carolina and retrieve the RD350, pile Deet into the truck and have a grand adventure on the way to New Mexico. This seemed like a solid plan until Deet started thinking about being stuck in a truck with me for three days and then sleeping on the concrete shed floor until I took him to El Paso for a flight home. He’s kinda funny in a George Thorogood way.

Plan C was for Deet to load the bike into his truck and drive it out to Tinfiny Ranch. “I’ve got to have my own wheels.” Deet told me over the phone, “I want to go when I feel like going.” Plan C-1 came about because it had been a while since we Messed With Hunter in real life. Videos are fine but nothing beats hand-to-hand smack talk.  Plan C-1 had Deet driving to Hunter’s new house in Oklahoma with the RD350 in his truck and me driving to Hunter’s. There, the two of us would mercilessly tag-team harass the old sodturner.

And that’s how it went. We unloaded the RD at Hunter’s and loaded it into my truck. Deet took back Hunter’s 1968 DT-1 for a full restoration job back at Enduro Central and I dragged the RD back to Tinfiny Ranch.

It’s tempting to put off the concrete floor project and mess with the RD350 but long time readers will remember that I also have the Z1 carbs apart on the work bench. It’s time I finished something. I can’t just keep taking things apart.

The RD is in beautiful condition considering its age. At $4,250 this is the most expensive motorcycle I’ve ever bought. The paintwork has a few small scratches and some fading but I’ll be leaving it as is. From 10 feet away it looks practically new. Everything looks stock, if not original. The gas tank is clean inside and may have been replaced some years ago. The paint matches well but the decals look a bit newer than the decals on the side covers.

There is a bit of confusion on the mileage. The title says 20,000 but the odometer says 4,000. I imagine the speedometer was replaced at some point in the distant past. The seller, a Flipper, was not sure how many miles were on the thing. The RD350 certainly looks low mileage.

The Flipper put a new battery in the RD350 and the lights and switches seem to work ok. I think there may be a bulb out in the speedometer backlighting. The battery seems to charge, even the blinkers work! This bike still has a headlamp switch unlike modern bikes that have the lights on all the time. I have a key, too!

Being original is less important to me than having all the stock parts. Over 47 years it would not be unusual for repairs to be made on a motorcycle. Normal wear items like foot pegs and the seat cover look in good condition. This bike has not been beat up. The engine starts first kick, revs and idles well with no unusual rattles or knocks. The chrome is in very good condition and will polish up like nobodies’ business. In a first for me, the stock tool kit is still under the seat in its original, thin, black plastic pouch.

A few things I’ll be doing on the RD350 when I get tucked in are a new air filter as they tend to crumble and clog the carbs, new tires and tubes, fix the front hydraulic brake, grease the wheel bearings, adjust the clutch, change all the fluids, replace the outer crank seals, clean the carbs, clean the exhaust baffles, re-grease the steering head bearings, lube all the cables, add inline fuel filters and whatever else I come up with. It sounds like a lot but this is typical for old bikes needing to be made street worthy after sitting. Really, you can hop on the bike and ride it right now.

Most of the vintage bikes I’ve had in my life were in terrible condition when I got them. This Rd350 breaks that mold. I paid more at the onset but I have much more to work with than usual. I’m amazed at how little I have to do to get it running and cosmetically the thing just needs a bath and a polish.

The concrete floor and the Z1 carbs come first but that doesn’t mean I won’t be ordering parts for the RD350. Watch this space for Hasty Conclusion reviews and further updates on the RD’s progress.


Never miss an ExhaustNotes blog!


More Joe Gresh Resurrections?  They’re right here!