An interesting dilemma…is this a Phavorite Photos blog, or just a regular blog? Hey, I’m going with both. Susie and I were on a content safari (a term I stole from Gresh) and one of the safari stops was the Sensorio light show in Paso Robles. Paso Robles is a cool little town along Highway 101 in central California. I initially wasn’t that keen on the concept, until I saw it. The artist, Bruce Unro, covered acres of rolling hills with lights. It sounded to me like the thing that guy did with umbrellas a few years ago, and I thought that was a goofy concept. But hey, what do I know? My wife has a better sense for these things than I do, I went with her better judgment, and I’m glad I did.
We arrived just as it was starting to get dark, and we could see the bulbs and their stems.
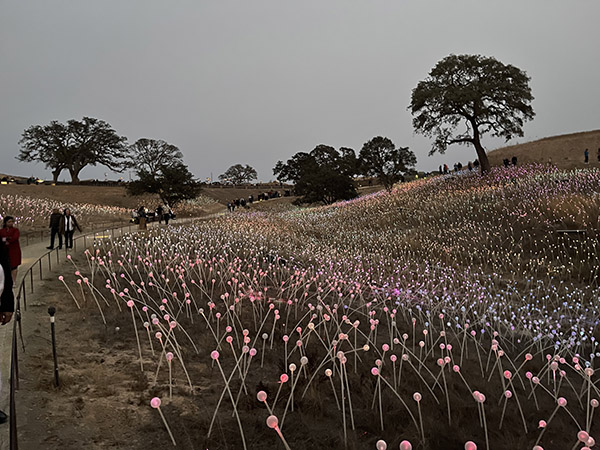
As it got dark, the lights started to stand out a bit more.

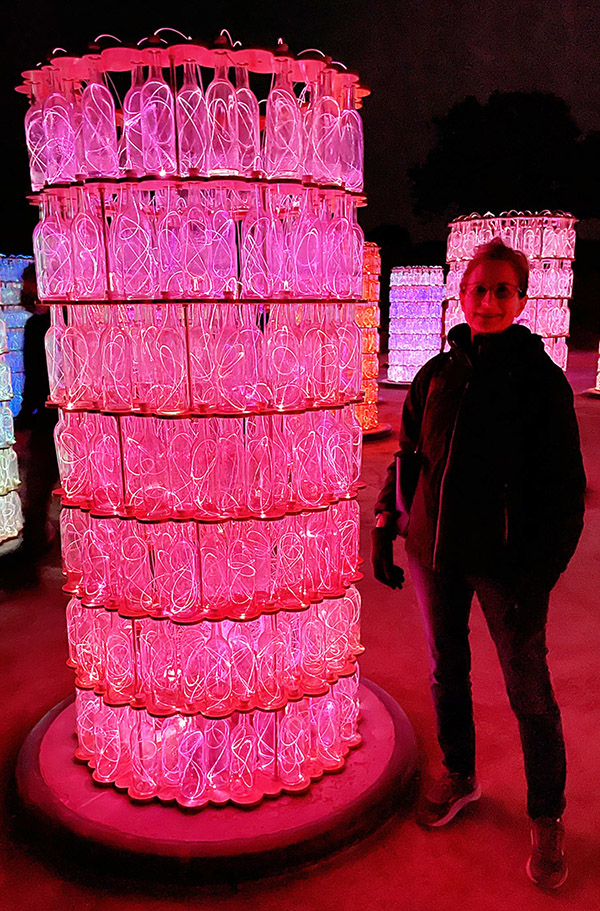
There are columns made of wine bottles about halfway through the exhibit. They were cool, too. Paso Robles is a wine-growing region.
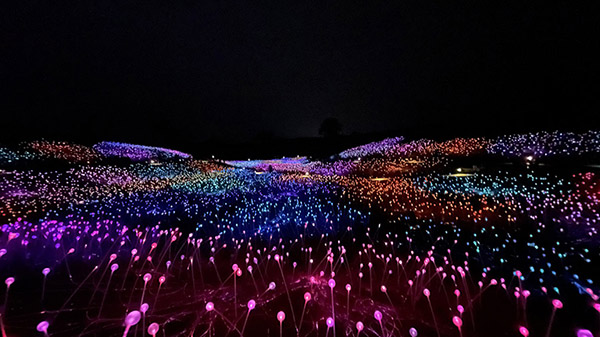
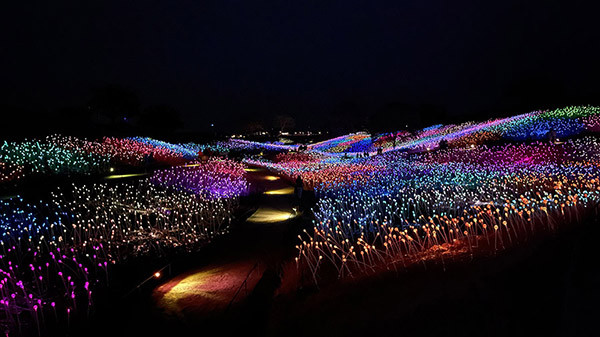
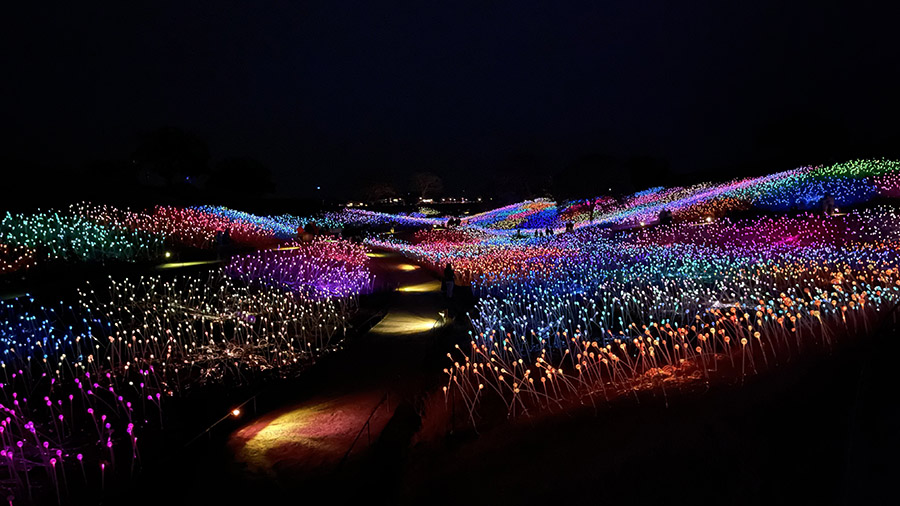
The full effect came into focus when it was completely dark, and it was something to see.
The folks who organized this show thought it through. There’s a lot of walking involved, and you sign up for a specific time to get in. They do that to limit the number of people at any one time, and that worked well. There were other people there, but we never felt crowded.
The website for the light show posted prohibitions about commercial use of any photos, so I left the Nikon home and used my cell phone to snap the photos you see here. The iPhone 12 has great capabilities, way more than I expected for available light photography. I’d like to tell you I knew what I was doing, but I just held the phone as steady as I could and let the camera do its thing. It was a three second exposure, so I suspect it has some kind of algorithm that acts like a gyroscope. The photos are great and I wanted to share them on the ExNotes blog, so I emailed the organizers and they gave me permission to do so (thanks, guys). In their response, they also sent their press release, which contains good info on the show so I included it here.
I enjoyed Sensorio and I think you will, too. If you get a chance, this is worth the trip to Paso Robles.
SENSORIO ADDS DATES FOR
BRUCE MUNRO: LIGHT AT SENSORIO
NOW EXTENDED THROUGH JANUARY 2, 2022
PASO ROBLES, CA (16 July 2021) — Due to overwhelming public demand, Sensorio announces the extension of the stunning outdoor art exhibit Bruce Munro: Light at Sensorio through January 2, 2022. The immersive installation includes Munro’s 15-acre Field of Light, an array of over 58,800 stemmed spheres lit by fiber-optics which gently illuminate the landscape in subtle blooms of morphing color, and the adjacent Light Towers, featuring 69 towers composed of more than 17,000 wine bottles illuminated with glowing optic fibers modulating to a custom musical score. Since reopening in April 2021 following a mandated closure due to the pandemic, the exhibit has been sold out weeks in advance. Says Sensorio Executive Director Paul Haught, “We are thrilled to announce this extension, so that all interested visitors can have the opportunity to experience this one-of-a-kind immersive exhibit.” Sensorio enhances the experience with live entertainment by local musicians, and offers food and beverages including wine/beer, snacks and meals. A VIP experience option is also available, which includes exclusive access to a terrace overlooking Field of Light, with an Airstream bar, private tables and fire pits, and other amenities. Bruce Munro: Light at Sensorio tickets are available for timed entry on Thursday-Sunday evenings, now through January 2, 2022, at Sensorio, 4380 Highway 46 East, Paso Robles, California. For more information, the public may visit SensorioPaso.com.
When Sensorio opened with Bruce Munro’s Field of Light in May 2019, it was an immediate hit, with thousands of visitors from around the globe flocking to experience this remarkable event. Sensorio’s installation is larger in size than any other Munro exhibition internationally and is Munro’s first US exhibit entirely powered by solar. It was singled out by The New York Times as #6 in its “52 Places to Go in 2020.” It has also attracted national and international media attention, applauded for creating a “movement that infuses culture in valleys of viticulture,” (The New York Times), and described as “the future of public wellness” (Forbes), and a “pilgrimage-worthy art escape” that is “meant to complement, never compete or detract, from the beauty of the landscape” (Travel + Leisure).
For Light Towers, Sensorio enlisted Munro to create a vibrant new illuminated work that pays tribute to the 200+ wineries and vineyards that blanket Paso Robles’ beautiful rolling hills. Light Towers is inspired by Munro’s earlier work Water-Towers, originally created for and exhibited at the spectacular arcaded cloisters at Salisbury Cathedral in Wiltshire, England. For Light Towers at Sensorio, Munro has utilized wine bottles for the first time, as an homage to Paso Robles’ abundant vineyards. The 69 towers are made from 17,388 wine bottles—252 bottles per tower—rising some seven feet high and illuminated in gently changing colors to visually represent the original composition “Rise and Shine,” composed by Orlando Gough and performed by an international vocal ensemble.
Sensorio was created by Central Valley locals Ken and Bobbi Hunter as a destination for entertainment, exploration, meditation, adventure, and delight, honoring the natural topography of the landscape. It opened with Bruce Munro: Field of Light, which became an international sensation. Sensorio launched its second phase with the addition of Light Towers, an extension of the current exhibition that is included in the admission fee. Both exhibitions will continue through January 2, 2022 at Sensorio. Other exhibitions and buildings are planned for future openings at the site.
London-born Bruce Munro is known for large-scale light-based artworks inspired by his continuous study of natural light and his curiosity for shared human experiences. With a fine arts degree, early career training in the lighting design industry, and an inventive urge for reuse, Munro creates art that captures his responses to literature, music, science, and the world around him. His work has been commissioned by and displayed in special exhibitions in galleries, parks, grand estates, cathedrals, botanical gardens, and museums around the globe, including Longwood Gardens, PA; the Guggenheim Museum, NY; the Sharjah Museum of Art, UAE; Montalvo Arts Center, CA; Scottsdale Museum of Contemporary Art, AZ; Desert Botanical Garden, AZ; Jeju Light Art Festa, South Korea; the Colorado Springs Fine Arts Center, CO; Sotheby’s Beyond Limits at Chatsworth; Victoria & Albert Museum, London; Waddesdon Manor, the Rothschild Collection, Buckinghamshire; and Salisbury Cathedral, among others. Artworks by Munro are held in the permanent collections of museums and public art collections worldwide including the Ashmolean Museum of Art and Archeology, Oxford; Cheekwood Botanical Garden and Art Museum, TN; and Texas Tech University Public Art. More information is available at www.brucemunro.co.uk.
WHAT: Due to overwhelming public demand, Sensorio announces the extension of the stunning outdoor art exhibit Bruce Munro: Light at Sensorio through January 2, 2022. The immersive installation includes Munro’s 15-acre Field of Light, an array of over 58,800 stemmed spheres lit by fiber-optics which gently illuminate the landscape in subtle blooms of morphing color, and the adjacent Light Towers, featuring 69 towers composed of more than 17,000 wine bottles illuminated with glowing optic fibers modulating to a custom musical score. Sensorio enhances the experience with live entertainment by local musicians, and offers food and beverages including wine/beer, snacks and meals. A VIP experience option is also available, which includes exclusive access to a terrace overlooking Field of Light, with an Airstream bar, private tables and fire pits, and other amenities.
WHEN: Now through January 2, 2022
DAYS/TIMES: July-August: Thursdays/Sundays 7pm-10pm, Fridays/Saturdays 7pm-11pm
September: Thursdays through Sundays 6pm-10pm
October – November 6: Thursdays through Sundays 5:30pm-10pm
November 7 – January 2: Thursdays/Sundays 4:30pm-9pm, Fridays/Saturdays 4:30pm-10pm (Additional holiday dates to be announced.)
WHERE: Sensorio, 4380 Highway 46 East, Paso Robles
TICKETS: LIMITED NUMBER OF TICKETS AVAILABLE NIGHTLY. To guarantee admission, tickets must be purchased in advance at sensoriopaso.com for a specific date/entry time. A limited number of walk-up tickets may be made available at the door, sold only as on-site guests depart to ensure safe distancing at all times.
ADULT ADMISSION: $31.50 to $41 + ticket fees
CHILD ADMISSION (12 and under): $9.50 to $20 + ticket fees. Children under 2 are admitted free.
VIP TERRACE: $81-110 + ticket fees. VIP patrons enjoy priority entry at opening and can arrive anytime during open hours. VIP tickets include exclusive access to the Private VIP Terrace with reserved seating, private restrooms, Airstream bar, fireside tables, and the best views of the exhibition. Includes 1 drink ticket. “VIP Experience + VIP Platter” tickets also include a charcuterie or crudités platter.
Cancellations may be caused by inclement weather or future mandated closures for COVID safety. In that event, ticket holders can reschedule to a future date.
COVID precautions: unvaccinated guests are kindly asked to wear a mask/face covering.
INFO: For information visit sensoriopaso.com.
More cool stuff? Check out our Reviews page!
Earlier Phavorite Photos? You bet! Click on each to get their story.

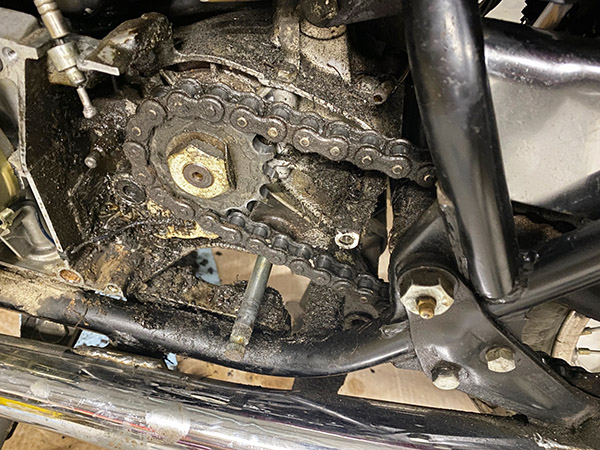

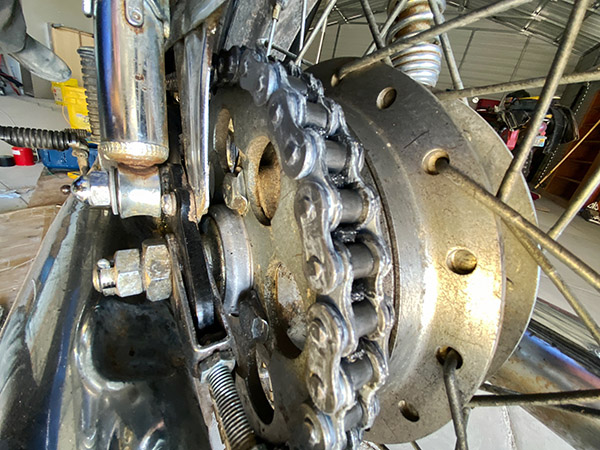
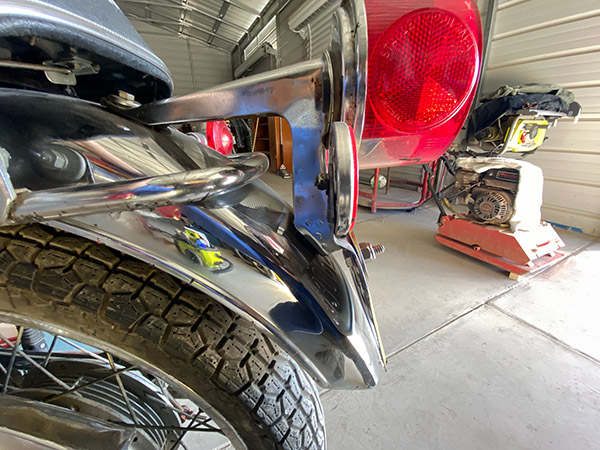
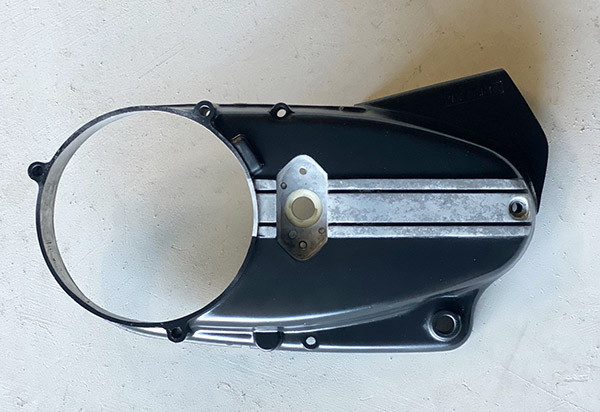 While I had the clutch helix cover apart I decided to install a new chain. I’m not one of those, replace-it-all-or-you’ll-die, type of guys. If the sprockets look unworn I’ll slap a new chain on the old sprockets. I realize this is hearsay in the Big-Sprocket boardrooms but those guys are in the sprocket selling business. The RD sprockets look like new so don’t worry, it will be fine. One glitch was the old tire is a 3.75-18 IRC, the bike calls for a 3.50-18. The narrow swingarm of the RD can barely accommodate the extra ¼ inch. I had to adjust the chain a wee bit tighter than I like to keep the tire from rubbing the front of the gusset. That problem will be solved when I replace the tires.
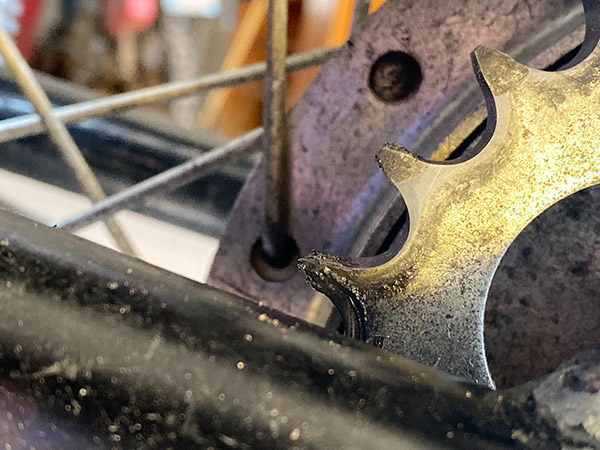


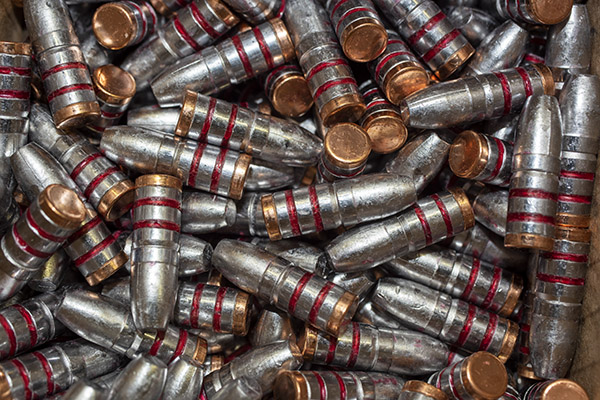
 I’ll probably vary the Trail Boss loads a bit with the Montana bullets at some point in the future.