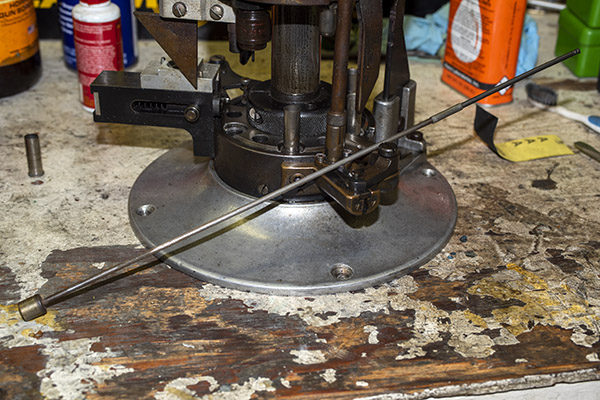
Star Reloader: The Final Tweaks

You’ve been following the Star resurrection, and if you haven’t, you can get the earlier Star stories here.  This blog wraps up the last few bits and pieces on the Star.  The resurrected Star is fully operational now and I’ve been making ammo on it.  In a future blog, I’ll do a video showing the machine in action.  I would have done it for today’s blog, but I’m out of empty cartridge cases.  That’s a good problem…I’ve got to  get to the West End Gun Club to shoot up some ammunition so I can reload again!

This blog covers the last few details, the last few bits and pieces I cleaned up, a part or two here and there, a few adjustments, and mounting the Star on my reloading bench…so here we go.

Mounting the Star

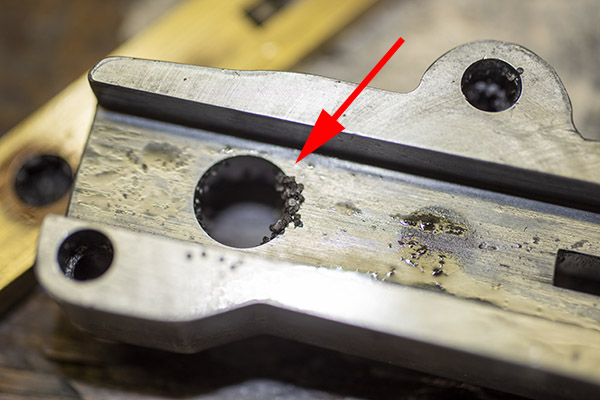
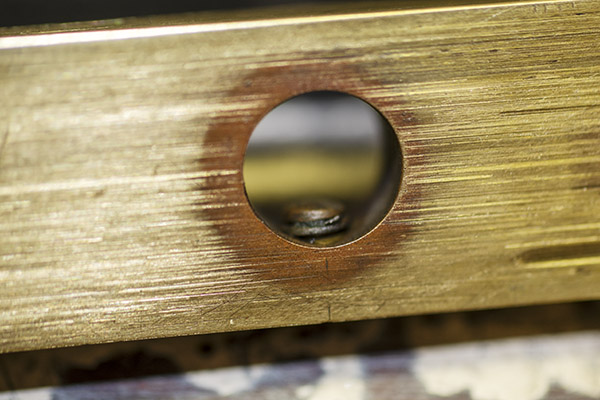
I needed to secure my Star reloader to my reloading bench.  That necessitated drilling four pilot holes for the mounting screws, and two holes beneath the reloader (one for the finished rounds to drop through, and the other for the old primers to drop through).   Here’s what the holes in the bench look like (the upper hole is for the finished rounds and the smaller hole is for the old primers).
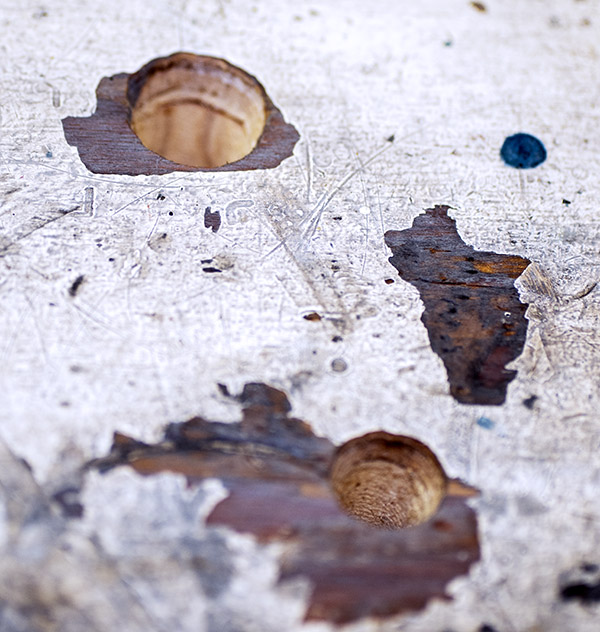
When the Star reloader operates, finished rounds drop from the bottom of the machine, which is why I needed that bigger hole you see above.  When used primers are punched out of the fired case (we call this decapping), they, too, drop from the bottom of the machine.  That’s what the little hole in the photo above is for.

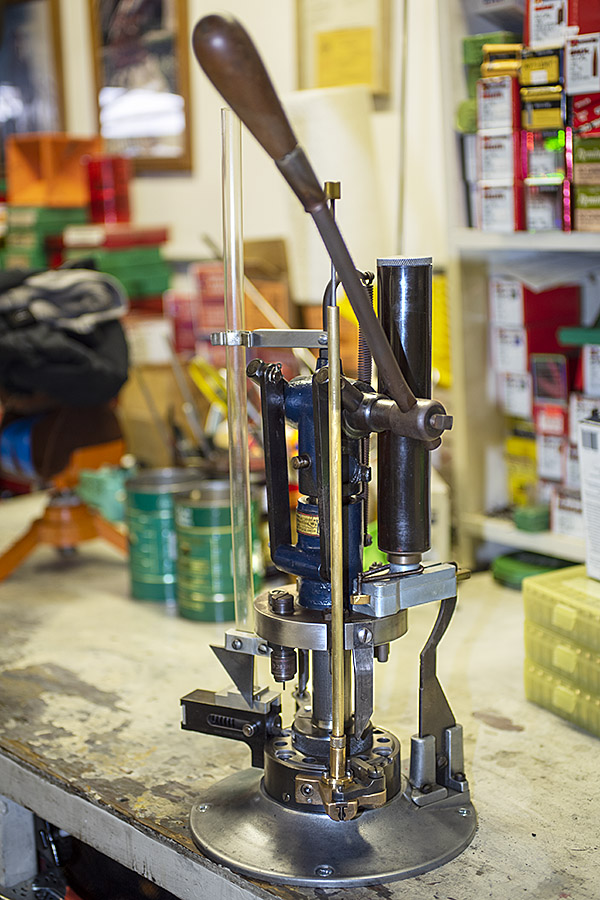
The finished Star mounts to the bench with four countersunk wood screws.  It looks really good.
Tool Head

The tool head is the piece that holds the dies, the powder dispenser, and a few other things.  It was basically rusted all over.  I went to work on the sides with Scotchbrite and Kroil, and the tool head cleaned up nicely.
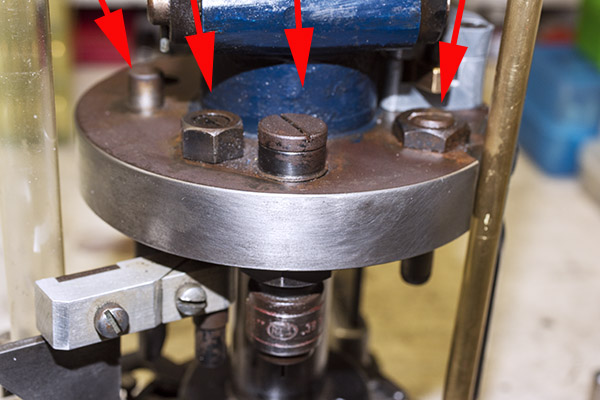
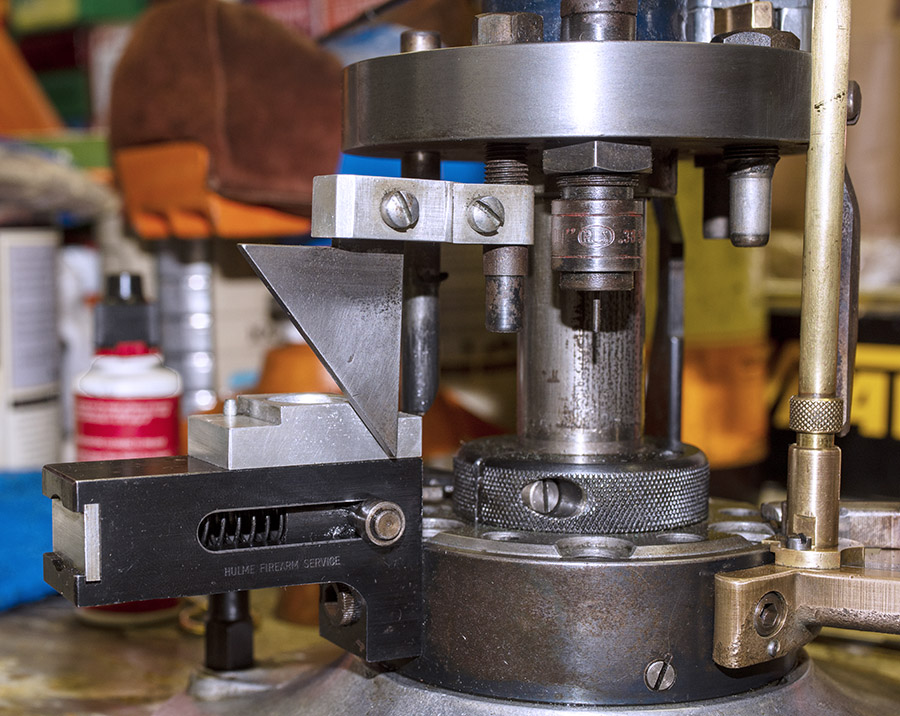
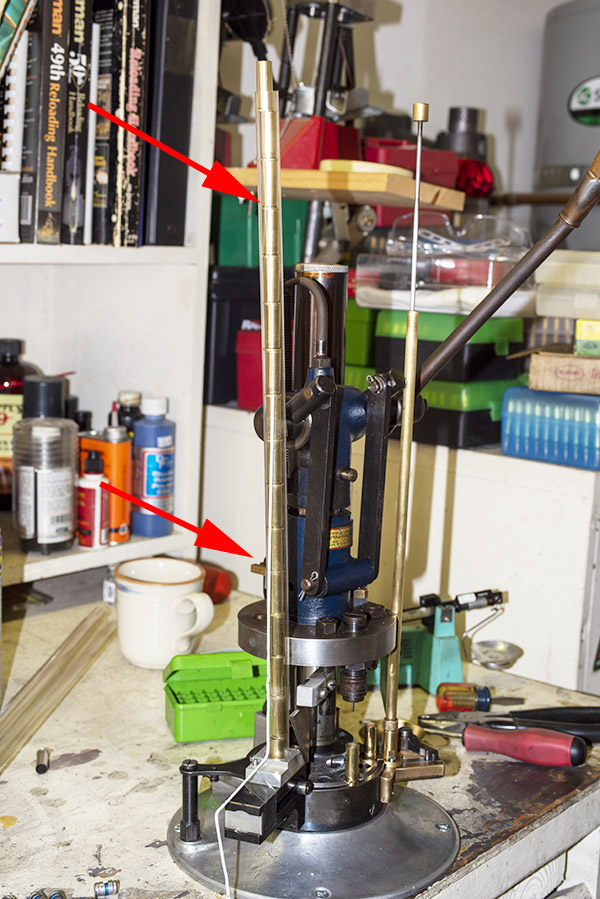
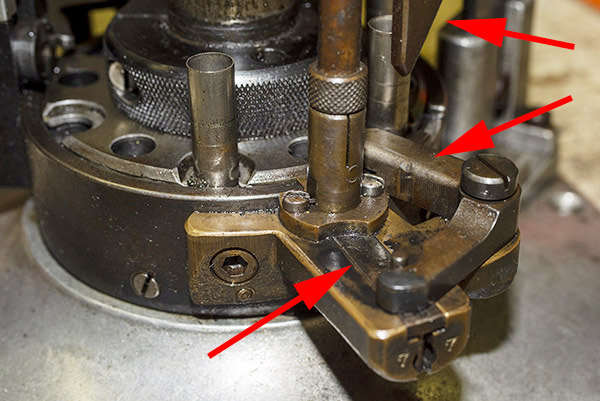
The arrows in the above photo point to key components that mount on the tool head.  From left to right, we have the double charge safety (more on that in a bit), the priming lever actuator (which also mounts the came for the Hulse case feed mechanism), the decapping and resizing die (this brings the case back to its specification dimensions), and the case flaring die (this puts a bell on the case mouth to allow the new bullet to enter the case).

Primer Feed Cam

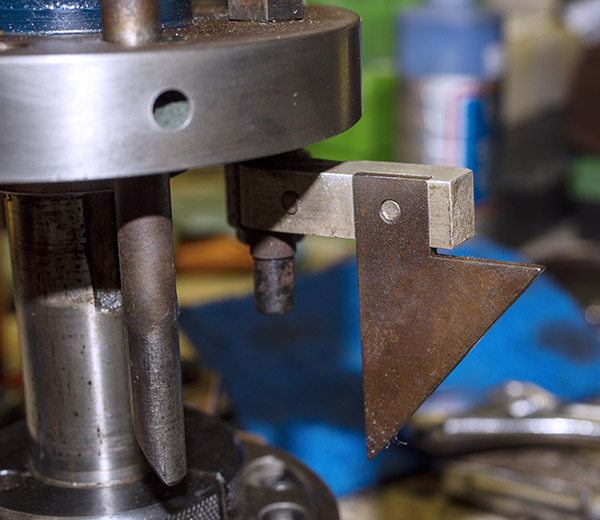
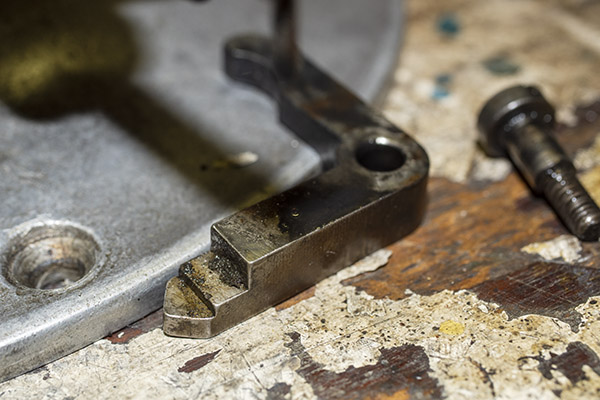
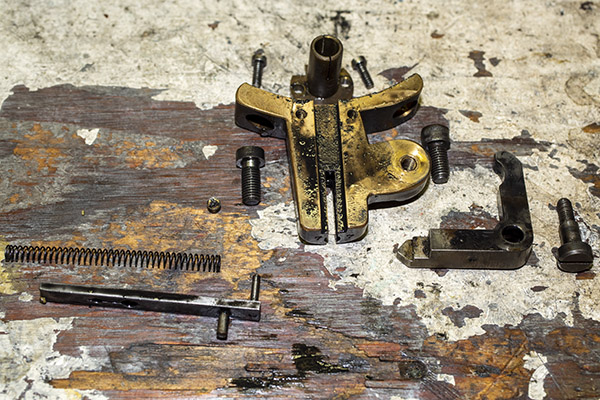
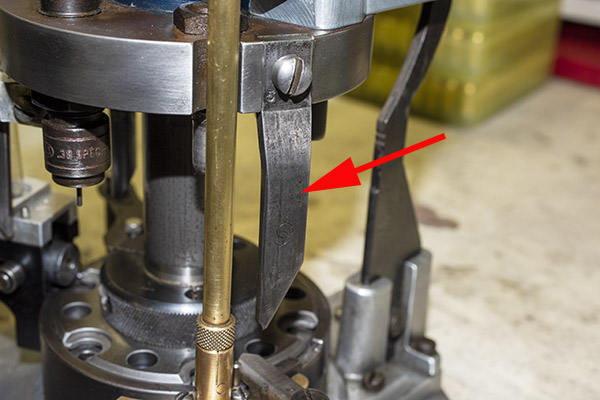
The primer feed cam is a knife-like looking thing that mounts to the tool head.  As explained in the blog on the case feed mechanism, this cam moves up and down with the tool head and actuates a lever, which in turns pushes a slider with a primer underneath the decapped case.  The primer feed cam was rusty so I cleaned it with Scotchbrite.  The part was originally blued, so I applied cold blue to the part to bring it back to near-original condition.  It looks good.
Powder Dispenser Corrections

When you reload, one of the things you have to pay attention to is the powder charge.  Too little, and you can get a bullet stuck in the barrel; too much, you risk blowing the gun up.  With propellants like Bullseye (which occupy very little of the available cartridge case volume), that’s a real serious concern.  One of things I wanted to do was make sure that the Star’s powder dispenser was dropping the right amount of propellant.  You may remember from our blog on the powder dispenser that my Star has a powder bar marked 2.7 GR BE, which is the bar for 2.7 grains of Bullseye.  That’s exactly what I wanted, so it was time to make sure that’s what the dispenser was serving.

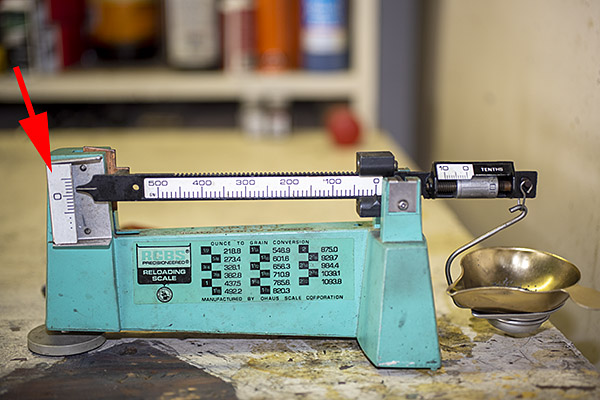
I added Bullseye powder to the powder hopper, cycled the powder slide a few times to throw a charge, and then I cycled it once more to capture a charge in my RCBS powder scale pan to weigh it.  To my surprise, I found that the powder dispenser dropped about 2.2 grains of Bullseye instead of the 2.7 grains it was supposed to dispense.
I had an idea about what might be causing the problem, but before I tore into the powder dispenser, I thought I’d check with good buddy Bruce at Star Machine Works.   Bruce knows more about these machines than any man alive.  Bruce told me that in his experience, the Star 2.7 GR BE slides throw over the specified weight to give 2.9 to 3.0 grains, not under as I was experiencing.

I thought this for a bit and realized I probably had residual oil in the dispenser from when I cleaned it, causing the Bullseye powder to clump up, and I was right.  Take a look:
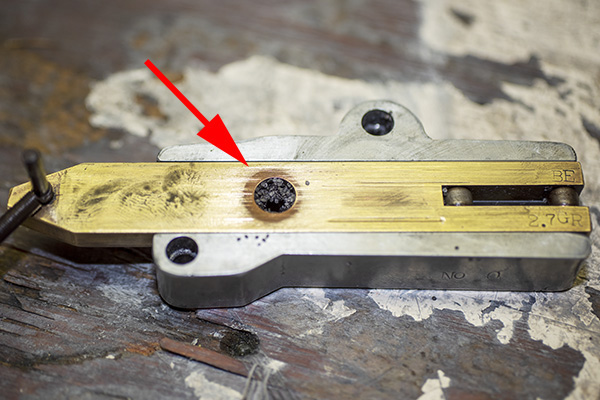
I cleaned the dispenser with alcohol to get all the oil out, let it dry, reassembled it, and tried it again.  Yep, Bruce was right…it was throwing right at 2.9-3.0 grains of Bullseye.  I thought that would probably be okay (0.3 grains of powder is probably about what a fly poops), but I knew that 2.7 grains was the secret sauce for good accuracy in 38 Special in my Model 52 Smith and Wesson, and that’s what I wanted.  I was thinking about when I looked at the powder slide again, and what do you know, I was once again blown away by how clever these Star folks were.  There was an adjustment in the powder slide.  It’s a little set screw in the powder slide, and by screwing it in or out you can adjust the volume of the powder slide cavity (and therefore the charge weight).  Very clever, indeed.
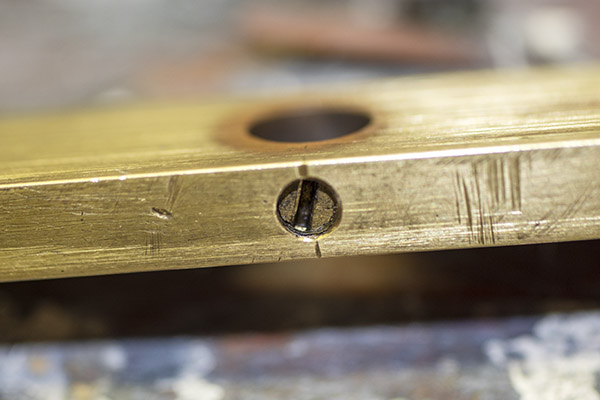
I screwed the set screw in to reduce the cavity volume by what I guesstimated would be 0.3 grains, and I got it right on the first try.  The dispenser drops exactly 2.7 grains of Bullseye now.
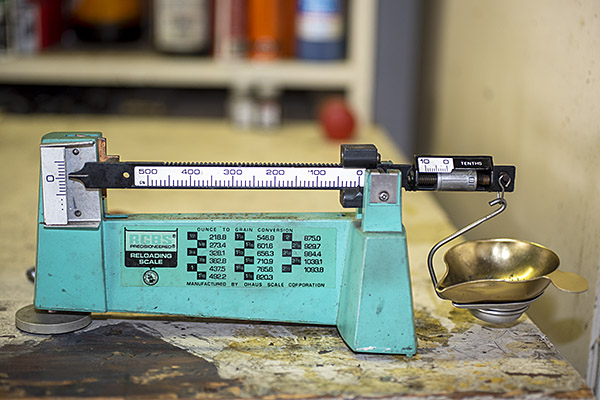
On that issue of overcharging a case:  The real concern is that you inadvertently double charge a case.  That could be disastrous.  The risk could be heightened, I think, by the fact that you have to manually advance the Star’s shell plate after each pull of the lever.   The mechanism does not automatically advance each time, and if someone wasn’t paying careful attention, an inadvertent double charge could occur.   Well, the Star folks thought of that, too.  The Star reloader incorporates a gizmo called the safety cam.

The Star Reloader Safety Cam

This thing is very clever, which seems to be a hallmark of everything on the Star.  It’s a toggling guard sort-of-deal on the left side of the reloader that I cleaned with Scotchbrite and Kroil.  You can see it in the photo below.
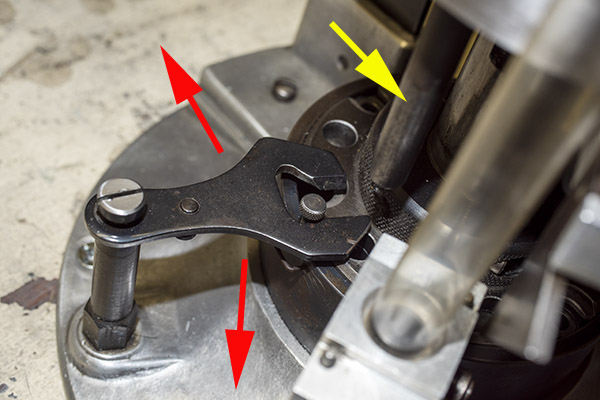
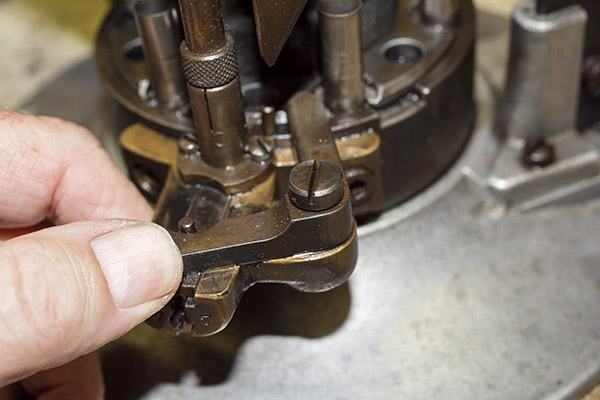
Take a look at the red and yellow arrows in the photo above.  That blued-steel Y-shaped toggle guard translates back and forth on its pedestal.  There’s a wire spring underneath the guard that makes it naturally flip to the position you see the photo above.  Now, look at the post beneath the tool head (the yellow arrow points to it).  If you attempt to operate the lever and lower the tool head (which would also operate the powder dispenser and drop 2.7 grains of Bullseye into the cartridge case beneath the powder dispenser), that post will hit the toggle and stop further tool head downward motion.  When that happens, no powder will drop.   We want that, because the case sitting below the powder dispenser has already been charged with propellant.

Okay, this is going to get a little complicated, so bear with me.  The Star reloader’s shell plate does not automatically advance.  You have to manually advance the shell plate as a separate action (it isn’t slaved to pulling the reloader’s lever).  Now, imagine you’ve pulled the lever in the previous step, doing all the things that makes happen (knocking out the old primer, resizing the case, inserting a primer in the next case, flaring a case mouth, dropping 2.7 grains of Bullseye into the primed and sized case, and seating a bullet and crimping the case).  Wow, that’s a lot.  Now it’s time to manually rotate the shell plate to the next position.   When we do that, the finished cartridge (new primer, new powder, new bullet, crimped bullet) advances into the safety cam toggle, rotating the toggle toward us.
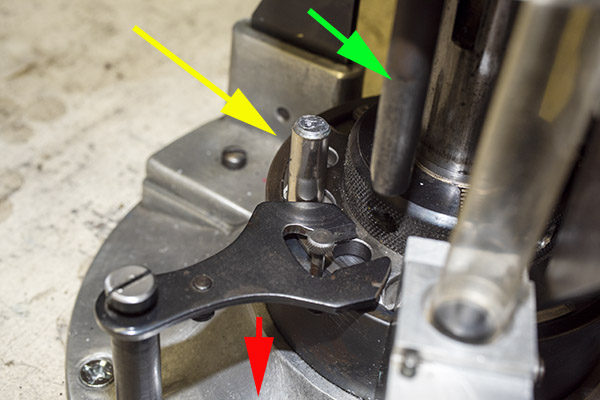
You can see all this in the photo above.  The safety cam toggle rotates toward us (indicated by the red arrow), pushed there by the completed cartridge case just before that case drops through the reloader (the case is indicated by the yellow arrow).  When the safety cam toggle moves toward us, the post mounted on the tool head (indicated by the green arrow) now has a clear shot at a hole in the shell holder (it’s no longer obstructed by the safety cam toggle), and the tool head can be fully lowered.  The new cartridge drops through the reloader, through the hole in the reloading bench shown at the top of this blog, and into a box waiting below the bench.  When the completed cartridge drops through the reloader and the lever is raised, the safety cam toggle’s spring pushes it back to the natural position, and the lever cannot be fully lowered again until the next cartridge case pushes the safety cam toggle to the safe position.  It’s clever and it’s complicated, but it’s simple and it prevents dropping the tool head twice on the same cartridge (thereby preventing a double charge).

Seating and Crimping Die Adjustment

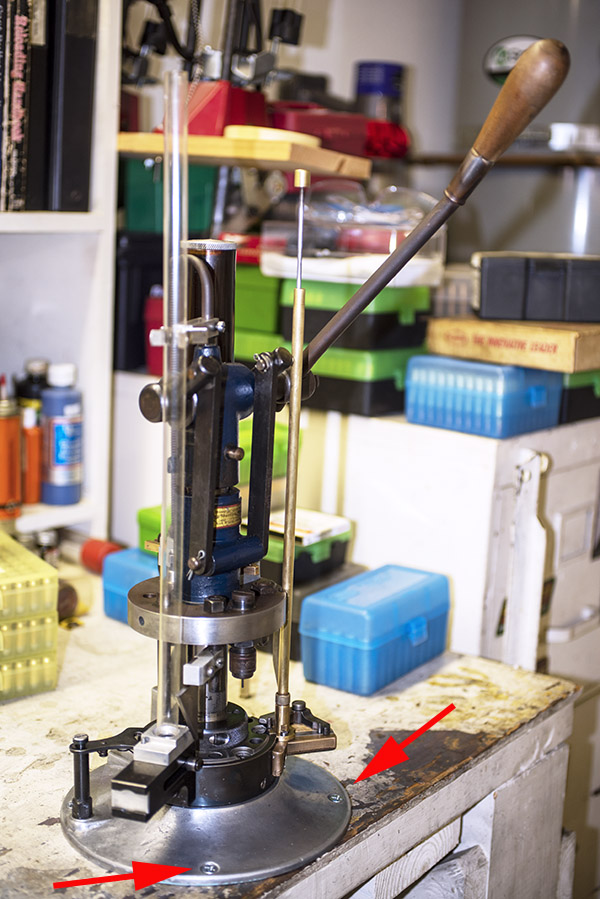
The final die in the tool head is the seating and crimping die.  It does two things.  It seats the new bullet in the cartridge case (it pushes the bullet in to the correct depth), and it roll crimps the cartridge case around the new bullet.
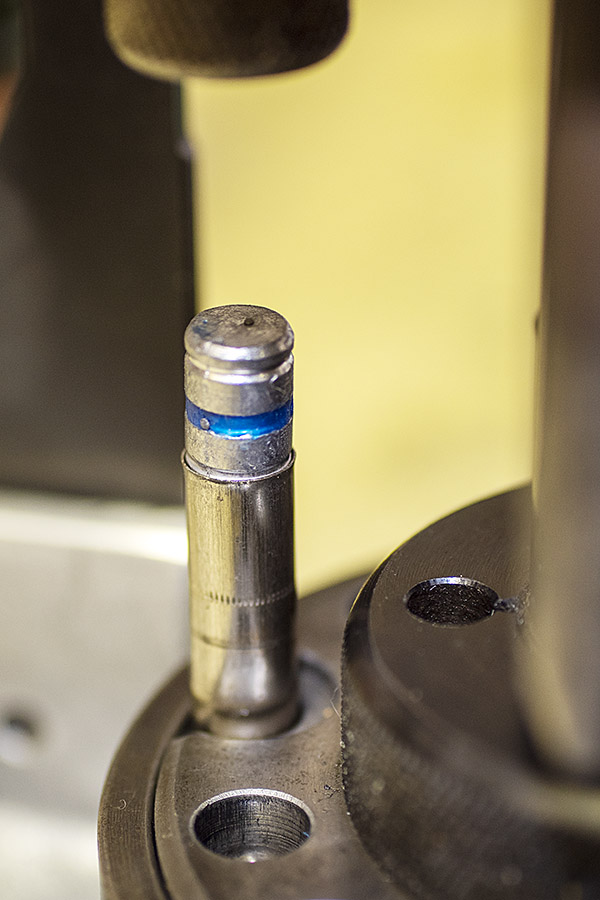
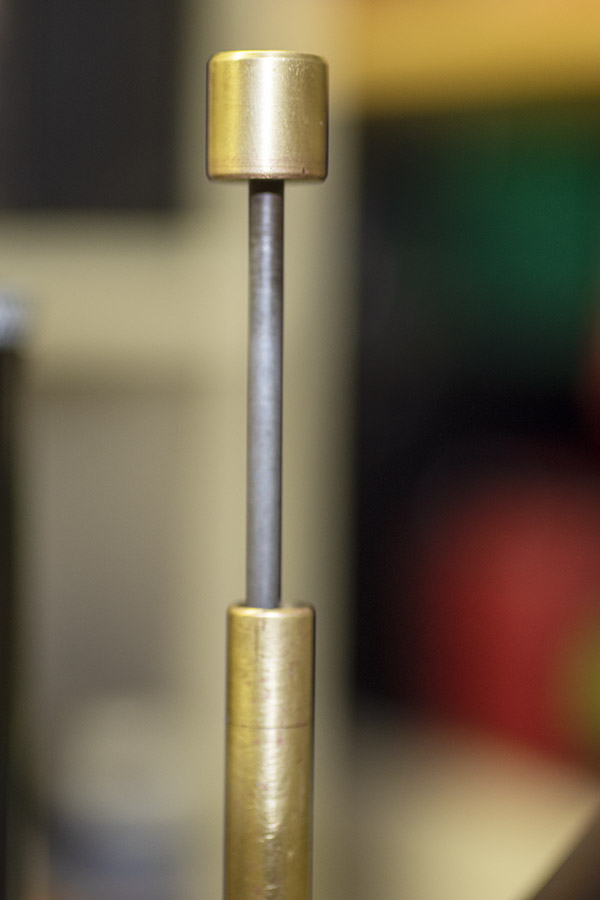
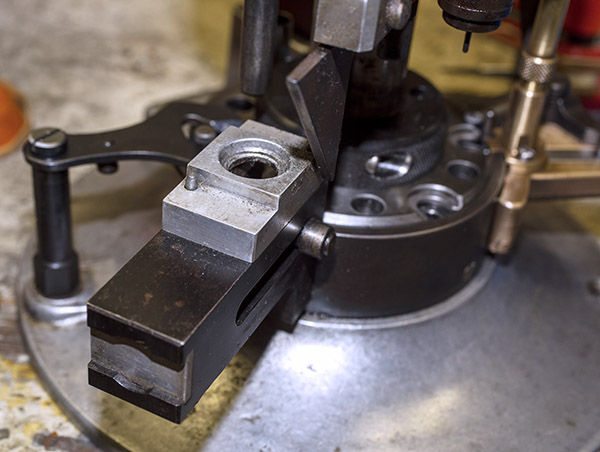
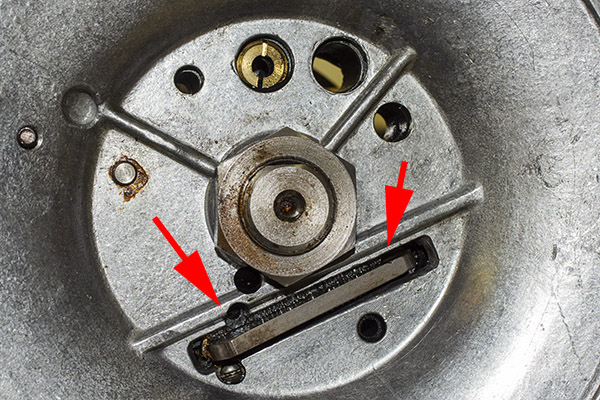
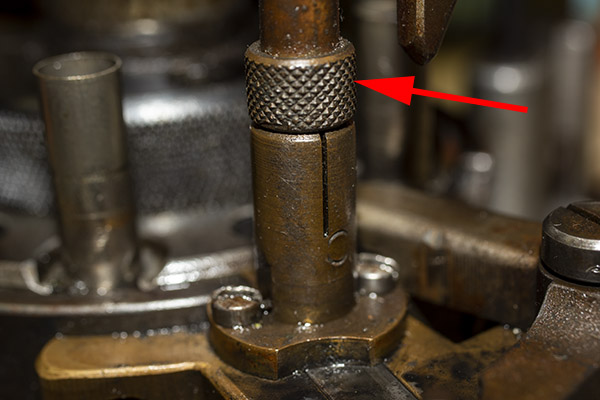
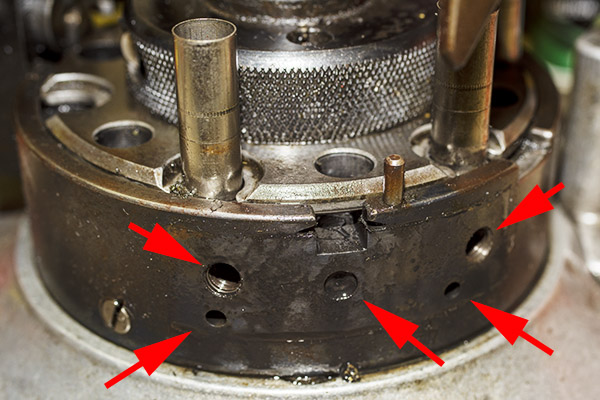
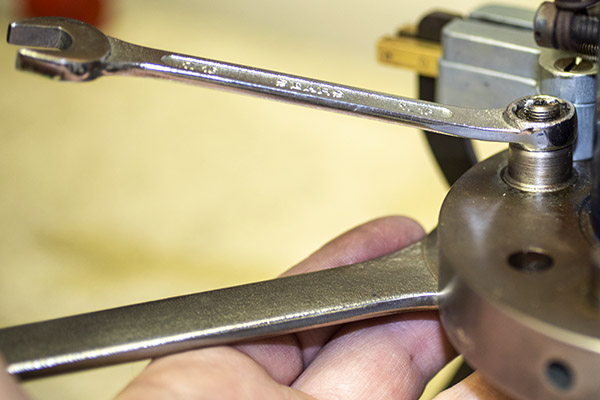
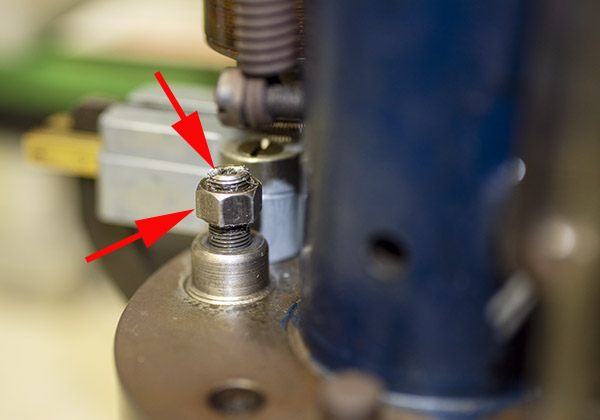
Seating depth and crimp are made through two adjustments.  There’s a locknut on the seating die beneath the tool head to lock the die in place, and there’s another locknut on the seating post to lock it into position.   Crimp is adjusted by positioning and locking the entire die in the tool head, and bullet seating depth is adjusted by how far the seating post is threaded into the die body and then locked in place with its locknut (see the red arrows in the photo below).
Case Feed Tube Support

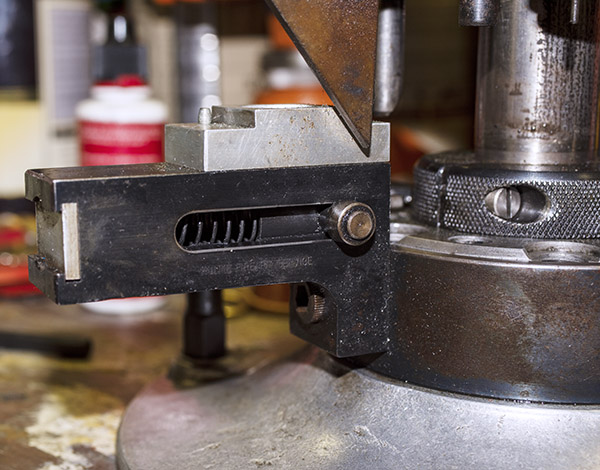
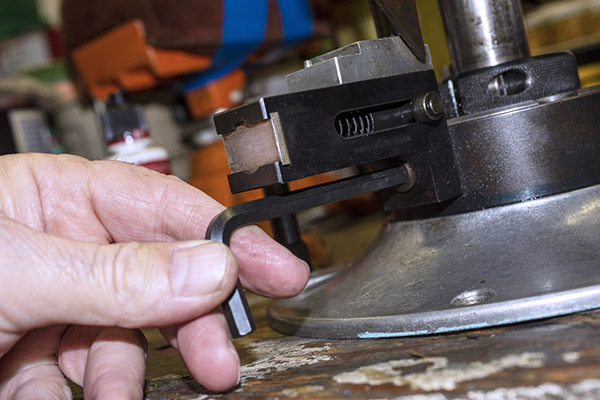
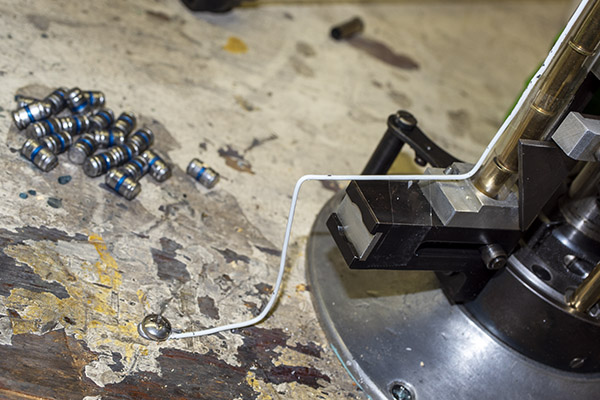
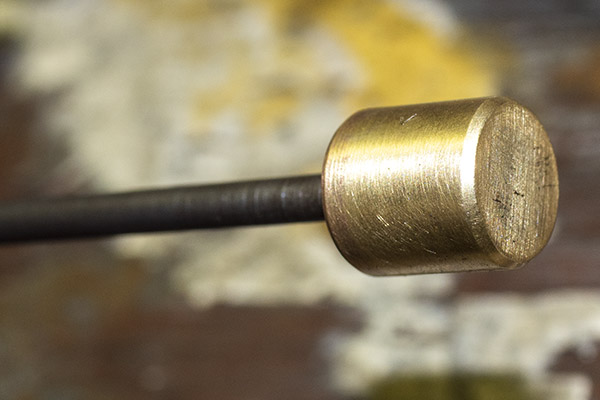
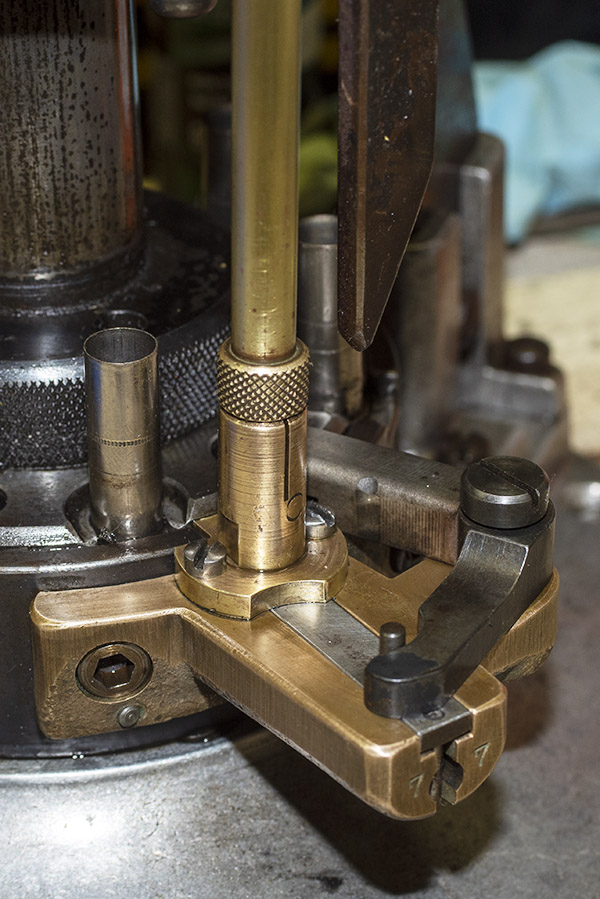
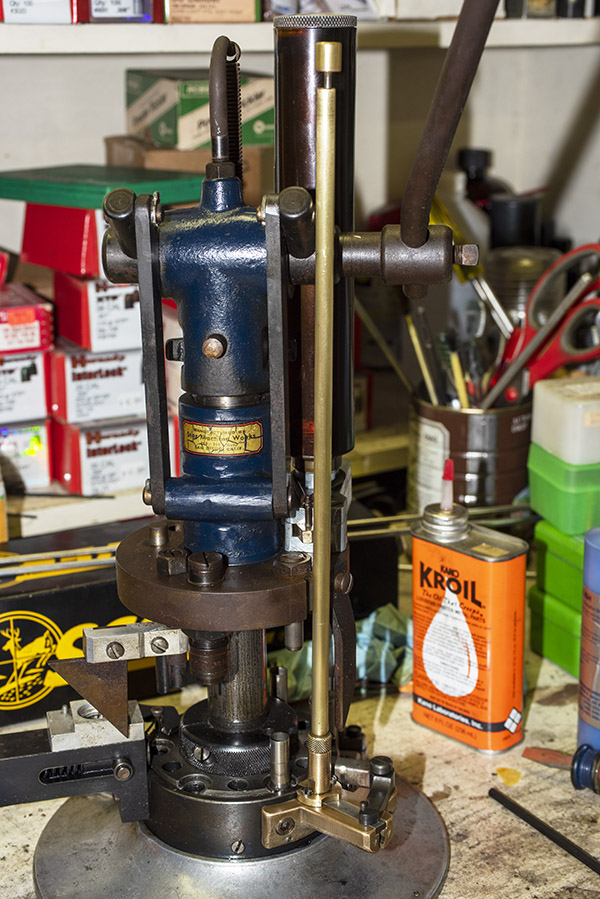
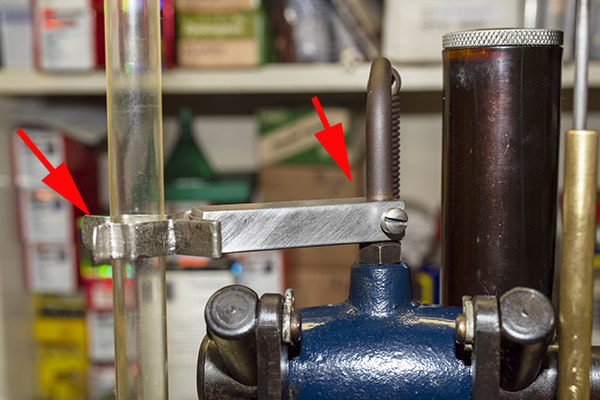
The last item I needed to add was the case feed tube support.   You may remember that I jury-rigged an external support from a coat hangar.  It was definitely a bit of Bubba engineering, but hey, it worked.  Good buddy Mike saw that, felt a wave of pity and a willingness to help, and asked me if I wanted a part that he had.   I said yep, Mike shipped it to me, and here it is installed on my machine.
This project has come together very nicely.  I just loaded another 50 rounds of .38 Special with the Star. I used a different bullet (the Hursman 158-grain cast flat point, which is what necessitated the bullet seating depth change described above).  The Star sure did a nice (and fast) job.  I loaded 50 rounds in less than 10 minutes. This thing is really cool and I am getting used to the tempo and the hand-eye-coordination/feel of the thing.  At first, I felt like I almost needed another hand to operate the Star because there’s so much going on, but I got the hang of it very quickly.  You only have to do three things each cycle:

    • Advance the shell plate one position (you do that manually on these machines; the mechanism doesn’t advance the cases).
    • Put a bullet in the charged shell at the back of the press.
    • Pull the lever down and then bring it back up.

While doing the above, you need to pay attention to the powder magazine, the primer magazine, and the case feed tube to make sure each has not run out of the components it feeds.  The Star reloader really is a slick device, and it works great.

As I mentioned in one of the earlier blogs on the Star, these machines ruled the roost for high-volume reloading for a cool half century.   At one point back in the day, a Star reloader sold for north of a thousand dollars, and there was a 2-year wait to get one.  It’s easy to see why.  This is a nice piece of equipment.  If you’re a gearhead, a gadget guy, a shooter, and a reloader (and I check all four boxes), you can’t help but love a Star reloader.


Do you enjoy reading about bringing old stuff back to life?  You’ll love the Resurrections page!

See all the Tales of the Gun here!

Never miss an ExNotes blog!

Star Primer Pickup Tubes: A Story Within A Story!

Like the title says, this is a story within a story.  It’s about using primer pickup tubes with my resurrected Star reloader, and how Lady Luck smiled on me yet again.

First, a bit of background.  There are a few approaches in the reloading world for transferring primers from the primer box into the reloader.  In our general series on reloading, I showed how to use the Lee primer tool, which is what I generally use when I’m loading on a single stage press like my RCBS Rockchucker.  Another approach is to use a primer pickup tube and a primer tray.   See, the deal is that you don’t want to touch the primers with your bare fingers.  You might get skin oils on the primer, and that could make the primer inert.  As explained earlier, in this game, you want all the primers to be “ert.”

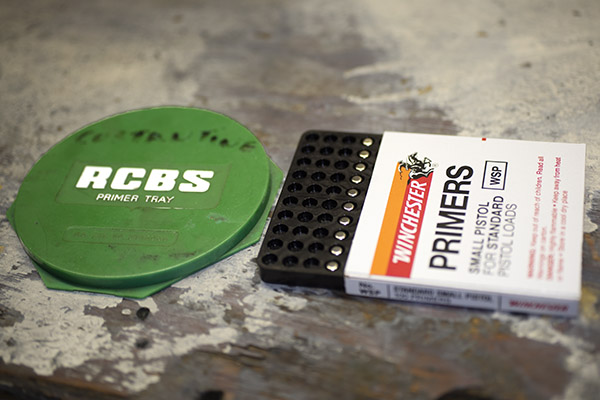
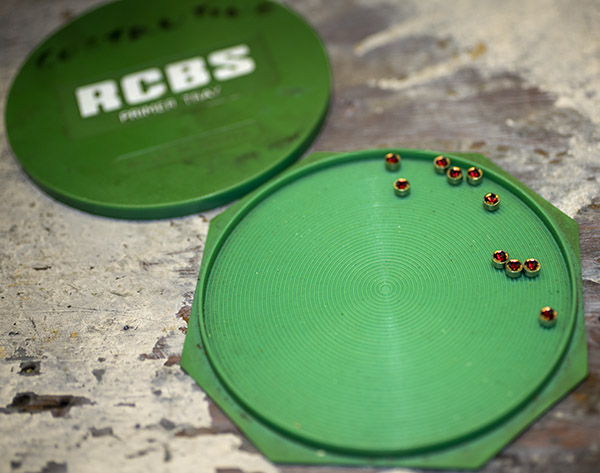
The first step is to transfer primers from the box they come in into a primer tray, like you see below.

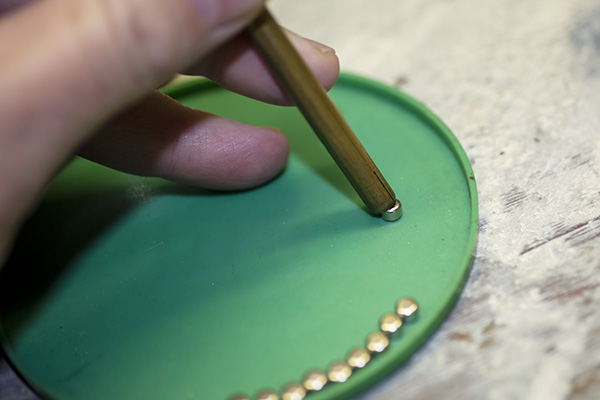
That green circular deal on the left in the photo above is the primer tray.  It consists of a base and a lid.  You take the lid off and drop the primers into the base, like you see below.

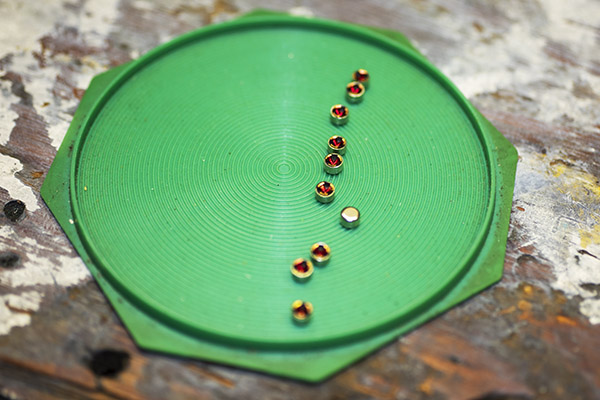
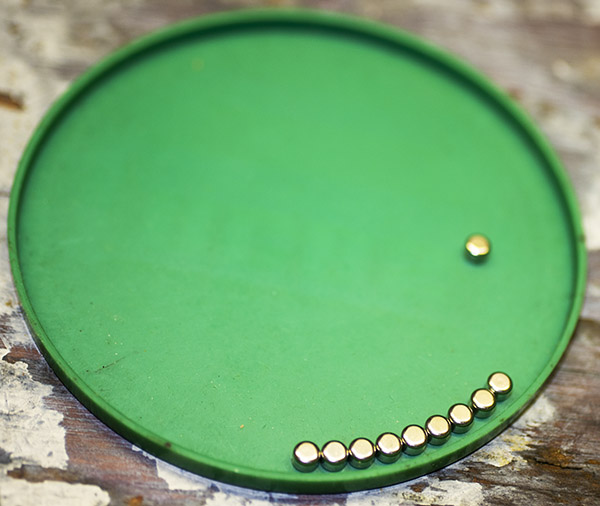
When you do that, though, invariably some of the primers will face up and some will face down.  We want them all facing down in the tray’s base, and we get that by jiggling the base.  There are little circumferential ridges molded into the base, and when you jiggle the tray, it makes all the primers face down (see below).

Get ready for more cleverness here, folks.  What we do next is put the lid back on the primer tray, invert it, and then remove the base from the lid.  That leaves us with the lid, and all the primers in it are facing up (see below).

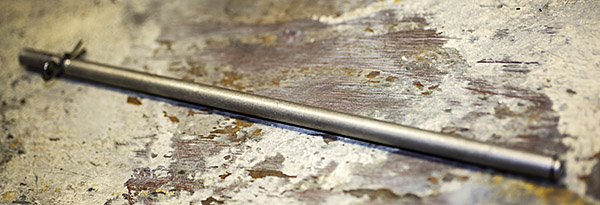
At this point, we pick up the primers from the tray using a primer pickup tube like you see in the photo below.

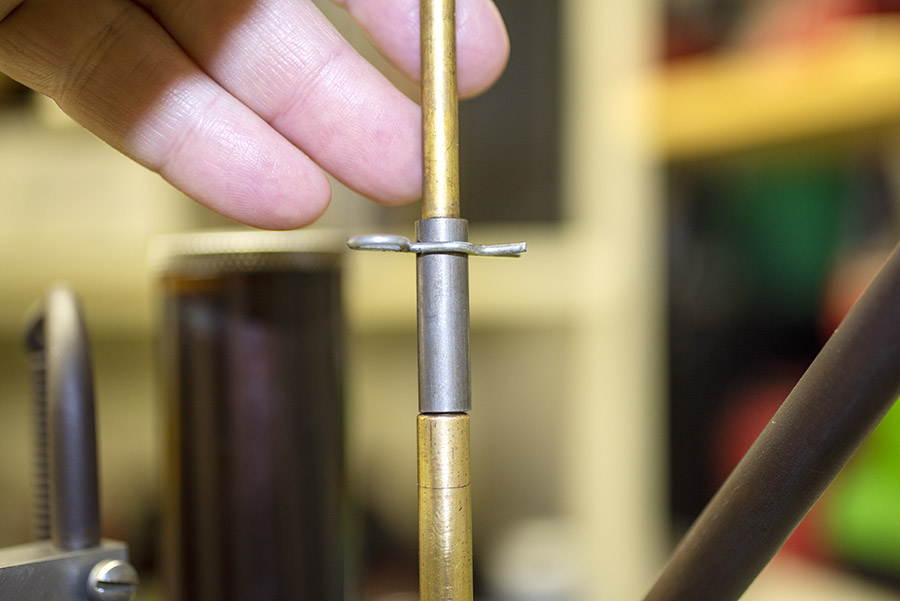
The tube you see in the photo above is an RCBS primer pickup tube.  It’s a hollow tube with a spring catch on one end and a spring clip on the other.  What you do is take that tube and push it down (spring end down) on top of each primer.  That stacks the primers, one on top of the other, in the tube.  Then you invert it over the primer magazine on the Star reloader, remove the spring clip, and all the primers in the pickup tube drop into the Star’s primer magazine.

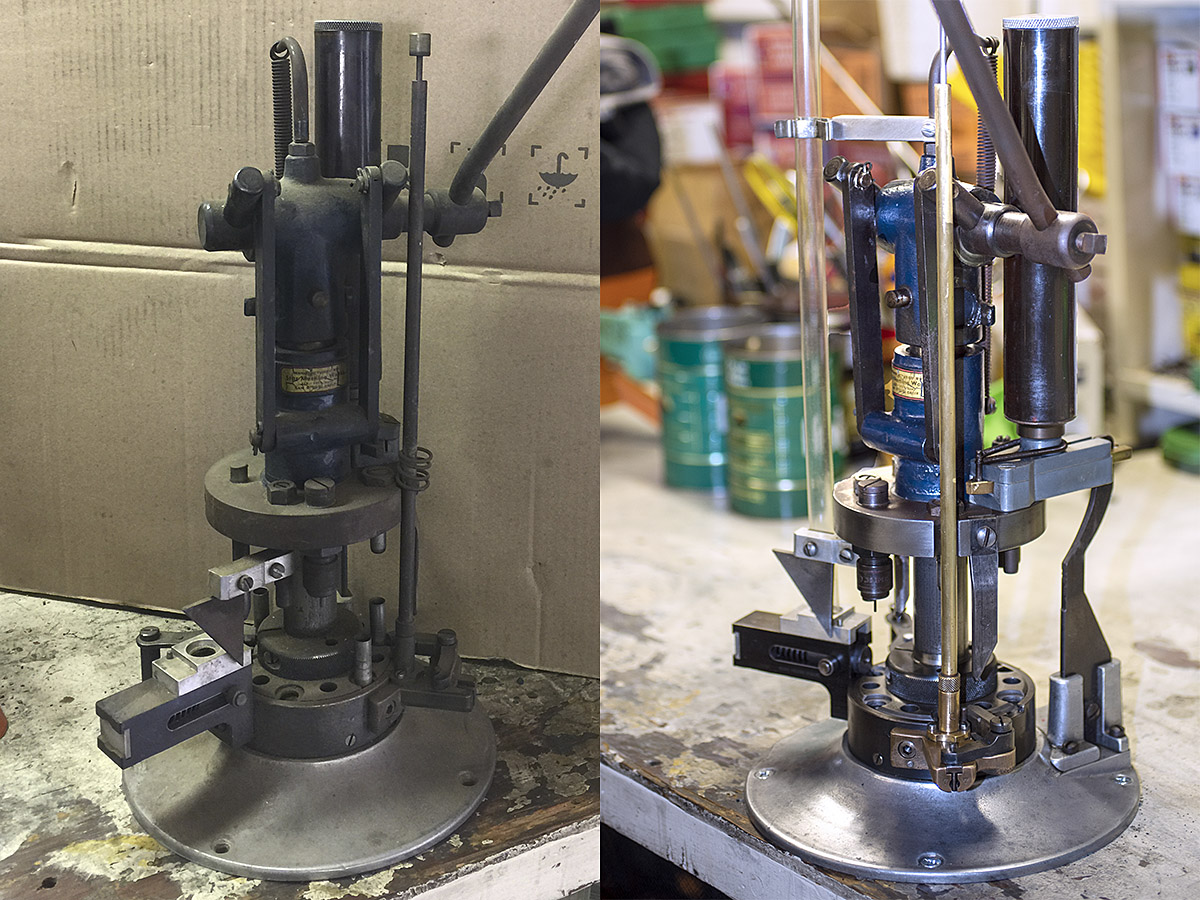
Star reloaders originally had a brass primer pickup tube, but that didn’t come with the one I have.  I’m not complaining; my Star reloader was free.  And I figured I’d just use an RCBS primer pickup tube, because I knew had three or four of those stashed away somewhere.  But I couldn’t find the things.  Then I remembered I had put a bunch of reloading odds and ends in a 50 cal ammo can somewhere, and I went through maybe 10 ammo cans before I found it. I used the RCBS primer pickup tube and I had to hold it carefully in alignment with the Star’s primer magazine when transferring the primers from the inverted tube, pulling the pin, and letting the primers fall into the Star brass primer magazine. It worked just fine. It wasn’t the original Star gear, but hey, you go to war with the Army you have.

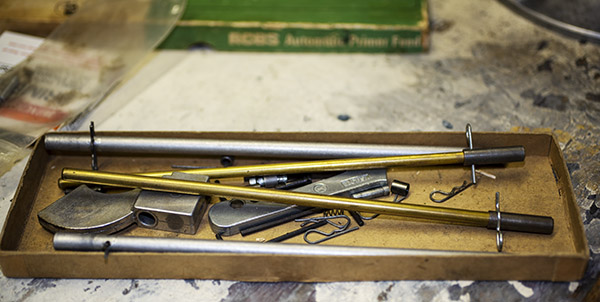
After I did that, I went on to other things.  I thought I was doing pretty good, you know, finding those RCBS primer pickup tubes, but the box they were in kept playing over and over again in my mind.  Something was tickling the neurons, but I didn’t know what it was.  Then it hit me.  I remembered earlier in the day when I took the RCBS primer pickup tube out of the box.  I could see it clearly in my mind:

There were two other brass primer pickup tubes in that box.  In my eagerness to get the RCBS primer pickup tubes (the ones I was looking for), I reached right over the brass tubes.  Could it be?  I put that stuff away a decade ago, way before I ever had the Star.

I went back to that box immediately, and son of a gun, there were not one, but two Star original brass primer pickup tubes. Two! I think they came from Sue’s Dad before he passed away more than 10 years ago (he was a reloader, too), and I got a lot of his old bits and pieces. He never had a Star reloader that I ever saw, but he must have latched onto these two primer pickup tubes somewhere along his journey through life. How about that?

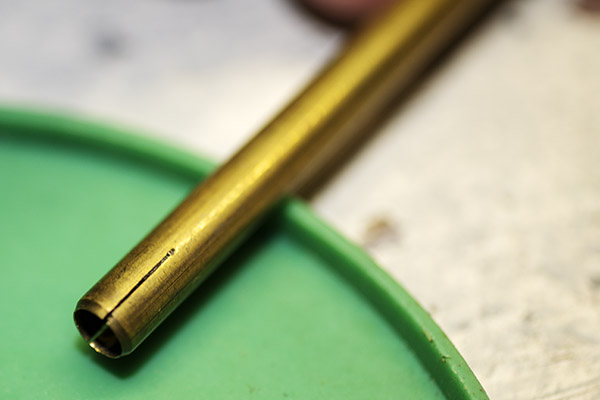
So, back to the story du jour…and more of the Star folks’ cleverness.  Star used a slightly different approach than did RCBS.  For starters, they made a cross cut in the pickup end of their primer pickup tubes to give the spring tension needed to hold the primers in the tube.

I started picking up a batch of primers from the primer tray lid with my newly-discovered Star primer pickup tube.

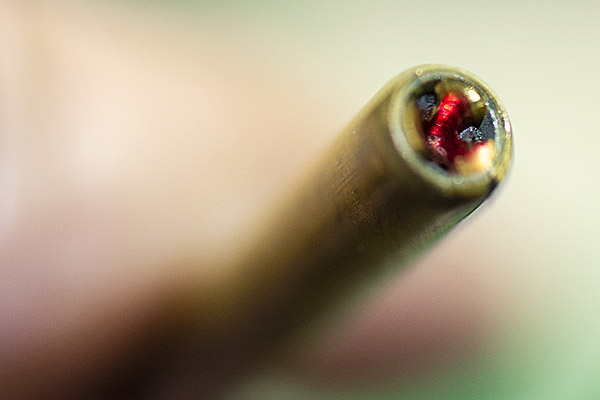
When you get that last one, you push it the rest of the way in with a probe (not your finger).  With apologies in advance for the inadequate photo depth-of-field, here’s what the last primer looks like in the Star tube.

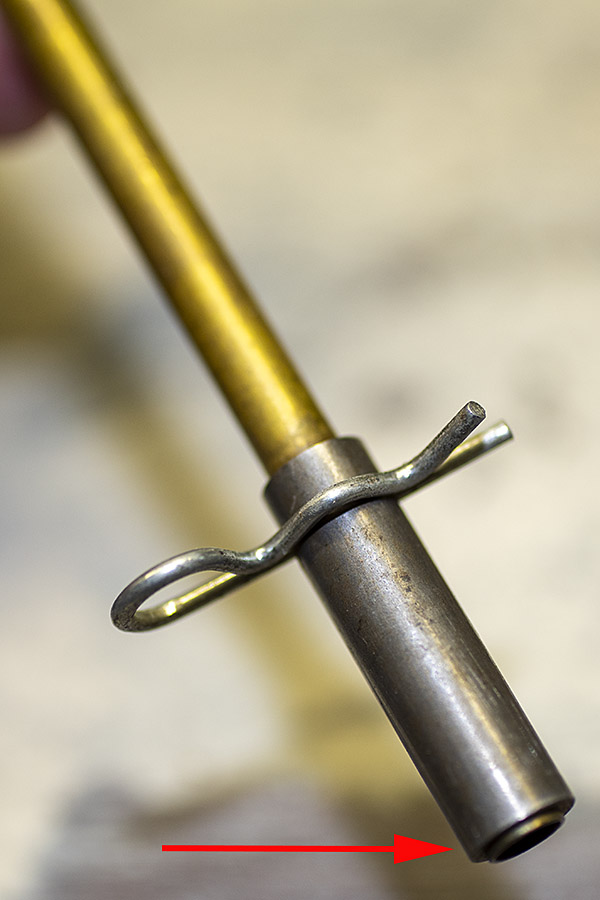
Then you invert the tube, so all the primers are at the other end.  The spring clip keeps them from falling out.  There’s a flange on the end of the Star primer pickup tube.  It interfaces with the Star reloader’s primer magazine to keep the primer pickup tube aligned with the primer magazine tube.

Here’s the top end of the Star reloader’s primer magazine, with the primer follower in place.  I removed it and placed the primer pickup tube on top.

At this point, I then removed the spring clip, and all the primers that were in the primer pickup tube transferred (gravity feed!) into the primer magazine.

So there you have it. The Star is up and running, and I’ll post about cleaning up a few more details on this magnificent old machine in the next Star blog. Stay tuned!


More cool reloading stuff is here!

Read the rest of the Star reloader resurrection here!

Sign up for email notifications when we post future blogs here:

A TJ Roscoe

Roscoe:  It’s slang for a snubnose revolver.  No one is really sure where the term originated.   There are others…heater, rod, piece, burner, gat (that last one is easy, with me knowing a little bit about The Gatling Gun and all), but the origins of most of these terms are lost in the haze of handgun history.  And on that Roscoe terminology, I recently tumbled onto a very cool website I’ll be talking about a bit more here on the ExNotes blog.  But that’s for later.  This blog is about my Roscoe.

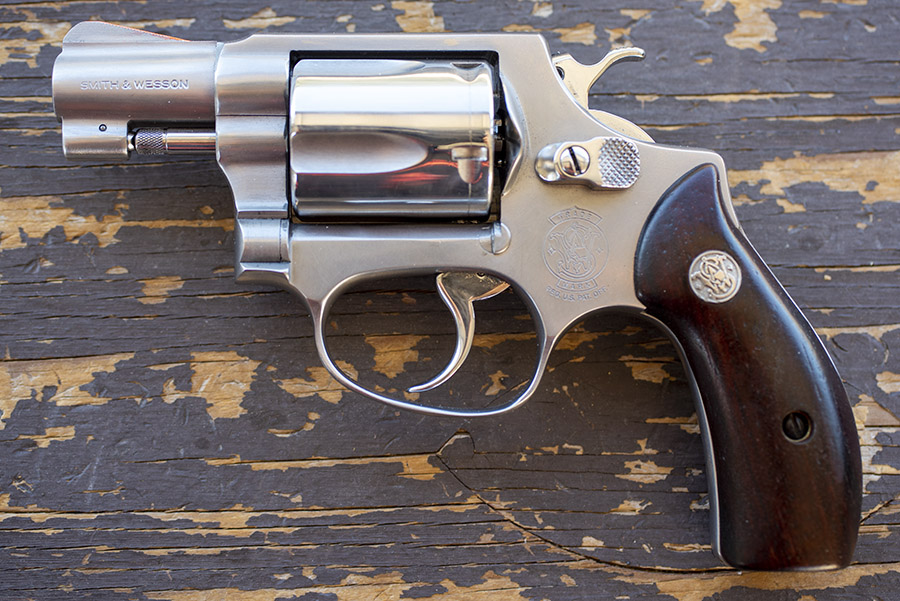
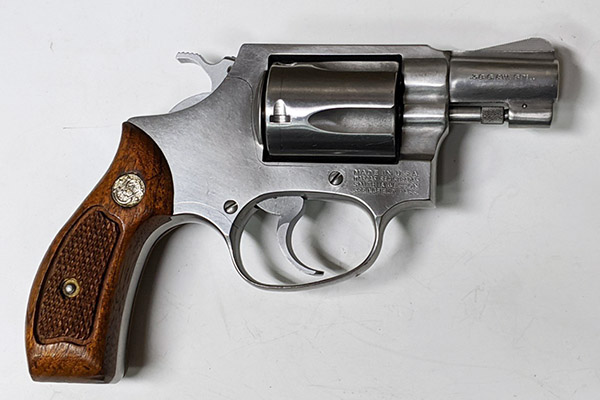
It’s a Model 60 (no dash) stainless steel Smith and Wesson snubbie, to be specific.  I mentioned it and the work my good buddy TJ was doing to it not too long ago, and it’s back.   And it’s awesome.  I had TJ do an action job, a little cosmetics work, and fix a problem or two.

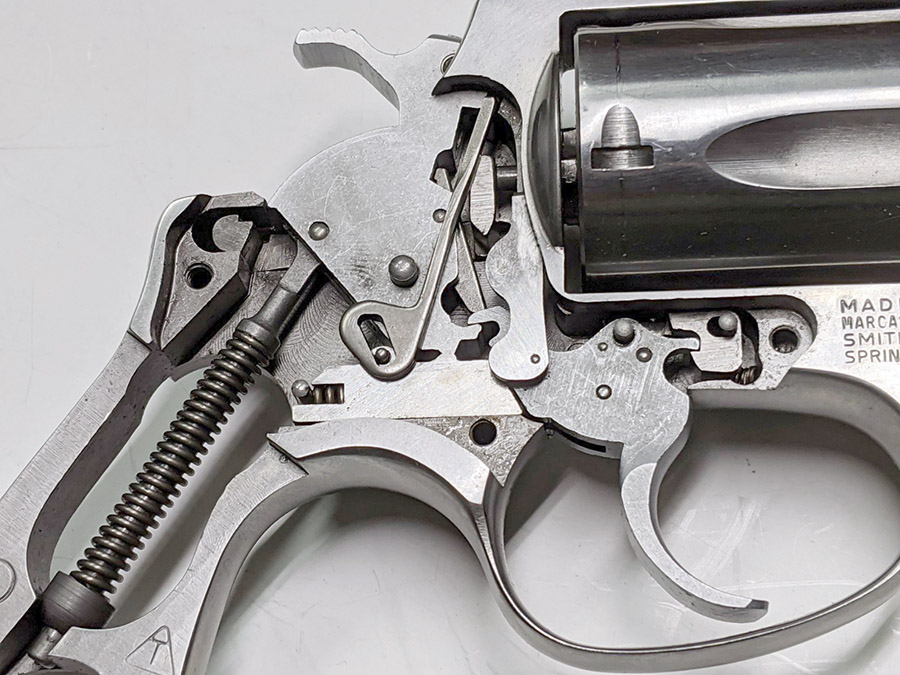
First, the action work.  TJ lightened both the double and single action trigger pull, and he did it the old-fashioned way…lots of hand work, polishing, and fitting.  Here’s what the guts of my Model 60 look like after a TJ Level 1 action job:

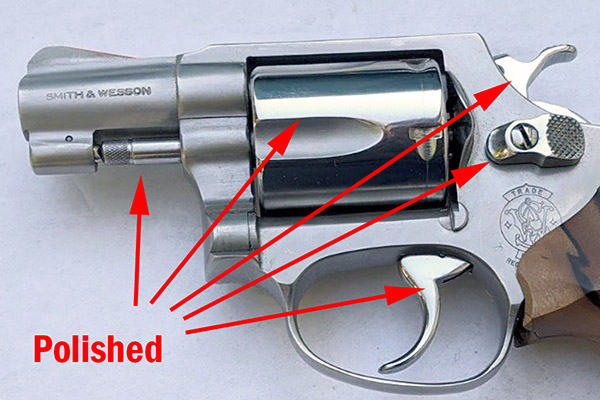
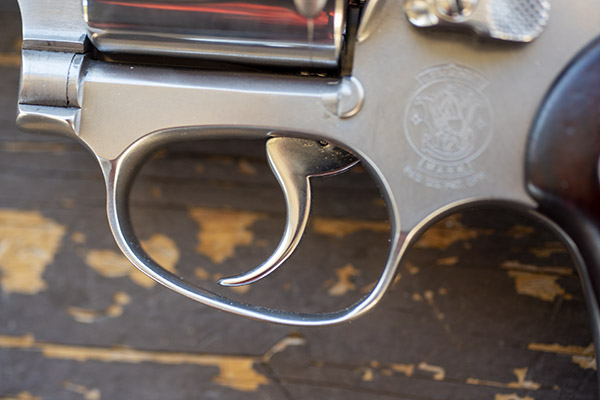
I initially thought I’d have TJ put a high polish on the entire revolver (it would have been something north of $300 just for that work), but TJ was looking out for my best interests.  “I can do the whole revolver,” TJ said, “but it will look a lot better if you just have me do the ejector rod, the cylinder, the trigger, the cylinder release, and the hammer.” He was right.  It looks awesome.

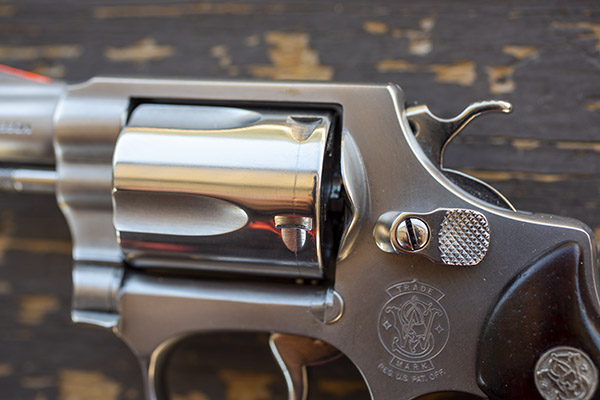
Here are a few more shots of the high polish TJ put on these components.

The work on the trigger is lot more than just cosmetic.  TJ recontoured the face of the trigger in addition to polishing it, and it really makes a difference in double action shooting.  It’s much easier to find and control that precise instant when the hammer drops during double action shooting with the new trigger contour.

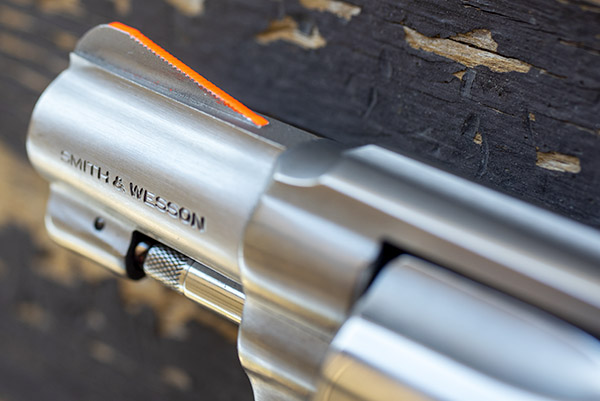
As part of the Level I action job, TJ also applied orange Day Glo to the front sight. It’s a small touch that works wonders. Finding and putting the front sight on target is much faster with this Day Glo treatment.  It’s not just a cosmetic thing.

I mentioned in a previous blog that the revolver was hard to open, and TJ found and fixed the root causes of that problem.  The ejector rod threads had stripped, the ejector rod’s axis wasn’t concentric to the bore, and the barrel underlug catch was not properly configured.  My Model 60 opens and closes the way it should now.  It’s slick.

Here’s another small detail I like…polishing the cylinder release and its slotted nut (it’s not a screw, even though it looks like one).  This little bit adds a nice touch to the revolver.

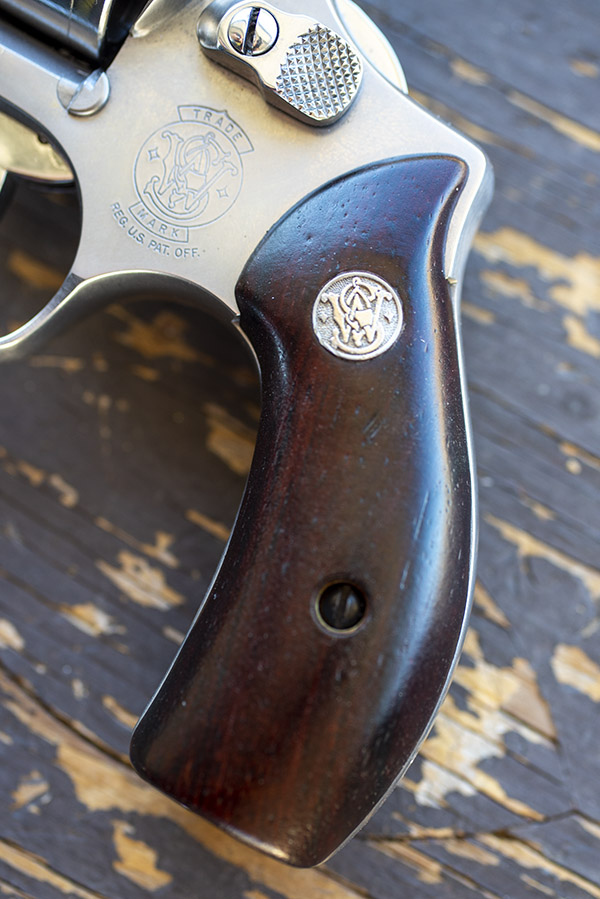
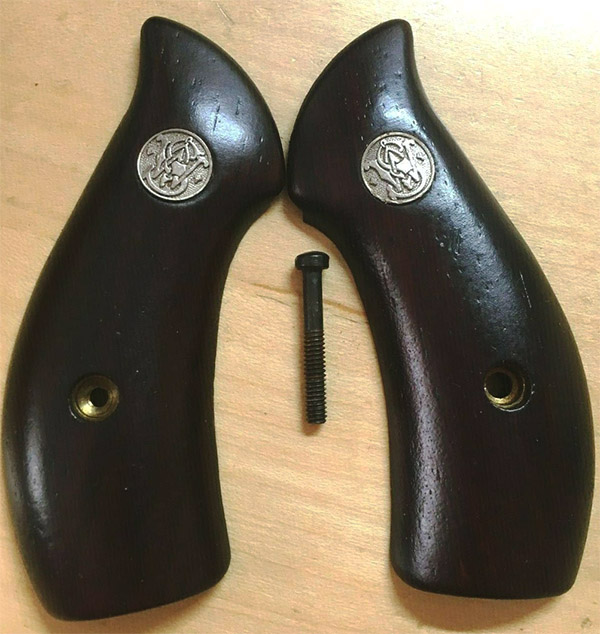
The grips are smooth rosewood, and they work well with their S&W emblems against the stainless steel revolver.  I like the look.

So, on to the main question:  How did the TJ-customized Model 60 shoot?  Superbly well, thank you.  I tried two loads with the new-to-me Model 60.  The first was the 148-grain wadcutter with 2.7 grains of Bullseye; the second was a 158-grain cast truncated flat point bullet with the same 2.7 grains of Bullseye.  I loaded both on my new-to-me freebie Star progressive reloader.  Yep, the Star is up and running now, and how it works will be a story for a future blog (in the meantime, you can read about the Star resurrection here).

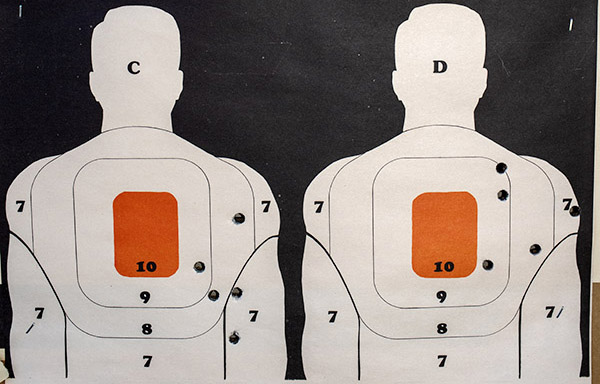
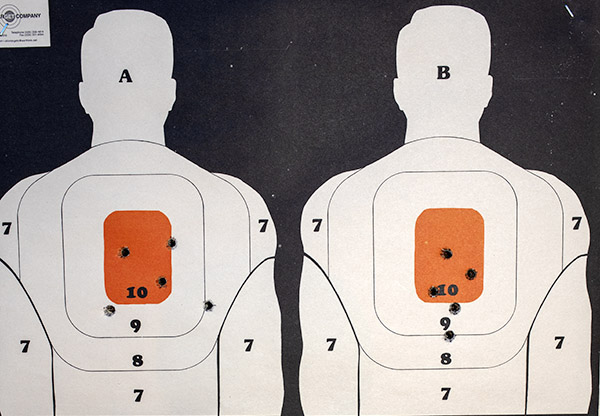
I fired four targets at 50 feet and the results are interesting.  The first two targets were with the 148-grain wadcutter load (I use an Alco silhouette that has four small silhouettes on a single target sheet).

I shot the target on the left with a 148-grain Missouri double-ended wadcutter bullet; the one on the right is with a Hornady swaged 148-grain hollow base wadcutter bullet.  I’ll tell you more about those in a bit.

Before TJ did any work on my Model 60, the gun printed wadcutter groups a good 12 inches to the right (good if you want to hit your bad guy in the elbow, I suppose).  After TJ fixed the ejector rod issue I described above, the wadcutter bullets still shot a little bit to the right, but much less than they had before.  That rightward bias is a function of the load, not the gun (as you’ll see in the next set of targets).

The really good news is how the Model 60 performed with the 158-grain truncated flat point bullets.  Those puppies shot exactly to point of aim, and after warming up with the first group on the left target below, I got serious about focusing on that beautiful Day Glo front sight and shot the group you see on the right target.  Point of aim was at 6:00, and for a 2-inch barrel Roscoe, that ain’t bad shooting.

If you’re not familiar with all this wadcutter and truncated flat point bullet business, here’s your lesson for the day.  Let’s call it Bulletology 101.

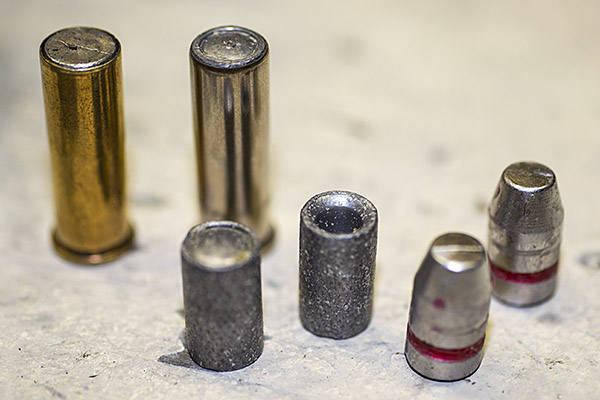
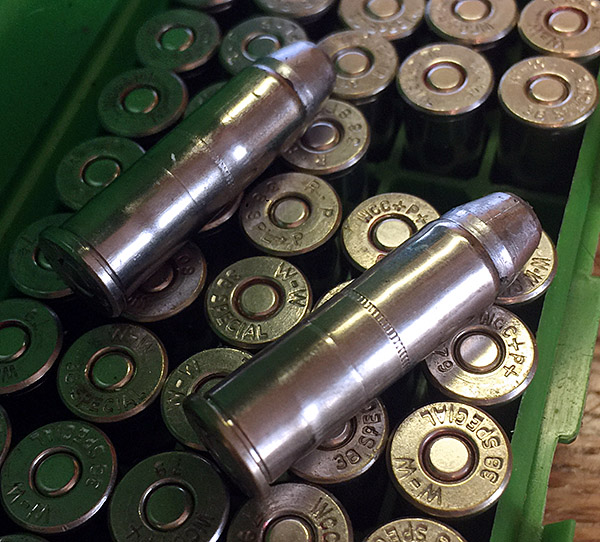
The brass cartridge on the left is loaded with a Missouri 148-grain DEWC (double ended wadcutter) cast bullet; the nickel-plated 38 Special cartridge to its right is loaded with a Hornady 148-grain swaged hollow base wadcutter (HBWC).  The Missouri DEWC bullets are symmetrical (they’re the same top and bottom); the Hornady HBWC bullets have (as the name implies) a hollow base (you can see those bullets in the center of the photo above, one inverted and the other right side up).  The idea behind a wadcutter bullet is that it punches a clean hole in the target (that makes it easier to score).  The two bullets on the right side of the photo above are 158-grain cast truncated flat points. I have a local caster make these for me.

I am enjoying my Model 60 and the custom work TJ did on it, but I’ll tell you what…this puppy bites.  The recoil is significant (even with the lighter 148-grain wadcutter loads), and I’m a guy used to shooting big bore handguns.  That little .38 Special cartridge is nothing to sneeze at (Elmer Keith, Dirty Harry, and all the rest of the bigger-is-better gunsels notwithstanding).

For a defense gun, I can live with Roscoe’s recoil (it’s not a handgun I would put 100 rounds through during a range session, though).  For all you keyboard commandos out there, I know, I know.  You can do that all day long.  I can, too, with a 1911.  But this little Chiefs Special is a handful, and after firing 5 or 6 groups, I’ve had enough.  Your mileage may vary.   I know, too, that if I put the Pachmayr-style oversize rubber grips on it, it would be more manageable (and I own a pair of those).  But then it wouldn’t look like it does now, and I love that look.


Hey, there’s more to this story…TJ also did a little work on my Compact 1911.  The latest improvements on the Compact 1911 are coming up in a future blog, so stay tuned!


More Tales of the Gun are here!

Want silhouette targets for your next trip to the range?    Don’t pay exorbitant range prices.  Get them here.

Custom grips for a snubbie Smith and Wesson?  Take a look here!
Never miss an ExNotes blog…get your own free subscription!


Want to turn your handgun into a one-of-a-kind combat companion?  You don’t need to live out here; TJ’s work is carried daily by law enforcement officers (and others whose lives depend on their sidearms) all over the world.  Here’s where you need to go to get started:

A TJ tune for my Model 60

I had trouble selecting a title for this blog.  The other contender was 50 Shades of Gray to go with the big photo you see above.  I wish I could say I took that photo, but the credit goes to good buddy and master gunsmith TJ.  TJ is the best pistolsmith there is, and one of the things that makes working with him so enjoyable is his photography.  When TJ works a custom gun project, he photodocuments it to keep you appraised of what’s going on, and a couple of the photos you see here are the ones he sent to me on my Model 60 project.   But I’m getting ahead of myself.  Let me back up a bit.

If you follow the blog (and you all do, right?), you’ve been watching the Star reloader resurrection project I’m working.  That’s coming along nicely, and I’m already making .38 Special ammo on my resurrected reloader.   This story started with my noticing an ad in my gun club newsletter for a Model 60 at a killer price.  I’m normally not a snubnose kind of guy, but hey, a deal’s a deal and I like the idea of a snubnose .38.  Maybe I watched too many cop shows in the ’50s and ’60s.  You know.  Cannon, Kojak, Hawaii 5-0, 77 Sunset Strip, Dragnet…you get the idea.  All those guys carried snubbies.

Anyway, the Model 60 was a good deal, but swinging the cylinder out to the side was a bit dicey…sometimes it wanted to stick.  The seller told me about that but I didn’t see it as a problem.  I saw it as an opportunity to do another project with good buddy TJ, and that’s what I’m doing.  TJ is doing his Level 1 action job for me (polishing all the internals and lightening both the double and single action trigger pulls), and I’m having him also put a mirror finish on the cylinder, the ejector rod, the cylinder release, the trigger, and the hammer.  It will make for a nice, subtle contrast with the brushed stainless finish on the rest of the gun.  That leaves only the grips, and I’m doing something about those, too.  TJ put into words what I was thinking, and that was that the stock grips (the ones you see above) are butt ugly (pardon the gun pun).

Back in the day Smith used to offer uncheckered rosewood grips, and that’s what I really wanted.  They don’t sell those any more, though, and I mentioned to TJ that I should have bought a set back in the ’70s.  You know,  just in case.  “Try E-Bay,” TJ said, and I did.  I hit paydirt almost immediately, and the grips you see below are on their way to me now.  Rosewood.  Smooth.  Just what I wanted.

The finish on my inbound grips may be a little funky, but that’s another opportunity, too.  It’s TruOil time, folks.  TruOil and a little patience will have these grips looking literally better than they did when they left the S&W factory in Springfield.

The Star reloader is operational now (I’ll show you more on the Star resurrection in upcoming blogs, and I’ll include a video that shows it making finished ammo).  I’ll have the Model 60 back in a few days, so I went ahead and loaded a box of ammo with the outstandingly accurate 158-grain cast bullets I get from my good buddy Roy.  It took only a few minutes on the Star (it would take closer to an hour on a single-stage press).  For a machine that’s probably older than I am, the Star sure does a good job.

When I take my custom snubbie .38 to the range, I’ll grab a few photos and share a range report with you here on the ExNotes blog.  Stay tuned, my friends, and keep your powder dry.


More Tales of the Gun!


Enter your email address for a free subscription to ExNotes!

The Star’s Hulme Case Feed Mechanism

The Star story just keeps getting better.  I not only picked up the reloader for free…I also got a free Hulme case feed mechanism.  I didn’t realize what I had until I started learning more about these marvelous old machines.

You may remember that we posted a blog a month or so ago about the Los Angeles Sheriffs Department Pistol Team.  It was a cool old video (it was from the 1930s), but I didn’t realize just how cool it was until I spoke with my buddy Paul about the Star reloader I’m resurrecting.  Paul mentioned that the LASD video had a segment about reloading .38 Special ammo, and as soon as he said it, I remembered the scene.   You’re certainly welcome to watch the entire video again, but my advice would be to jump to the 13:57 mark to see the Star reloader in action:

Man, those guys are busy, I thought as I watched them reloading .38 Special ammo in the video above.   It’s almost as if you need three hands (or two people) to operate the Star.  For every cycle, you need to:

      • Insert a case in the shell plate.
      • Insert a bullet in the case that’s just been charged with powder.
      • Pull the main lever down.
      • Pull the main lever up.
      • Index the shell plate one position counterclockwise.

Then I realized:  The guys in that video above were placing the empty .38 Special cases directly into the shell plate.   My Star doesn’t work that way.  It has a case feed mechanism.  Instead of inserting the empty case directly into the shell plate, you insert the case into the case feed mechanism.  Why do that, I wondered, when you can insert the case directly into the shell plate?

Then it hit me:  My Star had the optional Hulme case feeder.  It was missing a couple of parts (the empty case magazine and the support for that magazine), but those parts would be easy to replace or make myself.  That way, I wouldn’t have to insert an empty case into the Star every time I pulled the lever.  I could just load up 25 or 30 cases at a time, and the Hulme case feed mechanism would take care of the rest.  That would simplify the number of actions I’d have to do each cycle. Woo hoo!

Here’s another YouTube I found that explains how the Hulme case feed mechanism works.

It’s all very clever.  I started this part of the Star resurrection by cleaning up the Hulme case feed mechanism on my press.

Here’s what it looked like before I disassembled it for a more thorough cleaning.  Notice the rusty cam angle at the top of the photo below.

Here’s another photo of the rusty cam.  It’s the piece that drives the Hulme case feeder to the rear when the tool head is lowered (which occurs when the main lever is pulled down).

The Hulme case feed mechanism attaches to the Star base with a single Allen bolt.  Stars originally did not have that hole in the base, but the Hulme case feed mechanism was such a popular option that Star included a drilled and tapped hole (for the Hulme device) on all their presses sometime around 1959.  I learned this from good buddy Bruce at Star Machine Works in New Jersey.

I removed it and then cleaned the case feed mechanism with Kroil, WD 40, and Scotchbrite.

Then I went to work on the cam and its mounting bracket with Kroil and Scotchbrite.  After that, I remounted the Hulme case feed mechanism.  Here’s what the case feed mechanism looks like in operation:

So, I had the case feed mechanism cleaned and it was operational.  But I still needed to feed in a single case every cycle.  I didn’t want that; I wanted the cases to feed automatically.  It was time to channel my inner Bubba.  All I needed was a tube in which to stack empty .38 Special cases above the case feeder, and a means to secure that tube.  Hulme originally offered the componentry to do that, and my good buddy Bruce at Star Machine Works (the company that restores these magnificent old reloaders) offers the parts, but I hadn’t spent anything on my Star, and I wanted to keep it that way just for the sake of living up to my cheap SOB reputation.  I wondered:  WWJGD (what would Joe Gresh do)?  I noodled a few ideas around, and then went to the closet for a coat hanger.  I already had a clear plastic tube from one of my Lee reloading presses.

Like we say in French: Voilà!

The Star and its Hulme case feed mechanism works, and it works well. Take a look!

We’re getting pretty close to being done with the Star resurrection project, but there are still a few more things I want to show you.  Stay tuned; you’ll see them right here on the ExNotes blog!


Subscribe for free!


Read the entire Star resurrection story here, along with our resurrections of other cool old machines!

The Star Primer Feed Mechanism

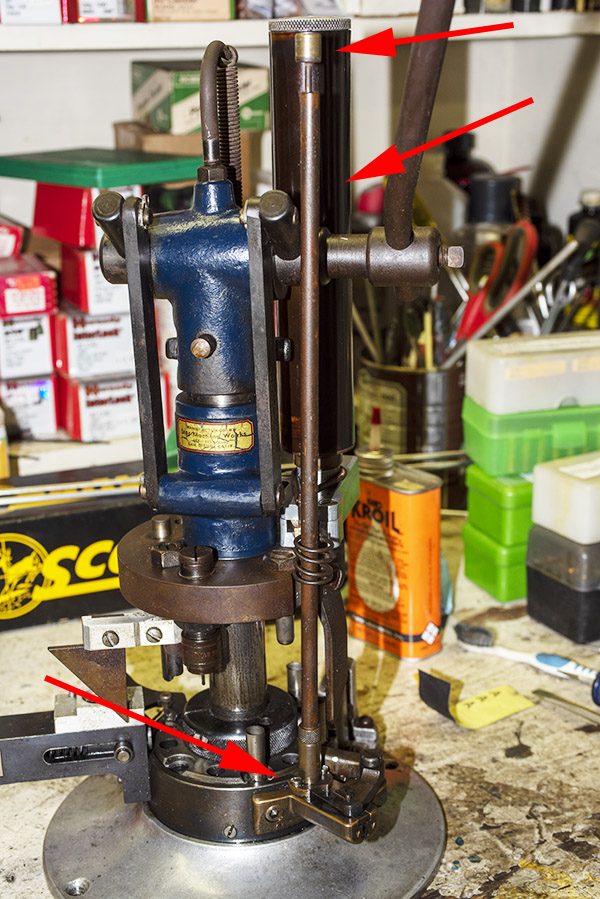
The next steps in bringing the Star progressive reloader back to life focused on the primer feed mechanism.  That subsystem consists of the primer follower rod (the upper red arrow in the photo below), the primer magazine (the middle arrow in the photo below), the primer pickup and feed mechanism (the lower red arrow in the photo below), and the primer seating device (which is under the base of the reloader, as you’ll see further along in this blog).

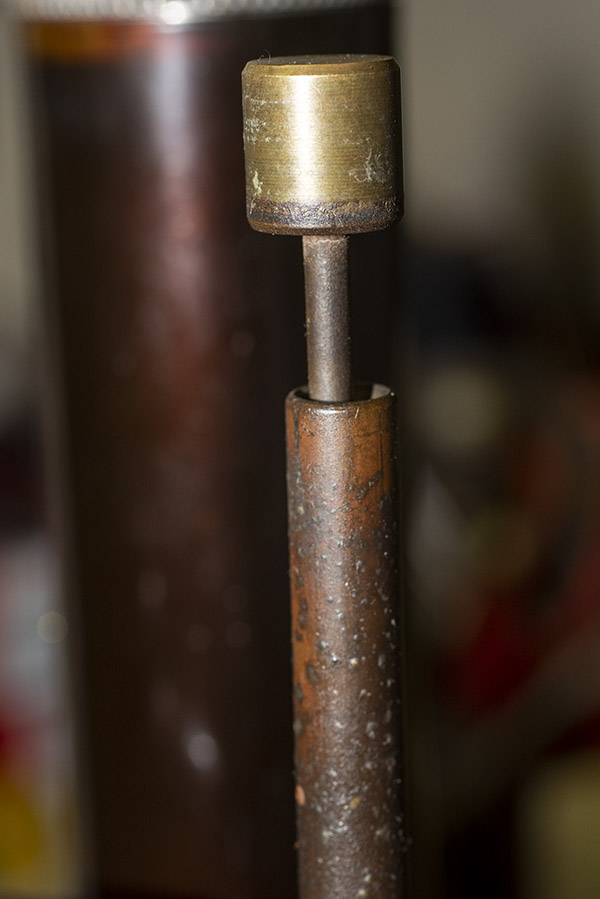
In looking at the primer feed mechanism, the primer magazine , and the primer follower rod, I could see they were mighty funky and thoroughly oxidized.  I wondered if they were all made of brass.  The tip of the primer follower rod obviously was (see the photo below), and probably the feed mechanism base was, but the magazine tube and other parts were so corroded I couldn’t tell.

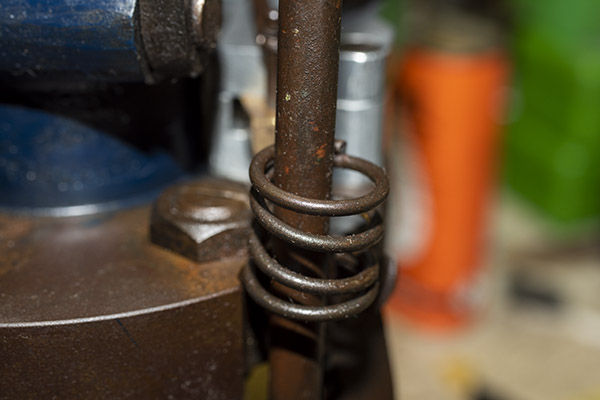
Then I realized I had another question.  See the spring in the photo below?  That one through me for a loop.  I couldn’t see that it served any function, and all the online references I found for Star reloaders did not show it.   So I sent an email to my good buddy Bruce over at Star Machine Works (the outfit that restores and sells parts for Star equipment).

Bruce responded quickly.  Here’s what he told me:

Hi Joe,

The spring is a hitch hiker on your machine. Nothing to do with a Star.

Bruce

A hitch hiker.  That got a laugh.

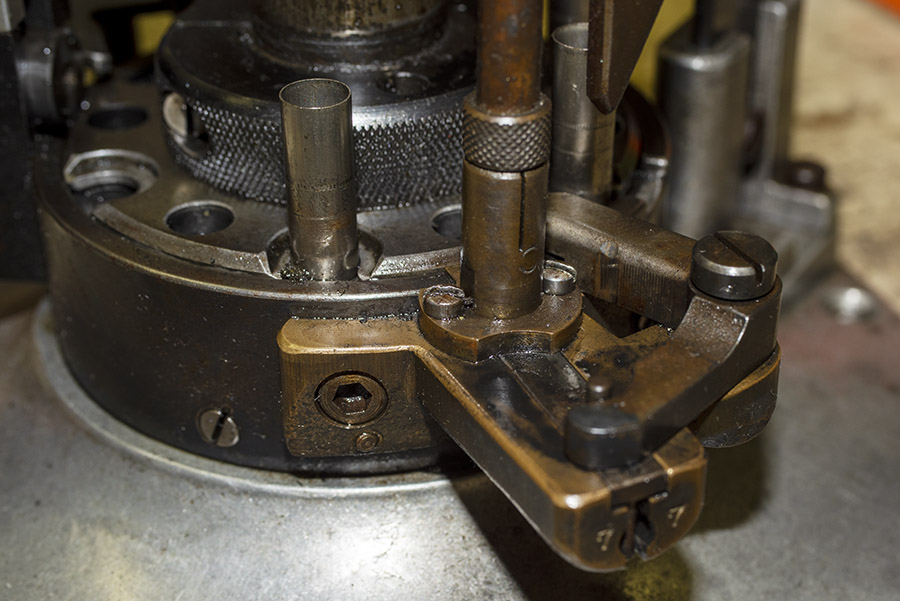
The primer pickup and feed mechanism (shown below) is what takes primers from the primer magazine and pushes them below the empty case.  That L-shaped lever on the right?  It’s the primer slide angle lever (shown by the lower arrow).  It’s actuated when the primer feed cam (shown by the middle arrow) descends as the tool head is lowered on each stroke.  The lever in turn actuates the primer slide in the feed mechanism (shown by the lower arrow), and that’s what picks up a primer from the magazine and positions it underneath the empty case.

With the primer now in position beneath a .38 Special case, it needs a way to be inserted into the case.  The Star has a clever way of doing this that takes advantage of the fact that there’s a shaft in the tool head that descends with the tool head when the main lever is pulled.  When the main lever is actuated and the tool head descends, the shaft fits through a hole in the shell plate and extends into the base of the reloader.  The tip of the shaft pushes one end of a pivoted lever down, and that then pushes the other end of the lever up.  That end actuates a plunger that seats the primer into the empty case.  Here’s what the lever looks like underneath the reloader.

Like I said, it’s all quite clever.  The guy that designed the Star was a mechanical genius.

Here’s a photo of the primer follower rod.  It sits on top of a stack of primers in the primer magazine.  Its weight pushes the primers down each time one is transferred from the primer magazine by the primer slide.

The knurled knob below allows you to grasp the primer magazine to remove the tube from the primer feed mechanism.  It doesn’t unscrew; it’s just a tight slip fit into the feed mechanism.

When I removed the primer magazine, I could see that the tube was made of brass.  There were still a couple of primers in it.  I doubt they would fire; they were probably soaked in oil.

When I removed the primer slide angle lever screw, the primer slide was pushed out by its spring.  As I was disassembling the primer feed mechanism, I found that the primer slide still held a primer.  These parts were pretty funky.  In a working reloader, you don’t want any oil in this area.  It will contaminate the primers and make them inert (we only want “ert” primers when reloading ammo).

Check out the funk on the primer slide angle lever.  This machine had been rode hard and put away wet, I think.  My spraying it down with WD 40 to clean didn’t help in that regard.  But it sure helped to clean up the Star.

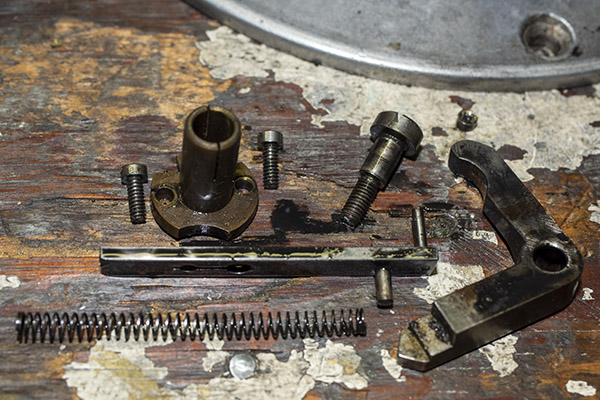
I then unscrewed the two screws holding the primer magazine socket to the primer feed mechanism housing.  Here are the parts in all their glorious funkiness.

The primer feed mechanism base is attached to the steel floor base with two large Allen bolts.

I removed the Allen bolts and then took the primer feed mechanism base off the machine.  It had two pins to locate it on the Star reloader’s base.

Here’s another exploded view photo of the primer feed mechanism and its components.

The photo below shows the reloader’s steel base and where the primer feed mechanism attaches.  The upper two arrows point to the Allen bolt attach points.  The lower two arrows point to the locating holes (this is where the two pins mentioned above fit).  The arrow in the middle points to the hole for the primer slide spring.  The rectangular slot is where the primer slide enters the reloader base to position a new primer beneath a .38 Special case.

The steel base is a blued steel part.  It’s just like the bluing on a gun.  This is a pretty cool feature.  There’s a fair amount of corrosion and discoloration on my Star, but it’s part of the machine’s charm.  I hit it with some OOOO steel wool and Kroil, but I’m not going to reblue it.  I like its patina.

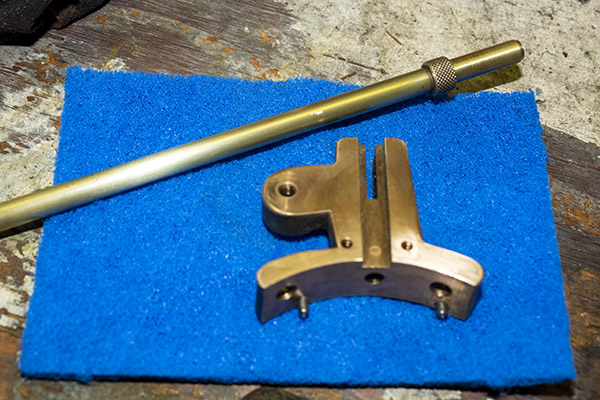
I next turned my attention to the primer magazine (the long tube I pointed out earlier).  When I withdrew the primer magazine from its slot, I could see the lower end of the tube was brass, but I still wasn’t sure about the entire tube.  I went to work on the tube with Scotchbrite and that did the trick. Hello, Beautiful!

I worked on all of the primer feed mechanism’s brass pieces with Scotchbrite.   The brass finish came up nicely.  This project is coming together fabulously well.

After cleaning and polishing everything, I reassembled it all.  I could have polished everything to a mirror finish, but you know the drill:  This is a resurrection, not a restoration.  Like I said above, I like the patina look.  This machine might be older than me, and I sure don’t look like new.  We match, the Star and I do.  Old.  Funky.  The ultimate in personalized patina.  That’s us.

In the photo below, you can see the primer cam to the right of the brass magazine tube.  It’s the part that actuates the primer angle lever.   You’ll get to see it all in a short video in just a minute.  People like videos, Gresh tells me.  We aim to please.

It’s beautiful, isn’t it?

So how does it all work?  Gloriously well, thank you.  Take a look:

Next up?  It’s going to be the case feed mechanism, and that will be the topic for our next Star blog.

I’ll share with you that the blogging part of this Star resurrection business is lagging behind the actual resurrection.  Yep, I actually have the Star running already, and it’s running well.   You’ll see how I got there in future blogs, and those blogs will be right here in the not too distant future.  But I don’t mind jumping ahead a tiny bit to tell you that I picked up my Model 60 Smith and Wesson yesterday morning and I fired the first few rounds I made on the Star through it.  They worked just like they were supposed to, as did the Model 60.  That’s a story for a future blog.

Stay tuned, my friends!


Hey, here are the Star resurrection blogs so far, along with our other Resurrection projects!

A Pair of Prancing Ponies…and that first No. 1

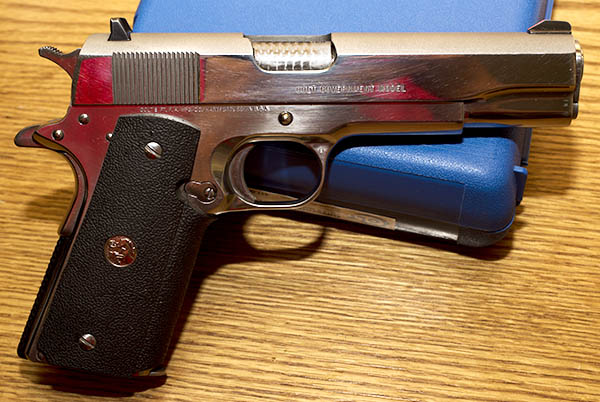
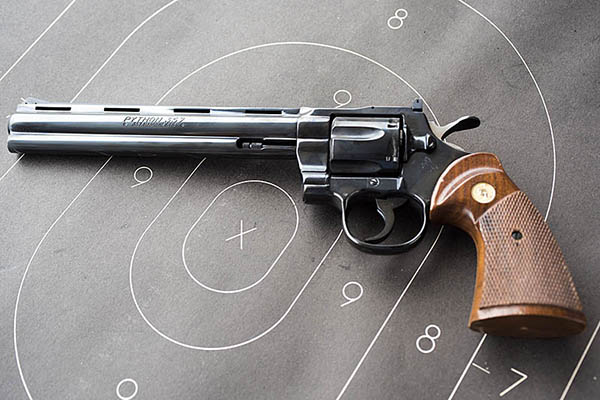
Good buddy Python Pete and I went to the range a few days ago to let loose with a pair of prancing ponies (that is to say, Colts), in both revolver and automatic flavors.  The auto was my tried-and-true bright stainless Colt Government Model 1911; the wheelgun was Pete’s stunning 8-inch Colt Python.   Both are stunningly beautiful and both are good shooting guns.

A custom bright stainless Colt, with Baer barrel, Millet sights, and a few other nice touches.

I bought the 1911 you see above at a pawn shop brand new back in the mid-1980s for just over $500.   Colt no longer offers bright stainless steel guns, so I guess you could say mine is collectible, and when you see bright stainless Colt 1911s come up for sale (which doesn’t happen very often), prices start at $2,000 and go north from there.  I guess you could say I made a good investment (except I won’t ever sell it).

A few years ago the front sight popped off my 1911, so I took it to a local gunsmith to have it restaked. That repair lasted all of 50 rounds, and I realized I needed to see an expert.  That’s when I hooked up with TJ’s Custom Guns, and I had TJ revamp the Colt.  It’s got a Les Baer match barrel, an extended one-piece guide rail, an engine turned chamber (I love that look), high profile/high visibility Millet fixed sights, and TJ’s exclusive high reliability tune.  That last little bit means that my Colt 1911 will reliably feed any bullet configuration (semi-wadcutters, hollow points, etc.) and it will work no matter what.   Folks, I’ve put tens of thousands of rounds through my 1911 since TJ massaged it, and it’s never had a failure of any kind (no failures to fire, no failures to feed, and no failures to eject…it just goes and goes and goes).

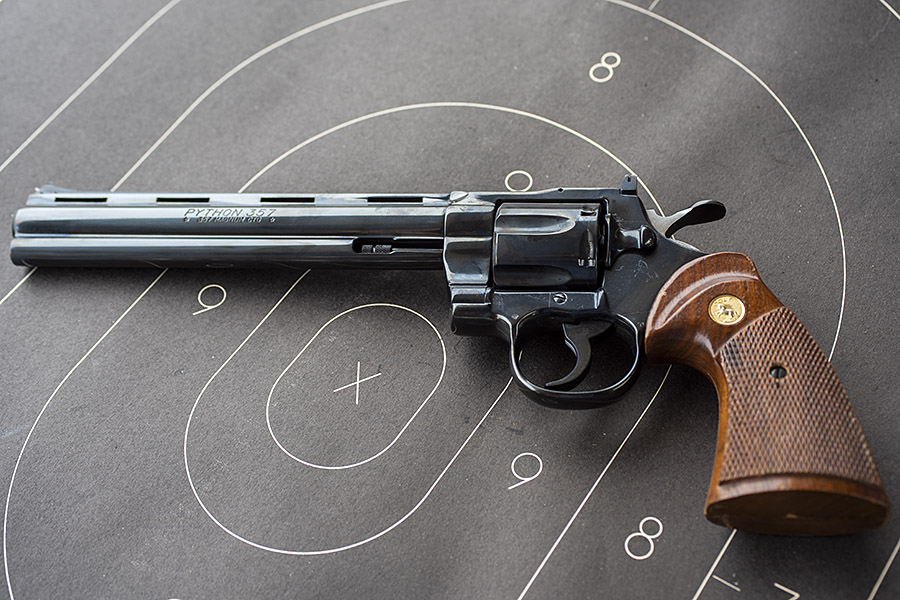
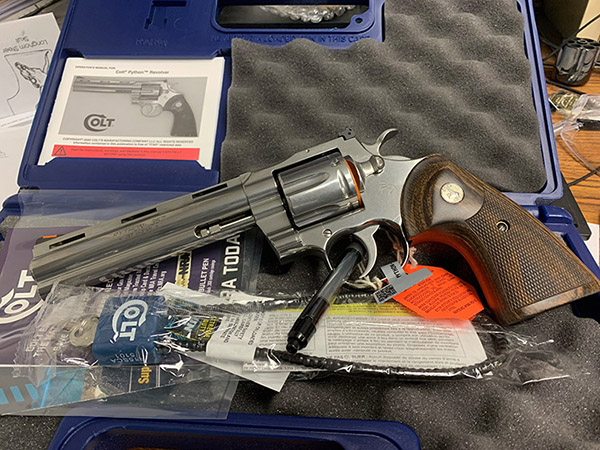
On to the Python.  I’ve known good buddy Pete for more than 30 years (we sort of grew up together in the aerospace industry).  Pete owns a Colt Python, a gun that is arguably the finest revolver ever made.  His is the super-rare 8-inch model, too.

Revolver royalty…the stunning Colt Python. The Colt Python is perhaps the finest revolver ever made.

Colt no longer makes the Python, probably because they were too expensive to produce.  The fit and finish are superior, and the feel of the thing is just sublime.  It’s a .357 Magnum, one of the world’s all time greats, and a cartridge that dominated the police market before 9mm became all the rage.  Colt revolvers were hand-fitted and involved lots of custom assembly, and I suppose it just didn’t in with the need for low cost manufacture in a market dominated by black plastic 9mm handguns.   No, the Python is from another era characterized by highly polished blue steel and finely figured walnut, an age in which I felt more comfortable.   Seeing a Python on the firing line again was a treat, and when Pete asked if I wanted to try the big Colt, he didn’t have to ask twice.

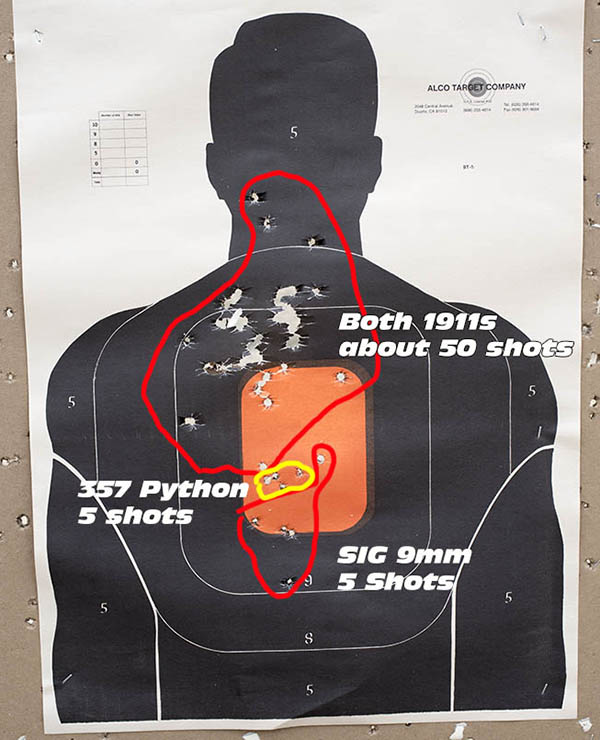
Pete and I had four handguns with us (the two mentioned above, plus a SIG 9mm and my Rock Island Compact 1911).   I shot my two 1911s offhand for a while, and then I tried my luck with Pete’s SIG and the Python.  It was fun.

You can argue about a good automatic being as accurate as a high-end revolver, but you won’t convince me. The Python is a tack driver.

I fired 5 shots of “nothing fancy” factory ammo with the Python, and the accuracy was superb.   The targets don’t lie, folks.

I’ve owned two Pythons in my life, and both were back in the 1970s.   When I was in Korea, I found out I could order one though the Base Exchange at a substantial discount.  I couldn’t believe what the nice lady was telling me at the Kunsan AFB Exchange, so I ordered a 6-inch blue steel Python for something like $150 (it sounded too good to be true).   Incredibly, it came in the mail to me in Korea.  Before I rotated home, I had to submit a form through the Army to get permission to import the revolver back to the US.  I did that, and a few weeks later I had a letter signed by the Director of the Alcohol, Tobacco, and Firearms Bureau allowing me to bring my Python home.  It went into my duffel bag, I produced the letter when I went through Customs in San Francisco, and that was that.  Better times.

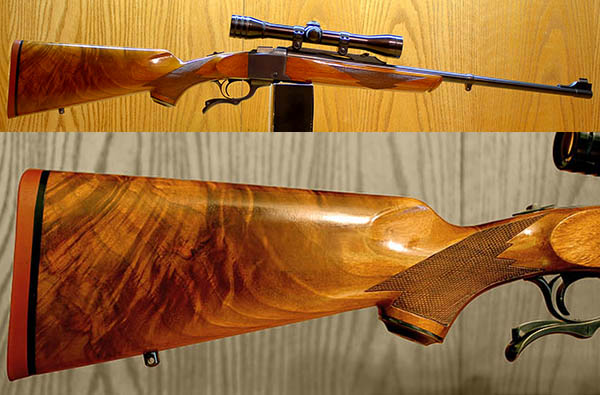
You know how it goes with these things.  When I was back in Texas shortly after my stint in Korea, I saw a Ruger No. 1 single shot rifle in .30 06 I couldn’t live without, and I traded the Python for it (the guy at the store through in a couple of boxes of .30 06 ammo, too).  Then I felt a void in my life because I no longer owned a Python, so I ordered another one (this time a 6-inch nickel-plated model) through the Fort Bliss Gun Club.  It was under $200.   Then I traded that for something else (I can’t remember what).  Ah, the mistakes we make.  But maybe they weren’t all mistakes.  I’ve sent a lot of lead downrange with the Ruger No. 1 over the last 45 years, it’s one of the most accurate rifles I own, and it has stunning walnut.

The Ruger No. 1 in 30 06 I traded the Kunsan Python to get. It’s a 200th Year Ruger.  I miss the Python, but I love my ’06 No. 1.  Some day I’ll do a blog on this rifle.

Today, Colt Pythons typically sell for something in the $3,000 to $4,000 range.   Pete’s would command even more, because it’s the 8-incher, which is a rare item.  I’ve asked Pete if he wanted to sell his, but all I got in return was a smile.  That’s probably just as well; I couldn’t afford it at today’s prices.


Whoa!  More gun stories?  You bet, and they’re right here!


Sign up for our automatic blog email updates!


Need targets?   Get them here, like we do!


Never miss an ExNotes blog!

Hit those pop up ads…it’s what keeps us going!