Colonel Colt and Captain Walker are in the building…

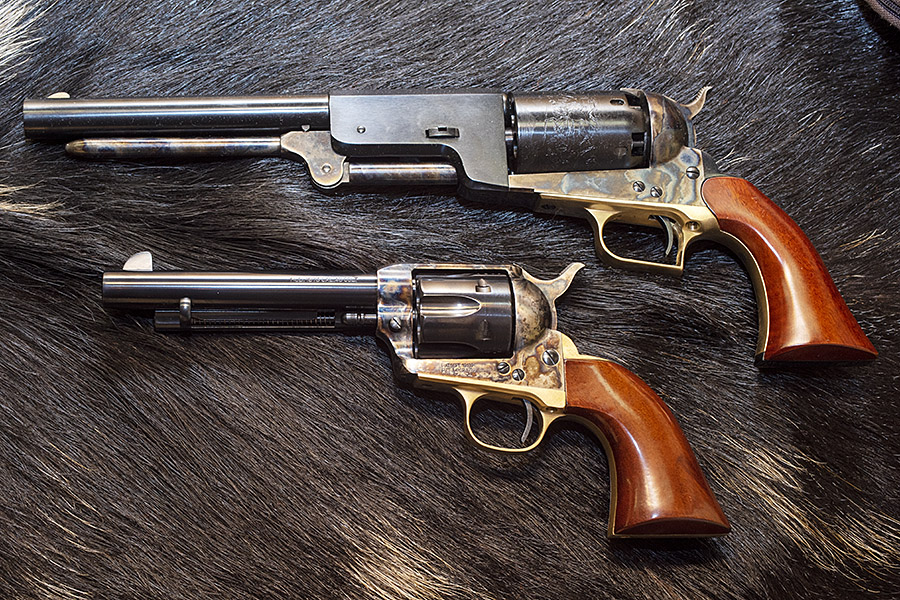
Two beautiful handguns, the ones you see above are.  The one on top is a Colt Walker, the one on the bottom the timeless Single Action Army.  But neither are actually Colts.  They are both Uberti guns, and both are magnificent.

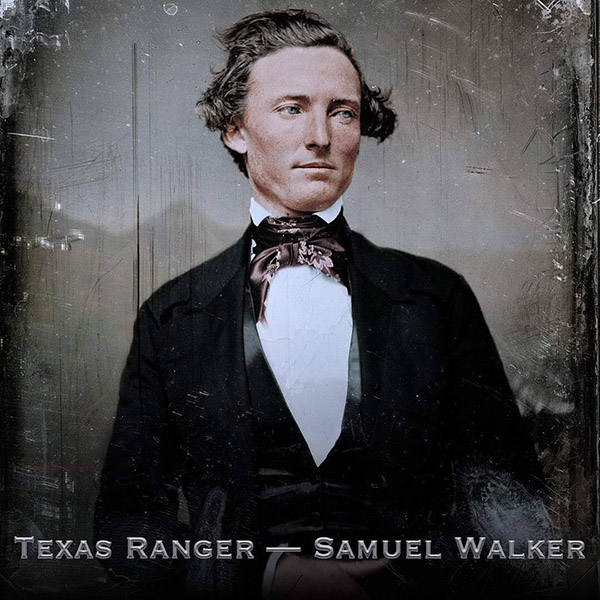
The story is one for the ages, and it goes like this:  Samuel Colt invented the revolver, but he and his factory in Paterson, New Jersey couldn’t make a go of it.  Colt left the gunmaking business and went on to other ventures, but in the meantime, there were already a few Colt revolvers writing history in the American West.  Captain Sam Walker and his Texas Rangers used the early Colts with great success in battles on the Texas frontier.  Walker mentioned this to Colt, Colt asked for an endorsement, Walker said yes, and then he helped Colt design a new revolver to better meet frontier combat needs.  Walker drove the design requirements as he took a new commission in the US Army, and the Army ordered a cool thousand of the new 1847 Colt Walkers.  Colt was back in business, courtesy of Sam Walker, the Texas Rangers, and the US Army.

Thus was born the Colt Walker, one of the largest handguns ever made.  Until the advent of the .357 Magnum in the 1930s, the Walker was the world’s most powerful handgun.  It was designed so that if it missed the bad guy but got the horse he was riding, it would kill the horse.  I can’t help but think of an old New Jersey expression (common when I was growing up and one I still use on occasion) that ends with “….and the horse you rode in on, too!”

The last of the original Colt Walkers that changed hands went for over a million bucks not long ago, so I knew that until the ExNotes blog goes more viral (than it already has, that is), I wouldn’t be getting an original Walker anytime soon.  But there’s something even better from a shootability perspective, and that’s the modern reproduction Walkers offered by Uberti.

I always wanted a Walker, and a few months ago I acted on that urge.  I had to wait several months because the Uberti factory in Italy was shut down by the Covid 19 pandemic.  Uberti is back in operation again and my Walker recently arrived.   It’s a good deal.  Unlike a cartridge revolver, here in the Peoples Republik of Kalifornia black powder guns can be shipped direct to your door.

I knew Uberti makes a quality handgun, as I had great experiences with my “tuned” Taylor 1873 Single Action Army in .45 Colt.   That’s one of the two revolvers you see in the photo at the top of this blog.  It’s a cool photo because it shows the relative size of the two guns (the Single Action Army is no pipsqueak, but it’s dwarfed by the Walker).  And, I’m showing off a bit with the photo’s background (it’s the pig hide from my Arizona wild boar expedition with good buddy Paul, who ordered himself a Walker not too long ago).

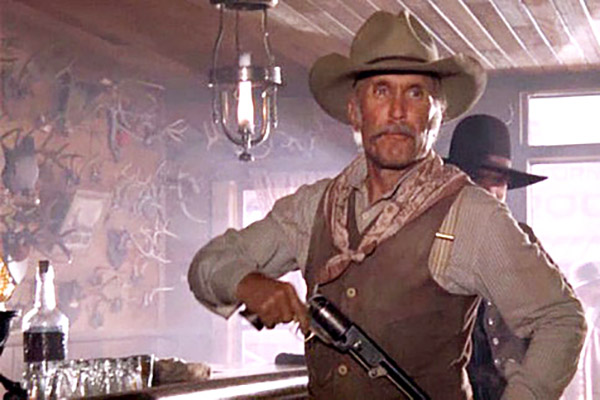
Robert Duvall as Gus MacCrae in Lonesome Dove, the greatest story ever told (in my opinion). Gus carried a Colt Walker.

I’ve mentioned the Walker Colt before, most notably in the book review we posted on Revolver, the book about Samuel Colt. The Colt Walker also figured prominently in Lonesome Dove, and I thought I’d show one of the many great scenes from that movie here again.

Everybody wants to be Gus MacCrae, I guess, and I’m no exception.  I suspect Paul feels the same way.  So consider this a fair warning:  If Paul and I walk into your establishment and order a whiskey, be quick about it. We don’t like surly bartenders, and we carry Walkers, you know.


Keep us afloat by clicking on the popup ads.   It’s how we pay the rent!

More Tales of the GunYou bet!


We’d love to give you a free subscription to the ExhaustNotes blog.  It’s about 45% guns and reloading, 45% motorcycles and adventure touring, and the rest is whatever we feel like writing about.   You can sign up here, and unsubscribe at any time, all at no cost:

The Destinations Deal Ride: One of the best ever!

When I wrote the blog for CSC Motorcycles, we organized several multi-day rides (trips through Baja, the western US, China, Colombia, and more).   One of my favorite rides was the Destinations Deal tour.  It started out as an idea by the real marketing whiz in the CSC organization (who likes her anonymity, so I won’t mention her name), with directions to include some of the best destinations in the southwestern US.  As I organized the ride, I realized all the spots I selected were featured in stories I wrote for Motorcycle Classics magazine.  CSC wanted to offer a discount on any new bike purchased for the event, the Motorcycle Classics columns were all titled Destinations, and the ride quickly became known as the Destinations Deal Tour. 

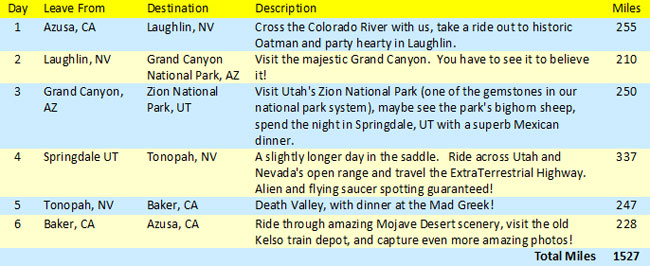
The ride was awesome:  Topock, Laughlin, Oatman, the Grand Canyon, Route 66, Zion, the Extraterrestrial Highway, Tonopah, Death Valley, Shoshone, Baker, and then home.  Just over 1500 miles in 6 days on 250cc motorcycles…it would be exactly what the doctor ordered.

The Destinations Deal was one of the best rides I ever did.  Old friends and new friends, great weather, great stops, great roads, and great stories combined for an awesome week.  The roads, the riders, the restaurants, the camaraderie…it all clicked on this one.  But don’t take my word for it.   Take a look at the photos.

Leighton and a killer hot dog in Topock on the Colorado River just as we crossed into Arizona. You get a discount coupon for the local coronary care unit when you order this meal.
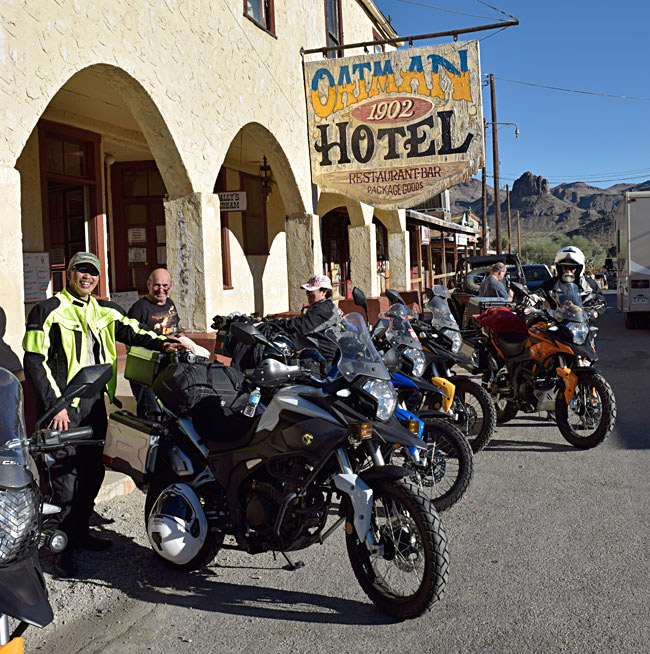
A few of the boys and their RX3s in Oatman. Clark Gable and Carole Lombard stayed in this hotel back in the day.
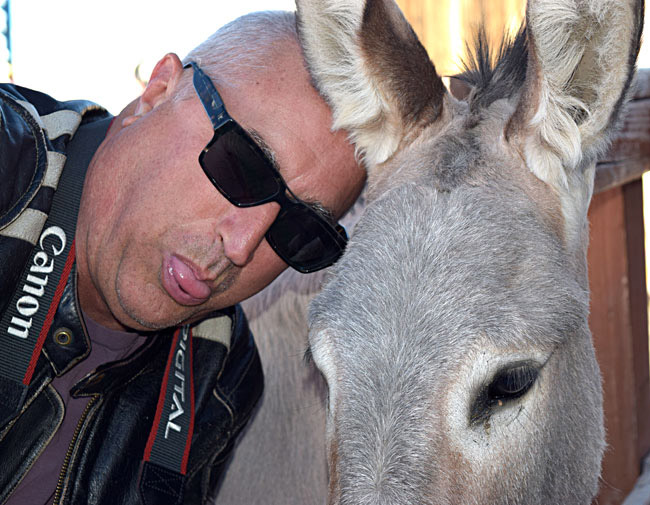
Wild jackasses roam the streets in Oatman.   I could have a lot of fun captioning this photo.
On our first night, we stayed in the Colorado Belle, a riverboat hotel on the Colorado River in Laughlin, Nevada.  It was our first day and we rode through three states already.  Gresh and I closed the bar that first evening. They had a live group doing ’60s Motown hits and the music was fantastic. Or maybe we just had a few too many cervezas. Or maybe it was both. The trip was off to a great start.
Day 2 on the way to the Grand Canyon. The weather was perfect for the entire ride.
Velma and Orlando, who rode two-up on a brand-new blue RX3. Orlando taught me Spanish on this ride: El naranja es el color más rápido.
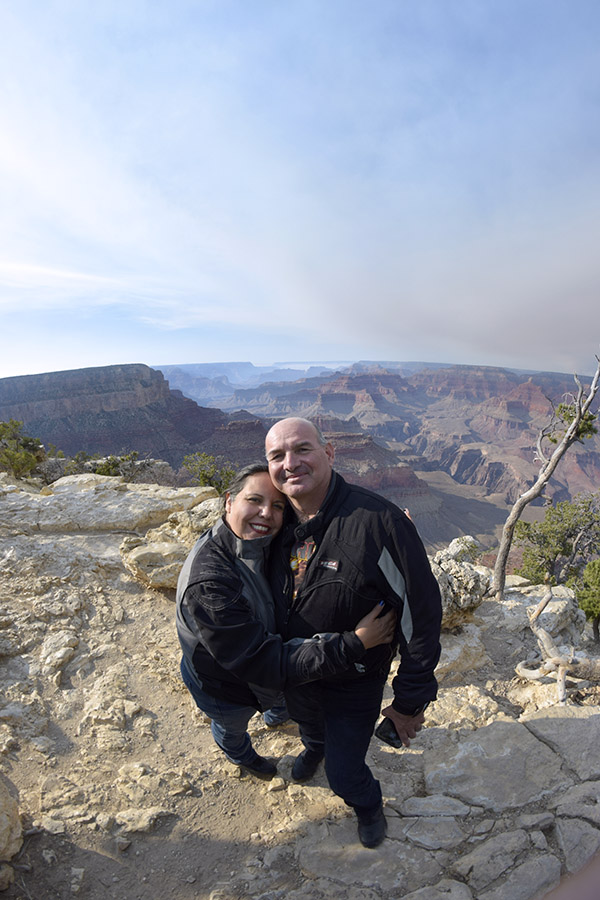
Another shot of the most photogenic couple you’ll ever see on an adventure ride, this time using a super-wide-angle lens on my Nikon.  You can actually see the curvature of the earth in this photo.
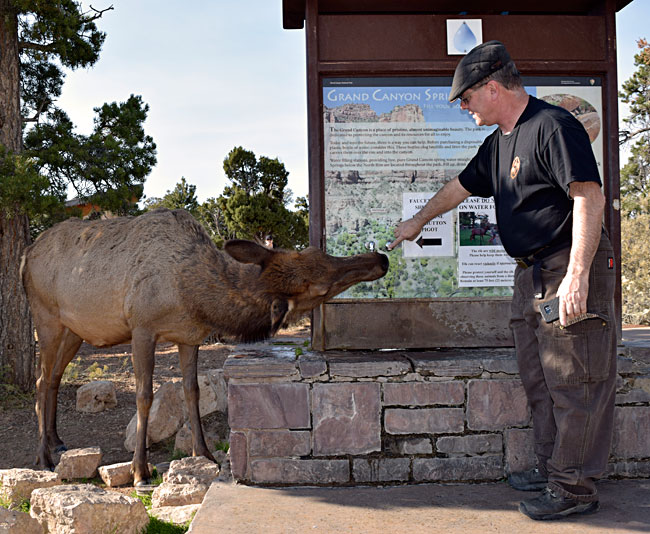
Good buddy Rob, with who I’ve ridden several times in the US and Mexico, buys a drink for a new friend at the Grand Canyon.
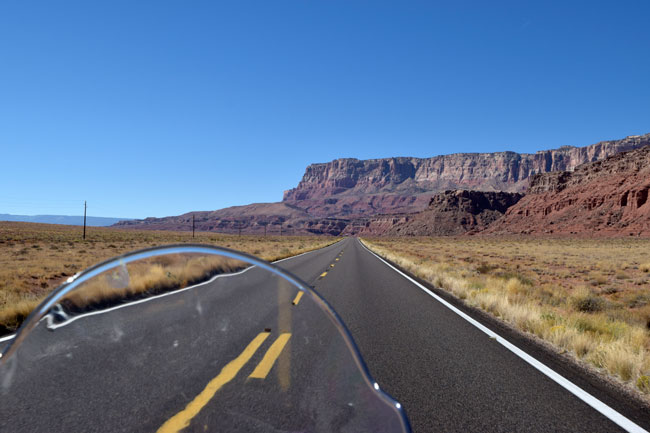
On the road to Zion along Arizona’s Highway 89A after visiting the Grand Canyon. This was a glorious ride.
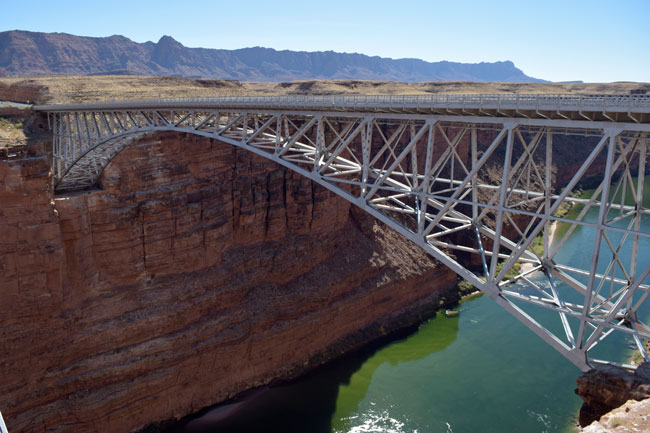
Marble Canyon in Arizona as we re-crossed the mighty Colorado River.
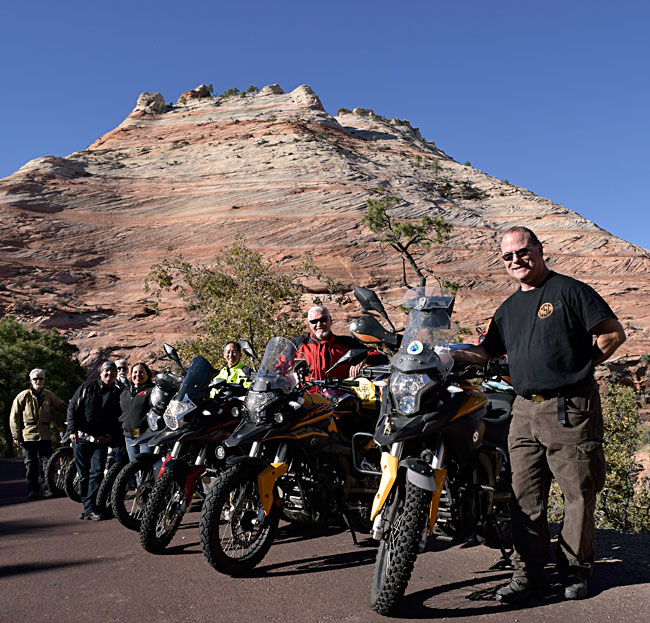
Zion, the Crown Jewel of our National Parks. This was shaping up to be one of the best trips ever.  From left to right, it’s Dan The Man, Orlando and Velma, Gary in the back, Leighton, Willie, and Rob.  Add Gresh and yours truly, mix well, and you have the makings of a grand adventure.
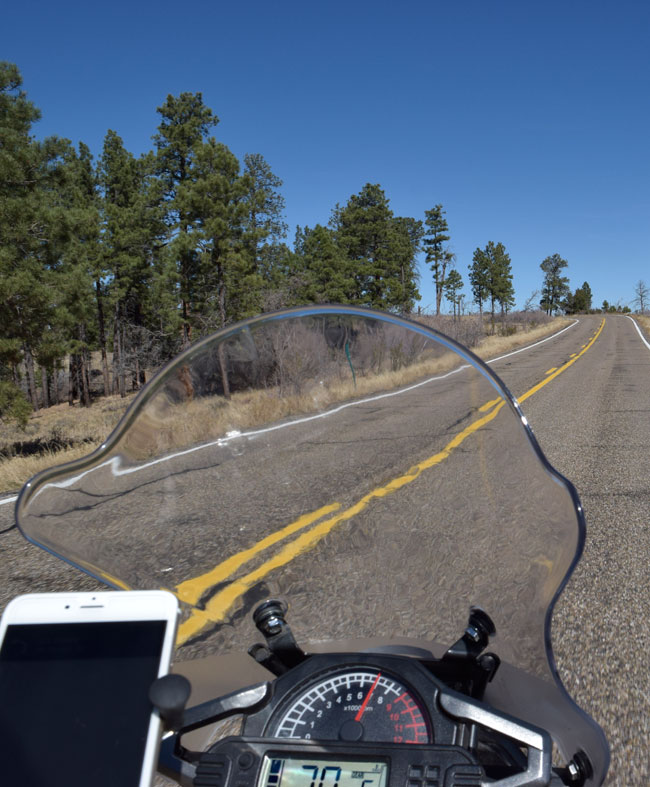
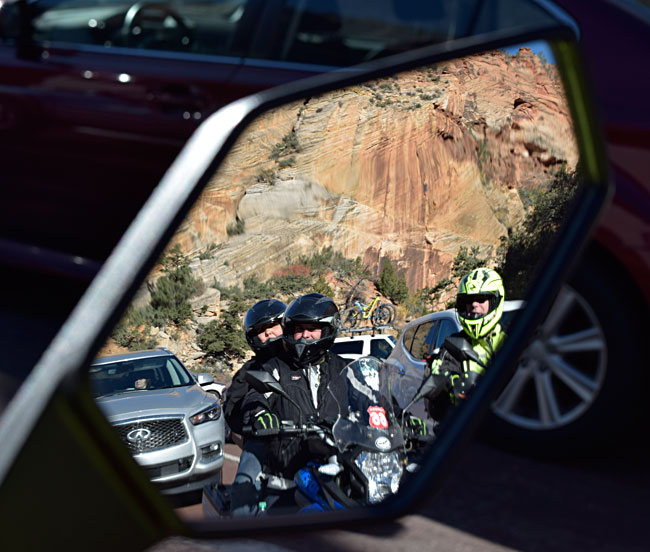
My buds in the rear view, as we waited for a group of big horn sheep to cross the road. You could say the delay was baa-aa-aa-ad, but it was worth it to see those magnificent big horns.
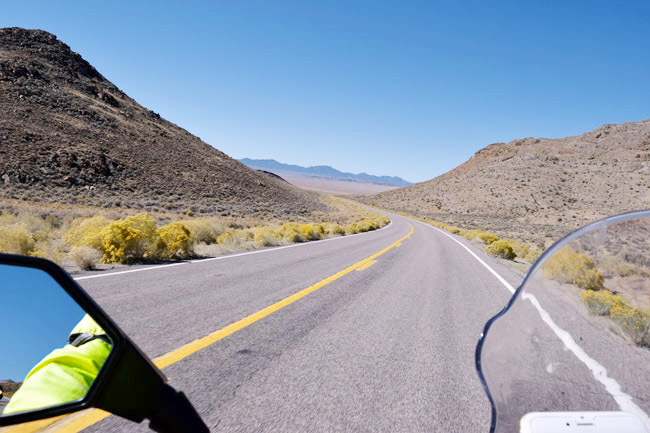
The next day it was on to Nevada for the long trek to Tonopah. We took the world-famous ExtraTerrestrial Highway. Here’s a shot of shot ET after he phoned home.
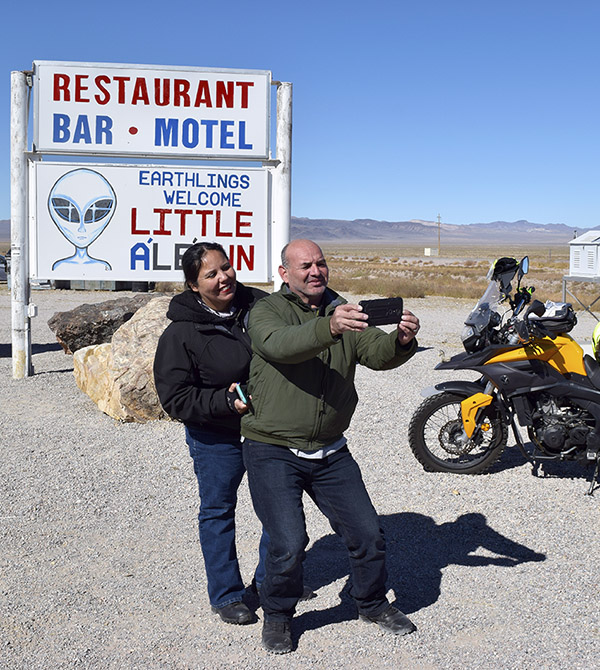
Selfies in Rachel, Nevada, where Joe Gresh made friends with an elderly waitress. She schooled Uncle Joe on the finer points of place settings, ketchup assignments, and more. You had to be there to fully appreciate the training session.  It was funny as hell.
On the ET Highway, headed toward Tonopah. The riding was incredible; the camaraderie even better.  We set a sedate pace to conserve fuel.  Everyone did over 70 mpg (even Orlando and Velma, riding two up).  Folks commented that they liked the slower pace.  I did, too.
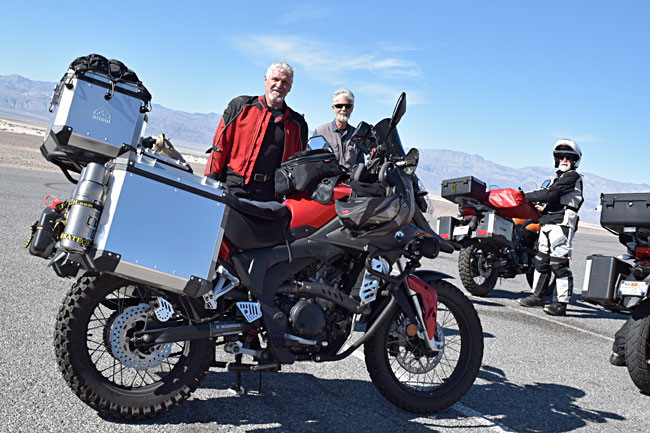
After a night in Tonopah, it was on to Death Valley (entering from the northeast) the next morning. It was awesome. That’s Willie, Dan, and Gary.
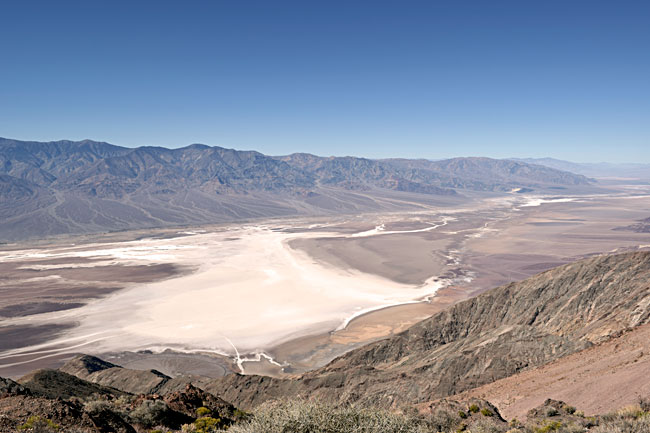
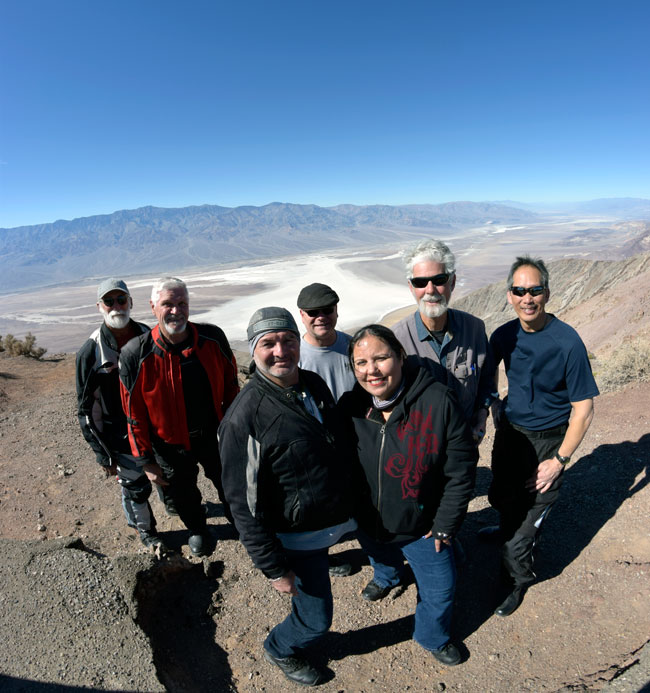
The entire valley, as seen from Dante’s Peak. Death Valley is an exceptional destination.  If you’ve never been to Death Valley, you need to go.
The crew (from left to right) included Gary, Willie, Orlando, Rob, Velma, Dan, Leighton and me (I was on the other side of the camera).  Gresh was there, but he spun off to see Stovepipe Wells in Death Valley that afternoon.  He had his reasons.
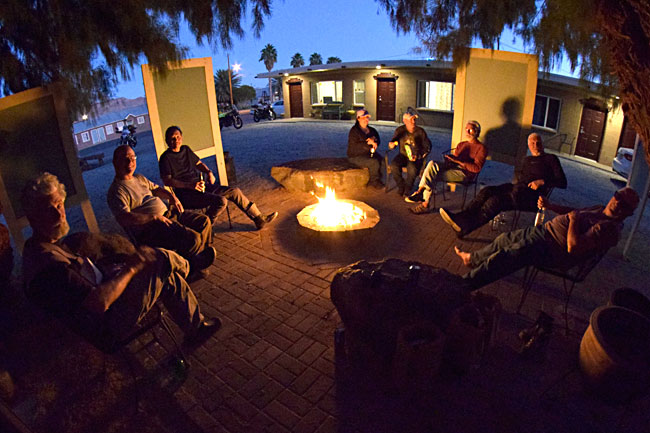
We stayed in Shoshone our last night. The Shoshone Inn had a fun firepit outside. Gresh bought the beer. It had been a grand ride and it would end the next day.  I think we doubled the population the night we were in Shoshone.
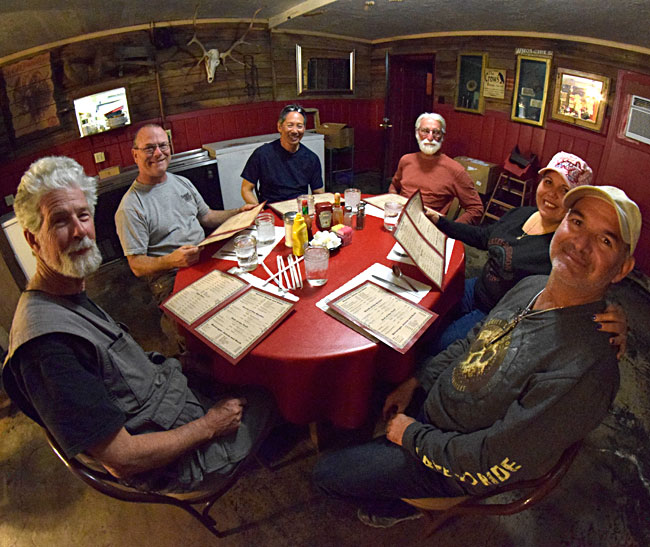
Dinner in Shoshone. Like every meal on the road, it was awesome.
Back through Baker after a freezing early morning ride, breakfast at the Mad Greek (another great meal and a popular motorcycle stop), and then home. What a week!

We did a lot of grand trips at CSC, and it did a lot to help publicize the RX3.  Baja, the Western America Adventure Ride, the China ride, the Colombia ride, and more.  I did a similar ride for Janus Motorcycles (Janus makes another great 250cc motorcycle) through northern Baja with a couple of their execs and it, too, was awesome (you can read about that one here).  There’s a lot to getting these rides organized and there are always things that can go wrong (personalities, bike issues, etc.), but I’ve been lucky.  Every one has been a hoot!


This is a good time to buy a CSC or Janus motorcycle.  Both companies are running awesome Thanksgiving sales.   Check out both motorcycles; you’ll be glad you did!

Star Machine Works

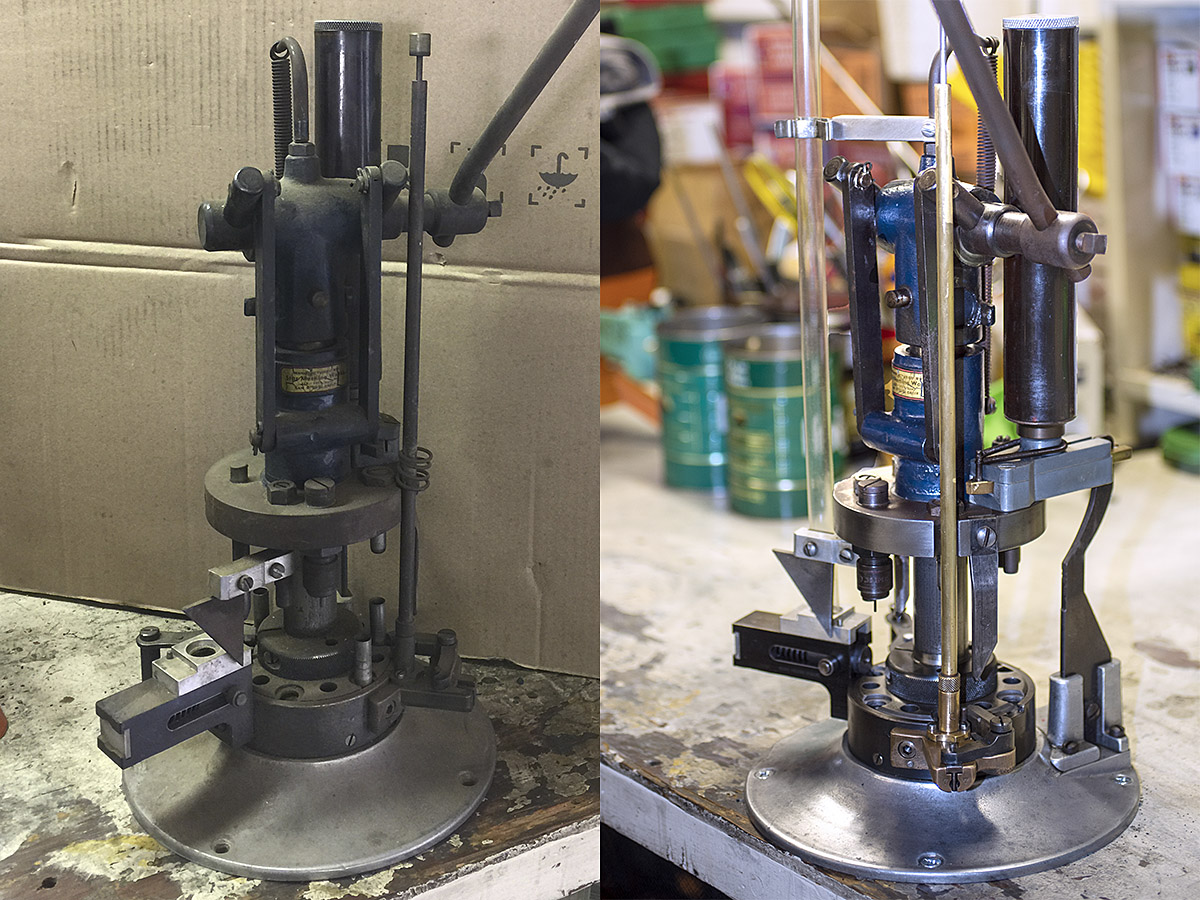
If you’ve followed the story about my resurrected Star reloader, you’ve read about good buddy Bruce Williams’ Star Machine Works.  Bruce bought the fixtures and other production equipment from the original Star Machine Works company, and he has made a business of restoring complete reloaders and offering parts for these grand old machines.  He is the go to guy when it comes to Star stuff, and his work is stunning.  My Star resurrection is a ham-and-eggs approach by a guy who really didn’t know what he was doing bringing a Star back to life; Bruce’s work is the gold standard. Bruce sent a few photos to me of his restored Star reloaders, and I thought I would share them with you here.

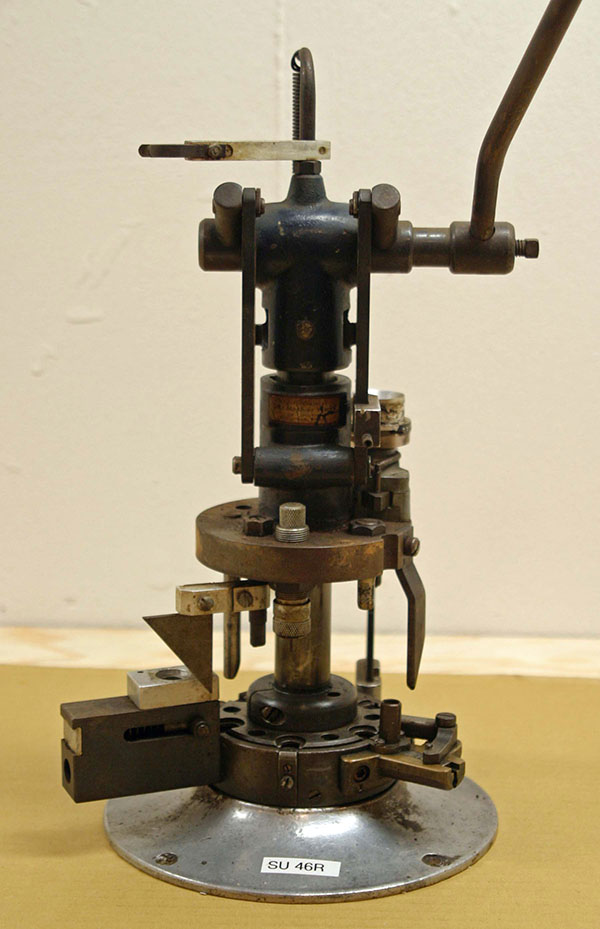
Here’s  a photo of Star that came to Bruce for restoration in the “before” condition:

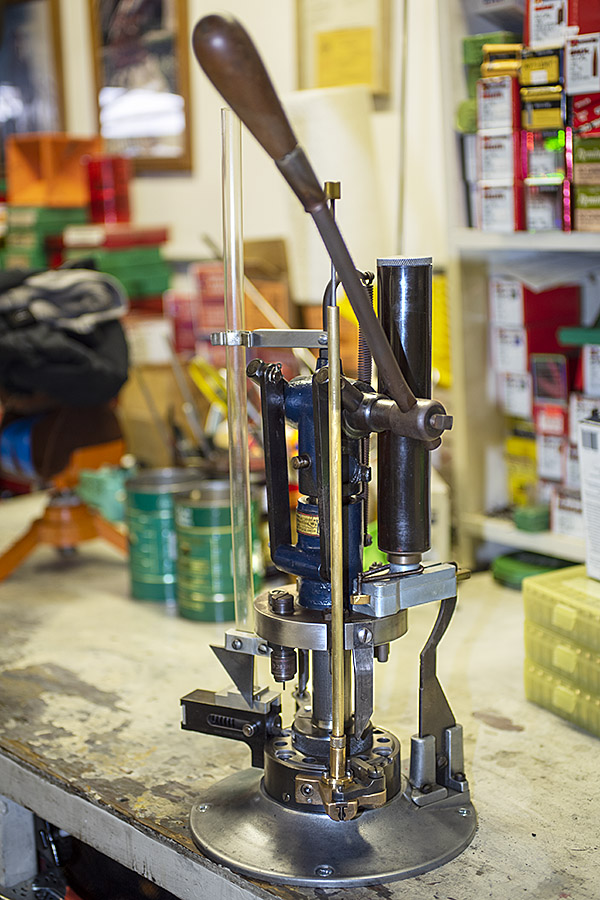
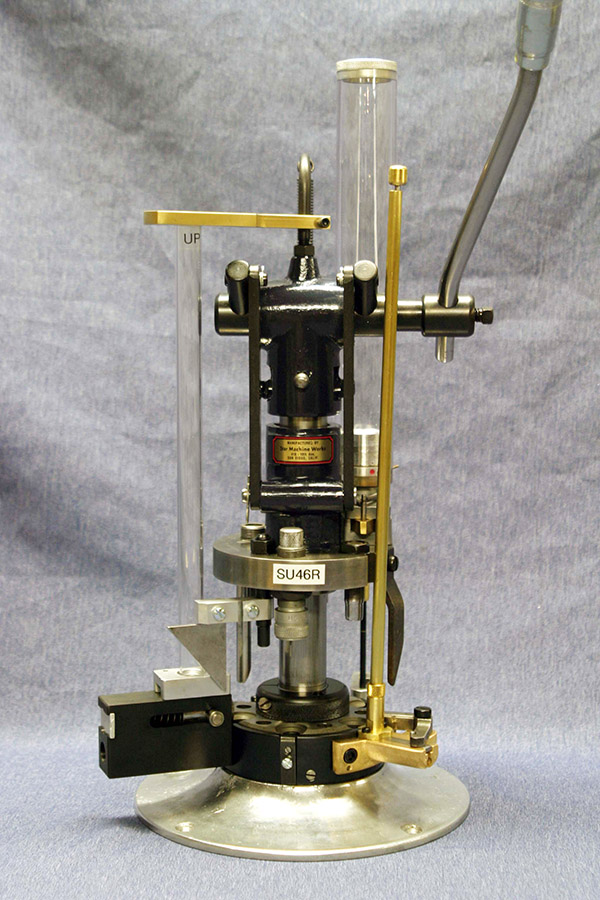
Here’s an “after” photo of that same fully-restored Star:

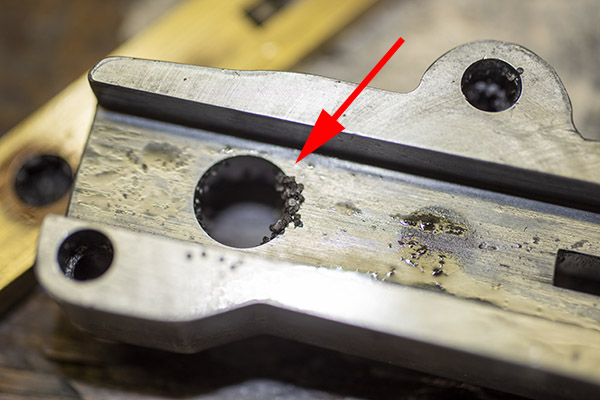
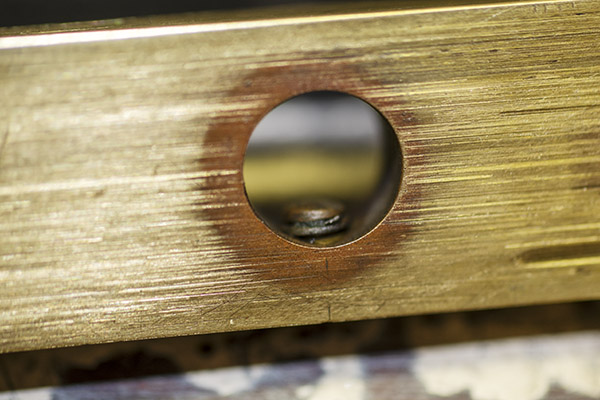
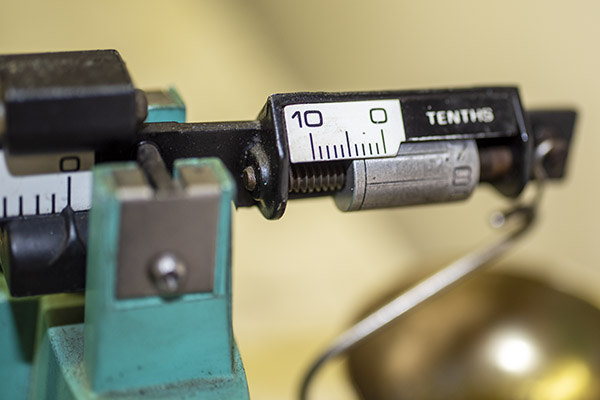
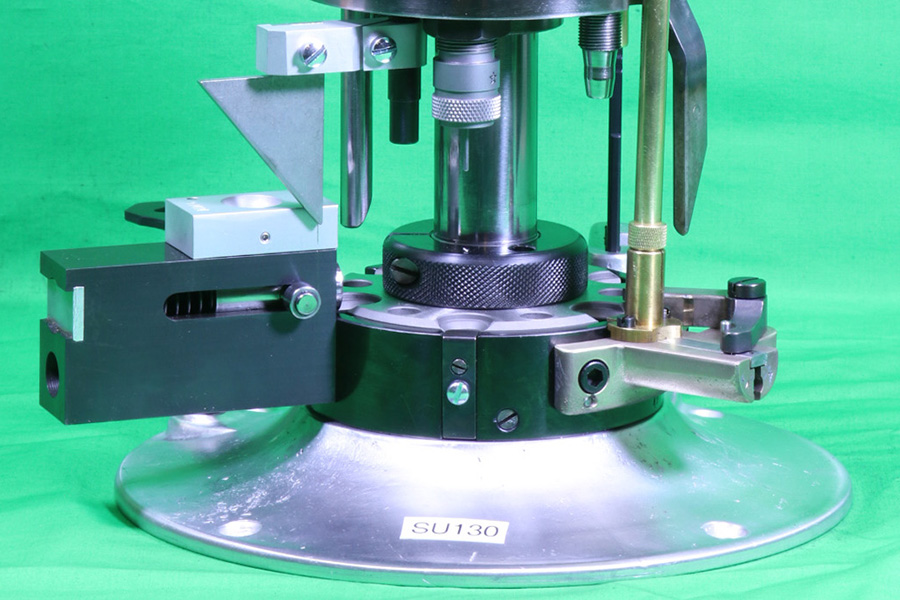
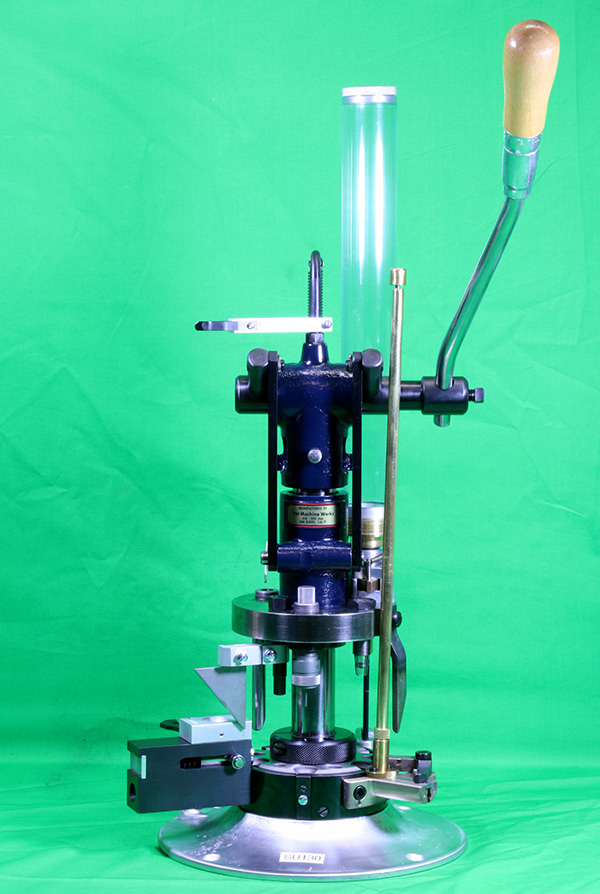
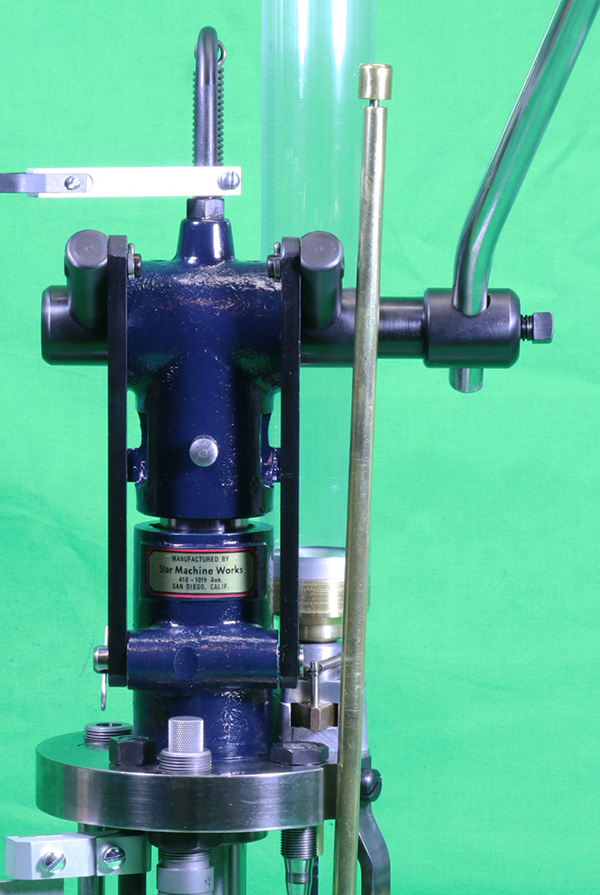
Here are a few closeup photos showing a few of Bruce’s other restorations:

Bruce’s prices on a restored Star reloader are, in my opinion, way too low.  I know the amount of work I put into mine to get it working, and there’s no way I would sell it for what Bruce gets for one of these machines.  Had I known what a Star reloader is (and what the machine can do), I would have just bought a restored Star from Bruce.  His work is impressive.


Check out our reloading and other firearms-related stories here.

Want to see alerts on new blogs?  Become a subscriber for free!

Resurrections: 1974 MGB-GT Part 3 “Christine”

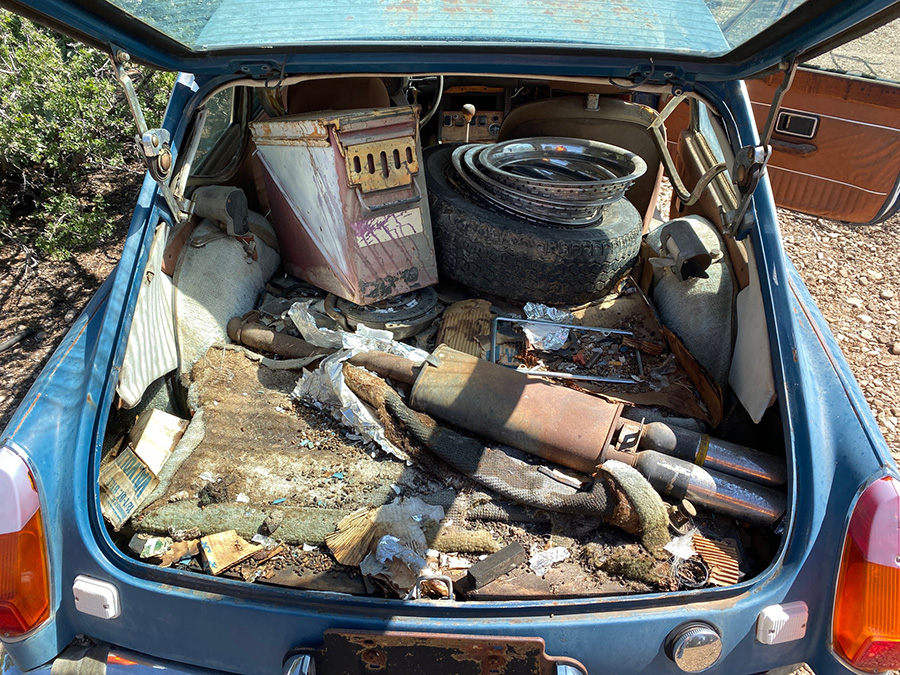
In between pouring slabs of concrete inside the shed I managed to get started on the MGB rat poo clean up. Several more doses of bleach were splashed around the interior of the car and wearing gloves and a N100 mask I started hauling junk out into New Mexico’s bright, November Sunshine. I’m hoping the Sun’s radiation will partially sterilize the hanta-contaminated bits.

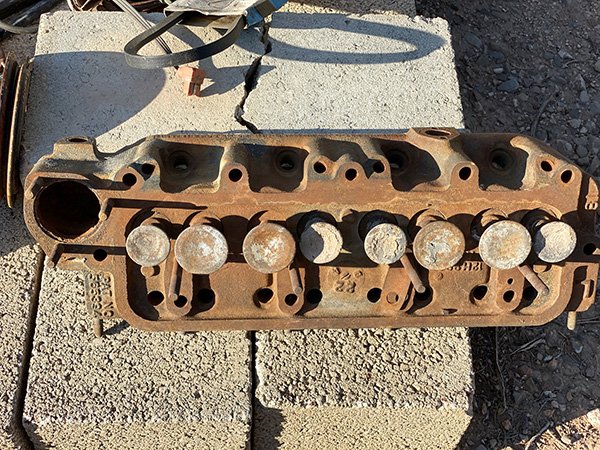
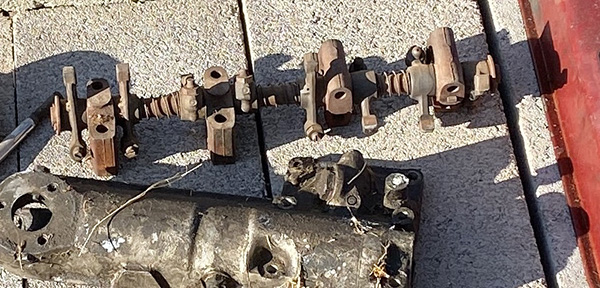
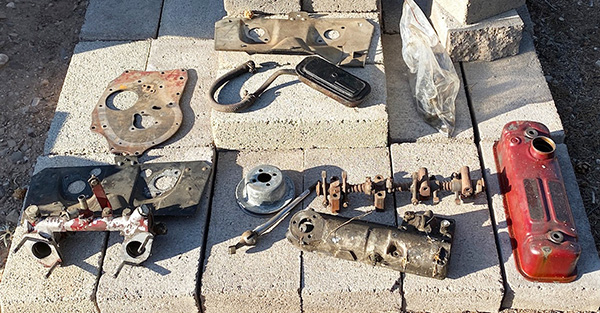
And what a collection of bits! A cylinder head with the valves installed upside down along with a complete rocker assembly is the big score. I haven’t found any valve springs to go with the head but I’m guessing you can still buy those parts.

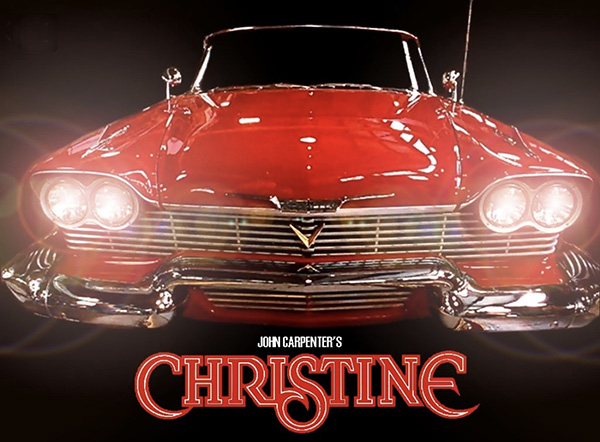
I wonder if my GT had the head replaced at some point and these are the old pieces or maybe the engine is shot and these were planned replacements? We will have to find out later because the owner died before he could finish the GT project. If you’ve ever read Steven King’s Christine you’ll have a good idea of the eerie vibe that comes from linking together the abandoned logic chain of a dead man’s life.

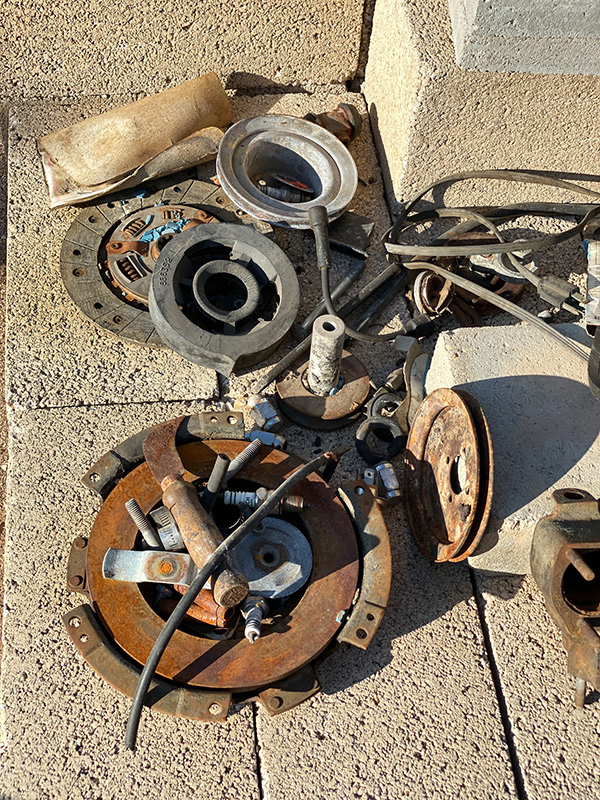
A real oddity is the front engine plate. These never go bad so why would an extra plate be under 6-inches of rat guano? I also dug out a tiny clutch and pressure plate that I assume fits the GT. I found several pulleys that look like they belong on a water pump and a harmonic balancer.

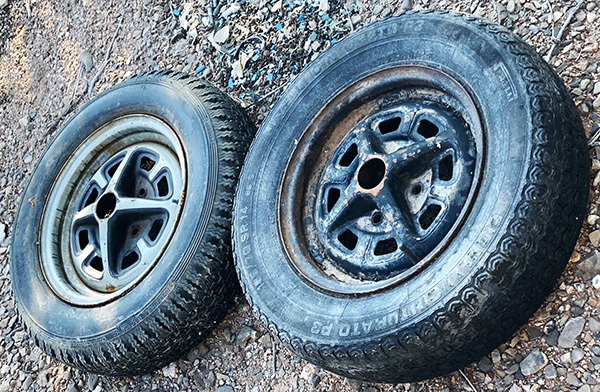
Two more wheels were inside, giving me 6 total. The extra wheels will come in handy as some of the tires are dry rotted and won’t hold air. I like the pressed metal Rostyle wheels, they look very mid-1970’s and are both strong and simple. Having been stored inside the car the extras are less rotted and should inflate enough to move the car from its sunken grave.

Included in the haul of parts are two carburetor heat shields, an intake manifold and a rocker cover. There’s a piece to the transmission that the shifter connects to and another shifter stick. I’ll have to get under the car to see if the transmission is all there. Then there’s the crankcase breather that bolts onto the side of the engine.

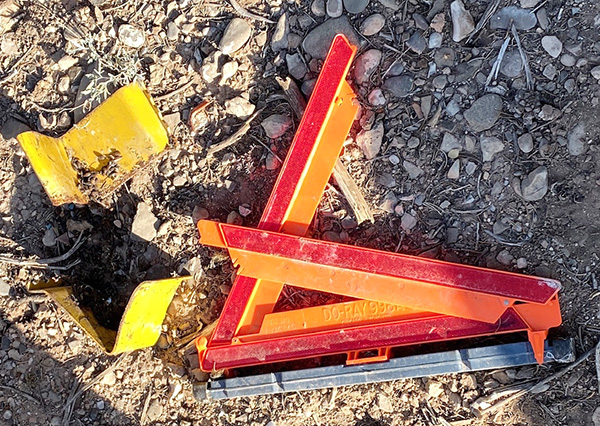
Under the back floor is a well to hold the spare tire. These tire changing chocks and emergency reflectors were nestled next to the spare. I wonder if they are original equipment?

A snazzy 1-into-2 tail pipe with muffler was inside the car also. The car was full of junk but the front seat area is relatively clear, if you don’t mind sitting in rat poo.

Christine’s original owner included three straight, non-rusted wheel trim rings with his Devil’s deal. I’m totally set for wheels now.

The funny part about all this junk is that the engine in Christine looks to be all there. Maybe the thing was rebuilt and the junk is leftovers. I can’t say, but it looks like I have plenty of parts. I have another plastic box of GT stuff still to look through. I saw a Weber carb in there and some other items of interest that we will get to later on in this resurrection.


Check out the earlier installments of the MGB GT resurrection!

Five Best Motorcycle Books Ever

Listicles, Gresh calls them…articles based around the (fill in the number) best things to do, worst things to do, motorcycles, movies, and more.  One of Gresh’s friends told him that lists get more hits than any other kind of Internet article.  I was a bit skeptical when I first heard that, but Google Analytics doesn’t lie:  When we do a listicle, our hits go up big time.  And comments, too.  We like comments.  And a lot of this blogging game is about the hits and comments.  Gresh’s The 5 Stupidest Ideas in Motorcycling, my recent The Big Ride: 5 Factors Affecting Daily Mileage, and other ExNote listicles…they’ve all done extremely well.

This listicle thing has me thinking in terms of the five best whatever when I’m spitballing new blog ideas, and the list du jour is on motorcycle books.  It’s a topic near and dear to my heart and one we’ve touched on lightly before, although the emphasis in the past has usually been on a single book.  I think I’ve read just about every motorcycle book ever published, and I particularly like the travel stories.  That said,  I think this introduction is long enough.  Let’s get to it.

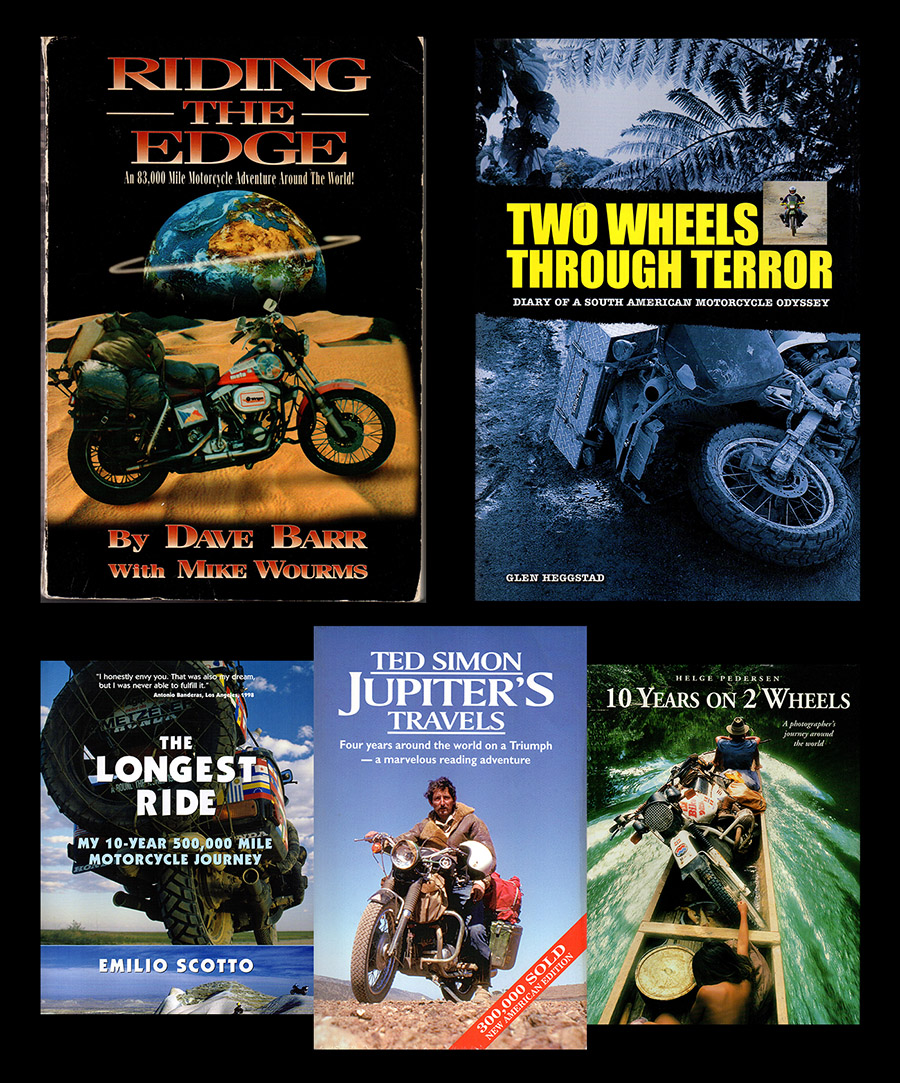
Riding the Edge

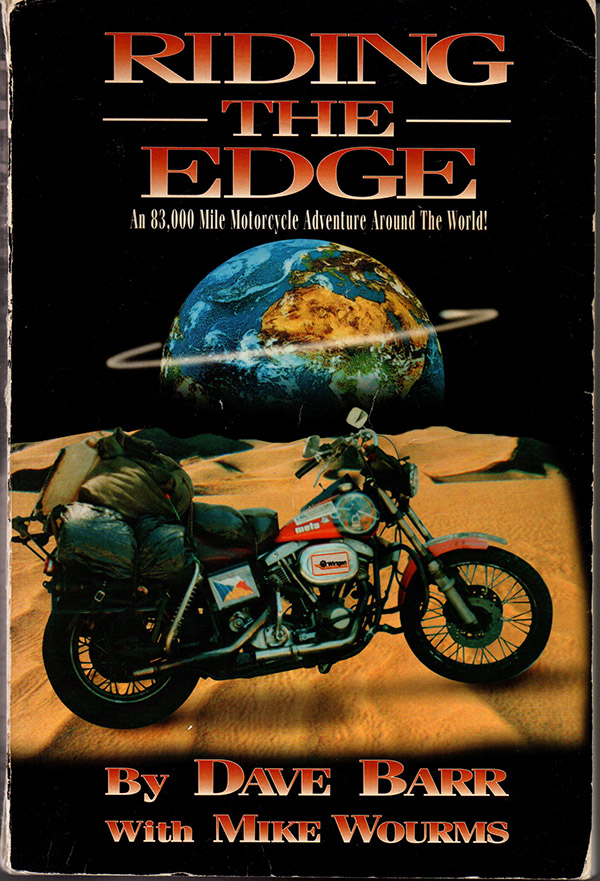
Riding the Edge, in my opinion, is the greatest motorcycle adventure story ever told, made all the more significant by two facts.   The first is that Dave Barr, the author, did the ride after losing both legs to a land mine in Africa; the second is that Dave did the ride on a beat up old ’72 Harley Super Glide that had 100,000 miles on the odometer before he started.

I know Dave Barr and I’ve ridden with him.  I can tell you that he is one hell of a man, and Riding the Edge is one hell of a story.  The ride took four years, mostly because Dave pretty much financed the trip himself.  He’d ride a country or two, run out of money, get a job and save for a bit, and then continue.  I read Riding the Edge nearly two decades ago, and it’s the book that lit my fire for international motorcycle riding.  None of the rides I’ve done (even though I’ve ridden through a few of the countries Barr did) begins to approach Dave Barr’s accomplishments.  The guy is my hero.

Riding the Edge is written in an easy, conversational style.  I’ve probably read my copy a half-dozen times.  In fact, as I type this, I’m thinking I need to put it on my nightstand and read some of my favorite parts again.  If you go for any of the books on this list, Riding the Edge is the one you have to read.

The Longest Ride

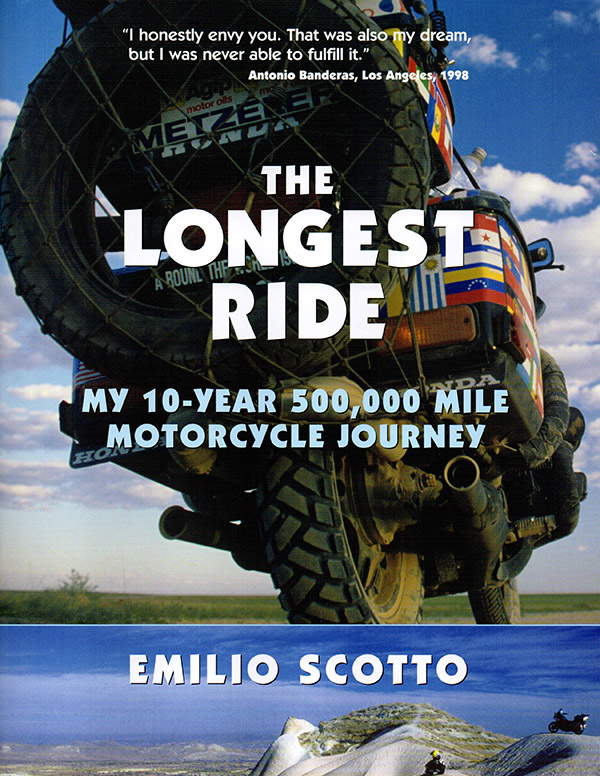
Emilio Scotto.   Remember that name, and remember The Longest Ride.  This is a guy who had never left his native Argentina, thought it might be cool to see the world on a motorcycle, bought a Gold Wing (which he named the Black Princess), and then…well, you can guess the rest.  He rode around the world on a motorcycle.

Emilio took 10 years for his trip around the world, and he covered 500,000 miles in the process.  He’s another guy who is good with a camera.  I thoroughly enjoyed The Longest Ride.  I think you will, too.

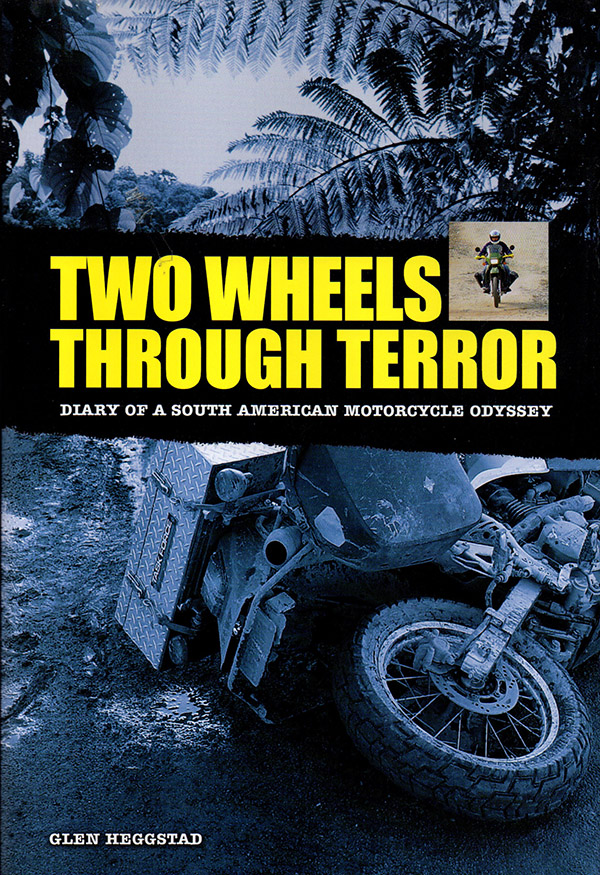
Two Wheels Through Terror

Glen Heggstad…that’s another name you want to remember.  Mix one martial arts expert, a Kawasaki KLR 650, a kidnaping (his own), a trip through South America, and a natural propensity for writing well and you’ll have Two Wheels Through Terror.  I love the book for several reasons, including the fact that Mr. Heggstad used a KLR 650 (one of the world’s great adventure touring motorcycles), the way he tells the story of his kidnaping in Colombia (a country I rode in), and his wonderful writing.

I’ve met Glen a couple of times.  The first time was at a local BMW dealership when he spoke of his travels; the second time was at his booth at the Long Beach International Motorcycle Show.  Glen is a hell of a man, a hell of a writer, and a hell of a fighter (all of which emerge in Two Wheels Through Terror).  He is a guy who just won’t quit when the going gets tough.  I admire the man greatly.

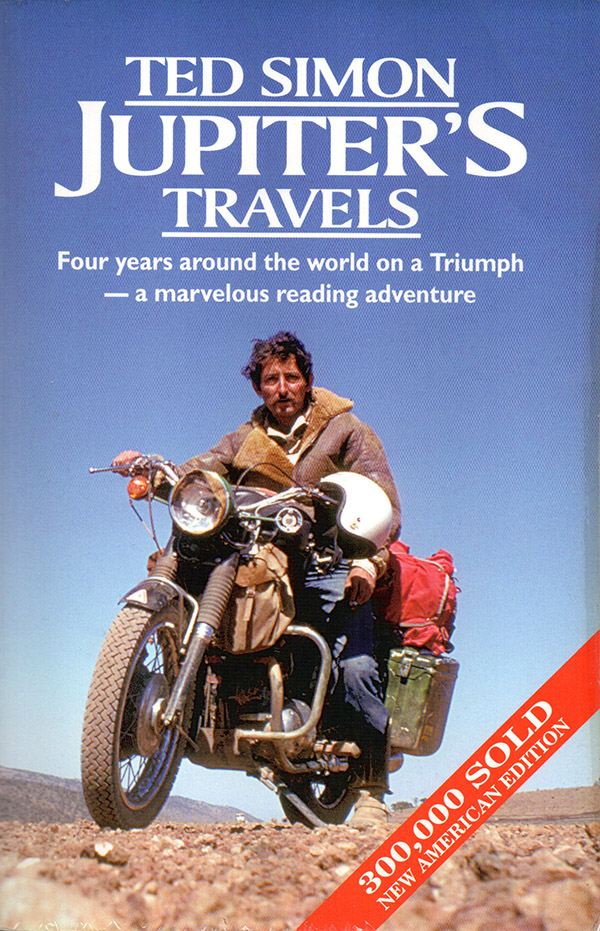
Jupiter’s Travels

Ah, Ted Simon, one of the granddaddies of adventure motorcycle riding.  I’d heard about his book, Jupiter’s Travels, for years before I finally bought a copy and read it, and then I felt like a fool for not having read it sooner.

Jupiter’s Travels was one of the first books about riding a motorcycle around the world, and what made it all the more interesting for me was that Simon didn’t do it as a publicity stunt.  No big sponsors, no support vehicles, no nothing, a lot like the other great journeys on this list.  It was what the guy wanted to do, so he quit his job and did it.  Simon’s bike was a 500cc air-cooled Triumph, and I liked that, too.  I’m a big fan of the old British vertical twins (the Triumph was a state-of-the-motorcycle-art when Ted Simon did his ride).  Trust me on this, folks:  Jupiter’s Travels is a motoliterature classic, and it’s one you need to read.

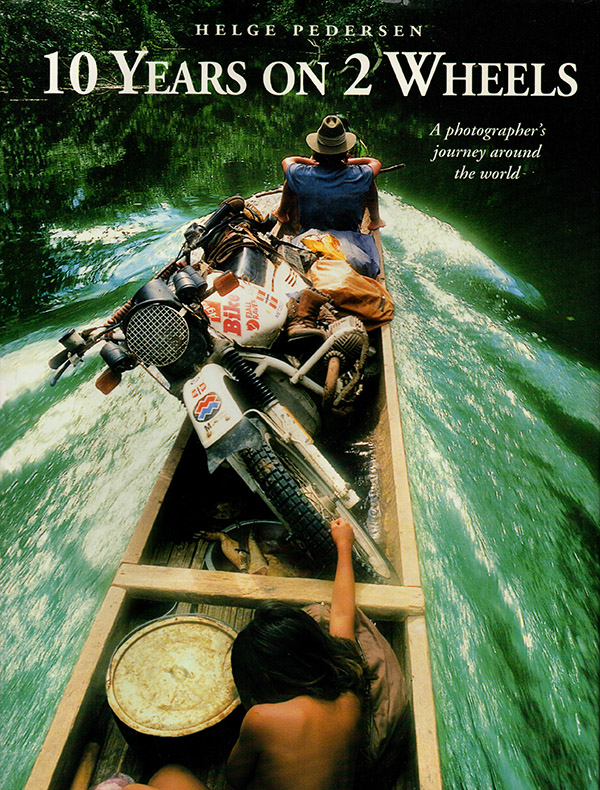
10 Years on 2 Wheels

Helge Pedersen is another name you want to know.  He is a phenomenal world traveler, writer, and photographer, and 10 Years on 2 Wheels is a phenomenal read.

What sets 10 Years on 2 Wheels apart is the photography, and you get a sense of that just by seeing the cover (this is one of those rare books that you can, indeed, judge by its cover).  10 Years on 2 Wheels is what inspired me to get serious about capturing great photographs during my travels, and Helge’s photos are fabulous (they’re art, actually).  This is a physically large book, and that makes the images even more of a treat.

Next Up:  The Five Worst Motorcycle Books

Look for a blog in the near future on the five worst motorcycle books I’ve ever read.  That one will be tough, because I pretty much like any book about motorcycles, but I’m guessing it will elicit a lot of comments.

So that’s it: Our list of the five best motorcycle books.  What do you think?  Leave your comments and suggestions here.   We want to hear them!


More book reviews?   You can find them here!

Never miss an ExNotes blog!  Sign up here:

Star Reloader: The Final Tweaks

You’ve been following the Star resurrection, and if you haven’t, you can get the earlier Star stories here.  This blog wraps up the last few bits and pieces on the Star.  The resurrected Star is fully operational now and I’ve been making ammo on it.  In a future blog, I’ll do a video showing the machine in action.  I would have done it for today’s blog, but I’m out of empty cartridge cases.  That’s a good problem…I’ve got to  get to the West End Gun Club to shoot up some ammunition so I can reload again!

This blog covers the last few details, the last few bits and pieces I cleaned up, a part or two here and there, a few adjustments, and mounting the Star on my reloading bench…so here we go.

Mounting the Star

I needed to secure my Star reloader to my reloading bench.  That necessitated drilling four pilot holes for the mounting screws, and two holes beneath the reloader (one for the finished rounds to drop through, and the other for the old primers to drop through).   Here’s what the holes in the bench look like (the upper hole is for the finished rounds and the smaller hole is for the old primers).
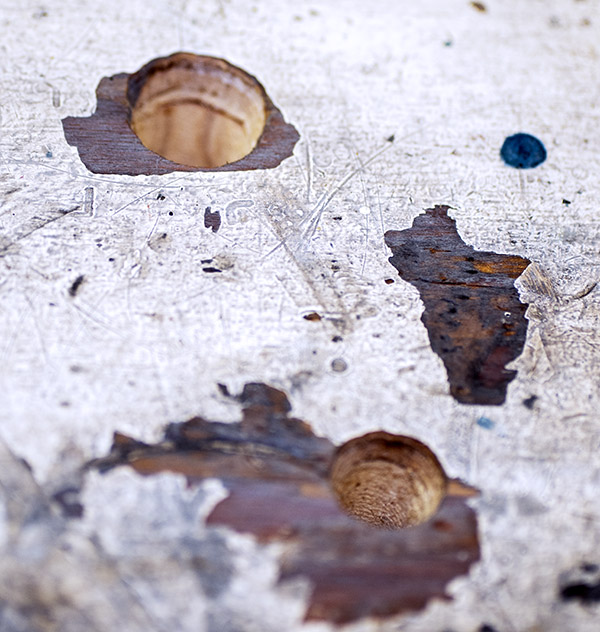
When the Star reloader operates, finished rounds drop from the bottom of the machine, which is why I needed that bigger hole you see above.  When used primers are punched out of the fired case (we call this decapping), they, too, drop from the bottom of the machine.  That’s what the little hole in the photo above is for.

The finished Star mounts to the bench with four countersunk wood screws.  It looks really good.
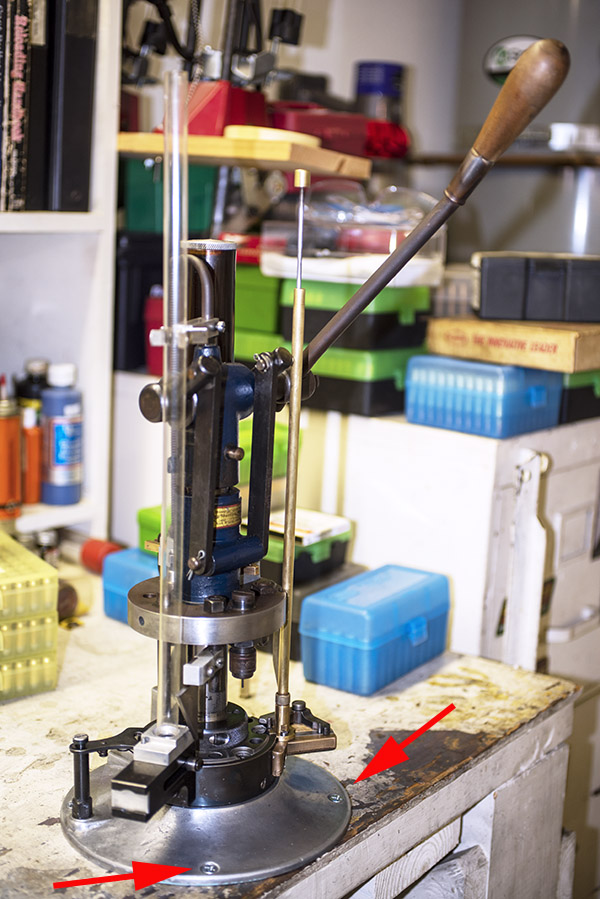
Tool Head

The tool head is the piece that holds the dies, the powder dispenser, and a few other things.  It was basically rusted all over.  I went to work on the sides with Scotchbrite and Kroil, and the tool head cleaned up nicely.
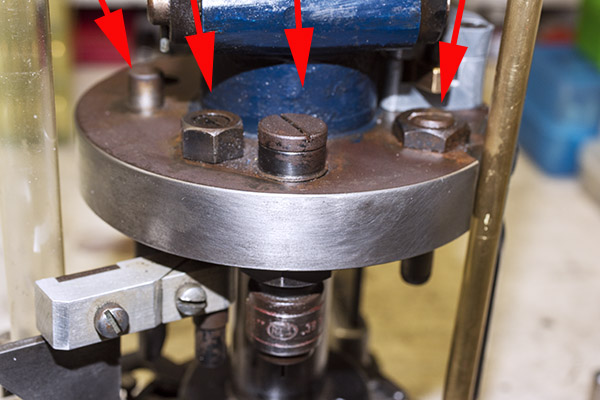
The arrows in the above photo point to key components that mount on the tool head.  From left to right, we have the double charge safety (more on that in a bit), the priming lever actuator (which also mounts the came for the Hulse case feed mechanism), the decapping and resizing die (this brings the case back to its specification dimensions), and the case flaring die (this puts a bell on the case mouth to allow the new bullet to enter the case).

Primer Feed Cam

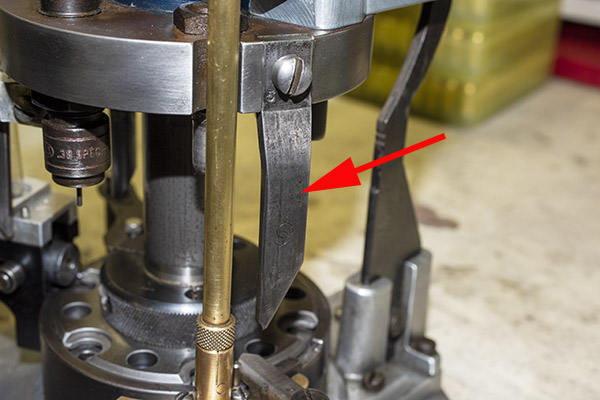
The primer feed cam is a knife-like looking thing that mounts to the tool head.  As explained in the blog on the case feed mechanism, this cam moves up and down with the tool head and actuates a lever, which in turns pushes a slider with a primer underneath the decapped case.  The primer feed cam was rusty so I cleaned it with Scotchbrite.  The part was originally blued, so I applied cold blue to the part to bring it back to near-original condition.  It looks good.
Powder Dispenser Corrections

When you reload, one of the things you have to pay attention to is the powder charge.  Too little, and you can get a bullet stuck in the barrel; too much, you risk blowing the gun up.  With propellants like Bullseye (which occupy very little of the available cartridge case volume), that’s a real serious concern.  One of things I wanted to do was make sure that the Star’s powder dispenser was dropping the right amount of propellant.  You may remember from our blog on the powder dispenser that my Star has a powder bar marked 2.7 GR BE, which is the bar for 2.7 grains of Bullseye.  That’s exactly what I wanted, so it was time to make sure that’s what the dispenser was serving.

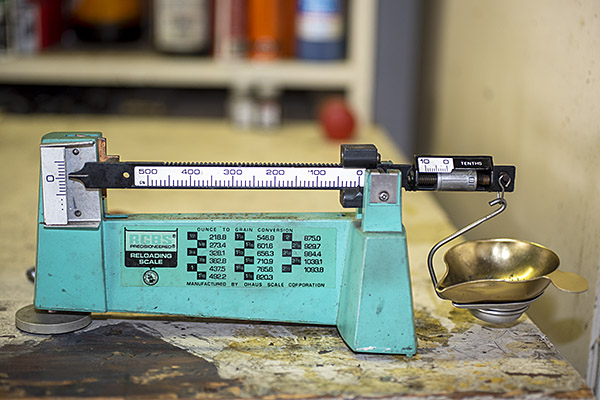
I added Bullseye powder to the powder hopper, cycled the powder slide a few times to throw a charge, and then I cycled it once more to capture a charge in my RCBS powder scale pan to weigh it.  To my surprise, I found that the powder dispenser dropped about 2.2 grains of Bullseye instead of the 2.7 grains it was supposed to dispense.
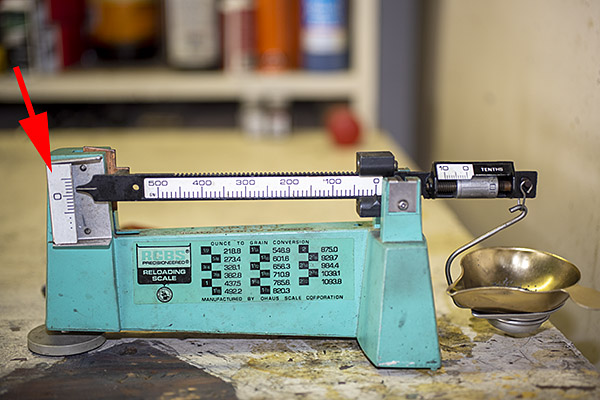
I had an idea about what might be causing the problem, but before I tore into the powder dispenser, I thought I’d check with good buddy Bruce at Star Machine Works.   Bruce knows more about these machines than any man alive.  Bruce told me that in his experience, the Star 2.7 GR BE slides throw over the specified weight to give 2.9 to 3.0 grains, not under as I was experiencing.

I thought this for a bit and realized I probably had residual oil in the dispenser from when I cleaned it, causing the Bullseye powder to clump up, and I was right.  Take a look:
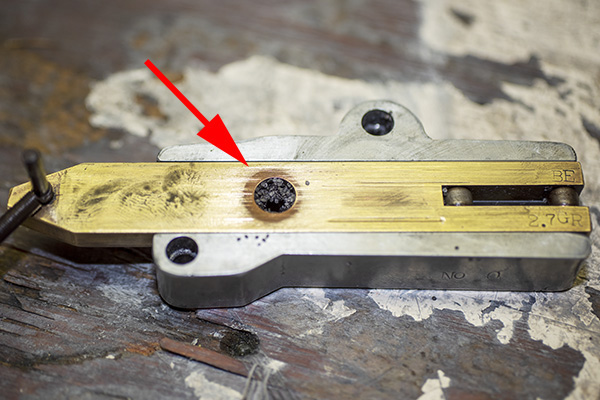
I cleaned the dispenser with alcohol to get all the oil out, let it dry, reassembled it, and tried it again.  Yep, Bruce was right…it was throwing right at 2.9-3.0 grains of Bullseye.  I thought that would probably be okay (0.3 grains of powder is probably about what a fly poops), but I knew that 2.7 grains was the secret sauce for good accuracy in 38 Special in my Model 52 Smith and Wesson, and that’s what I wanted.  I was thinking about when I looked at the powder slide again, and what do you know, I was once again blown away by how clever these Star folks were.  There was an adjustment in the powder slide.  It’s a little set screw in the powder slide, and by screwing it in or out you can adjust the volume of the powder slide cavity (and therefore the charge weight).  Very clever, indeed.
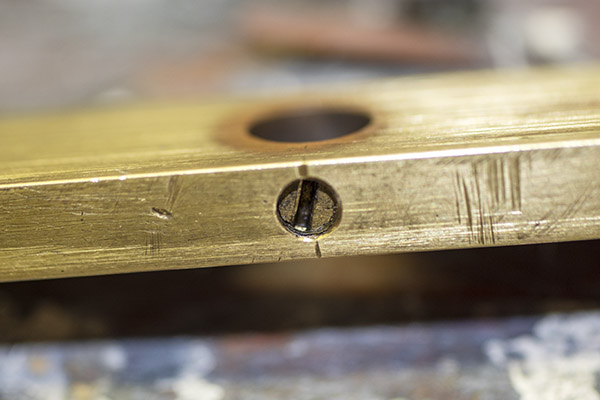
I screwed the set screw in to reduce the cavity volume by what I guesstimated would be 0.3 grains, and I got it right on the first try.  The dispenser drops exactly 2.7 grains of Bullseye now.
On that issue of overcharging a case:  The real concern is that you inadvertently double charge a case.  That could be disastrous.  The risk could be heightened, I think, by the fact that you have to manually advance the Star’s shell plate after each pull of the lever.   The mechanism does not automatically advance each time, and if someone wasn’t paying careful attention, an inadvertent double charge could occur.   Well, the Star folks thought of that, too.  The Star reloader incorporates a gizmo called the safety cam.

The Star Reloader Safety Cam

This thing is very clever, which seems to be a hallmark of everything on the Star.  It’s a toggling guard sort-of-deal on the left side of the reloader that I cleaned with Scotchbrite and Kroil.  You can see it in the photo below.
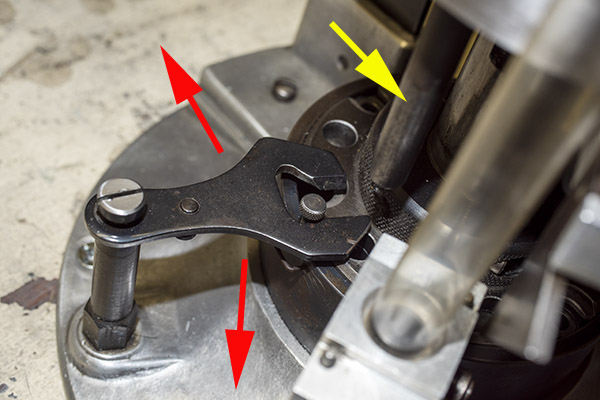
Take a look at the red and yellow arrows in the photo above.  That blued-steel Y-shaped toggle guard translates back and forth on its pedestal.  There’s a wire spring underneath the guard that makes it naturally flip to the position you see the photo above.  Now, look at the post beneath the tool head (the yellow arrow points to it).  If you attempt to operate the lever and lower the tool head (which would also operate the powder dispenser and drop 2.7 grains of Bullseye into the cartridge case beneath the powder dispenser), that post will hit the toggle and stop further tool head downward motion.  When that happens, no powder will drop.   We want that, because the case sitting below the powder dispenser has already been charged with propellant.

Okay, this is going to get a little complicated, so bear with me.  The Star reloader’s shell plate does not automatically advance.  You have to manually advance the shell plate as a separate action (it isn’t slaved to pulling the reloader’s lever).  Now, imagine you’ve pulled the lever in the previous step, doing all the things that makes happen (knocking out the old primer, resizing the case, inserting a primer in the next case, flaring a case mouth, dropping 2.7 grains of Bullseye into the primed and sized case, and seating a bullet and crimping the case).  Wow, that’s a lot.  Now it’s time to manually rotate the shell plate to the next position.   When we do that, the finished cartridge (new primer, new powder, new bullet, crimped bullet) advances into the safety cam toggle, rotating the toggle toward us.
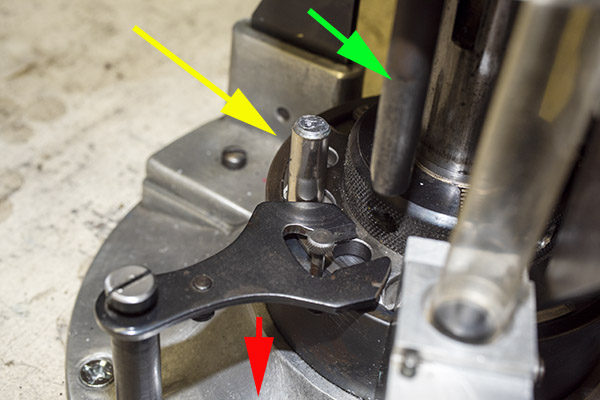
You can see all this in the photo above.  The safety cam toggle rotates toward us (indicated by the red arrow), pushed there by the completed cartridge case just before that case drops through the reloader (the case is indicated by the yellow arrow).  When the safety cam toggle moves toward us, the post mounted on the tool head (indicated by the green arrow) now has a clear shot at a hole in the shell holder (it’s no longer obstructed by the safety cam toggle), and the tool head can be fully lowered.  The new cartridge drops through the reloader, through the hole in the reloading bench shown at the top of this blog, and into a box waiting below the bench.  When the completed cartridge drops through the reloader and the lever is raised, the safety cam toggle’s spring pushes it back to the natural position, and the lever cannot be fully lowered again until the next cartridge case pushes the safety cam toggle to the safe position.  It’s clever and it’s complicated, but it’s simple and it prevents dropping the tool head twice on the same cartridge (thereby preventing a double charge).

Seating and Crimping Die Adjustment

The final die in the tool head is the seating and crimping die.  It does two things.  It seats the new bullet in the cartridge case (it pushes the bullet in to the correct depth), and it roll crimps the cartridge case around the new bullet.
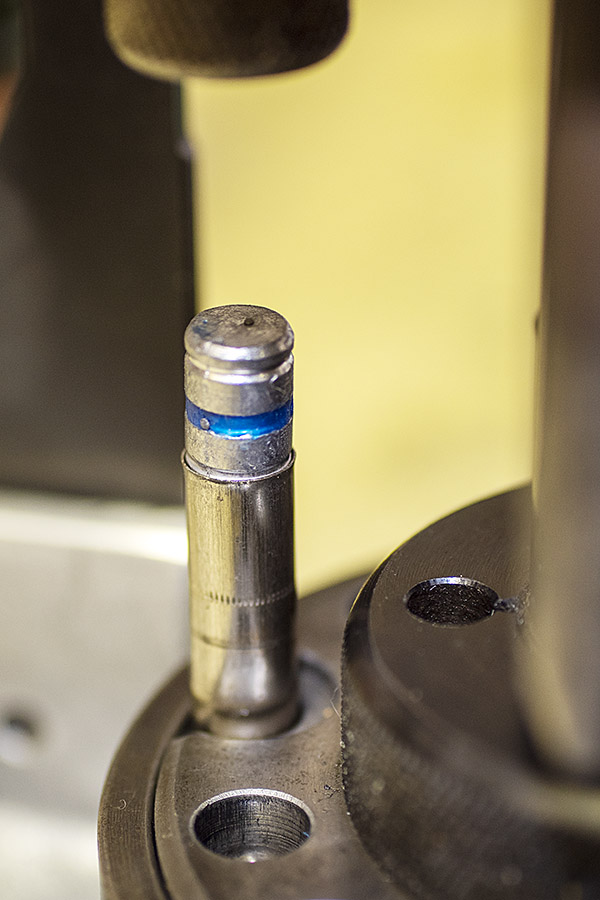
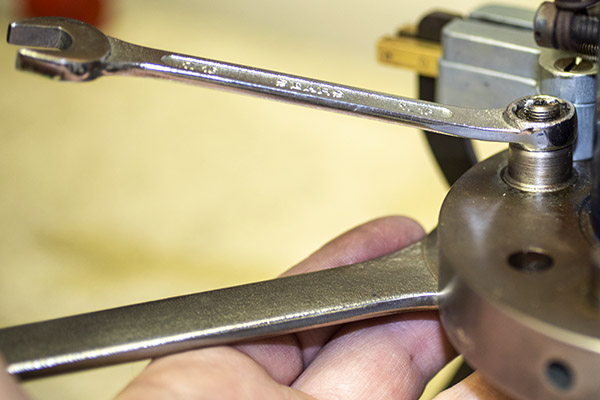
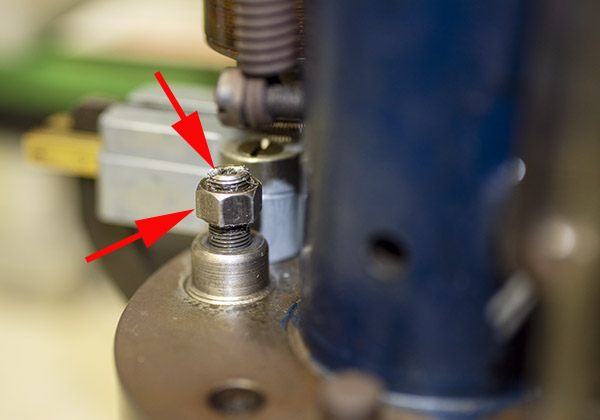
Seating depth and crimp are made through two adjustments.  There’s a locknut on the seating die beneath the tool head to lock the die in place, and there’s another locknut on the seating post to lock it into position.   Crimp is adjusted by positioning and locking the entire die in the tool head, and bullet seating depth is adjusted by how far the seating post is threaded into the die body and then locked in place with its locknut (see the red arrows in the photo below).
Case Feed Tube Support

The last item I needed to add was the case feed tube support.   You may remember that I jury-rigged an external support from a coat hangar.  It was definitely a bit of Bubba engineering, but hey, it worked.  Good buddy Mike saw that, felt a wave of pity and a willingness to help, and asked me if I wanted a part that he had.   I said yep, Mike shipped it to me, and here it is installed on my machine.
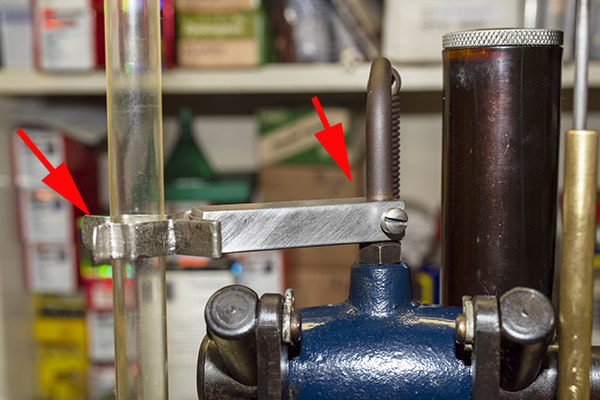
This project has come together very nicely.  I just loaded another 50 rounds of .38 Special with the Star. I used a different bullet (the Hursman 158-grain cast flat point, which is what necessitated the bullet seating depth change described above).  The Star sure did a nice (and fast) job.  I loaded 50 rounds in less than 10 minutes. This thing is really cool and I am getting used to the tempo and the hand-eye-coordination/feel of the thing.  At first, I felt like I almost needed another hand to operate the Star because there’s so much going on, but I got the hang of it very quickly.  You only have to do three things each cycle:

    • Advance the shell plate one position (you do that manually on these machines; the mechanism doesn’t advance the cases).
    • Put a bullet in the charged shell at the back of the press.
    • Pull the lever down and then bring it back up.

While doing the above, you need to pay attention to the powder magazine, the primer magazine, and the case feed tube to make sure each has not run out of the components it feeds.  The Star reloader really is a slick device, and it works great.

As I mentioned in one of the earlier blogs on the Star, these machines ruled the roost for high-volume reloading for a cool half century.   At one point back in the day, a Star reloader sold for north of a thousand dollars, and there was a 2-year wait to get one.  It’s easy to see why.  This is a nice piece of equipment.  If you’re a gearhead, a gadget guy, a shooter, and a reloader (and I check all four boxes), you can’t help but love a Star reloader.


Do you enjoy reading about bringing old stuff back to life?  You’ll love the Resurrections page!

See all the Tales of the Gun here!

Never miss an ExNotes blog!
The Big Ride: 5 Factors Affecting Daily Mileage

How many miles can you ride in a day?

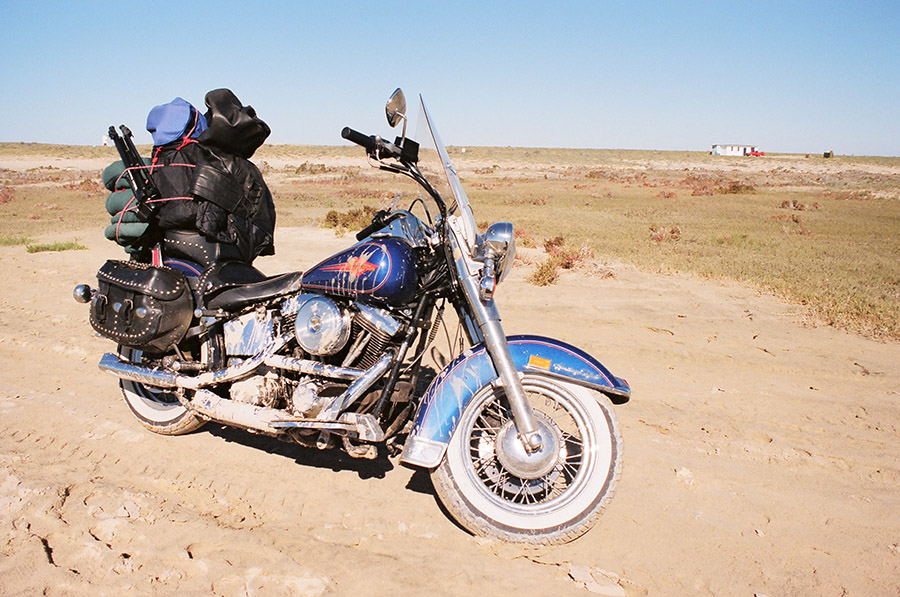
About 30 years ago I cranked 1070 miles in one day on a Harley Softail coming home from Mexico (and that was on an older Softail without the rubber mounted engine…it’s the one you see in the photo above).  I was younger and I could ride, as they say, like the wind.  A couple of weeks ago, I did a 250-mile day ride on my Enfield and it about wiped me out.

Gresh and I were talking about this recently, and I thought I would share my thoughts on how many miles you can plan on covering in a day.  Maybe it will influence your planning.  Maybe not.  We get paid the same either way.

1: Age

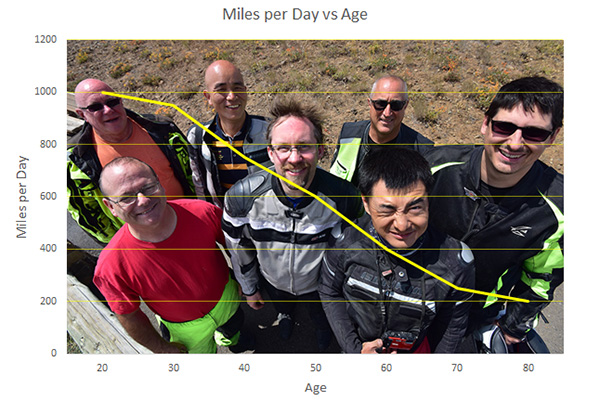
Like I said above, big miles used to be no big deal for me.  That’s not the case any more.  After substantial scientific study and close observation of my geezer buddies over many decades, I developed a graph showing the relationship between age and how many miles you can reasonably ride in a day.

Like it or not, when we get older, it gets harder to rack up big miles.  Serious scientific study went into the above, so if you want to debate our conclusions, bring facts.  We want to hear them.

2: Weather

Weather plays a big role in how many miles you can ride in a single day, and here at ExNotes we rely heavily on our weather rock before leaving on any ride.  You’ve probably heard about weather rocks.  We sell weather rocks here on ExNotes and they are conveniently sized to fit into a tank bag.  They work like this…you hang the rock from any available support (you have to supply your own string and support).  Here’s how to interpret your weather rock:

    • If the rock is wet, it means it’s raining and you should reduce however many miles you had planned to ride by half.
    • If the rock is swinging, it means it’s windy that day, and you should reduce your miles by maybe a third.
    • If the rock is hot to the touch, it means the temperature is elevated, and you should reduce your miles by maybe a third.  Maybe even more.
    • If the rock is cold, it means it’s cold, and you probably can ride as long as you dress appropriately.  If the rock is really, really cold, though, maybe you should stay home.  If there’s ice on the rock, you definitely should stay home.

ExNotes offers weather rocks in brand-specific models:

    • If you ride a Harley, we offer chrome weather rocks for $395, chrome with conchos and black leather fringe weather rocks for $495, and chrome, conchos, fringe, and matching do rag weather rocks for $595 (freight and setup fees not included).
    • If you ride a BMW, we offer the GS weather rock with an electronically adjustable center of gravity, BMW logos, and a one-year Starbucks gift certificate for $1995.
    • If you ride a Ducati, you probably don’t need a weather rock (Ducati riders generally only ride their motorcycles short distances on clear days, anyway, although if you insist, we can provide a red rock for you personally autographed by the former famous racer of your choice, or we can put several rocks in a bag you can shake to sound like a Ducati clutch).  Ducati rocks are free, or at least that’s what we tell you (we’ll recover the cost on your first valve adjustment and let you think you got the rock for free).
    • If you ride a Chinese motorcycle, we sell an ExNotes weather rock decal for $2 and you can put it on your own rock.

3: Roads

The kind of roads you plan to ride make a huge difference.  If it’s all freeway, you’ll be bored but you can rack up huge miles.  If it’s surface streets (and a lot of us do everything we can to stay off the freeway), you won’t cover as many miles unless you’re riding in Baja, where you can run 140mph+ on the long straights south of Valle de Los Cirios.  If it’s in the mountains, it will be less, unless you’re posting about your skills on Facebook, where the folks who post are world class riders (to hear them tell it).  The same holds true for riding in the dirt.  You just won’t cover as many miles.

4: Headcount

This is the big one, folks.  Maybe I should have listed it first.  If I’m riding by myself or with one of my motorcycle buddies in Baja, I can easily do over 500 miles a day.  Throw in more people, and…well, read on, my friends.

The number of riders in your group has a profound impact on how many miles you can ride in a day.   In the math world, we would say that the miles per day are inversely proportional to the number of riders in your group.

As a starting point (and after extensive research and mathematical modeling), the technical staff here at ExNotes developed Formula A:

A)  Miles per Day = (M)/(N)

where:

M = Miles you want to ride
N = Number of riders in your group

What the above means is that as the number of riders in your group increases, the number of miles you can cover in a day decreases.  That’s because with more riders you’ll start later in the morning, you’ll be stopping more often, and you’ll take more time at each stop.  That is, unless you’re riding with me.  Then Formula A reduces to Formula B:

B)  Miles per Day = M

where:

M = Miles you want to ride

The B in Formula B stands for Berk because basically I’ll leave you behind if you’re not ready when I am.  You can catch up with me later.  You might think I’m joking. I’m not.

Formula A varies a little depending on what kind of riders you have in your group, and especially if you have a Rupert.  Rupert is the guy who takes 20 minutes putting his motorcycle gear back on after every stop.  I once rode with a Rupert who could take 20 minutes just putting his gloves on.  He got better when we threatened to cut a few of his fingers off.

5: Your Motorcycle

There are several motorcycle factors that play a huge role in how many miles you can ride in a day.  In the old days, a motorcycle was a motorcycle and we did it all with a single bike (touring, off-road, canyon carving, adventure riding, etc.).  Today, you gotta get specific:

    • ADV-style bikes are actually pretty comfortable and the ergonomics make sense.  500-mile days are easy.  My KLR 650 was one of the best touring bikes I ever owned.   It had phenomenal ergos.
    • Standard motorcycles are also relatively comfortable and you can probably do 500 miles in a day, but you’ll feel it, especially if your bike does not have a windshield.  My Enfield 650 Interceptor is a good bike, but it’s the one that wiped me out on that recent 250-mile ride.
    • Cruisers look cool in motorcycle ads and they complement do rags and tattoos nicely, but they are less comfortable on long rides.  I’ve found I can reasonably do 350-mile days on a cruiser without needing to see a chiropractor.  Go much beyond that and you’ll feel it.
    • Sportbikes generally cut into big miles, but a lot depends on your age. Good buddy Marty and I rode sportbikes on the 2005 Three Flags Classic (I was on a Triumph Daytona) and we did big mile days on that ride. But I was 20 years younger then and I bent a lot easier.  I wouldn’t want to do it again.
    • Classic bikes generally require shorter daily riding distances, particularly if they are British and equipped with electricals manufactured by Lucas (as in Lucas, the Prince of Darkness).  I think a mid-’60s Triumph Bonneville is the most beautiful motorcycle ever created, but I wouldn’t want to ride Baja on one.

Beyond the style issues outlined above, there are other motorcycle factors to consider:

    • Bigger motors generally mean more miles in a day, but bigger motorcycles can slow you down if they suck up too much fuel.  One year at the International Motorcycle Show, Yamaha’s bikes all had labels that showed, among other things, fuel economy.  The VMax, as noted by Yamaha, averaged 27 miles per gallon.  You’d be making a lot more fuel stops on that one.  27 miles per gallon.  I can’t make up stuff this good.
    • Daily mileage is independent of displacement at 400cc and above (as long as fuel economy is not VMax nutty).  Below 400cc, it gets harder (I think) to crank big miles.  On my 250cc RX3, 500 miles is a big day for me.  But my good buddy Rob once did a 1000-mile Baby Butt on his RX3, so I guess anything is possible.
    • Seats can make a big difference.  I’ve never found any motorcycle seat to be really comfortable, but I have found a few to be god-awful (my Enfield is working hard to earn that title).  If you want to really improve a motorcycle seat so you can up your miles, get a sheepskin cover (I’ve found those to be quite comfortable).  There are other options like inflatable seats or custom made seats, but my advice is don’t waste your money.  A guy showed up with an inflatable seat cover on a group ride once and it slowed us considerably.  It kept blowing off his bike and we had to stop and look for it each time that happened.
    • Fuel tank capacity doesn’t make much difference.  My KLR could go 250 miles on a tank; my TL1000S would start blinking at 105 miles.  You’d think you could ride a lot further with a bigger tank, but I found I need to stop and stretch roughly every hour or two, and if I do that at gas stations, tank capacity doesn’t matter.

What do you think?

So there you have it:  Our thoughts on a complex topic.

We know there are keyboard commandos out there who will take exception to our carefully constructed and presented thoughts.  If you disagree, let’s hear it.  We appreciate all comments, dumbass and otherwise.  Please leave your thoughts here on the blog for others to see.  Don’t waste your time leaving comments on Facebook (all the cool people leave their comments here…only losers post comments on Facebook).  You’ll be a faster rider, you’ll be thinner, and you’ll look better if you post your comments here.  And don’t worry about spelling, punctuation, grammar, or capitalization (believe it or not, it will help our readers assess the validity of your thinking).

Like they say, your mileage may vary, and we’re looking forward to your comments.  If they’re particularly inane, so much the better. We await your inputs.


Some of our more interesting rides?  Right here, folks!


Never miss an ExNotes blog: 


Click on the popup ads and help us keep the lights on!

Check out our MotoBooks!

Reduced Loads: Less Wailin’ with the .35 Whelen

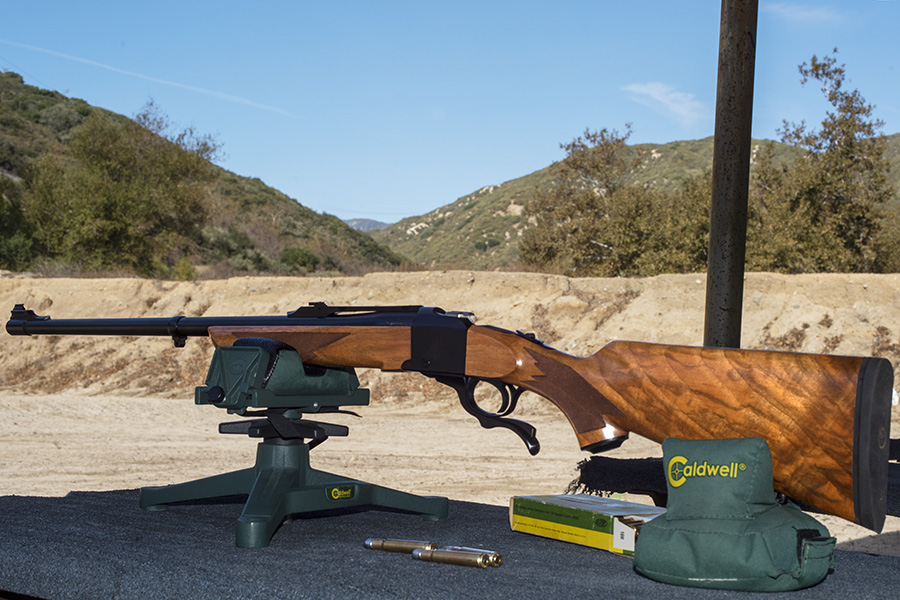
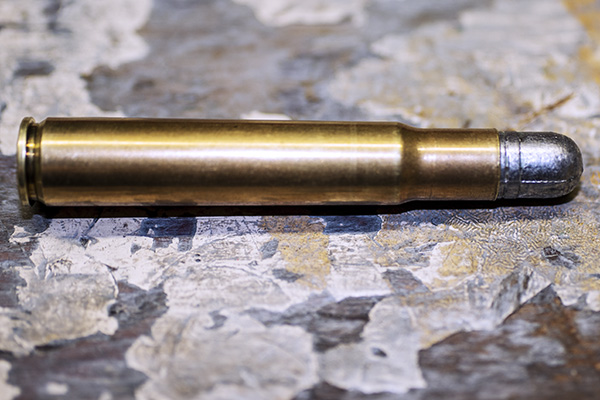
It’s the .35 Whelen (not “wailin'”), but with a name like that, I had to have a little fun.  I also considered “Win Some, Lose Some” for the title of this blog, but I’ll get to that in a minute.  What this blog is all about is the beginning work in finding a reduced velocity load for my .35 Whelen Ruger No. 1.

Photos from the Gunbroker auction for my rifle (yeah, I saved them). The big featured photo above shows the wood with an orange tint, but that’s because I used flash for that photo. The rifle’s colors are closer to what you see here. It’s a beautiful rifle.

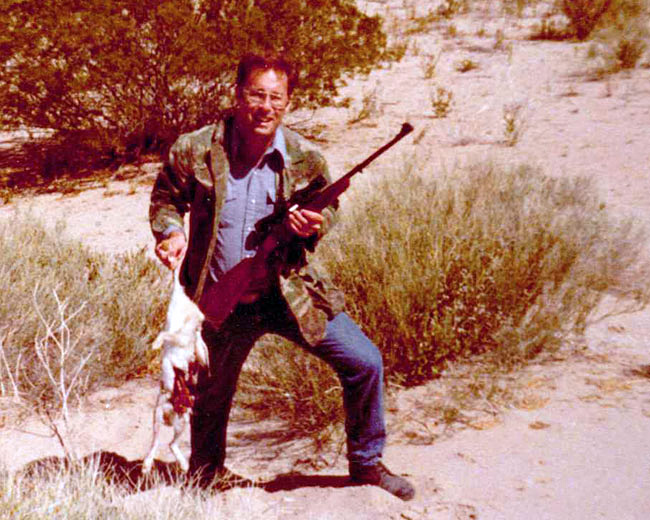
My .35 Whelen is the one you see in the photos above.  I have a thing, you see, for Ruger No. 1 rifles.  The first rifle I ever bought was a Ruger No. 1 in .30 06 when I was in the Army back in the ‘70s.  I initially thought I’d wear out the barrel on my .30 06 and have it recut to .35 Whelen, but that ain’t gonna happen (I’ll never shoot that rifle enough).  I have shot it a lot, though.  An infantry division of jackrabbits in west Texas met their maker on account of me and my .30 06 No. 1.

Me, half a century ago with a 30 06 Ruger No. 1 and a very dead jackrabbit (one of many) in the west Texas desert. That was a 400-yard offhand shot. The older I get, the better I was.

Okay, back to the .35 Whelen:  The concept of a big bore .30 06 stuck in my mind.   I’d wanted a Whelen ever since I read about the cartridge.  It was created by Townsend Whelen in 1922 (there’s some disagreement about whether it was Whelen or a guy he worked with, but there’s disagreement about everything on the Internet, and Townsend Whelen is the story I’m going with).  Old Colonel Whelen ran a .30 06 cartridge case over a .358 expander, plunked in a .358-caliber bullet, and voila, he had created the .35 Whelen.

The .35 Whelen was strictly a wildcat from 1922 to 1988; in 1988 Remington chambered their 700 Classic rifle for it (my good buddy Jason has one and he recently took a nice buck with it).  Then Ruger manufactured a limited run of No. 1 rifles in .35 Whelen maybe 5 or 6 years ago (I got mine from that run).   Most of these rifles had very plain wood (both the Remingtons and the Rugers); when I saw the one featured in this blog on GunBroker, I jumped on it.   The gun looks even better in person that it does in the photos (and it looks great in the photos).  My mantra for many years has been that you just can’t go wrong with a Ruger No. 1 and fancy walnut.   I believe these to be some of the classiest rifles ever made.

Why a reduced load?   Hey, why not?  I’ve got other thumpers, and if I ever hunt dinosaur, I can take my .458 Win Mag.  I thought finding a way to make the Whelen work with less energetic loads would be fun.  Factory-level loads are tough at both ends, and I want to have fun with this rifle.  Folks say the .35 Whelen is as good a game-dropper as a .375 H&H.  That may be, but it’s irrelevant to me, and besides, those kinds of energy levels come with big recoil.  Finding a load that makes a thumper less of a thumper is my idea of fun.  I just think the cartridge looks cool, too.

So I’ve had the Whelen a few years now, but until recently, I had never fired it.  Then, for reasons I won’t go into, I no longer have a .357 Magnum handgun but I have a couple thousand 200-grain cast .357 Mag bullets.  Hey, I thought…let’s see if they’ll work in the .35 Whelen.  I looked online and found that other guys are doing it, my 200-grain bullets are sized at .358, and I thought it ought to work.

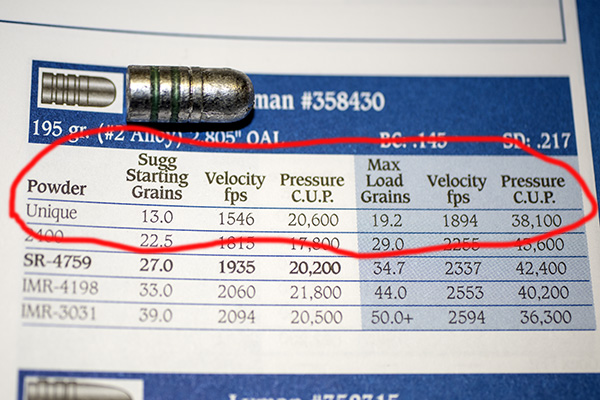
The Lyman cast bullet data for this bullet in the .35 Whelen.

I looked in the Lyman cast bullet book and I think the bullets I bought are the very same 200-grain Lyman bullet their cast bullet manual shows for the .35 Whelen (the profile is exactly the same).    Whoa, this just might work, and it would give me something to use those big pills in.

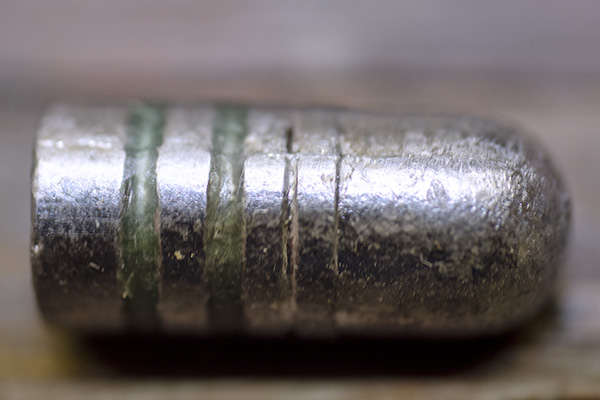
A big heavy 357 Mag/38 Special bullet. It does well in the .357 Magnum revolver (I’ve shot 3-inch groups with this bullet in my Ruger Blackhawk at 100 yards).

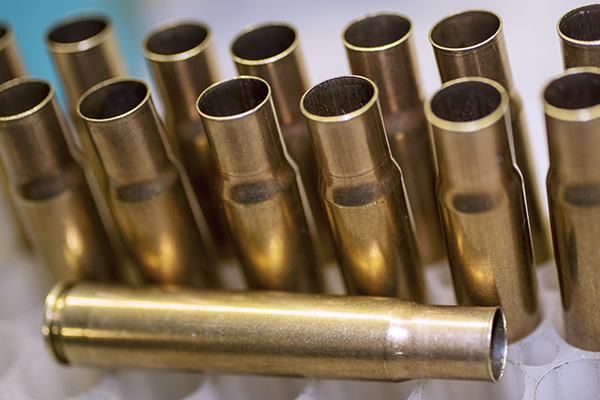
I actually have .35 Whelen brass, but I wanted to make some the old-fashioned way like Townsend Whelen did.  I ran 20 new .30 06 cases through the .35 Whelen sizing die to open the case mouths to .35 (from .308), I flared the mouths slightly with the Lee case mouth flaring tool (that’s so the cast bullets will start into the case mouth without shaving lead), and then the brass cases went into the tumbler.  They came out looking good.

.35 Whelen brass crafted from .30 06 cases.
A .30 06 case on the right, which is what the .35 Whelen cases are formed from.

I selected Unique as the propellant for this first load because I have some on hand, and because it shows the lowest velocities in the Lyman manual.  I went with 15.0 grains as a starting point.  My 200-grain .357 magnum cast bullets leaded the bore a little bit in my .357 Magnum Blackhawk revolver, so I was mildly concerned that they would lead the bore in my Ruger No. 1.  Hold that thought, because we’re going to return to it in a second.

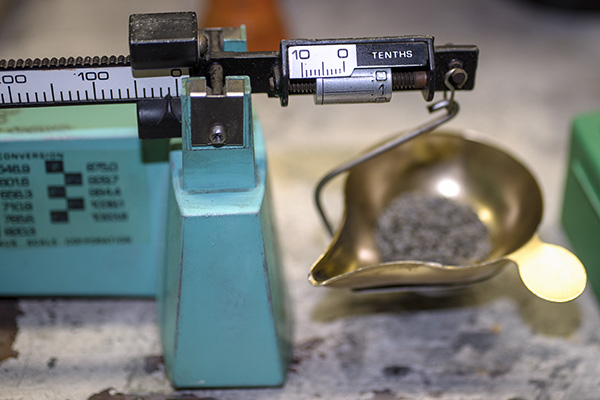
15.0 grains of Unique.
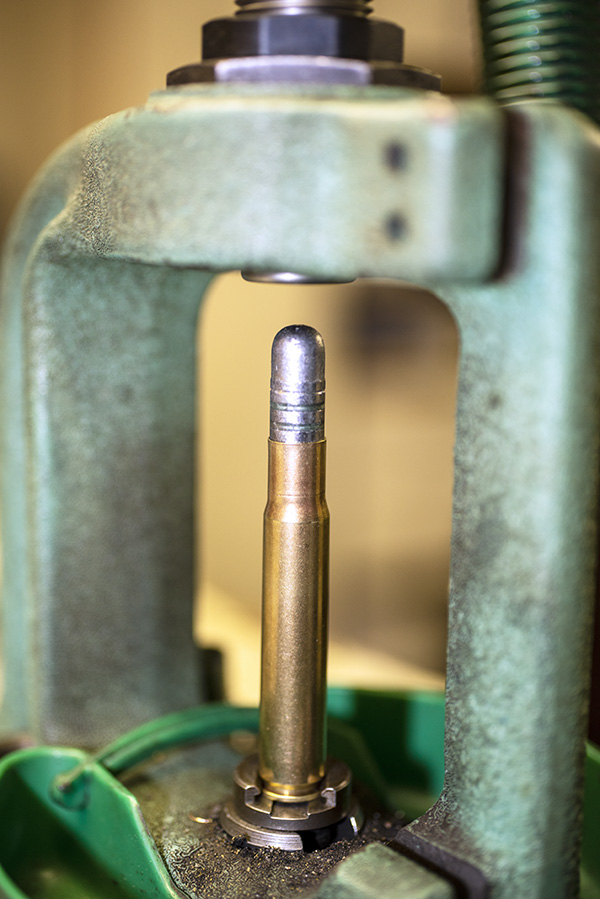
Seating the bullets in my RCBS Rockchucker press.

My .35 Whelen cartridges looked good, and they chambered with no issues in the No. 1.  I was eager to get to the range to see how they would group.

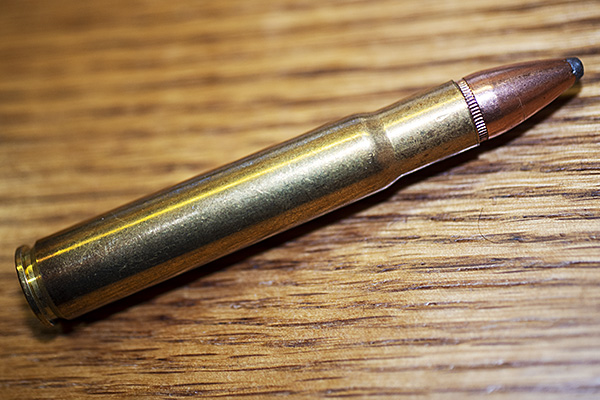
A finished .35 Whelen cartridge.  It’s a handsome cartridge, I think.
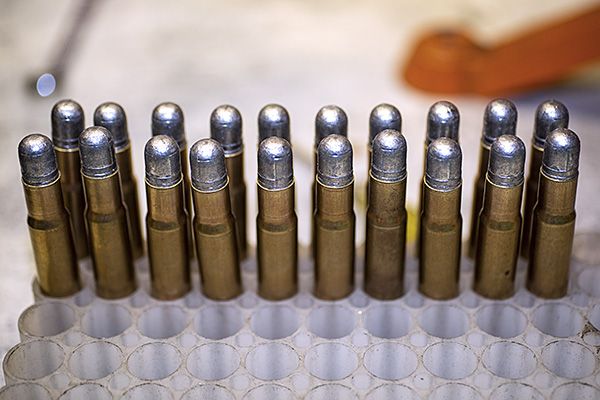
I loaded 20 rounds for a trial run. This is good-looking ammunition.

So how did it work?  Well, that brings us to the “lose some” portion of the tentative title I mentioned at the start of this blog.  You know, as in “Win Some, Lose Some,” although I don’t think any No. 1 with wood like the one you see here could be filed in the “lose some” column.

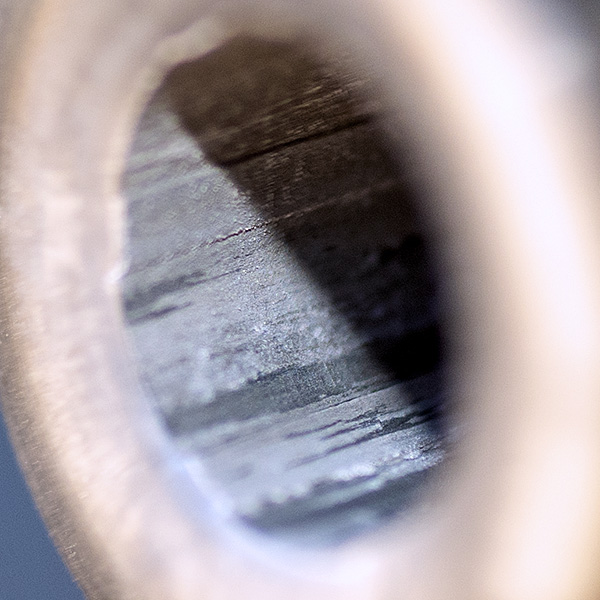
Bottom line?  The cast bullet load didn’t perform well at all.  The bullets didn’t tumble in flight (as would have been evidenced by their keyholing through the target), but they didn’t group worth a damn, either.  I’m talking 12-inch groups at 50 yards.  Hell, on a mediocre day I can shooter smaller groups at a hundred yards with a handgun.  A quick look at the bore revealed the culprit:   Leading.  Lots and lots of leading.

A severely-leaded Ruger No. 1 barrel. The bullets I used are intended for handgun velocities. I was hoping for a miracle. It didn’t happen. Not surprisingly, accuracy was nonexistent.  Good buddy Greg commented that there was probably enough lead in that barrel to cast another bullet or two.

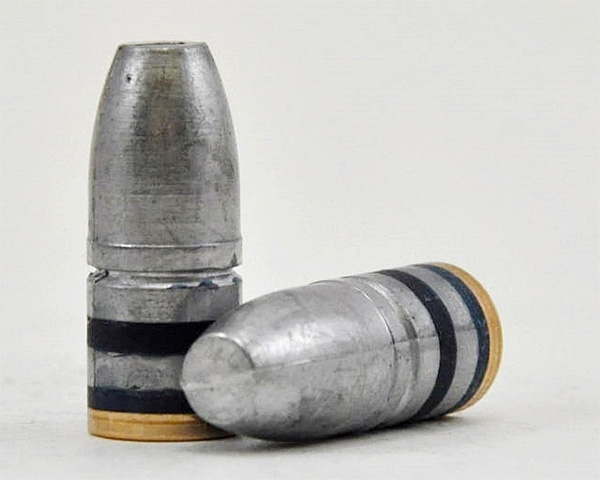
Okay, it’s knowledge gained, and that’s not a bad thing.  These handgun bullets won’t work in my No. 1.   But there are cast bullets out there made specifically for rifles, and I knew where to go to get some.  I like the cast bullets made by Montana Bullet Works.  I called them when I got home, I had a nice conversation with Bruce (the owner), and a hundred of his bullets are on their way to me now.   Bruce’s bullets are from an RCBS mold, they have a gas check, they’re hardened to 22 BHN, and they’re heat treated (to prevent breakup when hunting).  Everything I’ve read about these bullets on the Internet indicates they are great, and I’ve had good experiences with Montana Bullet Works when using their bullets in a different big bore rifle.  I’ll update you with a range report when I try them.

Montana Bullet Works 200-grain flatnose gas check bullets. It will be interesting to see how these perform in the .35 Whelen.

In the meantime (while I’m waiting for the Montana Bullet Works bullets), I explored the Internet and my loading manuals for more information on a reduced .35 Whelen load.  I didn’t do well with the 200-grain cast .357 Mag bullets but in researching this more, I found that others have had decent results using jacketed .357 Mag bullets, and there are loads published for this in the Lyman manual. The .35 Whelen rifle bullet diameter is listed at .358 and the jacketed pistol bullets are listed at .357 (we’re talking inches here, folks), but guys on the Internet are saying they get good results with the pistol bullets. So I loaded 20 and made a quick run to the range.

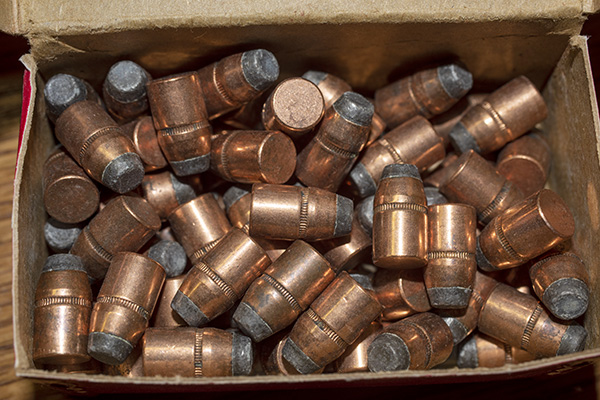
Hornady 158-grain .357 Magnum jacketed flatnose pistol bullets. These grouped well in the Whelen.
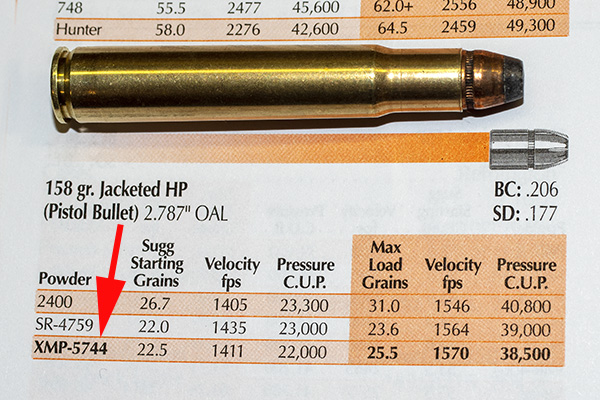
The Lyman manual’s data for using 158-grain .357 Magnum pistol bullets in the .35 Whelen.
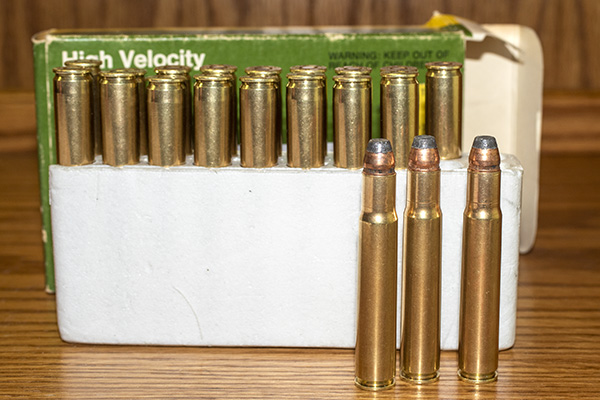
20 rounds of custom-made, good-looking .35 Whelen ammo.

I loaded at 24.0 grains of 5744 because I have that powder on hand and I didn’t want to dip into my stash of discontinued 4759.  While I was loading these, I was a little leery about shooting .357-inch diameter bullets in a .358-inch bore.  About 45 years ago in another life I tried loading .45 ACP bullets in a .458 Win Mag (I know, I was young and dumb). The difference there was too much (the pistol bullets were .451 inch and the bore diameter for a .458 Win Mag is .458). Those rounds fired okay, but accuracy was horrible.  The bullet was a whopping 0.007 smaller than the bore.  Here, with the .35 Whelen, I’m 0.001 smaller.  Maybe it would work, I thought.

I arrived at the range in the late afternoon and set up a target at 50 yards.  At the West End Gun Club, the rifle range points about 20-degrees north of due west, and what that means is that late afternoon shooting involves shooting into the sun (the sun is off to the left about 20 degrees).  Everything I’ve read about the effects of lighting on bullet point of impact says that the point of impact moves in the opposite direction that light emanates from, but my experience has always been exactly the opposite.  If the light is coming from the left, my point of impact is to the left, and that’s what I experienced with the Whelen.

My Ruger has a brass bead front sight (which I think is the worst kind of front sight), and it had a decided flare on the left side from the sinking sun.  Sure enough, my first group was sharply offset to the left.  Tight, but to the left.  I shifted the sight over to the right, and my guesstimate put the point of impact dead even with the centerline of the target.  I fired a 3-shot group, moved the front down a hair, and then fired a 5-shot group.  All were gratifying small, given that I was shooting almost into the sun by then and using iron sights (well, brass and iron, but you know what I mean).

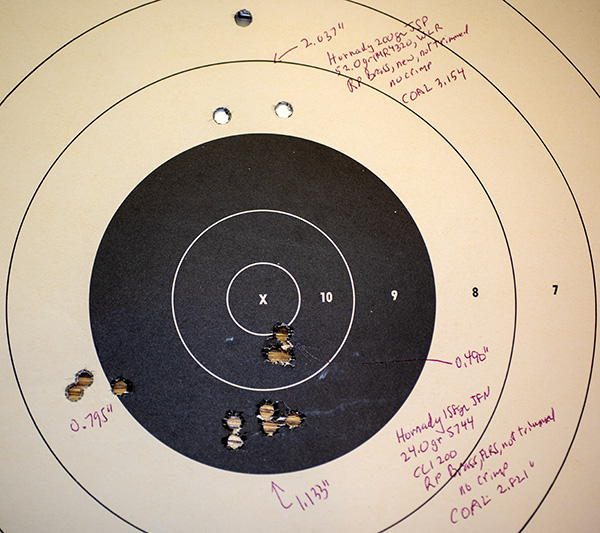
My 50-yard .35 Whelen target. The first group (a 0.795-inch group) was off to the left. I drifted the rear sight to the right and shot the 0.490-inch, 3-shot group. Then I moved the rear sight down a hair (or was it a hare?) and shot a 5-shot, 1.133-inch group. The top 3-shot, 2.037-inch group was with full power, 200-grain Hornady jacketed bullets.

This is looking good.  I am very satisfied with the accuracy I’m getting with the reduced velocity jacketed pistol bullet groups.  They’re maybe about 1500 feet per second, and that just feels right.

Then, just for giggles, I fired another 3-shot group with “real” .35 Whelen ammo, loaded with the 200-grain Hornady jacketed softpoint bullet and 52.0 grains of IMR 4320 ammo.  That’s at the low end of the big bore loads in the Hornady manual, recoil was substantially higher, and as expected, the group was quite a bit higher (I had the rear sight all the way up for the reduced velocity loads).   It wasn’t as tight as the pistol bullet reduced loads, but it’s the first load I tried in the big boy .35 Whelen load region.  It was late in the afternoon and the sun was, by now, nearly directly even with my line of sight.  I have a million excuses, folks.

The real deal…a big boy .35 Whelen load with a 200-grain Hornady bullet designed for big game rifle shooting.   Recoil was more than with the reduced loads, but it was not overwhelming.  I’d say it was about the same as a 30 06, but this was at the low end of the .35 Whelen propellant range.  The reduced loads discussed above are more fun.

Overall, this is good stuff.  At least it is to me.  I’m sure there’s a clown or two on Facebook who shoots quarter-inch groups offhand in the rain at 500 yards with his .35 Whelen (it’s always a guy, never a gal, making those insane claims), but for a geezer like me shooting iron sights, this ain’t bad for the second time I’ve had this rifle on the range.  You can bet there will be more.

You might be wondering:  Why not just go with a full-bore, factory-equivalent load?   I’m way ahead of you there.  I’ve got a hundred rounds of factory-level .35 Whelen loads ready to go with 200-grain and 250-grain jacketed Hornady bullets (well, now it’s 97, as three of them went through that target you see above).  Me?  I’m on a quest to develop a decent reduced load for this rifle and I am making good progress. I can shoot the full bore stuff later; for now, the reduced load quest continues.  I’ve got good results with the jacketed 158-grain Hornady pistol bullets; when the Montana 200-grain cast bullets arrive, I’ll let you know how they work.


Help us keep these stories coming:  Please click on the popup ads!

More Tales of the Gun and good reloading info are here!

Do you ride?  Check out some of our epic motorcycle trips!

The ultimate Roscoe?  You bet!

Never miss a blog!  Subscribe for free!

Star Primer Pickup Tubes: A Story Within A Story!

Like the title says, this is a story within a story.  It’s about using primer pickup tubes with my resurrected Star reloader, and how Lady Luck smiled on me yet again.

First, a bit of background.  There are a few approaches in the reloading world for transferring primers from the primer box into the reloader.  In our general series on reloading, I showed how to use the Lee primer tool, which is what I generally use when I’m loading on a single stage press like my RCBS Rockchucker.  Another approach is to use a primer pickup tube and a primer tray.   See, the deal is that you don’t want to touch the primers with your bare fingers.  You might get skin oils on the primer, and that could make the primer inert.  As explained earlier, in this game, you want all the primers to be “ert.”

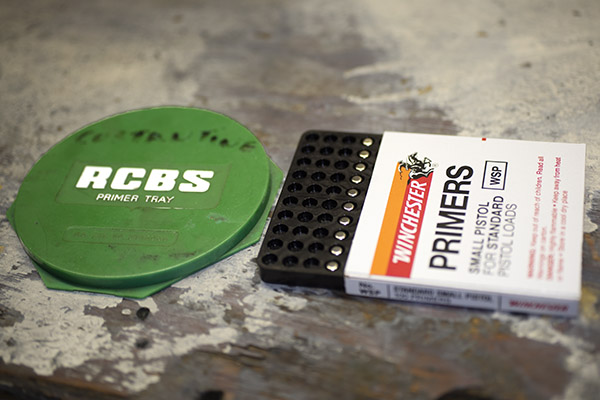
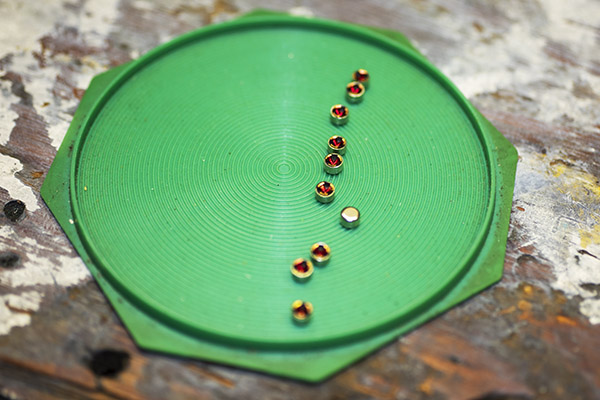
The first step is to transfer primers from the box they come in into a primer tray, like you see below.

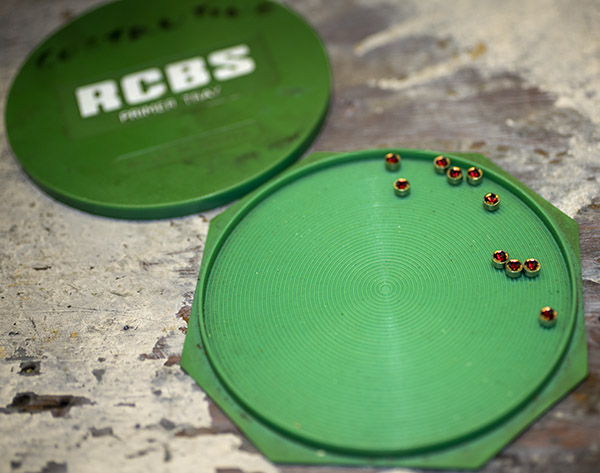
That green circular deal on the left in the photo above is the primer tray.  It consists of a base and a lid.  You take the lid off and drop the primers into the base, like you see below.

When you do that, though, invariably some of the primers will face up and some will face down.  We want them all facing down in the tray’s base, and we get that by jiggling the base.  There are little circumferential ridges molded into the base, and when you jiggle the tray, it makes all the primers face down (see below).

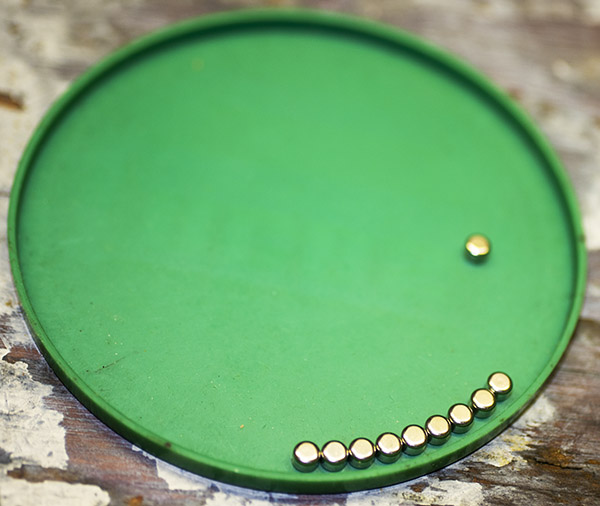
Get ready for more cleverness here, folks.  What we do next is put the lid back on the primer tray, invert it, and then remove the base from the lid.  That leaves us with the lid, and all the primers in it are facing up (see below).

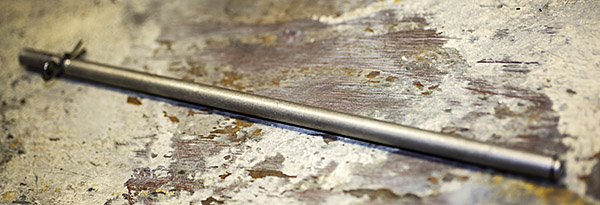
At this point, we pick up the primers from the tray using a primer pickup tube like you see in the photo below.

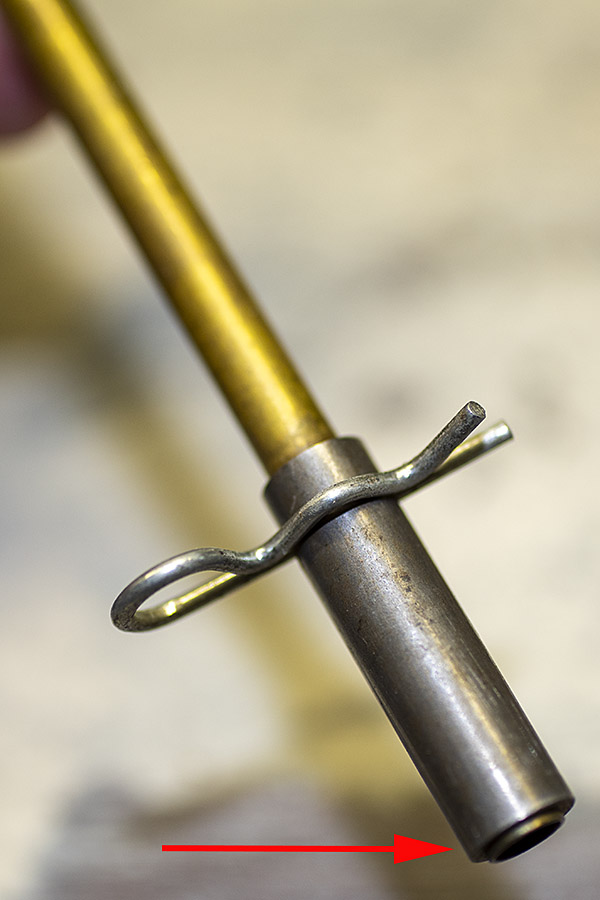
The tube you see in the photo above is an RCBS primer pickup tube.  It’s a hollow tube with a spring catch on one end and a spring clip on the other.  What you do is take that tube and push it down (spring end down) on top of each primer.  That stacks the primers, one on top of the other, in the tube.  Then you invert it over the primer magazine on the Star reloader, remove the spring clip, and all the primers in the pickup tube drop into the Star’s primer magazine.

Star reloaders originally had a brass primer pickup tube, but that didn’t come with the one I have.  I’m not complaining; my Star reloader was free.  And I figured I’d just use an RCBS primer pickup tube, because I knew had three or four of those stashed away somewhere.  But I couldn’t find the things.  Then I remembered I had put a bunch of reloading odds and ends in a 50 cal ammo can somewhere, and I went through maybe 10 ammo cans before I found it. I used the RCBS primer pickup tube and I had to hold it carefully in alignment with the Star’s primer magazine when transferring the primers from the inverted tube, pulling the pin, and letting the primers fall into the Star brass primer magazine. It worked just fine. It wasn’t the original Star gear, but hey, you go to war with the Army you have.

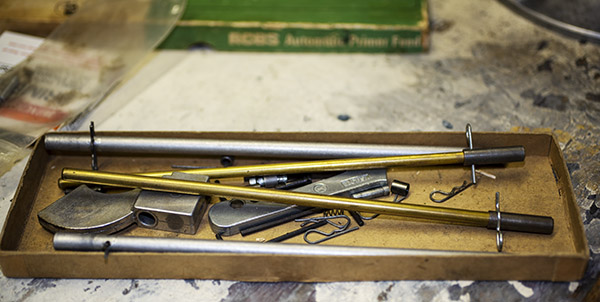
After I did that, I went on to other things.  I thought I was doing pretty good, you know, finding those RCBS primer pickup tubes, but the box they were in kept playing over and over again in my mind.  Something was tickling the neurons, but I didn’t know what it was.  Then it hit me.  I remembered earlier in the day when I took the RCBS primer pickup tube out of the box.  I could see it clearly in my mind:

There were two other brass primer pickup tubes in that box.  In my eagerness to get the RCBS primer pickup tubes (the ones I was looking for), I reached right over the brass tubes.  Could it be?  I put that stuff away a decade ago, way before I ever had the Star.

I went back to that box immediately, and son of a gun, there were not one, but two Star original brass primer pickup tubes. Two! I think they came from Sue’s Dad before he passed away more than 10 years ago (he was a reloader, too), and I got a lot of his old bits and pieces. He never had a Star reloader that I ever saw, but he must have latched onto these two primer pickup tubes somewhere along his journey through life. How about that?

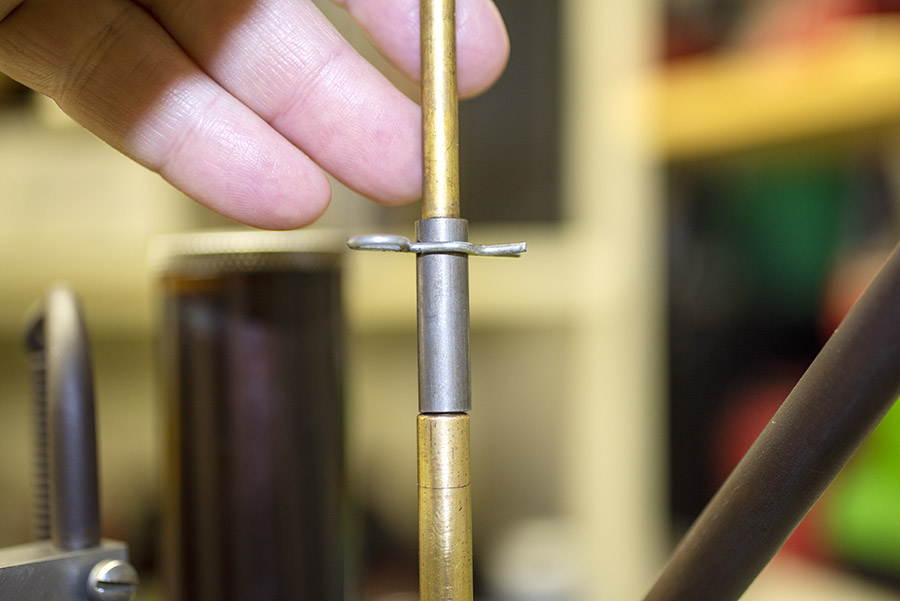
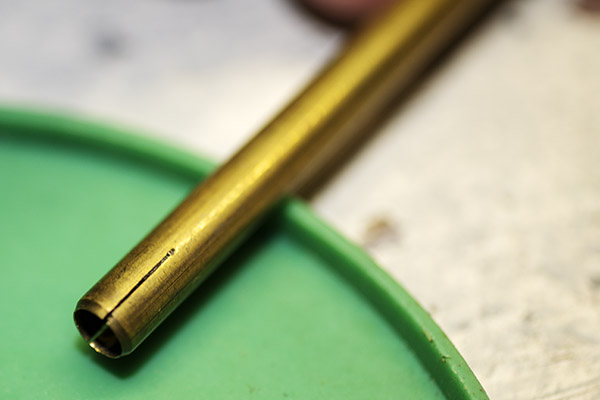
So, back to the story du jour…and more of the Star folks’ cleverness.  Star used a slightly different approach than did RCBS.  For starters, they made a cross cut in the pickup end of their primer pickup tubes to give the spring tension needed to hold the primers in the tube.

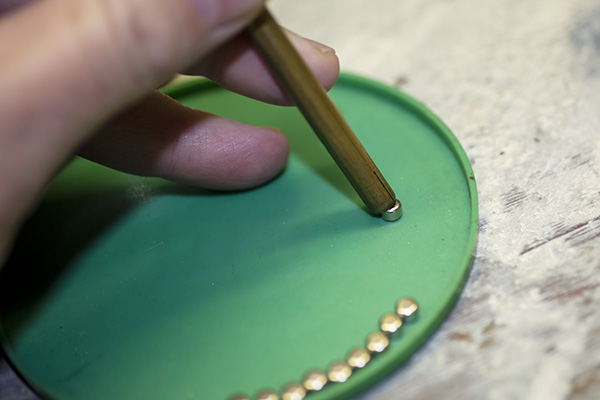
I started picking up a batch of primers from the primer tray lid with my newly-discovered Star primer pickup tube.

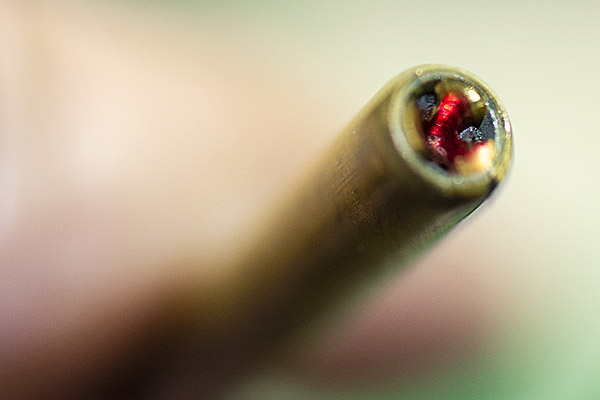
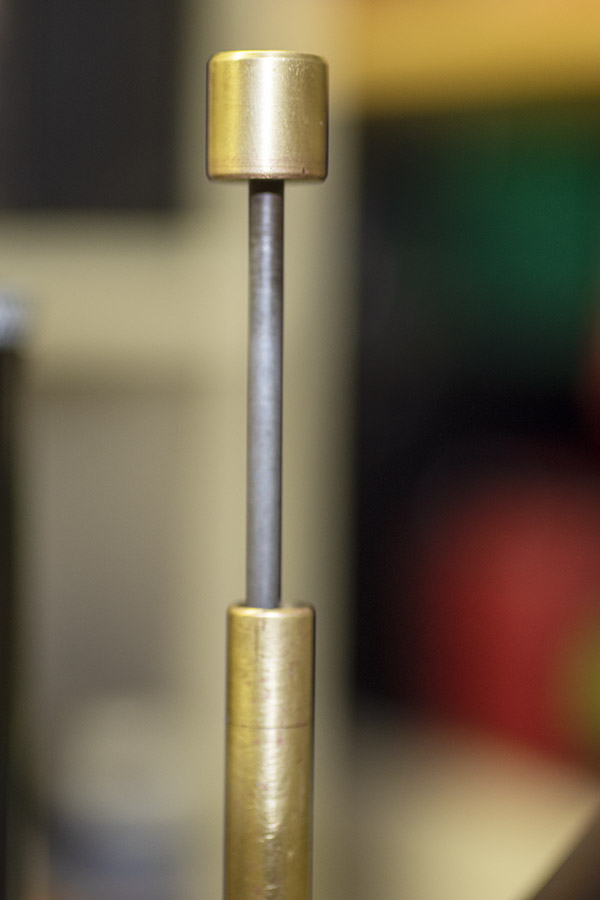
When you get that last one, you push it the rest of the way in with a probe (not your finger).  With apologies in advance for the inadequate photo depth-of-field, here’s what the last primer looks like in the Star tube.

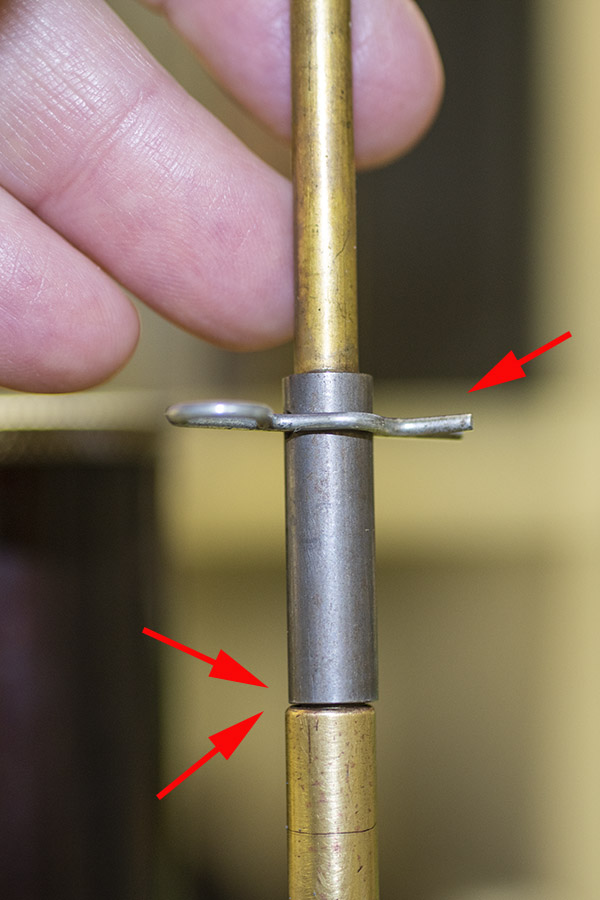
Then you invert the tube, so all the primers are at the other end.  The spring clip keeps them from falling out.  There’s a flange on the end of the Star primer pickup tube.  It interfaces with the Star reloader’s primer magazine to keep the primer pickup tube aligned with the primer magazine tube.

Here’s the top end of the Star reloader’s primer magazine, with the primer follower in place.  I removed it and placed the primer pickup tube on top.

At this point, I then removed the spring clip, and all the primers that were in the primer pickup tube transferred (gravity feed!) into the primer magazine.

So there you have it. The Star is up and running, and I’ll post about cleaning up a few more details on this magnificent old machine in the next Star blog. Stay tuned!


More cool reloading stuff is here!

Read the rest of the Star reloader resurrection here!

Sign up for email notifications when we post future blogs here:

Jeff’s Guest Blog

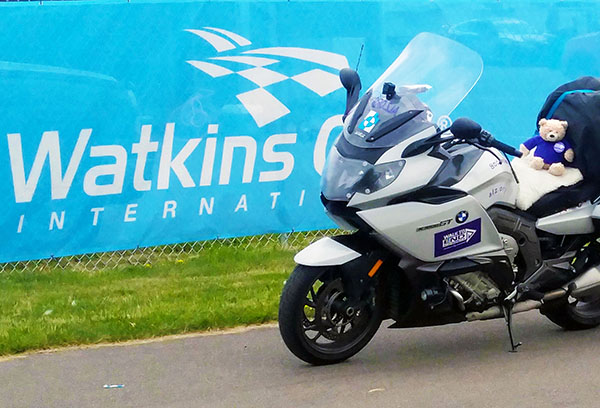
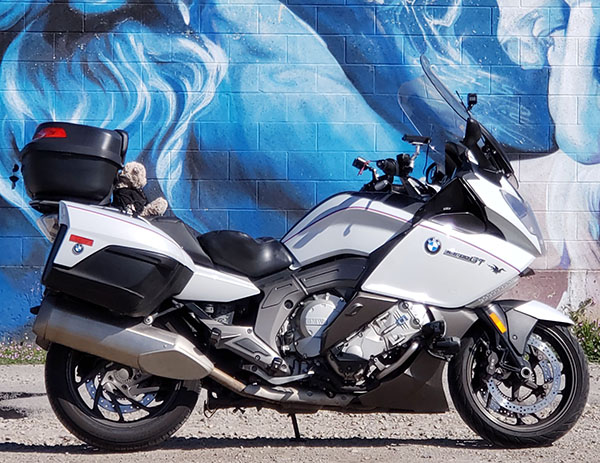
We love guest blogs.  This is one from good buddy Jeff, who rides a BMW with his teddy bear Jay.   It came about from a comment Jeff made on one of Gresh’s blogs, and in that comment he included his YouTube channel address.   Being a curious sort, I went there and I was blown away by the content and the quality.  One that caught my eye immediately was on Utah’s Highway 12, which runs from just east of Bryce Canyon National Park to Capitol Reef National Park.  I’ve ridden it several times, and I believe it is perhaps the finest motorcycle road in America.  The Highway 12 video is posted at the end of Jeff’s guest blog, along with a link for his YouTube channel.  And with that, let’s get to the main attraction.  Over to you, Jeff!


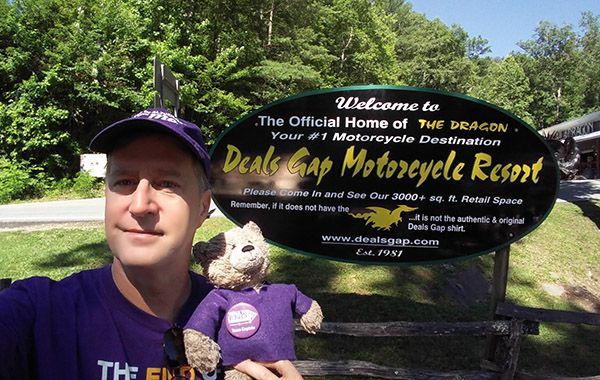
Jay is a teddy bear and my constant companion. I’m a guy. And 58 years old. How did this happen?!?

Usually this sort of personal revelation involves a phrase like “…Well, there was tequila involved, ok?” or something like that. For once in my life that was not the case.

I started riding motorcycles in college. I was born and raised Mennonite, so a red 1978 Yamaha XS 400 got me a lot of attention at a Mennonite school. I was hooked!

40 years later I’m riding more than ever. In 2011 I moved to Salt Lake City, UT and met the Lovely Laura the 4th day I was here. We’ve been together ever since.

Very early on in our relationship I gave Jay to Laura as a gift. Her family didn’t know about me yet. Her Mom was born and raised Mormon and dating a man with a MOTORCYCLE just wasn’t done in the 50’s and 60’s. Luckily I caught her daughter at a weak moment, so occasionally I’d steal Jay (we didn’t call it breaking and entering) and take him on adventures.

It would be 2 p.m. and Laura would be in a meeting somewhere and her phone would ding. There on her phone would be a picture of Jay having some grand adventure in Park City, UT, or having a beer at one of our favorite restaurants. Once he even went to Las Vegas! I loved making her smile like that.

When it came time to ride home to Indiana for my girls’ graduation from high school and college, one of my daughters asked, “Well, is Jay coming too?” – and so started Jay’s first Big Adventure.

Packing for 3 weeks on the road left no room for Jay in my luggage, so I strapped him to the side of the duffel bag I had strapped to the back seat. What I learned, was that when a motorcycle goes by a sleepy driver in a car at, say, something approaching triple digits, if I ran across them at a gas stop, they were rarely pleased. But with Jay along it always started a conversation instead. From that moment on, he always traveled with me and it got to be my ‘thing’.

I have been a driving instructor for BMW, Porsche, Ferrari, and a host of other groups for over 35 years with over 15,000 racetrack miles and a quarter million street miles. I joined a bunch of sport-bike groups to ride with here in Salt Lake City and invariably I’d get these strange looks showing up for a canyon ride.

“Dude! Who invited Grandpa on the touring bike? OMG he’s got a teddy bear with him!”

After blowing them all off in the twisties, I slowly earned their respect. In the pre-ride bench racing sessions, it would all go great until one of them would say, “Uh oh, Jay’s back!” For a fuzzy little bear, he has serious ‘street cred’.

Anyway, in 2017 the stars aligned, and I planned the trip of a lifetime. I decided to ride from Salt Lake City to Los Angeles, CA to dip my toes in the Pacific Ocean and then head east to repeat the toe-dip in Portsmouth, NH, not far from my twin sister. The ride was dedicated to raising awareness for the Alzheimer’s Association as by now Laura was the Director of Development for the State of Utah. Jay and I stopped at Alzheimer’s Association offices all across the USA. That trip is documented on our Instagram page #jaysbigadventure.

I’ve always enjoyed helping people with car and motorcycle maintenance and started our youtube.com channel to continue to teach people about cars, motorcycles and to raise awareness for the Alzheimer’s Association’s fight to cure this terrible disease. It is the only one of the top six killers in the USA that has no treatment, no cure, and no way to manage or control the symptoms.

Therefore, the end credits of every one of my videos has contact info to help people learn that there is help not only for the sufferers, but the supporting caregivers as well. 100% of their services are free.

Nine years ago, buying Laura a cute bear at a BMW dealership, I had no idea what a profound change he would bring to my life. I can’t wait to see what he comes up with over the next 9 years!


Jeff, that’s an awesome story.  Our readers, Joe Gresh, and I thank you for sharing it with us.

Here’s the Highway 12 YouTube video I mentioned above:

Jeff and Jay’s YouTube channel is here.  I subscribed to it; you might want to consider doing the same.


Never miss an ExNotes blog!  Sign up here: