Minimizing Travel Expenses: Three Significant Factors

By Bobbie Surber

Since I usually travel 50 percent of the year, I am frequently asked if I have an endless income stream or receive payments from dubious sources to afford this lifestyle.  The answer is no to both. Many people need help understanding that traveling can be as cheap or cheaper as living your normal day-to-day life.  This is especially true once choosing to travel outside the United States of America.  This blog will cover the three most significant factors that keep expenses to a minimum: airfare, lodging, and packing. Before going any further on this topic, I will provide this disclaimer: If you like luxury travel, skip this blog post! To travel successfully and feel the true heartbeat of any location requires you to be one with the locals and travel very modestly.

Airfare

I’ve tried many search engines over the years and found Google Flights the best. Learn the basics, and if you use Chrome, add Chrome Extensions, as this will give you average leg distance for each flight.

Some general rules follow.

Book in advance. Generally, the earlier you book your tickets, the cheaper they will be. Booking at least 2-3 months in advance can help you find better deals.

Avoid peak travel times. For example, consider traveling in the spring and fall if your destination is Europe. Prices will be 30-70% less, and you benefit from fewer tourists than in the busy and often hot summer months.


Help us help you:  Please click on the popup ads!


If traveling from the USA to Europe, don’t be focused on your final destination; instead, look into the least expensive port to fly into. Once in Europe, you can take an inexpensive local airline to your final destination. I often fly into Madrid, Spain, Frankfort, Germany, and Paris, France, spend a day sightseeing or revisiting favorite haunts, then the next day or two, I fly to my final destination. Ryan Air, Vueling, Easy Jet are the three I fly the most often.

Be flexible with your travel dates. If you have some flexibility in your travel dates, you can compare prices across different days and choose the cheapest option. Google Flights calendar will let you see the prices daily, allowing you to modify the departure and return date for the most significant savings. Pop-up suggestions from Google will give you different dates and/or a less expensive nearby airport.

Consider alternative airports. Flying in and out of smaller or alternative airports is often cheaper than flying into major airports. I live in Sedona, Arizona, and my saved airports are Phoenix, AZ, Tucson, AZ, Albuquerque, NM, and Las Vegas, NV. I have often found tickets that are hundreds of dollars less leaving out of LAX as well.

Sign up for airline newsletters. Airlines often send out promotions and discounts to their email subscribers, so signing up for their newsletters can be an excellent way to stay informed.

Use reward points or miles. If you have reward points or miles from a frequent flyer program, you can use them to offset the cost of your ticket. Also, get an Airline credit card that pays you in travel miles and awards for everyday purchases.

Lodging

If traveling alone, consider staying in a hostel. Many have private rooms that are less expensive than a hotel. Especially in Europe and Asia, hostels are for more than just the youth. You can easily filter out hostels that cater to the party crowd.

Consider alternative accommodation options. Instead of booking a traditional hotel room, be open to alternative options such as vacation rentals, Home Exchange, Couch Surfing, or Bed and Breakfasts. These can often be cheaper and offer a unique experience. My favorite booking sites are Booking.com, HostelWorld.com, And Airbnb. When in Europe, I like Momondo.com

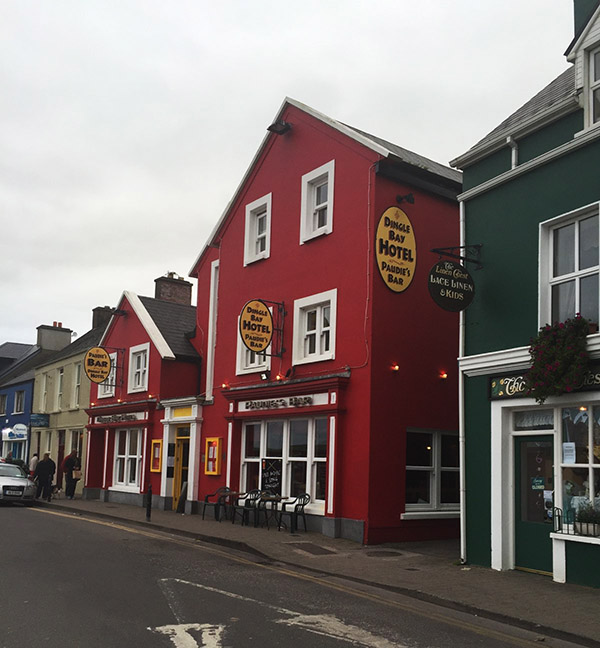
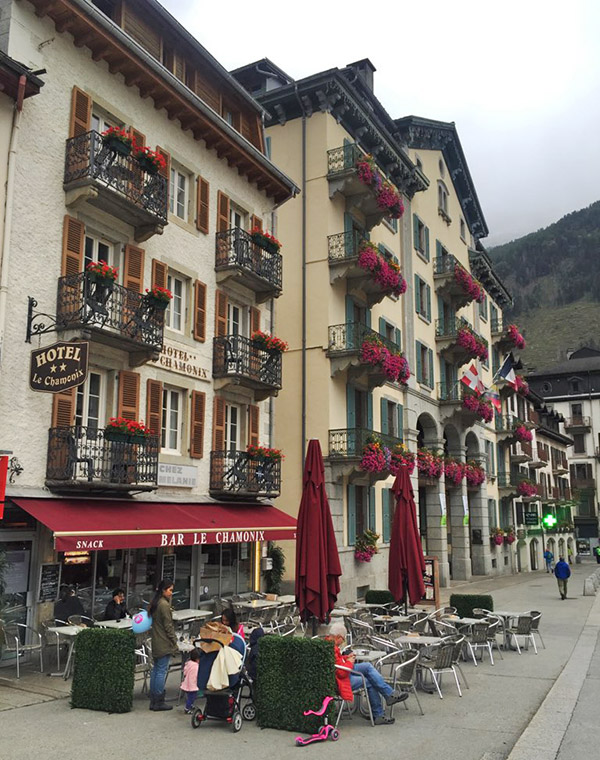
Avoid staying in tourist neighborhoods. Often, I can save 50% by selecting lodging a short walk away from the tourist areas with the added benefit of seeing and interacting with more locals.

Book in advance.  Like airline tickets, booking your hotel can help you find better deals. Hotels often offer discounts for early bookings. A disclaimer, If you want a more extended trip, don’t box yourself in by booking every portion of your travels; consider booking the first three nights when possible. This will allow you to adjust your itinerary and avoid cancelation fees.

Sign up for hotel loyalty programs. Many hotel chains offer loyalty programs that can provide you with discounts, free upgrades, and other perks.

Travel during off-peak times. Like airline tickets, traveling during off-peak times can often result in lower hotel prices.

Use credit card rewards. Some credit cards offer rewards points or cashback for hotel bookings. Check to see if your credit card has any rewards programs that can be used for hotels.

Negotiate directly with the hotel. Try negotiating the price if you book a hotel room. Sometimes hotels will be willing to offer a discount if you ask.

Packing: Why It’s Crucial 

Packing lightly for travel is a great way to save time, money and reduce stress. You will also avoid paying check-in luggage fees, avoid lost luggage, and have far more freedom to choose buses and trains for transportation rather than expensive taxis.

Here are a few strategies that I find helpful.

Make a packing list. Before you start packing, list all the items you must bring. This will help you avoid overpacking and ensure that you remember everything necessary.

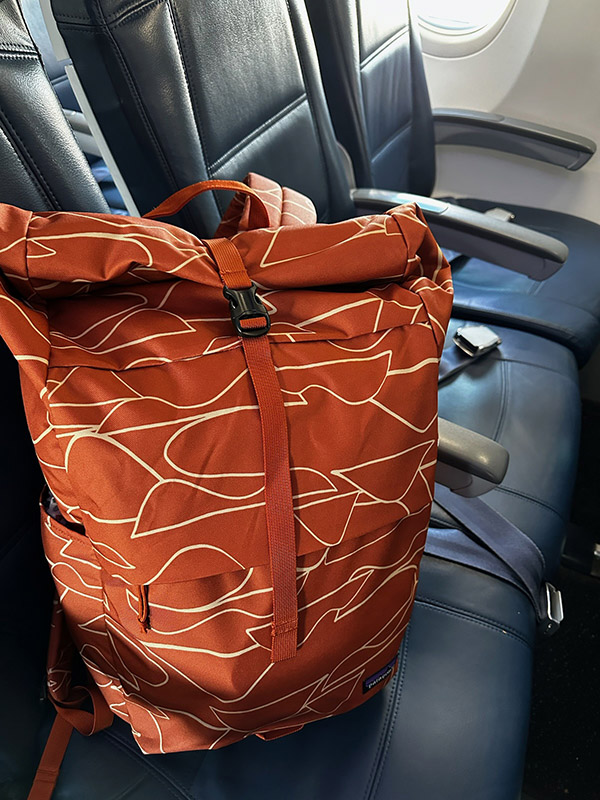
Choose the right luggage. Use a lightweight, durable suitcase or backpack that is the appropriate size for your trip. A smaller bag will encourage you to pack less and help you avoid excess baggage fees. Consider using a small daypack or travel backpack that will fit under your seat and avoid the struggles of pushing luggage with wheels on a city’s cobblestone street.

Pack versatile clothing. Choose items that can be mixed and matched to create different outfits. Stick to neutral colors and avoid bulky items that take up much space. I pack only neutrals and then add one or two colorful scarves to add interest to my limited wardrobe.

Use packing cubes. Packing cubes can help you organize your belongings and maximize space in your luggage. They also make it easier to find what you need without unpacking everything.

Limit toiletries. Instead of bringing full-size toiletries, opt for travel-sized items or only the essentials. You can always buy more toiletries at your destination if you run out.

Wear your bulkiest items. If you need bulky items such as a jacket or boots, wear them during travel to free up space in your luggage.

Avoid packing “just in case” items: Avoid packing items you might not need. Be realistic about what you will use during your trip.

Assemble your luggage/backpack several days in advance and critically look at what you can leave behind.


If you are like me and would rather spend your money on experiences instead of expensive airfare, lodging, and overpacking remember to be flexible and open yourself up to the experience of being a local rather than a tourist. Study up on airfare and lodging costs to better locate deals. Most importantly, get out there and travel!


Never miss an ExNotes blog:

Potpourri Part 1

By Joe Gresh

Clutter tends to accumulate in our lives. The unfinished and the left-hanging gather dust motes and wind up in soggy cardboard boxes of odds and ends. So it is with ExhaustNotes stories: some of them just sort of fizzle out inconclusively yet what remains is not enough meat for a stand-alone follow-up story. In an attempt to close the books on a few articles and give our dear readers peace of mind here are a few loose ends, tied.

The Harbor Freight Tire Machine

I’ve used the Harbor Freight tire machine to change five motorcycle tires and can report a 100% success rate. These successes include installing stiff knobby tires on the wide Husqvarna rims. Five in a row without a leak is unheard of for me. I’ve pinched a tube 5 times in a row! My usual success rate is around 50%. While the tire changer makes the job easier it’s still a bit of a work out. The built-in bead breaker is a godsend for old, stuck on the rim beads and having the rim held securely at waist level is nice on my sore back.

Working the machine, I ended up mostly using regular tire irons instead of the plastic duck-on-a-lever contraption. I haven’t given up on the duck lever and it may be a case of user error. I plan on making the duck part pivot on the lever part to allow it to mate with the curve of the rim better. My experience with the HF tire changer has been positive even if I did have to do a few modifications to make the thing function. I feel like I no longer have to fear the Husky’s tires and am confident I can change them in a reasonable amount of time without too much damage. I’m not sure HF still carries the motorcycle tire adapter so if you want one you might have to check several stores to see if they have the thing in stock.

The Husqvarna 21” front wheel conversion

After spending several hundred dollars and several days labor on the failed Husky wheel conversion I’m happy to report the bike is now back to stock configuration and rideable. After grinding clean through the old caliper I had to buy a new 4-piston Brembo caliper. I also replaced the wheel bearings as the originals had suffered enough of my abuse pounding them out of the wheel hubs twice.

Since I have given up on the 21” wheel idea I bought a Continental TKC knobby in the Husky’s original tire size. The tire cost $140 from Amazon and the knobs are about as high as the worn out knobs of a real dirt tire. The TKC is the knobbiest 17” tire I could find that fit the rim. I’m hoping the TKC will provide a bit more grip off road.


Help us bring more content to you:  Please click on the popup ads!


My buddy Mike graduated from a 390 KTM and has bought a new 890 KTM and I’ll have to work the Husky a bit harder to stay up with his 100 horsepower dirt bike. I’ve also raised the Husky fork tubes up ½” inside the triple clamps, effectively steepening the rake a bit. The old street slick on front would push in the dirt making corners a sit on the gas tank type of deal. Loose gravel was like riding on marbles and mud would coat the old tire within one revolution making the bike feel like it was on ice. Maybe the deeper grooves between knobs will give the mud some place to squish. Anyway, the bike looks much more dirt ready if a bit silly with the tiny front wheel.

Yamaha RT1-B 21” front wheel conversion

After my not so shocking failure converting the Husky to a 21” front wheel I had a brand new 21” knobby tire just sitting in the shed. Mirroring the same poor tire choice issue as the 17” Husky, the 1971 Yamaha’s 3.25 X 19” front tire is an oddball. I have been running through my inventory of $10, new old stock Metzelers but those tires were approaching 30 or 40 years old and had weather checking on the sides. I was getting a bit of chunking on the side knobs also as the rubber was just plain old and breaking apart.

Luckily for me, the Yamaha 21” conversion went smoothly. I bought a 1975 Yamaha DT400 front wheel, which is nearly a drop in conversion. The actual size of the tall-ish Metzeler 19” is only about ¾” shorter than the new 21” tire. I thought the bigger wheel might rub the fender but there’s clearance. I like the low fender look on the old Yamaha so I might raise the fender a tiny bit for more mud room. It’s usable as is, I’ll just have to budget my mud riding.

The old, looping, brake cable guides were in the wrong spot for the new wheel. The brake cable on the new wheel is routed straight up from the wheel, in front of and parallel with the fork legs making the cable shorter and more direct as there is only one turn in the run. So I had to buy a new brake cable. I bent up a small piece of file cabinet to make an upper cable guide, for the bottom I used an off the shelf Adel clamp.

Old Yamaha Enduros are not known for having powerful brakes so I was surprised to see the 1975 conical hub had a ½” larger brake drum. The extra braking power provided by the 6” drum is counteracted by the larger diameter wheel so it’s kind of a wash in the braking department. At least I didn’t go backwards.

At the end of all this back and forth motion I have two motorcycles with new front tires and a warming trend on the way. Spring is right around the corner and Mike has a new 890 KTM that we need to get dirty. We have the whole state of New Mexico to explore. I’ll have some more potpourri for ExhaustnNotes as I continue to tie up those loose ends.


Never miss an ExNotes blog:

Shield Savvy

By Joe Berk

I promised an update on my Smith and Wesson 9mm Shield, and this is it.  I’ve put 2,500+ rounds through the Shield (all reloads with different bullets and powders).  Until I recently took my Shield to good buddy TJ, I was growing increasingly dissatisfied with the pistol’s frequent failures to extract, and I wasn’t alone.  If you Google “failure to extract” and “Smith and Wesson Shield” you’ll find a lot of people are having this issue.  My problem is in the rearview mirror, though, and my Shield is 100% reliable now.  That’s because of TJ.  I’ll get to that in a minute.

That target above?  It’s 50 rounds at 30 feet through my Shield, shooting offhand.  If you’re a reloader, here are the load specifics:

      • Jim Gardner 125 grain powder coated roundnose bullets (Jim sized these to 0.356 inch, which is his standard bullet).
      • Cartridge overall length 1.145 inches.
      • 5.4 grains of Accurate No. 5 propellant.
      • Lee factory taper crimp (light crimp; see below).
      • Ammo loaded on Lee Classic 4-Turret press.
      • Mixed brass.

Ordinarily, I tailor a load to the handgun, and I thought I would be able to do that relatively easily with the Shield.  I found that not to be the case.  The Shield seemed accurate enough with nearly every load I tried, but nearly all had reliability issues.  On the low end, the lighter loads didn’t have enough energy to cycle the action (a common enough problem on compact semi-autos).  Light, mid range, and hot loads all gave the Shield extraction issues.  The Shield experienced a failure to extract about every other magazine.   It was very frustrating.  I scoured the Internet forums for this issue and the opinions were all over the map.  Here’s a smattering of the drivel I found:

      • Don’t use Winchester ammo because the rims are smaller (I measured them; that was baloney).
      • Don’t use cast bullets because they hang up (I knew that was baloney).
      • Don’t shoot aluminum ammo (which I never do, anyway).
      • Don’t shoot 115-grain bullets.
      • Don’t shoot 125-grain bullets.
      • Don’t shoot 147-grain bullets.
      • Clean your gun after every round (seriously?).
      • Don’t limp wrist your gun (again, seriously?).
      • Don’t do this, don’t do that, don’t do this other thing…
      • Do this, do that, do this other thing…

It was all written by people who apparently love the sound of their keyboards clacking.  None of it was useful information.  I felt stupid for wasting my time reading it.


Help us keep the content coming:  Please click on the popup ads!


What I found was that the extraction problem occurred more with powder coated bullets than either plated or jacketed bullets.  Other than that, there wasn’t a lot of correlation between any of the load variables I could play with and the gun’s failure to extract propensity.  Then, during one range visit when I had a failure to extract, I fell back on my failure analysis background.  I put the loaded gun down on the bench (being careful to keep it pointed downrange) and took a photo with my iPhone.

A cartridge case caught during extraction on the mouth of the case immediately below it.

Wow.  How about that?  It was apparent that the case being extracted was hanging up on the case mouth of the round still in the magazine, and it was a strong enough obstacle to pull the extractor off the rim.  This brought up a lot of questions in my mind centered on the crimp and the bullet.  The Gardner bullets have a slight ramped step just north of the crimp.   And when I crimp a bullet for a semi-auto, I put a slight taper crimp on it with the Lee taper crimp die.  I want enough of a crimp to remove the case mouth flare (part of the reloading process to assure the bullet will enter the case mouth without shaving lead or copper), and enough to assure the cartridge will chamber easily.  Maybe I didn’t have enough crimp, I thought, and that was causing the case being extracted to hang up.

One of my reloaded 9mm rounds with a taper crimp and a Gardner powder-coated bullet.

I examined my ammo and I thought it looked good (actually, I thought it looked great; like most reloaders, I enjoy looking at my finished ammo).  But, to make sure, I loaded another box with as much taper crimp as I could get out of the Lee die.  Lee is right when they say their taper crimp die makes it impossible to deform a case: I put a very pronounced crimp on all the cartridges in the next box of ammo.  But that wasn’t the answer, and it created a new problem.  With a semi-auto like the 9mm or the .45 Auto, the cartridge headspaces on the case mouth.  When I used a more pronounced crimp, I started getting misfires.  The rounds were going too far into the chamber, and the firing pin wasn’t igniting the primers reliably.  Nope, more crimp wasn’t the answer.

At this point, I was getting a little frustrated.  All these problems aside, I wanted to like my Shield.   I wanted to use it as my concealed carry weapon, so I needed the thing to be reliable.  Faced with this issue, I knew it was time for what works every time:  A visit to TJ’s Custom Gunworks.

TJ examined the Shield.  He observed that the magazine positions the first cartridge in the magazine unusually high in the gun, and that was probably aggravating the failures to extract.  But there’s not really anything you can do about that.  It’s the gun’s design.  It is what it is.

The Shield’s magazine sits relatively high.
A loaded round waiting to chamber when the Shield’s slide returns to battery.

TJ then took a look at the extractor.  It was pretty dirty with combustion residue, but he felt it should work.   TJ, honest as always, told me he could polish the ramp and the chamber (they come from the factory pretty rough), but he didn’t know if that would fix the failures to extract.  I asked TJ to proceed.

A photo from TJ showing how dirty my extractor was. Even though it was funky (shame on me), TJ felt it would not have caused the extractor to slip off the case rim.

Here are a couple of photos of the chamber and the ramp as they come from the Smith and Wesson factory.   The Shield always fed and chambered reliably; it was only the extraction that was an issue.  TJ explained that if the chamber is rough, it can hang on to the fired case as it is being extracted.  I’ve experienced that on other guns.  The Shield’s chamber and its ramp looked about like I’d expect them to look on a mass-produced pistol, which is to say not very good.  I asked TJ to work his magic on both the ramp and the chamber.

The Shield’s feed ramp and chamber as delivered from the factory. Rough, but not ready.
Another view of the factory Shield feed ramp. It looks like it might have been cut by hand with a dull chisel.

TJ did his usual excellent job, and here’s what things look like now.

Pure TJ magic.
What a good ramp looks like.  Slick.  Smooth.  Shiny.

TJ told me he also put a slight undercut on the extractor to allow it to get a better grasp on the case rim.

The Shield’s extractor, as seen from the bottom. This is the piece that pulls the fired case out of the chamber. TJ undercut the area indicated by the arrow to give the extractor a better grip on the case.

I picked up my Shield a few days later and went to the range that afternoon. The Shield is now what it is supposed to be.  You saw the target at the top of this blog.  I fired 50 rounds without a single failure to extract and eject.  The gun just feels a lot smoother and slicker now.  My Gardner bullet and Accurate No. 5 load is perfect.  And the recut extractor drops the cartridges in one nice small pile on the floor behind me.  Wow.  I’m impressed.  Then, just to make sure (and because I was having so much fun) I fired another box of 50 rounds (again, with ammo loaded on the Lee Classic Turret press using the load at the top of this page).

Another target, another 50 rounds. Reliable as death and taxes, and accurate. Now, the Shield is as it should have been from the factory (thanks to TJ).

The Lee Classic Turret press does a magnificent job, and now, so does my Smith and Wesson Shield.  It’s the way the pistol should have come from the factory.

It’s bothersome that most of my recent gun purchases have required additional work to get them to perform the way they should.  In my former life as an aerospace manufacturing guy, I used to manage organizations with machine shops.  I know it would cost a little more for the gun companies to do the kind of things TJ did to my Shield (and several other guns, for that matter).  I wish the gun companies would do that; they ought to just hire TJ as a consultant (he knows what they need to do).  The bottom line here? If you have a Smith and Wesson Shield and you want it to be what it is supposed to be, get in touch with TJ.

There are a lot of things I like about the Shield.  Accuracy and illuminated sights are at the top of the list.  You can get a feel for its accuracy from the targets shown here.  None of this was bench rested; it was all shooting offhand on an indoor range with banging and clanging and brass flying all around me.

I found that after firing a a box of ammo, gunshot residue tends to occlude the sides, front, and rear of the front sight, and that causes the red to glow a lot less.  But that’s a minor point.  The Shield’s high visibility sights are great.

Holstered, the S&W Shield is about the same size as the Rock Island Compact 1911.
Another Shield-to-Compact-1911 comparison: The holstered Shield on top of the holstered 1911. Length and height are about the same.
The Shield is narrower than the 1911, and much lighter. It should be easier to carry concealed.

I bought a Bianchi leather holster for the Shield.  It’s similar to the Bianchi I use with my Compact 1911.  When I put the Shield in its holster I was surprised:  It’s really not any smaller than my Compact 1911.  It’s a bit narrower, but by the time both guns are holstered, the overall width is about the same.  Where the Shield has a clear advantage, though, is weight.  And even though the Shield with its polymer frame is much lighter than the Compact 1911, the recoil is quite a bit less than the .45.  Now that the Shield has been made more reliable by TJ, it will make a good concealed carry gun.  Incidentally, TJ worked his magic on my 1911, too.  It’s one of the most reliable handguns I’ve ever owned.

Ten rounds from the Compact 1911, ten from the Model 60, and ten from the Shield. All are in the 10 ring, 28 of the 30 are in the X-ring.

Never miss an ExNotes blog:

Wiley Coyote Fact Checked

Did you ever get the feeling someone is watching you?

The coyote you see above was on the other side of fence just outside my backyard early yesterday.  Sue spotted him (or her?), so I grabbed the Nikon, mounted the 70-300 lens and took a photo through the window.  Sue asked what it was doing, and then it spoke up.

“Is the Kindle edition of A Cup O’ Joes available yet?”

I speak Coyote (a mostly tonal language), and that was what it asked.  Yes, I answered.  It is.  You can purchase it here.

Edit:  A short while after posting the above, Facebook fact checked it.  Here’s what they came back with:

The above is partly true.  As claimed above, you can purchase the Kindle edition of A Cup O’ Joes here (or you can click on the screen capture pic above).   The coyote you see in the featured photo above actually was behind Berk’s backyard fence yesterday, and Berk actually shot that photo.  Berk does not, however, speak Coyote (that claim is false).  And, the coyote in the above photo is not named Wiley (his real name is Deogi).


Never miss an ExNotes blog:

Live on Amazon!

A Cup O’ Joes is available now on Amazon.  Every bathroom in every motorcycle shop and every motorcyclist’s home needs this book.  They make great gifts.  Check out the blurb:

Joe Gresh and Joe Berk bring you a collection of their favorite articles and stories from the ExhaustNotes.us website, Motorcycle Classics magazine, Rider magazine, Motorcyclist magazine, ADVMoto magazine, and other publications.  Ride with the Joes in China, Colombia, Mexico, New Zealand, Canada, the former Soviet Union, and the United States.  Read their opinions on motorcycles, accessories, and more.  Humor, wit, insight, and great reading…this collection of motoliterature belongs in your library.  Published in black and white.

You could wait for the movie, but the movie deal fell through.  You know the story…I wanted Leonardo di Caprio to play me or Gresh, the studio countered with Danny DeVito, and things fell apart after that.

Seriously, though, you need this book.  It will make you taller, skinnier, more attractive, and a faster rider.  Trust us on this.


Never miss an ExNotes blog:

A Cup O’ Joes

By Joe Berk

Marcus, good buddy…we owe ya, Dude!

A Cup O’ Joes: I loved that title the moment I saw it and I knew it would be the winner, and Gresh and I felt the same way even after all the other suggestions arrived.  We thank you all for your ideas.  Marcus, we especially thank you.

The book is just about done.  Good buddy Jack Lewis wrote a killer Foreword, we just finished the front and rear cover (that’s what you see above), and we’re feeling good about this.  We’re going to take one more swing through before we hit publish, and then you’ll be able to order A Cup O’ Joes directly from Amazon.  The Kindle e-version will follow shortly thereafter.

Marcus, we’re going to send a signed copy to you.  Give us a little while.  I have to get a copy, sign it, USPS it to Gresh, he’ll sign it, and then it will be on its way to you.  Thanks again.

A Cup O’ Joes.  I love it.


Never miss an ExNotes blog:


Have you clicked on the popup ads today?

The Wayback Machine: Indiana Jones in Liqian

By Joe Berk
Yes, it really was like that. Somewhere along the Silk Road (the actual Silk Road) in China. I parked my RX3 when I saw the double rainbow, thinking someday I might use the shot in a blog about this adventure.

Almost 40 years ago, I saw my first Indiana Jones movie and it affected me profoundly.  I started traveling the world stumbling upon lost empires. Things that have been swallowed by time, as they say.  My motorcycle ride through Colombia had some of that.  The Baja adventures have a bit of it, too.  But none of the rides had more of an Indiana Jones flavor than did the ride across China.  That ride was three years ago this month, and I still think about it every day.  There were several things we saw in China that would have been right at home in an Indiana Jones movie.  One was Liqian.   I can best tell you about it with an excerpt from Riding China, the story of the ride with Joe Gresh across the Ancient Kingdom.

Gobi Gresh, aka Arjiu, stopping to smell the sunflowers in China.

The ride in the morning was just like yesterday. We rode the Silk Road at high speed, making great time in magnificent weather. I knew we were going to Wuwei (you could have a lot of fun with that name; it’s pronounced “woo wee”), but that was really all I knew about that day as we started out that morning. Boy, would this day ever be an interesting one!

It was to be a very full day, and Wuwei would be another one of those cities of several million people that seem to pop up in China every 50 to 100 miles. It was a huge city I had never heard of. China is an amazing place, and I was going to learn today it is more amazing than I could have imagined, and for a reason I would have never guessed. I’ve mentioned Indiana Jones movies a lot in this book. Today, we came upon something that could easily be…well, read on. This is going to be good.

After riding for a couple of hours, we left the freeway and entered a city called Yongchang. It seemed to be pretty much a regular Chinese city until we stopped. I needed to find a bathroom and Wong helped me. Wong is a big, imposing guy. He’s a corrections officer supervisor in Xi’an. He has a friendly look, but he can turn that off in a New York minute and become an extremely imposing figure. I saw him do that once on this trip, and I’ll tell you about that episode when we get to it.

Corrections Officer Supervisor Wong. He looks like a mischievous guy. This guy’s command presence was amazing. I saw him stop a car just by looking at it. Here, he’s enjoying the attention in Yongchang.

Anyway, I followed Wong through a couple of alleys and businesses until we came to an empty restaurant (it was mid-morning, and it had no customers). Wong spoke to the lady there, she nodded her head and smiled at me, and pointed to the bathroom. When I rejoined the guys back on the street, several women at a tailor shop (we had coincidentally stopped in front of a tailor shop) were fussing over Wong. He needed a button sewn on his jacket and it was obvious they were flirting with him. Wong seemed to be enjoying it. Like I said, Wong is a big guy, and I guess you could say he’s good looking. I think the women who were sewing his button on were thinking the same thing.

Beautiful young Chinese ladies. Mostly Chinese, anyway.  The one on the left is entering my phone number in her contacts list.

Three teenage girls approached us and wanted to know about our bikes. Like many young Chinese, they spoke English (in China, you learn English as a second language in grade school; it is a strong advantage in Chinese society if you can speak English well). They wanted to practice with us. It was the routine stuff (“how are you?” “hello,” and things like that) until one of the teenaged girls looked directly at me and asked, “Can I have your phone number?” Gresh and I both had a good laugh over that. I actually gave her my phone number and she carefully entered it into her phone (and no, she hasn’t called me yet).

I was enjoying all of this immensely, taking photos of the girls, the seamstresses flirting with Wong, and the rest of China all around me. There was something different about one of those teenage girls. I couldn’t quite recognize what it was, but to me she definitely looked, well, different.

Yongchang statues. They don’t look as Chinese as you might think they should. There’s a reason for that.

It was at about that time that Sean approached me and said, “Dajiu, do you see those three statues over there?” He pointed to three tall statues that faced us, perhaps 300 yards away. I nodded yes. “If you look at their faces, you will see that they have Roman features.” Truth be told, I couldn’t really see it in the statues because they were too far away, but I grabbed a photo and later, on my computer, I could see something different. But before I looked at the photo, it all clicked for me. That’s what had my attention with that girl. We were literally in the middle of China and she didn’t look as Chinese as her two friends. She looked different.

All right, my friends, I need to go tangential here for a minute or two and share this story with you. Hang on, because this is real Indiana Jones stuff. No, scratch that. I’ve never seen an Indiana Jones movie with a story line this good (and I’ve seen all of them).

More than 2,000 years ago, before the birth of Christ, the two most powerful empires on the planet were the Roman Empire and the Han Dynasty. These two superpowers of their time enjoyed a brisk trade relationship along the Silk Road. Yep, the very same trail we had been riding for the last few days. Between them (in what became Iran and its surrounding regions) lay a smaller empire called Parthia. For reasons only the Romans understood, Rome thought it would be a good idea to attack Parthia. They sent several Roman Legions to war (and to put this in perspective, a Roman Legion consisted of about 5,000 men). To everyone’s surprise (including, I would imagine, the Romans), the Parthians kicked Rome’s butt.

Wow, imagine that. Rome, defeated on the field of battle by the much smaller Parthian Empire. To put it mildly, things did not quite go the way the Romans thought they would.


Help us bring more content to you:  Please click on the popup ads!

All of this severely disrupted trade between the Han Dynasty and the Romans, and nobody liked that. “Why the hell did you do that?” the Han Dynasty asked Rome. “We had a good thing going and you screwed it up.”  At least that’s what I’m guessing the conversation went like.  You get the idea.

Cooler minds prevailed and the Romans  realized, yeah, that was a dumb move.  The Romans told the Parthians, hey, it’s over, let’s be friends again. The war ended, the Chinese were happy, the Romans were happy, the Parthians were happy, and trade resumed. All’s well that ends well.

Well, sort of. There was still that matter of those pesky Roman legions that had invaded Parthia. They didn’t come back from that war, and for two thousand years, no one knew what happened to them. The Romans probably assumed their Legionnaires had all been slaughtered.  No one knew until an Australian dude and a Chinese guy, both University archeologist types (starting to sound a little like Indiana Jones yet?) put a theory together in 1957. Hmmm, maybe those Romans had not been killed after all.

The Parthians, being bright enough to defeat the Romans, were not about to let the Legionnaires go home and perhaps attack them again in some future war. They didn’t want to kill the Romans, either. I guess they were kinder, gentler Parthians.  Here’s where those two Aussie and Chinese archeologists enter the picture. They hypothesized that the Parthians told the errant Legionnaires, “Look, we don’t want to kill all you guys, but there’s no way we’re going to let you go back to Rome. And there’s no room for you here, either. Your only option is to keep heading east. Go to China. Maybe you crazy warmongering Italians will find nice Chinese girls and settle down.”   With that, and as one might imagine, a hearty arrivederci, the Romans continued their eastward march straight into the middle of China.

And folks, the prevailing wisdom today is that is exactly what happened (although the prevailing wisdom evidently hasn’t prevailed very far, as I had never heard the story until that morning in Yongchang). In fact, prior to this theory surfacing, folks wondered why the Chinese referred to the area around Yongchang as Liqian. That’s not a Chinese word, and it’s unlike the name of any other Chinese town.  The folks who know about these things tell me it is an unusual word in the Chinese language.

Liqian is  pronounced “Lee Chee On.”

Get it yet?

Lee Chee On? Liqian?

Doesn’t it sound like “legion?” As in Roman legion?

A Chinese man in Liqian. This guy could be the Marlboro Man for a Chinese cigarette company!

I found all of this fascinating. I saw more than a few people around the Liqian area that had a distinct western appearance, and they all consented to my taking their photos when I asked. They recognize just how special their story is. The Chinese government is taking note of this area, too. They are developing a large theme park just outside of Yongchang with a Roman motif. We visited that theme park, and while we were there, Sergeant Zuo gave a book to me (printed in both English and Chinese) about the place. It is one of the two books I brought back from China, and that book is now one of my most prized possessions.

Imagine that:  Roman legions, resettled in the middle of China, in a town called Liqian.  And I rode there.  On an RX3.


That photo at the top of this blog?  All the gear, all the time?

Nah, it was nothing like that.  One of the Zongshen guys had this idea about making a movie with a Roman Empire theme (you know, being as we were in Liqian and all that), and he bought along gladiator costumes. I’m not sure what Gresh and I were thinking (we’re not normally into gladiator movies) but we let those guys talk us into putting the costumes on and taking a few pics and videos.  I guess you had to be there to understand it; it was all in the spirit of the ride.


Watch for our next Indiana Jones episode in China.  It’s about the lost Buddhist grottos at Mo Gao in the Gobi Desert.  There’s more good stuff coming your way.  Stay tuned!


Want to read more about the ride across China?  Pick up a copy of Riding China!

Your Worst Gun?

Here’s another story from good buddy Jose.  These are his opinions about his worst gun, a Cobra Derringer.  Jose gives us an interesting set of observations.


By Jose Armenta

Davis Industries of Chino, California, began manufacturing these cheap Derringers in 1982 until they were sued into oblivion in 1999. They are made of cast Zamak, a zinc alloy containing 93% zinc, 4% aluminum and 3% copper. You and I might call it “pot metal,” a material commonly used for inexpensive die cast model cars and other toys.

The Cobra Big Bore 38 Spl is small indeed.
Looking down .38 caliber junk barrels.
Pointing with index finger while firing with the middle finger. It’s the way some people shoot the Cobra Derringer, but I don’t recommend trying it. I don’t recommend this Derringer at all!

Cobra Enterprises acquired the Derringer manufacturing part of Davis and began producing identical guns in Salt Lake City, Utah. Then in 2016 someone had been carrying his Cobra Big Bore (in the 9mm Luger version) with the hammer resting on one of the firing pins, put it on a bench, and it discharged, hitting the gun’s owner in the stomach. I don’t know much about it except the guy sued Cobra and Hornady, the ammo manufacturer. In anticipation of a judgment against them, the company owner started another company, Bearman Industries, also in Salt Lake City. Cobra filed Chapter 7 bankruptcy in February 2020 and shortly thereafter Bearman took over Derringer production. And now Bearman is again plagued with consumer lawsuits.


Please click on the popup ads! It’s how we get paid.


This example is a Cobra I bought new around 2014. It is of the typical Zamak pot metal construction with some kind of cheap steel rifled barrel liner. The trigger is absolutely horrid and the cross-pin safety is barely functional. It shoots best with handloaded 148 grain wadcutters because its 2.75-inch barrel is totally useless with hollow point ammo. The gun wouldn’t be so bad if the crossbar safety wasn’t so hard to disengage. I might try polishing the safety detent when I get some time.

The mystique of the derringer hide-away gun is deeply rooted in 1950’s Hollywood western movies, such as this still of Paladin from Have Gun Will Travel.

Firing a Derringer takes some practice. If you pull straight back on the trigger, it will not fire even with 20 pounds or more. To fire, the trigger must be pulled slightly downward and not straight back. An old time cowboy action shooter once taught me that Derringers are best fired with the middle finger on the trigger while the index finger points at the target alongside the barrel. You hold your hand outstretched with the fingers open. Now watch your middle and lower fingers as you slowly close your hand into a tight fist. Just before your finger contacts the palm of the hand, the middle finger moves slightly downward at the very end of the pull. Weird, huh? But it works!

Pressing the trigger straight back will get you nowhere with a Derringer. One must pull the trigger slightly downward to release the sear. This is accomplished pretty easily by using the middle finger. Try this: hold your hand outstretched with the fingers open. Now watch your middle and lower fingers as you slowly close your hand into a tight fist. Just before your finger contacts the palm of the hand, the middle finger moves slightly downward at the very end of the “pull”. Weird, huh? But it works!

Check out these trigger pull directions from the manual.

Using this middle finger method works well at across-the-card-table distance. However, my index finger is a bit longer than the barrel so I have to bend my finger a little to keep it away from the muzzle.

Would I recommend the Cobra Big Bore Derringer to anyone? Absolutely NOT!

But I’ll still keep mine as a conversation piece. It’s a fantastic example of a crappy gun. I shoot it a couple times a year just to remind myself of what a pile of junk this thing really is. Someday maybe I’ll find an old Remington .41 rimfire Derringer just for fun. I understand the Remingtons have no safety at all and may be equally as crappy. Who knows?

What’s your worst gun?


Never miss an ExNotes blog:

The Wayback Machine: The Five Deadly Sins of Motorcycle Restoration

By Joe Gresh

My idea of a good restoration and your idea of a good restoration may differ, but you know deep down inside that I’m always right. I am the arbiter of cool. I am the final word, I am…Omni Joe. Here are 5 common restoration mistakes that drive me crazy.


Help us help you…please click on the popup ads!


Sin #1: Gas tank liners.

That sealer crap people pour into their motorcycle gas tanks is the worse invention of all time. Guys swear by this junk but don’t listen to those lazy bastards. When I read the words, gas tank liner and/or Caswell sealer in a motorcycle description I know an amateur’s hands have been fiddling the motorcycle. Who would pour that devil’s goop into a nice motorcycle gas tank? It makes me wonder what else they screwed up. The way to fix a leaking, rusty gas tank is to get rid of the rust and weld/braze any holes. Any other method is destined to fail. There’s no excuse for using devil’s goop, YouTube is lousy with videos explaining how to clean out a rusty gas tank and how to stop it from re-rusting.

Sin #2: Repainting serviceable original finishes.

Nothing annoys me like a guy posting up a 90% perfect, original-paint motorcycle and asking where he can get it repainted. Stop! If the paint has a few chips or is faded a tiny bit leave the damn thing alone. One of the most underused old-sayings is, “It’s only original once.” No matter how shiny and beautiful you think your topcoat turned out its still vandalism. There are many phony re-pop’s running around, don’t make your motorcycle one. By painting over your once desirable survivor you lower its historic value. Listen, I’m not against repainting really bad original body parts, lord knows my Z1 needs it but I know anything I do that covers over the factory work erases a story, and vintage motorcycles are commodities without a story.

Sin #3: Over restoration.

When the Japanese bikes that are considered classic today were first sold they had acceptable build quality. For some strange reason many motorcycle restoration experts go way overboard making the motorcycle a show bike that bears little resemblance to real motorcycles. Chrome back in the day was thin and yours should be too. Nothing depresses me as much as these tarted-up travesties. The nerve of some Johnny-Come-Lately with a fat wallet and no soul thinking he can render a better motorcycle than the factory. Keep it simple and try to match the level of finish that you remember. Otherwise, what’s the point? It’s already worth less because you damaged the original build by trying to improve the bike. Why pour money into the thing making it something it never was?

Sin #4: Giving a damn about numbers.

As people get deeper into the vintage bike hobby they grow ever more insane. It’s not enough to have the correct parts anymore: Now you must have the exact build date on the part to suit your motorcycle’s VIN number. This is madness. Nobody except lunatics and bike show judges will care that your sprocket cover was made a year or two after your bike left the factory. The only part number that matters is the one that can get your bike registered for the road. I’ve seen people on vintage groups debating a slight casting change or a vestigial nub as if it were the most important thing in the world. People like that have no business owning a motorcycle; they should go into accounting or better yet, prison.

Sin #5: Parking it.

The final and biggest sin of all is to restore a motorcycle and then park it. I can over look all the other sins, even tank sealer, if the owner rides his vintage motorcycle. Get the thing muddy. Do a burn out. Ride it to shows in the rain. Honor the motorcycle by using it. A show motorcycle that is too valuable or too clean to ride is nothing, less than worthless. The machine was built for you. It has a seat and controls for you. The engine wants to pull. Do the right thing by your motorcycle and your sins will be washed away, my brothers.


Keep up with the Zed resurrection!!


Never miss an ExNotes blog: