No trip to Peru can be complete without a journey to Lake Titicaca. It is the largest alpine lake on the planet at an elevation of 12,500 feet, and the lifestyle of those who live on the lake is beyond fascinating. This huge lake is nestled in a giant basin between two of the Andean mountain ranges and extends across the border to Bolivia. And yes, it has a funny name. There was no way I was going to miss this place even though it was quite a distance from my home base in Cusco.
Having planned to use all my vacation time while in Peru, it wasn’t too difficult to load up on my work early in the week and take a four-day weekend to knock out Lake Titicaca (did I mention it has a funny name?). Allowing four days would provide me with enough time to take a leisurely tour bus to this region of Peru, get some hikes and tourist attractions in along the way, and then return on an overnight bus on Sunday. This would assure (hopefully) that I would make it to work on time Monday morning. Instilling project management principles usually results in a successful outcome. To me the planning of a project or a vacation followed the same rigid processes. Of course, the vacation ones always had a few surprises along the way that I would have to adjust to, but that’s part of the fun.
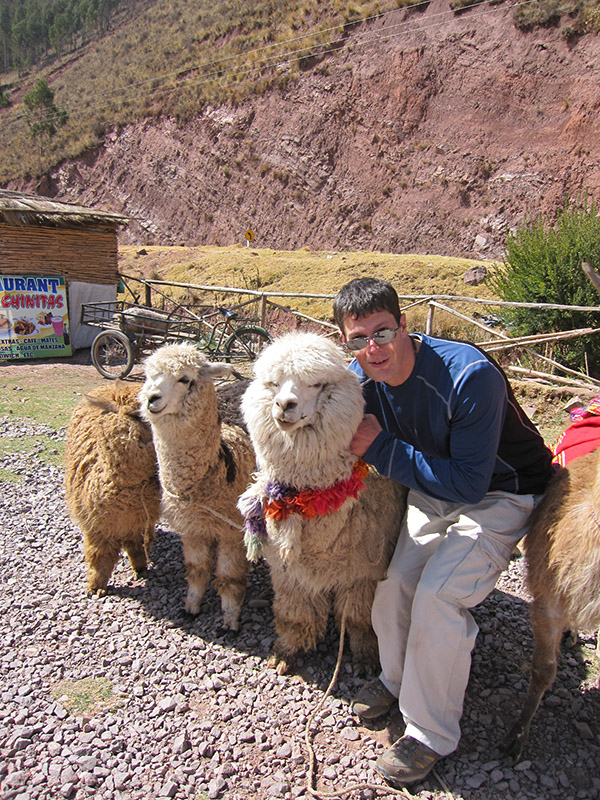
The bus ride was filled with incredible beauty with stops at local markets and panoramic mountain views that had me saying to myself “wow, I am in the Andes!” over and over again. Out of all the bus rides I’d been on, this was by far the most pleasant. I was used to the altitude, there were no Kirk Cameron movies, and I had made a special tea to enhance the ride (PM me for details on that, but it will probably bleed into another article). The entire ride was an extremely joyful 8 hours where I had an opportunity to meet two wonderful girls from Japan (we are still friends to this day).
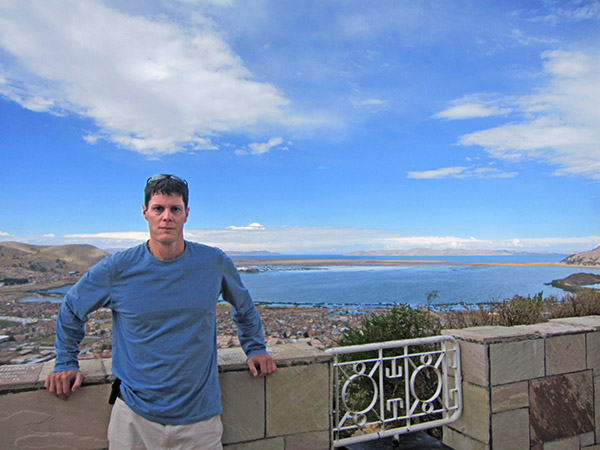
Feeling beyond happy but tired, we finally pulled into the lakeside city of Pulmo, Peru. This first day here would be relaxing and adjusting to the world I had just entered. There was a giant golden condor statue on a steep hill above the city, which provided a sense of calm. There was a large market that made for great people watching while having some coca tea and even a coca beer. The beer was like a prehistoric provided a buzz and amp at the same time. It almost reminded me of my Jager bomb days in Boston. Thankfully for the people of Pulmo I didn’t take it that far.
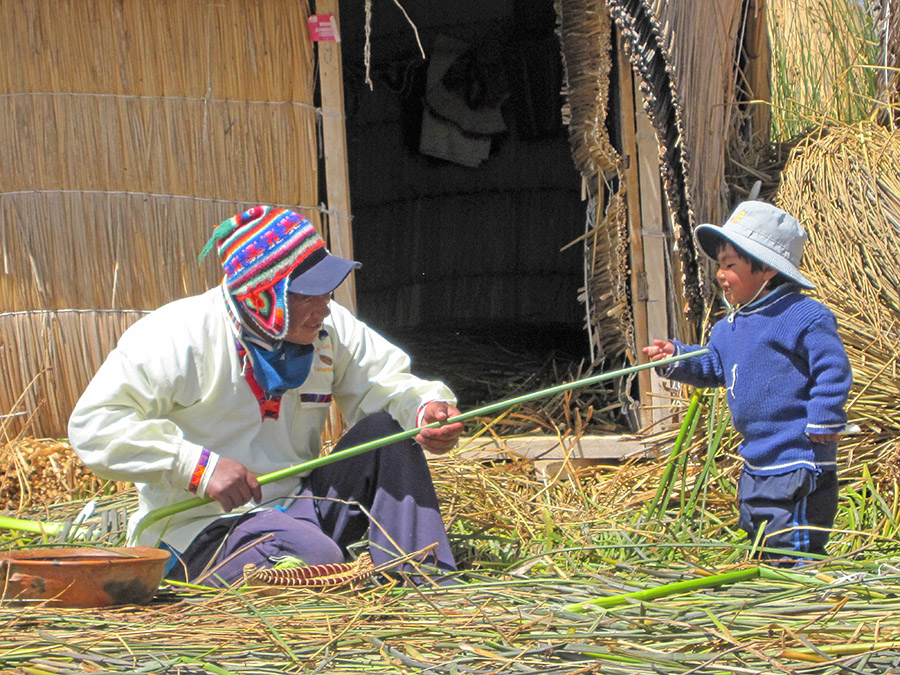
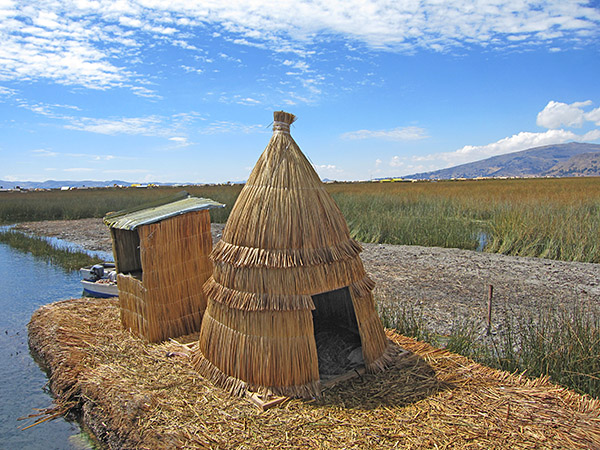
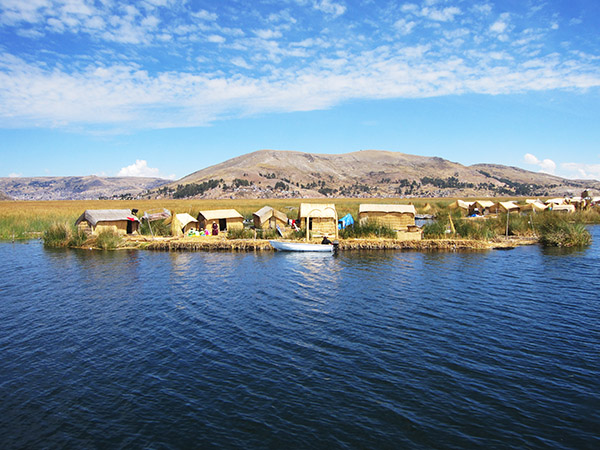
The next day I joined a boat tour that took us to many of the man-made islands. These islands were floating and made of dried totora, a type of papyrus the local population harvested from the lake marshes. The people are known as the Ura. The islands are fairly large, some of them over an acre or more in size. There were stores, restaurants, and cafes on some of the islands.
The islands were surprisingly stable and didn’t rock as we stepped onto them. When talking to one of the Ura (and speaking as well as I could in Spanish), I asked how they made the islands once they gathered the papyrus. It was a constant cycle of drying the papyrus, bundling them, and tying them to the upper part of the island. He showed me a hole cut into the center of one of the islands. It looked like a hole you would ice fish through and it was about 3 feet wide. The hole was large enough to see the bottom reeds starting to decay and back into the water. It was a constant process to keep their “land” from being swallowed by the lake. Many of the Ura, not much more than a mile offshore, hardly ever returned to the mainland shores of Pulmo. They much preferred their isolated yet tightly knit community on the lake where life was simple.
The city of Pulmo was so different from both the Amazon jungle and where I lived in Cusco. The more I explored Peru the more diverse and mystical it became. Sunday was a relaxing day with more coca beer and local foods with my new Japanese friends.
As the sun began to set it was time to find my way back to the bus depot and board the redeye that would return me to Cusco. It didn’t take too long for me to peacefully fall asleep on the bus. I didn’t wake up until the bus entered Cusco. It was a short taxi ride to my home and just in time to lead my first conference call of the day. Still bleary-eyed and having a buzz from the weekend (and the coca beer) my workday progressed as though the trip was just a dream. It was an adventure I wanted to share with my co-workers, but they wouldn’t understand as they were still under the assumption I was living in my condo in Boston. Throughout the day I wondered if and when I would ever return to Boston.
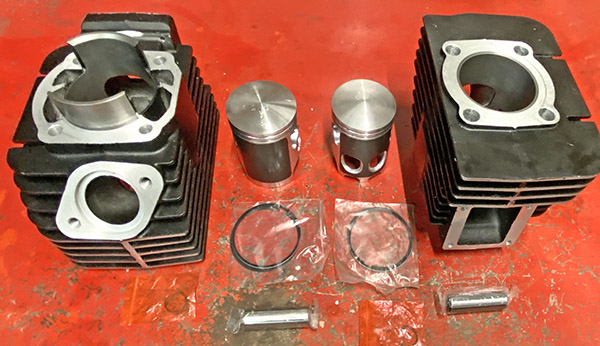
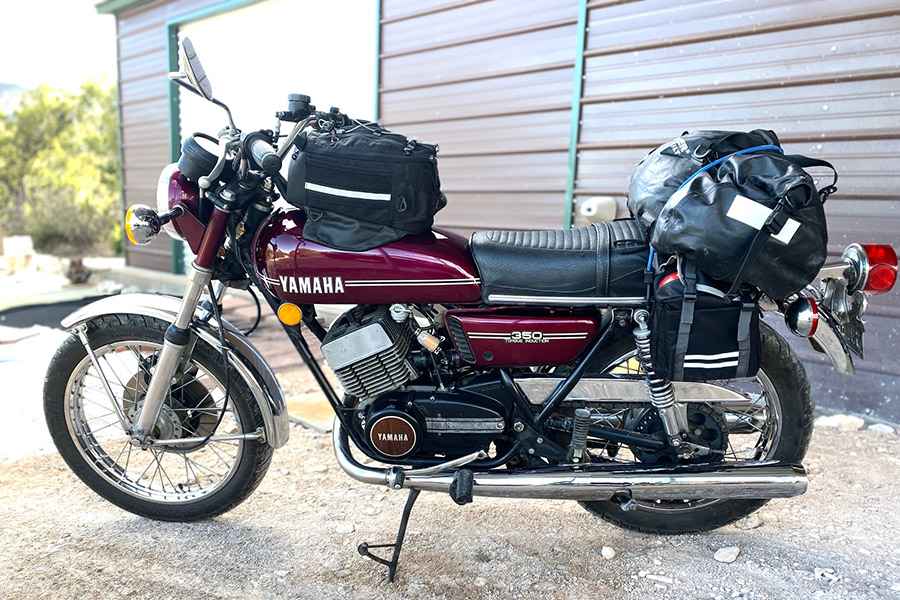
Parts for Yamaha’s RD350 are fairly easy to get but that didn’t stop me from hoarding a new top end set from eBay for the low, low price of $190. For that paltry sum you get two brand new cylinders, two brand new pistons, two brand new ring sets and two brand new wristpins with keepers. My buddy Bodden tried to warn me off the kit saying that the Teutonic name was a ruse and that Yamaha parts are far superior and I believe him. Still, $190 for an entire new top end? I had to bite.
First, there’s nothing wrong with my RD350; it runs great. I bought the Kveldwulf kit more as a spare and hedge against future scarcity. The kit is made in China; you know how international relations are going. We could be cut off at any moment. Unlike many people I don’t have a kneejerk reaction to Chinese products. I give them a chance to see if they are any good. In retrospect I probably should have bought an American made replacement RD350 top end kit (and I will if a company in the USA ever decides to manufacture one).
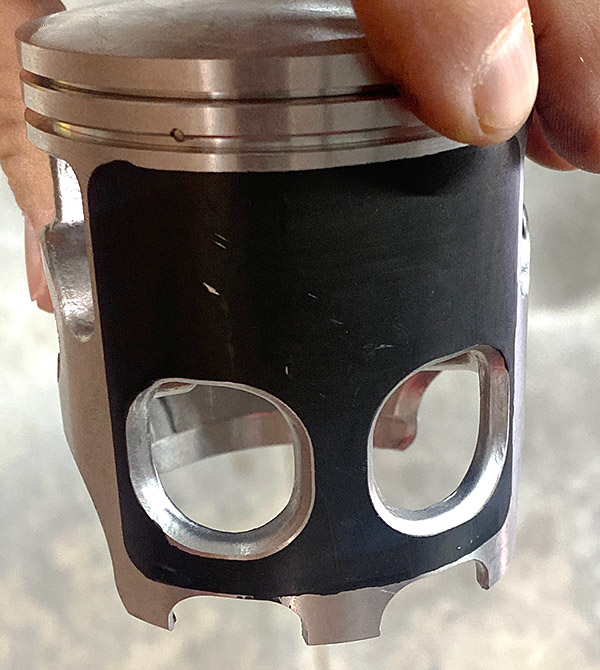
This particular top end kit has its problems. The biggest problem is that the right side piston won’t actually fit through the right side bore. The piston slides in about halfway and stops. Of course I could force it but the bike would only run a few minutes before it seized up. The left side is better but still feels a bit tight to me. What this means is I’ll have to have the cylinders bored to suit the piston size, a process that will probably cost more than the whole Kveldwulf kit.
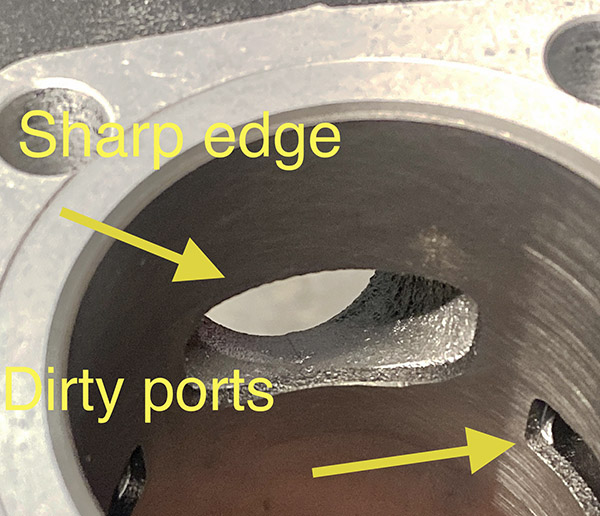
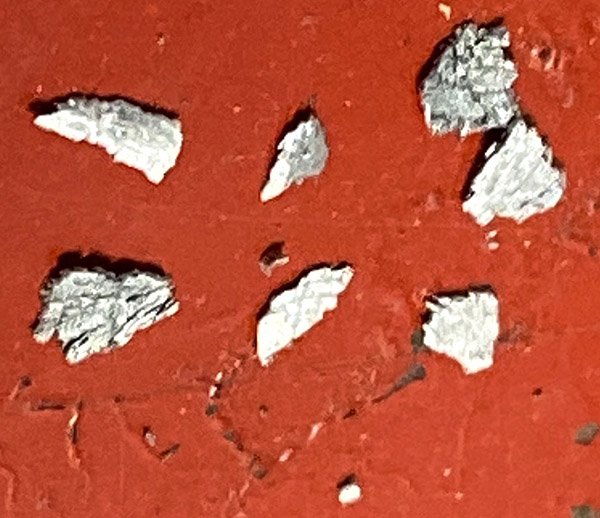
The ports on the kit cylinders are sharp edged and dirty looking. I think I’ll need to chamfer the port edges before using the cylinders or the thing will probably snag a ring. It wouldn’t hurt to run a burr through the ports to knock down some of the roughness either. When I unpacked the box there were quite a few loose bits of aluminum sprinkled throughout. A thorough cleaning is in order before bolting these parts onto my RD350. So the kit is not at a plug and play type deal.
The Kveldwulf pistons come with a Teflon-looking coating. I usually don’t like any of these new-fangled coatings and prefer plain old aluminum. I don’t have my RD350 apart so I can’t check the cut-away skirt and windows to see if the stock piston is the same. I’d also like to compare the ports to a stock cylinder to see how close the new stuff comes to original.
My best translation of Kveldwulf is “night wolf” and the prospects are indeed dim for this dog of an RD350 top end kit. I haven’t decided if I’m going to send it back and put up with that hassle or keep the kit and spend the time and money to remedy all its faults. I suppose if you had a RD350 that was missing its top end or it was severely corroded with broken fins the Kveldwulf kit would move you closer to the goal of a running motorcycle. You’ll have some sweat equity in the thing for sure.
If you have a stock RD350 and want to experiment with altering the ports but don’t want to mess up the original stuff this kit would be a cheap way to learn about two-stroke power bands without risking a ton of money. Then again, maybe I just got a dud. I’ll try to contact the eBay seller; they might take this top end set back and send me another one that is machined correctly. As delivered, I would only use the Kveldwulf kit as a last resort if my top end were totally wiped out, which is a hard thing to do with all the oversize pistons available. I’ll keep you updated whatever happens.
In these Covid-aware times being a long hauler means suffering from the effects of contracting the virus that caused so many problems a few years ago. But “long hauler” used to have a different meaning in the motorcycle community. It meant a rider that rode long distances over relatively short periods of time. The Iron Butt group sprang up to create a framework of recognition and certification for the tough riders that did 1000 miles in 24 hours and the challenges escalated from there.
I’ve never felt the desire to ride 1000 miles in 24 hours although I would have loved to run that pace the time I raced the Baja 1000. No, I usually go a few hundred miles if I’m bopping around near the ranch on a day ride. If I’m traveling long distances I’ll shoot for 400 miles a day or a little more depending on the time of year. On motorcycle trips I try to take it easy and enjoy the countryside. I’ll stop often to read historical markers or pull off the road to sip a little piping hot Dancing Goats coffee from my Thermos. I might see a stream and wander over to look for gold nuggets or stick my feet in the cold water. To me, motorcycle rides should be fun, not an endurance test.
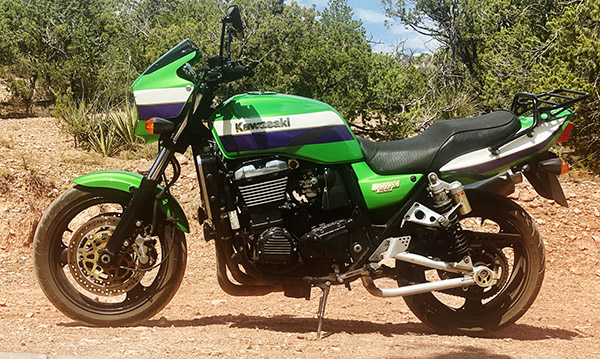
Sometimes I end up pushing it a bit like on the ride to Laguna Seca. I clocked 590 miles from Grand Junction, Colorado, to Tonopah, Nevada. I was riding the ZRX1100, it was hot, and I had plenty of daylight, so I just kept riding. I wasn’t in any great pain and there aren’t many places to get a motel room in the wilds of Nevada. That 590-mile run may not seem like much to an Iron Butt rider but I’ve done some other long distance rides on much less capable motorcycles.
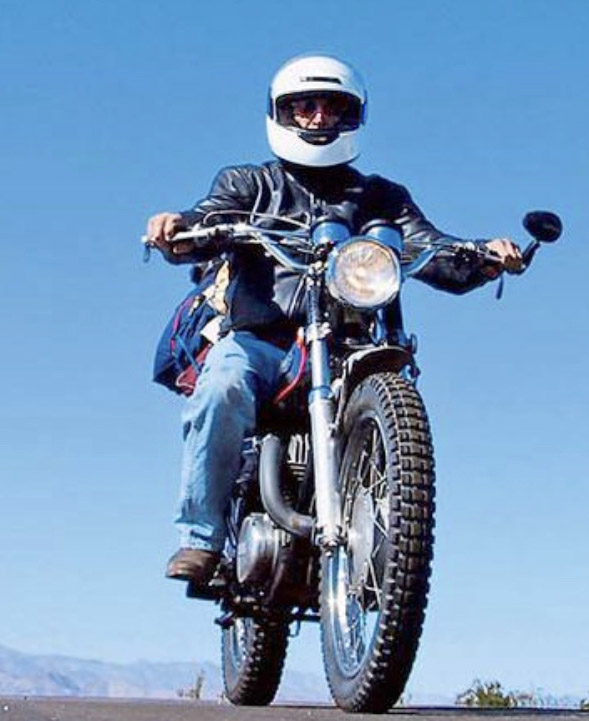
The longest single-day ride I did on my 1971 Yamaha RT1-B, 360cc Enduro was from Cross City, Florida to Big Pine Key, Florida, a distance of 530 miles. The old two-stroke, single-cylinder dirt bike is a fairly comfortable place to sit and it will happily cruise along at 60-65 miles per hour so it’s not like I was doing something all that special. At the time a hurricane had blown through Big Pine and our house was a mess, so I was hustling to get back home and start cleaning up.
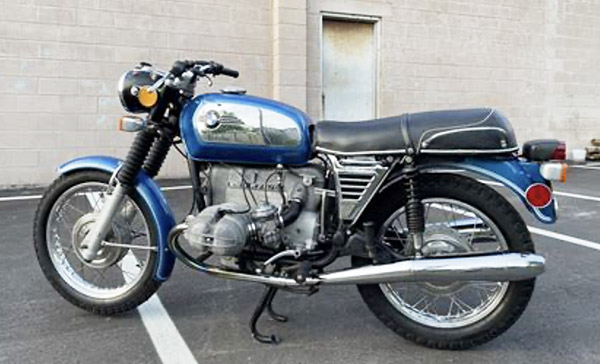
Another long day in the saddle was back in the 1970s riding my 1973 BMW R75/5. I was returning from a 41-state tour around America and the last leg was Cashiers, North Carolina to Miami, Florida. I racked up 750 miles in one, national-55-mph speed limited day. Back then you had to keep your eyes glued to the speedometer because it was nearly impossible to ride a 750cc motorcycle on a wide-open highway at 55 mph. You tended to creep up and all of a sudden you’re doing 70. The 55 mph speed limits stuck around a long time because it was a huge moneymaker for the Highway Patrol and local police forces.
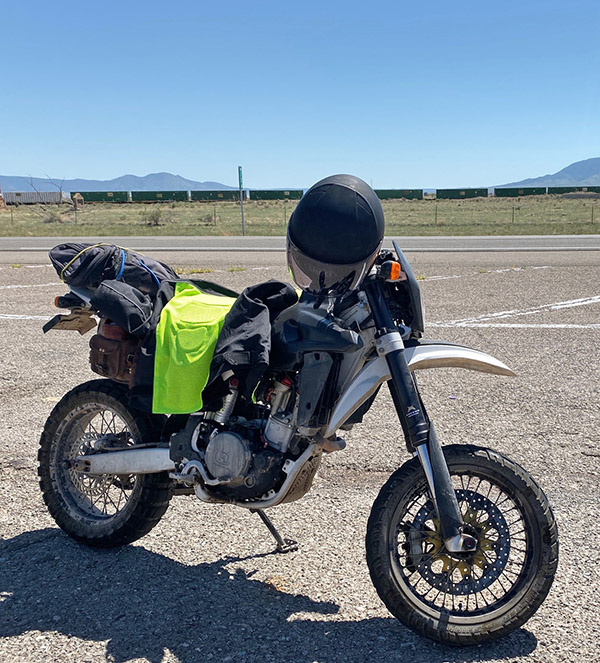
I rode my Husqvarna 510cc Super Motard 500 miles from Window Rock, Arizona to Caliente, Nevada in one agonizing stint. This run was the most physically demanding and it demanded it all from my butt. The Husky’s seat is narrow for ease of mobility in the dirt. It has almost zero padding towards the rear and the front area was no wider than a pack of cigarettes. I did a lot of stand up riding and crossed leg riding that day.
The closest I got to an Iron butt ride was on a 1968 Sportster. This motorcycle is another poor choice for long distance riding. At least the seat wasn’t 4 inches wide on the Sporty. I started out from Van Horn, Texas. It was late March, so it was still pretty chilly in the pre-dawn hours. I rode all the way to Point Loma, California and it took around 18 hours. Of course, with an old Harley all that time wasn’t spent riding. You have to twirl wrenches a bit.
The Sportster’s charging system failed because the mechanical, coil and point type voltage regulator shook itself to pieces. Running a total loss ignition system I had to stop at gas statins and charge the battery every so often, kind of like a modern EV car. As the voltage would drop the bike would start missing due to the plugs whiskering.
Motorcycle plug whiskering isn’t common with today’s high powered ignitions and alternators but back then it was not out of the realm of possible failure modes. It happened when the plug shorted out from a tiny piece of metal stuck between the electrode and the body of the plug. The remedy was fairly easy: you had to remove the plug and clear off the bit of metal that was causing the short, then put the plug back in. Don’t ask me where the tiny pieces of metal came from; it’s best not to think about it.
At some point on the ride, I found a voltage regulator wire broken from vibration and figured out how to make the old, brush-type Harley-Davidson generator charge its battery. I made the last 200 miles at night without having to stop for a charge. All in, I rode the Sportster 854 miles and man, were my arms tired. It’s kind of funny that the long haul effects of Covid (foggy brain, tired feeling and dizziness) were the same symptoms I felt after riding that Sportster 854 miles.
I don’t think I’ll ever do a thousand miles in 24 hours. It’s just not important to me and defeats the purpose of riding a motorcycle in the first place. I guess if it was an emergency and I had to do it I could ride the Kawasaki ZRX a thousand miles in a day, but honestly, if that situation arose, I’d rather take the Toyota truck.
What about you? Are you a long hauler? How far have you ridden in a day? Does racking up mileage for mileage’s sake mean anything to you?
Joe Gresh’s Oppenheimer review reminded me of going to the Hanford National Historic Park up here in Washington along the Columbia River in the years before Covid. A lot of things have changed with Covid, and the tours offered by the US Park Service at the Hanford site. This article is about the Hanford site, the tours Hanford offered before Covid, the tours currently being offered, and the photos I collected during previous visits.
Hanford is a place with a story. Hanford was the world’s first nuclear production facility, it was designed to produce plutonium for use in nuclear weapons, and it did. Plutonium produced here was used for testing at the Trinity Site in New Mexico during World War II and in the Fat Man bomb dropped on Nagasaki. The Hanford plant was built along the Columbia River because the reactors used Columbia River water for cooling. I’ve been told that Hanford was the biggest and most expensive construction site in the US. The place covers just under 600 acres.
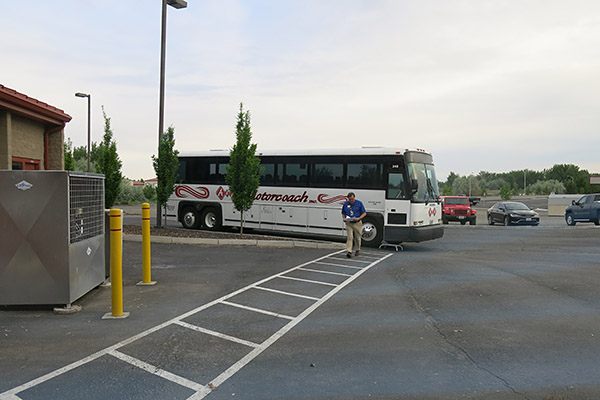
The air-conditioned bus that Hanford provides for getting around the site.
Hanford produced plutonium for several years after World War II. The result was a set of serious issues with radioactive waste and contamination. Cleanup efforts are still ongoing, and are part of the Hanford tour.
Before Covid, there were three tours available during the summer. Today, there are two. It’s best to check with the Hanford site before visiting to find out what is available for any planned visit.
Tour 1: The Full Meal Deal
A tour Hanford used to offer included everything (that’s why I call it the Full Meal Deal). This tour required registering online in advance, and I found I had to do so as soon the registration page started accepting reservations. The tour slots filled up quickly for the entire summer. When I last signed up, the government ran a background check on me ahead of time to make sure I was not a bad guy.
The Full Meal Deal tour started in the morning and went most of the day. It included seeing the B Reactor (where the Nagasaki bomb plutonium was created), cleanup work that involved filtering underground water, and the vitrification plant being built to turn the highly radioactive sludge in the 1940s storage tanks into glass. The vitrification process involves melting sand and mixing it with the radioactive waste to make it into a solid form. This solid form can then be buried without fear of it leaching out into the water table.
The Full Meal Deal tour includes a visit to the environmental restoration disposal waste facility. It is a covered, city-block-sized dump pit used for low level radioactive building materials, equipment, machinery, and other nasty stuff. The pit is lined with a barrier clay that absorbs radiation. Pumps remove any rain water that seeps into the covered materials. Hanford buries a level of radiated items across the bottom of the pit and then they cover it. That’s followed by burying more on top of the previous layer and covering that. This will continue until they fill the pits. When the pits approach their capacity, Hanford plans to take any equipment used to haul the debris and bury it, too. When the pit is completely full, Hanford will to cover it. It will look like the surrounding desert when they are done.
Tour 2: The B Reactor Tour
The B reactor tour includes (as the name implies) the B reactor, and I believe this tour is still offered. It provides a close up look at the reactor that made the Nagasaki bomb plutonium. As the name implies, it only includes the B Reactor. You can stay longer at the B Reactor than the Full Meal Deal tour above allowed, and Hanford opens up more of the building to explore. There are some places in the building you cannot go. The off-limits area includes where the fuel rods were pushed out of the back of the reactor (after which they fell into a water tank, cooled, and were then transported by rail to a building that processed them into plutonium).
There were nine reactors built at Hanford. Of these, seven were cocooned in concrete to contain radioactivity and cool to safe levels. By 1987 they were all shut down. None are operational today.
I didn’t get any photos other than the B Reactor. If I remember right, there were no cell phones or cameras allowed on the Full Meal Deal tour for security purposes. But I took photos of the B Reactor, as you can see below.
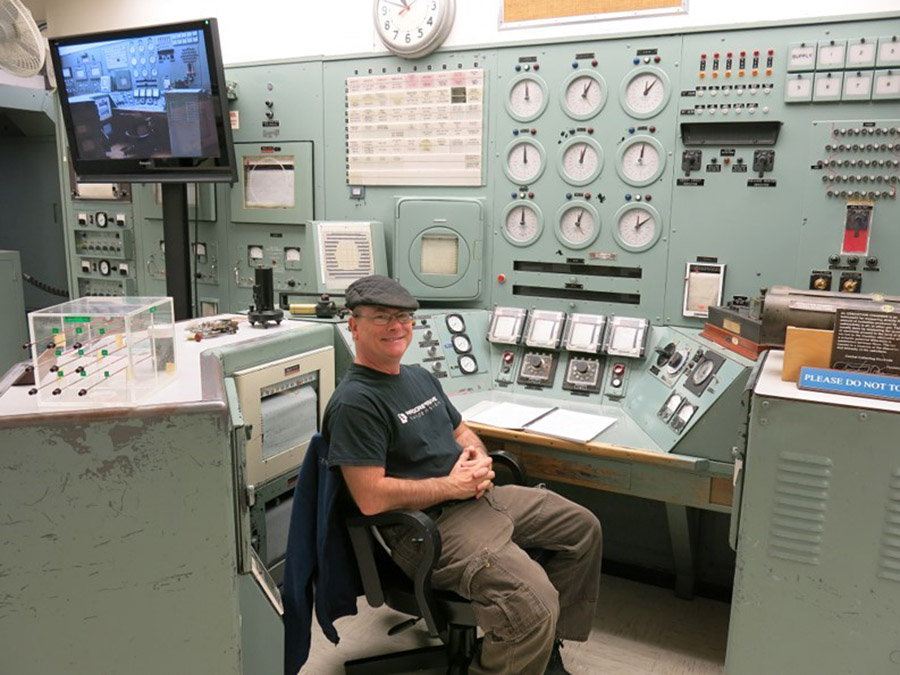
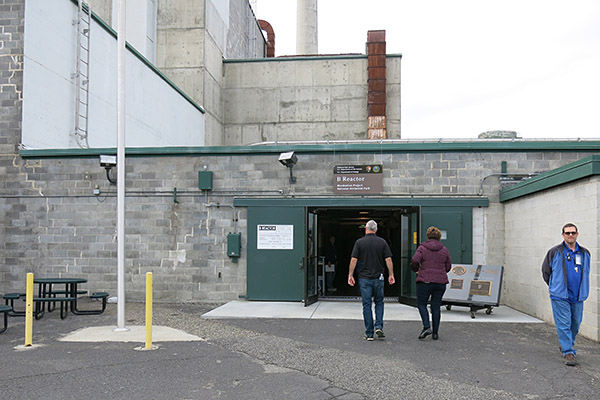
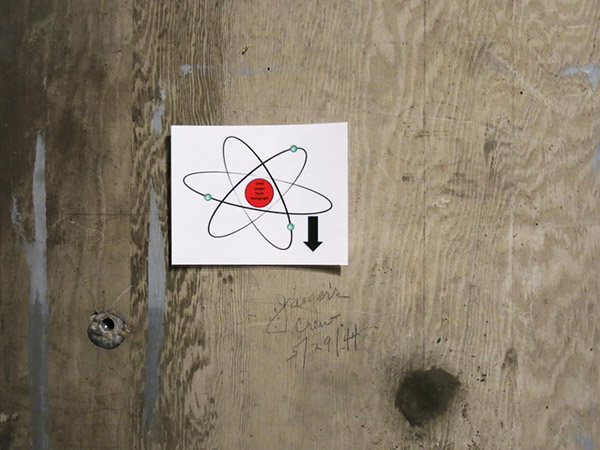
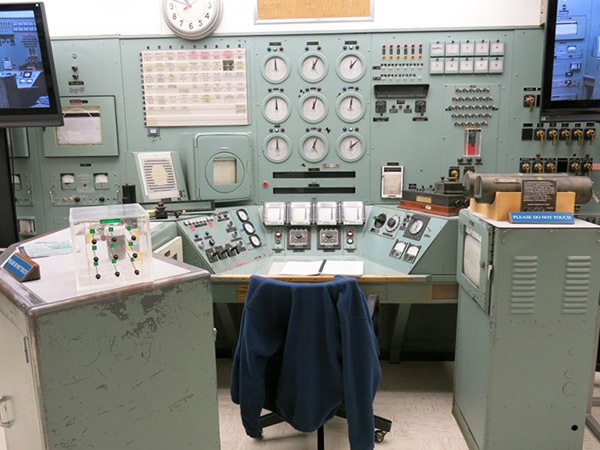
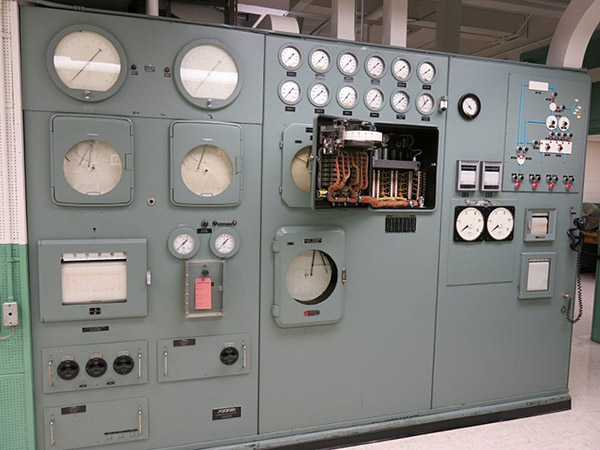
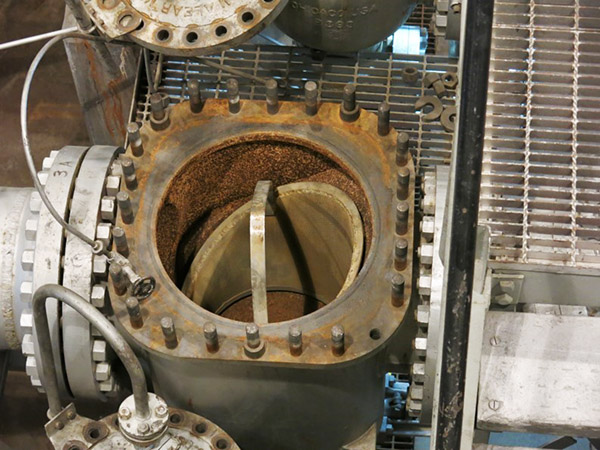
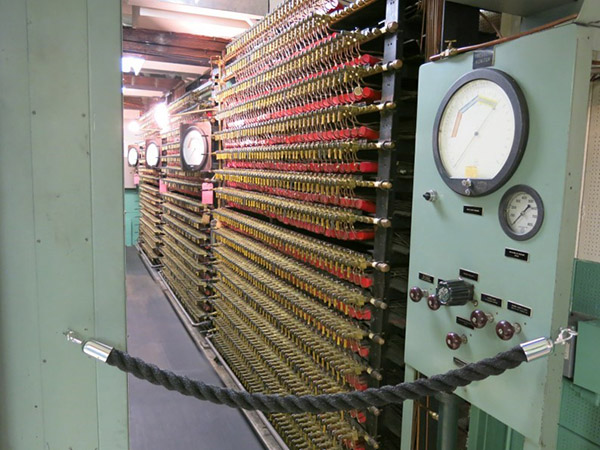
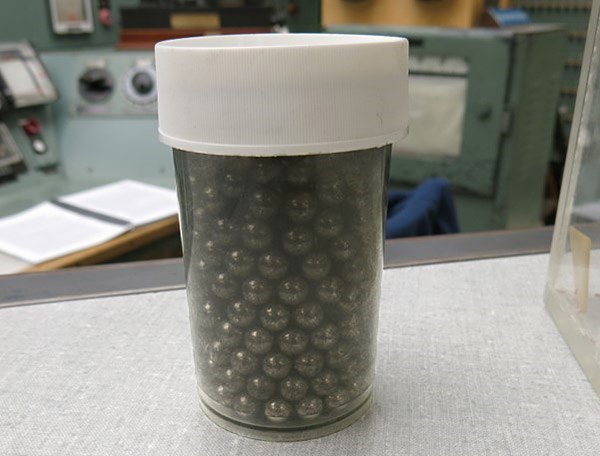
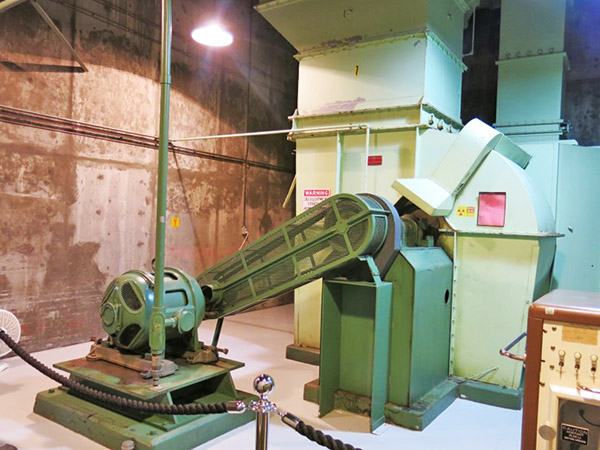
Hanford’s historic B Reactor. This reactor produced the plutonium used at Nagasaki.Entering the belly of the beast: The Hanford B Reactor where spent nuclear fuel cells provided plutonium for the Nagasaki bomb.A model of the nuclear reactor showing the cooling and beryllium rods used to control the reaction.The actual reactor, with cooling pipes on each side that used Columbia River water to cool the core.The water plumbing. Some valves are taken apart. That satisfies the Russians that the Reactor is non-operational. This is a part of the nuclear arms agreement. The Russians actually inspect the reactor to verify it is shut down. We do the same for their reactors.A signature. Was this a previous worker at Hanford?A clock that shows when the plant was shut down.A control center for watching core power and temperature.There were no computers in Hanford back in the 1940s.More open valves.Another view of some of the reactor controls and monitors.The train used to transport highly radioactive highly radioactive depleted fuel rods for further processing into plutonium.Beryllium balls used for controlling the nuclear reaction.Massive amounts of air were needed for ventilation.Personal Protective Equipment. Hanford was not a typical office job.
Tour 3: The Old Hanford Town Site Pre-War Tour
In my opinion, there’s not much to see on this tour. There’s a farming area where the previous inhabitants were told to leave at the start of the Manhattan Project. There is what’s left of the old concrete high school. The tour guide explained that someday Hanford hopes to restore it. You can see the old roads that went through the town and where the ferry crossed. The history the guide presented made it worthwhile.
Another Option
You can go to www.vtours.hanford.gov and take a virtual tour if you’re not able to go in person.
The Bottom Line
Look online (Hanford National Historic Park) for more info. I don’t think they are doing the Full Meal Deal tours since Covid (other than online virtual tours). Hanford is offering the B Reactor and Old Hanford tours the last time I checked (on a first come, first served basis).
I recommend a visit to the Hanford site, either in person or the virtual tour. The Hanford National Historic Park reveals a world that few of us have ever seen. It is an important part of our history.
Like what you see? Keep us going with your donation to the cause!
Among the many crazy conspiracy theories masquerading as knowledge today are the Walmart tunnels. These tunnels supposedly crisscross the nation for the usual nefarious reasons: FEMA camps, New World Order population control and extraterrestrial alien smuggling (to steal your jobs and women). When you stop to think about it, this whole insane, Walmart-tunnel thing is no wackier for Datil than the nearby Very Large Array radio-astronomy telescope.
The VLA was used in a movie about the search for alien radio transmissions. Or was it just a movie? If that doesn’t fire up our odd American mix of gullible/skeptical idiocy nothing will. Like all good conspiracy theories there is a grain of truth to the Walmart-tunnel thing that feeds the plot. New Mexico is full of old mining tunnels so if you look hard enough you’ll find one. Just not the ones owned by Walmart. Those ones are top secret.
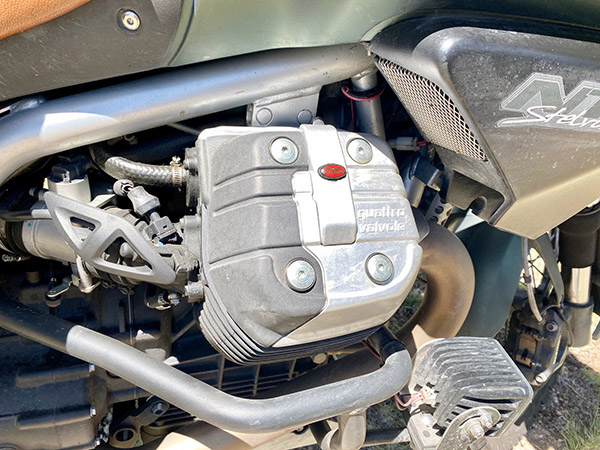
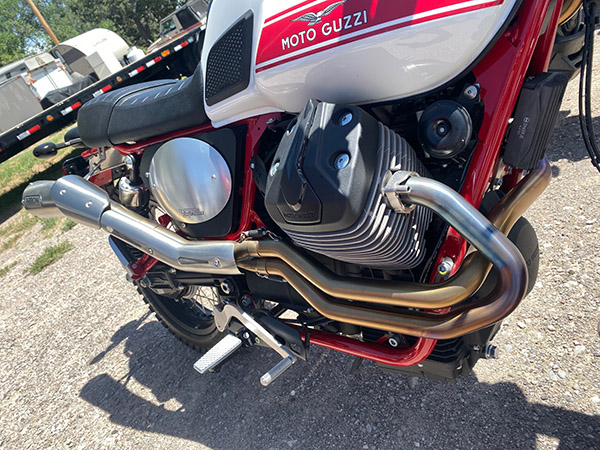
Naturally with all the weirdness going on near Datil, GRIN chose to hold its Guzzi motorcycle rally directly over a tunnel leading to Lake Como in Italy. I could hear the water rushing through the tunnels if I put my ear to a Quattro valvole rocker cover.
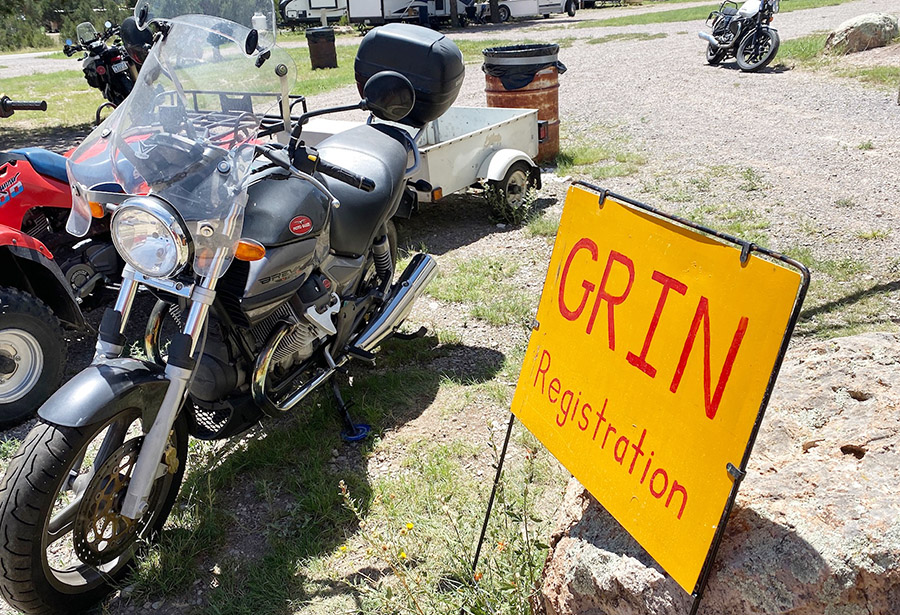
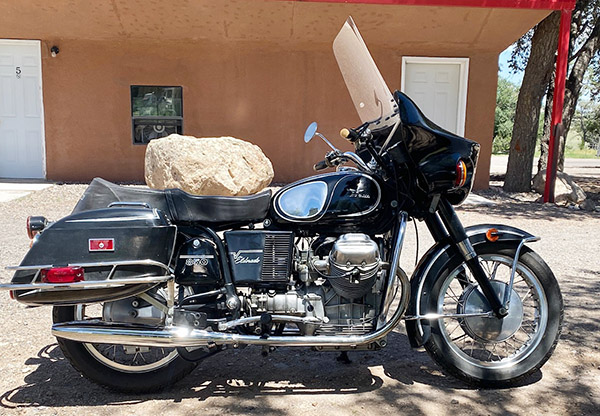
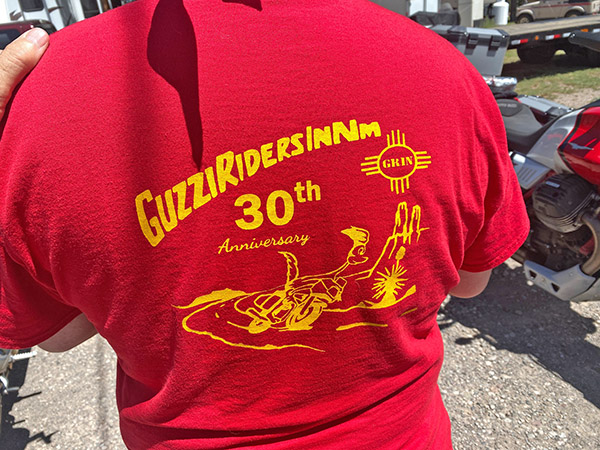
Finding Moto Guzzis in New Mexico is much harder than finding Walmart tunnels. I can’t recall seeing one on the road or parked up at a Starbucks. My buddy Robert rode his 850 Guzzi out to New Mexico one time but that doesn’t count. Guzzis aren’t super popular anywhere so a rally with 25-ish bikes is something to see. I forgot to add that GRIN stands for Guzzi Riders In New Mexico, the club that put on the show and rally.
Datil consists of an expensive gas station, a motel, a campground and a pretty good restaurant. I’m not sure you could call it a town, it’s more of a traveler’s rest. Behind the motel and gas station you’ll find the campground, and this is where the wrong-way, Italian V-Twins were situated.
The gang of Gizzard riders was an easygoing bunch. It took no time at all before I felt like one of the boys and damned if I didn’t start wanting one of these goofy motorcycles. An unusually high number of rally attendees told me that they had once owned a Kawasaki ZRX like the one I rode to the event. I did 410 miles round trip but there were riders from Texas and Colorado who had traveled much further.
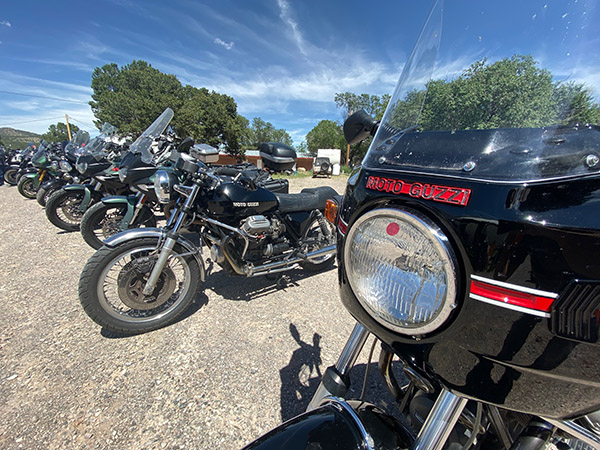
I’m a sucker for high pipes on a street bike so this Scrambler was my favorite of the bunch. Later in the day we went to the Datil restaurant and had a good lunch that totally blew my diet. I had the southwest turkey sandwich and it was smothered in Hatch green chili.
GRIN hosted several dinners for the 3-day rally and there was a Guzzi bike show. Attendees judged the bikes in a people’s choice sort of deal. It was kind of hard to see the entry numbers that were on tiny round stickers applied the Guzzi headlight glass. I didn’t get to vote because I wasn’t actually a member of GRIN. I feel this should invalidate the whole election process and make GRIN a dictatorship.
Late in the afternoon I had to head back to the ranch as I don’t like riding at night. My night vision is much improved since I had cataract surgery but an elk running across the road in front of your 70mph motorcycle takes a lot of seeing.
The seasons are slowly changing here in New Mexico, so it wasn’t unbearably hot on the ride home. Cool, dry air on top of the higher passes made me worry less as the sun set behind me. I pulled into the ranch in full darkness with the ZRX running on all four cylinders. It was like riding in a tunnel.
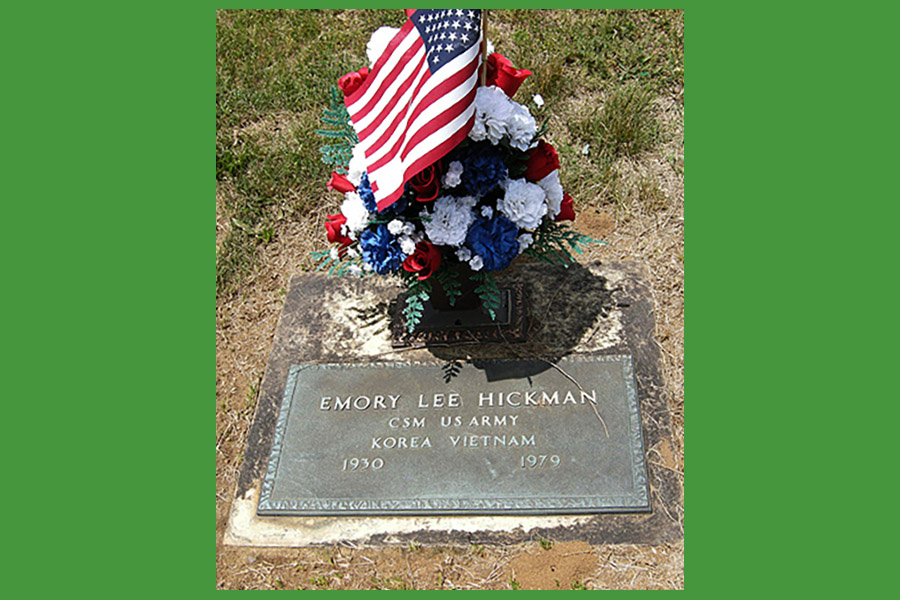
Command Sergeant Major Emory L. Hickman died way too young. He was 49 when he passed, and that was just a few years after I knew him. He was a tall, lean man with a salt and pepper crew cut, and like most of the noncommissioned officers I knew, he had a southern accent. I only knew him for a year and that was more than a half century ago, but during that year he taught me something I value to this day. Sergeant Major Hickman taught me how to shoot a handgun.
I first met Sergeant Major Hickman shortly after he was assigned to the Rutgers University Reserve Officers Training Corps detachment. The Army held these kinds of cush assignments out to very senior NCOs as they finished distinguished 30-year careers. Sergeant Major Hickman earned it: He served in the Korean and Vietnam Wars and he had the rows of ribbons showing that and much more. As with all Sergeants Major in the US Army, it was always “Sergeant Major,” never “Sergeant” or “Sarge.” Only a very tiny percentage of NCOs make E-9; addressing such men as “Sergeant Major” conveyed the respect they deserved. After I knew him, he was promoted to Command Sergeant Major, and just in case you ever encounter someone with that exalted rank, all three words should be used, as I did at the beginning of this blog.
The last half century has been a contest between my marksmanship skills going north and my vision going south, but thanks to the good Sergeant Major and what he taught me, I’m holding my own. I still sometimes dazzle folks at the range. What I’d like to do in this blog is talk about the fundamentals, tips, and techniques Sergeant Major Hickman taught me. I don’t shoot competitively these days, but I can still keep my shots in the black. If you use the tricks and techniques Sergeant Major Hickman taught me and if you practice a lot, maybe you will be able to do the same.
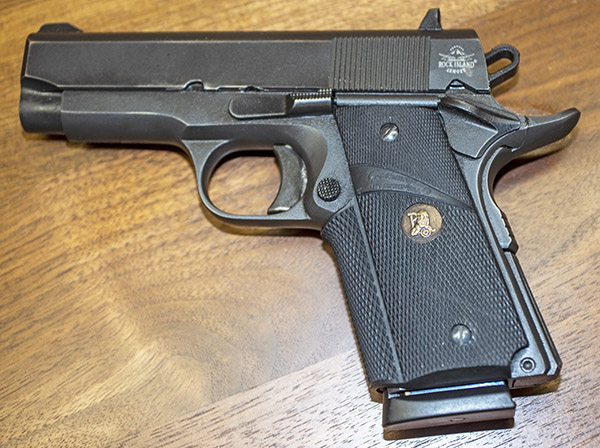
In 1973 when I picked up my MacManus 1911, my father and I both thought of ourselves as above-average shooters (Dad was a world-class trapshooter, and I did okay with a rifle). We assumed we could do well with a handgun, too. That is, until I came home with my 1911. We tossed a soda can about 20 feet out in our backyard and shot at it (in those days we could do that). I went first and emptied an entire magazine without hitting the can once. Dad had a laugh and then he tried. He didn’t do any better. We concluded that pistols were just not accurate.
I felt that way until I met Sergeant Major Hickman. He had heard about my MacManus award and he asked if I’d like to learn how to shoot the 1911. You know what my answer was. The Sergeant Major and I spent a lot of time on the Rutgers Campus Police pistol range over the next year. What follows is what he taught me.
1. Get A Grip
Forget all the Hollywood silliness. We don’t hold guns sideways like gangbangers, we don’t shoot from the hip, we’re not interested in how fast we can empty a magazine (the video above notwithstanding), and we don’t fire more rounds than the gun holds.
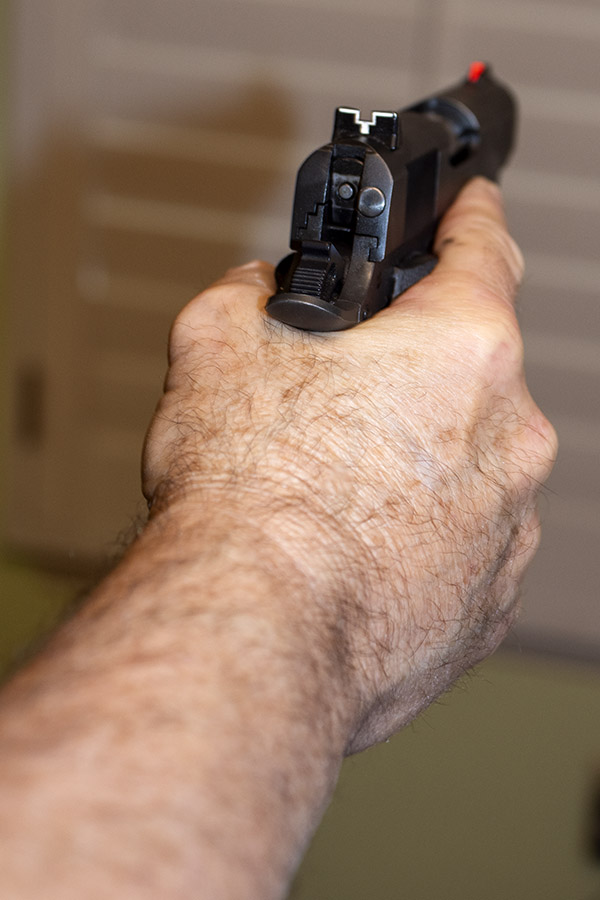
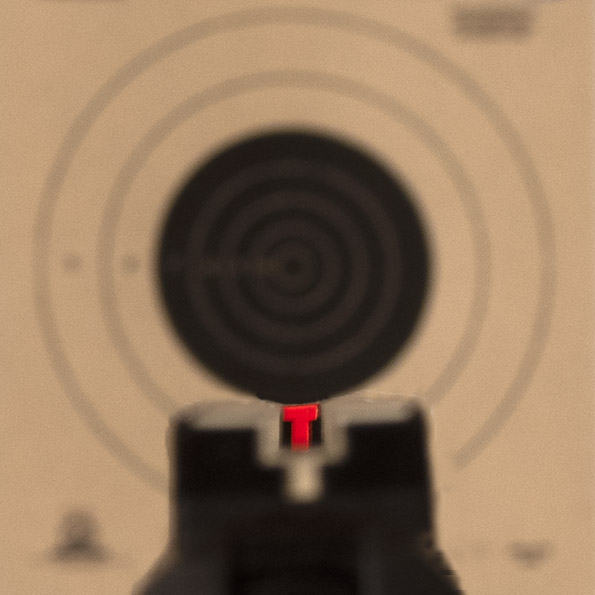
A handgun should nestle in the web of your hand, and it should form a straight line with your forearm. In this photo, the camera focused on the rear sight, which is not the way to do it. Focus instead on the front sight.
Back in the day, it was all about bullseye competition, and that involved shooting with iron sights and one hand only. Sergeant Major Hickman showed me how to stand at about a 30-degree angle to the target, place the pistol firmly in the web of my hand, close my eyes, and bring my arm up to point the pistol at the target. “When you open your eyes,” he said, “the sights should be on the bullseye.” He continued by telling me that if I had to twist my body or move my arm to bring the gun to the bullseye, my stance was wrong. When I could close my eyes, bring the gun up, open my eyes (both eyes), and the sights fell naturally on target, my grip and stance were correct. The grip should be tight, but not so tight that my hand trembled.
Pachmayr grips are my favorite for a 1911. They fit my hand perfectly.
I like fancy grips, but fancy doesn’t put shots in the black. Over the years I’ve found the best grips for a 1911 are Pachmayrs. I have others that are prettier, but the Pachmayrs offer the best control and consistency. You can still get Pachmayr grips on Amazon.
2. Front Sight Focus
When I fire a round at a target, I don’t see the target. It’s a Jedi (read: Sergeant Major Emory L. Hickman) mind trick. When my gun fires, all I see is the front sight and the bright orange propellant flash. When I see the front sight outlined by the muzzle flash, I don’t need to see the target. I know the bullet is in the black.
Focus should be on the front sight. The target and the rear sight should be blurred. The sights you see here are Millet sights installed by good buddy TJ.
I start by putting the top of the front sight at 6:00 on the target’s black bullseye, but my focus quickly shifts to the front sight and it stays there until the firearm discharges. The target and the rear sight will be a blur, but the front sight will be sharp as a tack. It’s where all my concentration is, it’s the only thing I’m interested in, and per Sergeant Major Hickman’s instruction, I will have both eyes open. I’m not worried about what my other eye sees. My total focus, my total being, is on that front sight. That’s the biggest secret in handgun shooting. Other things are important, too, but not as important as front sight focus. Front sight only. It’s hard to do, but when you do it, this single thing will improve your shooting more than anything else.
3. Breath Control
When I’m ready to shoot, I take a deep breath, I let it partly out to what feels like a natural pause point, and then I start squeezing the trigger while continuing to focus on the front sight. Sergeant Major Hickman told me that’s what it takes. He went on to tell me that the Soviet marksmanship training unit (the Soviet Army’s pistol team) had researched what made the difference between simply hitting in the 10-ring versus hitting in the x-ring (the x-ring is a smaller circle within the 10-ring used for breaking ties). The Soviets found that their top target shooters, without realizing it, were actually firing between heartbeats. They didn’t realize they were doing this, but they were. That’s info only; we’re interested in holding our breath at a natural exhalation point for the second or two it takes to focus on the front sight and squeeze the trigger. Speaking of which…
4. Trigger Control
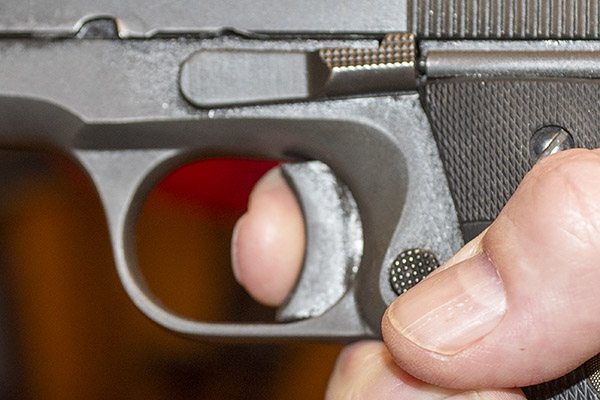
Point one on the topic of trigger squeeze: Keep your finger off the trigger until you are ready to shoot.
The trigger finger pad should engage the trigger, not the first joint of the trigger finger.
Sergeant Major Hickman taught me that when shooting a single action semi-automatic or a revolver in the single action mode, I should put the pad of my trigger finger (the part of my finger midway between the tip and the first joint) on the trigger. He explained that while I was focused on the front sight, I should start squeezing the trigger, but not think about it. The front sight will be aligned in the blurry rear sight, but it won’t be possible to make everything freeze on the target. The front sight will always have some motion on the target. The Sergeant Major told me not to worry about that. “The only way to make everything motionless is to be dead,” he said, “and you’re not dead.” Sergeant Major Hickman told me to simply hang on to the front sight and steadily increase trigger pressure. Just focus on the fundamentals, he said, and the groups will get smaller. Let the target swim around. Maintain a good grip. Hold the right stance. Focus on the front sight. Breath control. Trigger squeeze.
5. Be Surprised
What you want, the Sergeant Major said, is for the gun to surprise you. What you don’t want to do is anticipate the shot and then jerk the trigger. That will cause you to flinch (to jerk the gun in anticipation of the shot), and the gun will be pointed somewhere other than the target when it discharges. When I did it right, I was (and I still am) surprised when the gun fires. In fact, when I’m really doing it right and concentrating on the front sight, I do not even hear the gun fire. When that happens, you know you are on your way. Sergeant Major Hickman was right: Seeing the orange flash and not hearing your shots means the bullets are in the black, and that is a good feeling.
6. Dry Firing
You can’t do this with most guns chambered for the .22 Long Rifle cartridge, but you can dry fire until the cows come home with any centerfire handgun, and I do. A lot. I have a small black dot hanging in my office that I use for a target, and I spend a bit of time nearly every night dry firing a handgun at it. It is one of several tricks Sergeant Major Hickman taught me. I’m focused on the front sight when I do this, and I’m looking for it to not move when the hammer falls. I want the front sight to remain motionlessly centered in the rear sight groove (and the top of the front sight to remain even with the top of the rear sight) when the hammer falls. Doing this on a daily basis improved my shooting significantly some 50 years ago; doing it today on a regular basis keeps me sharp.
7. A Penny (or more) For My Thoughts
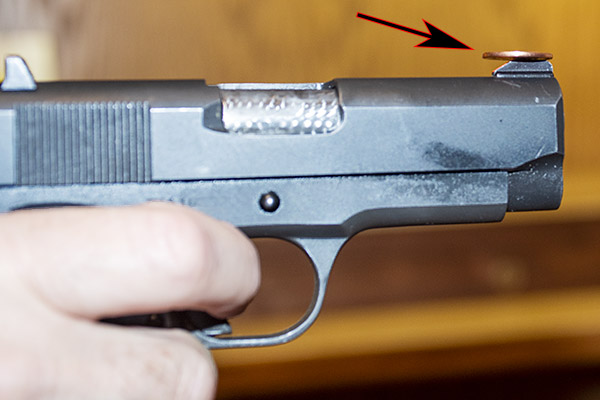
If you can balance a penny on the front sight and it remains in place when the hammer falls, you are making progress.
Here’s another trick the Sergeant Major taught me: Balance a penny on top of the 1911. Or a nickel. Or an empty case. You want it to stay put when the hammer falls. When that happens, it indicates that I didn’t jerk the trigger. When I can do that consistently, I know I’m doing well.
8. The Bic Trick
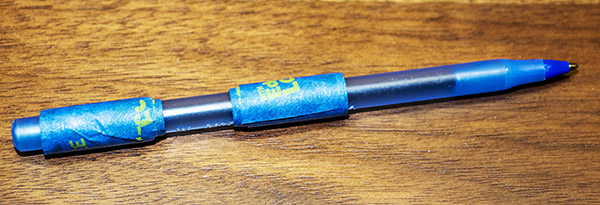
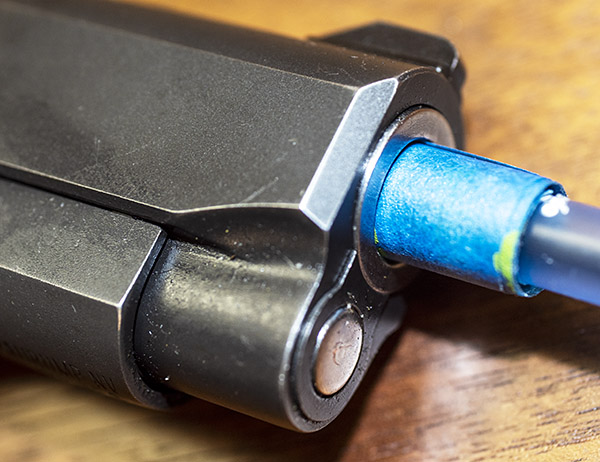
A Bic wrapped in masking tape. Read on…this gets interesting.
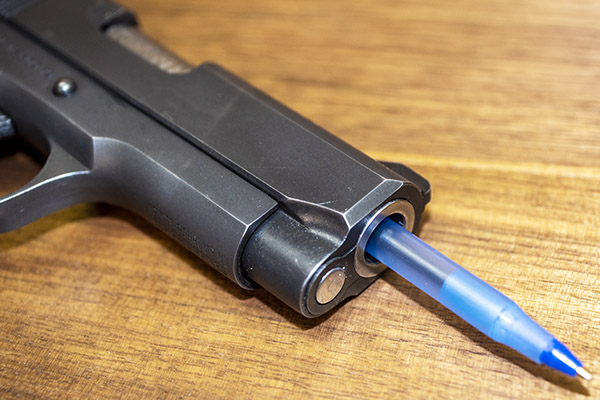
Here’s yet another cool trick Sergeant Major Hickman taught me: Take a Bic pen and wrap tape around it in two places so that the pen fits snugly but with no resistance inside the barrel. Put the rear end of the pen all the way into the barrel. When dry firing, the firing pin smacks the back of the pen and the pen will jump forward.
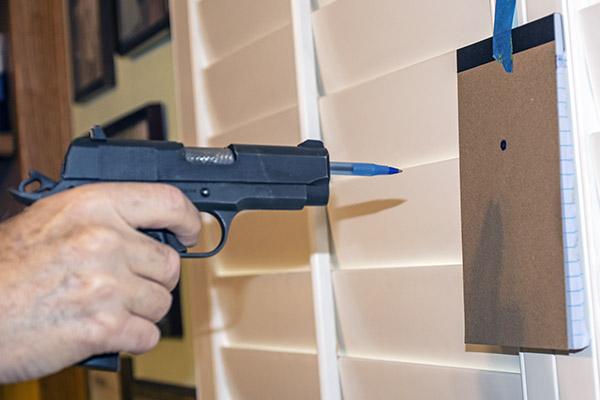
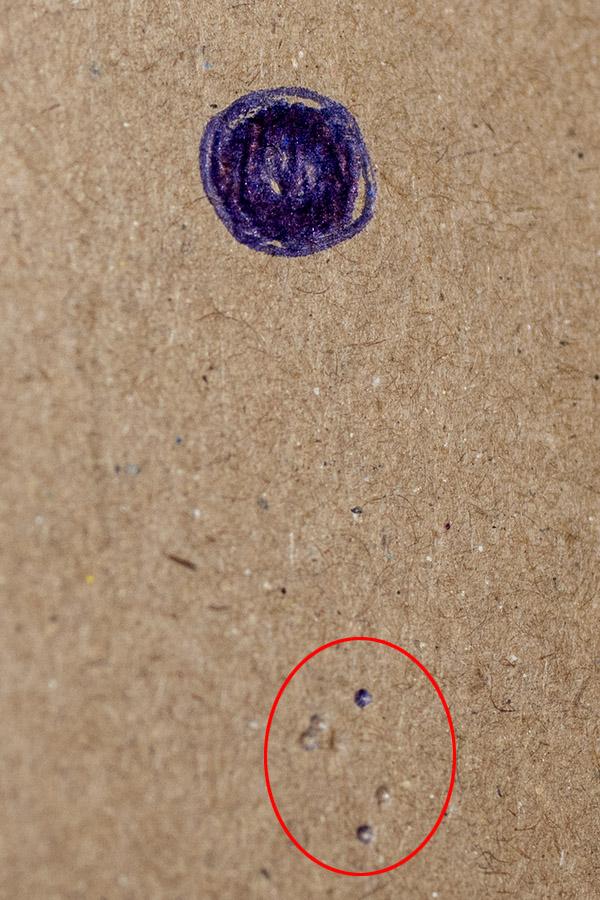
The tape should be wrapped to a diameter that fits snugly without drag in the barrel.Loaded and ready to shoot.My indoor target. The pen will shoot out with surprising velocity. Don’t point it at anyone and use a pad so the pen doesn’t shoot through the paper target.Look at that…a Bic group!
If you stand like you would when live firing, but with the pen’s tip a couple of inches from a target taped to a wall, the pen’s point will imprint on the target. Do that a few times and you’ll get a group, just like you would if you were firing live ammo. Do it a lot. It will help you to master the fundamentals described above, and your live fire groups will shrink. Trust me on this: They will shrink a lot.
9. Live Firing
I have never been able to shoot a handgun well without substantial time on the range. Let me say that again: I did not get better without substantial live fire practice. I spend a lot of time on the range, and it helps to keep my skills sharp. I fire two to three hundred rounds through a handgun every week. If you don’t have a sponsor or you don’t reload, you better be rich because factory ammo costs are going to roll up pretty quickly. I don’t have a shooting sponsor, so for me, reloading is the way to go. Here’s a good place to get information on how to get into reloading.
10. The Surprise Empty Chamber
Here’s another great training approach Sergeant Major Hickman shared with me: Have a buddy “load” your gun, but without you seeing what he (or she) is doing. What you want your buddy to do is sometimes load a live round, and at other times, to load no round (or an empty case if the gun has a loaded chamber indicator). You want to not know if you are dropping the hammer on a live round or an empty chamber. That’s going to tell you immediately if you are jerking the trigger (or flinching). If it’s not a live round and the gun twitches when I drop the trigger, I know I still have work to do. When I can drop the hammer and the gun remains motionless, I know I’m making progress.
11. Empty Cases at an Empty Head
Empty cases? Yep. They are surprisingly useful training aids for improving concentration, especially when bounced off your noggin.
Sergeant Major Hickman used to stand behind me when I was shooting and throw empty .45 cases at my head. At first I felt the cases hitting my head and I reacted (the Sergeant Major wasn’t being gentle). But after I became one with the front sight (I can’t emphasize the front sight enough), I stopped feeling those .45 ACP empties hitting my head. I’d have little welts afterwards, but I stopped feeling the cases when they whacked me. I realize this is a trick that’s kind of out there, but it sure helped me hone my concentration.
12. The Right Load
The last thing I’ll mention is that having a load optimized for your handgun really does make a difference. If you don’t reload, your options are limited to buying a bunch of different factory offerings and seeing what works. If you reload, though, you can develop a load tuned to your handgun. We’ve done a number of blogs on the optimal loads for different guns, and I’d invite you to peruse our Tales of the Gun page to read what we’ve found works best in our guns. I’ve found that a 230-grain cast roundnose bullet over 5.6 grains of Unique with an overall cartridge length of 1.250 inches is a very accurate load. Another favorite is a 185-grain cast semiwadcutter bullet over 5.0 grains of Bullseye with that same overall cartridge length of 1.250 inches. So does 4.2 grains of Bullseye and a 200-grain cast semiwadcutter bullet (and again, the same overall cartridge length). Be advised, though, that most 1911 handguns won’t feed these last two loads if the gun has not been ramped and polished. If you need your 1911 ramped and polished, look no further than TJ’s Custom Gunworks (he’s the best there is).
A Half Century (and a ton of lead) Later
So here I am, 50 years later, writing about my 1911 mentor, Sergeant Major Emory Hickman. I remember that first range session with him like it was yesterday. After listening to him and practicing what he taught me, my skills improved to the point where I could easily keep all of my shots on paper, with 80 percent of them hitting the black bullseye. When I got to that point, I asked the Sergeant Major if I should have my 1911 accurized. In those days, I wasn’t even sure what “accurizing” entailed, but it sounded like the right question to ask. Sergeant Major Hickman smiled. “Sir,” he said (I was, after all, a Second Lieutenant), “may I put a few shots downrange?”
I handed the 1911 to Sergeant Major Hickman. He loaded a magazine, inserted it in the 1911, released the slide to chamber the first round, and became the visual definition of intense and perfect concentration. Five shots later, there was one ragged hole centered in the bullseye. That one ragged hole wasn’t much larger than the hole a single .45 bullet would have made. “Maybe you could get it accurized somewhere down the road, Sir,” he said. “but for now, I think it’s good enough.”
The 1911 featured in this story is a Rock Island Armory Compact 1911. My Rock Compact 1911 has been extensively upgraded by TJ (of TJ’s Custom Gunworks). This handgun is 100% reliable with any of the loads listed above (and factory hardball ammo).
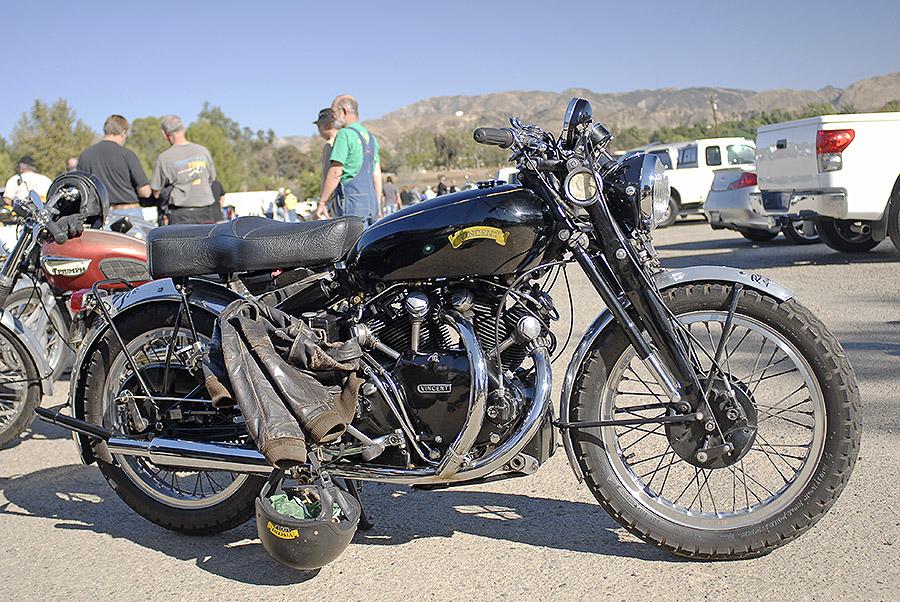
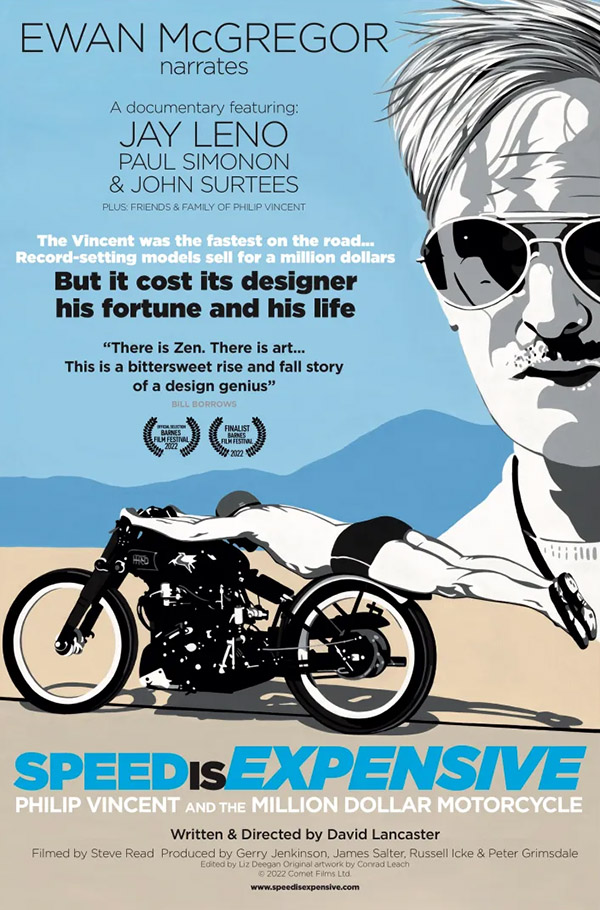
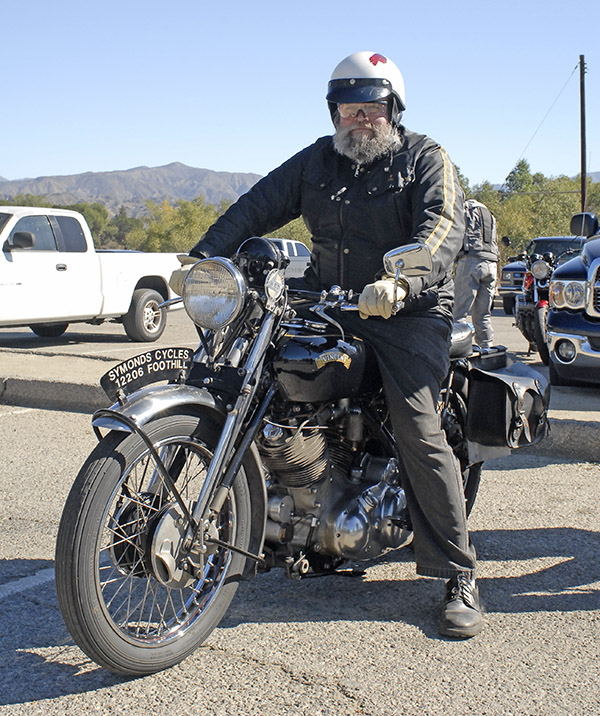
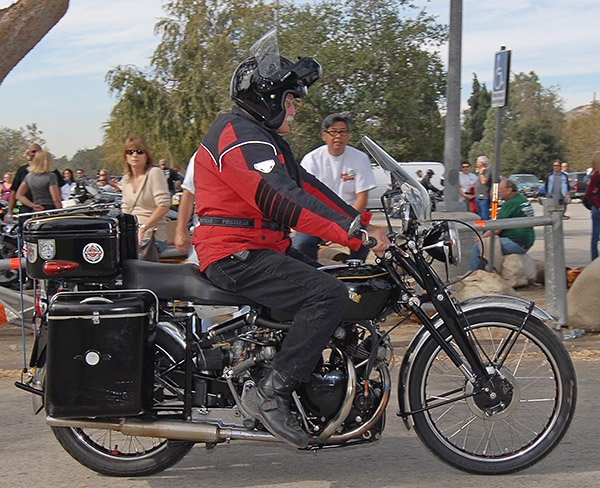
There’s a new motoflick due for release momentarily, and it promises to be a great one. You can’t watch Speed Is Expensive yet, but you will be able to very soon. Speed Is Expensive is the story of Philip Vincent and the Vincent motorcycle. A Vincent was the first motorcycle ever to break the 150 mph barrier (Rollie Free was the bathing-trunks-only rider, who shed all other clothing and rode stretched out on the saddle to reduce drag), and a Vincent became the most expensive motorcycle ever when one sold at auction in 2018 for 1.2 million dollars. They are mythical motorcycles.
The movie will be on Netflix in the near future, or you can pre-order Speed Is Expensive on Amazon now. I’m going to watch it as soon as it’s available. Watch for a review in the near future.
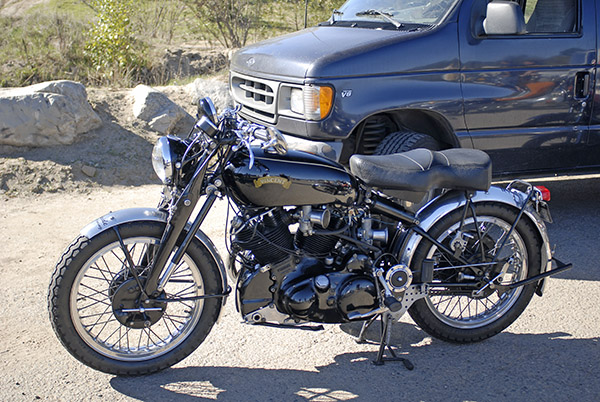
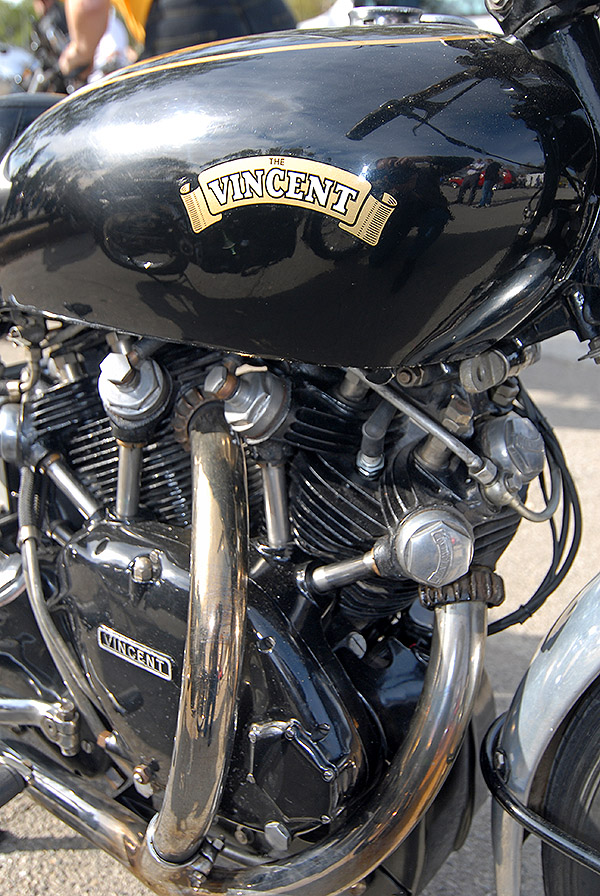
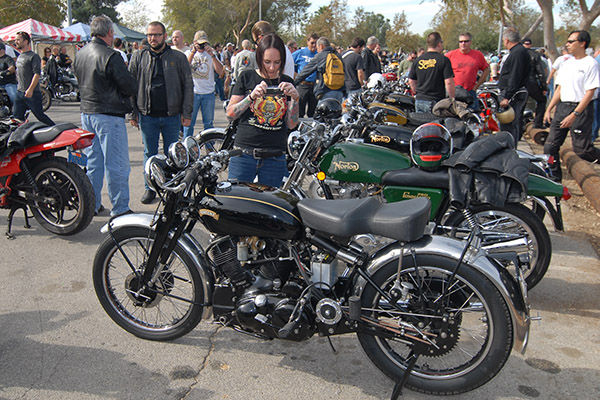
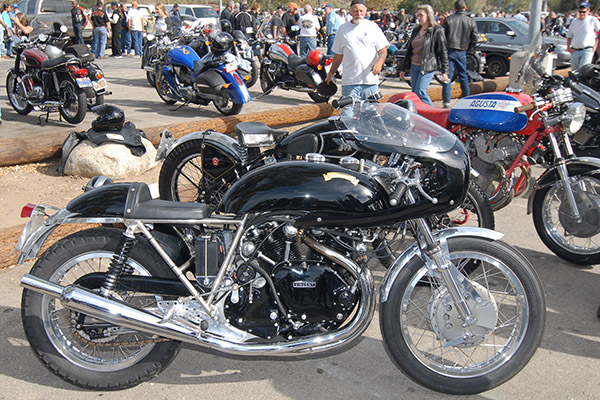
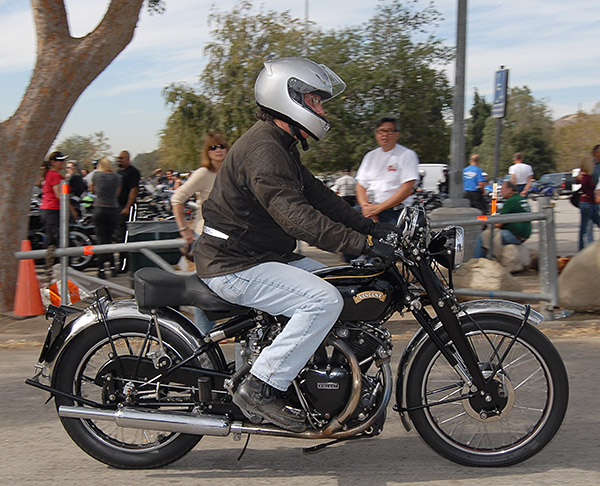
Vincents have always had an aura of incredible power and exclusivity. I see them at the Hansen Dam Britbike meets in my part of the world (it’s where I grabbed the photo at the top of this blog and the others below). The Hansen Dam events occur once or twice a year at Hansen Dam, about 70 miles from my home. All the photos you see here were from events in the 2004-2008 time frame, which means it’s been about 15 years since I’ve attended. I need to get out there again.
I have a few more Vincent photos from Hansen Dam, and I thought I would share a few of them here.
Like what you see here? Keep it going with your contribution to ExNotes!

 Having planned to use all my vacation time while in Peru, it wasn’t too difficult to load up on my work early in the week and take a four-day weekend to knock out Lake Titicaca (did I mention it has a funny name?). Allowing four days would provide me with enough time to take a leisurely tour bus to this region of Peru, get some hikes and tourist attractions in along the way, and then return on an overnight bus on Sunday. This would assure (hopefully) that I would make it to work on time Monday morning. Instilling project management principles usually results in a successful outcome. To me the planning of a project or a vacation followed the same rigid processes. Of course, the vacation ones always had a few surprises along the way that I would have to adjust to, but that’s part of the fun.
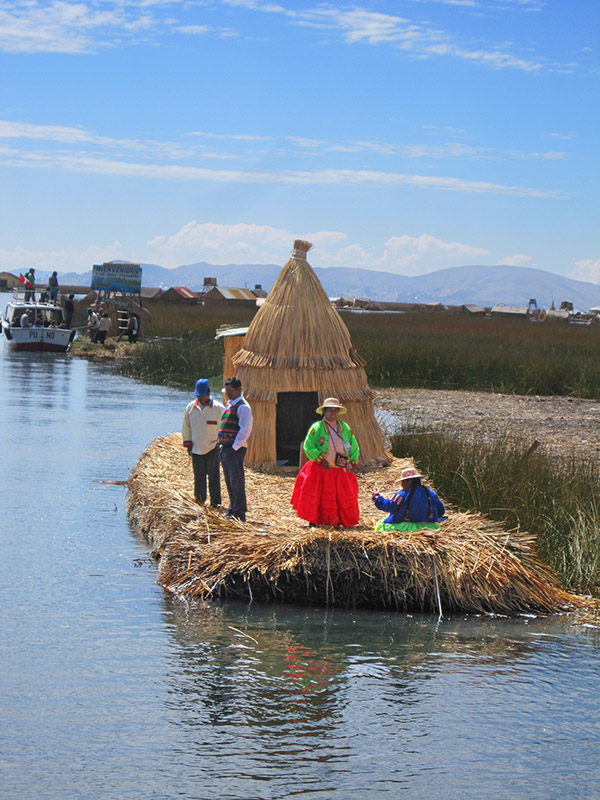
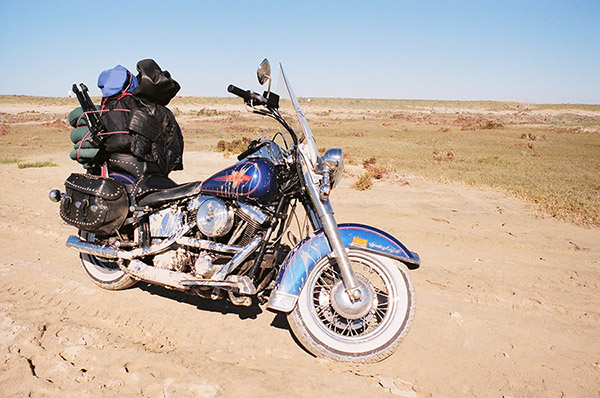
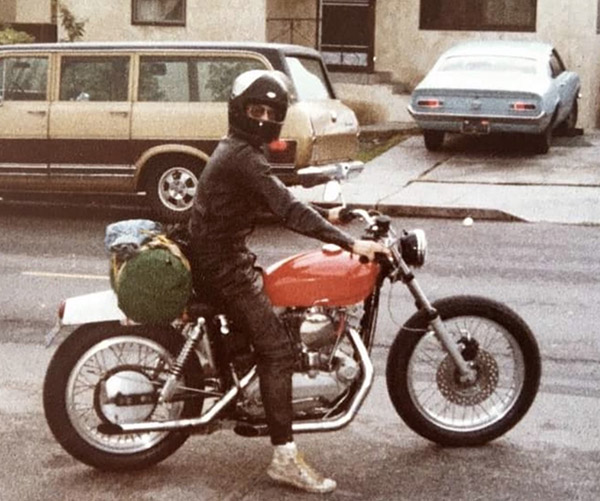 The closest I got to an Iron butt ride was on a 1968 Sportster. This motorcycle is another poor choice for long distance riding. At least the seat wasn’t 4 inches wide on the Sporty. I started out from Van Horn, Texas. It was late March, so it was still pretty chilly in the pre-dawn hours. I rode all the way to Point Loma, California and it took around 18 hours. Of course, with an old Harley all that time wasn’t spent riding. You have to twirl wrenches a bit.
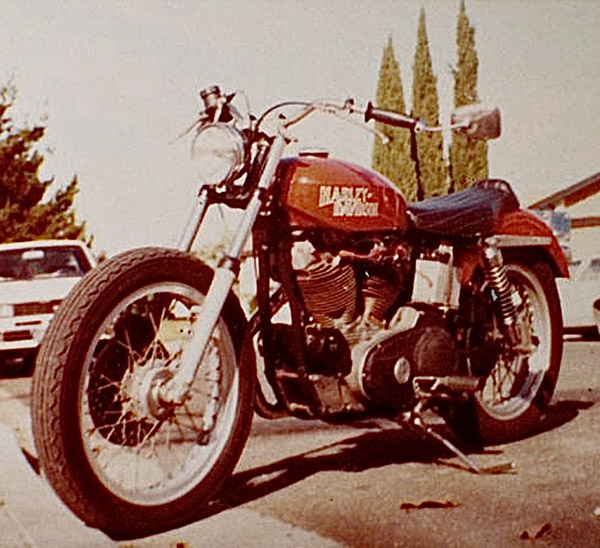 The Sportster’s charging system failed because the mechanical, coil and point type voltage regulator shook itself to pieces. Running a total loss ignition system I had to stop at gas statins and charge the battery every so often, kind of like a modern EV car. As the voltage would drop the bike would start missing due to the plugs whiskering.