Pictured Rocks National Lakeshore

By Joe Berk

The destination on this fine day was Pictured Rocks National Lakeshore, part of the National Park Service network.  It’s situated in the Hiawatha National Forest along the shores of Lake Superior, which is the large body of water you see in the above photograph.  Pictured Rocks lived up to its name; the drive to get there was even better.  It’s part of Michigan’s Upper Peninsula, and once we left the freeway on our ride out of Green Bay, Wisconsin, the roads were majestic.  We hit it at just the right time, too, which was in mid-October when the leaves were turning colors.  You might think I turned up the saturation in the photo below.  I did not.  You’re seeing it the way it came out of the camera (my Nikon D810, a 24-120 lens, and a Hoya polarizer).

The Pictured Rocks National Lakeshore area includes sandstone cliffs, beaches, waterfalls, and sand dunes.  There are many lakes in this area as well.  The roads are lined with forests.  It’s a nice area, and my thoughts were that it would be well suited for exploring on nearly any kind of motorcycle in the summer months (it’s cold in the fall, and from what I understand, really cold in the winter).   Speed limits were low (I think the highest we saw was 55mph, many areas were 40 or 45mph, so a small bike would do well here).   All the roads were fairly straight with few curves; a big touring bike like a Harley or a Gold Wing would be fine, too.

The temperatures are brisk this time of year. We had frost on the windshield in the morning.  This is a good time of year to take in the changing colors, though.  The leaves and the ride were incredibly scenic.

Once we entered Pictured Rocks National Lakeshore, we found that it’s not like the Jersey shore or the Grand Canyon’s South Rim; we couldn’t just ride along the edge of Lake Superior and take in the entire shoreline.  Nope, the way to see this National Park is by riding to a series of points along the lakefront from the interior.  Getting to each involves taking different roads to their ends where they meet Lake Superior.  That’s okay, because doing this in the fall with the leaves turning colors makes for a beautiful ride.

The town where we stayed the night is Munising (pronounced just like it’s spelled:  Muni Sing).  There is at least one glass bottom boat tour in the area, although we didn’t do that.

We couldn’t get anyone to recommend a restaurant in Munising, and after trying one, we understood why.  But that’s all right.  There are several shops in town that sell pasties, and the pasties are great.  Muldoon’s Pasties is the one we tried.  (Pasties are not what you might be thinking.  They are actually pastries.)  We had the chicken pasty and then a cherry one for dessert, and they were awesome.  That one chicken pasty you see below was more than a meal for both of us.

For this trip, we flew from Atlanta (where we stopped to visit with an Army friend and mentor) to Milwaukee, where we rented a Mazda CX30.  It’s an all-wheel-drive automobile that was okay, but not okay enough for me to ever consider buying one.

The CX30’s fuel economy was good, ride comfort (while better than a motorcycle) and road noise were not.  It would probably be an okay car for the area (they get a lot of snow up here in the winter).  We put about a thousand miles on the Mazda and had no issues, other than the tire pressure indicator nearly constantly flashing.  That seems to be a common occurrence with Enterprise Rental; the car we rented in Atlanta had the same problem.

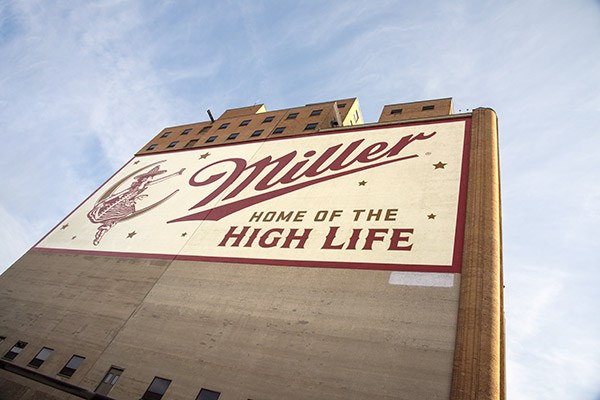
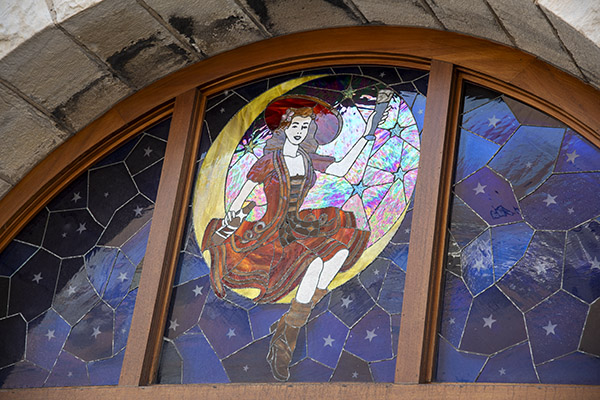
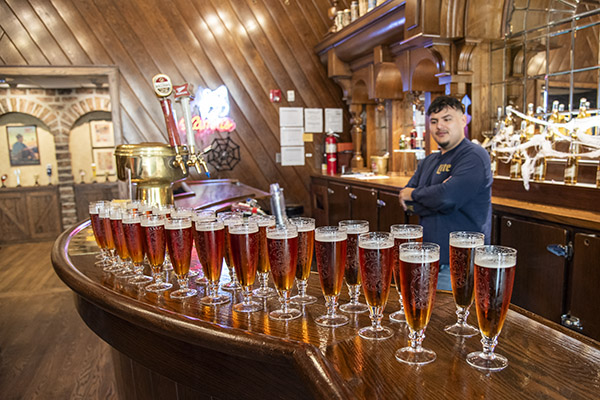
We’ve got more good stuff coming your way:  The Harley-Davidson Museum, World War II military motorcycles, the Green Bay Auto Gallery, the National Rail Museum, the Miller Beer tour, the Pabst Mansion, and a few other stops.  Hang in there, click on the pop-up ads to keep the lights on and the content flowing, and as always, stay tuned.


There must be a lot of potheads in Michigan.  I believe I saw more marijuana stores in Michigan than any place else I’ve ever been (and coming from the Peoples Republik of Kalifornia, that’s saying something).  There was one cannabis store after another, especially in the Upper Peninsula.


Never miss an ExNotes blog:


Join our Facebook ExNotes page!


Don’t forget: Visit our advertisers!


Check out these offerings from Viking Bags!

Motorcycle Saddlebags
Harley Davidson Saddlebags
Motorcycle Luggage Bags
Motorcycle Sissy Bar Bags
Motorcycle Sissy Bars
Motorcycle Backpacks

.22 LR Rim Thickness vs. Accuracy

By Joe Berk

Here’s the latest accuracy rabbit hole I’ve gone down: Rim thickness as an accuracy factor for .22 Long Rifle ammo.

Kevin’s .22 Long Rifle ammo sorted by rim thickness.

My friend Kevin told me about a hypothesis that holds you can get even cheap .22 ammo to shoot well if you sort by rim thickness.  I researched this online, and like most things online, opinions are all over the map (Abraham Lincoln once famously said not everything you read on the internet is true).  Kevin told me about this and suggested it might make for an interesting blog.  I felt it was worth investigating, and I’d never considered .22 Long Rifle rim thickness as a variable until Kevin mentioned it.

Federal Value Pack .22 Long Rifle ammo.
Velocity data on the Federal Value Pack ammo. A bit optimistic, as it turns out.

Kevin had a specially fixtured dial indicator for measuring rim thickness (see the photo on top of this blog) and he lent it to me for this blog.  I sorted a bunch of Federal Value Pack 36 grain .22 ammo.  It’s cheap ammo.  I’ll get to the results in a second.

First, take a look at the SAAMI specs for sporting .22 Long Rifle ammo:

…and for match grade .22 LR ammo:

Yeah, I couldn’t see any difference between the two, either.  You’d think match grade specs would be tighter, but they’re not.  But check out that tolerance on rim thickness for both grades of .22 Long Rifle ammo…it varies from 0.036 to 0.043 inches.  That seems like a huge tolerance to me.

If you read the SAAMI .22 Long Rifle chamber specs, the dimensioning there is the same for the chamber’s rim cavity on a sporting versus a match chamber.  The chamber rim cavity can range from 0.043 to 0.051 inches.  It would seem that a max thickness rim in a minimum length chamber would have line-to-line contact between the bolt face and the back of the cartridge.  Any cartridge case that is less than 0.043 inches thick, or any chamber with the rim cavity longer than 0.043 inches, would allow clearance between the bolt face and the rear of the cartridge.  Thicker rimmed cartridges would have minimal room to move around in the chamber, and should be more accurate.

The rim thickness versus accuracy hypothesis sounds like it could make sense.  Differing rim thicknesses will influence headspace (.22 Long Rifle ammo headspaces on the rim), and that could influence accuracy.  Also, as Kevin pointed out, rim thickness will affect firing pin strike on the cartridge case, so if the thicknesses are identical, the firing pin strike should be the same (and that should result in improved accuracy).  It all sounds good, anyway.

I used Kevin’s dial indicator and measured rim thickness until I got tired of doing so (it took 62 cartridges for me to get there).  I found four different rim thicknesses:  0.038, 0.039, 0.040, and 0.041 inches.  I could see that the rim thicknesses were normally distributed with the cartridges sorted on my desk, but I thought it would be cool to prepare a bar chart and make that finding a bit more clear.

A rim thickness histogram. The rim thicknesses are normally distributed.

All the cartridge rim thicknesses I measured were within the SAAMI specification, but the SAAMI specification is liberal.

I headed to the West End Gun Club the next day with my most accurate .22 rifle, a beautiful CZ 452 Varmint model with a 14X Mueller scope.

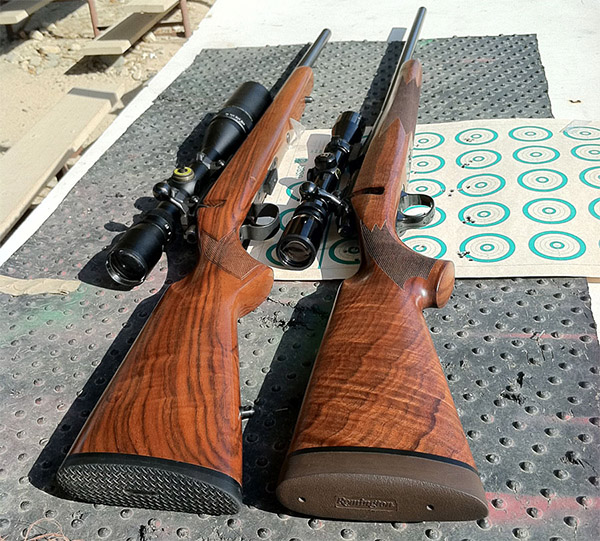
My CZ 452. I saw this photo on a forum and wrote to the owner asking if he’d consider selling the rifle. The answer was no. But a year later he contacted me to ask if I still wanted to buy it. With wood like that, my answer was “Hell, yeah…”

The plan was to shoot five-shot groups at 50 yards off the bench using the rim-thickness sorted Federal El Cheapo ammo.  Here’s how that turned out:

50-yard groups with ammo sorted by rim thickness.

All my shots felt right when the firing pin dropped, so I’m pretty sure that I wasn’t throwing the shots around due to poor technique.  This rifle normally shoots much tighter groups at 50 yards with standard velocity ammo.   The intent here was to see if I could get it to shoot better with cheap ammunition sorted by rim thickness.

Here’s how it all shook out:

Results show that for Federal Value Pack ammo, sorting by rim thickness does not improve accuracy. Note the average velocity figures; they are all well below Federal’s claimed 1260 feet per second value. All group size data in inches; all velocity data in feet per second.

My take on the above data is:

      • All the rim thicknesses I measured were well within the liberal SAAMI specification tolerance band.
      • Not surprisingly, rim thickness is normally distributed (something I’ve found to be true for most manufacturing processes).
      • Rim thickness, at least with my inexpensive Federal Value Pack ammo, has no effect on accuracy.  Well, almost no effect; that last group with 0.041-inch rims jumped in size.  But it was only one group.  I looked for more 0.041-inch-thick rounds to test this again and I couldn’t find any.
      • Rim thickness, at least with my inexpensive Federal Value Pack ammo, has no effect on average velocity.
      • Rim thickness, at least with my inexpensive Federal Value Pack ammo, probably has no effect on velocity variation.  Although the table above shows differences, it’s likely those differences would disappear if the sample sizes were larger.

Sorting by rim thickness is an interesting hypothesis, but my limited testing to assess the hypothesis shows it’s not worth the effort (at least with Federal Value Pack ammo).  I have Remington and Aquila target ammo, and I’m going to measure rim thickness on those two brands in the next day or so to see if the rim thickness variability is lower.   I’ll fire that sorted ammo through the CZ to see if the rim thickness hypothesis holds up with better ammo.   It’s another good excuse to get out to the range (not that I ever need an excuse).

Stay tuned, my friends.


Never miss an ExNotes blog:


Don’t forget: Visit our advertisers!


The Sopranos: Asbury Park

By Joe Berk

Asbury Park, New Jersey, is another Sopranos location.   In the series, several episodes depict Tony Soprano’s dreams.  It’s a well-worn cinematic technique, but David Chase (The Sopranos writer) did it well.  In the Asbury Park scene, Tony has been diagnosed with cancer and he pours gasoline over himself and self immolates in front of his minions.  Tony’s a good guy, you see, and he wants to short circuit his suffering and spare his friends the hospital visits associated with his impending lengthy illness.

In the video above, the building that spans the boardwalk is the Asbury Park Convention Center.   You can see it and the boardwalk, along with the beach (what we in New Jersey call “the shaw,” as in “Let’s go down the shaw…”) in the photo above this blog.

On the Asbury Park boardwalk, approaching the Convention Center.

In a later scene during Tony’s dream, Tony shoots Pauly Walnuts inside the Convention Center during a card game.  Throughout the series, Tony’s relationship with Pauly is complicated.  Pauly is probably Tony’s most loyal minion (along with Silvio Dante), but Pauly is constantly getting on Tony’s nerves.  The character development The Sopranos is very well done; it is one of many areas in which the show shines.   You probably can tell I am a Sopranos fanboy.  I am what I am.

Inside the Asbury Park Convention Center. The red arrow denotes where Tony (in his dream) shot Pauly.

The coin-operated binoculars you see in the video are no longer on the boardwalk, but they were there when I was a kid and I remember wishing I had the coins and the height to be able to see through them.  The benches you see in the video (on the boardwalk, facing the Atlantic) are still there.

Inside the Convention Center. It was built in 1929. I don’t think it is still used for conventions.  It would be cool if it did.
On the south side of the Convention Center, looking east at the Atlantic Ocean. In The Many Saints of Newark (a recently released prequel to the Sopranos), Dickie Moltisante (Tony’s childhood hero), murdered his girlfriend (and former stepmother) in the Atlantic at this spot. It’s a complicated plot.
Looking north along the Asbury Park boardwalk (on the northern side of the Convention Center, which was just behind me when I took this photo).

On the day I visited Asbury Park, contractors were erecting a stage right on the beach for a Bruce Springsteen concert the next day.    General admission tickets were $350; select seating tickets went as high as $4,000.  These were not scalper prices; these are the prices that were published for the event.  I learned this talking to a young lady inside the Convention Center.  I still have my New Jersey accent, and just for grins, I told her I went to high school with Bruce.  I didn’t, but I was having fun.

On the north side of the Convention Center, looking south. That stage to the left is where the Springsteen concert was going to be.

“Really?” she said.  I am Bruce Springsteen’s age, and young people are easily fooled.  I think she believed me.

“What was he like?” she asked, wide eyed.

“Truth be told, he was a first-class pain in the ass,” I answered. “Even in those days, he wanted everyone to call him ‘The Boss.’  It was weird, but we humored the guy.”  Her mouth opened in amazement. She was buying my line, but it wasn’t true.  There’s only one boss, and his name is Tony Soprano.


Never miss an ExNotes blog:


Don’t forget: Visit our advertisers!


Ride Oklahoma!

By Joe Berk

Unless you have visited Oklahoma or you live there, you probably wouldn’t think of Oklahoma as a motorcycling paradise.  But trust me, it is.  And finding the best rides in Oklahoma is easy, thanks to Oklahoma’s Tourism and Recreation Department.  Sue and I are always looking for interesting travel destinations, and as a guy who writes travel pieces for Motorcycle Classics magazine, my antenna goes up when I hear about great roads and great destinations.   Several years ago when I was working for CSC Motorcycles, we attended the Long Beach International Motorcycle Show.  In the vendor display area, Sue found a booth manned by the Oklahoma tourism folks.

One thing led to another, we received a package of travel information that would choke a brontosaurus, and shortly after that we were in Oklahoma.  I have a friend who retired in Tulsa, we visited a bit, and we hit a bunch of great destinations in Tulsa, Oklahoma City, and the surrounding areas.  I wrote several blogs about our visit, and several Motorcycle Classics Destinations articles.   These are the blogs:

But even with the above, we barely scratched the surface of what Oklahoma offers.   The materials the good folks in Oklahoma mailed to us included the Oklahoma Motorcycle Guide.   It suggests several rides, complete with maps and two or three pages on each ride.  The Oklahoma Motorcycle Guide is impressive.

A few suggested Oklahoma rides. Click on this image a couple times to enlarge it.

Imagine that:  One of our states issuing a motorcycle travel guide!   More good news?  It’s free, the latest version includes even more rides than does the version I received several years ago, and you can download it immediately at this link:  Oklahoma Motorcycle Guide Free Download

Trust me on this:  If you’ve been looking for your good next place to ride, Oklahoma needs to be on your list.


Never miss an ExNotes blog:


Don’t forget: Visit our advertisers!


A Tale of Two Two-Tone GMTs

By Joe Berk

Some time ago, we wrote a blog comparing the Casio Marlin and Rolex Sea Dweller dive watches.   This one is similar; it compares my nearly 40-year-old two-tone Rolex GMT II to a recently-released Seiko two-tone GMT.

Two GMT watches: The Rolex GMT Master II (left) and the Seiko two-tone GMT (right).  in the photos here, the Rolex has a much richer appearance; in real life, the Seiko looks just as good.
A close up of my Rolex GMT Master II, purchased new in 1986 when I was still a yuppie.  Note the cyclops lens over the date.  It really works.  The older I get, the better it works.
The Seiko two-tone GMT, purchased a few days ago.  The Seiko also has a cyclops lens over the date.  It’s a cool and useful touch.  This is a very nice watch.

I’m a sucker for a good-looking watch.  Many of my retired friends take pride in not wearing a watch, and many young people don’t wear watches (they’re glued to their cell phones all day; they can get the time there).  I always wear a watch.

The first watch I ever owned was a gift from my parents.  It was an inexpensive Timex that was completely unexpected, I loved it, and I wore it for years.  I first recognized watches as a status symbol and a cool thing to own when I was in the Army, and like all the other lieutenants overseas, I bought a Seiko chronograph at the Base Exchange.  After the Army came the aerospace industry where a Rolex was the status symbol, and when I was back in D.C. lobbying Congress to buy Aerojet cluster bombs instead of Brand X (Honeywell was Brand X for us), a jewelry store had the Rolex GMT Master II you see here.  I wore it full time for years after I first bought it, and then only intermittently after that.  I felt the Rolex was pretentious around clients, and I was afraid it would reinforce a feeling that they were paying me too much (which they were).  Now that I’m retired, the fear of being pretentious has been replaced by the fear of getting mugged, so I don’t wear it very often.

The hands of fate. The top arrow points to the bezel, which can be rotated in relation to the GMT hand (lower left arrow) to tell time on a 24-hour scale in a different time zone. The second-from-the-top red arrow points to the minute hand. The arrow on the right points to the conventional hour hand.  If you look closely at the inverted diamond at 12:00, you can see the bezel is slightly off.

So what is a GMT watch?  Basically, it is a watch that allows you to tell time in three time zones.   If you wanted to, one of the time zones could be Greenwich Mean Time (GMT), which is the time at the Greenwich Observatory in England.  Most of the time, I could care less what the time is in England, but that’s where the GMT descriptor originates.

Today, there are multiple approaches for time telling in different time zones, but the classic approach (and one followed by the Rolex and Seiko watches in this blog) is through the use of a third hand and a bezel with 24-hour numbering.  The way it works is this:

      • The standard hour and minute hands tell the local time.
      • The third hand can be shifted to tell the time in a different time zone.
      • The bezel can be rotated to tell the time in a third time zone.

There are variations on the above (like switching local time with destination time, etc.).  All of this may sound like a solution looking for a problem, but trust on this, when you travel to different time zones, it’s a very useful feature.

The Rolex GMT allows you to “step” the hour in one-hour increments by use of the winding knob when the knob is partially pulled out (some folks say this makes the Rolex a “true” GMT).  On the Seiko, it doesn’t have the “step” function; use of the winding knob advances either the third hand or the conventional hour hand without the one-hour clicks (depending on which click you bring the stem out to).   To me, either approach is acceptable.

The Rolex GMT Master II retails today for $14,050; the Seiko goes for $475.  There’s a lot more to the pricing story, though.  Prices on a Rolex are all over the map, and Rolexes sell for well above their suggested retail price.  Some, even used, sell for three or four times their suggested retail price.  I don’t know what my Rolex would sell for today as a used watch, and I’m not really interested because it’s not for sale.  The Rolex will eventually go to one of my grandsons.  I paid $3287 for it new in that Washington, D.C. jewelry store in 1986.  I could easily get my money out of it if I wanted to, but like I said, that’s not going to happen.

An all stainless (i.e., non-two-tone) Seiko GMT. These go for $317 on Amazon. It’s a good-looking watch.

Staying on pricing for a minute, the two-tone Seiko GMT is a relatively new model, so I couldn’t find it discounted on Amazon.  If the two-tone coloring is not important to you, you can get the all-stainless version on Amazon for $317, which is a smoking deal (it’s $158 less expensive than the two-tone version).

My Seiko GMT was an impulse buy.  Sue and I went out for lunch and there was a small watch shop a couple of doors down.  They had the two-tone model, which I had not seen before other than in online watch forums and Seiko’s website (I was in Tokyo last year, and I didn’t even see it there).  I asked the shop about a veteran’s discount, the guy said “you bet,” and mine set me back $402.  I like supporting local businesses, I like doing business with shops that offer a veteran’s discount, and I liked being able to see the watch in person before I pulled the trigger.

My Rolex runs fast, gaining about a minute a week.  That’s adjustable and would no doubt be corrected if I took the watch in for service, but I’m probably not going to do that.  I’ve had the Rolex serviced twice.  The last time was 25 years ago at the Rolex service center in Beverly Hills (where else could it possibly be?).  Rolex clipped me $1000 for the service.  I wasn’t happy at all.  After the servicing, the numbers on the click-detented bezel were offset from where they should have been, and when I bitched about that, they remounted the bezel.  It was better, but it is still offset a bit.  Within six months of that service (which included replacing the crystal), I noticed a gouge on the crystal.  I had worn the Rolex for 10 years before that and never had a scratch on the original crystal, so I have to wonder if I really received the sapphire crystal I paid for.  A servicing today will probably be about $1500 if I get the crystal replaced and the bezel numbers remounted.  It’s not likely I’ll spring for that.  Maybe I will.  I don’t know.  It’s something I think about now and then, but then I think about getting out on the range with a milsurp rifle or riding my motorcycle and I forget about it.  So far, the Seiko is keeping perfect time.  I’ll let you know if that changes.

The Seiko is a new watch, so I haven’t had it serviced yet.  Poking around a bit revealed that a typical mechanical watch servicing costs from $200 to $250. I think my local guy would probably be less than that.  It’s quite a bit lower than what a Rolex service costs.

Both the Seiko and the Rolex are automatics.  That means they are mechanical, selfwinding timepieces.  The good news is there are no batteries, and it doesn’t matter if I stay out in the sun long enough to charge the solar power source.  The bad news is that if I don’t wear an automatic watch for a few days, it stops.  When that happens, prior to the next time I wear it I need to wind it and set the time.  The Seiko, fully wound, has a 41-hour power reserve.  The Rolex has a 70-hour power reserve.  Rolex gets the nod here.

Regarding cosmetics, the “gold” bezel on the Seiko isn’t really gold; it’s plated.  The accents on the Seiko hands and the watchface are similarly gold colored (i.e., they are not real gold).  The Seiko’s jubilee bracelet links center areas are left a natural stainless steel finish.  On the Rolex, they are gold.  Another thing to note:  On any Rolex, wherever you see something gold, it’s real gold.  Nothing is plated on a Rolex.  The bezel, the watchface accents, the hands, the winder, and the jubilee bracelet are all solid gold.  Both watches look great, in my opinion.  The real gold obviously drives the cost of Rolex higher than a Seiko, but not enough to explain the $14,000 (or more) difference.  Most of the price difference is prestige pricing (Rolex gets away with it because some folks think they need such a thing).  I used to be one of them.  I’m not anymore.

About that jubilee bracelet:  What they refers to are the smaller links in the watchband’s center section.   Non-jubilee watches have bigger, single links instead of the jubilee bracelet’s three smaller links.  To me, the jubilee bracelet makes a real comfort difference.  The non-jubilee bracelet just doesn’t feel as good.

The Seiko is a much thicker case, and it sits higher on the wrist.  It’s enough to be noticeable.  The Rolex is thinner and I like the feel of it better for that reason.

Note the increased case thickness of the Seiko (on the right) compared to the downright thin Rolex. Rolex gets the nod here.

The Seiko’s stem winder is a push in/pull out affair.  The Rolex stem winder unscrews, which theoretically makes it more waterproof.   I don’t wear my watch in the shower any more (ever since I ruined a G-Shock by doing so), so the difference is meaningless to me.

One last area I’ll touch on is the clasp design.  Hands down (pardon the pun) the win here goes to Seiko.  The Seiko’s clasp has three retaining features compared to the Rolex clasp.  The fear, of course, is that the watch clasp comes undone and the watch slips off the wrist.  It could be damaged by a fall onto, say, concrete, or worse, go unnoticed.  The other fear is pickpockets.  I don’t know how difficult it would be for a pickpocket to lift your watch.  I once had a guy (a magician) remove a watch I was wearing without me noticing it.  That watch had a leather band and I later learned there’s a trick to it.  I don’t know if there’s a comparable trick for a metal bracelet, but if there is, I would think the Rolex would be more susceptible to such a thing.

The Seiko (on the left) clasp has three retaining features; the Rolex (on the right) has only one (which is a small dimensional difference between the outer clasp and the mating pin on the inner clasp). The Seiko design is better.

The bottom line to me is that the Seiko is a hell of a deal for under $500, and if you are looking for a watch that offers all the advantages of a GMT and is dressy, the Seiko is a good buy.  I own both, and I think Seiko hit a home run here.


There are other approaches to a GMT watch.  Citizen has a different dual time approach with their Nighthawk and Blue Angels models.  Many digital watches (some identified as GMT watches and some not) can display the time in different time zones at the touch of a button.  Casio has several cool models that do this.  The Citizen and the Casio watches are reviewed on our Product Reviews page.


Never miss an ExNotes blog:


Don’t forget: Visit our advertisers!


The Wayback Machine: Riding in High Temps

By Joe Berk

With the temps hitting over 100 degrees out here, I thought it might be a good idea to rerun a blog we ran a few years ago.  Let’s stay cool out here, folks!


I visited Chiriaco Summit and the Patton Museum last week (we’ll have a blog on it soon) and it was awesome.  But wow, was it ever hot.  As in 111 degrees when we left, and that’s not an unusually warm day out there in the Sonoran Desert.  The next town over is called Thermal, and a little further north there’s this place called Death Valley.  Death Valley recorded a whopping 131 degrees three weeks ago.  Sensing a pattern?

Looks like the Mojave, doesn’t it? Nope. That’s Joe Gresh in the Gobi Desert. Gresh and I rode across it after coming down off the Tibetan Plateau. It was a bit warm out there.

Yeah, it gets warm in these parts, and in other parts of the world as well.  Hot weather is not ideal riding weather, to say the least, but sometimes we find ourselves riding in shake and bake conditions. I’ve done it. I rode a 150cc scooter all the way down to Cabo and back in Baja’s hottest month of the year (September, when it was well over a hundred degrees every day).  It was humid down there, too, once we crossed over to the Sea of Cortez side of the peninsula.  We were literally entering the tropics as we crossed the Tropic of Cancer.  Whoa, that was rough riding!

Simon Gandolfi, suspenders flying in the breeze, riding my Mustang replica bike south of the Tropic of Cancer in Baja California Sur. It was one of the hottest rides I ever experienced.

When we did the Western America Adventure Ride with CSC and the guys from Zongshen, we rode through the same corridors described earlier above, riding across California and the Mojave Desert, through Joshua Tree, and on into Arizona with temps approaching 110 degrees.  That was brutal riding.

King Kong and Mr. Zuo in Joshua Tree National Park. That was another brutally hot day.  Higher higher temps were still in front of us when we later rolled through Amboy, California. This picture became the cover photo for 5000 Miles At 8000 RPM.  You should buy a copy or three (they make great gifts).

The ride across China that Joe Gresh and I did had similar challenges.  It started out hot, then it got cold as we rode into the Tibetan Plateau, and then it became brutally hot and humid as we descended into central China and rode east to Qingdao.  That was a 38-day ride, and I’d guess it was well over 100 degrees for at least 30 of those 38 days.

The risk, of course, is heat stroke, and it’s often not the kind of thing you can feel coming on.   You’ll think you’re okay one minute, and the next you’re waking up in an emergency room wondering what happened.  If you start to feel a headache while riding in hot weather, you are already perilously close to heat stroke.  You need to stop, drink copious amounts of water, and get some shade.   The better approach, though, is to not let yourself get anywhere near that condition, and that’s what this article is all about.

It almost seems like heresy to say it, but my first bit of advice about riding in hot weather is:  Don’t.  Given the choice, postpone the ride.  But let’s assume that this is not an option, as was the case for each of the rides mentioned above.  Okay, then…here’s my guidance on the topic.

12 Hot Weather Riding Tips

One: Don’t ride naked.  I’m not trying to be funny here, and I’m not implying you might be the kind of person who would go down the road wearing nothing at all (although there is that story about Gresh riding around with only a bathrobe).  Nope, what I’m talking about is not shucking your safety gear.  You have to wear it.  All of it.  ATGATT.  All the gear, all the time.  You can’t peel it off just because it’s hot.  It’s saved my life.

My Viking Cycles mesh jacket and the mighty Enfield.

Two: Wear a good mesh jacket.   These are available from several sources.  I have a Viking Cycles jacket I’m wearing these days and it works well.  I wore a Joe Rocket mesh jacket on the ride across China and it made a big difference.  You can get them from Viking Cycles, CSC Motorcycles, British Motorcycle Gear, and other sources.  Trust me on this…you need a ventilated jacket for riding in hot weather.  EDIT:  We’re getting interesting comments advising not wearing a mesh jacket in hot weather.  Make sure you read the comments below, and for those of you who responded, thanks very much!

Three: Use a cooling vest.  These things actually work, but they’re not as easy to use as it sounds.  They don’t work for long, but they work.  The idea is you soak them, and then wear them under a jacket.  The airflow causes the water in the vest to evaporate and that cools the vest and you.  I’ve found that on really hot days these vests need to be remoistened about every thirty minutes, but you should be stopping that often anyway (more on that later).  It’s the remoistening part that I don’t like.  It seems like they take forever to soak up water when you remoisten them.  I’ve found it easer to just get my clothes wet (see the next point below).

Four: Go soak your head (and everything else).  Don’t laugh; I’ve done this.  On the Baja ride I mentioned above, it was so unbearably hot that we took to pouring water down the inside of our riding jackets and inside our helmets at every stop.  We became rolling evaporative coolers.  It helped.

Five: Change your riding hours.  On the really hot days, I like to hit the road at 0:Dark:30.  Get out and get a hundred or so miles in before it gets unbearably hot.  You’d need good lighting on your bike to do this (I generally don’t like to ride at night, but I’ll make an exception when I know it’s going to be hot).   This is difficult to do when riding in a group because it’s hard to get everybody moving that early.  If it was just me and Gresh or Welker, we’d leave way early and get in a couple of hours of riding (or more) before the sun comes up.

We knew it was going to be brutally hot riding through Joshua Tree and the Mojave Desert, so we left just before sunup on the first day of the Western America Adventure Ride.

Six: Drink a lot of water.  The problem with riding in high temperatures is you don’t realize how much water you lose through perspiration.  My advice is to stop every 30 minutes and drink a bottled water.  Like I said above, most of us ain’t spring chickens, and you might be wondering if this means you’re going to be stopping a lot to pee.  Hey, it’s a common old guy problem, but it won’t be in hot weather.  Drink a lot of water; you’ll lose it through perspiration as you ride.

Seven: Avoid alcoholic beverages.  Alcohol will cause you to dehydrate more rapidly, and that’s the opposite of what we’re trying to do here.  You shouldn’t be consuming alcohol on a motorcycle ride anyway.  Drinking any kind of alcohol while riding in hot weather is just stupid.  Where I found you really have to watch this is when riding in a large group (there will be one or two riders who have to have that beer or two at lunch).

Beer is good, especially when it’s a Tecate at the Old Mill in Baja overlooking Bahia San Quintin. But save it for the end of the day, when the bikes are parked for the night.

Eight: Stop regularly to cool off.  Find a bit of shade or someplace air conditioned, and get off the bike to cool down.   When I ride in hot weather, I usually stop to cool off and rehydrate every 30 minutes or so.

Stopping to cool off at the Tropic of Cancer. Wow, it was hot and humid down there!  We were off standing in the shade, drinking bottled water.

Nine: Keep your tires at recommended pressures.  Another thing you definitely don’t want on a hot day is underinflated tires.  Tires flex with every rotation, and flexing causes the tires to heat.  Throw in high road surface temperatures with underinflated tires, and you’re flirting with a blowout.  This is especially important to remember if you’re one of those guys or gals who deflate their tires for dirt riding.  Don’t forget to pump them back up when you get back on the asphalt.

Ten: Don’t speed.  Tar melts on hot days, and melted tar is slick.  Factor that into your riding when it gets toasty.

A meal fit for a king, but not for lunch. You wouldn’t want to ride in hot weather immediately after this Baja seafood extravaganza.

Eleven: Eat light.  Don’t over indulge.  Heavy meals put a strain on your digestive system and your heart, and that can elevate your body temperature.  When I was involved in testing munitions out in the Mojave on hot days (where it was sometimes over 120 degrees), we always brought along melons for lunch and nothing else.  We didn’t need to keep them cool.  They were a great treat, they seemed to make it a little cooler on those horrifically hot days, and they help to keep you hydrated.  Good buddy Sergeant Zuo seemed to know all about that in China, too.  We were riding through Ledu in central China one ferociously hot day when our favorite Chinese NCO stopped the group, disappeared, and returned with a couple of watermelons.  That was a welcome respite and a marvelous treat.  We ate a lot of watermelon in China.

Gresh taking a break in Ledu, China. That’s the Yellow River (China’s Mother River) behind Uncle Joe.

Twelve:  Lighten up on the low sodium schtick.  A lot of us older guys try to watch our sodium intake.  When I was in the Army, they actually gave us salt tabs on really hot days when we were in the field, the theory being that we needed the sodium because we were losing so much through perspiration.  I later heard the Army reversed that practice, but the fact is you lose a lot of minerals through perspiration.  I don’t worry about my sodium intake when riding on hot days.


So there you have it.   You know, most folks who ride motorcycles these days…well, how can I say this delicately?  We aren’t spring chickens anymore.  Motorcycling tends to be a thing mostly enjoyed by full-figured senior citizens, and we have to take care of ourselves, especially when we venture out on hot days.

If you other ideas about hot weather riding, let us know in the Comments section.  We love hearing from you.


Never miss an ExNotes blog:


Don’t forget: Visit our advertisers!


The Sopranos: Paterson Falls

By Joe Berk

Another one of the stops on my New Jersey Sopranos tour was Paterson Falls.  Although only about 40 miles or so from where I grew up, I’d never been there.

I knew of the town, though.  It’s an old industrial village with waterfalls, which meant that in the early days of our country it was perfect for industrial development. The falls provided hydraulic power, and that could be used to drive machinery.  Indeed, it’s where Samuel Colt built his first run of revolvers, which are known (not surprisingly) as Paterson Colts.  Paterson was established as the nation’s first planned industrial city in 1792, with its readily-available hydraulic power and close proximity to New York City and the Atlantic Ocean.  Paterson manufactured silk cloth, steam locomotives, textiles, paper, firearms, and aircraft engines.    It is centered on the Passaic River, which flows into Newark Bay and from there to the Atlantic Ocean.

The Passaic Falls are contained within the Paterson Great Falls National Historic Park, which is (as the name implies) part of the U.S. National Park system.  All this was news to me, which is kind of amazing when you consider that I grew up a short 40 miles to the south.  I’d never known any of this, and to learn about it at my age was surprising.  I’ll give the credit for that to David Chase (the guy who created The Sopranos).  Had that show not sparked my interest, I’d still be ignorant.

So, let’s move on to the scene in The Sopranos that caught my attention.  It’s the episode in which Mikey Palmici (Uncle Junior’s driver and bodyguard) throws a drug dealer off the bridge over the Passaic Falls:

That episode you see above occurred later in The Sopranos.  There was another scene in the very first Sopranos episode on the same bridge shown above in which Hesh Rabkin and Big Pussy Bompensiero (two of The Sopranos characters) threaten to throw a health insurance company executive (a guy named Alex Mahaffey, played by Michael Gaston) off the same bridge if he didn’t cooperate with a Sopranos scam to defraud the insurance company.

When threatened with a swan dive off the bridge, Mahaffey gave in to the Soprano family’s demands, but alas, his Sopranos career was over; Michael Gaston never appeared in another episode.  But that didn’t mean Sue and I wouldn’t see him again.  In one of our trips to New Jersey, we rode the Air Trans shuttle between the airport and the rental car facility.  Just before we boarded the shuttle, Michael Gaston was leaving the car we entered.  We didn’t bug him, but we made eye contact and he knew we knew who he was.

Michael Gaston, an actor we bumped into on the Newark Airport Air Trans.

There’s a lot more to Paterson, though, then simply having been a location for a couple of The Sopranos scenes.  Here’s another video that describes Paterson’s history:

Today, Paterson is undergoing a renaissance, as the old factory buildings are being converted to loft apartments.  Yup, Paterson is being yuppified.  It looks like an interesting place to spend more time, but my schedule didn’t permit doing so on this visit.  For us it was roll into town, grab a few photos, and bail.

A view of Passaic Falls. This is a beautiful area.
The wood-surfaced foot bridge featured in two different Sopranos episodes.
Another view of the bridge. It’s closed to the public. On the Internet, it says it’s for safety reasons. One of my police buddies told me it’s because there were too many suicides from this bridge.
Another view of the Passaic River and its Falls in Paterson.
While we were visiting the Paterson Great Falls National Historic Park, this rather plump groundhog was doing the same. My Dad used to hunt these in New Jersey with his .243 Model 70 Winchester and the farmers loved having him do so. These woodchucks may look cute, but they destroy a lot of crops.

One thing I know for sure:   I’ll return to Paterson.  I’d like to explore the city, its museums, and more in greater detail.


Want to see our other visits to The Sopranos locations?  Here they are:

The Sopranos Mansion


Never miss an ExNotes blog:


Don’t forget: Visit our advertisers!


A Tale of Two M1922 Springfields

By Joe Berk

Many years ago, I inherited an M1922 Springfield rifle from my Dad.  I’ve only ever seen one other M1922 (that’s how rare they are), and it was at the West End Gun Club range earlier this month.  Good buddy Kevin owns one, and we both agreed to bring (and shoot) our rifles.  Like mine, Kevin’s rifle is beautiful.  It has nicer wood than mine.  Just seeing any M1922 is a treat (let alone one with figured walnut), so I really enjoyed seeing Kevin’s.

Two ultra-rare M1922 Springfields. The top one is mine, the lower one is Kevin’s. These are the only two I’ve ever seen.

As the name implies, the Springfield Model 1922 was developed in 1922.  It was built as a training rifle, intended to offer a lower cost, lower recoil approach to learning how to shoot the Army’s main battle rifle, the 1903 Springfield.  The M1922 has the same general dimensions as the 1903, including the large bolt and the long action, but the bolt only retracts just enough to extract and eject a .22 Long Rifle cartridge.  It’s really cool.

The M1922 has target grade Lyman adjustable sights, with interchangeable front sight inserts.  My rifle is configured as a “peep to peep” sight set; instead of seeing a front post in the rear aperture, the front sight has another aperture ring instead of a post.  The idea is that you focus on the target, and the two apertures (in the front sight and the rear sight) appear out of focus.  It’s counterintuitive to all the shooting I’ve ever done with iron sights, but it seems to work.  My issue is age; these days when looking through those tiny apertures it’s difficult to make sure I’m on the right bullseye on a multi-bullseye target. Ah, to be 70 again…

The adjustable rear Lyman peep sight on my M1922. Note the rifle’s jeweled bolt and long action.
The M1922’s front peep sight. There are different front sight inserts available. Mine had the aperture (or “peep”) insert installed when the rifle came into my possession, and I left it that way.

The M1922 was produced in four different variants from 1922 until the advent of World War II.  At that time, material shortages precluded further production, and the US Army had already moved on to the M1 Garand.  Springfield Arsenal produced 2,020 M1922 rifles.

Both Kevin’s rifle and mine have jeweled bolts and the jeweling is identical.  During all the years I owned my M1922, I always assumed that Dad did the jeweling on my rifle’s bolt (he did that on a lot of his shotguns and rifles).  When Kevin showed me his, he told me that the jeweling on his was the only thing on the rifle that wasn’t original.  I think we were both wrong.  The jeweling on both bolts (Kevin’s and mine) is absolutely identical.  I suspect the rifles left the Springfield Arsenal with jeweled bolts, although I did manage to find an internet M1922 photo with a non-jeweled bolt.

Kevin’s rifle had more figure in its walnut stock than mine, and that made me want it immediately (a reaction I have any time I see a rifle with fancy walnut).  But I know Kevin is not selling his, and I’m not selling mine, either.  These rifles are just too rare (they are irreplaceable, in my opinion), and mine came to me from my Dad (another reason I’ll never sell it).  Springfield M1922 rifles don’t come up for sale very often, and when they do, they go for big bucks.  I searched Gunbroker.com and found two that were listed at $2,499 and $2,099, and neither of those was in nearly as good a condition as mine or Kevin’s.  I’d expect our rifles to be in the $3,000+ range if they were for sale, but like I said above, they most definitely are not.  The magazines for these rifles are extremely rare, too.  I’ve never seen one for sale; I imagine if one did appear on the market, the ask would be several hundred dollars.

I’d previously written about my M1922 here on ExNotes and that story is here.  There’s more info about these fine rifles online.  Rock Island Auction has a good M1922 video.  Rock Island does a good job with their videos when they have interesting firearms for sale, and the M1922 Springfield is squarely in that category.


Never miss an ExNotes blog:


Folks, if you like what you read here, please consider helping us keep the lights on and the content flowing.  We need your help!


Don’t forget: Visit our advertisers!


Product Review: Garmin Chronograph

By Joe Berk

In an earlier blog on my 458 Win Mag No. 1, I mentioned that I used a friend’s Garmin chronograph and decided I needed one.  I pulled the trigger and I’ve been using my Garmin constantly since I bought it.  I’ve shot rifle with jacketed and cast bullets and I’ve shot several handguns to see how it performed.  The bottom line?  Garmin hit a home run with their new chrono.  Is it perfect?  No.  But it’s so good I can live with the few minor things I think could be improved.

The Garmin has a bunch of features (and I’ll get into them in a minute), but let my start by saying the most important feature is ease of use.  Basically, you turn the thing on, make a few screen inputs, set it on the shooting bench, and you’re good to go.  There’s no screwing around with setting up screens in front of the bench, running wires, or any of other stuff you need to do with earlier chronographs.  It’s plug and play, but you don’t even have to plug it in.

Operation

Operating the Garmin is straightforward, but it’s not entirely intuitive.  The On-Off button is one of four buttons on top of the device.  Garmin labels it “Power.” Touch it once and the device is on; hold it down for two seconds and it turns off.

The buttons up top. They are a little confusing at first.

Getting to what you want to shoot involves scrolling through a series of screens and menu options via two of the buttons on top of the Garmin.  One points up; the other points down, and that’s how you move from one choice to another on each data screen.  Basically, the choices are rifle or handgun (there’s also choices for archery, but I’m not Robin Hood), and their selection is governed by projectile velocity.  After navigating up or down on that screen, pressing the OK button gets the next screen up.  That asks if you the Garmin to calculate power level (bullet energy).  I always tell it no, but getting through that requires pressuring the down button and then the okay button again.   Then another screen pops up, advising chronograph placement with regard to gun location.   Then it’s necessary to press the OK button once more.  That gun placement screen is unnecessary, and it just necessitates pressing more buttons and scrolling through more screens.  Finally, the device is ready to use.  It’s a lot of button pushing and scrolling.  Granted, it is way, way easier than screwing around placing chronograph screens downrange, aligning them with your bullets’ flight path, and making electrical connections, and it’s easier than placing what used to be the most modern chrono (before the Garmin came along) out in front of the firing line.  The Garmin is a major step forward in the chrono game.

Once the string has been fired (as many as the shooter wants to include in the string), the scrolling and selecting game starts anew (along with pushing the back, up and down, and OK buttons).  I thought it would become intuitive for me, but I’m not the brightest bulb in the box and it seems I have to relearn it every time I go to the range (and I’m on the range at least a couple of times each week).

Charging and Battery Life

Charging is done via a laptop.  The chronograph comes with a cord that connects the chrono to your laptop, and that’s how it charges.  One charge is good for a couple of range sessions (or more, depending on how much you shoot).  Although I didn’t time it, I’m guessing it took maybe an hour to fully recharge.

Downloading Data

I thought the cord connecting the computer to the Garmin would allow me to download the data from each range “session” (a session is a string of shots for which you wish to record data), but if there’s a way to do that, I couldn’t find it.  I could the files for each range session, but they were in a format I couldn’t read.  What I can do, though, is Bluetooth connect the Garmin to my cellphone.  Then, once the data is in my cellphone, I can send the data (in an Excel spreadsheet) to my laptop via email.  That’s more bother than I wanted to mess around with, though.  I just look at the results on the Garmin screen.

Packaging and the Optional Case

The Garmin chrono doesn’t come with a carrying case.  It should.  I had to spring for an optional $15, cheaply constructed carrying case that probably cost about 25 cents to make in China.  But I’m glad it did.  It does a decent job protecting the Garmin and storing the charging cable.

The extra cost case. It ought to be included with the chronograph.

A Few Pistol Examples

I shot three handguns to assess how the Garmin would perform.  I thought I could do this at my indoor pistol range (I belong to a couple of gun ranges).  The indoor range is usually crowded, and that highlighted one of the Garmin’s weak spots.  Even though there are barriers between shooting positions, the Garmin was consistently capturing data from the guy shooting on either side of me.  As I had no interest in what they were doing, I picked up my marbles and to the West End Gun Club, an outdoor range.

1911s in .45 ACP, 9mm, and .22. The 1911 is one of the best pistol designs in the world. It’s been around for more than a century.

On the outdoor range there was more room between shooting positions, and  the Garmin picking up another shooter’s bullets was not an issue.  I shot and captured data for three different handguns.  All were 1911s.  I’ve written about them before (a .45 ACP Springfield, a 9mm Springfield, and a .22 GSG), but now I can bring you chrono data.  My plan was to shoot 50 rounds from each pistol and record the data, shooting at the same silhouette target at 25 yards.

1911 .22 Long Rifle GSG 

The GSG .22 Long Rifle 1911. There’s a lot of plastic in this gun, but wowee, does it ever shoot!

The first pistol up was the .22 GSG with Federal Champion ammo.  It’s cheap ammo and it’s advertised as having a muzzle velocity of 1260 feet per second, but that’s probably from a much longer rifle barrel.  I expected it to be slower from the 1911 and it was.

Federal .22 Long Rifle High Velocity Ammo. The GSG needs the high velocity ammo to function reliably.
I ordered a bunch of ammo when a court found California’s mail order ban unconstitutional. It’s since been overturned, but I brought in a couple thousand rounds when justice prevailed.
The Federal ammo is advertised at 1260 feet per second, but that’s out of a rifle. The chronograph doesn’t lie.

Here’s what the Garmin revealed for the 50 .22 Long Rifle shots fired from the 1911.

1020 versus 1260 feet per second. My lower velocities were due to shooting this ammo in a handgun rather than a rifle.

The velocity was lower than advertised, but as mentioned above, I fired from a 5-inch-barreled handgun and not a rifle.

1911 9mm Springfield 

I then turned to my Springfield 9mm 1911, which is one of my all time favorite pistols.

My 9mm Springfield Armory 1911. This is a great handgun.

I fired another 50 rounds through it with my handloaded ammo (the load I used is the 124-grain roundnose plated Xtreme bullet and 5.5 grains of Accurate No. 5 powder.  That ammo had about the same average velocity as the .22, but the extreme spread and the standard deviation were lower (a good thing).  Accuracy at 25 yards was about the same as the .22 1911.

1035 feet per second ain’t too shabby. I could go higher by running a hotter load, but this one is hot enough and it’s accurate.

You may have noticed that the Garmin only picked up 49 of the 50 shots I fired.  I don’t know why it did that.

1911 .45 ACP Springfield

For my final quick look handgun trials I used another Springfield 1911, this time chambered in .45 ACP.

One of the great ones: A .45 ACP 1911. This is also a Springfield Armory handgun.

The load was 4.6 grains of Bullseye under Gardner 185-grain cast semi-wadcutter bullets.  This has always been a great target load in any of my 1911s, and it proved that to be the case again.  I was not shooting for accuracy; I was simply showing 50 rounds through each of the three 1911s to wring out the Garmin.  On the target, the GSG .22 and the Springfield 9mm were grouping at about 10 inches (again, I wasn’t try to put them through the same hole during this test).   But that .45?  Wow.  It put 50 rounds through one ragged hold about 4 inches in diameter.  If I had put any effort into it, that hole would have been smaller.

A .45-caliber bullet at 850 feet per second will settle most arguments. It’s accurate, too.

You can see the inherent accuracy in the .45 load I used in this portion of the test.  Check out the very small standard deviation and extreme spread.  Both are much smaller than the corresponding values for the 9mm and .22 handguns.

Mosin-Nagant Cast Bullets 

I next wanted to try cast bullets in the Mosin-Nagant 91/30 rifle.  I knew the load I was using (a 173-grain cast bullet and SR 4759 powder) to be an accurate load from previous forays.

I love the Mosin-Nagant. There are certainly more elegant milsurp rifles out there. I haven’t found any that shoot better than a Mosin-Nagant.
Cast bullets loaded in 7.62x54R cases. This is a fun load.
Fast enough, and no leading. This is a great load.

As I said above, I knew this to be an accurate load, and the Garmin showed why: It had a l0w standard deviation.

Mini 14 Jacketed Bullets

Finally, I wanted to see how the Garmin would do with a small bullet moving at higher speeds, so I ran a few shots through my faithful Mini 14.

You don’t see many Mini 14 rifles with wood like this one. It’s stunning, and it can be surprisingly accurate with the right load.

My accuracy loads for the Mini 14 have been a Hornady 55-grain full metal jacket boattail bullet and a max load of either IMR 4320 or ARComp.  The results you see below are for the IMR load.  You might be wondering why the velocity is a bit less than the expected 3000 feet per second speeds attained with a .223 cartridge.   My Mini 14 has a 16-inch barrel.

The Garmin had no difficulty picking up those little 55-grain bullets flying away at 2800+ feet per second.

The results looked good to me.  Those five shots went into less than 2 inches at 100 yards.   Four of the five went into less than an inch.

A Mini 14? Are you kidding me? I never joke about my work, folks.

The Bottom Line

There’s the good, the bad, and the ugly.  The good is the Garmin chronograph has upped the ante by bringing an easily-used chronograph to the masses.  There’s no screwing around wires or screens, and you don’t have to get in front of the firing line to set it up.  This is a major breakthrough, and it’s what prompted me to finally pull the trigger on a chrono (well, that and my good buddy Walt telling me that any serious shooter and reloader needed a chrono).

The bad?  There’s not much.  I mentioned the tendency to pick up rounds fired from an adjacent lane on an indoor handgun range.  I think the screen scrolling drill could be simplified a bit.  The chrono occasionally failed to pick up a round (but that could be me not positioning it correctly).  I think the chrono should allow downloading data sessions directly to a computer (without having to Bluetooth the thing to a cell phone and then email it to myself).  These nits wouldn’t stop me from buying one, and they shouldn’t stop you, either.  I love my Garmin chronograph.  The Garmin engineers did a  good job.

What surprised me (but maybe didn’t surprise me too much) was that the lowest standard deviation did not necessarily result in the tightest group.  Barrel harmonics, bullet issues, and the guy behind the trigger also have a huge influence.  I suspect the so-called accuracy loads in the Lyman reloading manual are based mostly (perhaps exclusively) on standard deviation.    There are a lot of things that go into rifle and handgun accuracy.  With a Garmin chronograph, you can get a better understand them.


Never miss an ExNotes blog:


Don’t forget: Visit our advertisers!


The Bisley Revisited

By Joe Berk

One thing about Ruger:  Nobody can top their customer service.    Ruger may not explicitly state their firearms come with a lifetime warranty, but in effect, they do.

You may remember my story on the Ruger Bisley I won in a Rock Island Auction (I wrote about it several months ago).  I had wanted a .357 Magnum Bisley for its heavy construction and longer barrel and, truth be told, I was surprised that my bid prevailed.  When I won the Rock Island Auction, I ponied up all the nutty fees that come with such an undertaking (they are significant), and then when I received the Bisley I was disappointed.  It wasn’t particularly accurate (the group sizes were mediocre), and it shot so far to the left the rear sight had to be adjusted all the way to the right to get the shots on paper.

I figured I was kind of stuck with the Bisley and my initial thought was I’d look at the gun for a while, stick it in the safe, and then maybe sell it somewhere down the line.  But it bothered me.  Owning a firearm that doesn’t meet my expectations doesn’t set easy.  If there’s such a thing as having an obsessive-compulsive disorder with firearms that are less than perfect, I’d make for a good clinical study.

I wrote to Ruger and told them what I wanted, which was an accurate Bisley  that didn’t shoot to the left.  I told them the revolver left their plant in 1986, so I was more than willing to pay whatever it took to make me happy.  I also mentioned that I wanted to buy new grip frame screws and a new ejector rod shroud (cosmetically, they looked beat up).  And finally, I mentioned that extraction was difficult with hotter loads.  I asked the Ruger folks to hone the chamber walls so the fired cases would extract easily.

Ruger charged me $45 for a Fedex mailer (which they emailed to me), told me how to package my revolver (a plain brown box, with nothing on the outside to indicate its contents), and advised it could be 4 to 6 weeks before I saw the gun again.  Four days later, it was on its way back to me, with no additional charges other than the initial $45 I paid for the Fedex mailer.

A new ejector shroud on the Bisley.
New grip screws all the way around.
The rear sight, approximately centered. This is way better than what it was when I returned the Ruger.
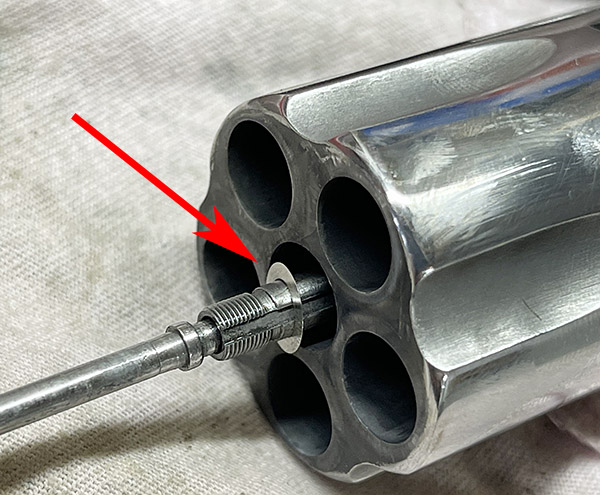
Ruger honed the chamber walls to prevent sticky extraction. The gun extracts flawlessly.

Ruger mentioned in the paperwork returned with the gun that they retorqued the barrel, installed a new ejector shroud, honed the chambers,  replaced all the grip screws, test fired it, and sent it home.  The first thing I looked at was the rear sight.  Comfortingly, it was a lot closer to being centered than it was when I sent the gun to them.

So how did it do?

Yessiree, that’s what I’m talking about!

Just fine, thanks.  The day I received it, I hopped in the Subie, motored over to my indoor range, and fired three different .357 loads at 10 meters.   Now, I know 10 meters is only 30 feet, but I wanted to get an idea how the revolver was working.   One load was a relatively mild Bullseye-powered concoction with cast 158-grain bullets, another was a gonzo 158-grain Hornady jacketed bullet load with a max charge of Unique, and the third was an even more energetic load with the same 158-grain jacketed hollow point Hornady bullet and a max load of Winchester 296 propellant.  On that indoor range, even with my Walker electronic earmuffs, the concussion of the big Bisley and its full throated .357 loads was starting to give me a headache.  But the targets?   Oh, boy…the Bisley and I were back in business.  I ran another target out to 50 feet (the longest range available at the indoor range), and that group was just as good as the ones at 30 feet.

Winchester’s 296, Unique, a finished .357 Magnum cartridge, the 158-grain Hornady XTP bullet, and the 180-grain Hornady XTP bullet.
A macro shot of the Hornady 159-grain and 180-grain XTP bullets. Viewed from outside the cartridge case, the bullets appear identical. The difference is in their length below the cannelure.
A couple of loaded .357 Magnum cartridges. I’ve always liked the .357 Magnum cartridge.

The day after that, I took the Bisley to our Wednesday morning Geezer get-together at the West End Gun Club.  I had three things in mind: I wanted to show off a bit to my friends, I wanted to chronograph the two balls-out .357 loads I mentioned above, and I wanted to see how the revolver would do at 100 yards.   Yes, you read that right:  100 yards.

100 yards with the Bisley. The first 30 shots or so were with the Unique load. When i switched over to the 296 load, the group tightened. Next time I’m out I’ll try the 180-grain bullets with 296 and dial in a little windage.

My buddy Kevin spotted for me with his spotting scope, and he was amazed with the first load (8.0 grains of Unique and the 158-grain Hornady jacketed hollow points).  Kevin gave a hearty “whoa!” and I suspected things were looking good.

Kevin said several of the shots (after I had warmed up a bit and got into my long-range groove) grouped like I was shooting a rifle.  I sure didn’t mind hearing that.  I checked the chronograph and the velocities were respectable, too.  The bullets were hitting to the left a bit, but I had room to adjust the rear sight to bring that in.  And where a gun prints on target is a function of how it is held.  I wasn’t consistent with the Bisley yet (I actually haven’t shot it that much).

The 158-grain Hornady bullet with 8.0 grains of Unique. It’s a max load and velocities were respectable, but not like what I attained with Winchester 295.

Then I switched to the heavier-duty 296 load (with the same Hornady XTP bullet), and wowee, I was keeping them in the black on that same 100-yard rifle target.  And those loads were smoking hot.  Winchester;s 296 propellant is good stuff.  Check this out.

Whoa, baby! 1500 fps plus! 296 is a dynamite powder in the .357 Magnum.

All the cartridge cases extracted easily and even with the 1500 feet per second 296 load above, there were no pressure signs (other than a hellacious muzzle blast). As mentioned above, Ruger honed the chambers for me and the prior extraction issues had evaporated.

With replacement of the grip frame screws and the ejector shroud, the Bisley looks like a new revolver.  And other than me paying for the initial shipping to Ruger, it was all on the house (Ruger’s house, that is).  Bear in mind what I said earlier in this blog:  The Bisley, purchased used, is a 38-year-old revolver.

The Bisley went from being a regret to a gun I’m excited about owning.  You probably know that Ruger also made these guns in other chamberings, to include .44 Magnum and .45 Colt, and you might be wondering why I wanted the .357 Magnum.  Back in the 1970s when I was a handgun metallic silhouette shooter, I competed with a .357 Magnum and I was a rarity.  While everyone else was shooting a .44 Magnum or a .45 Colt, or custom-built bolt-action handguns shooting what were essentially rifle cartridges, I was one of the very few people (in fact, the only one I knew of) who shot a .357 Magnum in that game.  With the right loads, the .357 would topple the 200-meter rams (the toughest target to knock over) more reliably than either the .44 Magnum or the .45 Colt, so there was a certain coolness (and a bit of smugness) on my part associated with that.  The other reason is weight.  When Ruger chambers different cartridges in the same firearm, the gun’s external dimensions remain the same, so the .357 Magnum Bisley weighs more than the .44 Magnum or the .45 Colt versions.  More weight means the gun holds steadier and that means greater accuracy.

What’s next for this revolver is working up a load with Hornady’s 180-grain jacketed hollow point bullet and 296 powder and getting the sights dialed in at 50, 100, 150, and 200 yards (the four stages of a handgun metallic silhouette competition).  When I used to compete in metallic silhouette competition, I used a cast 200-grain bullet, but nobody makes that bullet commercially.   Well, almost nobody.  I previously found a guy who sold a 200-grain bullet for the .357, but his bullets leaded terribly and accuracy fell off after the first three or four rounds (and cleaning the bore was a pain).  If I can get the 180-grain jacketed bullets to group well, I think the metallic silhouette rams at 200 yards won’t know the difference between a 200-grain cast bullet and a 180-grain jacketed bullet, and I may get back in the game.  We’ll see.


That term:  Balls out.  You might think it’s a crude anatomical and testicular reference, but it’s not.  Engine governors used to use lever-suspended rotating metal balls that moved further away from their axis of rotation as rpm increased.  When the engine speed reached a preset maximum value allowed by the governor, the centrifugal outward movement of the balls operated a lever that prohibit engine speed from going any higher.  At that point, the engine was running “balls out.”


Never miss an ExNotes blog:


Don’t forget: Visit our advertisers!