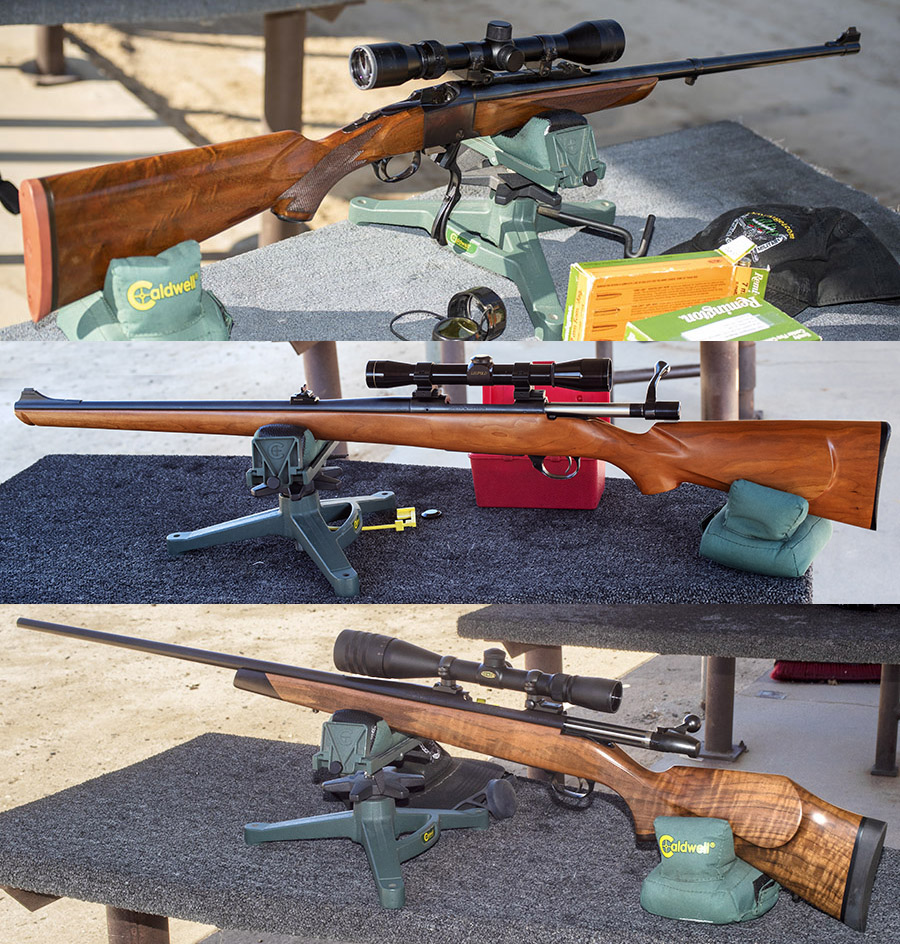
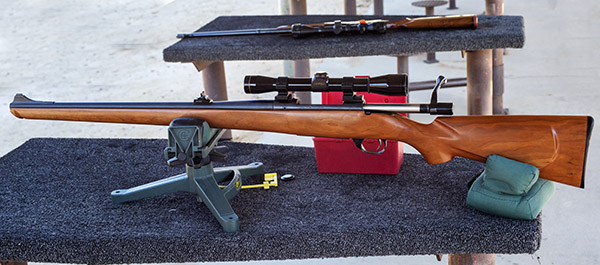
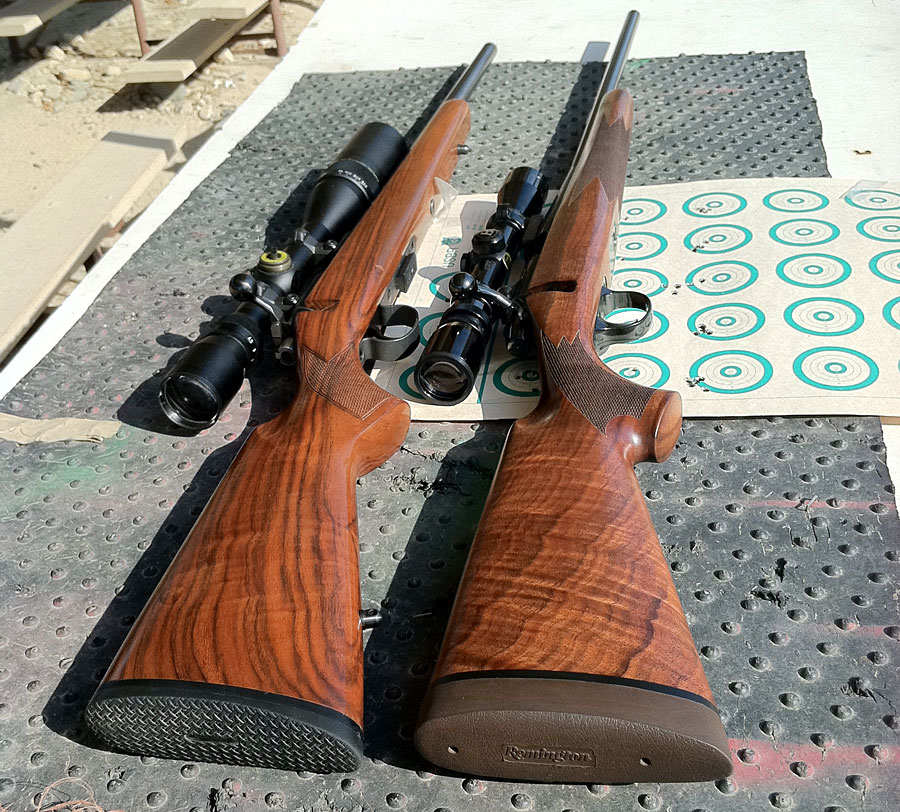
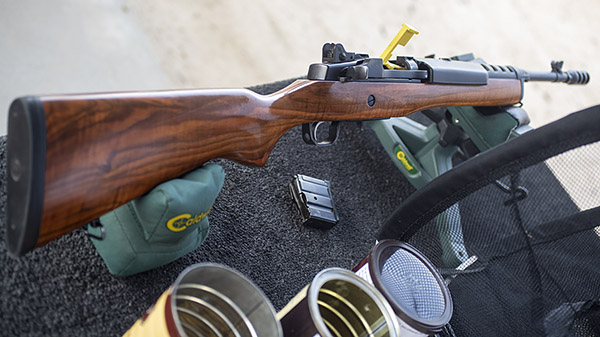
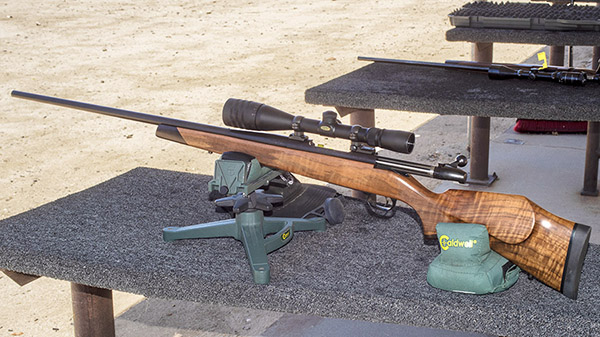
Rimfire rifles are cool. The ammo is inexpensive (when you can find it), there’s no recoil to speak of, they are accurate, and they usually cost less than centerfire rifles. Usually. Unless you go for fancy wood and high end rifles. Both the rimfires you see above fit that description.
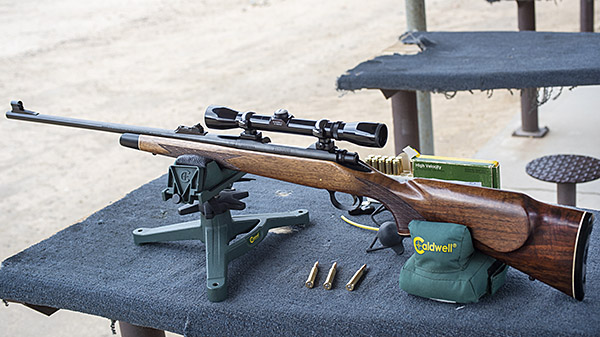
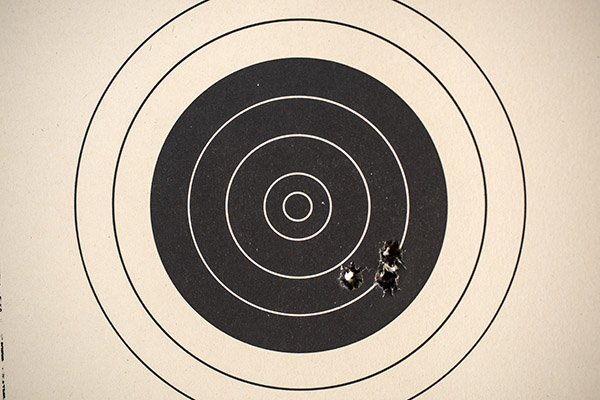
The one on the left is a CZ452 Varmint model and it is a stunning rifle. I bought it used and came to it in a unusual way. I’d never owned a CZ before I bought this one. I heard they were accurate and I’m a sucker for a pretty piece of walnut. I saw this one on an Internet rimfire forum, and I knew the chances of finding one like it in a store were slim. So I wrote to the owner through the board’s messaging system and asked if he’d be interested in selling it. “No way,” came the quick response. I forgot about it and then one day about a year later came the email. The guy needed cash and I needed that rifle. It was a match made in heaven, and I bought it as you see it here, complete with the Mueller scope. It’s as accurate as I hoped it would be (it’s the most accurate .22 rifle I own). Patience pays big sometimes.
Have you clicked on your popup ads today?
The one on the right I came to own in a different manner. About 15 years ago Susie and I were in Rapid City, South Dakota. Rapid City is a cool little town and it has a very cool gun store. First Stop Gun is a dream come true: A real gun shop, with an eye for high end guns, blue steel, and good wood. I didn’t buy anything on that visit, but having learned about the gun store I watched for their listings on Gunbroker.com. One day, they posted an ad for a Remington Custom Shop Model 504.
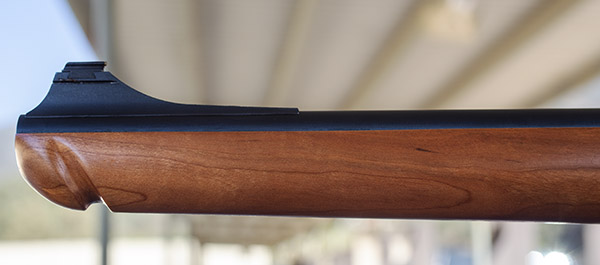
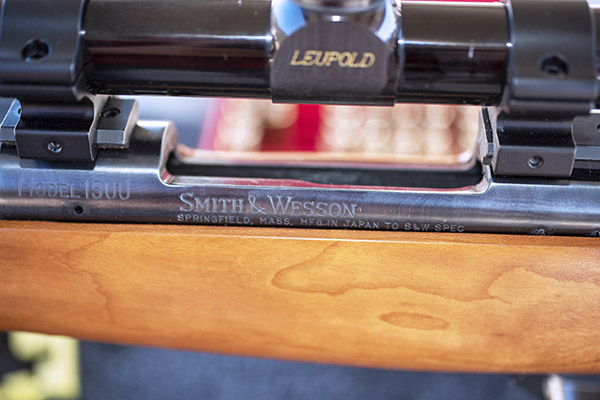
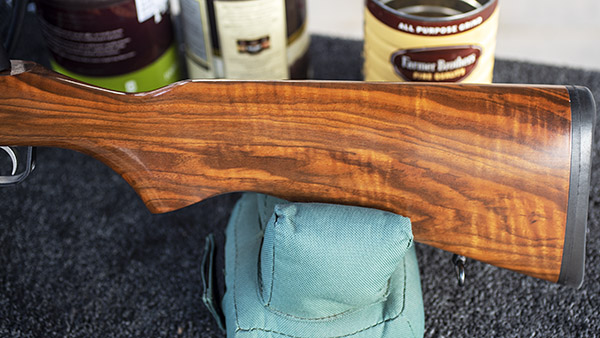
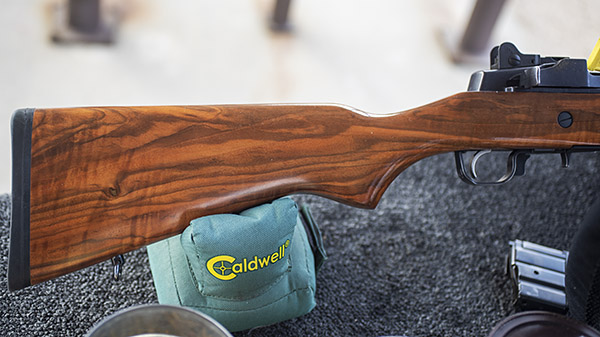
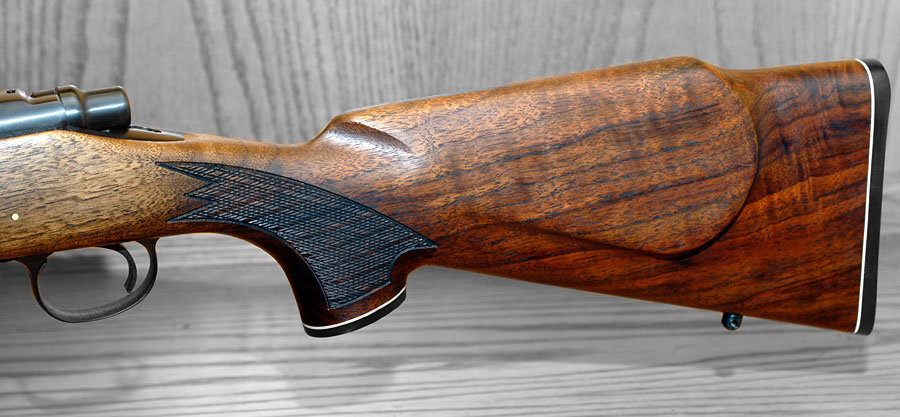
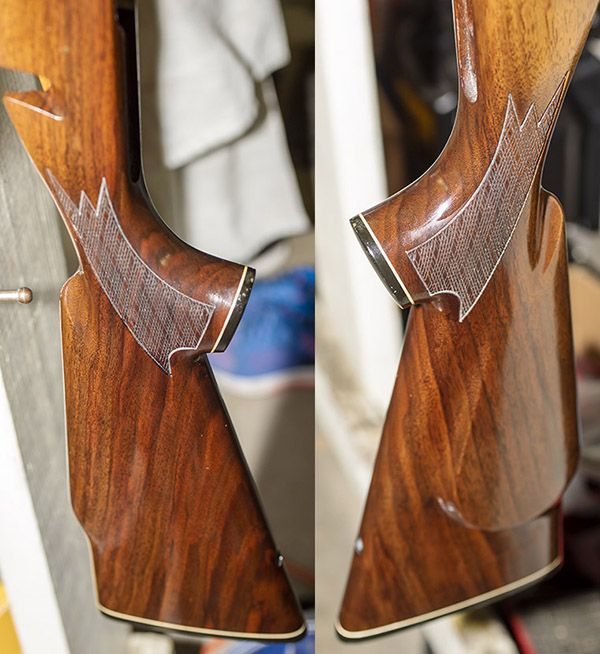
I pounced on the 504 and I’m glad I did. Remington (as we knew it) is no more, the Custom Shop (as we knew it) is no more, and the Model 504 is no more. This one checked all the boxes for me…great wood, a Custom Shop rifle, and a rimfire. Yeah, you might say I paid too much for it, but the value is only going one way (and that’s up). I’d say I didn’t pay too much; maybe I just bought it too soon. And no, it’s not for sale. It shoots well and the Model 504 has the feel of a full size centerfire (check out the recoil pad on this rifle). It doesn’t feel dinky like many .22s do. It’s just a fun gun to shoot and it’s a fun gun to look at. I do both a lot.
Do you like photos of high end handguns and rifles, and fancy walnut? Then here is where you want to be: Tales of the Gun!
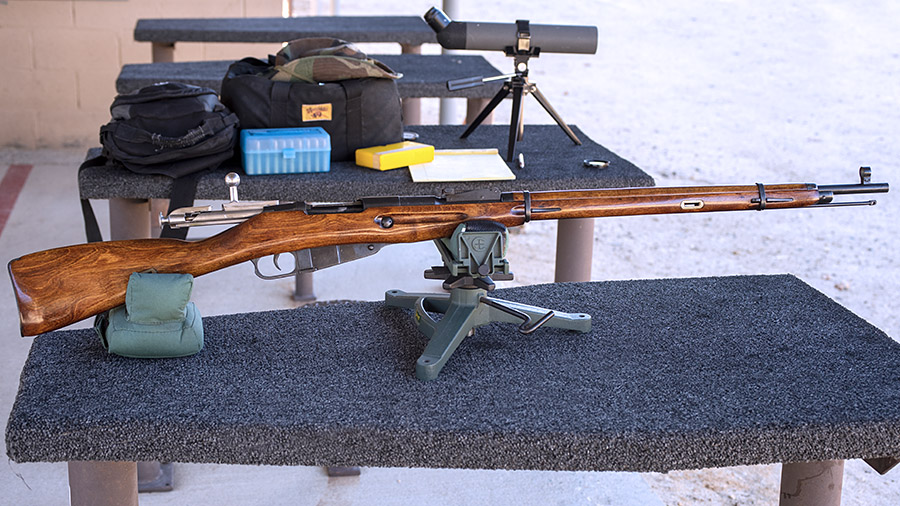
I used to not think too much of Mosin Nagant rifles. They looked cheap, they were crusted with cosmoline, and how good could a rifle be if it was made in Russia and sold at Big 5 for under a hundred bucks? (That under a hundred bucks thing, incidentally, is no more…prices on these rifles have climbed substantially.)
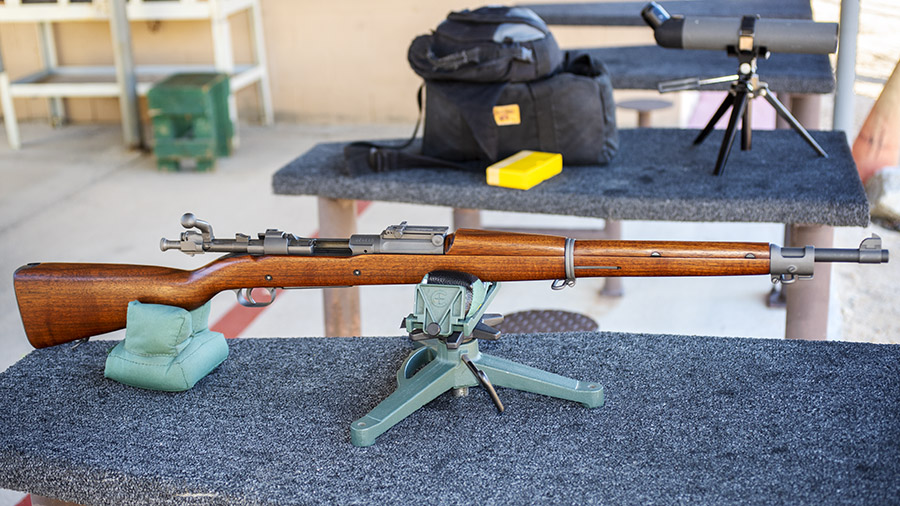
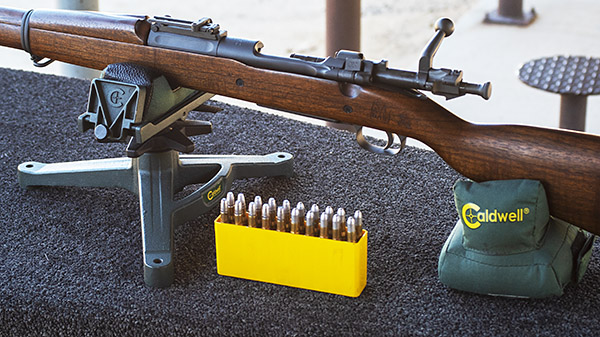
It was a grand day on the range with two old warhorses…a Mosin Nagant and a 1903 Springfield. It’s hard to say which one I like more.
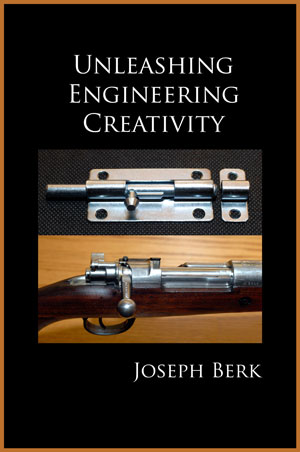
Then one day after I taught an engineering creativity class at Cal Poly, one of my students approached me to ask if I was a shooter. He had noticed the 1909 Mauser on my book.
A Modelo 1909 Argentinean Mauser on the cover of Unleashing Engineering Creativity. Don’t wait for the movie. Buy the book!
I told him I was and we talked about the Mauser a bit. He told me that he and his father had recently purchased a Mosin Nagant and they were having a lot of fun with it. That got my attention for a couple of reasons. The first reason was that prior to that, I hadn’t spoken with anybody who owned a Mosin. The second reason was that I always like hearing from young folks who enjoy shooting. This was a young man who was enjoying the Mosin he and his dad owned. You don’t hear that too much these days, and I enjoyed the discussion and this young engineering student’s enthusiasm.
The next time I was in a gun store….well, you can guess where this story is going. I pulled the trigger, and 10 days later, I bought my first Mosin home.
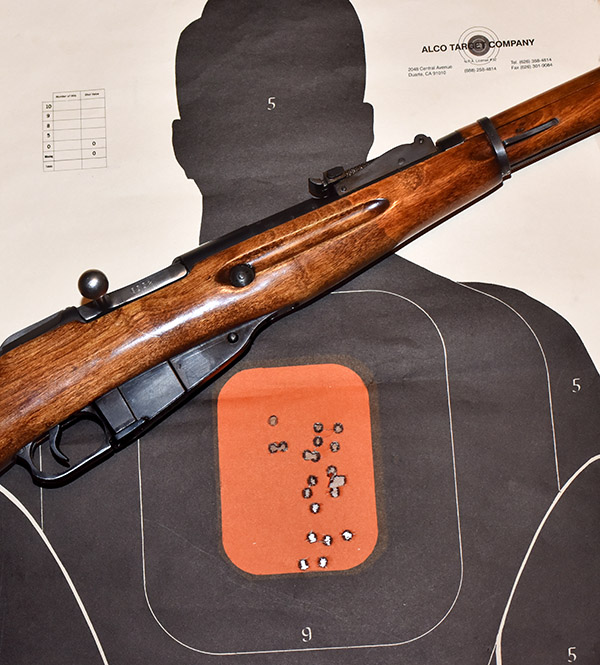
20 rounds from my Mosin at 100 yards with my accuracy load: 43.7 grains of IMR 4320 and the Hornady 150-grain jacketed bullet. I shot this in one of our informal West Gun Club Milsurp matches two or three years ago. The shots crept up as the barrel heated. Still, that’s not a bad 100-yard group from an 80-year-old combat infantryman’s rifle.
The first time I went to the range with the Mosin, my opinion changed completely. The rifle was reliable, it was fun to shoot, and wow, it was accurate. Don’t let a Mosin’s appearance and price fool you. Trust me on this: The Russians knew what they were doing. These are fine rifles.
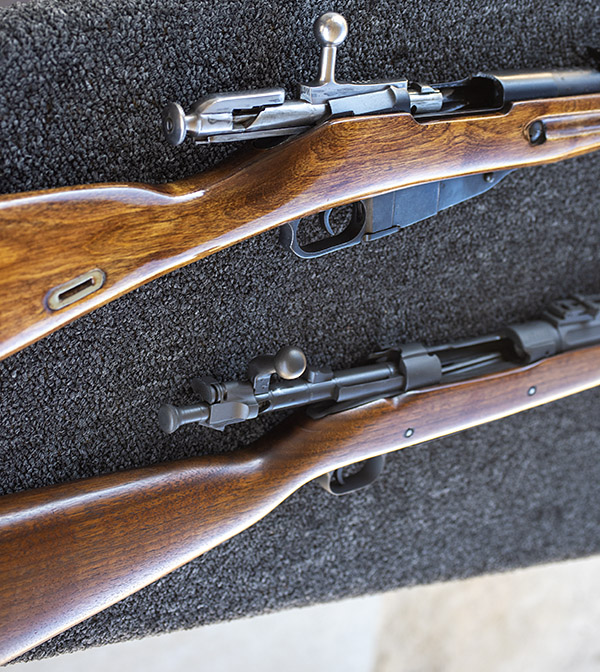
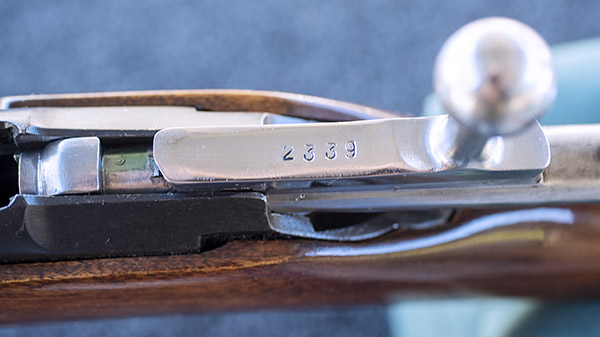
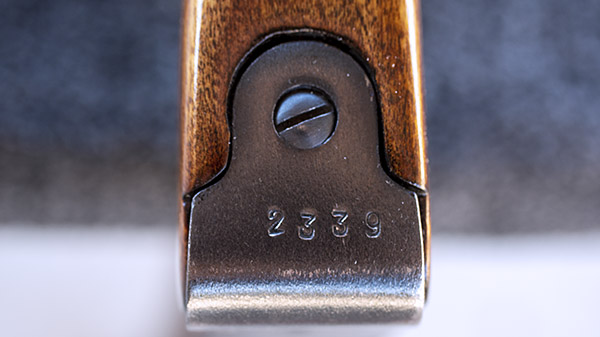
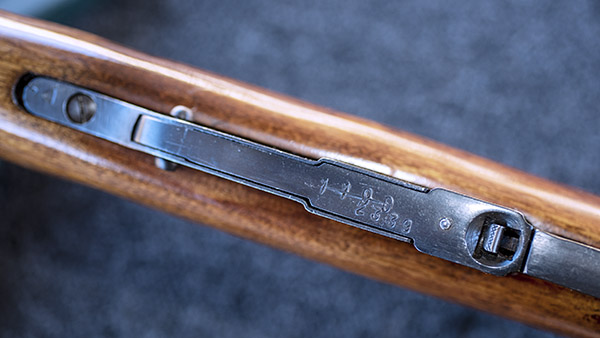
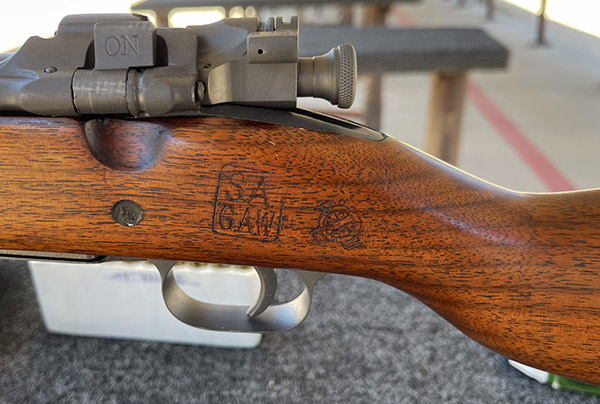
My Mosin was made in the Soviet Union’s Tula arsenal in 1940 and it has matching serial numbers on the receiver, the butt plate, and the bolt. The trigger guard/magazine is what we call a forced match. That means it had a different serial number, but Ivan struck through it and stamped a new serial number to match the others. That didn’t concern me at all. What I worry about are the serial numbers on the bolt and the receiver. If they match, the headspace is most likely good. If they don’t, you’ll want to make the seller show you with headspace gages that the headspace is within spec.
I’ve done a bit of work to my Mosin…glass bedding, a trigger job, and a TruOil refinish. I’ve also done a fair amount of load development (the last time my Mosin saw factory ammo it was in the hands of a Russian soldier; I’ve never shot factory ammo in my Mosin).
Note the star signifying Tula Arsenal production, and the 2339 serial number. Mosins will have another serial number on the side of the receiver stamped there by the importer, but that’s not the one you need to worry about.The bolt serial number matches the receiver serial number on my rifle, and that’s good. If the serial numbers in these two locations don’t match, you should always check that the headspace is within specification.Note that the butt plate serial number also matches. That’s cool, but it’s not necessary from a headspace or functionality perspective.A forced match. Ivan grabbed a trigger guard (the trigger guard and the magazine floorplate are a subassembly) that wasn’t on the rifle when it was originally manufactured at the Tula Arsenal in 1940. Nyet problemski thought the arsenal rebuild crew; we’ll just strike through the old serial number and add the new one.
My 7.62x54R ammo “go to” accuracy load is 43.7 grains of IMR 4320 under a Hornady 150-grain jacketed bullet. That load groups exceedingly well at 100 yards. But that’s when I can find the components I want, and that’s a tough thing to do these days. IMR 4320 is no longer made and it’s hard to find bullets, primers, and brass.
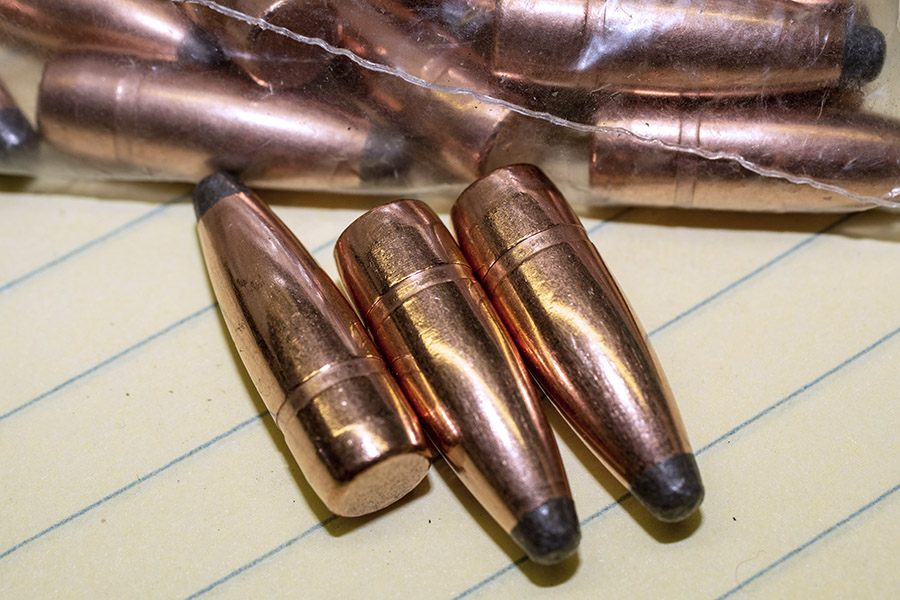
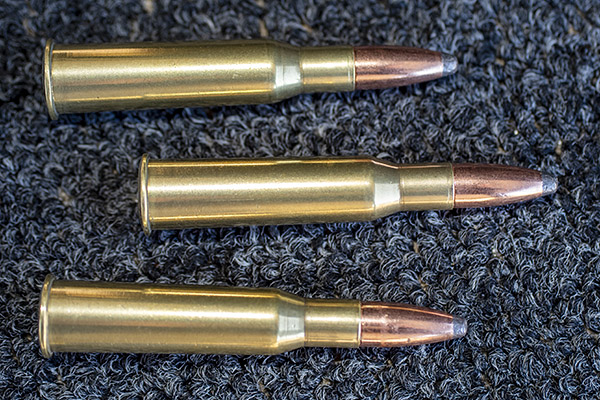
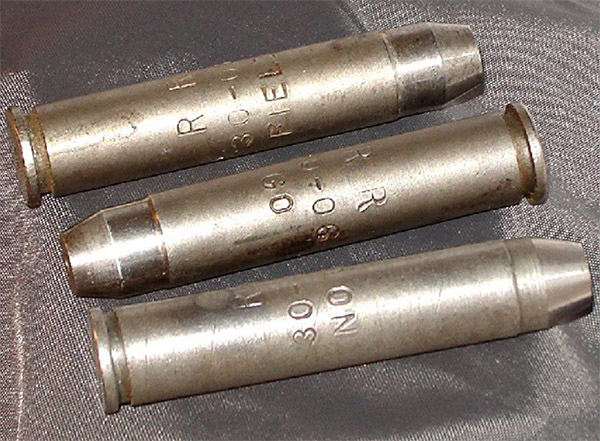
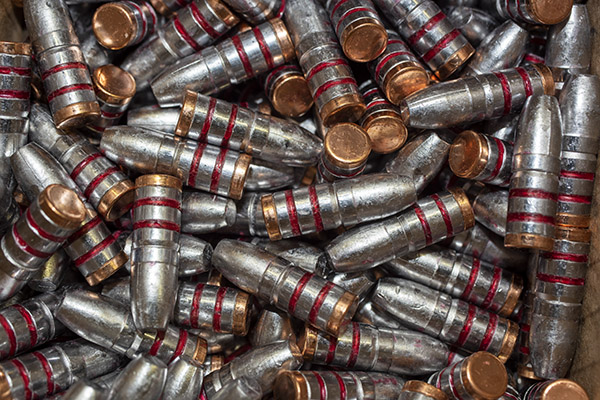
Fortunately, I have always tended to overbuy components and when I spot a good deal on something I think I can use, I scoop it up. When the pandemic and civil unrest shortages emerged a couple of years ago, I didn’t feel the impact from a components perspective. I had plenty of 7.62x54R PRVI brass, I had primers, and I had bullets. That was two years ago, though, and this is now. I shot up a lot of what I had, including my Hornady .312-inch diameter jacketed bullets. But when components were available back in those good old pre-pandemic, pre-Portland-anarchy days, I had spotted a couple of bags of PRVI Partizan 150-grain jacketed bullets. Being the curious pack rat sort of fellow I am, I bought them.
PRVI Partizan (or PPU) 150-grain jacketed softpoint bullets. If you see these, buy them. They’re good. If you see these and don’t buy them, let me know and I will.
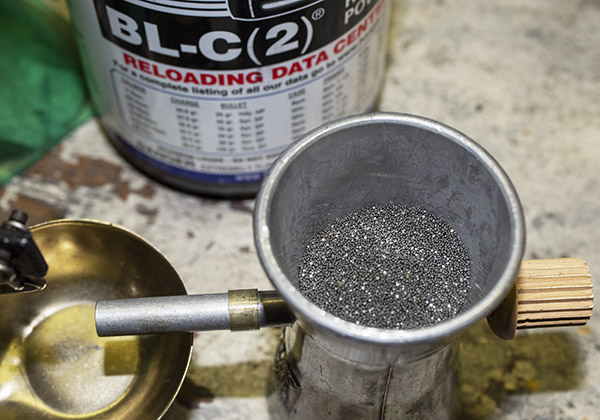
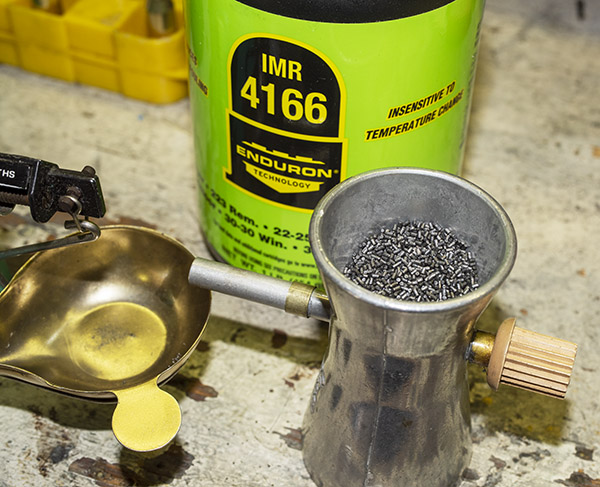
Most recently, my components dealer had a few powders on the shelves, and I picked up some new propellants. I wanted to see if I could work up a good load with the PRVI bullets for my Mosin. One propellant was IMR 4166, which is a powder designed to prevent copper fouling. I’ve already tried it in a couple of 30 06 loads and I was happy with the results, and I wanted to see how it would do in the Mosin. Another was Ballsy 2 (that powder is designated BL(C)2, but everybody calls it Ballsy 2). IMR 4166 is a relatively new powder. Ballsy 2 has been around for decades, but I had never used it. When I saw it, I grabbed a couple of bottles. The time to buy components is when you see them, especially these days.
Ballsy 2 is a spherical powder. It meters through the powder dispenser well.IMR 4166 is an extruded rod powder that looks a lot like 4320 and 4064. It doesn’t meter as well as Ballsy 2, but it meters well enough.
I also wanted to try my previous accuracy load (43.7 grains of IMR 4320) with the PPU bullets first. It didn’t take long to load the ammo I wanted…my previous accuracy load with IMR 4320, two load levels of Ballsy 2, and two load levels of IMR 4166.
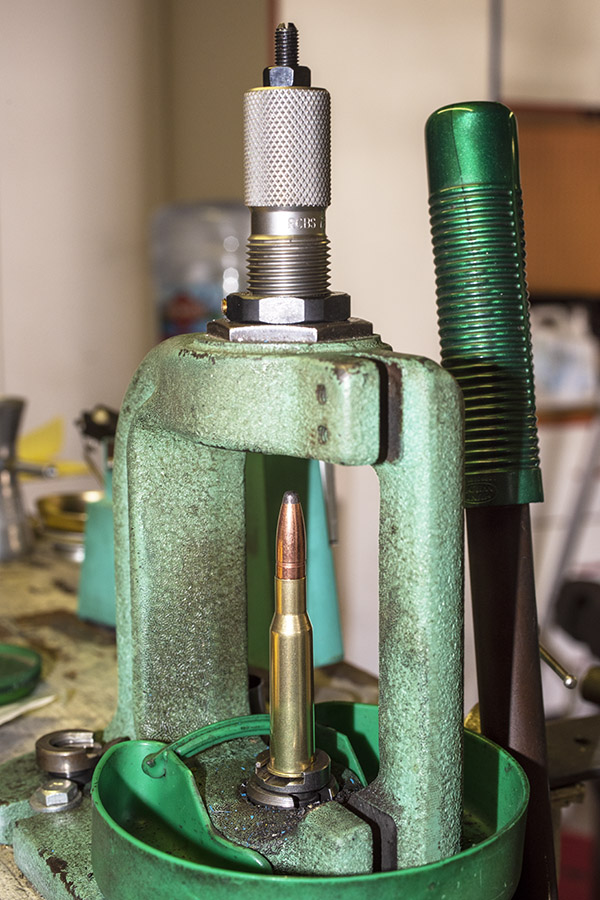
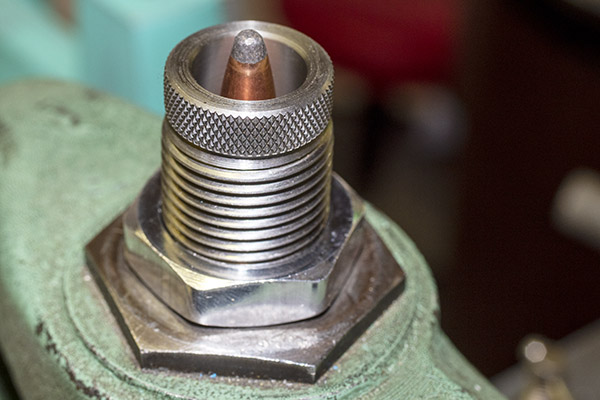
Seating the PPU bullets in my RCBS Rockchucker press.
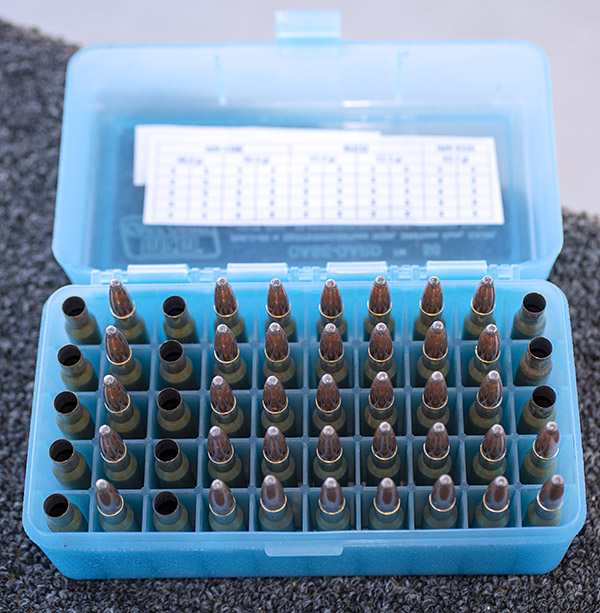
After charging the cases and seating the PPU bullets, I then labeled the ammo and it was off to the range.
7.62x54R reloaded ammunition. It looks good. It shoots well, too.
That labeling thing is important. I always label my ammo as soon as I finish loading it. I can’t rely on my memory to know what I loaded.
Loaded and labeled. Reloading is as much fun as shooting, I think.
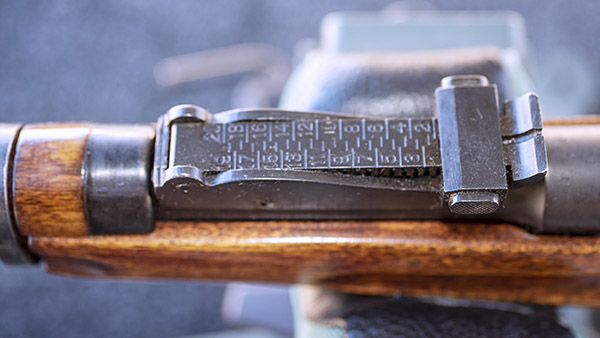
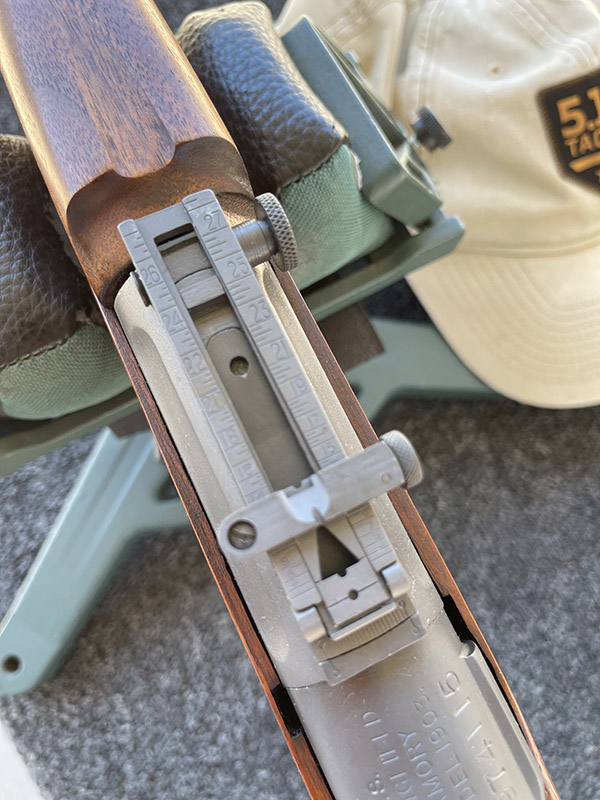
I shot all of my targets at 50 yards as a first look, and I had 10 rounds each. The first target I shot printed a little low, so I raised the rear sight a couple of notches and that put me in the black. The Mosin has great sights.
The rear sight on a Mosin Nagant. You slide the slider forward to raise the rear sight.The Mosin has a crisp, easy to use front sight post. I actually prefer the sights on the Mosin to most modern rifles (I’m not a brass bead fan). Simple is better, and because the Mosin’s length, it’s very easy to get a crisp front sight picture.
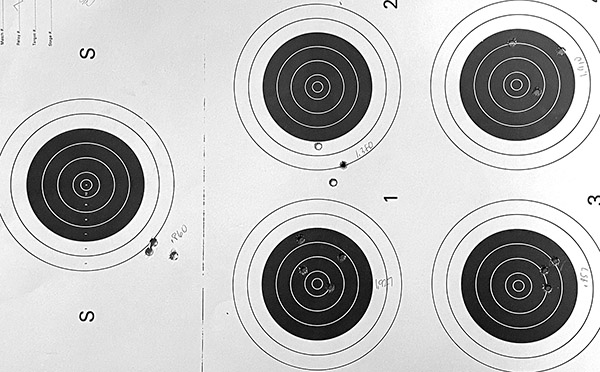
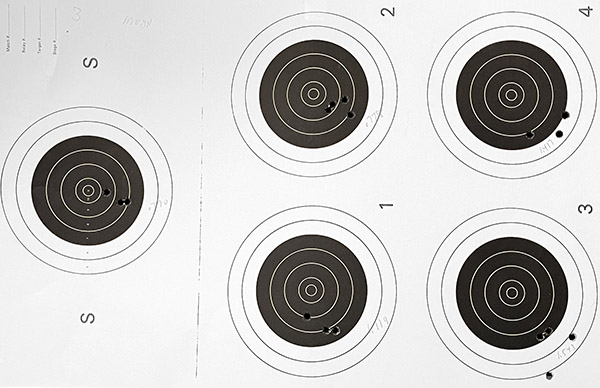
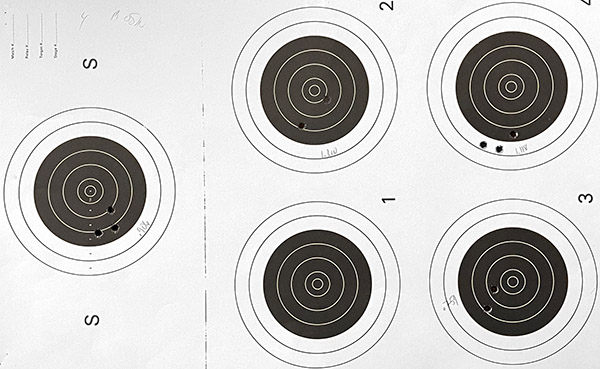
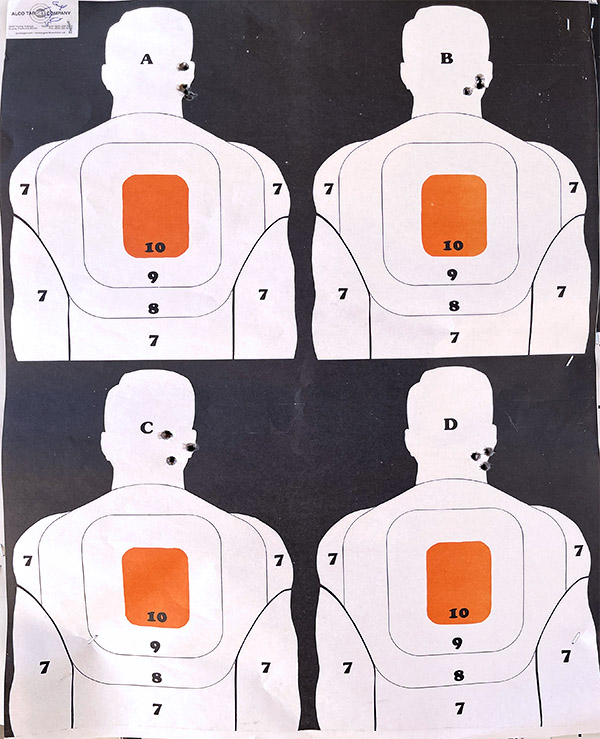
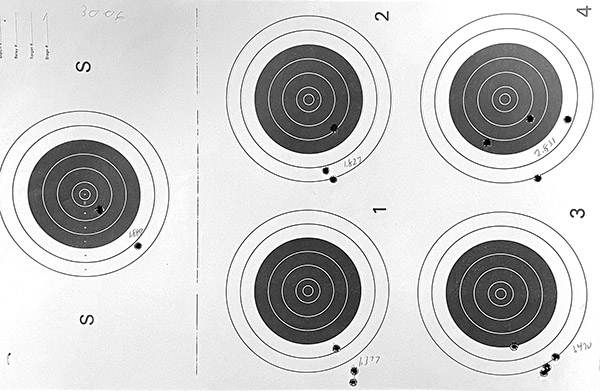
How did I do and what loads worked well? Here are the targets:
The bullseye on the left was shot with a 1903 Springfield (covered in another blog). The other four bullseyes were Mosin targets with IMR 4320 propellant.Mosin results with two levels of BL(C)2 propellant.Mosin groups with IMR 4166 propellant. Everything shot well in the Mosin.
The results from the targets shown here are tabulated below.
The bottom line is that my former accuracy load (with Hornady 150-grain jacketed soft point bullets) didn’t do as well with the PRVI Partizan bullets, but the PRVI bullets shot very well with BL(C)2 and IMR 4166. That’s good because even though I have a good stash of IMR 4320, it’s no longer in production and the other powders (BL(C)2 and IMR 4166) are available and they are accurate with the PPU bullets. Good times.
About now you might be wondering…how can I get a Mosin-Nagant rifle? It’s not as easy as it used to be. We’re not importing them from Russia like we used to, and you can’t pick them up for cheap at places like Big 5 any more. I felt they were exceptional bargains at those earlier price levels and I bought several (none are for sale), including a sniper Mosin I’ll write about one of these days. I checked on Gunbroker.com and you can still find Mosins, but they seem to be starting north of $300 now, and going up sharply from there. I think they’re still a bargain, even at those prices.
This is an interesting story and it’s one of the very few times in my life I was hosed on a firearm purchase. The rifle is a 1903 Springfield I bought a few years ago and didn’t shoot much. The times I shot it previously I had experimented with cast bullets and it shot okay, but not great. Then I tried it with jacketed bullets (loads at much higher pressures), and what do you know, I had a headspace issue. I could see it in the primers that had partially backed out of the brass after firing, and on one round, I split a case circumferentially just ahead of the base (indicating with near certainty an excess head space issue). I borrowed good buddy Greg’s 30 06 head space gages, and the bolt closed on both the no go and the field service gages. That’s a no no.
The 1903 Springfield rear sight. The 1903A3 went to a much less expensive stamped steel rear aperture sight.
My first thought was to have the existing barrel set back and rechambered, but that didn’t work. The 1903 Springfield has a barrel collar that holds a very sophisticated rear sight and positions the upper handguard. When we set the barrel back, the rear sight integrity was greatly weakened and the front handguard had excess play. Nope, I needed a new barrel.
I checked around and came to the conclusion that the best place to get this kind of work done is the Civilian Marksmanship Program (CMP) Custom Gunshop. This is a quasi-government arsenal and these folks are the experts. I priced having a new barrel and rear sight collar installed on my 1903, cutting a new 30 06 chamber with the correct headspace, and having the entire gun re-Parkerized. The work was surprisingly reasonable. I had to wait my turn in line, but that’s okay. I had other guns I could shoot.
With a re-Parkerized finish and a new barrel, my 1903 looks great.Very cool. The 1903 “scant” stock, complete with cartouche.
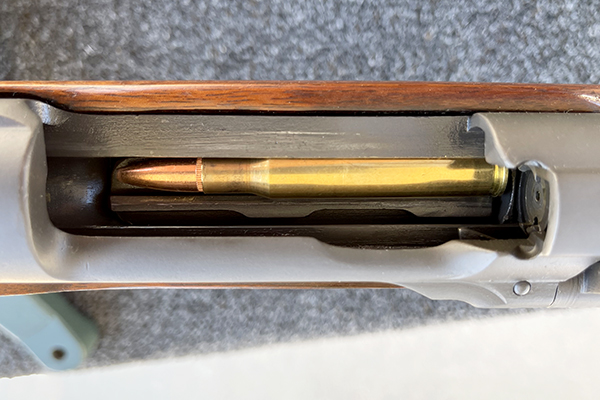
When the rifle was returned to me, it was stunning. It literally looked like a brand new 1903. A quick trip to the range followed, and I tried some jacketed bullet factory level reloads. I loaded and fed from the magazine, as the 1903 is a controlled round feed and it’s best in these guns to let the cartridge rim ride up and find its position behind the extractor.
A 30 06 cartridge in the 1903’s magazine.
I shot a few targets with copper jacketed bullets and found that the rifle shot about a 8 inches high and slightly to the right. The rear sight would take care of the right bias, and I figured the high impacts were okay. Some military rifles of this era are designed with a 300-yard battlesight zero, which means they shoot to point of aim at 300 yards at the lowest sight setting (everything in between is high, with the idea being that if you hold center-of-mass on a human size target, you’ll have a hit out to 400 or 500 yards).
High and slightly to the right with factory-level reloads. My point of aim was 6:00 on the orange bullseye.
I could buy a taller front sight blade to lower the point of impact, but that wasn’t the way I wanted to go. Nope, my plan was to shoot cast bullets in this rifle. My guess was that if the rifle shot 8 inches high at 50 yards with jacketed bullets, cast bullets would be right where I wanted them to be.
Loading my first batch of 1903 cast bullet test ammo was easy. Years ago I was on a reloading tear, and I had loaded a bunch of plated 110-grain round nose bullets with 14.0 grains of Unique. I knew those loads were terrible in other 30 06 rifles (the lead under the copper plating is dead soft and it tears off, resulting in terrible accuracy). Hey, no problem. I pulled the plated bullets, left the 14.0 grains of Unique in the cartridges, flared the case mouths, and seated different cast bullets. One was the 180-grain cast Hursman bullets with gas checks (these worked well in the .300 Weatherby), the other was the 210-grain Montana bullets I picked up from good buddy Paul (these are also gas checked bullets). After seating the cast bullets, I crimped the brass with my Lee factory crimp die.
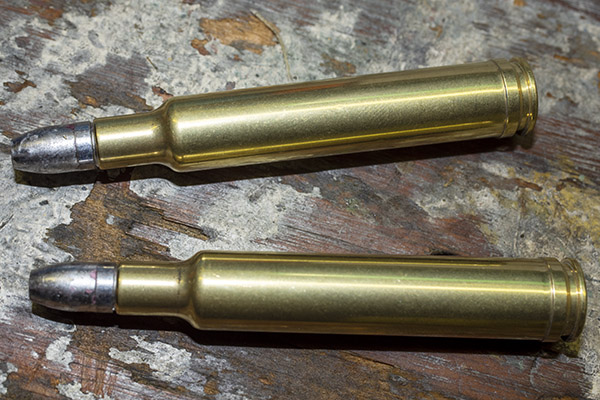
The Lee factory crimp die. It’s shown here with a jacketed bullet. It has collets that circumferentially crimp the case mouth to the bullet.30 06 reloads with cast bullets. That’s the Montana bullet on the upper cartridge, and the Hursman bullet in the lower cartridge. If you look closely, you can see that the case mouth has been crimped by the Lee factory crimp die.A macro shot of the Hursman 180 grain bullet. The case was crimped with a Lee factory crimp die.A similar photo of the Montana bullet. It’s cast with a Lyman mold. The Montana bullet’s rounded nose fed better from the 1903 magazine.
I only loaded 20 rounds (10 each with the two different cast bullets), as this was to be a “quick look” evaluation.
A morning at the range on an overcast day, a beautiful 1903 Springfield rifle, and .30 06 ammo loaded with cast bullets. Life doesn’t get much better.
Both loads shot reasonably well. I’m not going into the upholstery business with either of these loads (they are not tack drivers), but they are good enough. I was particularly pleased with the 210-grain Montana bullets. The Hursman bullets had proved to be the preferred load in the .300 Weatherby; the Springfield showed a decided preference for the Montana bullets.
I shot at 50 yards with both loads; future testing will be with the Montana bullet at 100 yards.
The Hursman bullet load at 50 yards. The load was 14.0 grains of Unique; it may be that the Hursman bullets will group better with other propellants.The Montana bullet at 50 yards on the left-most bullseye (the other bullseyes were shot with a Mosin-Nagnt rifle, covered in another blog). I found a sweet spot with that 14.0-grain Unique load and the Montana bullet.
Unique is not the best powder out there for loading cast bullets in rifle cartridges. In the past, I’ve shot much better groups in other rifles with IMR 4227, 5744, SR 4759, and Trail Boss. Those evaluations in the 1903 are coming up. For now, I know I’ve got a good load with Unique and the Montana bullets.
One of the big takeaways for me in this adventure is that when you buy a milsurp rifle, always check the headspace to make sure that it is within specification. It’s pretty common for these rifles to have gone through arsenal rebuilds and to have been cobbled together from parts bins, and when that occurs, if the chamber isn’t matched to the bolt you can have an excess headspace problem. That’s a bad situation, as it can be dangerous to the shooter and anyone nearby.
You can find headspace gages on Amazon and elsewhere. If you’re going to buy a military surplus rifle, checking the headspace should be part of the drill.
When you’re a reloader you get a bunch of odds and ends components and you go on a jag to load them all just to get the stuff off the bench. Oddball bullet dribs and drabs, brass you don’t want to bother cleaning, trimming, or sorting, that sort of thing. I had a bunch of the above laying around crying out to become .223 ammo, I hadn’t been to the range with my Mini 14, and it was time to shoot up the leftovers.
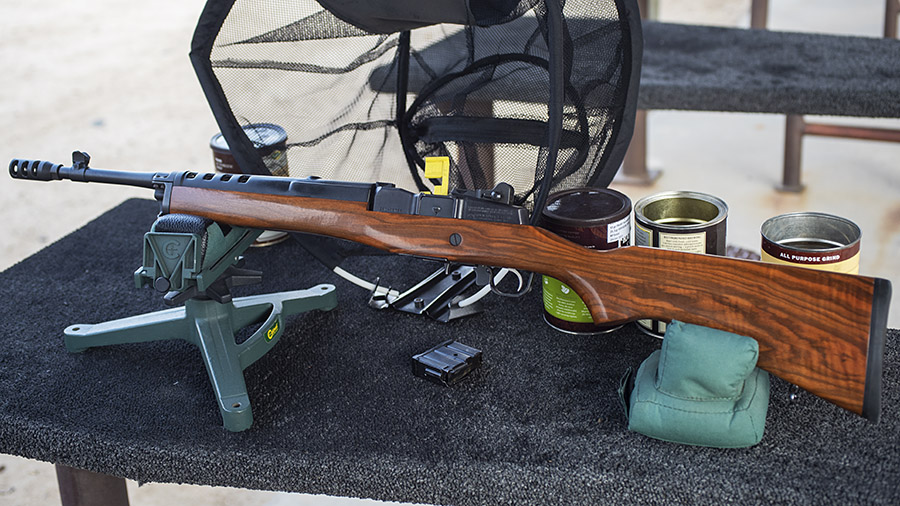
First, a bit about the rifle. It’s what Davidson’s called the Mini 14 Tactical, and it was a limited run they had Ruger make with Circassian walnut stocks. I looked at a bunch of them on Gunbroker before I spotted the one you see here and I pounced (most had very plain walnut).
An unusual Mini 14 with a Circassian stock. I get a lot of compliments on this rifle. It’s not for sale.
This is a rifle that gets compliments every time I bring it to the range. I’ve written about my Mini 14 before here on the ExNotes blog and I know what it takes to make this puppy group. This wasn’t going to be one of those days; like I said, I was just using up remnants from reloading sessions for other rifles.
The left side of the Mini 14’s Circassian walnut stock.The right side. This sure is a nice-looking Mini 14.
The Davidson’s Mini 14s came with 30-round mags and a flush suppressor, both of which are apparently favored by folks who rob gas stations and convenience stores (our legislators have their heads so far up their fourth points of contact they haven’t seen daylight in decades). I replaced the flash suppressor with a muzzle brake to make the rifle much less intimidating.
You might laugh at a muzzle brake on a Mini 14. It works, though. Fire a Mini 14 with a muzzle brake and then fire one without and you’ll feel the difference.
I also installed the Tech Sights Mini 14 rear aperture sight, which I like a lot better than the standard Mini 14 rear sight.
The Tech Sights rear aperture sight. If you have a Mini 14 and you don’t have one of these, you’re missing the boat.
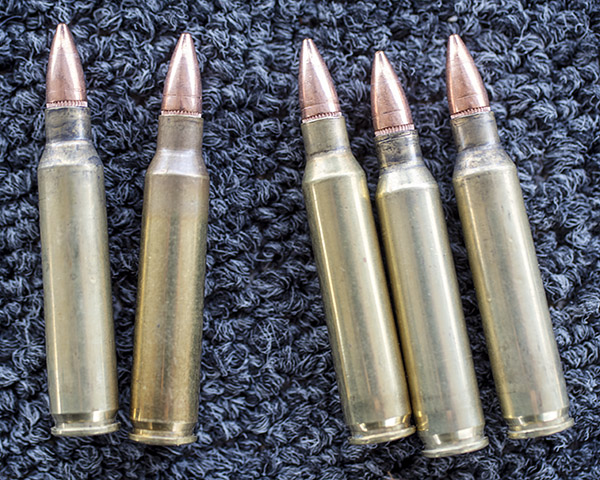
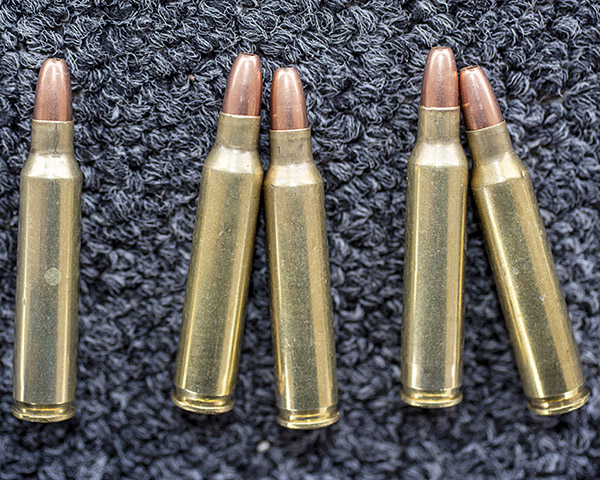
I loaded three configurations of ammo. The first was a new load I had developed using XBR 8208 propellant. For reasons I can’t remember, I had a bunch of Hornady 55-grain full metal jacket bullets I had pulled from another load. If you look closely at the photo below, you’ll see the circumferential ring where the collet puller grabbed the bullets. My thought was that pulled bullets would degrade accuracy, which is why they were tucked away and ignored for a long time. The load was 25.3 grains of XBR 8208, mixed brass previously fired in the Mini 14 (neck sized only for this load), and Winchester small rifle primers. I seated the bullets about midway in the cannelure, but I didn’t crimp. For this load, I didn’t tumble or trim the brass, either.
55-grain bullets loaded in .223 Remington brass for the Mini 14. Note the circumferential bullet puller collet marks just above the cannelure.
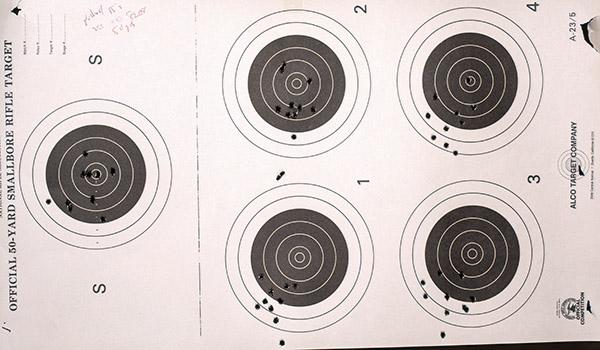
Surprisingly, the above load shot relatively well. If the marks on the bullets affected accuracy I couldn’t see it. I shot a few 10-shot groups at 50 yards just to get into the swing of things, and then I fired a 10-shot group at 100 yards (which I’ll get to at the end of this blog). The 10-shot group at 100 yards wasn’t too shabby. The rifle shot low left (my aim point was at 6:00), but I hadn’t adjusted the sights for this load.
50-yard groups with the above load. The flyers are do to operator error. The groups showed promise at 50 yards, and I knew I would test them at 100 yards.
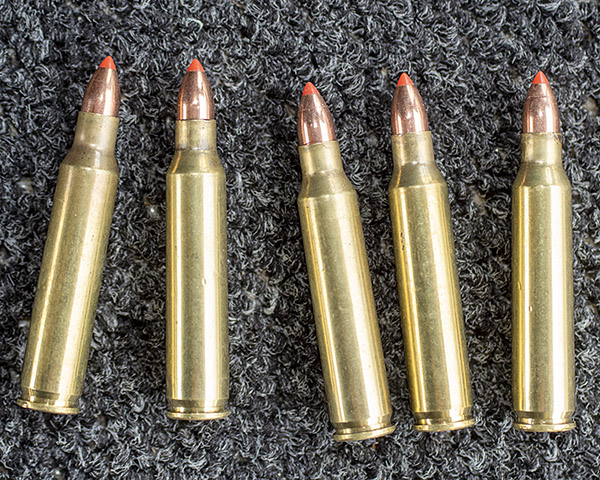
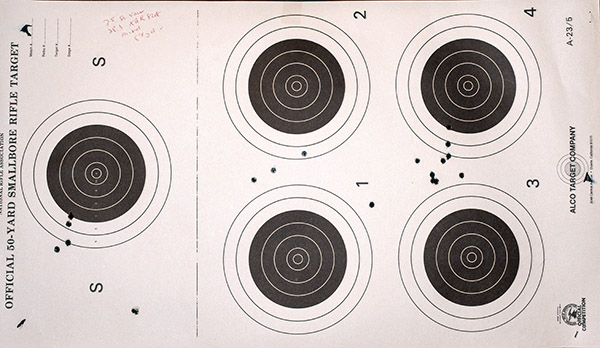
For the next load, I had a few 35-grain Hornady V-Max bullets I normally use for my .22 Hornet. This is a bullet I guessed would not do well in the much-higher-velocity .223 Remington cartridge, and I was right. Some of them grouped okay at 50 yards, but they were right on the edge of instability. A few tumbled and went wide. I didn’t bother firing these at 100 yards; if they were flaky at 50 yards, they would be positively flaky at 100.
.223 Remington cartrdiges loaded with 35-grain Hornady VMax Hornet bullets. The ammo looks good, but it was not a good load for the Mini 14.The 35-grain VMax loads at 50 yards. The bullets were right on the stability threshold.
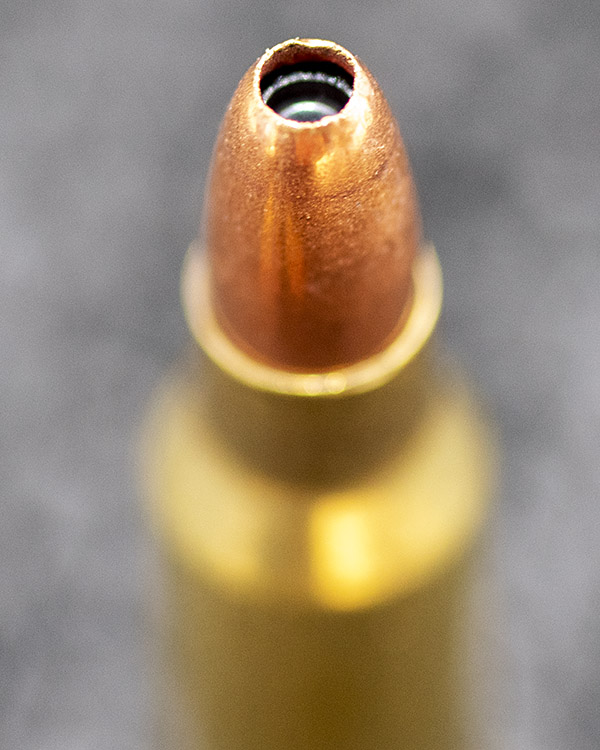
The last group was one I put together using another set of leftover Hornet bullets, the 46-grain Winchester jacketed hollow point bullet. They shot poorly when I tested them in my Ruger No. 3 Hornet, and they were really terrible in the .223 Mini 14. I suspect they were breaking up in flight. Several went wide or through the target sideways.
46-grain Winchester hollowpoint jacketed bullets loaded in .223 brass. This didn’t work out at all.A huge hollowpoint. It might work well on prairie dogs in the .22 Hornet, but these bullets weren’t stable and didn’t group well in the .223 Remington cartridge.
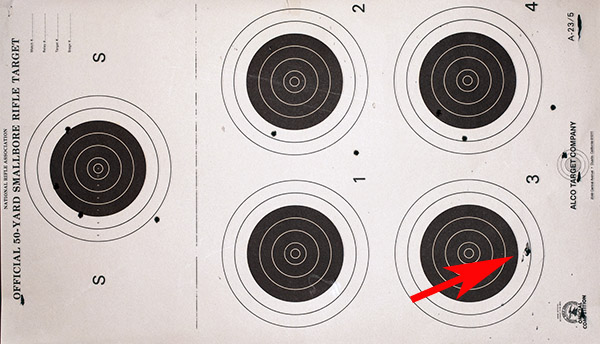
The 46-grain Winchester groups were huge at 50 yards and I could see on the target that they were unstable. At least one tumbled. Some never even made it to the target.
The above load’s poor performance was predictable, but I’m one of those guys who has to pee on the electric fence. You know, just to make sure. The arrow points to a spot where a bullet went through the target sideways.
After testing the above bullets at 50 yards, I knew that the Hornet bullets were a no go. Actually, I kind of knew that before I tested the load. But I had the bullets and I thought I would give it a try.
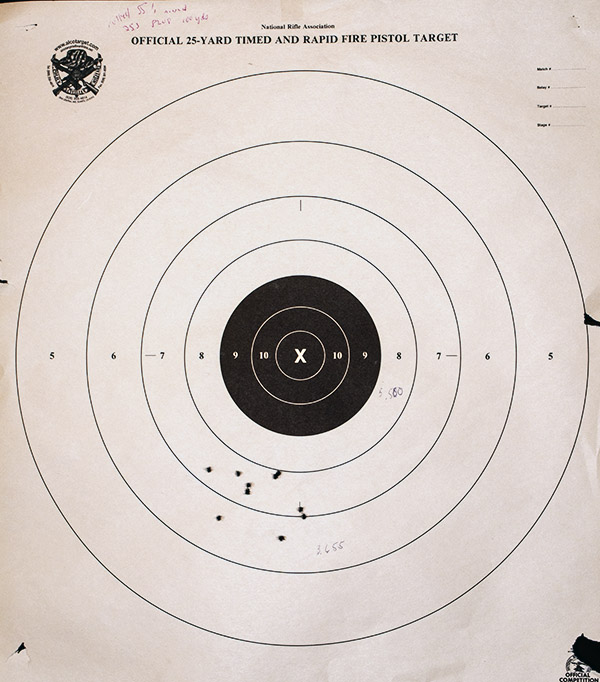
I wanted to see how the pulled 55-grain Hornady bullets would do at 100 yards, so I moved a target out to 100 yards they did relatively. The group centroid shifted from my usual Mini 14 load, but it was fairly tight for iron sights with junk/untrimmed mixed brass.
55-grain full metal jacket boattail pulled Hornady bullets, 25.3 grains of XBR 8208 propellant, Winchester small rifle primers, and mixed brass provided a 3.65-inch 10-shot group at 100 yards. The black bullseye is 5.50 inches in diameter. I was pleased with these results.
Well, you live and you learn. I cleaned off the reloading bench, I had a little fun, and I now know from personal experience that 35-grain and 46-grain Hornet bullets won’t do very well in the .223. Sometimes it’s good to learn what doesn’t work as well as what does.
More guns and reloading content? Like fancy walnut? Hey, it’s all right here!
You can’t beat free…sign up here and never miss an ExNotes blog.
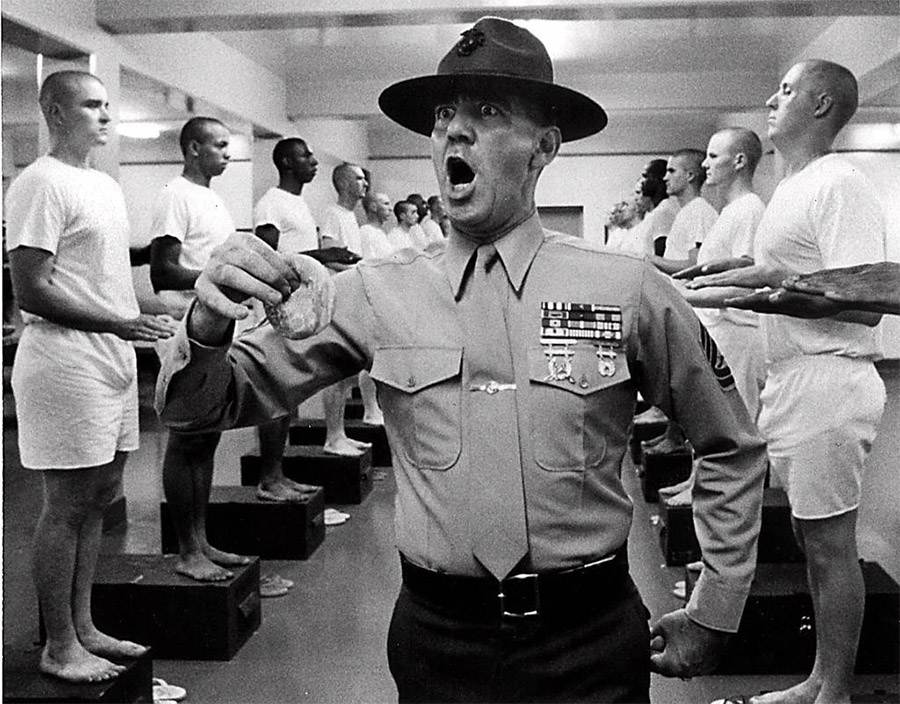
R. Lee Ermey was the real deal. A United States Marine and a drill instructor hired to advise the actors in Full Metal Jacket who was so impressive in showing the phonies how to be a real Marine the folks in charge hired him to play the role (or so the story goes; there are various versions floating around). We’ve all seen the movie; I watch it every time it airs.
What grabbed my attention is that the late R. Lee Ermey’s gun collection is about to go up for auction. I looked through the guns listed out of curiosity to see what Gunny Lee had, and he had good taste in firearms. Lee Ermey owned a lot of shotguns, a few handguns, and a few rifles.
Here are a few of the Gunny’s guns that got my attention.
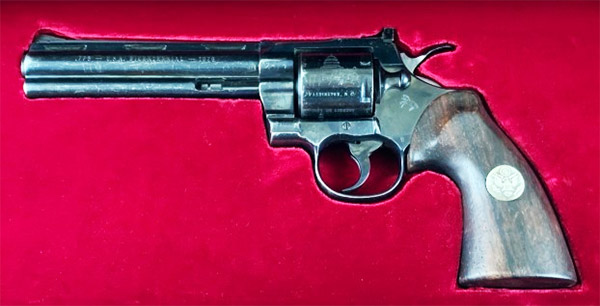
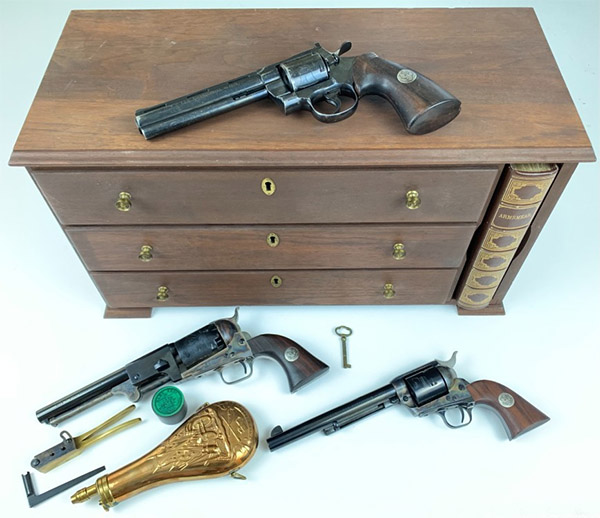
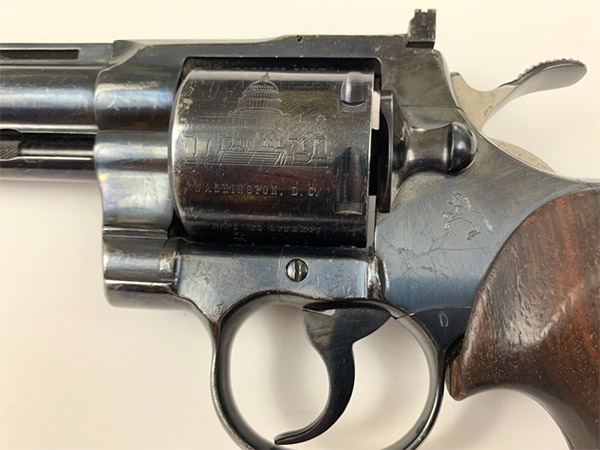
The first is a Colt Python that is part of a three gun cased set Colt offered several years ago (the set included a Python, a Single Action Army, and a black powder revolver). What’s interesting to me is that Gunnery Sergeant Ermey used his Python (it’s got the scratches and finish wear showing that).
Another one that’s interesting is the Model 62 Winchester. I have one of those that my Dad left to me; he bought it when he was a kid. One of these days I’ll do a blog on it.
And one more of the many that are going on the block. It’s a 1932 Mosin. If you’ve spent any time on the ExNotes blog, you know I love shooting my Mosins. Gunnery Sergeant Ermey was a man who knew his guns.
You can view the complete Lee Ermey auction here. I’ll be watching the auction as it unfolds, especially on the Mosin pictured above. It’s likely it will quickly go beyond my pay grade, but you never know.
I like the Remington 700. That’s been true for every one of the several Model 700s I’ve owned over the years, starting with a left-hand 30 06 BDL I bought in the late 1970s in Fort Worth, Texas. I’m right-handed, but the price on that 700 BDL was too good to let it get away. That rifle would put five shots of just about anything inside an inch at 100 yards. One of my good buddies had a teenaged southpaw son who was looking for a rifle and that BDL found a home with him (and the following month he used it to bag a deer, so it was a win-win for everyone except Bambi).
Three decades later I saw the subject of this blog, a Model 700 European in 30 06, new in the box and I had to have it. It had nice figure, it was unfired, and it was the rare European model. The Remington 700 BDL normally came with a high-gloss urethane finish, but in the early 1990s Remington offered the rifle in limited quantities with a satin oil finish. The European 700 BDL model was available in six chamberings: .243, .270, .280, 7mm-08, 7mm Rem. Mag., .30-06 and .308. I’ve never seen another European in any caliber. In 1994, the second and last year of production, the Model 700 European listed for $524.
I kept the rifle for about 10 years without firing it, taking it out of the safe to admire it occasionally. There were a couple of things I didn’t like about the rifle. Remington apparently put only one coat of tung oil on the stock, and the wood was fairly porous. I knew that the stock would be a magnet for moisture in that condition. And, the inletting around the floor plate was sloppy…it touched the metal on one side and had gaps on the other. I needed a project, and the Remington European 700 BDL was it. I glass bedded the action (and the trigger guard/floor plate area) and I went to work on the stock by adding 10 coats of TruOil. Then I found a good load for this rifle using IMR 4166 propellant (that blog is here).
As I added each coat of TruOil, I keep flipping back and forth between leaving a gloss finish on the rifle or knocking it down with 0000 steel wool. I liked the look of the gloss finish, but I liked the satin finish better. I think this one turned out well.
The Model 700 European with seven coats of TruOil, each one polished with 0000 steel wool and wiped clean before applying the next coat.After the ninth coat of TruOil, I was just about there. Ten coats would finish the rifle.
It’s easy enough to put another coat of TruOil on if I want to return to a gloss finish, but for me, the satin look is much more elegant, and that’s what I went with.
Load testing with the glass bedded and refinished Model 700 European.Three shots in under an inch. It will do that with five shots, too, but it’s hard to get game to sit still for five shots.
I’m going to sell the European (through an FFL, of course). I have other toys and the European BDL doesn’t fit the rest of my collection. It’s a sweet shooter and it needs a good home. If you’re interested, drop me a line at info@exhaustnotes.us.
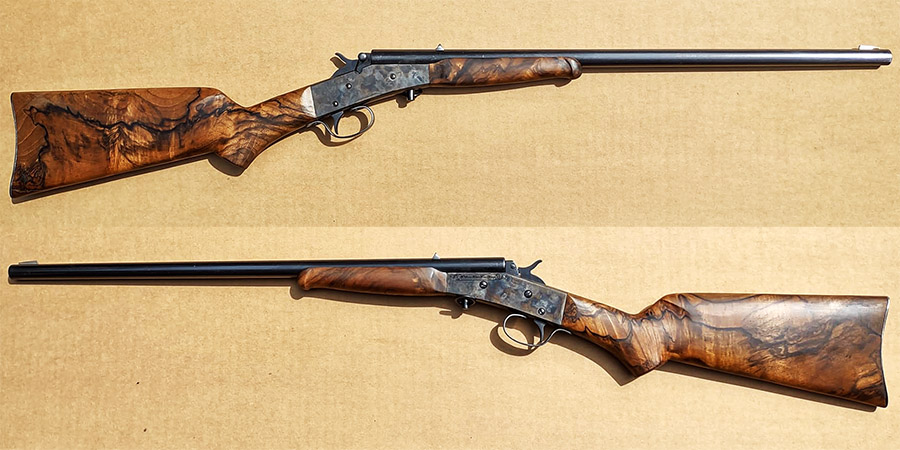
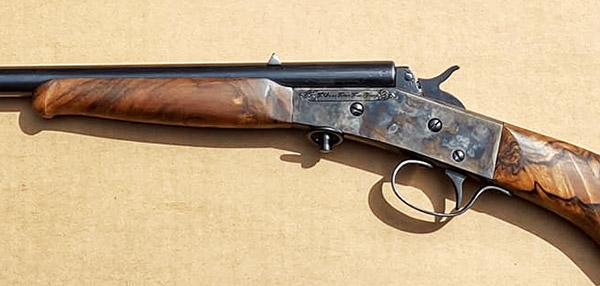
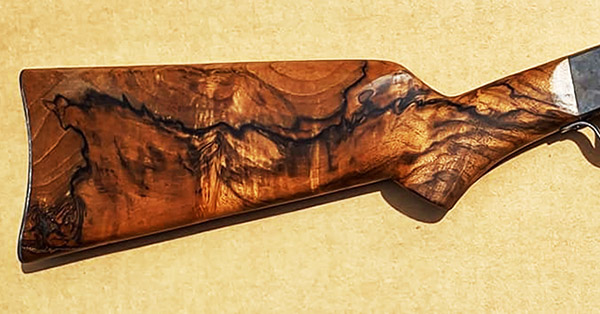
I saw this very interesting post on Facebook from good buddy Reeve not too long ago and I thought you fancy walnut aficionados might enjoy it:
Here’s my take on a Stevens Little Scout. I built it for my grandson from a rough original. The barrel has a new liner, and the stock changed to a pistolgrip. The forend changed from the lifeless little wedge to a Schnabel. The wood is Turkish walnut. I hot blued the metalwork. Engraving and color case by Mike Crumling.
Reeve, thanks for allowing us to share your artistry. I’d say your grandson is a lucky guy on many levels. That is a beautiful rifle, my friend.
Never miss one of our stories! Subscribe for free!
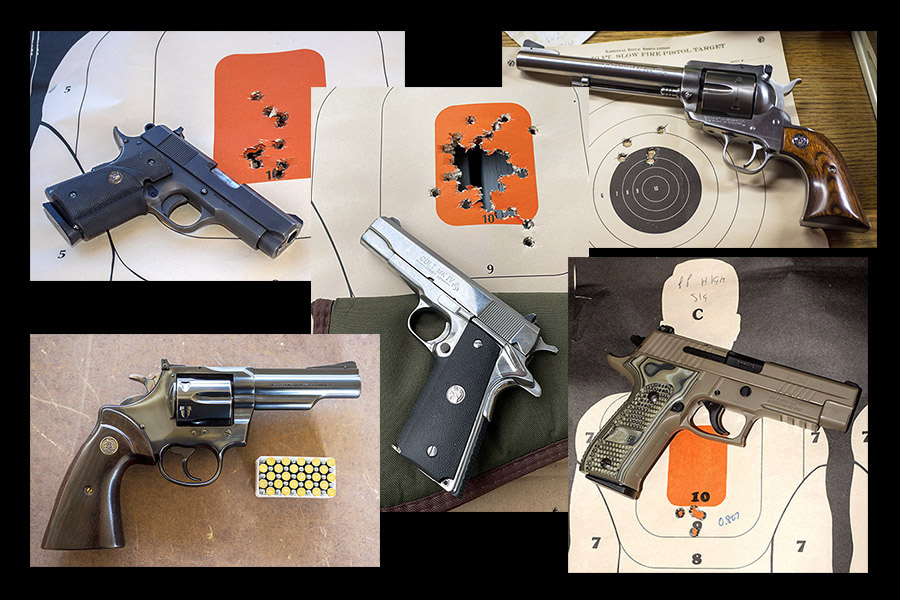
I’ve owned quite a few handguns and I’ve shot quite a few more. These are my five all-time favorites.
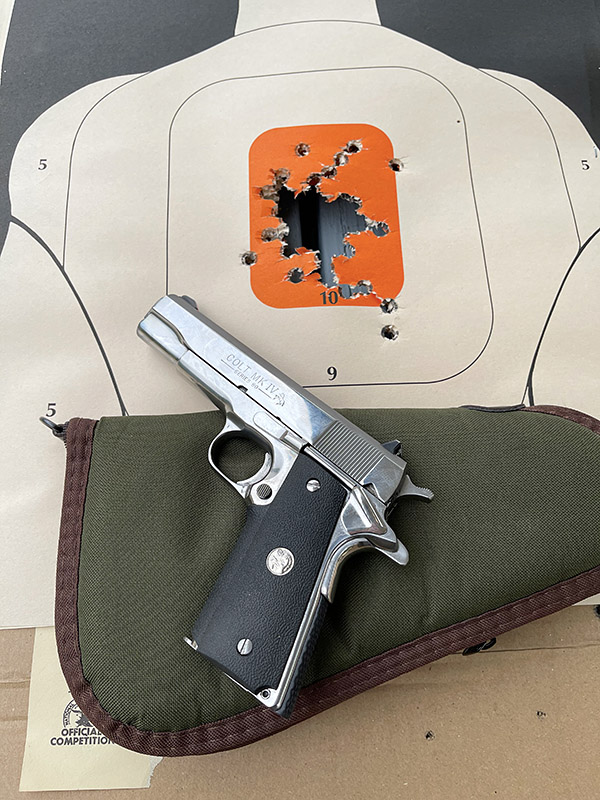
Colt 1911 Government Model
What can I say? I waxed eloquent about the 1911 in several ExNotes blogs. I’ve owned several 1911s, and I still own my first, the MacManus Award Colt 1911. My mid-1980s bright stainless steel 1911 is a real honey. It’s hard to go wrong with any 1911.
1911 Government Models can be phenomenally accurate handguns, I love the .45 ACP cartridge, and the 1911 is part of America. I carried a 1911 in the Army and I carry one today (see below).
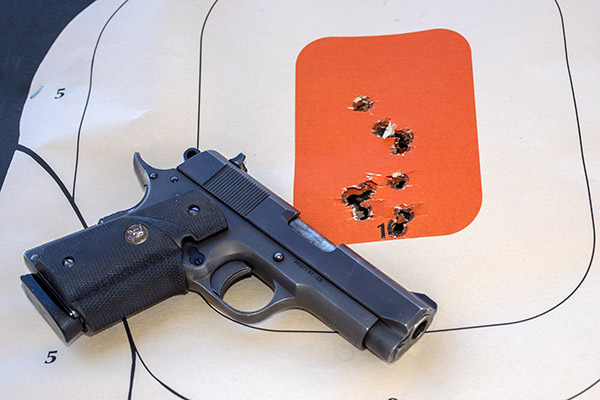
Rock Island Compact 1911
The Rock Island Compact checks all the boxes for me. It’s under $500 (I picked up mine new for an incredibly low $425). While not quite as accurate as a full-size Government Model, it’s accurate enough and it’s easy to carry. Like the bright stainless Colt 1911 above, my Compact has been lightly customized by TJ’s Custom Gunworks, with a polished barrel and chamber, engine-turned chamber exterior, Millet sights, and other mods to improve reliability (new extractor, recut ejector, etc.). It feeds anything. I like the Parkerized finish; it’s all business and it reminds me of the 1911s I carried in the Army. I call it my American Express gun (I never leave home without it).
My favored Compact 1911 loads are a 230-grain cast roundnose with 5.6 grains of Unique, and a 185-grain semi-wadcutter with 5.0 grains of Bullseye. The 185-grain SWC load is crazy accurate for a snubbie .45.
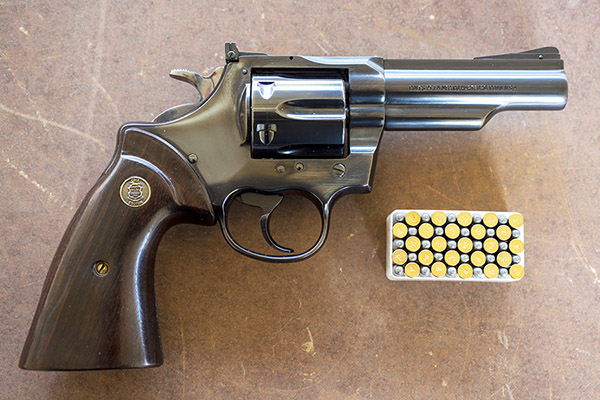
Colt .22 Trooper
This is an unusual one. I bought it in the 1980s. The Trooper is the same .357 Magnum that Colt manufactured for police duty, except it’s chambered in .22 Long Rifle. The barrel and the cylinder have the same external dimensions as the .357 Mag, which makes it heavy and that translates into stellar accuracy. It is the most accurate .22 handgun I own. Mine has custom rosewood grips. I love shooting the Trooper, and it does well with every brand of ammo I’ve put through it.
I paid $200 for the Trooper back in the ’80s. If you check what they go for today on Gunbroker.com, I think you’ll agree it was a good investment. But like all the other guns in this blog, it is not for sale.
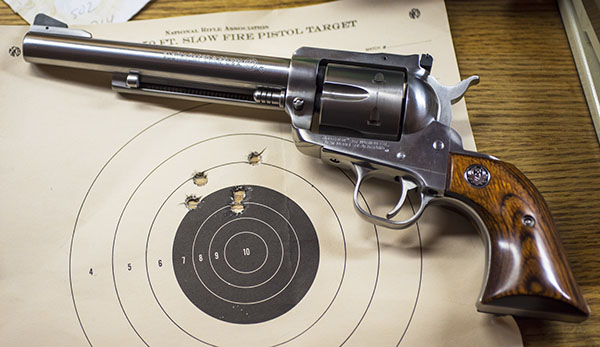
Ruger .357 Magnum Blackhawk
Ruger Blackhawks are exceptionally accurate revolvers, they are easy to shoot, and they are just plain cool. I’ve shot loads in mine that run the gamut: 148-grain wadcutter target loads, 110-grain max hollow point loads, 158-grain max loads, and metallic silhouette 200-grain cast roundnose loads. The Blackhawks don’t care; they handle all of them with target-grade accuracy.
I used to say Blackhawks last forever, but I have to tell you I can’t say that anymore. My stainless steel Blackhawk finally wore out. When I sent it in to Ruger for repair, they were surprised, too, and they backed up their surprise with an even-more-surprising offer to buy the gun back (an offer I accepted). I’ve got my antenna up for another .357 Blackhawk, and when things calm down a bit in the gun world, another one will find a home with me.
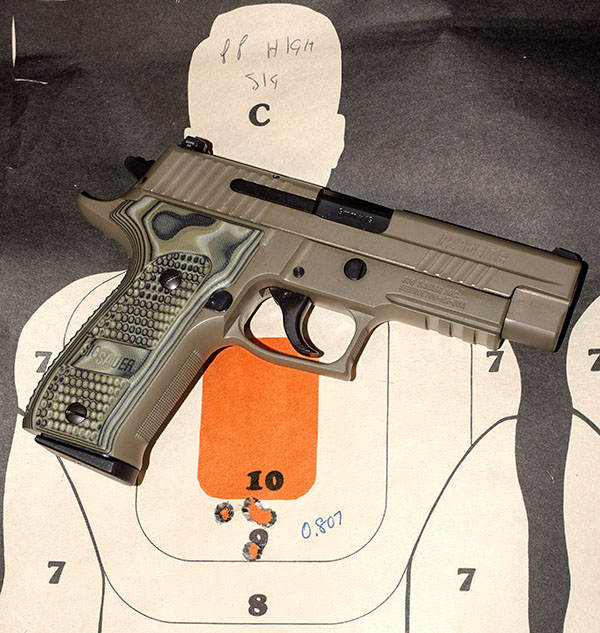
SIG P226 Scorpion
The SIG P226 is an amazing handgun. At $1200 (and that’s a pre-pandemic price), they are not cheap, but I feel like I spent my money wisely on this piece. I love the SIG’s finish and grips, and I love its accuracy (it is the most accurate 9mm handgun I’ve ever owned).
I first learned just how good the SIG is when I fired good buddy Python Pete’s, and it wasn’t too long after that I bought the one you see here. It did better than any of the other 9mm handguns in the load development comparos (for both cast and jacketed loads). Trust me on this…if you want a fine handgun, you won’t go wrong with a SIG P226.
This is a followup on the cast bullet story, focused specifically on the .300 Weatherby cartridge in a Mk V rifle.
I tried a few loads previously and I tried to get a little better results for this blog, but it seems I already had the keys to the kingdom. Here’s the bottom line first:
I didn’t see much difference between the two bullets I tried (a 180-grain gas-checked bullet and 20.0 grains of Trail Boss, and a 210-grain Montana Bullet Works gas checked bullet with the same powder charge).
20.0 grains of Trail Boss works well. I tried higher charges, but they weren’t as accurate.
Cast bullets in the .300 Weatherby won’t give you a tackdriver at 100 yards, but it will keep the holes in the black. I was averaging 2 1/2-inch groups at 100 yards with the loads mentioned above.
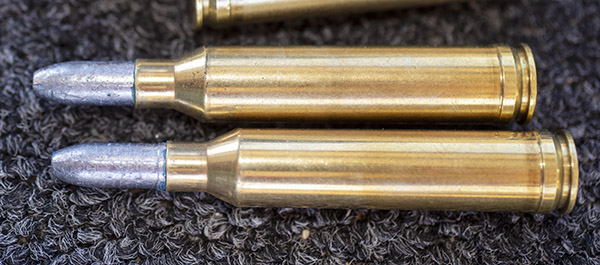
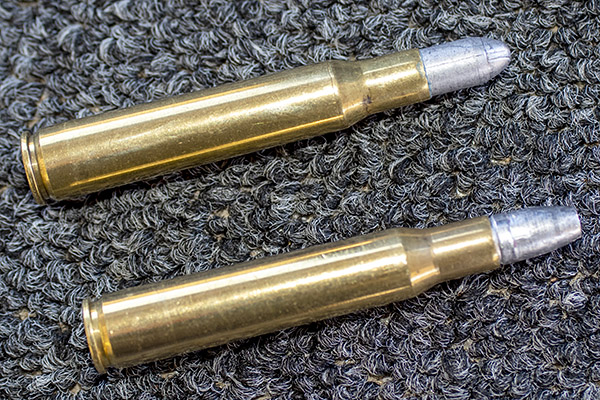
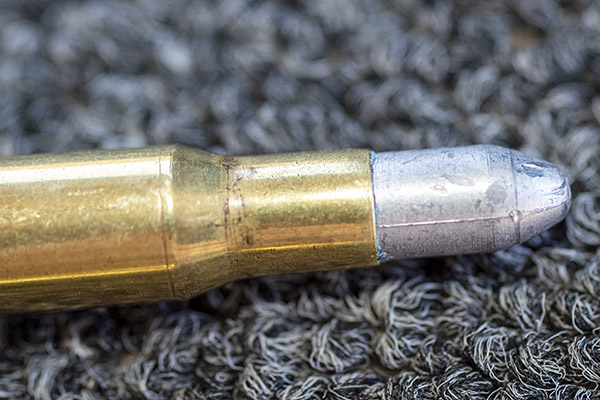
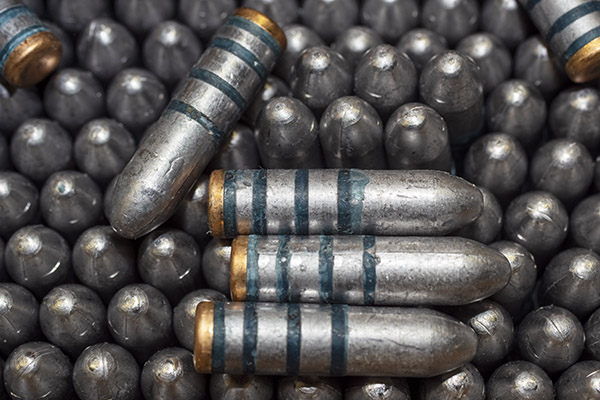
I experimented with two bullets, the 180-grain design mentioned above that I get from a local caster, and Montana Bullet Works 210-grain cast bullet. The Montana bullet is longer and has a more pointed tip; the 180-grain has a blunt nose. I think I showed you these photos before, but I’ll include them here again for easy reference.
180-grain cast bullets. These have a gas check and were sized to 0.309 inch.These are the Montana Bullet Company cast 200-grain rifle bullets. These were also sized to .309 inch.
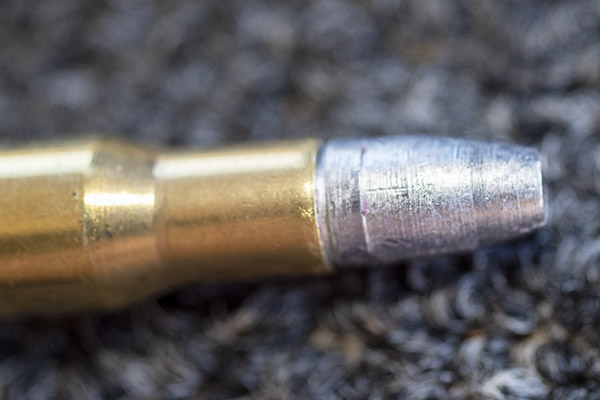
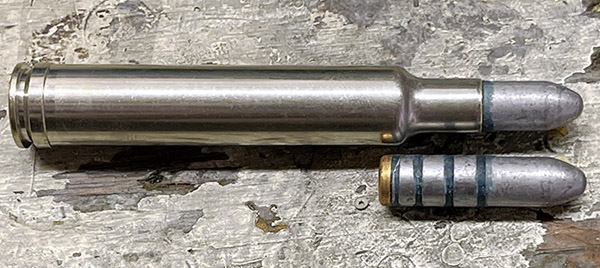
Neither bullet leaded the barrel with any of the loads I tried. The Montana bullets don’t appear to have a much of a step to crimp on like the locally-sourced 180-grain bullets. I crimped the Montana bullets just above the top grease groove. The blue lube you see north of the case mouth is just lube that had smeared above the top groove. I tried some with the loads as you see them above (with blue lube smeared above the crimp), and some where I wiped the lube clean after crimping; that had no effect on group size.
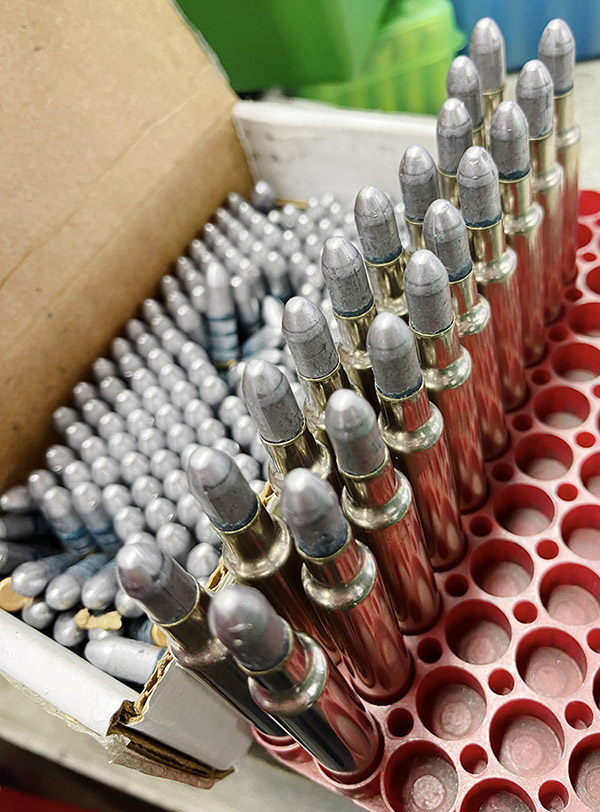
.300 Weatherby cartridges loaded with Montana 210-grain cast bullets.
The Montana bullet needed to go deep into the case neck to cover all the grease grooves. This wouldn’t be an issue for my target shooting because they are transported in a box, protected, before I shoot them. The guys that know about this stuff say if you’re going to hunt with them, you shouldn’t leave any grease grooves exposed because they can pick up grit. So I made mine like I was going to hunt with them. Someday maybe I will. There might be a pig out there with my name on it.
The cast Montana bullet base is well below the case neck when loaded.
Note that that the base of the Montana bullet is well below the neck inside the case. I thought that might cause the gas check to come off when these rounds are fired. That didn’t seem to be happening with mine and my friends who know about such things tell me that there’s more important stuff to worry about.
The data below are all for 100-yard results with 20.0 grains of Trail Boss, The Montana bullets have a slight edge, but not by much, and I’ve only tried the one load (20.0 grains of Trail Boss) with them. I had previously found 20.0 grains to be best with the 180 grain bullets.
I’ll probably vary the Trail Boss loads a bit with the Montana bullets at some point in the future.
I tried SR 4759, which has always done extremely well for me shooting cast bullets in other rifles. I tried two loads (22.0 grains, and 27.0 grains). Neither did nearly as well as the Trail Boss loads. I didn’t record the group sizes, but take my word on this: They were huge. The Lyman manual shows going up into the mid-30s (i.e., 35 grains) with SR 4759 and cast bullets in this cartridge; maybe that would be better. But I’m good enough with Trail Boss, and that’s where I’m going to hang my hat.
I have other powders I could try with cast bullets in the .300 Weatherby, but I think I have my load, and that’s 20.0 grains of Trail Boss with either 180-grain or 210-grain cast bullets. There’s not much difference between the two, and accuracy is okay at 100 yards (not great, but good enough to practice with). One more note, and that’s that I used CCI 200 primers in all loads, and I crimped all loads.
It sure is a lot easier shooting cast bullets in this rifle than it is shooting 300 Weatherby factory-level loads. It completely changes the character of the rifle and the shooting experience. Shooting 20 rounds of factory ammo off the bench in a .300 Weatherby is punishing, and unless you’re a self-styled Facebook expert, it’s time to call it a day. With cast bullet loads, though, I can go through 50 rounds and wish I had more. And the cast bullet savings are awesome. I did a little spreadsheet work to determine what a .300 Weatherby cartridge costs loaded with a cast bullet, and by my calcs, I figure I’m sending about $0.29 downrange every time I pull the trigger. A box of 20 rounds of 300 Weatherby (assuming you can find any) goes for around $80 to $100. At the high end, that’s $5.00 per round. Granted, you could knock down a T-Rex with factory ammo, but we don’t get too many of those at the West End Gun Club. I loaded 90 rounds this morning, so I guess I’m wealthy by Weatherby ammo standards.
I always liked that “kinder, gentler” line from George Bush. We don’t do politics here at ExNotes (we’d lose half our readers no matter which way we leaned), but every once in a while I’ll borrow a phrase if it fits. So, you’re looking at the big photo above showing a 300 Weatherby Magnum, a 7mm Remington Magnum Ruger No. 1, and a custom Howa 30 06, and you’re probably wondering: What is kinder and gentler about shooting those T-Rex cannons?
Cast bullets, that’s what. I started shooting cast bullets back in the 1970s in El Paso and I’ve been hooked on them ever since. I don’t cast my own these days (it’s easier to buy them), but I still enjoy the benefits. Lower cost, exclusivity (far fewer folks shoot cast bullet rifle loads), long brass life, easier cleaning, and the big one: Lower recoil.
That last one, reduced recoil, figures prominently in my mind. I’ve been beating myself up lately shooting full bore .300 Weatherby cartridges and it’s been tough. I have a box of 180-grain cast .308 bullets and I have a bottle of Trail Boss propellant and that got me to thinking: Would cast bullets work in the .300 Weatherby?
Help us keep the lights on…click on those popup ads!
I checked the Lyman manuals and there are cast loads listed for .300 Weatherby. I checked the Trail Boss site and it lists .300 Weatherby cast loads, too. Hmmm. I wondered how good it could be. After all, you could fit the Hollywood Bowl inside a .300 Weatherby cartridge case. There’s a lot of space in there, and not occupying it usually hurts accuracy. With jacketed bullets, the .300 Weatherby usually delivers its best accuracy at max or near-max loads. Would all that volume and the much lighter charges associated with cast bullets make an accurate load?
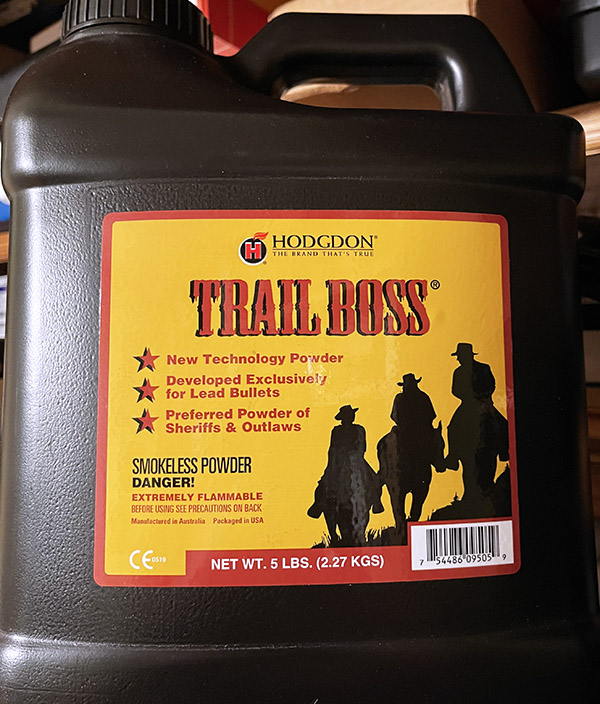
Trail Boss propellant. It’s shaped like flattened Cheerios and it’s a light, fluffy powder. It’s good stuff.
There’s one powder designed for cast bullet shooting that hits the cartridge case volume issue head on, and that’s Trail Boss. The Trail Boss people tell you to fill the case to the base of the bullet and that’s your max load, and if you take 70% of that, you’ll have your minimum load. My Weatherby brass took 31.3 grains of Trail Boss, but that was in a fired, unresized case, so I figured 30.0 grains would make for a good max load. 70% of that is 21.0 grains. Then I checked the Hodgdon site (they’re the folks who make Trail Boss) and it showed a range of 19.0 to 27.5 grains. That’s close enough for government work…my lower end load would be 21.5 grains, and then I’d try a warmer load with 24.5 grains. You know, to get a feel for what the Weatherby Mark V preferred. So I loaded a few rounds early one morning and I was ready to test the Mark V with cast bullets.
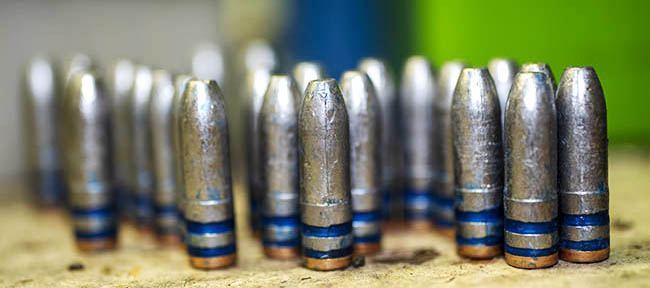
The .308 180-grain cast bullets I used in both the .30 06 and the .300 Weatherby. They were sized to .309..300 Weatherby ammo loaded with the above 180-grain cast bullets.
I already had a bunch of 7mm Remington Magnum reloads with Gardner’s 145-grain cast bullets. I had three boxes: One with 18.0 grains of Trail Boss, one with 20.0 grains, and a third with 21.4 grains. My prior reloading adventures with the 7mm Remington Magnum in my Ruger No. 1 indicated that it liked Trail Boss, but I didn’t know what the right dose would be.
Gardner’s 145-grain 7mm cast bullets.7mm Remington Mag ammo with cast bullets seated to different depths, with and without crimping.
I also had a box of .30 06 ammo loaded with cast bullets. I loaded these with SR 4759 powder, a stellar cast bullet propellant. I grabbed that box and my custom Howa.
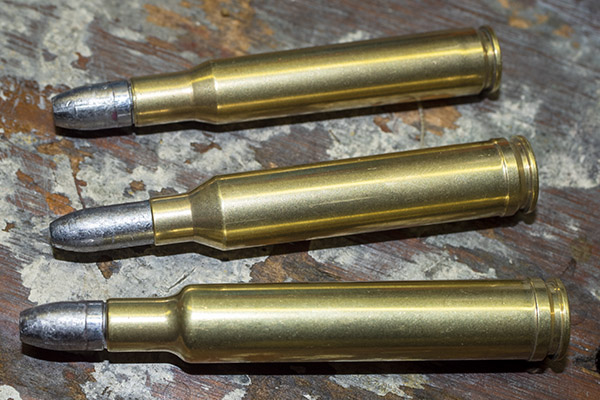
I stocked this rifle with a Bishop cherry stock about 35 years ago. It’s one of my favorite rifles. There’s a blog on it here.I wanted to try my hand at a Mannlicher style, full length stock. I carved it to match the Alex Henry fore end tip on a Ruger No. 1. It’s a unique rifle that always gets noticed on the range.Howa sold barreled actions to Smith and Wesson when Smith wanted to play in the rifle business maybe 40 years ago. They no longer are..30 06 ammo loaded with 180-grain cast bullets and SR 4759 propellant.A comparison: .30 06, 7mm Remington Magnum, and .300 Weatherby ammunition, all loaded with cast bullets. It’s cool-looking ammo.
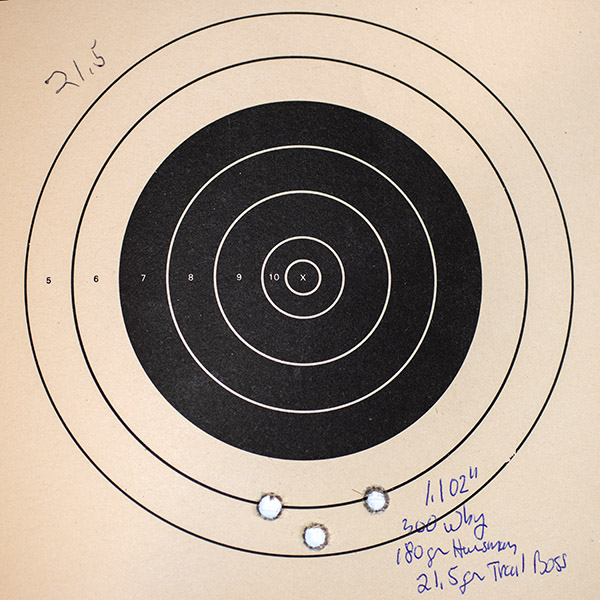
So how did the cast bullet rifle session go? Surprisingly well. I shot the Weatherby first, as it was the rifle that had prompted the cast bullet theme. The recoil level was low, almost like shooting a .38 Special. That was a welcome relief from the factory-level loads I had been shooting. The .300 Weatherby Mark V printed its best 50-yard group at 1.102 inches (a three-shot group), and that was with 21.5 grains of Trail Boss.
Shooting cast bullets in the .300 Weatherby was a pleasant experience. I could do this all day.
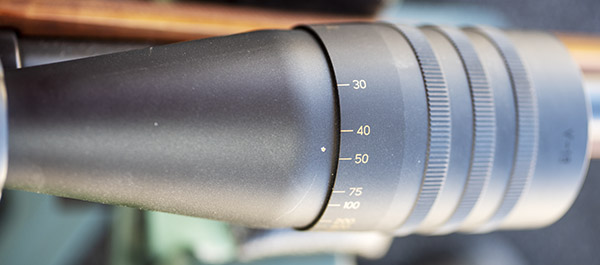
Because I was shooting at 50 yards, I needed to readjust the parallax on the Mark V’s 4-16 Weaver scope. When I did this at 100 yards, the parallax adjustment was right where Weaver had marked it for 100 yards. At 50 yards, the Weaver marking on the scope’s objective was a bit off, but that’s okay. I could move my eye around behind the scope and the crosshair movement had been appropriately minimized.
At 50 yards, the parallax adjustment was at about the 46-yard mark. I took this photo so I could return to this spot on subsequent 50-yard shooting sessions.
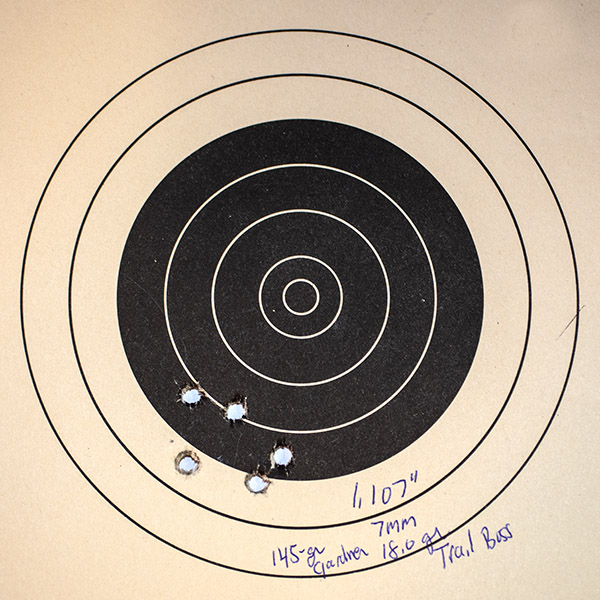
The Ruger No. 1 in 7mm Remington Magnum printed a 1.107-inch five-shot group at 50 yards with 18.0 grains of Trail Boss.
The Ruger No. 1 shot well with Trail Boss and cast bullets. I have more loaded with a slightly lighter load (not because of recoil, but because it appears the gun will do better with a lighter load).
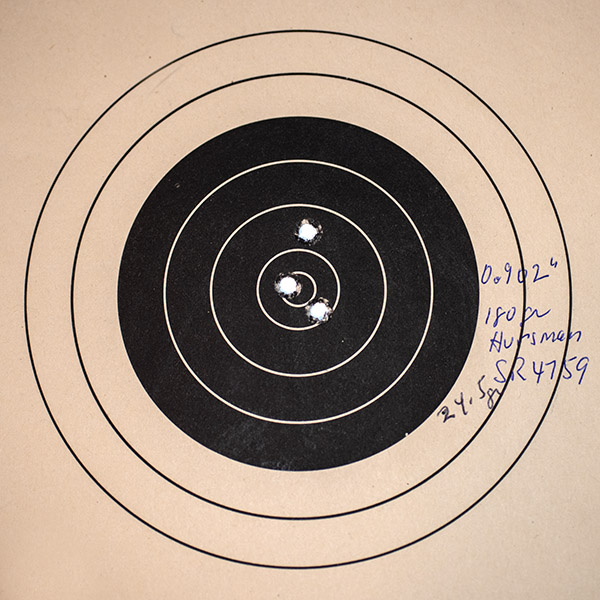
And my .30 06 Howa did the best of the three, with a 0.902-inch three-shot group at 50 yards. I loaded that ammo with 24.5 grains of SR 4759. I’ve always had good accuracy with SR 4759 when shooting cast bullets.
The .30 06 group. These were with SR 4759 powder; I’ll next test with Trail Boss.
None of the cast bullet loads leaded the barrels, and that’s a good thing. Take a look (all of these photos were after shooting, but before cleaning):
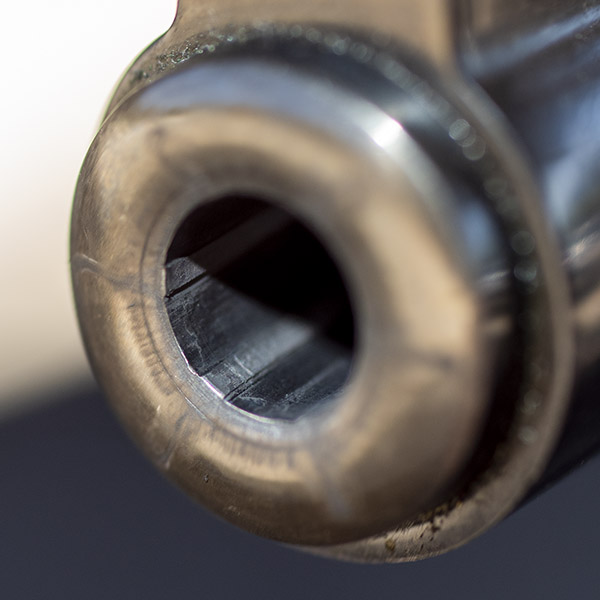
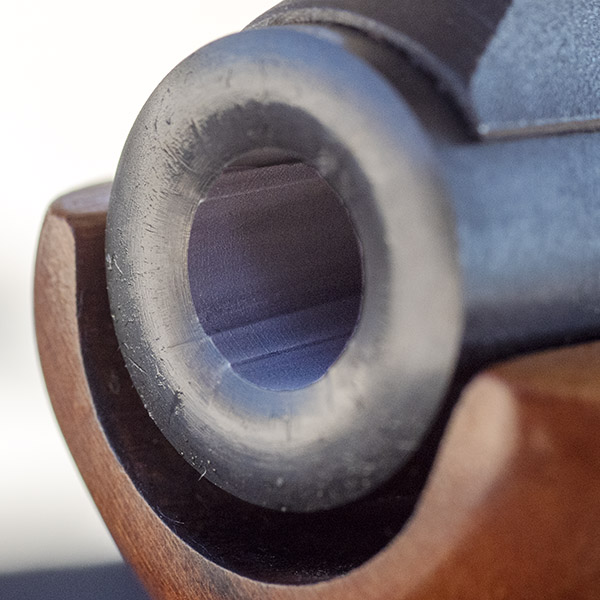
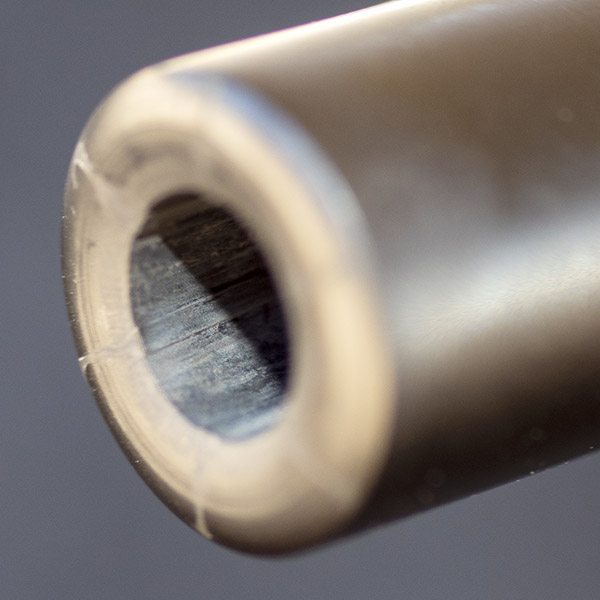
The 7mm Ruger No. 1 bore after firing cast bullet loads. The bore was surprisingly clean with almost no leading.The Howa’s bore after firing a box of cast bullets. This bore was immaculate. It appears the machining on it was better than the Weatherby and the Ruger rifles.The Weatherby Mark V’s bore after firing cast bullets. There’s a very tiny bit of leading, but nothing significant. It cleaned up easily.
Cleaning a rifle after shooting cast bullets is much easier than cleaning after shooting jacketed bullets. I run a patch soaked with Hoppes through the bore and let it set for maybe 15 minutes to soften any lead remnants and combustion residue. After that I run a bronze bore brush through the barrel three or four times, and then I push two or three patches through the bore. That’s all it takes to get an immaculate bore. It’s much easier than removing copper fouling after firing jacketed bullets.
On the next set of cast bullet loads, I think the direction is clear. The .300 Weatherby shot better with 21.5 grains of Trail Boss than it did with 24.5; the Hodgdon online data shows the charge going as low as 19.0 grains. My next .300 Weatherby load will be with 20.0 grains of Trail Boss. The 7mm Remington Mag shot better with 18.0 grains of Trail Boss than it did with 20.0 and 21.4 grains; I think I’ll try 17.0 grains in a few to see if accuracy improves. I haven’t tried any 30 06 loads with Trail Boss yet (the loads I shot for this blog were loaded with SR 4759), so I’ll do some .30 06 Trail Boss loads for the next outing.
I was just about out of Trail Boss powder after loading more cast bullet ammo for the next session with the above three rifles, and with component availability today being what it is, that concerned me. I got lucky, though. I found a source with a 5-pound bottle of Trail Boss at a decent price and I jumped on it. I’m set for a while.
Trail Boss propellant. Good stuff and a good find.Ready for the next range session: 7mm Remington Magnum, .300 Weatherby, and .30 06 ammo, all loaded with cast bullets and Trail Boss propellant.
I’ll move the targets to 100 yards the next time I’m out. Good buddy Paul set me up with a box of Montana Bullet Company’s 200-grain .308 cast bullets, and I’ll load a few of them to see how they do in the .30 06 and the .300 Weatherby. Montana Bullet Company’s cast bullets have done superbly well in my .35 Whelen and .416 Rigby rifles; I’m eager to see how these do in the .30 06 and .300 Weatherby.
Montana Bullet Company cast 200-grain rifle bullets. These are great bullets.
That’s it for now. I intend to be on the range sometime this week to continue the cast bullet testing, and when I do, you’ll read about it here.


 I’ll probably vary the Trail Boss loads a bit with the Montana bullets at some point in the future.